19” lcd / 8 channel dvr combo with 160gb hdd & 4 … · setting up remote viewing 4 19”...
TRANSCRIPT

Copyright © 2007 LOREX Technology Inc.
www.lorexcctv.com
19” LCD / 8 CHANNEL DVRCOMBO WITH 160GB HDD
& 4 CAMERAS
Overview - RemoteViewing
MODEL:SG19LD804-161
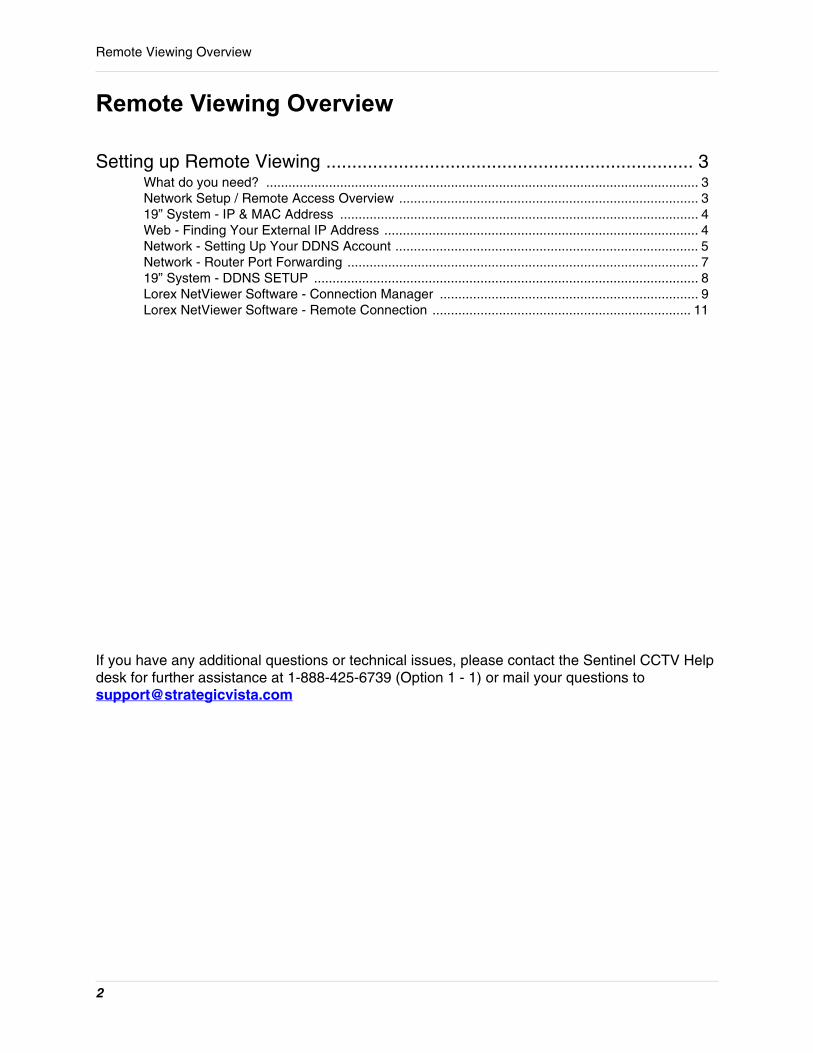
Remote Viewing Overview
2
Remote Viewing Overview
Setting up Remote Viewing ....................................................................... 3What do you need? ..................................................................................................................... 3Network Setup / Remote Access Overview ................................................................................. 319” System - IP & MAC Address ................................................................................................. 4Web - Finding Your External IP Address ..................................................................................... 4Network - Setting Up Your DDNS Account .................................................................................. 5Network - Router Port Forwarding ............................................................................................... 719” System - DDNS SETUP ........................................................................................................ 8Lorex NetViewer Software - Connection Manager ...................................................................... 9Lorex NetViewer Software - Remote Connection ...................................................................... 11
If you have any additional questions or technical issues, please contact the Sentinel CCTV Help desk for further assistance at 1-888-425-6739 (Option 1 - 1) or mail your questions to [email protected]
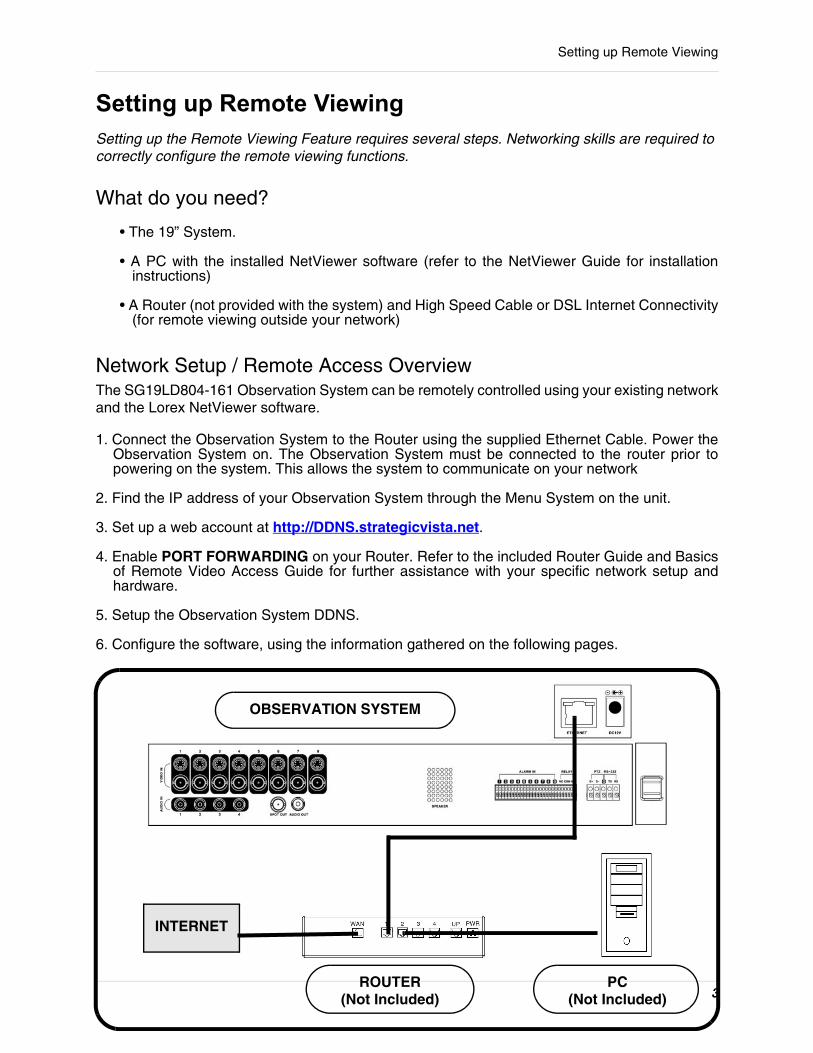
Setting up Remote Viewing
3
Setting up Remote ViewingSetting up the Remote Viewing Feature requires several steps. Networking skills are required to correctly configure the remote viewing functions.
What do you need?
• The 19” System.
• A PC with the installed NetViewer software (refer to the NetViewer Guide for installationinstructions)
• A Router (not provided with the system) and High Speed Cable or DSL Internet Connectivity(for remote viewing outside your network)
Network Setup / Remote Access OverviewThe SG19LD804-161 Observation System can be remotely controlled using your existing networkand the Lorex NetViewer software.
1. Connect the Observation System to the Router using the supplied Ethernet Cable. Power theObservation System on. The Observation System must be connected to the router prior topowering on the system. This allows the system to communicate on your network
2. Find the IP address of your Observation System through the Menu System on the unit.
3. Set up a web account at http://DDNS.strategicvista.net.
4. Enable PORT FORWARDING on your Router. Refer to the included Router Guide and Basicsof Remote Video Access Guide for further assistance with your specific network setup andhardware.
5. Setup the Observation System DDNS.
6. Configure the software, using the information gathered on the following pages.
OBSERVATION SYSTEM
ROUTER(Not Included)
PC(Not Included)
INTERNET
Setting up Remote Viewing
4
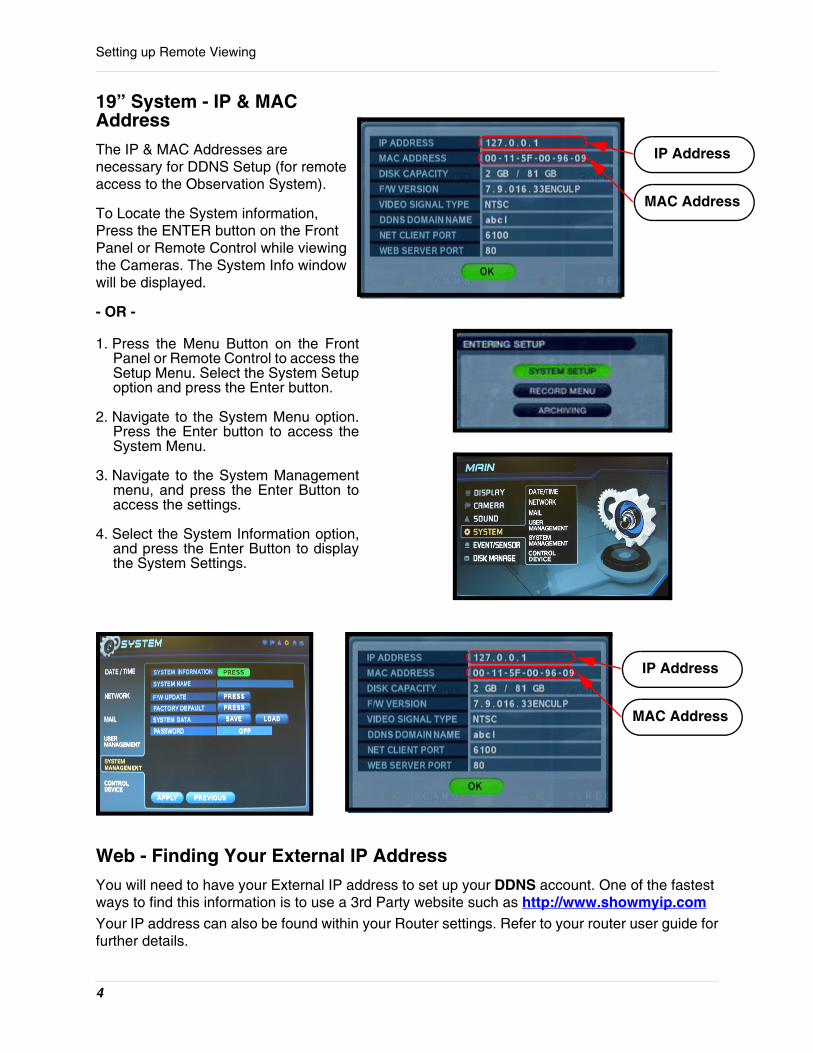
19” System - IP & MAC Address
The IP & MAC Addresses are necessary for DDNS Setup (for remote access to the Observation System).
To Locate the System information, Press the ENTER button on the Front Panel or Remote Control while viewing the Cameras. The System Info window will be displayed.
- OR -
1. Press the Menu Button on the FrontPanel or Remote Control to access theSetup Menu. Select the System Setupoption and press the Enter button.
2. Navigate to the System Menu option.Press the Enter button to access theSystem Menu.
3. Navigate to the System Managementmenu, and press the Enter Button toaccess the settings.
4. Select the System Information option,and press the Enter Button to displaythe System Settings.
Web - Finding Your External IP Address
You will need to have your External IP address to set up your DDNS account. One of the fastest ways to find this information is to use a 3rd Party website such as http://www.showmyip.comYour IP address can also be found within your Router settings. Refer to your router user guide forfurther details.
IP Address
MAC Address
IP Address
MAC Address

Setting up Remote Viewing
5
Network - Setting Up Your DDNS Account
Lorex offers a free DDNS service for use with your System. A DDNS account allows you to set up a web site address that points back to your Local Network. The following outlines how to set up your free DNS account.
1. Navigate to http://DDNS.strategicvista.net
2. Select the Create Account option from the list on the left sideof the screen.
3. Complete the Account Information fields with your personal information
4. Complete the System Information fields:
• Product License: Select your product model from theProduct License drop down menu
• <Product Code> - <MAC Address>: Locate the MACaddress of your (recorded while loading the System)
• URL Request: Choose a URL for your DDNS connection(i.e. your name, your company or business name, oranything of your choice.)

Setting up Remote Viewing
6
1. Click the Create New Account link at the bottom of the form to submit your request.
2. Your Account information will be sent to you at the E-mail Address you used in Step 3.
You will need this information for remote access to your System. Record YOUR information below:
Service provider:User Name: Domain Name: Password:
dns1.strategicvista.nettomsmith1tomsmith(your password)
User Name:
________________________________________________________ *
Domain Name:
__________________________________________________________
Password:
__________________________________________________________
* Only the first part of the Domain Name is required for setup on theSG19LD804-161 System. If the full Domain sent is tomsmith.strategicvis-ta.net, the unit only requires that only tomsmith be entered.

Setting up Remote Viewing
7
Network - Router Port Forwarding
You will need to enable port forwarding on your Router to allow for external communications with your Observation System for ports:
• TCP/IP PORT 6100
• WEB PORT 80
Computers, Observation Systems, and other devices inside your network can only communicate directly with each other within the internal network. Computers and systems outside your network cannot directly communicate with these devices. When a system on the internal network needs to send or receive information from a system outside the network (i.e. from the Internet), the information is sent to the Router.
When a computer on the Internet needs to send data to your internal network, it sends this data to the external IP address of the Router. The Router then needs to decide where this data is to be sent to. This is where setting up Port Forwarding becomes important.
Port Forwarding tells the router which device on the internal network to send the data to. When you set up port forwarding on your Router, it takes the data from the external IP address:port number and sends that data to an internal IP address:port number (i.e Router External IP 216.13.154.34:6100 to Observation System Internal IP 192.168.0.3:6100).
The instructions found online in the Router Configuration Guide will assist you in the port forwarding configurations for a selection of different router models.
Visit our Consumer Guides Support website at http://www.lorexcctv.com for more details
ComputerInternal IP192.168.0.2
Observation SystemInternal IP192.168.0.3
RouterInternal IP192.168.0.1
RouterExternal IP216.13.154.34
NETWORK EXAMPLE
Internet Internal Network

Setting up Remote Viewing
8
19” System - DDNS SETUP
Once the DDNS settings have been configured online, the information must be entered on the Observation System to allow for remote connection via the Lorex Client Software (or through Internet Explorer):
1. Access the Main Menu Setup screens, andnavigate to the SYSTEM option. Press theENTER button to access the setup.
2. Navigate to the NETWORK option. Pressthe Enter button to access the Networksettings. Select the DDNS Server option,and press the ENTER button to enter theDDNS SETUP.
3. Enter the information received in email(including the password). Press the DDNSStatus first - wait for the SUCCESSMESSAGE (as long as the information iscorrect).
Select OK to save the settings.
NOTE: Once all Network settings are configured, the System can be accessed usingthe Lorex Client Software. Refer to Page 8 for Connection Manager details.
Setting up Remote Viewing
9
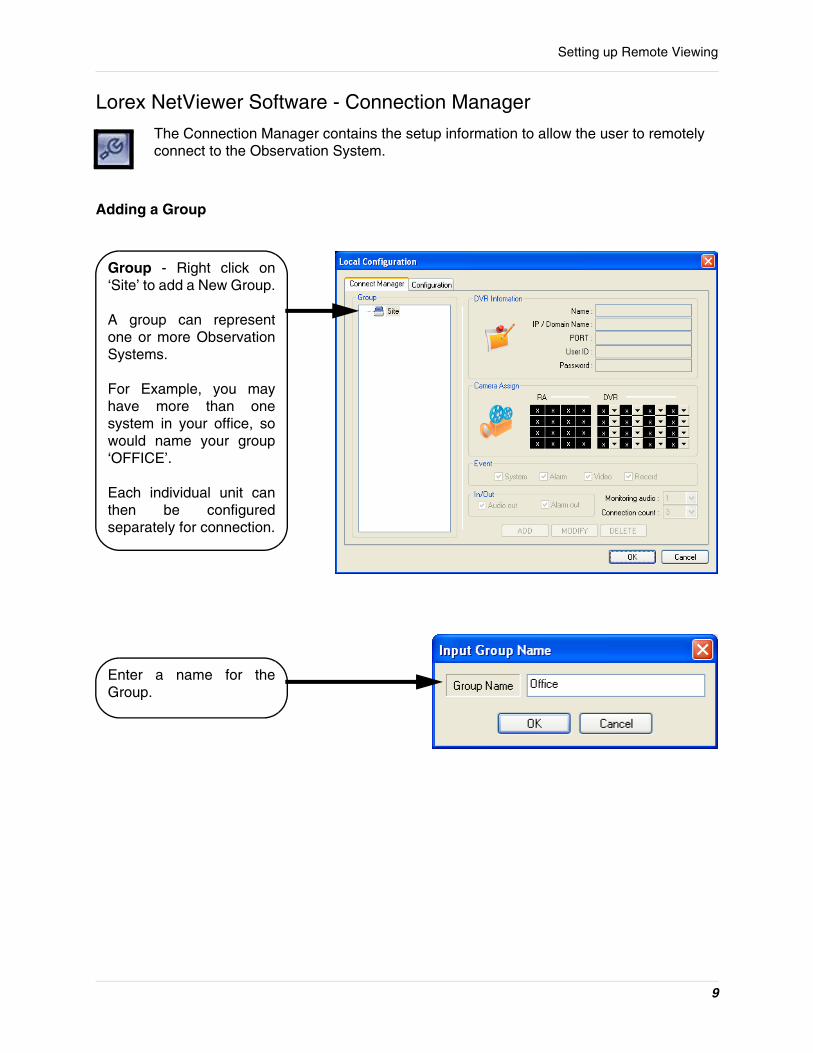
Lorex NetViewer Software - Connection Manager
The Connection Manager contains the setup information to allow the user to remotely connect to the Observation System.
Adding a Group
Group - Right click on‘Site’ to add a New Group.
A group can representone or more ObservationSystems.
For Example, you mayhave more than onesystem in your office, sowould name your group‘OFFICE’.
Each individual unit canthen be configuredseparately for connection.
Enter a name for theGroup.

Setting up Remote Viewing
10
Adding a Site (Individual Unit Configuration)
DVR Information - Enterthe information specific tothe unit (refer to page 30for setup instructions):• Name - Enter a name forthe unit.• IP / Domain Name -Enter the IP address orDomain Name for theSystem. This will varydepending on setup(Internal NetworkConnection or ExternalRemote access throughthe Internet)- refer to page30 for setup details.• Port - Set to 6100 bydefault.• User ID - Enter the USERID to connect to the system(the USER ID is configuredon the System - i.e. ADMIN- case sensitive).• Password - Thepassword used to accessthe System (i.e. TheADMIN password is set to1234 by default).
Camera Assign - Seteach camera to a portionof the 9-view window byusing the drop downmenu selections.
ADD Button - Adds thesite to the Group.OK Button - Accepts thechanges and Closes theconfiguration Window

Setting up Remote Viewing
11
Lorex NetViewer Software - Remote Connection
Once the site setup profile has been created, a connection can then be made to the Observation System:
1. Select the Site profilefrom the Dropdown List.
2. Press the CONNECTbutton.
The Connection Statuswindow displays the stateof the connection.
Once a successfulconnection to the Systemhas been made, the blackscreen view will switch toLive Camera View mode.
NOTE: If another user isconnected to the Systemusing the samecredentials (i.e ADMIN),the connection will berejected.

It’s all on the webProduct Information
User Manuals
Quick Start Guides
Specification Sheets
Software Upgrades
Firmware Upgrades
Lorex Technology International Inc.
VISIT
wwwlorexcctv.com
www.lorexcctv.com