1 wirele ss and beyond - radiolabs
TRANSCRIPT

O2Link High PowerUni
Wirele
r Router &iversal Re
1
ess And Beyon
& O2Point epeater Ins
nd
High Powstructions
wer Accesss
s Point

2
Please read these instructions before attempting to configure or deploy the O2Link or O2Point unit(s)
Thank you for purchasing a RadioLabs O2Link High Power Wireless Router or O2Point High Power
Wireless Access Point. This document will guide you through configuring your O2Link/O2Point
individually as a stand‐alone wireless repeater.
The RadioLabs O2 series wireless networking products allow multiple different operation modes and can
be configured to act as almost any part of a wireless network or WLAN and can be easily integrated into
an existing networking. The following instructions detail how to configure the O2Link/O2Point as a non‐
routing wireless repeater or “range extender”. This function is best used when the O2Link/O2Point is
being integrated into an existing network of non‐O2 devices or when an existing wireless signal needs to
be strengthened for rebroadcast to weaker wireless devices.
Using the O2Link/O2Point as a universal repeater only requires a single unit. You do not need both the
O2Link and theO2Point.
These instructions are only for use with the O2Link High Power Wireless Router (ITEM # RL54GXP) and
O2Point High Power Access Point (ITEM# O2POINT). If you have purchased a Point to Point Wireless
Bridge, please refer to the O2 Bridge Instructions, available at our downloads page:
http://www.radiolabs.com/support/downloads.php

3
Before configuring your O2Link/O2Point, you will need to disable your internal wireless card or Airport
(if applicably) and set a static or “unchanging” IP address.
Windows
XP: Open Start Menu and select Control Panel
Select Network Connections (if unavailable, select show “Classic view”)
Vista: Select Start Menu/Windows Logo > Network > Network and Sharing Center > Manage Network
Connections
Windows 7: Select Start Menu/Windows Logo > Network > Network and Sharing Center > Change
Adapter Settings
Once you can view your system’s network connections, right click on “Wireless Network Connection”
and select “Disable”.

4
Macintosh OS X
Select the Airport Status Icon (upper right hand corner of screen) and select “Turn Airport Off”
When logging into the O2Link/O2Point to configure the unit, you will need to have a Static IP address on
your PC/MAC’s Ethernet Adapter.
Windows
XP: Open Start Menu and select Control Panel
Select Network Connections and right click “Local Area Connection”
5
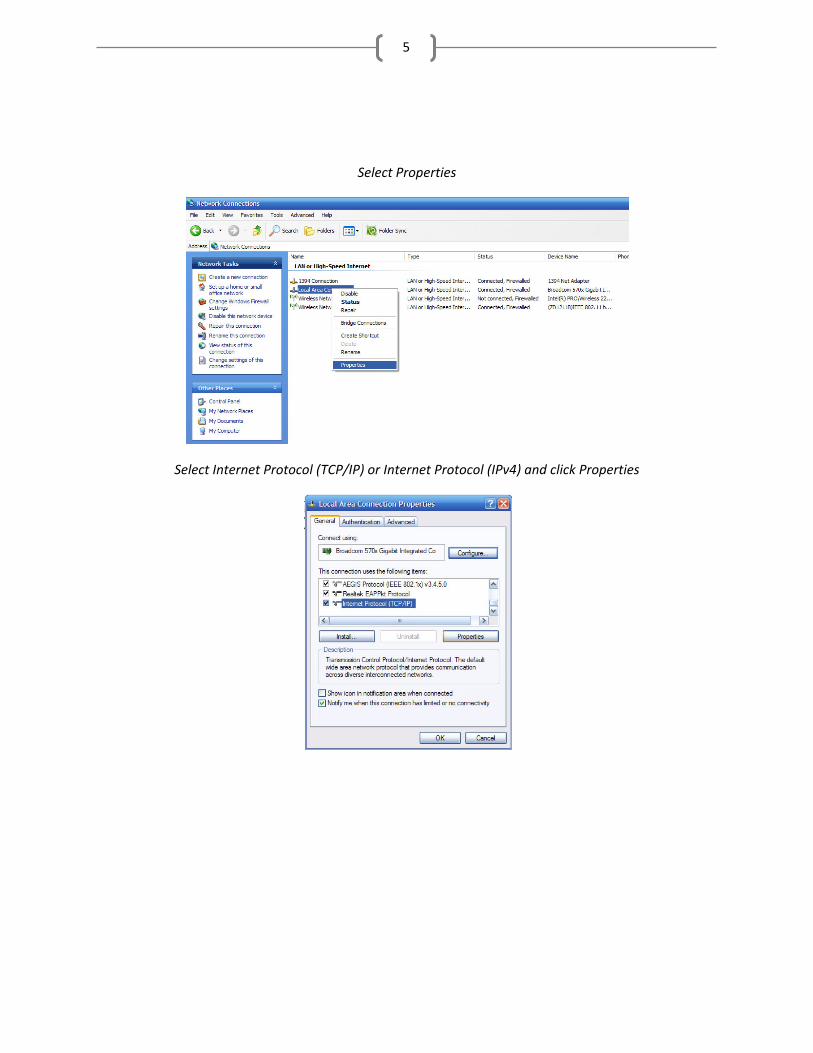
Select Properties
Select Internet Protocol (TCP/IP) or Internet Protocol (IPv4) and click Properties

6
Select “Use The Following IP Address” and Enter 192.168.1.10 into the IP Address field and 255.255.255.0
into the subnet mask field
Select “OK” and select “Close” on the Local Area Connection properties window.
Vista: Start Menu/Windows Logo > Control Panel > Network and Sharing Center > Manage Network
Connections > right click “Local Area Connection” and follow instructions from page 5.
Windows 7 : Start Menu/Windows Logo > Control Panel > Network and Sharing Center > Change Adapter
Settings > right click “Location Area Connection and follow instructions from page 5.
Once you have configured your O2Link or O2Point, you will need to follow these steps again and select
“Obtain an IP address automatically”

7
Now your system is ready to configure the O2Link or O2Point as a universal repeater
Using the included Ethernet cable, connect the Ethernet port of your computer to either the single port of
the O2Point or any of the 4 LAN ports of the O2Link
Do not connect to the WAN port, this will not allow configuration
To access the configuration page of your O2Link/O2Point, open a web browser (Internet Explorer, Mozilla
FireFox, Safari, etc.) and enter the IP address of your specific unit into the address bar.
O2Link High Power Router : 192.168.1.1
O2Point High Power Access Point : 192.168.1.100
These screenshots show configuring an O2Point, however, the procedure is identical when configuring an
O2Link.
Once you have entered the correct IP address for your unit, the status screen for the unit should appear

Sel
By defa
wish to re
lect “Wireless
Select t
ult, the unit w
ebroadcast yo
s” and “Basic
the Mode as
will re‐broadc
our own differ
Settings” to
“Client”, chec
cast the same
rent SSID or n
Inte
8
view the basi
ck the “Enable
e SSID or netw
network name
erface” field.
ic configuratio
e Universal R
work name of
e, enter the n
on page of yo
epeater Mod
f the original w
name into the
our O2 Unit.
de”.
wifi signal. If y
“SSID of Exte
you
ended

9
Select “Apply Changes” and click “OK”
(O2Link Router only)
Select “TCP/IP Settings” > “LAN Interface” and select DHCP as “Disabled”
Click “Apply Changes” and “OK”
10
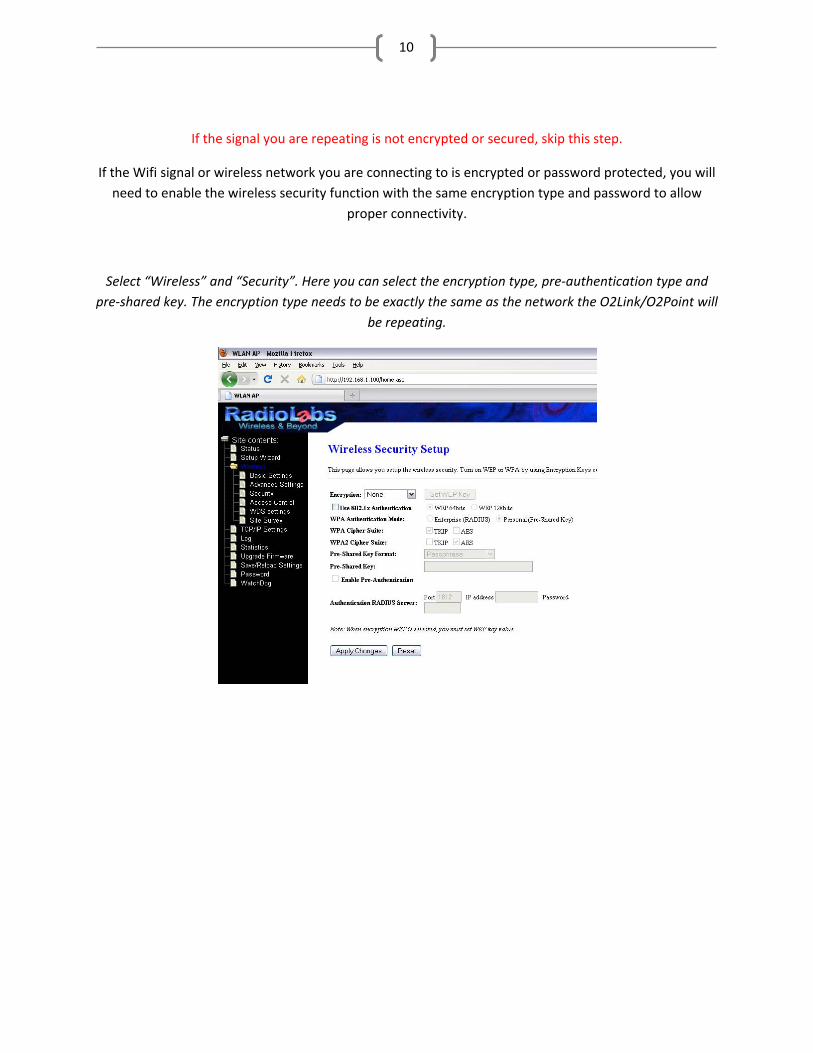
If the signal you are repeating is not encrypted or secured, skip this step.
If the Wifi signal or wireless network you are connecting to is encrypted or password protected, you will
need to enable the wireless security function with the same encryption type and password to allow
proper connectivity.
Select “Wireless” and “Security”. Here you can select the encryption type, pre‐authentication type and
pre‐shared key. The encryption type needs to be exactly the same as the network the O2Link/O2Point will
be repeating.

11
Select “Wireless” and “Site Survey”. Select “Refresh”
This will show a list of available networks within range of your O2Link/O2Point. Generally, a signal at
30% and above will allow a stable connection. If you are unable to pick up any signal or if you’re unable
to keep a stable connection, try repositioning the unit with the least amount of obstructions between the
wifi source and your O2 unit.
Select the network you would like to repeat and clicking “Connect”
If the settings are correct and enough signal is available, the next screen will display “Connect
Successful” and the procedure is finished. You can now re‐enable your wireless connection and connect
to the repeated signal.

12
If you select “OK”, you will be returned to the “Wireless Site Survey” page.
You can now disconnect the Ethernet cable from your computer and the O2 device.
If the encryption key or type is incorrect, the next screen will read “Encryption Type Mismatch”. You will
need to recheck your security settings and try again. If the signal you are repeating is unencrypted, you
need to make sure that your encryption type is set to “None” before connecting.
Your O2Link or O2Point is now acting as a client and access point simultaneously. You can connect
wirelessly to the repeated signal or connect via the Ethernet cable to access the internet.