1 web receiving november 28 th & 29 th, 2006 system administration
TRANSCRIPT

1
Web Receiving
November 28th & 29th, 2006
System Administration

2
Agenda
• 09:30 – 10:00 Introduction & Overview• 10:00 – 11:30 Web Receiving Power Point Presentation• 11:30 – 11:45 Break• 11:45 – 12:15 A/P payment authorization, voucher by
receipt, A/P tools• 12:15 – 12:30 Reports• 12:30 – 1:00 Questions, Roll-Out plan, Conclusion• 1:00 – 1:30 Hands On

3
University Controller’s Office Campus ContactsFax 518-443-5871
• Amy Kahn 518-443-5461• Binghamton• New Paltz• Oswego• Potsdam• System Administration
• Mary Horner 518-443-5547• Albany• Geneseo• Plattsburgh• Alfred State• Delhi• Farmingdale• Alfred Ceramics• Optometry• [email protected]
• Mark Mulligan 518-443-5437• University of Buffalo• HSC Brooklyn• Brockport• Fredonia• Oneonta• Purchase• Cobleskill• Morrisville• Cornell• [email protected]
• Christine Urschel 518-443-5457• Stony Brook• HSC Syracuse• Buffalo State• Cortland• Old Westbury• SUNY IT• Canton• ESF• Maritime• [email protected]

4
SUNYWEBRECV Discussion List
• In order to send an email to the SUNYWEBRECV discussion list, send to [email protected]
• You must be a member of the applicable lists to send or receive an email.• In order to review the membership of a specific list (you must be a member of the list); in the
body of the message type:• review SUNYWEBRECV• A copy of the membership list will be sent to your email address under separate cover. Upon
review, you may notice that names appear on the list more than once with different addresses. This indicates that the address has changed so they now appear on the list with the old address and the new address. This may result in receiving multiple copies of the same email. If any changes need to be done, please send an email to [email protected]. In the body of the email, use the following command format:
• subscribe SUNYWEBRECV your name• unsubscribe SUNYWEBRECV• You will need to do both subscribe and unsubscribe if your address has changed. You can only
unsubscribe before your actual address changes, if the address has already changed you will need to send the unsubscribe to the list owner.
• Each time one of the above commands are sent a notification from the listserv will be returned to the sender acknowledging receipt. If an error is detected in the format used by the sender, a notification will also be sent back indicating the error.

5
Types of Receiving(Needs applicable LEGACY Security)
• Centralized receiving (Item Receipt)
– receive materials at centralized loading dock or desktop (or both)
• loading dock/desktop user needs to have access to Internet
– items can be physically counted, logged or returned
• receipt generated for each transaction
• Decentralized receiving (Short Form Receipt)
– items are brought directly to requesting office without physical count
– minimal input by loading dock including:
• PO number
• office that merchandise was delivered to
– receipt generated
6
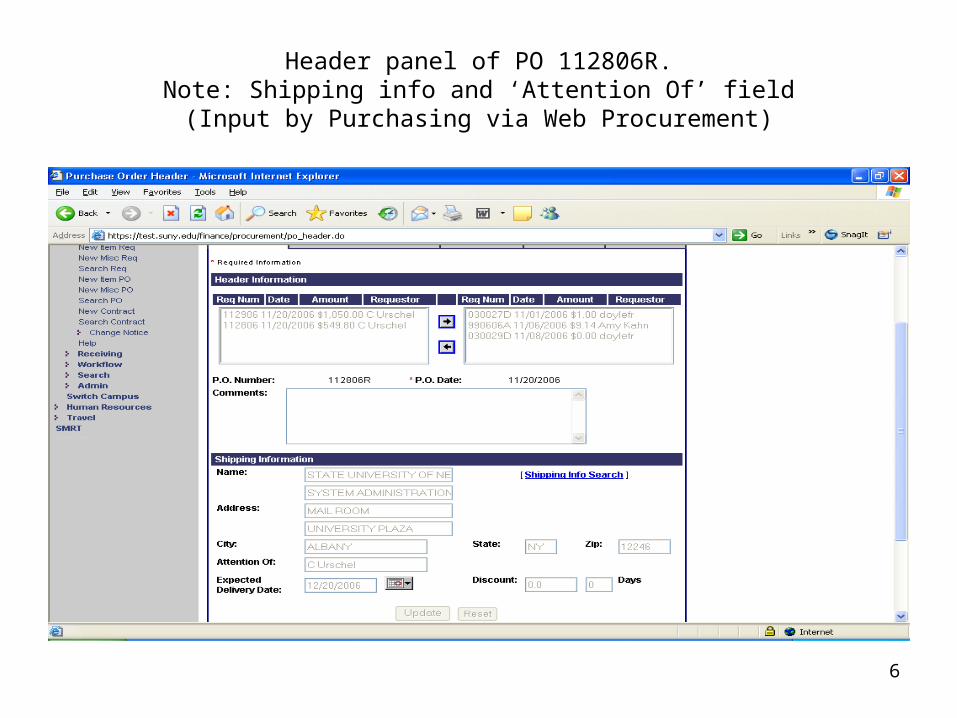
Header panel of PO 112806R.Note: Shipping info and ‘Attention Of’ field
(Input by Purchasing via Web Procurement)

7
Vendor panel (Input by Purchasing via Web Procurement)

8
NYS Campus panel (Input by Purchasing via Web Procurement)

9
PO Summary

10
Change Order panelNote: 2 reqs on PO 112806R
(Input by Purchasing via Web Procurement)

11
Summary of req 112806 (Input by Purchasing via Web Procurement)

12
Summary of req 112906

13
Short Form ReceiptSee Web Receiving Sign On Procedures
Note: Sign on to www.test.suny.edu until campus goes live. Then use www.suny.edu.

14
Short Form ReceiptNavigation: Finance/Receiving/New Short Form Receipt

15
Short Form Receipt(Continued from previous slide.)

16
Enter ‘Procurement Number’ (PO/Contract); Click ‘Search’.

17
PO is returned

18
Check the radio button next to the PO and click ‘select’.

19
Note: The vendor, delivery and material description have been populated from Web Procurement.
From commodity code
description

20
Select the delivery information brought over from the req or enter delivery info. This field has a 20 character limit.
Able to select comments for ‘special review’. Can become campus specific.
21
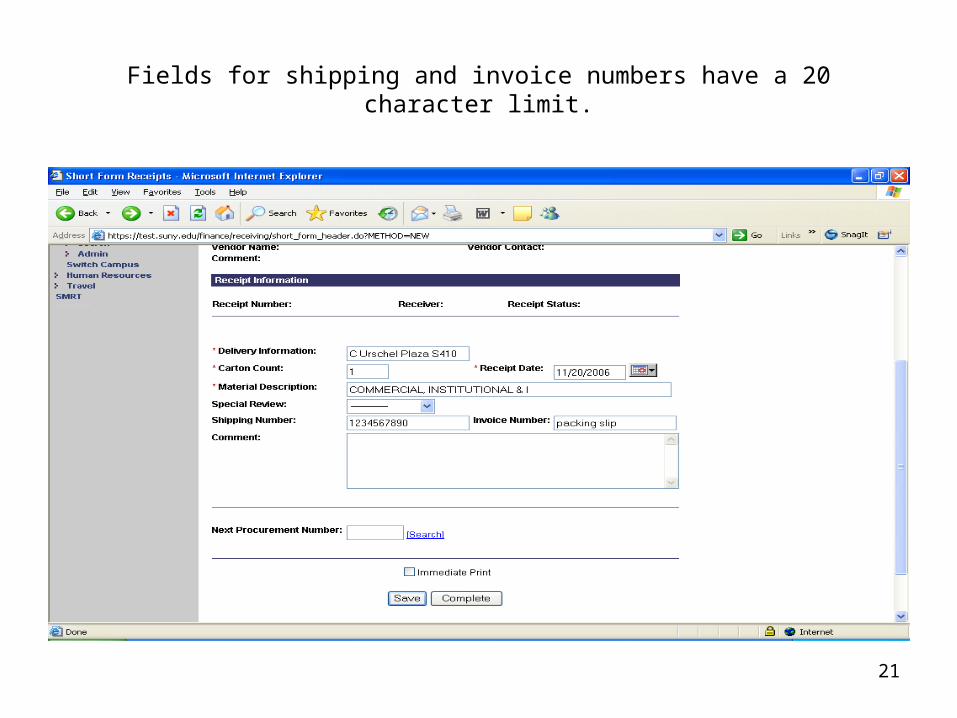
Fields for shipping and invoice numbers have a 20 character limit.
22
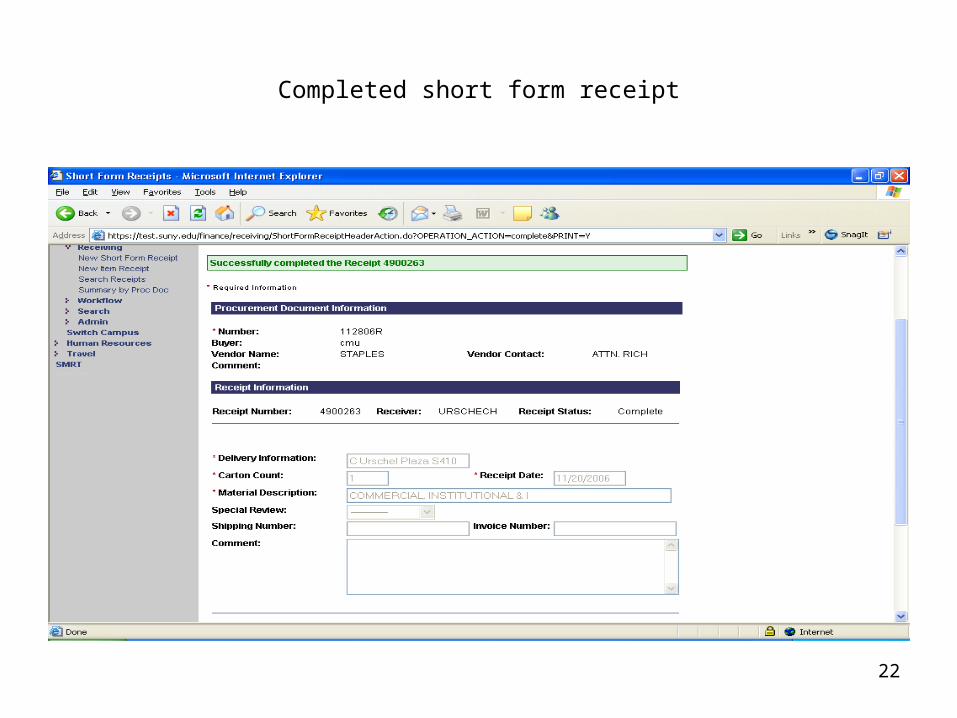
Completed short form receipt
23
Item Receipt

24
New Item Receipt(Finance/Receiving/New Item Receipt)

25
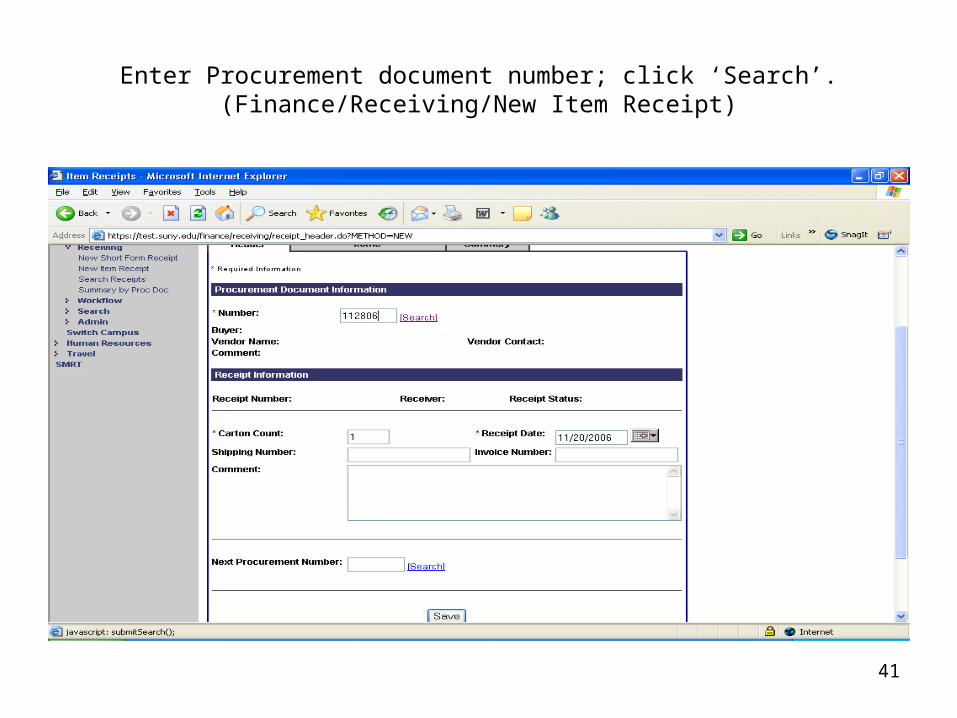
Enter Procurement Number (PO/Contract); click ‘Search’.

26
Check the radio button next to the PO and click ‘select’.

27
Complete required fields and other information. Clicking ‘save’ saves the receipt and assigns a receipt number. The receipt will be on the user’s work
list. ‘Complete’ completes the receipt and ‘delete’ will cancel the receipt.

28
Note the saved receipt number.

29
Items to be received are brought forward from the item screen on the Procurement document. Quantity ordered not shown per audit requirement.

30
Enter quantity received, counter’s initials, select any ‘Special Review’ options form the drop down menu or click ‘###’ to add a comment. ‘Save’ or
‘Complete’.

31
The receipt can be completed and printed immediately or completed to be printed at a later time.

32
To complete and print immediately, check the ‘Immediate Print’ box and click ‘Complete’. To complete only, click ‘Complete’ without checking the box.

33
SURS Primary Option MenuOptions RPRN, RPDT and RPRR are all available in SURS for users who have
mainframe access.

34
Returns – Can be done at the time the receipt is complete or at a later time through ‘Receipt Search’. The search default is to search for both short form and item receipts. The user can uncheck either of the boxes to search for a
specific receipt type.

35
The results are returned. Select the receipt to work on.
36
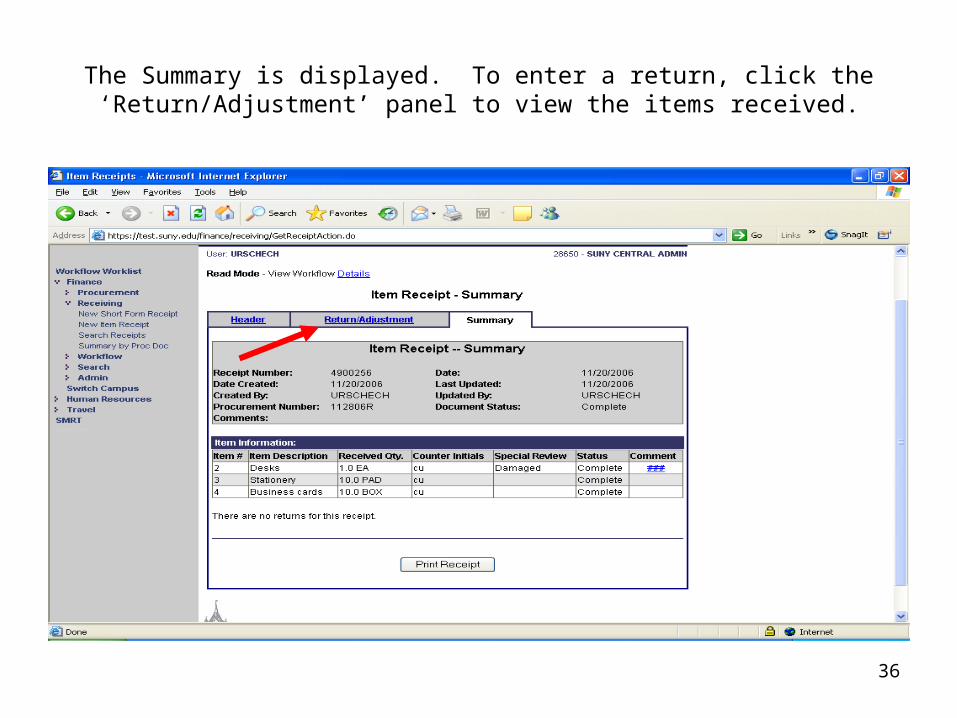
The Summary is displayed. To enter a return, click the ‘Return/Adjustment’ panel to view the items received.

37
Enter the quantity of the item to be received, the counters initials and a return reason. Comments may also be added. Click ‘Save Return’.

38
A Return Receipt number is assigned. The Return Receipt can be saved, completed or deleted. If completing, an immediate print may be done by
checking the ‘Immediate Print’ box.

39
A summary of the receipt, including return is displayed.

40
Overshipment and Addition of Unordered Item
Demonstrating Work List
41
Enter Procurement document number; click ‘Search’.(Finance/Receiving/New Item Receipt)

42
Select Procurement Document.

43
Click ‘Save’.

44
Enter quantity received and counter’s initials.

45
Once quantity and counter’s initials are entered, click ‘Save’.

46
Note: Overshipment indicator.

47
At this point, the user can click ‘Save’ and come back to it later or ‘Complete’ to complete and print.

48
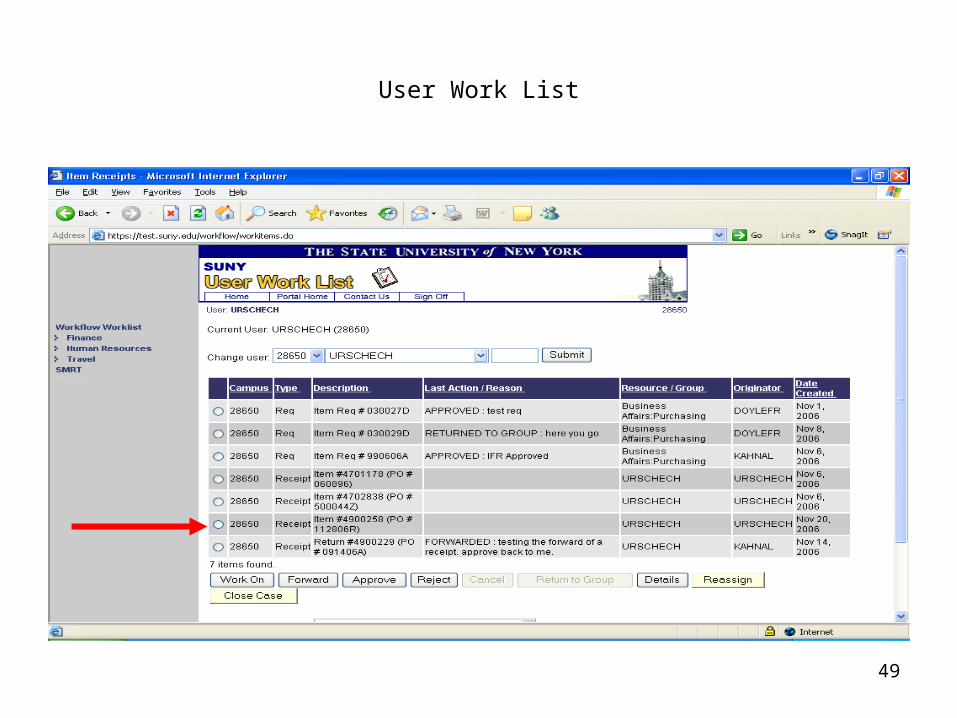
‘Save’ was chosen and the receipt is now on the user’s Work List.
49
User Work List

50
Forward Feature

51
Find the user in the drop down list to forward the document to.

52
Add comments if necessary. The “Return to Me” box can be checked if the user wants the document to come back to their work lost once the person forwarded
to has taken action. Click ‘forward’ to proceed or ‘cancel’.

53
Work Item Details provides a history of the document.
54
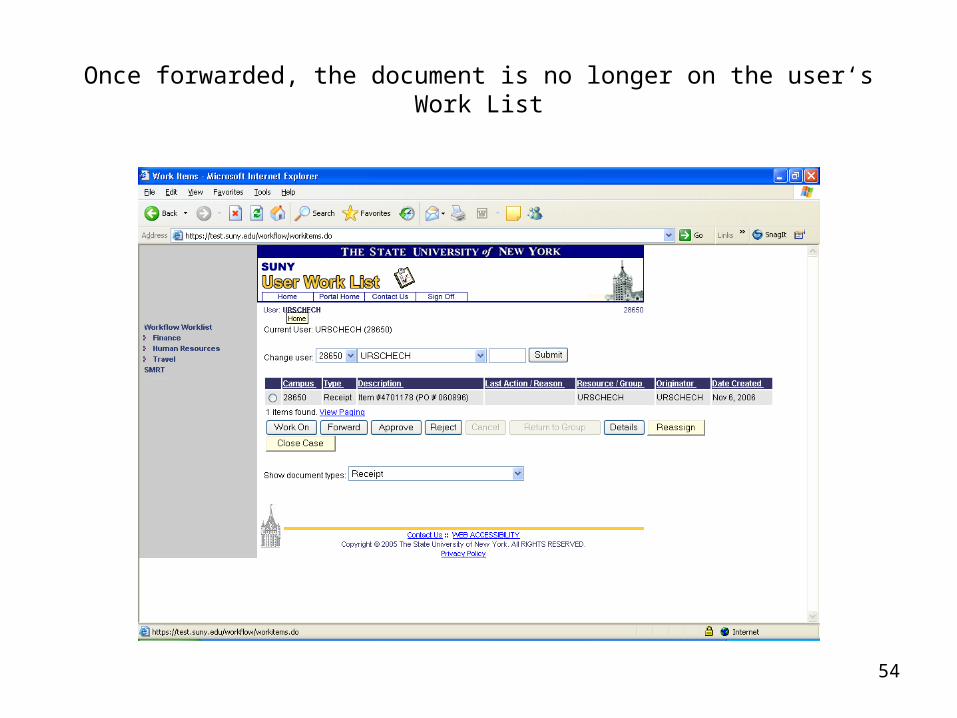
Once forwarded, the document is no longer on the user‘s Work List

55
The document is now on the user’s Work List selected from the drop down list.

56
After clicking ‘Approve’, the person reviewing the document can add comments to the original user. Once ‘OK’ is clicked, the document goes back to the original user. The ‘Work Item Details’ show the history of the document.

57
The document displays on the original user’s Work List and can be worked on.

58
The Summary is displayed. To enter more items, click the ‘Items’ panel.

59
If an item is shipped that is not on the Procurement document, it can be added to the receipt at this time by clicking ‘Add Unordered Item’.

60
The item screen is displayed. To add an item, a valid UNSPSC code must be chosen. Click ‘search/validate’ to enter the UNSPSC search module.
Refer to Web Procurement Application Procedures and UNSPSC code spreadsheet.

61
Enter the item to search. Plural form is preferred and will return a smaller result set. Click ‘Search’.

62
Click the radio button next to the item to be added. Click ‘Select’.

63
The UNSPSC code and description is returned to the item screen.

64
Enter required fields and comments if desired. Click ‘Create’.

65
Item was created as line number ‘900’.

66
Summary shows items received for this receipt.

67
Training Web Site
• www.suny.edu
• Faculty, Staff & Employment
• SUNY Secure “Sign On”
• Select campus, enter LAN username and password, “Login”
• Click the “More” tab
• Click the “System Administration Projects” tab
• Click SUNY University - wide Administrative Systems 5yr Plan link
• In the Navigation bar, choose ‘Finance & Management’.
• Click ‘Training/Presentation Materials’.
• Refer to Web Procurement Application Procedures and UNSPSC code spreadsheet.
• Web Receiving Power Point Presentation and Procedures will be added to the site.

68
Enhancements

69
Enhancements
• Print by date & date range• Requisition an allowable
procurement document type• Query on overshipments,
undershipments and complete receipts
• 3rd party destination receipts
• Complete or Partial receipt noted on receipt print
• UOM, i.e. LOT never fully received or overshipped
• Flags for PCS