macomber.weebly.com€¦ · web viewadobe indesign: everything you need to know (well, almost...
TRANSCRIPT

ADOBE INDESIGN: EVERYTHING YOU NEED TO KNOW(Well, almost everything)
1. How to set up a pagea. File → New → Documentb. Change column number to 6c. Click “Ok”
2. Get acquainted with the toolbar. Black pointer: this is your master
tool. o You will use this tool to grab items and move them around the page. When in
doubt, use this! T: this is the text box tool.
o To create a text book (use to create the flag, headlines, bylines, cutlines and photo credits!)
a. Click on the T.b. Click on your layout and drag to achieve the shape you want.c. At the top of your screen, a font toolbar will appear where you can
alter the size and font of your text. The box with the X through it: this is the tool you use to insert photos and
articles (see directions below) The plain box: this is the box you will use to insert shaded boxes (to place
behind articles if you want some variety). a. Click the box without the X. b. Click on your layout and drag to achieve the shape you want.c. Click the box with the red diagonal through it (this red diagonal
through a white box shows you the box is currently clear). d. Now, click the solid black box to show you want the box to be colored.
If you want the box to be gradiant, click the middle box. Yourbox should now look like this:
e. Notice that a window on the popped up. One the sliding colorlower right of the screen just scale, select color of gradient you want your box to become.
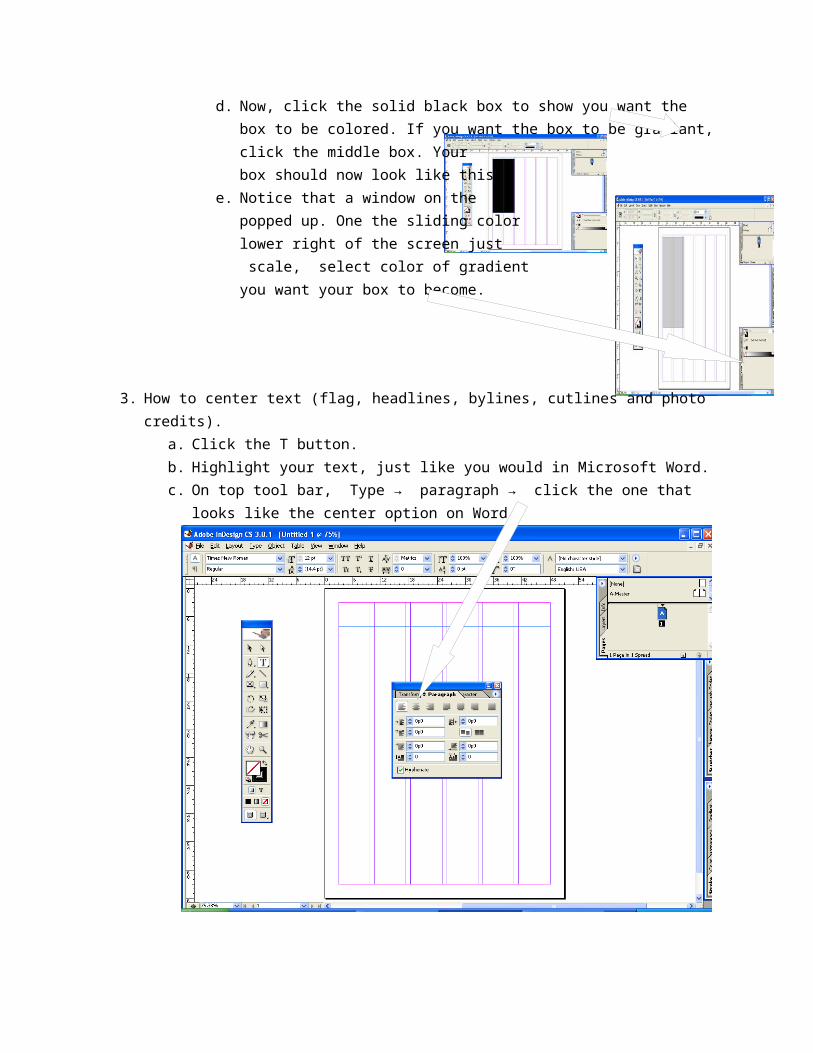
3. How to center text (flag, headlines, bylines, cutlines and photo credits).a. Click the T button.b. Highlight your text, just like you would in Microsoft Word.c. On top tool bar, Type → paragraph → click the one that looks like the center option on
Word
4. How to stretch text (use for flag and headlines)a. Click on the T tool.b. Highlight text, just like you would in Microsoft Word.c. Use these two options to stretch text either horizontally or vertically:d. Shortcut: once you click once on those options, you can use the up or down
arrow keys on your keyboard to expand/shrink your selected text!

5. How to insert photos and resize them without stretching:a. Click the box with the X through it.b. Click on your layout and create the size box you want the picture to be.c. File → Placed. Find the picture that has already been altered in Adobe Photoshop (grayscale and
resolution 130).e. Your picture should be placed. But wait! There are three people in this photo but it is
only showing one!f. To resize photos without stretching:g. Click on the black pointer.h. Right click on the picture →Fitting → Fit
content proportionatelyi. Adjust the size of your photo box to fit the
dimensions of your photograph
6. How to insert articles and get them to fit:a. Before you start: Adobe InDesign
does not acknowledge the newMicrosoft documents. So, you needto open up Microsoft Word and save your articles as Word 97-2003documents.To do this, go to File→ Save as → under Save as Type, select Word 97-2003 document. Close Microsoft Word.
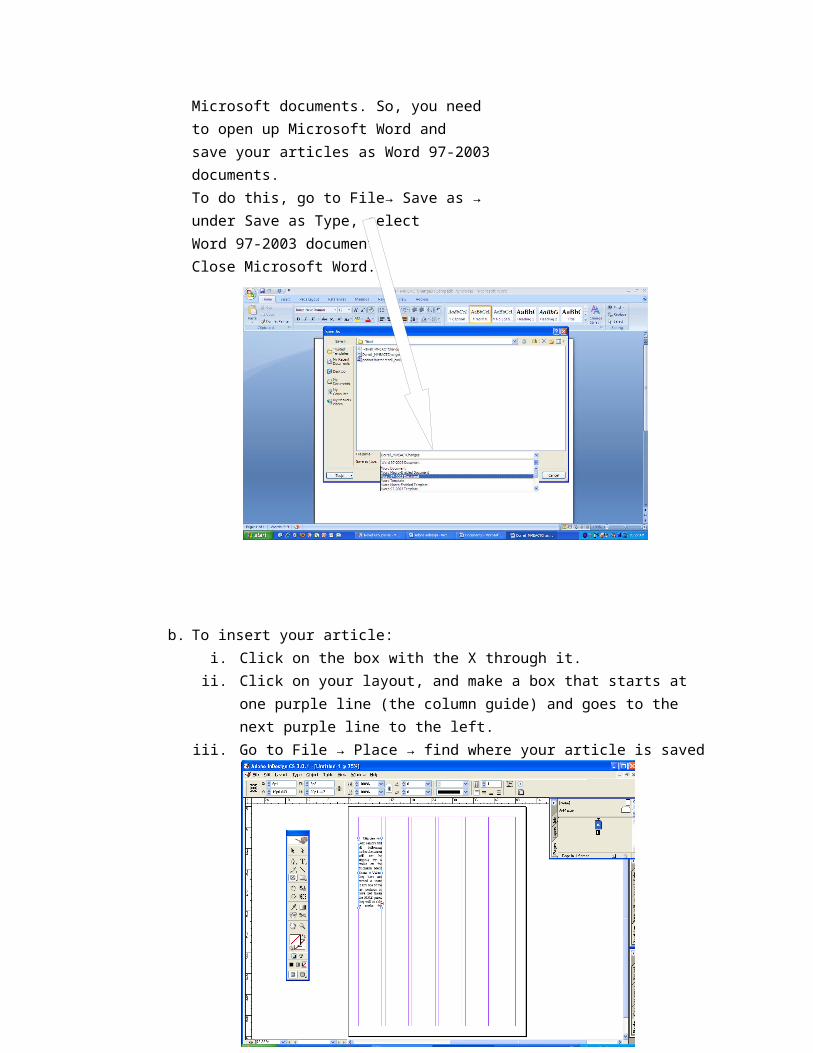
b. To insert your article: i. Click on the box with the X through it.
ii. Click on your layout, and make a box that starts at one purple line (the column guide) and goes to the next purple line to the left.
iii. Go to File → Place → find where your article is saved
iv. Notice there is a red + in the lower right-hand corner. This is letting you know there is more of the article to place- your box is not big enough!
v. Click on the black pointer then click red +. vi. Click in column to the right of placed text.
vii. Adjust column length to match column on left.
viii. Continue process until you don’t see the + sign anymore.

7. How to text wrap: (in case you want to put a picture in the middle of an article)a. Place photo where you want it. b. Adjust to fit frame proportionately. c. Notice the picture is covering words.
Not good! d. Using your black pointer, click the
picture. e. Go to window→ types and tables→
text wrap.f. Click one of the
options at the top.
g. The four boxes belowThese options adjust spacing around thephoto. In this example, 0p5 was used:
8. How to print your pagea. File→ print. b. Click setup on the right. c. Select scale to fit.d. Click print