© hairdressing-training.com 2004 female haircuts - classic bob
TRANSCRIPT

© Hairdressing-Training.com 2004
Female haircuts - Classic bob
© Hairdressing-Training.com 2004
Introduction
• The classic bob dates back to ancient Egypt - remember Cleopatra? More recently, it found fame in the 60s when Vidal Sassoon cut Mary Quant's hair into a bob and launched the modern revolution in hair cutting. Since then, it has evolved through the decades into one of the most sophisticated and timeless hair cuts of all.
• Our model's hair has been cut using the technique called 'reverse graduation'.
• This technique allows the hair to turn under easily. It also gives the hair a strong, blunt edge because there is no graduation in the cutting line.
© Hairdressing-Training.com 2004
Step 1 of 17 - Before
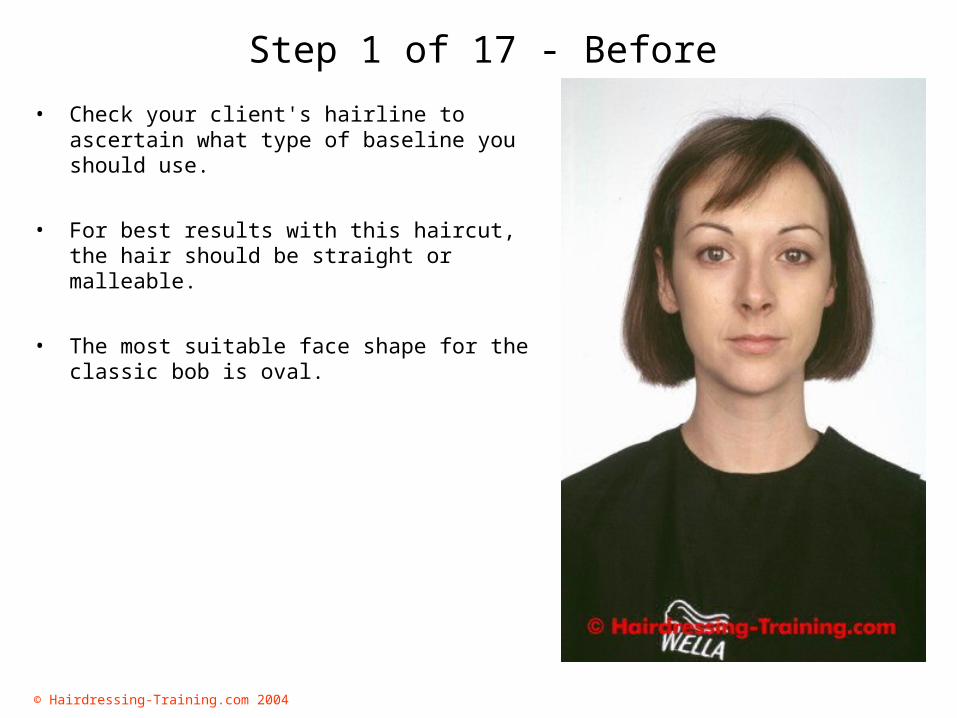
• Check your client's hairline to ascertain what type of baseline you should use.
• For best results with this haircut, the hair should be straight or malleable.
• The most suitable face shape for the classic bob is oval.

© Hairdressing-Training.com 2004
Step 2 of 17 - Centre parting/section
• It is important to check at this stage of the haircut that the centre parting is correct.
• There are several ways to check this. One way, that is 100 per cent accurate, is to place the back edge of your cutting comb on the top vertebra and lay it flat against the head. This will show you the centre point of the back of the head.
• Divide the hair from the centre.
• Check that the client is correctly seated and that their head is held slightly forward and down.
Tip: To achieve a good balance, keep an even moisture content throughout the haircut.

© Hairdressing-Training.com 2004
Step 3 of 17 - Creating a baseline
• Sectioning is now complete.
• We start the haircut, by keeping the hair wet at all times, we cut the hair onto the skin.
• As seen in the photograph, we cut from the inside out to create a pyramid baseline. In this case we have created a short point in the centre and a long point on the outside remembering this is reverse graduation technique, where each section gets progressively longer, enabling the hair to turn under.
• As we work up the back of the head, each section is slightly directed to the longest point, so when the hair returns to its natural position, each section will be progressively longer, (see hair travel).
© Hairdressing-Training.com 2004
Step 4 of 17 - Working up
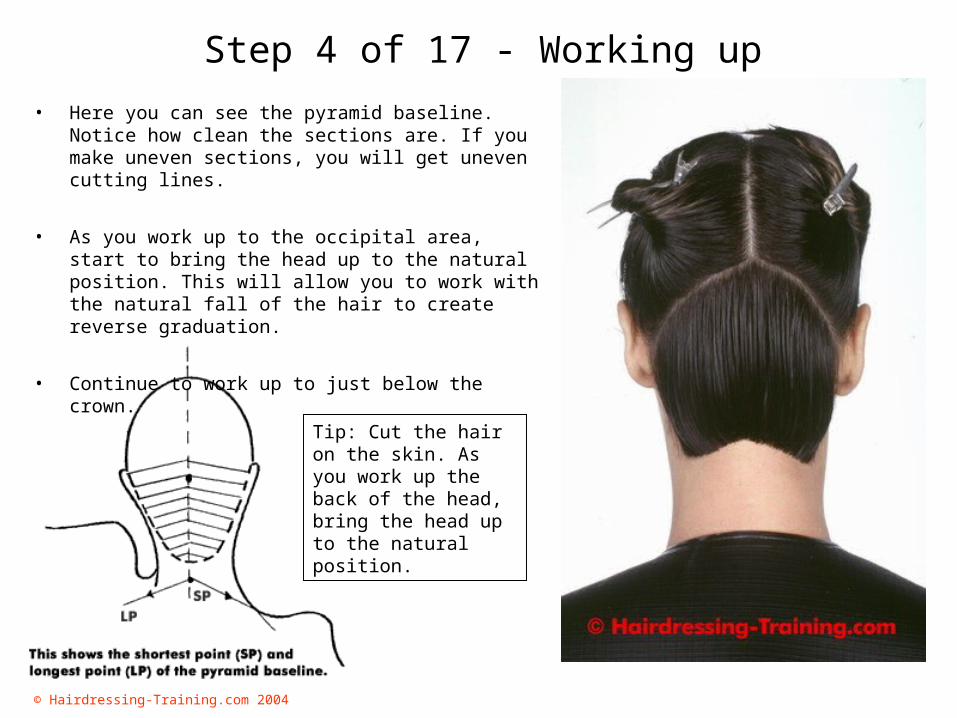
• Here you can see the pyramid baseline. Notice how clean the sections are. If you make uneven sections, you will get uneven cutting lines.
• As you work up to the occipital area, start to bring the head up to the natural position. This will allow you to work with the natural fall of the hair to create reverse graduation.
• Continue to work up to just below the crown.
Tip: Cut the hair on the skin. As you work up the back of the head, bring the head up to the natural position.

© Hairdressing-Training.com 2004
Step 5 of 17 - Completed back area
• In this picture, you can see the completed back area with the reverse graduation. Notice that we have taken a section out at the crown.
• You can also see how the pyramid baseline becomes softer as the head moves into an upright position.
Tip: Leave out a semi-circle section from the bottom to the top of the crown. This ensures that uneven crowns do not affect the smooth lines of the cut. This section is cut freehand on completion of all other areas.

© Hairdressing-Training.com 2004
Step 6 of 17 - Side area
• The next area to cut is the side area.
• The hair is divided into three sections to allow for the ear:
• Make the first section at the back of the ear. This allows you to pick up your guide line from the back of the haircut. Cut this section freehand.
• The second section is combed over the ear. Use the wide teeth of your comb to create relaxed tension in the hair and to allow for the ear. Cut this section freehand.
• The third section is in front of the ear. Cut this section freehand as well.
© Hairdressing-Training.com 2004
Step 7 of 17 - Side area
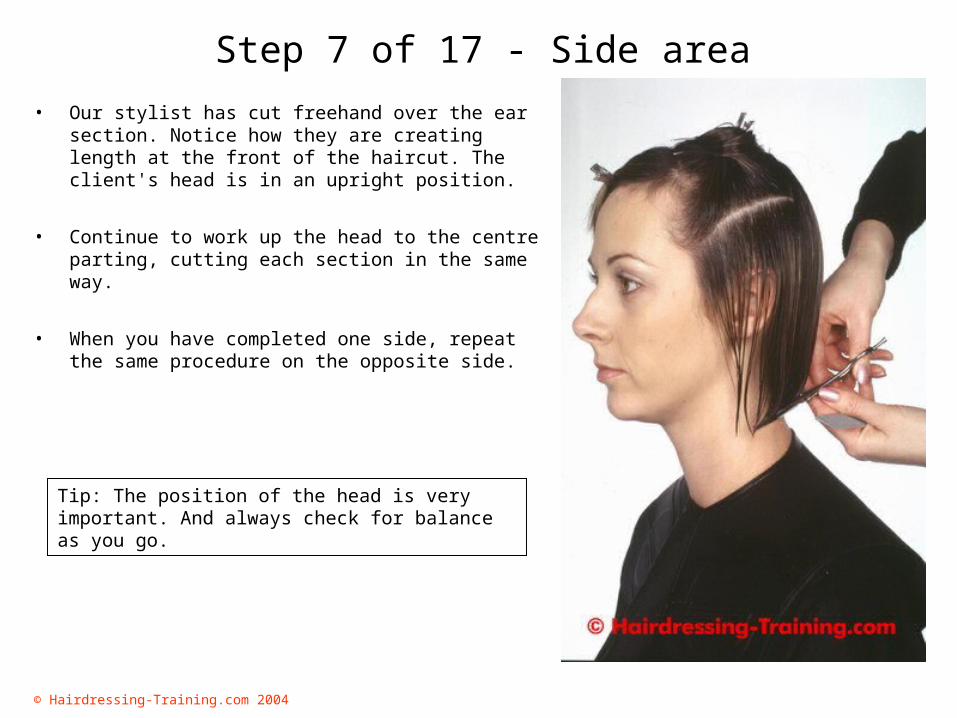
• Our stylist has cut freehand over the ear section. Notice how they are creating length at the front of the haircut. The client's head is in an upright position.
• Continue to work up the head to the centre parting, cutting each section in the same way.
• When you have completed one side, repeat the same procedure on the opposite side.
Tip: The position of the head is very important. And always check for balance as you go.

© Hairdressing-Training.com 2004
Step 8 of 17 - Fringe area
• You do not always have to cut a fringe.
• To allow for any movement or irregular hairlines, cut the fringe area freehand.
• Take a section from the outside corner of the eye to the front centre of the head.
• Cut from the outside towards the centre, keeping the hair wet at all times.
• Repeat the same steps on the other side, checking the balance as you go.
• The hair will fall freely from the head to achieve its natural shape.
• Continue to work up to your section, remembering to cut freehand.

© Hairdressing-Training.com 2004
Step 9 of 17 - Crown area
• When you have finished the rest of your haircut, cut the triangular section you left out from the back section.
• Cut this section freehand.
• Comb the hair down with the wide teeth of your comb to allow for the natural fall of the hair.
• Use the length of the bob as your cutting guide.
Tip: Check for balance at all times. For best results, cut this section while the hair is still damp.
© Hairdressing-Training.com 2004
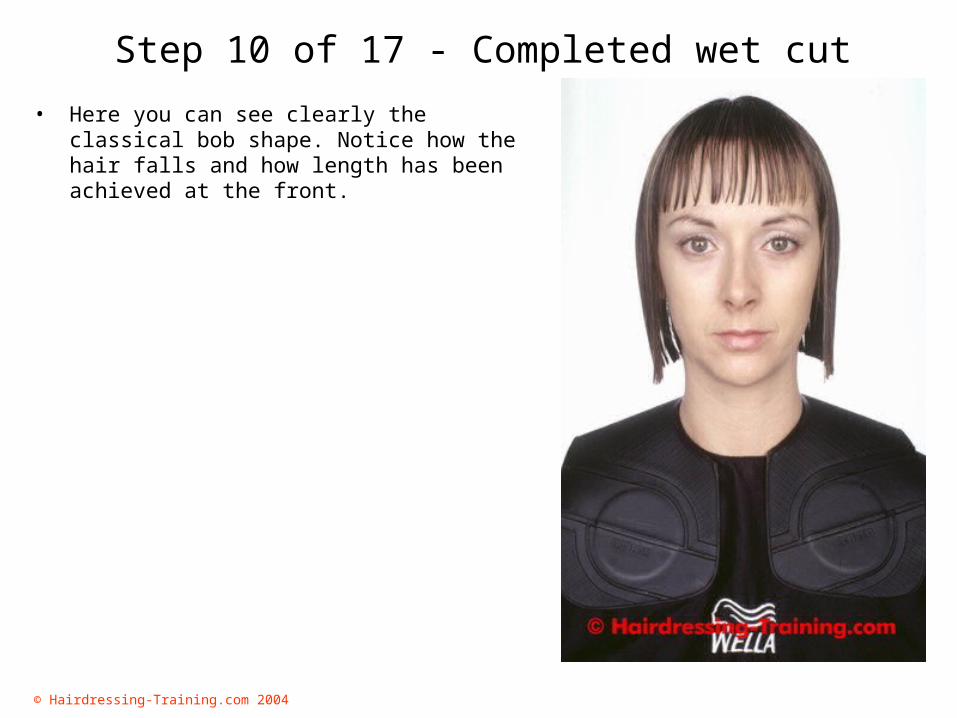
Step 10 of 17 - Completed wet cut
• Here you can see clearly the classical bob shape. Notice how the hair falls and how length has been achieved at the front.
© Hairdressing-Training.com 2004
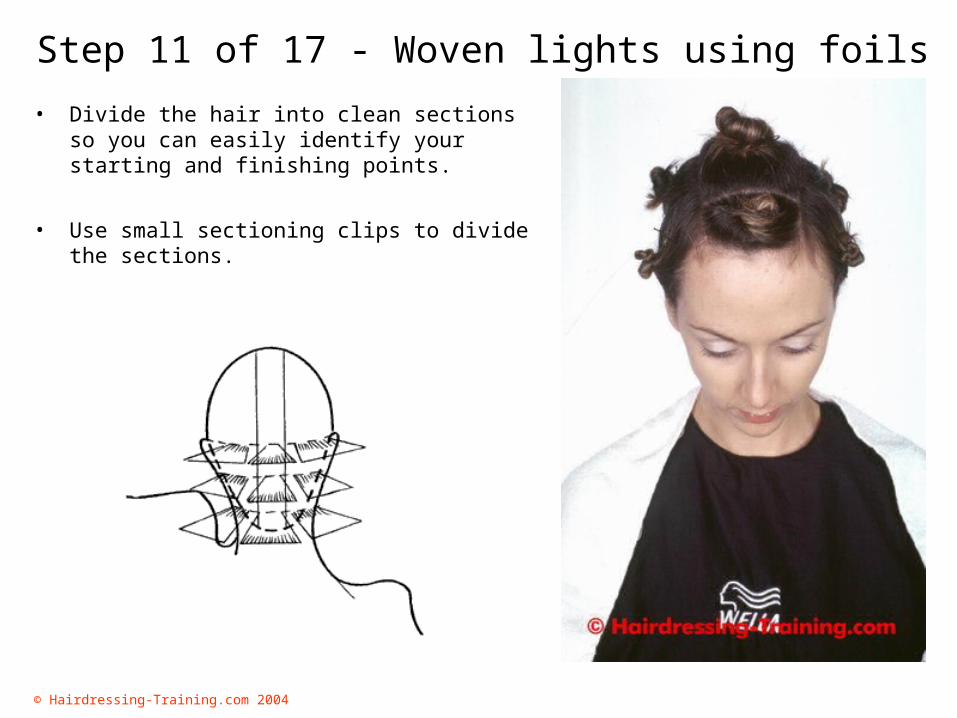
Step 11 of 17 - Woven lights using foils
• Divide the hair into clean sections so you can easily identify your starting and finishing points.
• Use small sectioning clips to divide the sections.

© Hairdressing-Training.com 2004
Step 12 of 17 - Application of Colour/foil
• Starting at the nape area, work round either side towards the front.
• Take horizontal slices of hair and weave a meche of hair using a pintail comb. Place the woven meche onto prepared foil.
• On our model, we first applied Wella Koleston Perfect 12/89, special pearl blonde with 12 per cent Welloxon Perfect to the middle lengths to secure the foil. We then applied colour to the root area and folded the foil.
© Hairdressing-Training.com 2004
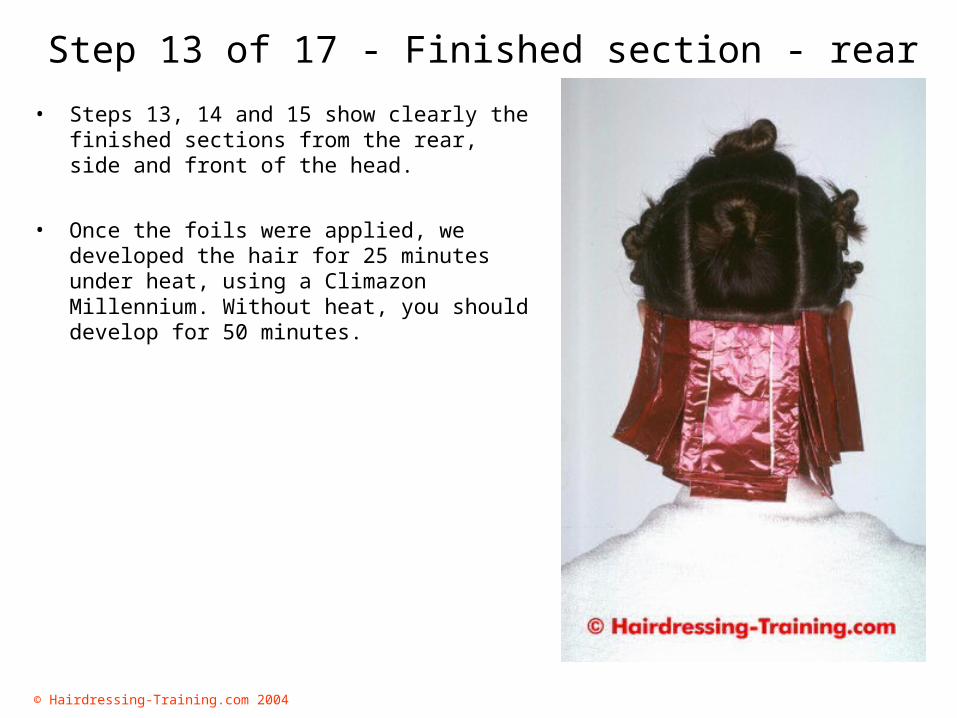
Step 13 of 17 - Finished section - rear
• Steps 13, 14 and 15 show clearly the finished sections from the rear, side and front of the head.
• Once the foils were applied, we developed the hair for 25 minutes under heat, using a Climazon Millennium. Without heat, you should develop for 50 minutes.
© Hairdressing-Training.com 2004
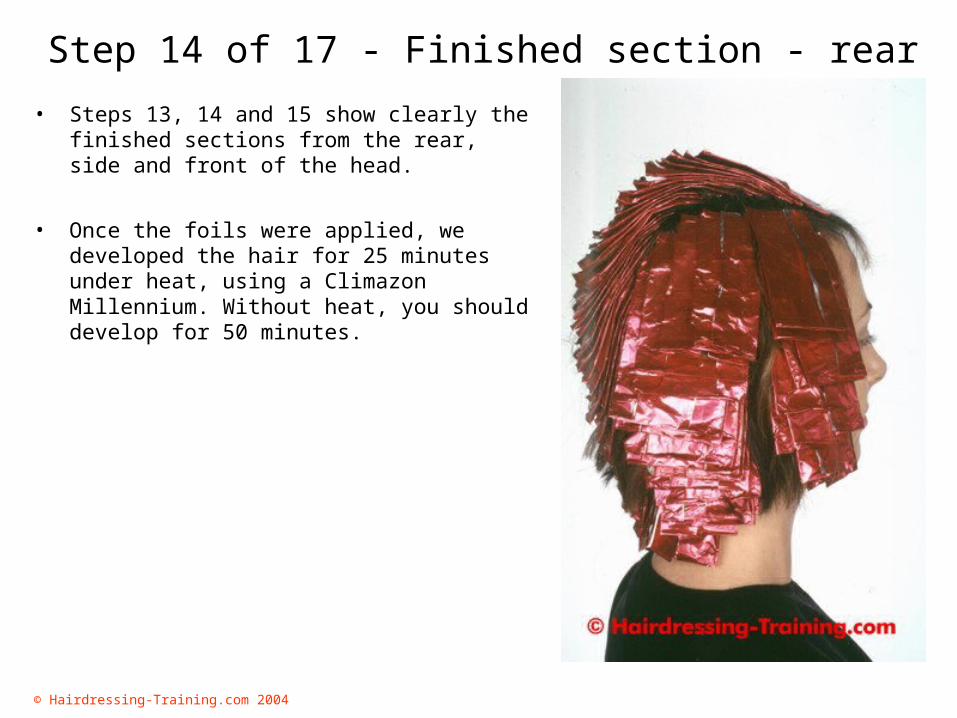
Step 14 of 17 - Finished section - rear
• Steps 13, 14 and 15 show clearly the finished sections from the rear, side and front of the head.
• Once the foils were applied, we developed the hair for 25 minutes under heat, using a Climazon Millennium. Without heat, you should develop for 50 minutes.

© Hairdressing-Training.com 2004
Step 15 of 17 - Finished section - rear
• Steps 13, 14 and 15 show clearly the finished sections from the rear, side and front of the head.
• Once the foils were applied, we developed the hair for 25 minutes under heat, using a Climazon Millennium. Without heat, you should develop for 50 minutes.

© Hairdressing-Training.com 2004
Step 16 of 17 - Finishing the cut
• Blow-dry the finished cut using a classic flat hairbrush.
• This encourages the hair to turn under and create a slightly bevelled edge. For more on this, see blow-drying techniques.

© Hairdressing-Training.com 2004
Step 17 of 17 - Final result
• We used Wella S P Mousse on our model to create volume and shine (see styling products).