© andrej brummer 12014 - saltwater aquarium...
TRANSCRIPT

© Andrej Brummer – 2014. 1

© Andrej Brummer – 2014. 2
Introduction to Selecting and Planning a Saltwater Aquarium ............................ 8
A note about being a saltwater aquarium owner: .................................................... 8
The cost of setting up a saltwater aquarium and being a responsible owner: ......... 9
Before you start setting up your tank: ................................................................... 11
Planning your saltwater aquarium correctly .......................................................... 12
Aquarium types: Fish-Only Systems ..................................................................... 16
Aquarium types: Fish-only With Live Rock Systems ............................................. 18
Aquarium types: Reef Systems............................................................................. 20
How to Choose an Aquarium Size and Where to Put It ........................................ 22
How to Choose Fish for Your Aquarium ............................................................... 23
Stocking Your Tank With Marine Life .................................................................... 24
What Commonly Goes WRONG When It Comes To Stocking ............................. 24
Making a Livestock Stocking Plan ........................................................................ 25
Stocking Your Tank The First Time ...................................................................... 26
Stocking Invertebrates .......................................................................................... 27
Marine Life Stocking Tips and Tricks .................................................................... 27
An Introduction to Choosing Marine Fish That are Compatible With Your Aquarium and With Each Other ............................................................................................ 29
Deciding What Goes In The Tank ......................................................................... 30
Putting Fish Into Your Tank .................................................................................. 33
How To Choose The Right Happy, Healthy Fish Specimen For Your Tank .......... 34
This is how you choose the right specimen for your saltwater aquarium: ............. 36
…At The Fish Store: ............................................................................................. 36
Selecting Marine Invertebrates ............................................................................. 37
The Look of your Saltwater Aquarium ................................................................... 39
Necessary Equipment: For Healthy Saltwater Aquariums .................................... 41
The other vital aquarium components are: ........................................................... 43
Vital Components 1: Filtration ............................................................................... 43
1. Mechanical filtration: ......................................................................................... 45
2. Physical filtration: .............................................................................................. 46
3. Chemical filtration: ............................................................................................ 47
4. Biological Filtration: ........................................................................................... 48
What Makes An Effective Bio Filter?..................................................................... 50
The Best Product is Nature! .................................................................................. 50
Choosing your Filter .............................................................................................. 51
Power/Canister style filters: .................................................................................. 54
Undergravel filters: ................................................................................................ 54
© Andrej Brummer – 2014. 3
Fluidised bed filters: .............................................................................................. 55
Wet / Dry (Trickle) Filters: ..................................................................................... 55
The Role of Filtration in Your Tank ....................................................................... 56
Lighting Your Saltwater Aquarium ........................................................................ 58
Lighting Fish-only and FOWLR tanks ................................................................... 59
Lighting a reef tank ............................................................................................... 61
Reef Tank Lighting Overview ................................................................................ 62
My Opinions on Reef Lighting Selection ............................................................... 63
Keeping Corals Happy Under Lighting .................................................................. 64
How To Choose Your Lighting Wisely! ................................................................. 65
Placement of Photosynthetic Marine Life Under Lights ........................................ 66
Heating/Chilling Your Saltwater Aquarium ............................................................ 66
Substrate For Your Saltwater Aquarium ............................................................... 67
Setting Up a Saltwater Aquarium The Right Way. ............................................... 68
Setting Up: Tank Design and Layout .................................................................... 68
The Aquascape .................................................................................................... 69
Saltwater Aquarium Decorating Options ............................................................... 70
Preparing the Water & Filling the Tank ................................................................. 71
Putting Your Saltwater Aquarium Together .......................................................... 72
Biological Cycling of Your Saltwater Aquarium ..................................................... 74
Initiating the biological cycling of your aquarium; the easy way! ........................... 75
What Happens In a Cycling Tank? ....................................................................... 76
What Phase of The Cycling Process is Your Tank in? .......................................... 77
Stocking Your Tank After Cycling ......................................................................... 78
Looking After Your Beneficial Bacteria ................................................................. 79
Maintaining Your Saltwater Aquarium ................................................................... 79
Daily Maintenance ................................................................................................ 80
Weekly Maintenance ............................................................................................ 80
Monthly tasks ........................................................................................................ 82
Other Maintenance ............................................................................................... 82
Saltwater Aquarium Maintenance A to Z .............................................................. 83
1. Partial water changes: ...................................................................................... 84
2. Cleaning filters and equipment: ........................................................................ 85
3. Visual inspection of you marine aquarium: ....................................................... 85
4. Algae control: .................................................................................................... 86
5. Water Quality Testing: ...................................................................................... 87

© Andrej Brummer – 2014. 4
How Do You Change The Water In A Saltwater Aquarium? ................................. 88
Marine Tank Janitors: Saltwater Aquarium Clean-up Crew .................................. 91
Creating a Perfect Environment ............................................................................ 93
1. Ensuring Good Quality Water: .......................................................................... 93
Why is Water Quality so Important to Saltwater Aquariums? ............................... 93
Poor Water Quality Can be Fatal .......................................................................... 94
The Keys to Good Water Quality .......................................................................... 95
Testing Water Quality ........................................................................................... 96
How pH works in your tank and how to adjust it ................................................... 99
Ammonia/Ammonium, Nitrite and Nitrate: ........................................................... 100
Water Hardness: ................................................................................................. 101
Carbonate Hardness (dKH): ............................................................................... 102
Salinity/Specific Gravity: ..................................................................................... 103
Phosphates: ........................................................................................................ 104
Calcium: .............................................................................................................. 105
Here are 2 easy to use water testing charts to help you: .................................... 107
Heating and Cooling Your Saltwater Aquarium .................................................. 109
Get a Good Heater! ............................................................................................ 109
Chillers ................................................................................................................ 110
The Nitrogen Cycle In Detail ............................................................................... 111
Getting rid of nitrates .......................................................................................... 113
Nurturing Your Beneficial Bacteria ...................................................................... 114
Biological Filtration in a Nut Shell ....................................................................... 114
Protein Skimming = Mechanical Filtration ........................................................... 115
What Exactly Do Protein Skimmers Do? ............................................................ 115
How Does Protein Skimming Work? ................................................................... 116
What Skimmer Should You Get? ........................................................................ 116
So, What Makes a Good Skimmer? .................................................................... 117
Counter- current and co-current skimmers ......................................................... 118
Venturi-style skimmers ....................................................................................... 118
Needle Wheel Skimmers .................................................................................... 118
ETS's & Down-Draft Skimming ........................................................................... 119
Cone Skimmers .................................................................................................. 119
Beneficial Micro-Organisms in Rocks and Sand ................................................. 120
Setting Up a Live Base For Bacteria ................................................................... 121
Compatibility in Your Saltwater Aquarium ........................................................... 123

© Andrej Brummer – 2014. 5
Common Incompatibility Causes: ....................................................................... 124
Dealing With Territorial Behaviour: ..................................................................... 126
16 Popular Saltwater Aquarium Species Fact Sheets ....................................... 128
Caring For Corals and Invertebrates .................................................................. 132
Phytoplankton ..................................................................................................... 133
Zooplankton ........................................................................................................ 134
Feeding Plankton in your Aquarium .................................................................... 135
Caring For Corals ............................................................................................... 136
Purchasing Corals .............................................................................................. 137
Now, Let’s Get to The Guts of Coral Keeping: .................................................... 138
The Preferred Water Environment for Coral and Invertebrates .......................... 142
How to Choose Healthy Coral Specimens That Are Right For Your Tank .......... 142
Questions to ask the Pet Shop about Invertebrates and Fish: ............................ 144
Where Does Your Marine Life Come From and Why You Should Care? ........... 145
What Do Bad Collection Practices Mean For You? ............................................ 146
Unnecessary Loss of Life From Underhanded Tactics ....................................... 147
1. Sodium cyanide capture: ................................................................................ 147
2. Collection and retail of species unsuitable for home aquariums: .................... 149
3. Bad handling, husbandry and shipping practices:........................................... 150
Where to Place Corals and Invertebrates In The Tank ....................................... 151
How to Correctly Acclimate Corals and Invertebrates......................................... 152
The Floating Method ........................................................................................... 152
The Drip Method ................................................................................................. 153
Common Coral Problems and Solutions ............................................................. 154
Stress is the Cause of Most Problems! ............................................................... 155
Coral Bleaching .................................................................................................. 157
Common Invertebrate Ailments and Diseases: ................................................... 159
Coral Diseases ................................................................................................... 160
Coral and other invertebrate treatments ............................................................. 161
Compatibility Among Coral and Invertebrates .................................................... 162
Marine Fish Diseases and General Health ......................................................... 164
Providing a Healthy Diet ..................................................................................... 164
Frozen Food Options .......................................................................................... 165
Freeze-Dried Food Options ................................................................................ 165
Dried Food Options ............................................................................................. 166

© Andrej Brummer – 2014. 6
Liquid Food Options ............................................................................................ 167
How To Provide Your Fish a Healthy Diet .......................................................... 167
Where Do Your Fish Feed and Why it Matters? ................................................. 171
Feeding the Occasional Treat ............................................................................. 172
Ensure a Varied Diet ........................................................................................... 173
Infectious Marine Fish Diseases ......................................................................... 173
Points to Note Before You do Battle With Saltwater Aquarium Disease ............. 174
Common Saltwater Aquarium Fish Diseases and How to Battle Them: ............ 175
Disease: Amyloodinium Ocellatum ..................................................................... 175
Disease: Bacterial Infections .............................................................................. 180
Disease: Brooklynella Hostilis ............................................................................. 180
Disease: Cryptocaryon Irritans ........................................................................... 184
A Note About Copper Treatments....................................................................... 187
A Note About “Other” Ich Treatments: ................................................................ 188
Common Behavioural Signs of Disease ............................................................. 189
Common Physical Signs of Disease ................................................................... 189
Preventative Measures: Quarantine ................................................................... 191
The Importance of a Quarantine Tank and Quarantining .................................... 192
Why Quarantine? ................................................................................................ 193
A Quarantine Tank Will Serve Multiple Purposes: .............................................. 194
This is How You will Set Up Your Quarantine Tank: ........................................... 197
Here’s my Super-Simple Quarantine Procedure: ................................................ 197
How do You Quarantine Corals and Other invertebrates? .................................. 198
Quarantining Sick Marine Life ............................................................................. 199
A Proper Medicine Cabinet for Aquarium Owners .............................................. 200
Antibiotics: .......................................................................................................... 200
Immunity and Stress ........................................................................................... 202
Stress in Marine Life ........................................................................................... 202
Tank and Fish Troubleshooting .......................................................................... 205
The 10 Most Common Saltwater Aquarium Mistakes Ever Made ....................... 205
1. Buying marine life without knowing enough about the specimen .................... 205
2. Taking things too fast ...................................................................................... 206
3. Marine life incompatibility ................................................................................ 207
4. Marine aquarium overload causing “New Tank Syndrome” or system crash .. 208
5. Lack of tank maintenance ............................................................................... 209
6. Using poor quality water ................................................................................. 210

© Andrej Brummer – 2014. 7
7. Unwittingly purchasing sick marine creatures ................................................. 211
8. Diagnosing disease incorrectly ....................................................................... 211
9. Poor water circulation and filtration ................................................................. 212
10. Too much medication ................................................................................... 213
Common Tank Problems and How to Remedy ................................................... 213
Invertebrate Problems and How to Solve Them ................................................. 216
Diet Related Problems ........................................................................................ 217
Environmental Causes of Disease ...................................................................... 219
Pest Algae Problems .......................................................................................... 220
Common Pest Algae Species in Saltwater Aquariums ....................................... 221
1. Blue-Green algae (Cyanobacteria): ................................................................ 221
2. Hair Algae (Derbesia): .................................................................................... 222
3. Bryopsis: ......................................................................................................... 222
4. Bubble Algae: ................................................................................................. 223
5. Diatoms: ......................................................................................................... 224
Marine Fish That Eat Algae ................................................................................ 225
How to Win the Battle Against Pest Algae .......................................................... 227
Pest Algae quick fix solutions: ............................................................................ 228
Underlying cause 1: Too much phosphate ......................................................... 229
Underlying cause 2: Too much nitrate ................................................................ 230
Underlying cause 3: Too little water movement and too much CO2 ................... 231
Underlying cause 4: Old lighting or too much natural light .................................. 231
Preventing Problems Within Your Aquarium ....................................................... 232
Recommended Resources Section .................................................................... 233
© Andrej Brummer – 2014. 8
Book 1:
Introduction to Selecting and Planning a Saltwater Aquarium
A note about being a saltwater aquarium owner:
Once you have decided to take that first step into bringing the undersea world into
your home the overwhelming majority of people, (like me!) never look back. It truly is
a captivating, entrancing addition to any home, and you will really enjoy the company
and antics of the colourful inhabitants inside.
Owning a saltwater aquarium filled with mesmerising, brightly coloured marine life is
quickly becoming one of the hottest hobbies in the world today. It’s easy to see why:
everyone is always so impressed when they see a saltwater aquarium set-up in
someone’s home, all who visit are totally hypnotised by these amazing creatures as
they play and chase each other around the tank. Marine aquariums have been
scientifically proven to greatly reduce stress levels and their otherworldly inhabitants
entertain and entrance for hours on end.
Thanks to modern technology and decades of research and development owning a
marine aquarium has never been easier or cheaper. However it is not for everyone,
for starters it’s not the cheapest hobby around and it requires regular input from
you; unless you use the services of maintenance and set-up companies. You really
need to know what you are doing plus nurture and care for your aquarium to reap the
rewards of years of entertainment and joy. Just like owning any other pet a
commitment is required from you.
Marine life have specific requirements in terms of diet, habitat and water quality, you
will need to be aware of these and set things up just so. Not only this you will need to
know which marine species gets along with which and who eats what. Aquariums
need to be maintained regularly and you will need to consider a whole lot of factors
© Andrej Brummer – 2014. 9
before you bring one into your home; available space, time and budget are just a
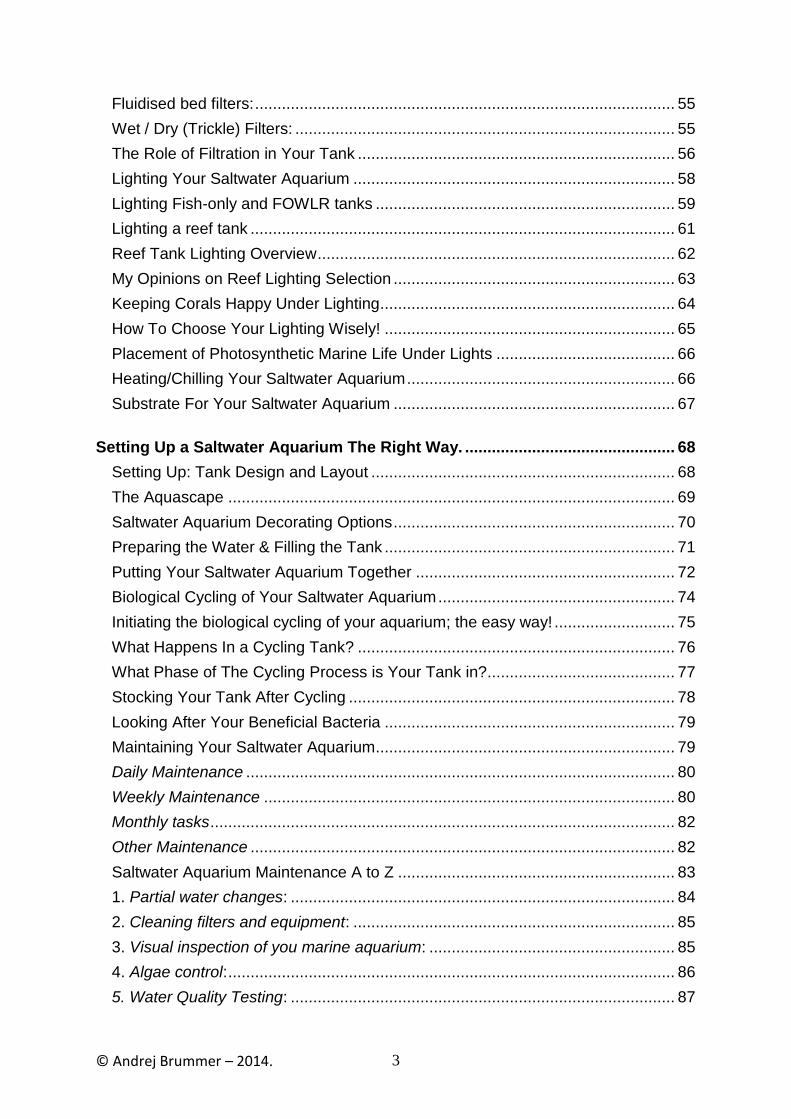
few. Are YOU ready for a marine aquarium?
Do you have what it takes to keep marine life?
The cost of setting up a saltwater aquarium and being a responsible owner:
The complete and honest truth is that setting up, maintaining and running a saltwater
aquarium is not cheap and if you are looking to get by in this hobby by choosing low
price over good quality at every chance you should stop now…
As marine life lovers our allegiance has to go to marine life first, taking these
stunning marine creatures out of their natural environment puts a massive
responsibility on us as their caretakers to ensure that they fair better under our
care than in the wild.
The truth is our oceans are dying and increasing masses of coral reef are bleaching
out and I really believe that this hobby will eventually become the cornerstone in
preserving the biodiversity of our planets tropical reef environments for generations

© Andrej Brummer – 2014. 10
to come by using captive breeding technology (learning how to breed marine life in
an aquarium) to replenish natural marine organism populations.
I take my caretaker responsibility very seriously as a scientist and nature lover; I
have often been told I am too hard on aquarists who won’t pay a bit more for quality
equipment and for that I make no apologies. You should be too!
To be the best aquarist you can be you really need quality equipment…your
equipment is the life support system of your marine pets!
If you think about it paying for quality has a number of advantages:
1. Your marine life will have a much better chance of survival if your
equipment and food are quality, this is the best advantage you can give
them and you will see them thrive, which means you have succeeded.
2. Quality stuff lasts longer than cheap stuff that only does half the job and
will inevitably breakdown in the near future (in most cases).
3. Your initial set up cost will be more when buying quality products - but is
that worse than watching you marine life die because you wanted to save
a few bucks? You will usually find that the costs of replacing your dodgy
equipment and dead livestock are so much greater than buying right in the
first place.
4. You get what you pay for: cheap stuff is seldom quality and quality is
seldom cheap.
5. By purchasing quality equipment the first time it greatly reduces the need
to upgrade when you change your set up or add more marine life to your
tank, which will save you money in the long run.
I totally believe that if you invest in better equipment it will not only prevent the
unnecessary death of your marine life because your equipment does the job it needs
© Andrej Brummer – 2014. 11
to do, but save you money in the long run in the form of replaced and upgraded
equipment and replacement pets. But most probably the greatest advantage is that it
will make your life less frustrating and prevent the very real pain of losing your
precious marine pets, which don’t take long to die in many cases of vital equipment
failure.
Please consider checking out a trusted fish store in your area or reputable online
retailers who won’t sell you cheap rubbish. A good retailer will choose every product
they stock based on its quality, durability and reputation.
Before you start setting up your tank:
When you decide to set up a new aquarium, whether you already have a fresh water
tank that you want to convert to saltwater, or you're upgrading from a fish-only
aquarium to one that includes reef organisms, it's important that you plan ahead
before you start dumping your fish and water into the aquarium!
With saltwater aquariums, there is more to the set up and planning than you might
think, and a little research of the various system design and equipment options there
are before you start can save you a lot of headaches later on. You need to decide
exactly what you want before you begin.
A huge mistake that I see time and time again is people setting up their marine
aquariums with a lack of fore-thought and planning before they jump in
headfirst. Once the aquarium is set up and running it becomes that much harder to
change things around when you don’t like them or you want to do something else.
You should to come up with a detailed written plan about what you want to achieve
for your aquarium, before you start putting fish and water in there. If you don’t do this
it is much easier to make mistakes you will regret later.

© Andrej Brummer – 2014. 12
Plan before you fill!
Planning your saltwater aquarium correctly
So many people make fatal mistakes with their marine life simply because they didn’t
plan ahead and know exactly what they were going to do and what was required for
their set-up - don‟t let this happen to you!
When I say plan, I mean sit down and write it all down on paper/computer. This way
everything will be set in stone and you can follow your optimised plan to the letter
which will prevent any impulse buys and help you to avoid decisions you may regret
in the future.
So, first of all you need to decide exactly what you want in your aquarium tank
(this is the theme); for example a fish only community tank or a mini reef featuring
soft corals from the Red sea, whatever floats your boat! Write it down, do some
research to see how easy/hard this is going to be for you, how much it will cost and
what you need to achieve the look you want to see if it is feasible considering your
available time and budget.
© Andrej Brummer – 2014. 13
Next, fully decide what type of set up you would like; fish only tank, fish only with
live rock (FOWLR) or a full-blown reef set up. After this you need to decide how
much time you have (for maintenance/feeding/observing) and what budget you have
got to work with, remember to factor in the ongoing costs of saltwater, electricity and
food.
The easiest and best way to decide on the set up and look you are after is to look at
what other people have got, view as many set ups as you can until you find one that
really resonates with you. Ask the owner exactly what equipment they have, what
skimmer, what substrates, what lights, any hints they can give will greatly help your
planning and make it easier to emulate their tank.
After you have worked this out you need to decide what size tank you will need (my
hint is to buy the biggest you can afford, this gives you more room for error and more
options with stocking marine life), remember to take into consideration where it will
go because you wont be able to move it easily when its full!
Other factors you will need to consider are:
Available space around the tank for equipment.
How much weight the surface you are planning to put your aquarium on can
handle.
Proximity to natural light (this will heat your aquarium excessively and cause
algal blooms).
How much marine life you want (the bioload).
How much space your marine pets will need to be happy.
© Andrej Brummer – 2014. 14
All this leads us on to the next vital part of planning, you will need to sit down and
work out EXACTLY what species you want for your aquarium. Start with a few of
your must-have specimens.
This will involve a lot of research to find out:
what they eat
what conditions they need to thrive
how hard they are to care for
what other species they are compatible with
You need to ensure what you have selected will lead to a harmonious marine
aquarium (which needs to be your aim for a trouble-free tank).
Once you have thoroughly researched and decided upon a few key species you are
well on your way. Make sure you give your aquarium plan room to evolve in the
future and not fill the tank up in one hit, purchasing good quality equipment rated
slightly above what you currently have will ensure your aquarium can easily cope
with the biomass of future additions.
The next step is to decide what equipment you will run, the big two here are lighting
set ups and filtration. There are no short cuts here, you will need to do research to
see what conditions your chosen species require and purchase accordingly from a
quality retailer.
As I have said previously, my advice here is to not try to buy the cheapest products
you can; spend a bit more and buy quality as this will definitely pay you back in the
long run and keep your tank running optimally. It will also save you money spent on
costly upgrades and replacing failing poor quality equipment, get online and see
what people are saying about that product you are thinking about.
I can’t stress how important research is at this early stage, try and find out as much
info as you can from many different sources about the set up you want (it is out of
the scope of this ebook to provide info on every single option and marine species),
© Andrej Brummer – 2014. 15
and any potential problems you may come across. Also remember to find out what
the species you want to keep require in order to thrive, and what other species they
are not compatible with.
Next up after doing all the research make yourself a shopping list of things you will
need (in order of importance), make sure that this fits the budget you have, if not put
it off until you save some more cash or make some changes!
The look you want really relies on the aquascape, the best idea to plan your
aquascaping is to draw the look you want for your aquarium on paper in as much
detail as you can, then when you come to setting it up you wont make any mistakes
you may regret. Once again do some surfing on the net until you find a set-up that
you like the look of.
Once you have your plan set in stone and you have purchased all the equipment you
need, start the construction of your dream saltwater aquarium. Do everything slowly
and carefully, any shortcuts you take here may come back to bite you later on!
Remember not to under-estimate the importance of the basic elements of any good
marine aquarium; filtration, lighting, heating/chilling, a protein skimmer (a must-
have unless you’re creating a fish only tank then its optional) and pumping water
around the tank. Never take shortcuts with these essential elements or you may pay
the price later with your marine life getting sick or dying (are you getting sick of
hearing me say that yet?).
After its all set up following your plan, double check the plan to ensure its all correct,
if it’s all good then it’s time for the water. Then after the system is equilibrated the
marine life can be added into their new well thought-out habitat and your new
creation!

© Andrej Brummer – 2014. 16
Moorish Idol; beautiful but hard to feed!
Let‟s look at the major types of aquarium set-ups…
Aquarium types: Fish-Only Systems
Most fish-only systems are just called plain old “saltwater aquariums” by the majority
of people. They contain fish, but sometimes may also have algae, detritus eating
crustaceans and snails. In a fish-only aquarium, you wouldn't have live corals or
many other sessile (non-moving) invertebrates. Many fish-only systems contain
decorative rocks, synthetic coral, artificial plants and seashells.

© Andrej Brummer – 2014. 17
Fish-only set-ups are the cheapest saltwater aquariums to set up, as you don’t
strictly need fancy lighting rigs, live rock and other coral sustaining equipment such
as protein skimmers, dosers, RO filters and trace elements. Fish-only aquariums are
also the easiest to keep, as fish are less fussy about their water quality than delicate
marine invertebrates like corals.
Fish only set-ups require regular water monitoring and more partial water changes to
keep the water clear than other set-ups because active fish produce the greatest
amount of accumulating nitrates and other biological waste products, which need to
be diluted out to keep the fish healthy and the water from becoming too cloudy and
smelly. The presence of Live rock will help convert nitrates to harmless nitrogen gas
which means less work for you.
You will need to periodically monitor the pH, ammonia, nitrite and nitrate levels
(ammonia and nitrite should be zero in a cycled tank). These readings will give you a
good handle on the water quality inside your tank and thus the health of your fish. It
will also give you an idea of how regularly you should be performing water changes
to get rid of these waste molecules.
There are 3 main subtypes for your fish only aquarium:
1. A community based aquarium inhabited by peaceful fish species that
get along well together for example small groups of small herbivorous
species.
2. The next subtype is for semi-aggressive species that should be kept one
of each species per tank. In this set up you will have fewer fish, as these
fish tend to be larger usually predatory fish.
3. Finally you could have a biotope fish-only tank, which has groups of fish
focused around a few main individuals from a specific geographical
location such as a Fiji island lagoon for example or a specific environment
such as New Zealand kelp forest.

© Andrej Brummer – 2014. 18
Fish only tanks can be very lively!
Aquarium types: Fish-only With Live Rock Systems
There are only a handful of differences between the fish-only set up and the fish-only
with live rock system aquarium; both are based on fish being the main feature. The
fish-only with live rock system does not include usually include more than 1 or 2
corals, but often has a few invertebrates.
Instead of using solely decorative rocks, live rock harvested from real reefs is added
into the tank to make the tank look much more natural (marine plants, algae and
other organisms encrust the outside and live within the live rock) plus you also have
the added benefit of the beneficial bacteria, macro-algae (non-pest algae species)
and tiny detritus-feeding organisms that inhabit live rock that help your tank filter
waste naturally.

© Andrej Brummer – 2014. 19
Live rock also provides a huge number of habitats for marine creatures and makes
them feel at home, there are also food morsels present so fish will always be
browsing the rock like in nature. The only fish that are kept in these systems are
those that won't be destructive to the organisms that grow on the rocks (except for
algae eaters, which you want to include to help keep the algae pruned) as these
organisms help clean your tank and filter your water.
Live rock (which you will learn about in more detail later) is actually made of the
calcium carbonate skeletons of corals that have died long ago, and other calcareous
organisms. Its name “live rock” is referring to the organisms that grow on and in the
rocks rather than the rocks themselves.
Live rock and live sand (sand containing beneficial live organisms) will actually act
as your biological filter in this set up, either by itself if you have enough for all your
filtration needs, or with a commercial filter if you don’t and thus greatly aids water
quality and increases stability. There are a variety of interesting hitchhikers (some
you don’t want such as mantis shrimp, Aptasia; tiny anemones and coral eating
fireworms that will need to be inspected for and removed before your live rock goes
in the tank) that will help with cleaning duties and gradually reveal themselves and
add to the interest and colour of your aquarium.
Live rock may well be the most expensive part of your FOWLR tank as you should
aim for 1 or 2 pounds per 1 gallon of water, but it is highly beneficial and looks cool!
FOWLR set ups usually are really good to keep a few invertebrate species in as the
live rock provides a fantastic eco system and structural base for them. You can just
sit back and watch your tiny ecosystem come to life with new creatures revealing
themselves almost every day and beneficial encrusting algae slowly spreading
around the tank.
The beauty of a FOWLR set up is that is can be easily converted to a reef aquarium
later on by upgrading lights and adding a few other bits of equipment. The real
© Andrej Brummer – 2014. 20
advantage of using Live rock and Live sand is the extra filtration (reduces
maintenance) and eco-system species you add to your tank.
Aquarium types: Reef Systems
The most prestigious, expensive and challenging saltwater aquarium set-up is the
reef aquarium, which concentrates on corals not fish (there are usually only one or 2
token small fish). Reef tanks usually focus on reef building coral species (hard
corals) building calcium carbonate skeletons on a live rock base to grow a real life
coral reef in your house!
This type of set-up uses invertebrates such as soft corals and LPS (large polyped
stony coral) and reef building SPS (small polyped stony coral) hard corals as well as
anemones and other stationary or moving marine invertebrates. Reef tanks often
have an otherworldly, alien look, which many people find cool.
There are sometimes included a few “reef-safe” fish species as well, specially
chosen to add interest and movement, control algae and not disturb the corals. Their
numbers are kept down though because their waste products (i.e. fish poo) add
nitrate and phosphates to the water both of which are not tolerated well by corals.
Nitrates need to be below 10.0 ppm and phosphates below 1.0 ppm for optimal
coral health.
Reef systems are meant to duplicate a small part of the ocean within the confines of
the tank; this requires high intensity, full spectrum light so corals can
photosynthesise (which means: energy generated by symbiotic algal cells in coral
tissues called zooanthellae) and grow. Corals are fussier than fish when it comes to
water quality and water movement, they like a lot of both; this means that you will
have to be very diligent in providing for their needs.
The reef tank is the most advanced set up but also the most visually stunning. Corals
and some invertebrates can be challenging to keep as they have different and

© Andrej Brummer – 2014. 21
specific lighting, water quality and water movement requirements. The fancy lighting
set up and high quality water supply (reverse osmosis (RO) or deionised (DI) or
RODI is best) are the expensive parts. Certain corals and other invertebrates can
also be quite pricey and hard to keep happy, so you really need to know what you
are doing.
You will need to have plenty of live rock for biological filtration and will need to add
supplements to the water for the corals such as Calcium, Strontium and Iodide to
keep the corals happy over the long term.
A fair amount of experience is recommended for owning a reef tank, because you
will need to keep the water parameters perfect and stable for corals and
invertebrates, which means a lot more regular water quality testing. You will also
need to know exactly what lighting requirements, food, preferred position in the tank
and water movement levels your chosen corals and invertebrates require in order to
have them thrive.
My advice is for beginners to start out keeping a fish only or FOWLR set-up
and then after you have mastered this for a good period of time upgrade to a
reef when you are ready.

© Andrej Brummer – 2014. 22
A real reef; creating a slice of this in your own home requires dedication.
How to Choose an Aquarium Size and Where to Put It
There are several things to consider when you are determining what size aquarium
to get. First of all, you'll need to figure out where you will put your tank and how
much space you have, bearing in mind that it should be kept away from:
Excessive noise.
Vibration (to keep stress to a minimum).
Natural light (causes algae blooms and heats the water).
Windows (either cool or heat the water, so are not good for keeping the
temperature stable).
A saltwater aquarium is best used as a focal point in the room it is placed.

© Andrej Brummer – 2014. 23
Whatever you use to hold your aquarium (the stand or support) must be able to
support the weight of the filled aquarium, so you need to be sure the stand (and the
floor!) you use is sturdy enough to support the size aquarium you choose. Place it
correctly the first time because moving a tank full of water and marine life is NOT
easy.
The major factor in the size of the aquarium you select, however, is the type of fish
you plan to put in it and the number of fish you hope to keep in your tank. Certain
fish require a minimum area to swim and live to be optimally healthy, like Tangs and
Angels. Big, active fish require more space than smaller, lazier fish. All fish require
more room than invertebrates.
Your budget will also obviously play a role in the size of aquarium you choose; as the
larger the tank the higher the price tag.
My advice is to always buy the biggest tank you can afford, this gives you more
stocking options later and the bigger the volume of water, the bigger the buffering
capacity of the water so the longer it takes for shifts in water parameters (like drops
in pH) to cause damage which is especially helpful for beginners still learning the
ropes. Don’t worry too much, this just means you get more room for error with a
bigger aquarium.
How to Choose Fish for Your Aquarium
This is probably the most fun part of setting up a saltwater aquarium: selecting your
marine fish!
Choosing marine life for your saltwater aquarium is really fun, however it is easy to
make mistakes you will regret by choosing something that is:
Too hard to care for.
Sick.

© Andrej Brummer – 2014. 24
Carries disease.
Not compatible with the rest of your marine aquarium inhabitants.
This next section will help you to avoid making these common
mistakes…
Stocking Your Tank With Marine Life
Stocking your saltwater aquarium (which means adding specimens) is one of the
most exciting events for the marine hobbyist. Introducing new additions to your
colourful marine aquarium to watch and wonder over is awesome fun. For everything
to go to plan and your new pets to thrive means that you will need to take things very
seriously here in regards to compatibility, stocking levels and choosing healthy
specimens.
What Commonly Goes WRONG When It Comes To Stocking
Incorrect stocking of marine aquariums is a very common mistake; this usually arises
from people moving too fast, picking unhealthy specimens and not doing
enough research on their desired pets leading to marine life compatibility issues.
This can lead to stress in your aquarium (mostly the new inhabitants) and even
death.
Stocking a marine aquarium is the biggest variable to success in the set up process,
if you do it wrong it can make the whole exercise a disaster, but if you do this right
and take your time marine aquarium ownership will be smooth sailing for you. Any
thoughtless purchases at this point can bring compatibility issues later which can be
very hard to solve without getting rid of some of your pets.
Stocking a saltwater aquarium must be taken very seriously, the key here is to have
patience and move very slowly, you should write a “fish stocking” plan (with the
© Andrej Brummer – 2014. 25
compatible species and the order and timing you should add them) and adhere to it
adding one or two fish every month (starting with the most hardy but least
aggressive ones) or so to give the biological filtration a chance to catch up with the
increasing bioload resulting from the fish biological waste.
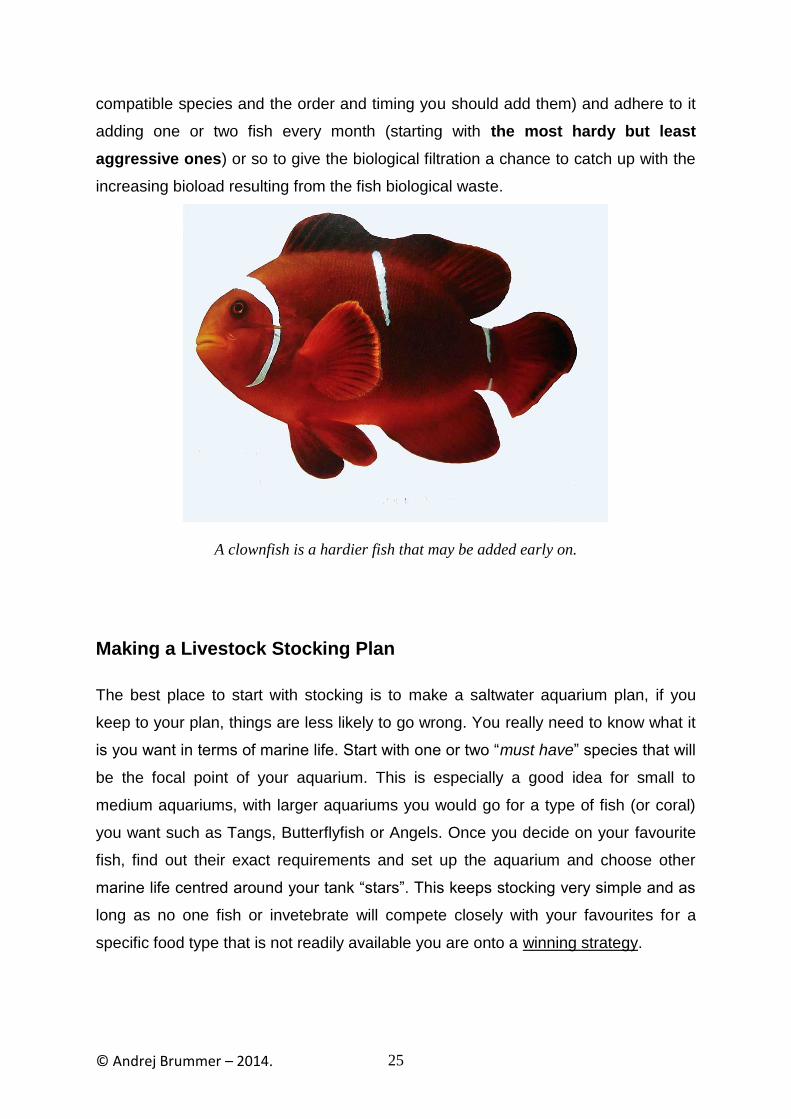
A clownfish is a hardier fish that may be added early on.
Making a Livestock Stocking Plan
The best place to start with stocking is to make a saltwater aquarium plan, if you
keep to your plan, things are less likely to go wrong. You really need to know what it
is you want in terms of marine life. Start with one or two “must have” species that will
be the focal point of your aquarium. This is especially a good idea for small to
medium aquariums, with larger aquariums you would go for a type of fish (or coral)
you want such as Tangs, Butterflyfish or Angels. Once you decide on your favourite
fish, find out their exact requirements and set up the aquarium and choose other
marine life centred around your tank “stars”. This keeps stocking very simple and as
long as no one fish or invetebrate will compete closely with your favourites for a
specific food type that is not readily available you are onto a winning strategy.
© Andrej Brummer – 2014. 26
Stocking Your Tank The First Time
When stocking your tank for the first time, you will first decide how many fish you can
have (called a stocking level) this is primarily based on your tank size – and this also
depends on the type of set-up you want to have (for example a reef tank contains
corals, which are sensitive to nitrates and phosphates; so can safely contain less
fish) the third factor that determines how many fish you can safely have is the size
and activity levels of the fish. The forth and final factor is the biological filtration;
this is the bacterial life support system that processes the toxic waste of the fish into
less harmful products, so you need to have enough filtration to cope with your
number of fish/invertebrates present.
A good beginner‟s rule of thumb that gives you some margin for error is as
follows:
Fish only marine aquarium – 8 inches (20cm) of total fish length (nose to
base of tail, not counting tail fin rays) per 22 gallons (100L) of water.
Fish only aquarium with live rock – 6 inches (15cm) per 22 gallons (100L)
of water.
Reef aquarium – no more than 4 inches (10cm) per 22 gallons (100L) this is
because of the very low tolerances of corals and other invertebrates for slow
nitrate build up in the water.
The above estimates allows for room for error, but I warn you if these limits are
exceeded by much the bioload will put too much strain on your biological filtration
system and all it will take is one lost, dead fish or a bunch of uneaten food over a few
days to cause the system to completely crash.
When in doubt always under-stock; this allows room for error and also takes into
consideration your growing marine life.

© Andrej Brummer – 2014. 27
Stocking Invertebrates
Adding invertebrates to the mixture can make things slightly trickier; if you have a
fish only with live rock (FOWLR) set up try to use hardier invertebrate species (such
as those commonly associated with live rock) that can tolerate a bit more nitrate in
the water. This will make your life easier trying to cater to Invertebrate water quality
needs.
Marine Life Stocking Tips and Tricks
1. As I have mentioned before the key to stocking compatible species is diligent
research of your chosen species in regard to:
behaviour/temperament
Diet
fully-grown size
preferred water conditions (light and water circulation)
growth rates
But ultimately fish have very individual personalities like us people, so it can
be common for individuals of the same species to behave slightly differently.
2. Another factor that affects stocking is the size of your tank and how much
rockwork there is, generally the bigger the tank is and the more likely that fish
can get out of the line of each others site for a while the better they will get
on.
3. A good way to ensure new additions settle in well is to rearrange the
aquarium (and the residents established territories) when someone new is
added, also keeping a light on at night seems to take the focus off the
newcomer and can greatly help with any bullying.
4. Keeping fish well fed will keep them happy too; a hungry fish is a grumpy fish.
© Andrej Brummer – 2014. 28
5. When adding new fish to an established aquarium a great strategy is to put
about 500mL of display aquarium water into the quarantine tank and visa
versa so the newbies and the established fish can become familiar with the
scent of each other before they meet.
6. Another good idea is to put the quarantine tank next to the display tank so the
fish can see each other.
7. When stocking your aquarium for the first time, start with the more hardy, less
aggressive fish first. This will give your aquarium water valuable time to
stabilise after cycling before more sensitive species are introduced and will
also help keep more aggressive, territorial species under control if they are
not the first additions.
8. Take the addition of fish very slowly waiting a month or so before adding one
or two more, this gives the biological filtration system time to adjust to
increasing waste levels.
9. The final aspect of stocking to get right is choosing healthy specimens, this
can be very easy to do with careful visual inspections of the fish you intend to
buy, checking every part of the fish for parasites, disease or other damage.
Make sure the aquarium it is housed in is healthy and clean also. Pay
attention to the fish’s behaviour to make sure it is acting normally. The golden
rule here is to watch it eat (more than once if you can) make sure it has a
good appetite, is alert and competitive with the other fish for food.
10. The final thing you want to avoid is a brand new fish into the store; give it a
week or so to see how it adjusts to captive life and copes with the stress of
being removed from the reef environment. It is worth a mention again that
where possible purchase captive reared marine life, as they are much
hardier, disease resistant, better eaters and happier than their wild-caught
relatives. Captive bred species also reduces pressure on species harvested
from reef ecosystems, which should be very important to any marine life
lover.

© Andrej Brummer – 2014. 29
So the keys to successful marine life stocking are research, planning and lots
of patience. Carefully planned out and executed saltwater aquarium stocking will
provide years of happiness for marine life and marine aquarists alike. A thoughtless
purchase not adhering to your compatible fish plan will usually come back to bite
you.
Many damselfish such as this humbug damsel, can be bullies, especially when put in first.
An Introduction to Choosing Marine Fish That are Compatible With Your Aquarium and With Each Other
Saltwater fish species may have special needs, including water temperature
requirements, dietary requirements, specific chemical parameters, or specific
tolerances (or intolerances) for other fish in the tank. It's important that you study the
basics of any species of fish you want to include to make sure your fish community
can live together in harmony; this is compatibility.
To get it right you will need to research the compatibility of the fish you want in
regard to:

© Andrej Brummer – 2014. 30
Behaviour/temperament
Diet
Size the fish grows to
Preferred water conditions (light and water circulation)
Basically, the question you are asking is can the different species you want co-exist
together and do they like similar water conditions? Ultimately fish have very
individual personalities like us people, so it can be common for individuals of the
same species to behave slightly differently - but don’t worry too much about this
as you cant do much about individuals that fall outside the general guidelines for a
species.
The other 2 important factors I have mentioned that affects compatibility is the size
of your tank and how much rockwork there is.
I will go into saltwater compatibility in more detail in Chapter 2.
Deciding What Goes In The Tank
A really good idea in deciding what marine fish and invertebrates you really want is
to make a saltwater aquarium plan before setting up your tank if you haven’t already
(see page 9). Here you would list all the marine life you are interested in then
research each in terms of the following considerations:
1. Care required and how easy they are to care for – can you care for them easily or
willingly?
2. Size at purchase and at maturity – do you have enough room for them?
3. Diet: food and feeding – can you provide for them easily or willingly?

© Andrej Brummer – 2014. 31
4. Behaviour (shy fish cant be put with boisterous ones easily) – will your pets get
along ok?
5. Set-up/water conditions required (additives, water movement, light levels) – can
you easily provide what they need?
6. Compatibility with other marine life (will they get along?)
7. Degree of aggression/territoriality (if high will cause other species stress)
8. Can they be kept in pairs or groups? – If not, don’t even try.
Now, you would group all species you like - that still make sense to purchase for
your tank after researching according to the above 8 criteria, all together, based on
such things as set-up required (fish only, FOWLR or reef aquarium), compatibility
(i.e. compatible or not), and type of community.
The idea is to see what species fits into your plan and come up with a
harmonious but interesting and vibrant community that will get along and have
similar or manageable requirements. Obviously each species can go into more
than one group. Now you choose which group would be best and coolest for you.
And this is what you will go with!

© Andrej Brummer – 2014. 32
Moray Eels dont usually play nicely with others.
Doing this planning before you set up your aquarium will give you a holistic
approach allowing you to set up and use equipment centred on exactly what you
want to keep, which will help to keep costs down for you by enabling you to purchase
only what you absolutely need.
Here are some other marine life selection points to consider:
Obviously fish that require coldwater temperatures can't be placed with fish
that requires warm water temperatures and visa versa.
Timid species (unless they have plenty of hiding places) will be stressed out
by boisterous species.
Territorial fish like Clownfish should not be kept in more than a pair and often
different species of a fish type (family) should not be combined.
Some fish are aggressive/predatory and will eat other smaller less-aggressive
fish species if they can fit in their mouth!

© Andrej Brummer – 2014. 33
The more different your fish are in terms of size, shape, diet and colouring the
more likely they will get along!
Some fish should not be kept in groups or pairs because of aggression.
Certain fish species require more room to swim about than others like Tangs
and Angelfish, which are very active fish that like to swim around a lot and
should not be kept in a small, cramped aquarium.
It is important to note that all marine life is aggressive to a degree because
fish and invertebrates must be competitive in their natural environments, so
you are looking out for overly aggressive and bullying species to avoid
(such as Damselfish, also many Triggerfish).
Putting Fish Into Your Tank
If you are just starting out you would choose one or two of the species in your group
that are most hardy (such as Clownfish or Gobies, but not most Damselfish because
they are more often than not bully fish) and start by adding them first; after the tank
has finished cycling and you have zero readings for nitrites and ammonia, because
hardy fish can tolerate imperfect water conditions better. I repeat, add hardy fish
first!
This will give your aquarium water valuable time to stabilise after cycling before more
sensitive species are introduced and will also help keep more aggressive, territorial
species under control if they are not the first additions to the tank.
Take the addition of fish very slowly waiting a month or so before adding one or two
more, this gives the biological filtration system time to adjust to increasing waste
levels (beneficial bacterial populations increase), test for ammonia and nitrite (should
be zero) to ensure the bio filter has caught up.
© Andrej Brummer – 2014. 34
Adding invertebrates to the mixture can make things slightly trickier; if you have a
fish only with live rock (FOWLR) set up try to use hardier invertebrate species (such
as those commonly associated with live rock; crabs, shrimp etc even soft corals) that
can tolerate a bit more nitrate and phosphate in the water to begin with and more
sensitive species later after water quality has stabilised over a week or more. This
will make your life easier trying to cater to Invertebrate water quality needs.
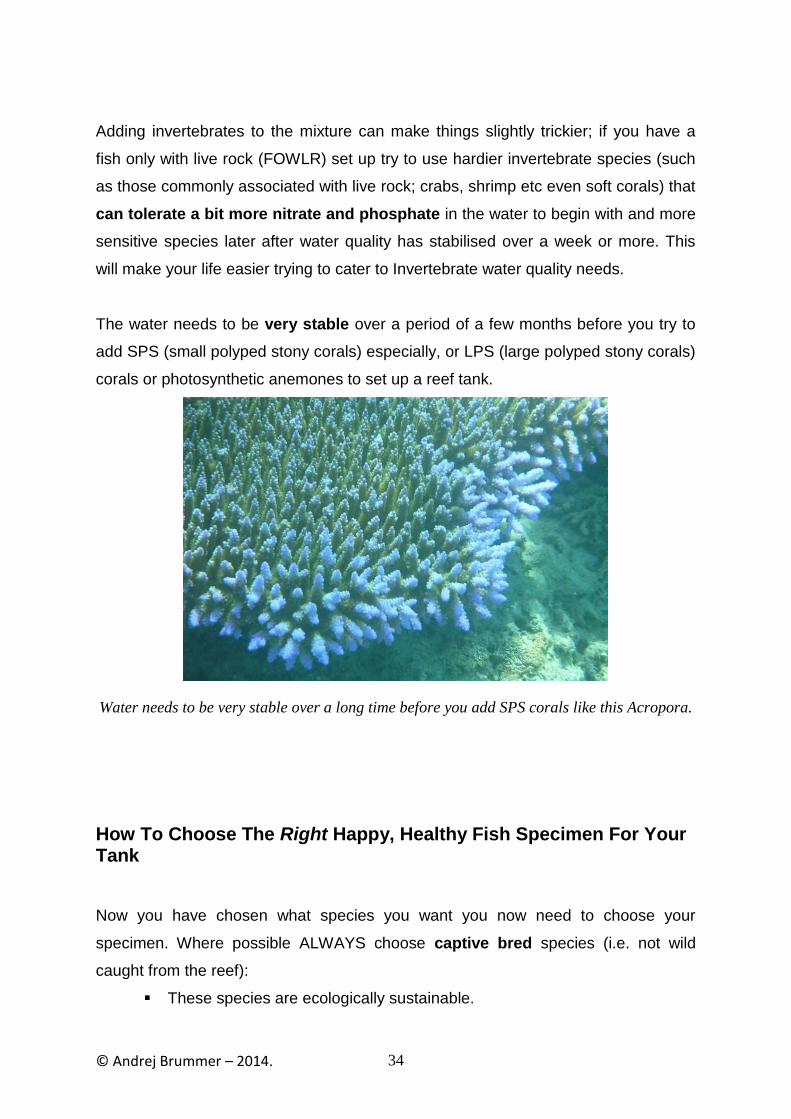
The water needs to be very stable over a period of a few months before you try to
add SPS (small polyped stony corals) especially, or LPS (large polyped stony corals)
corals or photosynthetic anemones to set up a reef tank.
Water needs to be very stable over a long time before you add SPS corals like this Acropora.
How To Choose The Right Happy, Healthy Fish Specimen For Your Tank
Now you have chosen what species you want you now need to choose your
specimen. Where possible ALWAYS choose captive bred species (i.e. not wild
caught from the reef):
These species are ecologically sustainable.

© Andrej Brummer – 2014. 35
Will be in better health.
Are much more hardy.
More tolerant to adverse water conditions.
Very unlikely to carry disease.
Are much more likely to eat whatever you give them.
Most importantly if you purchase captive bred species you can be 100% sure that
you are not inadvertently funding illegal, reef destroying and cruel capture methods
somewhere in the world.
If you can’t purchase the particular species you want as captive bred, then you will
need to find a reputable fish stockist. They must be professional, have a good
reputation and most importantly have all their marine life collected from sustainable
sources. Ask them where they got their fish and if you think it’s not legitimate do not
buy from them.
It really is crucial to choose only happy, healthy marine life for your tank, because if
you don’t learn how to do this the consequences could be massive. For example;
expensive vet bills, the heart break of losing your precious pets, the chance of
spreading infection to your current tank inhabitants, lost money and time; these
things can be easily avoided.
Captive bred clownfish, like these ones from alphacorals.com can be excellent choices!

© Andrej Brummer – 2014. 36
This is how you choose the right specimen for your saltwater aquarium:
1. Research: what you want online, or through books. Find out their exact
requirements (i.e. diet, habitat, water conditions, compatibility etc) and decide
whether this fits in with your current set up and existing pets (as mentioned
above). A new species must be compatible with everything you currently
have.
2. Select a good retailer: Choose a reputable marine fish, they must be
professional, have a good reputation; look for testimonials and most
importantly have all their marine life collected from sustainable sources or
farmed (captive bred), for the sake of preserving our oceans ask them where
they got their fish and if its not legitimate don’t buy from them.
…At The Fish Store:
3. Observe your fish: Go to the tank that contains your ideal candidate, and
study it: A healthy fish will be interactively swimming around its tank mates
and be curious about its surroundings and you!
4. Start by looking at the size; it needs to be not too small or scrawny and not
too big as these sizes are less likely to adapt to your aquarium conditions
and are more likely to be in worse shape after capture and shipping. Large
specimens are also less likely to adapt to the change of diet and be more
entrenched in their behaviour. Watch how they behave, swim and breathe
looking for anything abnormal. A healthy fish is active, alert and looks healthy
with vibrant colours.
5. Study its eyes; both should be bright and clear and not sunken or bulging out.
Study the body for evidence of physical damage and external parasites, Ich
© Andrej Brummer – 2014. 37
and velvet will show up as white spots or dust especially at eyes, mouth and
where the fins join the body. Remember, your ideal fish should be alert,
active and look healthy with vibrant colours. Shallow breathing, inactivity,
looking dazed and confused and sunken/too small looking eyes are a good
indicator of cyanide capture; avoid this fish as it may die as a result of this
inhumane and illegal capture method.
6. Feeding time: Next, ask the store people to feed the fish (or if this has
recently been done, come back at feeding time). A key indicator to a fish‟s
health is how well it is eating; you will definitely want to observe this (a
couple of times preferably). The fish should eat actively and should be alert
and competitive with the other fish in getting food. It should eat heartily and
have a good appetite.
7. Avoid new arrivals: Another tip is to never purchase a fish that is brand new
to the store, give it a few weeks of being in the captive environment to ensure
it adjusts well, is not stressed and has not been damaged during collection.
This amount of time will also reveal whether or not the fish has a disease.
What you can do is ask the store to put it on hold, put down a deposit if you
must and wait around a week or so to ensure that it remains in good
condition.
8. Guarantee? Once you have researched, observed and chosen your fish ask
the store owner if they offer a guarantee on the fish (always pays to ask). And
most importantly of all; when you get the fish home ensure you acclimate it
correctly and then quarantine (more information about these in later
chapters) it before placing it in your display tank, this will halt spread of
disease from the new fish into the main tank and gradually acclimatize the
fish to your specific aquarium conditions.
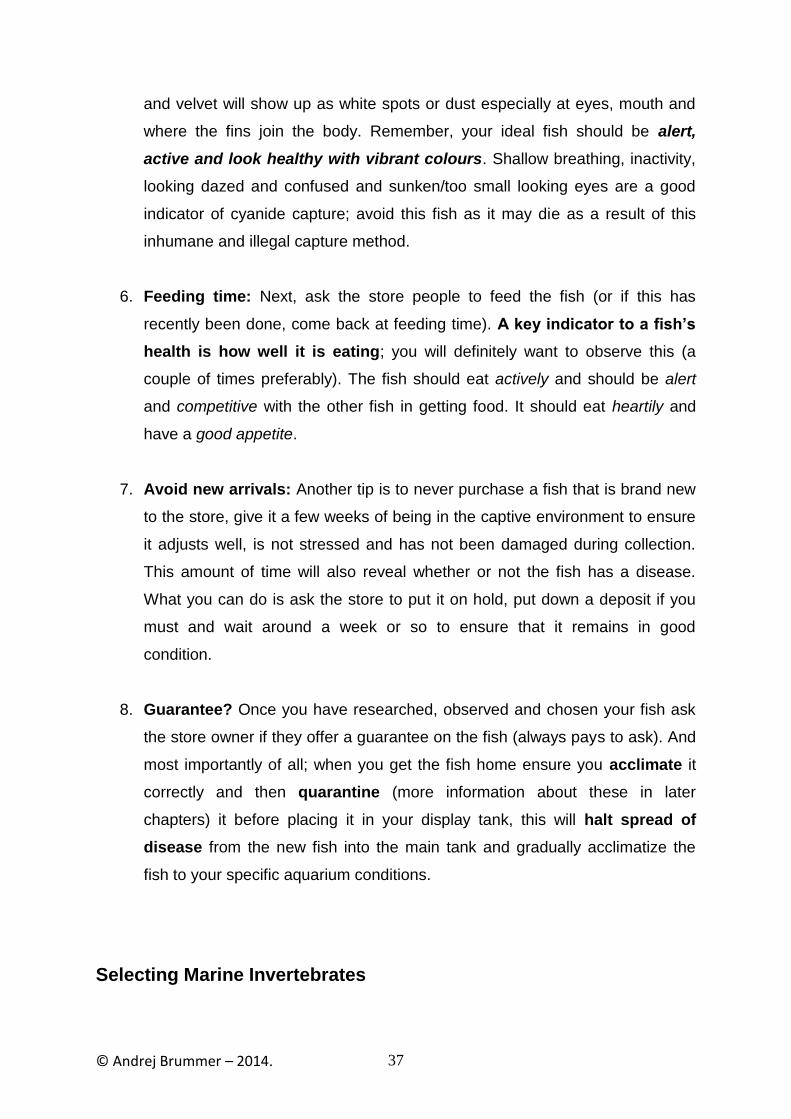
Selecting Marine Invertebrates

© Andrej Brummer – 2014. 38
Selecting healthy marine invertebrates is much more difficult but generally if it looks
appealing and healthy is usually is.
Here are some general rules of thumb for specific invertebrates:
Sea Urchins should not be shedding spines one or two broken off around the
aquarium is fine but anymore than this is a bad sign.
Sea fans and sea whips should be damage free and preferably attached to a bit of
live rock. Polyps that are fully extended are a sign of good health.
Sea Anemones unbelievably can be dyed for visual impact, avoid these unusually
coloured specimens. Their basal discs, columns and all tentacles should be intact
and healthy looking. Beware of constantly retracted individuals. Collapsed anemones
will most likely have bubbles of air trapped inside them from improper handling. Also
ensure the anemone is erect and expanded.
Molluscs will have no shell damage and a fully extended mantle and be exploring
the tank.
Corals should be undamaged (not too many bits broken off) and of uniform
colouration and not bleached looking. There should be no obvious area of tissue
absence, necrotic lesions or overly black or white regions. Avoid specimens with hair
algal growth. Ideally you will observe the polyps to be expanded and soft fleshy
areas will be turgid.
Sponges should always be submersed in water or else they can easily die, make
sure your supplier knows this before buying from them.
Sea stars should not be showing lesions or have a patched appearance, they should
be looking healthy and normal.

© Andrej Brummer – 2014. 39
If you take your time to look for happy, healthy marine pets and can recognise the
tell-tale signs of stress and disease then you should be able to avoid the cost and
emotion of sick and dying marine life in your saltwater aquarium.
Choosing a healthy coral is vital to your success. Look for expanded polyps!
The Look of your Saltwater Aquarium
Aquariums come in all shapes and sizes. The first question you need to ask is acrylic
or glass, you should have already decided on the size. The major disadvantage of
acrylic is getting scratched, however you can cheaply buy scratch repair kits if this
does happen. The advantages over glass are strength, lightness, better insulation
and clarity to view your marine life.
Glass aquariums are generally slightly easier to work with in terms of positioning
lights and getting things in and out, but frankly glass is almost a thing of the past
because of the aforementioned advantages of acrylic aquariums.
There are tanks that are created to be placed into the corner of a room; as well as
aquariums that are built right into walls, allowing you to view through the aquarium
from one room to the next. Standard aquariums in rectangle shapes can sit on
© Andrej Brummer – 2014. 40
wooden or metal stands, or other sturdy surfaces and become a beautiful fixture in
any room.
Some furniture is also being designed to hold aquariums - including coffee table
aquariums and end table aquariums. You can even get kitchen benches and entire
walls as saltwater aquariums now. These make wonderful conversation pieces and
add interest to any décor.
When you've selected your aquarium, clean it thoroughly with fresh water and a
sponge or cloth.
If you would like to add a background to your tank, you can purchase a pre-designed
background that will fit the size of your tank. Backgrounds are somewhat like a
poster that adds dimension to your tank; and can be purchased with reef designs or
other under-water themes. They help you hide the mechanics of your tank. Some
are applied to the outside of the aquarium and others are placed on the inside glass
of the aquarium.
If you are creating a background from the inside of your aquarium, be sure that it's
made from materials that are designed for fish tanks so that it cannot harm the
aquarium life in any way.
Take time and care deciding the look of your aquarium before you buy, your
aquarium will be with you for many years and is very difficult to change once it is all
set up and full of marine life.

© Andrej Brummer – 2014. 41
You want a good looking tank.
Necessary Equipment: For Healthy Saltwater Aquariums
When you come to the point of purchasing equipment for your saltwater aquarium it
is really easy to get overwhelmed with all the available options, brands and all the
contradicting advice you will hear or read about what is the “right way” to set up your
marine aquarium.
In truth there are many different approaches that work and it ultimately comes down
to the level of cost and complexity you personally want. There are now many
expensive add-ons like tank controllers and automatic dosers that will cost you a lot
but also help take care of and monitor your tank for you, but if you do more work you
can spend less money by using less technology.

© Andrej Brummer – 2014. 42
At the start all this different equipment and technology may seem quite complex, and
it can put a lot of first timers off due to information overload!
But persevere because after you have figured out the fundamentals and what
everything actually does (where I can really help you out at my
www.SaltwaterAquariumAdviceVIPClub.com and also at my regularly updated blog
www.SaltwaterAquariumAdviceBlog.com) you realise that there is a lot you really
don’t need to know, its like buying a car; ultimately they all do the same thing to
varying degrees of efficiency but there are hundreds of different makes and models
out there to choose between, don‟t sweat it and start basic!
Standard equipment will vary a bit with the kind of set up you are going for, for
example a full reef aquarium needs better lighting and a way of adding and testing
for calcium in the water that a fish only set up does not require.
Additionally size of the set up plays a part too, a smaller aquarium will require
equipment that is also designed for small aquariums, which will cost less, but smaller
set-ups generally have fewer options because of the physical size constraints.
Let's start with the most obvious necessity: making electricity and water mix safely!
You need electricity to run your aquarium, including the lights, filters, heaters, and
pumps, but how do you get around the dangers of mixing electricity and water?
A Ground Fault Circuit Interrupter is an inexpensive method that will protect both
you and your aquarium equipment and should be at the top of your “must have” list.
You NEED your equipment wired through a Ground-Fault Circuit Interrupter (GFCI or
GFI) that can stop electricity in a milli-second. This is the easiest safety precaution
you can take with you saltwater aquarium and is an absolute MUST!

© Andrej Brummer – 2014. 43
Dont keep your tank without a GFCI!
The other vital aquarium components are:
1. Filtration (most importantly biological and physical filtration components).
2. Lighting
3. Heating/Chilling (you only need chilling if you live in a hot climate or have a
delicate reef system with powerful lights)
4. Substrate
Each of these components are explained in detail below including the underlying
principles of how they work and why they are important for your saltwater aquarium:
Vital Components 1: Filtration
Filtration is probably the most critical element to a healthy saltwater aquarium.
Essentially it is the process of removing dissolved and undissolved organic
waste (from excrement, food, scales, algae, detritus, dead organisms) from the

© Andrej Brummer – 2014. 44
water, which if left to breakdown will cause the level of toxic compounds to build up
to concentrations that can easily kill marine life.
So good filtration equals good water quality and a stable, healthy aquarium
environment. Do not take short cuts or cheap options here.
THE Most Important Form of Filtration = Biological
Saltwater aquariums primarily need to have a biological filtration system in place.
This basically gives your saltwater aquarium a place for beneficial bacteria to grow.
Biological filtration is the process of bacteria cycling (consuming) nitrogenous
biological waste, namely excrement, decaying food and organic detritus and turning
it into less harmful chemical compounds. This is very important because water
quality can easily degrade to toxic levels that can kill all life if left untreated.
In the ocean the shear volume of water instantly dilutes these waste products,
additionally, there are hundreds of different marine organisms that feed off one form
or another; nothing is wasted down to the last molecule.
In your aquarium there is a very different story because of the small volume of
water in a closed system and there is lack of diverse organisms found in the ocean
to completely break it all down: this means we need to employ filtration devices to
help do natures job for us.
The area of filtration can be a very complicated and confusing one to the uninitiated,
there are quite a few different types of filtration and let me tell you not all of them are
necessary in your saltwater aquarium. And for every different type of filtration there
are a huge number of options….
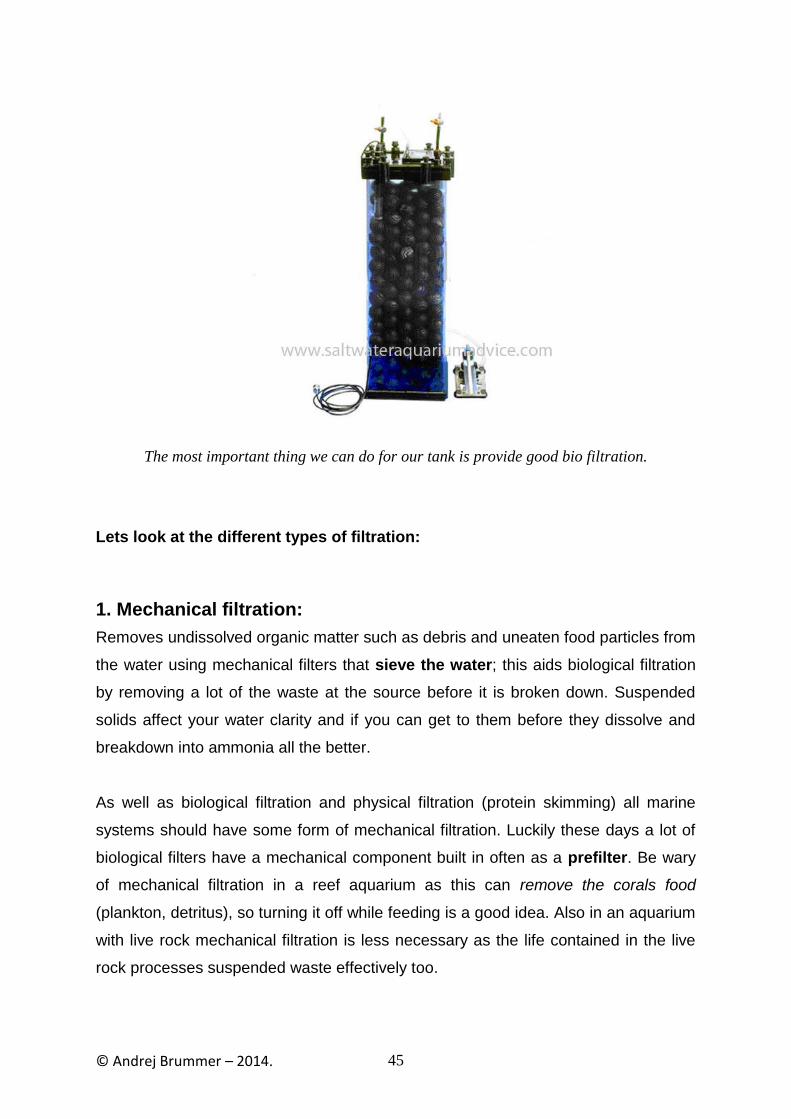
© Andrej Brummer – 2014. 45
The most important thing we can do for our tank is provide good bio filtration.
Lets look at the different types of filtration:
1. Mechanical filtration:
Removes undissolved organic matter such as debris and uneaten food particles from
the water using mechanical filters that sieve the water; this aids biological filtration
by removing a lot of the waste at the source before it is broken down. Suspended
solids affect your water clarity and if you can get to them before they dissolve and
breakdown into ammonia all the better.
As well as biological filtration and physical filtration (protein skimming) all marine
systems should have some form of mechanical filtration. Luckily these days a lot of
biological filters have a mechanical component built in often as a prefilter. Be wary
of mechanical filtration in a reef aquarium as this can remove the corals food
(plankton, detritus), so turning it off while feeding is a good idea. Also in an aquarium
with live rock mechanical filtration is less necessary as the life contained in the live
rock processes suspended waste effectively too.

© Andrej Brummer – 2014. 46
Mechanical filtration media can be any number of different unreactive materials such
as sponge or wool and will need to be cleaned out or replaced every few weeks or
so as this is dirty waters’ first obstacle in the filtration process.
2. Physical filtration:
Also known as Protein skimming is by far the most vital component to effective water
cleaning, this method of filtration is so effective at clearing and oxygenating the water
it is considered an absolute MUST for any marine aquarium and is secondary in
importance only to biological filtration. It serves to get rid of dissolved organic
waste before it is mineralised into ammonia (highly toxic to marine life), thus greatly
reducing the load on biological filters which reduces the strain on the system and
helps keep nitrates down.
Protein skimming works by using fine bubbles to attract protein molecules usually
from the aquarium water surface (as this area is where most waste accumulates) in
a chamber which removes the dissolved organic waste from the water column and
makes a foam of concentrated, smelly brown liquid which is channelled into some
kind of collection cup to be discarded.
Most people are amazed how much gunk comes out of their aquarium water in this
fashion. You cannot over skim a marine aquarium in my experience.

© Andrej Brummer – 2014. 47
Protein skimmer: one of the reef tanks best friends
The “natural” or Berlin style filtration system uses only a large volume, high output
protein skimmer, mechanical filter and live rock (and/or live sand) as the foundation
of its filtration requirements. Often there is also a wet/dry filter (without the wet/dry
chamber) with prefilter and sump containing the protein skimmer as well.
3. Chemical filtration:
The main component of chemical filtration is activated carbon or charcoal (which
naturally absorbs and deactivates chemicals) and this, if required, should be placed
in-line after mechanical and biological filtration has taken place so the chemical
media is not fouled up with gunk.
This has most common application in reef aquariums where water quality is of higher
importance. Chemical filtration removes unwanted metabolites, colouring and
chemicals from the water as a last stage treatment option.
Chemical filtration is not absolutely necessary if you are cautious about what goes
into the water but does have its use in high water quality generation especially in
reefs. For most applications the activated carbon simply sits in a nylon bag in the
filter housing through which the water is passed, the activated carbon/charcoal

© Andrej Brummer – 2014. 48
“scrubs” up phenols and heavy metal contaminants. If you plan to use carbon 200-
250g per 100 litres of tank water is a good amount to begin with. Carbon will
intermittently need to be changed after 3 to 6 months as its ability to absorb
chemicals will markedly decrease after time.
Chemical filtration media.
Another important aspect of chemical filtration is phosphate removal as this
compound can get into the water in a number of ways (overfeeding, detritus,
phosphate containing additives) and will essentially over fertilise the water, usually
resulting in unwanted, out of control algae outbreaks. Phosphate reactors with
special media can effectively reduce phosphates, which is especially important in
reef aquarium environments where corals don’t tolerate phosphates well.
4. Biological Filtration:
By far the most crucial type of filtering to any saltwater aquarium, this is a service
performed by marine bacteria feeding on dissolved nitrogenous waste and is part
of the nitrogen cycle. Waste is excreted from marine life in the form of protein, which
is quickly mineralised into ammonia/ammonium (NH3 or NH4); ammonia also
comes from the breakdown of food particles and decaying organisms.

© Andrej Brummer – 2014. 49
This ammonia is highly toxic to marine life, but luckily nature has a solution for us in
the form of a marine bacterium (Nitrosomonas) who use this substance as their
energy source and aerobically (in the presence of oxygen) convert it to nitrite (NO2).
Nitrite is less toxic but still nasty, yet another bacterium (Nitrobacter) then comes
along and converts nitrite to the less harmful nitrate (NO3). This process is known
as nitrification and you will need test kits to keep tabs on these levels in your
saltwater aquarium.
The final phase of this biological cycling is denitrification where anaerobic bacteria
in oxygen free environments convert the nitrate into harmless nitrogen gas bubbles.
These anaerobic zones can be found in the interior of live rock and live sand; you
can also purchase commercial denitrification filters that harbour these special
bacteria. The challenge of denitrification in a marine aquarium is to keep up with the
nitrate levels being generated as nitrification occurs at a much faster rate than
denitrification so nitrate levels can slowly rise over time, this is why we dilute them
out with regular partial water changes.
Ammonia/Ammonium, Nitrite and Nitrate testing kits. Regular testing is neccessary.

© Andrej Brummer – 2014. 50
What Makes An Effective Bio Filter?
An effective biological filter will have plenty of surface area for the bacteria to grow
(filter media includes balls, sponges, fibres, floss, beads and many others) and will
be supplied a constant source of well-oxygenated water and obviously ammonia to
use for food. These beneficial bacteria will eventually colonise any surface and will
grow as a “biofilm”. You must be careful to nurture this bacterial growth as damaging
the bacteria can cause your aquarium to crash because waste is no longer broken
down efficiently.
The Best Product is Nature!
The best biological filters are natures ones: live rock and live sand, these natural
substrates are harvested from tropical waters and are jam packed with beneficial
bacteria and tiny marine organisms that will literally come to life in your aquarium.
This not only gives your tank a natural look but gives marine fish a place to hide and
is packed with not only beneficial micro organisms but interesting algae and entire
tiny invertebrate eco-systems. The rock harbours both aerobic and anaerobic zones
which will see biological waste not only broken down to nitrate but converted to
harmless nitrogen gas; the complete marine nitrogen cycle. Live rock is weight by
weight the most expensive item for saltwater aquariums but is well worth the
investment.
Live Sand is another popular medium used in saltwater aquariums as a natural
biological filtration source it does the same job as live rock due to the bacteria and
other tiny marine organisms present but comes in the form of a substrate, which
goes in a bed on the base of your tank. It can also be used for other purposes.
Some people put sand in their tanks as a shallow or deep sand bed substrate, use it
in combination with live rock, or set up a raised-off-the-bottom, few-inches-thick
Jaubert style natural nitrate reduction (NNR) filter (also called a plenum) with their

© Andrej Brummer – 2014. 51
sand. This “deep sand bed” set up has anaerobic zones (which shallow beds don’t),
which process the nitrates from the water.
Choosing your Filter
Many commercial filters on the market today incorporate 3 types of filtration (bio,
mechanical and physical but not chemical) into one filter device such as Wet-
Dry/Trickle filters, which usually go in sumps if you choose one of the devices be
sure there will be sufficient surface area for adequate biological filtration for your
aquarium size/bioload or use live rock as well.
1Example of an "all in one" filter system. It includes physical (protein skimmer), mechanical,
chemical and biological filtration.
When considering filtration you will need to decide whether or not you will have a
sump or a refugium, which are physical chambers separate from the display tank
(often beneath the aquarium that pump water from the aquarium and back to it).
The advantages of sumps are increased area for water treatment/water dilution;
you can add various filtration components to it, have easy access for maintenance
and hide equipment that otherwise would be around the tank itself.

© Andrej Brummer – 2014. 52
A refugium is a modified sump, which has a chamber where you can keep filtering
marine life or even grow food species.
A good quality biological filter is a must, my personal favourites are Wet/Dry filters
because they thoroughly aerate the water and are very effective at converting
ammonium to nitrite then nitrate through a huge surface area for bacteria. Most also
have a pre-filter that acts as an effective mechanical filter and good ones have
enough space to put other filter media or even marine life. When used in conjunction
with a denitrification system (which would be regular partial water changes, live
rock or a commercial denitrification filter), these wet/dry filters have been bullet
proof in my experience.
Physical filtration is key in maintaining excellent water quality, the best way to tackle
this as we have seen is with a Protein Skimmer, which uses fine bubbles to attract
and remove dissolved organic waste from the water column as a concentrated,
smelly brown liquid. A good quality protein skimmer is an absolute must in all but the
most basic marine aquarium set ups.
Aeration and water movement are very important factors for a saltwater aquarium
especially if you intend to keep corals and other invertebrates. Basically its hard to
have too much of these two factors. Good filtration equipment will serve both
purposes well, but I really advice the use of a couple of powerheads to provide
multidirectional water flow this is healthy for marine life and stirs up detritus which
could cause water quality problems.

© Andrej Brummer – 2014. 53
Powerheads: very good for water movement.
Denitrification or Natural Nitrate Reduction filtration, (NNR), is even better than
regular biological filtration by itself, because it goes one step further and converts
the nitrate (which normally gradually accumulates until you remove it by water
change) into harmless nitrogen gas which bubbles off the water’s surface. For all but
the simplest tanks I would invest in some sort of denitrification component, especially
if you keep corals.
Bear in mind some filtration set-ups reduce nitrate levels naturally: for example the
use of live rock (which when teamed with a protein skimmer is termed the “Berlin”
system), some large fluidised bed filters, live sand with Jaubert filters (plenum), or
a combination of live rock and live sand. The faster the water moves over the
bacteria, the more efficient it is at reducing nitrates in the aquarium.
Including the natural methods of Live rock and Live sand there are several
other options for biological filtration methods, including:
Power/Canister Style Filters
Undergravel Filters
Fluidised bed filters
Live Rock / Berlin Systems
Live Sand / Jaubert Systems

© Andrej Brummer – 2014. 54
Wet / Dry Trickle Filters
Let’s look at some of these bio-filters in more detail:
Power/Canister style filters:
Power filters are excellent options for smaller and fish-only aquariums, they
come in many forms such as inside, outside, “hang on back” and canister. Power
filters pump water from the aquarium, filter it in a box using a sponge type filter then
pump clean water back.
They often come with mechanical filtration built in and have space for chemical
filtration media. They are excellent multi-purpose filters and are easy to maintain,
require the least amount of care, adapt quickly to increasing bioloads and they also
aid water circulation.
Hang-on-back power filter
Undergravel filters:
Are very commonly used and are now considered outdated and should be limited to
fish-only tank set-ups as they can create a lot of nitrates which would damage your
reef. Some people believe you absolutely must have an underground filter while
others think they are no longer needed due to other, better filtration methods. The
undergravel filters sit under the gravel you have in your aquarium, and pull the water

© Andrej Brummer – 2014. 55
down (or pushes it up) through the gravel and traps particles in a plate-type filter as
the water passes through it. It's similar to the filters found at the bottom of in-ground
pools. This is “old school” technology!
Fluidised bed filters:
These are a relatively new technology that sees the biological filtration take place in
a sleek tower unit separate to the aquarium where water is pumped up the chamber
suspending the media (sand or similar) inside which is coated with beneficial
bacteria providing excellent circulation and an unmatched surface area for efficient
biological filtration, if these units are large enough they can contain an anaerobic
zone for denitrification. Fluidised bed filters are especially good for large and heavily
stocked aquariums. They cope well with rapidly increasing bioloads and are very
efficient and self-cleaning.
A fluidised bed filter
Wet / Dry (Trickle) Filters:
These filters are popular for people because they are extremely efficient at
converting dissolved organic waste into nitrates as well as aerating the water.
Because they are so efficient you need to stay on top of nitrates levels with water
changes or enlist the help of a NNR/denitrification system.
Wet/Dry (trickle) filters (a.k.a. reef filters): are my top choice for medium to large or
heavy bioload aquariums as they are easily the most capable filters at providing
good water quality and provide a high level of oxygenation. Therefore they are a

© Andrej Brummer – 2014. 56
definite best choice for reef set-ups and biologically filter the water seriously fast and
can often provide biological, mechanical, physical and chemical filtration all in one
package.
These filters are usually reservoirs beneath the aquarium and are mostly in 2 parts,
the wet/dry chamber and a sump area which can contain a number of water
treatment options such as live sand, protein skimmers, denitrification filters,
phosphate removers, dosers. The principle is to maximise the air-water interface by
“trickling” the water over unsubmerged filter medium (dry area) which highly
oxygenates it, the water is then directed to a wet area where it is additionally treated
chemically and/or physically. Often these filters mechanically filter (sometimes using
a prefilter) the water as it is entering the system too.
The wet/dry (trickle) filter is very efficient and results in outstanding clean,
oxygenated water being pumped back into the aquarium.
A wet/dry trickle filter designed to act as a sump.
The Role of Filtration in Your Tank
As you can see filtration plays a very important role in our marine aquariums
removing undissolved and dissolved organic waste and is the key component in
good water quality. Good biological, mechanical, physical and (sometimes) chemical
filtration will serve to create the pristine water environment marine life needs to truly
thrive.

© Andrej Brummer – 2014. 57
You'll want to select the filtration system based on your tank size and bioload and
set-up; whether you are going to have a fish-only tank or a reef tank which will need
more filtration to keep the corals happy. Also you do need to select your filtration
system based on the level of maintenance you are able to provide your aquarium,
as some require more cleaning and changing of media than others.
Filter media, how often does it need to be replaced or changed? Are you happy with that?

© Andrej Brummer – 2014. 58
Lighting Your Saltwater Aquarium
The process of lighting a saltwater aquarium serves two purposes:
1. The first is to allow us to view the marine life and also to showcase and
highlight the amazing colours that lie within.
2. The second function is to mimic natural sunlight as closely as possible; to
give our marine life some sort of day/night rhythm and provide food for the
photosynthesising organisms such as corals, marine plants, coralline algae,
anemones, phytoplankton and other invertebrates which use light as their
energy source through photosynthesis. Ultimately this means they turn light
and carbon dioxide into food (carbon), oxygen and water. The light
requirement for this process is between 350- 750nm (wavelength) and is
partly UVA.
The type of lighting you choose for your aquarium will depend on whether you have
a fish-only set up or a reef tank. It's not that the lighting used in a reef tank won't
work in a fish-only tank, but you would probably find it to be much too bright and “too
much!” and maybe produce too much heat.
To adequately light your marine aquarium the only 3 parameters you must
consider are quality, quantity and duration of light:
1. Duration of light: Regular 12-16 hour lighting periods are optimal for good
marine life health, a great idea is to use timers and have the actinic bulbs only on for
1-2 hours each end to simulate dawn and dusk.
2. Quality of light: The best lighting system will be a combination of actinic (blue
light) and daylight bulbs.

© Andrej Brummer – 2014. 59
Actinic bulbs: use in conjunction with daylight bulbs
As a general rule of thumb the bulbs needed to sustain photosynthetic light should
have a colour temperature of around 6500°K - 12000°K (Kelvins) for general reef
applications. Colour temperature increases with depth so much deeper water
species require higher colour temperatures, these species are very specialist!
3. Quantity of light: You should also aim for 3 (soft corals) to 5 (hard corals)
watts of light per gallon of saltwater as another general rule, this will help you
decide how many bulbs at what wattage you will need.
Lighting Fish-only and FOWLR tanks
Fish-only Tank Lighting
If you do not intend to keep corals life for you is simpler! The most simplistic lighting
requirements can be used for fish only aquariums where all you want to do is be able
to view your fish and give them a day/night cycle. Fluorescent lights of
normal/standard output (NO) are all that is required here; full spectrum bulbs
produce a more natural looking light and actinic (blue) lights bring out colourful
pigments nicely.

© Andrej Brummer – 2014. 60
A tank like this fish-only one only needs basic lighting.
Basic Fish Only Tanks
A very basic fish-only aquarium will consist of the tank, filter, heater and lighting.
You can even go with the pre-made plastic tank covers that come with a single or
double fluorescent tube light. These are by far the easiest to install and maintain.
You buy it, put it on the top of your tank and flick the switch on. The bulbs are may
be geared more for freshwater goldfish instead of saltwater varieties, but there are
very little differences between the lighting except for a colour enhancement, they
wont affect the health of your fish.
Most fish will be enhanced greatly by certain types of lighting that the typical (basic)
hood lighting system won't bring out in the fish. If you replace the standard bulb in
the hood lights with a different variety (full spectrum and actinic bulbs), you can
greatly enhance the colour of your fish. You can get pretty cool bulbs that make the
colours on your fish fluoresce, which looks awesome.
FOWLR Lighting
A FOWLR requires a bit more lighting forethought than a fish only tank because of
photosynthesising organisms on the live rock and possibly the introduction of a few
extra invertebrates.

© Andrej Brummer – 2014. 61
Fish only with Live rock aquariums typically include the photosynthesising red
coralline algae encrusting the live rock and a handful of select invertebrates,
depending on how many and which type of corals and/or photosynthetic anemones
you have you may want to go up to high output fluorescents (greater luminosity than
normal output fluoros) such as a T5 set up. T5 lights have become extremely popular
in the past few years. If combined with electronic ballast they run cooler, longer and
more energy efficiently than other lighting set ups, they also penetrate the water
better than many other types of thicker bulbs.
If you have not much more photosynthetic life than just live rock in your FOWLR
simple actinic blue normal output fluorescents will suffice to keep the photosynthetic
creatures and algae happy and thus increase water quality too. If you want to keep a
variety of corals or marine plants you will need to get reef ready lighting.
T5 lighting rig with actinic blue bulbs and daylight bulbs.
Lighting a reef tank
Now, if you have a reef aquarium or have a few corals or marine plants the lighting
story is much different, as these organisms produce their food from light. So you will
need to get a lighting package that basically mimics the suns rays (as in nature).
Here the quality, spectrum and duration of your saltwater aquariums light really will
© Andrej Brummer – 2014. 62
mean the difference between life and death for your marine creatures and their
photosynthetic symbionts (the algae called zooanthellae that live in coral tissue).
Optimal Reef Tank Lighting
This is a delicate arrangement that is dictated by the type of reef aquarium you plan
to keep and what creatures you plan to keep in it.
Photosynthesising marine life falls into 3 different categories:
1. Low light species such as many soft corals.
2. Moderate light species such as large polyped stony corals (LPS).
3. High light loving including many small polyped stony corals (SPS) and
Tridacnid clams.
Reef Tank Lighting Overview
Reef tanks require much more intensive knowledge of lighting and can be an
intimidating area. Wattage, the colour rendition index and Kelvin are all
considerations for reef tanks.
Ultimately our reef aquarium lighting set-up depends on how much money you have
and what variety of corals you want to keep.
There also tends to be many pros and cons of every suggested lighting set up for a
reef aquarium. The specific lighting you need for a reef tank will vary depending on
the reef life you plan to keep - and you may need to find a specialized resource to
help you select the appropriate lighting for a reef aquarium. Lighting is dependant on
the animals you intend to keep.
As you may have guessed by now a reef aquarium requires the most intensive
lighting set up and to a reef appropriate lighting is as important for good health as
filtration.

© Andrej Brummer – 2014. 63
My Opinions on Reef Lighting Selection
Often times lighting will be one of the most expensive components in a reef
aquarium. I recommend HO fluorescents (such as T5’s) over VHO (very high
output) fluorescents for deeper, larger aquariums or more sensitive species, with a
combination of actinic blue and daylight bulbs.
A reef tank require full spectrum bulbs that mimic the suns rays.
Many aquarists use metal halide lights but because of their expense, excessive
heat output, high UV radiation (use shields here), high electricity usage and limited
lighting penetration over good fluorescents I don’t really see the real advantage of
the additional costs (and potential fire-hazard) involved.
Now you can get reef-ready LED lighting that is relatively new on the market and
has low power usage, heat and long bulb life. People have been getting great results
from this lighting in their reefs. This would be my top pick if you budget can afford
this reef lighting option.
Retrofit systems and other fluorescent lamp housings should have the light bulbs
no more than 3 inches above the water surface. Reflectors should be used to
direct all light to the water, many bulbs now have reflectors built in, these are very
efficient.

© Andrej Brummer – 2014. 64
Keeping Corals Happy Under Lighting
Soft corals require the least amount of light. Hard corals require more intense
lighting, as do taller aquariums. Don’t forget my general rule of thumb is 3 watts per
gallon for soft corals and 5 watts per gallon for hard corals.
For every reef set-up you should have blue actinic bulbs and “full spectrum” daylight
bulbs with a Kelvin (K) rating of at least 5,500 to 12,000 for normal reef applications
and up to 20,000 for the most demanding of deep-water hard corals, colour
temperature increases with increasing depth the particular species is found at – deep
water invertebrates are for experts only!
Kelvin (K) is a way of measuring the units of colour temperature. (Colour
temperature is a term used to measure the similarity to day sunlight.)
As I said previously generally the bulbs needed to sustain photosynthetic life should
have a colour temperature of around 6500°K - 12000°K for general reef applications.
Actinic lights are necessary when using frequencies below 10,000 K to provide
all lighting components ,so will be necessary for almost all reef aquarium owners.
Actinic lamps provide necessary blue light and act as boosters for daylight lamps
between 5,500K and 10,000K.
So if you intend to keep corals and other photosynthetic organisms, you will need
HO (high output) or VHO (very high output) fluorescent lights such as T5’s or power
compacts, with a combination of actinic (blue light) and “daylight” bulbs (remember
with a colour temperature of 6500°K up to about 12000°K for regular reef
applications) or metal halide lights or reef capable LED’s.
Metal halide lights are commonly used for stony corals but produce greater amounts
of heat, often requiring the use of a water chiller and so cost a lot more (and also
use a lot more power). Metal halides originally were thought to be the ultimate
lighting system for corals. However they produce that much heat and UV radiation
facilitating the requirement for chillers and UV shields. These days with modern
technology there are cheaper options that produce similar lighting with a lot less heat

© Andrej Brummer – 2014. 65
(such as T5 HO fluoros, VHO (very high output) fluorescent lights (such as power
compacts) and LED lighting suitable for hard corals). Metal halide lamps will add 7-
8 degrees F to room temperature and water in your aquarium so this is fairly
significant.
I have already said I really recommend LED lights if you can afford them, which
produce the intensity of metal halides but have a fraction of the heat output. This
saving in electricity costs, long life of the bulbs plus the convenience of cooler
lighting will pay itself back over time.
How To Choose Your Lighting Wisely!
When choosing a lighting set up, other than knowing what marine life you plan to
keep, you should always take into consideration the initial cost of the lighting fixture,
the ongoing operating costs (electricity), bulb replacement costs, frequency of
replacement, whether or not you would need a chiller for the aquarium and the ease
and eventual need for any upgrading. Some systems maybe cheaper initially but
may require more frequent bulb changes or chilling systems because of heat
generated making them more expensive in the long run.

© Andrej Brummer – 2014. 66
Placement of Photosynthetic Marine Life Under Lights
The trick here is to try and get compatible species that thrive under similar light
conditions or get very creative at placing high light species higher up towards the
lights and moderate light species lower in the aquarium this way you wont saturate
some species with too much light (damaging) or cause some species to not receive
enough lighting for good growth. Species that are not getting as much light as they
should be can to some degree be compensated with supplementary feeding such as
plankton.
Placement of corals can be tricky because different families like slightly different light!
Heating/Chilling Your Saltwater Aquarium
(Chapter 2 goes into more detail on saltwater aquarium heating and chilling) To
adequately heat your tank all year, you will need at least one aquarium heater to
keep your aquarium at optimal temperature at all times (2 smaller heaters means if
one fails or gets stuck on your tank should still be fine until you discover it), if you live
in a hot home/climate or have a metal halide light system you may need a chiller to
keep the water below 80°F (26.66°C).

© Andrej Brummer – 2014. 67
A chiller is also a good idea if your water temperature fluctuates a lot within the day
because marine life (especially corals) really don’t like this, marine life is only good at
coping with very gradual changes over time, too rapid temperature changes cause
stress which can lead to disease. A chiller will work in sync with the heat emitted by
the lighting to keep the water a stable temperature. A good pair of thermometers will
give you a handle on what the temperature is doing; this should be checked daily.
Substrate For Your Saltwater Aquarium
Also based on your aquarium plan you should know if you want substrate or not.
Personally I don’t use it as this makes it way easier to remove any detritus and the
space eventually gets covered with attractive, natural looking coralline algae and
other awesome encrusted marine life. By far the most beneficial substrate is Live
Sand substrate which is inhabited by beneficial microorganisms and tiny crustaceans
which will greatly enhance water quality and plays a similar role to live rock.
To add substrate or not? Mostly comes down to personal choice.

© Andrej Brummer – 2014. 68
Book 2:
Setting Up a Saltwater Aquarium The Right Way.
Now that you have finished planning your saltwater aquarium and know what vital
equipment you need (if you haven’t planned everything go back to Chapter 1 and go
through the process I outlined!), you now have done all the decision-making stuff and
now its time for the fun action part!
First, it’s finally time to buy all that stuff you need, making sure you adhere to your
plan 100%. If you adhere to your plan, then everything goes to plan, this is important
to your ongoing success. If you have a legitimate reason to change your plan then
do so making sure you write it down and have explored all the implications and
ramifications of this.
It’s important to note at this stage to TAKE IT SLOW. It’s not a race, do things slowly
and carefully and do not take any shortcuts here. A well-executed set up is vital to
your long-term marine life keeping success.
Setting Up: Tank Design and Layout
Coming up with a good tank design and layout or “aquascape” is like interior
decorating for your fish tank, but you will want to take into consideration what is
going to be living in the tank when deciding how to aquascape it.
As mentioned briefly previously, there are pre-designed backgrounds that can be
added to your tank to add interest, depth and help you hide the mechanical functions
of the tank, if you like this sort of thing.
© Andrej Brummer – 2014. 69
Alternatively, you could paint the outside of the aquarium, along the back piece of
glass/acrylic. Use a solid colour, like ocean blue, black, or green. Appliance spray
paint sticks to glass quite well. The advantage of painting the outside of the tank is
that you don't have to worry about water getting in between your background piece
and the glass - which tends to happen and can create a challenge for cleaning as the
salt water will leave a salt creep residue between the glass and the background if not
cleaned properly. You can also buy aquariums that already have a solid color on the
back. This is entirely your choice.
The Aquascape
When thinking about the aquascape of your aquarium, consider whether any of the
fish you plan to keep require hiding spaces. Dottybacks are fish that need to find
places to “hide” to feel secure in their environment - and there are numerous fish that
have unique needs that should be considered when designing your tank layout, this
is why you should plan your tank carefully from the beginning. It is possible to use
live rock and aragonite rock (many types of rock shouldn’t be used because of
leaching minerals into the water) to construct caves, grottos, valleys whatever
habitats your fish would like to make them feel at home.
If you are keeping reef in your tank, you'll need to have an understanding of which
corals need more intense light and which corals need less light. Generally stony
corals like more light and soft corals less, but each individual species does have it’s
own slightly different requirements. You'll use live rock/rock to position the light-
lovers closer to your light source while keeping the others more towards the bottom
of the tank.
When designing your aquarium, keep in mind you will need to maintain the aquarium
around what you put in. For instance, if you put live rocks and corals too close to the
glass, you may find it difficult to scrape algae off the surface of the glass without
disrupting your aquascape. If you add multiple water plants in one corner, it may

© Andrej Brummer – 2014. 70
make it impossible to vacuum off the gravel. These are all important considerations
when you set up your tank: it needs to both look nice and be functional.
Dottybacks, like this False Gramma Royal, love hiding places.
Saltwater Aquarium Decorating Options
“Fake” Coral, sometimes called “dead” coral, you may think looks great when you
first put it in your aquarium, but it really is hard to keep clean (and is so 1970’s).
You'll probably wish you didn't buy these decorations within a few tank-cleanings
because they don't look as nice after a short period of time in the water. Also they
are not really natural looking.
Live Coral on the other hand is one of the most natural ways to decorate your
aquarium, live corals are of course a living animal so they are more difficult to
maintain than dead coral, but they do clean themselves!
Live Rock looks natural AND serves a great biological purpose to your saltwater
aquarium. It's also ideal because of how much fun it is! You can literally use
aquarium silicon sealant to shape rocks into a design of your choosing. Live rock
can be drilled and then piped together with PVC pipes or bits of dowling,

© Andrej Brummer – 2014. 71
allowing you to create columns and archways out of the rock if they are attached to
each other in this method it is possible to dismantle them again.
This art is referred to as “rockscaping”. Just be sure you keep these rocks directly
on the bottom of the tank rather than on top of sand as you may have stability
problems and any sand burrowing species may get injured or trapped if the rocks are
sitting on the sand.
Preparing the Water & Filling the Tank
Creating a saltwater aquarium isn't quite as easy as dumping some table salt into the
water inside your aquarium but it needn't be overly complicated, either!
The products available on the market for saltwater aquariums these days make it
possible for even beginning aquarium enthusiasts to have and maintain a healthy
saltwater aquarium relatively easily.
Once you have:
Written a detailed plan of the type of fish and/or reef you are keeping.
Purchased the appropriate sized aquarium.
Prepared the tank by cleaning it with freshwater and a cloth.
Decided what kind of aquascaping you are going to add.
You can then, finally, start putting it all together.

© Andrej Brummer – 2014. 72
Putting Your Saltwater Aquarium Together
Before you put anything inside the tank, you'll need to figure out where you're going
to keep the aquarium. Remember that it will be nearly impossible to lift and move
once you pour the water in because of it's weight, so it's a good idea to position your
tank wherever you are going to be keeping it at this point.
Grab your aquarium and set up the stand (if you have one) in your decided location,
make sure it is level. The aquarium needs to be thoroughly cleaned with freshwater,
now is the time to do any plumbing customisations, add a background and add your
sump (if you want one). Ensure the aquarium is placed on the stand level then attach
all your equipment where you want it to be.
If you intend to use substrate , wash it in purified freshwater first, then put it in your
tank and place a clean bowl on the bottom of the tank and pour purified freshwater
into the bowl filling up the tank. The idea here is that the flow via the bowl wont
disrupt your substrate too much. You should be using water that has been filter
purified; or distilled water that you've purchased to minimize any harmful effects that
tap water might cause to your marine life. After the tank is filled to your desired level
you can turn on all the equipment for a “wet run” to make sure everything is
functioning correctly for a day or so. Now is also the time to check for any leaks and
see how everything works together.

© Andrej Brummer – 2014. 73
Making a tank into an ecosystem means moving slowly!
After a day or so of making sure all equipment is functioning correctly turn it all
off and remove about half the water because its time for aquascaping as we
mentioned earlier. If you haven’t already done so in your saltwater aquarium plan It’s
a good idea to draw a couple of options on paper and decide on the best one,
remember to keep in mind what marine life you will have and what sort of habitats
like caves and grottoes they will like to frequent.
Arrange all your decoration as you have decided, as I touched on earlier a great way
to put everything together is to peg bits of aquarium suitable rock or live rock
together by drilling holes and gluing in a piece of dowel in a rock then attaching it to
the other rock without glue, this way you can easily disassemble your structure if you
need to. It is a good idea to trial this on a table to see if your reef creation is
balanced before it goes in your aquarium. By doing this you can easily make an
amazing looking reef formation and provide a variety of hangouts for your marine life.
After your aquascaping is complete my strong recommendation is to initiate the
cycling of your aquarium using Live Rock (although there are other ways to do
this). Before this however you will restart the heaters, pumps/powerheads, protein
skimmer, filtration devices.

© Andrej Brummer – 2014. 74
Now you will then add your aquarium salt, a good dechlorinated salt mix that
you've purchased from a pet supply store or online. This creates your synthetic
seawater, you need to be continually mixing and measuring it to ensure the correct
specific gravity (ideally 1.023) pH (Ideally 8.3) and temperature (ideally 77-80°F
which is 25-27°C).
You'll need to test the water with pH and salinity (specific gravity) test kits.
Instructions are on the aquarium salt bags. The water will take a number of days to
stabilise to appropriate levels and temperature. After this time you can do any
adjustments you need to.
Biological Cycling of Your Saltwater Aquarium
So how do we correctly cycle a marine aquarium? To start with you need be familiar
with all the cycling terms: break in cycle, start up cycle, nitrification, biological
cycle; it’s all talking about the same biological process; converting toxic waste into
more harmless plant food by beneficial bacteria.
The most important time to do this is when you are first setting up your aquarium, it
usually takes around 2 weeks or longer depending on how fast the bacteria
colonise your aquarium at each stage of the cycle during this process you will need
to test your water using a test kit for ammonia, nitrite and nitrate and log your
readings.
Whatever chemical has the highest concentration will tell you at what phase the
aquarium is in; it will go from ammonium spike to nitrite spike to undetectable levels
of ammonium/nitrite and detectable nitrate (use test kits to find out). The entire
cycling process will take anywhere from 3-100 days depending on what type of
biological filtration you are using: live rock or a commercial filter, cured or
uncured live rock.
The only way to tell which phase the aquarium is in is to detect zero nitrite over
time and to observe various parameters such as pH start to stabilise.

© Andrej Brummer – 2014. 75
I do not recommend you put any fish in until the cycling is complete, as they will get
stressed and can die. The best way to initiate the cycle is with live rock which will
contain the beneficial bacteria and decaying organic matter to provide the
ammonium source and kick off the cycle.
Initiating the biological cycling of your aquarium; the easy way!
Live rock is quite possibly the most beneficial substance in the world to a marine
aquarist (and a smelly fishy rock to everyone else!). Live rock is porous rock taken
from the rubble zones of ocean reefs; it contains many tiny invertebrates and
microorganisms essential to biological cycling - which by now you know means
converting animal waste ammonium into nitrite, then much less toxic nitrate which is
either absorbed by plants or removed by partial water changes or denitrification
filters.
The outstanding advantage of live rock is that it harbours anaerobic zones where
denitrifying bacteria grow; these awesome little guys convert the nitrate into
harmless nitrogen gas thus completing the nitrogen cycle.
To begin with your new saltwater is essentially sterile and we need to encourage
beneficial bacterial growth on the surfaces of your aquarium to make it viable for
marine life.
Here‟s how we do that:
The biological cycling process is kicked off by ammonia, which will be released into
the aquarium by decaying life on the live rock (if it is unseeded or uncured), if your
live rock is cured (seeded) you may need to add a commercial ammonia solution
to kick off the reaction, this ammonium source will encourage the growth of specific
bacteria which will use it as an energy source and convert it into nitrite which is less
toxic to life. The increasing concentration of this new compound will initiate another
sort of bacterial population to multiply which convert nitrite to nitrate. This 3-step

© Andrej Brummer – 2014. 76
process is known as nitrification and is the series of reactions behind biological
filtration.
Many people used to kick of cycling by adding a Damselfish which sometimes died. There are
much less cruel ways...
What Happens In a Cycling Tank?
So, in the first few days ammonium levels will rise rapidly as the any dead life on the
life rock decays and the bacteria present multiply and begin to convert it, this is the
most stressful phase for marine life. Once the bacterial colony has established, the
ammonium level will peak and begin to decline to zero as the bacteria convert it to
nitrite.
Now nitrite levels will rise which again is stressful to fish (but no so much), the
second stage bacterial colonies will multiply and begin to start converting nitrite to
nitrate, nitrite can take a good week or so to reach its peak, then it will start to drop
and nitrate becomes detectable.
Now the 1st and 2nd stage bacteria have reached the correct density to keep up with
the ammonia released into the water, and now the tank is fully cycled and you can

© Andrej Brummer – 2014. 77
begin to slowly stock up your marine aquarium after the water is stable and settled
for a week or so.
What Phase of The Cycling Process is Your Tank in?
In case you have forgotten, you will use your ammonium, nitrite and nitrate test kits
to establish which phase the aquarium is in; it will go from ammonium spike to
nitrite spike to undetectable levels of ammonium/nitrite and detectable nitrate.
The entire cycling process will take anywhere from 3 to 100 days depending on
what type of biological filtration you are using: live rock or commercial filter, cured or
uncured live rock. The only way to tell is to detect zero nitrite over time and to
observe various parameters such as pH start to stabilise.
Do not rush this; putting in livestock now could easily throw the system out of
equilibrium!
Throughout the entire process my recommendation is to keep the protein skimmer
on to remove all the detritus and dissolved organics from the water. You water will
look pretty dirty throughout this process, you can just siphon out excess settled
detritus and let the protein skimmer and bacterial populations do their thing. You
also may see algae start to grow; this indicates nitrate levels are building; you should
get rid of the algae before it builds up to crazy levels.
The final phase is to initiate denitrification; get rid of the building nitrate by using a
commercial filter, conducting partial water changes with or without the assistance of
live rock.
You will want to bring nitrate levels down to around 20ppm and tweak any
temperature or water quality levels and let the water settle and clear before you
GRADUALLY add your livestock.

© Andrej Brummer – 2014. 78
Stocking Your Tank After Cycling
When stocking your tank after cycling you need to add marine life very gradually
so the different bacterial populations have a chance to adjust to the increasing
bioload. Start by adding the hardiest species first, wait for the system to adjust and
test to be sure. A mistake here could easily cause the whole system to crash. And
finally to avoid excess nitrates is the reason why you should conduct a twice-
monthly 20% water change as part of a regular maintenance routine.
Adding your first few marine species is the fun part! Add one or two species from
your plan into the aquarium; take it very slow to allow the bacteria to adjust to the
increased bioload. After a week or so test the water levels and if you get a zero
reading for ammonia and nitrite add one or two more. Then start gradually building
on your correctly set up and cycled dream marine aquarium!
Start with a hardy species like this Clownfish
When first lighting your tank, try to follow natural rhythms for day/night cycles to keep
your fish healthy and happy, simply by turning the lights on during the day and off at
night. An easier way is to have your lights connected to a timer so this happens
© Andrej Brummer – 2014. 79
automatically for you. Have your hood and lighting system ready to cover your
aquarium once you add your fish. If you don't cover your fish tank, your fish will jump
out so keep the cover on!
Looking After Your Beneficial Bacteria
Having a correctly functioning nitrogen cycle in your aquarium requires regular water
testing and ensuring that the bacterial populations in your biological filter are not
physically damaged or removed (such as any process that removes too much from
the filter media) or chemically damaged (adding something to the water that will kill
them off).
Maintaining Your Saltwater Aquarium
A saltwater aquarium requires ongoing maintenance to ensure the health of the
marine life inside it, and keep it looking as nice as the day you set it up. If you are
going to become a saltwater aquarium owner, you'll need to commit to a regular
maintenance routine, just as you would commit to other home chores that must get
done.
There are daily procedures that all aquarium owners should complete, but there isn't
really a set structure for the other weekly, bi-weekly or monthly maintenance tasks.
Each tank is unique and has it's own needs, but you will start to understand the
needs of your tank as time goes on.
To get you started, however, here is a general guideline you can follow for
maintaining your saltwater aquarium:

© Andrej Brummer – 2014. 80
Daily Maintenance
Check the powerheads, pumps, lights and filters and other electrical
equipment pieces to be sure they are all working properly.
Check the temperature of the water. The perfect way to catch a
malfunctioning heater before it hurts your pets.
Check your marine life. Are they all there? Watch the fish swim around- any
noticeable changes in behaviour or appearance? Do your invertebrates look
good? Is everything normal? The best time to do this is feeding time.
Check your protein skimmer and empty out the skimmer cup of collected
skimmate and rinse with water. Ensure bubbles are being produces as is a
nice foamy skimmate.
Does the water appear clean and without odour? If the water smells foul
or looks cloudy, use testing kits to check ammonia, nitrite and nitrate levels to
make sure everything is ok.
Weekly Maintenance
Check water filtering media (sponge, cartridge, pads, floss, etc- based on
what filtering system you are using) to see if it needs cleaning or replacing, a
weekly check and monthly clean is fine. Be careful not to remove or damage
beneficial bacteria from surfaces.
Partial water changes: Are the BEST thing you can do to replace trace
elements used up by marine life, increase buffering capacity of water and get
rid of harmful nitrates and phosphates. This is the most important
maintenance task bar none. You should actually aim for 10% every week.

© Andrej Brummer – 2014. 81
Top up any evaporated water with fresh water, this actually increases the
specific gravity as the salt doesn’t evaporate: not good for sensitive marine
life.
Water quality testing: just a quick pH, Ammonia/Ammonium, Nitrite and
Nitrate test. Record the results to be able to see general trends. If nitrate is
building or pH is slipping increase frequency of partial water changes or add
denitrification filter or increase buffering capacity of the water.
Clean tank: clean viewing panels on both sides, wipe off and remove salt
build up (salt creep) on the cover and tank light bulbs. Only use aquarium safe
cleaning products.
Gentle stir up a small area of the gravel or sand each week to help prevent
excess detritus or organic material from building up. If you don’t have
substrate vacuum tank bottom with a siphon to remove detritus. A saltwater
aquarium clean up crew can help you with this.
A gravel cleaner set is a good idea.

© Andrej Brummer – 2014. 82
Monthly tasks
Adding any supplements: Mostly important for reef aquarium applications.
Things like calcium, iron, iodine and strontium are very important for healthy
reef growth and are quickly depleted from the water.
Through checking of heating units: heater malfunction is a common killer
believe it or not. Malfunctioning heaters can also cause electrical fires so
check them well to be on the safe side.
Other Maintenance
The frequency that these items need to be done will vary depending on your own
tank and how it's set up.
Remove algae from the walls of the tank, rocks, gravel or sand.
Replace chemical filtration materials as needed.
Check leftover food levels: do not over-feed your fish- if you notice uneaten
food building up at the bottom of the tank, cut back on how much you are
feeding them.
Check the lights: all bulbs have a limited lifespan (usually around 6 months
to 1 year) after which time lighting set ups gradually lose their intensity, so
much so that they will no longer be beneficial to your photosynthesising
organisms. Record installation dates and read manufacturers replacement
recommendations.

© Andrej Brummer – 2014. 83
Keep an eye on plumbing: This is an often-overlooked area and plumbing
degradation can cause the contents of your aquarium to end up on the floor!
Check for rot, salt creep and degradation on tubing, fixtures and joins.
Small tanks REALLY need you to have a good handle on maintenance.
Saltwater Aquarium Maintenance A to Z
Good saltwater aquarium maintenance is the key to a happy thriving aquarium
once you have set it up properly and stocked it intelligently.
Ensuring a good regular maintenance schedule will help to ensure that your marine
aquarium is always looking at its best, it also will help to ensure your equipment
lasts as long as possible and your marine life is optimally healthy. So I strongly
advise people to be disciplined about this and do your maintenance regularly, the
time you will spend doing this will pay itself back in terms of minimal replacement
equipment and the costs and heartbreak of replacing marine life.
Here‟s more detail on the tasks you will need to do:

© Andrej Brummer – 2014. 84
1. Partial water changes:
This is very important as toxic biological waste builds up in your tank all the time
changing the water quality, if there are enough nitrates and phosphates present
your marine life will die. The only way to prevent this waste build up and replace
vital trace elements is to physically change the water. The most common technique
is to replace 30-40% of the aquarium water every month, now I personally
recommend you replace 20% every fortnight (or 10% per week); this is because
if you replace 40% at once pH shock can harm your marine life, also fish are very
sensitive to changes in salinity and temperature, so this will help reduce the shock of
1 major change. The water you are replacing must always be the same temperature,
pH and salinity etc.
When changing the water a good idea is to use a powerhead to “rinse” all debris
from rocks, corals and other items, then vacuum this out (as well as food debris)
from the bottom of the tank using a gravel cleaner or siphon. This should be done as
you siphon the water out into a bucket and discard it. The idea here is to stir up the
detritus and suck it all out!
Water change equipment like this Python tool will make the whole process easier.
Ensure you replace the water with good quality water (i.e. dechlorinated, well
mixed and the same temperature, salinity, specific gravity and pH as the rest of the
tank) that you have prepared beforehand in clean containers.
Don‟t forget to unplug your heater before you conduct a water change as a dry
heating unit can get very hot and may shatter when exposed to cold water. Many

© Andrej Brummer – 2014. 85
heaters these days turn off automatically when removed from the water, which is
very handy!
2. Cleaning filters and equipment:
When you are conducting your water change a good idea is to clean out the filters
and protein skimmers, getting rid of any debris and gunk you find, this will also let
you get a handle on when any pads need to be replaced. Also check the filter media
such as activated carbon and top up or replace as necessary. You should do this
monthly.
Clean any pumps and powerheads too, this ensures optimal flow in your marine
aquarium. These devices are very important in maintaining water quality and
therefore keep your marine life alive, ensuring everything is in good working order is
very important.
Cleaning the tank and equipment safely requires that you don’t use any chemical
that could kill you marine life (easier to do than you might think), buy a special
aquarium cleaning product or make up a solution of a small amount of vinegar and
water. This will keep you tank looking pristine.
3. Visual inspection of you marine aquarium:
This is the most simple but most important part of your maintenance routine, it
should be done daily at feeding time and is your opportunity to observe your marine
inhabitants to ensure they are all are eating properly, and are disease symptom,
parasite and damage free. It also gives you a chance to do a roll call to ensure all
your pets are present. If you spot anything wrong the key is to act fast to ensure the
problem doesn’t get worse or disease spread to others. Observe behaviour too, to
make sure everything is normal. This is a good opportunity to catch an illness and do
something about it before it is too late!
© Andrej Brummer – 2014. 86
4. Algae control:
Algae should be minimised and not completely eliminated as it does play a
beneficial role in the marine aquarium ecosystem by filtering out nutrients
(phosphate, nitrate) from the water and providing additional oxygen (although marine
plants can do this).
However algae can often get out of hand and start taking over your saltwater tank
this is usually done by pest algae species or “micro-algae” such as red slime
(cyanobacteria), hair algae or bubble algae. Not to be confused with beneficial
marine plants which are usually termed “macro-algae” species, meaning big, for
example coralline algae, Caulerpa and Halimedia species.
Algae control should be part of your regular maintenance routine. Excessive
amounts of nutrients (primarily nitrates, phosphates and silicates) and excess or
incorrect spectrum light (especially old bulbs or sunlight) causes pest algal
breakouts. Manual removal of algae from tank walls and rocks can be very effective,
but the underlying cause of an algae outbreak is probably excessive nutrients in the
water from such things as overfeeding, not doing regular or big enough water
changes, using unfiltered water, adding a product to the water containing excessive
nutrients (read the labels!) or decomposing waste; usually uneaten food or a dead
pet coming from somewhere. You can also stock fish such as Tangs, Algae
Blennies and/or invertebrates such as Turbo & Astrea snails, Sea Urchins that
like to eat algae to help keep it under control.

© Andrej Brummer – 2014. 87
Pest algae can creep up on you.
5. Water Quality Testing:
(Later on in this chapter we go into more detail on water quality and testing.) Ideally
all parameters should be measured completely every 1-2 weeks, things like
temperature and pH should be checked a few times a week at least (temperature is
very quick and can be checked daily using a good thermometer). Purchasing pH test
kits is inexpensive and regular testing will prevent problems.
Other things you should test for are ammonia (should be 0 ppm), nitrates and nitrites
(should be very low and consistent), oxygen and salinity.
If you adhere to a good, well documented maintenance schedule it will not only keep
your saltwater aquarium looking its best but ensure optimal health of your marine life
and help to prevent any costly problems and fatalities. I also recommend you keep a
maintenance checklist and write down any observations and record readings
over time to help you understand your tank better and also to help you track the
source of any potential problems.

© Andrej Brummer – 2014. 88
Fish like this Purple Tang will help you get rid of pest algae.
How Do You Change The Water In A Saltwater Aquarium?
First - it's important to note that it's never a good idea to change most of the water in
the fish tank at any one time! This is because it removes the bacteria, which are
necessary to keep the water from becoming toxic, also because the new water (if
more than 30%) can cause shock in your marine life if the parameters are not within
98% of the old water’s. Most people recommend changing 10-15% of the saltwater
aquarium water every two weeks, but I say go for 10% per week or 20% every
fortnight. This will ensure your water is always in top condition.
For around $60, you could have plenty of prepared saltwater on hand - for whenever
you need to change your water quickly, or for your regular water changes.
What You'll Need:
An unused 30-55 gallon plastic trash
container (get a size equal to or
slightly larger than your aquarium)

© Andrej Brummer – 2014. 89
Hydrometer
10 feet of flexible, vinyl tubing
Floating thermometer
Multipurpose aquarium powerhead/water pump
Submersible aquarium heater
Refractometer (to measure specific gravity)

© Andrej Brummer – 2014. 90
What You'll Do:
1. Using purified fresh water (you can purchase distilled water, or get a reverse
osmosis or deionisation purification unit), rinse out your plastic trash container. Do
not use any soap or detergent of any kind. Place it next to your aquarium. Fill it with
the amount of purified water you will need to replace the water in your aquarium that
you plan to.
2. Test the water temperature within your aquarium, and the specific gravity, and
record this information on a piece of paper.
3. Place the thermometer into your plastic mixing container. Place the powerhead
and heater at the bottom of the container to help the salt dissolve into the water
more quickly.
4. Measure out the total amount of quality salt mix (no phosphates should be in it)
you need for your tank (follow instructions on bag) and then divide it into three equal
amounts. Pour a third of the salt into the mixing container and stir until it is
completely dissolved before adding another third of the salt and so on. Check the
water temperature after each addition of salt. When the entire amount of salt has
been completely dissolved, you can test the specific gravity of the water adjust as
you need to by adding more salt (increase) or more fresh water (decrease) until it is
the same as your display tank.
5. You will run the powerhead in your bucket for several hours to completely aerate
the saltwater. It's a good idea to have prepared the saltwater 24 hours before using
it, but in emergencies, you could attach air stones to an air pump, or protein skimmer
in order to ensure you achieve the proper levels of oxygen. After you've mixed,
properly tested and oxygenated the saltwater, it's ready to use! You can keep a lid
over the water to prevent anything from contaminating the water until you're ready to
use it.
6. You will siphon out as much debris from your aquarium as possible as you get rid
of the old water.
© Andrej Brummer – 2014. 91
7. Turn off all electrical equipment. Carefully remove 10-15% of the water from your
tank. You can do this with measuring cups, so you know how much water you've
removed.
8. Check the filters to see if they need changing and make sure the glass and
pumps are free from algae and other forms of waste.
9. Begin adding your newly prepared and tested saltwater, and replace the
percentage of water you removed. If you're using the suggested pump equipment,
you can attach the flexible tubing and the powerhead will add the water for you
through the hose!
Target Gravity & Temperature Ranges:
The idea is to match your prepared saltwater in your bucket as closely as possible to
the temperature and specific gravity measurements of the water in your aquarium.
The target levels should be:
Temperature: 72-80 degrees Farenheit for fish only systems;
75-78 degrees F for reef systems
Gravity: 1.020 – 1.024 for fish only systems;
1.023 – 1.025 for reef systems
Marine Tank Janitors: Saltwater Aquarium Clean-up Crew
It’s true that keeping your marine aquarium clean can sometimes be a chore, but it is
a small price to pay for having a pristine display tank that looks awesome and wows
everyone that walks in the room. But, there is an easier way; enlisting the help of a
few particular species of invertebrates, plants and fish to do the job for you!

© Andrej Brummer – 2014. 92
Marine tank janitors are a selection of beneficial marine organisms that basically
feed on algae, detritus and any uneaten food left in the aquarium, additionally
marine plants mop up nitrates and phosphate (biological waste products of
excretion) in the water.
This assortment of helpful invertebrates, fish and plant life are literally the janitors or
clean up crew of a marine aquarium. If you own a reef tank having these guys
around is a must do as long as they get along with your corals and invertebrates, if
you have a fish only set up just do a bit of research first and make sure none of your
fish species will feast on your clean up crew (always research fish, coral and
invertebrate species compatibility before adding in new tank inhabitants).
So your clean up crew will generally be made up of a combination of crabs, snails,
shrimp, sea cucumbers, Starfish, marine plants and sand sifting Gobies and
Blennies. A number of these species are more suitable for beginners such as
Cleaner shrimp, crabs, Gobies and starfish.
If you have a sandy substrate, sand sifting species such as the Gobies (for example;
2 spot Goby, Sleeper Goby, Watchman Goby) and sea cucumbers such as the black
or Tiger tail will do an excellent job of ploughing through the sand looking for detritus.
This is very beneficial to keep your tank looking clean and the nitrate/nitrite levels
down and efficiently aerates the sand.
Ward's Sleeper Goby (Valenciennea wardii) will sift your sand.
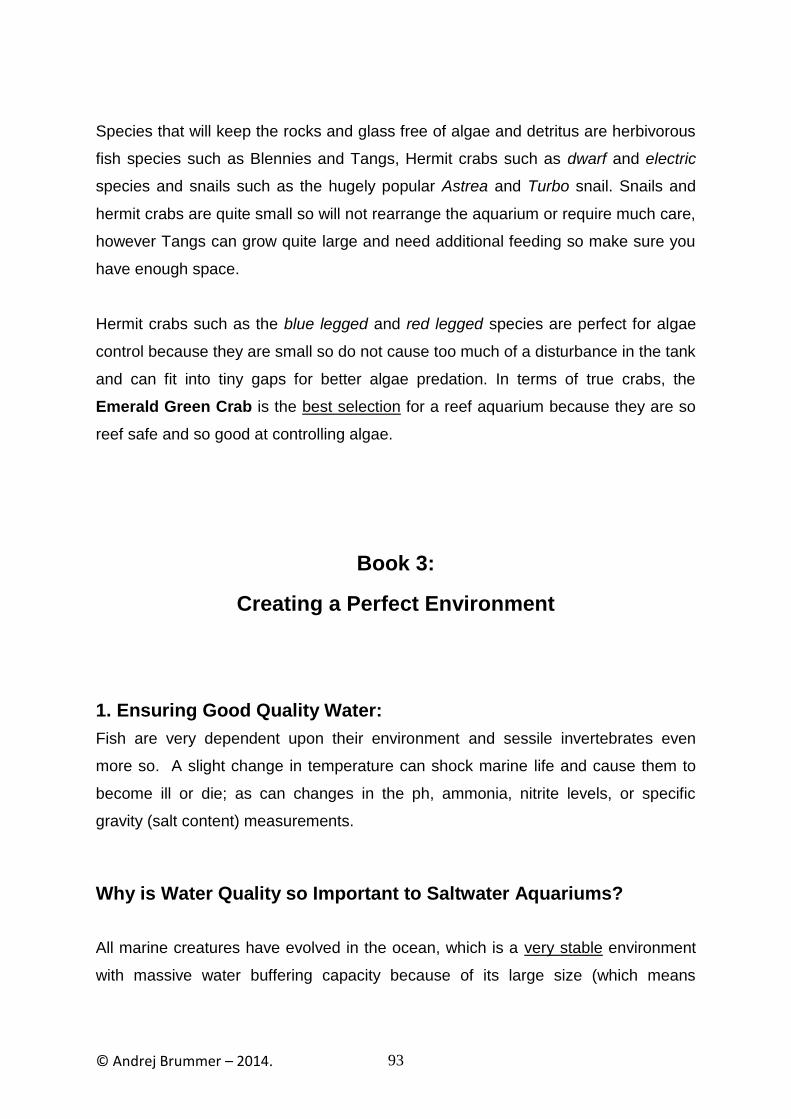
© Andrej Brummer – 2014. 93
Species that will keep the rocks and glass free of algae and detritus are herbivorous
fish species such as Blennies and Tangs, Hermit crabs such as dwarf and electric
species and snails such as the hugely popular Astrea and Turbo snail. Snails and
hermit crabs are quite small so will not rearrange the aquarium or require much care,
however Tangs can grow quite large and need additional feeding so make sure you
have enough space.
Hermit crabs such as the blue legged and red legged species are perfect for algae
control because they are small so do not cause too much of a disturbance in the tank
and can fit into tiny gaps for better algae predation. In terms of true crabs, the
Emerald Green Crab is the best selection for a reef aquarium because they are so
reef safe and so good at controlling algae.
Book 3:
Creating a Perfect Environment
1. Ensuring Good Quality Water:
Fish are very dependent upon their environment and sessile invertebrates even
more so. A slight change in temperature can shock marine life and cause them to
become ill or die; as can changes in the ph, ammonia, nitrite levels, or specific
gravity (salt content) measurements.
Why is Water Quality so Important to Saltwater Aquariums?
All marine creatures have evolved in the ocean, which is a very stable environment
with massive water buffering capacity because of its large size (which means
© Andrej Brummer – 2014. 94
constantly stable temperature, pH, specific gravity, oxygen, nitrate and other
chemicals).
This is unlike freshwater species whose environment can often be affected
dramatically by events like landslides, snowmelt, drought and flooding causing
massive changes in water conditions. This lack of chemical and physical change in
seawater means marine fish and invertebrates do not possess the physiological
ability to adapt to different water conditions that freshwater species possess.
Poor Water Quality Can be Fatal
In my experience poor water quality is the number one reason things go wrong
with marine life in peoples’ saltwater aquariums. It is the leading cause of death
resulting from the stress and shock of chemical and physical fluctuations in the
water.
For us as marine aquarists this means to ensure our marine pets not only survive but
thrive, we need to provide optimal water quality at all times. This is especially true for
reef aquariums where corals have a much more specific set of requirements than
marine fish.
Keeping a healthy saltwater aquarium requires that you keep up with the
daily/weekly/monthly/occasional water quality testing and routine maintenance of the
tank in general (see book 2). If you fail to do these simple steps correctly or
frequently enough, your fish and invertebrates will probably not survive for the long
term…

© Andrej Brummer – 2014. 95
Corals especially need good quality water
The Keys to Good Water Quality
1. The first main consideration in top quality water is a really good purified water
source. As I have mentioned before water from the tap should never be used as it
contains high levels of phosphate, nitrate and heavy metals among other chemicals
you do not want in your aquarium. The best way to obtain purified water is to
purchase a reverse osmosis or deionisation or RO/DI (combined unit) water filter
for tap water; this investment will soon pay itself back to you, and they are getting
cheaper all the time. Alternatively you can purchase prefiltered/distilled water or pre-
prepared saltwater, which is a more expensive option in the long term.
2. Next up would be a high quality salt mix if you are using filtered freshwater, this
should closely replicate the chemical composition of natural seawater (NSW) and
will add in all the vital minerals and trace elements your marine life need for
health. Be careful that your salt mix doesn’t contain unwanted additives like
phosphates etc, check the ingredients.
Now that we have the nuts and bolts of a good quality saltwater source figured out
the next major parameter required for high quality saltwater aquarium water are a
high level of oxygenation and strong water movement.
3. Oxygenation can come from a good protein skimmer, but also airstones, water
pumps and powerheads; anything that moves water around rapidly or puts bubbles
into it. All marine life breath oxygen as do we humans so this is important especially

© Andrej Brummer – 2014. 96
as saltwater absorbs 250 times less oxygen than freshwater so we want a high water
turnover at the surface of the tank where oxygen can be absorbed.
4. Strong, multidirectional water movement as I have mentioned before is
especially important for corals and other sessile invertebrates; to bring them their
plankton food and nutrients, clean them of detritus and oxygenate them. You can
never really have too much water movement in a marine aquarium; it stirs up detritus
and prevents anoxic (oxygen free) zones forming where organic debris could start
decaying anaerobically releasing deadly toxins into the water. A series of
powerheads pointed at each other will do the job (one in each corner is great); you
can even put them on timers to emulate ebb and flow. You can also get advanced
programmable propeller pumps to simulate different reef water movements and
waves.
Powerheads are your friends!
Testing Water Quality
Regular testing of your water parameters will be required to ensure your aquarium
and marine life are in optimal health at all times.
Testing your water may seem like a chore but things change in your saltwater
aquarium water over time and you need to stay on top of what is going on because

© Andrej Brummer – 2014. 97
poor water quality is the number one killer of marine life around the world. After
you get into a routine of testing it becomes that much easier, especially when you
know how often you need to test the various parameters.
Testing also acts as an early warning system for the environment your marine life
live in; it will tell you if there is a problem somewhere and give you time to act before
it gets worse. This is especially true for smaller aquariums where things can change
very rapidly because of the small volume of water present to buffer any changes.
Regular water testing can easily save the life of all your pets if a test result shows a
parameter at dangerous levels, you will be able to act immediately which is why it is
vital to not rely on the pet store or aquarium guy to do this for you, if you have to rely
on someone else it may be too late. This may save you a little bit of time but it’s just
not worth the risk.
Things are much simpler for marine aquarists these days than they used to be and
every vital element and parameter can be easily and quickly tested for using test kits
and testing equipment which will tell you exactly what is going on in your aquarium. I
have said this before, but it needs repeating: you should also log all your results in
an aquarium journal to keep track of changes over time this will teach you how your
aquarium is functioning so it becomes predictable and you can anticipate any
changes.
Temperature: The ideal water temperature for a saltwater aquarium is 77-80°F (25-
27°C) this should be achieved using 2 heaters depending on your aquarium size, 2
heaters means that the damage to your tank will be minimal if a heaters sticks on or
fails.
If you live in a warm house/climate or have metal halide lights you may need to
purchase a water chiller too, especially if you have a reef aquarium. A chiller is
particularly useful if your temperatures are fluctuating more than 4 degrees (F)
over less than 12 hours, this will stress out your marine life.

© Andrej Brummer – 2014. 98
A chiller: good for hot climates and temperature fluctuations.
To accurately keep the temperature in the range 77-80°F (25-27°C) you will need an
accurate thermometer. Even better is a good quality temperature controller unit
hooked up to your heater that will keep temperature fluctuations to a minimum and
lead to less stressed marine life. These units can be linked to both heater and chiller
to provide a VERY stable climate.
pH (alkalinity): Testing the pH level of the water requires a testing kit. They're
available from most aquarium retailers or online stores, for around $10-15. You'll
want to test the water every few days, and after any additions to the tank - including
water changes or new tank decorations. The ideal pH level for a saltwater aquarium
should be 8.3.
In a fish only set up the pH can range from 7.6 to 8.4 without causing harm to the
fish. In a reef tank the invertebrates are more sensitive requiring a pH range of 8.0 to
8.4.
© Andrej Brummer – 2014. 99
How pH works in your tank and how to adjust it
In a saltwater aquarium set up the pH is normally likely to go down overall (become
more acidic) mostly as result of organic acids produced by biological waste from
ordinary respiration of your pets. Usually the waters buffering system can retard this
pH drop to a degree but it does begin to wear out after a while and the buffering
chemicals such as calcium, carbonate, and bicarbonate need replenishing. This is
where the term “alkalinity” comes in; it is the waters buffering ability to stay
alkaline in the presence of these acids.
The best way to stabilise pH is with regular partial water changes, which replenishes
the aquariums buffering capacity, and also adds back vital trace elements that get
used up by marine life.
If the pH is too low you can add a pH reduction product. If its too high you can add a
pH increaser product or baking soda, you just have to be careful as the basic baking
soda can burn marine life before it gets diluted.
A pH probe is much quicker to use than strips.

© Andrej Brummer – 2014. 100
Ammonia/Ammonium, Nitrite and Nitrate:
These substances are all Nitrogenous compounds (composed of the element
Nitrogen) formed from the breakdown of biological waste and organic matter. All
should be scrubbed up by effective biological filtration and be kept to an absolute
minimum. Test kits are readily available for each compound. Ammonia and Nitrite
are particularly toxic to marine life and should only be present during biological
cycling in a new aquarium, ideally you will have a zero reading for these.
1. Ammonia: Having too much of a build up of ammonia within the tank will harm
your fish, literally it will burn their delicate skins. An established aquarium should
have 0 parts per million (ppm) ammonia level - which is determined with a test kit.
Ammonia is a natural by-product of animal metabolism, and also comes from
decomposition of plant and animal wastes which breakdown directly into ammonia;
but it is toxic to fish. Ammonia is especially dangerous when transporting fish in
small volumes of water, because soon after the fish excrete ammonia is formed from
the waste, you would need an ammonia deactivator for a situation like this .
Use an ammonia testing kit weekly to make sure the levels are remaining constant,
and if they start to rise, it could signify a problem with your filter not being clean, or
too infrequent of water changes. A weekly test is only necessary if your tank is not
established yet, if it is you only really need to test for ammonia if something is going
wrong.
2. Nitrates & Nitrites: Nitrite comes from the breakdown of ammonia and should
also be present only in tanks that have not yet completed the biological cycling
process. So unless your tank is cycling nitrite readings should be zero - this needs
be as close to none as possible as nitrites are toxic to fish, nitrite is in turn converted
by bacteria into nitrate.

© Andrej Brummer – 2014. 101
Nitrate is the end product of biological filtration, and comes from the decomposition
of nitrites. There are separate testing kits that allow you to check the level of nitrates
and nitrites within the aquarium.
Fish only aquariums should have less than 50ppm (~20mg/litre) of nitrates. Reef and
FOWLR (fish only with live rock) aquariums should have less than 20ppm
(~3mg/litre) nitrates. If your test results reveal increasing levels of nitrates, you need
to change your filter more often, or replace it if it's not functioning properly. Nitrates
can be removed from the water by conducting regular partial water changes (as can
ammonia and nitrites – BUT their rapidly increasing presence in an established tank
indicates something is wrong, for example a hidden decomposing fish).
These days testing kits for nitrogenous waste are easy to use and fast.
Water Hardness:
The hardness of water influences the regulatory functions of fish, plants and micro-
organisms within the aquarium. Water hardness differs depending on where you live.
If you are using distilled, purified water, instead of tap water, the hardness of the
water you use should be constant. When you purchase your purified water, see if
you can find it with water hardness above fifty but under two hundred parts per
million as this is the water hardness level in which fish thrive.

© Andrej Brummer – 2014. 102
Carbonate Hardness (dKH):
This is the measure of alkalinity or buffering capacity of saltwater, which is
essentially the pH stabiliser (and is different from water hardness!). Ideally you will
have 9-12dKH this will provide good buffering against pH fluctuations. This can best
tested for with carbonate hardness test kits. Carbonate hardness is mainly a concern
for reef tank owners as corals are very sensitive to pH changes.
You can increase your water's buffering capacity with a carbonate hardness buffer.
Calcium Reactors are high tech pieces of equipment that offer a fantastic solution
to the problems of pH fluctuations, carbonate hardness and calcium dosing
(especially important for reef building corals) all in one unit. Aquarium water, CO2
gas and calcium carbonate are combined in a reaction chamber to produce
injections of calcium bicarbonate that provides the calcium vital for invertebrates’
growth, adequately buffer aquarium water and corrects pH. Calcium reactors are
strongly recommended for reef aquariums as corals use a lot of calcium and are
more sensitive to pH fluctuations.

© Andrej Brummer – 2014. 103
Got a reef tank with lots of hard corals? You should get a calcium reactor.
Salinity/Specific Gravity:
Specific gravity is a weight ratio of one litre of a substance (saltwater in this case)
compared to one litre of pure water and is temperature dependant. It is essentially a
way to measure the salt content in your aquarium and to make sure it is as close as
possible to seawater. This is an important parameter of good quality aquarium water.
A salinity level of “0” is equivalent to a freshwater aquarium. Ideally the level for a
marine tank should be 1.023. A high level of salinity may require attention, as it is
possible there is not enough oxygen being absorbed by the water.
Hydrometers are used to measure specific gravity. Conductivity however is a more
accurate measure. The conductivity of your aquarium water should be 50.1 ms/cm
@ 25°C this can be measured using conductivity probe.

© Andrej Brummer – 2014. 104
Hydrometer: necessary to measure salinity/specific gravity.
Specific gravity will change with the event of evaporation, which leaves behind salt
and increases specific gravity and salinity that will harm marine life; this is why we
need to measure it regularly. If it‟s too low add more salt mix, too high add more
purified water.
It‟s important to note that marine life from the Red Sea which has a higher salt
content than the rest of the worlds oceans need their specific gravity at 1.024-
1.025 to be optimally healthy.
- All the major water quality and water chemistry components have now been
covered for fish only aquariums if you have a FOWLR aquarium with a few corals
and other invertebrates or a reef aquarium you must also consider the following
parameters:
Phosphates:
Phosphate levels must be kept to a minimum, even though phosphate is a major
nutrient for corals. Ideal phosphate levels should be less than 0.05ppm (or 0.01
mg/litre).

© Andrej Brummer – 2014. 105
Phosphate can be introduced to the aquarium in many forms (unfiltered water,
overfeeding, non-phosphate free salt mixes or medias) and excess leads to algae
blooms that are particularly undesirable in reef aquariums where it grows on the
corals and can suffocate them. So you should test new aquarium products for
phosphate by putting them in water for an hour then testing that water. Phosphates
are additionally not very well tolerated by corals.
Phosphate test kits are cheap and easy to use. Phosphate removal media is a very
good way to get rid of excess phosphate from your system. Regular water changes
help with keeping on top of phosphate levels.
PhosBan is a very good phosphate removal media.
Calcium:
This element is a very important compound in reef aquariums as hard corals,
molluscs, soft corals and crustaceans use a lot of this compound to build their
skeletons. Calcium is used up from the water fast in an established aquarium; as
much as 15mg/litre per day! Reef building SPS corals use the most calcium.
Calcium levels are ideally 420mg/litre, which is the same as NSW. Test kits can be
used to give a handle on this vital element calcium can be dosed into your aquarium
using a calcium reactor and not simply by adding coral sand to your aquarium as
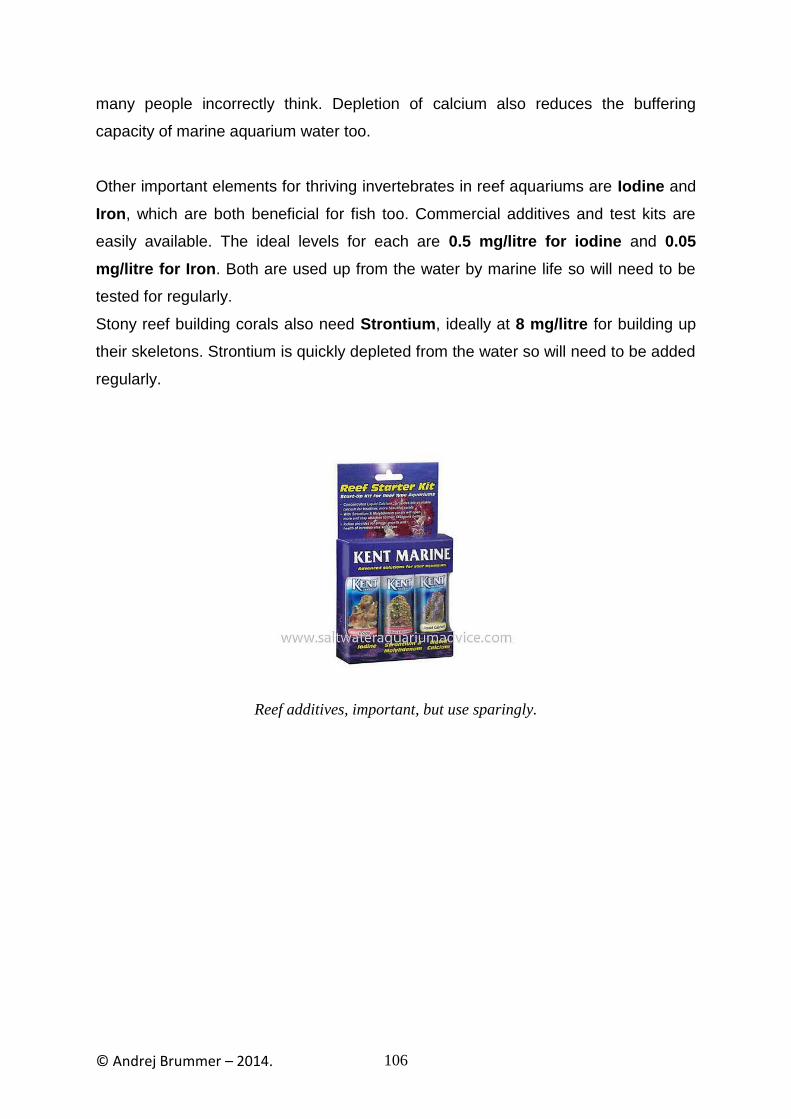
© Andrej Brummer – 2014. 106
many people incorrectly think. Depletion of calcium also reduces the buffering
capacity of marine aquarium water too.
Other important elements for thriving invertebrates in reef aquariums are Iodine and
Iron, which are both beneficial for fish too. Commercial additives and test kits are
easily available. The ideal levels for each are 0.5 mg/litre for iodine and 0.05
mg/litre for Iron. Both are used up from the water by marine life so will need to be
tested for regularly.
Stony reef building corals also need Strontium, ideally at 8 mg/litre for building up
their skeletons. Strontium is quickly depleted from the water so will need to be added
regularly.
Reef additives, important, but use sparingly.

© Andrej Brummer – 2014. 107
Here are 2 easy to use water testing charts to help you:
1. Testing parameters and frequencies recommended for a Fish only marine
aquarium set up:
2. A FOWLR set up with a handful of invertebrates + corals and a reef aquarium
have a few extra parameters added on for the coral and other invertebrates to grow
optimally:
Parameter: Method: Frequency: Acceptable range: Ideal level:
Temperature Thermometer Daily 77-80'F (25-27'C) 26'C
pH pH probe 4-5 times a week 7.6-8.4 8.3
Ammonia Test kit Daily if cycling, every 2 weeks if not None None
Nitrite Test kit Daily if cycling, every 2 weeks if not None - 0.01ppm None
Nitrate Test kit Weekly 10-50 ppm None
Specific Gravity Hydrometer (or
conductivity probe)
Weekly 1.020-1.024 (45.3-
51.5 ms/cm @25'C)
1.023 (50.1ms/cm
@25'C)
Carbonate
Hardness (optional)
Test kit Twice monthly 7-12 dKH 9 dKH
Parameter: Method: Frequency: Acceptable range: Ideal level:
Temperature Thermometer Daily 77-80'F (25-27'C) 26'C
pH pH probe 4-5 times a week 8.0 -8.4 8.3
Ammonia Test kit Daily if cycling, every 2 weeks if not None None
Nitrite Test kit Daily if cycling, every 2 weeks if not None None
Nitrate Test kit Weekly less than 20 ppm None
Specific Gravity Hydrometer (or
conductivity probe)
Weekly 1.022-1.026 (48.7-
53.3 ms/cm @25'C)
1.023 (50.1ms/cm
@25'C)
Carbonate
Hardness
Test kit Twice monthly 9-12 dKH 9 dKH
Phosphate Test kit Weekly (preventitive) 0- 0.04 ppm 0.01 ppm
Calcium Test kit Twice monthly 380- 450 ppm 420 ppm
Iodine Test kit Experts only 0.4- 2 ppm 0.5 ppm
Strontium Test kit Twice monthly 5- 15 ppm 8 ppm
Iron Test kit Twice monthly 0.03- 0.05 ppm 0.05 ppm
Magnesium Test kit Twice monthly 1250- 1350 ppm 1280 ppm
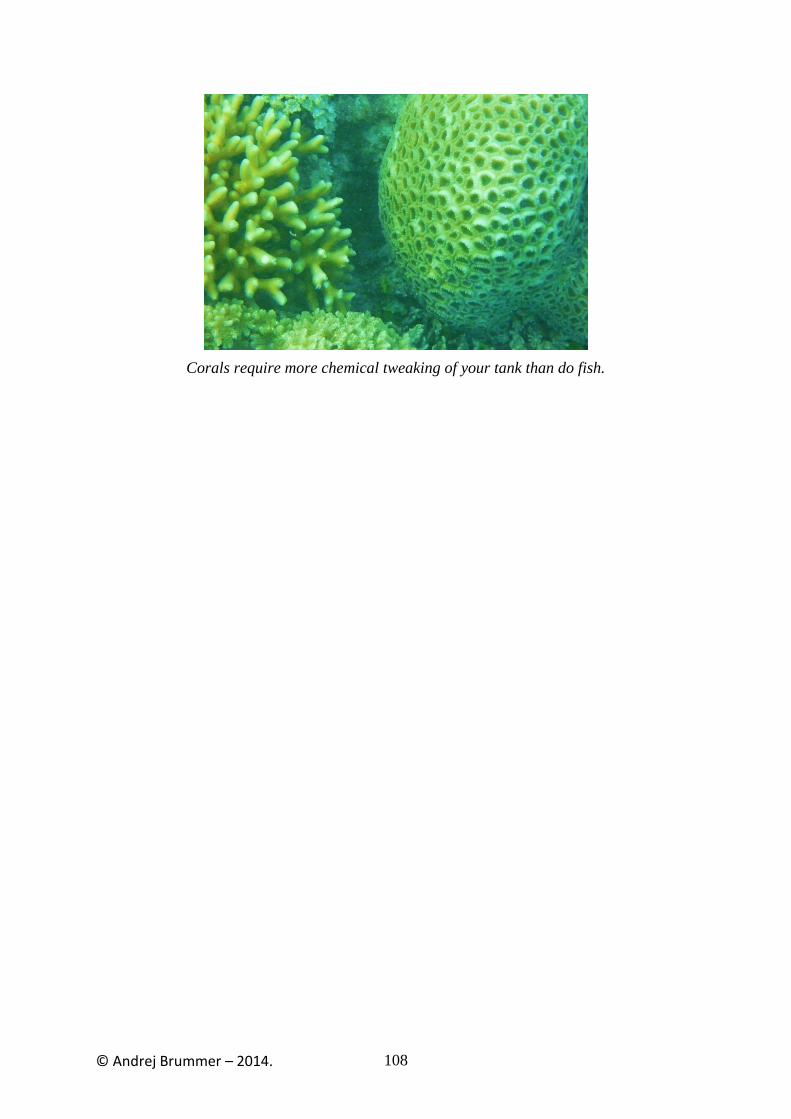
© Andrej Brummer – 2014. 108
Corals require more chemical tweaking of your tank than do fish.
© Andrej Brummer – 2014. 109
Heating and Cooling Your Saltwater Aquarium
Saltwater aquariums are almost always stocked with tropical marine life (you can
also have cold water marine set ups, but these are relatively uncommon), which by
definition is marine fish and invertebrates that come from tropical regions of the
world where water temperatures are a constant, balmy 77-80°F (25-27°C). This
marine life can only tolerate small and gradual changes in water temperature.
This universal characteristic of our favourite marine pets makes temperature (heating
and cooling) a vitally important aspect in any marine aquarium. The importance of
heating is often under-estimated by new marine aquarists, which can lead to heating
disasters, the easiest way to wipe out your entire tank results from heater
malfunctions, such as a single big heater being “stuck on” or not heating at all. A
heater being stuck on and causing all the inhabitants to perish is the source of many
a sad email to me.
Get a Good Heater!
The best thing you can do to prevent heating disasters is to buy a quality heater.
Cheap, poorly made heaters (for example many Chinese brands) can and do often
get stuck on or fail to heat; they can also be a fire risk in your home.
You need to look at your heater(s) as a life support system for your marine life;
choosing the cheap and cheerful option can often cost so much more in the long run.
A good heater is fully submersible as opposed to hang on. This is because if the
water level drops the hang on model can overheat and burn out. Another important
feature of a quality heater is being made of shatterproof material and is also
corrosion resistant. New titanium heaters are an excellent investment in my
opinion, these heaters are accurate, conduct heat brilliantly and mostly have a built
in temperature sensor which shuts off the unit if it comes into contact with the air
which would otherwise cause the heater to overheat and break.
Temperature Controller Units
A temperature controller unit is advisable to use with heating and cooling units, this
does all the leg work for you and keeps fluctuations to a minimum, which is very

© Andrej Brummer – 2014. 110
good news for marine life. I also advise a thermometer with an audible alarm (or one
that messages your smart phone!) as an extra measure.
Heater Tips
As I have hinted at earlier on another good practise is to go for 2 smaller heaters as
opposed to one big one; this will make it harder for one to overheat the tank before
you realise (if it gets stuck on which does happen) and if one stops heating the tank
temperature wont drop severely so shouldn’t cause massive damage to you marine
life. This means the tank will only cool down or heat up half as fast and that gives
you twice as much time to save your marine life!
Remember to handle all heaters with care and set-up as per manufacturers
instructions, turn units off when exposing to air or performing maintenance and keep
them clean, especially so you can see the indicator light is on. Always plug them into
a Ground fault circuit interrupter (GFI).
A good heater: titanium with a temp. control unit.
Chillers
If you live in a hot climate, prefer your home a little warmer or have an intense
lighting set-up (such as metal halide fluorescent lights for a reef aquarium; which are
the hottest lights) chances are you will need an aquarium chiller, which will keep
your marine aquarium water below a particular set temperature. This is especially

© Andrej Brummer – 2014. 111
important when you keep corals because the lighting requirements they have create
a lot of heat generation from the bulbs, often times this can cause a water
temperature increase of around 7°F! These lighting set ups can often mean you wont
need your heater turned on, however it is advisable to have one as a back up. Once
again as the correct temperature is so important it is my advice to purchase a
quality chiller unit.
When both a chiller and a heater are hooked up to a temperature controller this is
ideal to keep the temperature in your saltwater aquarium constant no matter what
else maybe happening and you marine life will love you for it.
Temperature controller unit can power your heater and chiller.
The Nitrogen Cycle In Detail
The Nitrogen cycle is one of the most crucial biological pathways that takes
place in your saltwater aquarium. It is carried out by microscopic marine bacteria
found in all seawater and occurs naturally in the ocean, understanding it is our key to
successful marine aquarium keeping.
This cycle is the cornerstone of biological filtration and is crucial to initiate correctly
when you first set up your aquarium, as we have seen this is called “cycling”.

© Andrej Brummer – 2014. 112
Back in the 70’s when this hobby first started to emerge, the nitrogen cycle was not
very well understood, which resulted in fish, corals and invertebrates having a very
short life in captivity due to high mortality. Once people came to terms with
understanding the microbiological processes happening in their marine eco-
system marine aquarium keeping became much more mainstream as marine life
survival rates became much higher.
The nitrogen cycle is initiated by biological waste products of your marine life (i.e.
excretion) and decaying organic matter:
1. Waste is excreted from marine life in the form of protein, which is quickly
mineralised into ammonia/ammonium (NH3 or NH4); ammonia also comes from the
breakdown of food particles and decaying organisms. This ammonia is highly toxic to
marine life and will also lower the pH of your tank if present in high enough
quantities. In oceans - which are huge, the buffering capacity of the water is so great
ammonia cannot get a chance to build up, but in an aquarium (a small closed
system) this is much more of a problem. Ammonia burns gills of marine fish.
2. But, luckily nature has a solution for us in the form of a marine bacterium
(Nitrosomonas) who use this substance as their energy source and aerobically
convert it to nitrite (NO2). Nitrite is less toxic than ammonia but still nasty.
3. Yet another bacterium (Nitrobacter) then comes along and converts nitrite to
nitrate (NO3). Nitrate is again less toxic than nitrite and readily absorbed by plants
that use it for growth, this build up of nitrates is a common cause for excessive algal
growth. Then to complete the cycle the plants decay or are eaten by fish and the
whole cycle begins again.
Nitrate is also harmful to marine life in high concentrations; as little as 20ppm will
harm corals (however corals require trace levels of nitrate to grow well) and fish will
become uncomfortable when levels reach 50ppm. It is these 2 types of bacteria
that make up our biological filters by growing on live rock , sponges or other
types of filter media.

© Andrej Brummer – 2014. 113
4. Remember, the final phase of the nitrogen cycle is called denitrification this is an
anaerobic (oxygen free) reaction whereby anaerobic bacteria covert the nitrate into
harmless nitrogen gas that bubble to the surface of the water and enters the
atmosphere completing the nitrogen cycle.
Getting rid of nitrates
Another way to get rid of climbing levels of nitrates other than by using live rock
(which is the easiest way) is by doing regular partial water changes (I recommend
10% per week), growing marine plants which use nitrate for growth or by using a
denitrifying filter.
While cycling your aquarium Ammonia and Nitrite levels tend to peak and then drop
to undetectable levels as they are converted to the next compound in the pathway,
but unless the nitrate is removed manually or you have enough live rock to cope with
this it will soon build up to harmful levels.
Now you can see how the nitrogen cycle plays a crucial role in the marine aquarium
and is the cause of one of the major disasters that can befall a new aquarium; when
it is not cycled correctly and the marine life dies because of the water toxicity.

© Andrej Brummer – 2014. 114
Big active fish like this Emperor Angelfish produce a LOT of nitrogenous waste!
Nurturing Your Beneficial Bacteria
Having a correctly functioning nitrogen cycle in your aquarium requires regular water
testing and ensuring that the bacterial populations in your biological filter are not
physically damaged or removed (such as any process that removes too much from
the filter media) or chemically damaged (adding something to the water that will kill
them off), this is critical for your tank to survive.
Biological Filtration in a Nut Shell
A biological filter in a saltwater aquarium is simply the place where bacteria are able
to grow. The biological filtration system includes all surfaces within the aquarium
that come into contact with the water. The movement of the water that passes over
the bacteria affects the efficiency of the biological filtration system; the faster the
water moves- the better. Bacteria are literally stripped from the filter surface.

© Andrej Brummer – 2014. 115
Protein Skimming = Mechanical Filtration
After biological filtration the next most important aspect in maintaining the good
water quality you need (especially for corals) has to be physical filtration done by
protein skimmers (a.k.a. foam fractionators).
These waste products are anything organic from uneaten food to fish excrement,
detritus, decaying marine organisms. As I have explained it all breaks down into the
same substances by the work of microscopic bacteria.
Skimmers get rid of dissolved organic wastes in the form of protein and amino acids
before they breakdown and are converted to the toxic compounds ammonia and
ammonium.
What Exactly Do Protein Skimmers Do?
The protein skimming process removes undesirable dissolved nitrogenous waste at
the source and greatly reduces the load on biological filtration microbes. This means
fewer nitrates are being produced in the system and the water is more stable a very
good thing!
Other than protein, skimmers also remove fats and fatty acids, carbohydrates and
trace elements such as copper and important iodine (which will need to be topped up
in reef aquariums). Contrary to popular belief skimmers do not remove plankton
because they are simply too big.
So not only this removal of noxious substances, but protein skimmers also serve
to oxygenate the water, reduce algae growth, increase water clarity and
increase its reduction/oxidisation potential all of which are also highly beneficial
for our marine life.

© Andrej Brummer – 2014. 116
How Does Protein Skimming Work?
The organic waste material we don’t want likes to accumulate at the water’s surface
as protein is attracted to air and away from water (hydrophobic) and protein
skimmers use this phenomenon in that dissolved organic molecules are also
attracted to air bubbles which they stick to and then rise to the surface of the
skimmers reactor chamber to be trapped and separated from the rest of the
aquarium water. This residual foam should reduce into about a cup a day of smelly
brown liquid, which you most definitely will be glad has left your aquarium water!
It deserves a mention right here and now that you cannot skim an aquarium too
much, protein skimmers should run constantly and if your aquarium is quite big you
should have two, these things really are worth their weight in gold.
The process of protein skimming also occurs in the ocean with the natural wave
action over reef environments creating sea foam that deposits proteinaceous waste
on the shore.
What Skimmer Should You Get?
I strongly recommend any marine aquarium owner to purchase a good quality high
capacity skimmer; the best you can afford. This is an investment in the health and
well being of your marine fish and invertebrates. These wonderful devices are an
absolute must for every saltwater aquarium there is nothing better that improves
water quality.
Protein skimmers can be inside aquarium, hang-on back or in sump models.
Hang on and in sump options are the best in my opinion. Water fed from the very
surface of the saltwater aquarium is more desirable as this is where most dissolved
waste will accumulate.
In sump models should be able to catch all water from the aquarium, ideally from a
surface overflow box first before any other water processing takes place (such as

© Andrej Brummer – 2014. 117
mechanical filtration) to be most effective. They should sit in a contained area with a
constant water level (reduces stress on skimmer parts) in a sump within a sump so
to speak; this keeps the unskimmed water from flowing to other areas of the sump
allowing the most effective water filtration route possible.
So, What Makes a Good Skimmer?
The flow rate/turnover of the skimmer pump (gallons per hour) should be around 5
times the tank volume as a general rule; we want a high volume of water
processed.
Also the finer the bubbles produced the better, as efficiency is all about surface area
and small bubbles have more surface area in the reaction chamber than big ones
(because there are much more of them!) so more waste is removed.
A longer contact time between water and bubbles increases efficiency as well, so a
larger skimmer works better than a smaller item. We also want a lot of consistently
small bubbles with the right water to air ratio for maximum water removal efficiency.
When you first set up a skimmer you may need to tweak the air/water volumes to
produce the best efficiency possible for your system, do this by keeping one constant
and adjusting the other, you will be able to tell this by the appearance of your
skimmate which should be dark brown; aim for a cup per day.
Different Types of Protein Skimmers:
Here is a brief explanation on some of the different types of protein skimmers just so
you can understand the main differences between them.

© Andrej Brummer – 2014. 118
Counter- current and co-current skimmers
Counter-current skimmers are more efficient than co-current (water and bubbles
flowing in the same direction: the earliest skimmer models) skimmers because with
counter-current models there is a longer reaction time between bubbles and water
because the water has to flow down through the upward stream of bubbles then
back up, which means more waste is removed because of increased contact or
“dwell” time.
The earliest and most simple skimmer types; co-current, air driven skimmers also
use lime wood air diffusers (which decay and block up with time so need to be
replaced) to produce bubbles.
Venturi-style skimmers
Years later an inventor by the name of Mazzei developed a “Mazzei Valve”. All
skimmers that use the Mazzei Valve are called Venturi-Style Skimmers. They use
air-injection created within the valve, so the Venturi valve was invented to draw in air
from the output side of the water pump then injects both the water and air as a high
pressure whooshing, foaming mass into the reaction chamber which also increases
air-water contact time, efficiency and output. This model type does away the need for
an airstone or air diffuser and gives better efficiency for less cost as co-current air
driven, however there are quite a few ineffective models on the market to beware of.
Needle Wheel Skimmers
An alternative to the Venturi design is the aspirating skimmer, which pulls in air and
water together from the water pump intake side then “chops” it up using an impellor
such as the “needle wheel” design to create much finer bubbles to be injected into
the reaction chamber, again increasing efficiency and contact time. These types of
protein skimmers are typically very efficient, consistent performers and take up
relatively little space compared to the other types, the best models are not cheap but

© Andrej Brummer – 2014. 119
require little maintenance and perform fantastically, especially the “needle-wheel”
models.
ETS's & Down-Draft Skimming
Another relatively new protein skimmer innovation is the downdraft skimmer or
ETS (environmental tower skimmer). This type of skimmer uses a long tube that
connects to the sump down which water is forced by a large pump down over bio-
balls which diffuse the water violently and turn it into a foam where it enters the sump
and is collected after a long dwell time. By the time the water makes the journey from
the top of the tube to the bottom, the water has become a sea of foam. A collection
cup is placed at the top of the tube, and the protein-rich froth that was created rises
up and “deposits” the junk stripped out of the water. These skimmers are big,
expensive to purchase and operate and are especially good for larger aquariums
since they can process large volumes of water.
Cone Skimmers
One of the newest protein skimmer forms to emerge is the cone skimmer; this
conical body shape allows for a more effective accumulation of protein-rich foam with
reduced turbulence and massive efficiency benefits.

© Andrej Brummer – 2014. 120
A good cone protein skimmer
Protein Skimmer Summary
a protein skimmer is a very valuable addition to your marine aquarium; buy the best
you can afford and clean it out regularly (the reaction chamber neck, collection
vessel and air injecting unit especially). A high efficiency, large capacity skimmer
that is easy to clean and adjust is a good skimmer. The best protein skimmers
are reliable and require little maintenance and adjustment they should serve your
marine life well for years to come.
Beneficial Micro-Organisms in Rocks and Sand
Basically for you to recreate a small slice of the ocean in your home, you need a
myriad of micro-organisms that are a crucial to the ocean eco-system. This is the
reason why early saltwater aquariums (like in the 70’s dude!) ended up having all the
marine life dying; especially corals, which people began to think could simply not
survive in captivity.
And right there is where live rock and live sand come in, you see live rock is taken
from rubble zones of ocean reefs it is very porous and in these pores live micro-

© Andrej Brummer – 2014. 121
organisms and tiny invertebrates that break down the waste products created by the
nitrogen-cycle in the ocean. So essentially to breakdown the waste products (from
excretion) in your aquarium it only makes sense that you require the assistance of
such organisms. So live rock and sand is fundamentally the biological filtration agent
of the oceans.
Before you go hurling chunks of live rock and handfuls of sand into your aquarium,
this stuff needs to be cured before it comes into contact with your marine life or else
the early stage decomposition that it will undergo can harm your marine life and
throw out your water quality by adding ammonia and debris. Curing initiates the
nitrogen cycle and takes about 5 weeks to do it properly, you want to initiate the
nitrogen cycle so the micro-organisms break down the waste products of your
marine life which if left unchecked will build up to toxic levels. During this curing
process you will want to change the water about once a week, replacing 25% at a
time. A good rule of thumb is to use 1.5 pounds of rock for every gallon of water.
Remember to check with the seller of the live rock to see whether the curing
has already been done, if you have to do it yourself it may seem like a lot of effort
but it is well worth it. Your marine aquarium will be a much more healthy and efficient
eco-system with a lot less toxic nitrates in the water. Also now you know how to cure
live rock, if you live in a tropical beach environment you can go and harvest your own
live rock from reef rubble zones and save a ton of money!
Setting Up a Live Base For Bacteria
All saltwater aquariums need beneficial micro-organisms to remain a healthy
environment. Most people will build the foundation of their aquarium by lining the
bottom of the tank with a calcium-rich, aragonite marine substrate. This is basically
the little stones you see on the bottom of fish tanks.
The substrate, once seeded will eventually be loaded with beneficial bacteria that
reduces the cycling time of your aquarium, and helps maintain the ideal water
chemistry and pH levels. It basically provides additional surface area for the bacteria

© Andrej Brummer – 2014. 122
to adhere to; approximately 20,000 square inches per cubic inch, which serves your
biological filtration system.
On top of the substrate, you can add two or three inches of live sand (this is the
seeding). As I have said live sand also provides beneficial bacteria and micro-
organisms and it has been harvested from the sea bed. Live sand may play a very
important role in denitrification (removal of waste nitrate from your aquarium) if it is in
a deep enough layer (probably more than 6 inches deep) so that no oxygen gets to
the base few inches.
Aragonite substrate, if you do want substrate use this and live sand!
On top of this foundation layer, you can add your live rock. As we know the rocks
hold many beneficial bacteria, micro-organisms, interesting hitchhikers and
encrusting animals and plants. Remember it also serves to give your smaller fish and
aquarium life a place to hide, which the need to be optimally happy. Live rock
massively increases biological filtration within the tank, and simply looks appealing
and creates a more natural environment for your marine life. There is no downside,
except the cost!
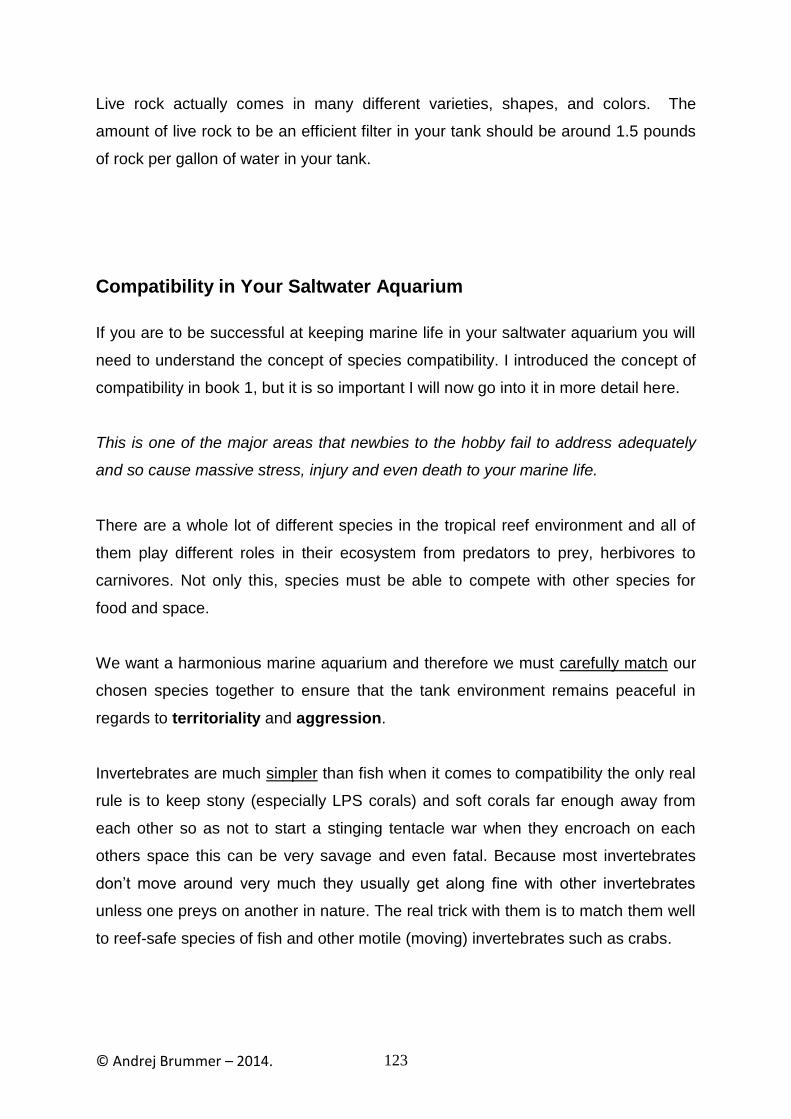
© Andrej Brummer – 2014. 123
Live rock actually comes in many different varieties, shapes, and colors. The
amount of live rock to be an efficient filter in your tank should be around 1.5 pounds
of rock per gallon of water in your tank.
Compatibility in Your Saltwater Aquarium
If you are to be successful at keeping marine life in your saltwater aquarium you will
need to understand the concept of species compatibility. I introduced the concept of
compatibility in book 1, but it is so important I will now go into it in more detail here.
This is one of the major areas that newbies to the hobby fail to address adequately
and so cause massive stress, injury and even death to your marine life.
There are a whole lot of different species in the tropical reef environment and all of
them play different roles in their ecosystem from predators to prey, herbivores to
carnivores. Not only this, species must be able to compete with other species for
food and space.
We want a harmonious marine aquarium and therefore we must carefully match our
chosen species together to ensure that the tank environment remains peaceful in
regards to territoriality and aggression.
Invertebrates are much simpler than fish when it comes to compatibility the only real
rule is to keep stony (especially LPS corals) and soft corals far enough away from
each other so as not to start a stinging tentacle war when they encroach on each
others space this can be very savage and even fatal. Because most invertebrates
don’t move around very much they usually get along fine with other invertebrates
unless one preys on another in nature. The real trick with them is to match them well
to reef-safe species of fish and other motile (moving) invertebrates such as crabs.
© Andrej Brummer – 2014. 124
To a certain extent a particular marine fish species eating habits can dictate its
behaviour, but there is much more to compatibility than this. The only way to
anticipate how one species will react to another is to research it thoroughly and there
are many good resources around. As we have seen like species can go with like (for
example algae eating species), but often times you cannot add more than one or two
of the same species as territorial instincts come into play which will result in fighting.
A good way to avoid this type of behaviour is to have enough space for fish to get
away from each other and a few different areas fish can use as their home base.
There are 2 golden rules of marine fish compatibility:
A small fish that can fit into a larger fishes mouth may end up being an
expensive treat!
The less related and similar looking (size, shape, colouring, pattern, even diet)
fish are the more likely that they will get along well.
Common Incompatibility Causes:
Compatibility issues usually fall into the following categories:
1. The predator-prey relationship: Basically you will need to ensure if you
keep any large, carnivorous predator species for example Groupers,
Lionfish, that you do not also have small potential prey species that it
may eat in its natural environment especially if it fits in the carnivores
mouth. Keep it with other like aggressive species, larger species or
don’t get one at all. Watch your motile (moving) invertebrates too!
2. Opportunity feeders: these are species that will snack on anything if
given the chance like Triggerfish, so it is not advisable to keep them
with invertebrates or other small species. Also there are quite a few
types of fish that enjoy the occasional coral polyp snack that should be
avoided in a reef set-up.

© Andrej Brummer – 2014. 125
Triggerfish commonly can "taste" a chunk of other fish and even you!
3. Fish protecting their mates: When you have a mating pair and you
introduce another individual of the same species there will often be
aggression from the same sexed fish of the pair towards the
newcomer. Avoid this scenario as often they can fight to the death.
4. Fish protecting their young: This one is also rather obvious, fish that are
spawning will be very protective of their young; warding off all fish
around their nesting area. This aggressive behaviour can be countered
with housing for the nesting species and plenty of space.
5. Territorial behaviour: This is the most common form of incompatibility a
marine aquarist will have to face. When you put a few different fish into
a new aquarium at once this is optimal because fish (all being new)
will have not already established a territory or home range. The
problem lies in when you add a new aquarium inhabitant into an
established aquarium community; it may well end up being harassed
regardless of what species it is by the more territorial of its tank mates
which essentially have a natural instinct to protect their territory that
they have already established. Damselfish are well known for their
territoriality. The best thing you can do is swap water over and put the
fish side by side as I have already mentioned in book 1.

© Andrej Brummer – 2014. 126
Territorial behaviour is made worse if the new addition is a member of an
existing species (or close relation) in your aquarium. This behaviour decreases
the less similar the new marine fish is to existing sizes, shapes and colours of fish
already in your aquarium!
The general rule here is to only have one example of the same species in your
aquarium if you want more its best to introduce them at the same time so they do not
get victimised by the more established of their species. You could also try getting
the opposite sex fish and have a pair, which works for lots of fish species.
Dealing With Territorial Behaviour:
There are a few ways territorial behaviour (the most common reason for bullying)
can be remedied and you can save that fish being harassed but you will need to get
adventurous:
1. You can place the new addition inside a physical barrier (such as
transparent plastic with holes) placed in the aquarium for a couple of weeks
and remove this after all fish concerned have gotten used to each other.
2. As I said above you can even do this using separate tanks placed close to
each other for the quarantine period of 2 weeks, mixing a good 500ml of each
other’s water in every few days so they can get used to the “smell” of all
concerned.
3. Another option is to remove all established fish from the aquarium then
rearrange all the aquascaping before placing them back in with your new
addition at the same time, I have seen good success with this method.
As you can see compatibility can be a huge issue but if you do your homework
correctly it shouldn’t be a problem, but there are always exceptions. If worst comes

© Andrej Brummer – 2014. 127
to worst you can always try asking your fish supplier if you can return your
incompatible fish and swap it for a more compatible fish.
Please understand that all marine fish are very different and it is outside the scope of
this ebook to be able to recommend which of the hundreds of fish species can go
with which, you will need to do your own specific research, either online or with a
marine species compatibility book (one with tables is helpful!).
Dont put a Moray Eel in with tiny fish!
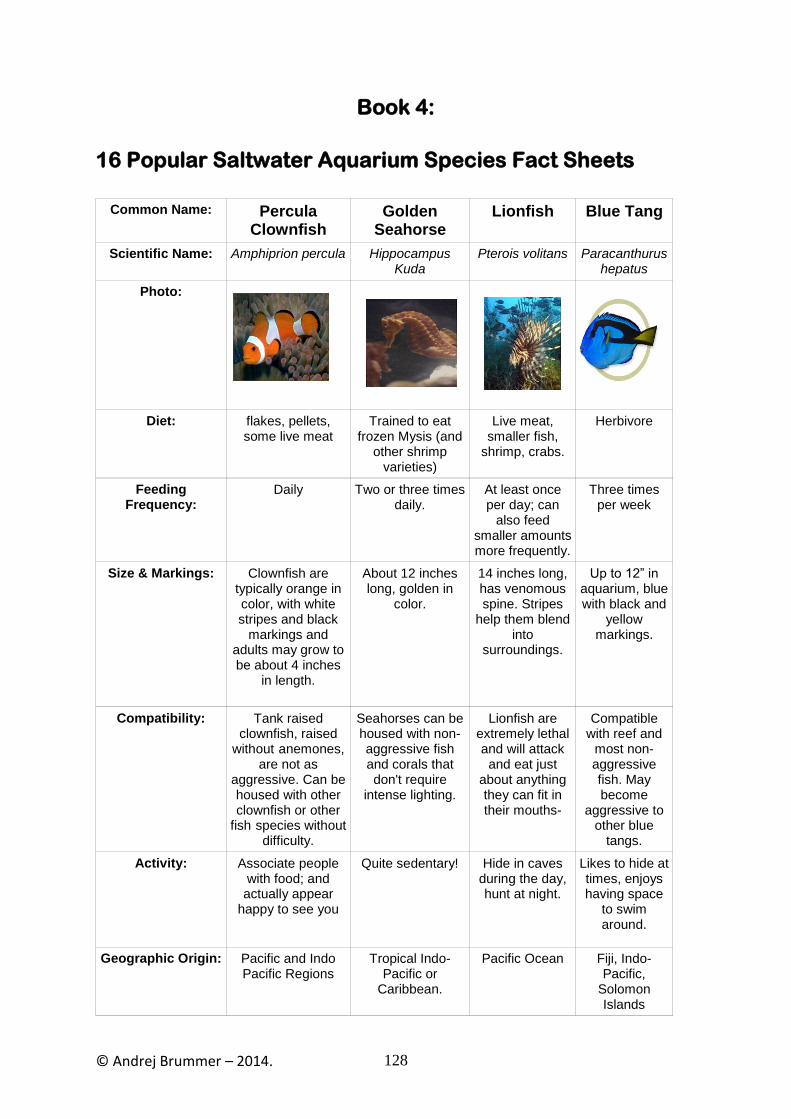
© Andrej Brummer – 2014. 128
Book 4:
16 Popular Saltwater Aquarium Species Fact Sheets
Common Name: Percula Clownfish
Golden Seahorse
Lionfish Blue Tang
Scientific Name: Amphiprion percula Hippocampus Kuda
Pterois volitans
Paracanthurus hepatus
Photo:
Diet: flakes, pellets, some live meat
Trained to eat frozen Mysis (and
other shrimp varieties)
Live meat, smaller fish,
shrimp, crabs.
Herbivore
Feeding Frequency:
Daily Two or three times daily.
At least once per day; can
also feed smaller amounts more frequently.
Three times per week
Size & Markings: Clownfish are typically orange in color, with white stripes and black
markings and adults may grow to be about 4 inches
in length.
About 12 inches long, golden in
color.
14 inches long, has venomous spine. Stripes
help them blend into
surroundings.
Up to 12” in aquarium, blue with black and
yellow markings.
Compatibility: Tank raised clownfish, raised
without anemones, are not as
aggressive. Can be housed with other clownfish or other
fish species without difficulty.
Seahorses can be housed with non-aggressive fish and corals that don't require
intense lighting.
Lionfish are extremely lethal and will attack
and eat just about anything they can fit in their mouths-
Compatible with reef and
most non-aggressive fish. May become
aggressive to other blue
tangs.
Activity: Associate people with food; and actually appear
happy to see you
Quite sedentary! Hide in caves during the day, hunt at night.
Likes to hide at times, enjoys having space
to swim around.
Geographic Origin: Pacific and Indo Pacific Regions
Tropical Indo-Pacific or
Caribbean.
Pacific Ocean Fiji, Indo-Pacific,
Solomon Islands

© Andrej Brummer – 2014. 129
Common Name: Spotted Cardinal Fish
Neon Blue Goby
BiColor Angelfish
Yellowtail Damselfish
Scientific Name:
Sphaeramia nematoptera
Elacatinus oceanops
Centropyge bicolor
Chrysiptera parasema
Photo:
Diet: Carnivore, well balanced diet of
meaty foods such as feeder shrimp, flake foods, pellet
foods, marine flesh,
bloodworms, and depending on its size, live feeder
fish.
Carnivore, live and frozen brine shrimp, frozen mysis shrimp,
table shrimp, and frozen food
preparations for carnivores
Omnivore. Spirulina, marine
algae, high-quality angelfish
preparations, and mysis or
frozen shrimp.
Omnivore. Will ignore
invertebrates in the aquarium and
feed on zooplankton and
algae. meaty items such as
mysis shrimp and vitamin-enriched
shrimp
Feeding Frequency:
Daily Daily Daily Daily
Size & Markings:
Up to 3”. Greenish-yellow face. Midsection is silver with bold
black scalar margins and the posterior section
of the body is silver with
orange polka-dots.
Up to 2” in length. Dark blue
with a striking horizontal light-blue stripe on
each side beginning above
the eyes and running the
entire length of the body.
Up to 4.5” in length. Has
yellow on the anterior half of its body and a deep
blue on the posterior half.
Up to 3”. Brightly blue colored with
a yellow tail.
Compatibility: In a group, they develop a
hierarchy without aggression.
Lives peacefully with most other peaceful fish.
Great in reef tanks; will fight it's own species
unless they are a mated pair.
The fish are semi-aggressive.
Are not good with reef as they
nip at it.
Semi-aggressive.
Activity: Swims around very slowly, in a
methodical manner.
Hardy fish that helps control diseases; will spawn in the
tank and leave eggs in corners and crevices.
Very difficult to breed in an aquarium.
Needs places to hide.
Likes many hiding places and
peaceful tank mates.

© Andrej Brummer – 2014. 130
Geographic Origin:
Coral Sea, Fiji, Indo-Pacific
Tank bred in the USA and England.
Coral Sea, New Caledonia, Fiji
Indo-Pacific
Common Name: Bicolor Pseudochro
mis
Black & White
Butterfly Fish
Orbiculate Batfish
Green Mandarin
Scientific Name:
Pseudochromis paccagnella
Heniochus acuminatus
Platax orbicularis
Synchiropus splendidus
Photo:
Diet: Carnivore. Meaty foods including
brine shrimp and prepared frozen
foods.
Omnivore.Small meaty foods and
herbivore preparations
Omnivore. shrimp, scallops, vitamin-enriched brine shrimp, and frozen herbivore
preparations
Small crustaceans
Feeding Frequency:
Daily Daily Three times daily.
Daily.
Size & Markings:
Up to 3”, has bright yellow and
bright purple colors.
Up to 10” Has elongated white
dorsal filament.Base color is white with two wide black stripes.
The soft dorsal and caudal fins are yellow, and there are black
marks above the eyes.
Up to 22”. Round body of reddish brown and large
round fins.
Up to 5”. A maze of blue and
orange over a green
background fish. Vivid yellow
spots over head.
Compatibility: Not intimated by other fish, will
defend territory. Semi-aggressive. Reef compatible.
Can live with other peaceful fish or with own
species if introduced at same time.
Not compatible with reef. Can live with most other peaceful
fish.
Compatible with reef and most
other fish except for conspecifics
Activity: Good hunters and agile
swimmers.
Prefers swimming in areas of live
rock.
Swims often, needs large area
to swim in.
Will often spawn successfully in an aquarium.
Geographic Origin:
Indo-Pacific
Fiji, Hawaii, South Asia,
Tahiti
Indo-Pacific, South Asia,
Tahiti
Indo-Pacific
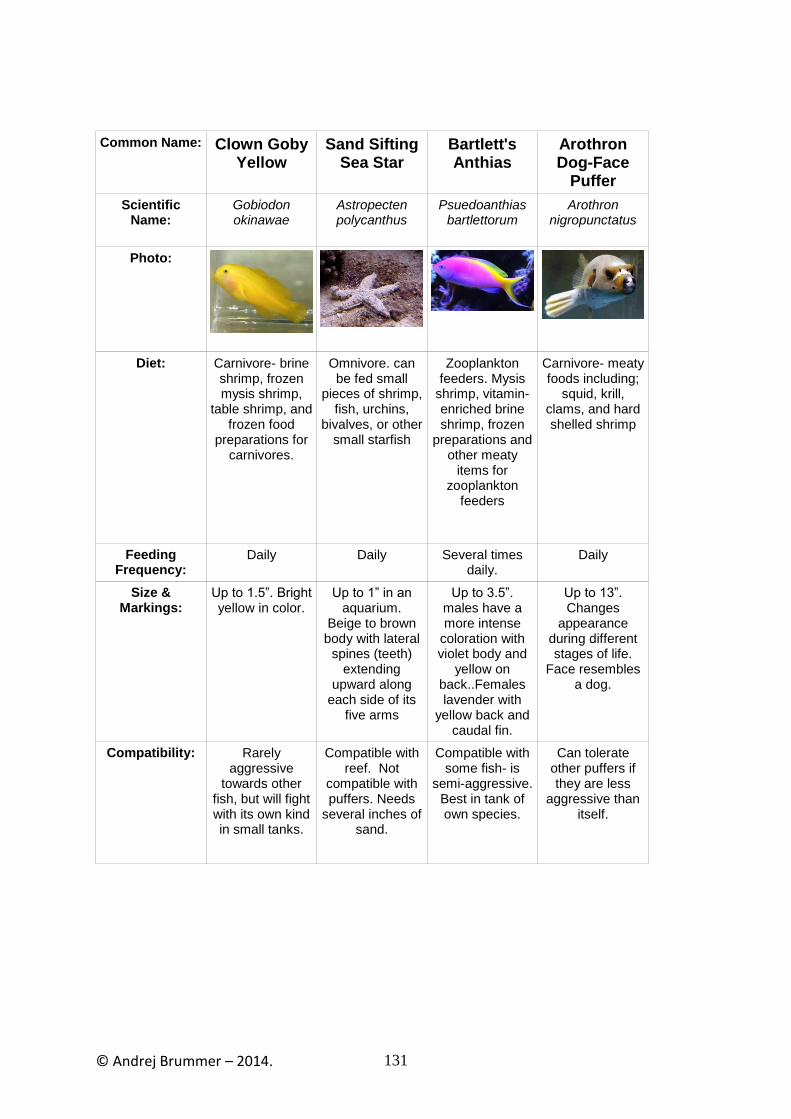
© Andrej Brummer – 2014. 131
Common Name: Clown Goby Yellow
Sand Sifting Sea Star
Bartlett's Anthias
Arothron Dog-Face
Puffer
Scientific Name:
Gobiodon okinawae
Astropecten polycanthus
Psuedoanthias bartlettorum
Arothron nigropunctatus
Photo:
Diet: Carnivore- brine shrimp, frozen mysis shrimp,
table shrimp, and frozen food
preparations for carnivores.
Omnivore. can be fed small
pieces of shrimp, fish, urchins,
bivalves, or other small starfish
Zooplankton feeders. Mysis
shrimp, vitamin-enriched brine shrimp, frozen
preparations and other meaty
items for zooplankton
feeders
Carnivore- meaty foods including;
squid, krill, clams, and hard shelled shrimp
Feeding Frequency:
Daily Daily Several times daily.
Daily
Size & Markings:
Up to 1.5”. Bright yellow in color.
Up to 1” in an aquarium.
Beige to brown body with lateral
spines (teeth) extending
upward along each side of its
five arms
Up to 3.5”. males have a more intense
coloration with violet body and
yellow on back..Females lavender with
yellow back and caudal fin.
Up to 13”. Changes
appearance during different stages of life.
Face resembles a dog.
Compatibility: Rarely aggressive
towards other fish, but will fight with its own kind in small tanks.
Compatible with reef. Not
compatible with puffers. Needs
several inches of sand.
Compatible with some fish- is
semi-aggressive. Best in tank of own species.
Can tolerate other puffers if they are less
aggressive than itself.

© Andrej Brummer – 2014. 132
Book 5:
Caring For Corals and Invertebrates
It used to be extremely difficult to raise the more delicate invertebrates and corals in
an aquarium. With advancements in the marine hobby though; primarily improved
nutrition, it is now much easier to keep invertebrates and corals healthy in your
aquarium.
In the ocean, most corals and sessile invertebrates photosynthesise but also eat
plankton as a major source of nutrition (usually at night). There are numerous
varieties of plankton, but when trying to create an ocean-like environment within your
aquarium for corals and invertebrates, you'll want to be sure to include
phytoplankton and/or zooplankton as they are the most important species for
corals and invertebrates. Different corals feed on different types of
plankton/copepods/amphipods.
Invertebrates as you probably know are animals without backbones. The animal
kingdom overall is divided into 34 phyla, and 33 of them include invertebrates. The
majority of marine invertebrates are classified in one of the following groups based
on their characteristics:
Porifera (Sponges)
Cnidaria (Corals and Anemones)
Platyhelminthesis (Flatworms)
Nematoda (Worms)
Annelida (segmented worms)
Mollusca (Molluscs)
Arthropoda (Arthropods)
Echinodermata (spiny skins e.g. sea urchins)
Invertebrates are classified based on having one of three different types of body
symmetry. They may be asymmetrical, have radial symmetry, or bilateral symmetry.
They also can have one of three different types of body cavities in which the organs

© Andrej Brummer – 2014. 133
reside, including acoelom (no cavity), psuedocoelom (false cavity) or coelom (fluid
filled body cavity). Many invertebrates are found within the ocean and are most
likely the first animals on earth. In fact, they are the ancestors of the world's current
animals.
Invertebrates mostly have simple body plans and are able to obtain their food and
oxygen directly from the environment.
Some of the most simple marine invertebrates (zooplankton) are food for our captive
marine invertebrates.
Phytoplankton
These are plant-based organisms such as free floating plants and algae and are
extremely tiny, this is the preferred food by filter-feeding invertebrates and corals that
have feathery like appendages or gills such as soft corals, zooanthids and
gorgonians. Phytoplankton can be purchased both in liquid and powder forms, a
variety of types are best for the nutrition of your invertebrates. Some marine
organisms absolutely require it for growth, including:
Feather duster worms
Scallops
Clams
Gorgonians with small polyps

© Andrej Brummer – 2014. 134
Phytoplankton, very easy to feed your marine pets.
Zooplankton
As the name suggests, zooplankton represents the animal portion of the plankton
species, these organisms can propel themselves through the water, there is great
variation in the size of organisms in this group but they are much larger than
phytoplankton and are eaten by invertebrates and corals with larger polyps (that
don’t resemble feathers), including:
Soft Corals
Zooanthids
Mushroom corals
SPS (small polyped stony) corals
LPS (large polyped stony)corals
Large polyped gorgonians
Anemones
Shrimp
Crab
Lobsters
Zooplankton is available in both liquid and frozen forms, some liquid forms are
complete zooplankton diets for zooplankton eaters. Frozen forms are finely chopped
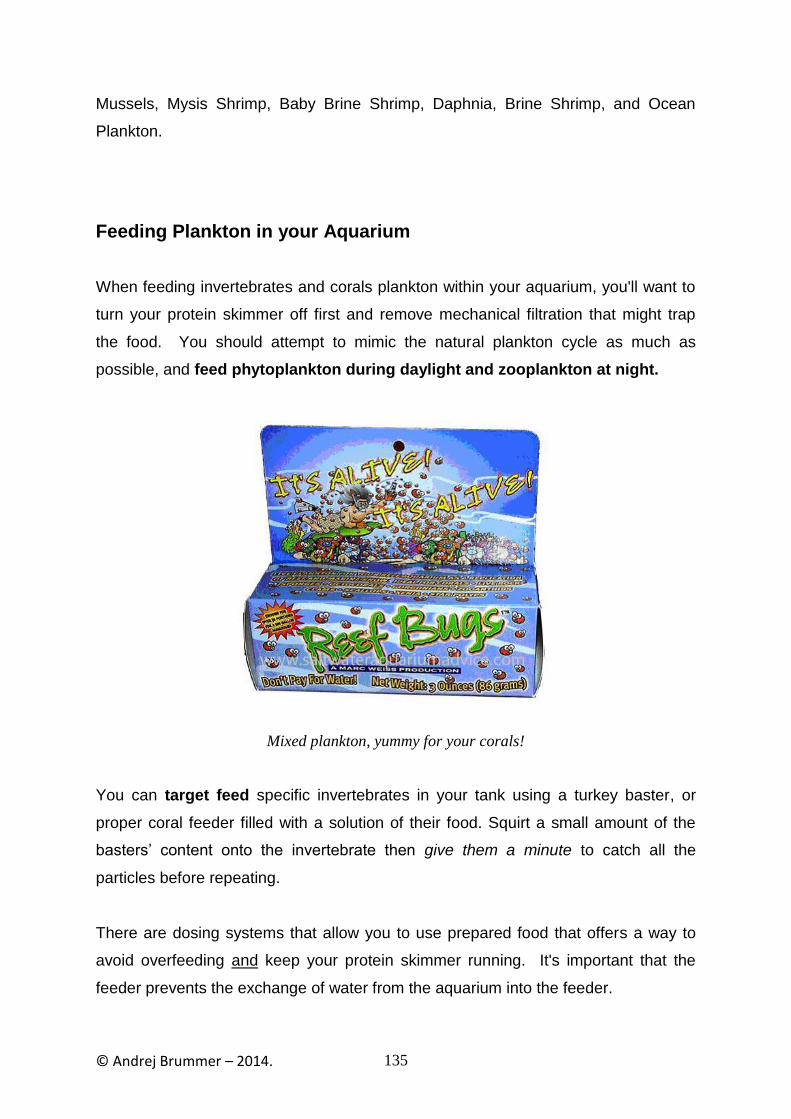
© Andrej Brummer – 2014. 135
Mussels, Mysis Shrimp, Baby Brine Shrimp, Daphnia, Brine Shrimp, and Ocean
Plankton.
Feeding Plankton in your Aquarium
When feeding invertebrates and corals plankton within your aquarium, you'll want to
turn your protein skimmer off first and remove mechanical filtration that might trap
the food. You should attempt to mimic the natural plankton cycle as much as
possible, and feed phytoplankton during daylight and zooplankton at night.
Mixed plankton, yummy for your corals!
You can target feed specific invertebrates in your tank using a turkey baster, or
proper coral feeder filled with a solution of their food. Squirt a small amount of the
basters’ content onto the invertebrate then give them a minute to catch all the
particles before repeating.
There are dosing systems that allow you to use prepared food that offers a way to
avoid overfeeding and keep your protein skimmer running. It's important that the
feeder prevents the exchange of water from the aquarium into the feeder.

© Andrej Brummer – 2014. 136
You need to remember it is difficult to generalize the food requirements for specific
groups (LPS, SPS or soft) of corals as there are always a few species in each group,
which have a more selective and specific diet.
Mysis Shrimp, Brine Shrimp, Copepods and Amphipods (collectively known as „pods
to the home aquarist!) will also be devoured by many corals. Copepods and
Amphipods are actually quite easy to purchase or cultivate in refugiums. You can
raise your own Brine Shrimp as Brine Shrimp eggs can be cheaply hatched and
raised in a simple DIY Brine Shrimp Hatchery.
Caring For Corals
Keeping corals in your saltwater aquarium can be a very rewarding experience.
Corals really do add an extra dimension to the marine aquarium, making it look a lot
more like a genuine slice of the ocean reef and add authenticity and colour to your
tank.
Some corals are very difficult to keep because of their requirements (for example
most SPS corals) and some are pretty easy (like most soft corals), so once again my
advice is to do your research and find one that suits your experience level, current
marine pets and existing aquarium set-up (i.e. in regards to lighting, water
movement, space etc).
When researching corals it can sometimes be challenging to find enough information
on the species you are interested in, so here’s a helpful tip; researching the corals‟
family name can yield quite a few clues on caring for the particular species you
are interested in.

© Andrej Brummer – 2014. 137
Acropora SPS coral, some of the trickiest coral to keep happy.
Purchasing Corals
You also need to be aware that corals are pretty delicate and can be expensive to
purchase (which apart from ocean conservation reasons is why you should learn to
propagate your own) especially if they are wild harvested. These days most corals
are propagated in saltwater aquariums and are grown from frags, the advantage of
growing corals from frags is that because they have been cultured in a saltwater tank
they are likely to be more hardy and less stressed in your tank.
Beginners, take heart it may seem like a massive expense to get your aquarium set
up with corals, but remember when they are established you can easily recoup your
costs by “fragging” your corals and swapping or even selling them to other
enthusiasts or pet stores.

© Andrej Brummer – 2014. 138
Now, Let‟s Get to The Guts of Coral Keeping:
1. Water Parameters: These need to be optimal to ensure the health of your corals,
so basically this means levels like this:
Specific gravity at 1.023 - 1.025
Temperature in the range of 76 - 82 °F
Alkalinity about 2.1 to 2.5 meq/L
Calcium 400 - 450 ppm
Magnesium 1200 - 1400 ppm
Ammonia, nitrite, nitrate and phosphate at 0 ppm
Keeping corals in such a pristine environment usually means you will need to carry
out more regular partial water changes than you would if you have a fish only set up,
my recommendation is still changing 10% per week or 20% per fortnight.
Also if you are planning on keeping a lot of corals you probably will need to add a
calcium supplement to the water for the corals growth requirements and possibly a
growth supplement that contains the trace elements they need for strong growth
such as strontium, iron, magnesium and iodine. Although good quality salt
mixtures should contain these trace elements and it is preferable to use these
because many supplements contain unwanted additives like phosphates which will
do more harm than good in your water. I recommend using a good salt mixture and
doing away with “magic reef additives in a bottle”.
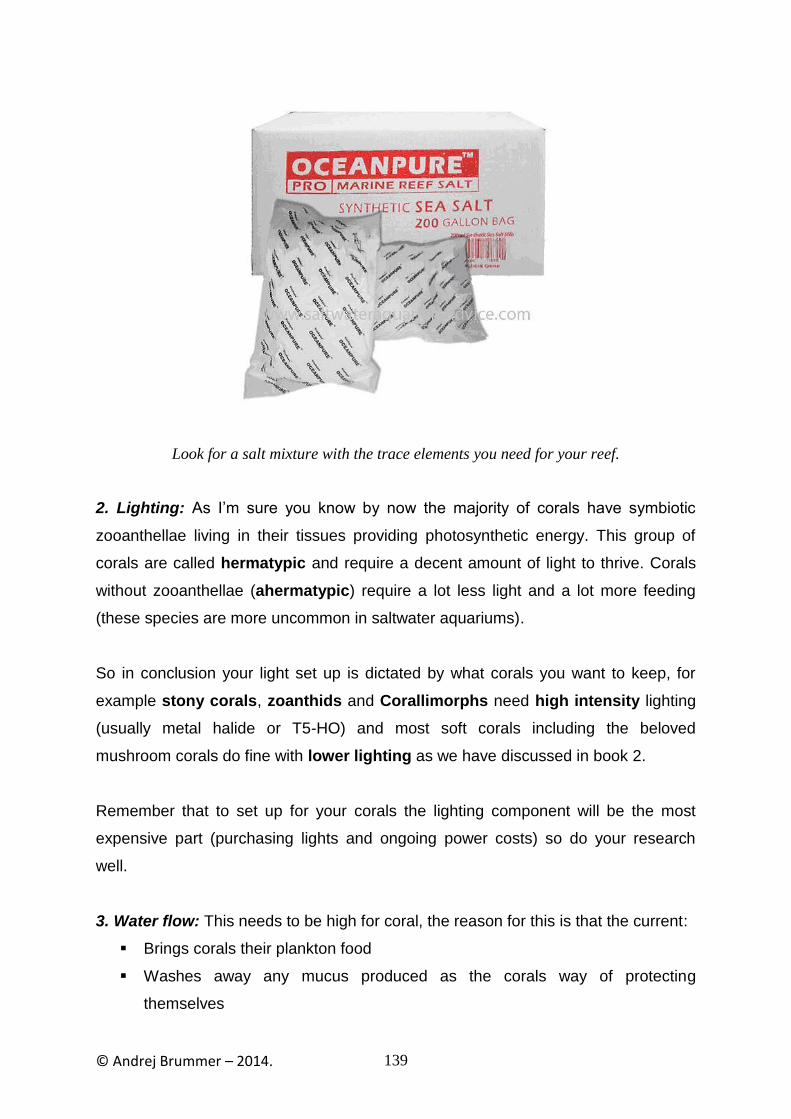
© Andrej Brummer – 2014. 139
Look for a salt mixture with the trace elements you need for your reef.
2. Lighting: As I’m sure you know by now the majority of corals have symbiotic
zooanthellae living in their tissues providing photosynthetic energy. This group of
corals are called hermatypic and require a decent amount of light to thrive. Corals
without zooanthellae (ahermatypic) require a lot less light and a lot more feeding
(these species are more uncommon in saltwater aquariums).
So in conclusion your light set up is dictated by what corals you want to keep, for
example stony corals, zoanthids and Corallimorphs need high intensity lighting
(usually metal halide or T5-HO) and most soft corals including the beloved
mushroom corals do fine with lower lighting as we have discussed in book 2.
Remember that to set up for your corals the lighting component will be the most
expensive part (purchasing lights and ongoing power costs) so do your research
well.
3. Water flow: This needs to be high for coral, the reason for this is that the current:
Brings corals their plankton food
Washes away any mucus produced as the corals way of protecting
themselves
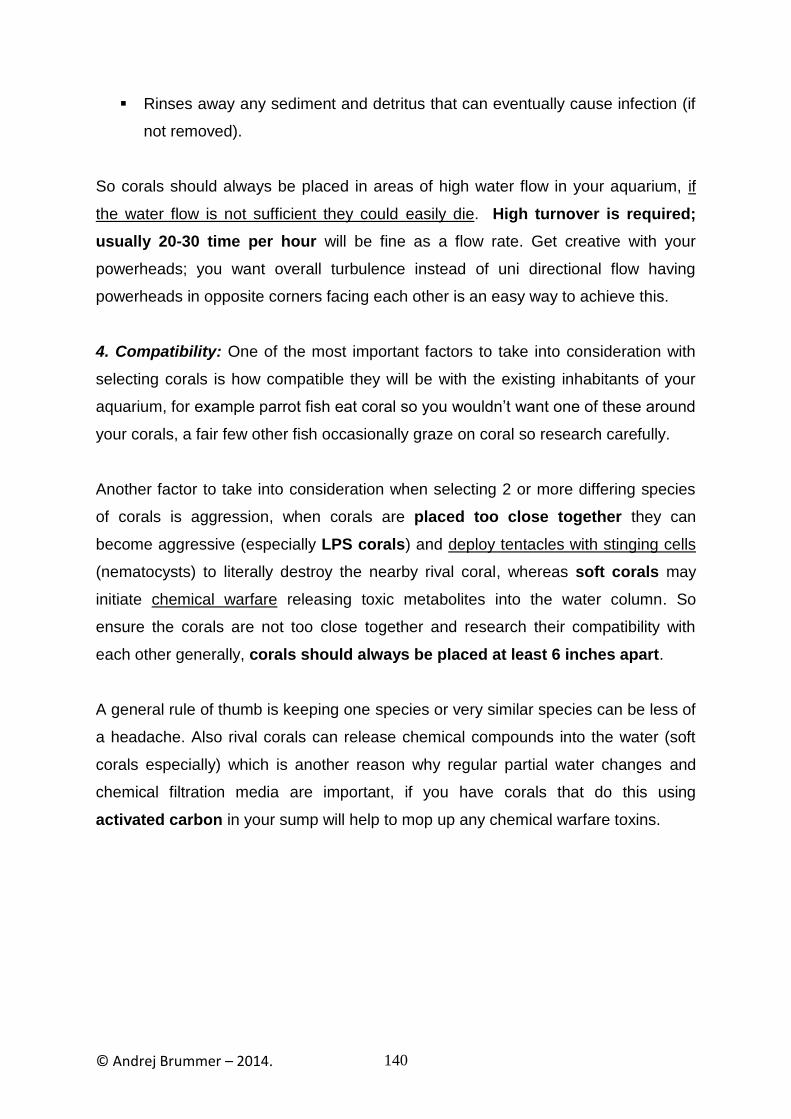
© Andrej Brummer – 2014. 140
Rinses away any sediment and detritus that can eventually cause infection (if
not removed).
So corals should always be placed in areas of high water flow in your aquarium, if
the water flow is not sufficient they could easily die. High turnover is required;
usually 20-30 time per hour will be fine as a flow rate. Get creative with your
powerheads; you want overall turbulence instead of uni directional flow having
powerheads in opposite corners facing each other is an easy way to achieve this.
4. Compatibility: One of the most important factors to take into consideration with
selecting corals is how compatible they will be with the existing inhabitants of your
aquarium, for example parrot fish eat coral so you wouldn’t want one of these around
your corals, a fair few other fish occasionally graze on coral so research carefully.
Another factor to take into consideration when selecting 2 or more differing species
of corals is aggression, when corals are placed too close together they can
become aggressive (especially LPS corals) and deploy tentacles with stinging cells
(nematocysts) to literally destroy the nearby rival coral, whereas soft corals may
initiate chemical warfare releasing toxic metabolites into the water column. So
ensure the corals are not too close together and research their compatibility with
each other generally, corals should always be placed at least 6 inches apart.
A general rule of thumb is keeping one species or very similar species can be less of
a headache. Also rival corals can release chemical compounds into the water (soft
corals especially) which is another reason why regular partial water changes and
chemical filtration media are important, if you have corals that do this using
activated carbon in your sump will help to mop up any chemical warfare toxins.

© Andrej Brummer – 2014. 141
Please dont place us too close together!
5. Placement and Attachment: So, after you have done all your research, got your
tank ready and purchased your new corals the next step is attaching them inside the
aquarium.
Different corals prefer different areas inside the aquarium depending on light
intensity and water movement, so take your species’ requirements into consideration
before attaching them.
Attachment for stony corals is as easy as attaching them to rock with superglue!
Take the rock out of the tank, let it dry and simply glue the frag to it, let it sit for a few
minutes then replace in the tank. Soft corals can be a bit more challenging; the frags
can be stuffed into holes of a rock, they can also be attached by rubber band, wedge
them between rocks or even piece them and hold in place with a toothpick!

© Andrej Brummer – 2014. 142
The Preferred Water Environment for Coral and Invertebrates
Corals and invertebrates have very specific and usually fussy requirements for the
water they live in (coral requirements are mentioned above). The exact specifics will
depend on which corals or invertebrates you are adding to your aquarium, but the
majority require a water temperature between 72 and 78°F (22.2C – 25.5C),
moderate to strong moving water, specific gravity between 1.023 and 1.025, and a
pH between 8.1 and 8.4.
Corals are Sensitive to Change
One thing to keep in mind is that corals and invertebrates are extremely sensitive to
changes in the water environment, so you will need to acclimate them to your
aquarium very slowly, and then maintain consistency in order for them to remain
healthy. Fluctuations in water temperature or water chemistry will cause stress and
stress is the leading cause of death for corals and other invertebrates in captivity.
How to Choose Healthy Coral Specimens That Are Right For Your Tank
When you are visiting an aquarium retailer, there are some clear signs as to whether
or not the marine life is likely to be cared for properly:
When you look at the tanks themselves, are they clean?
Is the water clear and do the invertebrates/corals seem to be active/brightly
coloured/healthy?
Do the corals have expanded polyps and are they free of slime?
If so, chances are the retailer is caring for the aquariums and marine life
appropriately. If the water is dirty or the fish appear to be unhealthy, you will
probably want to take your business someplace else to ensure you increase your
chances of getting healthy specimens to take home.

© Andrej Brummer – 2014. 143
If any of the following occurs to marine fish in a retailer's aquarium store, you should
look someplace else to purchase your fish because these are signs of illness, which
probably means the corals aren’t much better (but it’s harder to spot poor health
symptoms in corals):
Fish have white, green or black spots on them
Tiny worms in wounds of fish
Frequent rubbing against the tank or objects in the tank
Fins are torn or ripped
Eyes appear to have a slimy coat over them
Cotton-like fungus around fish mouth
Bloated bellies
Scales appear to be falling off
Grey, gold or white dust on fish body
Eyes protrude from head
Fish seem to be gasping for air at the surface of tank
If the fish are healthy chances are the corals will be too.
In order to choose corals and invertebrates that are right for your tank, you need to
know what water temperature your tank water is kept at, the specific gravity
and the pH level. Make sure you bring this information with you when shopping for

© Andrej Brummer – 2014. 144
new specimens, and take care to select corals and invertebrates that can survive
within the current environment of your aquarium.
In addition, you will want to make sure the invertebrates and corals you select are
not going to be toxic to the other fish and marine life living in your aquarium. There
are a few varieties of invertebrates and corals, including “Sea Apples”, which are
very colourful but extremely toxic to most fish and marine life. They are pretty but
perhaps not a good idea.
Other factors to take into consideration are the fully-grown size of your
invertebrates/corals (if you can find this out) and how adaptable they will be to you
set-up.
Coloration and behaviour are also important selection criteria for marine
invertebrates as well as fish; you should be aware that some fish species are only
colourful at the juvenile phase and become drab when they mature (most Angelfish
change their colours and patterning dramatically between juvenile and full grown). A
good fish choice should have impressive colouration or exhibit interesting behaviour
that is a delight to observe. Corals will not change colour like this but you do have to
ensure the form and colouration will please you for the long run. Corals do not
generally exhibit behaviour (like motile invertebrates), except for having expanded
polyps and pulsing Xenisa pulsing!
Questions to ask the Pet Shop about Invertebrates and Fish:
Is the fish/invertebrate tank reared (fragged) or gathered from the wild? Tank
reared probably means less chance of disease, more hardy, more likely to
take most foods, less stressed.
If from the ocean was it sustainably gathered? Only buy sustainably gathered
marine creatures, as reef and ocean conservation should be very important to
any marine aquarist countries to beware of are Indonesia and the Philippines

© Andrej Brummer – 2014. 145
(where 50% of our marine life comes from anyway) look for certification with
conservation and/or sustainable harvest agencies.
If from the wild, what area is the specimen from, this will help you to diagnose
any potential diseases and give you more insight into the characteristics of
your pet.
Is there a guarantee on the life of the fish? It’s always better if there is. Get
them to put their money where their mouth is!
Ask to see the fish get fed (twice is best), so you can see whether they are
eating or not. You can also ask to see a coral get fed.
Is the fish juvenile or adult? This will let you know what part of the life cycle
the fish is in, i.e. some fish are only colourful when juvenile so you may want
to avoid those species.
Remember, it is up to you to do all the research on the species you want to ensure
they will be compatible for you and your tank, don’t trust what the local fish store tells
you. If you are informed before you buy you are less likely to make a decision you
may regret later.
Where Does Your Marine Life Come From and Why You Should Care?
Now is a good time to talk about purchasing ecologically RIGHT marine life, as any
good home aquarist should care about the conservation of the world’s reefs, the
health of their potential purchases and know how to vote for good businesses with
their wallets.
The bottom line is that we all should know where our marine life is coming from
and whether or not it was collected humanely and sustainably.
© Andrej Brummer – 2014. 146
The reason for this is that the collection and handling practices used on the species
we buy has a real effect on their health and longevity in the home aquarium, not to
mention the negative effects unsustainable collection has on our oceans coral
reefs…
Most people have no idea where their marine life comes from (actually about 50%
come from the Philippines or Indonesia) and may not even be aware that there are
still some cowboys out there who collect marine creatures, handle and ship them in a
cruel fashion to make a quick buck from the end consumer…you! Don‟t forget that
up to a whopping 80% of all wild caught species die somewhere between reef
and your display tank!
What Do Bad Collection Practices Mean For You?
The reason you should care is because these species are often unsuitable for the
home aquarium and/or they are collected unsustainably thereby depleting natural
stocks and putting entire reef eco-systems at risk (which can easily collapse if
enough key species are lost). But not only that, the species collected often arrive at
the local fish store in such bad shape that they will die in the next few weeks, which
means unsuspecting consumers lose, many of these unsuspecting consumers are
first timers and give up the hobby completely because of this bad experience, which
is very sad…
Did you know a whopping 98% of all marine life in the trade is collected from the wild
(compared with just 30% of freshwater species) from a very stable environment in
regards to physical and chemical conditions (temperature, pH, alkalinity, salinity etc).
This equates to the real world statistic that up to 80% of saltwater species die before
they reach their final destination: the home aquarium.

© Andrej Brummer – 2014. 147
It’s a long hard road from here to your place.
Unnecessary Loss of Life From Underhanded Tactics
The reason there is so much loss of life is stress. The health of aquarium species
(especially fish) is directly related to collection, handling, holding and
shipping/packaging practices in the chain of distribution, from collector to fish store
customer.
So what exactly are the practises that we as hobbyists need to be aware of and
avoid to protect the future of our planets reefs and the health of captive marine
life?
1. Sodium cyanide capture:
This is still a very large problem in the Philippines and Indonesia. Cyanide is a very
toxic substance (ever hear of cyanide gas being used in wars?) that comes in tablets
which are crushed into squirt bottles of seawater, divers then squirt this over coral

© Andrej Brummer – 2014. 148
reefs and collect the stunned fish who are unable to swim quickly, the theory is that
“most” fish can recover from this chemical. Some fish escape into the coral heads
before the drug takes effect; the divers respond by smashing up the coral until they
find their fish!
The poison also indiscriminately kills corals and smaller marine species and lingering
toxicity will often kill captured fish weeks later and is strongly associated with
“sudden death syndrome”.
Treated fish can often (but not always) be spotted in your local fish store: they often
have too bright colours and will seem “dazed” in the tank and unresponsive,
completely in their own world. Angelfish are the fish family most often caught in this
fashion. So watch for “dazed and confused” Angels in the pet store having a private
party in the corner of the tank!
The Philippines are starting to enforce the ban of this nasty chemical that is also very
toxic to the divers that use it (through accidental exposure and poor equipment), but
a high premium for live fish, weak enforcement and widespread corruption means it
has been slow to take hold. The International Marine Life Alliance (IMA) has
opened cyanide detection labs across the Philippines, which randomly test fish for
export. The IMA has also trained many local fishermen to use fine mesh nets on the
reef instead. Both these steps have seen cyanide capture reduce in the Philippines,
but its use has instead risen in Indonesia.
Sadly cyanide capture has now spread to pristine reefs from the central Pacific to
East Africa.

© Andrej Brummer – 2014. 149
If your Majestic Angelfish has too bright colours and appears "dazed and confused" it could
well be cyanide caught.
What can you do about this?
Make sure you only purchase fish from a retailer who guarantees the fish are not
captured with cyanide! Be especially suspicious of fish from Indonesia or the
Philippines.
2. Collection and retail of species unsuitable for home aquariums:
Species such as Damselfish, Parrotfish, Moray Eel, Cleaner Wrasse, Seahorse,
Scorpionfish, Stonefish and many others have a very poor survival rate when they
are taken out of their natural environments (despite what you may be told). Also
check out this link to my Saltwater Aquarium Advice blog to see what marine
invertebrates and corals you shouldn’t buy.

© Andrej Brummer – 2014. 150
Retailers that sell these species and encourage new tank keepers to try their hand at
a species such as this not only cause grief with tank owners who lose money and
time but also to the reefs themselves.
What can you do about this?
The truth is quite a few fish stores know that these species should not be sold to
beginners or should not be sold at all, yet they still sell them, I consider this rather
despicable. These stores give the industry a bad name and I encourage you to avoid
them and tell others to do so as well.
3. Bad handling, husbandry and shipping practices:
Many marine collectors, brokers and exporters poorly handle and house the fish
through lack of knowledge, funds or share laziness; this is especially true in South
East Asia. It really is the rule that the more hands that handle the fish in the chain of
distribution the higher the mortality rates! Every step involves a transfer of liquid
environment and so a stressful acclimation process.
A good handling procedure involves specimens being bagged separately with
oxygen being used and plenty of space or systems for dilution of toxic wastes.
Shipping containers should be protective and strong as well as capable of
maintaining water temperature effectively.
Many holding tanks in the industry are too small and are overcrowded with
unsuitable species put together that should be kept separate and less than optimal
water quality. This all serves to create stress and as we all know stress lowers the
immune system and makes the animal more susceptible to disease and death.
What can you do about this?

© Andrej Brummer – 2014. 151
Do some research on your preferred marine life retailer, where do their fish come
from? How are they handled? Do they have a certification from any marine life
organization? Can they guarantee the life of the fish you purchase?
If your retailer gets their stock from sustainable sources, they will go to great
pains to tell you this in my experience!
Always purchase captive raised marine life and coral frags where possible!
Where to Place Corals and Invertebrates In The Tank
Corals prefer different areas of aquariums, mostly due to the closeness to the light
source and volume of water flow. Here are some examples:
Acropora: mostly prefers intense lighting, so should be placed as close to
your light source as possible. Also likes high flow water with a changing
current.
Zoanthids: are hardy and can handle a variety of different conditions within
your aquarium. You can put them anywhere and they'll do fine.
Ricordea Florida and many other soft corals: prefer low light conditions and
low/medium water flow, but could survive in higher light if you had to put them
closer to the light source.
Invertebrates typically require the drip-method process (next page) for acclimating
them safely to their new environment, so be sure to give them adequate time to get
used to the water before you place them into the tank. You can place invertebrates
along the side of your aquarium, and many will stick to the glass (snails, starfish,
etc). Other invertebrates can be placed at the bottom of the tank after they have
been fully acclimated.

© Andrej Brummer – 2014. 152
How to Correctly Acclimate Corals and Invertebrates
A good acclimation practice for both corals/invertebrates and marine fish will ensure
your survival rates are much higher than without using these methods correctly.
Proper acclimation is a very good way to ensure you give your new marine
creatures the best possible start to their lives in captivity.
The most stressful time your pets will have to endure (other than when they were
caught) is the introduction to a new aquarium. You do this right and you will save
yourself a lot of money and grief.
There are two main ways to acclimate corals and invertebrates to your water; the
floating method and the drip method. You never want to come home from the fish
store and just dump your new purchases into the tank. The shock will cause severe
trauma, illness- and may even kill them. A surprising number of people do this!
These methods also apply to marine fish.
The Floating Method
1. Dim the lights in the room you're going to be opening the shipping box in.
Sudden exposure to bright lights will shock the corals and/or invertebrates.
2. Turn the lights off in the aquarium.
3. Place the sealed bag with your new purchase in the aquarium and allow it
to float for fifteen minutes. Do not open the bag at this time. The water
temperature will slowly adjust to the temperature that is inside the
aquarium, and the bag itself will maintain a high level of dissolved oxygen.
4. After 15 minutes have passed, cut a small opening in the bag under the
metal clip. Roll the edge of the bag down so that an air pocket is created
within the top of the bag, and keep the bag floating on the surface of the
water. If you are acclimating heavy pieces of live coral, place the bag with
the coral in a plastic container.

© Andrej Brummer – 2014. 153
5. Add a ½ cup of aquarium water to the shipping bag and allow it to sit for
four minutes.
6. Add another ½ cup of aquarium water to the bag and wait four minutes.
Repeat every four minutes until the bag is full.
7. Lift the bag from the aquarium and discard about half of the water into a
bucket (never discard the water directly into the aquarium).
8. Float the bag in the aquarium again and add ½ cup of aquarium water into
the bag every four minutes until full.
9. Use a net to remove the marine life and release into the tank.
10. Remove and discard shipping bag and shipping water.
The Drip Method
For more sensitive corals and invertebrates, including sea stars and shrimp
the drip method should be used to acclimate the animals into the aquarium. You'll
need a three or five gallon bucket that is used only for aquarium use; and if you are
acclimating fish at the same time as corals, use separate buckets for each.
1. Start with the first 3 steps of the floating method to acclimate the water
temperature within the shipping bag.
2. Slowly pour the contents of the shipping bag into the bucket, but make sure
that invertebrates are not exposed to the air. You may have to tilt the
bucket on its side to make sure the animals remain fully submerged.
3. Use airline tubing to set up a drip line from the aquarium into the bucket. You
can tie a few loose knots in the airline tubing to regulate the flow of water; or
use a non-metal airline control valve.
4. Suck on the end of the airline tubing that will be in the bucket with your new
purchase to begin a siphon. When water flows out through the tubing adjust
the drip with a knot or control valve. You want the water to come out at a rate
of about 2 to 4 drops per second.
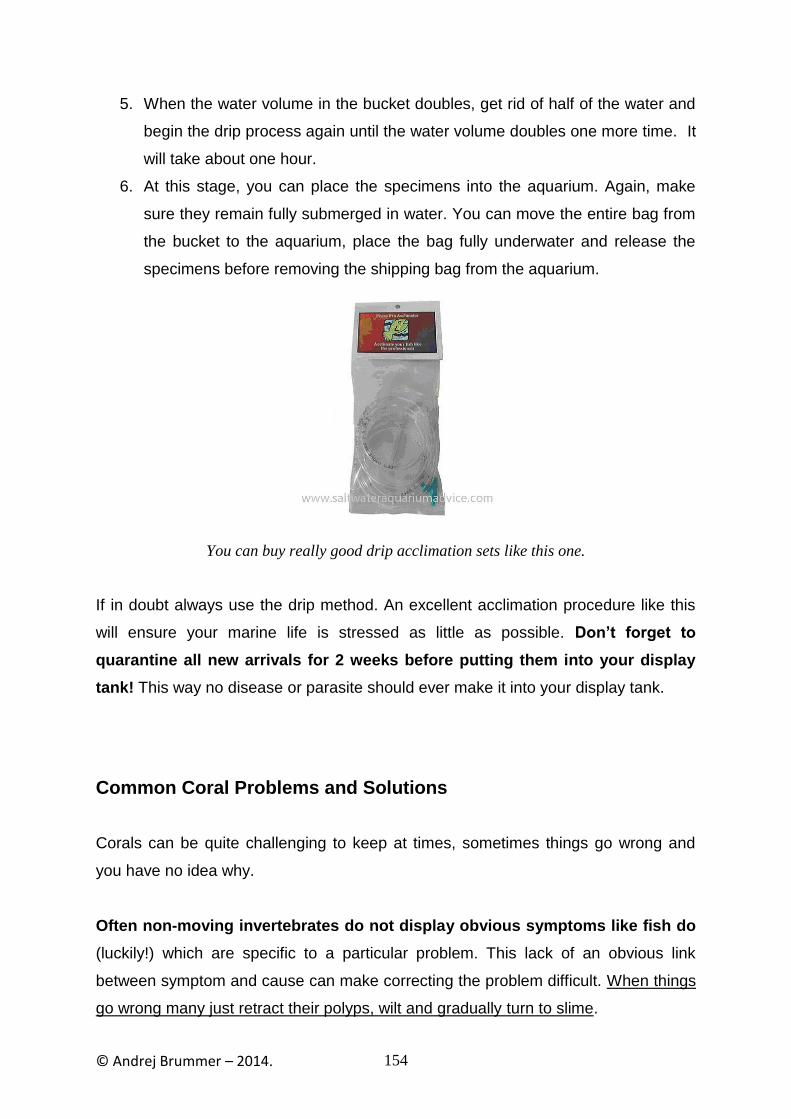
© Andrej Brummer – 2014. 154
5. When the water volume in the bucket doubles, get rid of half of the water and
begin the drip process again until the water volume doubles one more time. It
will take about one hour.
6. At this stage, you can place the specimens into the aquarium. Again, make
sure they remain fully submerged in water. You can move the entire bag from
the bucket to the aquarium, place the bag fully underwater and release the
specimens before removing the shipping bag from the aquarium.
You can buy really good drip acclimation sets like this one.
If in doubt always use the drip method. An excellent acclimation procedure like this
will ensure your marine life is stressed as little as possible. Don‟t forget to
quarantine all new arrivals for 2 weeks before putting them into your display
tank! This way no disease or parasite should ever make it into your display tank.
Common Coral Problems and Solutions
Corals can be quite challenging to keep at times, sometimes things go wrong and
you have no idea why.
Often non-moving invertebrates do not display obvious symptoms like fish do
(luckily!) which are specific to a particular problem. This lack of an obvious link
between symptom and cause can make correcting the problem difficult. When things
go wrong many just retract their polyps, wilt and gradually turn to slime.

© Andrej Brummer – 2014. 155
Its no secret that non-moving or sessile (which actually means attached to the
substrate) saltwater aquarium invertebrates are notorious for being difficult to
diagnose if things go wrong, this is especially true for photosynthetic anemones and
corals.
Stress is the Cause of Most Problems!
Up to around 80% of invertebrate symptoms are simply a result of stress -
usually caused by poor or fluctuating water quality or incorrect lighting, this is the
case most of the time. However there are some pretty nasty coral pests, predators
and diseases out there that you need to be aware of the majority of these will not
often show up in an aquarium where the new corals have been acclimated correctly
and then have been quarantined for 30 days before placing them into the display
tank.
So, stress is the number one killer of corals and other invertebrates. So, what are the
major forms of stress (in order of likelihood that these are affecting your
invertebrate):
1. Poor/fluctuating water quality (most commonly temperature and pH,
phosphates, nitrates induced stress).
2. Incorrect or inappropriate lighting (bulbs too old, too new, too close or too far
away).
3. Not enough water movement (you can never have enough of this in my opinion).
4. Incompatible tank mates (caused by predation, chemical turf wars, other
physical damage).
5. Starvation (feeding with supplements really helps sessile invertebrates out and
massively reduces the likelihood of starvation).
6. Physical damage (caused by collection, handling, pests, parasites, predation).
Stress causes these major symptoms in corals and other sessile invertebrates:
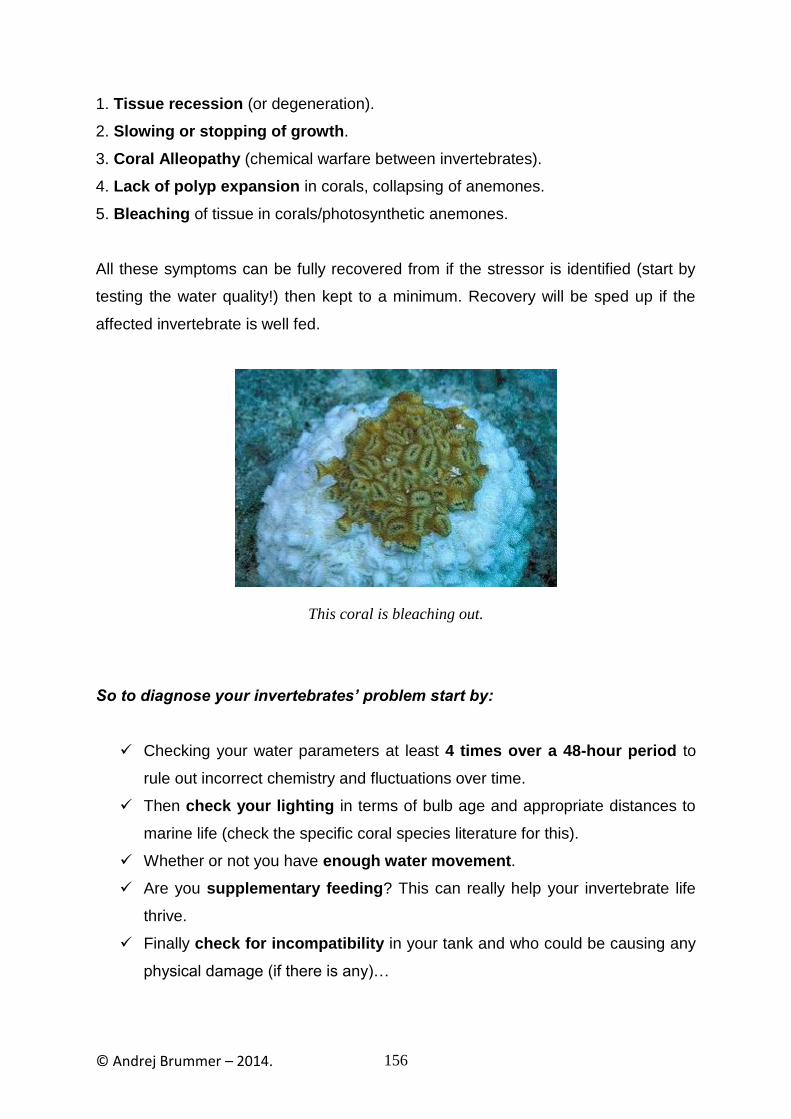
© Andrej Brummer – 2014. 156
1. Tissue recession (or degeneration).
2. Slowing or stopping of growth.
3. Coral Alleopathy (chemical warfare between invertebrates).
4. Lack of polyp expansion in corals, collapsing of anemones.
5. Bleaching of tissue in corals/photosynthetic anemones.
All these symptoms can be fully recovered from if the stressor is identified (start by
testing the water quality!) then kept to a minimum. Recovery will be sped up if the
affected invertebrate is well fed.
This coral is bleaching out.
So to diagnose your invertebrates’ problem start by:
Checking your water parameters at least 4 times over a 48-hour period to
rule out incorrect chemistry and fluctuations over time.
Then check your lighting in terms of bulb age and appropriate distances to
marine life (check the specific coral species literature for this).
Whether or not you have enough water movement.
Are you supplementary feeding? This can really help your invertebrate life
thrive.
Finally check for incompatibility in your tank and who could be causing any
physical damage (if there is any)…

© Andrej Brummer – 2014. 157
Coral Bleaching
A common problem with corals is bleaching/fading; this is when there is a mass
expulsion of zooanthellae (symbiotic algal cells contained in coral polyp tissues
that provide food converted from sunlight for the corals in return for safe housing and
nutrients) because of stress. This phenomenon is also occurring in the oceans of the
world today because of temperature stress caused by global warming.
In your marine tank there is a whole lot of potential causes of this stress-related
illness. The first place to start would be to check all the potential causes of stress
(above) one by one and rule them out, until the cause can be established. In other
words good old detective work!
As stress is the number one killer of corals (and disease symptoms are often
actually caused by stress as opposed to disease causing organisms) all
ailments should be worked through (not just bleaching!) in this fashion before you
ring the vet or medicate.
So you will need to check these things:
1. Temperature stress (usually the most common cause often caused by
fluctuations which a chiller and temperature controller can fix).
2. Physical stress; this can be damage caused by collection/handling and also
predation by fishes/invertebrates.
3. Chemical stress; all water parameters need to be checked here, also think about
what has been added to the water recently. The most common water parameters
that cause bleaching in corals are alkalinity (pH), excessive nitrates and phosphates.
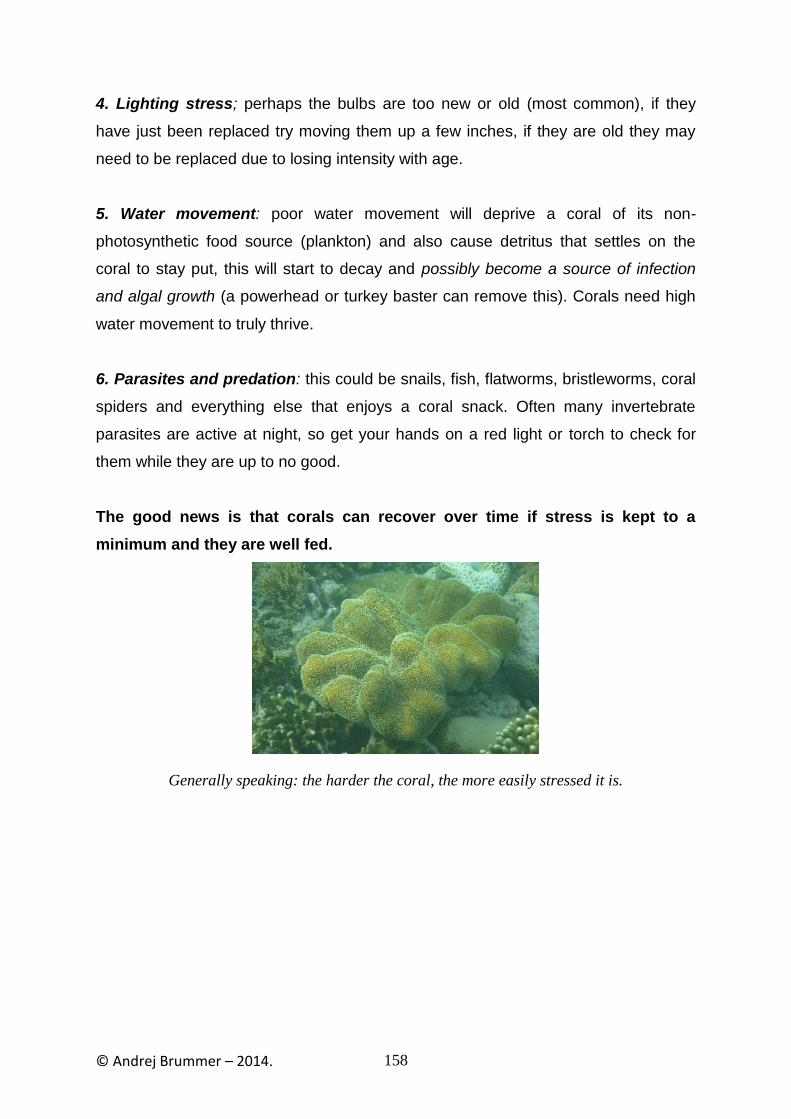
© Andrej Brummer – 2014. 158
4. Lighting stress; perhaps the bulbs are too new or old (most common), if they
have just been replaced try moving them up a few inches, if they are old they may
need to be replaced due to losing intensity with age.
5. Water movement: poor water movement will deprive a coral of its non-
photosynthetic food source (plankton) and also cause detritus that settles on the
coral to stay put, this will start to decay and possibly become a source of infection
and algal growth (a powerhead or turkey baster can remove this). Corals need high
water movement to truly thrive.
6. Parasites and predation: this could be snails, fish, flatworms, bristleworms, coral
spiders and everything else that enjoys a coral snack. Often many invertebrate
parasites are active at night, so get your hands on a red light or torch to check for
them while they are up to no good.
The good news is that corals can recover over time if stress is kept to a
minimum and they are well fed.
Generally speaking: the harder the coral, the more easily stressed it is.

© Andrej Brummer – 2014. 159
Common Invertebrate Ailments and Diseases:
Main sign of ailment/disease
Other signs
Species affected
Possible diagnosis
Treatments
Mantle irritations and damage
Giant Clams Parasitic snails in the family
Pyramidellidae. Pyramid snails.
Addition of Neon Wrasse; feeds on
snails and are colourful and harmless to other
species.
Moulting problems Lethargy Crustaceans Iodine levels are too low
Add commercial supplement to water
Crushed or broken parts of invertebrate
Death All corals and other
invertebrates (especially
hard skeleton species)
Physical damage caused by
mishandling (shipping or
collection), or becoming
dislodged from placement site
(e.g. by powerhead, fish)
Not much can be done, except ensuring optimal health and well fed and lit. Care and common
sense can reduce incidences.
Damaged soft tissue/polyps
Excess mucus
production in corals.
Small dark worms
spotted.
Mostly corals, sometimes-other soft tissued
invertebrates.
Animal predation due to non-compatible
species in tank. Convolutriloba
Flatworm infestation (.25 of
an inch long, reddish brown in colour, 3 pronged
tail)
Observe tank to find offending animals and
remove. This could include species
introduced with live rock/sand. If flatworms: freshwater dip afflicted specimen or add small
Butterfly fish.
Softening of exoskeleton
Malformed shells, fatality
Crustaceans, molluscs and hard corals
Calcium levels are too low
Add commercial supplement to water,
also check pH is correct
Obvious increasing algal growth on
coral/hard invertebrates
Disease Corals and other hard
sessile Invertebrates
Algal colonisation on damaged or
weakened species
Add algae eating fish/snails. Reduce light
(if not absolutely necessary for corals)
Specimen cannot right itself e.g. collapsed
anemone
Specimen is upside
down for long period
Echinoderms, Anemones.
Bubbles of air trapped within
body caused by being removed
from water
Carefully attempt to work out bubble with
fingers in tank.
Sediment accumulation on coral/sessile
Invertebrate. Could be sand or food detritus. (can cause bacterial
infections)
Excess mucus
production, algal
growth, bacterial infection
All species of sessile
Invertebrate
Damage caused by poor water flow
not removing sediment,
substrate sifting species.
Place specimen higher up in tank, remove
substrate-sifting species, and manually remove sediment with powerhead/syringe.

© Andrej Brummer – 2014. 160
Species appearing lethargic and generally
unhealthy
Not feeding, death
All invertebrates
Cytotoxicity caused by copper
(i.e. parasite treatment)
Replace all water in tank immediately, remove afflicted to
quarantine
Black region on coral underneath which
tissue is being eaten. Progresses as black
band over coral. Rotting area on
anemones
All corals, except
alcyonarians and fungids. Anemones
Anemones: bacterial infection. Coral; Black Band
Disease (BBD) caused by
cyanobacteria
Antibiotic paste painted onto specimen (e.g. neomycin sulphate),
coral: 2-3 days of darkness, fragging ahead of infection
Soft tissue deteriation/shrinking and changing colour
Lack of growth
Corals, zooanthellae containing clams and anemones
Too little light or incorrect spectrum
bulbs used
Fit bulbs with correct spectrum and wattage, move specimen closer
to light source
Progressive area of obvious tissue
absence; a white band moving slowly across
coral
Tissue peeling off
in small globes
leaving bare skeleton
All corals White Band Disease (WBD)
Antiseptic bath (Lugols solution) can help,
fragging ahead of band followed by optimal water and lighting
conditions
Coral tissues appearing white or abnormally light in
colour
Death All corals Bleaching: (mass expulsion of
zooanthellae) usually because of physical, chemical,
lighting, salinity, diet, poor water
movement stresses
Eliminate stress: major cause is temperature, so adjust if necessary.
Check all causative stress factors. Coral
can recover over time if stress is minimal and
they are well fed
Rapid tissue sloughing from the base up
leaving white skeleton
Death Corals, most commonly Acroporid
species and pocilloporid
corals
Rapid Tissue Necrosis (RTN) usually fatal and highly contagious resulting from non pathogenic stress
No treatment as death is sudden. Can be
prevented by quarantining new corals after slow acclimation.
Lugols dips, chloramphenicol and
fragging can be effective
Coral Diseases
Surprisingly, relatively little is known about coral disease, but as I have emphasized
to you stress is the number one killer of aquarium corals. In fact bleaching, infection,
polyp recession and rapid tissue necrosis are all likely caused by physical stress,
environmental stress and nutritional deficiency.

© Andrej Brummer – 2014. 161
Pathogens may not be the cause of these ailments (they just cause the symptoms
you can see). Any disease treatments should be always be undertaken in a
quarantine tank so as not to spread infection or cause harm to the aquarium
ecosystem with treatments.
Coral and other invertebrate treatments
Chloramphenicol: This anti-biotic agent can be harmful to humans and other
marine organisms but is widely thought to be highly effective against Rapid Tissue
Necrosis. 20mg/L seawater can be used in the quarantine tank with the infected
coral/invertebrate submersed for 24 hours.
Freshwater dips: 1-3 minute dips can get rid of some parasites such as flatworms
and cyanobacteria. The water should be chlorine treated (so chlorine is removed)
and be the same temperature and pH as the aquarium water. Note; some corals do
not like this treatment.
Antibiotic powders, solutions and dips: these are primarily used for bacterial
infections; for example a paste applied to a coral with BBD (black band disease) is
very effective. Most common antibiotics are kanamycin and neomycin sulphate
because of low levels of toxicity to other aquarium inhabitants. One of the most
highly regarded methods of antibiotic usage is soaking food in antibiotic and feeding
directly to infected invertebrate, this is a safe method as little antibiotic will remain in
the tank itself.
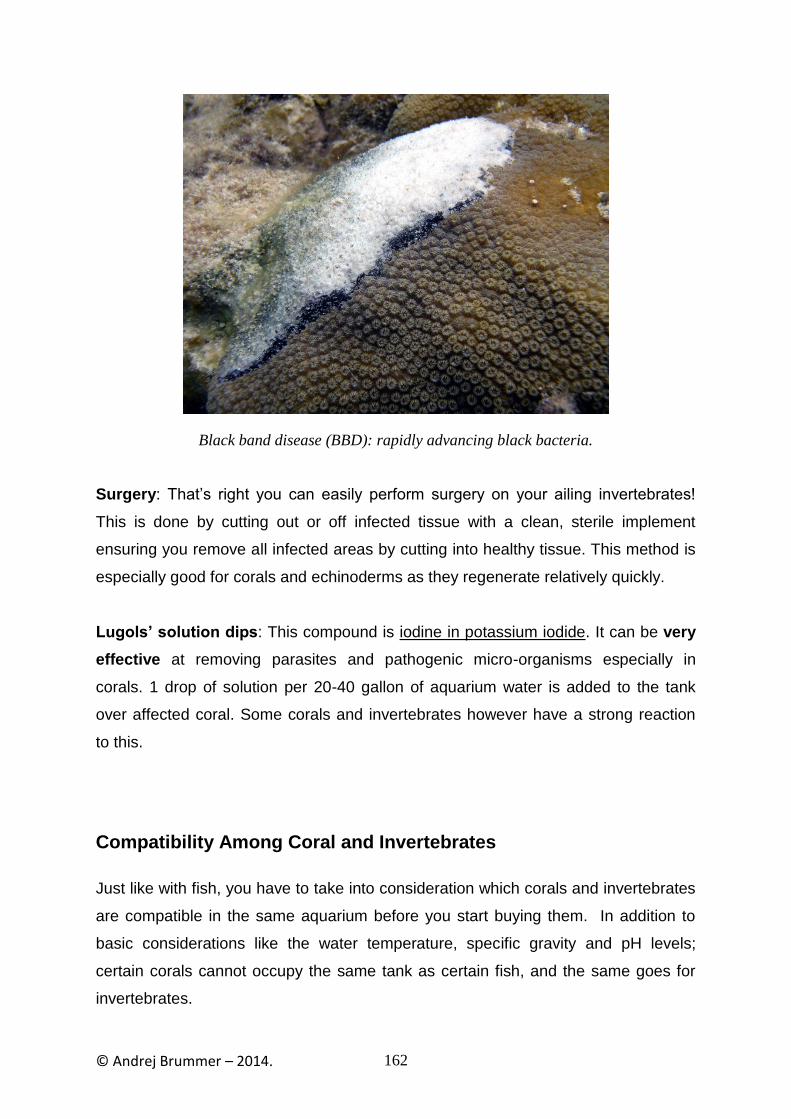
© Andrej Brummer – 2014. 162
Black band disease (BBD): rapidly advancing black bacteria.
Surgery: That’s right you can easily perform surgery on your ailing invertebrates!
This is done by cutting out or off infected tissue with a clean, sterile implement
ensuring you remove all infected areas by cutting into healthy tissue. This method is
especially good for corals and echinoderms as they regenerate relatively quickly.
Lugols‟ solution dips: This compound is iodine in potassium iodide. It can be very
effective at removing parasites and pathogenic micro-organisms especially in
corals. 1 drop of solution per 20-40 gallon of aquarium water is added to the tank
over affected coral. Some corals and invertebrates however have a strong reaction
to this.
Compatibility Among Coral and Invertebrates
Just like with fish, you have to take into consideration which corals and invertebrates
are compatible in the same aquarium before you start buying them. In addition to
basic considerations like the water temperature, specific gravity and pH levels;
certain corals cannot occupy the same tank as certain fish, and the same goes for
invertebrates.

© Andrej Brummer – 2014. 163
Coral Compatibility
Coral can mostly be kept with all types of coral in various amounts within the
aquarium, but try to avoid placing different species so they are touching or too close
as one may attack the other or release toxins into the water, at least 6 inches of
space is required between them.
Many fish are compatible with coral, including:
Angler, Anthias, Basslet, Batfish, Blenny, Cardinal, Clownfish, Damselfish, Drumfish,
Eel, Goatfish, Goby, Grouper, Grunt, Hawkfish, Hogfish, invertebrates, Lions, live
rock, Pseudochromis, Rabbitfish, Scorpionfish, Seabass, Snapper, Soldierfish,
Squirrelfish, Sweetlip, Tang, and Trunkfish.
Fish to avoid are:
some species of Angelfishes, Boxfish, some species of Butterflyfishes, Comb-tooth
Blenny, Filefish, Parrotfish, Porcupinefish, Pufferfish, Triggerfish.
Other Invertebrate Compatibility
Invertebrates can also be kept in groups of any number. They are compatible with
fewer types of fish than coral (because more fish snack on invertebrates than
corals), but still a decent enough number to give your aquarium variety.
Compatible fish with invertebrates include:
Anthias, Basslet, Batfish, Blenny, Cardinal, Clownfish, coral, Damselfish, Drumfish,
Goby, live rock, Pseudochromis, Rabbitfish, and Tang.

© Andrej Brummer – 2014. 164
Book 6:
Marine Fish Diseases and General Health
Fish are like any other living creature, in that they are susceptible to disease and
illness especially when stressed. As an aquarium owner, there are a number of
things you can do to help keep your marine life healthy and free from disease.
Providing a Healthy Diet
Every species of fish has it's own dietary requirements, which you should learn prior
to putting a fish into your aquarium. There are no boxes of fish food available that
are a one-size-fits-all approach to feeding the life in your aquarium!
It wouldn't be healthy for a human to eat the same food day after day, and fish also
need a varied diet in order to get the necessary nutrition for a healthy life.
Improper and incomplete diets often result in vitamin and nutrient deficiencies, which
cause a weakened immune system, improper growth or even death.
A balanced diet is a must for happy, healthy and optimally colourful fish. You can
even feed your fish some human food, for example giving the herbivores fresh
lettuce or peas can be a cheap way of providing a healthy varied diet.
Providing all the necessary nutrients for your fish will ensure they are more content
in their aquarium environment, but not only this their colouration will be more striking,
they will grow bigger and live longer while being more resistant to disease and
stress.
As I have mentioned before: hungry fish are grumpy fish; so providing the right foods
in the right quantities (enough to keep them looking in good condition which will
probably be less than you think) will reduce squabbles and bullying behaviour, which
cause stress.

© Andrej Brummer – 2014. 165
Dont be like some beginners and just feed flakes!
Frozen Food Options
Frozen food for marine life range from “meaty foods” like shrimp and squid, to
vegetable portions, such as seaweed and spirulina.
Depending on the type of fish you are feeding, frozen foods can be the staple diet, or
can be used to add variety and supplement the staple diet as a delicacy. Nutritional
value is retained in frozen foods, as well as the natural shape and appearance of the
foods which helps your fish instinctively feed on this food source.
Frozen foods can be purchased in convenient cubes and are actually as nutritionally
beneficial as fresh foods and much more cost effective. Frozen foods are better fed
to your marine life by thawing and breaking them up in a container of aquarium water
and slowly pouring in so all is eaten. Remove juices from meaty frozen foods that
have thawed as this is a major way of introducing phosphates.
Freeze-Dried Food Options
Freeze-dried food also retains its natural nutrition, appearance and texture of the live
food, but is processed in a freeze-dried system that allows for easy feeding and

© Andrej Brummer – 2014. 166
storage. You can also use freeze-dried varieties to give liquid vitamin supplements,
by adding a few drops into the food as needed. Freeze-dried food is typically for a
“treat” food for your fish, but in some cases may be used as part of the staple diet.
Dried Food Options
Dried foods are designed to make up the majority of your marine life's staple
diets. The food is flakey and softens in the water without disintegrating. When you
sprinkle the food in the top of the aquarium, it makes it's way slowly down through
the water - and what isn't eaten by most fish will then fall to the bottom of the tank,
where other fish varieties prefer to eat.
Prepared foods such as flakes and pellets can be very nutritionally complete contrary
to popular belief as well as being extremely convenient. The only issue is correct
storage to ensure the food is in top condition at all times. Avoid repackaging food
and buying in massive bulk, the food needs to be a quality product packaged
correctly (shaker containers are good) and stored as per instructions. If food goes off
or gets contaminated it can actually kill your fish, don’t take risks here.
In addition to the most common flake variety, dried food is also available in pellets
and granules; with sinking or floating varieties, and even specifically formulated for
carnivore fish or herbivore fish.
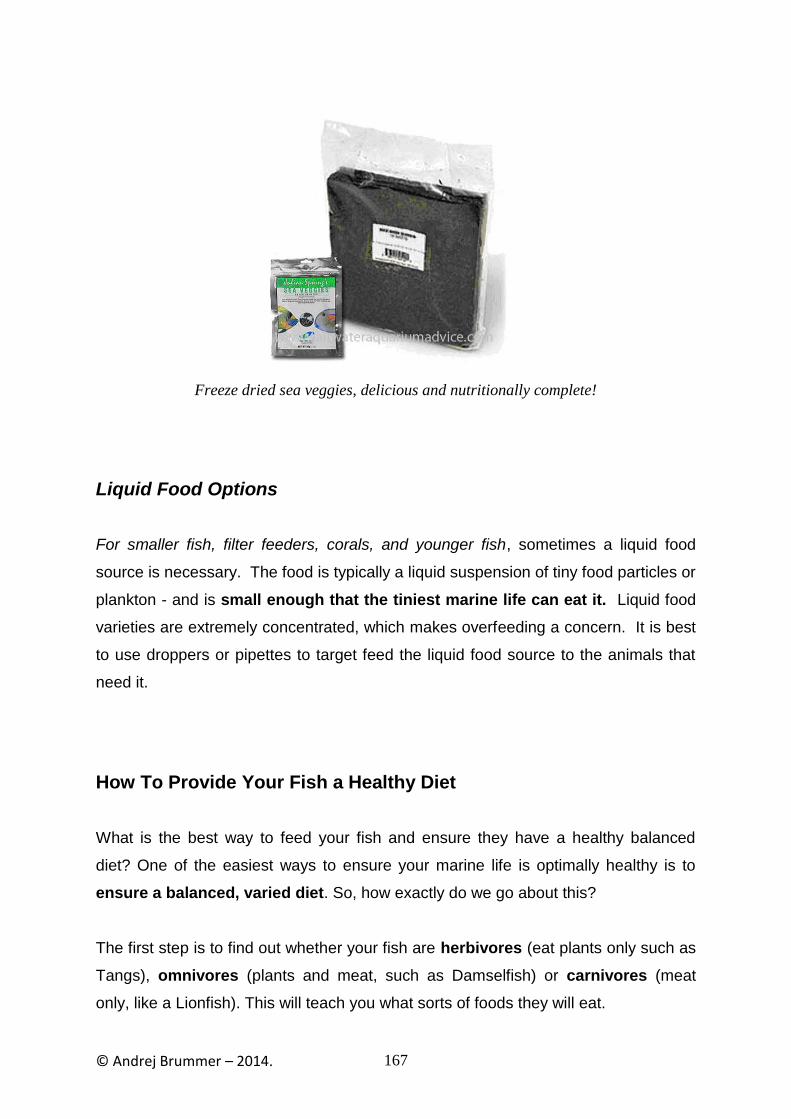
© Andrej Brummer – 2014. 167
Freeze dried sea veggies, delicious and nutritionally complete!
Liquid Food Options
For smaller fish, filter feeders, corals, and younger fish, sometimes a liquid food
source is necessary. The food is typically a liquid suspension of tiny food particles or
plankton - and is small enough that the tiniest marine life can eat it. Liquid food
varieties are extremely concentrated, which makes overfeeding a concern. It is best
to use droppers or pipettes to target feed the liquid food source to the animals that
need it.
How To Provide Your Fish a Healthy Diet
What is the best way to feed your fish and ensure they have a healthy balanced
diet? One of the easiest ways to ensure your marine life is optimally healthy is to
ensure a balanced, varied diet. So, how exactly do we go about this?
The first step is to find out whether your fish are herbivores (eat plants only such as
Tangs), omnivores (plants and meat, such as Damselfish) or carnivores (meat
only, like a Lionfish). This will teach you what sorts of foods they will eat.
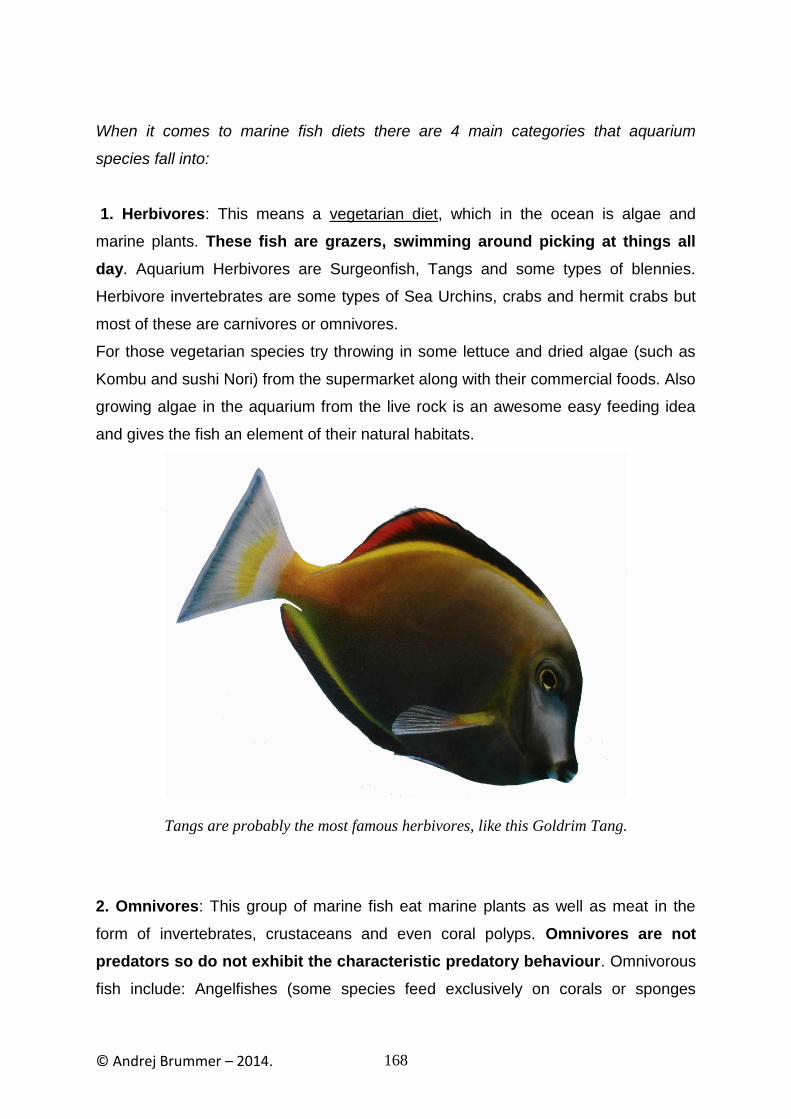
© Andrej Brummer – 2014. 168
When it comes to marine fish diets there are 4 main categories that aquarium
species fall into:
1. Herbivores: This means a vegetarian diet, which in the ocean is algae and
marine plants. These fish are grazers, swimming around picking at things all
day. Aquarium Herbivores are Surgeonfish, Tangs and some types of blennies.
Herbivore invertebrates are some types of Sea Urchins, crabs and hermit crabs but
most of these are carnivores or omnivores.
For those vegetarian species try throwing in some lettuce and dried algae (such as
Kombu and sushi Nori) from the supermarket along with their commercial foods. Also
growing algae in the aquarium from the live rock is an awesome easy feeding idea
and gives the fish an element of their natural habitats.
Tangs are probably the most famous herbivores, like this Goldrim Tang.
2. Omnivores: This group of marine fish eat marine plants as well as meat in the
form of invertebrates, crustaceans and even coral polyps. Omnivores are not
predators so do not exhibit the characteristic predatory behaviour. Omnivorous
fish include: Angelfishes (some species feed exclusively on corals or sponges
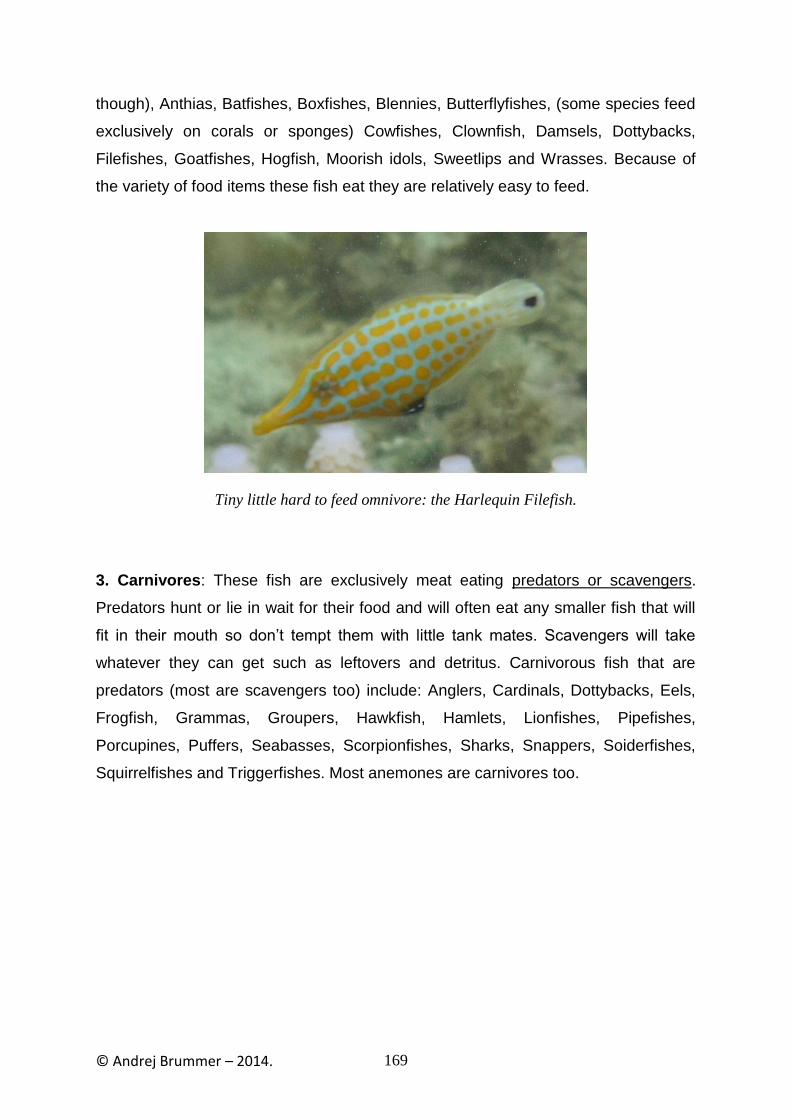
© Andrej Brummer – 2014. 169
though), Anthias, Batfishes, Boxfishes, Blennies, Butterflyfishes, (some species feed
exclusively on corals or sponges) Cowfishes, Clownfish, Damsels, Dottybacks,
Filefishes, Goatfishes, Hogfish, Moorish idols, Sweetlips and Wrasses. Because of
the variety of food items these fish eat they are relatively easy to feed.
Tiny little hard to feed omnivore: the Harlequin Filefish.
3. Carnivores: These fish are exclusively meat eating predators or scavengers.
Predators hunt or lie in wait for their food and will often eat any smaller fish that will
fit in their mouth so don’t tempt them with little tank mates. Scavengers will take
whatever they can get such as leftovers and detritus. Carnivorous fish that are
predators (most are scavengers too) include: Anglers, Cardinals, Dottybacks, Eels,
Frogfish, Grammas, Groupers, Hawkfish, Hamlets, Lionfishes, Pipefishes,
Porcupines, Puffers, Seabasses, Scorpionfishes, Sharks, Snappers, Soiderfishes,
Squirrelfishes and Triggerfishes. Most anemones are carnivores too.

© Andrej Brummer – 2014. 170
Famous predator: the Lionfish, also has toxic spines!
4. Filter feeders and sand sifters: Filter feeders are invertebrates that filter out tiny
plankton and food particles suspended in the water using modified feeding
appendages. This includes corals, sponges, some crabs, tubeworms and tunicates.
Other species are sand sifters like some Gobies, Mandarinfishes, Dragonets, Sea
Cucumbers, marine worms and Starfish. These marine species displace sand on the
bottom of the aquarium looking for copepods and amphipods that live in the
substrate.
Shrimp Gobies, like this spangled Goby love to sift sand looking for shrimp and pods.

© Andrej Brummer – 2014. 171
Where Do Your Fish Feed and Why it Matters?
The second step is to find where in the water column your fish typically feed (i.e. top,
middle or bottom feeders) and other specific feeding behaviours like sand sifting and
algae nibbling off rocks. This way you can cater to each type of fishes specific
requirements, which will keep them happy and ensure that they get their fair share of
food.
So you need to familiarize yourself with your fish’s natural diet and feeding habits:
1. Fish that are top feeders will need food that floats on the surface, such as
flakes.
2. Middle feeders will need slowly sinking food like sticks and pellets, where
they can catch the food as it falls through the water, these foods tend to sink
and spread in middle waters.
3. Bottom feeders need more dense food options that sink all the way down
such as tablets and wafers.
4. Finally filter feeders like coral and some invertebrates can get all their
nutrition from liquid diets, squirted toward them.
It is also important to feed your fish the same time everyday; this gives them
consistency in their lives; a healthy routine and can make for some quite interesting
antics when they see you coming!
It is also vitally important NOT to overfeed your fish, a general rule of thumb is
feed only what they can eat in a minute or so making sure that each different type of
eater is catered to in terms of type of food and where you place the food for them.
Uneaten food will breakdown into unwanted ammonia in the water which is toxic to
the rest of your marine life and puts additional stress on your filters and protein
skimmers, it is advised to remove this uneaten food yourself with a net or siphon.

© Andrej Brummer – 2014. 172
Ultimately you want no uneaten food it is far better to underfeed so go for feeding
less more often. Remember that in the wild marine life would go through periods of
almost no food at all.
Overfeeding is one of the key causes of crashes in biological filtration that will cause
massive damage to all livestock. Overfeeding is much more harmful than
underfeeding, if fish are eating less than you feed then provide less, and if they are
still looking hungry provide a little bit more, be flexible and adjust your feeding
quantities over time and in sync with your fish’s requirements.
I recommend feeding your fish twice a day, once in the morning and once at
night, as I mentioned previously it is better if you stick to a schedule, your fish will be
happier this way. Herbivores graze and eat little bits continuously and carnivores
usually consume bigger quantities less often, so twice a day is a good middle ground
for all fish types.
Feeding the Occasional Treat
If you want to provide your fish a special treat by feeding live food (such as brine
shrimp) ensure that you rinse under freshwater to avoid parasites and disease
entering your aquarium. Live foods are good for your fish but can be a massive effort
and expense for you (unless you culture them yourself). Live foods also can make
your marine life more aggressive as natural instincts from the wild come back into
play.
A lot of aquarists claim live food is the much more healthy, natural option but the
reality is your pets will still get the same nutrient injection from frozen foods of the
same type. However fresh foods can be a good option for new or very fussy marine
fish.
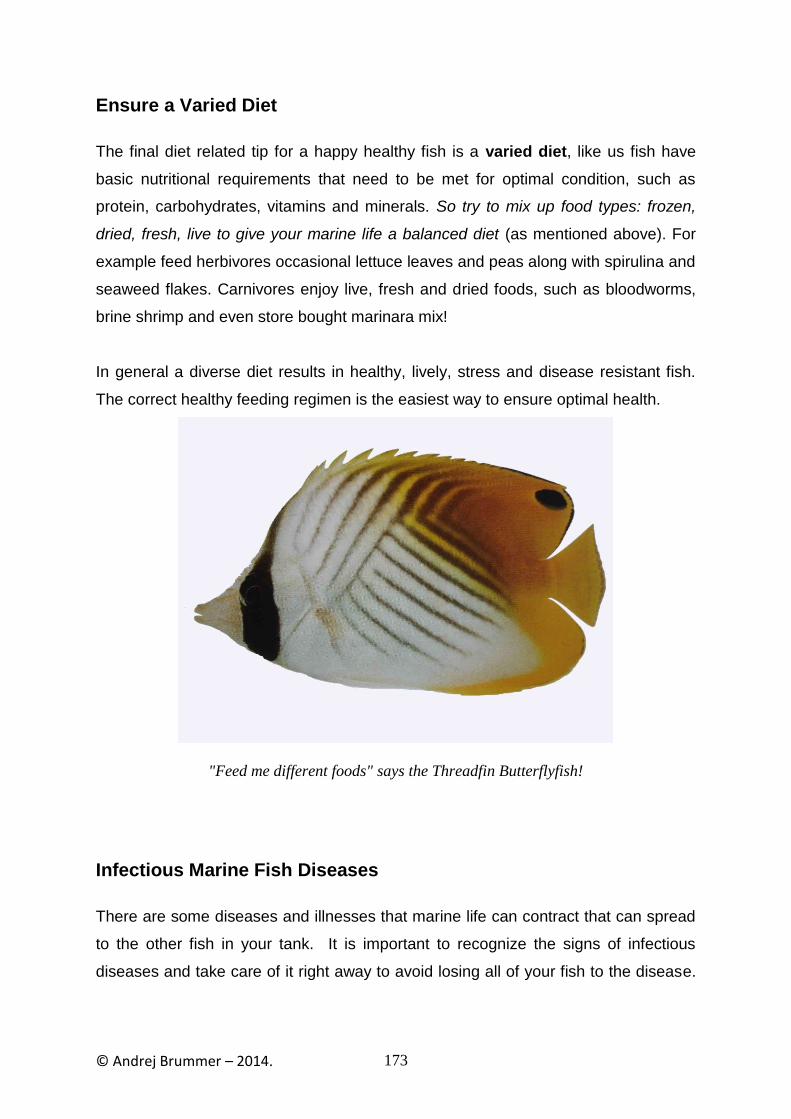
© Andrej Brummer – 2014. 173
Ensure a Varied Diet
The final diet related tip for a happy healthy fish is a varied diet, like us fish have
basic nutritional requirements that need to be met for optimal condition, such as
protein, carbohydrates, vitamins and minerals. So try to mix up food types: frozen,
dried, fresh, live to give your marine life a balanced diet (as mentioned above). For
example feed herbivores occasional lettuce leaves and peas along with spirulina and
seaweed flakes. Carnivores enjoy live, fresh and dried foods, such as bloodworms,
brine shrimp and even store bought marinara mix!
In general a diverse diet results in healthy, lively, stress and disease resistant fish.
The correct healthy feeding regimen is the easiest way to ensure optimal health.
"Feed me different foods" says the Threadfin Butterflyfish!
Infectious Marine Fish Diseases
There are some diseases and illnesses that marine life can contract that can spread
to the other fish in your tank. It is important to recognize the signs of infectious
diseases and take care of it right away to avoid losing all of your fish to the disease.

© Andrej Brummer – 2014. 174
The 3 most common diseases (and the 3 biggest killers) are – in order of how
much captive marine life deaths they are responsible for:
1. Marine Ich caused by the parasite Cyrptocaryon Irritans
2. Marine Velvet caused by the parasite Amyloodinium Ocellatum
3. Clownfish Disease caused by the parasite Brooklynella hostilis
Points to Note Before You do Battle With Saltwater Aquarium Disease
Before you medicate your fish you need to be SURE what the disease is as
you may only get one chance to get it right and incorrect medication can and
does kill fish and invertebrates.
As I mentioned above you also need to figure out why your fish have the
disease to nip the cause in the bud! The most common causes are transport
stress and incorrect acclimation procedures and “new tank syndrome” if your
aquarium has just been set up which means it hasn’t been cycled long
enough and this is causing chemical stress.
You need a quarantine tank! Think; (a) quiet, stress free place for new
arrivals to acclimate and (b) perfect environment to separate and medicate
sick marine life effectively. Two awesome reasons to get one!
Consider “cleaner” species such as Gobies (especially the Neon) and
Shrimp (Skunk cleaner shrimp are excellent), these guys will happily pick off
parasites from your fish and are natural biological control agents.
To effectively medicate read the label first (obvious I know, but so many
people don’t) and ensure medication will have no bad side effects on you
other pets (another reason a quarantine tank is a good idea!) especially corals
and the like. Finally remove any chemical filtration such as carbon to

© Andrej Brummer – 2014. 175
effectively douse your sick friend with the medicine without the media pulling it
out of the water.
Common Saltwater Aquarium Fish Diseases and How to Battle Them:
Disease: Amyloodinium Ocellatum
Common Names: Marine Velvet, Oodinium, Amyloodiniosis, Gold dust disease,
Coral fish disease.
Amyloodinium ocellatum is one of the fastest-acting saltwater fish diseases, and also
one of the deadliest. If one of your fish has this disease, it is very likely that all of the
fish sharing the aquarium will be infected with it to some extent. It is A
Dinoflaggelate (an algae like single celled organism placed halfway between plants
and an animal’s) parasite called Amyloodinium ocellatum (formally known as
Oodinium ocellatum).
Unlike marine Ich (the number 1 saltwater tank killer, read below!) there is unlikely
to be latent (existing in the background but not infesting fish) populations
existing in the aquarium that flare up when fish are under stress.
Usually the Amyloodinium is brought in on something being introduced wet to the
aquarium (invertebrates can carry this disease too) and reproduces rapidly, which
again brings to light the absolute need for freshwater dips and quarantine
procedures before adding something from the wild or another aquarium into our own.
This organism is very common in the wild and is commonly found on the skin of wild
caught specimens. When marine velvet is present you will know all about it!
Most aquarium cases of this disease, if left untreated result in rapid infestation,
reproduction and damage to fish’s gills causing death, eventually by oxygen

© Andrej Brummer – 2014. 176
starvation. Sadly this disease can kill as early as a single day of noticing the early
warning symptoms. It attacks the gills first.
The lifecycle of Amyloodinium is similar to Cryptocaryon irritans (read below) the 2
are often confused.
Visible Symptoms:
Rubbing at things in the tank.
Coating of tiny white particles on skin (looks like white, grey or gold dust) =
severe symptoms.
Hyperactivity.
Twitching.
Shuddering.
Rapid and shallow breathing.
Reduced appetite.
Faded coloring.
Gasping and staying near surface or in areas of highest water movement.
Treatments:
Preventing this particularly nasty parasite from every entering your aquarium in the
first place is much, much easier than trying to stop it once it has a hold on your fish.
So correct acclimation procedures, including freshwater dips for 3-5 minutes (of
everything!) and quarantine for about 4 weeks is going to save your marine life from
all the above mentioned nastiness.
The key to effectively treating this disease is rapid diagnosis and appropriate
treatment. Every minute counts with velvet! Ensuring excellent water quality and
nutrition throughout the treatment will aid the fish‟s immune systems and
speed up recovery.
© Andrej Brummer – 2014. 177
Marine velvet is NOT responsive to Hyposalinity treatments like with marine Ich (the
2 diseases are commonly confused but caused by very different parasites) but
can be killed in their free-swimming stage with UV sterilisers.
Some marine fish if exposed to small numbers of parasites can actually become
immune to infestation when Dinospore numbers are low enough not to cause
mortality and upon infection the trophonts simply fall off. But don’t try to wait for
natural immunity to happen, this is a swift progressing disease and if left untreated it
will kill your fish!
So what are the effective treatments for marine velvet?
1. Copper treatments: Copper is really the ONLY effective treatment here. The
treatment is the same for Marine Ich: you will need to ensure the copper levels in the
water remain at the effective level (0.15-0.25 mg/l) for at least 14 days. That will
mean testing for the appropriate copper solution (chelated or not) at least daily to
ensure it is in the effective range and adjust accordingly following the instructions.
Levels lower than this will not be effective and levels much higher than this will start
to become toxic to your fish.
As I have mentioned before copper is extremely toxic to all invertebrates and the
best option is to remove all fish (because the disease is highly contagious) to a QT
(quarantine tank) after a 3-5 minute freshwater dip and treat there, removing any
chemical filtration media. After treatment has been done you will want to remove
all traces of copper using chemical media (such as activated carbon) and
water changes.
The main tank should be left to run “fallow” and be run fish free for a month (with or
without invertebrates) where the parasite will go through its lifecycle then die out
because of a lack of host fish.

© Andrej Brummer – 2014. 178
A product like Cupramine is GOLD when you have an Ich or Velvet outbreak.
2. Freshwater dips: Although not a treatment in themselves a 3-5 minute freshwater
dip will provide relief for your infected fish by destroying at least some of the
parasites. This should be done prior to removing to said QT and copper treating. It
should also be done every time you want to introduce a new pet into your aquarium
before the quarantine period. Freshwater dips should always be done with filtered
water that has been adjusted to the same pH as in the water the fish is coming from.
3. Chloroquinine diphosphate: There is a single effective alternative to copper
solution treatments which is also an anti-malarial drug! However it has all the same
downfalls as copper being it is toxic to invertebrates (not to fish though) also it is
more expensive than copper and harder to find. The active dose of Chloroquinine
diphosphate is 5-10mg/L for 10 days.
4. Other treatments: Despite what you may read or hear the above treatments are
the only EFFECTIVE treatments currently on the market, as with other diseases
there are many “miracle” Amyloodinium specific “reef safe” products around that
work with seemingly random limited success. This disease is so rapid to kill that
you should take no chances with something that only MIGHT work. Something
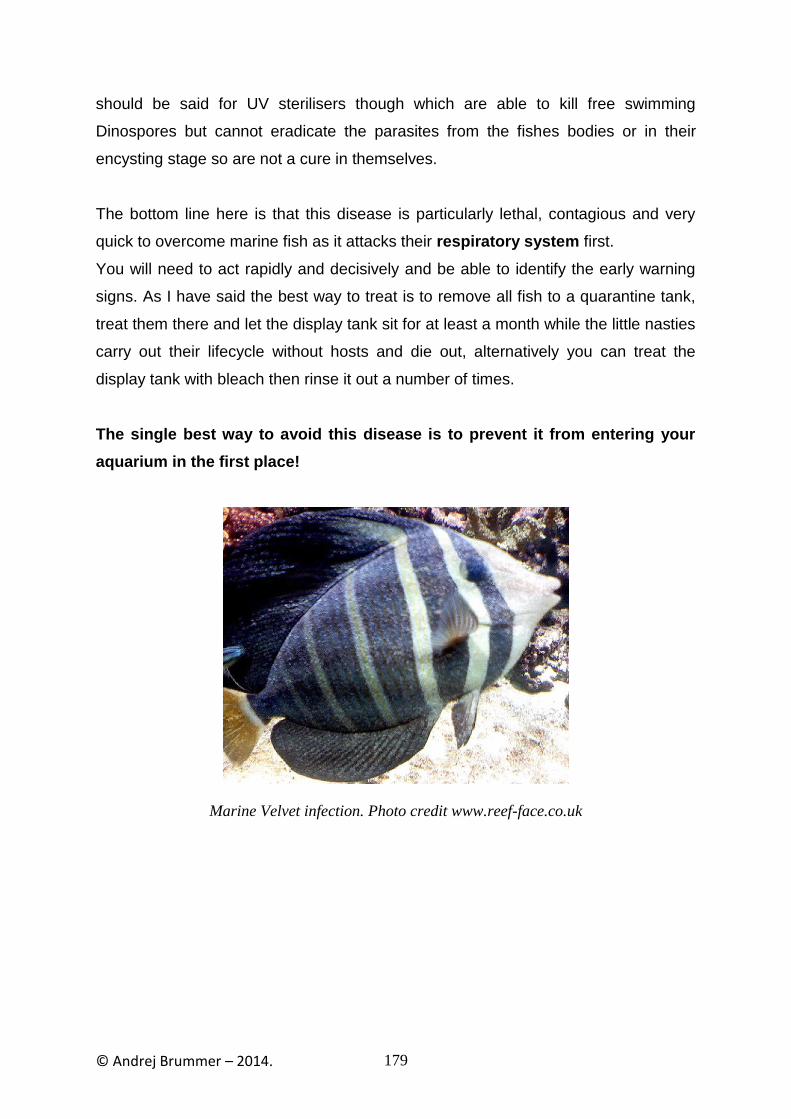
© Andrej Brummer – 2014. 179
should be said for UV sterilisers though which are able to kill free swimming
Dinospores but cannot eradicate the parasites from the fishes bodies or in their
encysting stage so are not a cure in themselves.
The bottom line here is that this disease is particularly lethal, contagious and very
quick to overcome marine fish as it attacks their respiratory system first.
You will need to act rapidly and decisively and be able to identify the early warning
signs. As I have said the best way to treat is to remove all fish to a quarantine tank,
treat them there and let the display tank sit for at least a month while the little nasties
carry out their lifecycle without hosts and die out, alternatively you can treat the
display tank with bleach then rinse it out a number of times.
The single best way to avoid this disease is to prevent it from entering your
aquarium in the first place!
Marine Velvet infection. Photo credit www.reef-face.co.uk

© Andrej Brummer – 2014. 180
Disease: Bacterial Infections
Bacterial infections in marine life are typically a result of having poor water
quality, although can be the result of injury or parasite infestation. Usually only one
or two fish in your aquarium will be infected initially.
Visible Symptoms:
Water in aquarium appears cloudy (when looking end to end)
Red spots and/or lines appear on the body of fish
Fish eyes seem cloudy
White patches on skin
Lesions or ulcers may appear
Loss of appetite
Fish may seem to hide
May have swollen bellies
Increased breathing
Treatments: Typically, identifying the cause of the stress (poor water quality) and correcting it will
correct the problem if noticed early on. Otherwise, a variety of antibiotics can be
used to treat the affected fish. Fish will return to health quickly once the cause of
stress is removed and a good diet is provided.
Disease: Brooklynella Hostilis
Common Names: Clownfish Disease, Brooklynellosis.
Brooklynella Hostilis is a parasite infection that is commonly seen in Clownfish, but
other species can also suffer from it. You will notice symptoms on one or two fish
initially; but it will spread rapidly if you don't take care of it. Brooklynella Hostilis will
kill fish in just a couple days if uncared for.

© Andrej Brummer – 2014. 181
Clownfish disease or Brooklynellosis is the third of the “Ich” type diseases
caused by 3 different external parasites, this group of 3 diseases exhibit similar
symptoms to the untrained eye and so are commonly confused by uneducated
aquarists. My aim is to ensure you don’t make this mistake yourself and lose lives by
incorrectly diagnosing and treating your marine fish.
Clownfish disease is caused by a ciliated protozoan known as Brooklynella hostilis,
which grow up to a few millimetres in size. A ciliated protozoan is surrounded by
hairs (cilia) that it uses to move around.
Brooklynellosis wrecks a lot less havoc in marine aquariums than Marine Ich and
Marine velvet but is so commonly associated with that most popular marine
aquarium inhabitant Clownfish, that it has been named after them. This disease is
very common in wild caught Clownfish, which get very stressed especially when
being removed from their Anemone hosts up to half of them don’t make it to home
aquariums. It also occurs when captive reared Clownfish come into contact with wild
caught ones and also when Clownfish undergo trauma in an aquarium environment.
This disease most commonly is seen in wild caught Clownfish or captive bred
examples exposed to wild caught ones and is usually brought to your aquarium
in this fashion. If these factors are ruled out this organism is not that commonly
seen.
This disease isn’t just seen on Clownfish though, Angelfish, Tangs, Wrasses and
even Sea Horses commonly fall victim to this parasite.
This parasite reproduces more quickly than both Amyloodinium and Cryptocaryon
and if left untreated can kill a very short time. The main symptom is excessive
production of mucus as a defence response to try and shed the attached parasite.
As this disease advances a thick whitish mucus coating spreads out from the head
and white rash-like lesions on the fishes skin will follow.
Visible Symptoms:

© Andrej Brummer – 2014. 182
Excessive mucus production centred around the gill area – characteristic
symptom
Loss of colouration around the head – early warning sign
Open mouth gasping near the surface – early warning sign
Rapid breathing (because the gills are being attacked first) – early warning
sign
Rubbing against things
String-like material (mucus) sloughing off the fish
Hyperactivity in beginning stages of disease
Lethargic in later stages of disease
White skin lesions in later stages of disease
Hiding in the tank
Loss of appetite
Treatments: Prevention is the best way to stop this disease before it can even occur (are you
seeing a pattern yet?) preventing is much, much easier than doing battle with it once
it has a foot hold. So, correct acclimation procedures, including freshwater dips
for 3-5 minutes (of everything!) and quarantine for about 4 weeks is the call of
the day.
The big difference with this parasite compared to Ich and velvet is that copper is
NOT an effective treatment here.
Secondary infections: You have to be aware of secondary bacterial infections that
can often occur when your fishes immune system is being compromised by a
Brooklynella infection, this can easily occur around the skin lesions. I recommend
you should consider using an antibiotic such as Erythromycin and even add some
methylene blue to the treatment water.
1. Formalin treatments: Formalin/formaldehyde is the ONLY effective treatment
here. You will need to be very careful, work in well-ventilated areas, follow the
© Andrej Brummer – 2014. 183
instructions and wear gloves, as this chemical is toxic and a potential carcinogen.
Formalin usually comes as a 37% solution, which you will use as a dip or a bath (pH
adjusted fresh or saltwater, but less than 80’F).
You will need to remove your fish to a quarantine tank (Formalin dip before adding
to QT), as Formalin will damage beneficial bacteria, corals, invertebrates and live
rock in your display tank. As Formalin depletes oxygen levels you should use an
airstone in your Formalin bath vessel.
The best way to treat is a Formalin bath using a 37% Formalin product; one or 2
teaspoons should provide the active dose, which will be 100 – 200 ppm (again,
follow the instructions). Scaleless and more sensitive species such as Tangs and
Butterflyfish should have a half dose.
You can either add Formalin to your QT which will damage all the above or can
conduct a series of Formalin baths which is my recommendation.
The bath should be given in a clean few gallon container containing an airstone. You
will want to place the fishes in here for at least 15 minutes to half an hour at a time. If
the fish gets highly stressed remove it and try again the following day. This bath
procedure should usually be repeated for 5 days (with new baths being made up
each day). It is a good idea to have another clean vessel of water to rinse the fish
from medication and parasites in for a few minutes after its dip before being placed
back into the QT to recover. Conduct very regular partial water changes of the QT
over the treatment period to remove any free-swimming parasites and residual
medication.
2. Freshwater dips: Although not a treatment in themselves a 3-5 minute freshwater
dip will provide relief for your infected fish by destroying at least some of the
parasites. This should be done prior to removing to said QT and formalin treating. It
should also be done every time you want to introduce a new pet into your aquarium
before the quarantine period. Freshwater dips should always be done with filtered
water that has been adjusted to the same pH as in the water the fish is coming from.

© Andrej Brummer – 2014. 184
Successful identification of Brooklynella is paramount to treating this disease in time.
As the other 2 Ich type diseases are treated by copper, which is ineffective
against Brookynella a mistake here could be very costly to your marine life. Once
again, non-formalin/formaldehyde commercial treatments can widely vary in their
effectiveness, in my humble opinion it is not wise to gamble with your marine life.
Clownfish disease; usually spread from Clownfish!
Disease: Cryptocaryon Irritans
Common Names: White Spot Disease, Saltwater Ich, Marine Ich (or Ick), Marine
whitespot, Cryptocaryonasis.
Cryptocaryon Irritans is caused by a ciliated Protozoan parasite. It is one of the more
common diseases that captive saltwater fish experience it is the number 1 disease
of captive marine life! This little nasty rarely occurs in the wild and is a lot less fatal
than in closed aquarium conditions. In a captive system it can wreak havoc because
aquariums are so suited to its reproduction and there are plentiful hosts around.
Infestations are usually brought about by environmental stresses like
temperature and exposure to excessive ammonia, nitrite and nitrate.
Understanding the Cyrptocaryon Irritans lifecycle

© Andrej Brummer – 2014. 185
The protozoan parasites start out as trophonts feeding, embedded on the skin of
the fish underneath and protected by the mucous layer.
They then drop off (protomont stage), fall to the bottom and crawl around for a few
hours before attaching to the substrate and transforming into cysts (now called
tomonts) where they multiply into many daughter parasites (called tomites) after 3-
30 days they then hatch from the cyst and are free swimming theoronts who must
attach onto a fish host within 24 hours or die. This is the stage at which Ich is most
effectively target by chemical treatments.
This complicated lifecycle is the reason why full treatment must span the entire
lifecycle of a month or so. Many people think they have cured Ich only to find it back
in a few weeks because of this.
Infestations are usually brought about by environmental stresses like temperature
and exposure to excessive ammonia, nitrite and nitrate. Tangs; along with
Pufferfish and Boxfish are especially prone to Cyrptocaryon Irritans
infestation. If you learn to recognize and treat at the onset of this parasite, it will not
be a major concern. Cryptocaryon Irritans progresses slower than Amyloodinium.
The disease starts with a telltale white, salt-size spots on the fish- and can be
treated before the disease gets out of control.
Visible Symptoms:
Salt sized white spots (1mm) appearing on the fins first and all over the body
in advanced cases.
The infected fish will “flash” which means scratching and rubbing against
objects
Frayed fins
Twitching
Hyperactivity at early stages
Increased breathing in later stages
Increased mucus production
Faded coloration

© Andrej Brummer – 2014. 186
Fish eyes are cloudy looking
Fish may appear to hide
Not eating leading to rapid weight loss
Treatments:
As per the other major diseases the best treatment is prevention, again this means
correct and gradual acclimation, quarantine for a month, freshwater dips on all new
arrivals (kills off parasites), keeping good water quality – this book will help you to
achieve all of these. If you do you can reduce the occurrence of disease in your
tank by up to 90%!
I really recommend removing all the fish to a quarantine tank for treatment, the Ich
will naturally die out in the display tank after a month or so with no fish hosts.
If you identify a Marine Ich outbreak you should crank up the water
temperature to around 85F (29.4C) if your marine life can tolerate it to speed
up the lifecycle (and treatment) of Crypto.
1. Hyposalinity: In my opinion this is the safest of effective Ich treatments and it
involves reducing the salt content (and thus specific gravity) of the water to 16ppt
(1.010 specific gravity at normal water temperature) for around 2 weeks. This should
in theory cause the Ich theoronts to “pop” with osmotic pressure (they deserve it!).
This procedure is best done in a QT (quarantine tank) as it can kill invertebrates
(including those populating live rock) and some more sensitive fish (such as sharks
and Rays) don’t like it.
You will have to gradually bring the specific gravity back up after the treatment over
a few days so as not to stress your fish; aim for 0.001-0.002 specific gravity points
per day until they get back to their normal 1.023.
2. Copper Solution Treatment: First of all, a word of caution copper is highly
effective against Ich in the free swimming stage but very toxic to all invertebrates
so do this procedure in a quarantine tank or remove any invertebrates from your

© Andrej Brummer – 2014. 187
main tank first! This treatment although harmful to some marine life will be 100%
effective!
A Note About Copper Treatments
Excessive copper concentrations are harmful to fish; fish without scales are a lot
more susceptible than scaled fish to copper (like Blennies and Pufferfish). The dose
must be spot on because too little copper wont work and too much will suppress their
immune systems and could even kill your fish. Remember to turn off or remove your
chemical filtration before treatment. Also materials containing calcium carbonate like
dead corals and coral sand will actually absorb the copper making it useless!
You want to aim for 0.15 - 0.2 mg/l copper treatment, but always follow the
manufacturers instructions dosing at night is best because this is when the theoronts
will hatch looking for a new host. I personally recommend Seachem Cupramine.
You should monitor the copper levels every day to ensure they are within the
effective treatment range and adjust as necessary. Copper solutions come either
chelated (attached to another molecule to last longer in water) or not (more effective
but disperses faster) so you will need a test kit for chelated copper or not depending
on what you are using.
You will want to treat as per instructions, for about 7-10 days, and remember to
change the water sufficiently over time for undetectable copper levels before
returning fish to the main tank or before reintroducing any invertebrates. Again it is
way better to copper treat in a QT!
3. Regular Water Changes: This is the simplest place to start for minor infestations
and where sensitive species are present that may not tolerate harsher treatments
such as copper. If you don’t have a heavy infestation this would be my treatment of
choice, as it is very safe for all fish and invertebrates. The idea is to remove all your
fish into a QT and perform 50% water changes every day for 2 weeks and do a total
clean of the aquarium each time. This should physically remove mobile parasites

© Andrej Brummer – 2014. 188
from the aquarium in various phases of their lifecycle. You will need to ensure the
water parameters are carefully matched up to cause the minimum amount of stress.
After 2 weeks keep them hanging around for another 3 weeks to regain strength
before putting them back into the display tank.
A Note About “Other” Ich Treatments:
There are plenty of other treatments that are out there, a few work quite well like
using Formalin (quite a toxic carcinogen) but are best left to very experienced
aquarists because they can be quite dangerous to handle (you need to wear gloves
and aerate the room etc). There are also various “reef safe” products which go
in and out of favour all the time but are generally believed to be mostly
ineffectual by the experts and also treatments from the kitchen such as garlic,
ginger and pepper, these I would be tempted to leave alone if you have an Ich
outbreak you want to use something that works for sure! Yes, they may work but with
Ich you really want to use tried and true methods above that have worked for me and
people I know.
Marine Ich: the number 1 saltwater aquarium killer.

© Andrej Brummer – 2014. 189
Common Behavioural Signs of Disease
Often when a fish is behaving abnormally, it can be because it has something wrong
with it. Here are a few telltale behaviours not mentioned above and what they
could mean for your fish:
Sudden quick movements: This could point to new tank syndrome or sudden onset
water poisoning, especially if the fish has balance issues and its gills are moving
rapidly. Water quality should be checked immediately.
Sudden death: This is likely to be Pancreatic necrosis virus if the fish is lethargic,
losing weight and accumulating fluid in its abdomen. Unfortunately there is no
treatment for this virus.
Fish rubbing up against things and generally appearing irritated: most likely to
be skin flukes, especially if the skin is red and inflamed looking. Treatment options
are freshwater dips (five minutes for five days) or a commercial eco-parasite product.
Fish appears inactive, weak and its physical condition is deteriorating: could be
blood borne protozoan parasites. A commercial preparation such as Methylene blue
added to the water is highly effective.
Respiratory issues causing distress: when this is coupled with the fish itching its
gill areas and general lethargy the most likely issue is gill flukes. Treatment options
include freshwater dips (as above) and ectoparasitic commercial treatments.
Common Physical Signs of Disease
Additional to any unusual fish behaviour, there may be recognisable physical
abnormalities indicative of particular diseases and ailments:

© Andrej Brummer – 2014. 190
Ulcers and haemorrhaging: usually coupled with abnormal swimming, this is likely
to be caused by a bacterial infection. The fish should be immediately moved to a
quarantine tank and be treated with antibiotics.
Depressions in fishes head muscles and lateral lines (Tangs and Angelfish):
Will be Head-and-lateral-line disease most likely caused by a deficiency in vitamin A,
but could also be protozoan/viral infection. Try vitamin A supplement then if no effect
treat against protozoa and virus.
Tiny black spots over skin: may also be causing respiratory distress, is most likely
caused by protozoa (generally Turbellaria) parasites. Freshwater dips can be highly
effective.
Losing weight with bulging abdomen: highly likely to be tapeworm especially if the
fish is no longer growing in size. Commercial treatments are readily available. Note:
Fish losing weight with curvature of the spine is a symptom of fish TB for which there
is no easy cure, this disease is highly contagious.
Tumour-like bulges on flanks of fish: neoplasia; surgery is required to remedy.
Abnormal bumpy tumour-like growths on skin and fins: usually caused by
Lymphocystis. Ozone and UV treatment may resolve, but usually heals by itself.
Marks on the skin of Tangs and Surgeonfish that resemble fingerprints: Tang
fingerprint disease. There is currently no treatment for this virus.
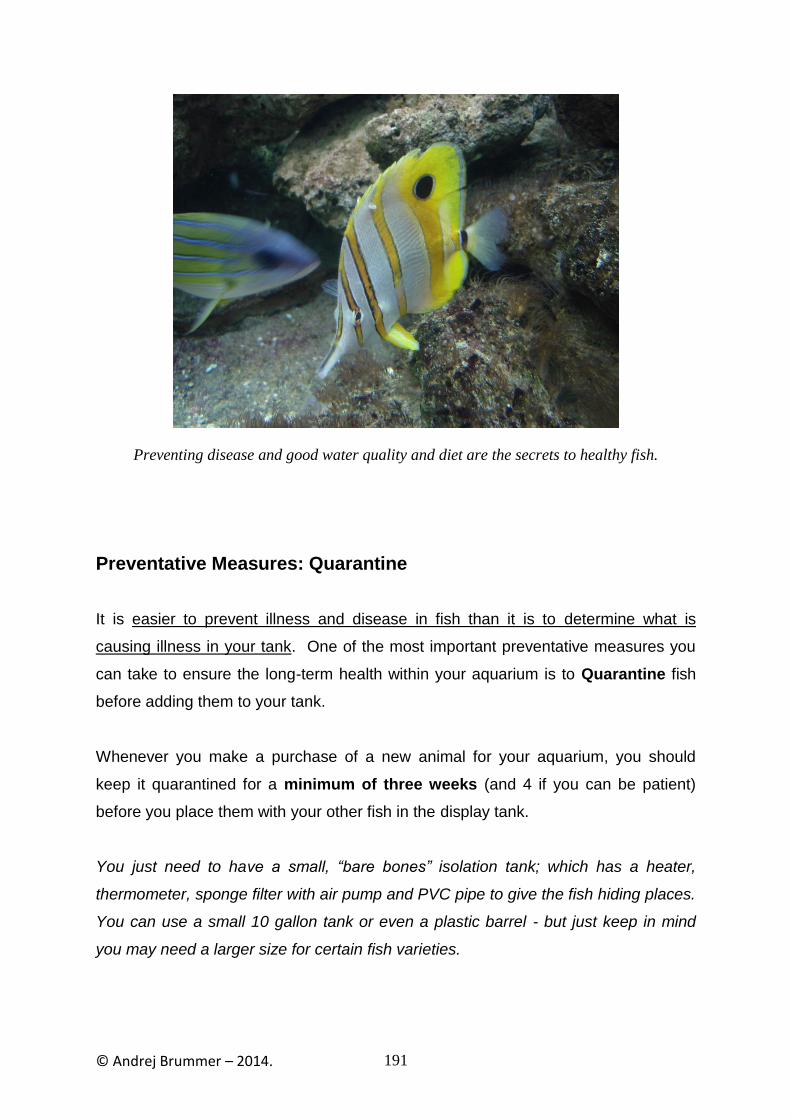
© Andrej Brummer – 2014. 191
Preventing disease and good water quality and diet are the secrets to healthy fish.
Preventative Measures: Quarantine
It is easier to prevent illness and disease in fish than it is to determine what is
causing illness in your tank. One of the most important preventative measures you
can take to ensure the long-term health within your aquarium is to Quarantine fish
before adding them to your tank.
Whenever you make a purchase of a new animal for your aquarium, you should
keep it quarantined for a minimum of three weeks (and 4 if you can be patient)
before you place them with your other fish in the display tank.
You just need to have a small, “bare bones” isolation tank; which has a heater,
thermometer, sponge filter with air pump and PVC pipe to give the fish hiding places.
You can use a small 10 gallon tank or even a plastic barrel - but just keep in mind
you may need a larger size for certain fish varieties.

© Andrej Brummer – 2014. 192
You can also use the isolation tank when you need to treat your fish for illnesses and
diseases - unless the fish cannot be moved for any reason. Removing sick fish for
treatment in an isolation tank will minimize the risks of other fish contracting the
infectious disease, as well.
The Importance of a Quarantine Tank and Quarantining
For those that don’t know quarantine tank (QT) is a small, basically set up (bare
bones) stand-alone aquarium completely independent of your display aquarium. Its
primary purpose is to “quarantine” all newly acquired marine pets to ensure they do
not carry disease into your display tank potentially infecting your established pets.
Quarantining fish and invertebrates is a very important part of keeping a successful
marine aquarium full of happy, healthy marine life.
There are two main reasons to quarantine:
When introducing a new fish or invertebrate to your display tank (to acclimate
it to a life of captivity)
To avoid the spread of disease when you notice you have an ill marine
creature.
Quarantine tanks don’t have to be fancy (and are better if they are not) but they are
invaluable when it comes to looking after your marine life properly and avoiding
potentially fatal spread of disease. They will easily pay for themselves in terms of
trouble avoided.

© Andrej Brummer – 2014. 193
A little 15 gallon like this will be perfect for a QT.
The simple act of putting all newly acquired marine specimens into quarantine for a
month (after acclimation) before putting them into your display tank will prevent
disease outbreaks, stress and shock to the tune of approximately a 90% reduction
in mortality across the board. That is massive; imagine what that could do for your
stress and sorrow levels not to mention your bank balance with disease and deaths
wrecking havoc in your not-exactly-cheap aquarium.
Think of it as the most effective way to limit your loses bar none. Public aquariums
and fish breeders ALL quarantine livestock!
Why Quarantine?
When you first purchase a new fish it will often come home highly stressed out, and
can be unable to compete with other fish for food and/or be harassed by other fish if
put directly into the display tank, this can easily lead to death. Not only this; store
brought fish can also harbour disease even if symptoms are not obvious yet.
© Andrej Brummer – 2014. 194
Just a few weeks ago when your new fish was swimming around the coral reef
minding its business the balance between parasites/disease was on much more
equal footing than in an aquarium setting. Let me explain; most parasitic infections in
the wild are pretty minor, the parasite just wants to reproduce and there are many
many fish and a huge area of the reef which means that for the parasite/infectious
organism to ensure its continued survival there will be low infection rates on any one
fish.
But when the fish is captured it becomes very stressed - its’ body virtually shutting
down functions like the immune system to devote energy to a potential escape (fight
or flight response), not only this but the stresses of transport and sub-optimal water
quality begin to kick in further weakening its immune system. Then you add it to a
small closed system (your aquarium) which doesn’t naturally dilute out infectious
organisms and parasites like the ocean and this set of circumstances stack the odds
massively in the favour of parasites and disease.
This is where quarantine becomes vitally important. So putting your new pet into
quarantine for at least a month (to totally rule out any infection) will ensure it is fit and
healthy enough to thrive in your display tank and will limit the spread of any existing
disease to your existing fish. Additionally a period of quarantine will allow you to try a
whole range of foods out on the fish and see what it will eat and to give it one on one
care to ensure it is optimally fit and healthy enough to thrive in the display tank.
A Quarantine Tank Will Serve Multiple Purposes:
1. A peaceful haven to rest up, de-stress then strengthen marine pets that were
swimming around on a coral reef a few days before and are seriously weakened,
dazed and confused after their gruelling transport to your place. This is ideal before
they face the rigours and potential aggressive behaviour of other fish in your display
aquarium. You can also use this time to learn their particular habits and behaviours
and make sure they are eating properly.

© Andrej Brummer – 2014. 195
2. The perfect isolated environment to check for any disease symptoms over the
time period you would see them presented. After this time (a month) if there was any
disease you would definitely have seen it so can safely say your pet is disease free
and its ready to meet the rest of your pets.
3. A quiet place to observe your marine pet away from the stresses and competition
of your main aquarium if you suspect disease, damage, bullying etc.
4. An excellent place to effectively medicate sick, diseased individuals so that
disease cannot spread further in your display tank and the medication cannot harm
your other marine life (for example many medications are toxic to invertebrates,
corals, biological filter bacteria and live rock).
5. A place to put marine life if something goes wrong in your display tank, your QT
will be nearby on standby.
6. You can even use it as an extra aquarium, breeding brine shrimp, propagating
corals, snails for food or cleaning the display tank.
So what do you need to set up a quarantine tank?
Here is a list of the very basic requirements of your quarantine tank. You will need a
bare bottom tank with adequate heating, aeration and filtration consisting of:
1. A small covered glass or acrylic aquarium of about 10-40 gallons depending on
the number and also size of the fish to be quarantined and the number of fish your
display tank contains.
2. A simple outside filter such as a hang-on canister filter or wet/dry filter that will
give you combined mechanical and biological filtration in one. It is a really good idea
to “seed” your new filter from water containing bacteria from your main aquarium.
3. A basic heater and thermometer appropriate for the aquarium size.

© Andrej Brummer – 2014. 196
4. Some PVC piping cut at different lengths for fish to hide in.
5. Very simple fluorescent lighting to illuminate the tank (or if you intend to
quarantine corals find a fluoro light around the same intensity as they are getting in
the main tank).
6. No substrate, rocks or anything else that could possibly absorb treatment
medication.
That’s it! It is also a good idea to get a net and a siphon that you use only for the
quarantine tank. You will also need to purchase the appropriate test kits for any
copper etc you will use for treatment.
This Percula Clownfish says "If you love me you will quarantine me!".

© Andrej Brummer – 2014. 197
This is How You will Set Up Your Quarantine Tank:
The best way to set up your QT is simply to use water from your existing display
tank (if it is healthy), this way you wont need to go through the entire cycling
process. You can seed the filter material by placing it in the sump of your display
aquarium for a few days, this way you can always ensure your filter is good to go on
a moments notice. Ensure your heater and filter are plugged in and test you water
parameters (which should be on par with your display aquarium). Simply maintain as
per your display aquarium and use that water for top ups and regular partial water
changes, too easy!
Here‟s my Super-Simple Quarantine Procedure:
When you get your new fish home, start with my acclimation procedure as per
Chapter 4, then a freshwater dip for 3-5 minutes, which will kill, off a lot of the nasty
skin parasites. Then simply place in the quarantine tank, turn off the lights, don’t feed
for 24 hours and observe every day keep a careful eye out for any infection.
With your QT conduct maintenance and regular partial water changes as you would
your display tank. And strive to siphon up any debris and uneaten food quickly. Keep
the fish in the aquarium for at least 30 days (the duration of marine Ich and
Marine velvets‟ lifecycles). If at any time during this 30-day period you add another
specimen to the QT you need to hold the original specimen for another 30 days
(nothing should go into the display tank without being quarantined for at least 30
days).
If you spot any sign of disease or parasitism diagnose quickly and treat in your
perfect treatment centre feeling good about the fact that the disease is not spreading
rampant through your display tank! After all signs of the disease are gone you will
need to hold for an additional 30 days to make sure everything really is fine

© Andrej Brummer – 2014. 198
This procedure is so easy and will make such an unbelievable difference to
your chance of success with your new marine pet!
If you are using your QT to medicate don’t forget to use water changes and chemical
filtration at the end to get rid of every trace of chemical (if harmful) until it is
undetectable using the test kit. Then drain and clean all parts of the system
thoroughly before using again. Remembering that the medication may have killed off
your filters beneficial bacteria, in this case sterilise then place in the sump of your
display tank to seed again.
How do You Quarantine Corals and Other invertebrates?
The introduction of corals into your aquarium can easily result in adding flatworms,
box snails, planarians and even worse to your aquarium. The procedure for their
quarantine is very similar to marine fishes with a couple of differences:
1. Corals need to be spaced out from each other so as to avoid any chemical
or physical warfare as much as possible. Especially species in possession of
sweeper tentacles (mostly LPS corals) that will sting their neighbours.
2. Avoid freshwater dips with invertebrates as they are more sensitive than fish
and they may not recover from the osmotic shock.
3. Chemical filtration will be necessary to mop up any metabolites and toxins
released in to the water. This is best achieved by simply placing a pouch of
media such as activated carbon into the filter box in contact with the incoming
water stream.
4. Debris such as mucus, uneaten food and parasites should be siphoned out
regularly from the bare base of the tank, which allows you to see them
easily.

© Andrej Brummer – 2014. 199
5. To help remove metabolites and toxins from the water and replenish vital
elements you will need to do more regular partial water changes. I change
5% at a time, twice a week. If appropriate just use water from your display
tank to keep things easy.
6. As I mentioned above you simply need to try and match the lighting intensity
you use in your display tank with simple fluorescent lights, any lack of lighting
can be made up for by simply feeding them more while in quarantine.
7. Parasites can actually be lured out of their coral hiding places by putting a bit
of seafood meat near to the corals.
Quarantining Sick Marine Life
When you notice some disease symptoms on organisms in your display tank you
should immediately remove them to the quarantine tank, then medicate. This will
hopefully stop the spread of disease and allow you to medicate in a stress free
environment where the medication cannot harm any marine invertebrates.
The most common marine aquarium disease is marine Ich (caused by Cryptocaryon
protozoans) the life cycle of the disease causing organism is 2 to 3 weeks, so
quarantining for at least a month weeks will allow you to be very sure the disease
has gone before re-introduction back to the display tank. The quarantine tank allows
you to treat the disease immediately in a stress-free environment. Another tip is to
get a small quarantine tank (I recommend a tank about 20 gallons, 10 gallons is too
small and 40 is getting too big) so you will have to use less medication to treat your
infected fish.
Hopefully by now you will have realised the massive importance of quarantine and
how having you own QT is massively useful, beneficial and not that expensive or
difficult.

© Andrej Brummer – 2014. 200
A Proper Medicine Cabinet for Aquarium Owners
In order to be well prepared, aquarists should have certain items on hand to handle
the more common fish diseases. As mentioned above, having a quarantine tank
ready to go is probably one of the most important items on the list: it can save you
time and save the lives of your fish.
You should also have extra saltwater that is already conditioned for your aquarium
available as well. You may need it to help clear up low quality water, and since it
takes time to condition seawater, it's always a good idea to have it mixed and ready
to go.
All saltwater aquarists should have test kits for ammonia, pH, copper, and specific
gravity – among other testing kits and tools. Having an assortment of fish antibiotics
on hand can make treating the common ailments easier, but you can always obtain
these items when they are needed.
Antibiotics:
There are a number of fish antibiotics available, and the one you choose to use will
depend on what you are treating…be sure to get this right!
Minocycline: effective for many bacterial infections when used in a double dose
every day for five to seven days. Internal infections are treated well with this
antibiotic because it is absorbed well into fish systems. The disadvantage is this
antibiotic will turn the water in your tank brown, and while it may not be as effective
as Neomycin or Nitrofurazone (see below), it seems to be less destructive than
Neomycin on biological filtration. You can increase the effectiveness of this
medication by changing the water in the tank each day before adding another dose.
© Andrej Brummer – 2014. 201
Nitrofurazone: can be used for both internal and external infections. You use this
antibiotic in a one-time dose of 30 to 40 mg per gallon, and it treats for three to five
days. Dim the aquarium lights when using this medication as light can deactivate the
medication.
Neomycin: considered the most powerful of the antibiotics listed here, it's not quite
as useful for internal infections. It is the preferred treatment for external
conditions, including fin rot. You cannot use Neomycin in combination with copper;
but it can be used with either Minocycline or Nitrofurazone. You use Neomycin
with a one-time dose of 250 mg per gallon, and the treatment will last three to five
days. You will definitely want to remove your biological filter when using Neomycine,
because this antibiotic will kill the bacteria needed for the biological filtration
(particularly nitrite converting ones). Neomycin is a poor choice within a crowded
aquarium.
Nifurpirinol: this antibiotic was developed specifically for the aquarium industry. It's
often packaged with the name “furanace” or “furanase”. You will want to follow the
directions on the package for a four-day treatment.
One thing to keep in mind is that the package directions for antibiotics often
recommend low doses that may not have the desired response. If the fish aren't
responding to the antibiotic therapy within three days, or they appear to be getting
worse, you will want to change the water in your tank and try another antibiotic or a
stronger dose.

© Andrej Brummer – 2014. 202
Sensitive marine invertebrates make medicating the display tank difficult - all sick fish should
be removed to quarantine.
Immunity and Stress
Fish that survive saltwater ich can actually develop a degree of immunity for about
six months, although this doesn't happen in all fish. The immunity occurs when fish
maintain the presence of the parasite, but without evidence of pathological lesions.
It's not pure immunity or protection, though, and some fish may also have a low level
infection that can cause later outbreaks because the parasite is not completely
eliminated. If a fish is under stress, the immunity can be diminished which will result
in a renewed outbreak by enabling the parasite population to increase.
Stress in Marine Life
Stress in fish is any condition that causes physical or mental discomfort. Stress
increases heart rate, blood pressure, blood sugar and cortisol (steroid) levels in fish
just as it does in humans. Stress contributes to the majority of deaths in aquarium
fish.

© Andrej Brummer – 2014. 203
When a fish is under stress, they have a lowered immune response and that allows
parasites, bacteria and fungi to infect the fish and then cause disease and/or death.
Causes of stress in marine fish include:
Elevated ammonia levels
Elevated nitrite/nitrate levels
Water temperature fluctuations
Improper pH levels
Decreased oxygen level
Not having a place to hide
Too small of a tank
Improper levels of salinity
Being harassed by other fish
Too many fish in the tank
Poor nutrition
Shipping of fish
Eliminate Stress in Fish Just as it is not possible to eliminate all stress experienced by humans, it is not
possible to eliminate all potential fish stressors- but they can be reduced
significantly:
When adding new fish to your aquarium:
Be sure to give them proper time to get acclimated
Use the quarantine tank
Make sure they are being fed properly with a balanced, varied diet.
Don't allow people to tap on the glass of your aquarium, as this is a common
cause of stress.
Avoid too much vibration around the tank for example from heavy bass.
Try to provide suitable habitats and give them plenty of rockwork to get away
from other fish and forage in.

© Andrej Brummer – 2014. 204
Avoid netting the fish frequently as it causes stress.
Ensure you always select compatible species.
Keep a good eye on chemical and physical parameters as fluctuations and
improper conditions cause a LOT of stress.
By providing a suitable tank environment, most stress will be reduced which will
greatly reduce the amount of diseases your fish are exposed to.

© Andrej Brummer – 2014. 205
Book 7:
Tank and Fish Troubleshooting
Even the most careful of aquarium owners can come up against tank or fish
problems. This chapter is dedicated to helping you troubleshoot common issues and
help provide you with effective solutions.
The 10 Most Common Saltwater Aquarium Mistakes Ever Made
This is a list of the 10 most common mistakes people make with their saltwater
aquarium to help you to avoid them. The methods to avoid these mistakes you would
have learned about already just by reading this book, but I will go over the methods
again just to remind you!
There is a mistake-making epidemic in the hobby today and it stems from
people falling in love with the idea of having an awesome marine aquarium and
rushing in head-first without doing their due diligence.
Here are the top 10 most common mistakes:
1. Buying marine life without knowing enough about the specimen
This is probably one of the most preventable mistakes you can make. So many
people get upset when their newest pet gets sick or worse then you find out its
because they had no idea how to care for and feed it, and sometimes they don’t
even know what it is!
Don’t be lured in by the pretty colours or the nice shapes of marine life at the pet
shop, any purchase you make should be fully researched FIRST! And don’t just rely

© Andrej Brummer – 2014. 206
on the person at the pet shop, do your own research and ensure you know what the
exact requirements are for keeping your new pet in optimal health.
You need to know as much as you can about any living purchase you want to make.
Research what it is; if the fish store cant tell you the vital info then move on to
the next store! Know what it eats, what habitat it prefers, how to care for it, how
hard it will be to keep with your level of experience and how compatible it will be with
your other marine life.
To avoid disasters with your marine life every purchase needs to be well researched
and thought out. Think of the bigger picture (your aquarium eco-system) rather than
individual purchases that catch your eye. You also need to ensure (as I’ve said time
and time again) it will be compatible with your marine aquarium set up and the
current marine pets you have.
Do you know what this is? If no then dont buy it!
2. Taking things too fast
This is probably the number one mistake that causes new systems to crash and
marine life to perish. When setting up your marine aquarium it is so vital to go slow,
to prevent overloading the system especially when it comes to biological filtration.

© Andrej Brummer – 2014. 207
It is very tempting to add marine life when the water is in the tank but you must be
patient and give the appropriate bacterial populations time to build up to levels that
can cope with the biological waste that will come from your marine life.
A tank must be properly cycled before you put any life inside, do the
appropriate tests to ensure the water parameters (ammonia, nitrites and nitrates
especially) are 100% correct. Patience is required for just about everything you do
with a saltwater aquarium, it is a living ecosystem that can only adjust gradually to
new inputs, so go slow!
Additionally, you really need to take the time to study up on marine aquarium
keeping first (starting with reading this entire book!), before you begin and take all
things slowly and carefully. Every step must be carefully planned out and executed.
3. Marine life incompatibility
Another very common mistake; the bottom line here is that you must thoroughly
research every species you put into your aquarium to make sure it will get along with
everything else you plan to keep in there. If not it may cause stress, injury or even
death to affected specimens. If you have gotten anything from this book it has to be
this!
The first consideration is not to put predatory species in with something they might
like to eat; this is an expensive way to feed! Also if you plan on keeping corals and
other invertebrates you will need reef-safe fish that will not eat coral.
Some species are very toxic or territorial as well which may not be agreeable to the
rest of your inhabitants. Yet other species like some Tangs cannot be keep in
groups, as they will constantly fight.

© Andrej Brummer – 2014. 208
You will need to research potential pets eating habits, behaviour and personality to
make sure that they will fit in well into a harmonious happy aquarium. Choosing
compatible species will save you a lot of trouble. The ocean eco-system is ruled by a
complex series of marine life interactions; therefore you can’t predict what will
happen, you MUST do your research before you buy.
4. Marine aquarium overload causing “New Tank Syndrome” or system crash
This is when you put too much marine life or live rock/sand into your aquarium
at once; the system cannot handle it and the delicate balance is thrown out and new
tank syndrome often results.
This commonly occurs in a tank that has been recently cycled or has not quite
completed the cycling process. It occurs by putting in too much livestock at once
throwing out the delicate biological balance where your beneficial bacteria can no
longer keep up with the organic waste levels and toxic ammonium and nitrite levels
build up. It can happen in established aquariums too. The bioload is too much for
biological filtration.
Once again the key is to go slow and not overload your tank. You must also be
careful to preserve the bacterial populations and not accidentally physically remove
them by messing with the filter media too much or damage them with some sort of
fish medication for example .The solution? Slow down and gradually add more stock
so the system can cope much more efficiently naturally AND know what the bioload
limits should be for your tank size and set-up.
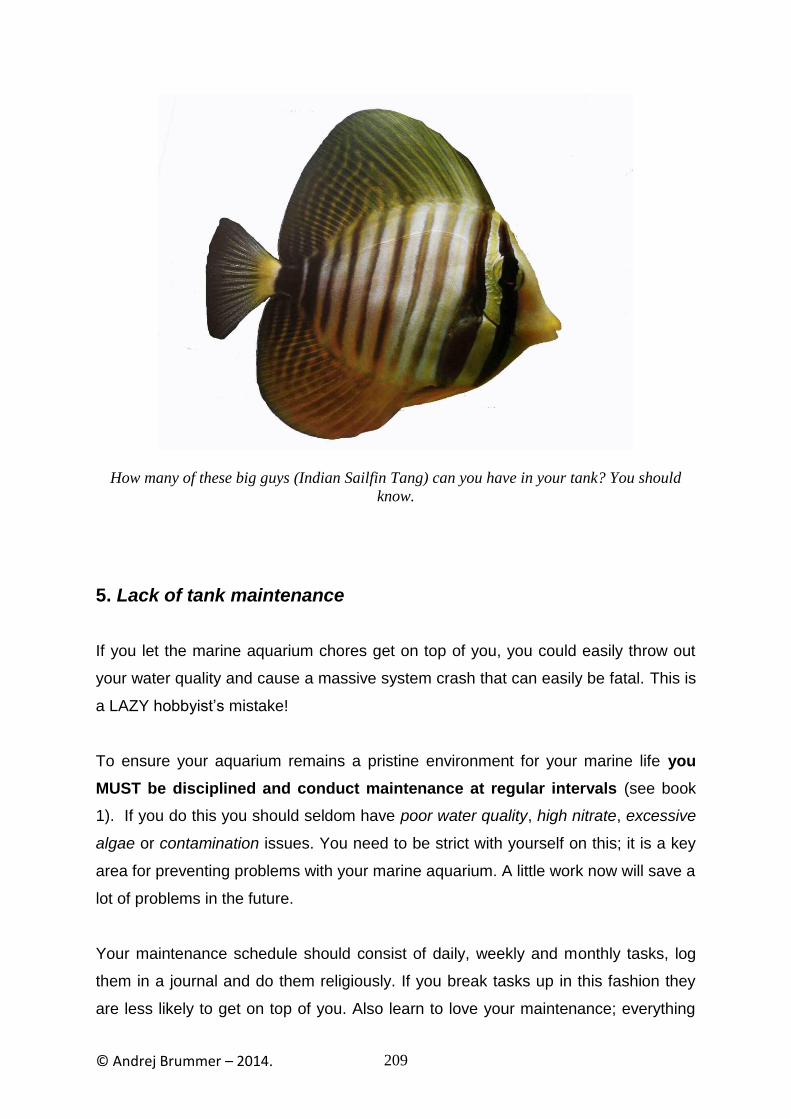
© Andrej Brummer – 2014. 209
How many of these big guys (Indian Sailfin Tang) can you have in your tank? You should
know.
5. Lack of tank maintenance
If you let the marine aquarium chores get on top of you, you could easily throw out
your water quality and cause a massive system crash that can easily be fatal. This is
a LAZY hobbyist’s mistake!
To ensure your aquarium remains a pristine environment for your marine life you
MUST be disciplined and conduct maintenance at regular intervals (see book
1). If you do this you should seldom have poor water quality, high nitrate, excessive
algae or contamination issues. You need to be strict with yourself on this; it is a key
area for preventing problems with your marine aquarium. A little work now will save a
lot of problems in the future.
Your maintenance schedule should consist of daily, weekly and monthly tasks, log
them in a journal and do them religiously. If you break tasks up in this fashion they
are less likely to get on top of you. Also learn to love your maintenance; everything
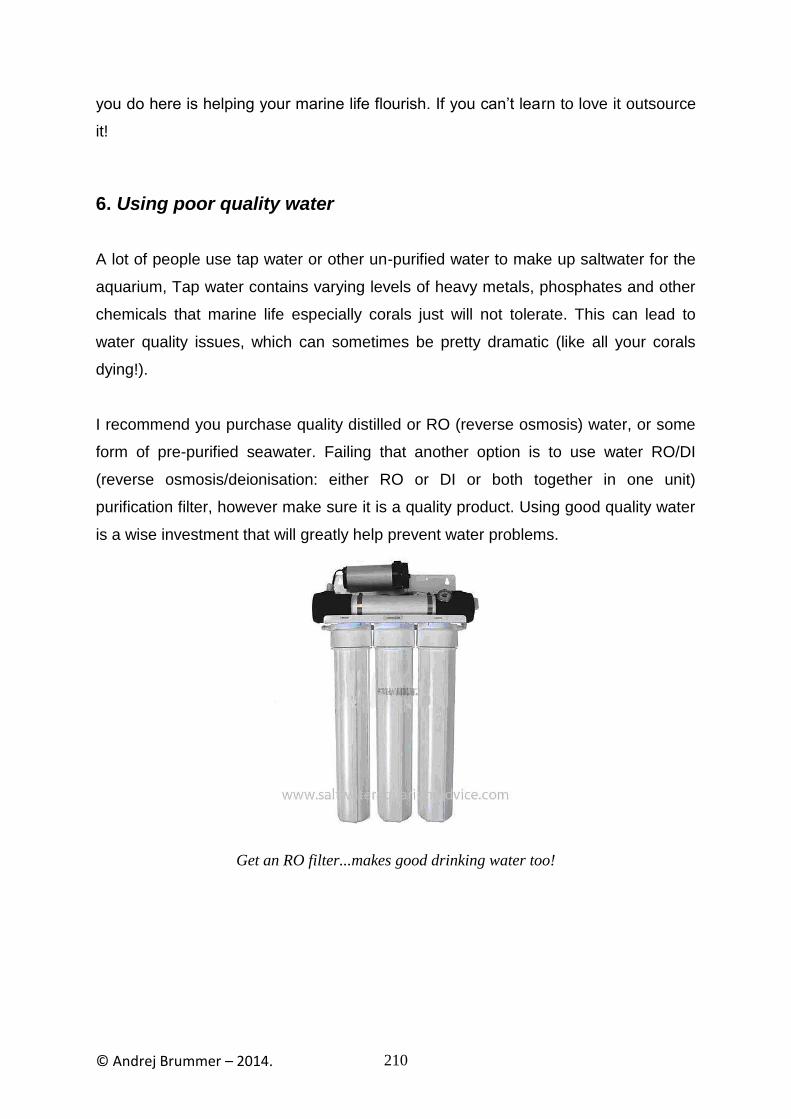
© Andrej Brummer – 2014. 210
you do here is helping your marine life flourish. If you can’t learn to love it outsource
it!
6. Using poor quality water
A lot of people use tap water or other un-purified water to make up saltwater for the
aquarium, Tap water contains varying levels of heavy metals, phosphates and other
chemicals that marine life especially corals just will not tolerate. This can lead to
water quality issues, which can sometimes be pretty dramatic (like all your corals
dying!).
I recommend you purchase quality distilled or RO (reverse osmosis) water, or some
form of pre-purified seawater. Failing that another option is to use water RO/DI
(reverse osmosis/deionisation: either RO or DI or both together in one unit)
purification filter, however make sure it is a quality product. Using good quality water
is a wise investment that will greatly help prevent water problems.
Get an RO filter...makes good drinking water too!

© Andrej Brummer – 2014. 211
7. Unwittingly purchasing sick marine creatures
Choosing a sick individual could easily result in its death with the shock of moving
into a new aquarium, not only that but you could spread disease to your existing
marine life.
The key to not making this mistake is to observe the fish for a while (see books 1
and 4), studying their behaviour and the fish themselves carefully. You should learn
what common tell tales signs of disease and illness to look for (book 5). Another
major indicator of sickness is when the fish get fed, if its not eating normally then do
not buy it, if it doesn’t display a healthy appetite and isn’t competitive in getting food
DON’T buy it, even if you feel sorry for it.
You will also want to observe the marine specimens body for physical damage and
parasites. Ensure it isn’t exhibiting odd behaviour and that the eyes are bright and
clear. It’s colouration should be vivid and not faded looking! Discovering whether a
fish is healthy or not is very easy to do and will save you a load of trouble. For
corals and other invertebrates it can be a lot more tricky, look for bold, not faded
colours, extended polyps, no lesions and erect/turgid stature.
8. Diagnosing disease incorrectly
You need to learn to recognise the signs of common diseases and parasite
infections accurately (see book 5), then you will not go through the tedium of
treating one disease while your marine life gets sicker from another. If you are
not sure what the disease is and you medicate incorrectly chances are you could be
too late and you sick pet will die. You will need to get up to speed on marine life
disease and symptoms; the Internet is also a good resource for this.
For example saltwater ich is commonly mistaken for marine velvet or Clownfish
disease (and vice versa) these have similar (but different) symptoms but are caused
by 3 different parasites that require very different treatments. 2 organisms have the

© Andrej Brummer – 2014. 212
same treatment and one is different, this means you have a 33.3% chance of getting
it wrong by guessing! But there are easy ways of finding out which organism is
responsible which will allow you to act before it’s too late. Once again you need to do
your research.
Just because your Clownfish has white spots doesnt make it Clownfish disease...
9. Poor water circulation and filtration
These two factors are a must for any healthy saltwater aquarium. Ultimately it is hard
to have too much of either filtration or water circulation.
Poor biological filtration will quickly result in the demise of your marine life due to
water toxicity, you must ensure that your filtration is adequate for the bioload
produced and is a good quality product(s). Mechanical/physical filtration is also
important to keep gunk out of the water; a good protein skimmer will do this job.
Good filtration results in good water quality that will never build up to levels toxic to
marine life.
Water circulation is vital to stir up detritus, feed/clean sessile invertebrates,
increase dissolved oxygen (DO) levels and reduce pest algal build up. It has
© Andrej Brummer – 2014. 213
also been proven that fish in high water movement environments are happier and
healthier. Ensure you have at least 2 powerheads creating multidirectional water
flow.
There are a wide range of choices in purchasing these two essential life support
systems, especially filtration; where not getting the right filter set up for your
particular waste levels can lead to problems. Circulation can be easily improved by
adding additional powerheads or a surge device.
10. Too much medication
It’s very common for me to hear reports about aquarists submitting sick animals to
ludicrous amounts of the wrong medication in panic. This is the wrong thing to do,
you need to identify the disease correctly then select medication that targets this
disease specifically (but this said you can get really good broad spectrum
solutions) and medicate according to the instructions.
Preferably this would happen in a quarantine tank to isolate the disease in a stress
free environment for the patient. A Quarantine tank will also prevent the ill effect of
medication damaging your other marine life, for example medicines containing
copper are very toxic to corals.
These are the world’s top 10 saltwater aquariums mistakes, so now you should
never make any of them right?
Common Tank Problems and How to Remedy
Poor Water Quality: is the most common problem in aquariums. It is the main
cause of disease and death within marine life, and is easily remedied.

© Andrej Brummer – 2014. 214
The best way to keep the water quality of your aquarium at its most optimum level is
to do regular water changes (10% per week is optimal). In between changes, you
can also use special water conditioners as a quick fix, but use them sparingly. These
products will fix the symptoms but not the underlying cause. Water conditioners
exist to remedy the following situations:
Reduce overall cycle time
Instantly remove contaminants to make water safe for fish
Remedy dangerous ammonia spikes
Clear cloudy water
Invertebrates surviving the copper treatment method: Saltwater Ich is best
treated with copper. If you have a tank that contains both fish and invertebrates
together, you cannot use copper, as it is lethal to invertebrates. Medicate in a
quarantine tank or move all your invertebrates to another tank if you believe the fish
are too weak to survive moving. You will need to flush the tank out many times to
remove all traces of copper. It will also pay to get some chemical filtration media
that can absorb copper.
What to do if your marine aquarium gets too hot:
In summer time and in hot climates a lot of heat stress can be put on your aquarium.
Too hot is above 80′F (26.6′ Celcius), above which damage to marine life will occur.
This is a pretty bad situation, as a scientist I know only too well that excessive heat
causes proteins to denature in organisms (which are made of protein). So
essentially once your marine life gets too hot it can be fatal.
So now that we have established too much heat is a bad thing, what can you
do about it?
1. Draw curtains and blinds in the room the aquarium is in (if you don’t have them get
some), also open windows/turn on air-conditioning.

© Andrej Brummer – 2014. 215
2. If the lights aren’t necessary (no corals or marine plants) try turning them off as
these produce heat, or reverse the cycle so the lights come on at night when its
cooler.
3. You can also vent air across the surface of the water with a small fan etc. Just be
careful here and make sure the fan is firmly attached and cannot fall in the water.
4. The most important thing to mention is getting a good quality, reliable
thermometer, and checking it regularly to get a feeling for the normal temperature
fluctuations in your marine tank. If you catch a problem early you can prevent it
before its too late.
5. Purchase a chiller unit; this is especially important if you keep corals, which hate
temperature fluctuations. This unit will kick in when the temperature rises to specific
point and turn off once it has cooled the water to its programmed set point. Coupling
a heater, chiller and temperature control unit will always ensure your aquarium
temperature is within a specific range not matter what is happening outside the tank.
Easily the best long term solution for excess heat problems is just to splash out on a chiller.
© Andrej Brummer – 2014. 216
Invertebrate Problems and How to Solve Them
Problems with corals, anemones, shrimp, and other invertebrates, are difficult to
detect and treat.
Most invertebrate problems come from:
Poor water quality
Aggression between animals
Inadequate water motion
Poor lighting levels
Issues in how the invertebrates are handled in the supply chain before you
purchase.
Lack of polyp expansion in corals: this problem is usually caused by not having
enough water motion, poor lighting and/or poor water quality. A healthy, happy coral
will always have expanded polyps. Sometimes corals naturally retract their polyps as
part of their normal life cycle for a few days (usually to shed mucus), this should be a
phase lasting less than a week if this is the cause.
Coral bleaching: (expulsion of zooxanthellae) is typically a result of water
temperature stress or lighting problems. (see book 4 for more information).
Tissue recession in corals: while the causes are debated, it is thought that it may
be caused from physical damage, temperature stress or insufficient water changes,
or chemical warfare. Sometimes this is a result of disease in which case you will be
able to see white or black (necrotic tissue) areas usually accompanied by a lot of
slime.
Limbs lost by crustaceans: crabs and shrimps show problems by loosing limbs
when shedding. They also may appear very lethargic. Causes are typically related
to poor water quality, imbalances in the chemical makeup of the water, and dietary
issues.
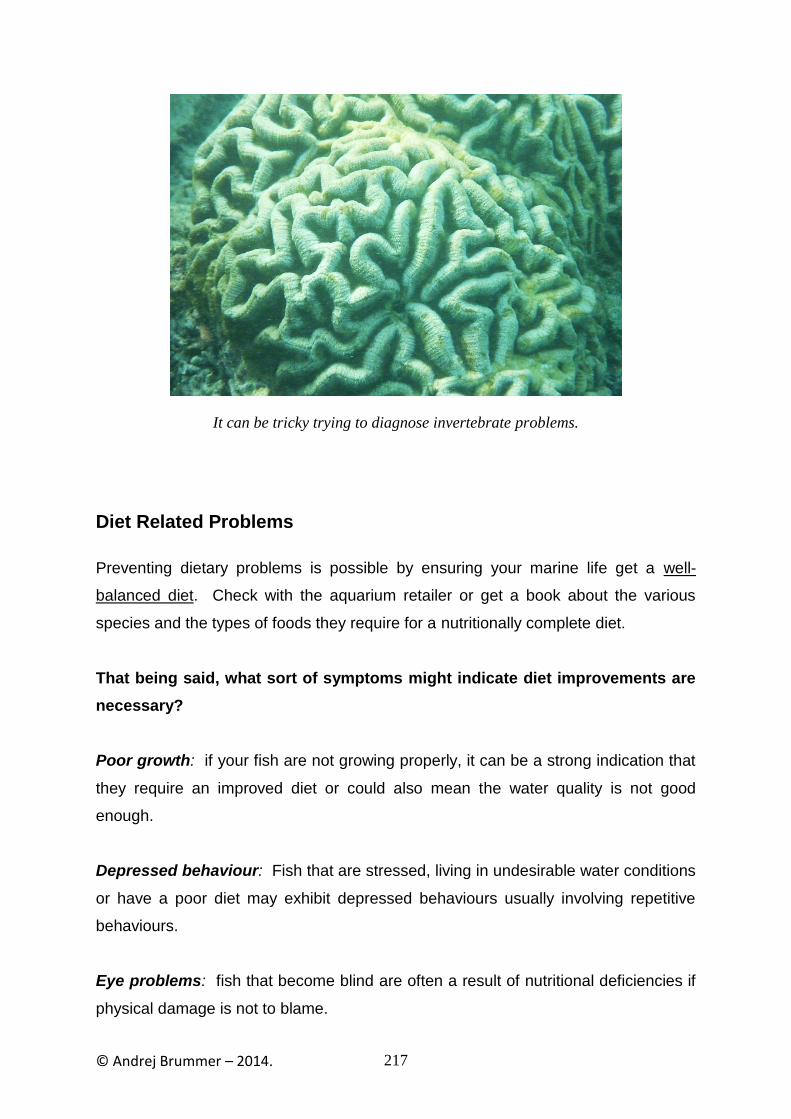
© Andrej Brummer – 2014. 217
It can be tricky trying to diagnose invertebrate problems.
Diet Related Problems
Preventing dietary problems is possible by ensuring your marine life get a well-
balanced diet. Check with the aquarium retailer or get a book about the various
species and the types of foods they require for a nutritionally complete diet.
That being said, what sort of symptoms might indicate diet improvements are
necessary?
Poor growth: if your fish are not growing properly, it can be a strong indication that
they require an improved diet or could also mean the water quality is not good
enough.
Depressed behaviour: Fish that are stressed, living in undesirable water conditions
or have a poor diet may exhibit depressed behaviours usually involving repetitive
behaviours.
Eye problems: fish that become blind are often a result of nutritional deficiencies if
physical damage is not to blame.

© Andrej Brummer – 2014. 218
Death: fish that are extremely deprived of adequate nutrition will die. They will have
hollow sunken bellies and dull faded colours if nutrition is responsible.
Dietary deficiencies can be caused by:
Foods that are not properly stored
Not giving your fish foods that are an adequate substitute for their natural diet
Not giving a well-balanced diet
By under or over feeding.
Fish foods that are kept beyond their expiration dates lose nutritional content,
unless frozen.
You can refrigerate flake and freeze-dried food to extend their life. Always buy in
smaller quantities so food remains fresh.
Some fish require several, small feedings each day because they have rapid
metabolisms. Some fish, including most predators, shouldn't be fed every day, as
overeating will cause them to accumulate too much fat. There are some species,
like tangs, which require constant food to “graze” on. It's extremely important that
you understand the dietary requirements of each of the fish species you have
in your tank.
You can also soak the fish food in a good vitamin supplement on a regular basis, to
ensure that they are getting adequate nutrition.

© Andrej Brummer – 2014. 219
To get the best colouration out of your Firefish provide them good nutrition.
Environmental Causes of Disease
About 95% of the causes of fish illness and disease are environmental, and are
not caused by an outside organism. Conversely most of the pathogenic diseases
remain dormant, unless the fish are weakened by environmental factors, then stress
will lower their immune systems and the fish become susceptible to whatever
background levels of pathogens/parasites resides in the water.
If you notice problems with your fish, you can probably assume it is related to
environmental factors. An aquarium is attempting to recreate the ocean in a closed
ecosystem and it's extremely vulnerable to changes, imbalances and overload.
Often, simply changing the water will clear up many problems that are
environmental – even if a check of the water shows it is of good quality.
The first step of any disease symptom should always be a check of the water quality
at least twice over 48 hours; that is the environmental factors.

© Andrej Brummer – 2014. 220
Pest Algae Problems
There are many different types of pest algae, and numerous reasons why an
aquarium may have problems with algae growing on the tank, substrate and rock
surfaces.
Algae is a healthy part of all marine environments and should be a part of yours
too as it provides excellent filtration and oxygenation, mostly you should just need to
give it a trim and scrape some off the glass or rockwork every now and again in
order to view your marine life unobstructed. When its growth is out of control, then
you have a real problem!
Both beginners and experienced aquarists alike all have to deal with unwanted algae
outbreaks from time to time. Explosive, out of control algal growth in your aquarium
indicates an underlying problem.
High phosphates, nitrates, excess nutrients and silicates may be the cause, but
there are other reasons as well.
Beware Microalgae…
So, its micro-algae species that causes the huge majority of pest algae problems in
marine aquariums. They cause issues by covering every object in the tank (and the
glass) including corals and other invertebrates which can suffocate them, cause
infection and block out their light causing damage and even death. Some algae are
even toxic if eaten.
Pest algae outbreaks also suck out massive amounts of oxygen from the water
at night, clog up filters, destroy water quality with their decaying biomass and
generally look nasty preventing us from seeing our lovely fish and corals!

© Andrej Brummer – 2014. 221
Common Pest Algae Species in Saltwater Aquariums
1. Blue-Green algae (Cyanobacteria):
Blue-green slime algae is responsible for a lot of saltwater aquarium mayhem, these
single-celled organisms are more related to bacteria than algae. In colour this algae
ranges from red all the way through to bluish-black and can be seen as slime, hair-
like threads or a smear of evil looking film. Blue-green algae covers everything in
its path and is very tolerant of water parameters but does best in high
phosphate, well-lit environments.
Blue-green slime algae can be any thing from blue to red to purple to black to green!
It is mostly encountered when aquariums are going through their start-up cycling and
also when there is not enough aeration and water movement and too much
dissolved organic waste.
It is easy to remove from the aquarium but difficult to control, growing back quickly.
Unlike other pest algae species there are very few marine organisms that will feed
on this; perhaps a hermit crab or two if you are lucky.
Specific control of slime algae is through thorough cleaning, chemical treatments and
reducing light levels.
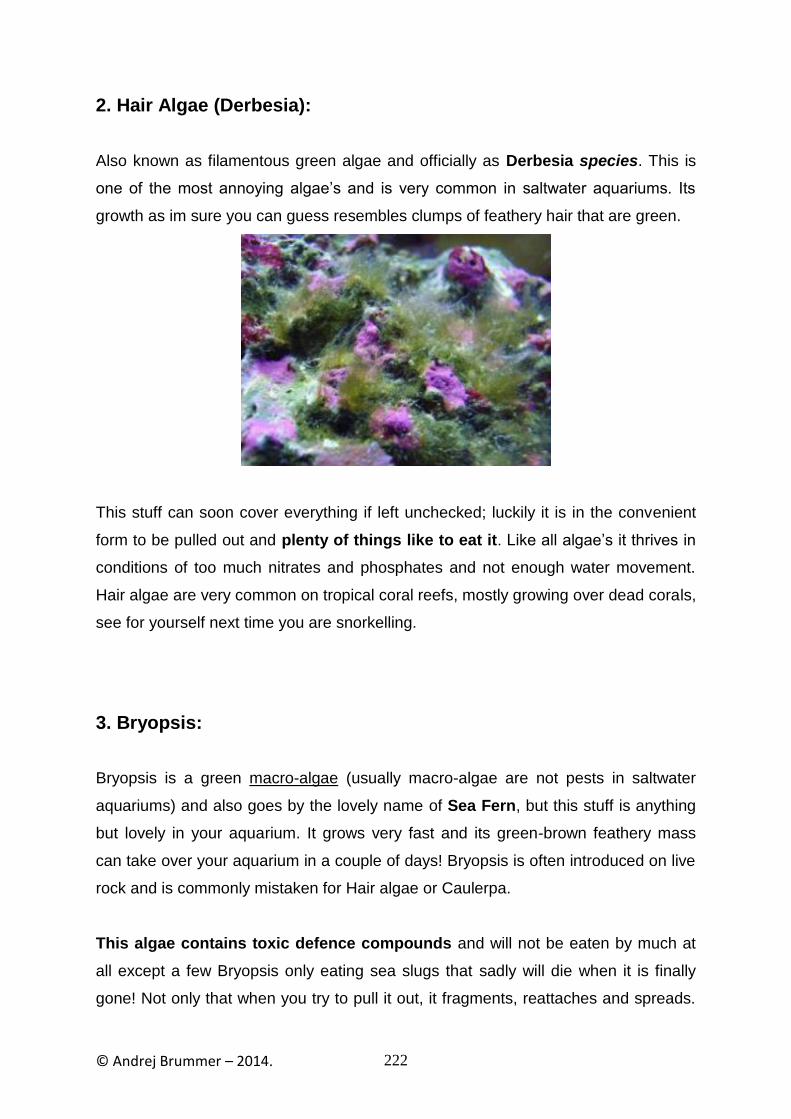
© Andrej Brummer – 2014. 222
2. Hair Algae (Derbesia):
Also known as filamentous green algae and officially as Derbesia species. This is
one of the most annoying algae’s and is very common in saltwater aquariums. Its
growth as im sure you can guess resembles clumps of feathery hair that are green.
This stuff can soon cover everything if left unchecked; luckily it is in the convenient
form to be pulled out and plenty of things like to eat it. Like all algae’s it thrives in
conditions of too much nitrates and phosphates and not enough water movement.
Hair algae are very common on tropical coral reefs, mostly growing over dead corals,
see for yourself next time you are snorkelling.
3. Bryopsis:
Bryopsis is a green macro-algae (usually macro-algae are not pests in saltwater
aquariums) and also goes by the lovely name of Sea Fern, but this stuff is anything
but lovely in your aquarium. It grows very fast and its green-brown feathery mass
can take over your aquarium in a couple of days! Bryopsis is often introduced on live
rock and is commonly mistaken for Hair algae or Caulerpa.
This algae contains toxic defence compounds and will not be eaten by much at
all except a few Bryopsis only eating sea slugs that sadly will die when it is finally
gone! Not only that when you try to pull it out, it fragments, reattaches and spreads.

© Andrej Brummer – 2014. 223
The only real way to get rid of this nasty stuff is to elevate the magnesium content of
the water. Luckily there is a fantastic product called Kent Marine Tech M that works
a treat!
Unlike the name Sea Fern is not pleasant!
4. Bubble Algae:
Bubble algae (Valonia and Ventricaria species) are common hitchhikers on live
rock and resemble a growth of green bubbles in your saltwater aquarium (obvious I
know) that would be fine in your tank if they didn’t grow so damn fast. They have
little nutrient or light requirements too (can grow in near dark), so reducing these 2
factors will do little to get rid of them.

© Andrej Brummer – 2014. 224
Don’t pop the bubbles!
The best way to get rid of bubble algae is good old manual removal making sure you
don’t pop the spore containing bubbles to avoid more growing up in their place. They
are also a popular favourite food of most species of the reef safe Emerald crab and
Indian Ocean Sail-fin Tang.
5. Diatoms:
Diatoms are also known as brown algae, gold algae or “grass of the sea”. This is
another pest algae that is not actually an algae at all! Diatoms are single celled
phytoplankton encased in a silica shell, they grow as a brown/green/gold film on
the aquarium glass and will happily grow over corals, killing them quickly.

© Andrej Brummer – 2014. 225
Diatoms: happy to kill corals.
These plankton are very common and will often be the first species to colonise
surfaces in a marine aquarium. Typically Diatoms usually appear just after or during
the initial aquarium cycling phase and when live rock is introduced. As they grow on
aquarium panels they can be easily scraped off with a sponge, being careful to
rinse the sponge after each wipe and vacuum out the scrapings if a hungry Tang
doesn’t get to them first.
Diatom growth predominantly arises in the presence of silicic acid or silicates;
these could be introduced to aquarium water from unfiltered tap water, the wrong
type of substrate (Aragonite is best), or your poor quality salt brand having too much
silica.
In keeping with other algae’s; phosphates, lighting, nitrates, dissolved organics and
water movement all contribute to growth.
Marine Fish That Eat Algae
Some fish eat algae, but it grows back much faster than the fish can eat it and
keep it under control, in most cases. Having a few species that eat algae (most
© Andrej Brummer – 2014. 226
notably Tangs) can't do anything but help, though! Fish that are most likely to pick at
various types of algae and seagrasses include:
Angelfish
Batfish
Blennies
Butterflyfish
Clownfish
Damselfish
Dragonnets
Filefish
Gobies
Parrotfish
Puffers
Rabbitfish
Seachubs
Surgeonfish & Tangs
Triggerfish
Emerald crabs, sea urchins and certain snails also effectively remove algae.
Algae usually thrive in a fish only tank as there is little competition and lots of
nutrients, in a tank like this marine plants can use up a lot of the nutrients algae feed
on effectively out-competing them (marine plants are macro-algae species not the
pest algae species which are predominantly micro-algae).
One way to help control the amount of algae in your tank is to reduce the level of
light in the tank. Be careful as some corals require a certain amount of light- but if
your aquarium can do without the lights on for an hour or two, you'd be surprised by
how much that can reduce the growth of algae within the aquarium.
Another way is to completely eliminate phosphate, by conducting water changes,
eliminating phosphate-containing products, using a phosphate reactor or by adding
marine plants. The paragraph below will go into these strategies in more details and
give you some other hints to banish algae for good.
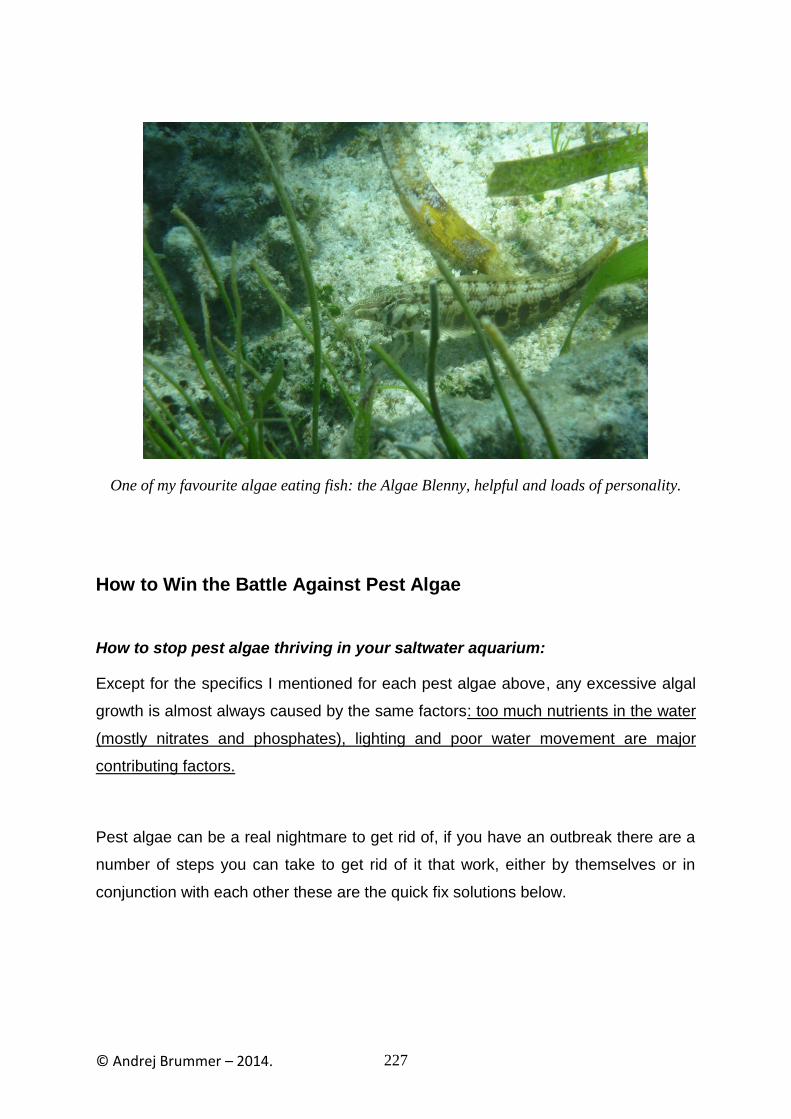
© Andrej Brummer – 2014. 227
One of my favourite algae eating fish: the Algae Blenny, helpful and loads of personality.
How to Win the Battle Against Pest Algae
How to stop pest algae thriving in your saltwater aquarium:
Except for the specifics I mentioned for each pest algae above, any excessive algal
growth is almost always caused by the same factors: too much nutrients in the water
(mostly nitrates and phosphates), lighting and poor water movement are major
contributing factors.
Pest algae can be a real nightmare to get rid of, if you have an outbreak there are a
number of steps you can take to get rid of it that work, either by themselves or in
conjunction with each other these are the quick fix solutions below.
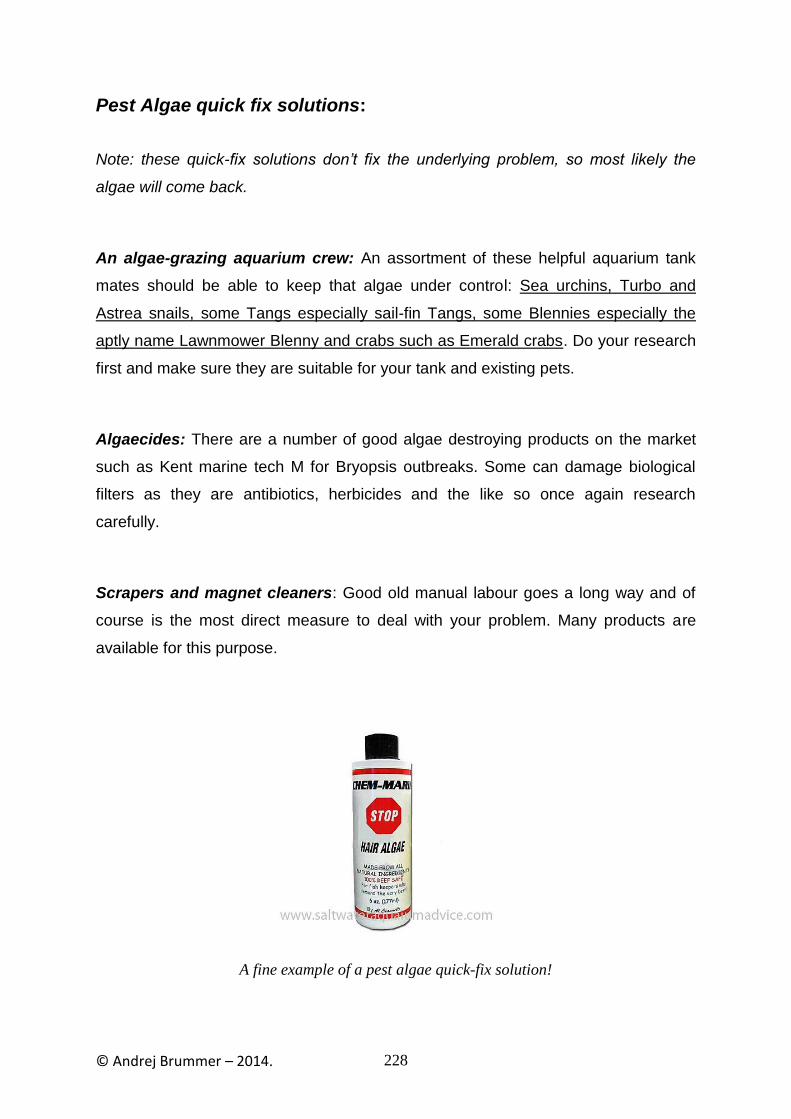
© Andrej Brummer – 2014. 228
Pest Algae quick fix solutions:
Note: these quick-fix solutions don’t fix the underlying problem, so most likely the
algae will come back.
An algae-grazing aquarium crew: An assortment of these helpful aquarium tank
mates should be able to keep that algae under control: Sea urchins, Turbo and
Astrea snails, some Tangs especially sail-fin Tangs, some Blennies especially the
aptly name Lawnmower Blenny and crabs such as Emerald crabs. Do your research
first and make sure they are suitable for your tank and existing pets.
Algaecides: There are a number of good algae destroying products on the market
such as Kent marine tech M for Bryopsis outbreaks. Some can damage biological
filters as they are antibiotics, herbicides and the like so once again research
carefully.
Scrapers and magnet cleaners: Good old manual labour goes a long way and of
course is the most direct measure to deal with your problem. Many products are
available for this purpose.
A fine example of a pest algae quick-fix solution!

© Andrej Brummer – 2014. 229
Reducing light: If you have a fish only tank, then you can have blackout periods of
a few days to kill off the algae. Obviously if you have any photosynthetic species
including live rock this will not be a good idea.
UV Sterilisers: These are actually very good at destroying floating particles of algae
(single celled micro-algae’s which are mostly our pest species), they are devices
which radiate the water passing through them with Ultraviolet (UV) light killing
organisms like algae, bacteria, parasites. Powerheads do the job of pumping
water through the UV steriliser.
These quick fix solutions all work fine however I would advice you to look deeper,
there is an underlying cause of your outbreak and if you want to get to the bottom of
it, instead of praying the algae doesn’t come back again, (just like the saying “treat
the cause not the symptoms”) rule out the following underlying problems one by one,
wait for results for each, this is showing you what is working and what isn’t, enabling
you to ensure it doesn’t happen again long term!
Underlying cause 1: Too much phosphate
Phosphate (PO4) is probably the most important element in the growth of plants
(including algae). To find out whether this is your problem you will need a phosphate
test kit (phosphate should be undetectable in a healthy tank) and to pay closer
attention to what is going into your water. Phosphate can come from:
1. Overfeeding (fish foods contain phosphate), of particular importance here is the
juice from frozen foods, defrost and get rid of it. You can test foods by mixing them
up in a little water and reading after 20 or so minutes.
2. Tap water can contain phosphates, RO filtered water (link to RO filters) will get rid
of phosphate, nitrate and other nutrients, heavy metals and so on
3. Aquarium additives can contain phosphates.

© Andrej Brummer – 2014. 230
4. Activated carbon, some brands have phosphates, put some in water and test it!
5. Long-term use of Kalkwasser precipitates phosphates out of the water making
them insoluble and so unavailable for algae. But in localised areas of the tank the pH
can drop from built up debris, which actually releases the insoluble phosphate settled
on the rocks in that area into the water! So rockwork should be wiped down from
time to time.
Underlying cause 2: Too much nitrate
Nitrates are the other major chemical element algae thrive on. Nitrate (NO3) is
the resulting compound from from dissolved organic waste and accumulates in the
water all the time unless removed. Get a test kit (link to nitrate test kit) and check this
out.
Ways to reduce nitrate are:
1. More regular partial water changes go for a higher volume per week like 10%
water replacement. You should be topping up evaporated water with pure water not
tap water.
2. Use RO or some other form of purified water.
3. Vacuum your gravel more often and make sure you get rid of settled detritus. A
good glass and rockwork wiping now and again helps as well.
4. Get a protein skimmer, these remove dissolved organics at the source (before
they get converted to nitrate) they are VERY good at keeping the water pristine.
5. Clean out or replace your filter media regularly, organic debris can easily build
up in here adding to the nitrate levels in the water.
6. Only feed as much food as your fish will eat in a few minutes, less is more!
7. Purchase a nitrate reducing system or some more live rock (I can never have
too much of this stuff!), which has anaerobic zones, which will convert nitrate into
harmless Nitrogen gas.
© Andrej Brummer – 2014. 231
8. Get some macro-algae species, also called sea plants, they look cool,
oxygenate the water and will effectively out compete the pest algae for light and
nutrients. They can either be kept in the display tank or in a lit refugium. You can’t go
wrong here!
Underlying cause 3: Too little water movement and too much CO2
Too little water movement makes “dead” zones perfect for algal growth that like
stagnant waters, if there isn’t enough water movement CO2 will probably be high
and saturated oxygen levels will be down also.
You don’t want so much water sloshing around that fish cant swim properly but good,
vigorous multi-directional water movement helps stir up detritus (so it is picked up by
the filter or skimmer), feeds corals their food, oxygenates the water (thus reducing
CO2) and makes conditions generally unfavourable for pest algae. All this is
achieved by a couple of simple powerheads strategically placed pointing at each
other.
Underlying cause 4: Old lighting or too much natural light
You should always change your bulbs as per the manufacturers instructions; either
once a year or every 6 months. As bulbs age their colour spectrum changes and
produces more and more light that algae like! Algae like less intense light over
shorter time frames.
Natural light is obviously what causes algae to grow in nature, so you want as little
as possible hitting your aquarium. Algae also like heat so if your aquarium is hotter
than it should be this will favour algal growth.
© Andrej Brummer – 2014. 232
So, algae are actually beneficial to the saltwater aquarium environment when it can
be groomed and trimmed and trusted to not over run the tank. When you get an algal
bloom it can be fixed immediately using the quick-fix strategies in the pages above
however this outbreak is always caused by an underlying problem so if you don’t
want to periodically be trying to reclaim your aquarium from these plants I
recommend you get to the bottom of it using the information directly above!
Preventing Problems Within Your Aquarium
As mentioned in more than one book of this volume, many of the problems that may
occur within your saltwater aquarium can be prevented with some precautionary
measures, including:
Proper tank maintenance.
Good diet and nutrition for your marine life.
Limiting the number of fish you keep in the aquarium.
Testing the water to ensure it's of good quality.
Tank Maintenance: having an aquarium requires that you are prepared to maintain
it! This involves checking that the equipment is all operating properly; the tank is
adequately cleaned frequently. (See Maintaining the Aquarium in book 1 for time
schedule sample.)
Good Diet & Nutrition: as with all living creatures, marine life requires a good diet
with adequate nutrition to live a healthy and long life. It is up to you, as the aquarium
owner, to ensure that all of the species you maintain in your aquarium have an
adequate food supply with the nutritional elements each need to survive. (See more
about Proper Food and Nutrition on page 165)
Testing the Water: throughout this ebook, the importance of having quality salt
water for your aquarium has been stressed. It's a fact that the majority of issues and

© Andrej Brummer – 2014. 233
fish diseases are a result of poor water quality. Changing the water frequently,
having a backup supply of tested and prepared saltwater, and performing regular
tests of the aquarium water will help you keep the water quality good for your marine
life. Good water quality will help prevent a number of other problems that can occur
within your aquarium ecosystem, so this should be a top priority for you. (book 2 will
provide you with the information for creating and maintaining high water quality for
your aquarium, starting on page 92).
Thanks for reading!
Andrej Brummer, Bsc (Bachelor of Science)
Recommended Resources Section
Additional saltwater aquarium information:
http://www.SaltwaterAquariumAdviceBlog.com
Have a look through my hundreds of articles about all things saltwater aquarium on
my blog, to find an article on a specific topic, use the search bar to the right.
http://www.SaltwaterAquariumAdviceVIPClub.com
For those who want to fast track their way to saltwater aquarium mastery, I have
created an outstanding new program.

© Andrej Brummer – 2014. 234
My VIP club membership gives you personal access to me to help you and is jam-
packed with Premium Content:
Weekly E-classes direct to your inbox packed with exclusive insider knowledge and
seriously helpful marine aquarium articles with all the details of all my unique marine
secrets, techniques and steps from years of scientific theory, experience and
research. Why not take your tank to the next level and master this awesome hobby!
http://www.chucksaddiction.com
An excellent online resource by someone who knows what they are talking about
with detailed articles and loads of photos. Good quality information from a reliable
source.
http://wetwebmedia.com/marine/index.htm
A very well written, authoritative and detailed site with excellent specific information
on many different marine species highly useful for research on new species to put
into your tank.
Livestock sourcing:
http://www.liveaquaria.com/
A very professional outfit and probably the most reliable place to order livestock
online, these guys also offer a 14 and 30 day guarantee on livestock and have great
shipping practices. They also have good information about the particular marine
species they are selling.