contents · 4. after this hook, you could then provide a brief ... ask the students to hold up...
TRANSCRIPT

Melbourne Aug-17
©State of Victoria (Department of Education and Training) 2016
The copyright in this document is owned by the State of Victoria (Department of Education and Training), or in the case of some materials, by third parties (third party materials). No part may be reproduced by any process except in accordance with the provisions of the Copyright Act 1968, the National Education Access Licence for Schools (NEALS) (see below) or with permission.
An educational institution situated in Australia which is not conducted for profit, or a body responsible for administering such an institution may copy and communicate the materials, other than third party materials, for the educational purposes of the institution.
Authorised by the Department of Education and Training,
2 Treasury Place, East Melbourne, Victoria, 3002
Department of Education Training (2017) Clean Hands – Hand Hygiene Curriculum Resources for Foundation, Grade 1 or Grade 2 Year Levels in Victorian Primary Schools, Melbourne.
CONTENTS
1: Why is hand hygiene important.............................................................................................................................. 4
Learning intentions ..................................................................................................................................................... 4
Lesson 1.1: What are germs? ................................................................................................................................... 4
Lesson 1.2: What do germs need to live and where can we find them?.................................................................... 6
Lesson 1.3: Why can germs be harmful to us? ......................................................................................................... 7
Lesson 1.4: Why do we need to keep our hands clean? ........................................................................................... 8
2: When do I perform hand hygiene? ...................................................................................................................... 10
Learning intentions ................................................................................................................................................... 10
Lesson 2.1: When and where is handwashing important? ...................................................................................... 10
Lesson 2.2: How clean are our hands? ................................................................................................................... 11
Lesson 2.3: GlitterBug activities ............................................................................................................................. 12
3: How do I perform hand hygiene? ........................................................................................................................ 13
Learning intentions ................................................................................................................................................... 13
Lesson 3.1: Washing hands like a Soapy Hero! ...................................................................................................... 13
Lesson 3.2: How well do I wash my hands? ............................................................................................................ 14
Lesson 3.3: Review ................................................................................................................................................. 15
REVIEW/EVALUATION .............................................................................................................................................. 16
WORKSHEETS ........................................................................................................................................................... 17
Worksheet 1 – Germs .............................................................................................................................................. 18
Worksheet 2 – Where’s Gerry the Germ hiding at school? ...................................................................................... 20
Worksheet 3 – Where’s Gerry the Germ hiding at home? ........................................................................................ 21
Worksheet 4 – The good guys and the bad guys ..................................................................................................... 22
Worksheet 5 – My handwashing song...................................................................................................................... 23
Worksheet 6 – The steps to becoming a Soapy Hero! ............................................................................................. 24
Worksheet 7 – Maze ................................................................................................................................................ 25
TOOLS ........................................................................................................................................................................ 26
Tool 1 – Y-chart template ......................................................................................................................................... 27
Tool 2 – What are we looking at? ............................................................................................................................. 28
Tool 3 – Say ‘Hi!’ to our Soapy Heroes – Simon and Selina and Bubbles the dog ................................................... 29
Tool 4 – Gerry the Germ .......................................................................................................................................... 31
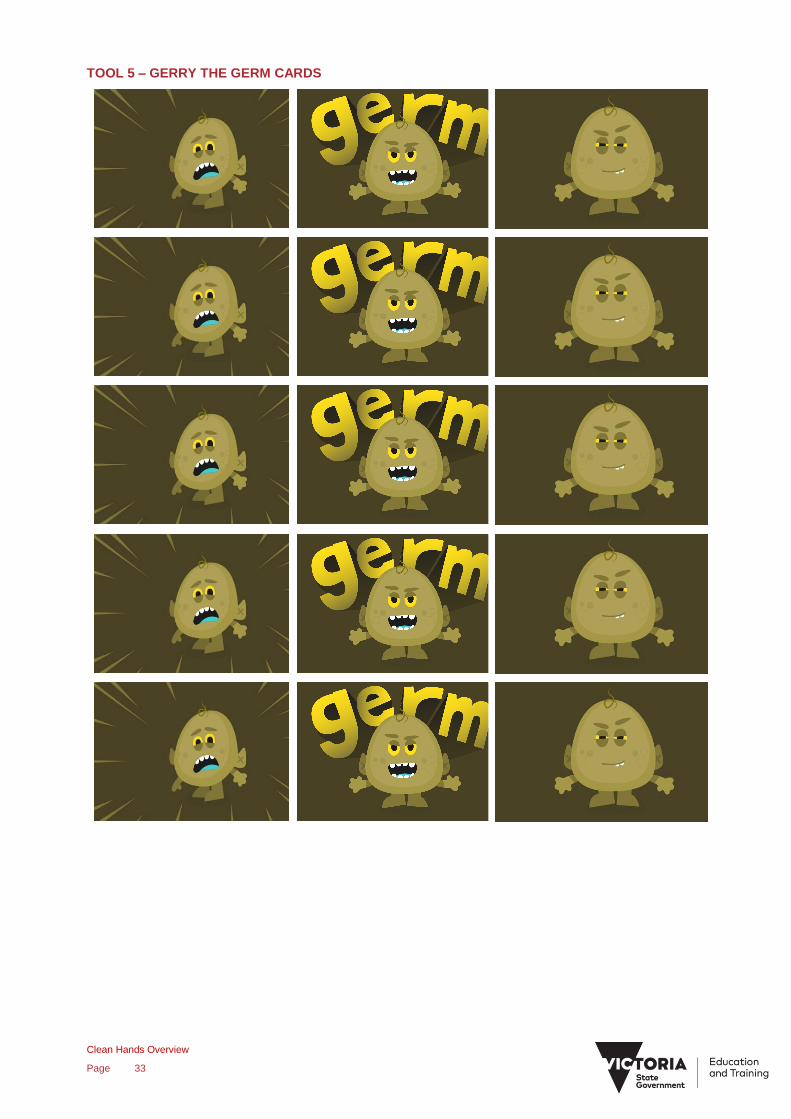
Tool 5 – Gerry the Germ cards ................................................................................................................................. 33
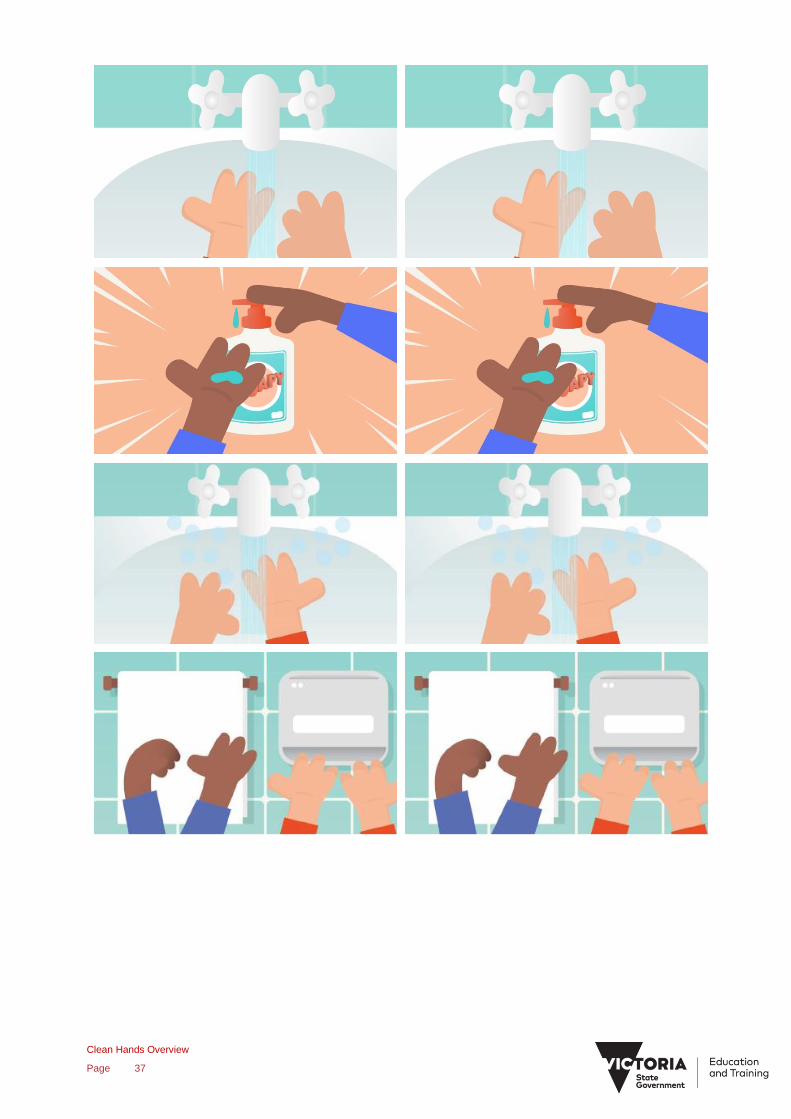
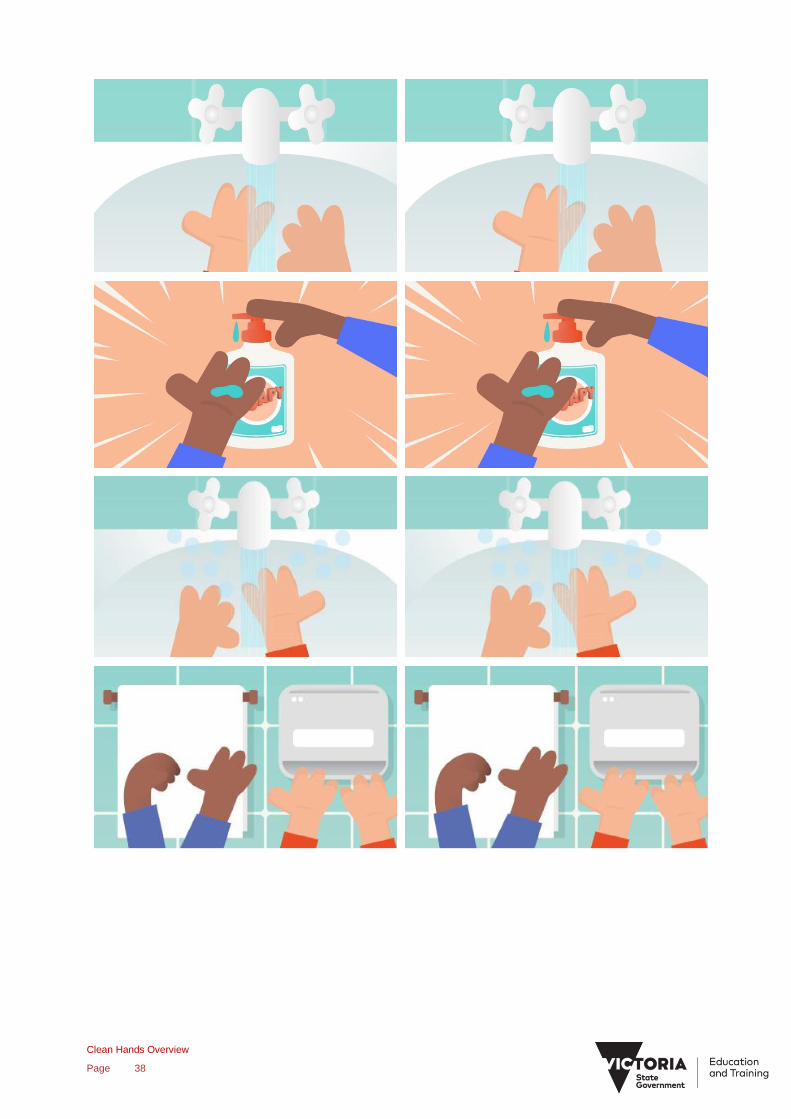
Tool 6 – Handwashing pictures ................................................................................................................................ 35
Melbourne Aug-17
©State of Victoria (Department of Education and Training) 2016
The copyright in this document is owned by the State of Victoria (Department of Education and Training), or in the case of some materials, by third parties (third party materials). No part may be reproduced by any process except in accordance with the provisions of the Copyright Act 1968, the National Education Access Licence for Schools (NEALS) (see below) or with permission.
An educational institution situated in Australia which is not conducted for profit, or a body responsible for administering such an institution may copy and communicate the materials, other than third party materials, for the educational purposes of the institution.
Authorised by the Department of Education and Training,
2 Treasury Place, East Melbourne, Victoria, 3002
Department of Education Training (2017) Clean Hands – Hand Hygiene Curriculum Resources for Foundation, Grade 1 or Grade 2 Year Levels in Victorian Primary Schools, Melbourne.
Tool 7 – Using the GlitterBug Beginner Kit ............................................................................................................... 39
Tool 8 – Be a Soapy Hero ........................................................................................................................................ 40
Tool 9 – WHO’s How to Handwash? ........................................................................................................................ 41
Tool 10 – WHO’s How to Handrub? ......................................................................................................................... 42
Tool 11 – Soapy Hero training certificate ................................................................................................................. 43
Tool 12 – Be a Soapy Hero! posters ........................................................................................................................ 44
Page | 4
Foundation
1: Why is hand hygiene important
LEARNING INTENTIONS
At the end of this topic, students will be able to:
understand what germs are
identify what germs need to live and where they come from
understand why germs can be harmful to us
discuss ways that our hands can become contaminated with germs.
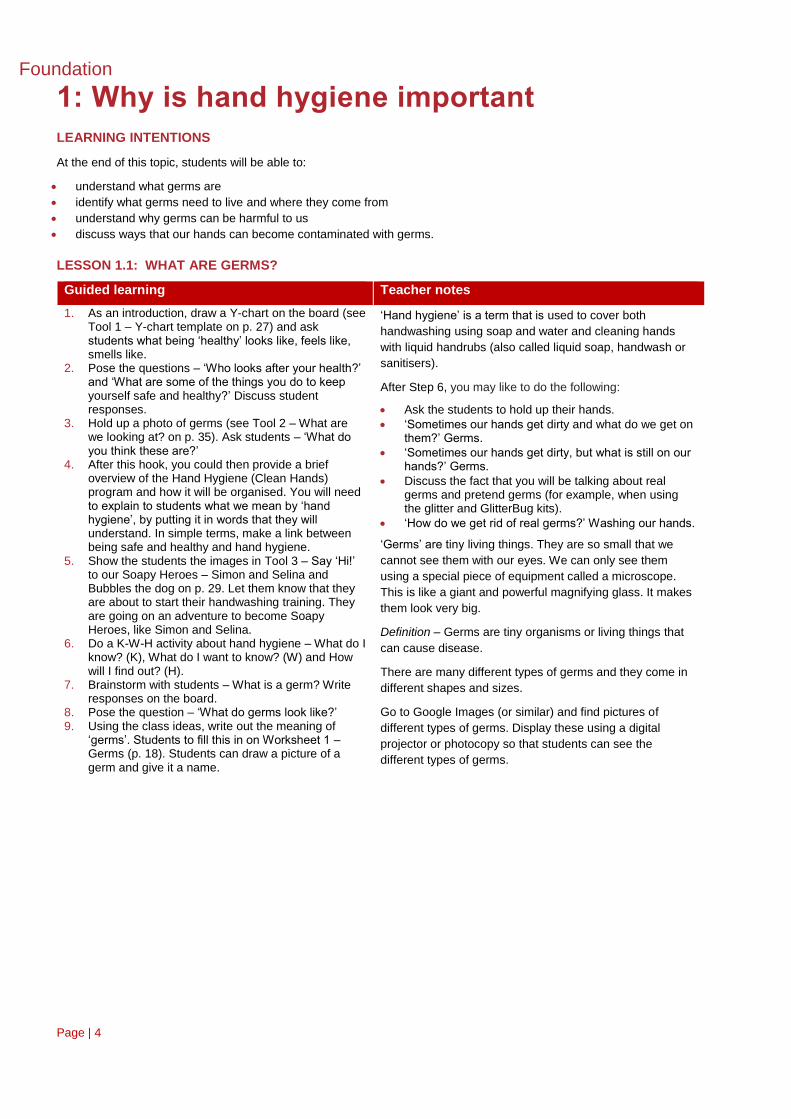
LESSON 1.1: WHAT ARE GERMS?
Guided learning Teacher notes
1. As an introduction, draw a Y-chart on the board (see Tool 1 – Y-chart template on p. 27) and ask students what being ‘healthy’ looks like, feels like, smells like.
2. Pose the questions – ‘Who looks after your health?’ and ‘What are some of the things you do to keep yourself safe and healthy?’ Discuss student responses.
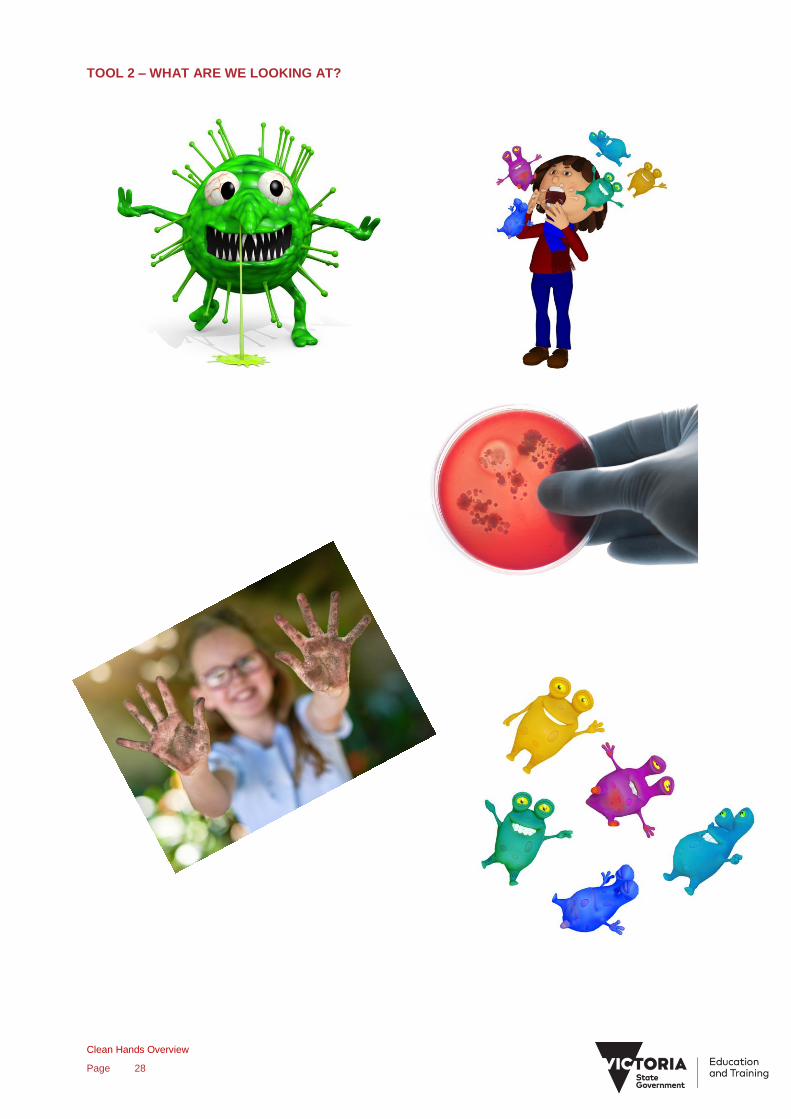
3. Hold up a photo of germs (see Tool 2 – What are we looking at? on p. 35). Ask students – ‘What do you think these are?’
4. After this hook, you could then provide a brief overview of the Hand Hygiene (Clean Hands) program and how it will be organised. You will need to explain to students what we mean by ‘hand hygiene’, by putting it in words that they will understand. In simple terms, make a link between being safe and healthy and hand hygiene.
5. Show the students the images in Tool 3 – Say ‘Hi!’ to our Soapy Heroes – Simon and Selina and Bubbles the dog on p. 29. Let them know that they are about to start their handwashing training. They are going on an adventure to become Soapy Heroes, like Simon and Selina.
6. Do a K-W-H activity about hand hygiene – What do I know? (K), What do I want to know? (W) and How will I find out? (H).
7. Brainstorm with students – What is a germ? Write responses on the board.
8. Pose the question – ‘What do germs look like?’ 9. Using the class ideas, write out the meaning of
‘germs’. Students to fill this in on Worksheet 1 – Germs (p. 18). Students can draw a picture of a germ and give it a name.
‘Hand hygiene’ is a term that is used to cover both
handwashing using soap and water and cleaning hands
with liquid handrubs (also called liquid soap, handwash or
sanitisers).
After Step 6, you may like to do the following:
Ask the students to hold up their hands.
‘Sometimes our hands get dirty and what do we get on them?’ Germs.
‘Sometimes our hands get dirty, but what is still on our hands?’ Germs.
Discuss the fact that you will be talking about real germs and pretend germs (for example, when using the glitter and GlitterBug kits).
‘How do we get rid of real germs?’ Washing our hands.
‘Germs’ are tiny living things. They are so small that we
cannot see them with our eyes. We can only see them
using a special piece of equipment called a microscope.
This is like a giant and powerful magnifying glass. It makes
them look very big.
Definition – Germs are tiny organisms or living things that
can cause disease.
There are many different types of germs and they come in
different shapes and sizes.
Go to Google Images (or similar) and find pictures of
different types of germs. Display these using a digital
projector or photocopy so that students can see the
different types of germs.
Page | 5
Activities for further learning Resources
1. Students work individually or in small groups and use classroom materials to create a collage of a germ. Give the germ collages names, similar to Gerry the Germ, and display them in the classroom. For example, ‘Barry the Bacteria’.
Tool 1 – Y-chart template (p. 27).
Tool 2 – What are we looking at? (p. 28).
Tool 3 – Say ‘Hi!’ to our Soapy Heroes – Simon and Selina
and Bubbles the dog (p. 29).
The following link provides information (and variations)
about the K-W-H graphic organiser –
http://www.education.vic.gov.au/school/
teachers/support/pages/graphicorganisers.aspx?Redirect=1
Worksheet 1 – Germs (p. 18).
Internet.
Classroom materials such as paper, crayons, coloured
pens or pencils, magazines, scissors, glue, modelling clay.
Page | 6
LESSON 1.2: WHAT DO GERMS NEED TO LIVE AND WHERE CAN WE FIND THEM?
Guided learning Teacher notes
1. Review Lesson 1.1. 2. Pose the questions – ‘If you have a pet, what do you
or your family do to take care of it?’, ‘What do people need to live?’ and ‘If germs are living creatures, what do you think they need to live?’ Write responses on the board.
3. Discuss with students the fact that most germs are found everywhere. This means that they can be on anything we touch. Pose the question – ‘In our classroom or in other places around the school, where do you think germs could be found?’
4. Provide students with Post-it notes. As them to go around the classroom and put the Post-it notes on places that they think would have lots of germs. Regroup and ask them where they placed them and their reasons why they chose these locations.
5. Pose the question – ‘Where do these germs come from?’
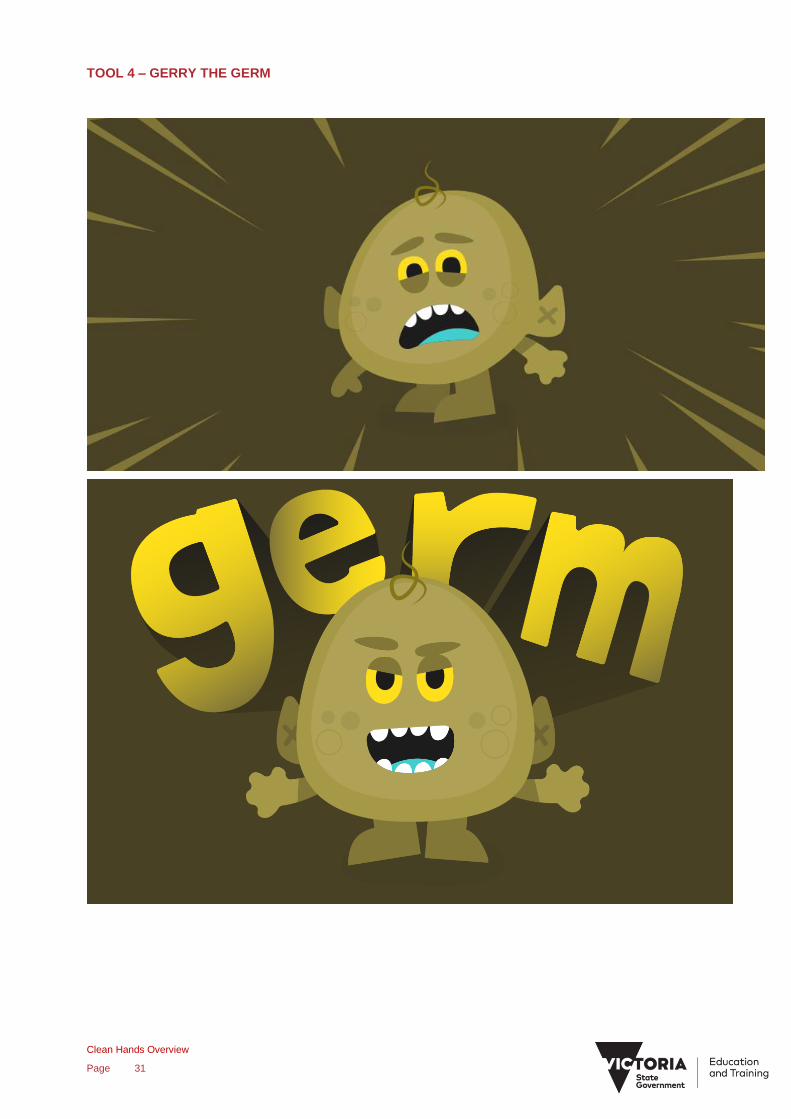
6. Pose the question – ‘Where do germs live?’ 7. Introduce students to Gerry the Germ (see
Worksheet 2 – Where’s Gerry the Germ hiding at school? on p. 20). You could use this handout to summarise all the different places that Gerry the Germ could be hiding at school. Alternatively, use it as an activity to be completed at home.
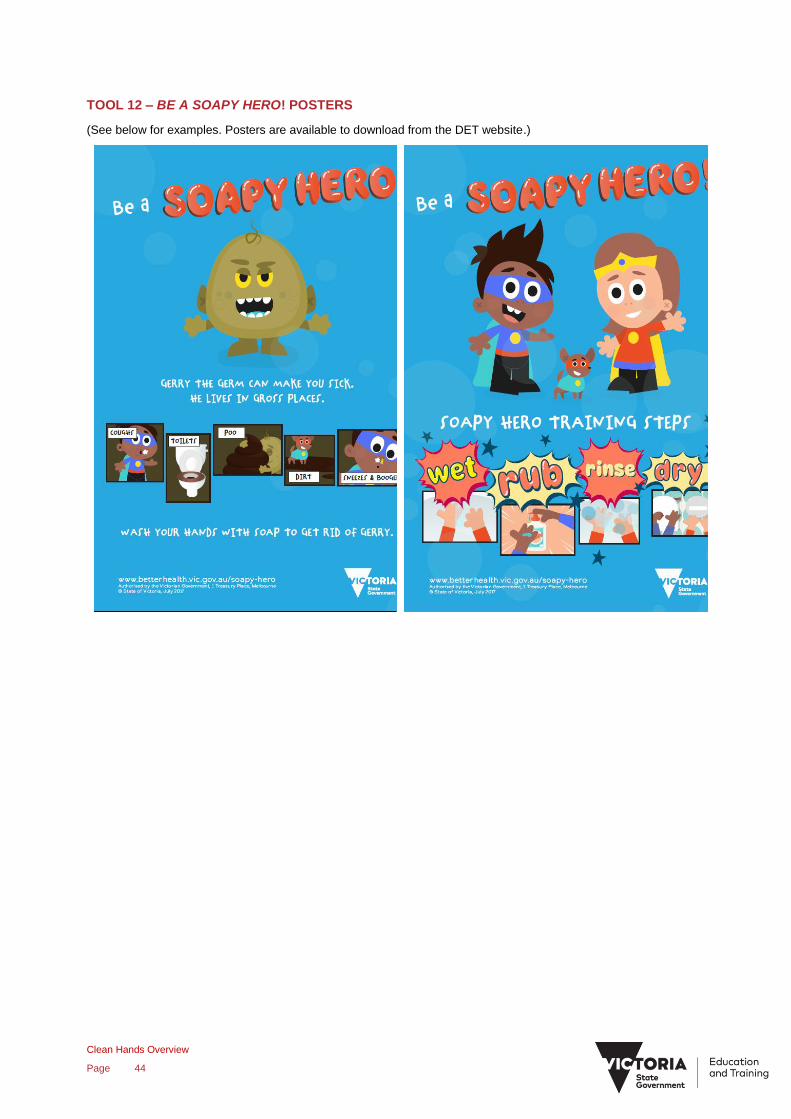
8. Refer students to the poster – ‘Be a Soapy Hero!’ (see also Tool 12 – Poster on p. 44). Point out the gross places that Gerry the Germ lives in:
coughs
toilets
sneezes and boogers
poo
Teacher guide to question – ‘Where do these germs
come from?’
All plants and animals have certain things they need to
live and grow. Germs aren’t any different.
Germs can be found everywhere! They are found all
over the world and in every type of place. They get the
things that they need to live from lots of different places.
Germs get what they need to live from food scraps,
liquids, rubbish and even faeces (poo!).
There are even germs that live on our bodies. Most of
the germs that live on our bodies are good germs and
don’t cause us any harm. But sometimes we pick up bad
germs that can make us sick.
Bad germs can get into our bodies and we don’t even
know they are there until we get sick. This doesn’t
always happen of course, but there are many germs that
cause us to be unwell.
Germs can get into our bodies through our mouths,
noses and eyes.
Teacher guide to question – ‘Where do germs live?’
Germs live anywhere where they can find the things that
they need to grow:
some germs love our bodies. The environment is warm, wet and provides lots of food
they can live inside our bodies and on our skin
inside or on the bodies of animals, such as our pets
on food
on rubbish
on the ground
in the air
in unclean water
in sewerage systems; the toilet is a popular place!
Activities for further learning Resources
1. Students imagine a germ’s favourite place to live. They could draw their germ and the things in its ‘home’ that keep it happy and healthy.
2. Students take Worksheet 3 – Where’s Gerry the Germ hiding at home? (p. 21) home and write down or draw all the different places where Gerry the Germ could be hiding.
Paper, crayons, markers, coloured pencils etc.
Worksheet 2 – Where’s Gerry the Germ hiding at
school? (p. 20).
Worksheet 3 – Where’s Gerry the Germ hiding at home?
(p. 21).
Tool 12 – Be a Soapy Hero! posters (p. 44).
Page | 7
LESSON 1.3: WHY CAN GERMS BE HARMFUL TO US?
Guided learning Teacher notes
1. Review Lesson 1.2. 2. Pose the question – ‘Are all germs bad?’ Discuss. 3. Pose the question – ‘How can germs harm us?’
Discuss.
If you wish, you can prompt discussion by asking
the questions – ‘Have you ever had a cold? How did
it make you feel?’ (Tired, hard to breathe, fever,
headache, a runny or blocked nose. Other
examples of how germs can harm us are a sore
tummy, vomiting and an infected finger or toe.)
4. Students complete Worksheet 4 – The good guys and the bad guys on p. 22 by writing down how some germs (bacteria) can be helpful and how germs are harmful.
Teacher guide to question – ‘Are all germs bad?’
There are different types of germs. Bacteria are one type
of germ, but not all bacteria cause us harm. For
example:
Some ‘germs’ are good for our bodies because they help keep things in balance. Good bacteria live in our intestines and help us use the nutrients from food and make waste from what is left over. They help us make the most of healthy meals.
Some bacteria are used by scientists in labs to produce medicines and vaccines to keep us healthy.
Other germs in the environment turn milk into yoghurt.
Other types of germs that help break down vegetable matter into compost.
Teacher guide to question – ‘How can germs harm
us?’
When disease-causing germs are inside our body, they can stop it from working as well as it should. These germs can multiple very quickly; in a small space of time, a small number can become millions.
Germs can cause disease because they upset how our bodies work:
o They can produce substances called ‘toxins’. These substances act like poisons and cause symptoms like fever, runny nose, rashes, coughing, vomiting and diarrhoea.
o Their numbers increase rapidly and they can stop parts of our body from working properly.
o They can attack and damage a part of the body.
Some germs make us sick if they get into our bodies.
Our good germs don’t usually cause disease unless they find their way to another part of the body. For example, a bacterium called E. coli (Escherichia coli) lives in our gut and helps us to digest food. However, if it gets into our urine (wee), it can make us sick.
Not all diseases caused by germs are serious; they may go away in a day or so. But, other times they may be very serious. Sometimes, diseases caused by germs have to be treated with special medicines such as antibiotics, which work by killing the germs.
Activities for further learning Resources
1. Students could work individually or in small groups and design a poster which shows how germs can harm us.
Worksheet 4 – The good guys and the bad guys (p. 22).
Paper, crayons, coloured pencils, etc.
Page | 8
LESSON 1.4: WHY DO WE NEED TO KEEP OUR HANDS CLEAN?
Guided learning Teacher notes
1. Review Lesson 1.3. 2. Pose the question – ‘How are germs spread?’ 3. Pose the question – ‘How do we get germs on our
hands?’ 4. Teacher demonstration – ‘Spreading germs’. 5. As a class, discuss the most important messages
that the students learnt in ‘Why is hand hygiene important?’
Teacher guide to question – ‘How are germs spread?’
Germs can be spread from one place to another, but
they need something to help them. It’s a bit like how a
car transports us from place to place; germs also need a
way to move from place to place. Some examples of
ways that germs spread are through insects, droplets in
the air, water, food and contact with blood.
Our hands are another way that germs can be moved
around. If we touch something that has a bad germ on it
and we don’t wash our hands before we eat, the germs
can get inside our bodies and make us sick.
Teacher guide to question – ‘How do we get germs on
our hands?’
Germs like to hide on our hands. Here are some
important things to know about germs and our hands:
Our fingernails are a great hiding place for germs. If you have been outside playing, you may notice dirt under your fingernails. Dirt contains germs and comes from the things you have touched.
Germs also like to live in the lines on the palm of our hands and knuckles.
When you use a tissue or touch your nose, or cough or sneeze into your hands, germs can spread onto your hands.
You can get germs on your hands when playing, particularly outside by touching things that other people who may have dirty hands have also touched, or by touching things that are dirty.
Germs also get onto our hands when we play with a pet.
When a person goes to the toilet, they may get germs of their hand from the faeces (poo) or urine (wee). If hands aren’t washed properly after going to the toilet, the germs will stay on them.
Touching food, such as raw meat, can transfer germs especially to other food that is not then cooked, such as salads.
If hands are not washed properly, germs can be transferred to whatever the person touches. Someone else may then touch that same thing and pick up the germs that had been left behind.
If we have germs on our hands and touch our mouths, for example, the germs can find their way
into our bodies and cause harm.
Teacher demonstration – ‘Spreading germs’.
This activity teaches students how easily germs can
spread from hands to food.
1. Present the apples on a plate to students. 2. Students observe the teacher washing his/her
hands with soap and water. 3. The teacher holds the first piece of apple in his/her
right hand. 4. The teacher then coughs, sneezes, wipes his/her
nose on his/her left hand and then holds the apple in this hand.
5. Ask students which apple they would prefer to eat. Which apple is cleaner?
Page | 9
Note: Explain to students that the apple held in the right
hand is preferred because the apple held in the left hand
has been contaminated. Germs are everywhere and so it
is important to wash our hands before handling food.
(Adapted from Healthy Hands: Hand hygiene resource
manual ages 4-14, North Bay Parry Sound District
Health Unit.)
Activities for further learning Resources
1. Students do a drawing which shows how germs
spread and get onto our hands. Apples, sink, soap or liquid handrub and water.

Page | 10
Foundation
2: When do I perform hand hygiene?
LEARNING INTENTIONS
At the end of this topic, students will be able to:
explain where hand hygiene is important
identify when they need to perform hand hygiene.
LESSON 2.1: WHEN AND WHERE IS HANDWASHING IMPORTANT?
Guided learning Teacher notes
1. Review the previous topic, ‘Why is hand hygiene important?’
2. Discuss with students the importance of getting rid of germs.
3. Pose the question – ‘Think about how often you use your hands every day. What do we use our hands for?’
4. Pose the question – ‘When and where is it important to clean my hands?’ Write responses on the board.
5. Reintroduce students to the character Gerry the Germ.
Start a discussion about the different places at school where Gerry the Germ might be hiding.
Provide a map of the school and give students some pictures of Gerry the Germ (Tool 5 on p. 33). Ask them to place them on the map where they think they could come into contact with Gerry the Germ. Refer to the key times in the Teacher notes.
Brainstorm with students and develop a list of the important times to clean hands at school.
Ask students to give reasons why these key times are important for good hand hygiene.
6. Ask students to now think about the other places where they come into contact with Gerry the Germ. Develop a list of occasions when they need to wash their hands before and/or after.
Teacher guide to question – ‘Think about how often
you use your hands every day. What do we use our
hands for?’
Prompt them to think about their day. Students will come
up with a range of answers – brushing teeth, brushing or
combing hair, going to the toilet, putting on our clothes,
putting on our shoes, eating or making food, playing,
writing and drawing, tidying up…
Key points
Washing hands with soap and water is the most effective
way to prevent the spread of gastrointestinal and
respiratory infections in community settings.
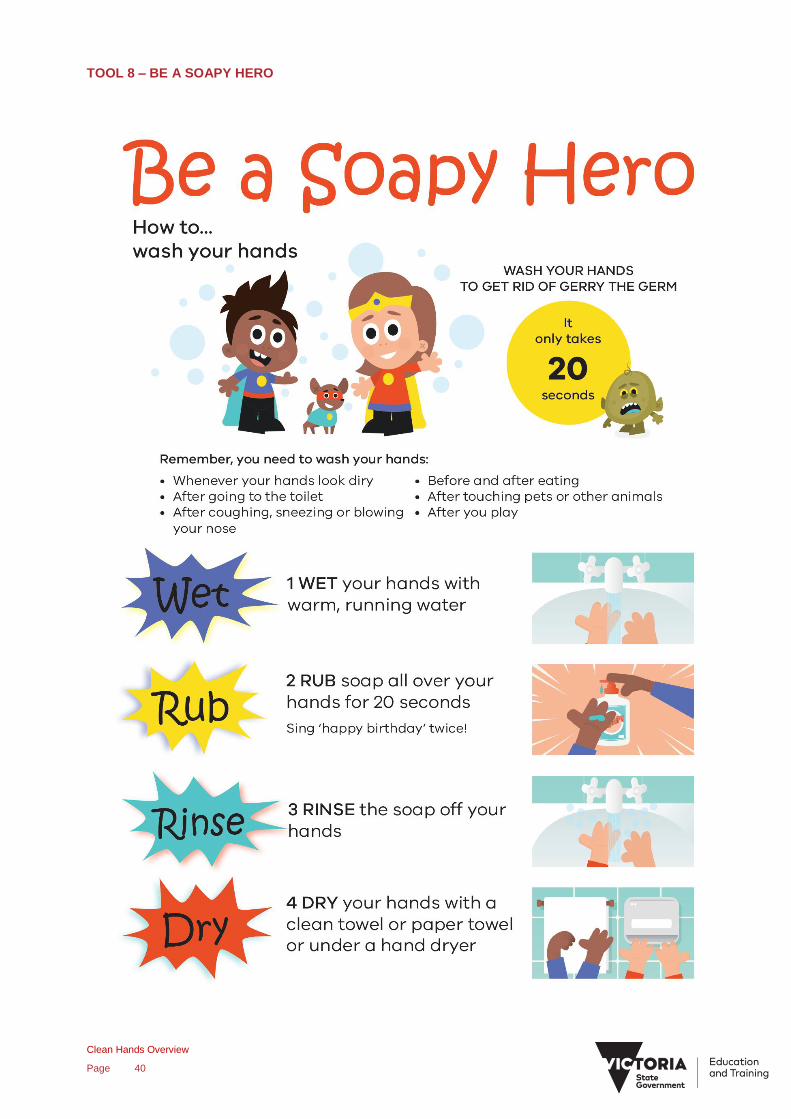
The key times are:
whenever your hands look dirty
after going to the toilet
before and after eating
after coughing, sneezing or blowing your nose
after touching pets and other animals
after you play.
Washing hands before and after eating is encouraged as
a strategy to minimise the risks associated with known
food allergens.
This may be the appropriate time to talk about the use of
liquid handrubs (or liquid soap or sanitisers etc.). Refer
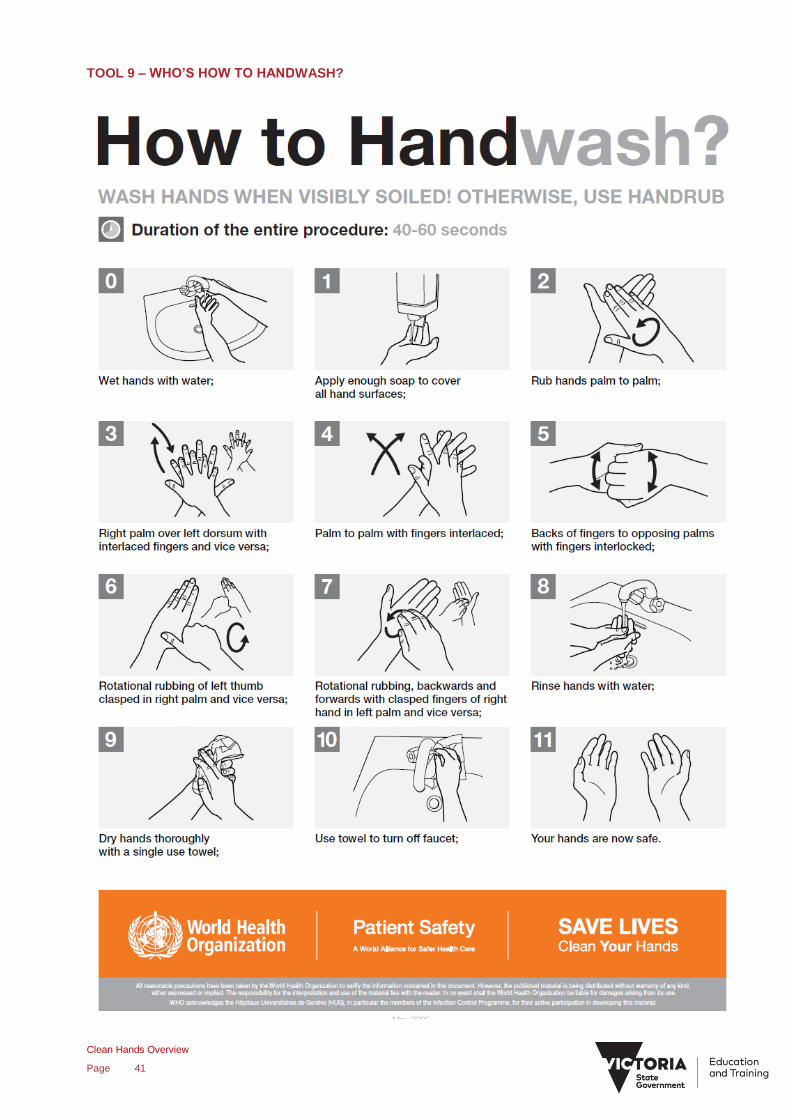
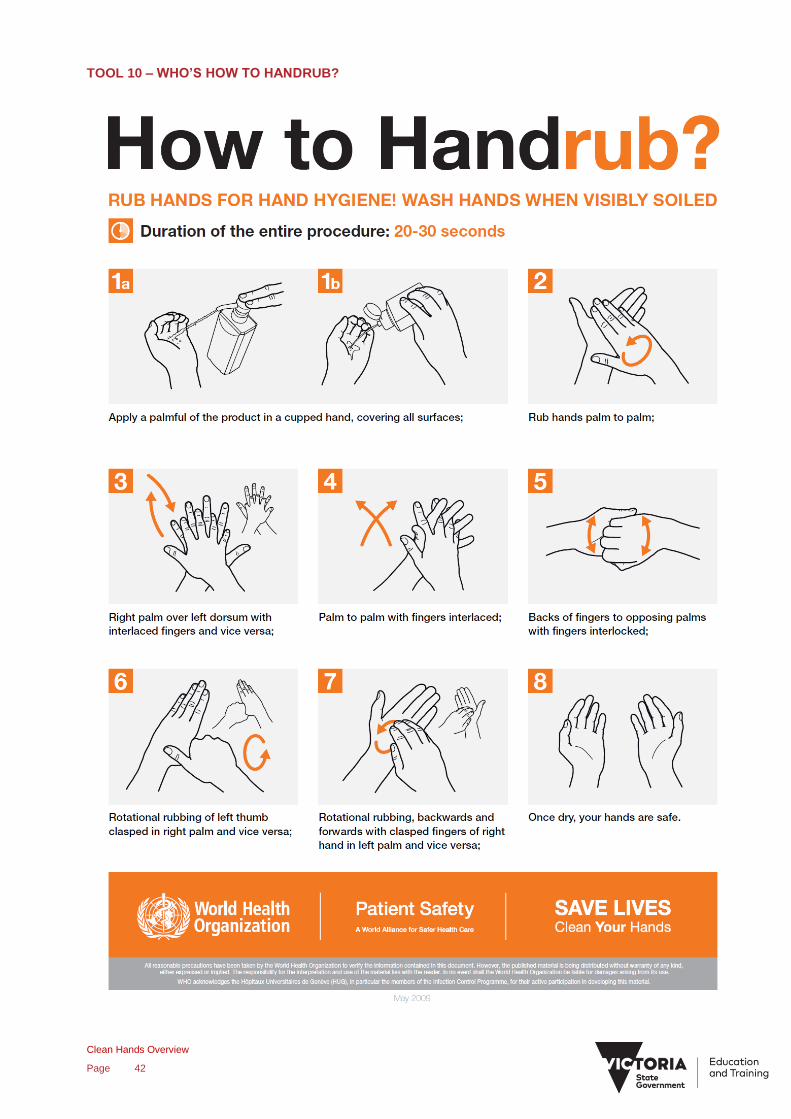
to the World Health Organization (WHO) – How to
Handwash? and How to Handrub? These posters state
that you should wash your hands or use handrub when
they are visibly soiled. As students may more commonly
have access to soap at home, school and other places,
how to handwash is emphasised.
Activities for further learning Resources
1. Students could use the pictures of Gerry the Germ to design a poster which shows the areas around the school where they may come into contact with Gerry the Germ.
Map of the school (retain map for other lessons).
Tool 5 – Gerry the Germ (p. 33).

Page | 11
LESSON 2.2: HOW CLEAN ARE OUR HANDS?
Guided learning Teacher notes
1. Review Lesson 2.1. 2. Remind students that germs can be on their hands
even though they cannot see them. Correct handwashing can remove germs from our hands.
Glitter activity:
Each student is to rub a small amount of hand lotion all over their hands.
Ask students to open their hands and they apply a small amount of glitter, which they rub all over their hands.
Explain to students that like the glitter, germs are all over their hands; however, they can see the glitter but not the germs.
Students are then to thoroughly wash their hands using the liquid soap and paper towels and then look at their hands again.
Debrief:
What do students notice about the amount of glitter on their hands?
Is there any glitter still on their hands after they washed them?
Are there areas on their hands where they can still see the glitter? This means that if hands aren’t washed correctly, germs could still be there.
(Adapted from Healthy Hands: Hand hygiene resource
manual ages 4-14, North Bay Parry Sound District
Health Unit.)
This lesson uses materials that are readily available in
the classroom. If GlitterBug kits are available, do the
activity in Lesson 2.3.
Note: Check that students do not have any reactions to
the hand lotion or liquid soap that is being used or
reasons why they cannot come into physical contact with
other students.
Activities for further learning Resources
1. Students could create a healthy hands mural. Each
student paints their hand and put their hand print on
the poster. They could write their name underneath.
The poster could be decorated with pictures (such
as Simon and Selina, water bubbles and droplets,
handwashing images) and words to remind the
class about the importance of handwashing.
Hand lotion, glitter, handwashing facilities, liquid soap
dispensers, paper towels.
Large poster paper, paint, coloured pens, scissors, glue,
etc.
Page | 12
LESSON 2.3: GLITTERBUG ACTIVITIES
Guided learning Teacher notes
1. Review Lesson 2.2. 2. Use the GlitterBug materials to complete the
following activity:
Before the activity begins, apply some of the GlitterBug Potion to some areas of the classroom.
Select a water-resistant toy to use for the demonstration.
Apply the GlitterBug Potion to the toy. Pretend that you have coughed or sneezed on the toy.
Pass the toy around amongst the students, making sure that some of the students have the opportunity to come into contact with the GlitterBug Potion.
Two students could be allocated the role of ‘detectives’. Give them the UV light and ask them to go around the room and find the germs on the other children and places around the room.
If you turn off the lights to make the room as dark as possible, explain to students that that when their hands glow, this means that they now have ‘germs’ on their hands from the toy that you coughed and sneezed on and then touched without washing your hands.
Discuss that germs can spread from objects that are contaminated to their hands and then to other people or objects. If we wash our hands, we can stop the spread of germs.
Repeat the activity so that every student has the chance to touch the toy. Swap the ‘detective roles’.
Ask some of the students to wash their hands. Then shine the UV on their hands and compare them to others in the class.
Pose the question – ‘What does this tell us
about how germs spread?’
Tool 7 has some basic information about using the
GlitterBug kit.
There are a number of ways that you can use the
GlitterBug kit. This activity is an example that works well
for Foundation. However, the GlitterBug website
provides you with other ideas – www.glitterbug.net.au.
Activities for further learning Resources
1. Vary this activity by students working in groups or
setting up a ‘germ trail’ in the classroom.
GlitterBug Beginner Kit for primary school, plastic toy.
Tool 7 – Using the GlitterBug Beginner Kit (p. 39).
Water, soap and paper towels.
Page | 13
Foundation
3: How do I perform hand hygiene?
LEARNING INTENTIONS
At the end of this topic, students will be able to:
understand the correct ways to perform hand hygiene
demonstrate the correct technique for hand hygiene.
LESSON 3.1: WASHING HANDS LIKE A SOAPY HERO!
Guided learning Teacher notes
1. Review the two previous topics, ‘Why is hand hygiene important?’ and ‘When do I perform hand hygiene?’
2. Show students the hand hygiene video animation located on the Better Health Channel’s Soapy Hero campaign page: www.betterhealth.vic.gov.au/soapy-hero.
3. Ask them the following questions:
Who is the ‘baddy’ in the story?
What was on Simon’s hand?
What are the places that Gerry the Germ lives?
How did Simon and Selina feel about getting sick?
Why is Gerry the Germ so sneaky?
Tell me the steps that Simon and Selina used to get rid of Gerry the Germ.
4. It is important that students look at their own environments (home, school, sporting venues) to know where handwashing materials are located.
On the map of the school, where are the places where we can find the things we need to wash our hands?
Where do you have these at home?
Think about the other places that you go. Where are they in these places? Are they easy to find?
5. Remind students that they have learnt about WHY they need to wash their hands and WHEN they need to wash their hands. Now, they are going to learn about correct handwashing (HOW).
6. Show students the technique for correct handwashing. Refer students to Tool 8 – Be a Soapy Hero on p. 40). Students can take it in turns to practice correct handwashing.
Students have already be introduced to Gerry the Germ,
Simon and Selina and Bubbles the dog. Now, they can
look at how Simon and Selina have become Soapy
Heroes.
The technique for correct handwashing:
1. WET your hands with warm, running water. 2. RUB soap all over your hands for 20 seconds. 3. RINSE the soap off your hands. 4. DRY your hands with a clean towel or paper towel
or under a hand dryer.
Activities for further learning Resources
1. Students could suggest another way to demonstrate the steps in getting rid of germs.
Map of the school from Lesson 2.1.
Hand Hygiene clip.
Sink, warm water, a soap dispenser, paper towel.
Tool 8 – Be a Soapy Hero (p. 40).
Page | 14
LESSON 3.2: HOW WELL DO I WASH MY HANDS?
Guided learning Teacher notes
1. Review Lesson 3.1. 2. To engage students, select a favourite classroom
toy. Let them know that we are going to work out what 20 seconds feels like by playing a game.
Remind them that most people don’t wash their hands for long enough. You could pretend to wash your hands (a couple of seconds) and wipe them on your top.
Give one student the toy and ask them to make the toy dance while you time 20 seconds on the stopwatch. Review the four steps of handwashing as you do this.
Students could come up in turns and make the toy dance, estimating 20 seconds. Use the stopwatch to see how close students get.
3. One of the best ways to know long you should be washing your hands for is to sing ‘Happy Birthday to me’ twice. This is about 20 seconds. Students practice this.
The purpose of these activities is for students to be able
to estimate 20 seconds, which is the suggested amount
of time to spend washing your hands.
Activities for further learning Resources
1. Think of another song that you could sing that lasts for the same amount of time. Write this on Worksheet 5. Students could then share their songs with the class.
Favourite classroom toy, clock with a seconds hand or a
stopwatch.
Worksheet 5 – My handwashing song (p. 23).
Page | 15
LESSON 3.3: REVIEW
Guided learning Teacher notes
1. Review the three previous topics, ‘Why is hand hygiene important?’, ‘When do I perform hand hygiene?’ and ‘How do I perform hand hygiene?’
2. Pretend germs activity:
Put the finger-tips or finger puppets on the four fingers of your hand and tell the students that these are pretend germs. Ask them – ‘If there are real germs on your hand, what do you need to get rid of them?’ ‘Let’s get rid of these germs.’
Ask students what we need to get rid of these germs, in order. As they correctly mention each one, take off one of the tips. The order is –
1. WET your hands with warm, running water 2. RUB soap all over your hands for 20 seconds 3. RINSE the soap off your hands 4. DRY your hands with a clean towel or paper
towel or under a hand dryer Note: Friction is important to help remove the germs.
You could invite students up to put the pretend germs on their fingers and repeat the activity.
3. Complete Worksheet 6 – The steps to becoming a Soapy Hero! on p. 24 by cutting out the pictures and pasting them in the correct sequence.
4. Issue the Soapy Hero training certificate (Tool 11 on p. 43).
This is a good time to reinforce the four steps for correct
handwashing. Refer to the poster – ‘Be a Soapy Hero!’
(see also Tool 12 on p. 44) or Tool 8 – Be a Soapy Hero
(p. 40).
Activities for further learning Resources
1. Complete the maze activity on Worksheet 7. 2. At the end of this topic of the Hand Hygiene (Clean
Hands) program, talk to students about the following:
We have finished the activities in the Hand Hygiene (Clean Hands) program and you have received your Soapy Hero training certificates.
Pose the question – ‘What do we need to keep doing from now on to be Soapy Heroes?’
Place the Soapy Hero posters in prominent places around the school.
Regularly reinforce the messages about correct
handwashing to students.
Four finger tips from a glove or finger puppets (as grimy
looking as possible).
Tool 12 – Poster (‘Be a Soapy Hero!’) (p. 44).
Tool 8 – Be a Soapy Hero (p. 40).
Worksheet 6 – The steps to becoming a Soapy Hero! (p.
24)
Worksheet 7 – Maze (p. 25).
Tool 11 – Soapy Hero training certificate (p. 43).

Page | 16
REVIEW/EVALUATION This review/evaluation can be completed by the teacher before, during and/or after completing all three topics of why, how and
when to perform hand hygiene. It may be used for individual students or overall for the whole class. Both formative and
summative assessment can provide information to assess students against the learning outcomes and learning intentions. This
may be formal or informal, depending on the year level and the role of these resources in the school curriculum.
It can be used as a tool for formative assessment (that is, assessment for learning). The teacher is able to use evidence of student progress to inform their teaching and learning; assess student progress and how well they understand the learning; help modify activities. It can also be used for assessment as learning; students can reflect and evaluate their own progress
to inform their learning.
It can be used as a tool for summative assessment (that is, assessment of learning). The teacher is able to use evidence of
student learning to make judgements about student achievement against the learning outcomes and learning intentions.
Circle a number 1 to 5 to indicate your opinion about the student’s or students’ knowledge and understanding.
In your opinion does the student or most of the
students:
Very low Very high
1 2 3 4 5
understand what germs are
identify what germs need to live and where they come from
understand why germs can be harmful to us
discuss ways that our hands can become contaminated with
germs
explain why hand hygiene is important
identify when they need to perform hand hygiene
understand the correct ways to perform hand hygiene
demonstrate the correct technique for hand hygiene.
Page | 17
WORKSHEETS

Page | 18
WORKSHEET 1 – GERMS
What is a germ?
_____________________________________________________________________________________________________
_____________________________________________________________________________________________________
_____________________________________________________________________________________________________
_____________________________________________________________________
Page | 19
Draw a picture of a germ and give it a name!
Page | 20
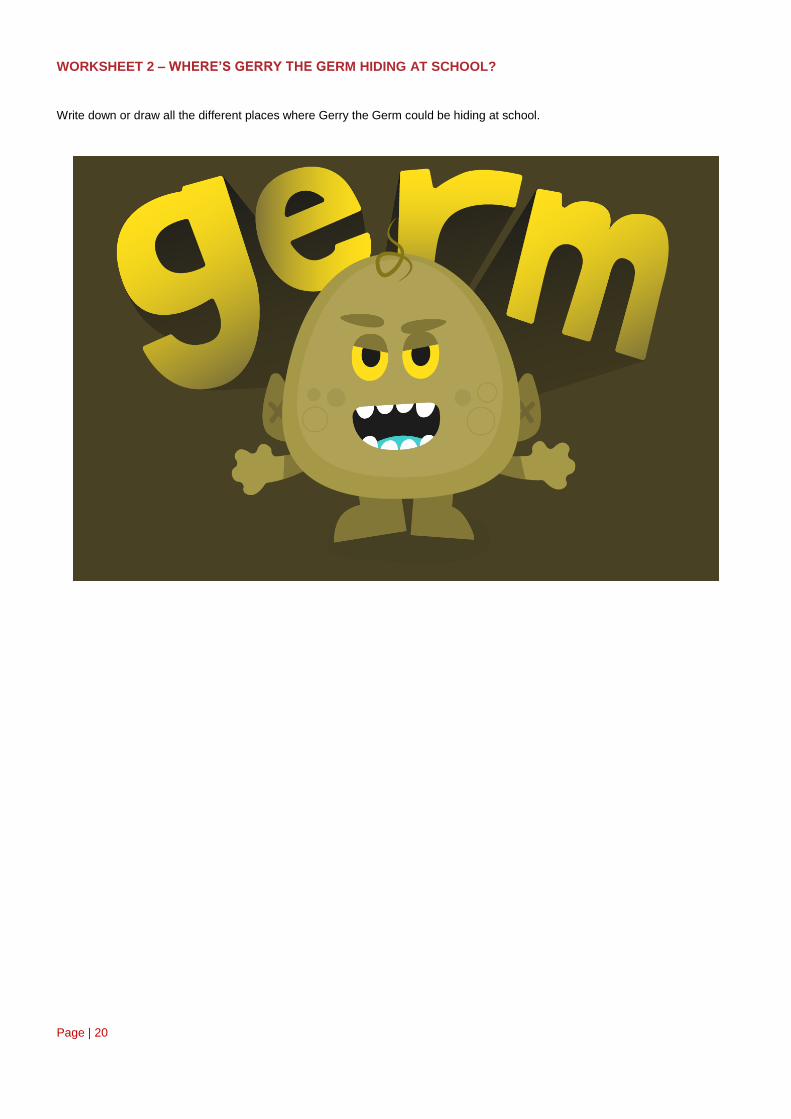
WORKSHEET 2 – WHERE’S GERRY THE GERM HIDING AT SCHOOL?
Write down or draw all the different places where Gerry the Germ could be hiding at school.
Page | 21
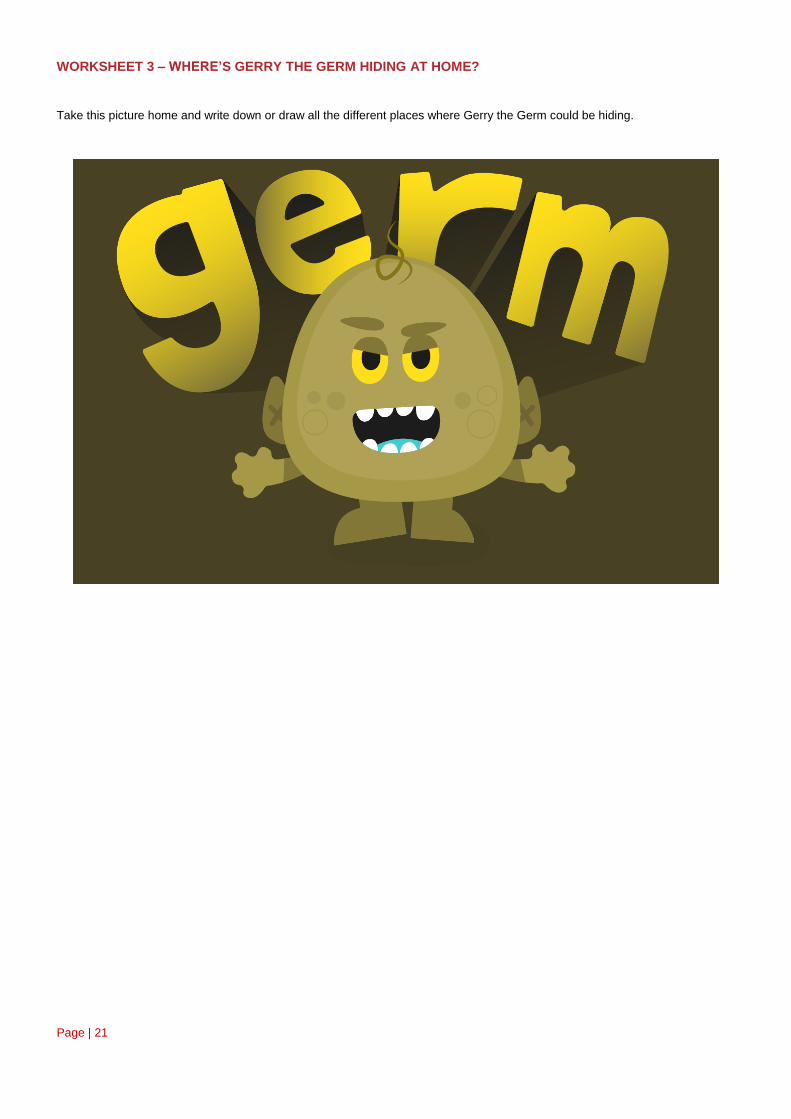
WORKSHEET 3 – WHERE’S GERRY THE GERM HIDING AT HOME?
Take this picture home and write down or draw all the different places where Gerry the Germ could be hiding.
Page | 22
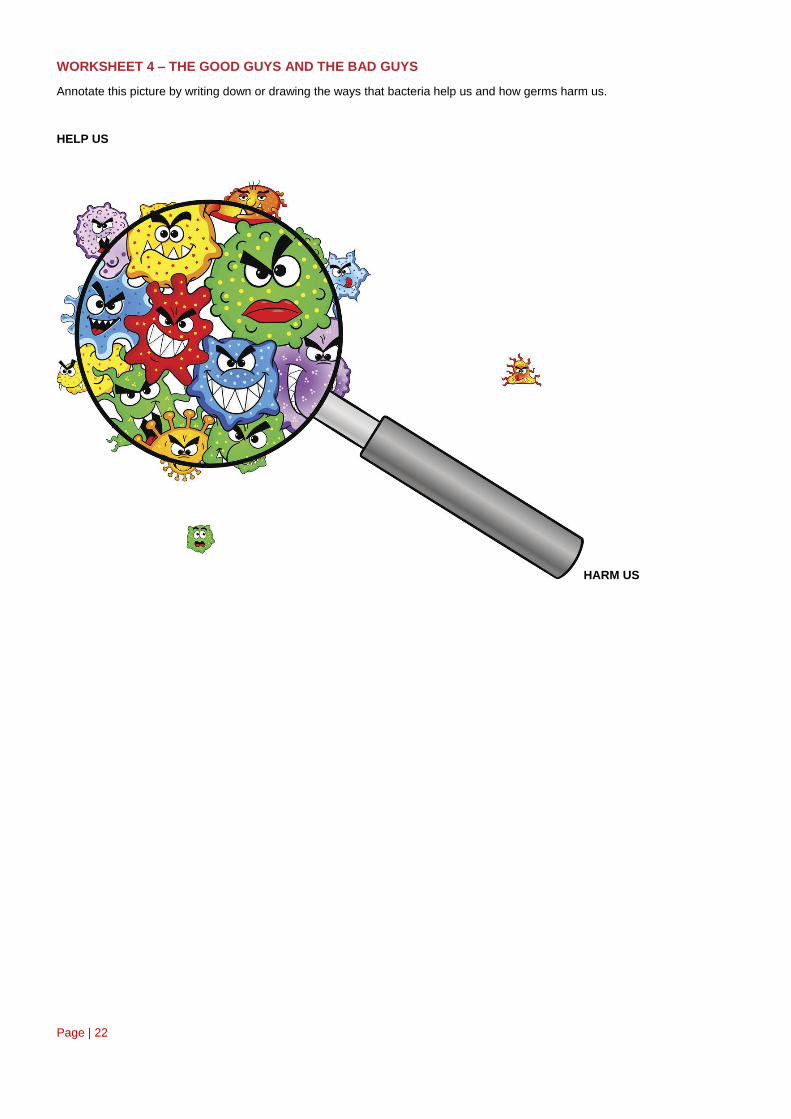
WORKSHEET 4 – THE GOOD GUYS AND THE BAD GUYS
Annotate this picture by writing down or drawing the ways that bacteria help us and how germs harm us.
HELP US
HARM US
Page | 23
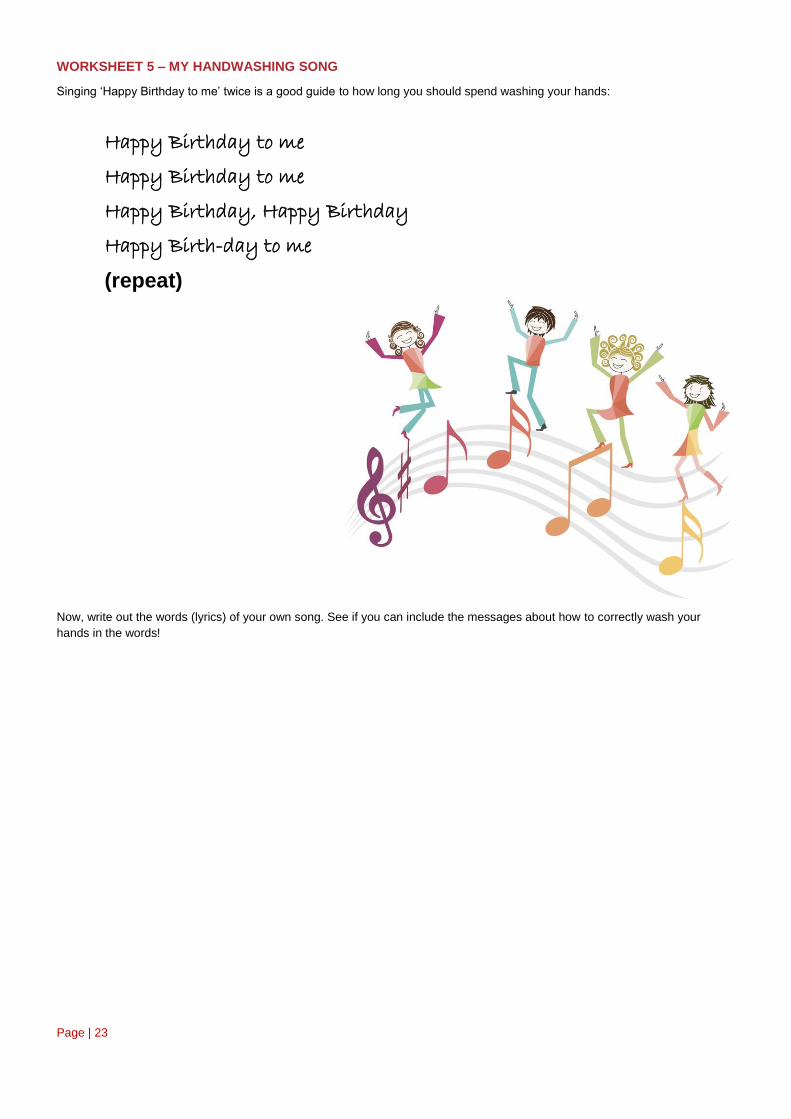
WORKSHEET 5 – MY HANDWASHING SONG
Singing ‘Happy Birthday to me’ twice is a good guide to how long you should spend washing your hands:
Happy Birthday to me
Happy Birthday to me
Happy Birthday, Happy Birthday
Happy Birth-day to me
(repeat)
Now, write out the words (lyrics) of your own song. See if you can include the messages about how to correctly wash your
hands in the words!

Page | 24
WORKSHEET 6 – THE STEPS TO BECOMING A SOAPY HERO!
Cut out the pictures and paste them in the correct order on the diagram below:
2
3 4
5
Page | 25
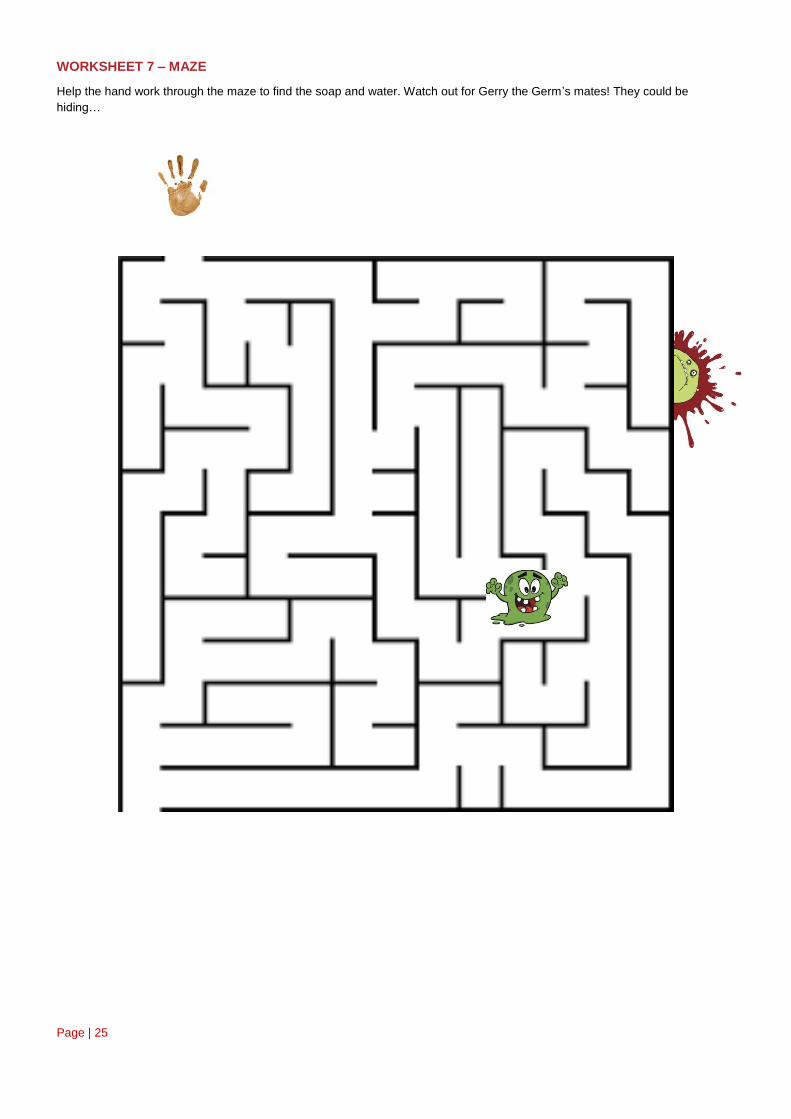
WORKSHEET 7 – MAZE
Help the hand work through the maze to find the soap and water. Watch out for Gerry the Germ’s mates! They could be
hiding…
Page | 26
TOOLS

Clean Hands Overview
Page 27
TOOL 1 – Y-CHART TEMPLATE
Clean Hands Overview
Page 28
TOOL 2 – WHAT ARE WE LOOKING AT?

Clean Hands Overview
Page 29
TOOL 3 – SAY ‘HI!’ TO OUR SOAPY HEROES – SIMON AND SELINA AND BUBBLES THE DOG
Clean Hands Overview
Page 30
Clean Hands Overview
Page 31
TOOL 4 – GERRY THE GERM
Clean Hands Overview
Page 32
Clean Hands Overview
Page 33
TOOL 5 – GERRY THE GERM CARDS

Clean Hands Overview
Page 34

Clean Hands Overview
Page 35
TOOL 6 – HANDWASHING PICTURES

Clean Hands Overview
Page 36
Clean Hands Overview
Page 37
Clean Hands Overview
Page 38
Clean Hands Overview
Page 39
TOOL 7 – USING THE GLITTERBUG BEGINNER KIT
The GlitterBug Beginner Kit comes with:
one GlitterBug Potion (240 ml bottle for handwashing training)
one UV torch
one cardboard case.
The basic instructions for using the GlitterBug Potion are as follows:
Using GlitterBug Potion is simple:
Squirt one pump of GlitterBug Potion onto your hands and rub it in, just as you would with moisturiser. Wash and dry your hands Use the UV Torch to illuminate all the lotion that hasn’t been washed off. This represents germs which have been left to spread to everything you touch or could be ingested if you put your hands to your mouth or face.
The GlitterBug website (www.glitterbug.net.au) provides information on Getting Started, Products, Hand Hygiene and
cost if your school would like to purchase one.
Clean Hands Overview
Page 40
TOOL 8 – BE A SOAPY HERO
Clean Hands Overview
Page 41
TOOL 9 – WHO’S HOW TO HANDWASH?
Clean Hands Overview
Page 42
TOOL 10 – WHO’S HOW TO HANDRUB?

Clean Hands Overview
Page 43
TOOL 11 – SOAPY HERO TRAINING CERTIFICATE
(Electronic version of this resource available DET website)
Clean Hands Overview
Page 44
TOOL 12 – BE A SOAPY HERO! POSTERS
(See below for examples. Posters are available to download from the DET website.)