© 2011 delmar, cengage learning chapter 1 getting to know illustrator
TRANSCRIPT
© 2011 Delmar, Cengage Learning
Chapter 1
Getting to Know Illustrator
Objectives• Explore the Illustrator workspace
• View and modify artboard elements
• Work with objects and smart guides
• Create basic shapes
• Apply fill and stroke colors to objects
• Select, move, and align objects
• Transform objects
• Make direct selections
• Work with multiple artboards
© 2011 Delmar Cengage Learning
Explore the Illustrator Workspace
• The arrangement of windows and panels that you see on your monitor is called the workspace.
• Illustrator CS5 offers a number of predefined workspaces that are customized for different types of tasks.
© 2011 Delmar Cengage Learning

Explore the Illustrator Workspace
• The default workspace is called Essentials.
• You can switch from one workspace to another by clicking Windows on the Application bar, pointing to Workspace, and then choosing a workspace.
© 2011 Delmar Cengage Learning
Explore the Illustrator Workspace
© 2011 Delmar Cengage Learning
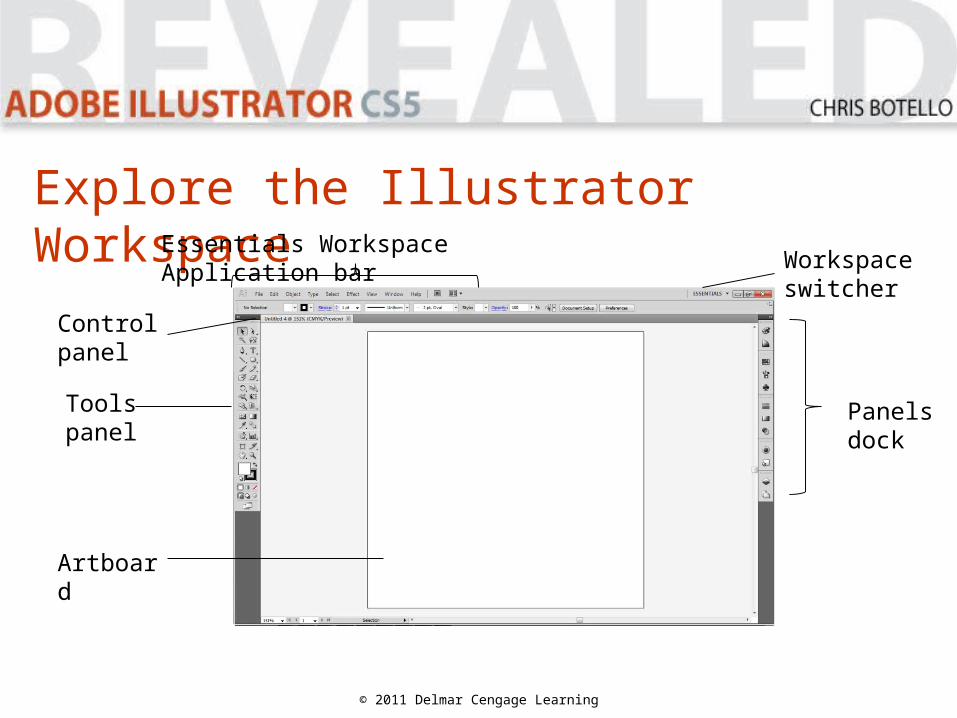
Artboard
Tools panel
Control panel
Workspace switcher
Panels dock
Essentials Workspace Application bar
© 2011 Delmar Cengage Learning
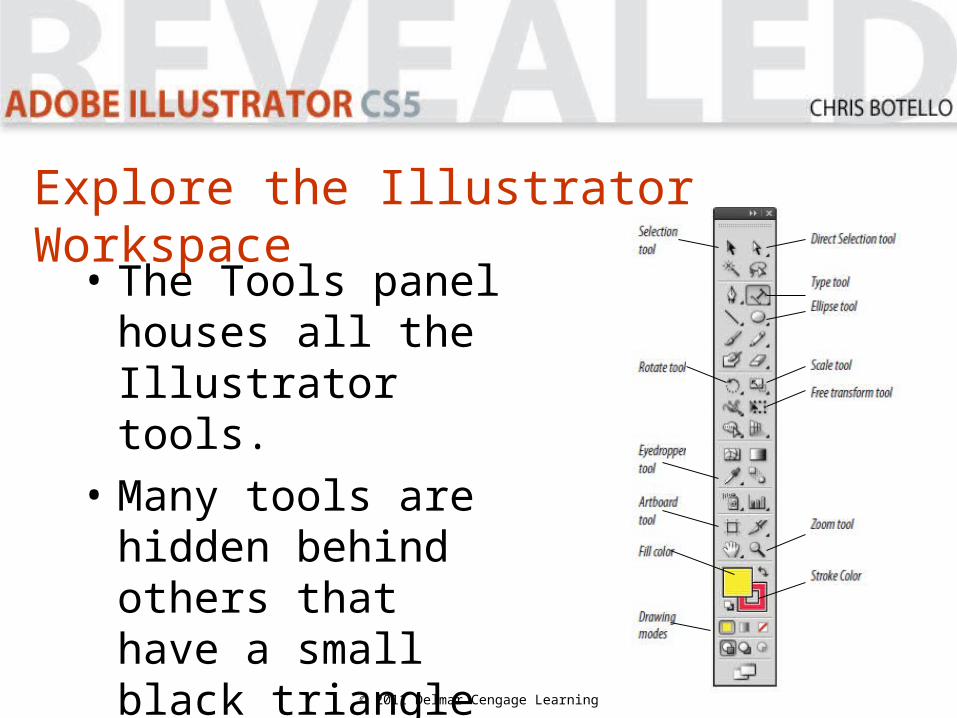
• The Tools panel houses all the Illustrator tools.
• Many tools are hidden behind others that have a small black triangle in the lower-right corner.
Explore the Illustrator Workspace
Explore the Illustrator Workspace
• Panels are windows containing features for modifying and manipulating Illustrator objects.
• Panels are arranged in groups on the right side of the workspace.
© 2011 Delmar Cengage Learning
© 2011 Delmar Cengage Learning
Explore the Illustrator Workspace
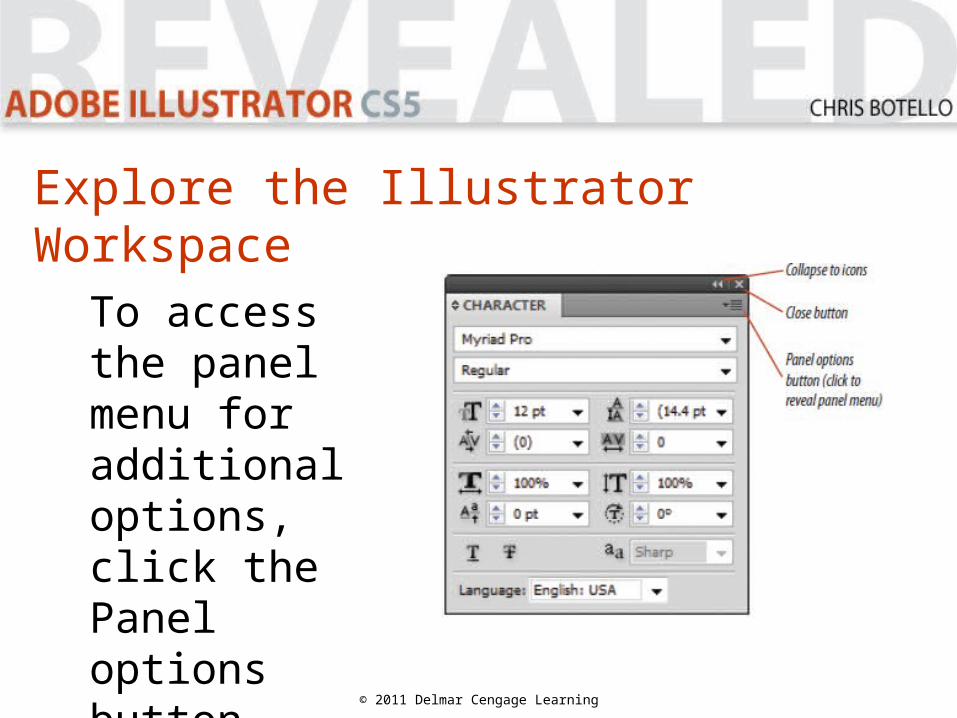
To access the panel menu for additional options, click the Panel options button.
Explore the Illustrator Workspace
© 2011 Delmar Cengage Learning
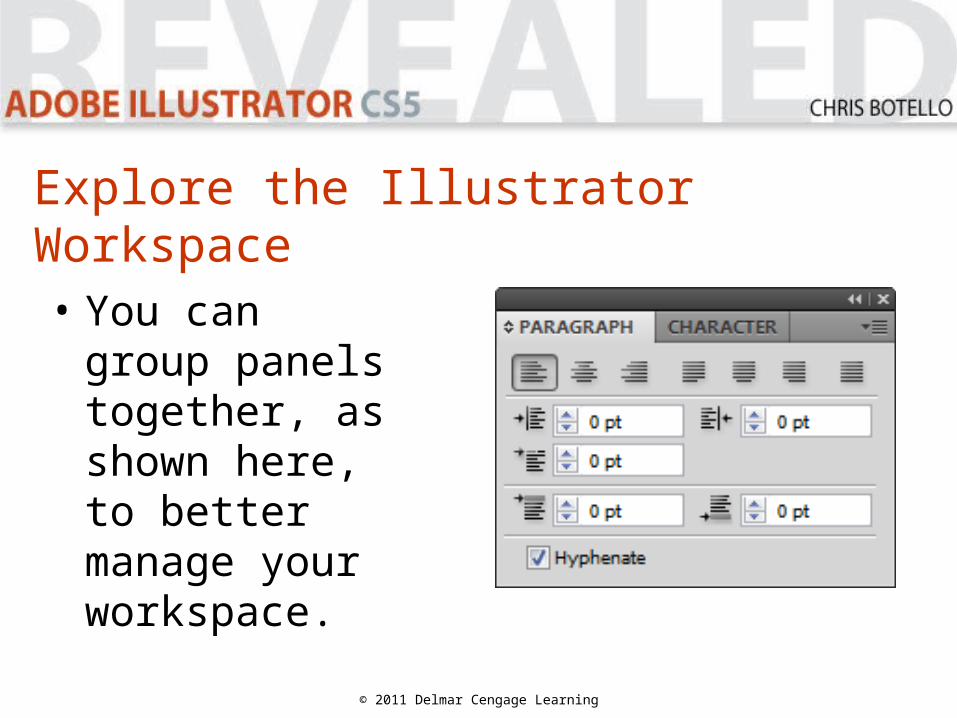
• You can group panels together, as shown here, to better manage your workspace.

Explore the Illustrator Workspace
© 2011 Delmar Cengage Learning
• You can dock panels together, as shown here, so you can move them together.
View and Modify Artboard Elements
• The Zoom tool is found on the Tools panel and is used to adjust magnification.
• Click the document window with the Zoom tool to enlarge it.
• Press and hold [Alt](Win) or [option](Mac) while clicking the document to reduce it.
© 2011 Delmar Cengage Learning

© 2011 Delmar Cengage Learning
Magnification levels indicated here
View and Modify Artboard Elements
• To switch temporarily to the Zoom tool while using other tools, press and hold [Ctrl][Spacebar](Win) or [Command] [Spacebar](Mac), then click to zoom in.
• To zoom out, press and hold [Ctrl][Alt][Spacebar](Win) or [Command][option][Spacebar](Mac).
© 2011 Delmar Cengage Learning
View and Modify Artboard Elements
• The Hand tool is found on the Tools panel.
• Use the Hand tool to move a document around.
• The keyboard shortcut for accessing the Hand tool is to simply press and hold [Spacebar].
© 2011 Delmar Cengage Learning
View and Modify Artboard Elements
• Illustrator has several features to help with precise positioning and sizing.
• Rulers are positioned at the top and left side of the pasteboard.
• Set an option for hiding or showing rulers on the View menu.
© 2011 Delmar Cengage Learning
View and Modify Artboard Elements

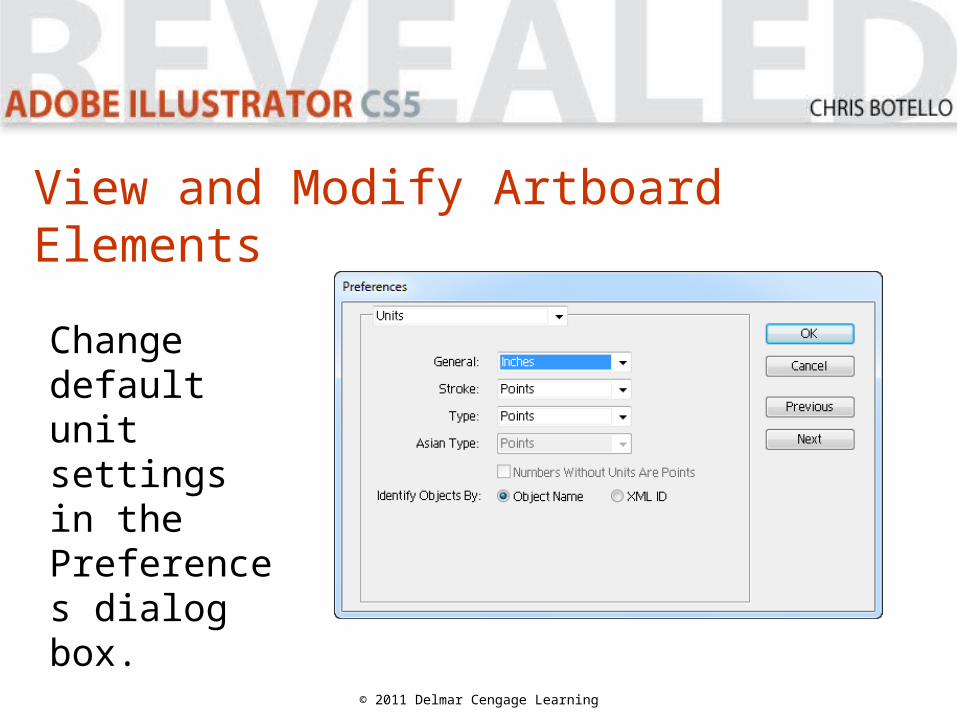
• You can determine the units with which you want to work in the Preferences dialog box.
• Click Edit (Win) or Illustrator (Mac) on the Application bar, point to Preferences, then click Units to display the dialog box.
© 2011 Delmar Cengage Learning
View and Modify Artboard Elements
© 2011 Delmar Cengage Learning
View and Modify Artboard Elements
Change default unit settings in the Preferences dialog box.

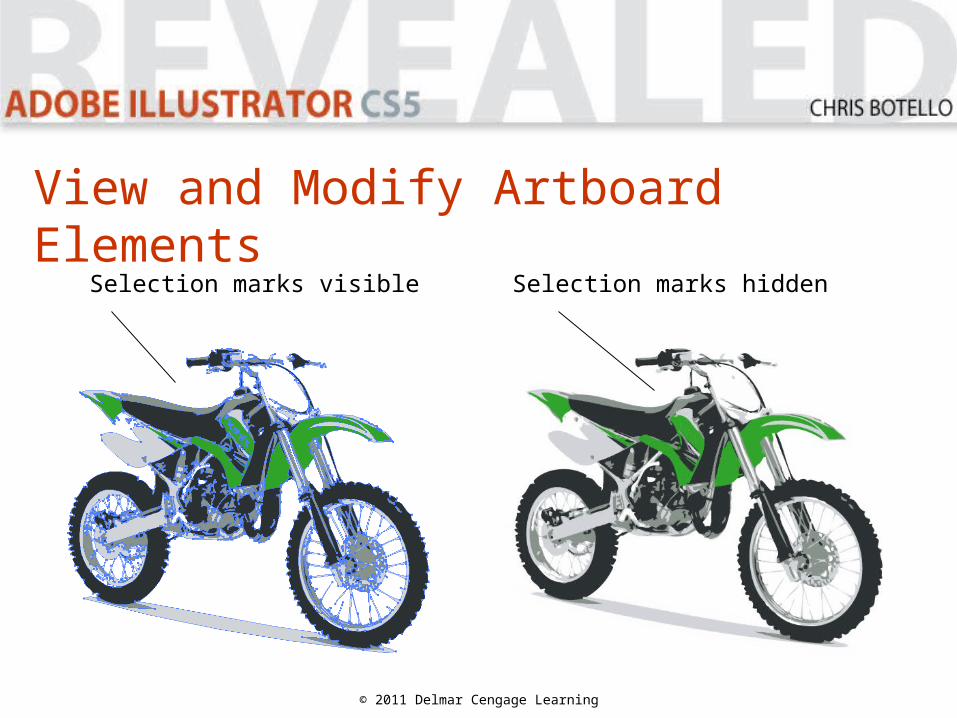
• All objects you create have visible selection marks or selection edges.
• When you select an object those edges automatically show.
• You can opt to hide them on the View menu.
© 2011 Delmar Cengage Learning
View and Modify Artboard Elements
View and Modify Artboard Elements
© 2011 Delmar Cengage Learning
Selection marks visible Selection marks hidden

• Screen modes are options for viewing your documents.
• The two basic screen modes are Normal and Outline.
© 2011 Delmar Cengage Learning
View and Modify Artboard Elements
• In Normal mode, objects are displayed with fills, strokes, and effects.
• In Outline mode, objects are displayed as hollow shapes, with no fills, strokes, or effects.
• Working in Outline mode can be helpful for careful selection.
© 2011 Delmar Cengage Learning
View and Modify Artboard Elements
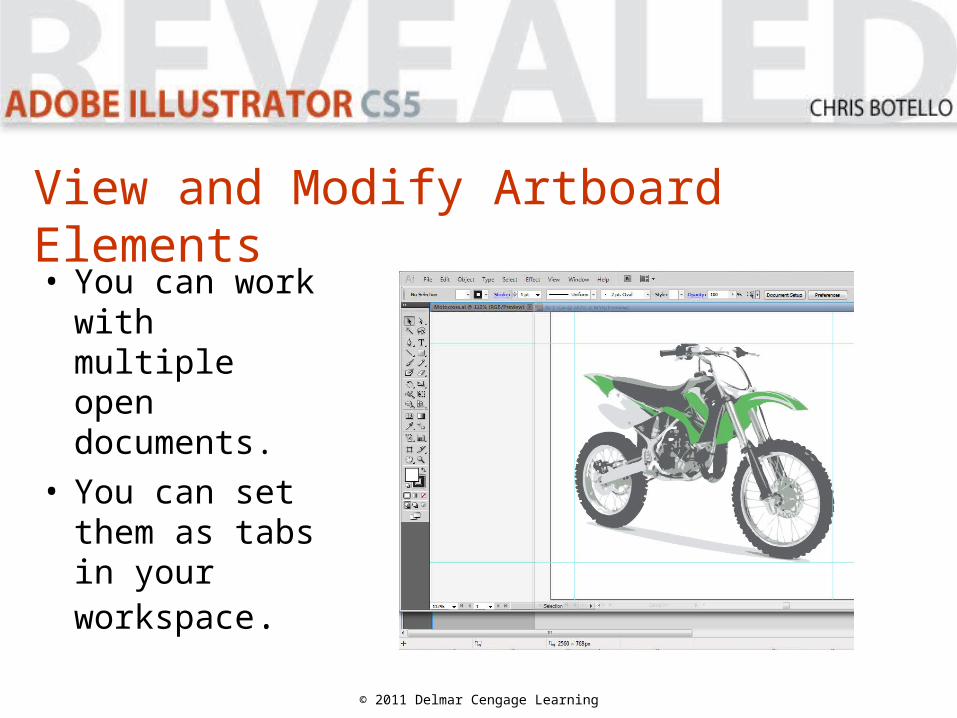
• You can work with multiple open documents.
• You can set them as tabs in your workspace.
© 2011 Delmar Cengage Learning
View and Modify Artboard Elements
• Shortcut keys allow quick access to commands essential for performing basic and complex operations.
• When available, shortcut keys are listed beside commands on the menu.
© 2011 Delmar Cengage Learning
View and Modify Artboard Elements
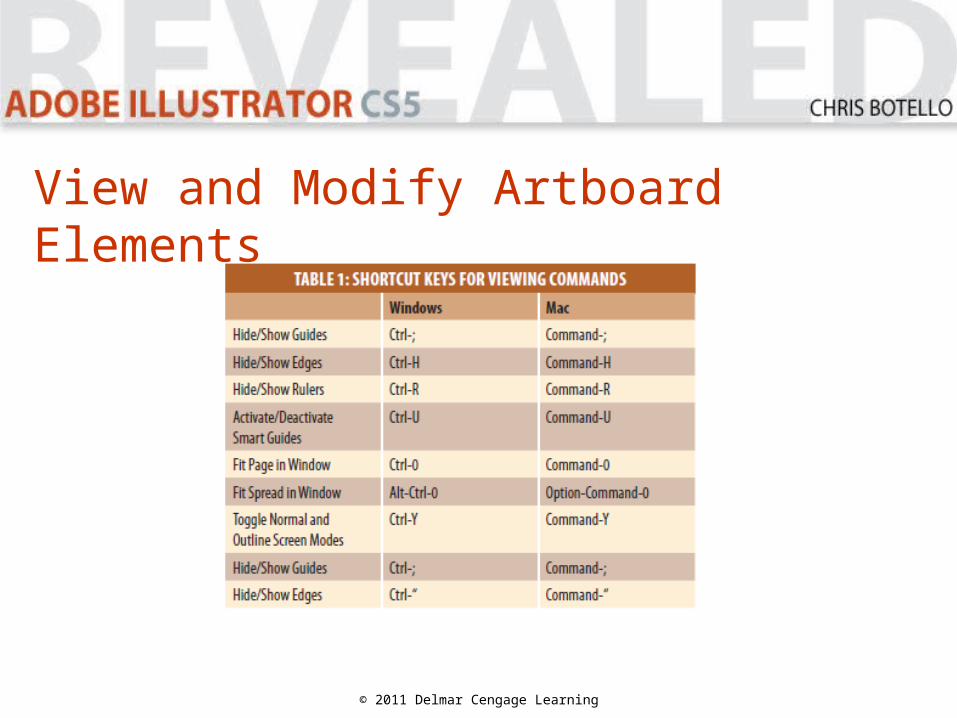
© 2011 Delmar Cengage Learning
View and Modify Artboard Elements
Work with Objects and Smart Guides
• Illustrator features 12 preferences dialog boxes.
• Preferences are defaults you set for how you want to work.
© 2011 Delmar Cengage Learning
Work with Objects and Smart Guides
• Objects in Illustrator are any individual pieces of artwork you create, such as:– Shapes– Lines– Text
© 2011 Delmar Cengage Learning

Work with Objects and Smart Guides
• You can use the bounding box of an object to resize it.
• Select the Show Bounding Box option on the View menu.
• Click and drag any of the eight handles that appear to change the object’s shape and size.
© 2011 Delmar Cengage Learning

Work with Objects and Smart Guides
• Selected circle with the bounding box showing.
© 2011 Delmar Cengage Learning

Work with Objects and Smart Guides
• When you select multiple objects, a single bounding box appears around all of them.
© 2011 Delmar Cengage Learning
Work with Objects and Smart Guides
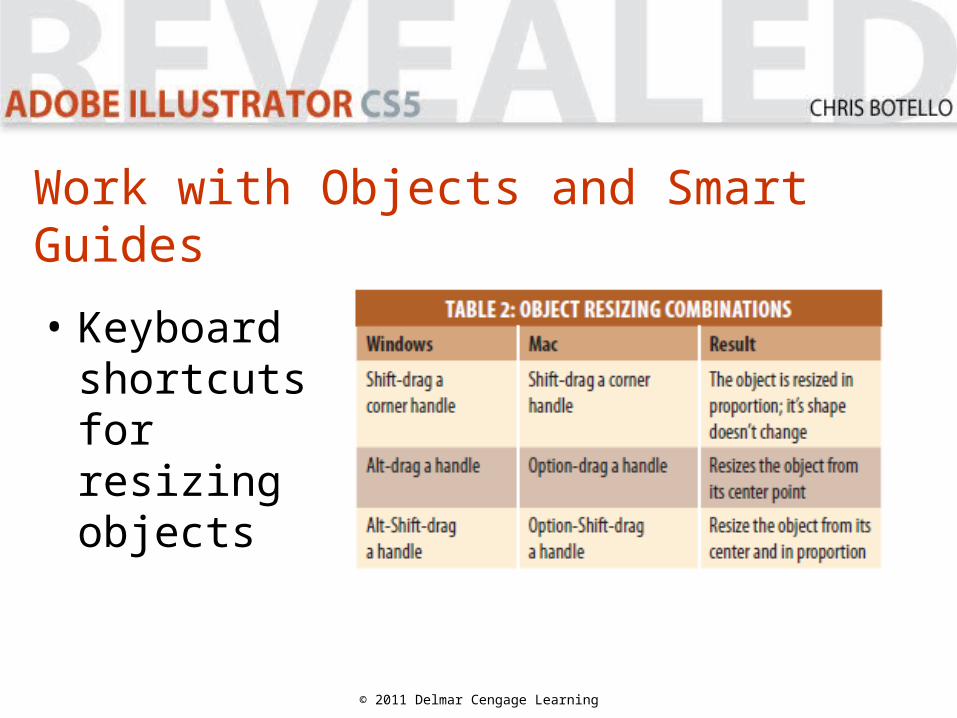
• Keyboard shortcuts for resizing objects
© 2011 Delmar Cengage Learning
Work with Objects and Smart Guides
• You can copy and paste objects in Illustrator.
• Objects are pasted at center of artboard by default.
• The Edit menu offers three other paste options.
© 2011 Delmar Cengage Learning
Work with Objects and Smart Guides
• The Paste in Front command pastes the copy directly in front of the original.
• The Paste in Back command pastes the copy directly behind the original.
• The Paste in Place command also pastes a copy directly in front of the original.
© 2011 Delmar Cengage Learning
Work with Objects and Smart Guides
Other useful Object menu commands include:
• Hide
• Lock
• Group
• Ungroup
© 2011 Delmar Cengage Learning
Work with Objects and Smart Guides
• Smart guides give you visual information for positioning objects precisely in relation to the artboard or other objects.
• When activated, smart guides appear automatically when you move objects.
© 2011 Delmar Cengage Learning
Work with Objects and Smart Guides
© 2011 Delmar Cengage Learning
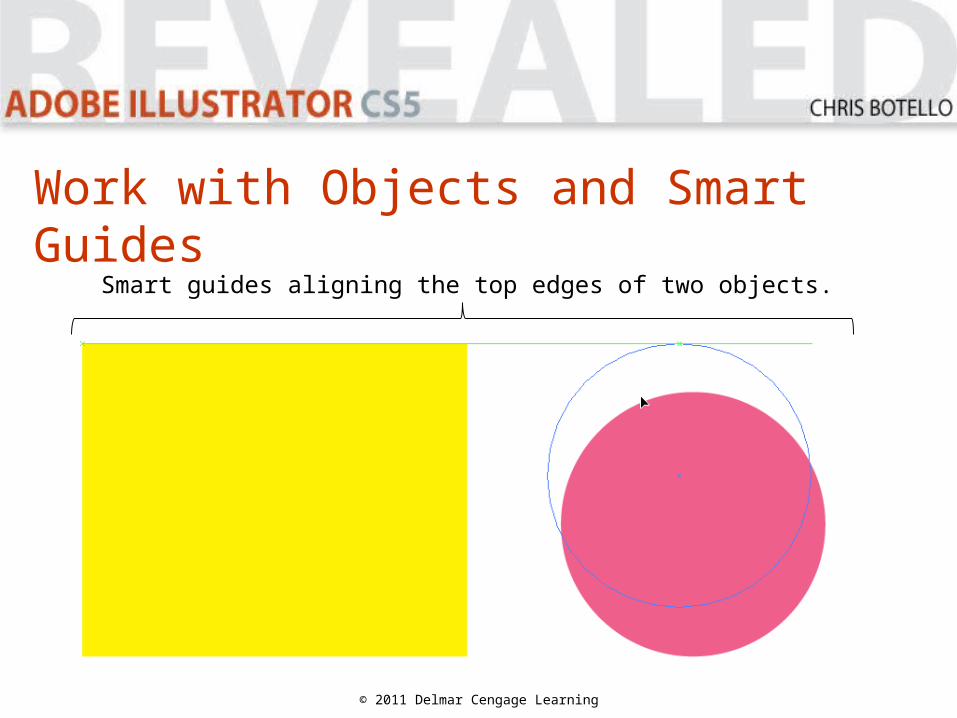
Smart guides aligning the top edges of two objects.

Create Basic Shapes
• Basic geometric shapes are the foundation of Illustrator.
© 2011 Delmar Cengage Learning
Create Basic Shapes
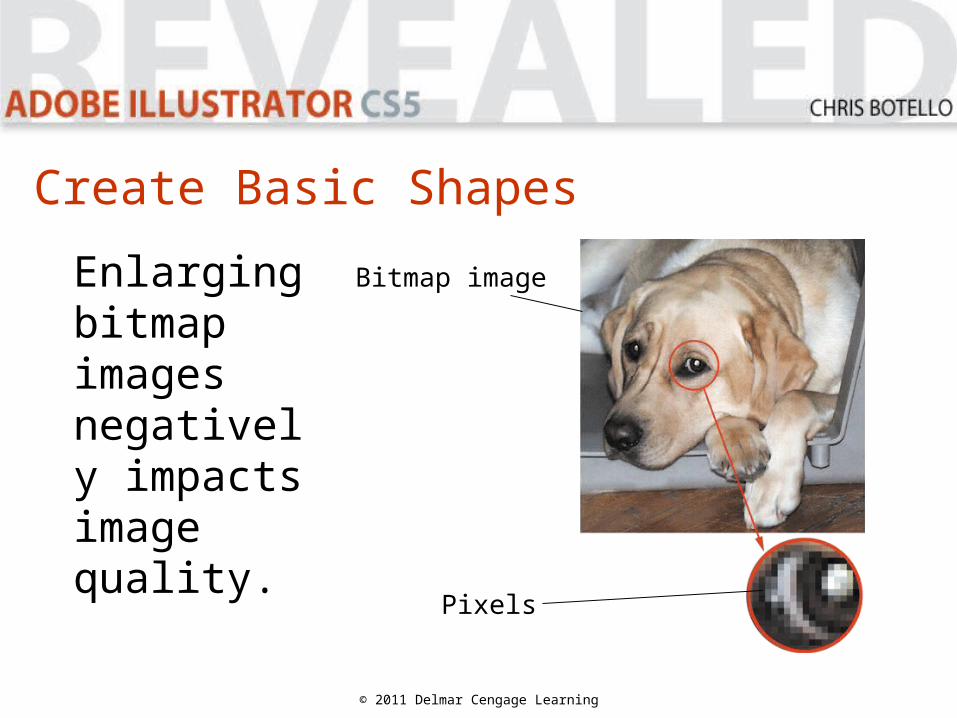
• Bitmap Images are created using a square or rectangle grid of colored squares called pixels.
• All digital images are composed of pixels.
© 2011 Delmar Cengage Learning
Create Basic Shapes
• The number of pixels in a given inch is referred to as image’s resolution.
• Bitmap images are resolution-dependent.
© 2011 Delmar Cengage Learning
Create Basic Shapes
© 2011 Delmar Cengage Learning
Bitmap image
Pixels
Enlarging bitmap images negatively impacts image quality.

Create Basic Shapes
• Graphics created in Illustrator are vector graphics.
• They are created with lines and curves.
• They are defined by mathematical objects called vectors.
© 2011 Delmar Cengage Learning
Create Basic Shapes
• Vector graphics consist of anchor points and line segments, together referred to as paths.
• They can be scaled to any size.
• They are resolution-independent.
© 2011 Delmar Cengage Learning

Create Basic Shapes
© 2011 Delmar Cengage Learning
Vector graphic
Apply Fill and Stroke Colors to Objects
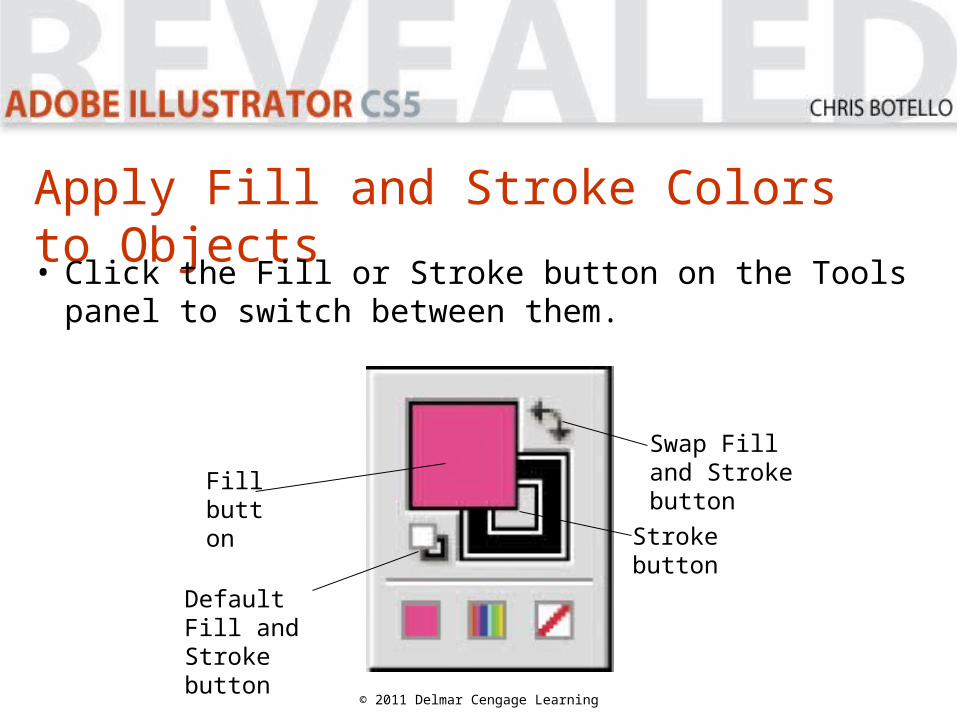
• Click the Fill or Stroke button on the Tools panel to switch between them.
© 2011 Delmar Cengage Learning
Stroke button
Swap Fill and Stroke buttonFill
button
Default Fill and Stroke button
Apply Fill and Stroke Colors to Objects
• The Swatches panel is central to color management.
• It is the simplest resource for applying fills and strokes to objects.
© 2011 Delmar Cengage Learning
Apply Fill and Stroke Colors to Objects
• When an object is selected, click a swatch in the panel to apply a color as the fill or stroke, depending on which is activated.
• Dragging a swatch to an unselected object will change the color of its fill or stroke, depending on which is activated.
© 2011 Delmar Cengage Learning

Apply Fill and Stroke Colors to Objects
© 2011 Delmar Cengage Learning
Pre-set colors, gradients, patterns,and shades of gray.
Select, Move, and Align Objects
• To move or modify an object, select it with a selection tool, menu item, or command key.
• Two basic ways to move objects:• Click and drag• Use arrow keys
© 2011 Delmar Cengage Learning
Select, Move, and Align Objects
• Pressing [Alt](Win) or [option](Mac) when dragging creates a copy of an object.
© 2011 Delmar Cengage Learning
Select, Move, and Align Objects
• Grouping objects allows them to be selected with one click of Selection tool– To group:
• Select objects• Click Object on Application bar• Click Group
© 2011 Delmar Cengage Learning

Select, Move, and Align Objects
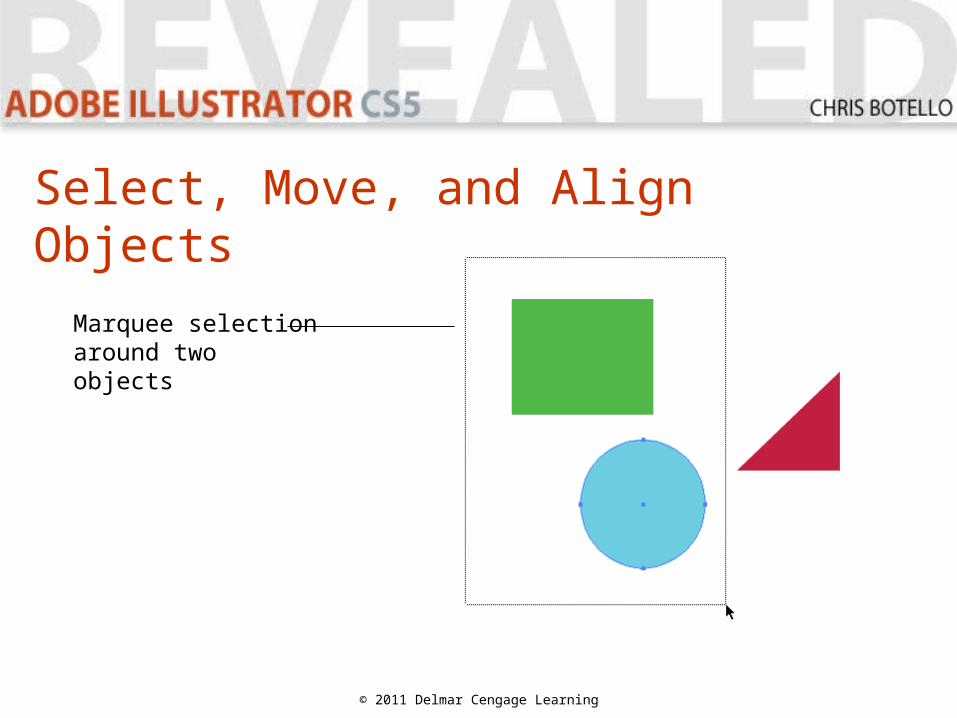
• A marquee selection is a dotted rectangle created when you drag the Selection tool around an object or objects.
• Any object a marquee touches before the mouse button is released will be selected.
© 2011 Delmar Cengage Learning
© 2011 Delmar Cengage Learning
Select, Move, and Align Objects
Marquee selection around two objects
Transform Objects
• Fundamental transformation tools:– Scale tool: resize objects– Rotate tool: rotate objects– Reflect tool: flip objects over an imaginary
axis
© 2011 Delmar Cengage Learning

Transform Objects
• Transform an object using the desired tool or enter precise numbers in its dialog box.
© 2011 Delmar Cengage Learning
Transform Objects
• You can repeat transformations using the Transform Again command found on the Object menu.
• Copying and repeating transformations allows you to create complex geometric shapes from basic objects.
© 2011 Delmar Cengage Learning
Transform Objects
© 2011 Delmar Cengage Learning
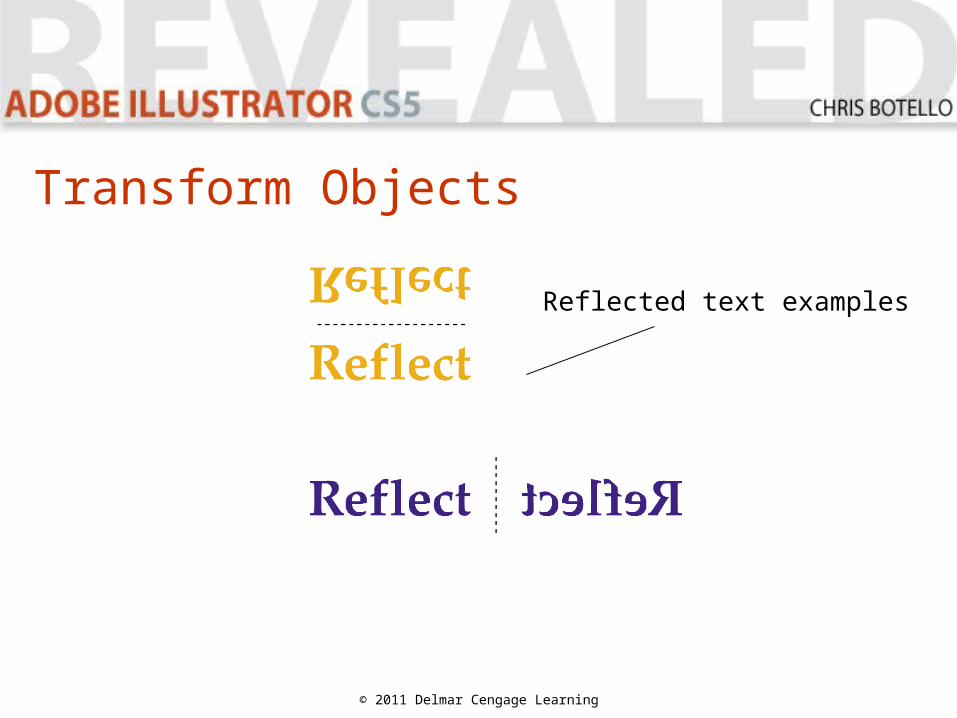
Reflected text examples
Make Direct Selections
• Use the Direct Selection tool to select individual anchor points or single paths of an object.
• Drag a marquee or press and hold [Shift] while using the Direct Selection tool to select multiple anchor points or multiple paths.
© 2011 Delmar Cengage Learning
Make Direct Selections
• Clicking the center of an object with the Direct Selection tool selects the entire object.
• Click the edge to select the path only.
© 2011 Delmar Cengage Learning
Make Direct Selections
• The Add Anchor Points command creates new anchor points without distorting the object.
• To add anchor points:– Click Object on the Application bar– Point to Path– Click Add Anchor Points
© 2011 Delmar Cengage Learning
Make Direct Selections
© 2011 Delmar Cengage Learning
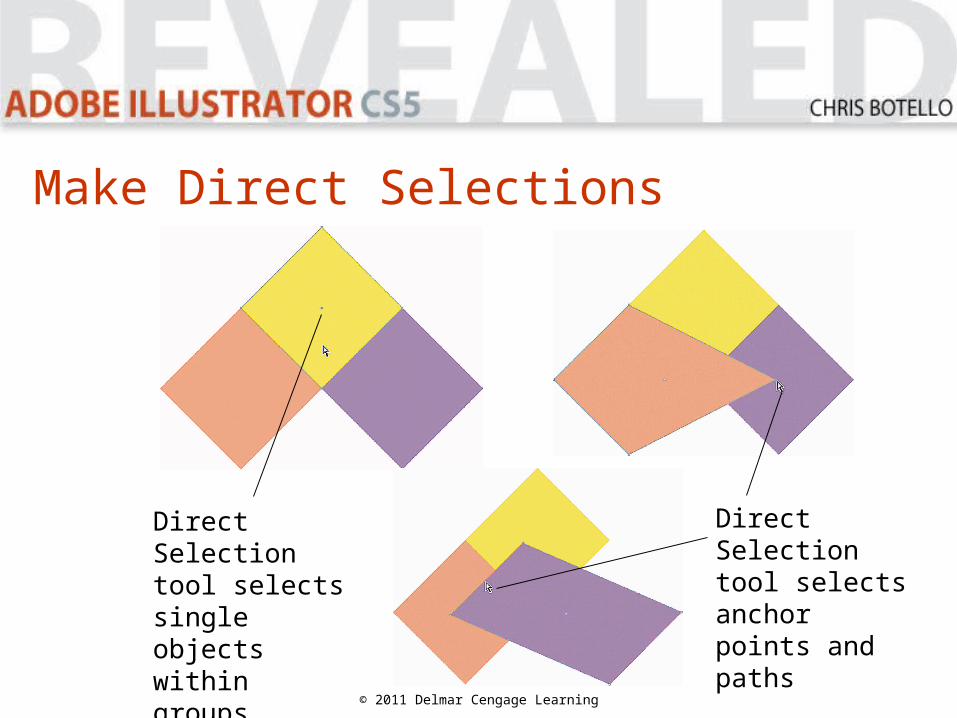
Direct Selection tool selects single objects within groups
Direct Selection tool selects anchor points and paths

Make Direct Selections
• Any object you create can be turned into a guide.– Select object– Click View on the Application bar– Point to Guides– Click Make Guides
© 2011 Delmar Cengage Learning
Make Direct Selections
• When an object becomes a guide, it loses its attributes, such as fill, stroke, and stroke weight.
• Illustrator remembers its original attributes. • To transform a guide back into an object, click
View on the Application bar, point to Guides, then click Release Guides.
© 2011 Delmar Cengage Learning

Make Direct Selections
• The Draw Behind Drawing Mode and the Stacking Order refer to the order of how objects are arranged in front of and behind other objects on the artboard.
• This is not the same concept as layers in a document.
© 2011 Delmar Cengage Learning
Make Direct Selections
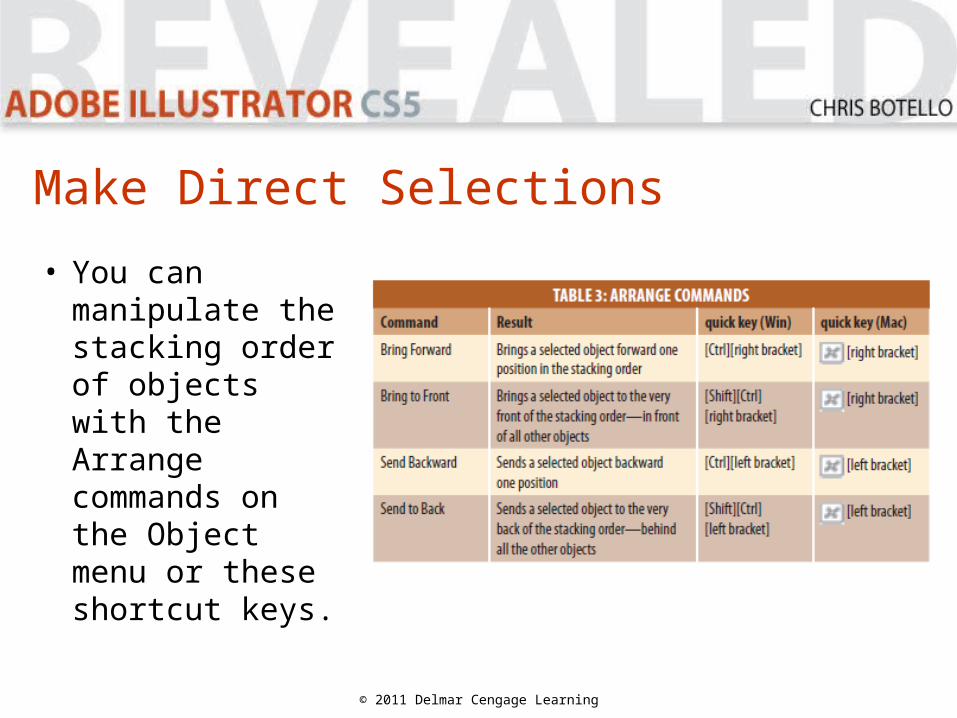
• You can manipulate the stacking order of objects with the Arrange commands on the Object menu or these shortcut keys.
© 2011 Delmar Cengage Learning
Work with Multiple Artboards
• The artboard is your workspace in an Illustrator document.
• Sometimes the size of it is important; sometimes it is not.
© 2011 Delmar Cengage Learning
Work with Multiple Artboards
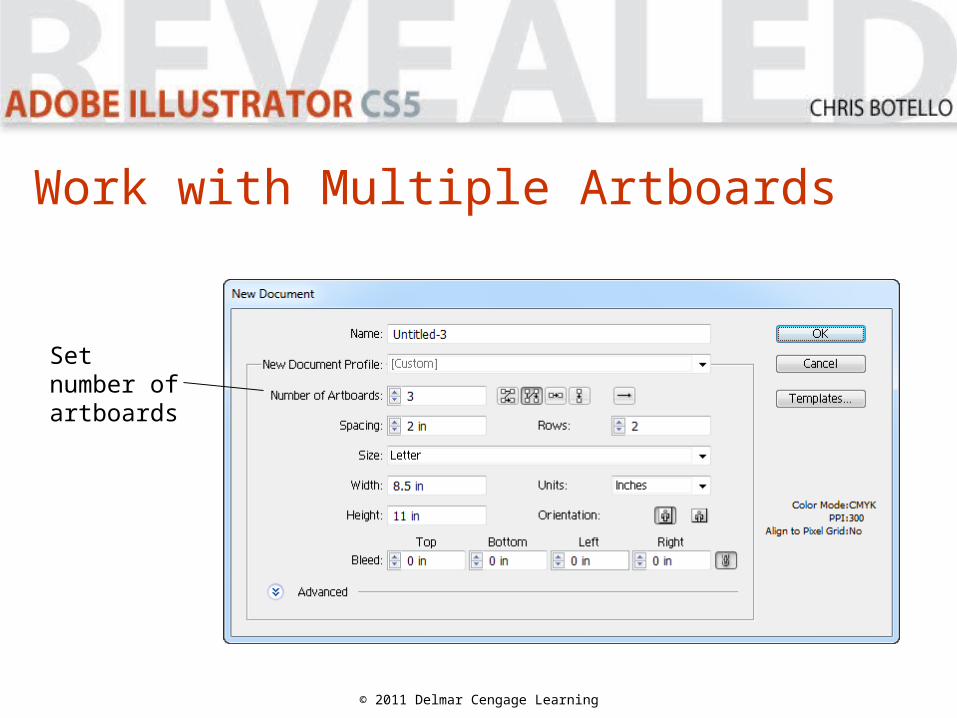
• You can set up multiple artboards of different sizes in Illustrator CS5.
• You can set artboards up in the New Document dialog box.
© 2011 Delmar Cengage Learning
© 2011 Delmar Cengage Learning
Set number of artboards
Work with Multiple Artboards

© 2011 Delmar Cengage Learning
Multiple artboards in a document
Manage multiple artboards using the Artboards panel
Work with Multiple Artboards
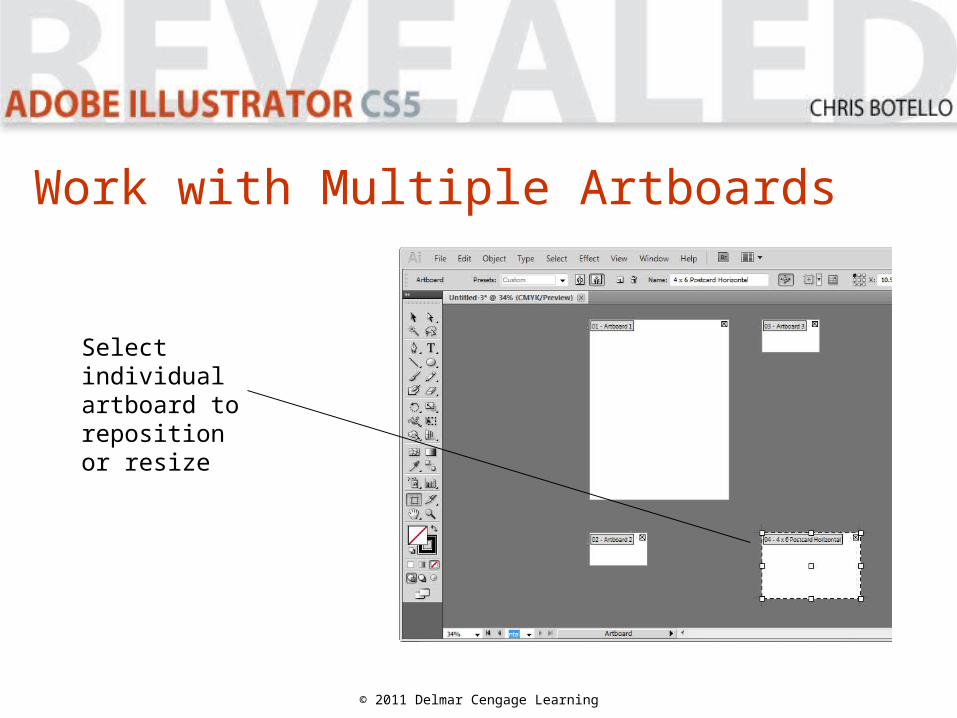
Clicking the Artboard tool changes the screen to Edit Artboards mode

© 2011 Delmar Cengage Learning
• Click the New Artboard button on the Control panel, then move cursor over other artboards.
• You will see a transparent board.
• Click to place it.
Work with Multiple Artboards
© 2011 Delmar Cengage Learning
Select individual artboard to reposition or resize
Work with Multiple Artboards

© 2011 Delmar Cengage Learning
Paste artwork in the same location on another artboard using the Paste in Place command on the Edit menu
Work with Multiple Artboards
© 2011 Delmar Cengage Learning
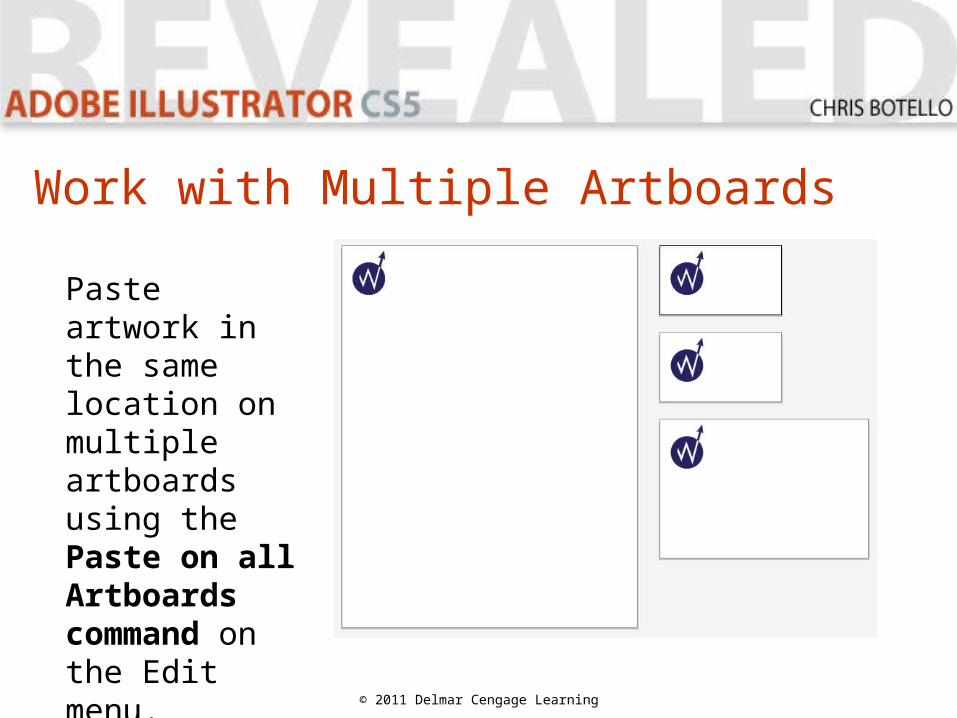
Paste artwork in the same location on multiple artboards using the Paste on all Artboards command on the Edit menu.
Work with Multiple Artboards