© 2008 masimo corporation includes a review on carbon monoxide poisoning for emergency responders...
TRANSCRIPT

© 2008 Masimo Corporation
Includes a review on Carbon Monoxide Poisoning For Emergency Responders
V.8 1 May 2011
Monitoring CO Poisoningwith the Rad-57TM

© 2008 Masimo Corporation
IMPORTANT NOTICE
This program is not meant as a substitute for a program or course of study in carbon monoxide recognition and treatment, or emergency medicine. This is for review only. Please refer to your physician or local Medical Director for approved content and medical protocols.
This program is not meant as a substitute for the manufacturer’s operator manual for the Masimo Rad-57. Please refer to the manufacturer for complete operating instructions.

© 2008 Masimo Corporation
Introduction
Using the RAD-57 Pulse CO-Oximeter
Note: This is NOT intended to replace or act as a substitute for the Operators Manual. Please refer to the manufacturer’s Operator Manual for complete information on the operation and safety of the RAD-57 Pulse CO-Oximeter.

© 2008 Masimo Corporation
RAD-57 EMS Carry Case
Water resistant, protective case Extra sensor pocket Reference card holder Pen holder Spare battery pocket
For maximum protection, the device MUST remain in the protective case during field use.

© 2008 Masimo Corporation
Powering Up
POWER Press to turn ON Press and HOLD to turn OFF Do NOT have to turn the device on/off
in between readings!
Battery Life Indicator 4 Green LED’s Each represents ~25% battery life Do Not use rechargeable batteries
Battery Compartment Located on the back panel Holds 4 AA alkaline batteries Operates 8-10 hours

© 2008 Masimo Corporation
Sensor Placement
3 STEPS TO SENSOR PLACEMENT:
Step 1: Select the appropriately sized sensor for the patient’s finger.
Step 2: Carefully insert the patient’s finger into the sensor until it reaches the digit stop.
Step 3: Shield the sensor in environments of excessive ambient light
Optimal LED path
© 2008 Masimo Corporation
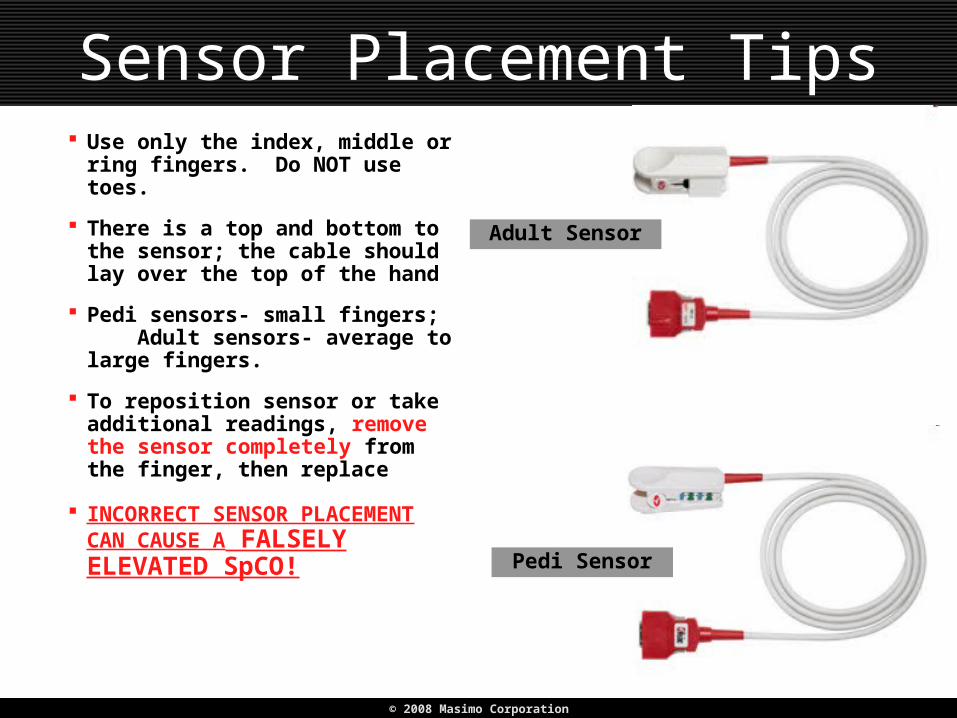
Sensor Placement Tips Use only the index, middle or ring
fingers. Do NOT use toes.
There is a top and bottom to the sensor; the cable should lay over the top of the hand
Pedi sensors- small fingers; Adult sensors- average to large fingers.
To reposition sensor or take additional readings, remove the sensor completely from the finger, then replace
INCORRECT SENSOR PLACEMENT CAN CAUSE A FALSELY ELEVATED SpCO!
Adult Sensor
Pedi Sensor

© 2008 Masimo Corporation
Startup Sequence Finger should be relatively clean & dry
Calibration: Display will scroll through alarm
settings immediately upon start up Takes ~10 seconds
Calculation: Display will show scrolling zeroes
(0 – 0 – 0) followed by dashed lines Takes ~20 seconds Limit sensor movement during this
phase
Begin patient monitoring: Defaults to SpO2/ Pulse Rate screen

© 2008 Masimo Corporation
Measuring SpO2 and Pulse Rate
Pulse oximeter (SpO2) reading on top in GREEN; heart rate on bottom in RED.
SIQ- Signal Identification and Quality- identifies the quality of the SpO2 signal.
Press YELLOW “Bell” button to silence alarms.
Press DISPLAY button to scroll through display screens
Mode/Enter/Up & Down Arrows- for higher menu functions (i.e. change alarm settings or screen brightness)
Alarm Silence Button

© 2008 Masimo Corporation
Measuring SpCO
Display after Startup: Carboxyhemoglobin (SpCO)
on top, in % The letters ‘CO’ on bottom
CONFIRM ALL ELEVATED SpCO READINGS by taking a total of 3 readings on 3 different fingers. Use the average of the three as the SpCO.
If SpO2 < 90% or SpMet > 2%, SpCO may NOT read if your sensor is Rev H or above. Display will show dashed
lines. To determine what rev sensor you have: Look at the letter stamped on the
base of the sensor

© 2008 Masimo Corporation
Measuring PI
Press the DISPLAY button to display the PI parameter.
PI = Perfusion Index. A measurement of blood flow to the extremity the sensor is on.
The same principal as capillary refill.
Values range from 0.02-20. The lower the number, the lower the perfusion.
Displayed both numerically and graphically.
Perfusion Index Bar Graph

© 2008 Masimo Corporation
Optional Features
Auto ON/ OFF Can opt to turn device off after
period of non use 5, 10, 15 minutes
Perfusion Index (PI) Display can be turned on or off
Can make SpCO the default display upon start up screen (instead of SpO2/pulse rate)
© 2008 Masimo Corporation
Light Shield Use
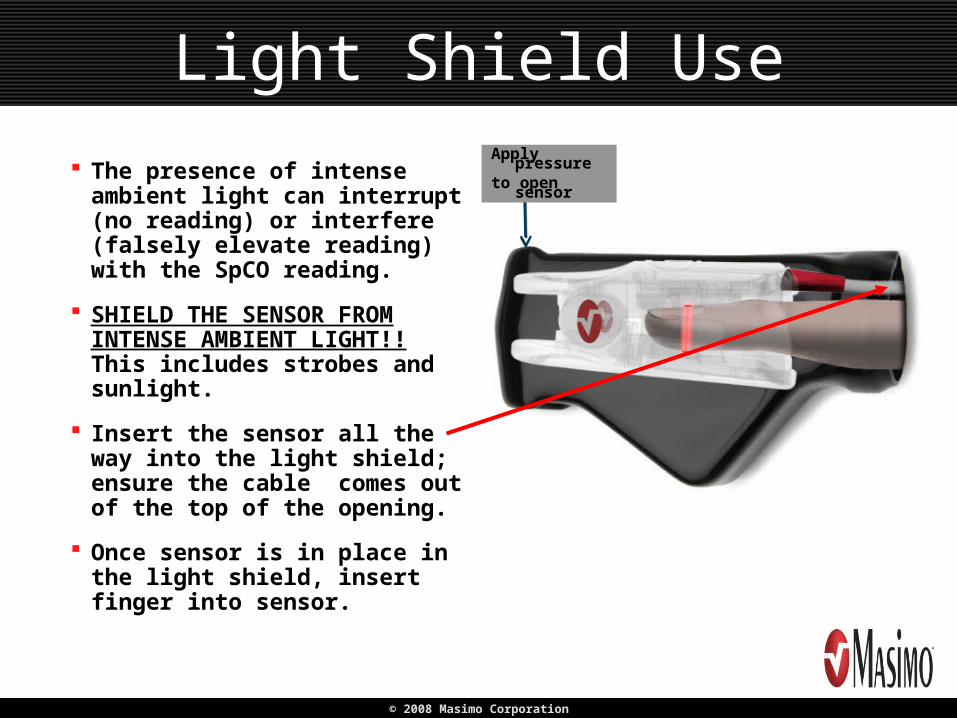
The presence of intense ambient light can interrupt (no reading) or interfere (falsely elevate reading) with the SpCO reading.
SHIELD THE SENSOR FROM INTENSE AMBIENT LIGHT!! This includes strobes and sunlight.
Insert the sensor all the way into the light shield; ensure the cable comes out of the top of the opening.
Once sensor is in place in the light shield, insert finger into sensor.
Apply pressure
to open sensor

© 2008 Masimo Corporation
SpCO Accuracy
The SpCO parameter has an accuracy of +/- 3% (for one standard deviation, which is 67% of patients)
Example: A reading of 4% could actually be between 1% - 7%
Measurements may vary from reading to reading, even on the same patient, within the accuracy specification
If an elevated SpCO is detected, ALWAYS confirm by measuring 2 additional fingers. Use the rough average of the readings as the person’s SpCO value.

© 2008 Masimo Corporation
Warnings and Cautions
Good arterial perfusion along with correct sensor placement will provide a stable CO reading. Inaccurate measurements may be caused by: Incorrect sensor placement Hypoxemia, including altitude induced
hypoxemia Elevated levels of methemoglobin Intense ambient light Low arterial perfusion Motion artifact

© 2008 Masimo Corporation
Thank You
QUESTIONS?