zgl, a zebra zpl printer protocol...
TRANSCRIPT
ZGL, a Zebra® ZPL® Printer Protocol Interpreter
Programmer’s Reference Manual
Thermal Series Printers

Trademark Acknowledgments
ZPL, ZPL II, and Zebra are registered trademarks of Zebra Technologies Corporation.
COPYRIGHT © 2002, 2013, 2015 PRINTRONIX, INC. All rights reserved.
Table of Contents
Introduction ..................................................................... 7 About This Manual ............................................................................................... 7
ZGL Configuration Options ........................................................................... 7
ZGL Menu Conversions ................................................................................ 7
ZGL Setup Menus ............................................................................................... 8
Menus Descriptions ...................................................................................... 9
Fully Supported Commands ......................................... 17
^Bx - Barcodes ............................................................................................ 17
^BY - Barcode Defaults ............................................................................... 18
~CC / ^CC - Change Caret ......................................................................... 18
~CD / ^CD - Change Delimiter .................................................................... 18
^CF - Change Alphanumeric Default Font .................................................. 18
~CT / ^CT - Change Tilde ........................................................................... 18
^CV - Bar Code Validation .......................................................................... 18
~ DE - Download Encoding Table ............................................................... 18
^DF - Download Format .............................................................................. 18
~DT - Download Bounded TrueType Font .................................................. 18
~DU - Download Unbounded TrueType Font ............................................. 19
~EF / ^EF - Erase Format ........................................................................... 19
~EG / ^EG - Erase Downloaded Images .................................................... 19
^FA - Field Allocate ..................................................................................... 19
^FC - Field Clock ......................................................................................... 19
^FD - Field Data .......................................................................................... 19
^FH - Field Hex ........................................................................................... 19
^FN - Field Number ..................................................................................... 19
^FO - Field Origin ........................................................................................ 19
^FR - Field Reverse .................................................................................... 19
^FS - Field Separator .................................................................................. 19
^FT - Field Type Set.................................................................................... 19
^FW - Field Orientation ............................................................................... 19
^FX - Comment ........................................................................................... 19
^GB - Graphics Box .................................................................................... 20
^GC - Graphic Circle ................................................................................... 20
^GD - Graphic Diagonal Line ...................................................................... 20
^GE - Graphic Ellipse .................................................................................. 20
^GS - Graphic Symbol ................................................................................ 20
~HI - Host Identification .............................................................................. 20
^HG - Host Graphic ..................................................................................... 20
^HV - Host Verification ................................................................................ 20
^HY - Upload Graphic ................................................................................. 20
^IL - Image Load ......................................................................................... 20
^IM - Image Move ....................................................................................... 20
^IS - Image Save ......................................................................................... 20
~JA - Cancel All .......................................................................................... 20
~JL - Set Label Length ................................................................................ 20
^JM - Set Half Density................................................................................. 21
^JR - Power On Reset ................................................................................ 21
^JX - Cancel Partial Input Format ............................................................... 21
^LH - Label Home ....................................................................................... 21
^LL - Label Length ...................................................................................... 21
^LR - Label Reverse ................................................................................... 21
^LS - Label Shift .......................................................................................... 21
^LT - Label Top ........................................................................................... 21
~Lx - Base Emulation Support .................................................................... 21
^MM - Print Mode ........................................................................................ 21
^MT - Media Type ....................................................................................... 21
^MU - Mode Units ....................................................................................... 21
~NC - Network Connect .............................................................................. 21
^NI - Network ID Number ............................................................................ 21
~NR - Set All Network Printers Transparent ............................................... 22
~NT - Set Currently Connected Printer Transparent .................................. 22
^PM - Print Mirror Image of Label ............................................................... 22
^PW - Print Width ........................................................................................ 22
^SE - Select Encoding Table ...................................................................... 22
^SF - Serialization Field .............................................................................. 22
^SL - Set Mode/Language .......................................................................... 22
^SN - Serialized Data .................................................................................. 22
^SO - Set Offset .......................................................................................... 22
^SZ - Set ZPL .............................................................................................. 22
^TA - Tear Off Adjust .................................................................................. 22
^XA - Label Start ......................................................................................... 22
^XB - Suppress Backfeed ........................................................................... 22
^XF - Recall Format .................................................................................... 22
^XG - Recall Graphic .................................................................................. 22
^XZ - Label End .......................................................................................... 23
Command Enhancements and Differences .................. 25
^A@ - Select Font by Name ....................................................................... 25
^Ax - Select Alphanumeric Font .................................................................. 25
^B$x - Barcodes .......................................................................................... 25
^CI - Select International Set ...................................................................... 28
^CW - Font Identifier ................................................................................... 31
~DB - Download Bitmap Font ..................................................................... 31
~DG - Download Graphics .......................................................................... 31
~DN - Abort Download ................................................................................ 32
~DY - Download Graphic ............................................................................ 32
^FB - Field Block ......................................................................................... 32
^FP - Field Parameter ................................................................................. 32
^FV - Field Variable Data ............................................................................ 32
^GF - Graphic Field ..................................................................................... 32
~HM - Host Memory Status ........................................................................ 32
^HR - Calibrate RFID Transponder Position ............................................... 32
~HS - Host Status Return ........................................................................... 33
^HW - Host Directory List ............................................................................ 33
^ID - Item Delete ......................................................................................... 33
~J$A - Paper Feed ...................................................................................... 33
^J$E - Switch Emulation ............................................................................. 34
~JD - Enable Diagnostics ........................................................................... 34
^JE - Disable Diagnostics ........................................................................... 34
~JP - Pause & Cancel ................................................................................. 34
^JU - Configuration Update ......................................................................... 34
^JZ - Reprint After Error .............................................................................. 34
~Lx - Base Emulation Support .................................................................... 34
^MC - Map Clear ......................................................................................... 35
^MD - Media Darkness ............................................................................... 35
^MN - Media tracking .................................................................................. 35
^PF - Slew Dot Rows .................................................................................. 35
~PH / ^PH - Slew to Home .......................................................................... 35
^PO - Print Orientation ................................................................................ 35
~PP / ^PP - Programmable Pause ............................................................. 35
^PQ - Print Quantity .................................................................................... 35
~PR / ^PP - Print Rate ................................................................................ 35
^RB - Define EPC Data Structure ............................................................... 36
^RF - Read or Write RFID Format .............................................................. 36
^RM - Enable RFID Motion ......................................................................... 36
^RR - Specify RFID Retries for Read/Write ................................................ 36
^RS - RFID Setup ....................................................................................... 36
^RT - Read RFID Tag ................................................................................. 36
^RZ - Set RFID Tag Password ................................................................... 36
~SD - Set Darkness .................................................................................... 36
^SP - Start Print .......................................................................................... 36
^ST - Set Date/Time .................................................................................... 37
^SX - Set Alert ............................................................................................. 37
~WC - Print Configuration ........................................................................... 37
^WD - Print Directory .................................................................................. 37
^WT - Write RFID Tag................................................................................. 37
AUTOEXEC Bootup File ............................................................................. 37
Missing Characters with Font E (OCR-B) ................................................... 37
ZGL-DBCS ................................................................... 39 Overview ............................................................................................................ 39
Command Syntax .............................................................................................. 39
^Ax – Select Alphanumeric Font Command ............................................... 39
For Scalable fonts: ...................................................................................... 40
^CI – Select International Set ..................................................................... 40
DBCS Data.................................................................................................. 41
Unicode Data .............................................................................................. 41
UTF8 Data................................................................................................... 41
Andalé Font ................................................................................................. 41
^CW – Select Font Identifier ....................................................................... 42
^DE - Download Encoding .......................................................................... 43
^SE- Select Encoding ................................................................................. 43
Flash Memory Usage ................................................... 45 Overview ............................................................................................................ 45
Read .................................................................................................................. 45
Write ............................................................................................................ 45
Delete .......................................................................................................... 46
Contact Information ...................................................... 47
Printronix Customer Support Center ................................................................. 47
Printronix Supplies Department .................................................................. 47
Corporate Offices ........................................................................................ 48
7
Introduction
About This Manual This manual explains the differences between the Printer Protocol Interpreter Zebra Graphic Language (ZGL) Utility and the Zebra® ZPL® language. Use this manual in conjunction with the proper Administrator’s Manual.
ZGL Configuration Options
ZGL has several configuration options available. Depending on the printer model, the configuration options may be located in a different part of a front panel menu or within a separate application. In some cases, the selections may differ. For this reason, the options are described in detail within their respective Administrator’s Manuals.
ZGL Menu Conversions
When substituting a Zebra Xi III model printer with a Printronix printer, the menus and configuration between the Zebra and Printronix printer are different. Conversion tables that help users migrate from Zebra printers to Printronix printers have been created. Because the menu structures and configuration options vary between Printronix models, the conversion tables can be found in their respective User’s Manuals.
8
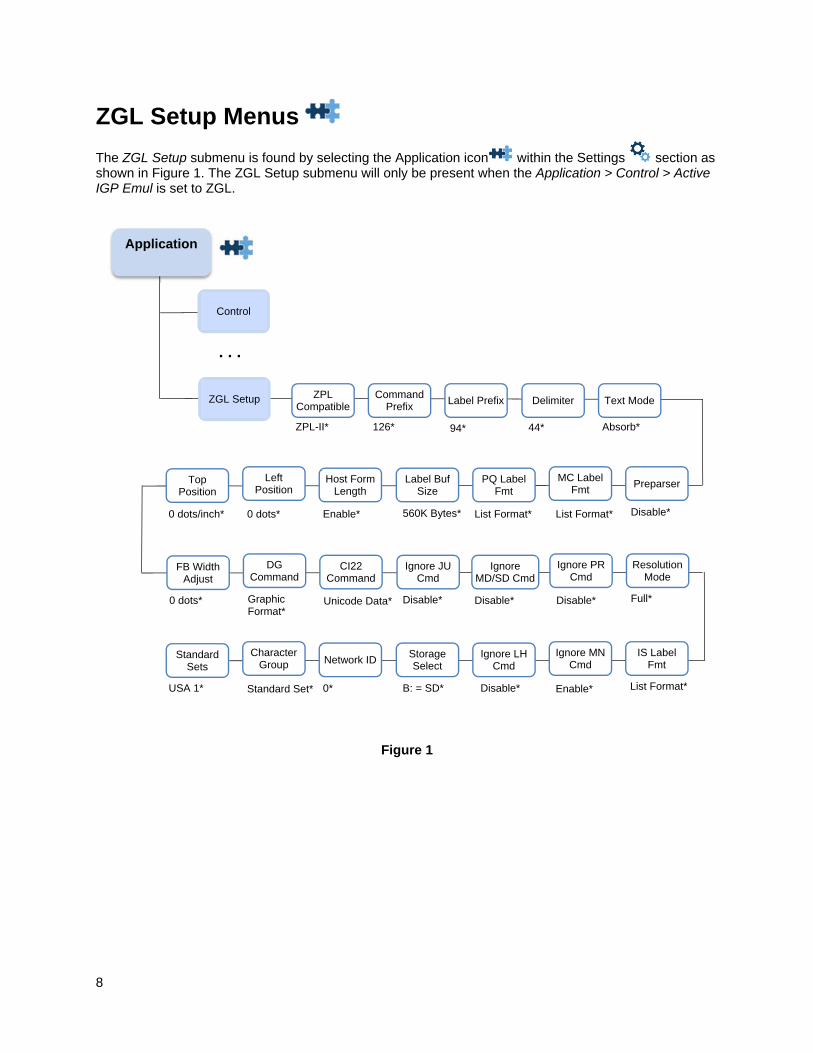
ZGL Setup Menus
The ZGL Setup submenu is found by selecting the Application icon within the Settings section as shown in Figure 1. The ZGL Setup submenu will only be present when the Application > Control > Active IGP Emul is set to ZGL.
Figure 1
Application
ZPL Compatible
ZGL Setup
Control
ZPL-II*
Command Prefix
Label Prefix Delimiter Text Mode
126* 94* 44* Absorb*
Host Form Length
Label Buf Size
PQ Label Fmt
0 dots* Enable* 560K Bytes* List Format*
Top Position
0 dots/inch*
. . .
Left Position
MC Label Fmt
Preparser
List Format* Disable*
CI22 Command
Ignore JU Cmd
Ignore MD/SD Cmd
Graphic Format*
Unicode Data* Disable* Disable*
FB Width Adjust
0 dots*
DG Command
Ignore PR Cmd
Resolution Mode
Disable* Full*
Network IDStorage Select
Ignore LH Cmd
Standard Set* 0* B: = SD* Disable*
Standard Sets
USA 1*
Character Group
Ignore MN Cmd
IS Label Fmt
Enable* List Format*
9
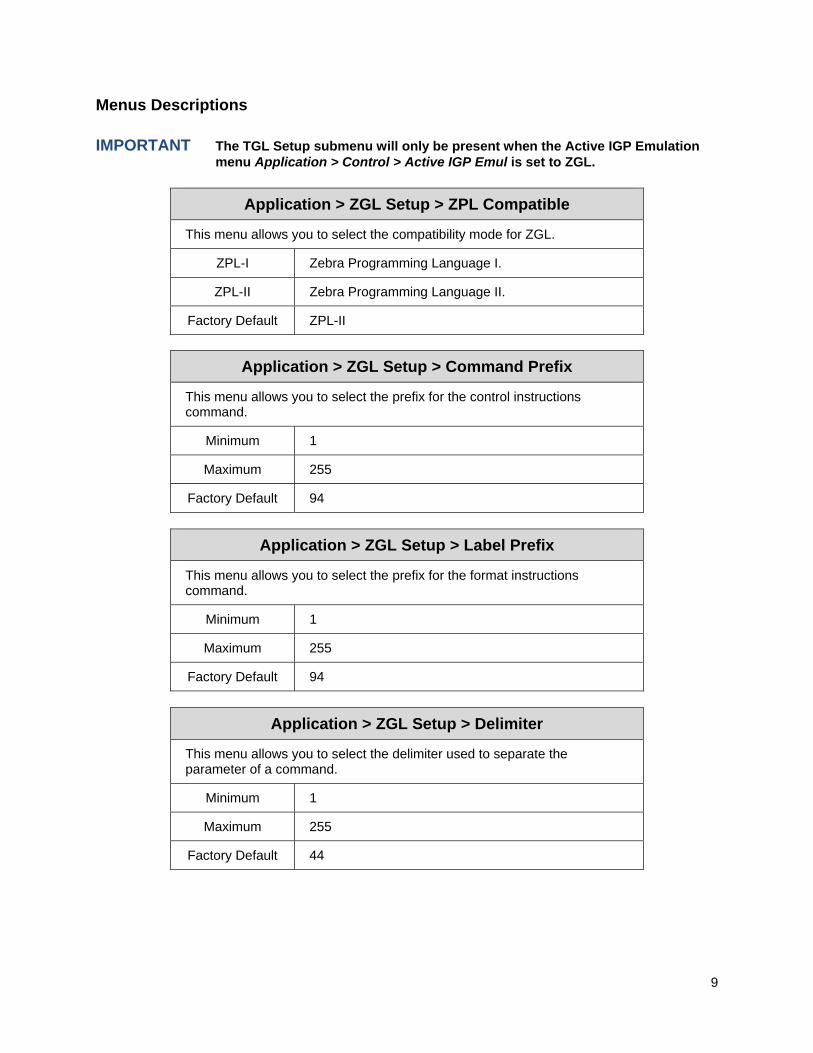
Menus Descriptions
IMPORTANT The TGL Setup submenu will only be present when the Active IGP Emulation
menu Application > Control > Active IGP Emul is set to ZGL.
Application > ZGL Setup > ZPL Compatible
This menu allows you to select the compatibility mode for ZGL.
ZPL-I Zebra Programming Language I.
ZPL-II Zebra Programming Language II.
Factory Default ZPL-II
Application > ZGL Setup > Command Prefix
This menu allows you to select the prefix for the control instructions command.
Minimum 1
Maximum 255
Factory Default 94
Application > ZGL Setup > Label Prefix
This menu allows you to select the prefix for the format instructions command.
Minimum 1
Maximum 255
Factory Default 94
Application > ZGL Setup > Delimiter
This menu allows you to select the delimiter used to separate the parameter of a command.
Minimum 1
Maximum 255
Factory Default 44
10
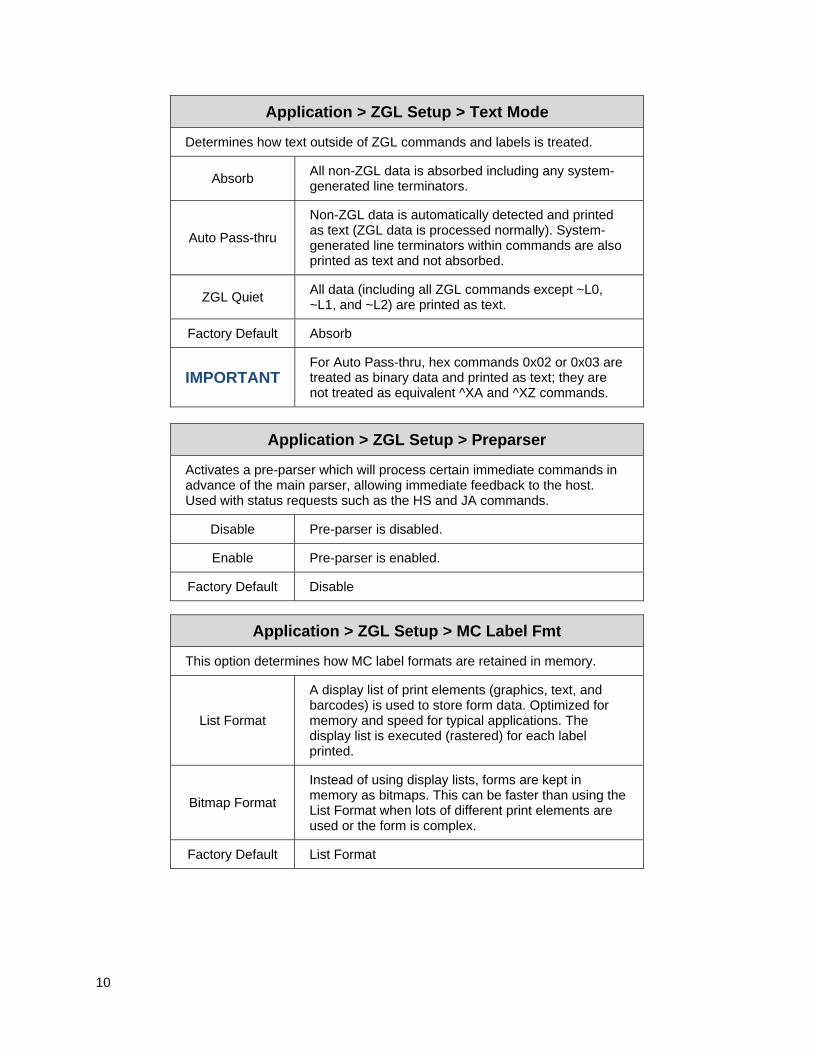
Application > ZGL Setup > Text Mode
Determines how text outside of ZGL commands and labels is treated.
Absorb All non-ZGL data is absorbed including any system-generated line terminators.
Auto Pass-thru
Non-ZGL data is automatically detected and printed as text (ZGL data is processed normally). System-generated line terminators within commands are also printed as text and not absorbed.
ZGL Quiet All data (including all ZGL commands except ~L0, ~L1, and ~L2) are printed as text.
Factory Default Absorb
IMPORTANT For Auto Pass-thru, hex commands 0x02 or 0x03 are treated as binary data and printed as text; they are not treated as equivalent ^XA and ^XZ commands.
Application > ZGL Setup > Preparser
Activates a pre-parser which will process certain immediate commands in advance of the main parser, allowing immediate feedback to the host. Used with status requests such as the HS and JA commands.
Disable Pre-parser is disabled.
Enable Pre-parser is enabled.
Factory Default Disable
Application > ZGL Setup > MC Label Fmt
This option determines how MC label formats are retained in memory.
List Format
A display list of print elements (graphics, text, and barcodes) is used to store form data. Optimized for memory and speed for typical applications. The display list is executed (rastered) for each label printed.
Bitmap Format
Instead of using display lists, forms are kept in memory as bitmaps. This can be faster than using the List Format when lots of different print elements are used or the form is complex.
Factory Default List Format
11
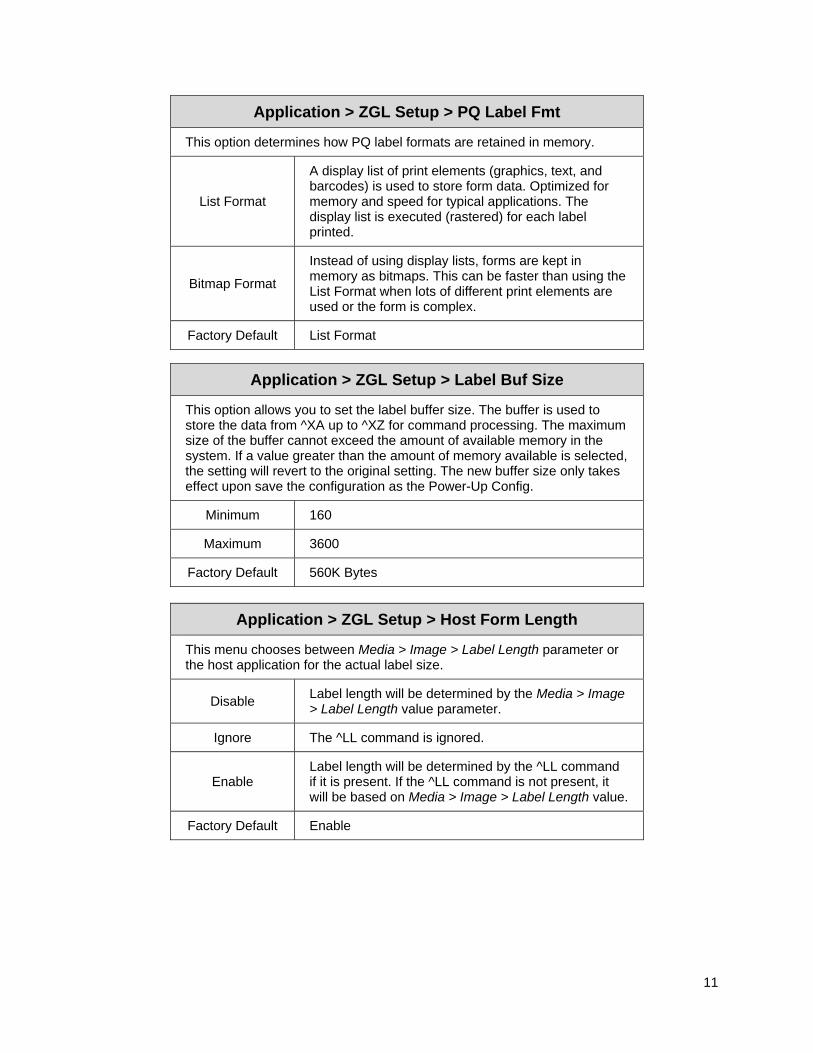
Application > ZGL Setup > PQ Label Fmt
This option determines how PQ label formats are retained in memory.
List Format
A display list of print elements (graphics, text, and barcodes) is used to store form data. Optimized for memory and speed for typical applications. The display list is executed (rastered) for each label printed.
Bitmap Format
Instead of using display lists, forms are kept in memory as bitmaps. This can be faster than using the List Format when lots of different print elements are used or the form is complex.
Factory Default List Format
Application > ZGL Setup > Label Buf Size
This option allows you to set the label buffer size. The buffer is used to store the data from ^XA up to ^XZ for command processing. The maximum size of the buffer cannot exceed the amount of available memory in the system. If a value greater than the amount of memory available is selected, the setting will revert to the original setting. The new buffer size only takes effect upon save the configuration as the Power-Up Config.
Minimum 160
Maximum 3600
Factory Default 560K Bytes
Application > ZGL Setup > Host Form Length
This menu chooses between Media > Image > Label Length parameter or the host application for the actual label size.
Disable Label length will be determined by the Media > Image > Label Length value parameter.
Ignore The ^LL command is ignored.
Enable Label length will be determined by the ^LL command if it is present. If the ^LL command is not present, it will be based on Media > Image > Label Length value.
Factory Default Enable
12
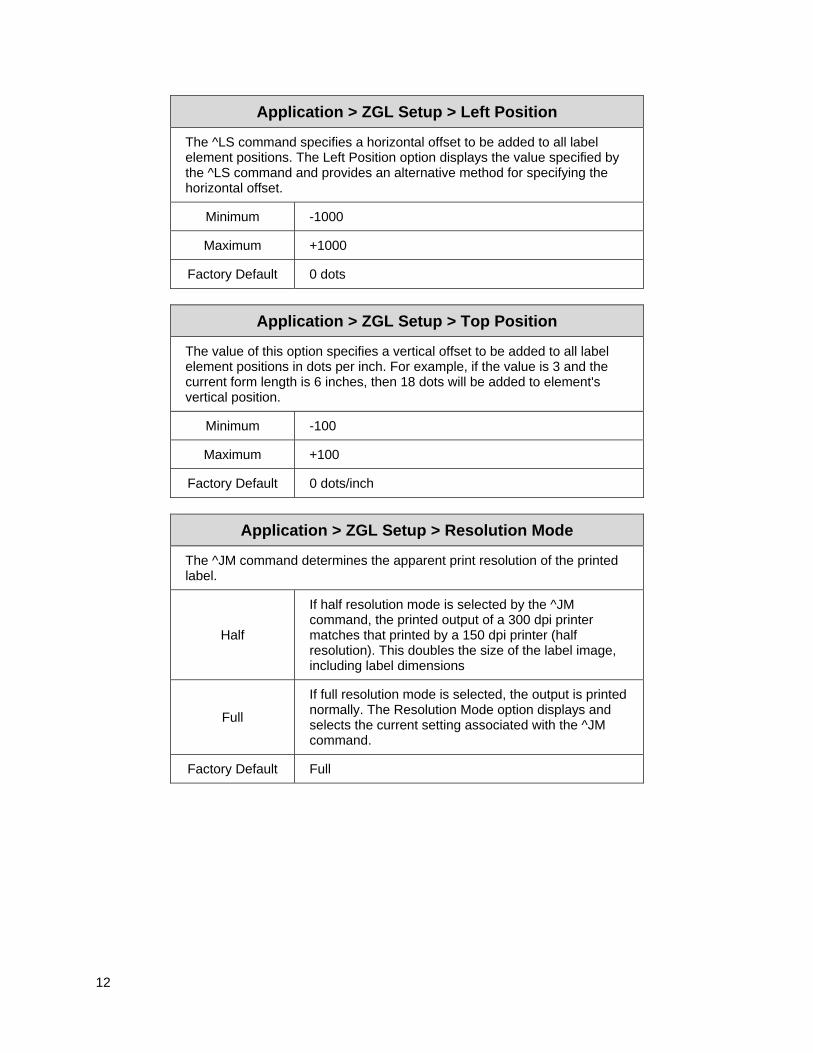
Application > ZGL Setup > Left Position
The ^LS command specifies a horizontal offset to be added to all label element positions. The Left Position option displays the value specified by the ^LS command and provides an alternative method for specifying the horizontal offset.
Minimum -1000
Maximum +1000
Factory Default 0 dots
Application > ZGL Setup > Top Position
The value of this option specifies a vertical offset to be added to all label element positions in dots per inch. For example, if the value is 3 and the current form length is 6 inches, then 18 dots will be added to element's vertical position.
Minimum -100
Maximum +100
Factory Default 0 dots/inch
Application > ZGL Setup > Resolution Mode
The ^JM command determines the apparent print resolution of the printed label.
Half
If half resolution mode is selected by the ^JM command, the printed output of a 300 dpi printer matches that printed by a 150 dpi printer (half resolution). This doubles the size of the label image, including label dimensions
Full
If full resolution mode is selected, the output is printed normally. The Resolution Mode option displays and selects the current setting associated with the ^JM command.
Factory Default Full
13
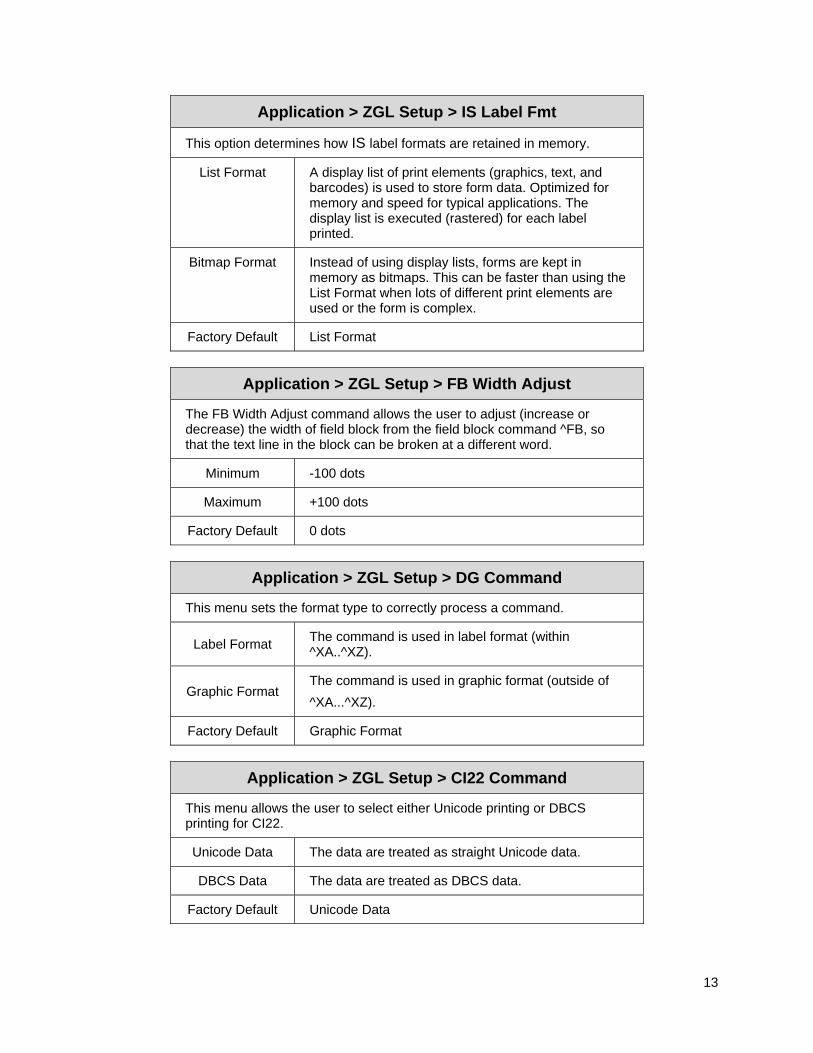
Application > ZGL Setup > IS Label Fmt
This option determines how IS label formats are retained in memory.
List Format A display list of print elements (graphics, text, and barcodes) is used to store form data. Optimized for memory and speed for typical applications. The display list is executed (rastered) for each label printed.
Bitmap Format Instead of using display lists, forms are kept in memory as bitmaps. This can be faster than using the List Format when lots of different print elements are used or the form is complex.
Factory Default List Format
Application > ZGL Setup > FB Width Adjust
The FB Width Adjust command allows the user to adjust (increase or decrease) the width of field block from the field block command ^FB, so that the text line in the block can be broken at a different word.
Minimum -100 dots
Maximum +100 dots
Factory Default 0 dots
Application > ZGL Setup > DG Command
This menu sets the format type to correctly process a command.
Label Format The command is used in label format (within ^XA..^XZ).
Graphic Format The command is used in graphic format (outside of
^XA...^XZ).
Factory Default Graphic Format
Application > ZGL Setup > CI22 Command
This menu allows the user to select either Unicode printing or DBCS printing for CI22.
Unicode Data The data are treated as straight Unicode data.
DBCS Data The data are treated as DBCS data.
Factory Default Unicode Data
14
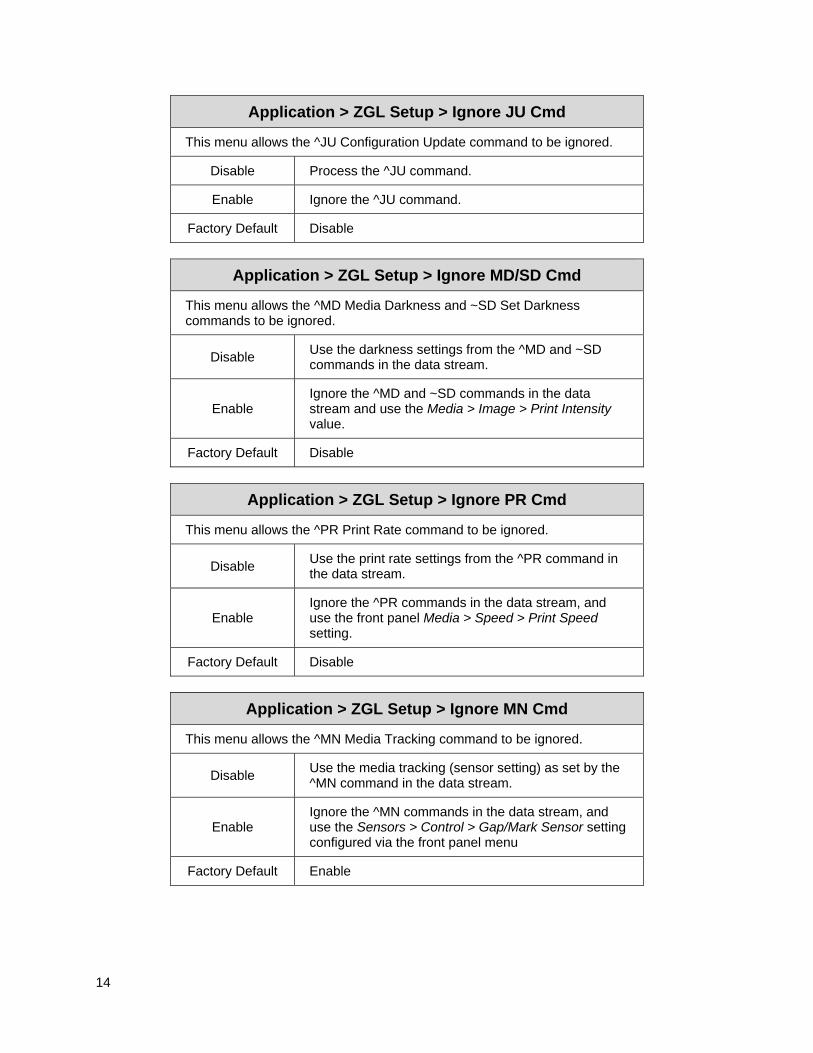
Application > ZGL Setup > Ignore JU Cmd
This menu allows the ^JU Configuration Update command to be ignored.
Disable Process the ^JU command.
Enable Ignore the ^JU command.
Factory Default Disable
Application > ZGL Setup > Ignore MD/SD Cmd
This menu allows the ^MD Media Darkness and ~SD Set Darkness commands to be ignored.
Disable Use the darkness settings from the ^MD and ~SD commands in the data stream.
Enable Ignore the ^MD and ~SD commands in the data stream and use the Media > Image > Print Intensity value.
Factory Default Disable
Application > ZGL Setup > Ignore PR Cmd
This menu allows the ^PR Print Rate command to be ignored.
Disable Use the print rate settings from the ^PR command in the data stream.
Enable Ignore the ^PR commands in the data stream, and use the front panel Media > Speed > Print Speed setting.
Factory Default Disable
Application > ZGL Setup > Ignore MN Cmd
This menu allows the ^MN Media Tracking command to be ignored.
Disable Use the media tracking (sensor setting) as set by the ^MN command in the data stream.
Enable Ignore the ^MN commands in the data stream, and use the Sensors > Control > Gap/Mark Sensor setting configured via the front panel menu
Factory Default Enable
15
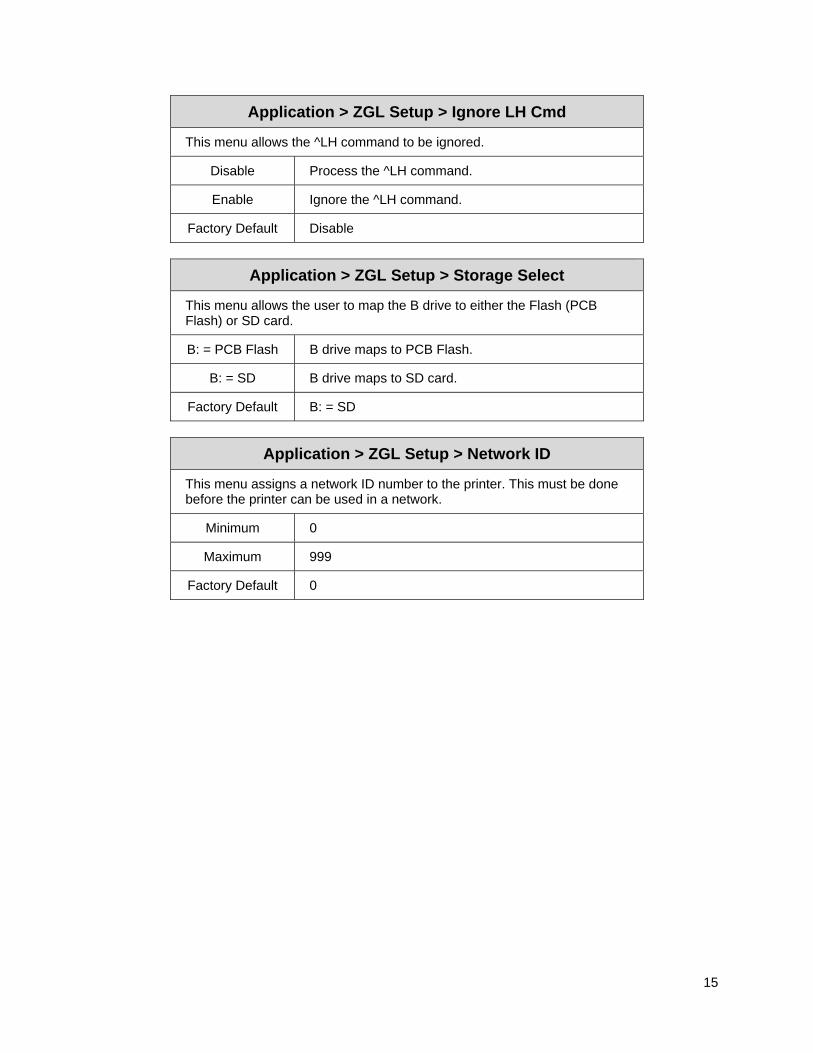
Application > ZGL Setup > Ignore LH Cmd
This menu allows the ^LH command to be ignored.
Disable Process the ^LH command.
Enable Ignore the ^LH command.
Factory Default Disable
Application > ZGL Setup > Storage Select
This menu allows the user to map the B drive to either the Flash (PCB Flash) or SD card.
B: = PCB Flash B drive maps to PCB Flash.
B: = SD B drive maps to SD card.
Factory Default B: = SD
Application > ZGL Setup > Network ID
This menu assigns a network ID number to the printer. This must be done before the printer can be used in a network.
Minimum 0
Maximum 999
Factory Default 0
16
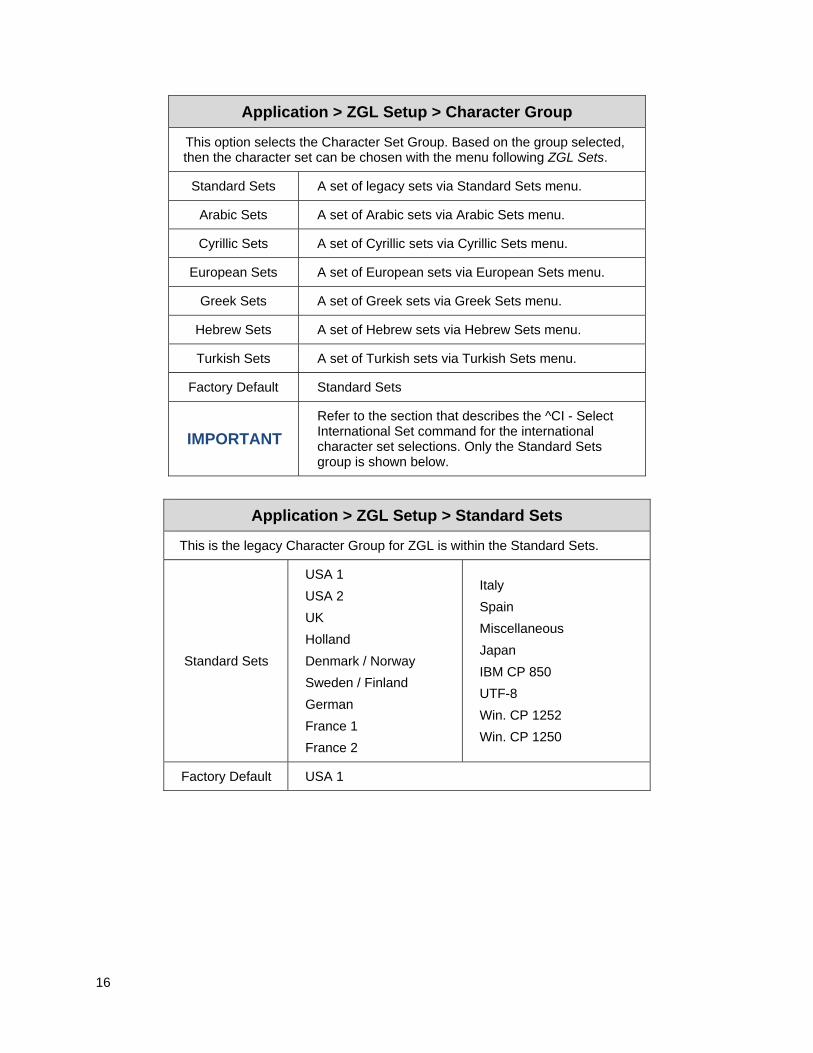
Application > ZGL Setup > Character Group
This option selects the Character Set Group. Based on the group selected, then the character set can be chosen with the menu following ZGL Sets.
Standard Sets A set of legacy sets via Standard Sets menu.
Arabic Sets A set of Arabic sets via Arabic Sets menu.
Cyrillic Sets A set of Cyrillic sets via Cyrillic Sets menu.
European Sets A set of European sets via European Sets menu.
Greek Sets A set of Greek sets via Greek Sets menu.
Hebrew Sets A set of Hebrew sets via Hebrew Sets menu.
Turkish Sets A set of Turkish sets via Turkish Sets menu.
Factory Default Standard Sets
IMPORTANT
Refer to the section that describes the ^CI - Select International Set command for the international character set selections. Only the Standard Sets group is shown below.
Application > ZGL Setup > Standard Sets
This is the legacy Character Group for ZGL is within the Standard Sets.
Standard Sets
USA 1
USA 2
UK
Holland
Denmark / Norway
Sweden / Finland
German
France 1
France 2
Italy
Spain
Miscellaneous
Japan
IBM CP 850
UTF-8
Win. CP 1252
Win. CP 1250
Factory Default USA 1
17
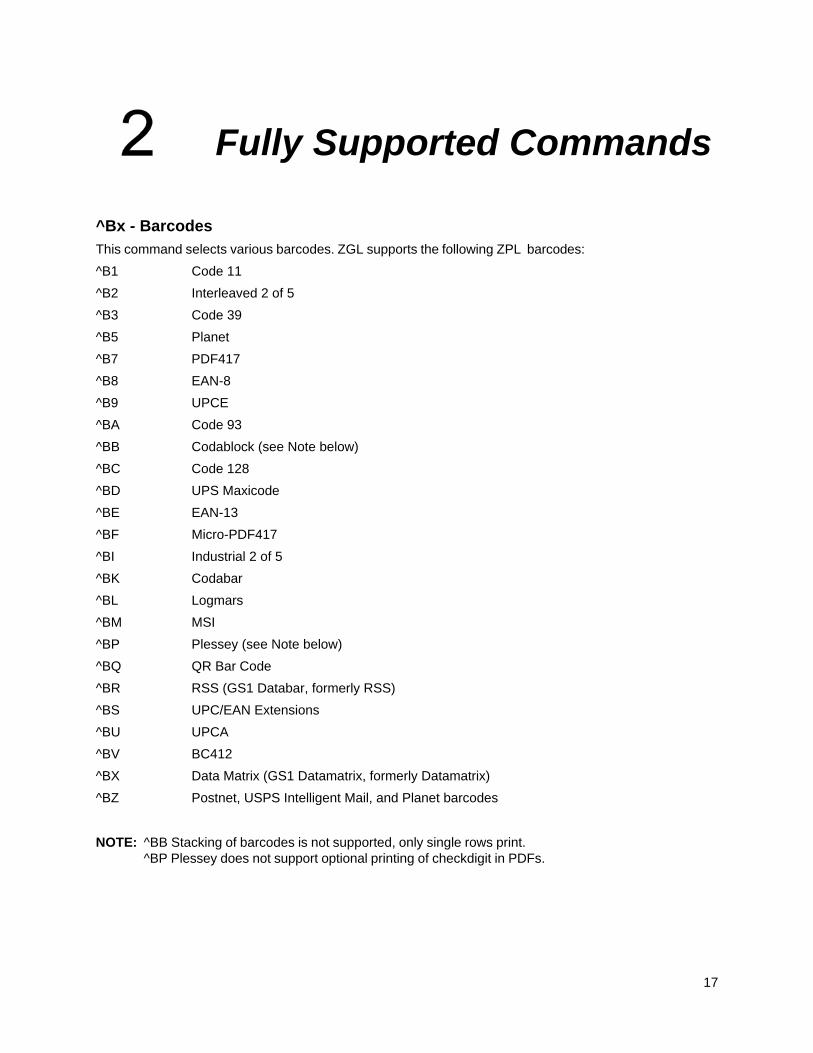
Fully Supported Commands
^Bx - Barcodes
This command selects various barcodes. ZGL supports the following ZPL barcodes:
^B1 Code 11
^B2 Interleaved 2 of 5
^B3 Code 39
^B5 Planet
^B7 PDF417
^B8 EAN-8
^B9 UPCE
^BA Code 93
^BB Codablock (see Note below)
^BC Code 128
^BD UPS Maxicode
^BE EAN-13
^BF Micro-PDF417
^BI Industrial 2 of 5
^BK Codabar
^BL Logmars
^BM MSI
^BP Plessey (see Note below)
^BQ QR Bar Code
^BR RSS (GS1 Databar, formerly RSS)
^BS UPC/EAN Extensions
^BU UPCA
^BV BC412
^BX Data Matrix (GS1 Datamatrix, formerly Datamatrix)
^BZ Postnet, USPS Intelligent Mail, and Planet barcodes
NOTE: ̂ BB Stacking of barcodes is not supported, only single rows print. ^BP Plessey does not support optional printing of checkdigit in PDFs.
18
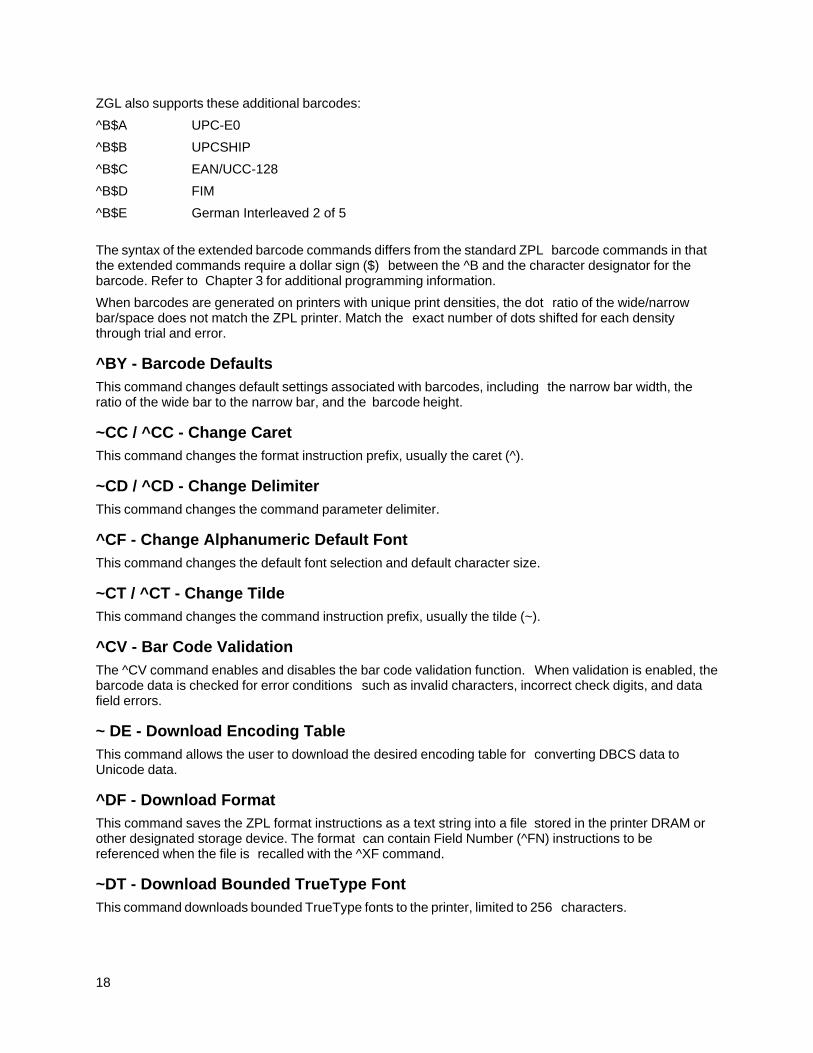
ZGL also supports these additional barcodes:
^B$A UPC-E0
^B$B UPCSHIP
^B$C EAN/UCC-128
^B$D FIM
^B$E German Interleaved 2 of 5
The syntax of the extended barcode commands differs from the standard ZPL barcode commands in that the extended commands require a dollar sign ($) between the ^B and the character designator for the barcode. Refer to Chapter 3 for additional programming information.
When barcodes are generated on printers with unique print densities, the dot ratio of the wide/narrow bar/space does not match the ZPL printer. Match the exact number of dots shifted for each density through trial and error.
^BY - Barcode Defaults
This command changes default settings associated with barcodes, including the narrow bar width, the ratio of the wide bar to the narrow bar, and the barcode height.
~CC / ^CC - Change Caret
This command changes the format instruction prefix, usually the caret (^).
~CD / ^CD - Change Delimiter
This command changes the command parameter delimiter.
^CF - Change Alphanumeric Default Font
This command changes the default font selection and default character size.
~CT / ^CT - Change Tilde
This command changes the command instruction prefix, usually the tilde (~).
^CV - Bar Code Validation
The ^CV command enables and disables the bar code validation function. When validation is enabled, the barcode data is checked for error conditions such as invalid characters, incorrect check digits, and data field errors.
~ DE - Download Encoding Table
This command allows the user to download the desired encoding table for converting DBCS data to Unicode data.
^DF - Download Format
This command saves the ZPL format instructions as a text string into a file stored in the printer DRAM or other designated storage device. The format can contain Field Number (^FN) instructions to be referenced when the file is recalled with the ^XF command.
~DT - Download Bounded TrueType Font
This command downloads bounded TrueType fonts to the printer, limited to 256 characters.
19
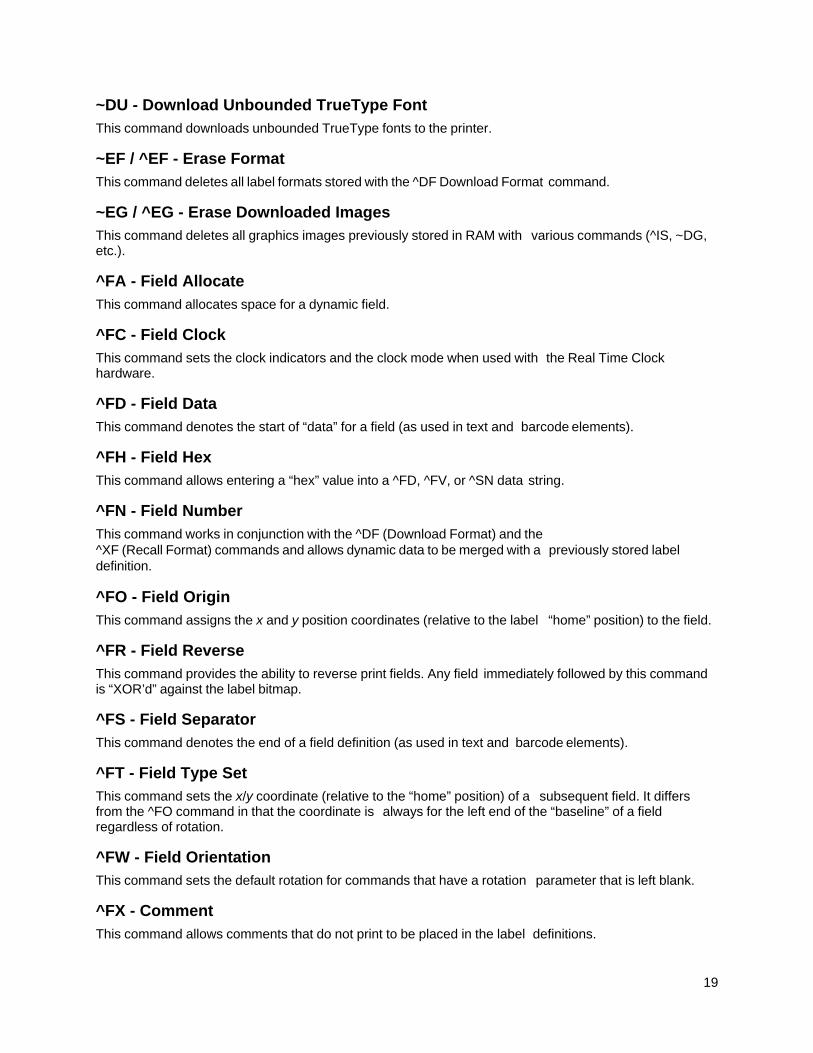
~DU - Download Unbounded TrueType Font
This command downloads unbounded TrueType fonts to the printer.
~EF / ^EF - Erase Format
This command deletes all label formats stored with the ̂ DF Download Format command.
~EG / ^EG - Erase Downloaded Images
This command deletes all graphics images previously stored in RAM with various commands (^IS, ~DG, etc.).
^FA - Field Allocate
This command allocates space for a dynamic field.
^FC - Field Clock
This command sets the clock indicators and the clock mode when used with the Real Time Clock hardware.
^FD - Field Data
This command denotes the start of “data” for a field (as used in text and barcode elements).
^FH - Field Hex
This command allows entering a “hex” value into a ^FD, ^FV, or ^SN data string.
^FN - Field Number
This command works in conjunction with the ̂ DF (Download Format) and the ^XF (Recall Format) commands and allows dynamic data to be merged with a previously stored label definition.
^FO - Field Origin
This command assigns the x and y position coordinates (relative to the label “home” position) to the field.
^FR - Field Reverse
This command provides the ability to reverse print fields. Any field immediately followed by this command is “XOR’d” against the label bitmap.
^FS - Field Separator
This command denotes the end of a field definition (as used in text and barcode elements).
^FT - Field Type Set
This command sets the x/y coordinate (relative to the “home” position) of a subsequent field. It differs from the ^FO command in that the coordinate is always for the left end of the “baseline” of a field regardless of rotation.
^FW - Field Orientation
This command sets the default rotation for commands that have a rotation parameter that is left blank.
^FX - Comment
This command allows comments that do not print to be placed in the label definitions.
20
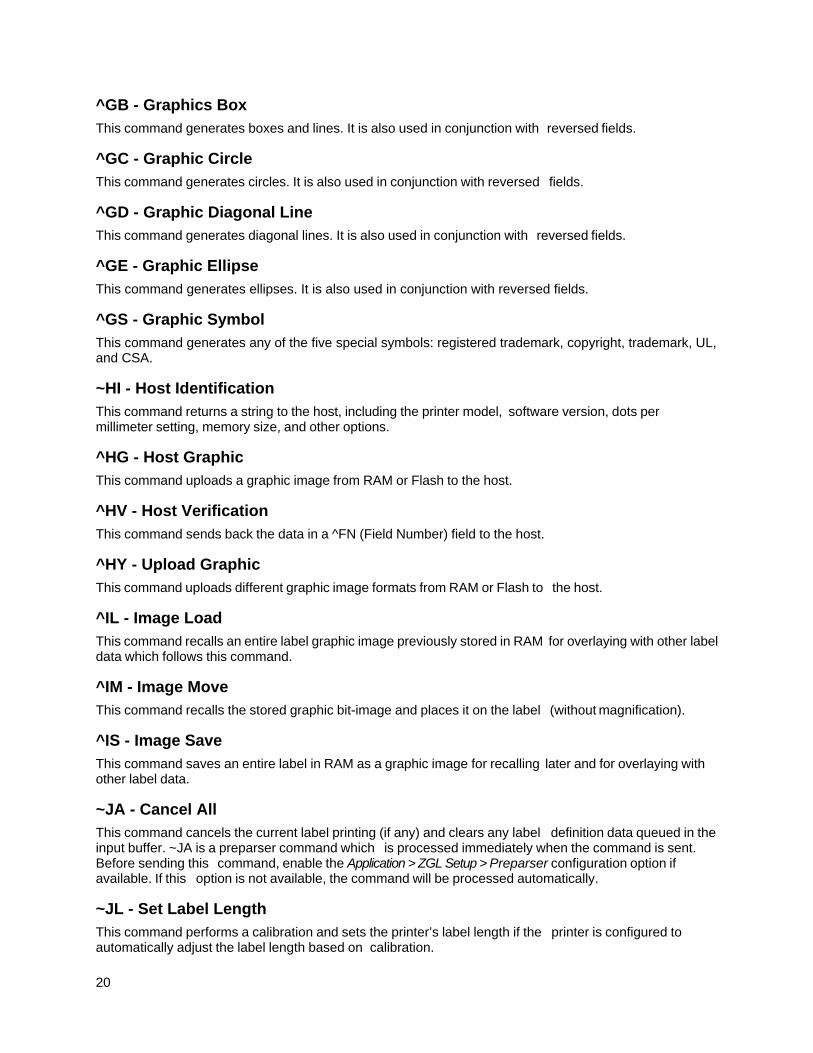
^GB - Graphics Box
This command generates boxes and lines. It is also used in conjunction with reversed fields.
^GC - Graphic Circle
This command generates circles. It is also used in conjunction with reversed fields.
^GD - Graphic Diagonal Line
This command generates diagonal lines. It is also used in conjunction with reversed fields.
^GE - Graphic Ellipse
This command generates ellipses. It is also used in conjunction with reversed fields.
^GS - Graphic Symbol
This command generates any of the five special symbols: registered trademark, copyright, trademark, UL, and CSA.
~HI - Host Identification
This command returns a string to the host, including the printer model, software version, dots per millimeter setting, memory size, and other options.
^HG - Host Graphic
This command uploads a graphic image from RAM or Flash to the host.
^HV - Host Verification
This command sends back the data in a ^FN (Field Number) field to the host.
^HY - Upload Graphic
This command uploads different graphic image formats from RAM or Flash to the host.
^IL - Image Load
This command recalls an entire label graphic image previously stored in RAM for overlaying with other label data which follows this command.
^IM - Image Move
This command recalls the stored graphic bit-image and places it on the label (without magnification).
^IS - Image Save
This command saves an entire label in RAM as a graphic image for recalling later and for overlaying with other label data.
~JA - Cancel All
This command cancels the current label printing (if any) and clears any label definition data queued in the input buffer. ~JA is a preparser command which is processed immediately when the command is sent. Before sending this command, enable the Application > ZGL Setup > Preparser configuration option if available. If this option is not available, the command will be processed automatically.
~JL - Set Label Length
This command performs a calibration and sets the printer’s label length if the printer is configured to automatically adjust the label length based on calibration.

21
^JM - Set Half Density
This command sets the printer density to half.
^JR - Power On Reset
This command resets the printer to the power-up state.
^JX - Cancel Partial Input Format
This command cancels any partial label definition data queued in the input buffer.
^LH - Label Home
This command sets the “home” x/y coordinate used as a reference for all positioning commands, and, therefore, allows an entire label to be moved without changing the individual element position commands.
^LL - Label Length
This command defines the length of a label in printer dots. Any label printed on continuous media causes the defined length of media to be moved. The ^LL will be ignored if you are using NON-CONTINUOUS gap/mark media. The printer will calibrate and measure the label length in those.
^LR - Label Reverse
This command provides the ability to reverse print ALL fields following the ^LR in a label (in contrast with the ̂ FR command which reverse prints only an individual field).
^LS - Label Shift
This command shifts the “home” position to the left by a defined number of dots. It is used so that the label definitions for printers where narrow media is “right justified” works on printers that are “left justified.”
^LT - Label Top
This command shifts the label image vertically on the media.
~Lx - Base Emulation Support
ZGL supports text printing using the LP+ emulation. See Chapter3.
^MM - Print Mode
This command determines what happens after a label has been printed: tear off, rewind, peel off, continuous, and cutter.
^MT - Media Type
This command selects the type of media used: thermal transfer or direct thermal.
^MU - Mode Units
This command selects the measurement units in commands having parameters, which specify distance, height, or width.
~NC - Network Connect
This command connects a particular printer to a network by calling up the printer’s network ID number.
^NI - Network ID Number
This command assigns a network ID number to the printer. This must be done before the printer can be used in a network.
22
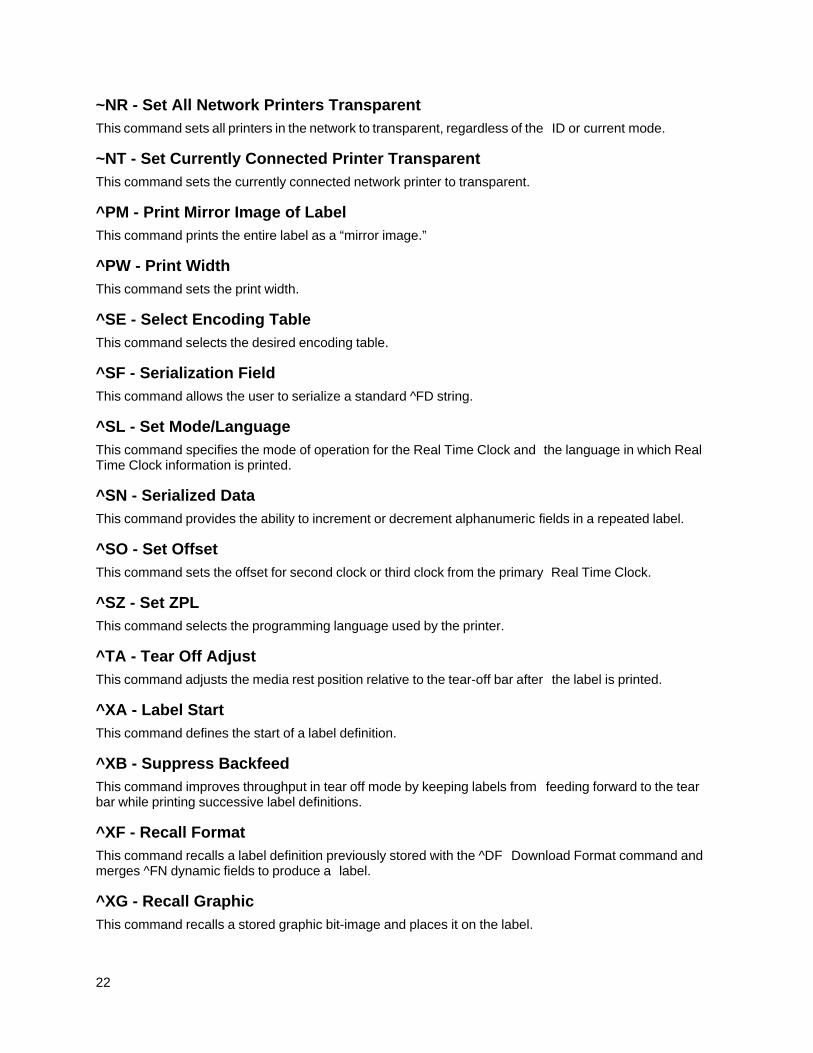
~NR - Set All Network Printers Transparent
This command sets all printers in the network to transparent, regardless of the ID or current mode.
~NT - Set Currently Connected Printer Transparent
This command sets the currently connected network printer to transparent.
^PM - Print Mirror Image of Label
This command prints the entire label as a “mirror image.”
^PW - Print Width
This command sets the print width.
^SE - Select Encoding Table
This command selects the desired encoding table.
^SF - Serialization Field
This command allows the user to serialize a standard ^FD string.
^SL - Set Mode/Language
This command specifies the mode of operation for the Real Time Clock and the language in which Real Time Clock information is printed.
^SN - Serialized Data
This command provides the ability to increment or decrement alphanumeric fields in a repeated label.
^SO - Set Offset
This command sets the offset for second clock or third clock from the primary Real Time Clock.
^SZ - Set ZPL
This command selects the programming language used by the printer.
^TA - Tear Off Adjust
This command adjusts the media rest position relative to the tear-off bar after the label is printed.
^XA - Label Start
This command defines the start of a label definition.
^XB - Suppress Backfeed
This command improves throughput in tear off mode by keeping labels from feeding forward to the tear bar while printing successive label definitions.
^XF - Recall Format
This command recalls a label definition previously stored with the ^DF Download Format command and merges ^FN dynamic fields to produce a label.
^XG - Recall Graphic
This command recalls a stored graphic bit-image and places it on the label.

23
^XZ - Label End
This command denotes the end of a label definition.

24
25
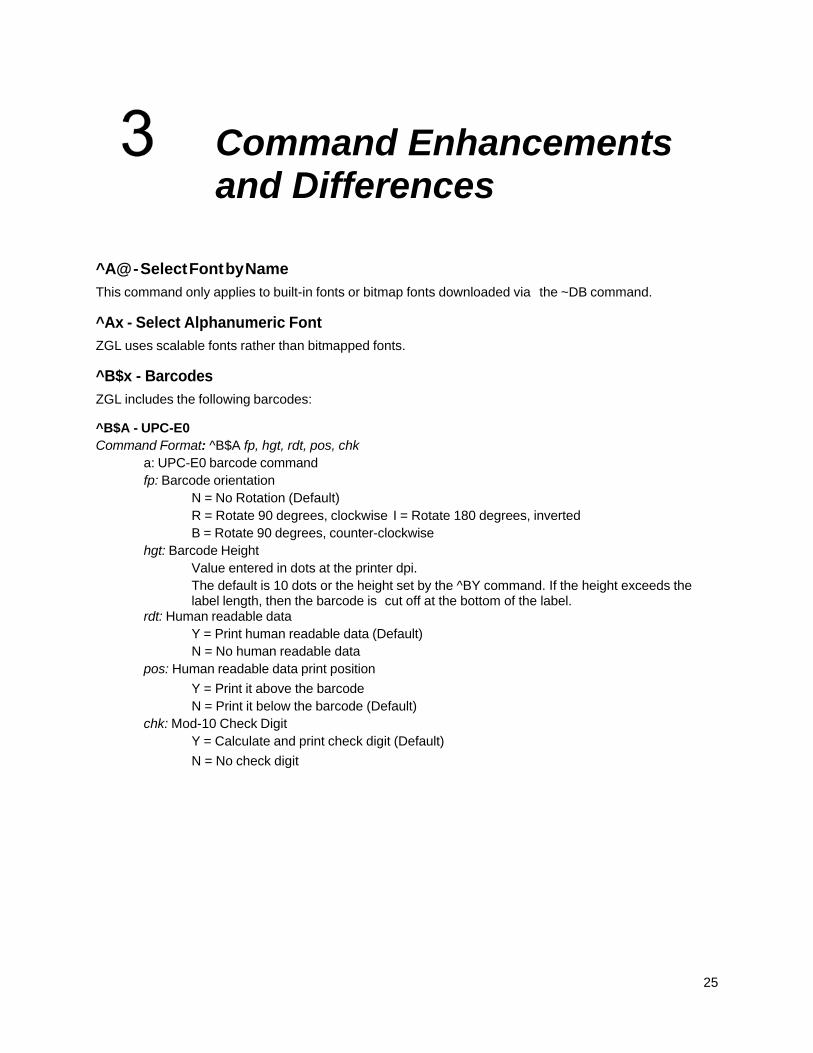
Command Enhancements and Differences
^A@ - Select Font by Name
This command only applies to built-in fonts or bitmap fonts downloaded via the ~DB command.
^Ax - Select Alphanumeric Font
ZGL uses scalable fonts rather than bitmapped fonts.
^B$x - Barcodes
ZGL includes the following barcodes:
^B$A - UPC-E0 Command Format: ^B$A fp, hgt, rdt, pos, chk
a: UPC-E0 barcode command fp: Barcode orientation
N = No Rotation (Default) R = Rotate 90 degrees, clockwise I = Rotate 180 degrees, inverted B = Rotate 90 degrees, counter-clockwise
hgt: Barcode Height Value entered in dots at the printer dpi. The default is 10 dots or the height set by the ^BY command. If the height exceeds the label length, then the barcode is cut off at the bottom of the label.
rdt: Human readable data Y = Print human readable data (Default) N = No human readable data
pos: Human readable data print position
Y = Print it above the barcode N = Print it below the barcode (Default)
chk: Mod-10 Check Digit Y = Calculate and print check digit (Default)
N = No check digit
26
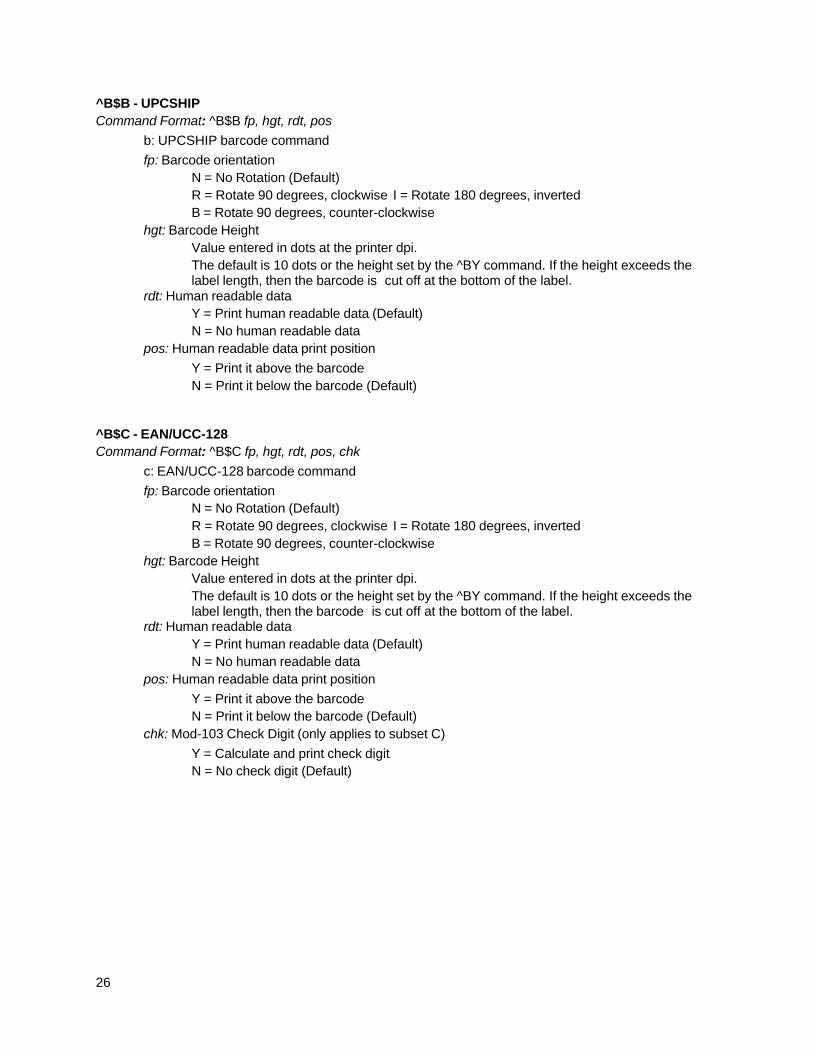
^B$B - UPCSHIP Command Format: ^B$B fp, hgt, rdt, pos
b: UPCSHIP barcode command
fp: Barcode orientation N = No Rotation (Default) R = Rotate 90 degrees, clockwise I = Rotate 180 degrees, inverted B = Rotate 90 degrees, counter-clockwise
hgt: Barcode Height Value entered in dots at the printer dpi. The default is 10 dots or the height set by the ^BY command. If the height exceeds the label length, then the barcode is cut off at the bottom of the label.
rdt: Human readable data Y = Print human readable data (Default) N = No human readable data
pos: Human readable data print position
Y = Print it above the barcode N = Print it below the barcode (Default)
^B$C - EAN/UCC-128 Command Format: ^B$C fp, hgt, rdt, pos, chk
c: EAN/UCC-128 barcode command
fp: Barcode orientation N = No Rotation (Default) R = Rotate 90 degrees, clockwise I = Rotate 180 degrees, inverted B = Rotate 90 degrees, counter-clockwise
hgt: Barcode Height Value entered in dots at the printer dpi. The default is 10 dots or the height set by the ^BY command. If the height exceeds the label length, then the barcode is cut off at the bottom of the label.
rdt: Human readable data Y = Print human readable data (Default) N = No human readable data
pos: Human readable data print position
Y = Print it above the barcode N = Print it below the barcode (Default)
chk: Mod-103 Check Digit (only applies to subset C)
Y = Calculate and print check digit N = No check digit (Default)
27
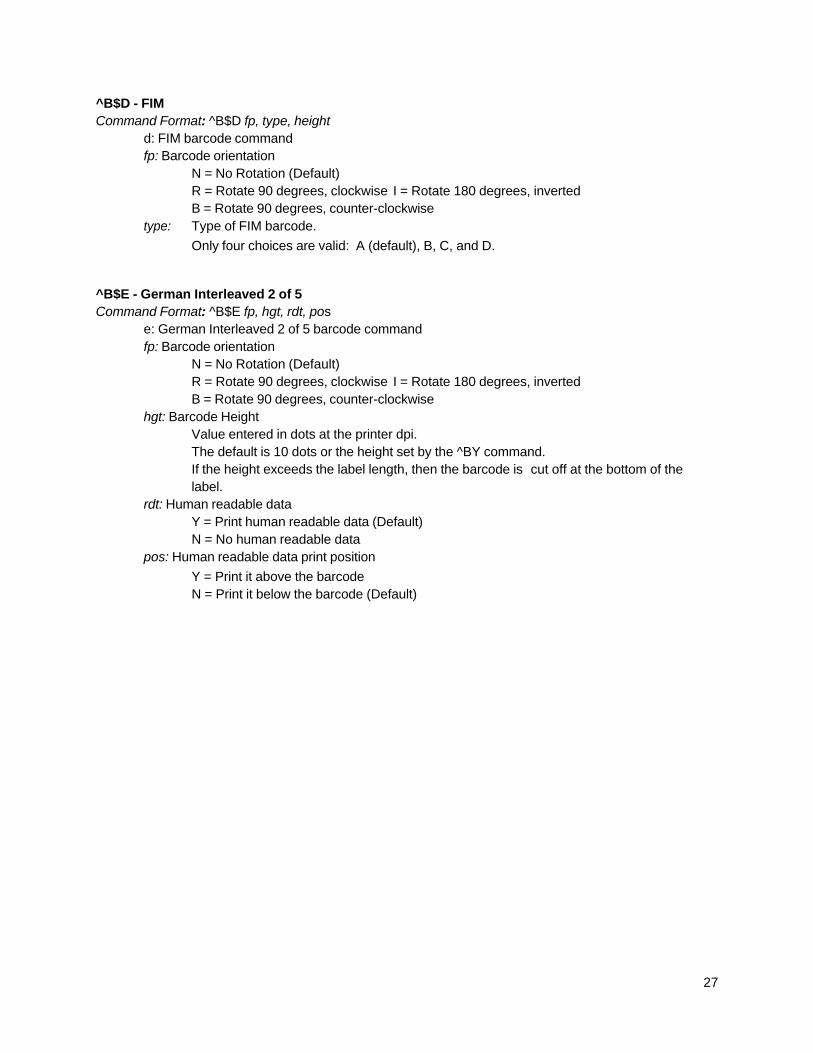
^B$D - FIM Command Format: ^B$D fp, type, height
d: FIM barcode command fp: Barcode orientation
N = No Rotation (Default) R = Rotate 90 degrees, clockwise I = Rotate 180 degrees, inverted B = Rotate 90 degrees, counter-clockwise
type: Type of FIM barcode.
Only four choices are valid: A (default), B, C, and D.
^B$E - German Interleaved 2 of 5 Command Format: ^B$E fp, hgt, rdt, pos
e: German Interleaved 2 of 5 barcode command fp: Barcode orientation
N = No Rotation (Default) R = Rotate 90 degrees, clockwise I = Rotate 180 degrees, inverted B = Rotate 90 degrees, counter-clockwise
hgt: Barcode Height Value entered in dots at the printer dpi. The default is 10 dots or the height set by the ^BY command. If the height exceeds the label length, then the barcode is cut off at the bottom of the label.
rdt: Human readable data Y = Print human readable data (Default) N = No human readable data
pos: Human readable data print position
Y = Print it above the barcode N = Print it below the barcode (Default)
28
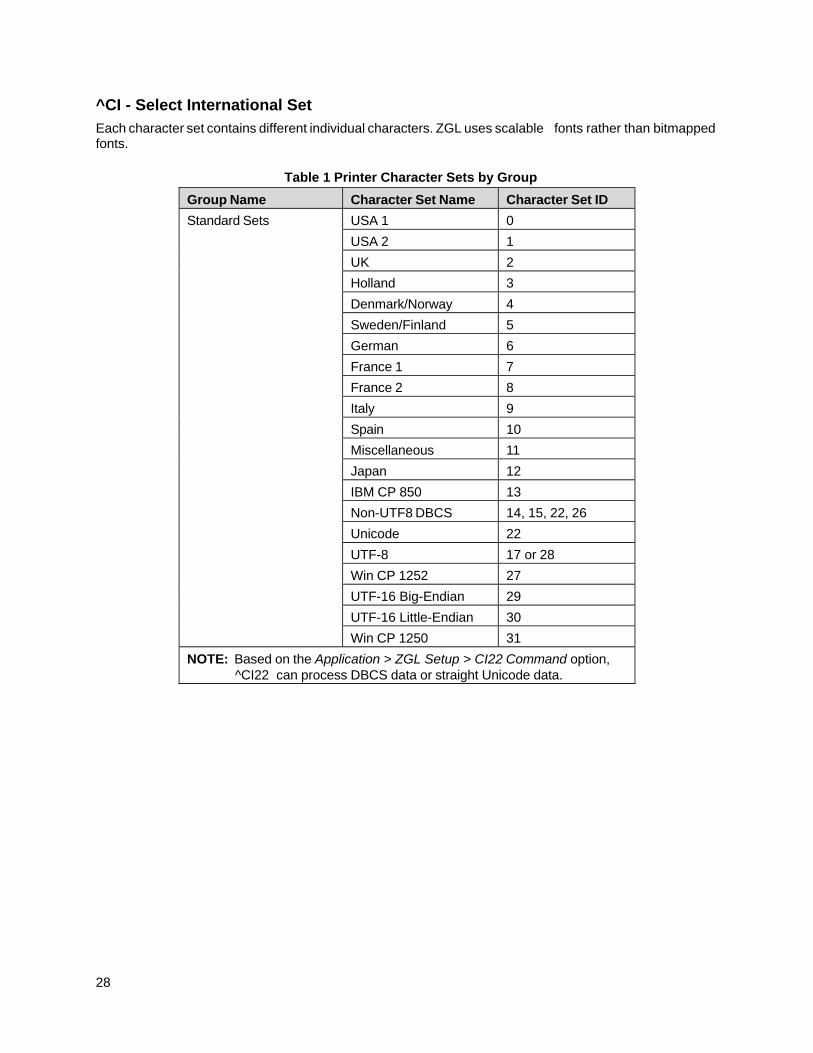
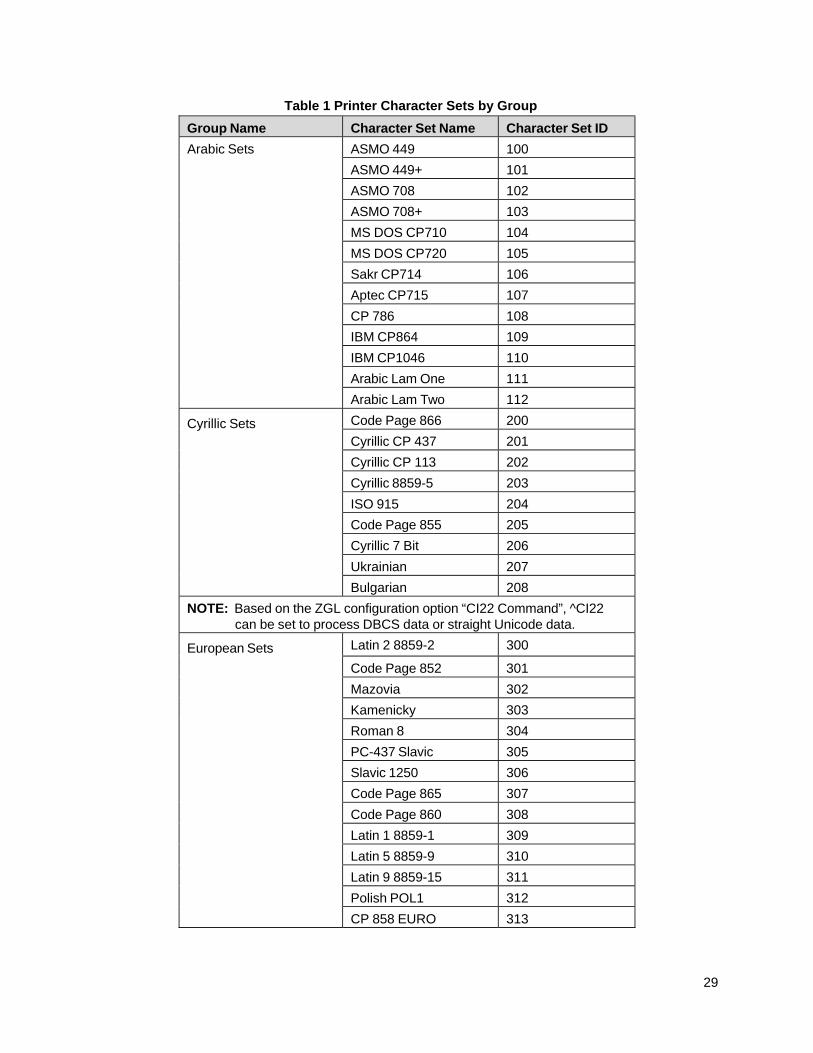
^CI - Select International Set
Each character set contains different individual characters. ZGL uses scalable fonts rather than bitmapped fonts.
Table 1 Printer Character Sets by Group
Group Name Character Set Name Character Set ID
Standard Sets USA 1 0
USA 2 1
UK 2
Holland 3
Denmark/Norway 4
Sweden/Finland 5
German 6
France 1 7
France 2 8 Italy 9 Spain 10 Miscellaneous 11 Japan 12 IBM CP 850 13 Non-UTF8 DBCS 14, 15, 22, 26 Unicode 22 UTF-8 17 or 28 Win CP 1252 27 UTF-16 Big-Endian 29
UTF-16 Little-Endian 30
Win CP 1250 31
NOTE: Based on the Application > ZGL Setup > CI22 Command option, ^CI22 can process DBCS data or straight Unicode data.
29
Table 1 Printer Character Sets by Group
Group Name Character Set Name Character Set ID
Arabic Sets ASMO 449 100 ASMO 449+ 101
ASMO 708 102
ASMO 708+ 103
MS DOS CP710 104
MS DOS CP720 105
Sakr CP714 106
Aptec CP715 107
CP 786 108
IBM CP864 109
IBM CP1046 110
Arabic Lam One 111
Arabic Lam Two 112
Cyrillic Sets Code Page 866 200
Cyrillic CP 437 201
Cyrillic CP 113 202
Cyrillic 8859-5 203
ISO 915 204
Code Page 855 205
Cyrillic 7 Bit 206
Ukrainian 207 Bulgarian 208
NOTE: Based on the ZGL configuration option “CI22 Command”, ^CI22 can be set to process DBCS data or straight Unicode data.
European Sets Latin 2 8859-2 300
Code Page 852 301 Mazovia 302 Kamenicky 303 Roman 8 304 PC-437 Slavic 305 Slavic 1250 306 Code Page 865 307 Code Page 860 308 Latin 1 8859-1 309 Latin 5 8859-9 310 Latin 9 8859-15 311 Polish POL1 312 CP 858 EURO 313
30
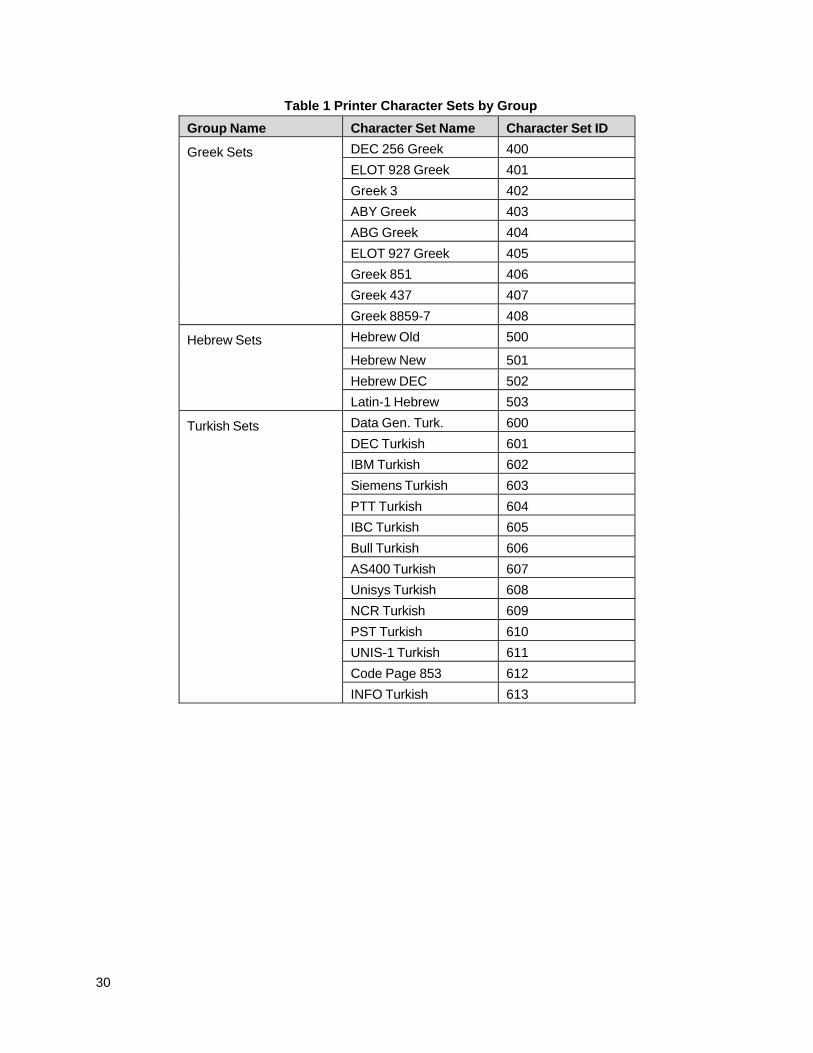
Table 1 Printer Character Sets by Group
Group Name Character Set Name Character Set ID
Greek Sets DEC 256 Greek 400
ELOT 928 Greek 401
Greek 3 402
ABY Greek 403
ABG Greek 404
ELOT 927 Greek 405
Greek 851 406
Greek 437 407 Greek 8859-7 408
Hebrew Sets Hebrew Old 500
Hebrew New 501 Hebrew DEC 502 Latin-1 Hebrew 503
Turkish Sets Data Gen. Turk. 600
DEC Turkish 601
IBM Turkish 602
Siemens Turkish 603
PTT Turkish 604
IBC Turkish 605
Bull Turkish 606
AS400 Turkish 607
Unisys Turkish 608
NCR Turkish 609
PST Turkish 610
UNIS-1 Turkish 611
Code Page 853 612
INFO Turkish 613
31
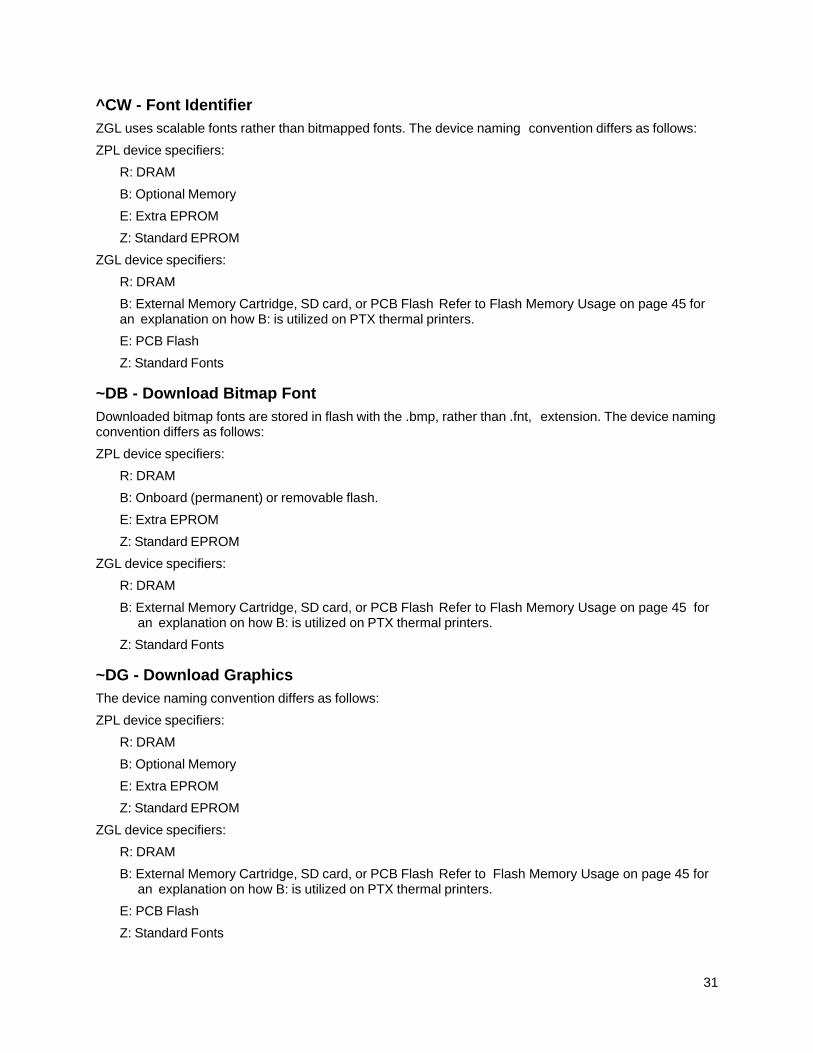
^CW - Font Identifier
ZGL uses scalable fonts rather than bitmapped fonts. The device naming convention differs as follows:
ZPL device specifiers:
R: DRAM
B: Optional Memory
E: Extra EPROM
Z: Standard EPROM
ZGL device specifiers:
R: DRAM
B: External Memory Cartridge, SD card, or PCB Flash Refer to Flash Memory Usage on page 45 for an explanation on how B: is utilized on PTX thermal printers.
E: PCB Flash
Z: Standard Fonts
~DB - Download Bitmap Font
Downloaded bitmap fonts are stored in flash with the .bmp, rather than .fnt, extension. The device naming convention differs as follows:
ZPL device specifiers:
R: DRAM
B: Onboard (permanent) or removable flash.
E: Extra EPROM
Z: Standard EPROM
ZGL device specifiers:
R: DRAM
B: External Memory Cartridge, SD card, or PCB Flash Refer to Flash Memory Usage on page 45 for an explanation on how B: is utilized on PTX thermal printers.
Z: Standard Fonts
~DG - Download Graphics
The device naming convention differs as follows:
ZPL device specifiers:
R: DRAM
B: Optional Memory
E: Extra EPROM
Z: Standard EPROM
ZGL device specifiers:
R: DRAM
B: External Memory Cartridge, SD card, or PCB Flash Refer to Flash Memory Usage on page 45 for an explanation on how B: is utilized on PTX thermal printers.
E: PCB Flash
Z: Standard Fonts
32
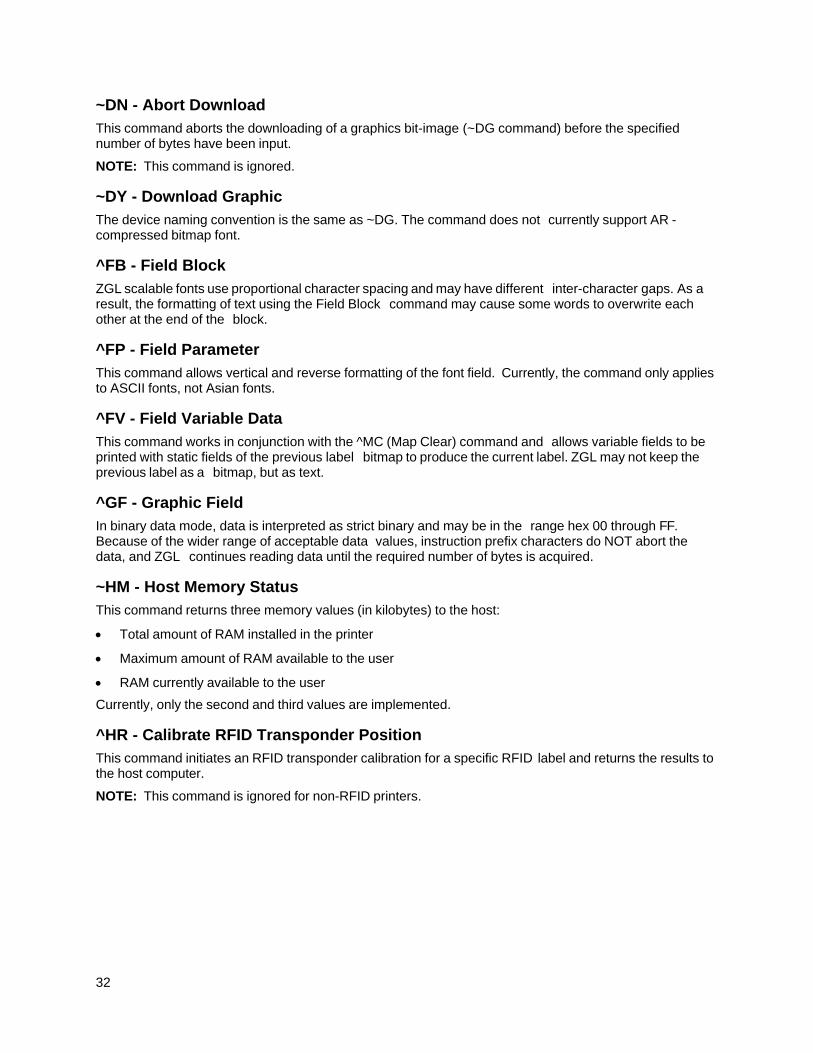
~DN - Abort Download
This command aborts the downloading of a graphics bit-image (~DG command) before the specified number of bytes have been input.
NOTE: This command is ignored.
~DY - Download Graphic
The device naming convention is the same as ~DG. The command does not currently support AR - compressed bitmap font.
^FB - Field Block
ZGL scalable fonts use proportional character spacing and may have different inter-character gaps. As a result, the formatting of text using the Field Block command may cause some words to overwrite each other at the end of the block.
^FP - Field Parameter
This command allows vertical and reverse formatting of the font field. Currently, the command only applies to ASCII fonts, not Asian fonts.
^FV - Field Variable Data
This command works in conjunction with the ^MC (Map Clear) command and allows variable fields to be printed with static fields of the previous label bitmap to produce the current label. ZGL may not keep the previous label as a bitmap, but as text.
^GF - Graphic Field
In binary data mode, data is interpreted as strict binary and may be in the range hex 00 through FF. Because of the wider range of acceptable data values, instruction prefix characters do NOT abort the data, and ZGL continues reading data until the required number of bytes is acquired.
~HM - Host Memory Status
This command returns three memory values (in kilobytes) to the host:
Total amount of RAM installed in the printer
Maximum amount of RAM available to the user
RAM currently available to the user
Currently, only the second and third values are implemented.
^HR - Calibrate RFID Transponder Position
This command initiates an RFID transponder calibration for a specific RFID label and returns the results to the host computer.
NOTE: This command is ignored for non-RFID printers.
33
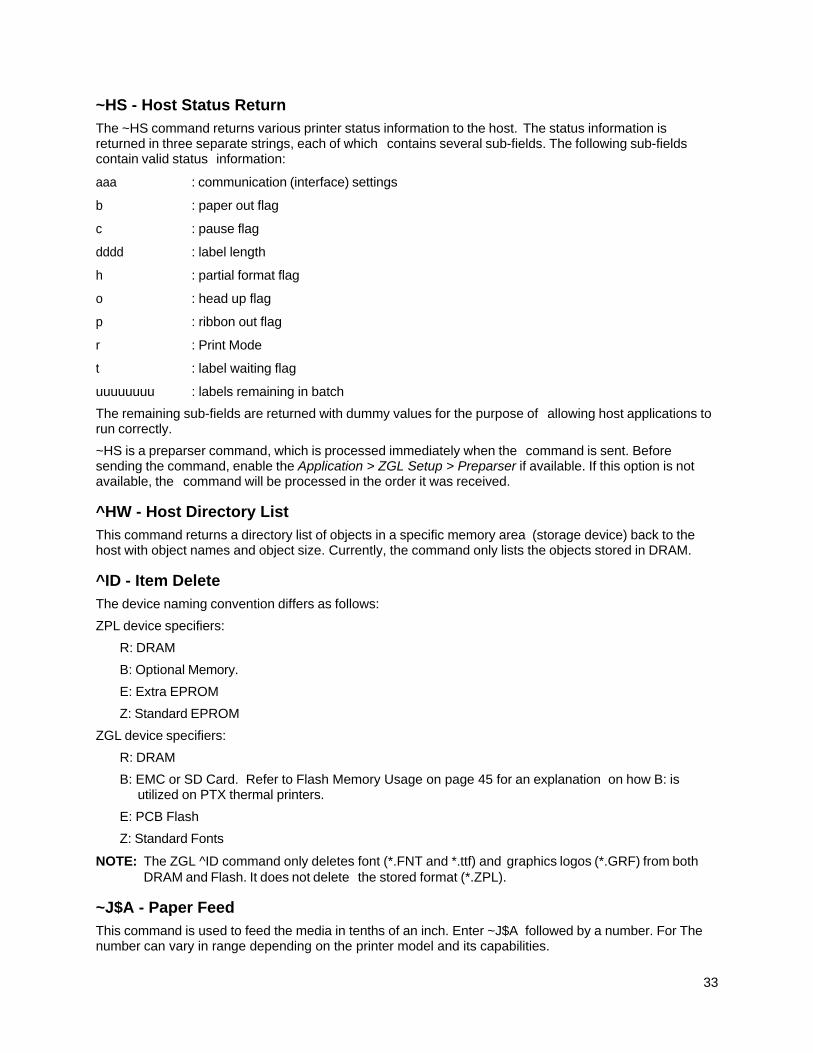
~HS - Host Status Return
The ~HS command returns various printer status information to the host. The status information is returned in three separate strings, each of which contains several sub-fields. The following sub-fields contain valid status information:
aaa : communication (interface) settings
b : paper out flag
c : pause flag
dddd : label length
h : partial format flag
o : head up flag
p : ribbon out flag
r : Print Mode
t : label waiting flag
uuuuuuuu : labels remaining in batch
The remaining sub-fields are returned with dummy values for the purpose of allowing host applications to run correctly.
~HS is a preparser command, which is processed immediately when the command is sent. Before sending the command, enable the Application > ZGL Setup > Preparser if available. If this option is not available, the command will be processed in the order it was received.
^HW - Host Directory List
This command returns a directory list of objects in a specific memory area (storage device) back to the host with object names and object size. Currently, the command only lists the objects stored in DRAM.
^ID - Item Delete
The device naming convention differs as follows:
ZPL device specifiers:
R: DRAM
B: Optional Memory.
E: Extra EPROM
Z: Standard EPROM
ZGL device specifiers:
R: DRAM
B: EMC or SD Card. Refer to Flash Memory Usage on page 45 for an explanation on how B: is utilized on PTX thermal printers.
E: PCB Flash
Z: Standard Fonts
NOTE: The ZGL ^ID command only deletes font (*.FNT and *.ttf) and graphics logos (*.GRF) from both DRAM and Flash. It does not delete the stored format (*.ZPL).
~J$A - Paper Feed
This command is used to feed the media in tenths of an inch. Enter ~J$A followed by a number. For The number can vary in range depending on the printer model and its capabilities.
34
^J$E - Switch Emulation
This command is used to switch emulations from ZGL to PGL or VGL:
^J$EP Switch to PGL
^J$EV Switch to VGL
~JD - Enable Diagnostics
The hex dump format is different from the ZPL format. In addition, communication errors may not be displayed. This command also changes the value of the related front panel option.
^JE - Disable Diagnostics
This command disables Hex Dump mode.
~JP - Pause & Cancel
The Status LED is illuminated when the printer is ONLINE.
^JU - Configuration Update
This command saves/loads the configuration.
^JU op, num
op = Configuration update operation to perform.
F: Load factory configuration
R: Load saved configuration number num
S: Save current configuration as power-up configuration number num
num = Configuration number to load, used only when op = R or S
^JZ - Reprint After Error
The current setting is reflected in the corresponding front panel value. The conditions which generate a fault are determined by the capabilities of the model or engine type.
~Lx - Base Emulation Support
ZGL supports text printing of pure text (non-ZGL data) by sending the data to the LP+.
In addition to the three front panel Text Mode selections, there are three ZGL commands which allow you to select Text Mode through the data stream:
~L0 - Text Mode = Absorb (ZPL compatibility)
~L1 - Text Mode = Auto Pass-thru
~L2 - Text Mode = ZGL Quiet
With Text Mode set to “Absorb,” all non-ZGL data is absorbed including any system-generated line terminators.
When Text Mode is set to “Auto Pass-thru,” non-ZGL data is automatically detected and printed as text (ZGL data is processed normally). If the hex commands 0x02 or 0x03 are received, they are treated as binary data and printed as text; they are not treated as the equivalent ^XA and ^XZ commands. System-generated line terminators within commands are also printed as text and not absorbed, as they are in the “Absorb” mode.
If Text Mode is set to “ZGL Quiet,” all data (including all ZGL commands except ~L0, ~L1, and ~L2) are printed as text. When a ~Lx command is received, the corresponding front panel setting is updated to reflect the current Text Mode value.
35
Text printing is useful in debugging label definitions, as it allows the incoming data to be printed without entering hex dump mode. Simply placing ~L2 before the label definition (to enter Quiet mode) and ~L0 or ~L1 after it (to return to ZGL command processing) causes the label definition commands to be printed rather than executed. Text generated via the base emulation is not part of overlay data for any repetitive job.
^MC - Map Clear
This command controls clearing of the label bitmap after printing. ZGL may not keep the previous label as a bitmap, but as text.
^MD - Media Darkness
Identical darkness values may not produce the same darkness on your printer as ZPL. The command displays the final value on the “Print Intensity” configuration setting. Each ^MD syntax is treated separately in relation to the current value of the configuration setting. For example, if the current value on the configuration setting is 10, ^MD5 will change the current value to 15.
^MD-5 will change the current value to 5 (from 10 to 5).
^MN - Media tracking
This command selects the type of media the printer is using: continuous, transmissive, or reflective.
^PF - Slew Dot Rows
With ZGL, a slew speed increase may not occur since the engine slew definition and use may be different than ZPL.
~PH / ^PH - Slew to Home
This command causes the printer to move to the top of the next label.
^PO - Print Orientation
The following orientation parameter values are allowed:
N: No rotation (Normal)
R: Rotate 90 degrees (Landscape)
I : Rotate 180 degrees (Inverted)
B: Rotate 270 degrees (Inverted Landscape)
~PP / ^PP - Programmable Pause
The ~PP command takes the printer offline as soon as the current label being printed is completed. The exact moment at which this occurs in the label stream may not match exactly. The ^PP command takes the printer offline after the label definition in which the command appears is finished printing.
^PQ - Print Quantity
The ^PQ command controls printing operations such as the number of labels to print, labels printed before the printer pauses, and replications of each serial number.
~PR / ^PP - Print Rate
This command sets the print speed of the printer in inches per second. The exact set of available speed settings provided by the ZGL is printer dependent and may not match those available through ZPL.
36
^RB - Define EPC Data Structure
This command defines the structure of EPC data, which can be read from or written to an RFID tag.
NOTE: This command is ignored for non-RFID printers.
^RF - Read or Write RFID Format
This command allows you to read or write to an RFID tag.
NOTE: This command is ignored for non-RFID printers.
^RM - Enable RFID Motion
This command enables or disables RFID motion. When disabled, Zebra does not move the label. Printronix moves the label if there is data to print on the label. When enabled, both Zebra and PTX moves the label.
NOTE: This command is ignored for non-RFID printers.
^RR - Specify RFID Retries for Read/Write
This command changes the number of times that the printer attempts to read or write to a tag. By default, Zebra attempts six retries. Printronix attempts two retries. The command value ranges from 0 to 10 for Zebra and 1 to 9 for Printronix.
NOTE: This command is ignored for non-RFID printers.
^RS - RFID Setup
This command sets up parameters including tag type, read/write position of the transponder, and error handling. Currently, only the read/write position of the transponder and label retry are supported by Printronix.
NOTE: This command is ignored for non-RFID printers.
^RT - Read RFID Tag
This command tells the printer to read the current RFID tag data.
start Starting block location where data will be read from the RFID tag.The default is 0. Since there is currently only one 8-byte or 12-byte block, the starting block number can only be 0.
length The number of blocks to be read from the RFID tag. The default is 1. Since there is currently only one 8-byte or 12-byte block, the block length can only be 1.
NOTE: This command is ignored for non-RFID printers.
^RZ - Set RFID Tag Password
This command lets you define the password for the tag during writing.
NOTE: This command is ignored for non-RFID printers.
~SD - Set Darkness
Identical darkness values may not produce the same relative darkness on your printer as ZPL. This command overrides the current value of Media > Image > Print Intensity configuration option for the printer.
^SP - Start Print
With ZPL I selected, this command is ignored. With ZPL II selected, printing does not start until ^XZ is received.

37
^ST - Set Date/Time
This command sets the date and time of the Real Time Clock.
NOTE: The valid year parameter range for Printronix printers is 2000 to 2097, whereas the range on Zebra printers is 1998 to 2097.
^SX - Set Alert
This command requests the printer to send an alert message when a certain condition is set or clear.
The serial port is the only supported destination for route alert.
PQ Done is the only supported condition type. If both condition set and condition clear are enabled, a message will be sent immediately while the job is still in progress and another message will be sent when the job is complete.
~WC - Print Configuration
ZGL uses the Printronix configuration format.
^WD - Print Directory
The ZGL format of this directory may differ from the ZPL format.
^WT - Write RFID Tag
This command allows you to program the current RFID tag with the data.
start Starting block location where data will be programmed into the RFID tag. The default is 0. Since there is currently only one 8-byte or 12-byte block, the starting block number can only be 0.
NOTE: This command is ignored for non-RFID printers.
AUTOEXEC Bootup File
ZGL supports this feature via the PTX-SETUP capability to process files in battery-backed RAM or flash memory on power-up.
Missing Characters with Font E (OCR-B)
ZGL uses the OCR-B character sets, which may differ from other manufacturers. Among others, characters 0x5B, 0x5C, and 0x5D are different.

38
39
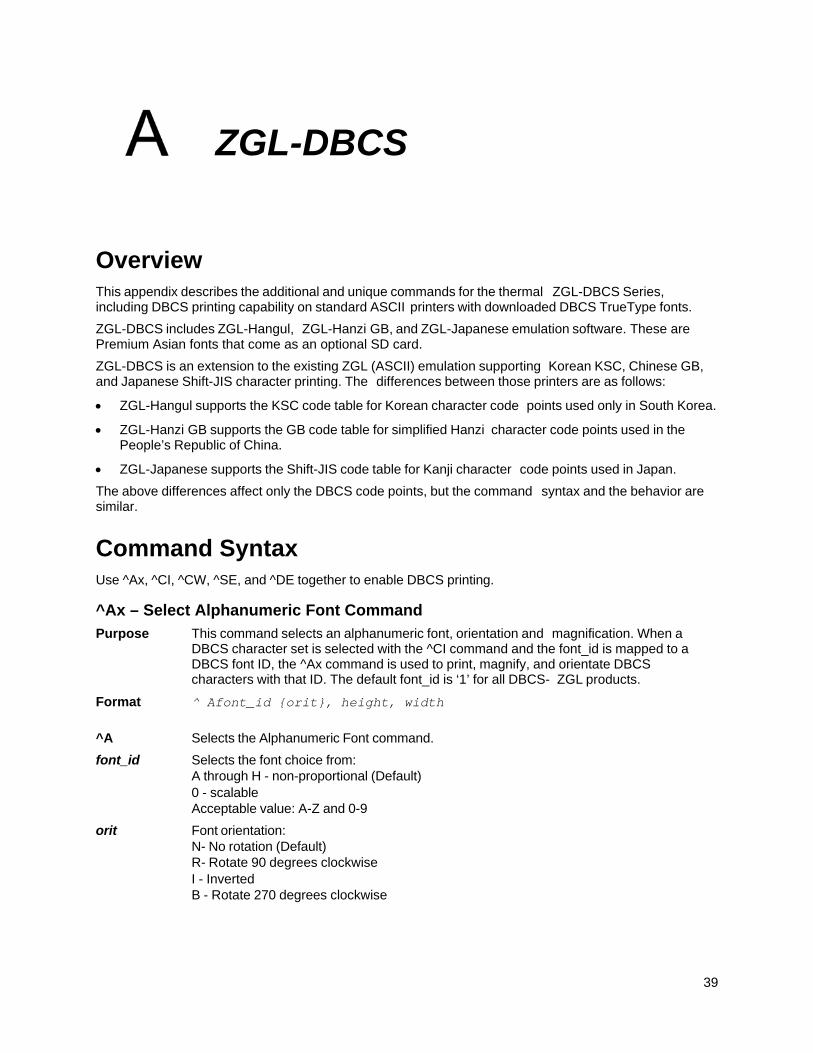
ZGL-DBCS
Overview This appendix describes the additional and unique commands for the thermal ZGL-DBCS Series, including DBCS printing capability on standard ASCII printers with downloaded DBCS TrueType fonts.
ZGL-DBCS includes ZGL-Hangul, ZGL-Hanzi GB, and ZGL-Japanese emulation software. These are Premium Asian fonts that come as an optional SD card.
ZGL-DBCS is an extension to the existing ZGL (ASCII) emulation supporting Korean KSC, Chinese GB, and Japanese Shift-JIS character printing. The differences between those printers are as follows:
ZGL-Hangul supports the KSC code table for Korean character code points used only in South Korea.
ZGL-Hanzi GB supports the GB code table for simplified Hanzi character code points used in the People’s Republic of China.
ZGL-Japanese supports the Shift-JIS code table for Kanji character code points used in Japan.
The above differences affect only the DBCS code points, but the command syntax and the behavior are similar.
Command Syntax Use ^Ax, ^CI, ^CW, ^SE, and ^DE together to enable DBCS printing.
^Ax – Select Alphanumeric Font Command
Purpose This command selects an alphanumeric font, orientation and magnification. When a DBCS character set is selected with the ^CI command and the font_id is mapped to a DBCS font ID, the ^Ax command is used to print, magnify, and orientate DBCS characters with that ID. The default font_id is ‘1’ for all DBCS- ZGL products.
Format ^ Afont_id {orit}, height, width
^A Selects the Alphanumeric Font command.
font_id Selects the font choice from: A through H - non-proportional (Default) 0 - scalable Acceptable value: A-Z and 0-9
orit Font orientation: N- No rotation (Default) R- Rotate 90 degrees clockwise I - Inverted B - Rotate 270 degrees clockwise
40
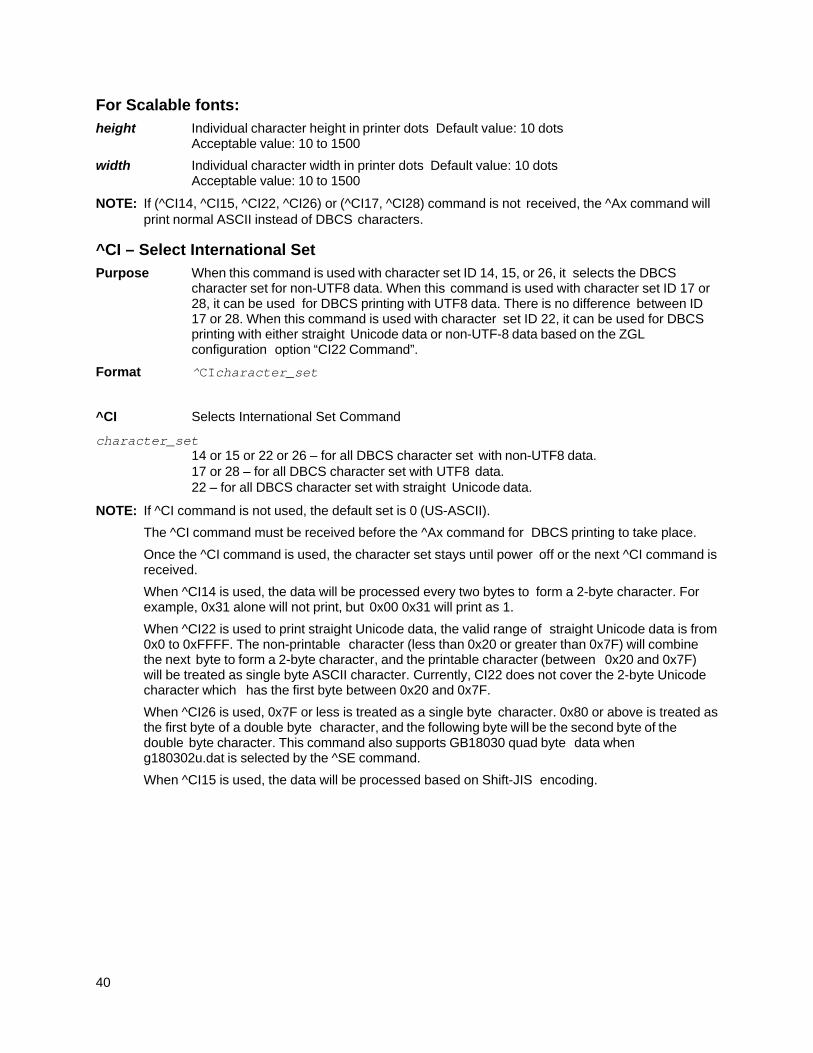
For Scalable fonts:
height Individual character height in printer dots Default value: 10 dots Acceptable value: 10 to 1500
width Individual character width in printer dots Default value: 10 dots Acceptable value: 10 to 1500
NOTE: If (^CI14, ^CI15, ^CI22, ^CI26) or (^CI17, ^CI28) command is not received, the ^Ax command will print normal ASCII instead of DBCS characters.
^CI – Select International Set
Purpose When this command is used with character set ID 14, 15, or 26, it selects the DBCS character set for non-UTF8 data. When this command is used with character set ID 17 or 28, it can be used for DBCS printing with UTF8 data. There is no difference between ID 17 or 28. When this command is used with character set ID 22, it can be used for DBCS printing with either straight Unicode data or non-UTF-8 data based on the ZGL configuration option “CI22 Command”.
Format ^CIcharacter_set ^CI Selects International Set Command
character_set 14 or 15 or 22 or 26 – for all DBCS character set with non-UTF8 data. 17 or 28 – for all DBCS character set with UTF8 data. 22 – for all DBCS character set with straight Unicode data.
NOTE: If ^CI command is not used, the default set is 0 (US-ASCII).
The ^CI command must be received before the ^Ax command for DBCS printing to take place.
Once the ^CI command is used, the character set stays until power off or the next ^CI command is received.
When ^CI14 is used, the data will be processed every two bytes to form a 2-byte character. For example, 0x31 alone will not print, but 0x00 0x31 will print as 1.
When ^CI22 is used to print straight Unicode data, the valid range of straight Unicode data is from 0x0 to 0xFFFF. The non-printable character (less than 0x20 or greater than 0x7F) will combine the next byte to form a 2-byte character, and the printable character (between 0x20 and 0x7F) will be treated as single byte ASCII character. Currently, CI22 does not cover the 2-byte Unicode character which has the first byte between 0x20 and 0x7F.
When ^CI26 is used, 0x7F or less is treated as a single byte character. 0x80 or above is treated as the first byte of a double byte character, and the following byte will be the second byte of the double byte character. This command also supports GB18030 quad byte data when g180302u.dat is selected by the ^SE command.
When ^CI15 is used, the data will be processed based on Shift-JIS encoding.
41
DBCS Data
For products with extended memory such as SD cards, CI14, CI15, CI22 and CI26, DBCS data requires the presence of a Premium Asian font SD card, or downloaded TTF DBCS fonts to work for DBCS printing.
For CI22, the ZGL configuration option “CI22 Command” is available to select either Unicode printing or DBCS printing with options “Unicode Data” and “DBCS Data”, respectively. The default is Unicode printing. However, if the ^CW command is used with the resident DBCS font name (msgbl.ttf, hgrml.ttf, msung.fnt, kgothic.fnt, or gothic24.fnt), the DBCS printing will be automatically enforced regardless of the configuration setting. Unicode format fonts such as hzmjsm.ttf or Andalé fonts, support both Unicode and DBCS data.
In the DBCS printer, when ^CW command is not used and the default ID is 1, ZGL automatically locates and prints the DBCS font, including the Andalé font on the SD card or on the Flash to replace the default Gothic font while using CI14, CI15, CI22, CI26, CI17 and CI28. For a different ID, when the ^CW command is not used, the default font will be used (ex, CG Trium font for ID 0 and Gothic font for ID 2). For CI22 with ID = 1, the ZGL configuration option Application > ZGL Setup > CI22 Command must be set to “DBCS Data” to print DBCS data.
For any ID in DBCS printing, when the ^CW command is used and a new mapped font (DBCS or non-DBCS) is found, the new font will be used. If a new mapped font is not found, print the current font associated with the ID. If no other font has been previously mapped to the ID, the current font could be the previously mapped DBCS (or non-DBCS) font or the default font. For ID = 1, if the new mapped font is not found and the current font is the default Gothic font, ZGL automatically locates and prints the DBCS font installed on SD card or PCB Flash to replace the default Gothic font. Also, if the font used with ^CW is a Zebra resident font (msung.fnt, kgothic.fnt and gothic24.fnt), the font will be replaced with Printronix resident fonts (msgbl.ttf, h2mjsm.ttf, and hgrml.ttf, respectively).
In DBCS printing with resident fonts, by default, ZGL will use the default encoding table corresponding to the resident DBCS font currently used (refer to Table 3 and Table 4 on page 43). However, when the ^SE command is used, the selected encoding table will be used instead.
ZGL allows downloaded fonts for DBCS printing with or without the SD card installed in the printer. As long as the font and corresponding encoding table are downloaded to the printer, the font can be used to print DBCS. For CI22Unicode, CI17, and CI28, the commands go through ASCII path to print Unicode data. The downloaded font is allowed with or without the DBCS SD card.
Unicode Data
For CI22 only, when the ZGL configuration option “CI22 Command” is set to “Unicode Data”, ZGL treats the data as straight Unicode data. However, if the ^CW command is used with the resident DBCS font name (msgbl.ttf, h2mjsm.ttf, hgrml.ttf, msung.fnt, kgothic.fnt or gothic24.fnt), DBCS printing will be automatically enforced regardless of the configuration setting and the data will be treated as DBCS data.
UTF8 Data
For CI17 and CI28, ZGL treats the data as UTF8 data and decodes them into straight Unicode data. By default, ^CI17 uses Unicode encoding and UTF-8 when combined with ^F8.
Andalé Font
For CI22, when the ZGL configuration option “CI22 Command” is set to “Unicode Data”, ZGL treats the data as straight Unicode data. When the ZGL configuration option “CI22 Command” is set to “DBCS Data”, ZGL treats the data as DBCS data and uses the KSC encoding table. For DBCS data printing, the ^SE command is ignored.
For CI15, ZGL treats the data as DBCS data and uses the SJIS encoding table. The ^SE command is ignored.
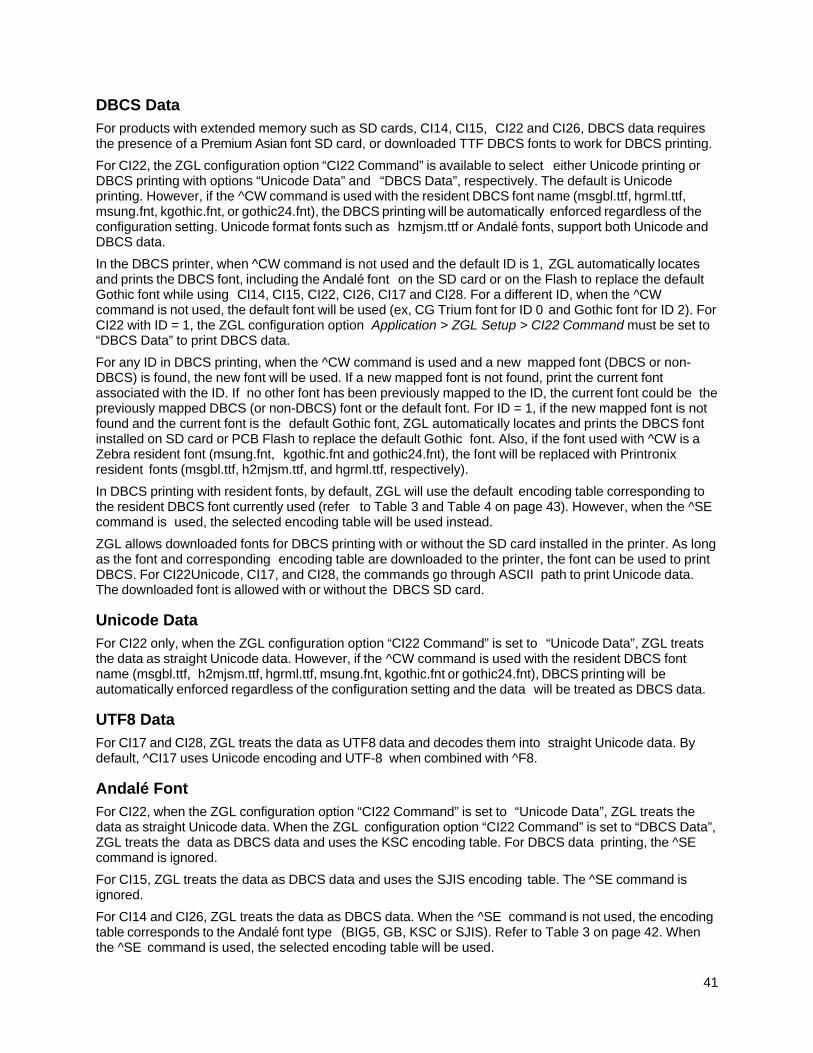
For CI14 and CI26, ZGL treats the data as DBCS data. When the ^SE command is not used, the encoding table corresponds to the Andalé font type (BIG5, GB, KSC or SJIS). Refer to Table 3 on page 42. When the ^SE command is used, the selected encoding table will be used.
42
For CI17 and CI28, ZGL treats data as UTF8 data and decodes them into straight Unicode data. By default, ^CI17 uses Unicode encoding and UTF-8 when combined with ^F8.
For other CI commands, ZGL treats data as ASCII data.
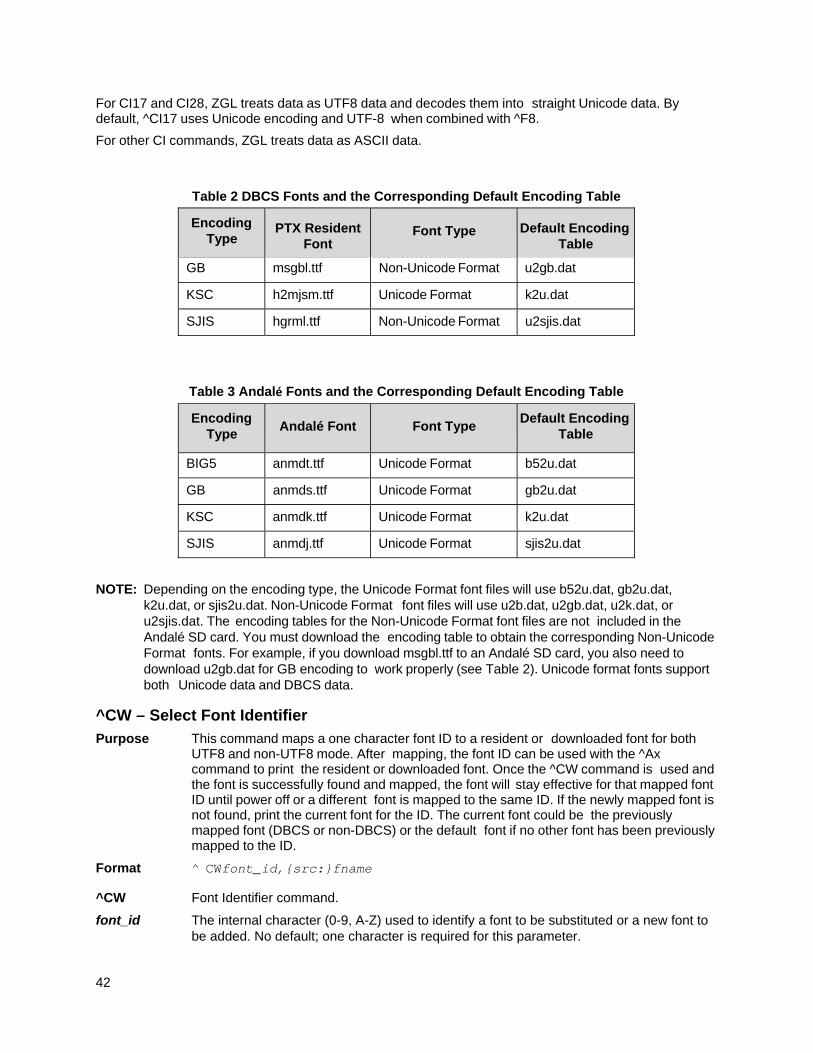
Table 2 DBCS Fonts and the Corresponding Default Encoding Table
Encoding Type
PTX Resident Font
Font Type Default Encoding
Table
GB msgbl.ttf Non-Unicode Format u2gb.dat
KSC h2mjsm.ttf Unicode Format k2u.dat
SJIS hgrml.ttf Non-Unicode Format u2sjis.dat
Table 3 Andalé Fonts and the Corresponding Default Encoding Table
Encoding Type
Andalé Font
Font Type
Default Encoding Table
BIG5 anmdt.ttf Unicode Format b52u.dat
GB anmds.ttf Unicode Format gb2u.dat
KSC anmdk.ttf Unicode Format k2u.dat
SJIS anmdj.ttf Unicode Format sjis2u.dat
NOTE: Depending on the encoding type, the Unicode Format font files will use b52u.dat, gb2u.dat, k2u.dat, or sjis2u.dat. Non-Unicode Format font files will use u2b.dat, u2gb.dat, u2k.dat, or u2sjis.dat. The encoding tables for the Non-Unicode Format font files are not included in the Andalé SD card. You must download the encoding table to obtain the corresponding Non-Unicode Format fonts. For example, if you download msgbl.ttf to an Andalé SD card, you also need to download u2gb.dat for GB encoding to work properly (see Table 2). Unicode format fonts support both Unicode data and DBCS data.
^CW – Select Font Identifier
Purpose This command maps a one character font ID to a resident or downloaded font for both UTF8 and non-UTF8 mode. After mapping, the font ID can be used with the ^Ax command to print the resident or downloaded font. Once the ^CW command is used and the font is successfully found and mapped, the font will stay effective for that mapped font ID until power off or a different font is mapped to the same ID. If the newly mapped font is not found, print the current font for the ID. The current font could be the previously mapped font (DBCS or non-DBCS) or the default font if no other font has been previously mapped to the ID.
Format ^ CWfont_id,{src:}fname ^CW Font Identifier command.
font_id The internal character (0-9, A-Z) used to identify a font to be substituted or a new font to be added. No default; one character is required for this parameter.
43
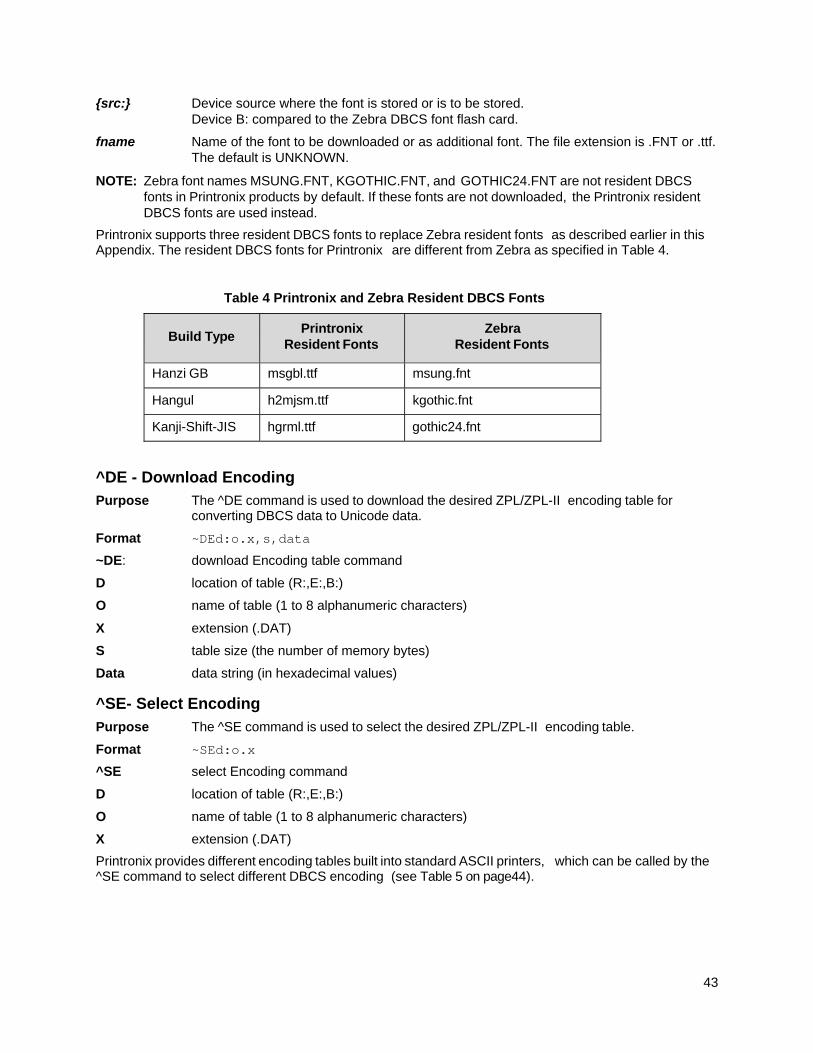
{src:} Device source where the font is stored or is to be stored. Device B: compared to the Zebra DBCS font flash card.
fname Name of the font to be downloaded or as additional font. The file extension is .FNT or .ttf. The default is UNKNOWN.
NOTE: Zebra font names MSUNG.FNT, KGOTHIC.FNT, and GOTHIC24.FNT are not resident DBCS fonts in Printronix products by default. If these fonts are not downloaded, the Printronix resident DBCS fonts are used instead.
Printronix supports three resident DBCS fonts to replace Zebra resident fonts as described earlier in this Appendix. The resident DBCS fonts for Printronix are different from Zebra as specified in Table 4.
Table 4 Printronix and Zebra Resident DBCS Fonts
Build Type
Printronix Resident Fonts
Zebra Resident Fonts
Hanzi GB msgbl.ttf msung.fnt
Hangul h2mjsm.ttf kgothic.fnt
Kanji-Shift-JIS hgrml.ttf gothic24.fnt
^DE - Download Encoding
Purpose The ^DE command is used to download the desired ZPL/ZPL-II encoding table for converting DBCS data to Unicode data.
Format ~DEd:o.x,s,data
~DE: download Encoding table command
D location of table (R:,E:,B:)
O name of table (1 to 8 alphanumeric characters)
X extension (.DAT)
S table size (the number of memory bytes)
Data data string (in hexadecimal values)
^SE- Select Encoding
Purpose The ^SE command is used to select the desired ZPL/ZPL-II encoding table.
Format ~SEd:o.x
^SE select Encoding command
D location of table (R:,E:,B:)
O name of table (1 to 8 alphanumeric characters)
X extension (.DAT)
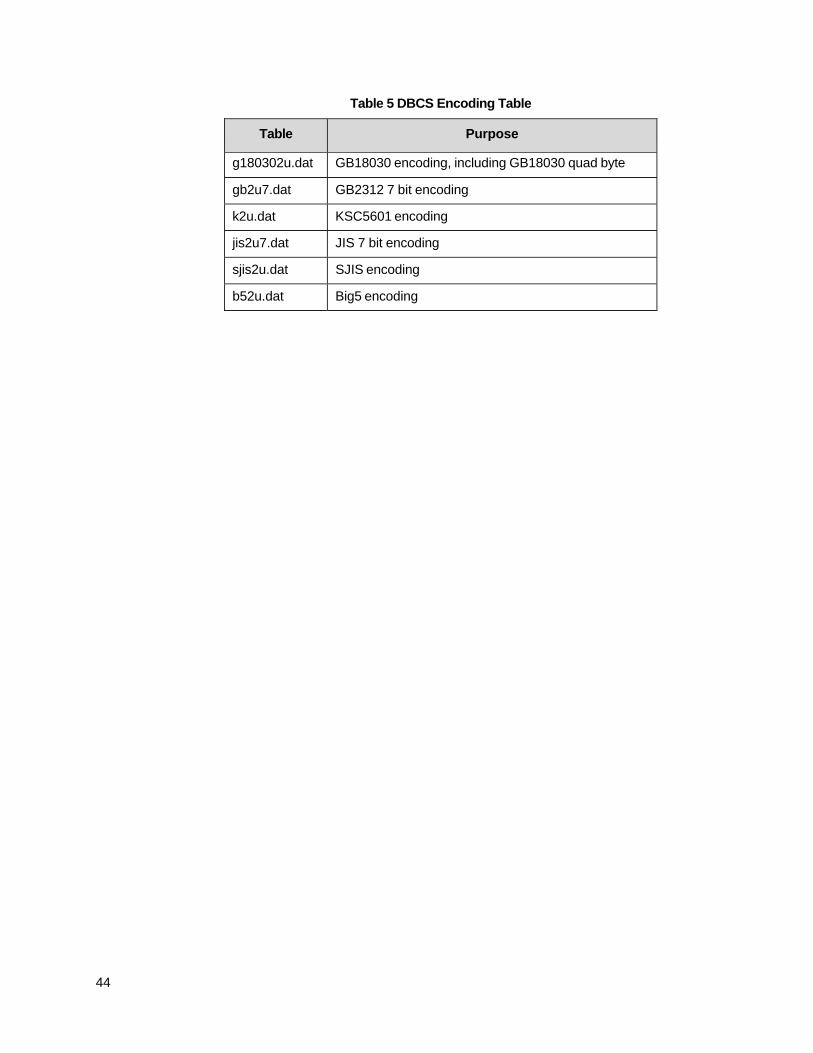
Printronix provides different encoding tables built into standard ASCII printers, which can be called by the ^SE command to select different DBCS encoding (see Table 5 on page44).
44
Table 5 DBCS Encoding Table
Table Purpose
g180302u.dat GB18030 encoding, including GB18030 quad byte
gb2u7.dat GB2312 7 bit encoding
k2u.dat KSC5601 encoding
jis2u7.dat JIS 7 bit encoding
sjis2u.dat SJIS encoding
b52u.dat Big5 encoding

45
Flash Memory Usage
Overview Zebra printers utilize the device names R:, B:, and E: for storing/retrieving data onto DRAM, Expanded Memory (SD Card), and onboard PCB flash memory.
All printers have a certain amount of onboard, non-removable flash memory on the main controller board that can be used for permanent storage.
Depending on the application, this Onboard Flash Memory may not be sufficient. Certain models of Printronix printers can be ordered with extended memory such as the SD card. Expanded Memory can be used to extend the range of permanent data storage for applications. For printers with SD capability, the extended range of data storage can be significant (GB).
Since printers with extended memory have two storage choices (allowing the same file name to exist on both on the extended memory and Onboard Flash Memory), a hierarchy (search order) is required for finding, reading, writing, and deleting files. This hierarchy is described below. Such a hierarchy is not needed for printers without extended memory since there is only one location allowed for permanent data storage.
Read NOTE: For commands including ̂ A@, ̂ CW, ̂ HG, ̂ HW, ̂ HY, ̂ IL, ̂ IM, ̂ WD, ^XF, and ^XG).
When extended memory is installed, the printer automatically searches the file first from DRAM, then extended memory, then PCB Flash. The search stops at the first occurrence when the file is found. If the file is not found, the file is not printed.
When the extended memory is not installed, the printer automatically searches the file from DRAM and then PCB Flash. The search stops at the first occurrence when the file is found. If the file is not found, the file is not printed. If the device is specified as ‘B:’, the external memory will be searched first, followed by the PCB Flash. If the device is specified as ‘E’, only the PCB flash will be searched.
For ̂ HW and ̂ WD commands which lists the files in the DRAM or Flash, only the files on the specified device will be listed.
Write
NOTE: For commands including ~DB, ^DF, ~DG, ~DU, ~DY, ~DZ, and ^IS.
When the cartridge is installed, B: will write to the extended memory or PCB Flash based on the ZGL configuration option Application > ZGL Setup > Storage Select. E: will write to PCB Flash. R: will write to DRAM.
When the extended memory is not installed, B: will try to write to the extended memory and cause an error message to print, or write to PCB Flash with no error message based on the ZGL configuration option Application > ZGL Setup > Storage Select. E: will write to PCB Flash. R: will write to DRAM. If a drive letter is not specified, the file will be written to DRAM only.
46
Delete
NOTE: For commands including ^ID.
When the extended memory is installed, B: will delete from extended memory or PCB Flash based on the ZGL configuration option Application > ZGL Setup > Storage Select. E: will delete from PCB Flash. R: will delete from DRAM.
When the extended memory is not installed, B: will have no action or delete from PCB Flash based on the ZGL configuration option Application > ZGL Setup > Storage Select. E: will delete from PCB Flash. R: will delete from DRAM. If a drive letter is not specified, the file will be deleted from DRAM only.

47
Contact Information
Printronix Customer Support Center IMPORTANT Please have the following information available prior to calling the Printronix
Customer Support Center:
• Model number
• Serial number (located on the back of the printer)
• Installed options (i.e., interface and host type if applicable to the problem)
• Configuration printout: (See “Printing A Configuration” ) in your printers Administrator’s manual.
• Is the problem with a new install or an existing printer?
• Description of the problem (be specific)
• Good and bad samples that clearly show the problem (faxing or emailing of these samples may be required)
Americas (714) 368-2686
Europe, Middle East, and Africa (31) 24 6489 311
Asia Pacific (65) 6548 4114
China (86) 800-999-6836
http://www.printronix.com/support.aspx
Printronix Supplies Department
Contact the Printronix Supplies Department for genuine Printronix supplies.
Americas (800) 733-1900
Europe, Middle East, and Africa (33) 1 46 25 19 07
Asia Pacific (65) 6548 4116 or (65) 6548 4132
China (86) 400-886-5598
India (800) 102-7869
http://www.printronix.com/supplies-parts.aspx
48
Corporate Offices
Printronix, Inc. 15345 Barranca Parkway Irvine, CA 92618 U.S.A. Phone: (714) 368-2300 Fax: (714) 368-2600
Printronix Inc. c/o Printronix Nederland BV Bijsterhuizen 11-38 6546 AS Nijmegen The Netherlands Phone: (31) 24 6489489 Fax: (31) 24 6489499
Printronix Schweiz GmbH 42 Changi South Street 1 Changi South Industrial Estate Singapore 486763 Phone: (65) 6542 0110 Fax: (65) 6546 1588
Printronix Commercial (Shanghai) Co. Ltd 22F, Eton Building East No.555, Pudong Av. Shanghai City, 200120, P R China Phone: (86) 400 886 5598 Fax: (86-21) 5138 0564
Visit the Printronix web site at www.printronix.com
258782-001 A