wren kitchens installation tips 3static.wrenliving.com/pdf/installation-guides.pdf · 6 fitting the...
TRANSCRIPT
1
tra
2
Index
Wren Kitchens Installation Tips ..................................................................... 3
Carefully check your kitchen delivery ............................................................ 4
Measuring out and marking up ..................................................................... 5
Fitting the base cabinets ............................................................................... 6
Fitting the corner cabinets ............................................................................ 7
The 972mm or ‘L’ shaped corner base and Internal Curved Corner base……..11
Door and Drawer adjustment ..................................................................... 13
Curved Base unit ......................................................................................... 16
Belfast Sink Base ......................................................................................... 17
Half Height Base Unit .................................................................................. 18
Attaching Plinth .......................................................................................... 19
Larder Units and Appliance Housing ........................................................... 20
Fitting the Wall Cabinets ............................................................................. 21
Cornice and Light Pelmet ............................................................................ 25
Curved Cornice and Light Pelmet ................................................................ 26
Curved Posts ............................................................................................... 27
Fitting Handles ............................................................................................ 28
Lighting ....................................................................................................... 29
3
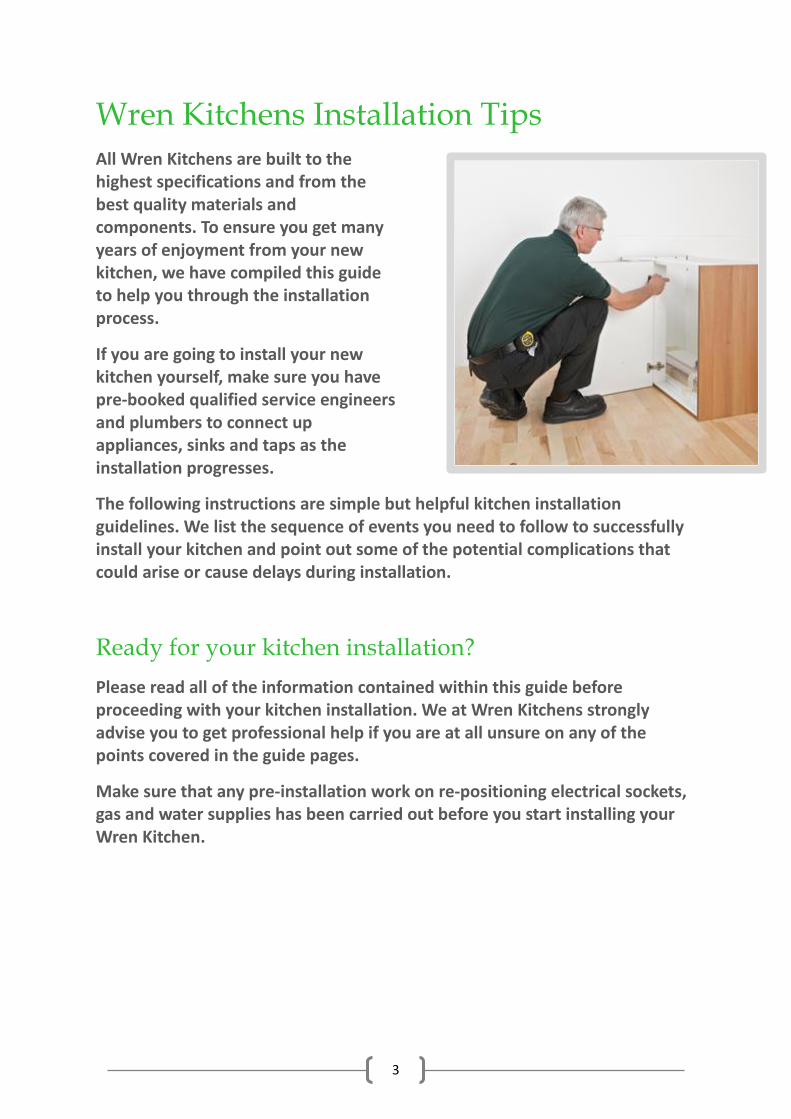
Wren Kitchens Installation Tips All Wren Kitchens are built to the highest specifications and from the best quality materials and components. To ensure you get many years of enjoyment from your new kitchen, we have compiled this guide to help you through the installation process.
If you are going to install your new kitchen yourself, make sure you have pre-booked qualified service engineers and plumbers to connect up appliances, sinks and taps as the installation progresses.
The following instructions are simple but helpful kitchen installation guidelines. We list the sequence of events you need to follow to successfully install your kitchen and point out some of the potential complications that could arise or cause delays during installation.
Ready for your kitchen installation?
Please read all of the information contained within this guide before proceeding with your kitchen installation. We at Wren Kitchens strongly advise you to get professional help if you are at all unsure on any of the points covered in the guide pages.
Make sure that any pre-installation work on re-positioning electrical sockets, gas and water supplies has been carried out before you start installing your Wren Kitchen.

4
Carefully check your kitchen delivery
Look over each item that has
been delivered for your Wren
Kitchen. If there is any
noticeable damage to the
packaging, open the pack and
check if the item of furniture or
component is damage free.
If the item is damaged please
advise the driver. When you sign
for the delivery please mention
what item is damaged.
If any damage has occurred you have 48 hours from delivery to report this to
Wren Customer Services on: 0845 404 1000
Using your invoice or delivery note, try to group your furniture into the following categories making sure that you know what is in each package – base cabinets, wall cabinets, tower cabinets, appliances, worktop, sinks & accessories.
If you have enough space, stack your grouped cabinets outside your empty kitchen. You can then fit each item without having to climb over anything.
At this stage leave the packaging on the furniture, only unwrap when you need each item. This will avoid damaging the pieces when they are moved around.

5
Measuring out and marking up
The base cabinets for your Wren Kitchen will be
installed first.
Before you start to bring any cabinets into your kitchen,
you should mark a horizontal line onto your walls to help
check the level of your kitchen. This is critical to ensure a
professional kitchen fit.
Find the highest point on your kitchen floor where wall
and floor meet.
A laser leveller is the best tool for this task.
Mark a horizontal line 150mm above the highest point
around your walls. This line will indicate the bottom line
of your run of base cabinets. You can adjust each cabinet
leg to ensure your base cabinet run is horizontal.
Draw a second horizontal line 720mm
above the bottom line. 870mm is the
height of your base cabinets including
the 150mm plinth so this will give
you the level position for the top of
each cabinet.
Check how square your kitchen
corners are if you have included any
base corner cabinets in your kitchen.
Using a spirit level or your laser leveller, check the flatness
and vertical line of your walls. This will give you some idea
of what cabinet levelling needs to take place for your base,
wall and tall cabinets.
You now have the horizontal position for your base cabinets marked out.
Using your kitchen plan, mark out the approximate width of each cabinet on
to your wall to check that service elements are positioned as you want them.
6
Fitting the base cabinets
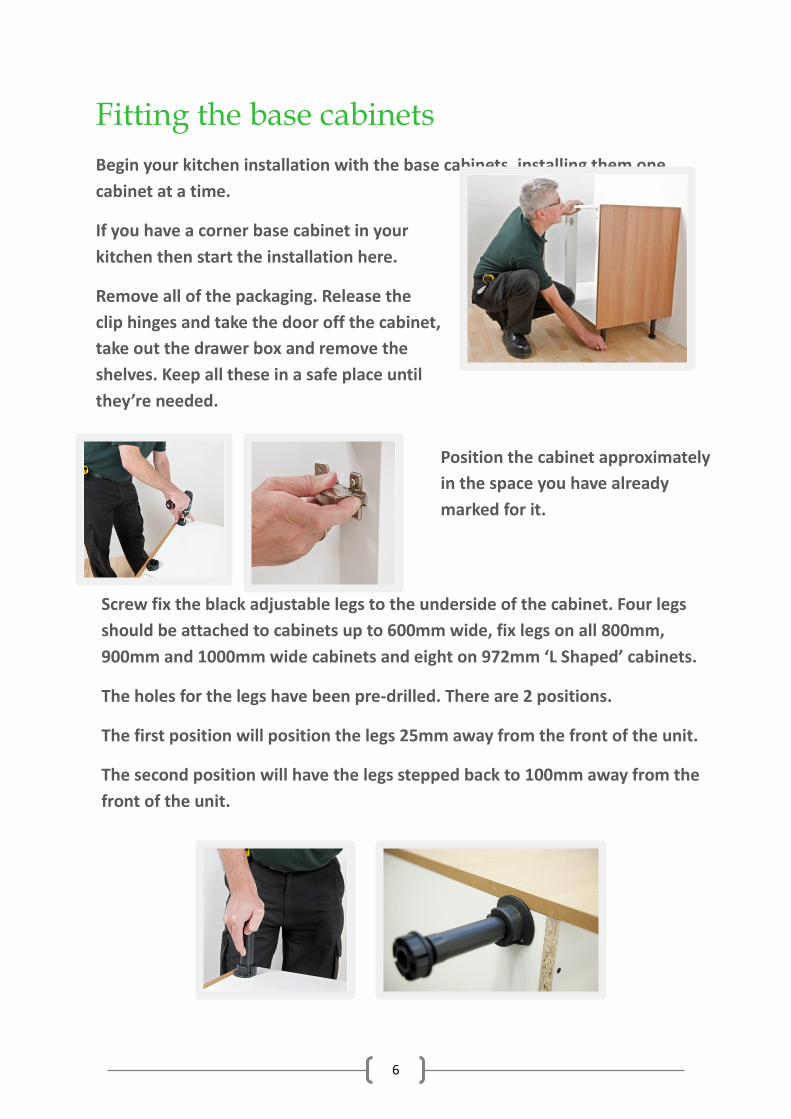
Begin your kitchen installation with the base cabinets, installing them one
cabinet at a time.
If you have a corner base cabinet in your
kitchen then start the installation here.
Remove all of the packaging. Release the
clip hinges and take the door off the cabinet,
take out the drawer box and remove the
shelves. Keep all these in a safe place until
they’re needed.
Position the cabinet approximately
in the space you have already
marked for it.
Screw fix the black adjustable legs to the underside of the cabinet. Four legs
should be attached to cabinets up to 600mm wide, fix legs on all 800mm,
900mm and 1000mm wide cabinets and eight on 972mm ‘L Shaped’ cabinets.
The holes for the legs have been pre-drilled. There are 2 positions.
The first position will position the legs 25mm away from the front of the unit.
The second position will have the legs stepped back to 100mm away from the
front of the unit.
7
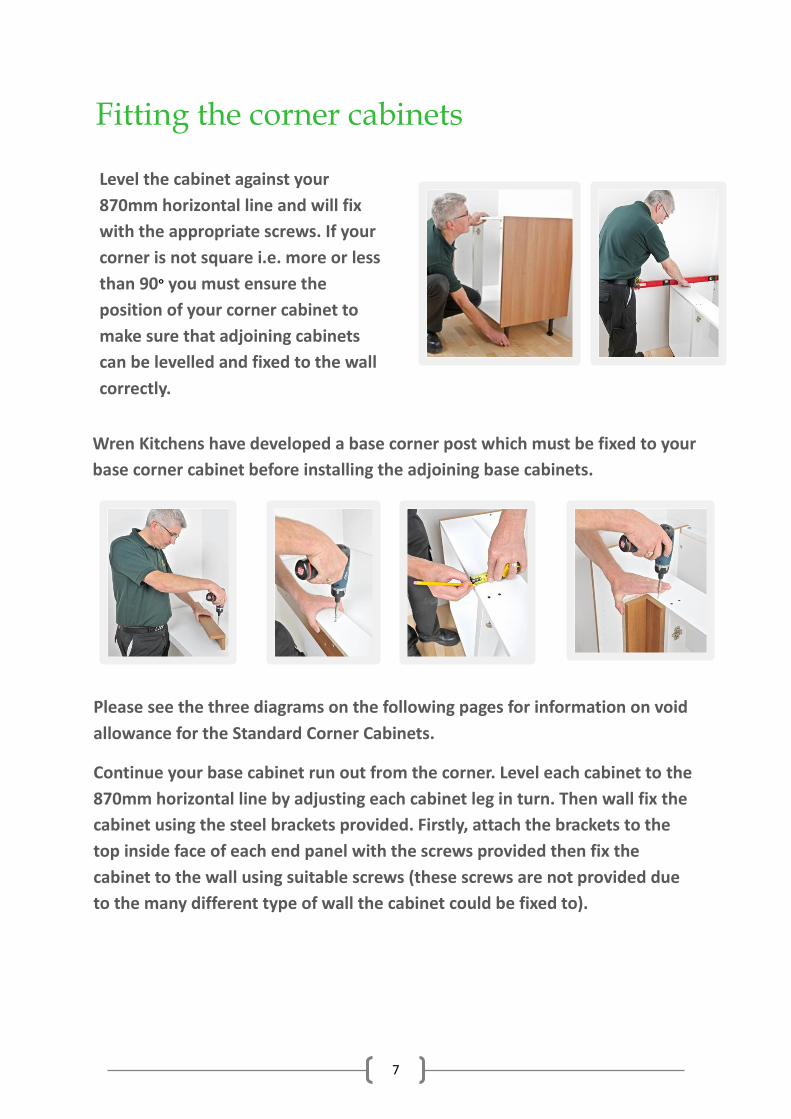
Fitting the corner cabinets
Level the cabinet against your
870mm horizontal line and will fix
with the appropriate screws. If your
corner is not square i.e. more or less
than 90° you must ensure the
position of your corner cabinet to
make sure that adjoining cabinets
can be levelled and fixed to the wall
correctly.
Wren Kitchens have developed a base corner post which must be fixed to your
base corner cabinet before installing the adjoining base cabinets.
Please see the three diagrams on the following pages for information on void
allowance for the Standard Corner Cabinets.
Continue your base cabinet run out from the corner. Level each cabinet to the
870mm horizontal line by adjusting each cabinet leg in turn. Then wall fix the
cabinet using the steel brackets provided. Firstly, attach the brackets to the
top inside face of each end panel with the screws provided then fix the
cabinet to the wall using suitable screws (these screws are not provided due
to the many different type of wall the cabinet could be fixed to).
8

9
Standard base corner units
800 Standard Corner Cabinet
Standard Position showing
Void space.
900 Standard Corner Cabinet
Standard Position showing
Void space.
1000 Standard Corner Cabinet
Standard Position showing
Void space.
10
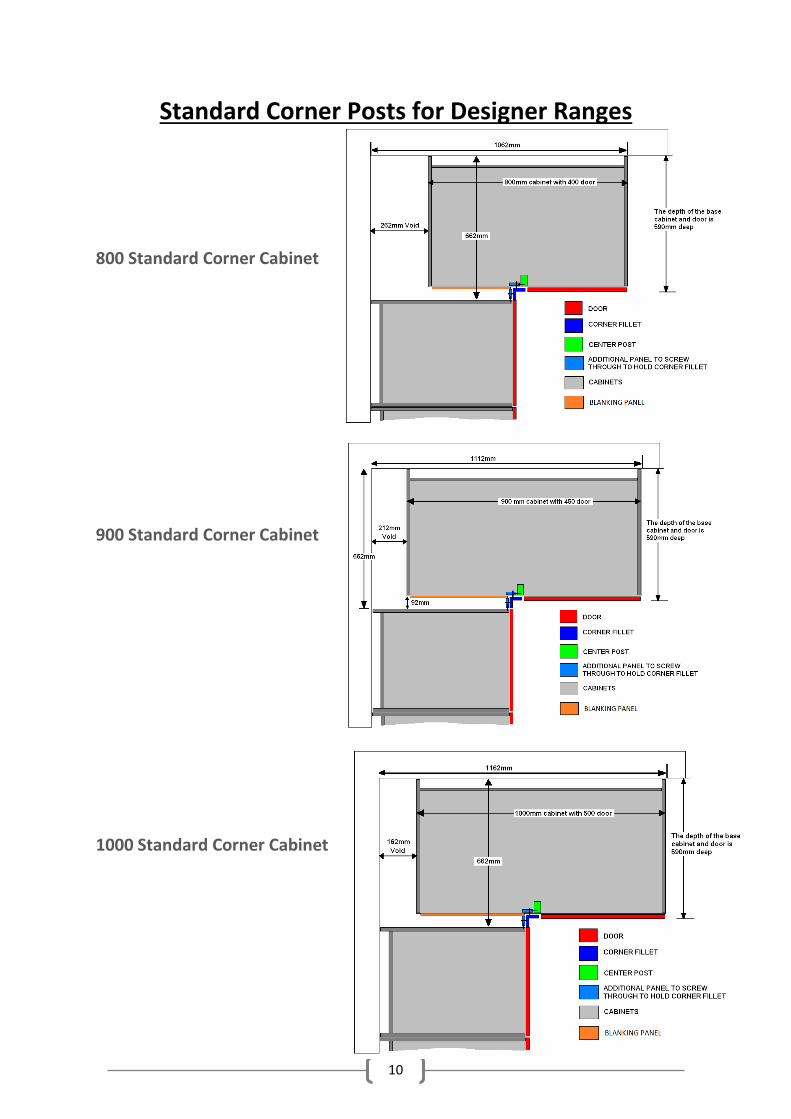
Standard Corner Posts for Designer Ranges
800 Standard Corner Cabinet
900 Standard Corner Cabinet
1000 Standard Corner Cabinet
11
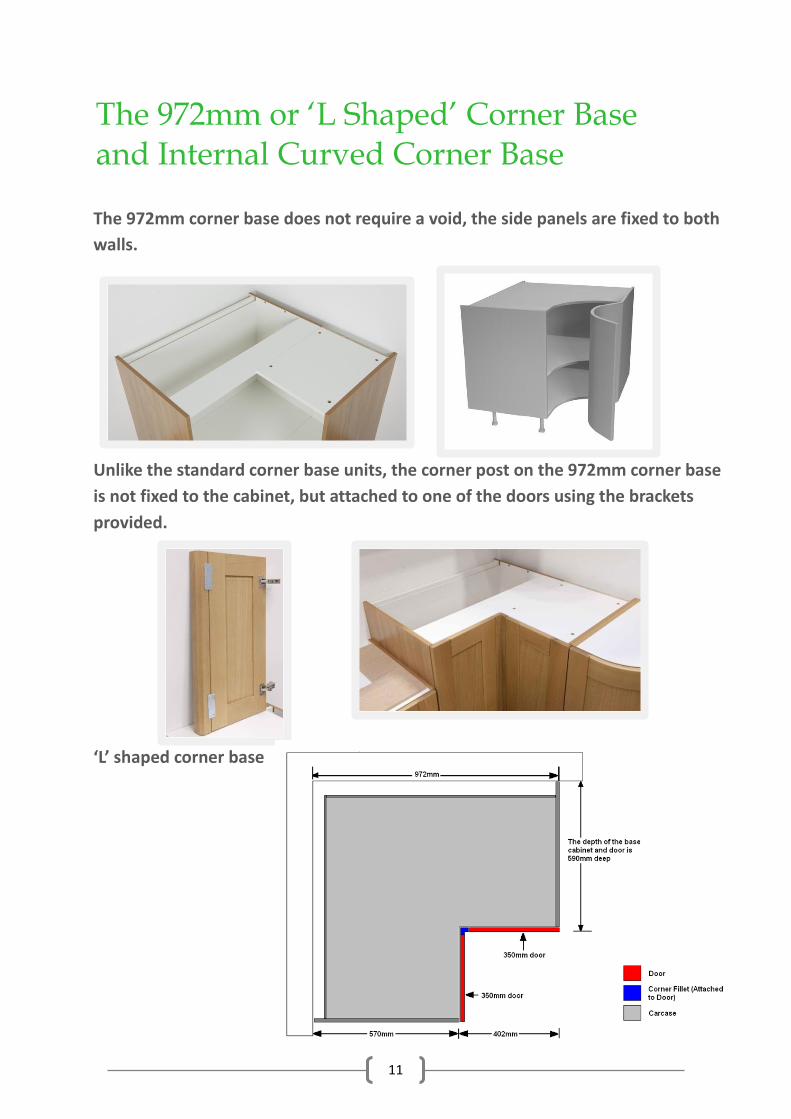
The 972mm or ‘L Shaped’ Corner Base and Internal Curved Corner Base
The 972mm corner base does not require a void, the side panels are fixed to both
walls.
Unlike the standard corner base units, the corner post on the 972mm corner base
is not fixed to the cabinet, but attached to one of the doors using the brackets
provided.
‘L’ shaped corner base
12
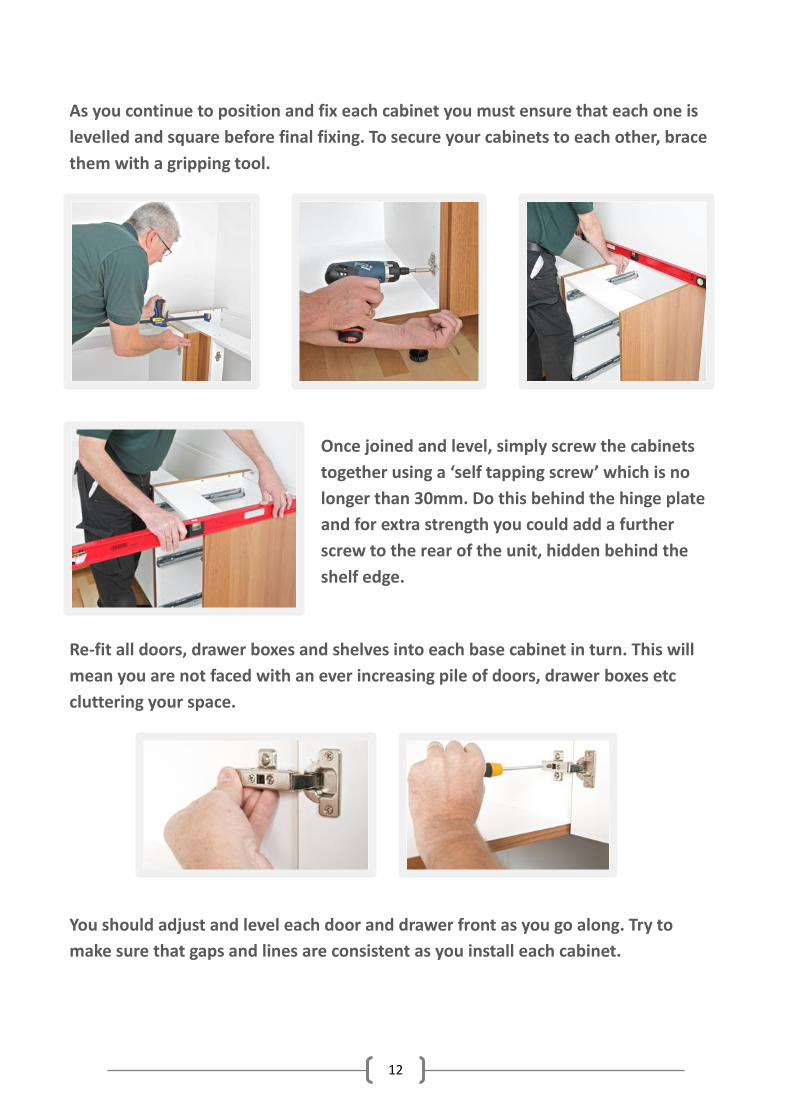
As you continue to position and fix each cabinet you must ensure that each one is
levelled and square before final fixing. To secure your cabinets to each other, brace
them with a gripping tool.
Once joined and level, simply screw the cabinets
together using a ‘self tapping screw’ which is no
longer than 30mm. Do this behind the hinge plate
and for extra strength you could add a further
screw to the rear of the unit, hidden behind the
shelf edge.
Re-fit all doors, drawer boxes and shelves into each base cabinet in turn. This will
mean you are not faced with an ever increasing pile of doors, drawer boxes etc
cluttering your space.
You should adjust and level each door and drawer front as you go along. Try to
make sure that gaps and lines are consistent as you install each cabinet.
13
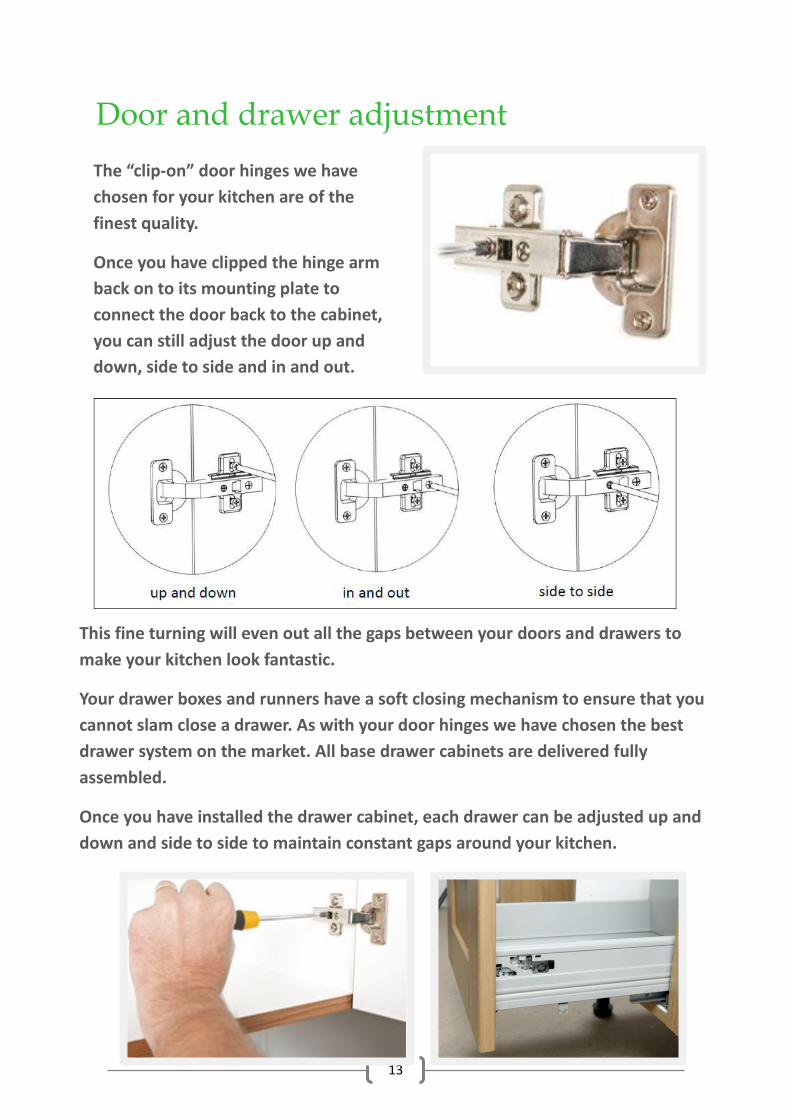
Door and drawer adjustment
The “clip-on” door hinges we have
chosen for your kitchen are of the
finest quality.
Once you have clipped the hinge arm
back on to its mounting plate to
connect the door back to the cabinet,
you can still adjust the door up and
down, side to side and in and out.
This fine turning will even out all the gaps between your doors and drawers to
make your kitchen look fantastic.
Your drawer boxes and runners have a soft closing mechanism to ensure that you
cannot slam close a drawer. As with your door hinges we have chosen the best
drawer system on the market. All base drawer cabinets are delivered fully
assembled.
Once you have installed the drawer cabinet, each drawer can be adjusted up and
down and side to side to maintain constant gaps around your kitchen.

14
Making adjustments to the drawer box and Frontal
1. Screw A adjusts the drawer front up and down.
2. Screw B is the locking screw to hold your drawer in place after adjustment
3. Screw C adjusts the drawer front from side to side
When the drawer has been aligned and the locking screw tightened, clip the
plastic cover plates into place as below.
15
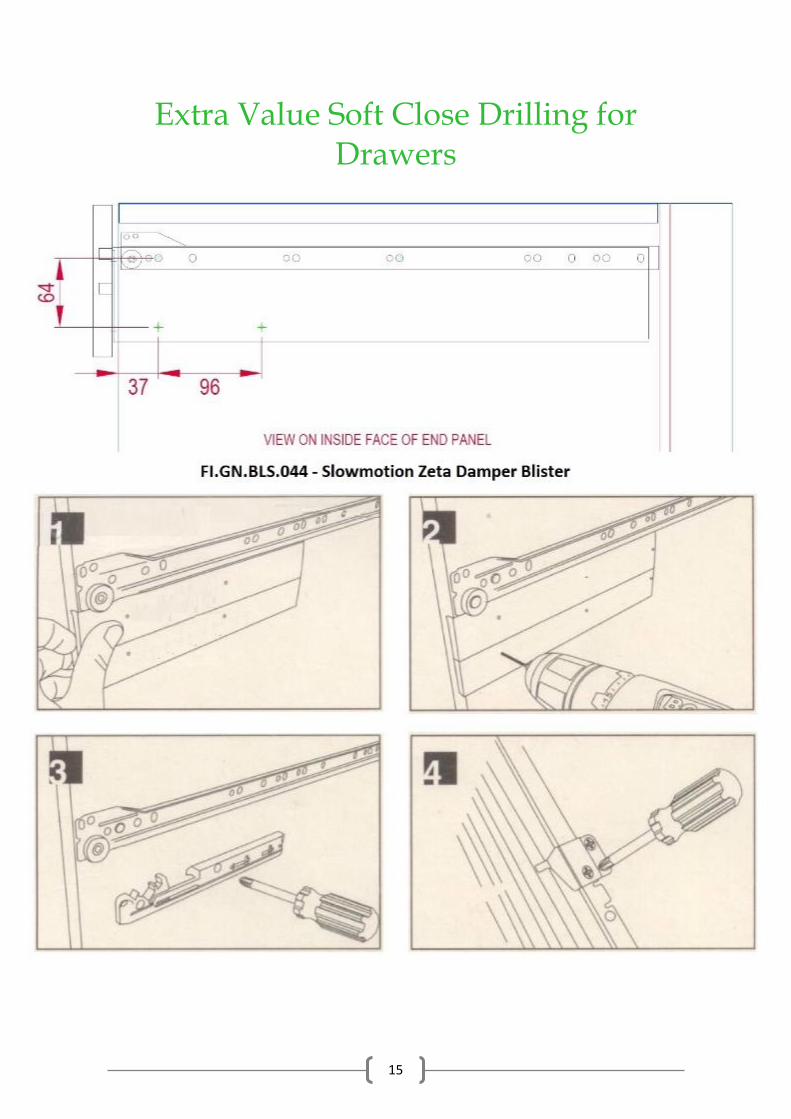
Extra Value Soft Close Drilling for Drawers
16
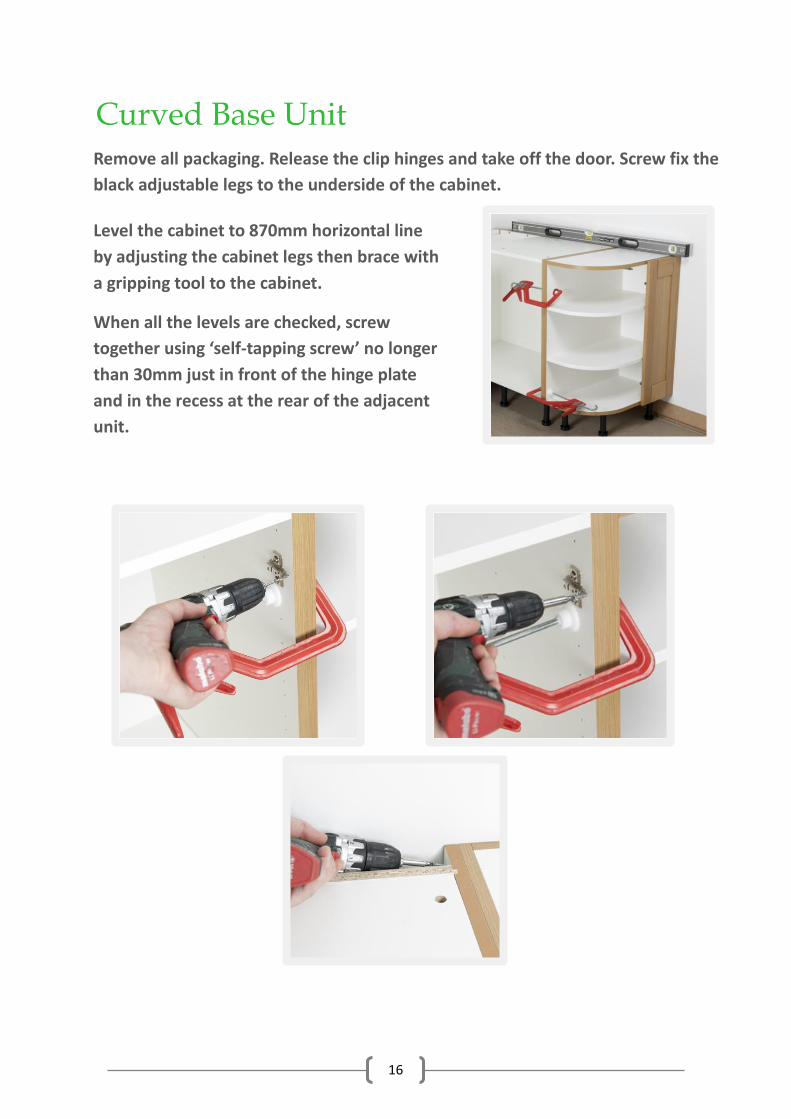
Curved Base Unit
Level the cabinet to 870mm horizontal line
by adjusting the cabinet legs then brace with
a gripping tool to the cabinet.
When all the levels are checked, screw
together using ‘self-tapping screw’ no longer
than 30mm just in front of the hinge plate
and in the recess at the rear of the adjacent
unit.
Remove all packaging. Release the clip hinges and take off the door. Screw fix the
black adjustable legs to the underside of the cabinet.
17
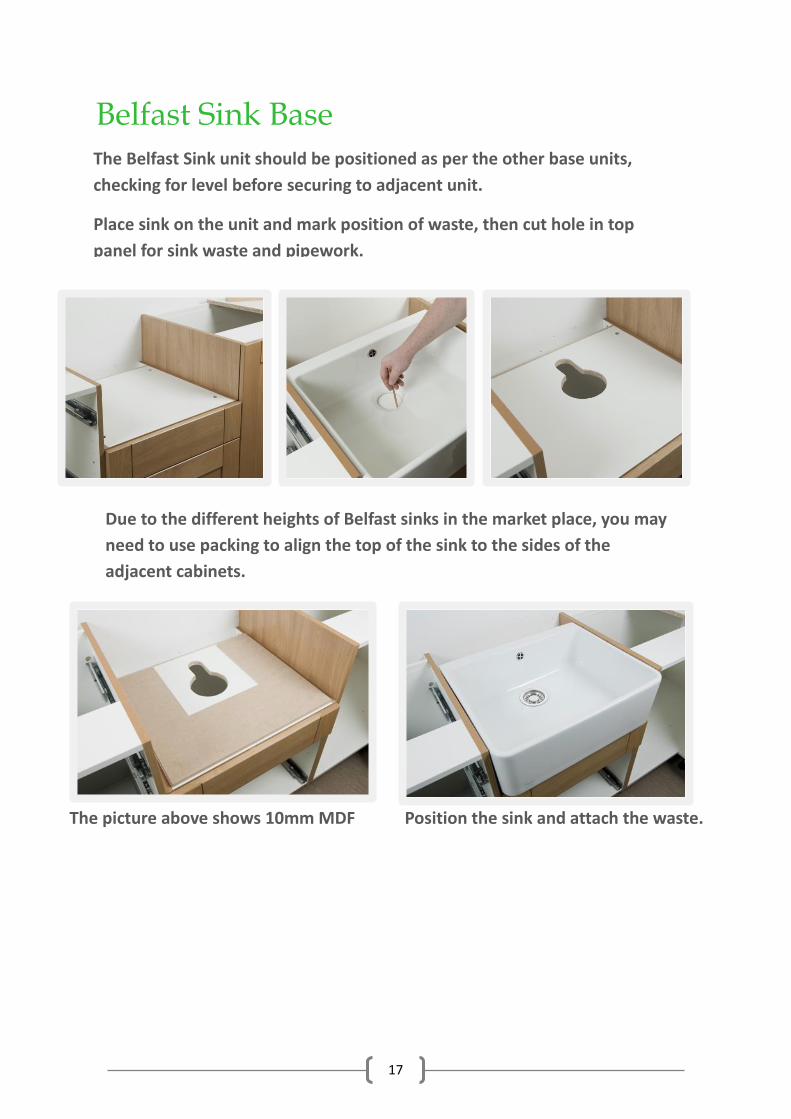
Belfast Sink Base
The Belfast Sink unit should be positioned as per the other base units,
checking for level before securing to adjacent unit.
Place sink on the unit and mark position of waste, then cut hole in top
panel for sink waste and pipework.
Due to the different heights of Belfast sinks in the market place, you may
need to use packing to align the top of the sink to the sides of the
adjacent cabinets.
The picture above shows 10mm MDF Position the sink and attach the waste.

18
Half Height Base Unit
Remove the drawer, check level and brace to adjacent unit with gripping tool. It
may need extra support at this stage, if this is to be the last unit on the run.
Drill holes in the back panel and mark the wall for extra fixing points. Remove the
cabinet and drill/insert fixings into the wall. Replace your cabinet, re-check for
level and screw together through the side of the cabinet using ‘self-tapping screw’
no longer than 30mm and in the recess at the rear of the adjacent unit. Secure
through the back panel to the wall fixings.
19
Attaching Plinth
If you have ordered the Servo drawer system then your drawer base cabinets
will have the system pre-installed. You will need to house a transformer and
cradle below a base shelf in a chosen base cabinet and then connect the
single or multiple servo cabinets to the mains in a ring system.
Drawer sensor lighting is available in drawer base cabinets wider than
600mm. Lighting is installed once all base cabinets are fixed. You must
connect all strip lights to a transformer before linking to the mains.
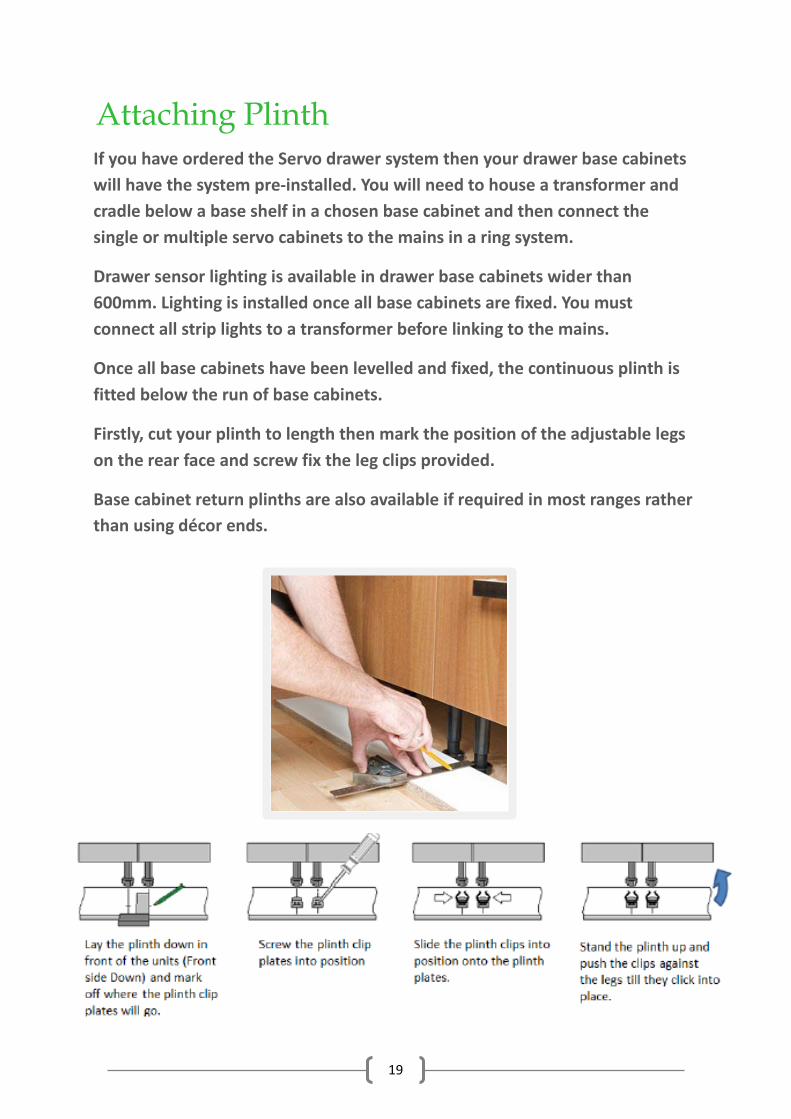
Once all base cabinets have been levelled and fixed, the continuous plinth is
fitted below the run of base cabinets.
Firstly, cut your plinth to length then mark the position of the adjustable legs
on the rear face and screw fix the leg clips provided.
Base cabinet return plinths are also available if required in most ranges rather
than using décor ends.
20
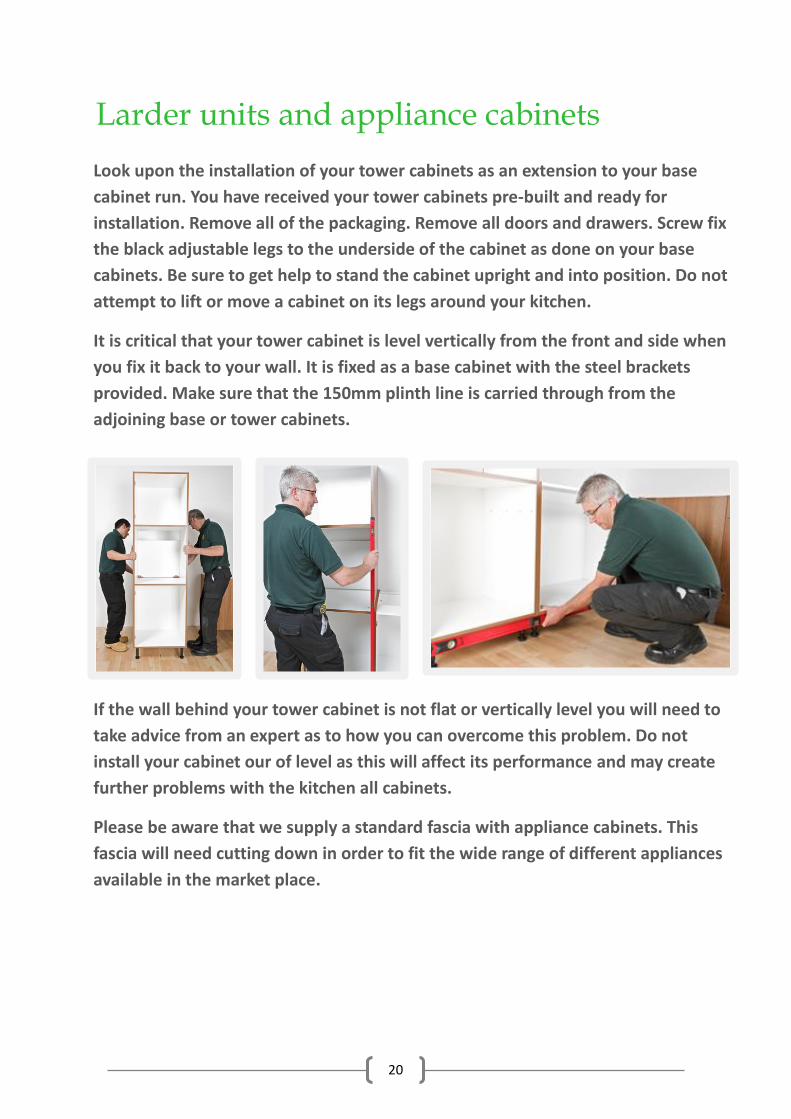
Larder units and appliance cabinets
Look upon the installation of your tower cabinets as an extension to your base
cabinet run. You have received your tower cabinets pre-built and ready for
installation. Remove all of the packaging. Remove all doors and drawers. Screw fix
the black adjustable legs to the underside of the cabinet as done on your base
cabinets. Be sure to get help to stand the cabinet upright and into position. Do not
attempt to lift or move a cabinet on its legs around your kitchen.
It is critical that your tower cabinet is level vertically from the front and side when
you fix it back to your wall. It is fixed as a base cabinet with the steel brackets
provided. Make sure that the 150mm plinth line is carried through from the
adjoining base or tower cabinets.
If the wall behind your tower cabinet is not flat or vertically level you will need to
take advice from an expert as to how you can overcome this problem. Do not
install your cabinet our of level as this will affect its performance and may create
further problems with the kitchen all cabinets.
Please be aware that we supply a standard fascia with appliance cabinets. This
fascia will need cutting down in order to fit the wide range of different appliances
available in the market place.
21
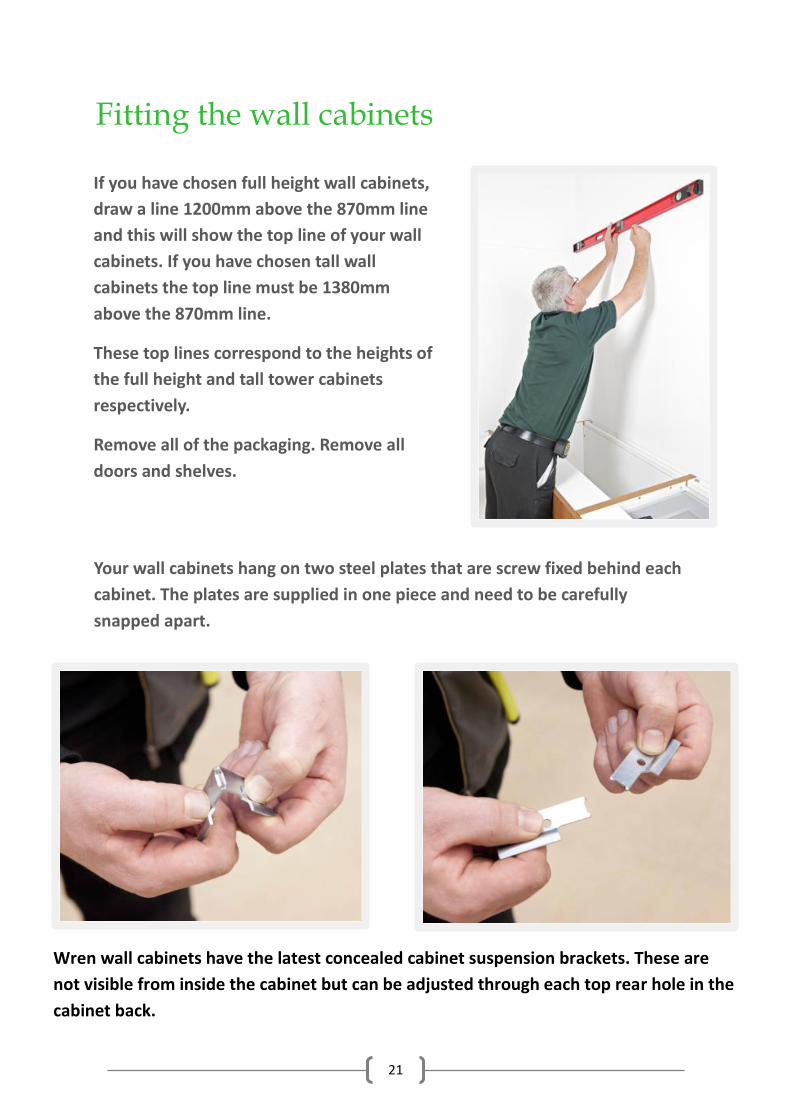
Fitting the wall cabinets
If you have chosen full height wall cabinets,
draw a line 1200mm above the 870mm line
and this will show the top line of your wall
cabinets. If you have chosen tall wall
cabinets the top line must be 1380mm
above the 870mm line.
These top lines correspond to the heights of
the full height and tall tower cabinets
respectively.
Remove all of the packaging. Remove all
doors and shelves.
Your wall cabinets hang on two steel plates that are screw fixed behind each
cabinet. The plates are supplied in one piece and need to be carefully
snapped apart.
Wren wall cabinets have the latest concealed cabinet suspension brackets. These are
not visible from inside the cabinet but can be adjusted through each top rear hole in the
cabinet back.
22
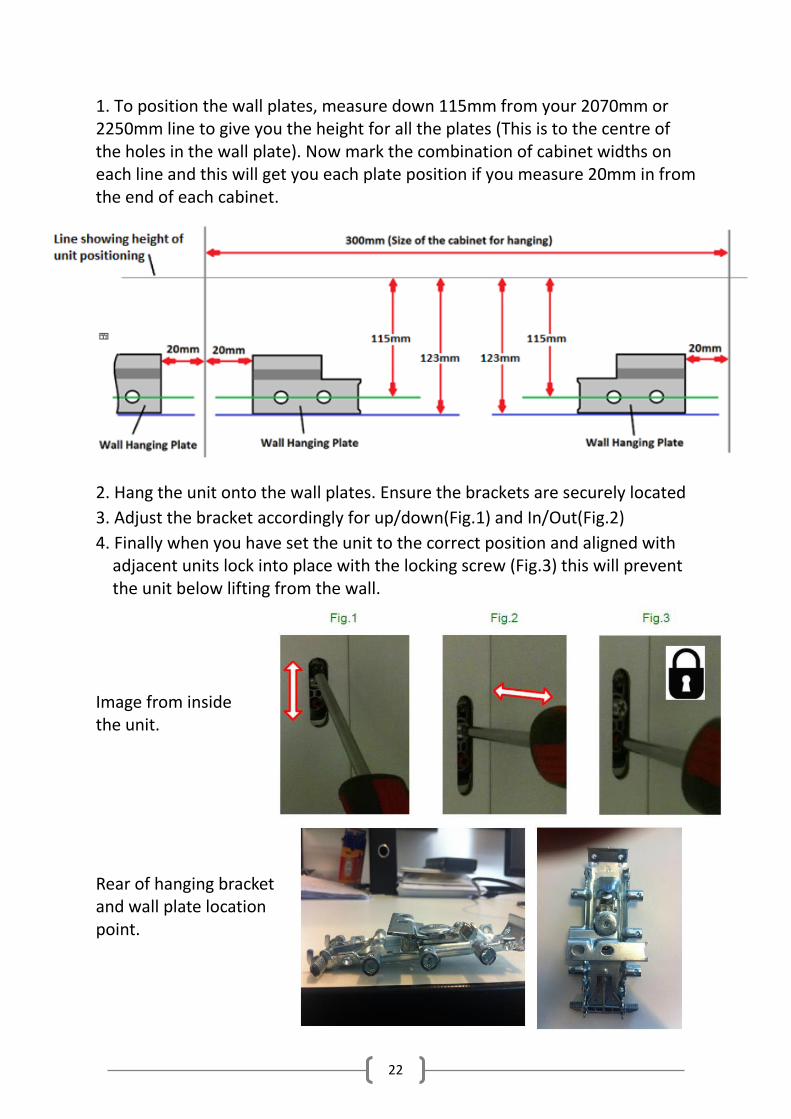
1. To position the wall plates, measure down 115mm from your 2070mm or 2250mm line to give you the height for all the plates (This is to the centre of the holes in the wall plate). Now mark the combination of cabinet widths on each line and this will get you each plate position if you measure 20mm in from the end of each cabinet. 2. Hang the unit onto the wall plates. Ensure the brackets are securely located
3. Adjust the bracket accordingly for up/down(Fig.1) and In/Out(Fig.2)
4. Finally when you have set the unit to the correct position and aligned with adjacent units lock into place with the locking screw (Fig.3) this will prevent the unit below lifting from the wall. Image from inside the unit. Rear of hanging bracket and wall plate location point.
23
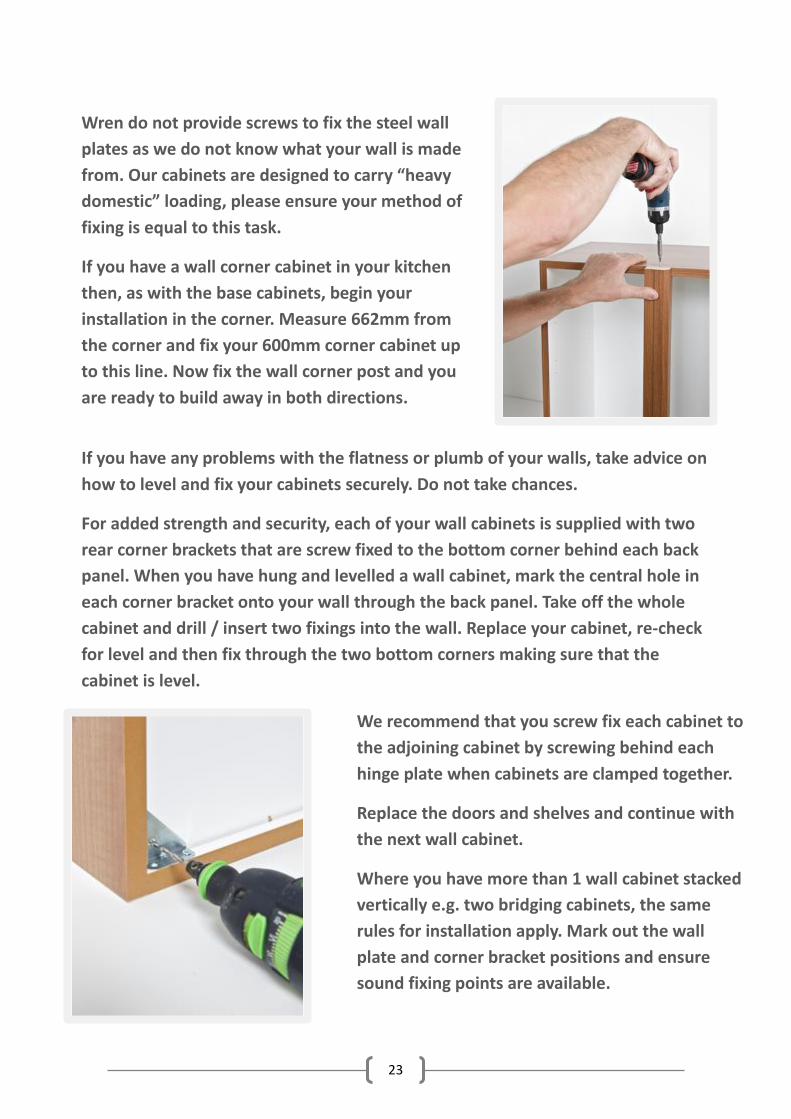
Wren do not provide screws to fix the steel wall
plates as we do not know what your wall is made
from. Our cabinets are designed to carry “heavy
domestic” loading, please ensure your method of
fixing is equal to this task.
If you have a wall corner cabinet in your kitchen
then, as with the base cabinets, begin your
installation in the corner. Measure 662mm from
the corner and fix your 600mm corner cabinet up
to this line. Now fix the wall corner post and you
are ready to build away in both directions.
If you have any problems with the flatness or plumb of your walls, take advice on
how to level and fix your cabinets securely. Do not take chances.
For added strength and security, each of your wall cabinets is supplied with two
rear corner brackets that are screw fixed to the bottom corner behind each back
panel. When you have hung and levelled a wall cabinet, mark the central hole in
each corner bracket onto your wall through the back panel. Take off the whole
cabinet and drill / insert two fixings into the wall. Replace your cabinet, re-check
for level and then fix through the two bottom corners making sure that the
cabinet is level.
We recommend that you screw fix each cabinet to
the adjoining cabinet by screwing behind each
hinge plate when cabinets are clamped together.
Replace the doors and shelves and continue with
the next wall cabinet.
Where you have more than 1 wall cabinet stacked
vertically e.g. two bridging cabinets, the same
rules for installation apply. Mark out the wall
plate and corner bracket positions and ensure
sound fixing points are available.

24
25
Cornice and Light Pelmet
If you have chosen to attach cornice and light pelmets to your kitchen wall
cabinets, here are some pointers to carry out a successful installation.
Traditional style cornice and modern combined cornice and light pelmets
should be positioned so that they cover the doors in their run of wall
cabinets.
Where a length of cornice/pelmet butts up to a returning wall, simply cut to
length and pre-drill the rear section of the moulding before screw fixing it into
the wall cabinet.
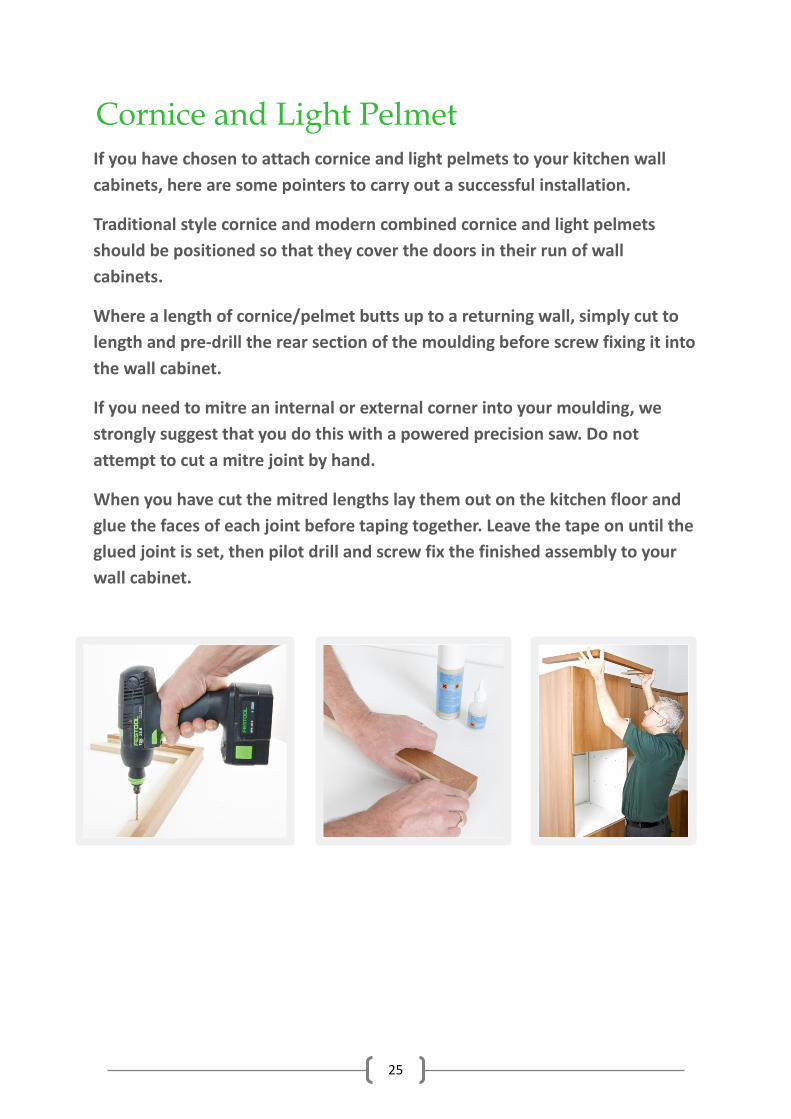
If you need to mitre an internal or external corner into your moulding, we
strongly suggest that you do this with a powered precision saw. Do not
attempt to cut a mitre joint by hand.
When you have cut the mitred lengths lay them out on the kitchen floor and
glue the faces of each joint before taping together. Leave the tape on until the
glued joint is set, then pilot drill and screw fix the finished assembly to your
wall cabinet.
26
Curved Cornice & Light Pelmet
If your kitchen has curved wall units, there is a pre-shaped modern style and
traditional style cornice and light pelmet available to match the curve of the door.
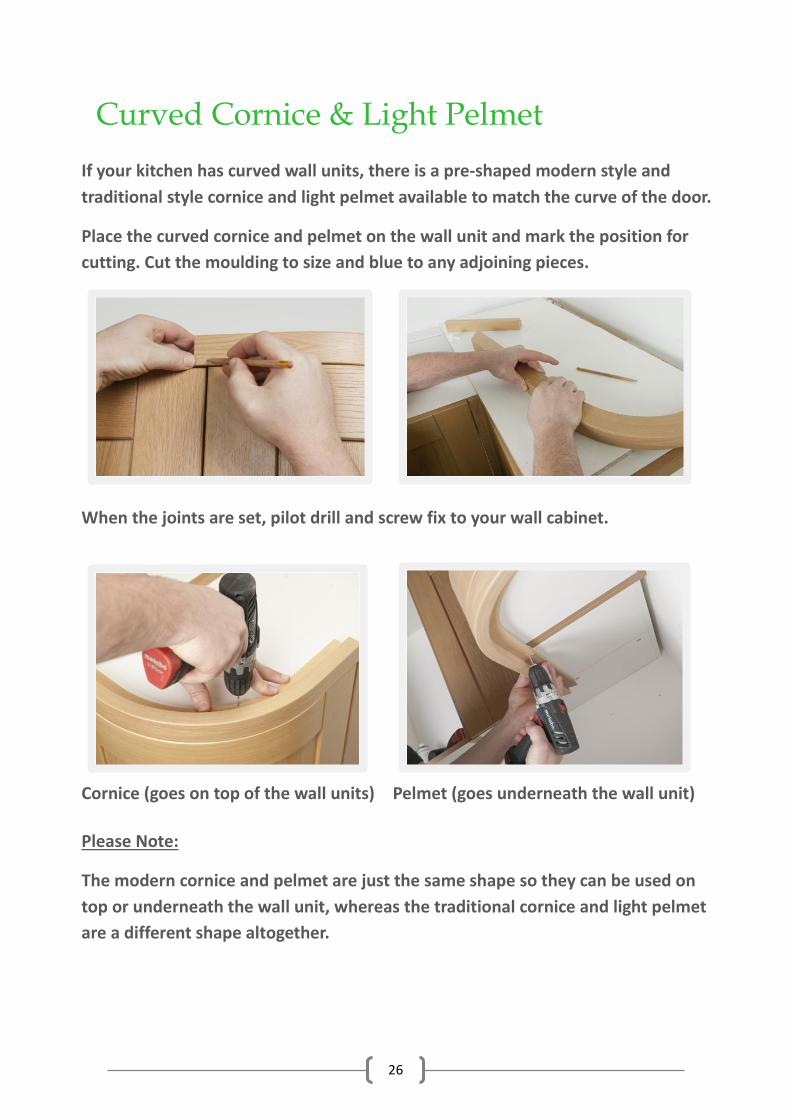
Place the curved cornice and pelmet on the wall unit and mark the position for
cutting. Cut the moulding to size and blue to any adjoining pieces.
When the joints are set, pilot drill and screw fix to your wall cabinet.
Cornice (goes on top of the wall units) Pelmet (goes underneath the wall unit)
Please Note:
The modern cornice and pelmet are just the same shape so they can be used on
top or underneath the wall unit, whereas the traditional cornice and light pelmet
are a different shape altogether.

27
Curved Posts
Cut the post to the length required and
attach to the relevant clad panel.
Mark the post to match the thickness
of the door to be fitted, and trim the
panel so the post will fit flush to the
front edge of the door.
Attach the post to the cabinet using self-tapping screws and to the wall with
‘L Shaped’ brackets or fixing blocks (not supplied).
28
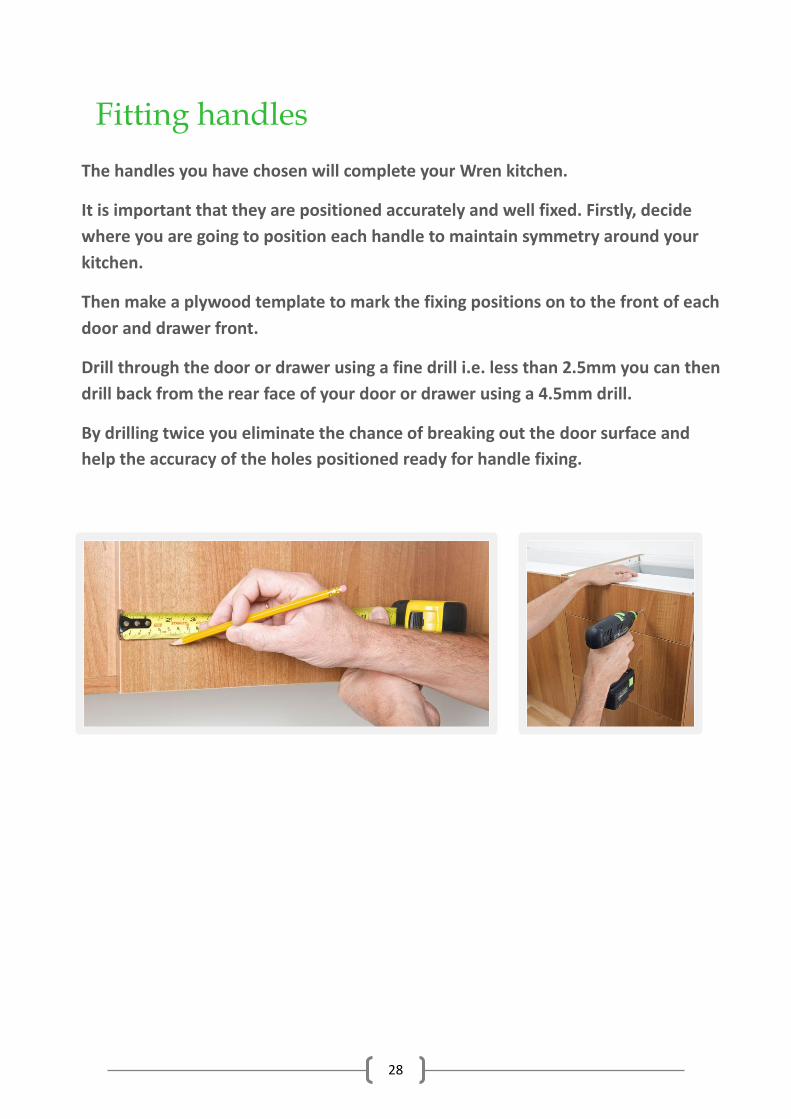
Fitting handles
The handles you have chosen will complete your Wren kitchen.
It is important that they are positioned accurately and well fixed. Firstly, decide
where you are going to position each handle to maintain symmetry around your
kitchen.
Then make a plywood template to mark the fixing positions on to the front of each
door and drawer front.
Drill through the door or drawer using a fine drill i.e. less than 2.5mm you can then
drill back from the rear face of your door or drawer using a 4.5mm drill.
By drilling twice you eliminate the chance of breaking out the door surface and
help the accuracy of the holes positioned ready for handle fixing.
29
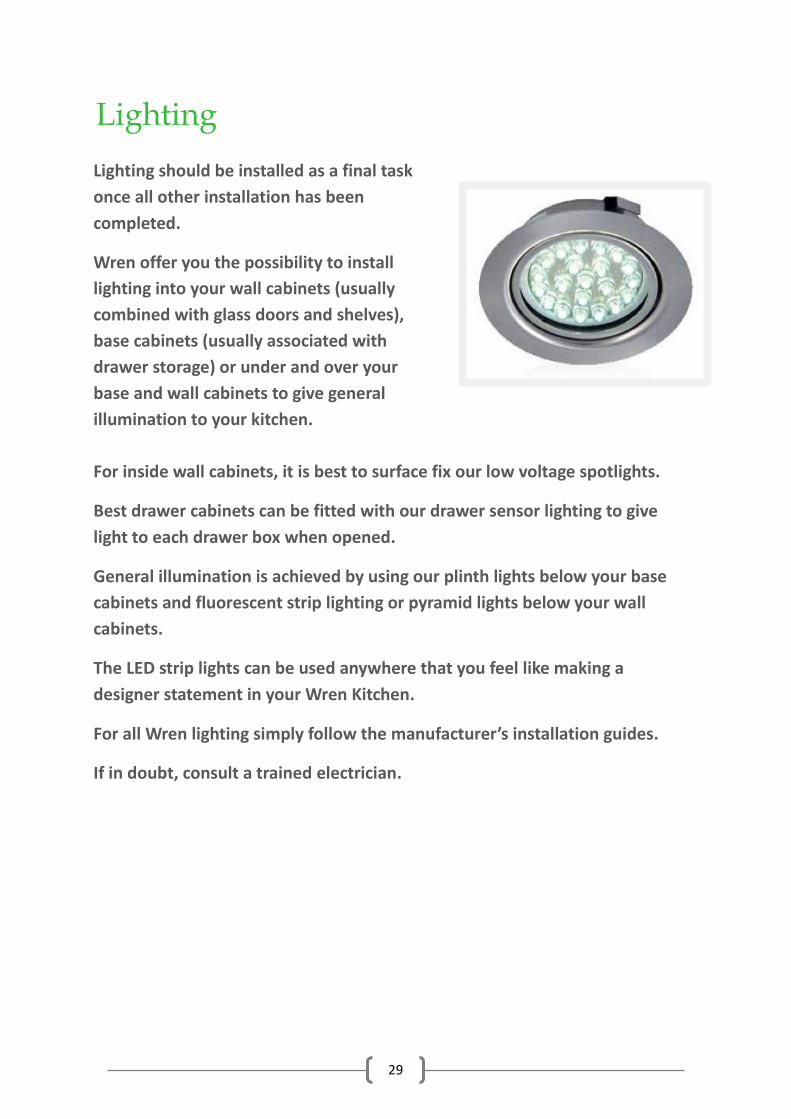
Lighting
Lighting should be installed as a final task
once all other installation has been
completed.
Wren offer you the possibility to install
lighting into your wall cabinets (usually
combined with glass doors and shelves),
base cabinets (usually associated with
drawer storage) or under and over your
base and wall cabinets to give general
illumination to your kitchen.
For inside wall cabinets, it is best to surface fix our low voltage spotlights.
Best drawer cabinets can be fitted with our drawer sensor lighting to give
light to each drawer box when opened.
General illumination is achieved by using our plinth lights below your base
cabinets and fluorescent strip lighting or pyramid lights below your wall
cabinets.
The LED strip lights can be used anywhere that you feel like making a
designer statement in your Wren Kitchen.
For all Wren lighting simply follow the manufacturer’s installation guides.
If in doubt, consult a trained electrician.