word 2013 basic functions
DESCRIPTION
Word 2013 Intro.TRANSCRIPT
Word 2013
Getting to Know Word42 2 8 9
Introduction
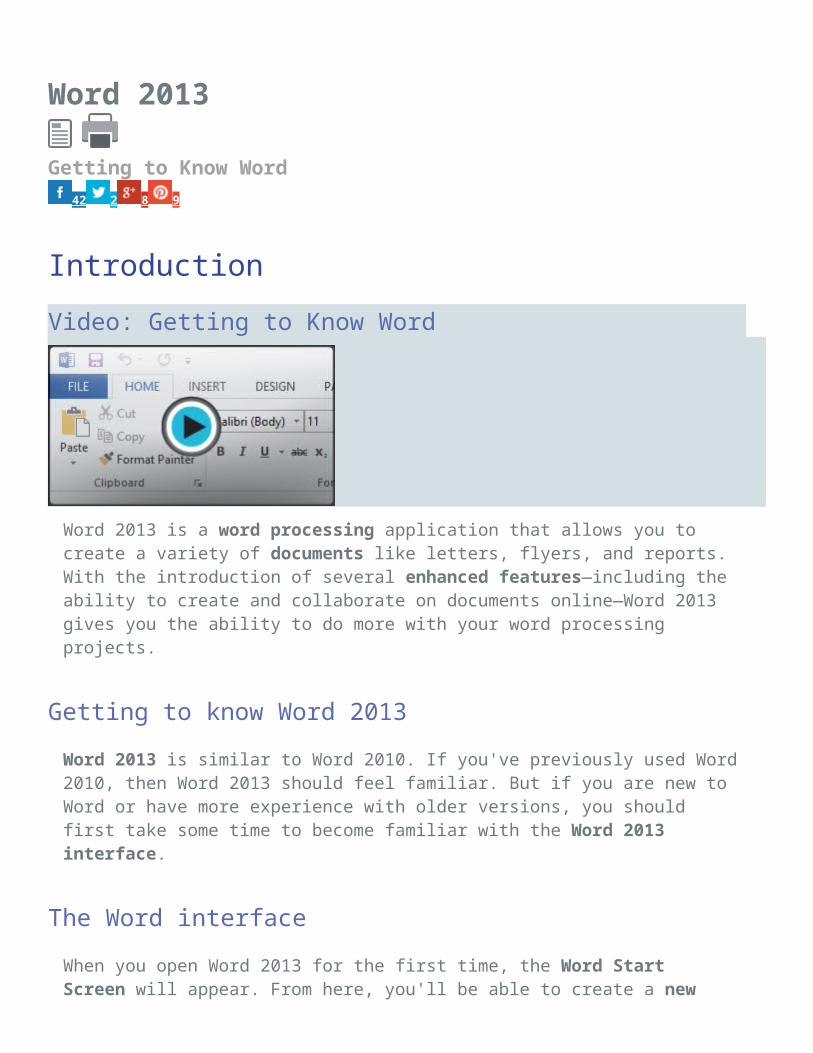
Video: Getting to Know Word
Word 2013 is a word processing application that allows you to create a variety of documents like letters, flyers, and reports. With the introduction of several enhanced features—including the ability to create and collaborate on documents online—Word 2013 gives you the ability to do more with your word processing projects.
Getting to know Word 2013
Word 2013 is similar to Word 2010. If you've previously used Word 2010, then Word 2013 should feel familiar. But if you are new to Word or have more experience with older versions, you should first take some time to become familiar with the Word 2013 interface.
The Word interface
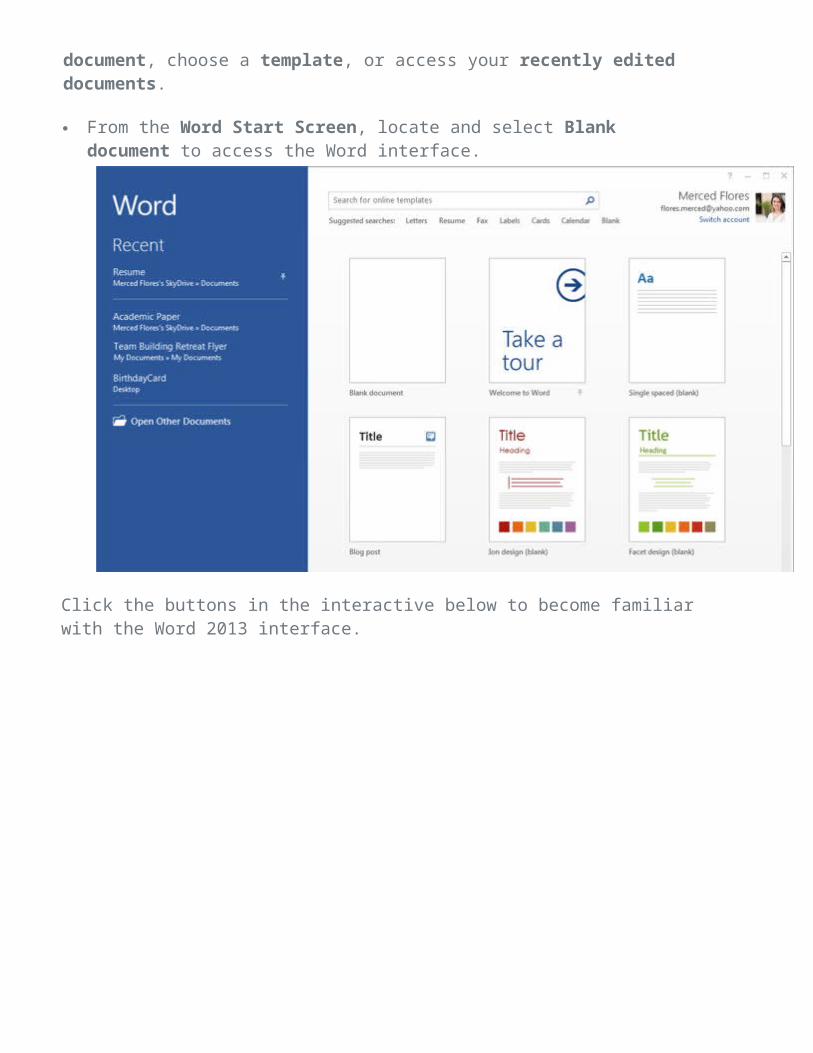
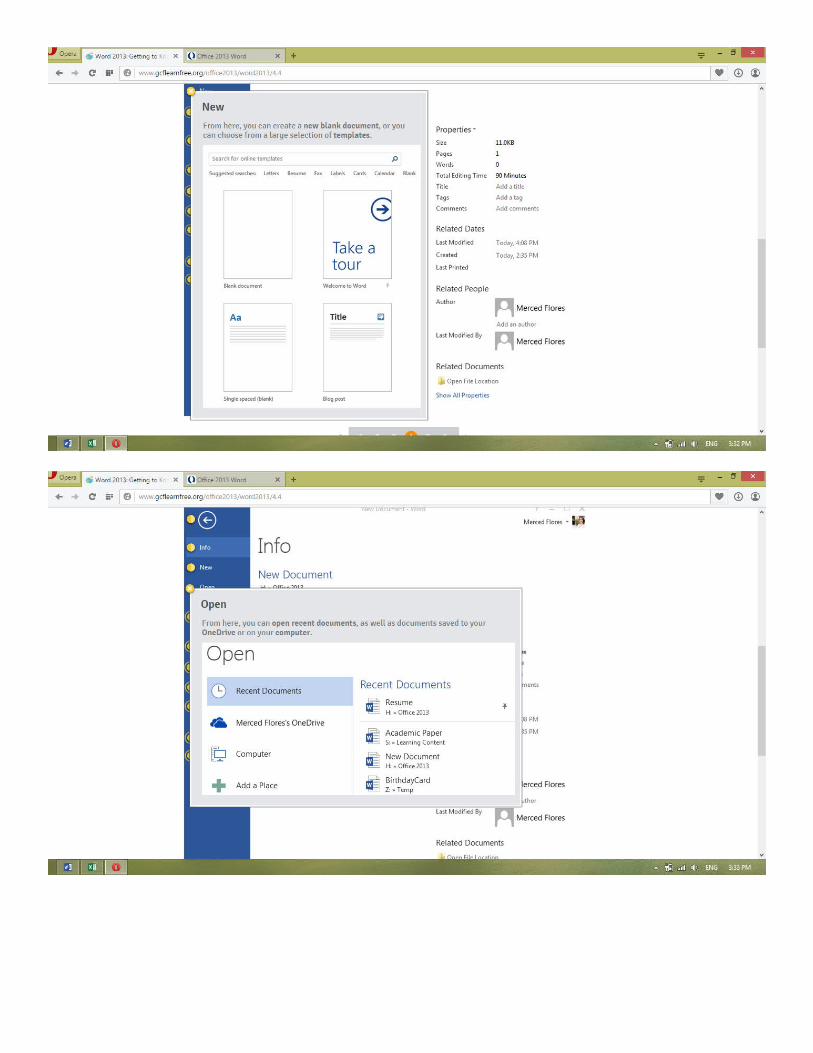
When you open Word 2013 for the first time, the Word Start Screen will appear. From here, you'll be able to create a new document, choose a template, or access your recently edited documents.
From the Word Start Screen, locate and select Blank document to access the Word interface.
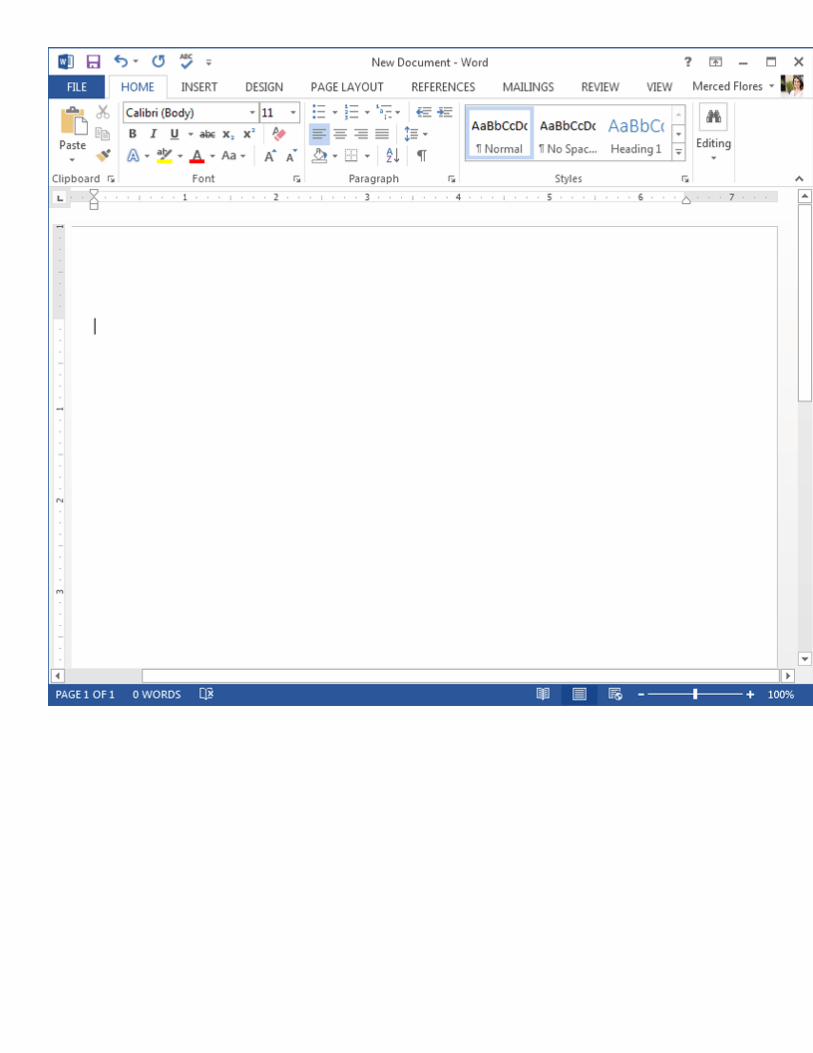
Click the buttons in the interactive below to become familiar with the Word 2013 interface.

Working with the Word environmentIf you've previously used Word 2010 or 2007, then Word 2013 should feel familiar. It continues to use features like the Ribbon and the Quick Access toolbar—where you will find commands to perform common tasks in Word—as well as Backstage view.
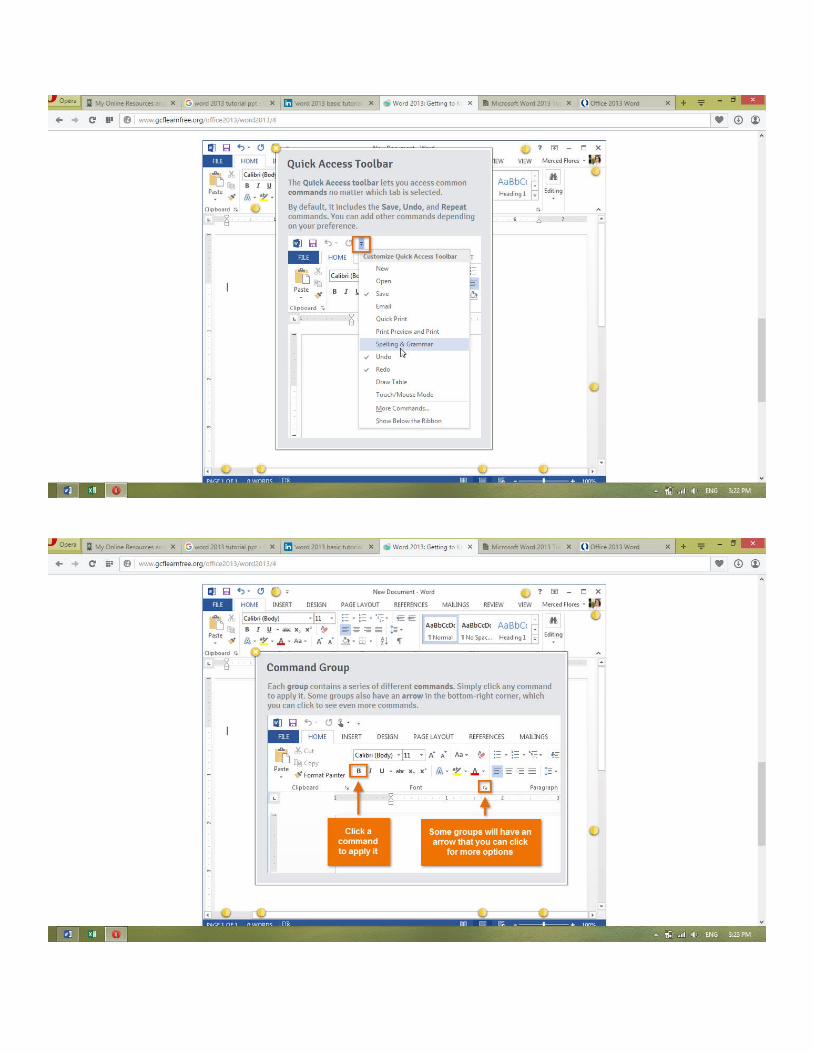
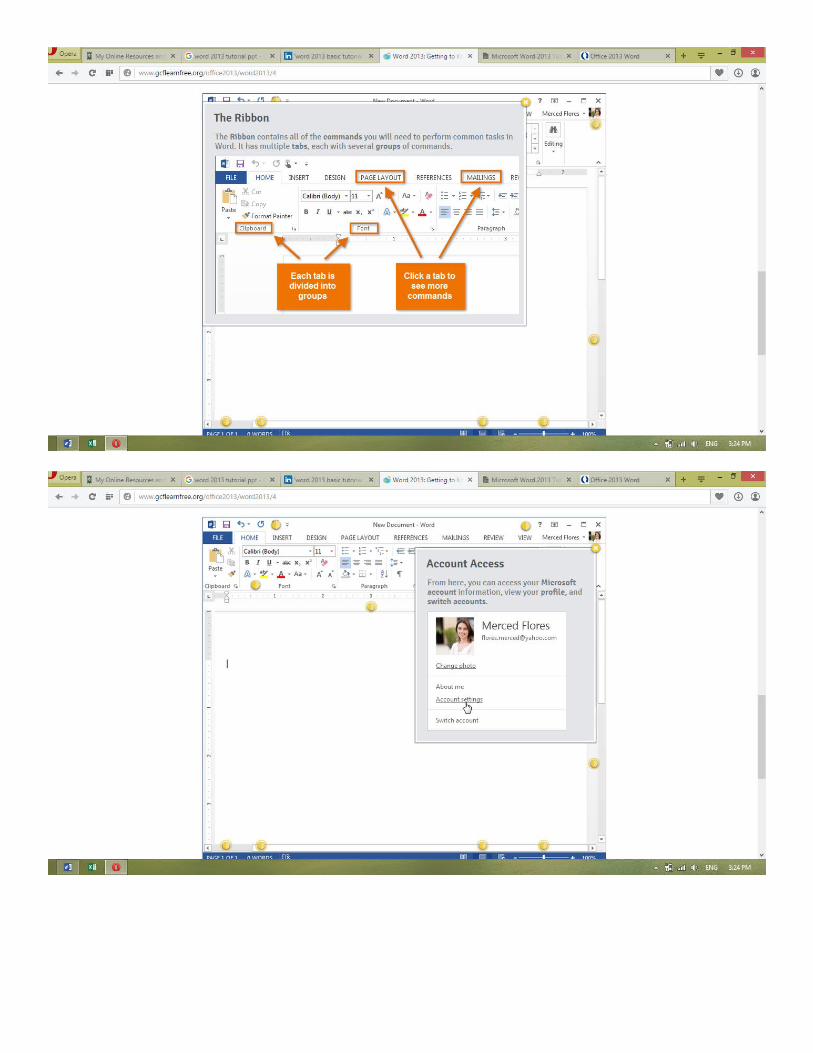
The RibbonWord 2013 uses a tabbed Ribbon system instead of traditional menus. The Ribbon contains multiple tabs, each with several groups of commands. You will use these tabs to perform the most common tasks in Word.
Click the arrows in the slideshow below to learn more about the different commands available within each tab on the Ribbon.
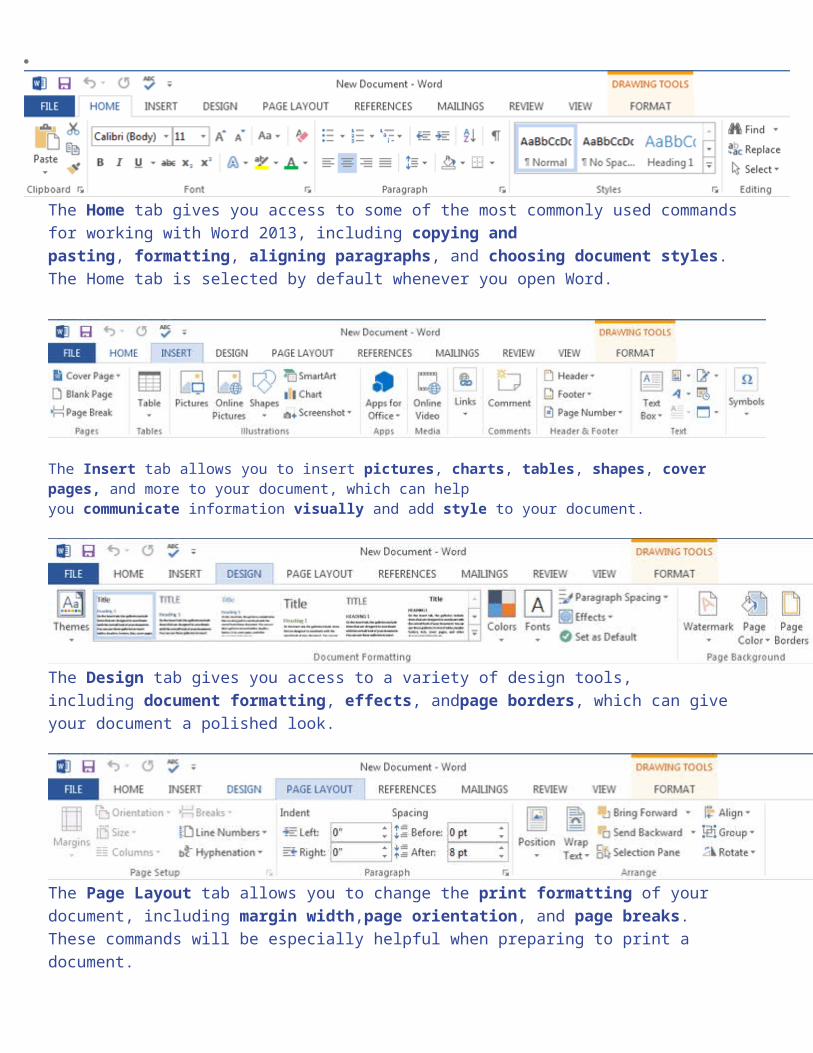
The Home tab gives you access to some of the most commonly used commands for working with Word 2013, including copying and pasting, formatting, aligning paragraphs, and choosing document styles. The Home tab is selected by default whenever you open Word.
The Insert tab allows you to insert pictures, charts, tables, shapes, cover pages, and more to your document, which can help you communicate information visually and add style to your document.
The Design tab gives you access to a variety of design tools, including document formatting, effects, andpage borders, which can give your document a polished look.
The Page Layout tab allows you to change the print formatting of your document, including margin width,page orientation, and page breaks. These commands will be especially helpful when preparing to print a document.
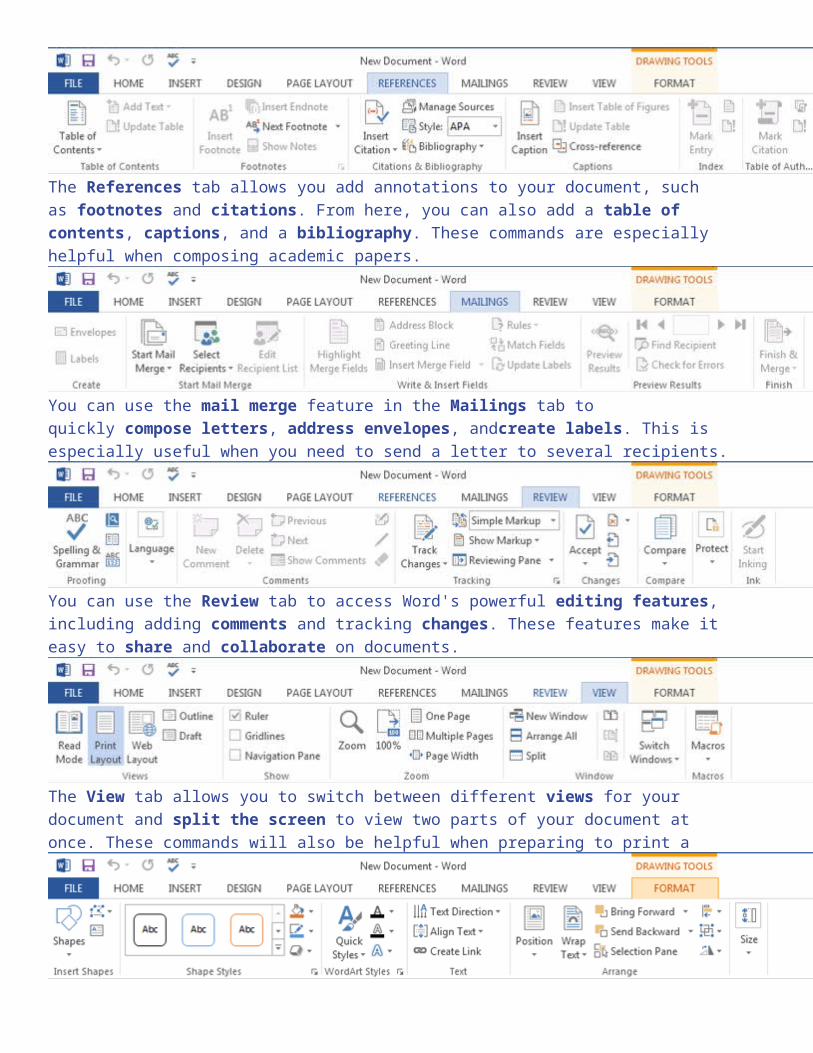
The References tab allows you add annotations to your document, such as footnotes and citations. From here, you can also add a table of contents, captions, and a bibliography. These commands are especially helpful when composing academic papers.
You can use the mail merge feature in the Mailings tab to quickly compose letters, address envelopes, andcreate labels. This is especially useful when you need to send a letter to several recipients.
You can use the Review tab to access Word's powerful editing features, including adding comments and tracking changes. These features make it easy to share and collaborate on documents.
The View tab allows you to switch between different views for your document and split the screen to view two parts of your document at once. These commands will also be helpful when preparing to print a
Contextual tabs will appear on the Ribbon when you're working with certain items, such as tables andpictures. These tabs contain special command groups that can help you format these items as needed.
Certain programs, such as Adobe Acrobat Reader, may install additional tabs to the Ribbon. These tabs are called add-ins.
To minimize and maximize the Ribbon:
The Ribbon is designed to respond to your current task, but you can choose to minimize the Ribbon if you find that it takes up too much screen space.
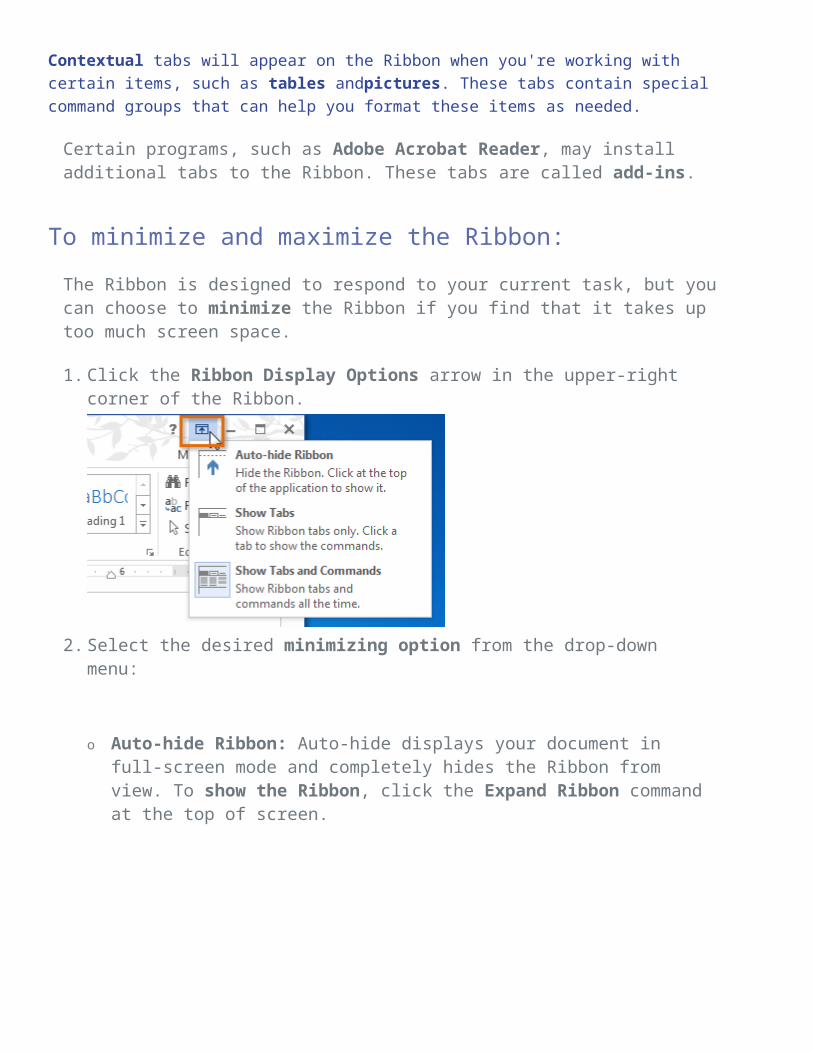
1. Click the Ribbon Display Options arrow in the upper-right corner of the Ribbon.
2. Select the desired minimizing option from the drop-down menu:
o Auto-hide Ribbon: Auto-hide displays your document in full-screen mode and completely hides the Ribbon from view. To show the Ribbon, click the Expand Ribbon command at the top of screen.
o Show tabs: This option hides all command groups when not in use, but tabs will remain visible. To show the Ribbon, simply click a tab.
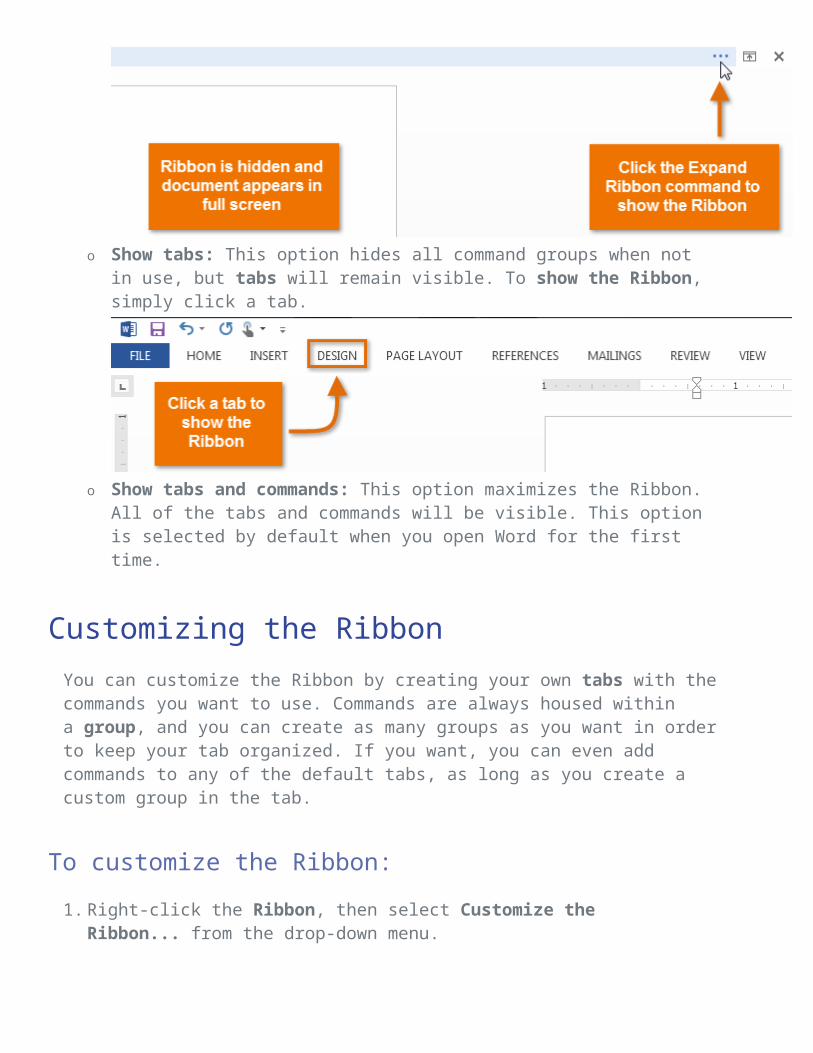
o Show tabs and commands: This option maximizes the Ribbon. All of the tabs and commands will be visible. This option is selected by default when you open Word for the first time.
Customizing the RibbonYou can customize the Ribbon by creating your own tabs with the commands you want to use. Commands are always housed within a group, and you can create as many groups as you want in order to keep your tab organized. If you want, you can even add commands to any of the default tabs, as long as you create a custom group in the tab.
To customize the Ribbon:
1. Right-click the Ribbon, then select Customize the Ribbon... from the drop-down menu.
2. The Word Options dialog box will appear. Locate and select New Tab.
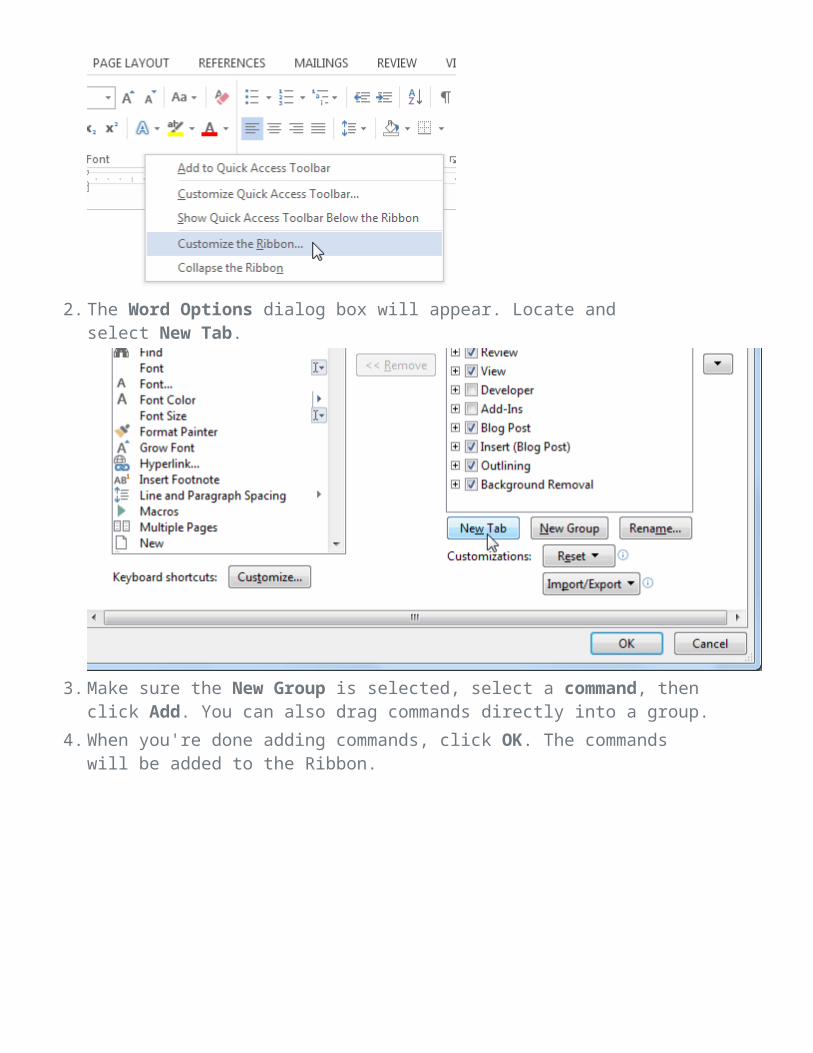
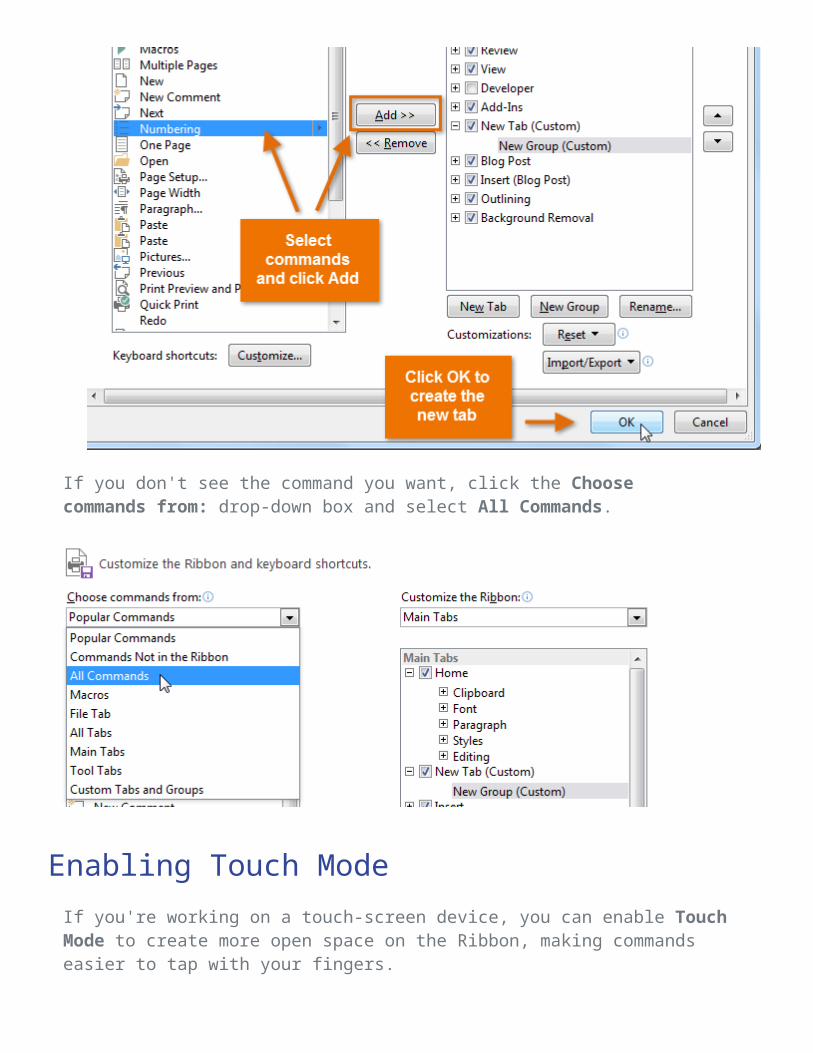
3. Make sure the New Group is selected, select a command, then click Add. You can also drag commands directly into a group.
4. When you're done adding commands, click OK. The commands will be added to the Ribbon.
If you don't see the command you want, click the Choose commands from: drop-down box and select All Commands.
Enabling Touch ModeIf you're working on a touch-screen device, you can enable Touch Mode to create more open space on the Ribbon, making commands easier to tap with your fingers.
To view the Ribbon in Touch Mode:
1. Click the drop-down arrow to the right of the Quick Access toolbar, then select Touch/Mouse Mode from the drop-down menu.
2. The Touch/Mouse Mode command will appear on the Quick Access toolbar.
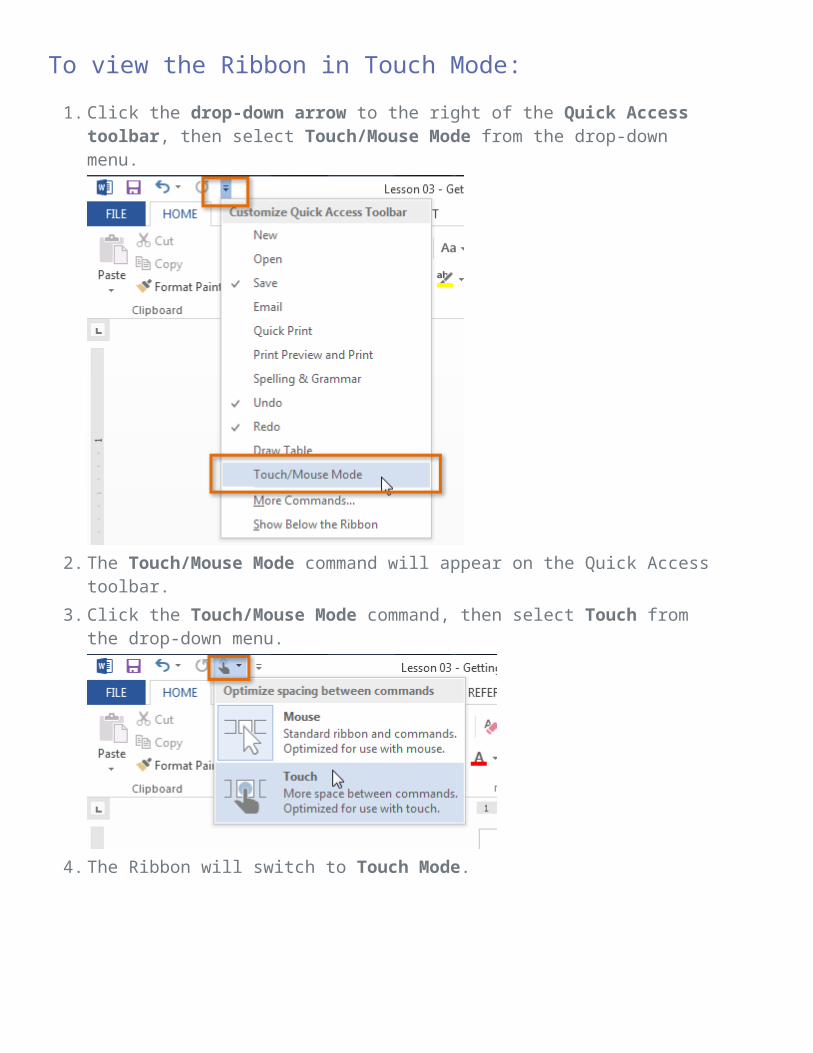
3. Click the Touch/Mouse Mode command, then select Touch from the drop-down menu.
4. The Ribbon will switch to Touch Mode.
To turn off Touch Mode, click the Touch/Mouse Mode command, then select Mouse from the drop-down menu.
The Quick Access toolbarLocated just above the Ribbon, the Quick Access toolbar lets you access common commands no matter which tab is selected. By default, it shows the Save, Undo, and Repeat commands. You can add other commands depending on your preference.
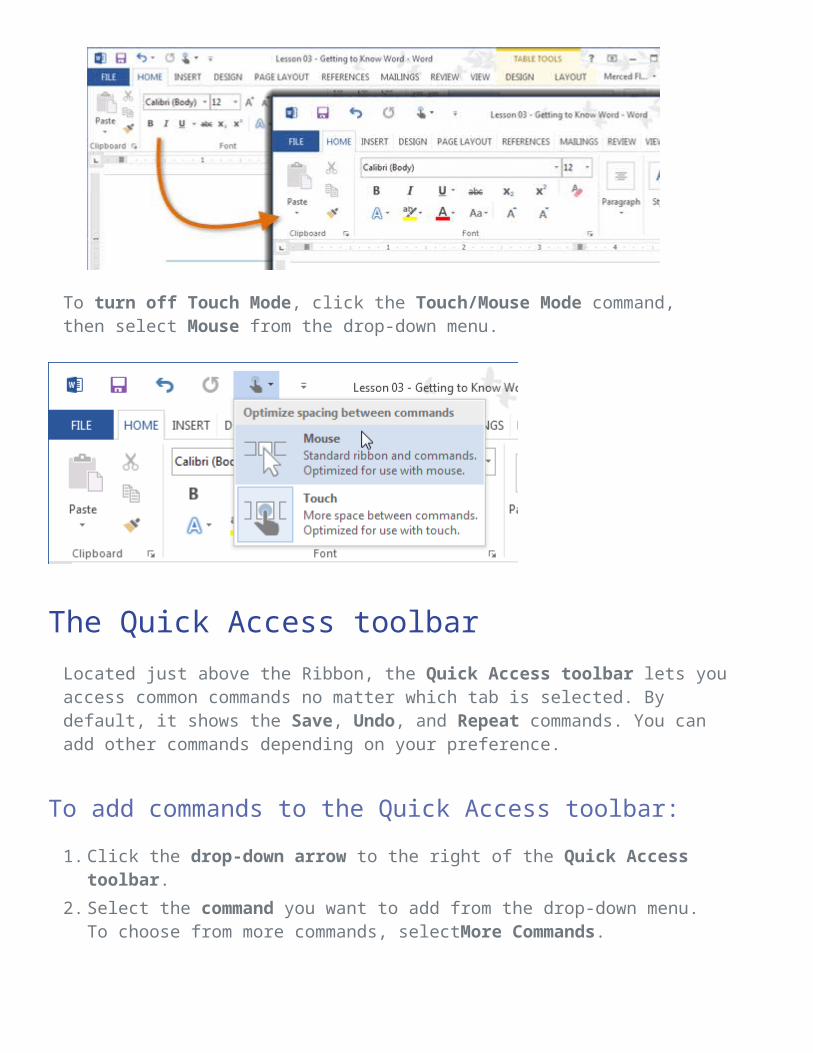
To add commands to the Quick Access toolbar:
1. Click the drop-down arrow to the right of the Quick Access toolbar.2. Select the command you want to add from the drop-down menu. To
choose from more commands, selectMore Commands.
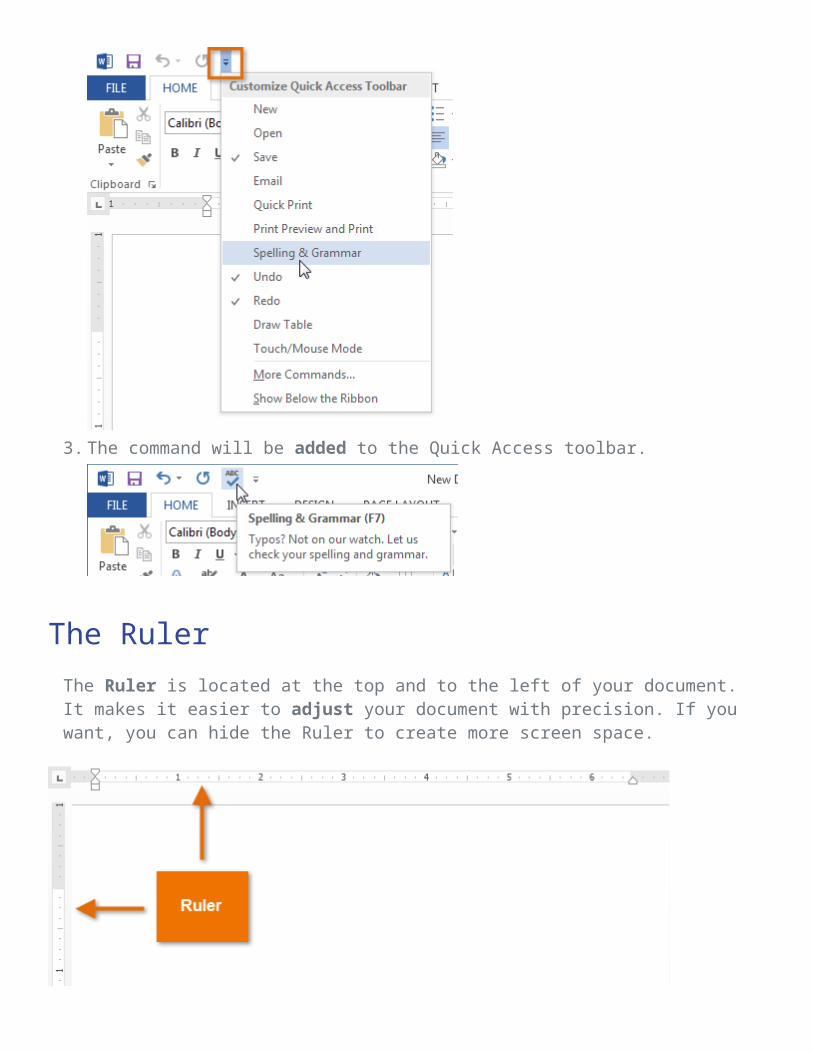
3. The command will be added to the Quick Access toolbar.
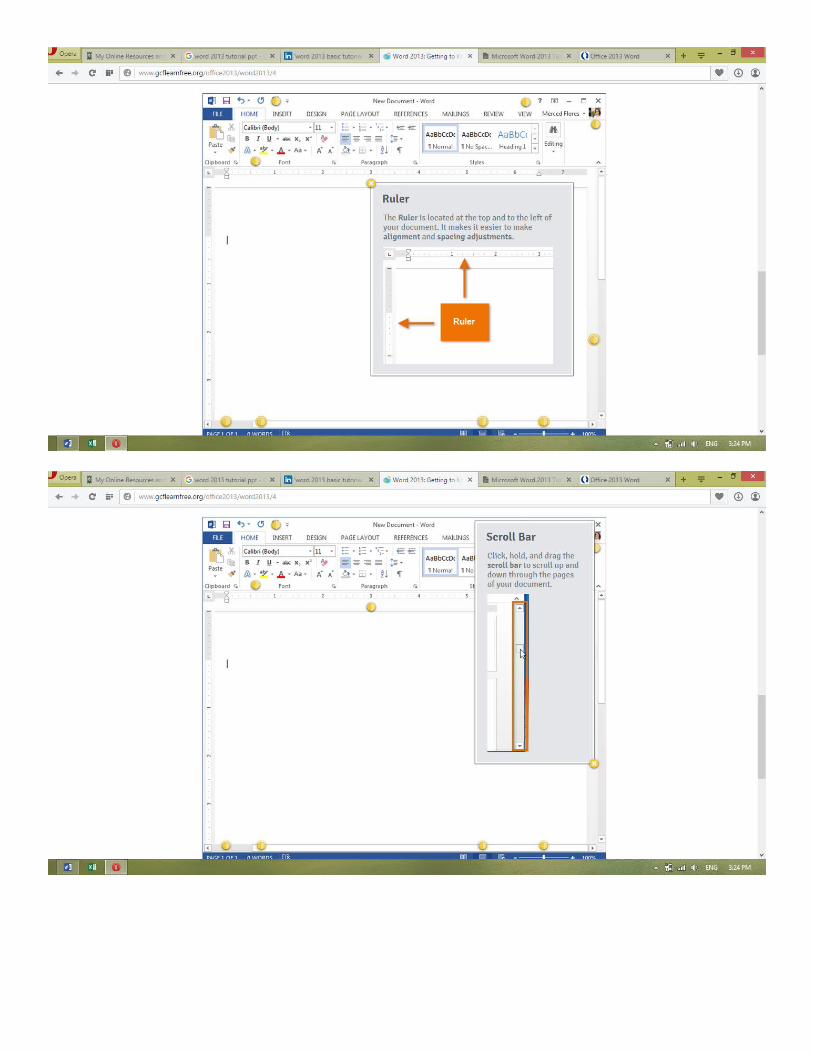
The RulerThe Ruler is located at the top and to the left of your document. It makes it easier to adjust your document with precision. If you want, you can hide the Ruler to create more screen space.
To show or hide the Ruler:
1. Click the View tab.2. Click the check box next to Ruler to show or hide the ruler.
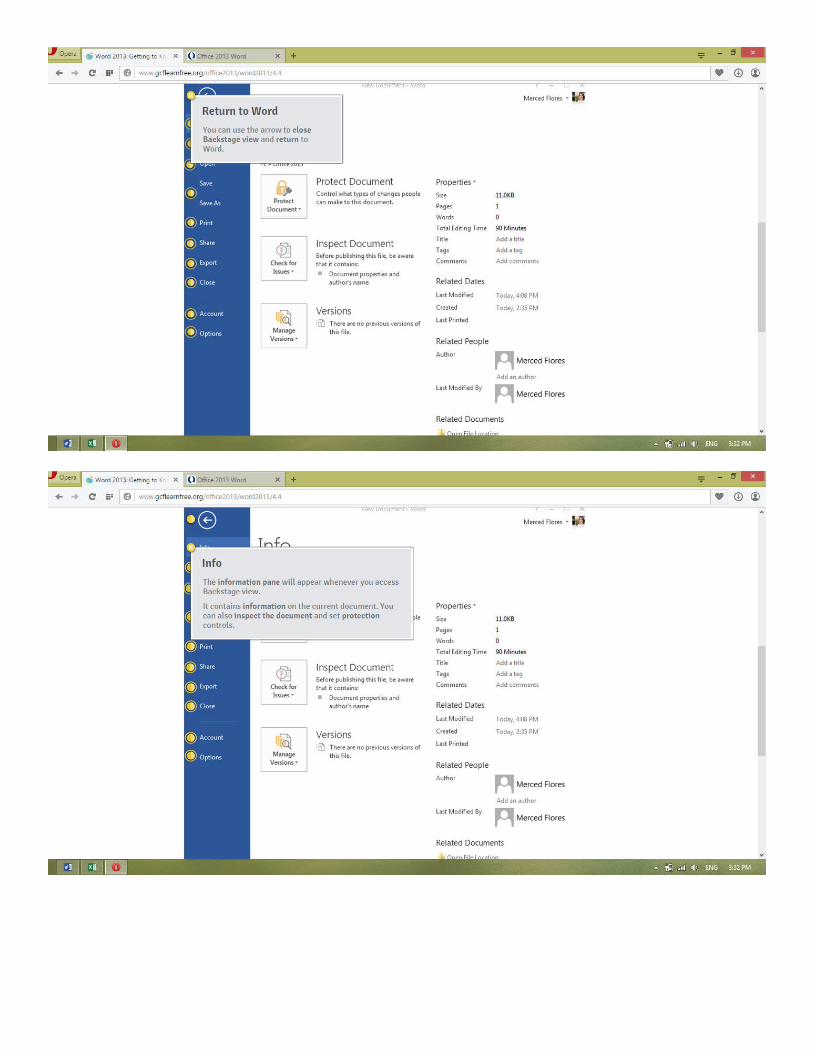
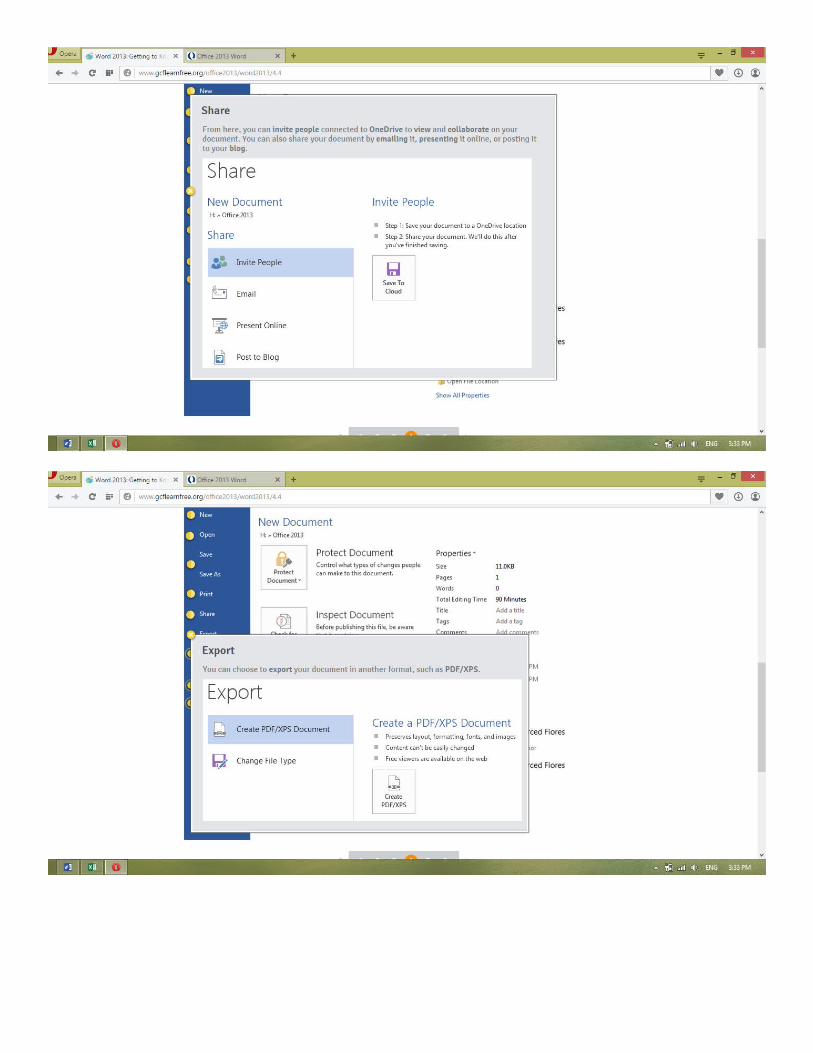
Backstage viewBackstage view gives you various options for saving, opening a file, printing, and sharing your document.
To access Backstage view:
1. Click the File tab on the Ribbon. Backstage view will appear.


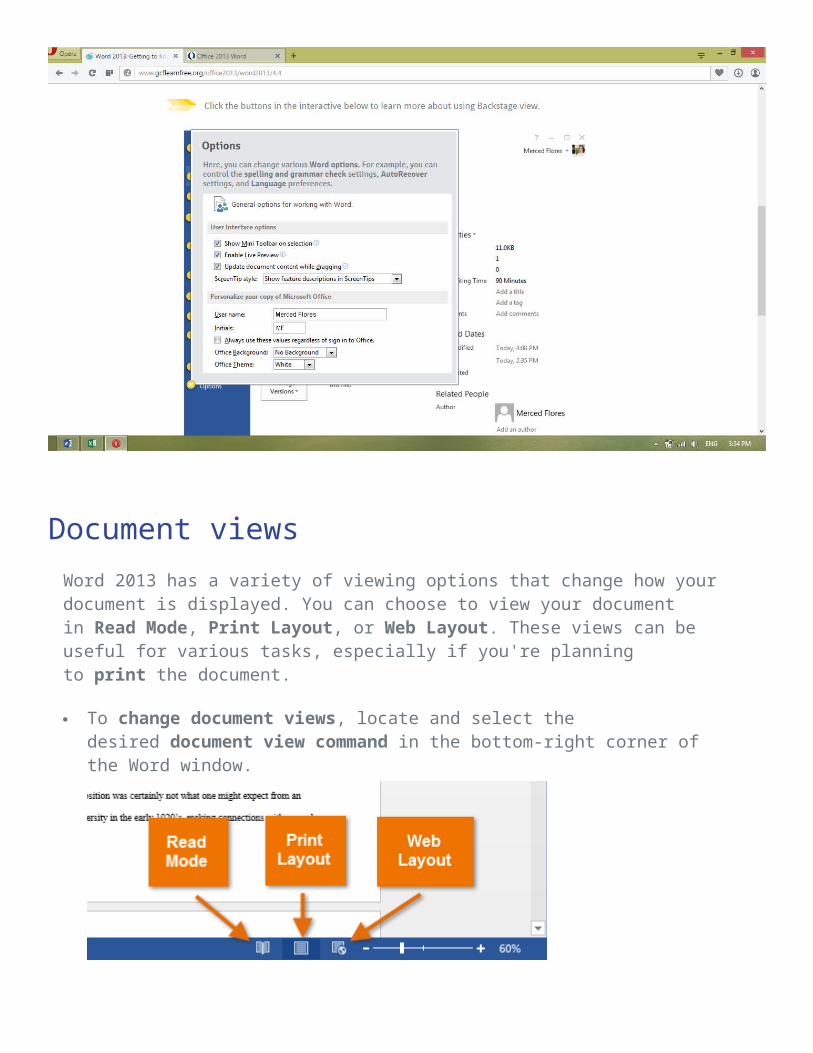
Document viewsWord 2013 has a variety of viewing options that change how your document is displayed. You can choose to view your document in Read Mode, Print Layout, or Web Layout. These views can be useful for various tasks, especially if you're planning to print the document.
To change document views, locate and select the desired document view command in the bottom-right corner of the Word window.
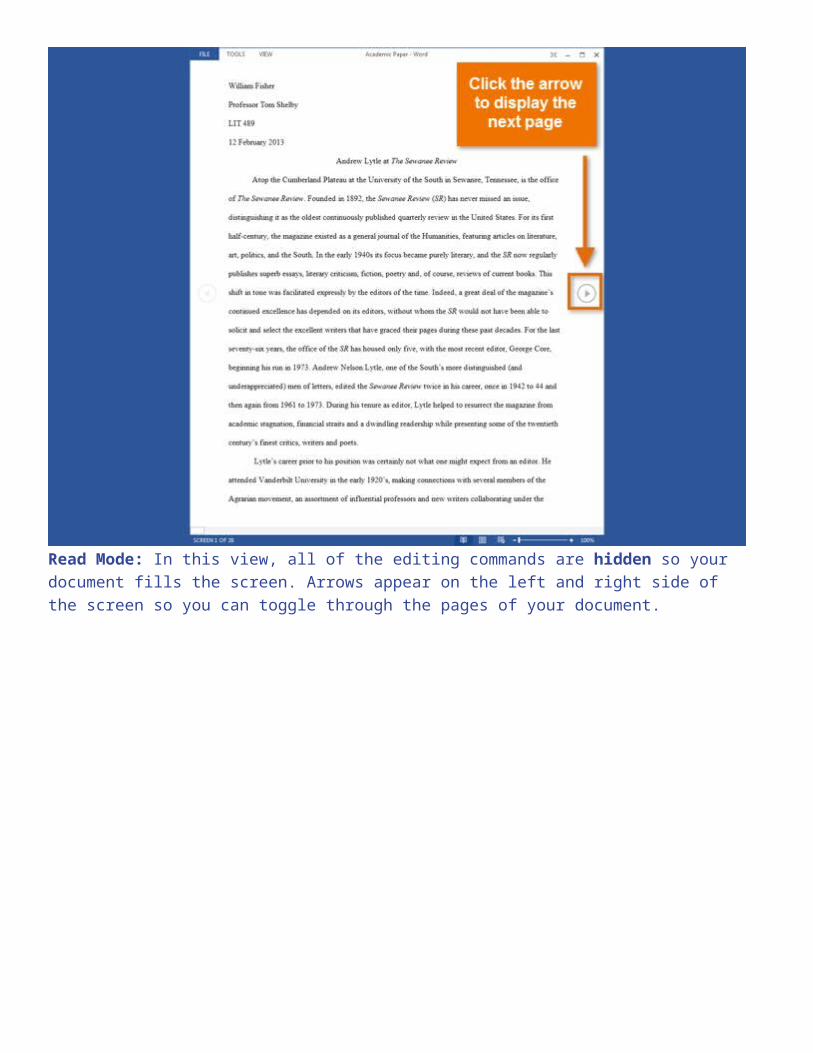
Read Mode: In this view, all of the editing commands are hidden so your document fills the screen. Arrows appear on the left and right side of the screen so you can toggle through the pages of your document.
Print Mode: This is the default view, where you create and edit your document. There are page breaks in between each page, indicating how your document will look when printed.

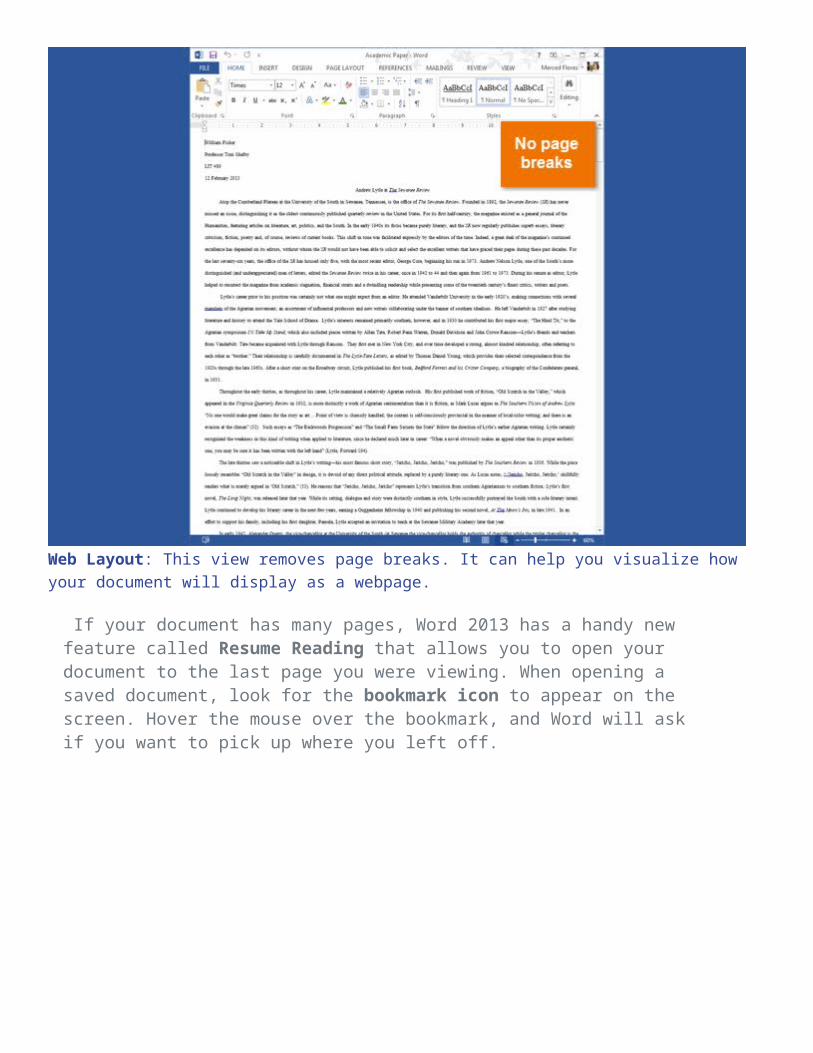
Web Layout: This view removes page breaks. It can help you visualize how your document will display as a webpage.
If your document has many pages, Word 2013 has a handy new feature called Resume Reading that allows you to open your document to the last page you were viewing. When opening a saved document, look for the bookmark icon to appear on the screen. Hover the mouse over the bookmark, and Word will ask if you want to pick up where you left off.
Challenge!1. Open or navigate to the Word 2013 interface.2. Click through all of the tabs, and review the commands on
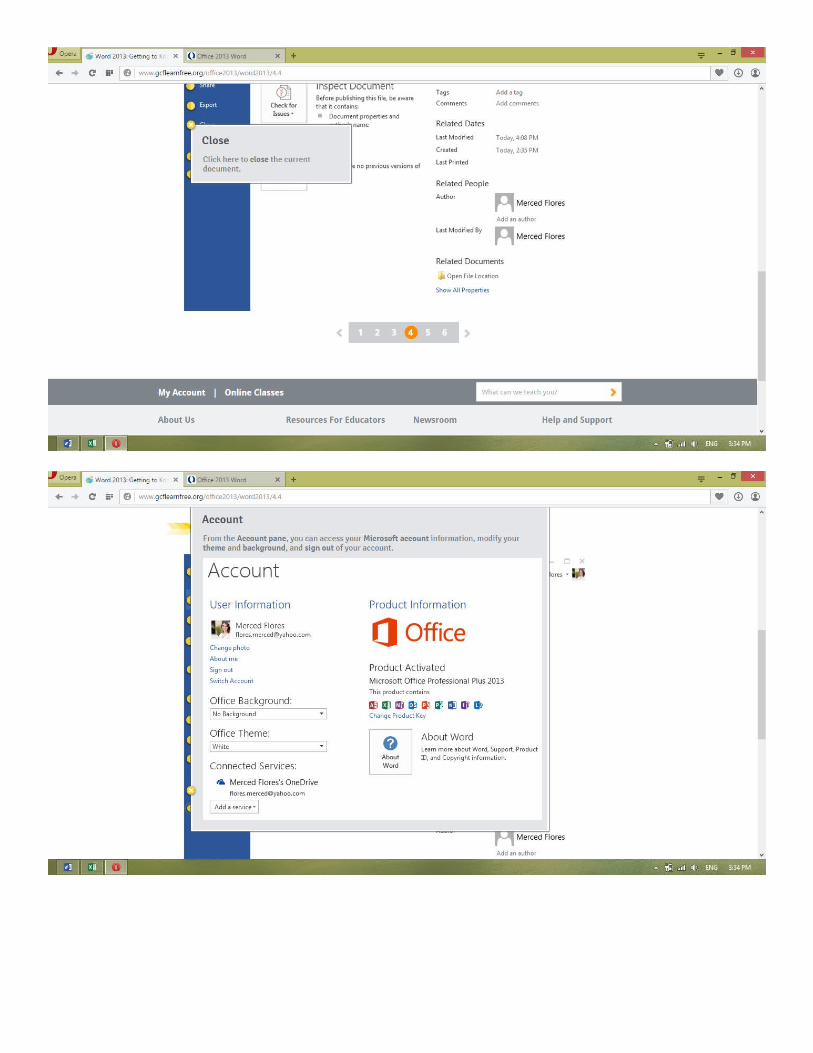
the Ribbon.3. Try minimizing and maximizing the Ribbon.4. Add a command to the Quick Access toolbar.5. Hide and show the Ruler.6. Navigate to Backstage view, and open your Account settings.7. Try switching document views.8. Close Word (you do not have to save the document).