woolly school garden manual
DESCRIPTION
This woolly little manual, prepared specially for woollyschoolgarden by the Gardenerd, is designed to guide you step by step through: 1) Choosing the perfect location to hang your woollypockets, 2) Installing your Pockets, 3) Watering -- when, where, why and how much?, 4) Planting in Pockets, and 5) Caring for your Pockets.TRANSCRIPT
created by

woollyschoolgarden
1Gardening Manual - WELCOME!
WELCOME TO YOUR WOOLLYSCHOOLGARDEN!
This woolly little manual, prepared specially for woollyschoolgarden by the Gardenerd, is designed to guide you step by step through…
. Choosing the perfect location to hang your woollypockets
. Installing your Pockets
. Watering -- when, where, why and how much?
. Planting in Pockets
. Caring for your Pockets
There is detailed information about each type of vegetable already included in your seed kit, plus other delicious and fun plants you may decide to grow later. This WoollySchoolGarden Manual is designed to work in tandem with the GrowingGreat with WoollySchoolGardens Curriculum, providing an easy reference for specific plants and the Pockets they love!
If you’re new to gardening, don’t worry—everyone was a beginner once! Our handy Glossary at the end of the Manual will help you learn the lingo. Soon, kohlrabi will be your middle name!
Finally, a word about cooperation: make sure your school’s district, Principal/Director, janitorial staff, food service staff, etc. all know about your woollyschoolgarden and are on board — the more support you have, the better your garden will grow!
We’re here to help anytime, and we’re excited to hear your feedback! Questions? Comments? Email us at [email protected]
We hope you and your students enjoy your woollyschoolgarden,
—The WoollySchoolGarden Team
woollyschoolgarden
Gardening Manual2
WHERE TO WOOLLY? ........................................................... 4
INSTALLING YOUR WOOLLY POCKETS .........................
WATERING YOUR WOOLLYSCHOOLGARDEN ..................... 7
HOW DOES YOUR GARDEN GROW? ........................................ 10
PLANTING YOUR POCKETS .............................................. 14
MAINTAINING YOUR WOOLLYSCHOOLGARDEN ............. 1
WHAT GROWS WHERE ............................................................ 17
HARDIDNESS ZONE PLANTING CHARTS ...........................18
PLANTS THAT LOVE POCKETS ....................................... 28
PLANT PAGES
VEGGIES
ARUGULA ...................................................... 30
BEETS .......................................................... 31
BROCCOLI .................................................... 32
BUSH BEANS ................................................. 33
CARROTS ..................................................... 34
CAULIFLOWER ............................................ 3
SWISS CHARD ............................................. 36
COLLARD GREENS ........................................ 37
KALE ............................................................. 38
KOHLRABI ................................................... 39
TABLE OF CONTENTS
woollyschoolgarden
Gardening Manual 3
LEEKS .......................................................... 40
LETTUCE ................................................... 41
GREEN ONIONS ............................................ 42
MUSTARD GREENS ...................................... 43
PEAS .............................................................. 44
PEPPERS ....................................................... 4
RADISHES ..................................................... 46
SPINACH ...................................................... 47
TOMATOES ................................................. 48
HERBS
BASIL .......................................................... 0
CHIVES ......................................................... 1
CILANTRO .................................................. 2
OREGANO ....................................................... 3
PARSLEY ....................................................... 4
SAGE ..............................................................
THYME ......................................................... 6
FLOWERS
MARIGOLDS ................................................. 7
NASTURTIUMS ......................................... 8
SWEET PEAS ............................................... 9
GLOSSARY .............................................................................. 61
woollyschoolgarden
4 Gardening Manual - WHERE TO WOOLLY!
WHERE TO WOOLLY!
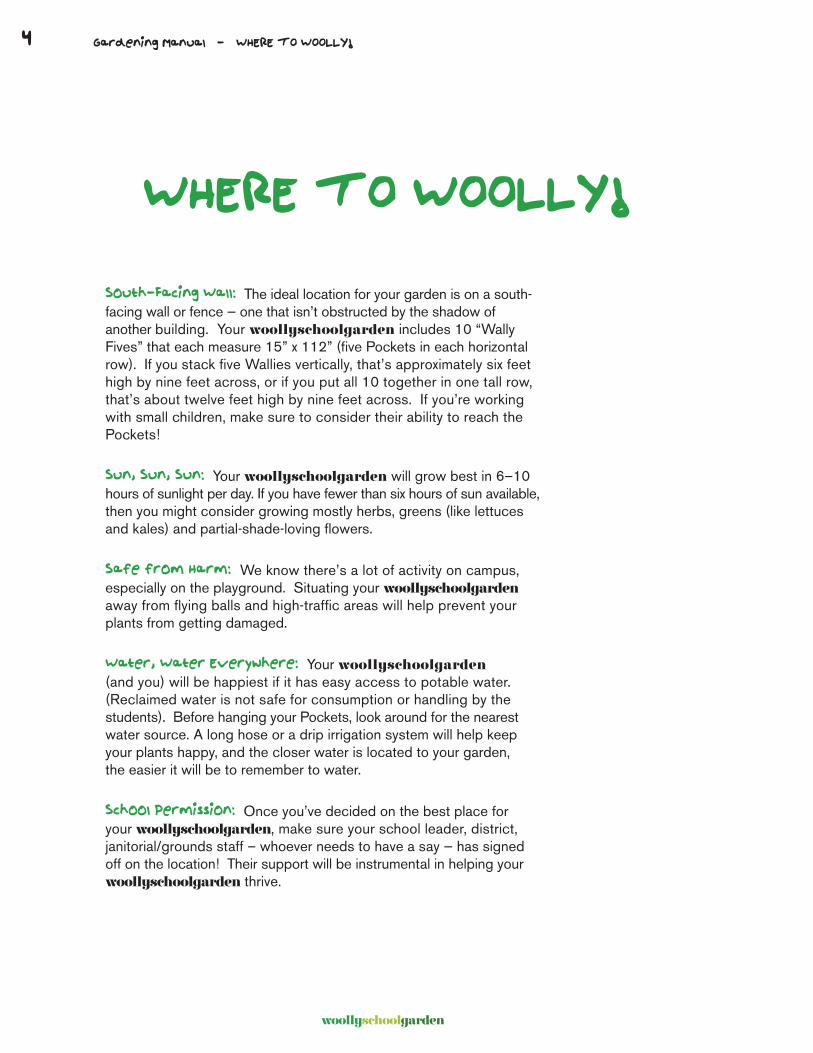
South-Facing Wall: The ideal location for your garden is on a south-facing wall or fence — one that isn’t obstructed by the shadow of another building. Your woollyschoolgarden includes 10 “Wally Fives” that each measure 15” x 112” (five Pockets in each horizontal row). If you stack five Wallies vertically, that’s approximately six feet high by nine feet across, or if you put all 10 together in one tall row, that’s about twelve feet high by nine feet across. If you’re working with small children, make sure to consider their ability to reach the Pockets!
Sun, Sun, Sun: Your woollyschoolgarden will grow best in 6–10 hours of sunlight per day. If you have fewer than six hours of sun available, then you might consider growing mostly herbs, greens (like lettuces and kales) and partial-shade-loving flowers.
Safe from Harm: We know there’s a lot of activity on campus, especially on the playground. Situating your woollyschoolgarden away from flying balls and high-traffic areas will help prevent your plants from getting damaged.
Water, Water Everywhere: Your woollyschoolgarden (and you) will be happiest if it has easy access to potable water. (Reclaimed water is not safe for consumption or handling by the students). Before hanging your Pockets, look around for the nearest water source. A long hose or a drip irrigation system will help keep your plants happy, and the closer water is located to your garden, the easier it will be to remember to water.
School Permission: Once you’ve decided on the best place for your woollyschoolgarden, make sure your school leader, district, janitorial/grounds staff – whoever needs to have a say — has signed off on the location! Their support will be instrumental in helping your woollyschoolgarden thrive.
woollyschoolgarden
5Gardening Manual - INSTALLING YOUR WOOLLY POCKETS
INSTALLING YOUR WOOLLY POCKETS
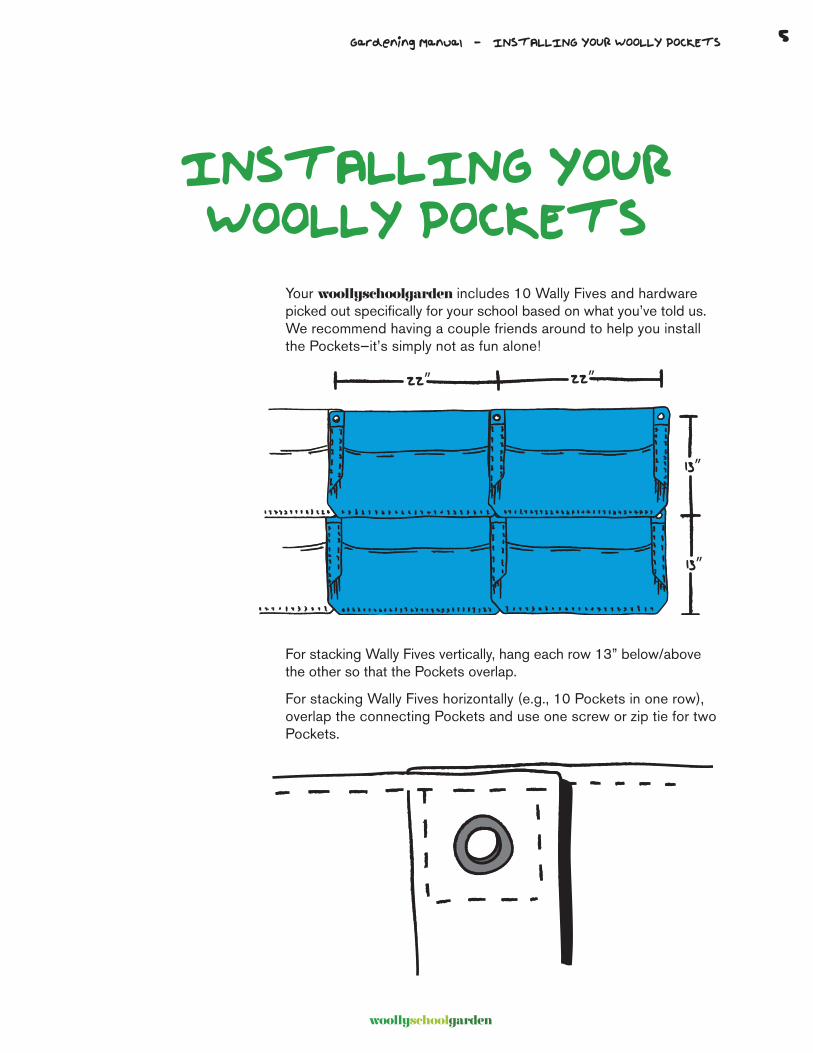
Your woollyschoolgarden includes 10 Wally Fives and hardware picked out specifically for your school based on what you’ve told us. We recommend having a couple friends around to help you install the Pockets—it’s simply not as fun alone!
For stacking Wally Fives vertically, hang each row 13” below/above the other so that the Pockets overlap.
For stacking Wally Fives horizontally (e.g., 10 Pockets in one row), overlap the connecting Pockets and use one screw or zip tie for two Pockets.

woollyschoolgarden
6 Gardening Manual - INSTALLING YOUR WOOLLY POCKETS
Chain link fence: Hold your first Wally Five up against the fence and use a level to make sure it’s straight. While one person holds the Wally Five, the other will simply use one zip tie for each grommet in the Pockets and loop the zip tie through the grommet, through the chain link fence, and pull it tight. As easy as falling off a log backwards!
Wood or steel fence/wall: The screws that are included with your Pockets do NOT require pre-drilling into wood or steel. Simply hold your Wally Five against the wall/fence, and ask a friend to use a level to make sure you’ve got it straight. Then, while you hold, have your friend use an electric drill or screwdriver, and insert one screw into each grommet. Voilá!
Masonry wall: For installation in brick, concrete, etc., you’ll need to pre-drill holes and use the plastic anchors included in your Woolly Pocket hardware.
First, we recommend holding your Wally Five up against the wall (use a level to make sure it’s straight!) and use a pencil to mark the placement of each grommet hole. Your first hole will be 1” from the edge of the Wally Five, and then spaced 22” apart.
Next, pre-drill your holes with a 3/16” masonry drill bit. Place a plastic anchor into each hole and tap it in firmly with a hammer until it is flush with the wall.
Then, have a friend hold up the Wally Fives and align the grommets with each hole/anchor. Use an electric drill or screwdriver to screw in each black screw into the anchors. Stand back and stare at what an amazing job you just did—yay!
Dry wall: You won’t need to pre-drill holes, but you will use silver anchors called “studsolvers.”
First, we recommend holding your Wally Five up against the wall (use a level to make sure it’s straight!) and use a pencil to mark the placement of each grommet hole. Your first hole will be 1” from the edge of the Wally Five, and then spaced 22” apart.
Next, using an electric drill or screwdriver, screw the silver studsolvers directly into the wall.
Then, have a friend hold up the Wally Fives and align the grommets with each hole/anchor. Use an electric drill or screwdriver to screw in each black screw into the silver studsolvers. Give yourself a pat on the back, you can now start gardening !

woollyschoolgarden
7Gardening Manual - WATERING YOUR WOOLLYSCHOOLGARDEN
WATERING YOUR WOOLLYSCHOOLGARDEN
The easier it is to water your garden, the more likely it is to get done, and the more time you’ll have to eat what you’ve been growing! Whatever method you choose, be sure to have a clear system for who is in charge of watering, including on weekends and school vacations. Adult supervision for younger students is necessary to ensure that each of the Pockets are watered sufficiently (and the children don’t get watered). You can use watering cans, a hose with a nozzle or a sprinkler attachment, etc. Anything you wish!
As a general rule, each Pocket will require 3 cups of water every day in a dry climate, less in more humid climates.
Did you know...
Outdoor Woolly Pockets are only lined on the back? That way when it rains, your Pockets will be able to drain through the bottom to prevent flooding your plants. Now you know!

woollyschoolgarden
8 Gardening Manual - WATERING YOUR WOOLLYSCHOOLGARDEN
Installing a Drip Irrigation System
Take a deep breath. We know the title sounds intimidating for most novice gardeners, but a drip line can actually be your best friend! First, a drip irrigation system is not necessary—however, it can be very helpful on weekends and during school breaks and vacations. Drip irrigation consists of:
. approximately 100 feet of 1/4" tubing with holes (or emitters)
. 1/4" tubing without emitters--you’ll determine the length you need below
. barbed tee connectors--1 for each tube connection
. end caps (also called “goof plugs")--1 for the end of each horizontal row
. an adaptor for your hose spigot, and
. a battery operated timer
These items can be purchased at most hardware stores for about $100–$150 and can be assembled in an hour or two.
Here’s How It Works:
Run tubing with emitters horizontally across the Pockets, through the loops and in between the tongue and the back of the Pocket.
Snip the tubing with scissors or gardening shears once you’re sure you’ve covered the length.
Connect the horizontal tubes, starting at the top, by running a vertical line of tubing without emitters on the side closest to your water source. Use tee-connectors as shown on the right, and make sure you snip the tube carefully after measuring the length you need. Don’t snip below the bottom row of Pockets, as this tube will reach all the way to your water spigot!
Attach goof plugs along the opposite end of each horizontal line, farthest from your water source. The goof plugs keep the water from squirting out the opposite end of the tubes!
At this point, you should have one row of horizontal tubes with emitters in each row of Pockets, plus a vertical line with connectors up along the Pockets on the side closest to your water source (to move the water through the entire Pocket system) and dead-end plugs for the water at the opposite end of each horizontal row.

woollyschoolgarden
9Gardening Manual - WATERING YOUR WOOLLYSCHOOLGARDEN
Connect the Vertical tube from the bottom row of Pockets to your timer and water spigot using the adaptor.
Set your timer to water your garden for two minutes every day at first. You’ll need to monitor whether this is enough, too much, or not enough water for your climate/Pockets (see Watering Instructions in this Manual), and adjust the timer accordingly.
Lastly, turn on the water and check all the connecting points for any leaks. Use plumber’s tape if needed to ensure a tight seal.
Don’t forget, if you run into trouble, call us!
We’re always here to help! + 310 837 3220
woollyschoolgarden
10 Gardening Manual - HOW DOES YOUR GARDEN GROW?
HOW DOES YOUR GARDEN GROW?
Soil
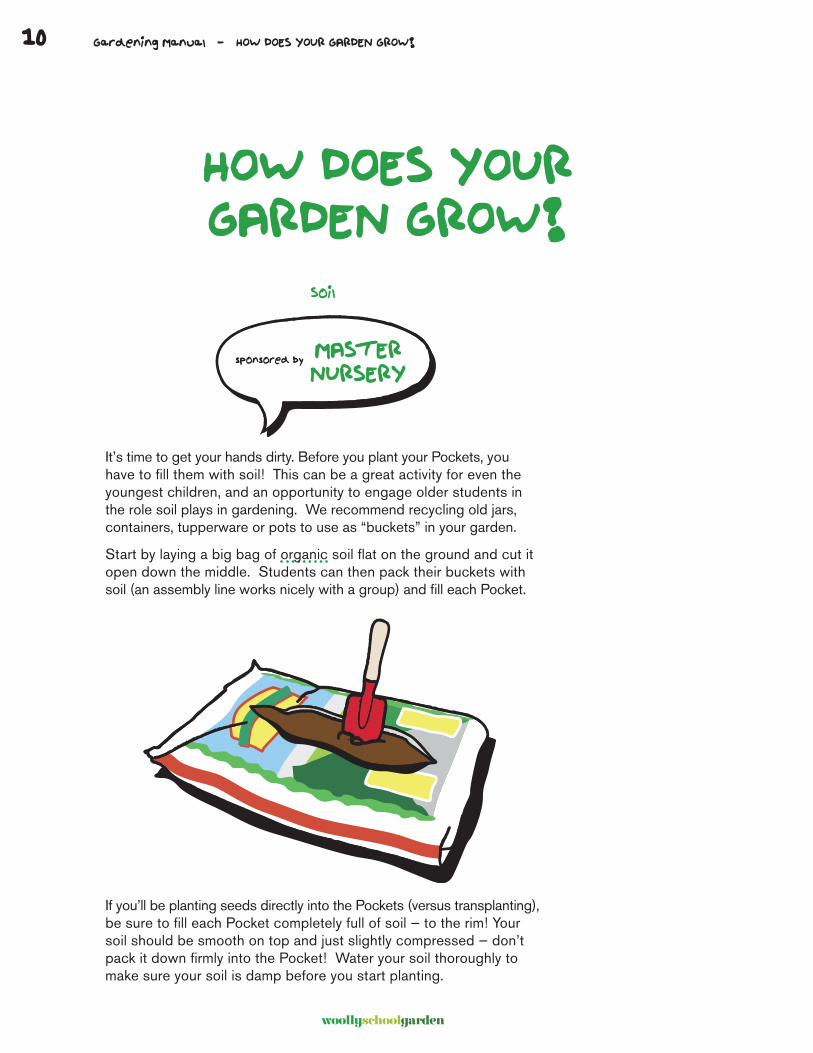
It’s time to get your hands dirty. Before you plant your Pockets, you have to fill them with soil! This can be a great activity for even the youngest children, and an opportunity to engage older students in the role soil plays in gardening. We recommend recycling old jars, containers, tupperware or pots to use as “buckets” in your garden.
Start by laying a big bag of organic soil flat on the ground and cut it open down the middle. Students can then pack their buckets with soil (an assembly line works nicely with a group) and fill each Pocket.
If you’ll be planting seeds directly into the Pockets (versus transplanting), be sure to fill each Pocket completely full of soil — to the rim! Your soil should be smooth on top and just slightly compressed — don’t pack it down firmly into the Pocket! Water your soil thoroughly to make sure your soil is damp before you start planting.
MASTERNURSERY
sponsored by

woollyschoolgarden
11Gardening Manual - HOW DOES YOUR GARDEN GROW?
Seeds
Most seeds will remain viable (meaning that they will sprout when you plant them) for years if you use and store them properly. Remember, the same three things that help your seeds grow — water, sunlight, and heat — will also shorten the lifespan of your seeds in storage.
When you take your seed packets out to the garden, be careful not to get the package wet. Use dry hands, and set the seed packets on a dry table or bench and not damp soil. Keep your seeds out of direct sunlight and away from heat. Fold the top over when finished using the packet to keep other seeds from falling out.
Store your seeds in an airtight container, like a wide mouth glass jar or lock-lid plastic container, and keep it in the refrigerator or a dark, cool closet.
You can also throw in a few desiccant packets that come in the packaging for shoes, vitamins, etc. This will help absorb moisture and will keep your seeds dry.
Plant Markers
In the garden, there is nothing more confusing than trying to remember what was planted where. Plant markers are the perfect way to identify your seedlings. While store-bought markers are fine, making your own plant markers is economical and easy — and a great project for students! Reminder: Use permanent markers on non-porous and semi-porous materials such as stone and plastic, otherwise the ink will wash away. Here are some of our ideas:
Clothespins: Write on the flat side of the clothespin and then pinch onto your Pocket.
PEACEFUL VALLEYSEED CO.sponsored by
woollyschoolgarden
12 Gardening Manual - HOW DOES YOUR GARDEN GROW?
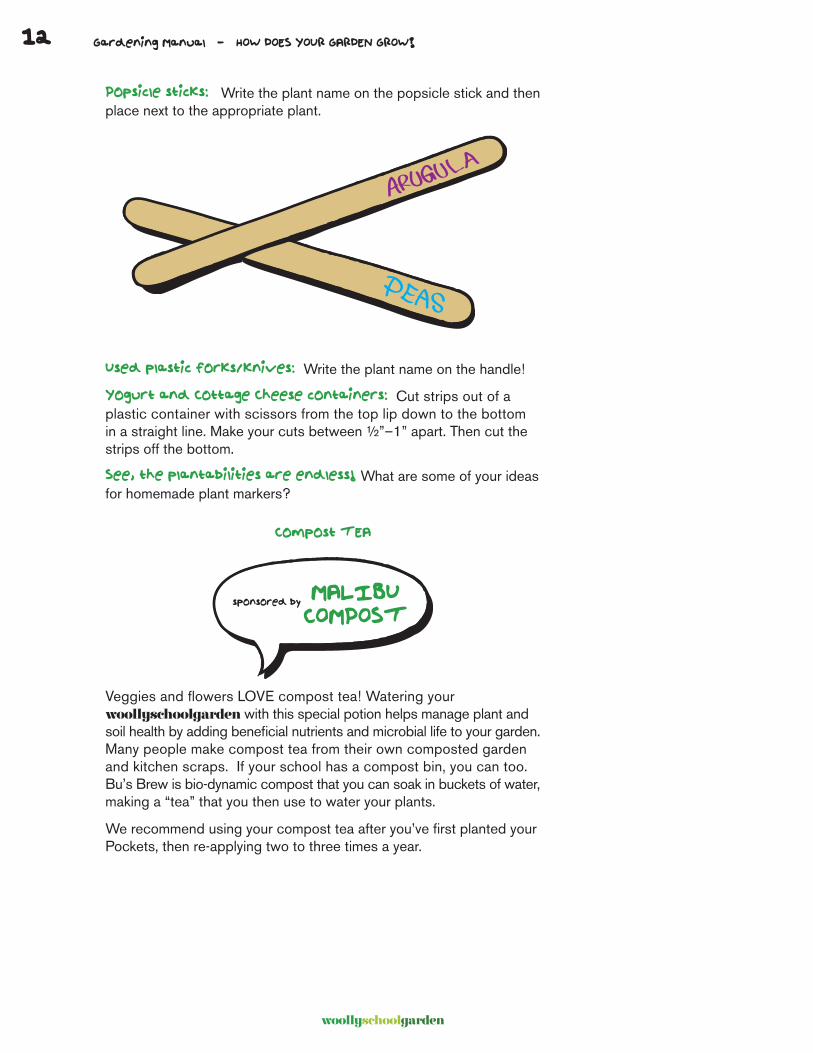
Popsicle sticks: Write the plant name on the popsicle stick and then place next to the appropriate plant.
Used plastic forks/knives: Write the plant name on the handle!
Yogurt and Cottage Cheese containers: Cut strips out of a plastic container with scissors from the top lip down to the bottom in a straight line. Make your cuts between ½”–1” apart. Then cut the strips off the bottom.
See, the plantabilities are endless! What are some of your ideas for homemade plant markers?
Compost TEA
Veggies and flowers LOVE compost tea! Watering your woollyschoolgarden with this special potion helps manage plant and soil health by adding beneficial nutrients and microbial life to your garden. Many people make compost tea from their own composted garden and kitchen scraps. If your school has a compost bin, you can too. Bu’s Brew is bio-dynamic compost that you can soak in buckets of water, making a “tea” that you then use to water your plants.
We recommend using your compost tea after you’ve first planted your Pockets, then re-applying two to three times a year.
MALIBUCOMPOST
sponsored by
woollyschoolgarden
13Gardening Manual - HOW DOES YOUR GARDEN GROW?
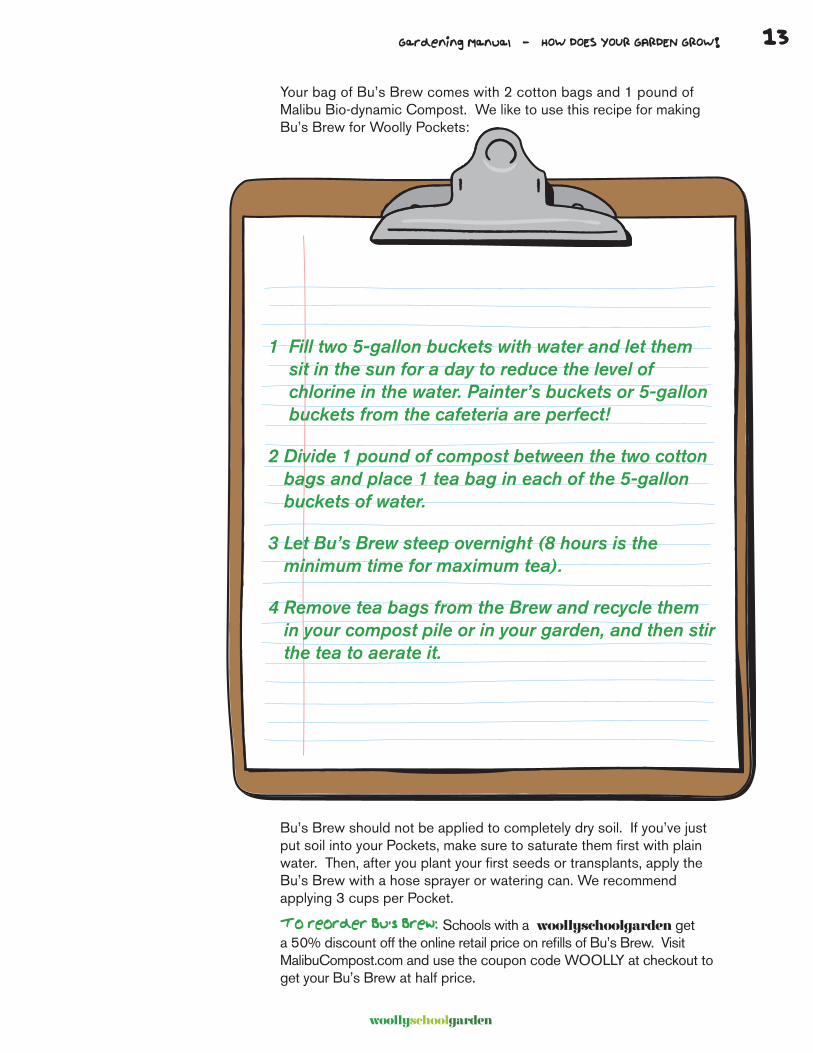
Your bag of Bu’s Brew comes with 2 cotton bags and 1 pound of Malibu Bio-dynamic Compost. We like to use this recipe for making Bu’s Brew for Woolly Pockets:
1 Fill two 5-gallon buckets with water and let them sit in the sun for a day to reduce the level of chlorine in the water. Painter’s buckets or 5-gallon buckets from the cafeteria are perfect!
2 Divide 1 pound of compost between the two cotton bags and place 1 tea bag in each of the 5-gallon buckets of water.
3 Let Bu’s Brew steep overnight (8 hours is the minimum time for maximum tea).
4 Remove tea bags from the Brew and recycle them in your compost pile or in your garden, and then stir the tea to aerate it.
Bu’s Brew should not be applied to completely dry soil. If you’ve just put soil into your Pockets, make sure to saturate them first with plain water. Then, after you plant your first seeds or transplants, apply the Bu’s Brew with a hose sprayer or watering can. We recommend applying 3 cups per Pocket.
To reorder Bu’s Brew: Schools with a woollyschoolgarden get a 50% discount off the online retail price on refills of Bu’s Brew. Visit MalibuCompost.com and use the coupon code WOOLLY at checkout to get your Bu’s Brew at half price.
woollyschoolgarden
14 Gardening Manual - PLANTING YOUR POCKETS
PLANTING YOUR POCKETSWait! Before you plant your Pockets we want you to know that the GrowingGreat with Woolly School Gardens Curriculum includes standards-based lesson plans you can use with your students as you physically plant your woollyschoolgarden — a great excuse to take today’s class outside!
Shhh… We’ve gathered some of our top secret tips and tricks to help you have the most successful garden possible! We’ve also included bios on some of our favourite veggies that are jam packed with helpful facts and tips about growing each one in your wonderful new woollyschoolgarden! We hope you enjoy!
Planting Seeds in Pockets
Finger Drill: Rather than sprinkling seeds in a row like a traditional farmer and later having to “thin” the growth, we suggest you and your students use a finger or a pencil to “drill” holes in the soil. Be sure to drill holes only as deep and as far apart as this manual suggests (information also provided on seed packet). (This is great measuring practice for young students!) Burying a seed too deep could prevent it from germinating, and we don’t want that!
Sow a Seed or Two: If you have a new packet of seeds, you really only need to put one seed in each hole. If your seeds are from previous years you may put a few seeds in each hole. Just be aware that you may have to “thin” or cut away all but one seedling if they all germinate.
Cover the Seeds: Gently backfill the seed holes with additional soil and pat the surface gently. The key word is GENTLY!
Water: The seed bed needs to be kept moist until the seeds germinate. Right after you plant the seeds, we recommend using your Compost Tea to saturate the soil. Then, don’t let the seed bed dry out in the coming days. Gently hand-water, or use the mist setting on a hose, being careful not to disturb the seeds.
Tick, Tock: Refer to the pages in this Manual or your seed packets to determine how long it should take for the seed to germinate. Your class will enjoy monitoring the Pockets for progress each day!
woollyschoolgarden
15Gardening Manual - MAINTAINING YOUR WOOLLYSCHOOLGARDEN
MAINTAINING YOUR WOOLLYSCHOOLGARDEN
Snails and Spiders and Bees--oh my!
Bugs: Even though your Woolly School Garden is off the ground, there is still a chance that you will have bugs in your garden. Not all bugs are bad! The “good” bugs — ladybugs, lacewings, parasitic wasps, bees, yellow jackets, centipedes, earthworms, decollate snails and spiders — help patrol your garden and eat the “bad” bugs.
The “bad” bugs are just there to eat your garden: aphids, cabbage moths and worms, green beetles and green beetle grubs, flea beetles, white flies, leafhoppers, snails and mealy bugs.
Your students can research these bugs on the internet or in your school library to figure out who is who!
The best way to keep pests out of your garden is to check the underside of leaves daily. Aphids like to hide out on the dark underside of leaves, where it’s cooler. Hand-picking bugs off your plants might sound gross, but you’re doing your garden a favor —chances are, you’ll have at least one student who thinks this is fun!
Another good way to invite the “good” bugs into your garden is to plant beneficial flowers like Nasturtiums, Marigolds, and Alyssums. Who knows, some friendly butterflies might show up!
Birds: Birds can also be good or bad in the garden. They help eat bugs, but they also can eat your food!
Did you know...
Birds don’t like shiny things that reflect sunlight? So you can hang old, scratched CDs/DVDs in the garden so that they swing freely, or have your students research and create other effective bird deterrents. Now you know!
woollyschoolgarden
16 Gardening Manual - MAINTAINING YOUR WOOLLYSCHOOLGARDEN
Plant Disease
Airborne fungus and bacterial disease are very common and may make your plants look funny. The good news is, many of them won’t actually kill your plants. Your local nursery can recommend different organic products to combat diseases (a task for adults only), including organic horticultural oils and sprays. Be careful not to use chemical pesticides in your wonderful organic garden! Be aware that spraying your Pockets may discolor them a little — probably not, but it might.
If your garden is infected with a disease, you will want to change out the soil in your Pockets’ next season, to help ensure that the disease isn’t living in the soil.
End of Season
For specifics on what to do with each of your plants at the end of the season, consult the individual plant’s bio. The good news is that some of the plants in your Pockets are perennials, meaning they will grow for years under proper care! As a general rule with annual plants, you simply pull them out at the end of the season and put them into your compost or greens recycling bin.
New Season
You’ll follow the same basic instructions for the start of each new season. You will want to rotate your crops from season to season. In other words, don’t plant the same thing in the same Pocket for three years. This helps to prevent diseases.
Refresh the soil each season by adding more compost/soil amendments and organic fertilizer to each Pocket.
woollyschoolgarden
17Gardening Manual - WHAT GROWS WHERE?
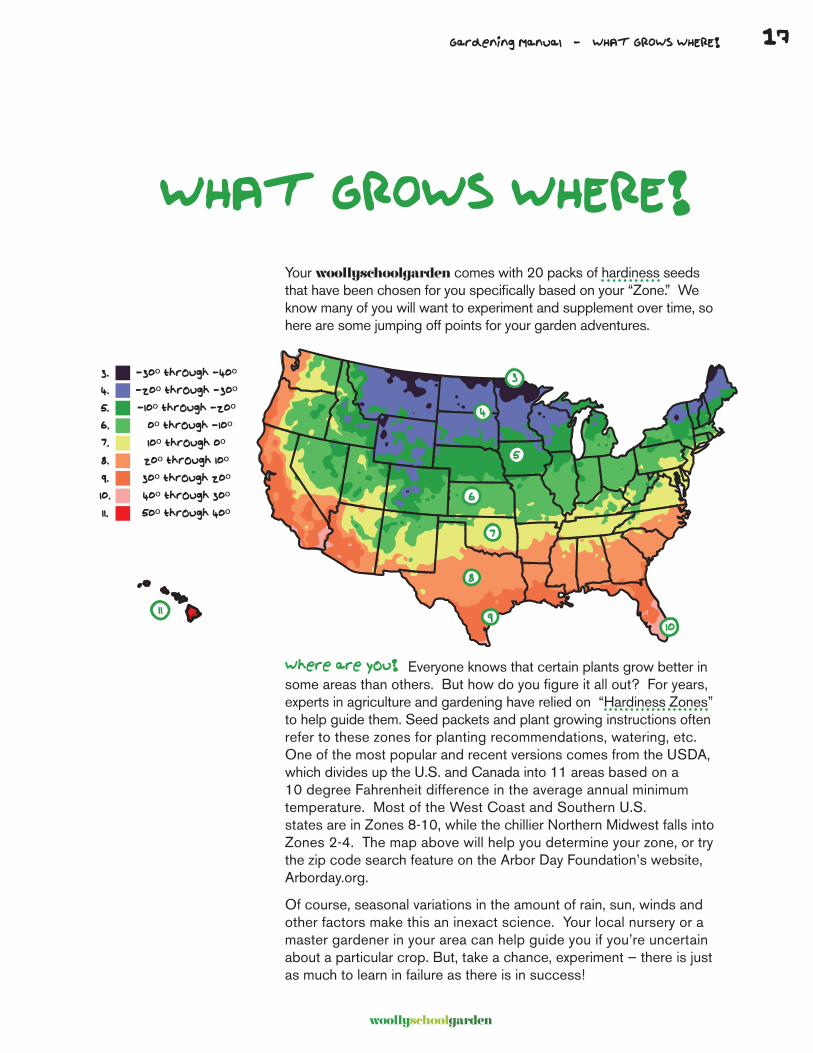
Your woollyschoolgarden comes with 20 packs of hardiness seeds that have been chosen for you specifically based on your “Zone.” We know many of you will want to experiment and supplement over time, so here are some jumping off points for your garden adventures.
WHAT GROWS WHERE?
Where are you? Everyone knows that certain plants grow better in some areas than others. But how do you figure it all out? For years, experts in agriculture and gardening have relied on “Hardiness Zones” to help guide them. Seed packets and plant growing instructions often refer to these zones for planting recommendations, watering, etc. One of the most popular and recent versions comes from the USDA, which divides up the U.S. and Canada into 11 areas based on a 10 degree Fahrenheit difference in the average annual minimum temperature. Most of the West Coast and Southern U.S. states are in Zones 8-10, while the chillier Northern Midwest falls into Zones 2-4. The map above will help you determine your zone, or try the zip code search feature on the Arbor Day Foundation’s website, Arborday.org.
Of course, seasonal variations in the amount of rain, sun, winds and other factors make this an inexact science. Your local nursery or a master gardener in your area can help guide you if you’re uncertain about a particular crop. But, take a chance, experiment — there is just as much to learn in failure as there is in success!

18
woollyschoolgarden
Gardening Manual - ZONE CHARTS
Na
stu
rtiu
ms
Lett
uce
s
Lett
uce
s
Mu
sta
rd
Gre
ens
Mu
sta
rd
Gre
ens
Basi
l
Bush
Bea
ns
Ka
le
Brocc
oli
Gre
en O
nio
ns
Carr
ots
Beets
Suga
r Sn
ap
Pea
s
Ra
dis
hes
Aru
gula
Swis
s
Cha
rd
Spin
ach
Sweet
Pea
Fl
ow
ers
Ra
dis
hes
Aru
gula
Basi
l
Bush
Bea
ns
Ka
le
Brocc
oli
Ma
rigo
lds
Carr
ots
Beets
Suga
r Sn
ap
Pea
s
Ra
dis
hes
Aru
gula
Swis
s
Cha
rd
Spin
ach
Sweet
Pea
Fl
ow
ers
Ra
dis
hes
Aru
gula
Gre
en O
nio
ns
Basi
l
Ka
le
Brocc
oli
Gre
en O
nio
ns
Gre
en O
nio
ns
Basi
l
Ka
le
Brocc
oli
Ma
rigo
lds
Na
stu
rtiu
ms
Lett
uce
s
Lett
uce
s
Gre
en O
nio
ns
Gre
en O
nio
ns
Ref
er to
you
r see
d pa
cket
s an
d co
nsul
t you
r loc
al n
urse
ry o
r Mas
ter
Gar
dene
r if y
ou h
ave
ques
tions
abo
ut g
row
ing
in y
our c
limat
e.
If yo
u ha
ve a
sho
rt gr
owin
g se
ason
, or y
our s
choo
l sch
edul
e lim
its y
our
grow
ing
time,
sta
rt y
our g
arde
n w
ith tr
ansp
lant
s (a
ka s
eedl
ings
) tha
t yo
u ei
ther
gro
w in
door
s fo
r 6-8
wee
ks fi
rst,
or b
uy fr
om a
loca
l nur
sery
. Th
is c
an b
e es
peci
ally
hel
pful
for
plan
ts li
ke b
rocc
oli,
colla
rds,
kal
e,
pepp
ers,
squ
ash,
egg
plan
t and
tom
atoe
s th
at ty
pica
lly t
ake
a lit
tle
bit l
onge
r to
gro
w.
Oth
er c
rops
like
rad
ishe
s an
d le
ttuc
es g
row
ve
ry q
uick
ly.
Som
e cr
ops
are
pere
nnia
l whi
ch m
eans
they
will
live
for y
ears
and
do
not
nee
d to
be
rem
oved
. Fo
r non
-per
enni
als,
rota
te y
our c
rops
ev
ery
year
. D
on’t
plan
t the
sam
e th
ing
in th
e sa
me
Poc
ket f
or 3
ye
ars,
as
this
will
hel
p pr
even
t dis
ease
.
Oth
er c
rops
, suc
h as
Sw
iss
Cha
rd, w
ill li
ve fo
r lon
ger t
han
one
year
(if
not
kill
ed b
y fro
st) a
nd c
ontin
ue to
pro
duce
a h
arve
st.
Tom
atoe
s, s
wee
t pea
s an
d na
stur
tium
s w
ill h
ang
dow
n as
they
gr
ow, s
o gr
ow fa
st c
rops
like
radi
shes
and
lettu
ces
belo
w th
em, a
nd
harv
est b
efor
e th
ey a
re c
over
ed u
p.
ZON
E 4
Av
era
ge d
ate
s: l
ast f
rost
: M
ay 1
st to
May
30th
, firs
t fro
st:
Sep
tem
ber 1
st to
Sep
tem
ber 3
0th

19
woollyschoolgarden
Gardening Manual - ZONE CHARTS
Na
stu
rtiu
ms
Lett
uce
s
Lett
uce
s
Mu
sta
rd
Gre
ens
Mu
sta
rd
Gre
ens
Basi
l
Bush
Bea
ns
Ka
le
Brocc
oli
Gre
en O
nio
ns
Carr
ots
Beets
Suga
r Sn
ap
Pea
s
Ra
dis
hes
Aru
gula
Swis
s
Cha
rd
Spin
ach
Sweet
Pea
Fl
ow
ers
Ra
dis
hes
Aru
gula
Basi
l
Bush
Bea
ns
Ka
le
Brocc
oli
Ma
rigo
lds
Carr
ots
Beets
Suga
r Sn
ap
Pea
s
Ra
dis
hes
Aru
gula
Swis
s
Cha
rd
Spin
ach
Sweet
Pea
Fl
ow
ers
Ra
dis
hes
Aru
gula
Gre
en O
nio
ns
Basi
l
Ka
le
Brocc
oli
Gre
en O
nio
ns
Gre
en O
nio
ns
Basi
l
Ka
le
Brocc
oli
Ma
rigo
lds
Na
stu
rtiu
ms
Lett
uce
s
Lett
uce
s
Gre
en O
nio
ns
Gre
en O
nio
ns
Ref
er to
you
r see
d pa
cket
s an
d co
nsul
t you
r loc
al n
urse
ry o
r Mas
ter
Gar
dene
r if y
ou h
ave
ques
tions
abo
ut g
row
ing
in y
our c
limat
e.
If yo
u ha
ve a
sho
rt gr
owin
g se
ason
, or y
our s
choo
l sch
edul
e lim
its y
our
grow
ing
time,
sta
rt y
our g
arde
n w
ith tr
ansp
lant
s (a
ka s
eedl
ings
) tha
t yo
u ei
ther
gro
w in
door
s fo
r 6-8
wee
ks fi
rst,
or b
uy fr
om a
loca
l nur
sery
. Th
is c
an b
e es
peci
ally
hel
pful
for
plan
ts li
ke b
rocc
oli,
colla
rds,
kal
e,
pepp
ers,
squ
ash,
egg
plan
t and
tom
atoe
s th
at ty
pica
lly t
ake
a lit
tle
bit l
onge
r to
gro
w.
Oth
er c
rops
like
rad
ishe
s an
d le
ttuc
es g
row
ve
ry q
uick
ly.
Som
e cr
ops
are
pere
nnia
l, w
hich
mea
ns th
ey w
ill li
ve fo
r yea
rs a
nd
do n
ot n
eed
to b
e re
mov
ed. F
or n
on-p
eren
nial
s, ro
tate
you
r cro
ps
ever
y ye
ar.
Don
’t pl
ant t
he s
ame
thin
g in
the
sam
e P
ocke
t for
3
year
s, a
s th
is w
ill h
elp
prev
ent d
isea
se.
Oth
er c
rops
, suc
h as
Sw
iss
Cha
rd, w
ill li
ve fo
r lon
ger t
han
one
year
(if
not
kill
ed b
y fro
st) a
nd c
ontin
ue to
pro
duce
a h
arve
st.
Tom
atoe
s, s
wee
t pea
s an
d na
stur
tium
s w
ill h
ang
dow
n as
they
gr
ow, s
o gr
ow fa
st c
rops
like
radi
shes
and
lettu
ces
belo
w th
em, a
nd
harv
est b
efor
e th
ey a
re c
over
ed u
p.
ZON
E Av
era
ge d
ate
s: l
ast f
rost
: A
pril
30th
to M
ay 3
0th, fi
rst f
rost
: S
epte
mbe
r 30th
to O
ctob
er 3
0th
20
woollyschoolgarden
Gardening Manual - ZONE CHARTS
Na
stu
rtiu
ms
Lett
uce
s
Lett
uce
s
Mu
sta
rd
Gre
ens
Mu
sta
rd
Gre
ens
Swis
s Ch
ard
Bush
Bea
ns
Ka
le
Brocc
oli
Gre
en O
nio
ns
Carr
ots
Beets
Suga
r Sn
ap
Pea
s
Ra
dis
hes
Thym
e
Swis
s
Cha
rd
Spin
ach
Sweet
Pea
Fl
ow
ers
Ra
dis
hes
Aru
gula
Gre
en O
nio
ns
Bush
Bea
ns
Ka
le
Brocc
oli
Ma
rigo
lds
Carr
ots
Beets
Suga
r Sn
ap
Pea
s
Ra
dis
hes
Aru
gula
Swis
s
Cha
rd
Spin
ach
Sweet
Pea
Fl
ow
ers
Ra
dis
hes
Aru
gula
Carr
ots
Basi
l
Ka
le
Brocc
oli
Gre
en O
nio
ns
Gre
en O
nio
ns
Basi
l
Ka
le
Brocc
oli
Ma
rigo
lds
Na
stu
rtiu
ms
Lett
uce
s
Lett
uce
s
Swis
s Ch
ard
Swis
s Ch
ard
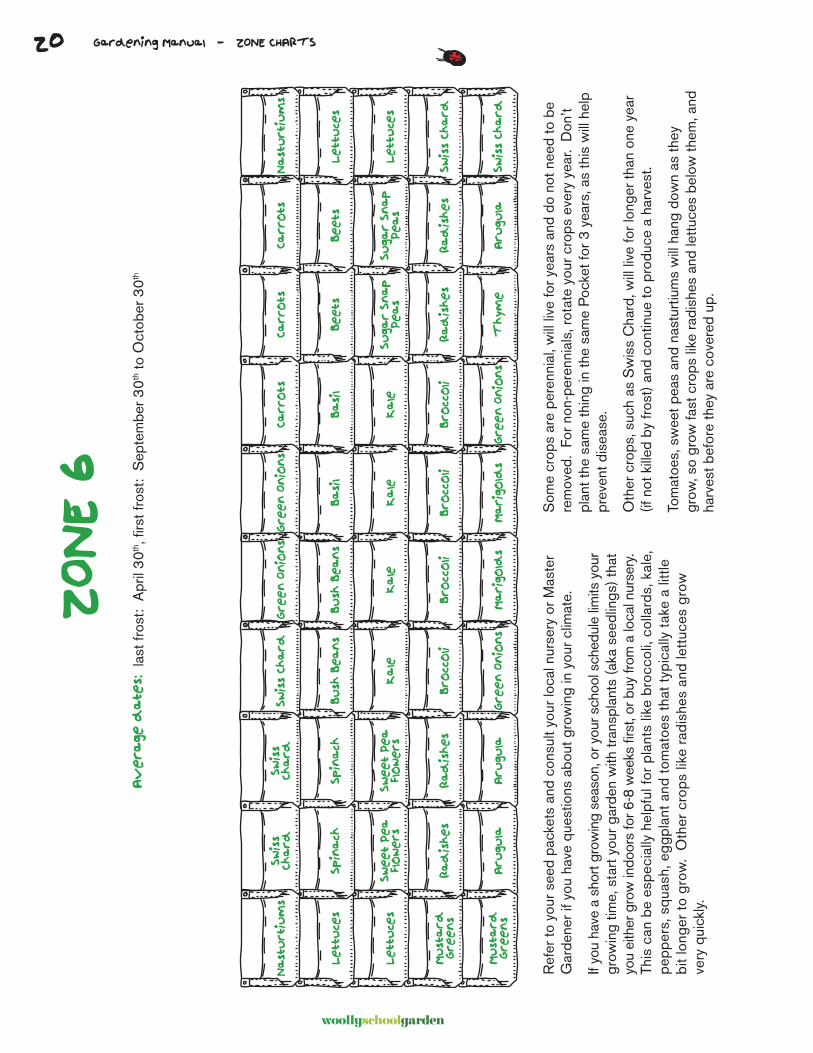
ZON
E 6
Av
era
ge d
ate
s: l
ast f
rost
: A
pril
30th
, firs
t fro
st:
Sep
tem
ber 3
0th to
Oct
ober
30th
Ref
er to
you
r see
d pa
cket
s an
d co
nsul
t you
r loc
al n
urse
ry o
r Mas
ter
Gar
dene
r if y
ou h
ave
ques
tions
abo
ut g
row
ing
in y
our c
limat
e.
If yo
u ha
ve a
sho
rt gr
owin
g se
ason
, or y
our s
choo
l sch
edul
e lim
its y
our
grow
ing
time,
sta
rt y
our g
arde
n w
ith tr
ansp
lant
s (a
ka s
eedl
ings
) tha
t yo
u ei
ther
gro
w in
door
s fo
r 6-8
wee
ks fi
rst,
or b
uy fr
om a
loca
l nur
sery
. Th
is c
an b
e es
peci
ally
hel
pful
for
plan
ts li
ke b
rocc
oli,
colla
rds,
kal
e,
pepp
ers,
squ
ash,
egg
plan
t and
tom
atoe
s th
at ty
pica
lly t
ake
a lit
tle
bit l
onge
r to
gro
w.
Oth
er c
rops
like
rad
ishe
s an
d le
ttuc
es g
row
ve
ry q
uick
ly.
Som
e cr
ops
are
pere
nnia
l, w
ill li
ve fo
r yea
rs a
nd d
o no
t nee
d to
be
rem
oved
. Fo
r non
-per
enni
als,
rota
te y
our c
rops
eve
ry y
ear.
Don
’t pl
ant t
he s
ame
thin
g in
the
sam
e P
ocke
t for
3 y
ears
, as
this
will
hel
p pr
even
t dis
ease
.
Oth
er c
rops
, suc
h as
Sw
iss
Cha
rd, w
ill li
ve fo
r lon
ger t
han
one
year
(if
not
kill
ed b
y fro
st) a
nd c
ontin
ue to
pro
duce
a h
arve
st.
Tom
atoe
s, s
wee
t pea
s an
d na
stur
tium
s w
ill h
ang
dow
n as
they
gr
ow, s
o gr
ow fa
st c
rops
like
radi
shes
and
lettu
ces
belo
w th
em, a
nd
harv
est b
efor
e th
ey a
re c
over
ed u
p.
21
woollyschoolgarden
Gardening Manual - ZONE CHARTS
Na
stu
rtiu
ms
Lett
uce
s
Lett
uce
s
Mu
sta
rd
Gre
ens
Mu
sta
rd
Gre
ens
Basi
l
Colla
rds
Ka
le
Brocc
oli
Gre
en O
nio
ns
Carr
ots
Beets
Suga
r Sn
ap
Pea
s
Ra
dis
hes
Aru
gula
Swis
s
Cha
rd
Spin
ach
Suga
r Sn
ap
Pea
s
Ra
dis
hes
Aru
gula
Basi
l
Colla
rds
Ka
le
Brocc
oli
Ma
rigo
lds
Carr
ots
Beets
Suga
r Sn
ap
Pea
s
Ra
dis
hes
Aru
gula
Swis
s
Cha
rd
Spin
ach
Suga
r Sn
ap
Pea
s
Ra
dis
hes
Aru
gula
Gre
en O
nio
ns
Kohlr
abi
Ka
le
Brocc
oli
Gre
en O
nio
ns
Gre
en O
nio
ns
Kohlr
abi
Ka
le
Brocc
oli
Ma
rigo
lds
Na
stu
rtiu
ms
Lett
uce
s
Lett
uce
s
Swis
s Ch
ard
Swis
s Ch
ard
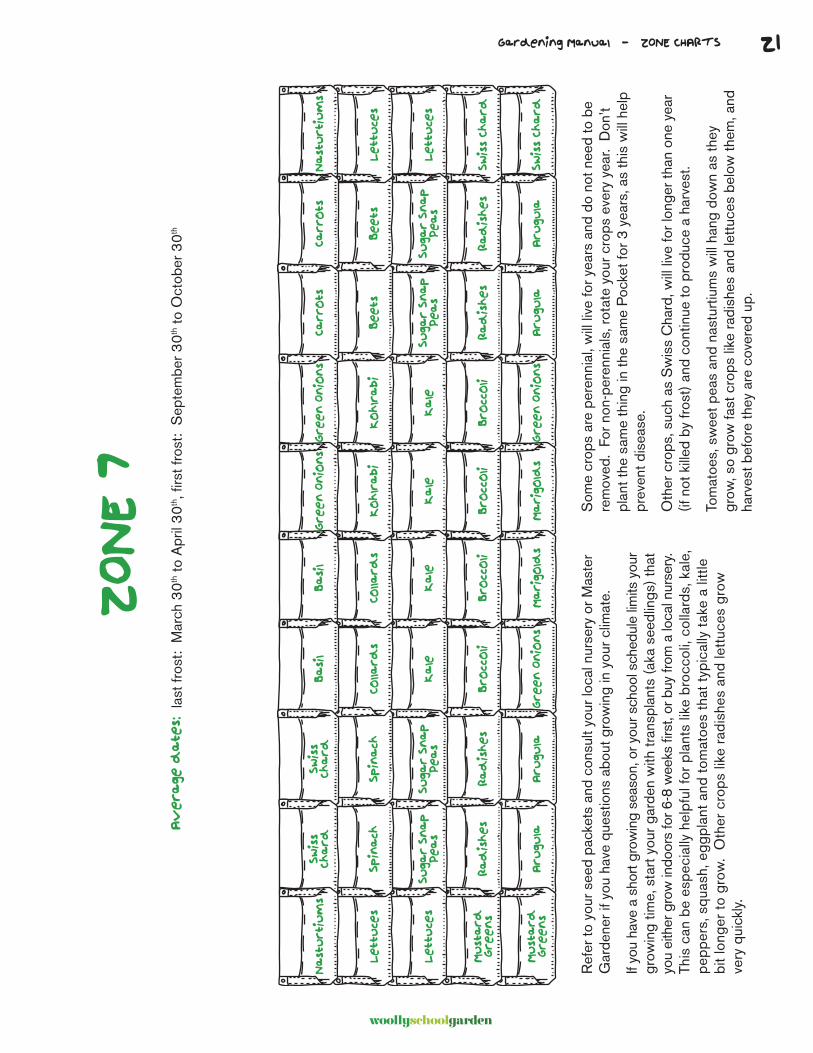
ZON
E 7
Av
era
ge d
ate
s: l
ast f
rost
: M
arch
30th
to A
pril
30th
, firs
t fro
st:
Sep
tem
ber 3
0th to
Oct
ober
30th
Ref
er to
you
r see
d pa
cket
s an
d co
nsul
t you
r loc
al n
urse
ry o
r Mas
ter
Gar
dene
r if y
ou h
ave
ques
tions
abo
ut g
row
ing
in y
our c
limat
e.
If yo
u ha
ve a
sho
rt gr
owin
g se
ason
, or y
our s
choo
l sch
edul
e lim
its y
our
grow
ing
time,
sta
rt y
our g
arde
n w
ith tr
ansp
lant
s (a
ka s
eedl
ings
) tha
t yo
u ei
ther
gro
w in
door
s fo
r 6-8
wee
ks fi
rst,
or b
uy fr
om a
loca
l nur
sery
. Th
is c
an b
e es
peci
ally
hel
pful
for
plan
ts li
ke b
rocc
oli,
colla
rds,
kal
e,
pepp
ers,
squ
ash,
egg
plan
t and
tom
atoe
s th
at ty
pica
lly t
ake
a lit
tle
bit l
onge
r to
gro
w.
Oth
er c
rops
like
rad
ishe
s an
d le
ttuc
es g
row
ve
ry q
uick
ly.
Som
e cr
ops
are
pere
nnia
l, w
ill li
ve fo
r yea
rs a
nd d
o no
t nee
d to
be
rem
oved
. Fo
r non
-per
enni
als,
rota
te y
our c
rops
eve
ry y
ear.
Don
’t pl
ant t
he s
ame
thin
g in
the
sam
e P
ocke
t for
3 y
ears
, as
this
will
hel
p pr
even
t dis
ease
.
Oth
er c
rops
, suc
h as
Sw
iss
Cha
rd, w
ill li
ve fo
r lon
ger t
han
one
year
(if
not
kill
ed b
y fro
st) a
nd c
ontin
ue to
pro
duce
a h
arve
st.
Tom
atoe
s, s
wee
t pea
s an
d na
stur
tium
s w
ill h
ang
dow
n as
they
gr
ow, s
o gr
ow fa
st c
rops
like
radi
shes
and
lettu
ces
belo
w th
em, a
nd
harv
est b
efor
e th
ey a
re c
over
ed u
p.

22
woollyschoolgarden
Gardening Manual - ZONE CHARTS
ZON
E 8
Fall/
Win
ter
Ga
rden D
esi
gn
Av
era
ge d
ate
s: l
ast f
rost
: Fe
brua
ry 2
8th to
Mar
ch 3
0th, fi
rst f
rost
: O
ctob
er 3
0th to
Nov
embe
r 30th
P
lant
this
gar
den
in J
uly,
Aug
ust o
r ear
ly S
epte
mbe
r.
Na
stu
rtiu
ms
Lett
uce
s
Lett
uce
s
Mu
sta
rd
Gre
ens
Mu
sta
rd
Gre
ens
Ma
rigo
lds
Colla
rds
Ka
le
Brocc
oli
Gre
en O
nio
ns
Carr
ots
Beets
Suga
r Sn
ap
Pea
s
Ra
dis
hes
Aru
gula
Swis
s
Cha
rd
Spin
ach
Suga
r Sn
ap
Pea
s
Ra
dis
hes
Aru
gula
Ma
rigo
lds
Colla
rds
Ka
le
Brocc
oli
Ma
rigo
lds
Carr
ots
Beets
Suga
r Sn
ap
Pea
s
Ra
dis
hes
Aru
gula
Swis
s
Cha
rd
Spin
ach
Suga
r Sn
ap
Pea
s
Ra
dis
hes
Aru
gula
Gre
en O
nio
ns
Spin
ach
Ka
le
Brocc
oli
Gre
en O
nio
ns
Gre
en O
nio
ns
Spin
ach
Ka
le
Brocc
oli
Ma
rigo
lds
Na
stu
rtiu
ms
Lett
uce
s
Lett
uce
s
Swis
s Ch
ard
Swis
s Ch
ard
Ref
er to
you
r see
d pa
cket
s an
d co
nsul
t you
r loc
al n
urse
ry o
r Mas
ter
Gar
dene
r if y
ou h
ave
ques
tions
abo
ut g
row
ing
in y
our c
limat
e.
If yo
u ha
ve a
sho
rt gr
owin
g se
ason
, or y
our s
choo
l sch
edul
e lim
its y
our
grow
ing
time,
sta
rt y
our g
arde
n w
ith tr
ansp
lant
s (a
ka s
eedl
ings
) tha
t yo
u ei
ther
gro
w in
door
s fo
r 6-8
wee
ks fi
rst,
or b
uy fr
om a
loca
l nur
sery
. Th
is c
an b
e es
peci
ally
hel
pful
for
plan
ts li
ke b
rocc
oli,
colla
rds,
kal
e,
pepp
ers,
squ
ash,
egg
plan
t and
tom
atoe
s th
at ty
pica
lly t
ake
a lit
tle
bit l
onge
r to
gro
w.
Oth
er c
rops
like
rad
ishe
s an
d le
ttuc
es g
row
ve
ry q
uick
ly.
Som
e cr
ops
are
pere
nnia
l, w
ill li
ve fo
r yea
rs a
nd d
o no
t nee
d to
be
rem
oved
. For
non
-per
enni
als,
rota
te y
our c
rops
eve
ry y
ear.
Don
’t pl
ant t
he s
ame
thin
g in
the
sam
e P
ocke
t for
3 y
ears
, as
this
will
hel
p pr
even
t dis
ease
.
Oth
er c
rops
, suc
h as
Sw
iss
Cha
rd, w
ill li
ve fo
r lon
ger t
han
one
year
(if
not
kill
ed b
y fro
st) a
nd c
ontin
ue to
pro
duce
a h
arve
st.
Tom
atoe
s, s
wee
t pea
s an
d na
stur
tium
s w
ill h
ang
dow
n as
they
gr
ow, s
o gr
ow fa
st c
rops
like
radi
shes
and
lettu
ces
belo
w th
em, a
nd
harv
est b
efor
e th
ey a
re c
over
ed u
p.
23
woollyschoolgarden
Gardening Manual - ZONE CHARTS
Ma
rigo
lds
Gre
en O
nio
ns
Tom
ato
Lett
uce
Ma
rigo
lds
Gre
en O
nio
ns
Peppers
Sweet
Pea
s
Ra
dis
hes
Ra
dis
hes
Bush
Bea
ns
Bush
Bea
ns
Basi
l
Aru
gula
Aru
gula
Beets
Carr
ots
Tom
ato
Lett
uce
Lett
uce
Basi
l
Peppers
Sweet
Pea
s
Aru
gula
Aru
gula
Bush
Bea
ns
Bush
Bea
ns
Tom
ato
Lett
uce
Lett
uce
Beets
Carr
ots
Basi
l
Mu
sta
rd
Gre
ens
Mu
sta
rd
Gre
ens
Gre
en O
nio
ns
Peppers
Na
stu
rtiu
ms
Ra
dis
hes
Ra
dis
hes
Basi
l
Peppers
Na
stu
rtiu
ms
Mu
sta
rd
Gre
ens
Mu
sta
rd
Gre
ens
Ma
rigo
lds
Gre
en O
nio
ns
Tom
ato
Lett
uce
Ma
rigo
lds
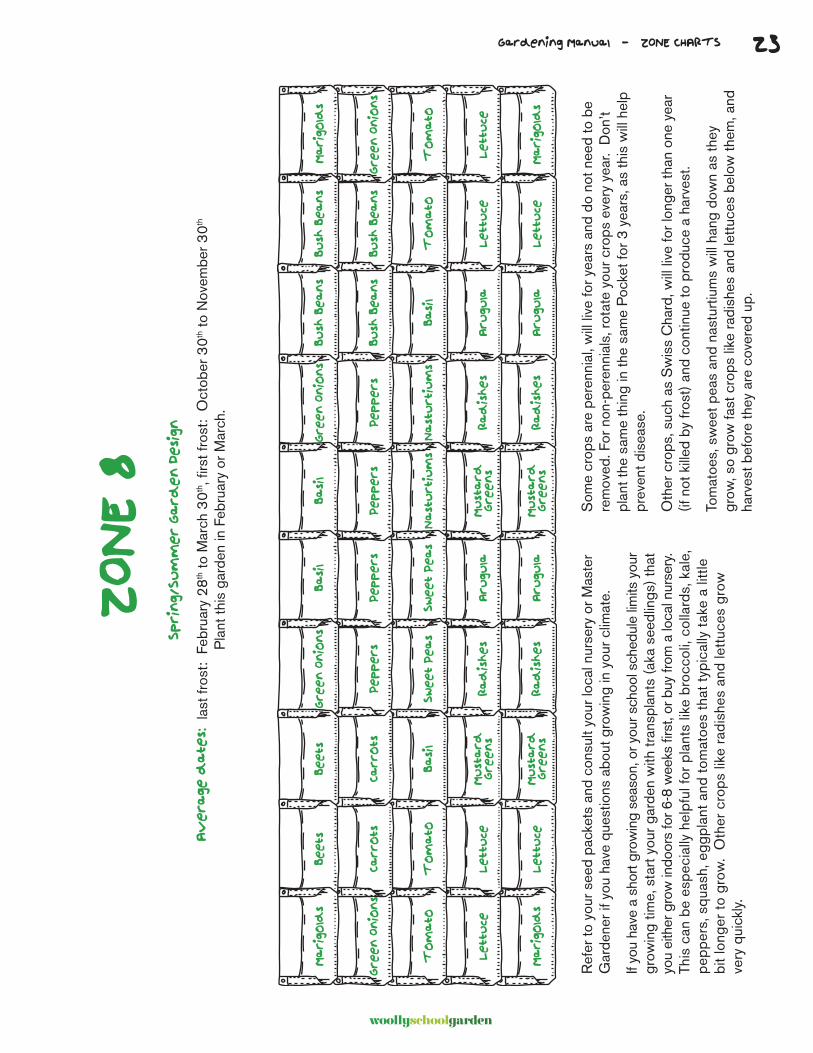
ZON
E 8
Spri
ng/
Sum
mer
Ga
rden D
esi
gn
Av
era
ge d
ate
s: l
ast f
rost
: Fe
brua
ry 2
8th to
Mar
ch 3
0th, fi
rst f
rost
: O
ctob
er 3
0th to
Nov
embe
r 30th
P
lant
this
gar
den
in F
ebru
ary
or M
arch
.
Ref
er to
you
r see
d pa
cket
s an
d co
nsul
t you
r loc
al n
urse
ry o
r Mas
ter
Gar
dene
r if y
ou h
ave
ques
tions
abo
ut g
row
ing
in y
our c
limat
e.
If yo
u ha
ve a
sho
rt gr
owin
g se
ason
, or y
our s
choo
l sch
edul
e lim
its y
our
grow
ing
time,
sta
rt y
our g
arde
n w
ith tr
ansp
lant
s (a
ka s
eedl
ings
) tha
t yo
u ei
ther
gro
w in
door
s fo
r 6-8
wee
ks fi
rst,
or b
uy fr
om a
loca
l nur
sery
. Th
is c
an b
e es
peci
ally
hel
pful
for
plan
ts li
ke b
rocc
oli,
colla
rds,
kal
e,
pepp
ers,
squ
ash,
egg
plan
t and
tom
atoe
s th
at ty
pica
lly t
ake
a lit
tle
bit l
onge
r to
gro
w.
Oth
er c
rops
like
rad
ishe
s an
d le
ttuc
es g
row
ve
ry q
uick
ly.
Som
e cr
ops
are
pere
nnia
l, w
ill li
ve fo
r yea
rs a
nd d
o no
t nee
d to
be
rem
oved
. For
non
-per
enni
als,
rota
te y
our c
rops
eve
ry y
ear.
Don
’t pl
ant t
he s
ame
thin
g in
the
sam
e P
ocke
t for
3 y
ears
, as
this
will
hel
p pr
even
t dis
ease
.
Oth
er c
rops
, suc
h as
Sw
iss
Cha
rd, w
ill li
ve fo
r lon
ger t
han
one
year
(if
not
kill
ed b
y fro
st) a
nd c
ontin
ue to
pro
duce
a h
arve
st.
Tom
atoe
s, s
wee
t pea
s an
d na
stur
tium
s w
ill h
ang
dow
n as
they
gr
ow, s
o gr
ow fa
st c
rops
like
radi
shes
and
lettu
ces
belo
w th
em, a
nd
harv
est b
efor
e th
ey a
re c
over
ed u
p.

24
woollyschoolgarden
Gardening Manual - ZONE CHARTS
ZON
E 9
Spri
ng/
Sum
mer
Ga
rden D
esi
gn
Av
era
ge d
ate
s: l
ast f
rost
: Ja
nuar
y 3
0th to
Feb
ruar
y 28
th, fi
rst f
rost
: O
ctob
er 3
0th to
Nov
embe
r 30th
W
e su
gges
t you
pla
nt th
is g
arde
n in
Feb
ruar
y or
Mar
ch.
Ma
rigo
lds
Gre
en O
nio
ns
Tom
ato
Lett
uce
Ma
rigo
lds
Gre
en O
nio
ns
Peppers
Sweet
Pea
s
Ra
dis
hes
Ra
dis
hes
Bush
Bea
ns
Bush
Bea
ns
Basi
l
Aru
gula
Aru
gula
Beets
Carr
ots
Tom
ato
Lett
uce
Lett
uce
Basi
l
Peppers
Sweet
Pea
s
Aru
gula
Aru
gula
Bush
Bea
ns
Bush
Bea
ns
Tom
ato
Lett
uce
Lett
uce
Beets
Carr
ots
Basi
l
Mu
sta
rd
Gre
ens
Orega
no
Gre
en O
nio
ns
Peppers
Na
stu
rtiu
ms
Ra
dis
hes
Ra
dis
hes
Basi
l
Peppers
Na
stu
rtiu
ms
Mu
sta
rd
Gre
ens
Mu
sta
rd
Gre
ens
Ma
rigo
lds
Gre
en O
nio
ns
Tom
ato
Lett
uce
Ma
rigo
lds
Ref
er to
you
r see
d pa
cket
s an
d co
nsul
t you
r loc
al n
urse
ry o
r Mas
ter
Gar
dene
r if y
ou h
ave
ques
tions
abo
ut g
row
ing
in y
our c
limat
e.
If yo
u ha
ve a
sho
rt gr
owin
g se
ason
, or y
our s
choo
l sch
edul
e lim
its y
our
grow
ing
time,
sta
rt y
our g
arde
n w
ith tr
ansp
lant
s (a
ka s
eedl
ings
) tha
t yo
u ei
ther
gro
w in
door
s fo
r 6-8
wee
ks fi
rst,
or b
uy fr
om a
loca
l nur
sery
. Th
is c
an b
e es
peci
ally
hel
pful
for
plan
ts li
ke b
rocc
oli,
colla
rds,
kal
e,
pepp
ers,
squ
ash,
egg
plan
t and
tom
atoe
s th
at ty
pica
lly t
ake
a lit
tle
bit l
onge
r to
gro
w.
Oth
er c
rops
like
rad
ishe
s an
d le
ttuc
es g
row
ve
ry q
uick
ly.
Som
e cr
ops
are
pere
nnia
l, w
ill li
ve fo
r yea
rs a
nd d
o no
t nee
d to
be
rem
oved
. Fo
r non
-per
enni
als,
rota
te y
our c
rops
eve
ry y
ear.
Don
’t pl
ant t
he s
ame
thin
g in
the
sam
e P
ocke
t for
3 y
ears
, as
this
will
hel
p pr
even
t dis
ease
.
Oth
er c
rops
, suc
h as
Sw
iss
Cha
rd, w
ill li
ve fo
r lon
ger t
han
one
year
(if
not
kill
ed b
y fro
st) a
nd c
ontin
ue to
pro
duce
a h
arve
st.
Tom
atoe
s, s
wee
t pea
s an
d na
stur
tium
s w
ill h
ang
dow
n as
they
gr
ow, s
o gr
ow fa
st c
rops
like
radi
shes
and
lettu
ces
belo
w th
em, a
nd
harv
est b
efor
e th
ey a
re c
over
ed u
p.

woollyschoolgarden
2Gardening Manual - ZONE CHARTS
ZON
E 9
Fall/
Win
ter
Ga
rden D
esi
gn
Av
era
ge d
ate
s: l
ast f
rost
: Ja
nuar
y 3
0th, fi
rst f
rost
: N
ovem
ber 3
0th to
Dec
embe
r 30th
We
sugg
est p
lant
this
gar
den
in F
ebru
ary
or M
arch
.
Na
stu
rtiu
ms
Lett
uce
s
Lett
uce
s
Mu
sta
rd
Gre
ens
Mu
sta
rd
Gre
ens
Ma
rigo
lds
Colla
rds
Ka
le
Brocc
oli
Gre
en O
nio
ns
Carr
ots
Beets
Suga
r Sn
ap
Pea
s
Ra
dis
hes
Aru
gula
Swis
s
Cha
rd
Spin
ach
Suga
r Sn
ap
Pea
s
Ra
dis
hes
Aru
gula
Ma
rigo
lds
Colla
rds
Ka
le
Brocc
oli
Ma
rigo
lds
Carr
ots
Beets
Suga
r Sn
ap
Pea
s
Ra
dis
hes
Aru
gula
Swis
s
Cha
rd
Spin
ach
Suga
r Sn
ap
Pea
s
Ra
dis
hes
Aru
gula
Gre
en O
nio
ns
Mu
sta
rd
Gre
ens
Ka
le
Brocc
oli
Gre
en O
nio
ns
Gre
en O
nio
ns
Mu
sta
rd
Gre
ens
Ka
le
Brocc
oli
Ma
rigo
lds
Na
stu
rtiu
ms
Lett
uce
s
Lett
uce
s
Swis
s Ch
ard
Swis
s Ch
ard
Ref
er to
you
r see
d pa
cket
s an
d co
nsul
t you
r loc
al n
urse
ry o
r Mas
ter
Gar
dene
r if y
ou h
ave
ques
tions
abo
ut g
row
ing
in y
our c
limat
e.
If yo
u ha
ve a
sho
rt gr
owin
g se
ason
, or y
our s
choo
l sch
edul
e lim
its y
our
grow
ing
time,
sta
rt y
our g
arde
n w
ith tr
ansp
lant
s (a
ka s
eedl
ings
) tha
t yo
u ei
ther
gro
w in
door
s fo
r 6-8
wee
ks fi
rst,
or b
uy fr
om a
loca
l nur
sery
. Th
is c
an b
e es
peci
ally
hel
pful
for
plan
ts li
ke b
rocc
oli,
colla
rds,
kal
e,
pepp
ers,
squ
ash,
egg
plan
t and
tom
atoe
s th
at ty
pica
lly t
ake
a lit
tle
bit l
onge
r to
gro
w.
Oth
er c
rops
like
rad
ishe
s an
d le
ttuc
es g
row
ve
ry q
uick
ly.
Som
e cr
ops
are
pere
nnia
l, w
ill li
ve fo
r yea
rs a
nd d
o no
t nee
d to
be
rem
oved
. Fo
r non
-per
enni
als,
rota
te y
our c
rops
eve
ry y
ear.
Don
’t pl
ant t
he s
ame
thin
g in
the
sam
e P
ocke
t for
3 y
ears
, as
this
will
hel
p pr
even
t dis
ease
.
Oth
er c
rops
, suc
h as
Sw
iss
Cha
rd, w
ill li
ve fo
r lon
ger t
han
one
year
(if
not
kill
ed b
y fro
st) a
nd c
ontin
ue to
pro
duce
a h
arve
st.
Tom
atoe
s, s
wee
t pea
s an
d na
stur
tium
s w
ill h
ang
dow
n as
they
gr
ow, s
o gr
ow fa
st c
rops
like
radi
shes
and
lettu
ces
belo
w th
em, a
nd
harv
est t
hem
bef
ore
they
are
cov
ered
up.

26
woollyschoolgarden
Gardening Manual - ZONE CHARTS
ZON
E 10
Spri
ng/
Sum
mer
Ga
rden D
esi
gn
Av
era
ge d
ate
s: l
ast f
rost
: Ja
nuar
y 3
0th, fi
rst f
rost
: O
ctob
er 3
0th to
Nov
embe
r 30th
to D
ecem
ber 3
0th
We
sugg
est y
ou p
lant
this
gar
den
in F
ebru
ary
or M
arch
.
Ma
rigo
lds
Gre
en O
nio
ns
Tom
ato
Lett
uce
Ma
rigo
lds
Gre
en O
nio
ns
Peppers
Sweet
Pea
s
Ra
dis
hes
Ra
dis
hes
Bush
Bea
ns
Bush
Bea
ns
Basi
l
Aru
gula
Aru
gula
Beets
Carr
ots
Tom
ato
Lett
uce
Lett
uce
Basi
l
Peppers
Sweet
Pea
s
Aru
gula
Aru
gula
Bush
Bea
ns
Bush
Bea
ns
Tom
ato
Lett
uce
Lett
uce
Beets
Carr
ots
Basi
l
Mu
sta
rd
Gre
ens
Orega
no
Gre
en O
nio
ns
Peppers
Na
stu
rtiu
ms
Ra
dis
hes
Ra
dis
hes
Basi
l
Peppers
Na
stu
rtiu
ms
Mu
sta
rd
Gre
ens
Mu
sta
rd
Gre
ens
Ma
rigo
lds
Gre
en O
nio
ns
Tom
ato
Lett
uce
Ma
rigo
lds
Ref
er to
you
r see
d pa
cket
s an
d co
nsul
t you
r loc
al n
urse
ry o
r Mas
ter
Gar
dene
r if y
ou h
ave
ques
tions
abo
ut g
row
ing
in y
our c
limat
e.
If yo
u ha
ve a
sho
rt gr
owin
g se
ason
, or y
our s
choo
l sch
edul
e lim
its y
our
grow
ing
time,
sta
rt y
our g
arde
n w
ith tr
ansp
lant
s (a
ka s
eedl
ings
) tha
t yo
u ei
ther
gro
w in
door
s fo
r 6-8
wee
ks fi
rst,
or b
uy fr
om a
loca
l nur
sery
. Th
is c
an b
e es
peci
ally
hel
pful
for
plan
ts li
ke b
rocc
oli,
colla
rds,
kal
e,
pepp
ers,
squ
ash,
egg
plan
t and
tom
atoe
s th
at ty
pica
lly t
ake
a lit
tle
bit l
onge
r to
gro
w.
Oth
er c
rops
like
rad
ishe
s an
d le
ttuc
es g
row
ve
ry q
uick
ly.
Som
e cr
ops
are
pere
nnia
l, w
ill li
ve fo
r yea
rs a
nd d
o no
t nee
d to
be
rem
oved
. Fo
r non
-per
enni
als,
rota
te y
our c
rops
eve
ry y
ear.
Don
’t pl
ant t
he s
ame
thin
g in
the
sam
e P
ocke
t for
3 y
ears
, as
this
will
hel
p pr
even
t dis
ease
.
Oth
er c
rops
, suc
h as
Sw
iss
Cha
rd, w
ill li
ve fo
r lon
ger t
han
one
year
(if
not
kill
ed b
y fro
st) a
nd c
ontin
ue to
pro
duce
a h
arve
st.
Tom
atoe
s, s
wee
t pea
s an
d na
stur
tium
s w
ill h
ang
dow
n as
they
gr
ow, s
o gr
ow fa
st c
rops
like
radi
shes
and
lettu
ces
belo
w th
em, a
nd
harv
est b
efor
e th
ey a
re c
over
ed u
p.
woollyschoolgarden
Gardening Manual - ZONE CHARTS
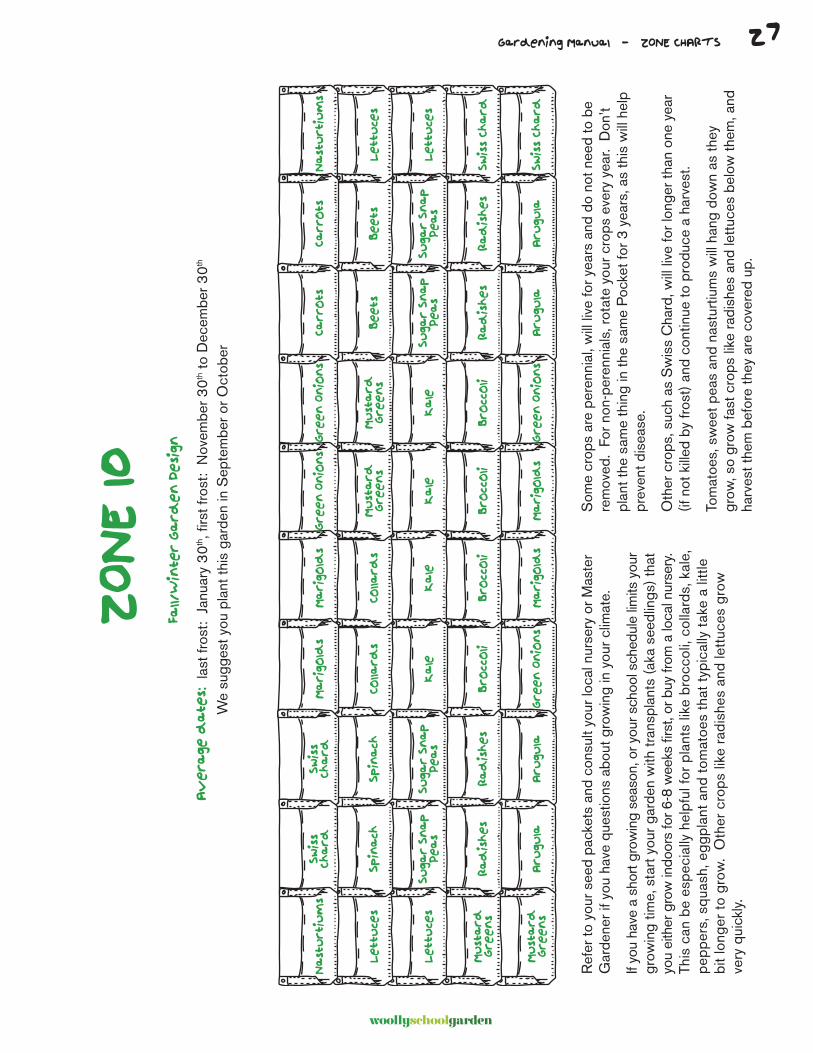
ZON
E 10
Fall/
Win
ter
Ga
rden D
esi
gn
Av
era
ge d
ate
s: l
ast f
rost
: Ja
nuar
y 3
0th, fi
rst f
rost
: N
ovem
ber 3
0th to
Dec
embe
r 30th
We
sugg
est y
ou p
lant
this
gar
den
in S
epte
mbe
r or O
ctob
er
Na
stu
rtiu
ms
Lett
uce
s
Lett
uce
s
Mu
sta
rd
Gre
ens
Mu
sta
rd
Gre
ens
Ma
rigo
lds
Colla
rds
Ka
le
Brocc
oli
Gre
en O
nio
ns
Carr
ots
Beets
Suga
r Sn
ap
Pea
s
Ra
dis
hes
Aru
gula
Swis
s
Cha
rd
Spin
ach
Suga
r Sn
ap
Pea
s
Ra
dis
hes
Aru
gula
Ma
rigo
lds
Colla
rds
Ka
le
Brocc
oli
Ma
rigo
lds
Carr
ots
Beets
Suga
r Sn
ap
Pea
s
Ra
dis
hes
Aru
gula
Swis
s
Cha
rd
Spin
ach
Suga
r Sn
ap
Pea
s
Ra
dis
hes
Aru
gula
Gre
en O
nio
ns
Mu
sta
rd
Gre
ens
Ka
le
Brocc
oli
Gre
en O
nio
ns
Gre
en O
nio
ns
Mu
sta
rd
Gre
ens
Ka
le
Brocc
oli
Ma
rigo
lds
Na
stu
rtiu
ms
Lett
uce
s
Lett
uce
s
Swis
s Ch
ard
Swis
s Ch
ard
Ref
er to
you
r see
d pa
cket
s an
d co
nsul
t you
r loc
al n
urse
ry o
r Mas
ter
Gar
dene
r if y
ou h
ave
ques
tions
abo
ut g
row
ing
in y
our c
limat
e.
If yo
u ha
ve a
sho
rt gr
owin
g se
ason
, or y
our s
choo
l sch
edul
e lim
its y
our
grow
ing
time,
sta
rt y
our g
arde
n w
ith tr
ansp
lant
s (a
ka s
eedl
ings
) tha
t yo
u ei
ther
gro
w in
door
s fo
r 6-8
wee
ks fi
rst,
or b
uy fr
om a
loca
l nur
sery
. Th
is c
an b
e es
peci
ally
hel
pful
for
plan
ts li
ke b
rocc
oli,
colla
rds,
kal
e,
pepp
ers,
squ
ash,
egg
plan
t and
tom
atoe
s th
at ty
pica
lly t
ake
a lit
tle
bit l
onge
r to
gro
w.
Oth
er c
rops
like
rad
ishe
s an
d le
ttuc
es g
row
ve
ry q
uick
ly.
Som
e cr
ops
are
pere
nnia
l, w
ill li
ve fo
r yea
rs a
nd d
o no
t nee
d to
be
rem
oved
. Fo
r non
-per
enni
als,
rota
te y
our c
rops
eve
ry y
ear.
Don
’t pl
ant t
he s
ame
thin
g in
the
sam
e P
ocke
t for
3 y
ears
, as
this
will
hel
p pr
even
t dis
ease
.
Oth
er c
rops
, suc
h as
Sw
iss
Cha
rd, w
ill li
ve fo
r lon
ger t
han
one
year
(if
not
kill
ed b
y fro
st) a
nd c
ontin
ue to
pro
duce
a h
arve
st.
Tom
atoe
s, s
wee
t pea
s an
d na
stur
tium
s w
ill h
ang
dow
n as
they
gr
ow, s
o gr
ow fa
st c
rops
like
radi
shes
and
lettu
ces
belo
w th
em, a
nd
harv
est t
hem
bef
ore
they
are
cov
ered
up.
27

28
woollyschoolgarden
Gardening Manual - ZONE CHARTS
ZON
E 11
Fall/
Win
ter
Ga
rden D
esi
gn
Zon
e 11
is fr
ost f
ree
year
-rou
nd.
Exc
essi
ve m
oist
ure
durin
g ra
iny
seas
on m
ay li
mit
som
e ty
pes
of p
lant
s, s
o ex
perim
ent!
W
e su
gges
t tha
t you
pla
nt th
is g
arde
n in
Oct
ober
.
Na
stu
rtiu
ms
Lett
uce
s
Lett
uce
s
Mu
sta
rd
Gre
ens
Mu
sta
rd
Gre
ens
Carr
ots
Colla
rds
Ka
le
Brocc
oli
Gre
en O
nio
ns
Carr
ots
Beets
Suga
r Sn
ap
Pea
s
Ra
dis
hes
Spin
ach
Swis
s
Cha
rd
Spin
ach
Suga
r Sn
ap
Pea
s
Ra
dis
hes
Aru
gula
Carr
ots
Colla
rds
Ka
le
Brocc
oli
Ma
rigo
lds
Carr
ots
Beets
Suga
r Sn
ap
Pea
s
Ra
dis
hes
Aru
gula
Swis
s
Cha
rd
Spin
ach
Suga
r Sn
ap
Pea
s
Ra
dis
hes
Gre
en O
nio
ns
Gre
en O
nio
ns
Colla
rds
Ka
le
Brocc
oli
Spin
ach
Gre
en O
nio
ns
Colla
rds
Ka
le
Brocc
oli
Ma
rigo
lds
Na
stu
rtiu
ms
Lett
uce
s
Lett
uce
s
Swis
s Ch
ard
Swis
s Ch
ard
Ref
er to
you
r see
d pa
cket
s an
d co
nsul
t you
r loc
al n
urse
ry o
r Mas
ter
Gar
dene
r if y
ou h
ave
ques
tions
abo
ut g
row
ing
in y
our c
limat
e.
If yo
u ha
ve a
sho
rt gr
owin
g se
ason
, or y
our s
choo
l sch
edul
e lim
its y
our
grow
ing
time,
sta
rt y
our g
arde
n w
ith tr
ansp
lant
s (a
ka s
eedl
ings
) tha
t yo
u ei
ther
gro
w in
door
s fo
r 6-8
wee
ks fi
rst,
or b
uy fr
om a
loca
l nur
sery
. Th
is c
an b
e es
peci
ally
hel
pful
for
plan
ts li
ke b
rocc
oli,
colla
rds,
kal
e,
pepp
ers,
squ
ash,
egg
plan
t and
tom
atoe
s th
at ty
pica
lly t
ake
a lit
tle
bit l
onge
r to
gro
w.
Oth
er c
rops
like
rad
ishe
s an
d le
ttuc
es g
row
ve
ry q
uick
ly.
Som
e cr
ops
are
pere
nnia
l, w
ill li
ve fo
r yea
rs a
nd d
o no
t nee
d to
be
rem
oved
. For
non
-per
enni
als,
rota
te y
our c
rops
eve
ry y
ear.
Don
’t pl
ant t
he s
ame
thin
g in
the
sam
e P
ocke
t for
3 y
ears
, as
this
will
hel
p pr
even
t dis
ease
.
Oth
er c
rops
, suc
h as
Sw
iss
Cha
rd, w
ill li
ve fo
r lon
ger t
han
one
year
(if
not
kill
ed b
y fro
st) a
nd c
ontin
ue to
pro
duce
a h
arve
st.
Tom
atoe
s, s
wee
t pea
s an
d na
stur
tium
s w
ill h
ang
dow
n as
they
gr
ow, s
o gr
ow fa
st c
rops
like
radi
shes
and
lettu
ces
belo
w th
em, a
nd
harv
est b
efor
e th
ey a
re c
over
ed u
p.
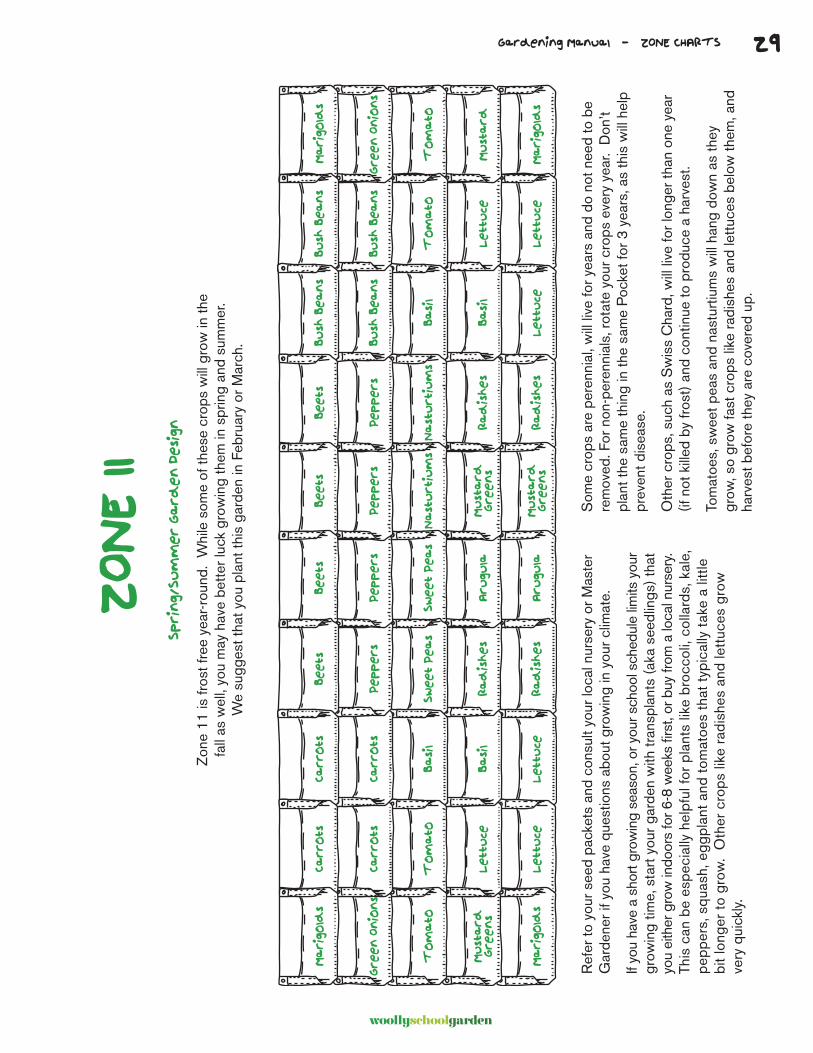
29
woollyschoolgarden
Gardening Manual - ZONE CHARTS
ZON
E 11
Spri
ng/
Sum
mer
Ga
rden D
esi
gn
Zon
e 11
is fr
ost f
ree
year
-rou
nd.
Whi
le s
ome
of th
ese
crop
s w
ill g
row
in th
e
fall
as w
ell,
you
may
hav
e be
tter l
uck
grow
ing
them
in s
prin
g an
d su
mm
er.
We
sugg
est t
hat y
ou p
lant
this
gar
den
in F
ebru
ary
or M
arch
.
Ma
rigo
lds
Gre
en O
nio
ns
Tom
ato
Mu
sta
rd
Gre
ens
Ma
rigo
lds
Beets
Peppers
Sweet
Pea
s
Ra
dis
hes
Ra
dis
hes
Bush
Bea
ns
Bush
Bea
ns
Basi
l
Basi
l
Lett
uce
Carr
ots
Carr
ots
Tom
ato
Lett
uce
Lett
uce
Beets
Peppers
Sweet
Pea
s
Aru
gula
Aru
gula
Bush
Bea
ns
Bush
Bea
ns
Tom
ato
Lett
uce
Lett
uce
Carr
ots
Carr
ots
Basi
l
Basi
l
Lett
uce
Beets
Peppers
Na
stu
rtiu
ms
Ra
dis
hes
Ra
dis
hes
Beets
Peppers
Na
stu
rtiu
ms
Mu
sta
rd
Gre
ens
Mu
sta
rd
Gre
ens
Ma
rigo
lds
Gre
en O
nio
ns
Tom
ato
Mu
sta
rd
Ma
rigo
lds
Ref
er to
you
r see
d pa
cket
s an
d co
nsul
t you
r loc
al n
urse
ry o
r Mas
ter
Gar
dene
r if y
ou h
ave
ques
tions
abo
ut g
row
ing
in y
our c
limat
e.
If yo
u ha
ve a
sho
rt gr
owin
g se
ason
, or y
our s
choo
l sch
edul
e lim
its y
our
grow
ing
time,
sta
rt y
our g
arde
n w
ith tr
ansp
lant
s (a
ka s
eedl
ings
) tha
t yo
u ei
ther
gro
w in
door
s fo
r 6-8
wee
ks fi
rst,
or b
uy fr
om a
loca
l nur
sery
. Th
is c
an b
e es
peci
ally
hel
pful
for
plan
ts li
ke b
rocc
oli,
colla
rds,
kal
e,
pepp
ers,
squ
ash,
egg
plan
t and
tom
atoe
s th
at ty
pica
lly t
ake
a lit
tle
bit l
onge
r to
gro
w.
Oth
er c
rops
like
rad
ishe
s an
d le
ttuc
es g
row
ve
ry q
uick
ly.
Som
e cr
ops
are
pere
nnia
l, w
ill li
ve fo
r yea
rs a
nd d
o no
t nee
d to
be
rem
oved
. For
non
-per
enni
als,
rota
te y
our c
rops
eve
ry y
ear.
Don
’t pl
ant t
he s
ame
thin
g in
the
sam
e P
ocke
t for
3 y
ears
, as
this
will
hel
p pr
even
t dis
ease
.
Oth
er c
rops
, suc
h as
Sw
iss
Cha
rd, w
ill li
ve fo
r lon
ger t
han
one
year
(if
not
kill
ed b
y fro
st) a
nd c
ontin
ue to
pro
duce
a h
arve
st.
Tom
atoe
s, s
wee
t pea
s an
d na
stur
tium
s w
ill h
ang
dow
n as
they
gr
ow, s
o gr
ow fa
st c
rops
like
radi
shes
and
lettu
ces
belo
w th
em, a
nd
harv
est b
efor
e th
ey a
re c
over
ed u
p.

woollyschoolgarden
30 Gardening Manual - PLANTS THAT LOVE POCKETS
PLANTS THAT LOVE POCKETS
Hello! We’re Cool Weather - - or Short Season -- Crops!
Sow Seeds Directly in Pockets: Arugula, Beets, Carrots, Collards, Garlic (plant cloves in the soil), Green Onions, Herbs (all but basil), Kale, Leeks, Lettuce, Mesclun Salad Mixes, Mustard Greens, Green Onions, Parsnips, **Sugar Snap Peas, Potatoes (sow pieces with eyes), Radishes, Rutabagas, Shallots (plant cloves in the soil), Spinach, Swiss Chard.
Some Cool Weather Flowers: Chrysanthemums, Daffodils, Dutch Iris, Freesia, Iceland Poppies, Sweet Peas, Tulips (sow directly).
We’re Tricky (Best Grown from Transplants): Broccoli, Brussels Sprouts, Cabbage, Cauliflower, Celery, Kohlrabi, Strawberries, Turnips (sow directly).
Hi! We’re Warm Weather crops!
Sow Seeds Directly in Pockets: Arugula, Basil, Beets, Cantaloupe, Carrots, Chives, Cilantro, Collard Greens, Fava Beans, Garlic, Kale, Kohlrabi, Leeks, Lettuce, Onions, Parsley, **Peas, Potatoes (sow pieces with eyes), Radishes, Scallions, Shallots (directly sow cloves into the soil), Swiss Chard, Spinach, Turnips.
Some Warm Weather Flowers: Alyssum, Asters, Dahlias, Lavender, Crocus (Saffron), Marigolds, Nasturtiums, Ranunculus.
We’re Tricky (Best Grown from Transplants): Broccoli, Brussels Sprouts, Cabbage, Cauliflower, Celery, Strawberries.
And We’re Hot Weather Crops!
Sow Seeds Directly in Pockets: **Bush/Pole Beans, **Cucumbers, **Lima Beans, Okra.
Some Hot Weather Flowers: Blue Salvia, Cosmos, Zinnias, Bearded Iris, Sunflowers (short varieties), Gloriosa Daisy, Dianthus, Carnations, Dandelions.
We’re Tricky (Best Grown from Transplants): Eggplant, Peppers, *Pumpkins, *Summer Squash (Zucchini, Yellow Crookneck, etc.), **Tomatoes, *Watermelon.

31
woollyschoolgarden
Gardening Manual - PLANT PAGES - Veggies
*These heavier plants should be planted in lower Pockets and allowed to trail on the ground.
**These plants should be planted in upper Pockets and hang down, or use a trellis.
Note
While all plants will grow in Pockets, there are a few we don’t recommend in vertical gardens, including: Corn, Asparagus, Artichokes, and fruit trees. These are best grown in our Woolly Meadows & Deep Meadows!
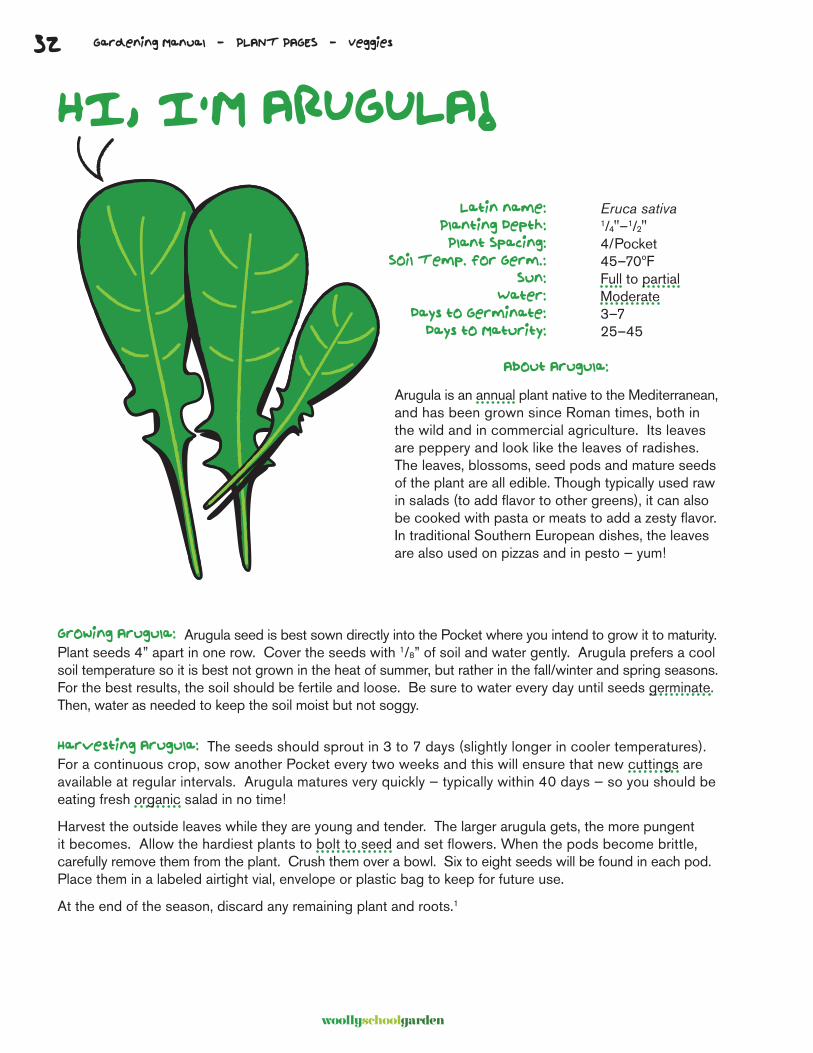
32
woollyschoolgarden
Gardening Manual - PLANT PAGES - Veggies
HI, I’M ARUGULA!
Growing Arugula: Arugula seed is best sown directly into the Pocket where you intend to grow it to maturity. Plant seeds 4” apart in one row. Cover the seeds with 1/8” of soil and water gently. Arugula prefers a cool soil temperature so it is best not grown in the heat of summer, but rather in the fall/winter and spring seasons. For the best results, the soil should be fertile and loose. Be sure to water every day until seeds germinate. Then, water as needed to keep the soil moist but not soggy.
Harvesting Arugula: The seeds should sprout in 3 to 7 days (slightly longer in cooler temperatures). For a continuous crop, sow another Pocket every two weeks and this will ensure that new cuttings are available at regular intervals. Arugula matures very quickly — typically within 40 days — so you should be eating fresh organic salad in no time!
Harvest the outside leaves while they are young and tender. The larger arugula gets, the more pungent it becomes. Allow the hardiest plants to bolt to seed and set flowers. When the pods become brittle, carefully remove them from the plant. Crush them over a bowl. Six to eight seeds will be found in each pod. Place them in a labeled airtight vial, envelope or plastic bag to keep for future use.
At the end of the season, discard any remaining plant and roots.1
Eruca sativa1/4"–1/2"4/Pocket45–70ºFFull to partialModerate3–725–45
Latin name:Planting Depth:Plant Spacing:
Soil Temp. for Germ.:Sun:
Water:Days to Germinate:
Days to Maturity:
About Arugula:
Arugula is an annual plant native to the Mediterranean, and has been grown since Roman times, both in the wild and in commercial agriculture. Its leaves are peppery and look like the leaves of radishes. The leaves, blossoms, seed pods and mature seeds of the plant are all edible. Though typically used raw in salads (to add flavor to other greens), it can also be cooked with pasta or meats to add a zesty flavor. In traditional Southern European dishes, the leaves are also used on pizzas and in pesto — yum!
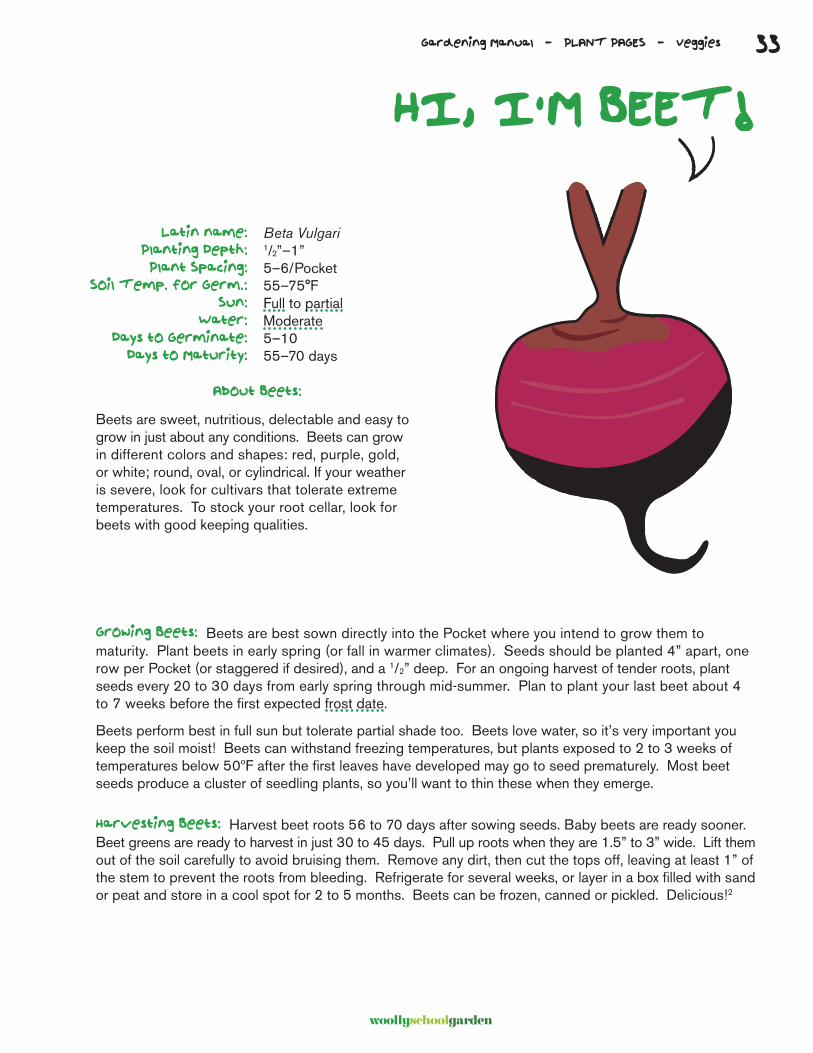
33
woollyschoolgarden
Gardening Manual - PLANT PAGES - Veggies
Eruca sativa1/4"–1/2"4/Pocket45–70ºFFull to partialModerate3–725–45
HI, I’M BEET!
Growing Beets: Beets are best sown directly into the Pocket where you intend to grow them to maturity. Plant beets in early spring (or fall in warmer climates). Seeds should be planted 4” apart, one row per Pocket (or staggered if desired), and a 1/2” deep. For an ongoing harvest of tender roots, plant seeds every 20 to 30 days from early spring through mid-summer. Plan to plant your last beet about 4 to 7 weeks before the first expected frost date.
Beets perform best in full sun but tolerate partial shade too. Beets love water, so it’s very important you keep the soil moist! Beets can withstand freezing temperatures, but plants exposed to 2 to 3 weeks of temperatures below 50ºF after the first leaves have developed may go to seed prematurely. Most beet seeds produce a cluster of seedling plants, so you’ll want to thin these when they emerge.
Harvesting Beets: Harvest beet roots 56 to 70 days after sowing seeds. Baby beets are ready sooner. Beet greens are ready to harvest in just 30 to 45 days. Pull up roots when they are 1.5” to 3” wide. Lift them out of the soil carefully to avoid bruising them. Remove any dirt, then cut the tops off, leaving at least 1” of the stem to prevent the roots from bleeding. Refrigerate for several weeks, or layer in a box filled with sand or peat and store in a cool spot for 2 to 5 months. Beets can be frozen, canned or pickled. Delicious!2
Beta Vulgari1/2”–1”5–6/Pocket55–75°FFull to partialModerate5–1055–70 days
Latin name:Planting Depth:Plant Spacing:
Soil Temp. for Germ.:Sun:
Water:Days to Germinate:
Days to Maturity:
About Beets:
Beets are sweet, nutritious, delectable and easy to grow in just about any conditions. Beets can grow in different colors and shapes: red, purple, gold, or white; round, oval, or cylindrical. If your weather is severe, look for cultivars that tolerate extreme temperatures. To stock your root cellar, look for beets with good keeping qualities.
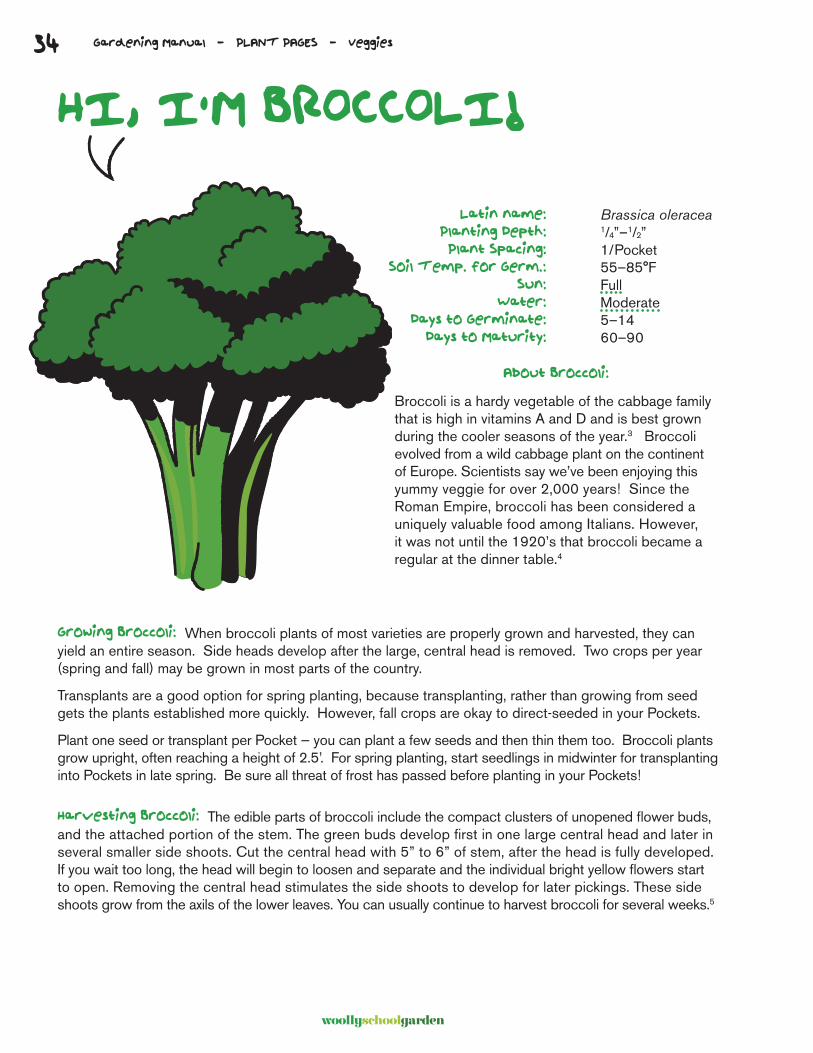
34
woollyschoolgarden
Gardening Manual - PLANT PAGES - Veggies
HI, I’M BROCCOLI!
Growing Broccoli: When broccoli plants of most varieties are properly grown and harvested, they can yield an entire season. Side heads develop after the large, central head is removed. Two crops per year (spring and fall) may be grown in most parts of the country.
Transplants are a good option for spring planting, because transplanting, rather than growing from seed gets the plants established more quickly. However, fall crops are okay to direct-seeded in your Pockets.
Plant one seed or transplant per Pocket — you can plant a few seeds and then thin them too. Broccoli plants grow upright, often reaching a height of 2.5’. For spring planting, start seedlings in midwinter for transplanting into Pockets in late spring. Be sure all threat of frost has passed before planting in your Pockets!
Harvesting Broccoli: The edible parts of broccoli include the compact clusters of unopened flower buds, and the attached portion of the stem. The green buds develop first in one large central head and later in several smaller side shoots. Cut the central head with 5” to 6” of stem, after the head is fully developed. If you wait too long, the head will begin to loosen and separate and the individual bright yellow flowers start to open. Removing the central head stimulates the side shoots to develop for later pickings. These side shoots grow from the axils of the lower leaves. You can usually continue to harvest broccoli for several weeks.5
Brassica oleracea1/4”–1/2”1/Pocket55–85°F FullModerate5–1460–90
Latin name:Planting Depth:Plant Spacing:
Soil Temp. for Germ.:Sun:
Water:Days to Germinate:
Days to Maturity:
About Broccoli:
Broccoli is a hardy vegetable of the cabbage family that is high in vitamins A and D and is best grown during the cooler seasons of the year.3 Broccoli evolved from a wild cabbage plant on the continent of Europe. Scientists say we’ve been enjoying this yummy veggie for over 2,000 years! Since the Roman Empire, broccoli has been considered a uniquely valuable food among Italians. However, it was not until the 1920’s that broccoli became a regular at the dinner table.4
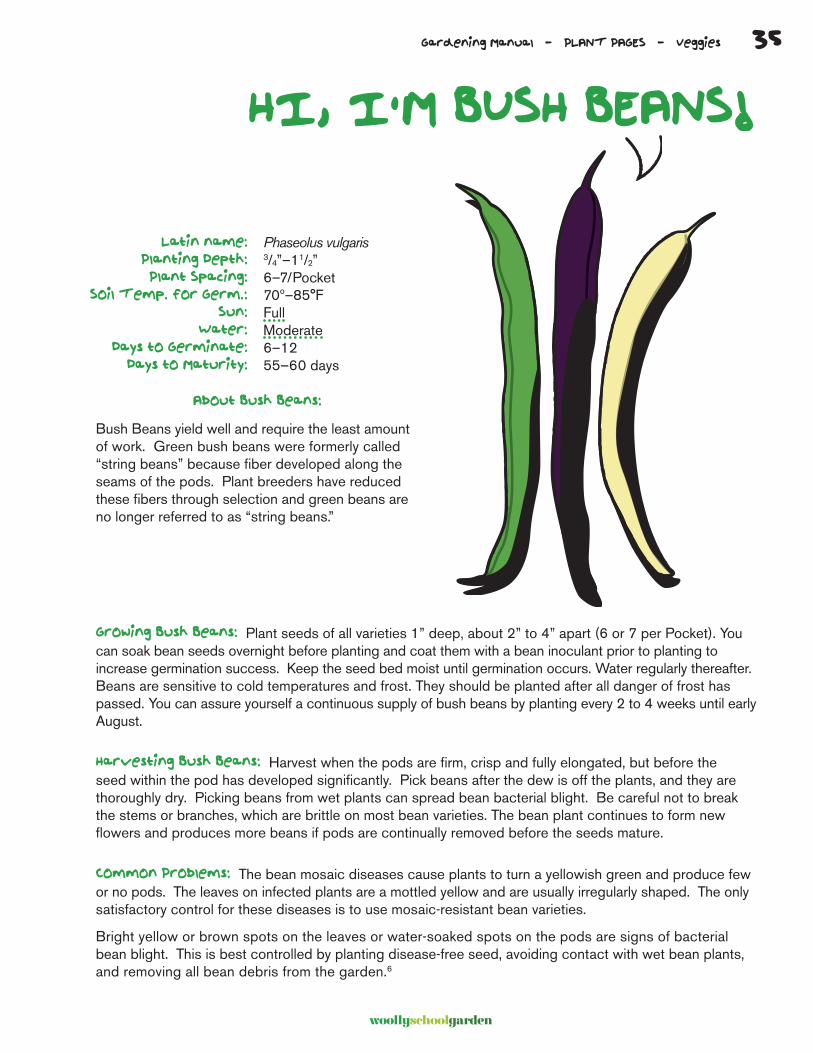
35
woollyschoolgarden
Gardening Manual - PLANT PAGES - Veggies
Brassica oleracea1/4”–1/2”1/Pocket55–85°F FullModerate5–1460–90
HI, I’M BUSH BEANS!
Growing Bush Beans: Plant seeds of all varieties 1” deep, about 2” to 4” apart (6 or 7 per Pocket). You can soak bean seeds overnight before planting and coat them with a bean inoculant prior to planting to increase germination success. Keep the seed bed moist until germination occurs. Water regularly thereafter. Beans are sensitive to cold temperatures and frost. They should be planted after all danger of frost has passed. You can assure yourself a continuous supply of bush beans by planting every 2 to 4 weeks until early August.
Harvesting Bush Beans: Harvest when the pods are firm, crisp and fully elongated, but before the seed within the pod has developed significantly. Pick beans after the dew is off the plants, and they are thoroughly dry. Picking beans from wet plants can spread bean bacterial blight. Be careful not to break the stems or branches, which are brittle on most bean varieties. The bean plant continues to form new flowers and produces more beans if pods are continually removed before the seeds mature.
Common Problems: The bean mosaic diseases cause plants to turn a yellowish green and produce few or no pods. The leaves on infected plants are a mottled yellow and are usually irregularly shaped. The only satisfactory control for these diseases is to use mosaic-resistant bean varieties.
Bright yellow or brown spots on the leaves or water-soaked spots on the pods are signs of bacterial bean blight. This is best controlled by planting disease-free seed, avoiding contact with wet bean plants, and removing all bean debris from the garden.6
Phaseolus vulgaris3/4”–11/2”6–7/Pocket70º–85°FFullModerate6–1255–60 days
Latin name:Planting Depth:Plant Spacing:
Soil Temp. for Germ.:Sun:
Water:Days to Germinate:
Days to Maturity:
About Bush Beans:
Bush Beans yield well and require the least amount of work. Green bush beans were formerly called “string beans” because fiber developed along the seams of the pods. Plant breeders have reduced these fibers through selection and green beans are no longer referred to as “string beans.”
35
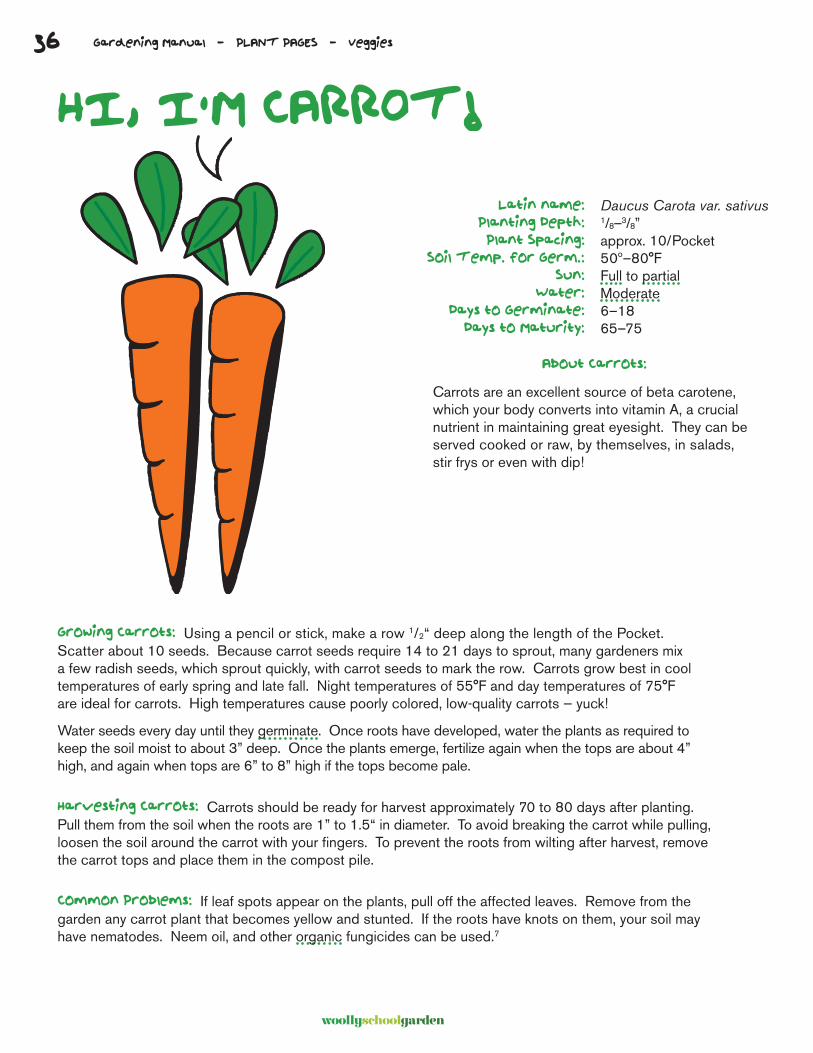
36
woollyschoolgarden
Gardening Manual - PLANT PAGES - Veggies
HI, I’M CARROT!
Growing Carrots: Using a pencil or stick, make a row 1/2“ deep along the length of the Pocket. Scatter about 10 seeds. Because carrot seeds require 14 to 21 days to sprout, many gardeners mix a few radish seeds, which sprout quickly, with carrot seeds to mark the row. Carrots grow best in cool temperatures of early spring and late fall. Night temperatures of 55°F and day temperatures of 75°F are ideal for carrots. High temperatures cause poorly colored, low-quality carrots — yuck!
Water seeds every day until they germinate. Once roots have developed, water the plants as required to keep the soil moist to about 3” deep. Once the plants emerge, fertilize again when the tops are about 4” high, and again when tops are 6” to 8” high if the tops become pale.
Harvesting Carrots: Carrots should be ready for harvest approximately 70 to 80 days after planting. Pull them from the soil when the roots are 1” to 1.5“ in diameter. To avoid breaking the carrot while pulling, loosen the soil around the carrot with your fingers. To prevent the roots from wilting after harvest, remove the carrot tops and place them in the compost pile.
Common Problems: If leaf spots appear on the plants, pull off the affected leaves. Remove from the garden any carrot plant that becomes yellow and stunted. If the roots have knots on them, your soil may have nematodes. Neem oil, and other organic fungicides can be used.7
Daucus Carota var. sativus1/8–3/8”approx. 10/Pocket50º–80°F Full to partialModerate6–1865–75
Latin name:Planting Depth:Plant Spacing:
Soil Temp. for Germ.:Sun:
Water:Days to Germinate:
Days to Maturity:
About Carrots:
Carrots are an excellent source of beta carotene, which your body converts into vitamin A, a crucial nutrient in maintaining great eyesight. They can be served cooked or raw, by themselves, in salads, stir frys or even with dip!
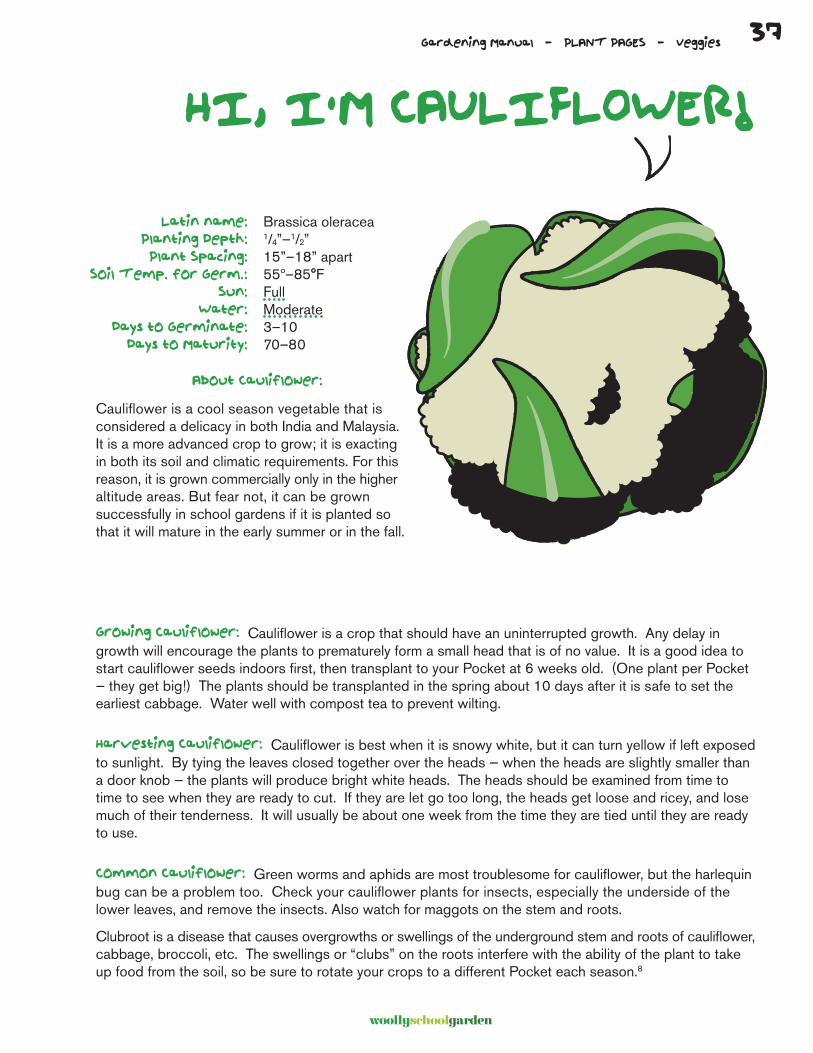
woollyschoolgarden
Gardening Manual - PLANT PAGES - Veggies
Daucus Carota var. sativus1/8–3/8”approx. 10/Pocket50º–80°F Full to partialModerate6–1865–75
HI, I’M CAULIFLOWER!
Growing Cauliflower: Cauliflower is a crop that should have an uninterrupted growth. Any delay in growth will encourage the plants to prematurely form a small head that is of no value. It is a good idea to start cauliflower seeds indoors first, then transplant to your Pocket at 6 weeks old. (One plant per Pocket — they get big!) The plants should be transplanted in the spring about 10 days after it is safe to set the earliest cabbage. Water well with compost tea to prevent wilting.
Harvesting Cauliflower: Cauliflower is best when it is snowy white, but it can turn yellow if left exposed to sunlight. By tying the leaves closed together over the heads — when the heads are slightly smaller than a door knob — the plants will produce bright white heads. The heads should be examined from time to time to see when they are ready to cut. If they are let go too long, the heads get loose and ricey, and lose much of their tenderness. It will usually be about one week from the time they are tied until they are ready to use.
Common Cauliflower: Green worms and aphids are most troublesome for cauliflower, but the harlequin bug can be a problem too. Check your cauliflower plants for insects, especially the underside of the lower leaves, and remove the insects. Also watch for maggots on the stem and roots.
Clubroot is a disease that causes overgrowths or swellings of the underground stem and roots of cauliflower, cabbage, broccoli, etc. The swellings or “clubs” on the roots interfere with the ability of the plant to take up food from the soil, so be sure to rotate your crops to a different Pocket each season.8
Brassica oleracea1/4”–1/2”15”–18” apart55º–85°F FullModerate3–1070–80
Latin name:Planting Depth:Plant Spacing:
Soil Temp. for Germ.:Sun:
Water:Days to Germinate:
Days to Maturity:
About Cauliflower:
Cauliflower is a cool season vegetable that is considered a delicacy in both India and Malaysia. It is a more advanced crop to grow; it is exacting in both its soil and climatic requirements. For this reason, it is grown commercially only in the higher altitude areas. But fear not, it can be grown successfully in school gardens if it is planted so that it will mature in the early summer or in the fall.
37
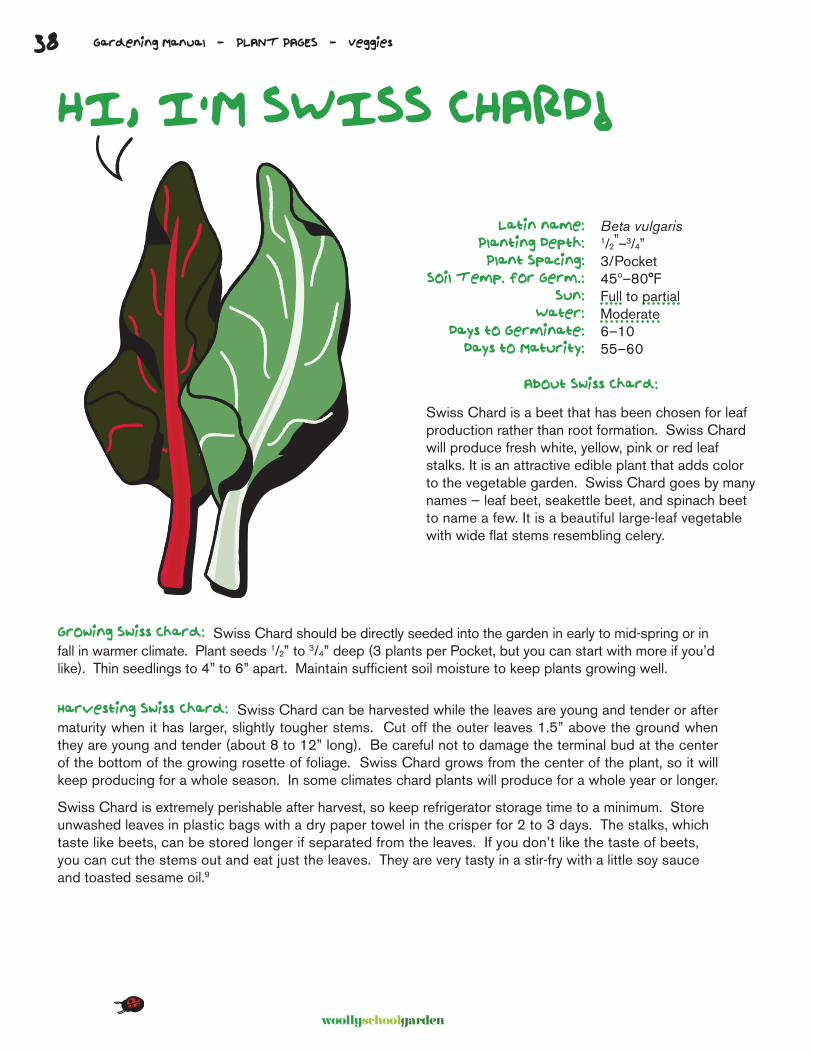
38
woollyschoolgarden
Gardening Manual - PLANT PAGES - Veggies
HI, I’M SWISS CHARD!
Growing Swiss Chard: Swiss Chard should be directly seeded into the garden in early to mid-spring or in fall in warmer climate. Plant seeds 1/2” to 3/4” deep (3 plants per Pocket, but you can start with more if you’d like). Thin seedlings to 4” to 6” apart. Maintain sufficient soil moisture to keep plants growing well.
Harvesting Swiss Chard: Swiss Chard can be harvested while the leaves are young and tender or after maturity when it has larger, slightly tougher stems. Cut off the outer leaves 1.5” above the ground when they are young and tender (about 8 to 12” long). Be careful not to damage the terminal bud at the center of the bottom of the growing rosette of foliage. Swiss Chard grows from the center of the plant, so it will keep producing for a whole season. In some climates chard plants will produce for a whole year or longer.
Swiss Chard is extremely perishable after harvest, so keep refrigerator storage time to a minimum. Store unwashed leaves in plastic bags with a dry paper towel in the crisper for 2 to 3 days. The stalks, which taste like beets, can be stored longer if separated from the leaves. If you don’t like the taste of beets, you can cut the stems out and eat just the leaves. They are very tasty in a stir-fry with a little soy sauce and toasted sesame oil.9
Beta vulgaris1/2”–3/4”3/Pocket45º–80°F Full to partialModerate6–1055–60
Latin name:Planting Depth:Plant Spacing:
Soil Temp. for Germ.:Sun:
Water:Days to Germinate:
Days to Maturity:
About Swiss Chard:
Swiss Chard is a beet that has been chosen for leaf production rather than root formation. Swiss Chard will produce fresh white, yellow, pink or red leaf stalks. It is an attractive edible plant that adds color to the vegetable garden. Swiss Chard goes by many names — leaf beet, seakettle beet, and spinach beet to name a few. It is a beautiful large-leaf vegetable with wide flat stems resembling celery.
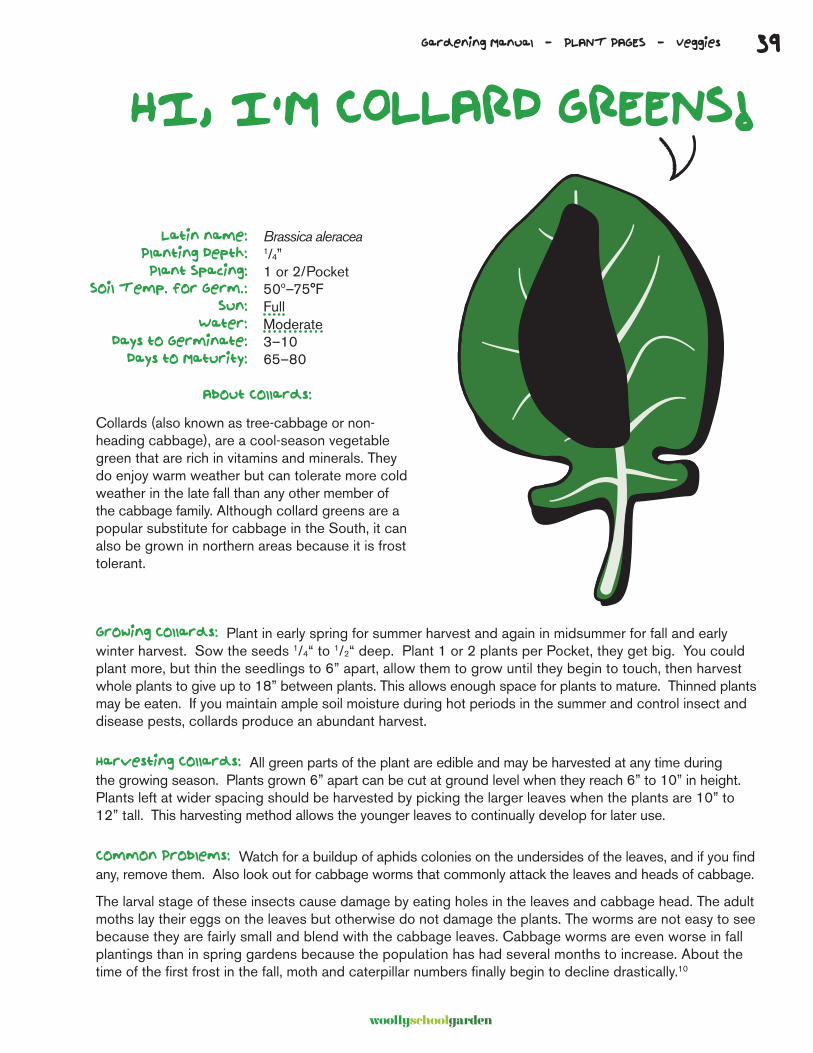
39
woollyschoolgarden
Gardening Manual - PLANT PAGES - Veggies
Beta vulgaris1/2”–3/4”3/Pocket45º–80°F Full to partialModerate6–1055–60
HI, I’M COLLARD GREENS!
Growing Collards: Plant in early spring for summer harvest and again in midsummer for fall and early winter harvest. Sow the seeds 1/4“ to 1/2“ deep. Plant 1 or 2 plants per Pocket, they get big. You could plant more, but thin the seedlings to 6” apart, allow them to grow until they begin to touch, then harvest whole plants to give up to 18” between plants. This allows enough space for plants to mature. Thinned plants may be eaten. If you maintain ample soil moisture during hot periods in the summer and control insect and disease pests, collards produce an abundant harvest.
Harvesting Collards: All green parts of the plant are edible and may be harvested at any time during the growing season. Plants grown 6” apart can be cut at ground level when they reach 6” to 10” in height. Plants left at wider spacing should be harvested by picking the larger leaves when the plants are 10” to 12” tall. This harvesting method allows the younger leaves to continually develop for later use.
Common Problems: Watch for a buildup of aphids colonies on the undersides of the leaves, and if you find any, remove them. Also look out for cabbage worms that commonly attack the leaves and heads of cabbage.
The larval stage of these insects cause damage by eating holes in the leaves and cabbage head. The adult moths lay their eggs on the leaves but otherwise do not damage the plants. The worms are not easy to see because they are fairly small and blend with the cabbage leaves. Cabbage worms are even worse in fall plantings than in spring gardens because the population has had several months to increase. About the time of the first frost in the fall, moth and caterpillar numbers finally begin to decline drastically.10
Brassica aleracea1/4”1 or 2/Pocket50º–75°F FullModerate3–1065–80
Latin name:Planting Depth:Plant Spacing:
Soil Temp. for Germ.:Sun:
Water:Days to Germinate:
Days to Maturity:
About Collards:
Collards (also known as tree-cabbage or non-heading cabbage), are a cool-season vegetable green that are rich in vitamins and minerals. They do enjoy warm weather but can tolerate more cold weather in the late fall than any other member of the cabbage family. Although collard greens are a popular substitute for cabbage in the South, it can also be grown in northern areas because it is frost tolerant.
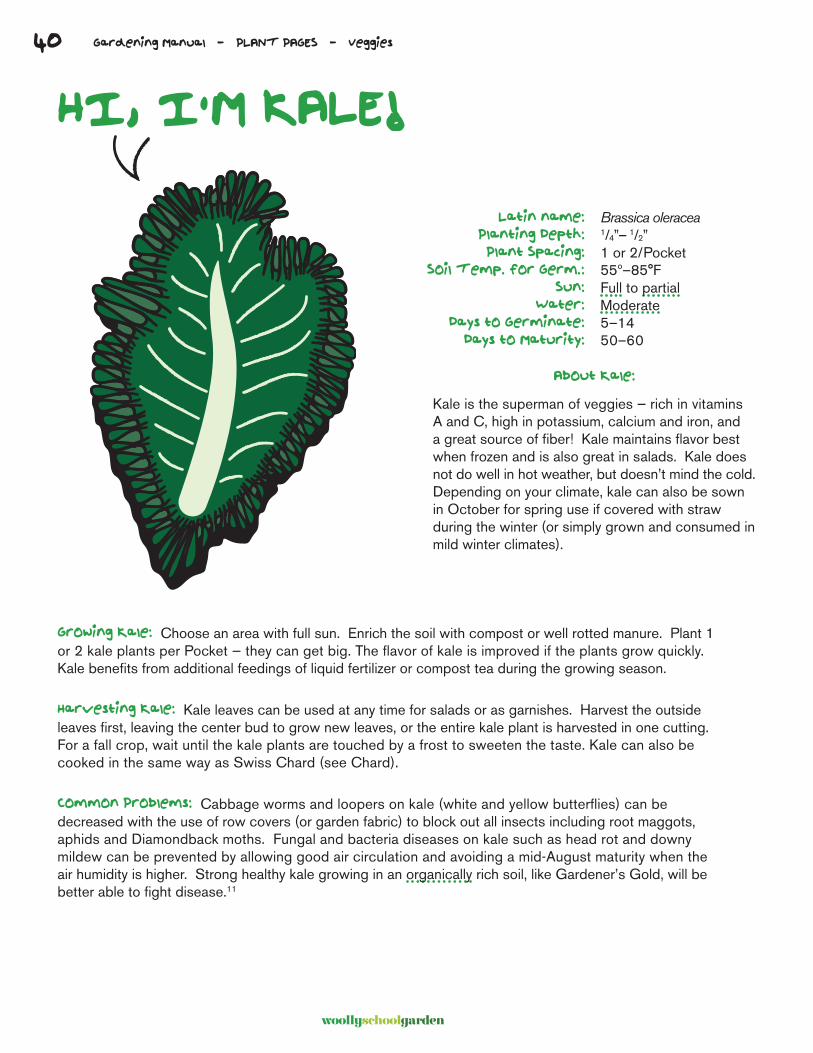
40
woollyschoolgarden
Gardening Manual - PLANT PAGES - Veggies
HI, I’M KALE!
Growing Kale: Choose an area with full sun. Enrich the soil with compost or well rotted manure. Plant 1 or 2 kale plants per Pocket — they can get big. The flavor of kale is improved if the plants grow quickly. Kale benefits from additional feedings of liquid fertilizer or compost tea during the growing season.
Harvesting Kale: Kale leaves can be used at any time for salads or as garnishes. Harvest the outside leaves first, leaving the center bud to grow new leaves, or the entire kale plant is harvested in one cutting. For a fall crop, wait until the kale plants are touched by a frost to sweeten the taste. Kale can also be cooked in the same way as Swiss Chard (see Chard).
Common Problems: Cabbage worms and loopers on kale (white and yellow butterflies) can be decreased with the use of row covers (or garden fabric) to block out all insects including root maggots, aphids and Diamondback moths. Fungal and bacteria diseases on kale such as head rot and downy mildew can be prevented by allowing good air circulation and avoiding a mid-August maturity when the air humidity is higher. Strong healthy kale growing in an organically rich soil, like Gardener’s Gold, will be better able to fight disease.11
Brassica oleracea1/4”– 1/2”1 or 2/Pocket55º–85°F Full to partialModerate5–1450–60
Latin name:Planting Depth:Plant Spacing:
Soil Temp. for Germ.:Sun:
Water:Days to Germinate:
Days to Maturity:
About Kale:
Kale is the superman of veggies — rich in vitamins A and C, high in potassium, calcium and iron, and a great source of fiber! Kale maintains flavor best when frozen and is also great in salads. Kale does not do well in hot weather, but doesn’t mind the cold. Depending on your climate, kale can also be sown in October for spring use if covered with straw during the winter (or simply grown and consumed in mild winter climates).

41
woollyschoolgarden
Gardening Manual - PLANT PAGES - Veggies
Brassica oleracea1/4”– 1/2”1 or 2/Pocket55º–85°F Full to partialModerate5–1450–60
HI, I’M KOHLRABI!
Growing Kohlrabi: Sow seeds in early spring. Sow seeds 1/4” to 1/2” deep, about 3 to 5” apart. Transplant the surplus seedlings to fill in blanks in other parts of the Pocket or into additional Pockets if more harvest is desired. Use excess plants for tender, stir-fry greens — delicious!
Make small plantings every 2 to 3 weeks for continuous spring and early summer harvest. For an especially early harvest, plants may be started indoors or in the greenhouse in flats to be transplanted into the garden as soon as the ground becomes workable. Like cabbage, kohlrabi plants can stand some frost. One or two late plantings can also be made in mid-summer at the same time as late cabbage. In very hot weather, these seedlings may benefit from some shade when they are small.
Harvesting Kohlrabi: Kohlrabi has the mildest and best flavor (resembling mild white turnips) when small. Unfortunately, many gardeners allow kohlrabi to grow too large before harvesting it. Large, older kohlrabi is tough and woody and it may have an off-flavor. Begin harvesting (pull or cut at ground level) when the first stems are about 1” in diameter. Continue harvesting until the stems are 2” to 3” in diameter. When the stems get much bigger than 3”, they begin to develop woody fibers, especially in the lower part of the expanded stem. Even overgrown kohlrabi still may have some tender and tasty tissue at the top, where the youngest leaves continue to emerge as the plants grow. The young leaves may be cooked like other greens.
Common Problems: Cabbage worms are pesky and tend to love kohlrabi — keep your eyes peeled and remove them if found.12
Brassica oleracea1/4”–1/2”3 or 4/Pocket60º–65°F Full to partialModerate5–1060–65
Latin name:Planting Depth:Plant Spacing:
Soil Temp. for Germ.:Sun:
Water:Days to Germinate:
Days to Maturity:
About Kohlrabi:
Kohlrabi is a part of the cabbage family. It was first grown in Europe around 1500 and was imported into America 300 years later. Despite being around for so long, it is still not a household name. It has a turnip like appearance, with leaves standing out like spokes from the edible portion, which is a rounded, enlarged stem section which grows just above the soil line. Kohlrabi is sometimes misclassified as a root vegetable.
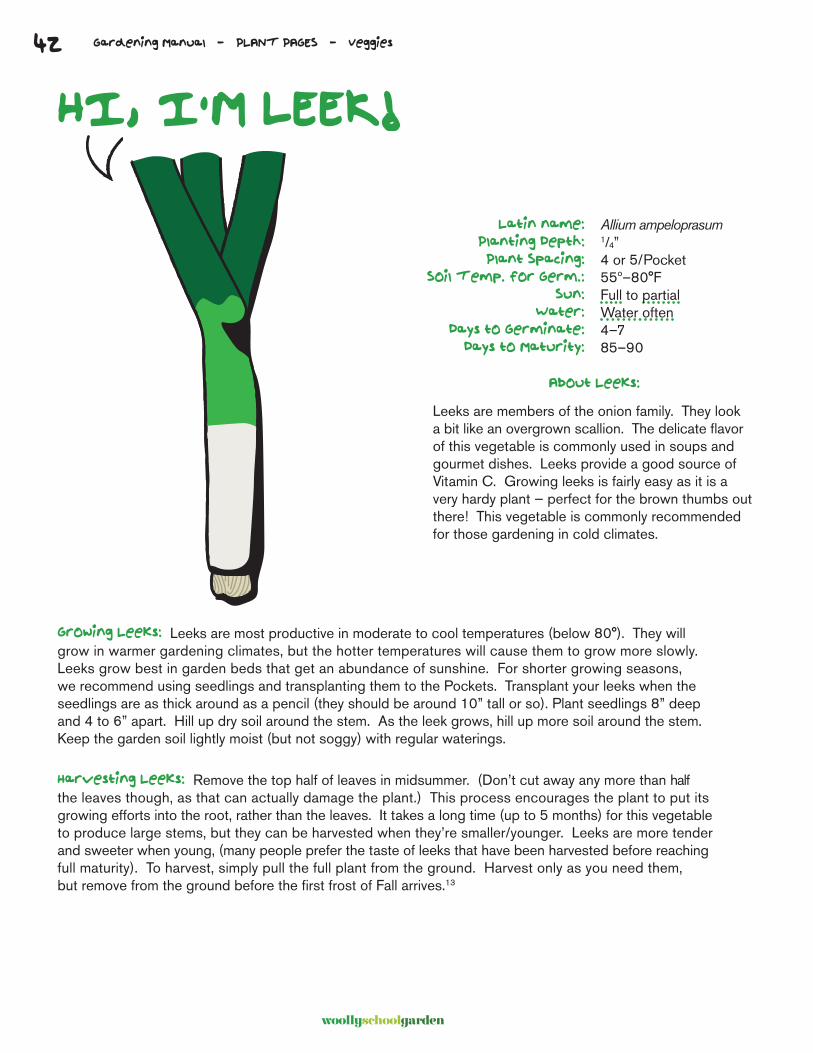
42
woollyschoolgarden
Gardening Manual - PLANT PAGES - Veggies
HI, I’M LEEK!
Growing Leeks: Leeks are most productive in moderate to cool temperatures (below 80°). They will grow in warmer gardening climates, but the hotter temperatures will cause them to grow more slowly. Leeks grow best in garden beds that get an abundance of sunshine. For shorter growing seasons, we recommend using seedlings and transplanting them to the Pockets. Transplant your leeks when the seedlings are as thick around as a pencil (they should be around 10” tall or so). Plant seedlings 8” deep and 4 to 6” apart. Hill up dry soil around the stem. As the leek grows, hill up more soil around the stem. Keep the garden soil lightly moist (but not soggy) with regular waterings.
Harvesting Leeks: Remove the top half of leaves in midsummer. (Don’t cut away any more than half the leaves though, as that can actually damage the plant.) This process encourages the plant to put its growing efforts into the root, rather than the leaves. It takes a long time (up to 5 months) for this vegetable to produce large stems, but they can be harvested when they’re smaller/younger. Leeks are more tender and sweeter when young, (many people prefer the taste of leeks that have been harvested before reaching full maturity). To harvest, simply pull the full plant from the ground. Harvest only as you need them, but remove from the ground before the first frost of Fall arrives.13
Allium ampeloprasum1/4”4 or 5/Pocket55º–80°F Full to partialWater often4–785–90
Latin name:Planting Depth:Plant Spacing:
Soil Temp. for Germ.:Sun:
Water:Days to Germinate:
Days to Maturity:
About Leeks:
Leeks are members of the onion family. They look a bit like an overgrown scallion. The delicate flavor of this vegetable is commonly used in soups and gourmet dishes. Leeks provide a good source of Vitamin C. Growing leeks is fairly easy as it is a very hardy plant — perfect for the brown thumbs out there! This vegetable is commonly recommended for those gardening in cold climates.

43
woollyschoolgarden
Gardening Manual - PLANT PAGES - Veggies
Allium ampeloprasum1/4”4 or 5/Pocket55º–80°F Full to partialWater often4–785–90
HI, I’M LETTUCE!
Growing Lettuce: Lettuce can be planted anytime in the spring when the soil is dry enough, or in late summer for a fall crop. Lettuce does not withstand hot summer days well and spring planting should be completed at least a month before the really hot days of early summer begin. Plant seeds 1/4” to 1/2” deep about 6“ apart (3 or 4 per Pocket). Watering is essential for seed germination and establishment of seedlings. Heat-tolerant varieties (mainly loose-leaf types) may be grown in the shade during hot weather. Frequent light watering causes the leaves to develop rapidly, resulting in high-quality lettuce. Overwatering, can lead to disease, soft growth and scalding or burning of the leaf margins.
Harvesting Lettuce: Harvest the outside leaves of Romaine and Leaf lettuce whenever it is large enough to use. The plant will continue to produce leaves from the center. Butterhead varieties form small, loose heads that weigh 4 to 8 ounces at harvest (60 to 70 days).
Common Problems: Watch for buildup of colonies of aphids on the undersides of the leaves.
Foliage rot can be a problem, especially in hot or wet seasons. Providing good soil and air drainage for the lettuce bed can help to minimize damage in most years.14
Lactuca sativa1/4”3 or 4/Pocket40º–80°F Full to partialWater often2–1560–70
Latin name:Planting Depth:Plant Spacing:
Soil Temp. for Germ.:Sun:
Water:Days to Germinate:
Days to Maturity:
About Lettuce:
Lettuce is a fairly hardy, cool-weather vegetable that thrives when the average daily temperature is between 60º and 70°F. It should be planted in early spring or late summer. At high temperatures, growth is stunted, the leaves may be bitter and a center seed stalk forms and elongates rapidly. Some types and varieties of lettuce (such as Leaf lettuce) withstand heat better than others.
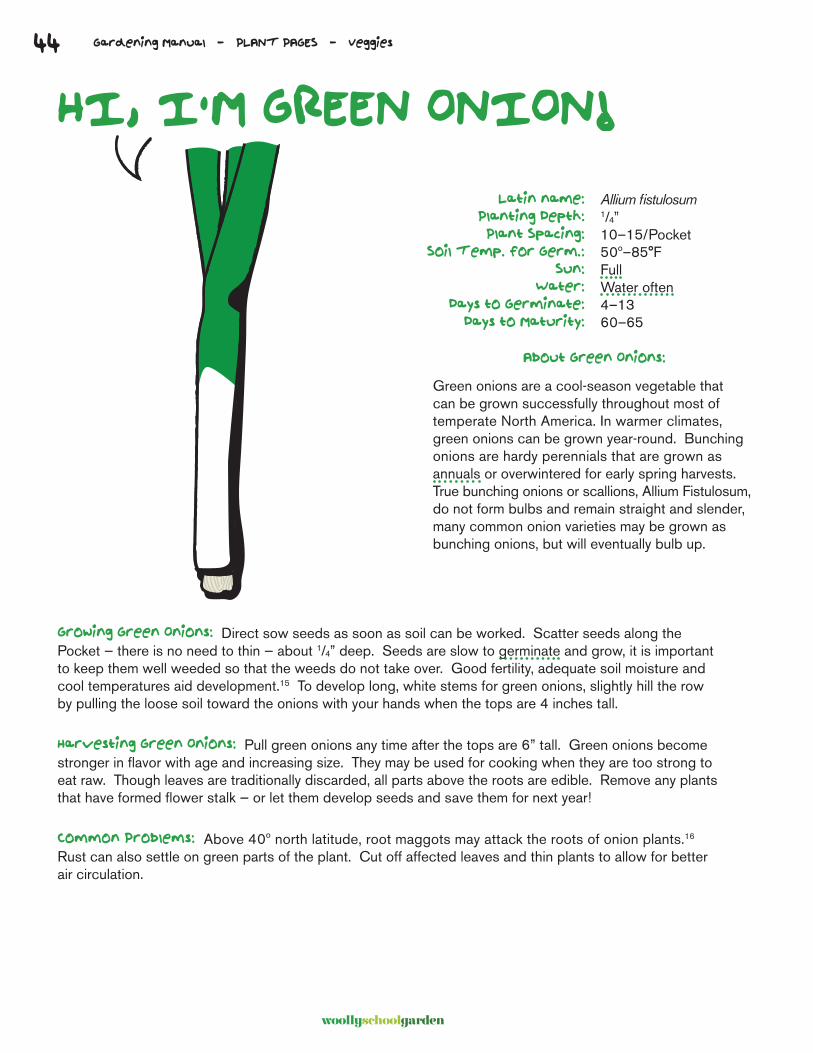
44
woollyschoolgarden
Gardening Manual - PLANT PAGES - Veggies
HI, I’M GREEN ONION!
Growing Green Onions: Direct sow seeds as soon as soil can be worked. Scatter seeds along the Pocket — there is no need to thin — about 1/4” deep. Seeds are slow to germinate and grow, it is important to keep them well weeded so that the weeds do not take over. Good fertility, adequate soil moisture and cool temperatures aid development.15 To develop long, white stems for green onions, slightly hill the row by pulling the loose soil toward the onions with your hands when the tops are 4 inches tall.
Harvesting Green Onions: Pull green onions any time after the tops are 6” tall. Green onions become stronger in flavor with age and increasing size. They may be used for cooking when they are too strong to eat raw. Though leaves are traditionally discarded, all parts above the roots are edible. Remove any plants that have formed flower stalk — or let them develop seeds and save them for next year!
Common Problems: Above 40º north latitude, root maggots may attack the roots of onion plants.16 Rust can also settle on green parts of the plant. Cut off affected leaves and thin plants to allow for better air circulation.
Allium fistulosum 1/4”10–15/Pocket50º–85°F FullWater often4–1360–65
Latin name:Planting Depth:Plant Spacing:
Soil Temp. for Germ.:Sun:
Water:Days to Germinate:
Days to Maturity:
About Green Onions:
Green onions are a cool-season vegetable that can be grown successfully throughout most of temperate North America. In warmer climates, green onions can be grown year-round. Bunching onions are hardy perennials that are grown as annuals or overwintered for early spring harvests. True bunching onions or scallions, Allium Fistulosum, do not form bulbs and remain straight and slender, many common onion varieties may be grown as bunching onions, but will eventually bulb up.
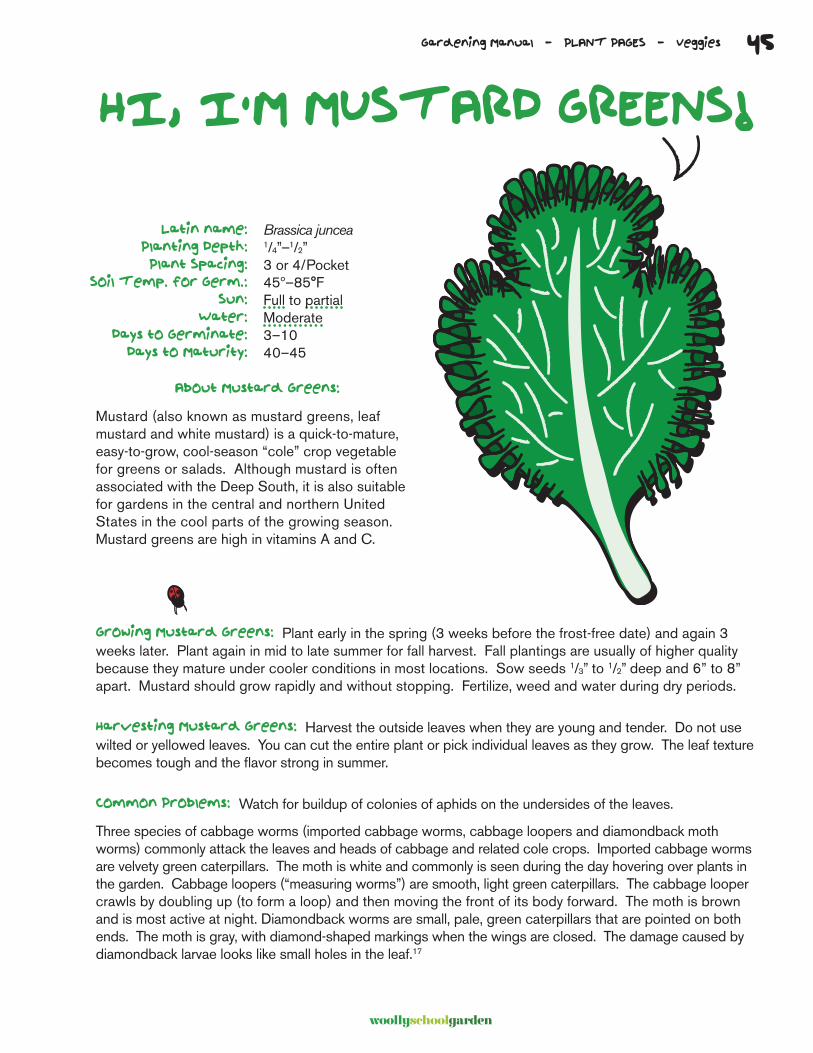
45
woollyschoolgarden
Gardening Manual - PLANT PAGES - Veggies
Allium fistulosum 1/4”10–15/Pocket50º–85°F FullWater often4–1360–65
HI, I’M MUSTARD GREENS!
Growing Mustard Greens: Plant early in the spring (3 weeks before the frost-free date) and again 3 weeks later. Plant again in mid to late summer for fall harvest. Fall plantings are usually of higher quality because they mature under cooler conditions in most locations. Sow seeds 1/3” to 1/2” deep and 6” to 8” apart. Mustard should grow rapidly and without stopping. Fertilize, weed and water during dry periods.
Harvesting Mustard Greens: Harvest the outside leaves when they are young and tender. Do not use wilted or yellowed leaves. You can cut the entire plant or pick individual leaves as they grow. The leaf texture becomes tough and the flavor strong in summer.
Common Problems: Watch for buildup of colonies of aphids on the undersides of the leaves.
Three species of cabbage worms (imported cabbage worms, cabbage loopers and diamondback moth worms) commonly attack the leaves and heads of cabbage and related cole crops. Imported cabbage worms are velvety green caterpillars. The moth is white and commonly is seen during the day hovering over plants in the garden. Cabbage loopers (“measuring worms”) are smooth, light green caterpillars. The cabbage looper crawls by doubling up (to form a loop) and then moving the front of its body forward. The moth is brown and is most active at night. Diamondback worms are small, pale, green caterpillars that are pointed on both ends. The moth is gray, with diamond-shaped markings when the wings are closed. The damage caused by diamondback larvae looks like small holes in the leaf.17
Brassica juncea1/4”–1/2”3 or 4/Pocket45º–85°F Full to partialModerate3–1040–45
Latin name:Planting Depth:Plant Spacing:
Soil Temp. for Germ.:Sun:
Water:Days to Germinate:
Days to Maturity:
About Mustard Greens:
Mustard (also known as mustard greens, leaf mustard and white mustard) is a quick-to-mature, easy-to-grow, cool-season “cole” crop vegetable for greens or salads. Although mustard is often associated with the Deep South, it is also suitable for gardens in the central and northern United States in the cool parts of the growing season. Mustard greens are high in vitamins A and C.
45
45
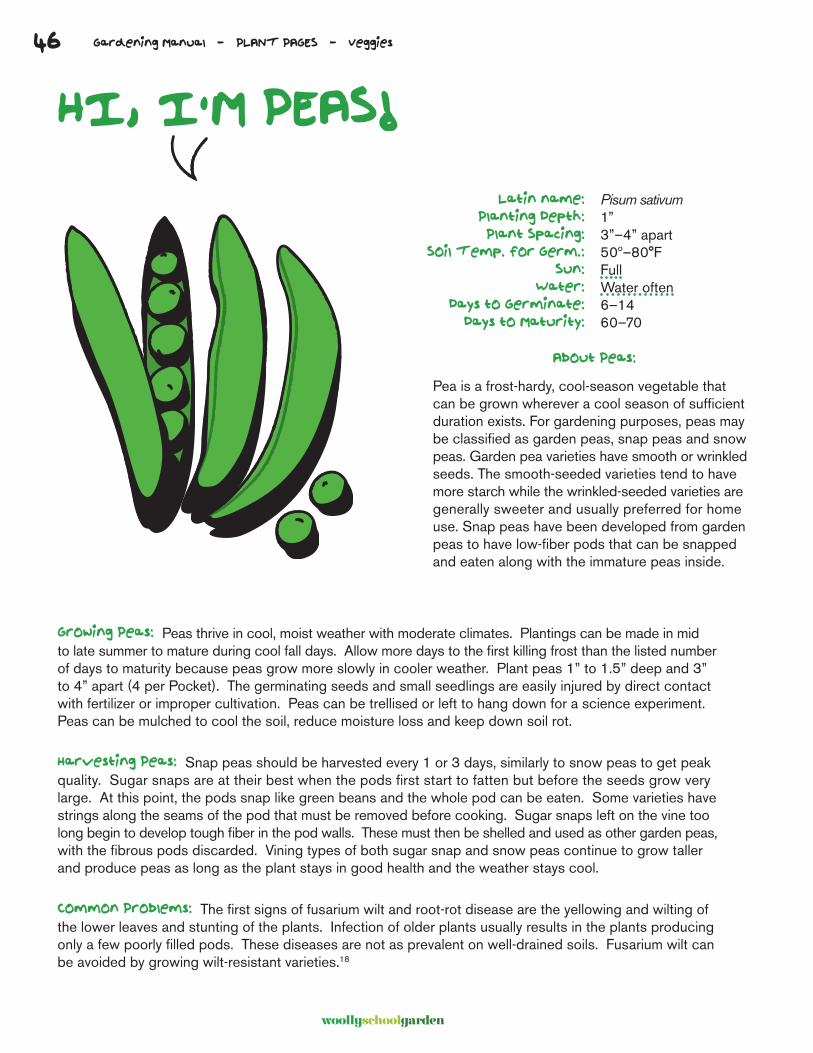
46
woollyschoolgarden
Gardening Manual - PLANT PAGES - Veggies
HI, I’M PEAS!
Pisum sativum1”3”–4” apart50º–80°F FullWater often6–1460–70
Latin name:Planting Depth:Plant Spacing:
Soil Temp. for Germ.:Sun:
Water:Days to Germinate:
Days to Maturity:
About Peas:
Pea is a frost-hardy, cool-season vegetable that can be grown wherever a cool season of sufficient duration exists. For gardening purposes, peas may be classified as garden peas, snap peas and snow peas. Garden pea varieties have smooth or wrinkled seeds. The smooth-seeded varieties tend to have more starch while the wrinkled-seeded varieties are generally sweeter and usually preferred for home use. Snap peas have been developed from garden peas to have low-fiber pods that can be snapped and eaten along with the immature peas inside.
Growing Peas: Peas thrive in cool, moist weather with moderate climates. Plantings can be made in mid to late summer to mature during cool fall days. Allow more days to the first killing frost than the listed number of days to maturity because peas grow more slowly in cooler weather. Plant peas 1” to 1.5” deep and 3” to 4” apart (4 per Pocket). The germinating seeds and small seedlings are easily injured by direct contact with fertilizer or improper cultivation. Peas can be trellised or left to hang down for a science experiment. Peas can be mulched to cool the soil, reduce moisture loss and keep down soil rot.
Harvesting Peas: Snap peas should be harvested every 1 or 3 days, similarly to snow peas to get peak quality. Sugar snaps are at their best when the pods first start to fatten but before the seeds grow very large. At this point, the pods snap like green beans and the whole pod can be eaten. Some varieties have strings along the seams of the pod that must be removed before cooking. Sugar snaps left on the vine too long begin to develop tough fiber in the pod walls. These must then be shelled and used as other garden peas, with the fibrous pods discarded. Vining types of both sugar snap and snow peas continue to grow taller and produce peas as long as the plant stays in good health and the weather stays cool.
Common Problems: The first signs of fusarium wilt and root-rot disease are the yellowing and wilting of the lower leaves and stunting of the plants. Infection of older plants usually results in the plants producing only a few poorly filled pods. These diseases are not as prevalent on well-drained soils. Fusarium wilt can be avoided by growing wilt-resistant varieties.18
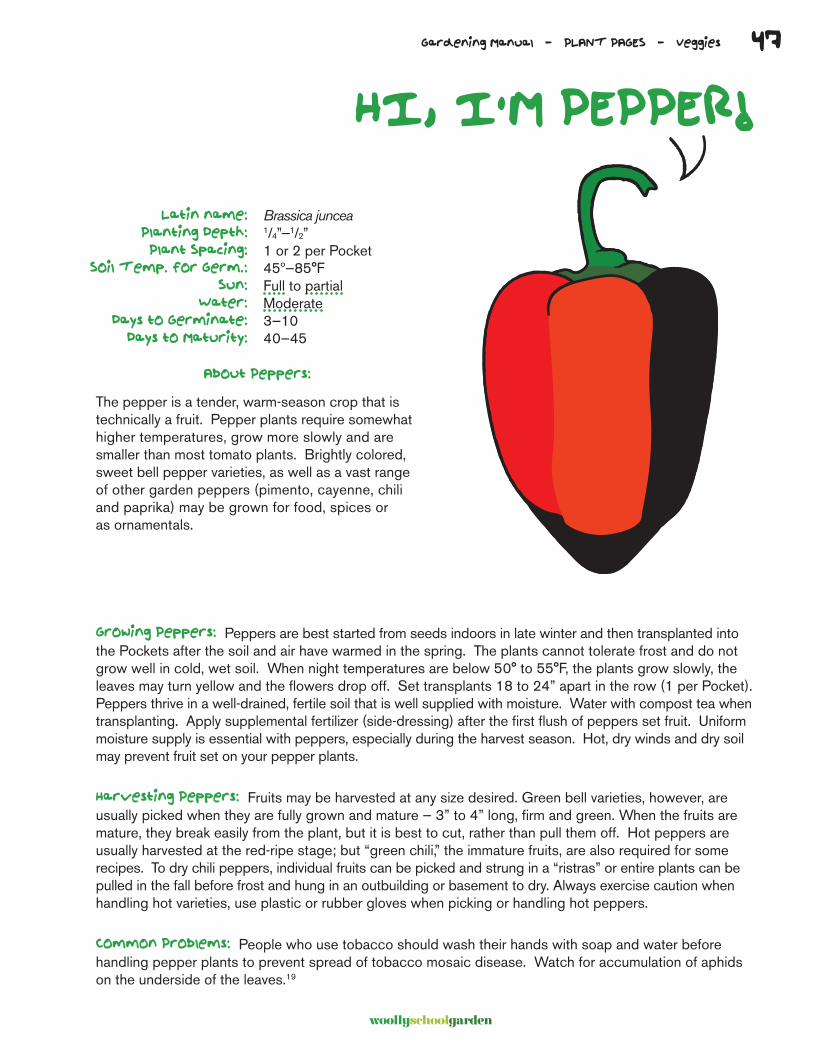
woollyschoolgarden
Gardening Manual - PLANT PAGES - Veggies
Pisum sativum1”3”–4” apart50º–80°F FullWater often6–1460–70
HI, I’M PEPPER!
Growing Peppers: Peppers are best started from seeds indoors in late winter and then transplanted into the Pockets after the soil and air have warmed in the spring. The plants cannot tolerate frost and do not grow well in cold, wet soil. When night temperatures are below 50° to 55°F, the plants grow slowly, the leaves may turn yellow and the flowers drop off. Set transplants 18 to 24” apart in the row (1 per Pocket). Peppers thrive in a well-drained, fertile soil that is well supplied with moisture. Water with compost tea when transplanting. Apply supplemental fertilizer (side-dressing) after the first flush of peppers set fruit. Uniform moisture supply is essential with peppers, especially during the harvest season. Hot, dry winds and dry soil may prevent fruit set on your pepper plants.
Harvesting Peppers: Fruits may be harvested at any size desired. Green bell varieties, however, are usually picked when they are fully grown and mature — 3” to 4” long, firm and green. When the fruits are mature, they break easily from the plant, but it is best to cut, rather than pull them off. Hot peppers are usually harvested at the red-ripe stage; but “green chili,” the immature fruits, are also required for some recipes. To dry chili peppers, individual fruits can be picked and strung in a “ristras” or entire plants can be pulled in the fall before frost and hung in an outbuilding or basement to dry. Always exercise caution when handling hot varieties, use plastic or rubber gloves when picking or handling hot peppers.
Common Problems: People who use tobacco should wash their hands with soap and water before handling pepper plants to prevent spread of tobacco mosaic disease. Watch for accumulation of aphids on the underside of the leaves.19
Brassica juncea1/4”—1/2”1 or 2 per Pocket45º—85°F Full to partialModerate3—1040—45
Latin name:Planting Depth:Plant Spacing:
Soil Temp. for Germ.:Sun:
Water:Days to Germinate:
Days to Maturity:
About Peppers:
The pepper is a tender, warm-season crop that is technically a fruit. Pepper plants require somewhat higher temperatures, grow more slowly and are smaller than most tomato plants. Brightly colored, sweet bell pepper varieties, as well as a vast range of other garden peppers (pimento, cayenne, chili and paprika) may be grown for food, spices or as ornamentals.
47
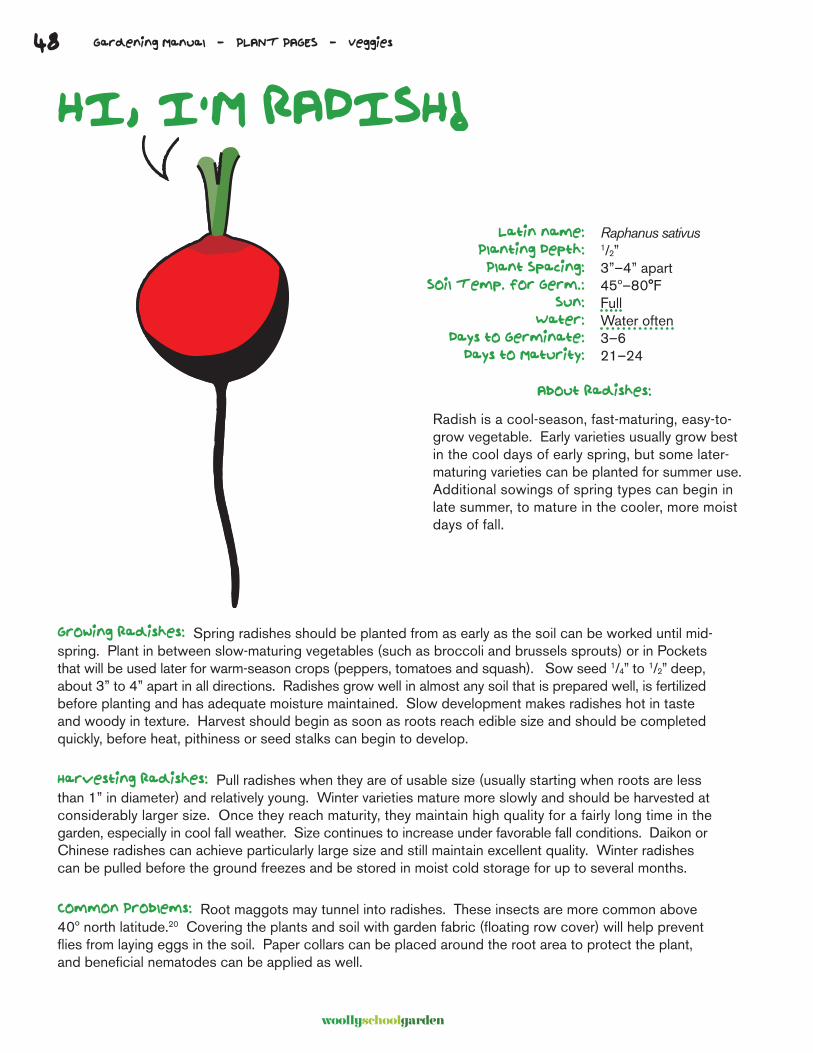
48
woollyschoolgarden
Gardening Manual - PLANT PAGES - Veggies
HI, I’M RADISH!
Growing Radishes: Spring radishes should be planted from as early as the soil can be worked until mid- spring. Plant in between slow-maturing vegetables (such as broccoli and brussels sprouts) or in Pockets that will be used later for warm-season crops (peppers, tomatoes and squash). Sow seed 1/4” to 1/2” deep, about 3” to 4” apart in all directions. Radishes grow well in almost any soil that is prepared well, is fertilized before planting and has adequate moisture maintained. Slow development makes radishes hot in taste and woody in texture. Harvest should begin as soon as roots reach edible size and should be completed quickly, before heat, pithiness or seed stalks can begin to develop.
Harvesting Radishes: Pull radishes when they are of usable size (usually starting when roots are less than 1” in diameter) and relatively young. Winter varieties mature more slowly and should be harvested at considerably larger size. Once they reach maturity, they maintain high quality for a fairly long time in the garden, especially in cool fall weather. Size continues to increase under favorable fall conditions. Daikon or Chinese radishes can achieve particularly large size and still maintain excellent quality. Winter radishes can be pulled before the ground freezes and be stored in moist cold storage for up to several months.
Common Problems: Root maggots may tunnel into radishes. These insects are more common above 40º north latitude.20 Covering the plants and soil with garden fabric (floating row cover) will help prevent flies from laying eggs in the soil. Paper collars can be placed around the root area to protect the plant, and beneficial nematodes can be applied as well.
Raphanus sativus1/2”3”–4” apart45º–80°F FullWater often3–621–24
Latin name:Planting Depth:Plant Spacing:
Soil Temp. for Germ.:Sun:
Water:Days to Germinate:
Days to Maturity:
About Radishes:
Radish is a cool-season, fast-maturing, easy-to-grow vegetable. Early varieties usually grow best in the cool days of early spring, but some later-maturing varieties can be planted for summer use. Additional sowings of spring types can begin in late summer, to mature in the cooler, more moist days of fall.
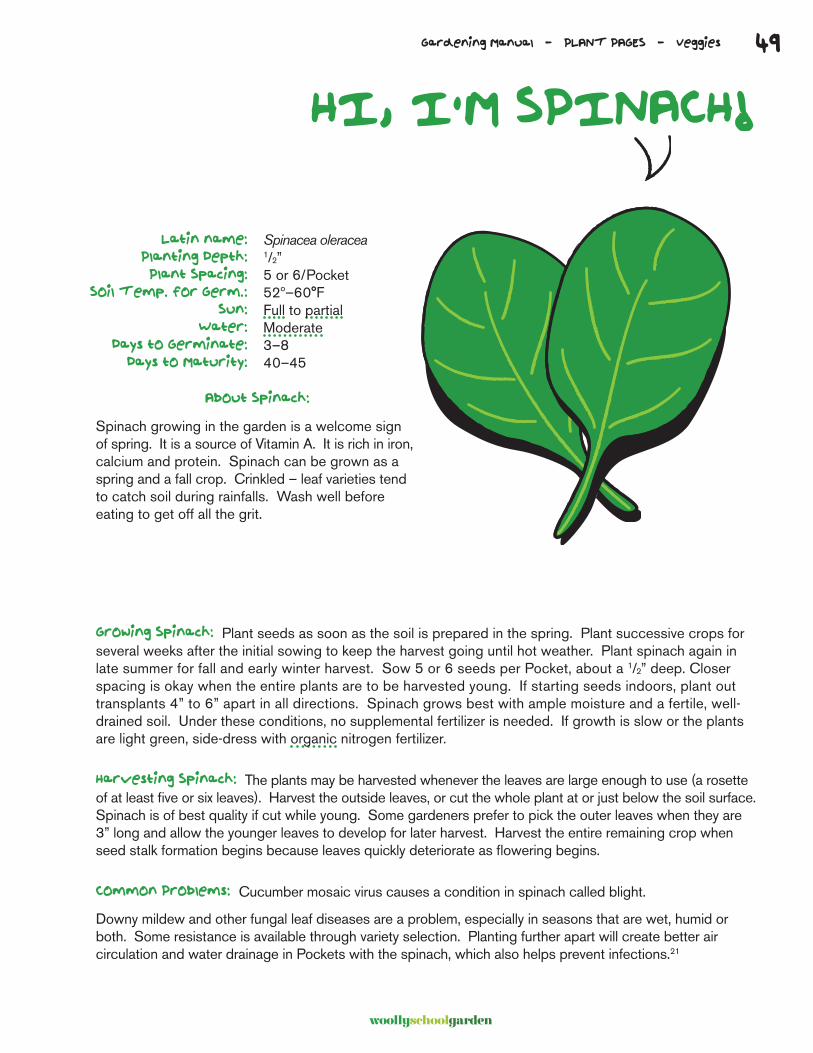
49
woollyschoolgarden
Gardening Manual - PLANT PAGES - Veggies
Raphanus sativus1/2”3”–4” apart45º–80°F FullWater often3–621–24
HI, I’M SPINACH!
Growing Spinach: Plant seeds as soon as the soil is prepared in the spring. Plant successive crops for several weeks after the initial sowing to keep the harvest going until hot weather. Plant spinach again in late summer for fall and early winter harvest. Sow 5 or 6 seeds per Pocket, about a 1/2” deep. Closer spacing is okay when the entire plants are to be harvested young. If starting seeds indoors, plant out transplants 4” to 6” apart in all directions. Spinach grows best with ample moisture and a fertile, well-drained soil. Under these conditions, no supplemental fertilizer is needed. If growth is slow or the plants are light green, side-dress with organic nitrogen fertilizer.
Harvesting Spinach: The plants may be harvested whenever the leaves are large enough to use (a rosette of at least five or six leaves). Harvest the outside leaves, or cut the whole plant at or just below the soil surface. Spinach is of best quality if cut while young. Some gardeners prefer to pick the outer leaves when they are 3” long and allow the younger leaves to develop for later harvest. Harvest the entire remaining crop when seed stalk formation begins because leaves quickly deteriorate as flowering begins.
Common Problems: Cucumber mosaic virus causes a condition in spinach called blight.
Downy mildew and other fungal leaf diseases are a problem, especially in seasons that are wet, humid or both. Some resistance is available through variety selection. Planting further apart will create better air circulation and water drainage in Pockets with the spinach, which also helps prevent infections.21
Spinacea oleracea1/2”5 or 6/Pocket52º–60°F Full to partialModerate3–840–45
Latin name:Planting Depth:Plant Spacing:
Soil Temp. for Germ.:Sun:
Water:Days to Germinate:
Days to Maturity:
About Spinach:
Spinach growing in the garden is a welcome sign of spring. It is a source of Vitamin A. It is rich in iron, calcium and protein. Spinach can be grown as a spring and a fall crop. Crinkled – leaf varieties tend to catch soil during rainfalls. Wash well before eating to get off all the grit.
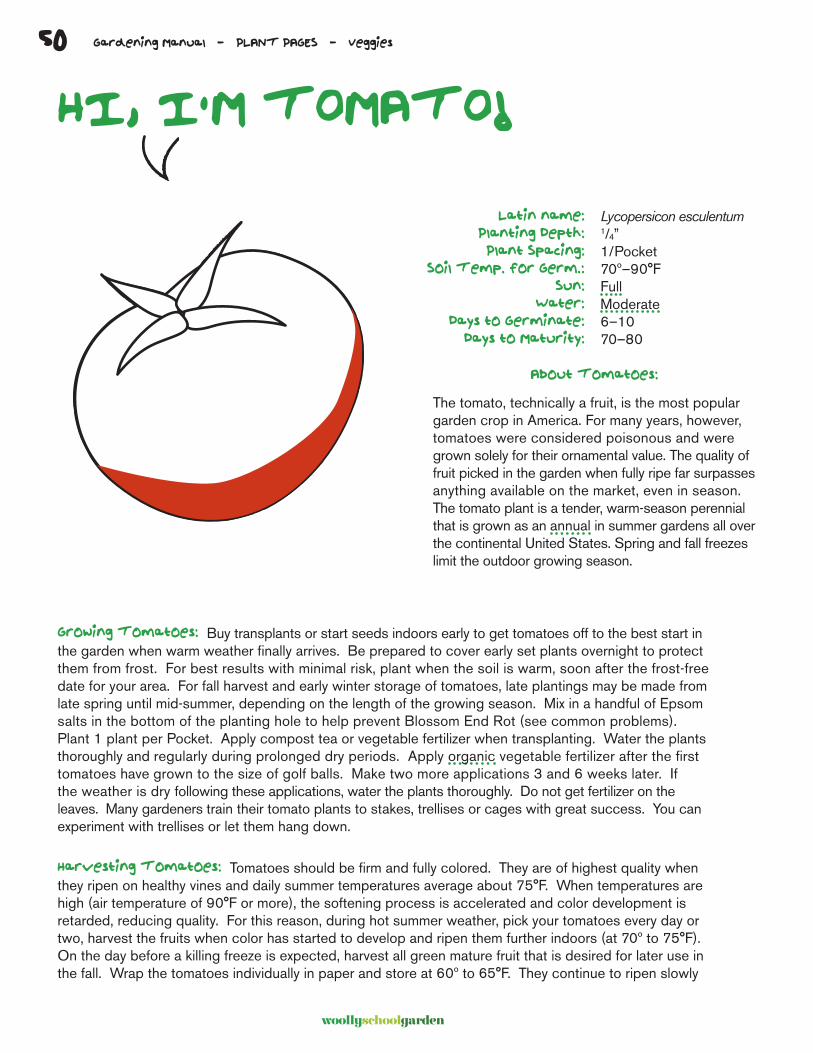
50
woollyschoolgarden
Gardening Manual - PLANT PAGES - Veggies
HI, I’M TOMATO!
Growing Tomatoes: Buy transplants or start seeds indoors early to get tomatoes off to the best start in the garden when warm weather finally arrives. Be prepared to cover early set plants overnight to protect them from frost. For best results with minimal risk, plant when the soil is warm, soon after the frost-free date for your area. For fall harvest and early winter storage of tomatoes, late plantings may be made from late spring until mid-summer, depending on the length of the growing season. Mix in a handful of Epsom salts in the bottom of the planting hole to help prevent Blossom End Rot (see common problems). Plant 1 plant per Pocket. Apply compost tea or vegetable fertilizer when transplanting. Water the plants thoroughly and regularly during prolonged dry periods. Apply organic vegetable fertilizer after the first tomatoes have grown to the size of golf balls. Make two more applications 3 and 6 weeks later. If the weather is dry following these applications, water the plants thoroughly. Do not get fertilizer on the leaves. Many gardeners train their tomato plants to stakes, trellises or cages with great success. You can experiment with trellises or let them hang down.
Harvesting Tomatoes: Tomatoes should be firm and fully colored. They are of highest quality when they ripen on healthy vines and daily summer temperatures average about 75°F. When temperatures are high (air temperature of 90°F or more), the softening process is accelerated and color development is retarded, reducing quality. For this reason, during hot summer weather, pick your tomatoes every day or two, harvest the fruits when color has started to develop and ripen them further indoors (at 70º to 75°F). On the day before a killing freeze is expected, harvest all green mature fruit that is desired for later use in the fall. Wrap the tomatoes individually in paper and store at 60º to 65°F. They continue to ripen slowly
Lycopersicon esculentum1/4”1/Pocket70º–90°F FullModerate6–1070–80
Latin name:Planting Depth:Plant Spacing:
Soil Temp. for Germ.:Sun:
Water:Days to Germinate:
Days to Maturity:
About Tomatoes:
The tomato, technically a fruit, is the most popular garden crop in America. For many years, however, tomatoes were considered poisonous and were grown solely for their ornamental value. The quality of fruit picked in the garden when fully ripe far surpasses anything available on the market, even in season. The tomato plant is a tender, warm-season perennial that is grown as an annual in summer gardens all over the continental United States. Spring and fall freezes limit the outdoor growing season.
50
51
woollyschoolgarden
Gardening Manual - PLANT PAGES - Veggies
Lycopersicon esculentum1/4”1/Pocket70º–90°F FullModerate6–1070–80
over the next several weeks. Whole plants may be uprooted and hung in sheltered locations, where fruit continues to ripen.
Common Problems: Tomato hornworms are large (2” to 3” long when fully grown), green caterpillars with white stripes on the body. A horn protrudes from the top rear end of the worm. Tomato hornworms feed on the leaves and fruit. Several worms on one plant can quickly defoliate it and ruin developing fruit. Because their green coloring so closely resembles tomato foliage and stems, they are difficult to see. Handpick in cooler parts of the day. If you see hornworms with small, white cocoons protruding, leave them alone. These structures are the pupae of parasitic insects that help control the hornworm population and the individual wearing them is already doomed.
Verticillium and fusarium wilts are soil-borne diseases that cause yellowing of the leaves, wilting and premature death of plants. These diseases persist in gardens where susceptible plants are grown. Once they build up, the only practical control is the use of resistant (VF) varieties.
Early blight is characterized by dead brown spots that usually start on the lower leaves and spread up the plant. Upon close inspection, you can see concentric rings within the spots. Although early blight is most severe on the leaves, it sometimes occurs on the stems and can cause severe defoliation. Certain varieties (Roma and Supersonic) are more tolerant of early blight than others.
Septoria leaf spot is characterized by numerous small black spots on the leaves. The centers of these spots later turn white and tiny black dots appear in the white centers. The disease starts on the bottom leaves and may become severe in wet weather.
Blossom-end rot is a dry, leathery brown rot of the blossom end of the fruit that is common in some seasons on tomatoes. It is caused by the combination of a localized calcium deficiency in the developing fruit and wide fluctuations of soil moisture. The problem is especially bad in hot weather. Soil applications of calcium seldom help, though foliar calcium sprays may minimize the occurrence of the problem. Make sure the formulation is designed for foliar application or severe damage could result. Pruning causes stress to the plants that may increase the incidence of blossom-end rot. Some tomato varieties are much more susceptible to this condition than others. Mulching and uniform watering help to prevent blossom-end rot. Once the blackened ends appear, affected fruits cannot be saved. They are best removed and destroyed so that healthy fruit setting later can develop more quickly.
Poor color and sunscald occur when high temperatures retard the development of full red color in tomatoes exposed directly to the hot sun. Sunscald occurs as a large, whitish area on the fruit during hot, dry weather. It becomes a problem when foliage has been lost through other diseases such as early blight or on early varieties that normally have poor foliage cover as the fruit ripens.22
51
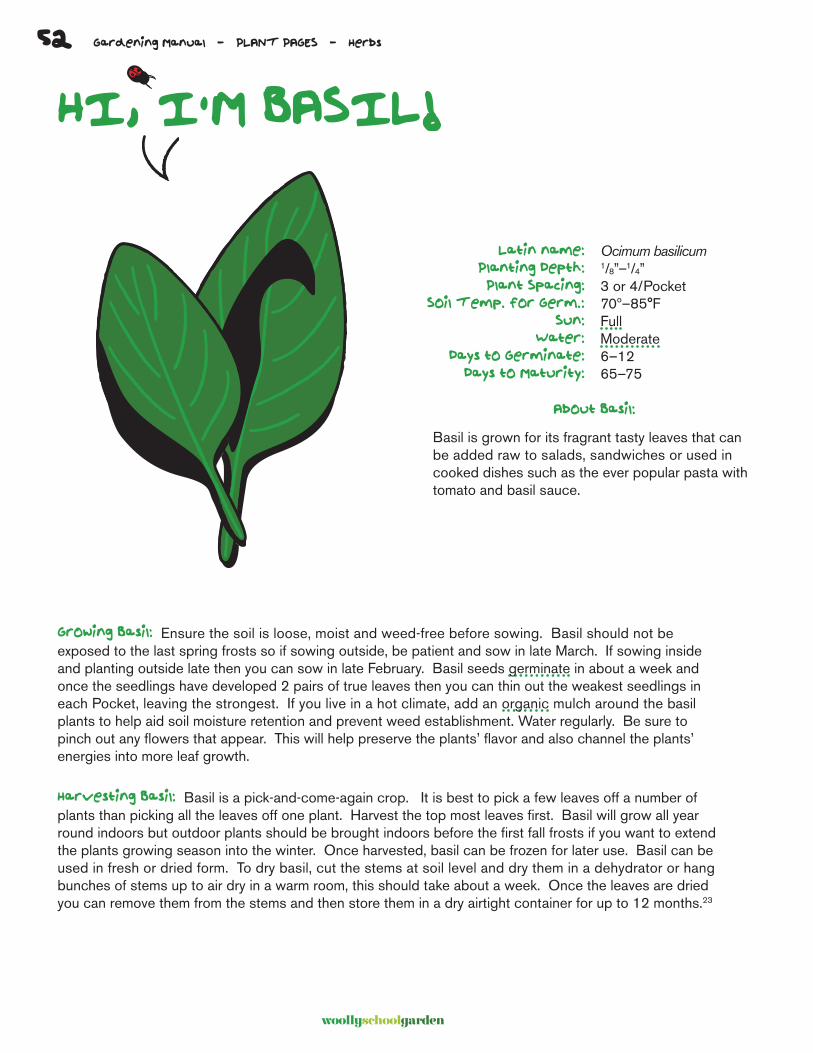
woollyschoolgarden
Gardening Manual - PLANT PAGES - Herbs
HI, I’M BASIL!
Growing Basil: Ensure the soil is loose, moist and weed-free before sowing. Basil should not be exposed to the last spring frosts so if sowing outside, be patient and sow in late March. If sowing inside and planting outside late then you can sow in late February. Basil seeds germinate in about a week and once the seedlings have developed 2 pairs of true leaves then you can thin out the weakest seedlings in each Pocket, leaving the strongest. If you live in a hot climate, add an organic mulch around the basil plants to help aid soil moisture retention and prevent weed establishment. Water regularly. Be sure to pinch out any flowers that appear. This will help preserve the plants’ flavor and also channel the plants’ energies into more leaf growth.
Harvesting Basil: Basil is a pick-and-come-again crop. It is best to pick a few leaves off a number of plants than picking all the leaves off one plant. Harvest the top most leaves first. Basil will grow all year round indoors but outdoor plants should be brought indoors before the first fall frosts if you want to extend the plants growing season into the winter. Once harvested, basil can be frozen for later use. Basil can be used in fresh or dried form. To dry basil, cut the stems at soil level and dry them in a dehydrator or hang bunches of stems up to air dry in a warm room, this should take about a week. Once the leaves are dried you can remove them from the stems and then store them in a dry airtight container for up to 12 months.23
Ocimum basilicum1/8”–1/4”3 or 4/Pocket70º–85°F FullModerate6–1265–75
Latin name:Planting Depth:Plant Spacing:
Soil Temp. for Germ.:Sun:
Water:Days to Germinate:
Days to Maturity:
About Basil:
Basil is grown for its fragrant tasty leaves that can be added raw to salads, sandwiches or used in cooked dishes such as the ever popular pasta with tomato and basil sauce.
52

woollyschoolgarden
Ocimum basilicum1/8”–1/4”3 or 4/Pocket70º–85°F FullModerate6–1265–75
Gardening Manual - PLANT PAGES - Herbs
HI, I’M CHIVES!
Growing Chives: Sow chives in the garden or set out divisions — small bulbs separated from clumps — as early as 4 to 6 weeks before the last frost in spring. Sow seed 1/4 to ½ inch deep. Seedlings can grow close together to form clumps. Space clumps or rows 8 to 12 inches apart; they will fill in over time. To plant divisions, use a spade or shovel to divide clumps of plants, trim back leaves to 1 inch above the ground and replant the divisions covering the bulblets with soil.
Chives will germinate in 2 to 3 weeks at 60°F. Sow chive seeds indoors at 70°F for optimal germination. Chives will grow in temperatures from 40° to 85°F, and can tolerate frost. They are evergreen in warm-winter regions, but die back and go dormant in cold-winter regions. Plant chives in autumn or winter in mild-winter regions. Chives require moderate regular water to become established. Established plants will survive in dry soil. The tips of leaves of plants that dry out will turn brown and papery.
Harvesting Chives: Chives are ready for cut-and-come-again harvest 75 to 90 days after sowing, 60 days after transplanting. Established plants a year old or more can withstand regular harvest. Harvest from the base of leaves to avoid plants with cut tops. Stop harvest 3 weeks before the first frost date to allow plants to flower and the clump to expand. Use chives fresh or dried. Refrigerate chives in a sealed plastic bag for up to 7 days. Chives can be frozen or dried.24
Allium schoenoprasum1/4”2 or 3/Pocket55º–75°F FullModerate7–1460–70
Latin name:Planting Depth:Plant Spacing:
Soil Temp. for Germ.:Sun:
Water:Days to Germinate:
Days to Maturity:
About Chives:
Chives are a hardy cool-weather perennial, a relative of the onion. With slender, round, hollow grass-like leaves 6 to 10 inches long. Chives produce soft, globe-like pinkish-purple flowers in spring on stalks to 12 inches tall or more. Leaves rise from small scallion-like bulbs which grow in clumps. Once established, chives will grow for many years. Garlic chives (Allium tuberosum) are also a hardy cool-weather perennial. Garlic chives have long, flat grass-like leaves with white flowers. The tips of garlic chive leaves have a mild garlic onion flavor.
53
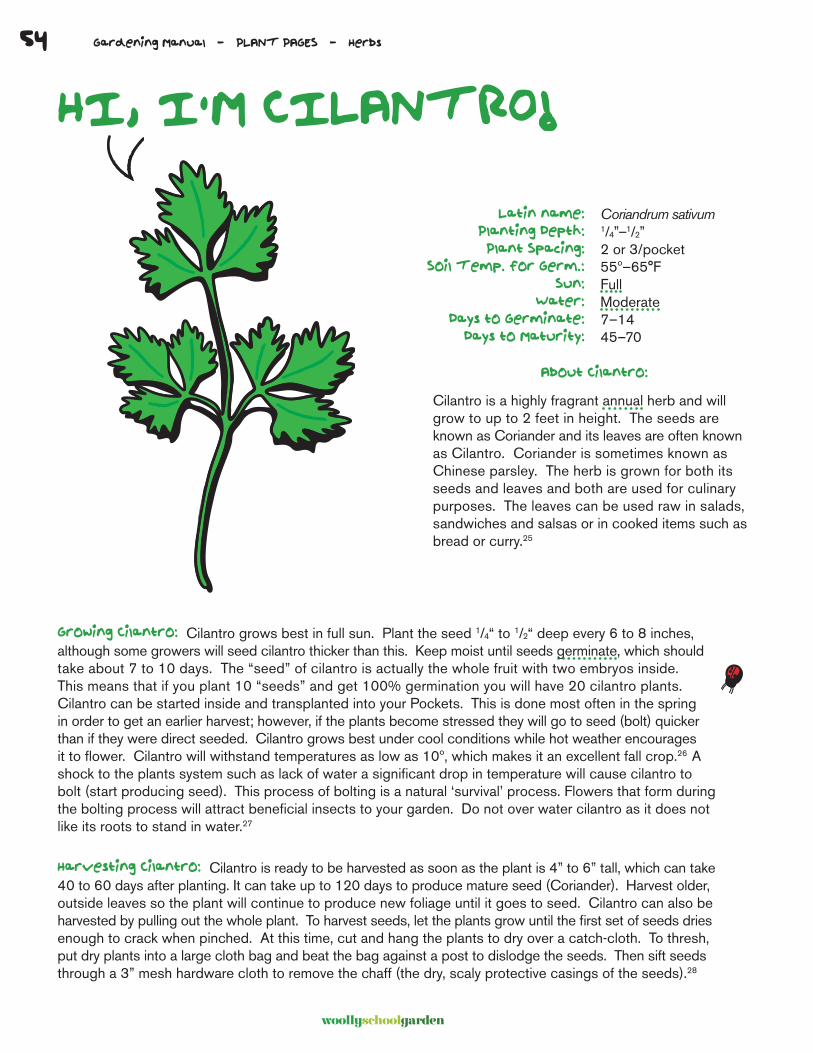
woollyschoolgarden
Gardening Manual - PLANT PAGES - Herbs
HI, I’M CILANTRO!
Growing Cilantro: Cilantro grows best in full sun. Plant the seed 1/4“ to 1/2“ deep every 6 to 8 inches, although some growers will seed cilantro thicker than this. Keep moist until seeds germinate, which should take about 7 to 10 days. The “seed” of cilantro is actually the whole fruit with two embryos inside. This means that if you plant 10 “seeds” and get 100% germination you will have 20 cilantro plants. Cilantro can be started inside and transplanted into your Pockets. This is done most often in the spring in order to get an earlier harvest; however, if the plants become stressed they will go to seed (bolt) quicker than if they were direct seeded. Cilantro grows best under cool conditions while hot weather encourages it to flower. Cilantro will withstand temperatures as low as 10º, which makes it an excellent fall crop.26 A shock to the plants system such as lack of water a significant drop in temperature will cause cilantro to bolt (start producing seed). This process of bolting is a natural ‘survival’ process. Flowers that form during the bolting process will attract beneficial insects to your garden. Do not over water cilantro as it does not like its roots to stand in water.27
Harvesting Cilantro: Cilantro is ready to be harvested as soon as the plant is 4” to 6” tall, which can take 40 to 60 days after planting. It can take up to 120 days to produce mature seed (Coriander). Harvest older, outside leaves so the plant will continue to produce new foliage until it goes to seed. Cilantro can also be harvested by pulling out the whole plant. To harvest seeds, let the plants grow until the first set of seeds dries enough to crack when pinched. At this time, cut and hang the plants to dry over a catch-cloth. To thresh, put dry plants into a large cloth bag and beat the bag against a post to dislodge the seeds. Then sift seeds through a 3” mesh hardware cloth to remove the chaff (the dry, scaly protective casings of the seeds).28
Coriandrum sativum1/4”–1/2”2 or 3/pocket55º–65°F FullModerate7–1445–70
Latin name:Planting Depth:Plant Spacing:
Soil Temp. for Germ.:Sun:
Water:Days to Germinate:
Days to Maturity:
About Cilantro:
Cilantro is a highly fragrant annual herb and will grow to up to 2 feet in height. The seeds are known as Coriander and its leaves are often known as Cilantro. Coriander is sometimes known as Chinese parsley. The herb is grown for both its seeds and leaves and both are used for culinary purposes. The leaves can be used raw in salads, sandwiches and salsas or in cooked items such as bread or curry.25
54
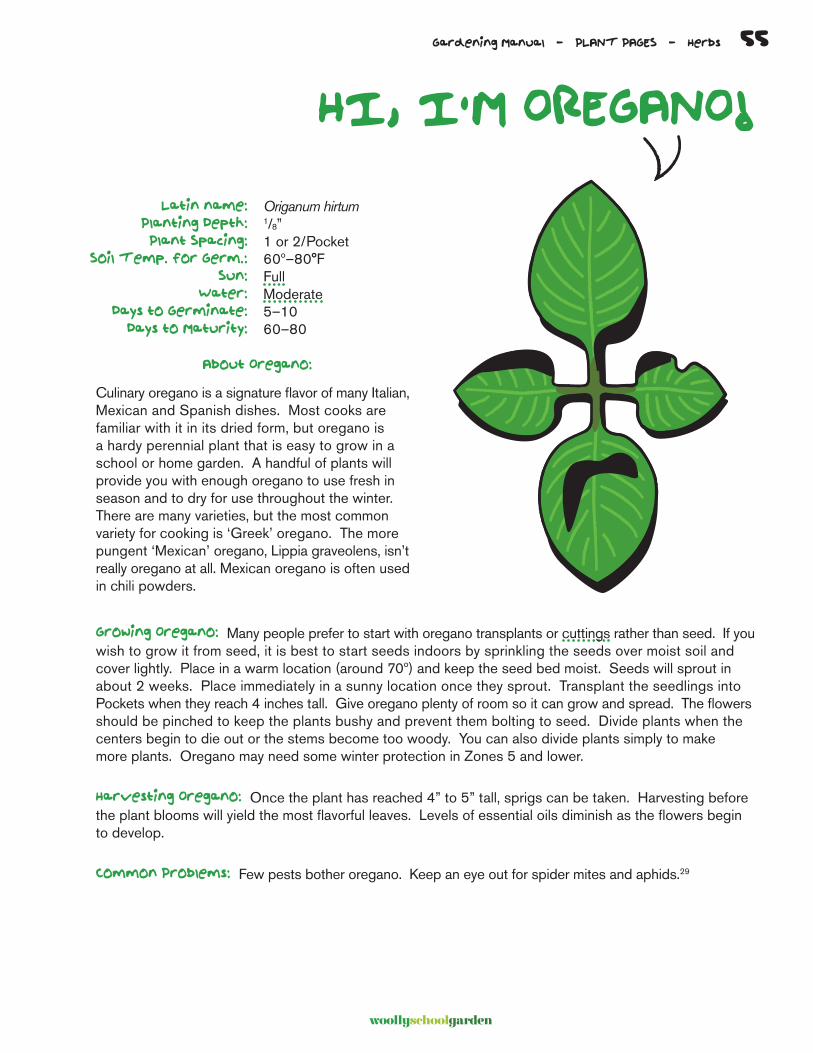
woollyschoolgarden
Coriandrum sativum1/4”–1/2”2 or 3/pocket55º–65°F FullModerate7–1445–70
Gardening Manual - PLANT PAGES - Herbs
HI, I’M OREGANO!
Growing Oregano: Many people prefer to start with oregano transplants or cuttings rather than seed. If you wish to grow it from seed, it is best to start seeds indoors by sprinkling the seeds over moist soil and cover lightly. Place in a warm location (around 70º) and keep the seed bed moist. Seeds will sprout in about 2 weeks. Place immediately in a sunny location once they sprout. Transplant the seedlings into Pockets when they reach 4 inches tall. Give oregano plenty of room so it can grow and spread. The flowers should be pinched to keep the plants bushy and prevent them bolting to seed. Divide plants when the centers begin to die out or the stems become too woody. You can also divide plants simply to make more plants. Oregano may need some winter protection in Zones 5 and lower.
Harvesting Oregano: Once the plant has reached 4” to 5” tall, sprigs can be taken. Harvesting before the plant blooms will yield the most flavorful leaves. Levels of essential oils diminish as the flowers begin to develop.
Common Problems: Few pests bother oregano. Keep an eye out for spider mites and aphids.29
Origanum hirtum1/8”1 or 2/Pocket60º–80°F FullModerate5–1060–80
Latin name:Planting Depth:Plant Spacing:
Soil Temp. for Germ.:Sun:
Water:Days to Germinate:
Days to Maturity:
About Oregano:
Culinary oregano is a signature flavor of many Italian, Mexican and Spanish dishes. Most cooks are familiar with it in its dried form, but oregano is a hardy perennial plant that is easy to grow in a school or home garden. A handful of plants will provide you with enough oregano to use fresh in season and to dry for use throughout the winter. There are many varieties, but the most common variety for cooking is ‘Greek’ oregano. The more pungent ‘Mexican’ oregano, Lippia graveolens, isn’t really oregano at all. Mexican oregano is often used in chili powders.
55
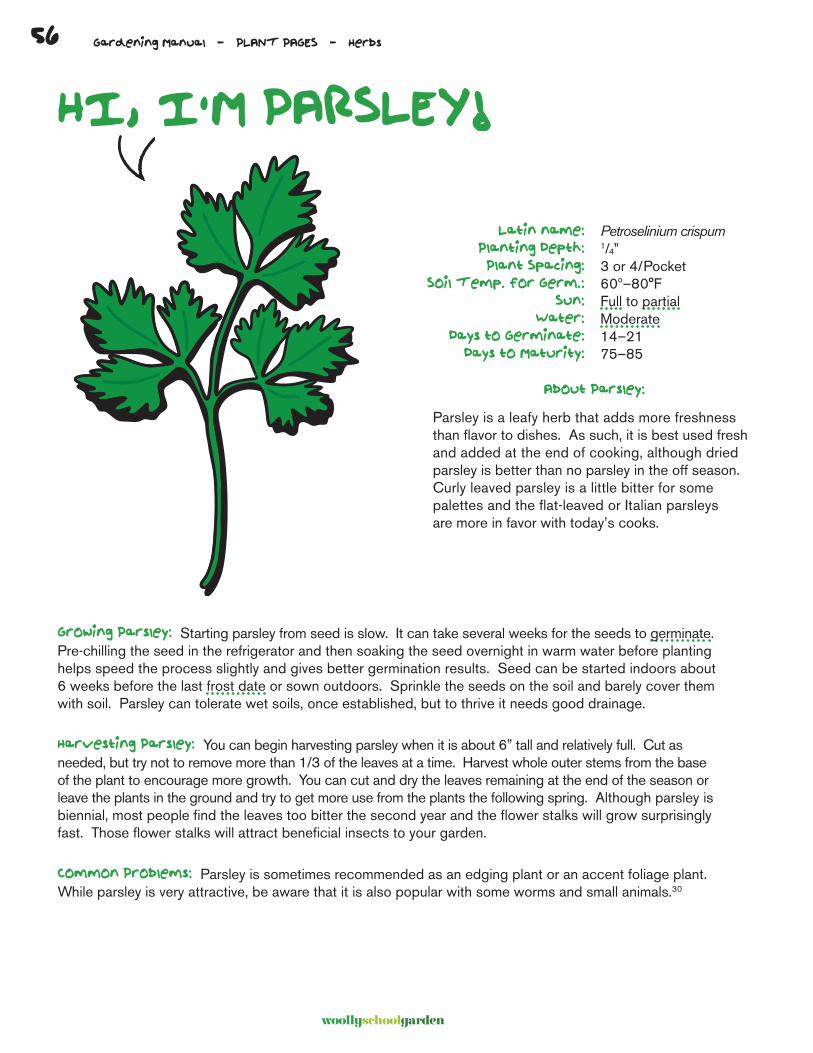
woollyschoolgarden
Gardening Manual - PLANT PAGES - Herbs
HI, I’M PARSLEY!
Growing Parsley: Starting parsley from seed is slow. It can take several weeks for the seeds to germinate. Pre-chilling the seed in the refrigerator and then soaking the seed overnight in warm water before planting helps speed the process slightly and gives better germination results. Seed can be started indoors about 6 weeks before the last frost date or sown outdoors. Sprinkle the seeds on the soil and barely cover them with soil. Parsley can tolerate wet soils, once established, but to thrive it needs good drainage.
Harvesting Parsley: You can begin harvesting parsley when it is about 6” tall and relatively full. Cut as needed, but try not to remove more than 1/3 of the leaves at a time. Harvest whole outer stems from the base of the plant to encourage more growth. You can cut and dry the leaves remaining at the end of the season or leave the plants in the ground and try to get more use from the plants the following spring. Although parsley is biennial, most people find the leaves too bitter the second year and the flower stalks will grow surprisingly fast. Those flower stalks will attract beneficial insects to your garden.
Common Problems: Parsley is sometimes recommended as an edging plant or an accent foliage plant. While parsley is very attractive, be aware that it is also popular with some worms and small animals.30
Petroselinium crispum1/4”3 or 4/Pocket60º–80°F Full to partialModerate14–2175–85
Latin name:Planting Depth:Plant Spacing:
Soil Temp. for Germ.:Sun:
Water:Days to Germinate:
Days to Maturity:
About Parsley:
Parsley is a leafy herb that adds more freshness than flavor to dishes. As such, it is best used fresh and added at the end of cooking, although dried parsley is better than no parsley in the off season. Curly leaved parsley is a little bitter for some palettes and the flat-leaved or Italian parsleys are more in favor with today’s cooks.
56
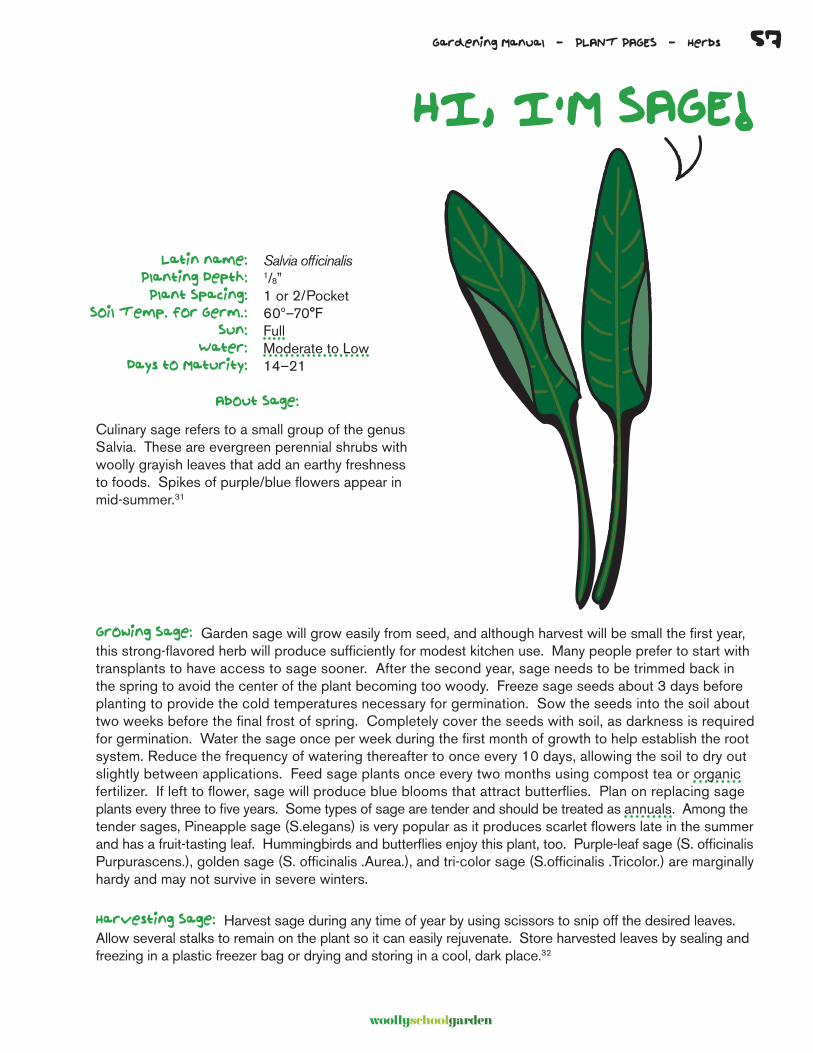
woollyschoolgarden
Petroselinium crispum1/4”3 or 4/Pocket60º–80°F Full to partialModerate14–2175–85
Gardening Manual - PLANT PAGES - Herbs
HI, I’M SAGE!
Growing Sage: Garden sage will grow easily from seed, and although harvest will be small the first year, this strong-flavored herb will produce sufficiently for modest kitchen use. Many people prefer to start with transplants to have access to sage sooner. After the second year, sage needs to be trimmed back in the spring to avoid the center of the plant becoming too woody. Freeze sage seeds about 3 days before planting to provide the cold temperatures necessary for germination. Sow the seeds into the soil about two weeks before the final frost of spring. Completely cover the seeds with soil, as darkness is required for germination. Water the sage once per week during the first month of growth to help establish the root system. Reduce the frequency of watering thereafter to once every 10 days, allowing the soil to dry out slightly between applications. Feed sage plants once every two months using compost tea or organic fertilizer. If left to flower, sage will produce blue blooms that attract butterflies. Plan on replacing sage plants every three to five years. Some types of sage are tender and should be treated as annuals. Among the tender sages, Pineapple sage (S.elegans) is very popular as it produces scarlet flowers late in the summer and has a fruit-tasting leaf. Hummingbirds and butterflies enjoy this plant, too. Purple-leaf sage (S. officinalis Purpurascens.), golden sage (S. officinalis .Aurea.), and tri-color sage (S.officinalis .Tricolor.) are marginally hardy and may not survive in severe winters.
Harvesting Sage: Harvest sage during any time of year by using scissors to snip off the desired leaves. Allow several stalks to remain on the plant so it can easily rejuvenate. Store harvested leaves by sealing and freezing in a plastic freezer bag or drying and storing in a cool, dark place.32
Salvia officinalis1/8”1 or 2/Pocket60º–70°F FullModerate to Low14–21
Latin name:Planting Depth:Plant Spacing:
Soil Temp. for Germ.:Sun:
Water:Days to Maturity:
About Sage:
Culinary sage refers to a small group of the genus Salvia. These are evergreen perennial shrubs with woolly grayish leaves that add an earthy freshness to foods. Spikes of purple/blue flowers appear in mid-summer.31
57
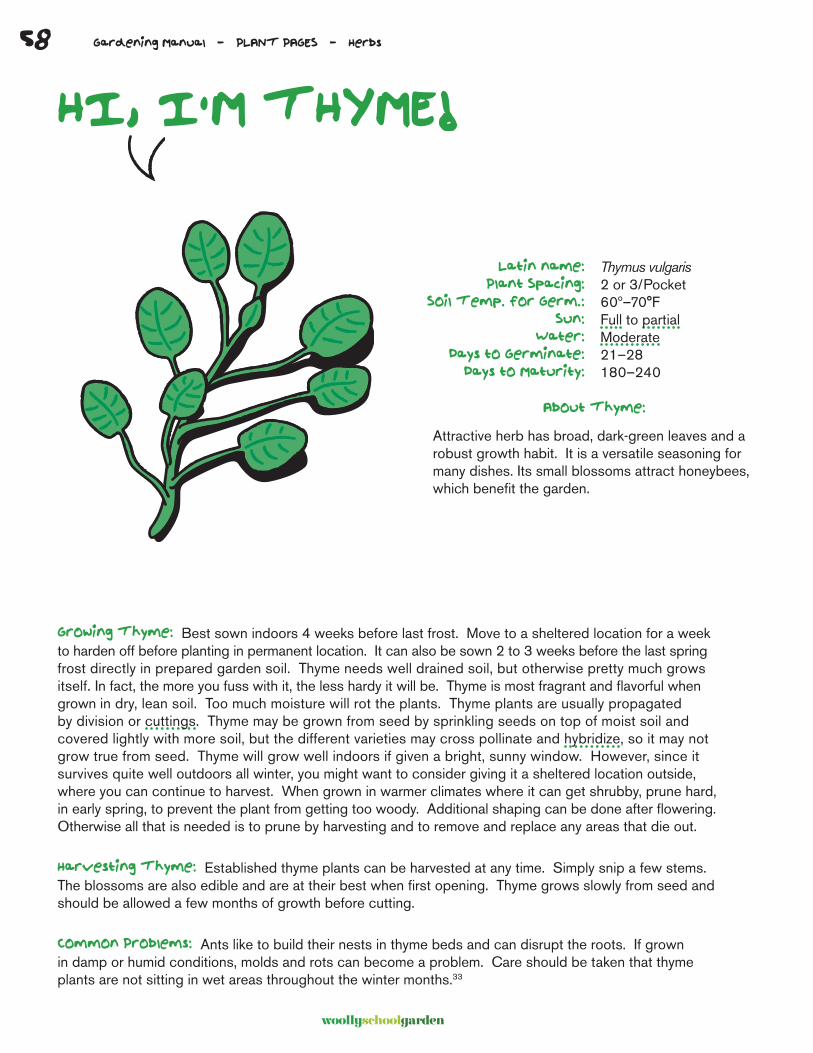
woollyschoolgarden
Gardening Manual - PLANT PAGES - Herbs
HI, I’M THYME!
Growing Thyme: Best sown indoors 4 weeks before last frost. Move to a sheltered location for a week to harden off before planting in permanent location. It can also be sown 2 to 3 weeks before the last spring frost directly in prepared garden soil. Thyme needs well drained soil, but otherwise pretty much grows itself. In fact, the more you fuss with it, the less hardy it will be. Thyme is most fragrant and flavorful when grown in dry, lean soil. Too much moisture will rot the plants. Thyme plants are usually propagated by division or cuttings. Thyme may be grown from seed by sprinkling seeds on top of moist soil and covered lightly with more soil, but the different varieties may cross pollinate and hybridize, so it may not grow true from seed. Thyme will grow well indoors if given a bright, sunny window. However, since it survives quite well outdoors all winter, you might want to consider giving it a sheltered location outside, where you can continue to harvest. When grown in warmer climates where it can get shrubby, prune hard, in early spring, to prevent the plant from getting too woody. Additional shaping can be done after flowering. Otherwise all that is needed is to prune by harvesting and to remove and replace any areas that die out.
Harvesting Thyme: Established thyme plants can be harvested at any time. Simply snip a few stems. The blossoms are also edible and are at their best when first opening. Thyme grows slowly from seed and should be allowed a few months of growth before cutting.
Common Problems: Ants like to build their nests in thyme beds and can disrupt the roots. If grown in damp or humid conditions, molds and rots can become a problem. Care should be taken that thyme plants are not sitting in wet areas throughout the winter months.33
Thymus vulgaris 2 or 3/Pocket60º–70°F Full to partialModerate21–28180–240
Latin name:Plant Spacing:
Soil Temp. for Germ.:Sun:
Water:Days to Germinate:
Days to Maturity:
About Thyme:
Attractive herb has broad, dark-green leaves and a robust growth habit. It is a versatile seasoning for many dishes. Its small blossoms attract honeybees, which benefit the garden.
58
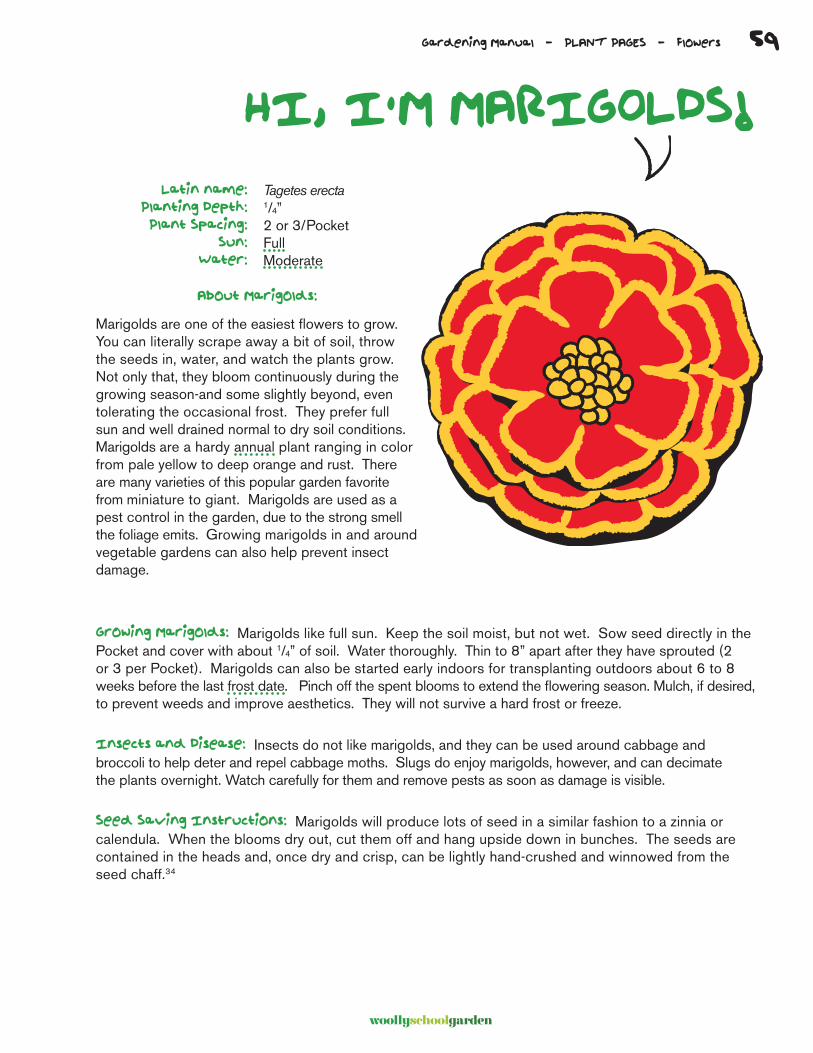
woollyschoolgarden
Thymus vulgaris 2 or 3/Pocket60º–70°F Full to partialModerate21–28180–240
Gardening Manual - PLANT PAGES - Flowers
HI, I’M MARIGOLDS!
Growing Marigolds: Marigolds like full sun. Keep the soil moist, but not wet. Sow seed directly in the Pocket and cover with about 1/4” of soil. Water thoroughly. Thin to 8” apart after they have sprouted (2 or 3 per Pocket). Marigolds can also be started early indoors for transplanting outdoors about 6 to 8 weeks before the last frost date. Pinch off the spent blooms to extend the flowering season. Mulch, if desired, to prevent weeds and improve aesthetics. They will not survive a hard frost or freeze.
Insects and Disease: Insects do not like marigolds, and they can be used around cabbage and broccoli to help deter and repel cabbage moths. Slugs do enjoy marigolds, however, and can decimate the plants overnight. Watch carefully for them and remove pests as soon as damage is visible.
Seed Saving Instructions: Marigolds will produce lots of seed in a similar fashion to a zinnia or calendula. When the blooms dry out, cut them off and hang upside down in bunches. The seeds are contained in the heads and, once dry and crisp, can be lightly hand-crushed and winnowed from the seed chaff.34
Tagetes erecta1/4”2 or 3/PocketFullModerate
Latin name:Planting Depth:Plant Spacing:
Sun:Water:
About Marigolds:
Marigolds are one of the easiest flowers to grow. You can literally scrape away a bit of soil, throw the seeds in, water, and watch the plants grow. Not only that, they bloom continuously during the growing season-and some slightly beyond, even tolerating the occasional frost. They prefer full sun and well drained normal to dry soil conditions. Marigolds are a hardy annual plant ranging in color from pale yellow to deep orange and rust. There are many varieties of this popular garden favorite from miniature to giant. Marigolds are used as a pest control in the garden, due to the strong smell the foliage emits. Growing marigolds in and around vegetable gardens can also help prevent insect damage.
59
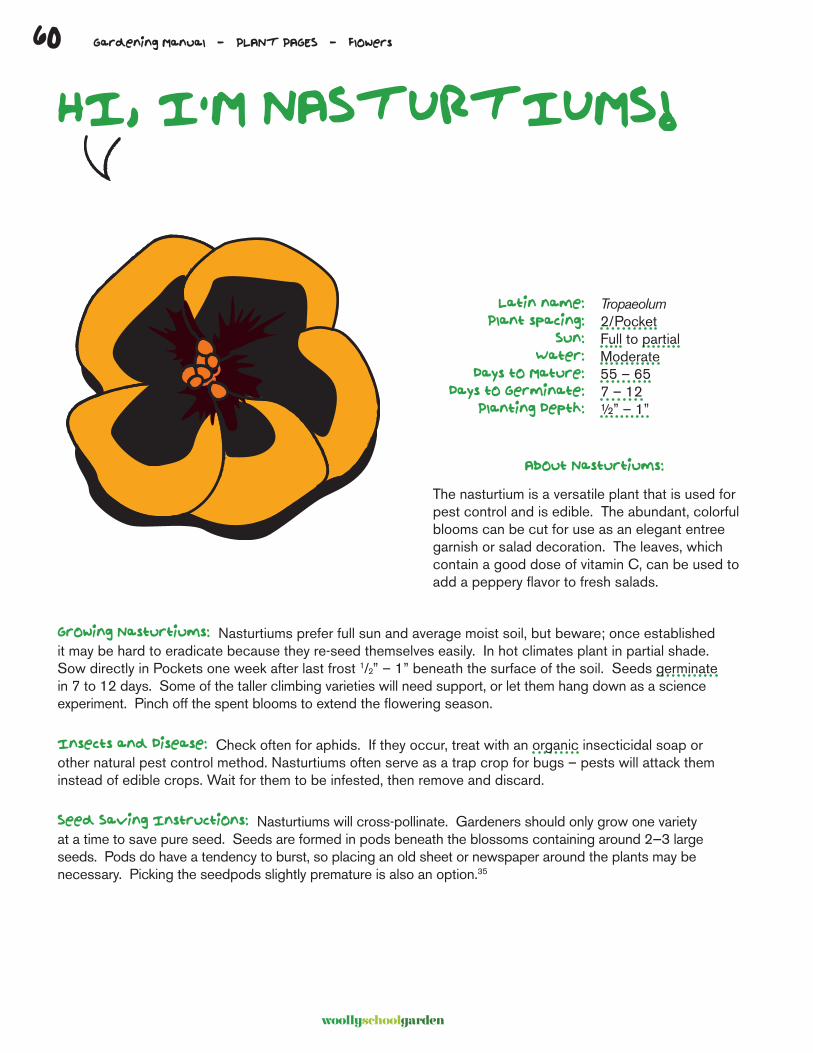
woollyschoolgarden
Gardening Manual - PLANT PAGES - Flowers
HI, I’M NASTURTIUMS!
Growing Nasturtiums: Nasturtiums prefer full sun and average moist soil, but beware; once established it may be hard to eradicate because they re-seed themselves easily. In hot climates plant in partial shade. Sow directly in Pockets one week after last frost 1/2” – 1” beneath the surface of the soil. Seeds germinate in 7 to 12 days. Some of the taller climbing varieties will need support, or let them hang down as a science experiment. Pinch off the spent blooms to extend the flowering season.
Insects and Disease: Check often for aphids. If they occur, treat with an organic insecticidal soap or other natural pest control method. Nasturtiums often serve as a trap crop for bugs – pests will attack them instead of edible crops. Wait for them to be infested, then remove and discard.
Seed Saving Instructions: Nasturtiums will cross-pollinate. Gardeners should only grow one variety at a time to save pure seed. Seeds are formed in pods beneath the blossoms containing around 2 —3 large seeds. Pods do have a tendency to burst, so placing an old sheet or newspaper around the plants may be necessary. Picking the seedpods slightly premature is also an option.35
Tropaeolum2/PocketFull to partialModerate55 – 657 – 12½” – 1”
Latin name:Plant spacing:
Sun:Water:
Days to Mature:Days to Germinate:
Planting Depth:
About Nasturtiums:
The nasturtium is a versatile plant that is used for pest control and is edible. The abundant, colorful blooms can be cut for use as an elegant entree garnish or salad decoration. The leaves, which contain a good dose of vitamin C, can be used to add a peppery flavor to fresh salads.
60
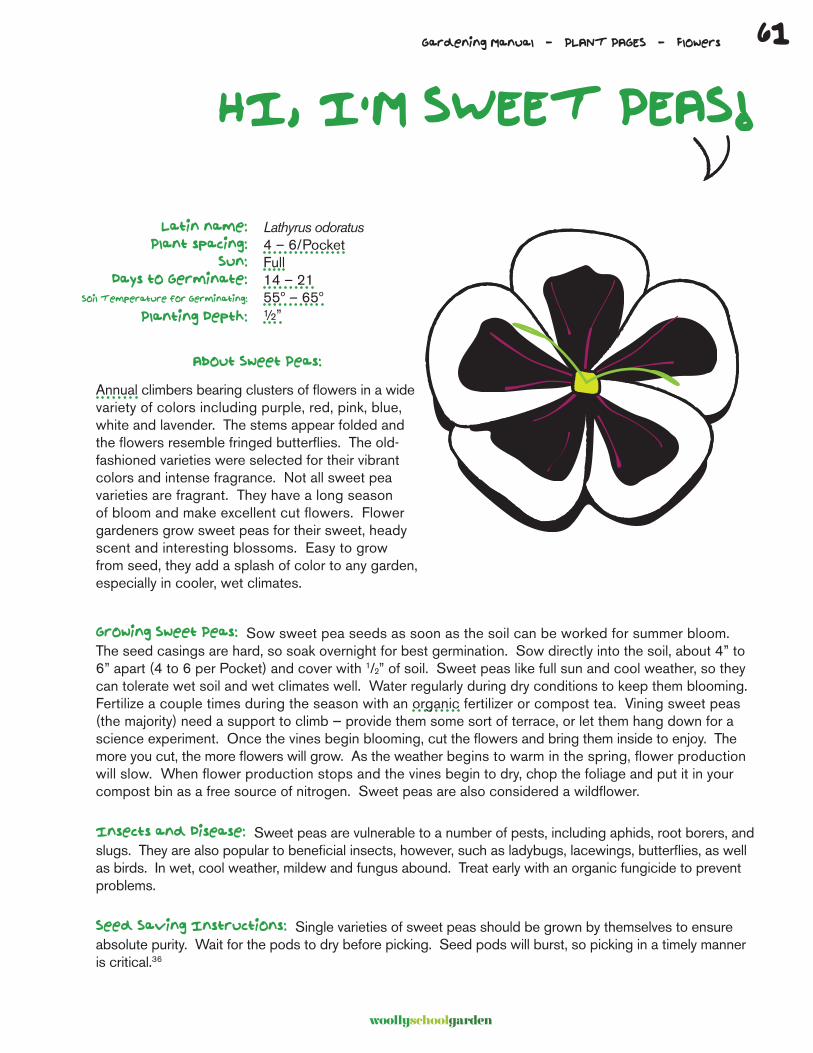
woollyschoolgarden
Tropaeolum2/PocketFull to partialModerate55 – 657 – 12½” – 1”
Gardening Manual - PLANT PAGES - Flowers
HI, I’M SWEET PEAS!
Growing Sweet Peas: Sow sweet pea seeds as soon as the soil can be worked for summer bloom. The seed casings are hard, so soak overnight for best germination. Sow directly into the soil, about 4” to 6” apart (4 to 6 per Pocket) and cover with 1/2” of soil. Sweet peas like full sun and cool weather, so they can tolerate wet soil and wet climates well. Water regularly during dry conditions to keep them blooming. Fertilize a couple times during the season with an organic fertilizer or compost tea. Vining sweet peas (the majority) need a support to climb — provide them some sort of terrace, or let them hang down for a science experiment. Once the vines begin blooming, cut the flowers and bring them inside to enjoy. The more you cut, the more flowers will grow. As the weather begins to warm in the spring, flower production will slow. When flower production stops and the vines begin to dry, chop the foliage and put it in your compost bin as a free source of nitrogen. Sweet peas are also considered a wildflower.
Insects and Disease: Sweet peas are vulnerable to a number of pests, including aphids, root borers, and slugs. They are also popular to beneficial insects, however, such as ladybugs, lacewings, butterflies, as well as birds. In wet, cool weather, mildew and fungus abound. Treat early with an organic fungicide to prevent problems.
Seed Saving Instructions: Single varieties of sweet peas should be grown by themselves to ensure absolute purity. Wait for the pods to dry before picking. Seed pods will burst, so picking in a timely manner is critical.36
Lathyrus odoratus4 – 6/PocketFull14 – 2155º – 65º½”
Latin name:Plant spacing:
Sun:Days to Germinate:
Soil Temperature for Germinating:
Planting Depth:
About Sweet Peas:
Annual climbers bearing clusters of flowers in a wide variety of colors including purple, red, pink, blue, white and lavender. The stems appear folded and the flowers resemble fringed butterflies. The old-fashioned varieties were selected for their vibrant colors and intense fragrance. Not all sweet pea varieties are fragrant. They have a long season of bloom and make excellent cut flowers. Flower gardeners grow sweet peas for their sweet, heady scent and interesting blossoms. Easy to grow from seed, they add a splash of color to any garden, especially in cooler, wet climates.
61

62
woollyschoolgarden
Gardening Manual - PLANT PAGES - Endnotes
Content sourced and edited from:
1 SurvivalGardening.net & SeedsOfChange.com
2 OrganicGardening.com and SeedsOfChange.com
3 SeedsOfChange.com
4 Wikipedia.org
5 University of Illinois Extensions http://urbanext.illinois.edu/veggies/broccoli1.html
6 University of Illinois Extentions http://urbanext.illinois.edu/veggies/beans1.html
7 Easy Gardening: Carrots by Joseph Masabn
8 John Jett, Extension Specialist, Horticulture http://wvu.edu/~agexten/hortcult/homegard/cauliflwr.htm
9 Watch Your Garden Grow University of Illinois http://urbanext.illinois.edu/veggies/chard1.html
10 Watch Your Garden Grow, University of Illinois http://urbanext.illinois.edu/veggies/collards1.html
11 USA Gardener http://usagardener.com/how_to_grow_vegetables/how_to_grow_kale.php
12 Watch Your Garden Grow University of Illinois http://urbanext.illinois.edu/veggies/kohlrabi1.html
13 HowToGardenAdvice.com http://howtogardenadvice.com/vegetables/grow_leeks.html
14 Watch Your Garden Grow, University of Illinois http://urbanext.illinois.edu/veggies/lettuce1.html
15 HighMowingSeeds.com http://highmowingseeds.com/organic-onions-bunching- growing-and-seed-saving-info.html
16 Watch Your Garden Grow, University of Illinois http://urbanext.illinois.edu/veggies/onion1.html
17 Watch Your Garden Grow, University of Illinois http://urbanext.illinois.edu/veggies/mustard1.html
18 Watch You Garden Grow, University of Illinois http://urbanext.illinois.edu/veggies/peas1.html
19 Watch Your Garden Grow, University of Illinois http://urbanext.illinois.edu/veggies/peppers1.html
20 Watch Your Garden Grow, University of Illinois http://urbanext.illinois.edu/veggies/radish1.html
21 Watch Your Garden Grow, University of Illinois http://urbanext.illinois.edu/veggies/spinach1.html
22 Watch Your Garden Grow, University of Illinois http://urbanext.illinois.edu/veggies/tomato1.html
23 GardeningPatch.com http://gardeningpatch.com/herbs/growing-basil.aspx
24 HarvestWizard.com http://harvestwizard.com/2009/04/how_to_grow_chives.html
25 GardeningPatch.com http://gardeningpatch.com/herbs/growing-coriander- cilantro.aspx
26 University of Massachusetts http://umassvegetable.org/growers_services/pdf_files/growing_marketing_cilantro_mass.pdf
27 GardeningPatch.com http://gardeningpatch.com/herbs/growing-coriander- cilantro.aspx
28 University of Massachusetts http://umassvegetable.org/growers_services/pdf_files/growing_marketing_cilantro_mass.pdf
29 About.com http://gardening.about.com/od/plantprofil2/p/Oregano.htm
30 About.com http://gardening.about.com/od/herbsspecificplants1/p/Parsley.htm
31 About.com http://gardening.about.com/od/herbs/p/Sage.htm
32 GardenGuides.com http://gardenguides.com/94871-grow-herb-sage.html
33 About.com http://gardening.about.com/od/herbsspecificplants1/p/Thyme.htm
34 PlanetNatural.com http://planetnatural.com/site/xdpy/kb/growing-marigolds.html
35 PlanetNatural.com http://planetnatural.com/site/nasturtium-empress-of-india.html
36 PlanetNatural.com http://planetnatural.com/site/xdpy/kb/growing-sweet-peas.html
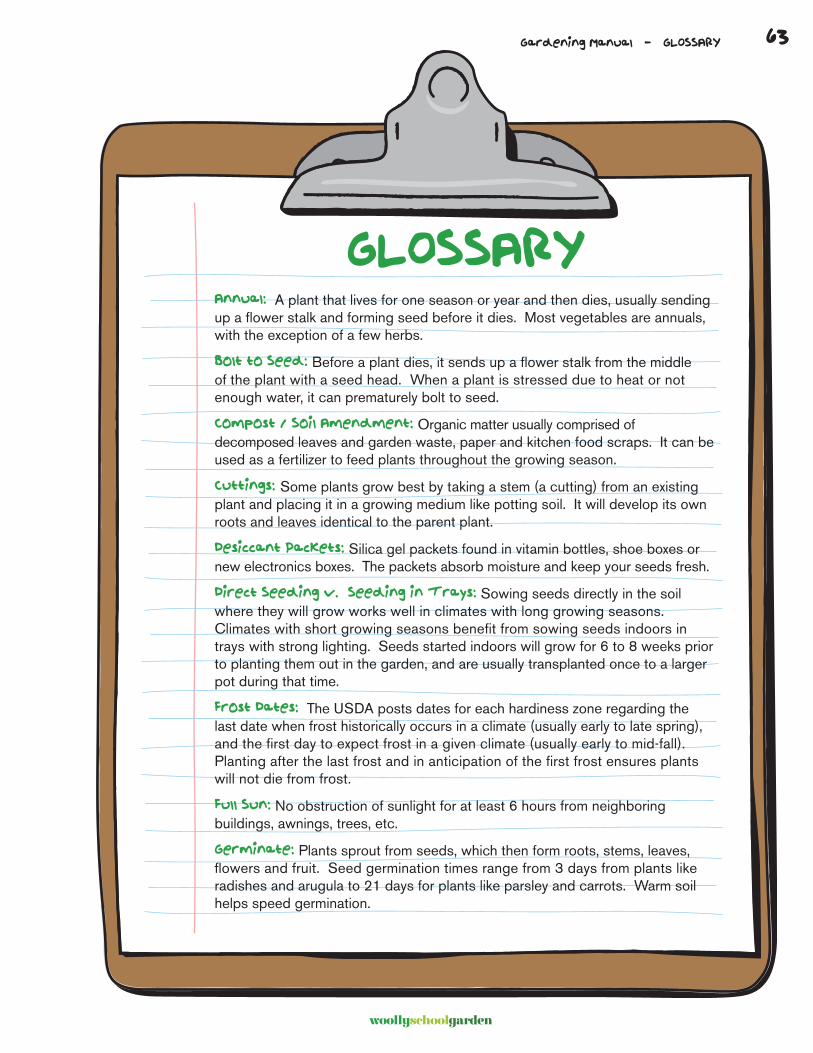
woollyschoolgarden
63Gardening Manual - GLOSSARY
Annual: A plant that lives for one season or year and then dies, usually sending up a flower stalk and forming seed before it dies. Most vegetables are annuals, with the exception of a few herbs.
Bolt to Seed: Before a plant dies, it sends up a flower stalk from the middle of the plant with a seed head. When a plant is stressed due to heat or not enough water, it can prematurely bolt to seed.
Compost / Soil Amendment: Organic matter usually comprised of decomposed leaves and garden waste, paper and kitchen food scraps. It can be used as a fertilizer to feed plants throughout the growing season.
Cuttings: Some plants grow best by taking a stem (a cutting) from an existing plant and placing it in a growing medium like potting soil. It will develop its own roots and leaves identical to the parent plant.
Desiccant Packets: Silica gel packets found in vitamin bottles, shoe boxes or new electronics boxes. The packets absorb moisture and keep your seeds fresh.
Direct Seeding v. Seeding in Trays: Sowing seeds directly in the soil where they will grow works well in climates with long growing seasons. Climates with short growing seasons benefit from sowing seeds indoors in trays with strong lighting. Seeds started indoors will grow for 6 to 8 weeks prior to planting them out in the garden, and are usually transplanted once to a larger pot during that time.
Frost Dates: The USDA posts dates for each hardiness zone regarding the last date when frost historically occurs in a climate (usually early to late spring), and the first day to expect frost in a given climate (usually early to mid-fall). Planting after the last frost and in anticipation of the first frost ensures plants will not die from frost.
Full Sun: No obstruction of sunlight for at least 6 hours from neighboring buildings, awnings, trees, etc.
Germinate: Plants sprout from seeds, which then form roots, stems, leaves, flowers and fruit. Seed germination times range from 3 days from plants like radishes and arugula to 21 days for plants like parsley and carrots. Warm soil helps speed germination.
GLOSSARY

woollyschoolgarden
64 Gardening Manual - GLOSSARY
Hardiness Zone: These zones help growers determine what crops will thrive in a local climate. The U.S. and Canada are divided into 11 different hardiness zones based on a 10º Fahrenheit difference in the average annual minimum temperature. Most of the West Coast and Southern U.S. states are in Zones 8–10, while the chillier Northern states fall into Zones 2-5, with the middle of the country primarily in Zones 6–7. Seed packets typically indicate which zones are ideal for growing that particular plant.
Heirloom: These varieties of plants have been handed down from generation to generation and not been used in commercial farming production. Heirlooms are naturally resistant to diseases and pests.
Hybrids: Cross-pollinated plants that are a combination of two different varieties of parent plants, usually of the same species. The resulting seeds carry the same traits as their parents, but as a combination of different varieties, are not identical to either parent. Hybrids usually show increased vigor and disease resistance, but decrease biodiversity and are not suitable for seed saving.
Native Plants: Plants that are indigenous to any given climate that grow well in that climate’s weather conditions (i.e., native wildflowers and cactus grow naturally in California’s desert areas).
Open Pollinated: Bees, birds, wind and other natural agents pollinate plants naturally, crossing two parent plants of the same variety and producing plants that are identical to the parents. The resulting seeds produce plants just like the parents and can be saved for future planting.
Organic: Technically the word means “carbon-based” and has a broad definition that is used somewhat misleadingly in products available to gardeners. In organic gardening, the word refers to the standards by which food and flowers are grown without the use of chemical pesticides or petroleum-based fertilizers.
Partial Sun: Sunlight exposure for 3–6 hours per day. Plants requiring partial sun can usually tolerate some full sun and heat, but prefer some shade.
Perennial: A plant that lives for more than one year or one season and will continue to produce food or flowers if maintained.
Seed Pods: Small seeds enclosed in a membrane that forms on plants either at the end of their life cycle or as part of their annual growth cycle.
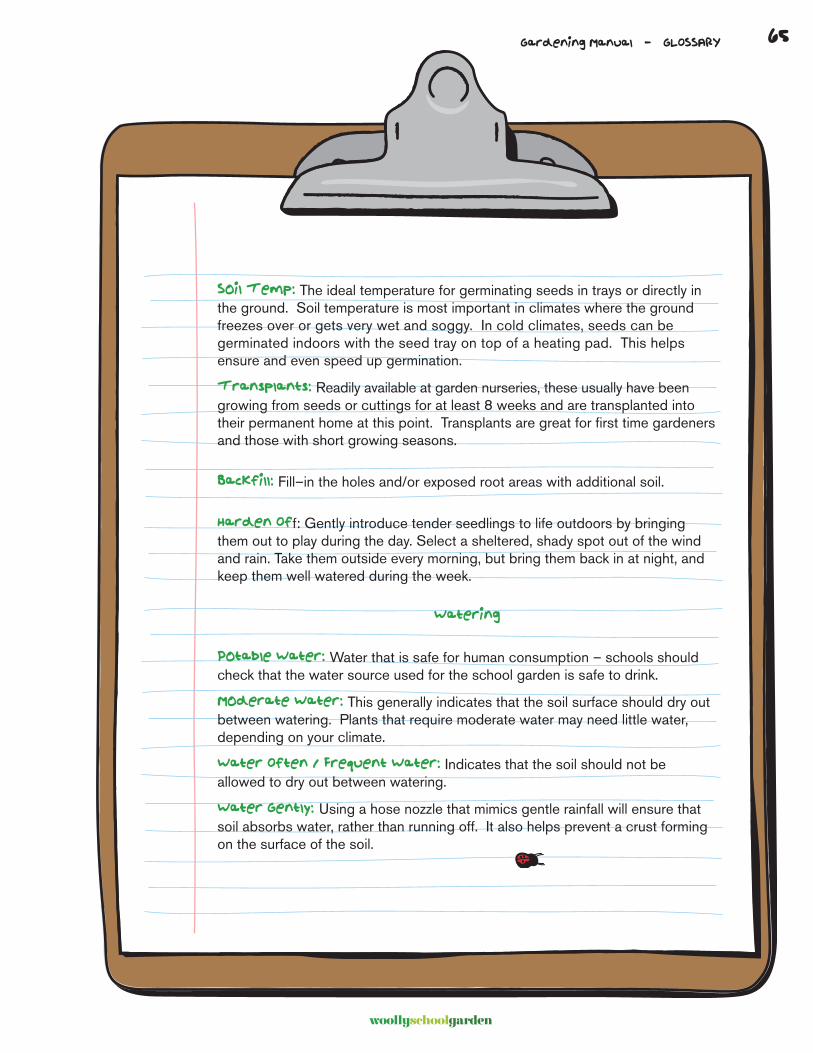
woollyschoolgarden
65Gardening Manual - GLOSSARY
Soil Temp: The ideal temperature for germinating seeds in trays or directly in the ground. Soil temperature is most important in climates where the ground freezes over or gets very wet and soggy. In cold climates, seeds can be germinated indoors with the seed tray on top of a heating pad. This helps ensure and even speed up germination.
Transplants: Readily available at garden nurseries, these usually have been growing from seeds or cuttings for at least 8 weeks and are transplanted into their permanent home at this point. Transplants are great for first time gardeners and those with short growing seasons.
Backfill: Fill–in the holes and/or exposed root areas with additional soil.
Harden Off: Gently introduce tender seedlings to life outdoors by bringing them out to play during the day. Select a sheltered, shady spot out of the wind and rain. Take them outside every morning, but bring them back in at night, and keep them well watered during the week.
Watering
Potable Water: Water that is safe for human consumption – schools should check that the water source used for the school garden is safe to drink.
Moderate Water: This generally indicates that the soil surface should dry out between watering. Plants that require moderate water may need little water, depending on your climate.
Water Often / Frequent Water: Indicates that the soil should not be allowed to dry out between watering.
Water Gently: Using a hose nozzle that mimics gentle rainfall will ensure that soil absorbs water, rather than running off. It also helps prevent a crust forming on the surface of the soil.