wikipad 7 user manual - video game console library · 8 using android apps all apps app 33 ... play...
TRANSCRIPT

Wikipad 7
User Manual
2
TABLE OF CONTENTS
0 INTRODUCTION
Thank You For Purchasing Wikipad 7 07
Your New Wikipad 7 07
What’s In The Box 08
Important Safety Precautions 08
Cleaning 09
1 AT A GLANCE
Wikipad 7 Overview 10
Game Controller Overview 11
Connecting Wikipad 7 With Game Controller 12
Accessories 12
Specifications 13
2 GET STARTED
Charging The Battery 14
Turning On The Tablet 15
Turning Off The Tablet 15
The Lock Screen 15
3
3 STARTUP WIZARD
First Time Startup 17
Select Wi-Fi 17
Got Google? 17
4 HOME SCREENS
Navigating The Home Screens 19
Access Apps & Widgets Screen 20
Organizing The Home Screens 20
Notifications 21
Changing The Wallpaper 22
5 CONNECTING TO WI-FI
Setting Up Wi-Fi 23
Adding A Wi-Fi Network 23
Forget A Wi-Fi Network 24
Set Wi-Fi Notifications & Other Advanced Options 24
Connect To A Virtual Private Network (VPN) 25
Configure Proxy Setting 26
6 USING THE KEYBOARD
Use The Keyboard 28
Managing Keyboard Dictionaries 29
4
Typing Tips 30
Typing Text By Speaking 30
7 USING GESTURES
8 USING ANDROID APPS
All Apps App 33
Clock App 33
Downloads App 34
People App 34
Camera 35
Photo Gallery 35
9 SETTING UP EMAIL
Gmail App 37
Email App 37
10 WEB BROWSING
Chrome 38
Adjust Text Size (For Low-Vision Users) 39
Force Enable Zoom 39
More Chrome Help 39
11 WIKIPAD GAMING
Built For Gaming 40
Controller 40
5
Android Gaming 40
12 BLUETOOTH
Connect The Tablet With Bluetooth Devices 41
Receive Files Through Bluetooth 42
13 TRANSFER AND MANAGE FILES
Connecting The Wikipad To A PC Or MAC 45
14 MULTIMEDIA
Google Play Store 46
Play Books 46
Play Magazines 46
Play Movies & Tv 47
Music 47
15 SETTINGS
Settings App 48
Customizing Sound Settings 48
Restore 48
OTA “Over The Air” Upgrade 49
16 ACCESSIBILITY
Accessibility Settings 50
Modify Accessibility Settings 51
How To Use TalkBack 52
6
TalkBack Settings 53
Enhance Web Accessibility 54
Accessibility Gestures 55
17 SECURITY
Manage Security Settings 56
18 MAXIMIZE WIKIPAD PERFORMANCE
Optimize Battery Life 57
Extend The Life Of Your Battery 57
Check Battery Level And Usage 58
Optimize Memory Usage 58
Use The Apps Screen 59
19 FREQUENTLY ASKED QUESTIONS
7
INTRODUCTION
THANK YOU FOR PURCHASING WIKIPAD 7
Wikipad enables you to:
• Experience true mobile console gaming.
• Surf the Internet faster and more smoothly.
• Enjoy extreme quad-core multitasking performance.
• Watch HD video smoothly wherever you are.
• Share media files through Bluetooth.
• Play music; Watch videos; View pictures.
• Take photos and record videos; Make sound recordings.
This manual contains important safety information and operation instructions, so please read all the instructions carefully before using the device and keep it for future reference.
YOUR NEW WIKIPAD 7
Once connected to a Wi-Fi network, you can do the following:
• Access the Internet through Wi-Fi.
• Use online services, such as music, videos, social networking services, news, clock, and other services.
0
8
• Download thousands of applications from Google Play.
WHAT’S IN THE BOX
Make sure that you have received the following items:
• Wikipad 7.
• Interchangeable game controller.
• USB power adapter.
• USB cable.
• Quick start guide.
• Warranty card.
• Quality Certificate.
IMPORTANT SAFETY PRECAUTIONS
WHEN USING YOUR DEVICE
Always follow these basic safety precautions when using your device. This will reduce the risk of fire, electric shock, product damage and personal injury.
• Warning: Do not remove the cover or back to reduce the risk of electric shock. There are no user-serviceable parts inside. Refer servicing to qualified personnel.
• Warning: Do not expose the device to rain or moisture to prevent fire or electric shock hazard.
• Do not use the earphone at a high volume to prevent hearing damage.
• Do not expose the device to water (dripping or splashing) and other objects filled with liquids, such as vases.
• Do not expose the product to excessive heat caused by heating equipment or direct sunlight.
9
• Do not place the device on unstable cart, stand, tripod, bracket or table. The unit may fall, resulting in possible damage or injury.
• Never place heavy or sharp objects on the LCD panel or device.
• Only use the AC adapter included with the device. Using any other adapter will void your warranty.
• Protect the power cord from being walked on or pinched particularly at plugs, receptacles and the point where the cord attaches to the device.
• Unplug the power from the outlet when the unit is not in use.
CLEANING
• Turn off the device before cleaning.
• Never spray or pour liquid directly onto the screen or plastic casing.
• To clean the LCD screen, wipe the screen with a clean, soft, lint-free cloth. This removes dust and other particles. If it is still not clean, apply a small amount of non-ammonia, non-alcohol based glass cleaner on a clean, soft, lint-free cloth to clean the screen.
• To clean the plastic casing, use a soft, dry cloth. If it is still not clean, apply a small amount of non-ammonia, non-alcohol based, mildly non-abrasive detergent on a clean, soft, lint-free cloth to clean the surface.
10
AT A GLANCE
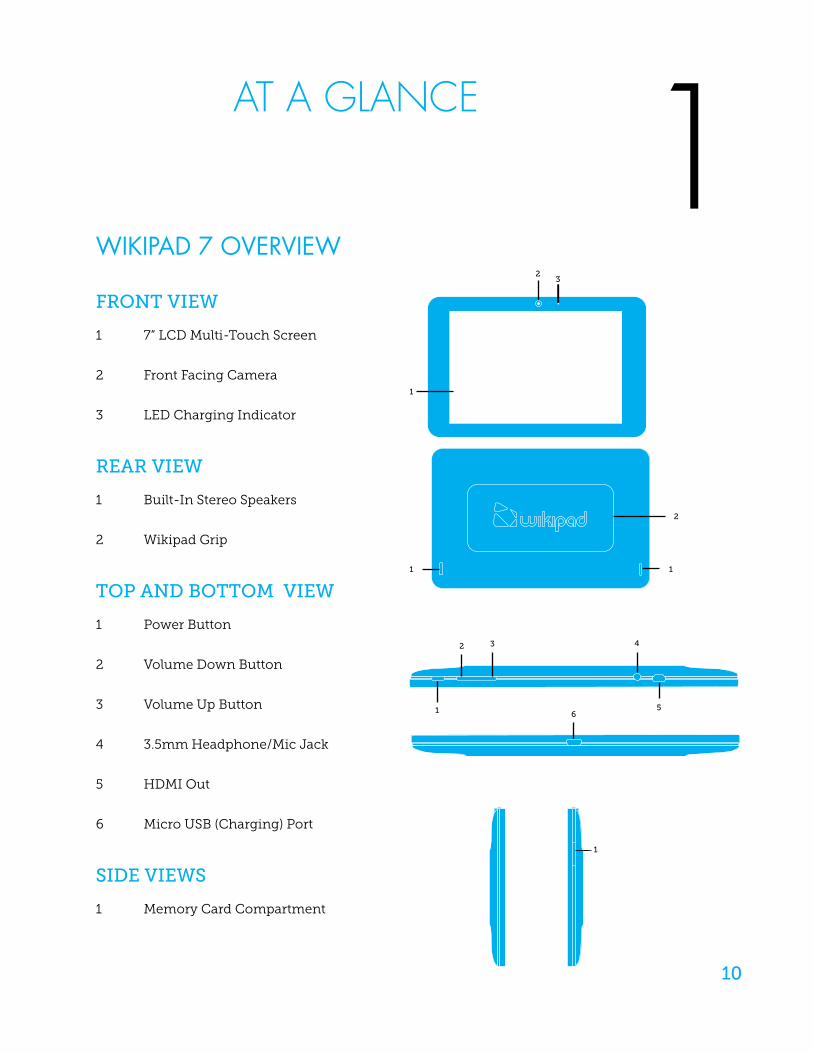
WIKIPAD 7 OVERVIEW
FRONT VIEW
1 7” LCD Multi-Touch Screen
2 Front Facing Camera
3 LED Charging Indicator
REAR VIEW
1 Built-In Stereo Speakers
2 Wikipad Grip
TOP AND BOTTOM VIEW
1 Power Button
2 Volume Down Button
3 Volume Up Button
4 3.5mm Headphone/Mic Jack
5 HDMI Out
6 Micro USB (Charging) Port
SIDE VIEWS
1 Memory Card Compartment
2
1
3
1 1
2
1
2 3 4
56
1
1
11
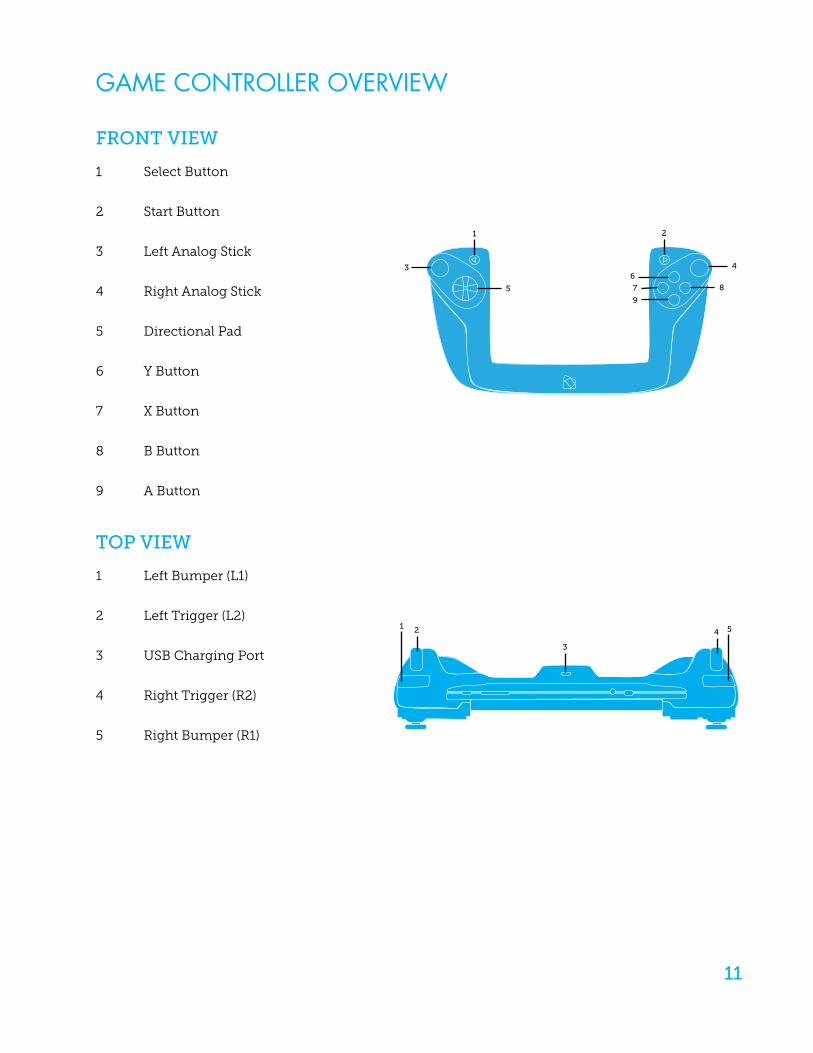
GAME CONTROLLER OVERVIEW
FRONT VIEW
1 Select Button
2 Start Button
3 Left Analog Stick
4 Right Analog Stick
5 Directional Pad
6 Y Button
7 X Button
8 B Button
9 A Button
TOP VIEW
1 Left Bumper (L1)
2 Left Trigger (L2)
3 USB Charging Port
4 Right Trigger (R2)
5 Right Bumper (R1)
1 2
3 4
5
6
7 8
9
1 2
3
4 5
12
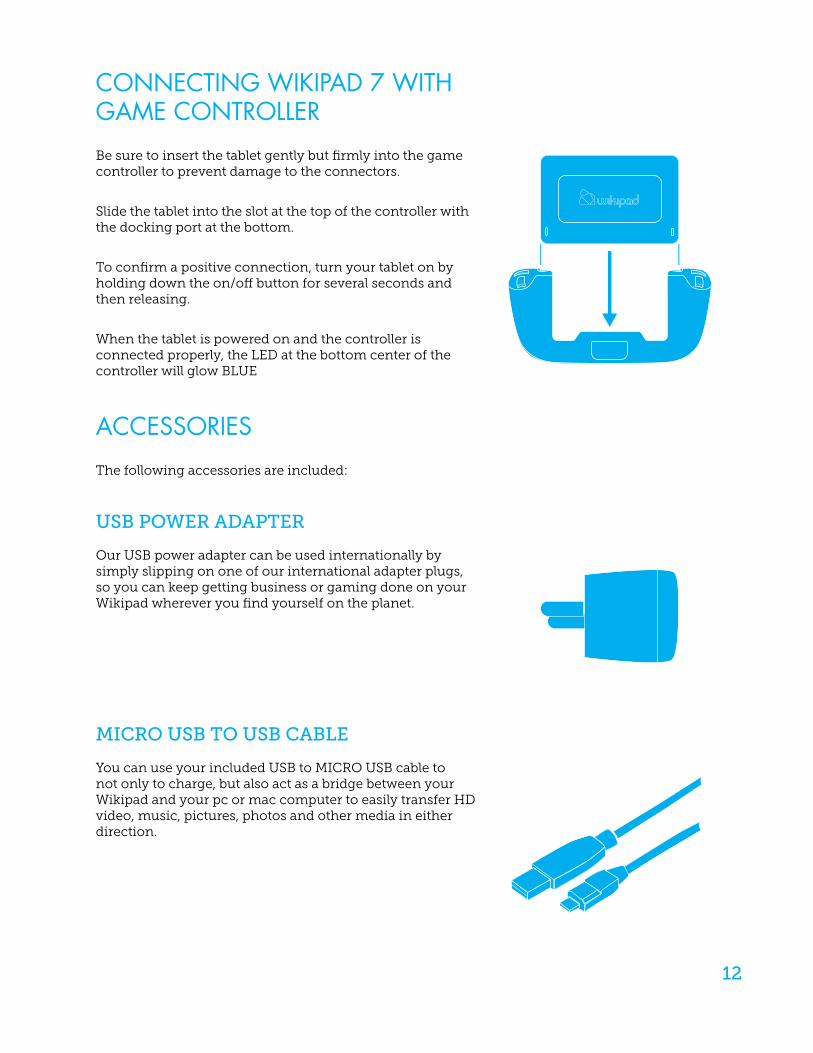
CONNECTING WIKIPAD 7 WITH GAME CONTROLLER
Be sure to insert the tablet gently but firmly into the game controller to prevent damage to the connectors.
Slide the tablet into the slot at the top of the controller with the docking port at the bottom.
To confirm a positive connection, turn your tablet on by holding down the on/off button for several seconds and then releasing.
When the tablet is powered on and the controller is connected properly, the LED at the bottom center of the controller will glow BLUE
ACCESSORIES
The following accessories are included:
USB POWER ADAPTER
Our USB power adapter can be used internationally by simply slipping on one of our international adapter plugs, so you can keep getting business or gaming done on your Wikipad wherever you find yourself on the planet.
MICRO USB TO USB CABLE
You can use your included USB to MICRO USB cable to not only to charge, but also act as a bridge between your Wikipad and your pc or mac computer to easily transfer HD video, music, pictures, photos and other media in either direction.
13
SPECIFICATIONS
• Processor: NVIDIA® Tegra ® mobile processor with quad-core CPU and 5th battery-saver core.
• Operating System: Android 4.1 (Jelly Bean).
• Display: 7” (diagonal) IPS (1280x800) 16:10 ration wide-view panel, capacitive multi-touch screen (supports 5-point gesture), scratch-resistant military-grade screen.
• Wireless: Dual-band WiFi (802.11 a/b/g/n), Bluetooth 4.0®.
• Storage: Internal Memory: 1GB DDR3, Flash Memory: 16GB, Micro SD Slot: supports up to 32GB.
• Camera: Front: 2-megapixel.
• Connectivity: WiFi, Bluetooth, GPS.
• Sensors: 3-axis Accelerometer, e-Compass, Gyroscope, GPS (including GLONASS).
• Input/Output: 3.5mm stereo headphone and mic mini jack, built-in stereo speakers (2), Built-in Microphone, Micro USB data and power, Micro-HDMI output.
• Battery/Power: Built-in 4100mAh watt-hour rechargeable lithium-polymer battery, Universal AC adapter (5V, 2A).
• User Interface: Volume up/down buttons, Power button, Charging indicator LED.
• Size/Weight: Tablet and Controller: Width: 11:26 inches (286.0 mm), Height: 5.71 inches (145.0 mm), Depth: 2.57 inches (65.3 mm), Weight: 1.23 pounds (760 g) Tablet only: Width: 7.70 inches (195.6 mm), Height: 4.95 inches (125.7 mm), Depth: 0.42 inch (10.6 mm), Weight: 0.71 pound (320 g).
14
GET STARTED
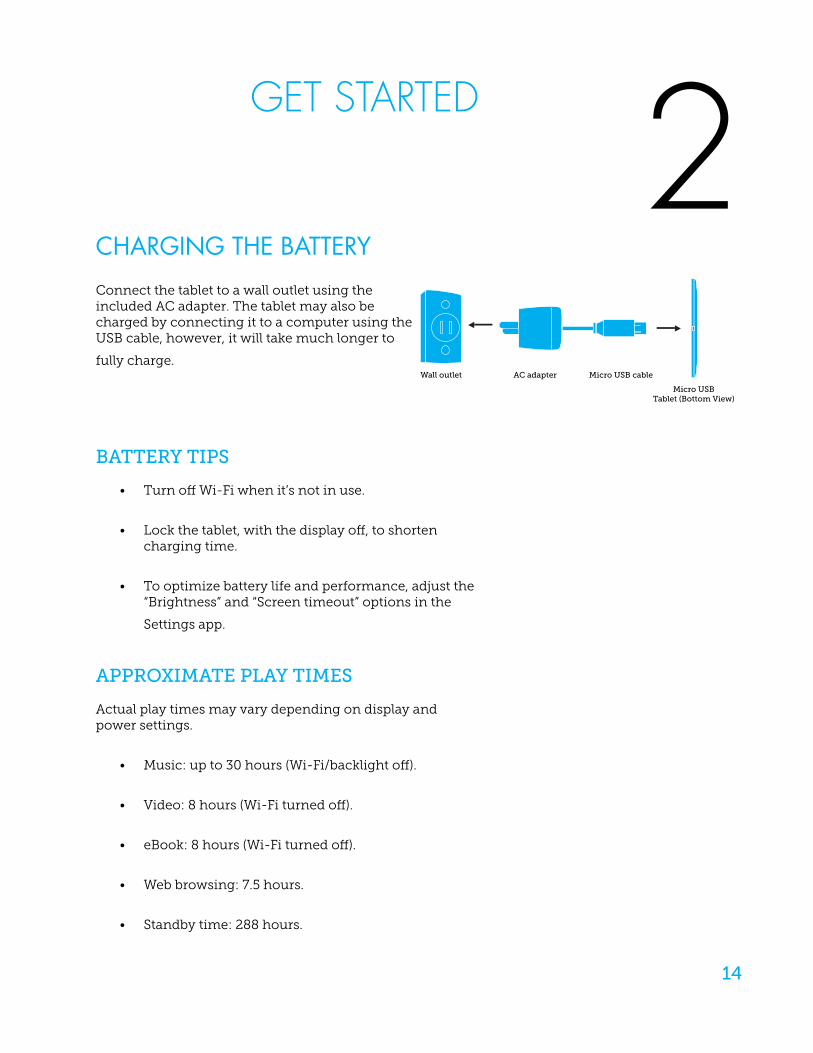
CHARGING THE BATTERY
Connect the tablet to a wall outlet using the included AC adapter. The tablet may also be charged by connecting it to a computer using the USB cable, however, it will take much longer to
fully charge.
BATTERY TIPS
• Turn off Wi-Fi when it’s not in use.
• Lock the tablet, with the display off, to shorten charging time.
• To optimize battery life and performance, adjust the “Brightness” and “Screen timeout” options in the
Settings app.
APPROXIMATE PLAY TIMES
Actual play times may vary depending on display and power settings.
• Music: up to 30 hours (Wi-Fi/backlight off).
• Video: 8 hours (Wi-Fi turned off).
• eBook: 8 hours (Wi-Fi turned off).
• Web browsing: 7.5 hours.
• Standby time: 288 hours.
Wall outlet AC adapter Micro USB cable
Micro USBTablet (Bottom View)
2
15
TURNING ON THE TABLET
Press and hold the “Power” button until the Wikipad logo appears.
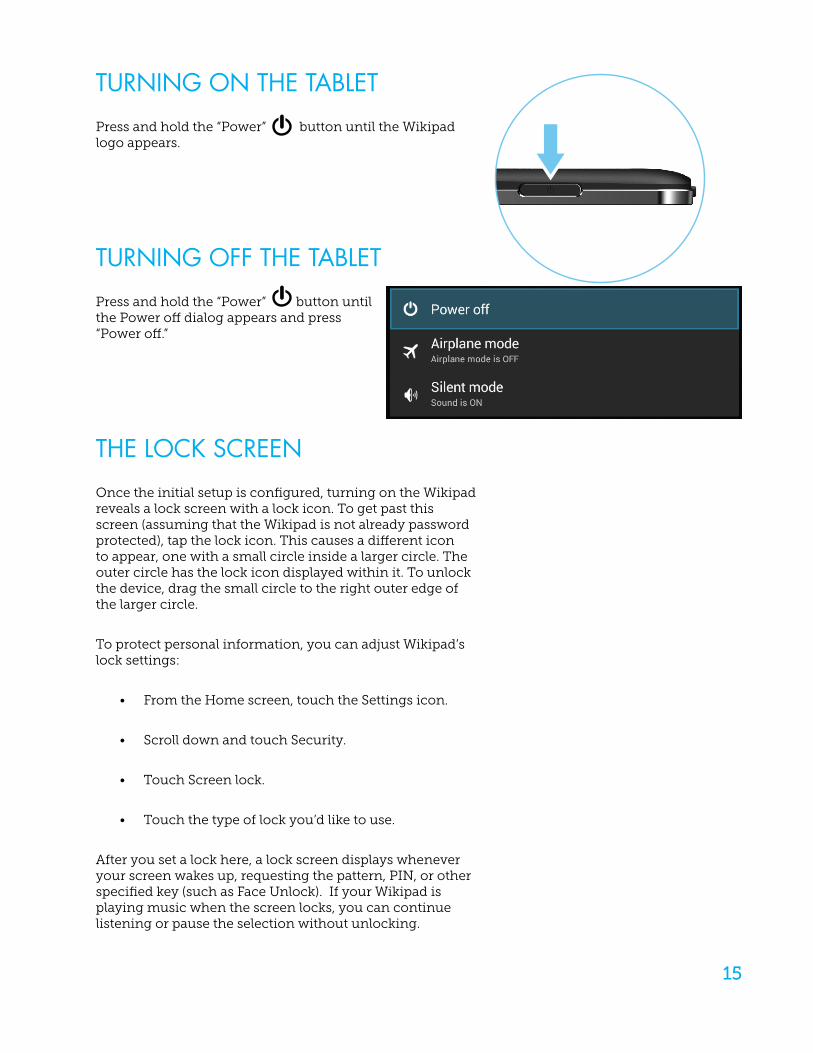
TURNING OFF THE TABLET
Press and hold the “Power” button until the Power off dialog appears and press “Power off.”
THE LOCK SCREEN
Once the initial setup is configured, turning on the Wikipad reveals a lock screen with a lock icon. To get past this screen (assuming that the Wikipad is not already password protected), tap the lock icon. This causes a different icon to appear, one with a small circle inside a larger circle. The outer circle has the lock icon displayed within it. To unlock the device, drag the small circle to the right outer edge of the larger circle.
To protect personal information, you can adjust Wikipad’s lock settings:
• From the Home screen, touch the Settings icon.
• Scroll down and touch Security.
• Touch Screen lock.
• Touch the type of lock you’d like to use.
After you set a lock here, a lock screen displays whenever your screen wakes up, requesting the pattern, PIN, or other specified key (such as Face Unlock). If your Wikipad is playing music when the screen locks, you can continue listening or pause the selection without unlocking.

16
UNLOCK (ENTER) THE TABLET
Press and hold the ”Lock icon” and slide finger to the right, over the “Unlock icon”
LOCK (STANDBY) THE TABLET
To lock the tablet, briefly press the “Power” button (Lock the device to conserve the battery).
FACE UNLOCK
Face Unlock is a feature that lets you unlock your Wikipad using Face Recognition technology and is one of the options available under the Screen lock settings panel. After you have set it up by following the on screen prompts, you can unlock your Wikipad simply by looking at it. Although Face Unlock is not very secure, it can be very convenient and fun to use.
17
STARTUP WIZARD
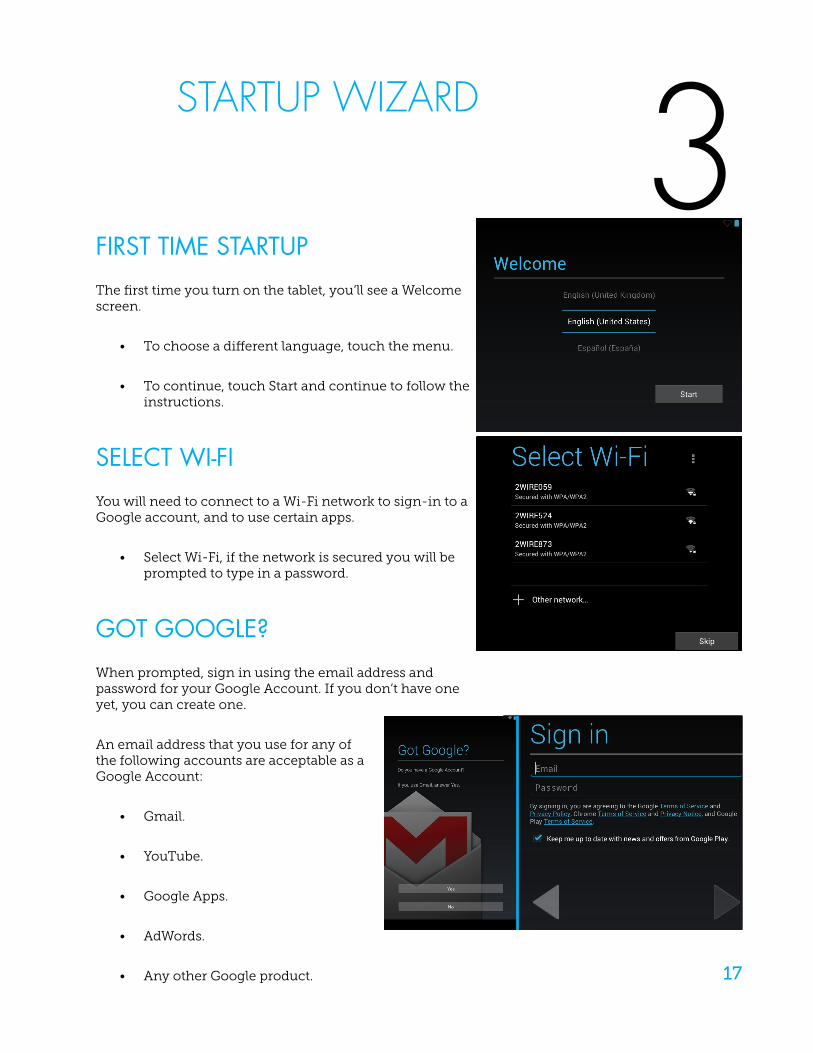
FIRST TIME STARTUP
The first time you turn on the tablet, you’ll see a Welcome screen.
• To choose a different language, touch the menu.
• To continue, touch Start and continue to follow the instructions.
SELECT WI-FI
You will need to connect to a Wi-Fi network to sign-in to a Google account, and to use certain apps.
• Select Wi-Fi, if the network is secured you will be prompted to type in a password.
GOT GOOGLE?
When prompted, sign in using the email address and password for your Google Account. If you don’t have one yet, you can create one.
An email address that you use for any of the following accounts are acceptable as a Google Account:
• Gmail.
• YouTube.
• Google Apps.
• AdWords.
• Any other Google product.
3
18
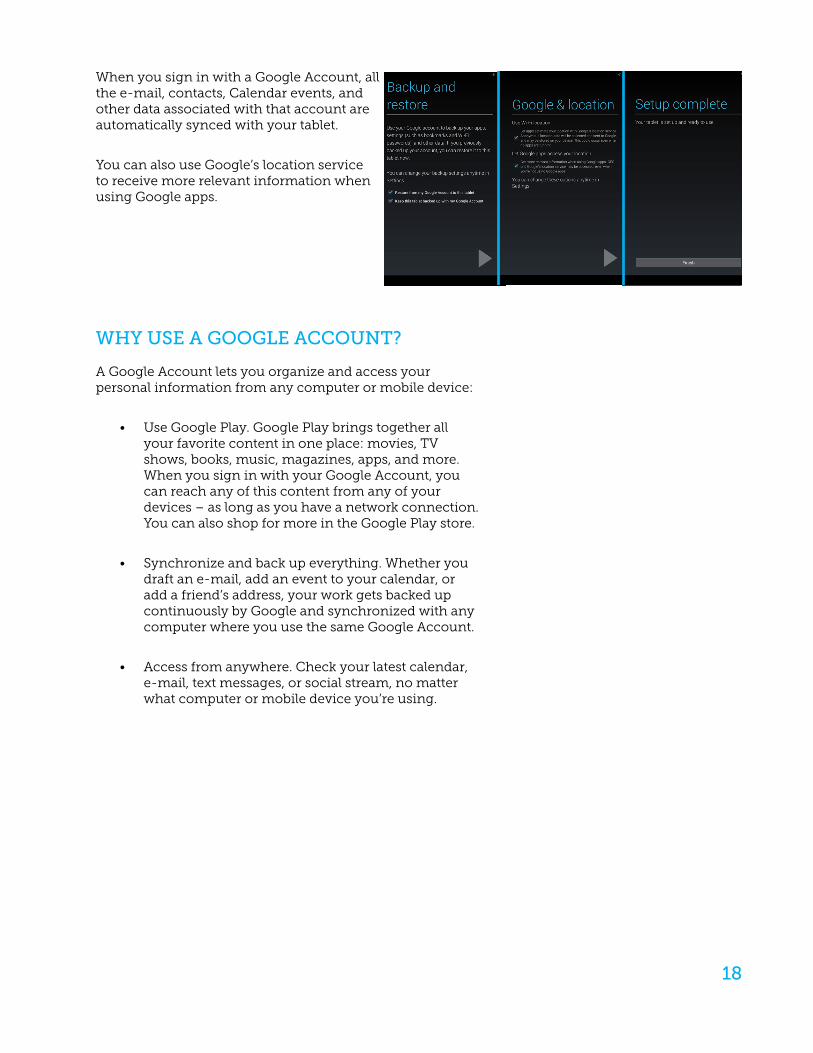
When you sign in with a Google Account, all the e-mail, contacts, Calendar events, and other data associated with that account are automatically synced with your tablet.
You can also use Google’s location service to receive more relevant information when using Google apps.
WHY USE A GOOGLE ACCOUNT?
A Google Account lets you organize and access your personal information from any computer or mobile device:
• Use Google Play. Google Play brings together all your favorite content in one place: movies, TV shows, books, music, magazines, apps, and more. When you sign in with your Google Account, you can reach any of this content from any of your devices – as long as you have a network connection. You can also shop for more in the Google Play store.
• Synchronize and back up everything. Whether you draft an e-mail, add an event to your calendar, or add a friend’s address, your work gets backed up continuously by Google and synchronized with any computer where you use the same Google Account.
• Access from anywhere. Check your latest calendar, e-mail, text messages, or social stream, no matter what computer or mobile device you’re using.
19
HOME SCREENS
NAVIGATING THE HOME SCREENS
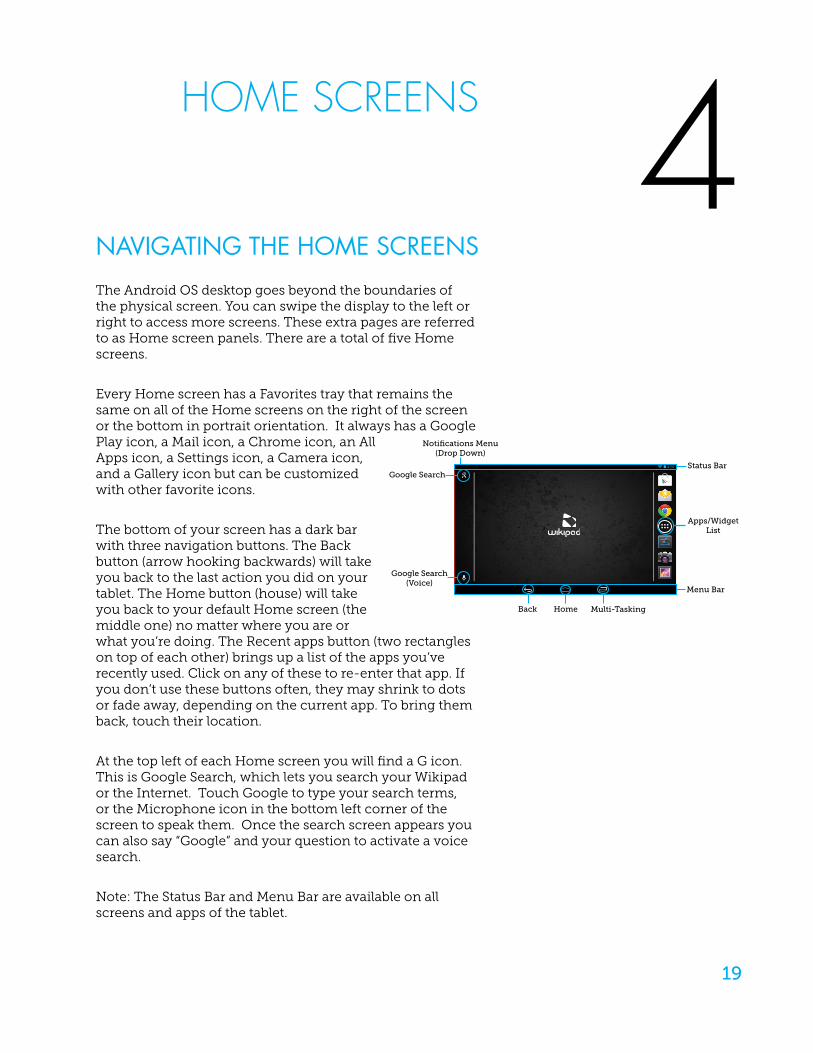
The Android OS desktop goes beyond the boundaries of the physical screen. You can swipe the display to the left or right to access more screens. These extra pages are referred to as Home screen panels. There are a total of five Home screens.
Every Home screen has a Favorites tray that remains the same on all of the Home screens on the right of the screen or the bottom in portrait orientation. It always has a Google Play icon, a Mail icon, a Chrome icon, an All Apps icon, a Settings icon, a Camera icon, and a Gallery icon but can be customized with other favorite icons.
The bottom of your screen has a dark bar with three navigation buttons. The Back button (arrow hooking backwards) will take you back to the last action you did on your tablet. The Home button (house) will take you back to your default Home screen (the middle one) no matter where you are or what you’re doing. The Recent apps button (two rectangles on top of each other) brings up a list of the apps you’ve recently used. Click on any of these to re-enter that app. If you don’t use these buttons often, they may shrink to dots or fade away, depending on the current app. To bring them back, touch their location.
At the top left of each Home screen you will find a G icon. This is Google Search, which lets you search your Wikipad or the Internet. Touch Google to type your search terms, or the Microphone icon in the bottom left corner of the screen to speak them. Once the search screen appears you can also say “Google” and your question to activate a voice search.
Note: The Status Bar and Menu Bar are available on all screens and apps of the tablet.
4:20
Google Search
Google Search(Voice)
Status Bar
Notifications Menu(Drop Down)
Menu Bar
Back Home Multi-Tasking
Apps/WidgetList
4
20
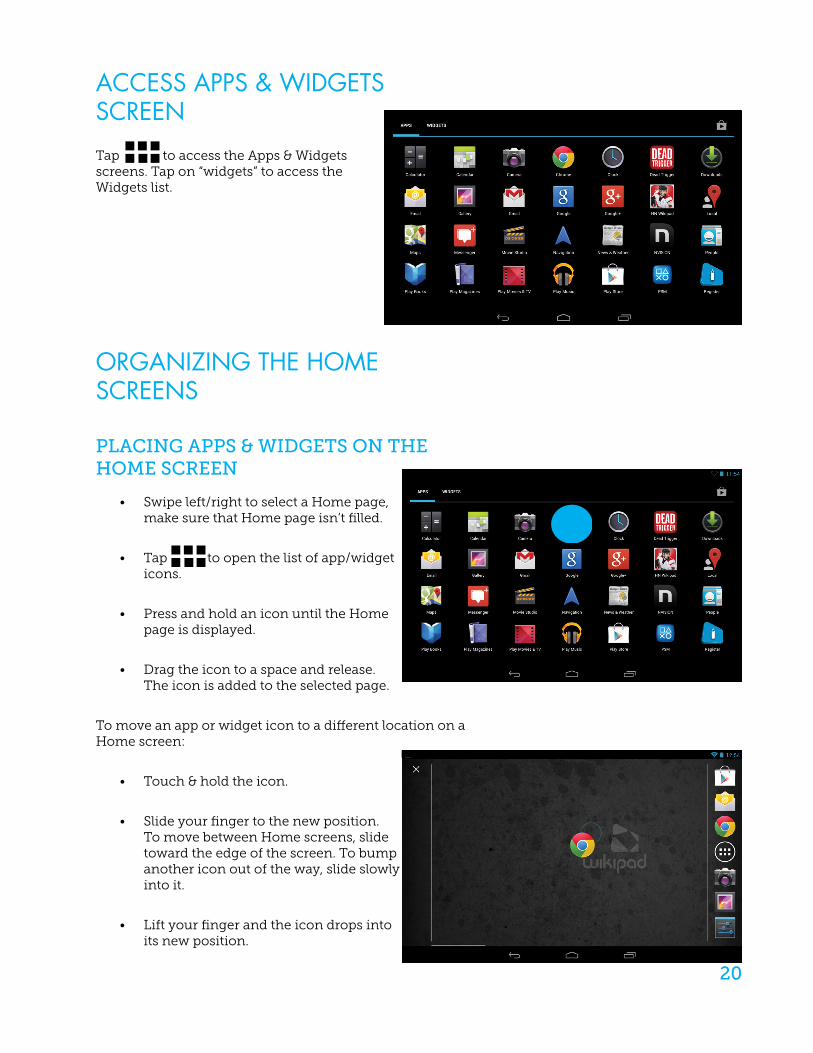
ACCESS APPS & WIDGETS SCREEN
Tap to access the Apps & Widgets screens. Tap on “widgets” to access the Widgets list.
ORGANIZING THE HOME SCREENS
PLACING APPS & WIDGETS ON THE HOME SCREEN
• Swipe left/right to select a Home page, make sure that Home page isn’t filled.
• Tap to open the list of app/widget icons.
• Press and hold an icon until the Home page is displayed.
• Drag the icon to a space and release. The icon is added to the selected page.
To move an app or widget icon to a different location on a Home screen:
• Touch & hold the icon.
• Slide your finger to the new position. To move between Home screens, slide toward the edge of the screen. To bump another icon out of the way, slide slowly into it.
• Lift your finger and the icon drops into its new position.
21
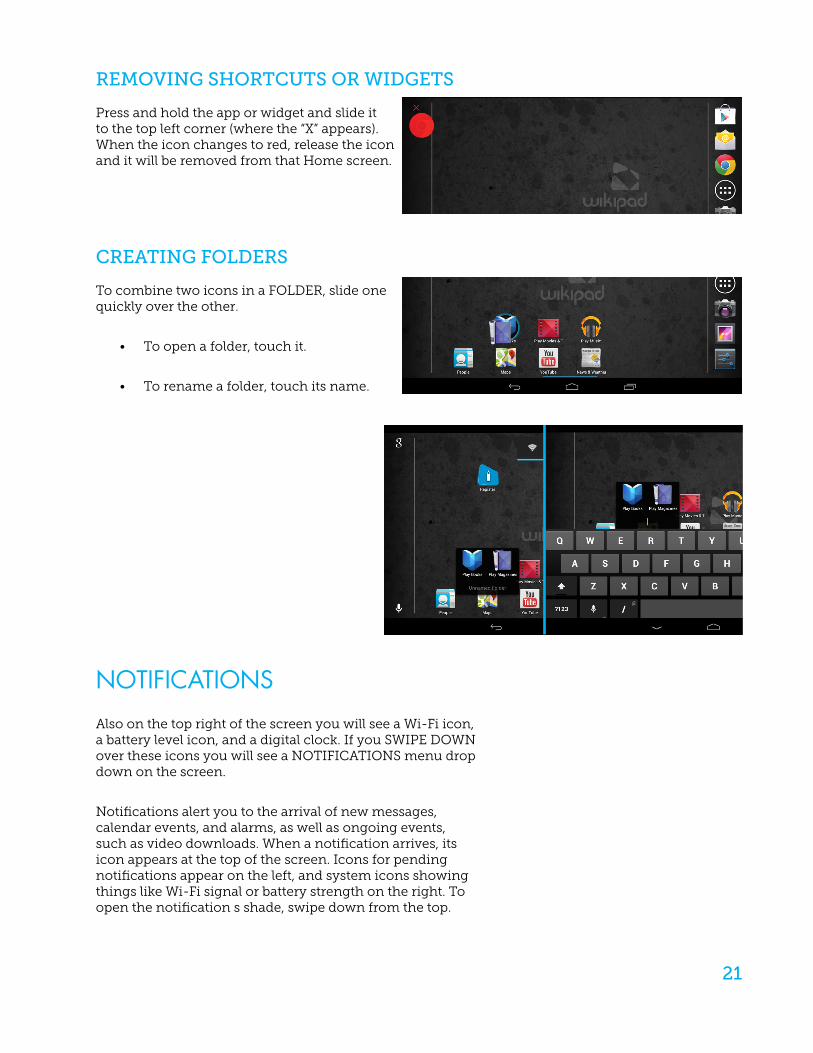
REMOVING SHORTCUTS OR WIDGETS
Press and hold the app or widget and slide it to the top left corner (where the “X” appears). When the icon changes to red, release the icon and it will be removed from that Home screen.
CREATING FOLDERS
To combine two icons in a FOLDER, slide one quickly over the other.
• To open a folder, touch it.
• To rename a folder, touch its name.
NOTIFICATIONS
Also on the top right of the screen you will see a Wi-Fi icon, a battery level icon, and a digital clock. If you SWIPE DOWN over these icons you will see a NOTIFICATIONS menu drop down on the screen.
Notifications alert you to the arrival of new messages, calendar events, and alarms, as well as ongoing events, such as video downloads. When a notification arrives, its icon appears at the top of the screen. Icons for pending notifications appear on the left, and system icons showing things like Wi-Fi signal or battery strength on the right. To open the notification s shade, swipe down from the top.
22
Certain notifications can be expanded to show more information, such as e-mail previews or calendar events. The one at the top is always expanded when possible. To expand or collapse a notification, use two fingers to either swipe vertically or twist together. To open the related app, touch the notification icon on the left. Some notifications also allow you to take specific actions by touching icons within the notification. For example, Calendar notifications allow you to Snooze (remind you later) or send e-mail to other guests.
When you’re finished with a notification, just swipe it away to the left or right. If you want to dismiss all notifications, touch the Dismiss icon at the top of the notification shade drawer.
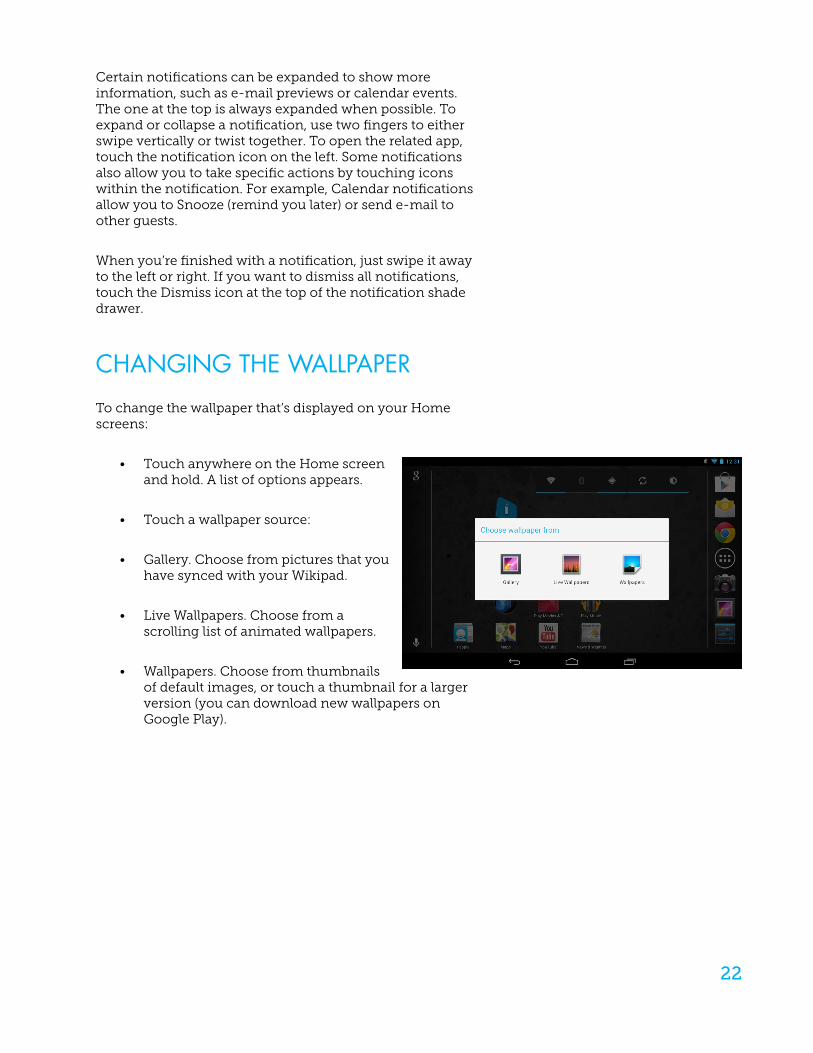
CHANGING THE WALLPAPER
To change the wallpaper that’s displayed on your Home screens:
• Touch anywhere on the Home screen and hold. A list of options appears.
• Touch a wallpaper source:
• Gallery. Choose from pictures that you have synced with your Wikipad.
• Live Wallpapers. Choose from a scrolling list of animated wallpapers.
• Wallpapers. Choose from thumbnails of default images, or touch a thumbnail for a larger version (you can download new wallpapers on Google Play).
23
CONNECTING TO WI-FI
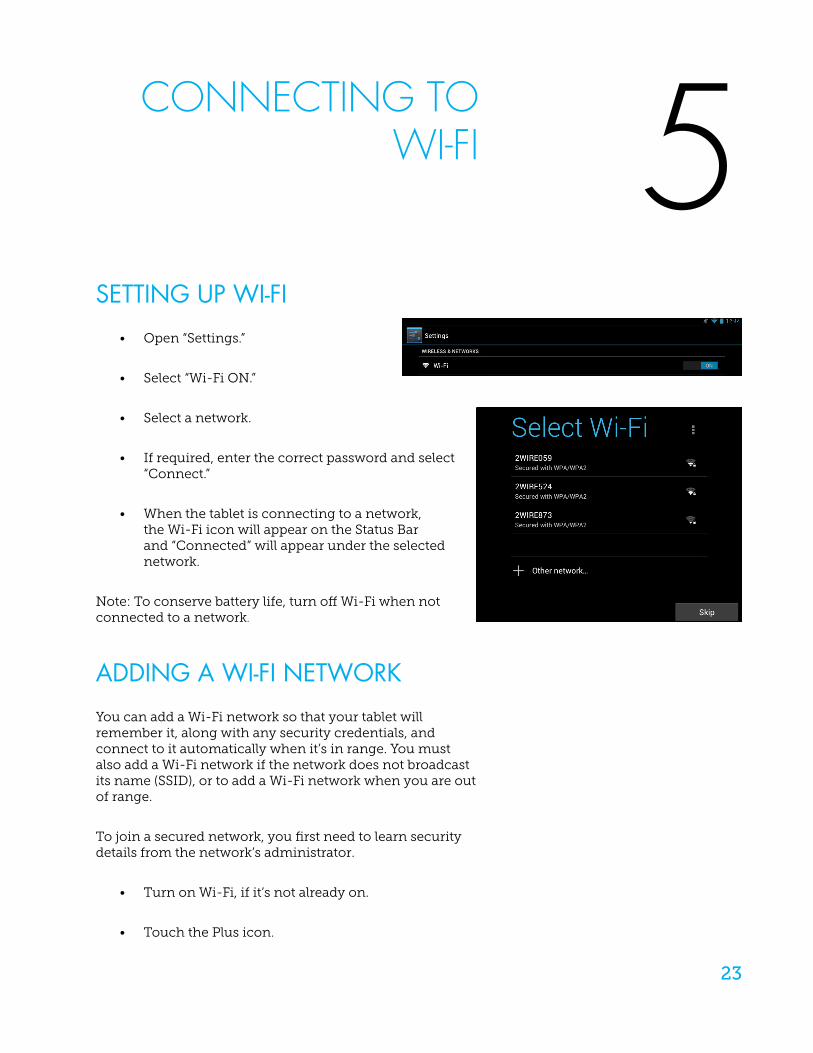
SETTING UP WI-FI
• Open “Settings.”
• Select “Wi-Fi ON.”
• Select a network.
• If required, enter the correct password and select “Connect.”
• When the tablet is connecting to a network, the Wi-Fi icon will appear on the Status Bar and “Connected” will appear under the selected network.
Note: To conserve battery life, turn off Wi-Fi when not connected to a network.
ADDING A WI-FI NETWORK
You can add a Wi-Fi network so that your tablet will remember it, along with any security credentials, and connect to it automatically when it’s in range. You must also add a Wi-Fi network if the network does not broadcast its name (SSID), or to add a Wi-Fi network when you are out of range.
To join a secured network, you first need to learn security details from the network’s administrator.
• Turn on Wi-Fi, if it’s not already on.
• Touch the Plus icon.
5
24
• Enter the SSID (name) of the network. If necessary, enter security or other network configuration details.
• Touch Save.
The information about the network is saved. Your tablet will connect to this network automatically the next time you come within range.
FORGET A WI-FI NETWORK
You can make the tablet forget about the details of a Wi-Fi network that you added—for example, if you don’t want the tablet to connect to it automatically or if it’s a network that you no longer use.
• Turn on Wi-Fi, if it’s not already on.
• In the Wi-Fi settings screen, touch the name of the network.
• Touch Forget in the dialog that opens.
SET WI-FI NOTIFICATIONS & OTHER ADVANCED OPTIONS
To work with advanced Wi-Fi settings:
• Turn on Wi-Fi, if it’s not already on.
• In the Wi-Fi settings screen, touch the Menu icon and choose Advanced.
These are the settings you can adjust:
• Network notification: By default, when Wi-Fi is on, you receive notifications in the Status bar when your tablet detects an open Wi-Fi network. Uncheck this option to turn off notifications.
• Avoid poor connections: Check to automatically avoid using networks with a low-quality or intermittent Internet connection.
25
• Wi-Fi frequency band: Specify Automatic, 5 GHz, or 2.4 GHz frequency bands.
This screen also displays the following information:
• MAC address: The Media Access Control (MAC) address of your tablet when connected to a Wi-Fi network.
• IP address: The Internet Protocol (IP) address assigned to the tablet by the Wi-Fi network you are connected to (unless you used the IP settings to assign it a static IP address).
CONNECT TO A VIRTUAL PRIVATE NETWORK (VPN)
Virtual private networks (VPNs) allow entry into secured locale networks from the outside. Corporations, schools, and other institutions use VPNs to grant access to local network resources when people are not on campus or connected to a wireless network. To configure VPN access, you must first obtain the details from your network administrator. Depending on your organization’s solution, you may need to obtain a VPN app, either from your administrator or on Google Play.
To view VPN settings, touch Settings>Wireless & networks>More>VPN.
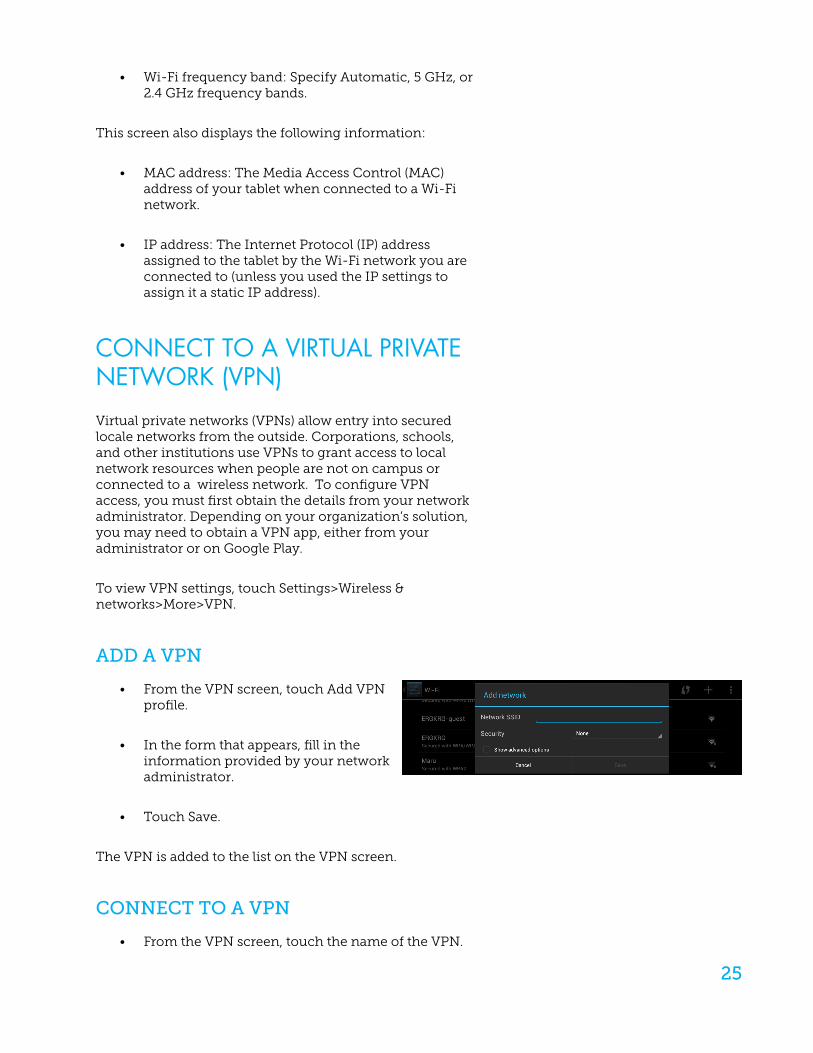
ADD A VPN
• From the VPN screen, touch Add VPN profile.
• In the form that appears, fill in the information provided by your network administrator.
• Touch Save.
The VPN is added to the list on the VPN screen.
CONNECT TO A VPN
• From the VPN screen, touch the name of the VPN.
26
• In the dialog that opens, enter any requested credentials.
• Touch Connect.
When you’re connected to a VPN, a Status icon and notification are displayed continuously. To disconnect, touch the notification for the VPN connection.
EDIT A VPN
• From the VPN screen, touch & hold the name of the VPN profile.
• In the dialog that opens, touch Edit profile.
• Edit the VPN settings you want.
• Touch Save.
DELETE A VPN
• From the VPN screen, touch & hold the name of the VPN profile.
• Touch & hold the VPN you want to delete.
• In the dialog that opens, touch Delete profile.
CONFIGURE PROXY SETTING
Some network administrators require you to connect to internal or external network resources via a proxy server. By default, the Wi-Fi networks you add are not configured to connect via a proxy, but you can change that for each Wi-Fi network you’ve added.
Proxy settings are used by Chrome or Browser but may not be used by other apps.
• Touch & hold a network in the list of Wi-Fi networks you’ve added.
• Touch Modify network in the dialog that opens.

27
• Select Show advanced options. (You may have to lower the keyboard first. To do so, touch the modified Back button).
• If the network has no proxy settings, touch None under Proxy Settings, then touch Manual in the menu that opens.
• Enter the proxy settings supplied by your network administrator.
• Touch Save.
The proxy settings apply only to the Wi-Fi network you modified. To change the proxy settings for other Wi-Fi networks, modify them individually.
28
THE KEYBOARD
USE THE KEYBOARD
You can enter text using the on screen keyboard. Some apps open it automatically. In others, you open it by touching where you want to type. To make the keyboard go away, touch the modified Back button below it.
BASIC EDITING
• Move the insertion point: Touch where you want to type. The cursor blinks in the new position, and a tab appears below it. Drag the tab to move the cursor.
• Select text: Touch & hold or double-tap within the text. The nearest word highlights, with a tab at each end of the selection. Drag the tabs to change the selection. The tab disappears after a few moments. To make it reappear, touch the text again.
• Delete text: Touch to delete selected text or the characters before the cursor.
• Type capital letters: Touch the Shift key once to switch to capital letters for one letter. Or touch & hold the Shift key while you type. When you release the key, the lowercase letters reappear.
• Turn caps lock on: Double-tap or touch & hold the Shift key, so it changes to. Touch the Shift key again to return to lowercase.
• Cut, copy, paste: Select the text you want to manipulate. Then touch the Cut, Copy, or Paste button.
USE NEXT-WORD SUGGESTIONS
6
29
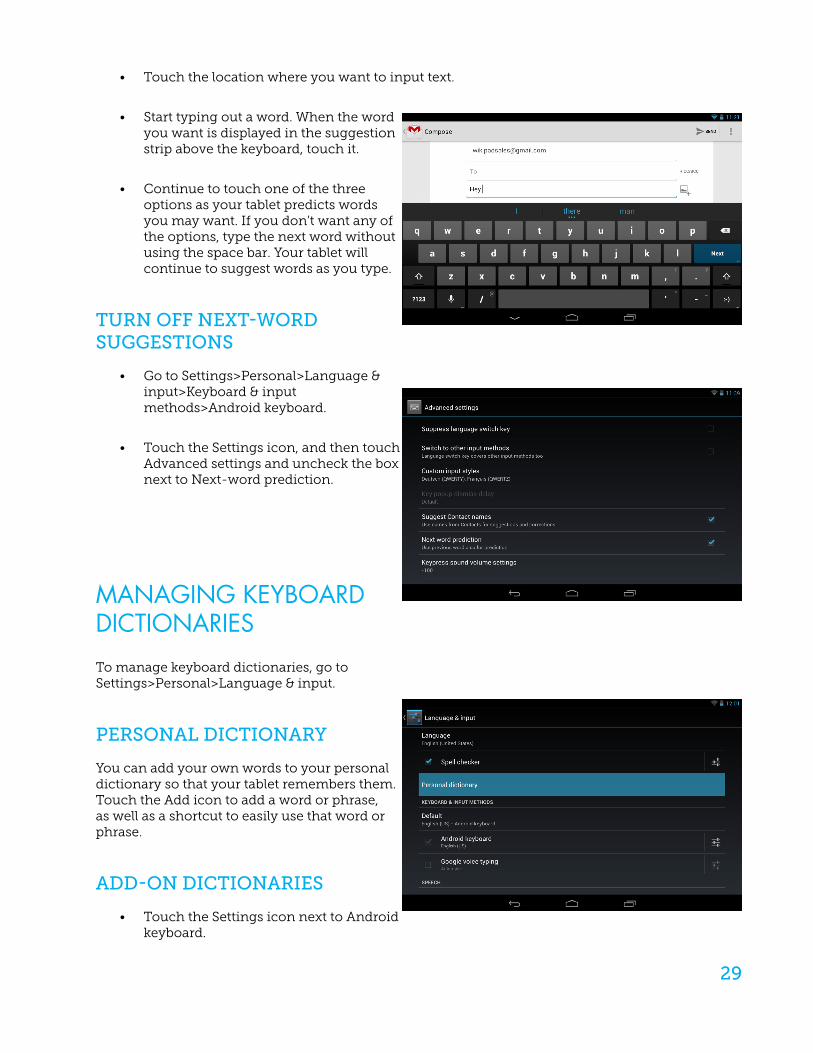
• Touch the location where you want to input text.
• Start typing out a word. When the word you want is displayed in the suggestion strip above the keyboard, touch it.
• Continue to touch one of the three options as your tablet predicts words you may want. If you don’t want any of the options, type the next word without using the space bar. Your tablet will continue to suggest words as you type.
TURN OFF NEXT-WORD SUGGESTIONS
• Go to Settings>Personal>Language & input>Keyboard & input methods>Android keyboard.
• Touch the Settings icon, and then touch Advanced settings and uncheck the box next to Next-word prediction.
MANAGING KEYBOARD DICTIONARIES
To manage keyboard dictionaries, go to Settings>Personal>Language & input.
PERSONAL DICTIONARY
You can add your own words to your personal dictionary so that your tablet remembers them. Touch the Add icon to add a word or phrase, as well as a shortcut to easily use that word or phrase.
ADD-ON DICTIONARIES
• Touch the Settings icon next to Android keyboard.
30
• Touch Add-on dictionaries. You’ll see dictionaries for other languages that you can download to your device.
• Touch the dictionary you want, and then touch Install.
TYPING TIPS
There are some useful typing tips and shortcuts you can use:
• Type capital letters: Touch the Shift key once to switch to capital letters for one letter. Or touch & hold the Shift key while you type. When you release the key, the lowercase letters reappear.
• Turn caps lock on: Double-tap or touch & hold the Shift key, so it changes to caps lock. Touch the Shift key again to return to lowercase.
• Show numbers or symbols: Touch the ?123 key.
• Change input language or keyboard: Touch & hold the Settings key to the far left of the space bar, and then release it. The Input options menu appears. Choose the option you want to adjust.
TYPING TEXT BY SPEAKING
You can use voice input to type text by speaking anywhere you might bring up a keyboard. This feature uses Google’s speech-recognition service, so you must have a data connection through a Wi-Fi network to use it.
• Touch a text field, or a location in text you’ve already entered in a text field.
• Touch the Microphone icon on the on screen keyboard.
• When you see the microphone image, speak what you want to type.
Say “comma”, “period”, “question mark”, “exclamation mark” or “exclamation point” to enter punctuation. When you pause, what you spoke is transcribed by the speech-
31
recognition service and entered in the text field, underlined. You can touch the Delete key to erase the underlined text. If you start typing or entering more text by speaking, the underline disappears.

32
USING GESTURES
You can use your fingers to manipulate icons, buttons, menus, the on screen keyboard, and other items on the touch screen. You can also change the screen’s orientation.
• To select or activate something, touch it.
• To type something, such as a name, password, or search terms, just touch where you want to type. A keyboard pops up that lets you type into the field.
Other common gestures include:
• Touch & hold: Touch & hold an item on the screen by touching it and not lifting your finger until an action occurs.
• Drag: Touch & hold an item for a moment and then, without lifting your finger, move your finger on the screen until you reach the target position. For example, you can drag to reposition shortcuts on the Home screen.
• Swipe or slide: Quickly move your finger across the surface of the screen, without pausing when you first touch, so you don’t drag something instead. For example, you can slide a Home screen left or right to view the other Home screens.
• Double-tap: Tap quickly twice on a web page, map, or other screen to zoom. For example, double-tap a web page in Browser or Chrome to zoom in, and double-tap to zoom out.
• Pinch: In some apps (such as Maps, Browser, and Gallery), you can zoom in and out by placing two fingers on the screen at once and pinching them together (to zoom out) or spreading them apart (to zoom in).
• Rotate the screen: The orientation of the screen rotates with your device as you turn it. You can change this Display setting. Some apps may limit your ability to rotate the screen.
7
33
USING ANDROID APPS
ALL APPS APP
To see all your apps, touch the All Apps icon in the favorites tray of any Home screen. This is where you can see all your apps, including those downloaded from Google Play or the Amazon Android Appstore. From All apps you can:
• Move between screens. Swipe left or right.
• Open an app. Touch its icon.
• Place an app icon on a Home screen. Touch & hold the app icon, slide your finger, and lift your finger to drop the icon in place.
• Browse widgets. Touch the Widgets tab at the top of any All Apps screen or Swipe up.
• Get more apps. Touch the Google Play store icon in the list of apps.
To remove an app icon from the Home screen, Touch & hold it, slide your finger toward the top of the screen, and drop the app over the G icon.
CLOCK APP
To open the Clock, touch the Clock icon from a Home or All Apps screen. Set an alarm
• Touch the Alarm Clock icon under the date.
• Touch the Add icon to add a new alarm.
• Select the time you want, and then touch OK.
8
34
Any existing alarms will show in the main display screen. To turn one On or Off, slide the switch. You can also add a label to an alarm and change the ringtone. To change these options for a single alarm, touch the arrow underneath the On/Off switch.
DOWNLOADS APP
To manage most downloads; touch the Downloads icon on the All Apps screen. Movies and some other content that you download don’t show up in the Downloads app. Google Play streams your purchases and rentals from Google servers while you’re playing them. They don’t occupy any permanent storage space. However, you can pin (download) books, movies, and other content in order to access it offline. In addition to downloading content from Google Play, you can download files from Gmail or other sources. Use the Downloads app to view, reopen, or delete what you download in this way. From the Downloads app:
• Touch an item to open it.
• Touch headings for earlier downloads to view them.
• Check items you want to share. Then touch the Share icon and choose a sharing method from the list.
• Check items you want to delete. Then touch the Trash icon.
• At the bottom of the screen, touch Sort by size or Sort by date to switch back and forth.
When your tablet is connected to a computer, look in the Download directory to view files available in the Downloads app. You can view and copy files from this directory.
PEOPLE APP
The People app gives you a quick and easy access to everyone you want to reach. To open it, touch the People icon on a Home or All Apps screen. When you first turn on your tablet and sign into a Google Account, any existing contacts from that account are synced with your People app. After that, all your contacts stay in sync automatically on your phone, another device, or a Web browser. If you use Exchange, you can also sync that contact information with People. All your People information is available
35
from Gmail, Google Talk, and other apps. As you add contacts from different sources, the People app syncs them automatically across all the places you need them. When you open the People app, you can:
• View all contacts, favorites, or groups. Choose from the top left of the screen.
• Read details. Touch a name to see details for a contact or group.
• View recent activity. When viewing a contact, swipe to the right to see recent updates.
• Edit details. While viewing a contact, touch the Menu icon to search contacts, edit or share contact details, delete a contact, and so on. You can also touch the star beside the contact’s name to add a contact to your Favorites list.
• Change your settings. While viewing the main list screen, touch the Menu icon to import or export contacts, choose display options for the Groups and All tabs, and add or edit accounts.
No matter where you are within People, you can always get back to the main lists by touching the People icon at the top of the screen.
CAMERA
Select Camera on the apps screen to go to camera mode. It is possibile to take pictures or videos with the built-in, front facing camera.
VIDEO CHAT
Use the built-in, front facing camera to video chat with friends and family. There are many different VOIP services that offer video chat like SKYPE.
PHOTO GALLERY
Select Gallery to access pictures and videos stored on the tablet.
36
VIEWING PICTURES
Pinch to enlarge and swipe to go to previous or next pictures.
SHARE PICTURES VIA EMAIL
To utilize this feature, an Email account must be set up for this option to appear.
• Share: Share the selected picture through Email.
• Trash: Delete the selected picture.
• Menu: Slideshow, edit and more.
WATCHING VIDEOS
While playing a video, tap the display to access the video controller, tap the display again to hide the controller.
37
SETTING UP EMAIL
GMAIL APP
Use the Gmail app to read and write e-mail from any mobile device or browser. Touch the Gmail icon to open it. Once you sign in you can take advantage of all the Google services like:
• Google Now.
• Calendar.
• People.
• Google Drive.
While reading your e-mail:
• Touch the icons and menu along the top of the screen to archive, delete, label, or perform other actions on that message.
• Swipe left or right to read the previous or next conversation.
To organize your e-mail, check the box beside a message to select it. Then use the icons and menu along the top of the screen to manage the selected messages. To change your settings, add an account, or get help, touch the Menu icon (3 vertical dots). No matter where you are within Gmail, you can get back to the inbox by touching the Gmail icon at the top of the screen.
EMAIL APP
You should use the Email app to read and send e-mail from services other than Gmail. Email includes a wizard that makes it easy to configure it for several popular e-mail service providers, including those based on IMAP, POP3, and Microsoft Exchange ActiveSync.
9
38
WEB BROWSING
CHROME
Chrome opens to display your home page or the most recent page you were browsing.
The web address (URL) of the current page is located at the top of the screen in the address box (also called the omnibox).
To edit or input a web address, you can:
• Swipe right to find the omnibox at the top of the screen, and double-tap to edit.
• Slide your finger across the on screen keyboard and release a key to input text.
• As you type, a list of matching suggestions appears. You can keep on typing or find a suggestion and double-tap to open the page.
• To search for the contents of the omnibox or open a specific web address it contains, find and double-tap the Go key on the right side in the second row of the keyboard.
NAVIGATE WITHIN A WEB PAGE
To navigate within a web page, you can:
• Navigate forward and backward. Swipe left to right to move forward and right to left to go backward.
• Scroll. Slide two fingers in any direction.
• Receive spoken feedback. Touch anywhere on the screen to hear the contents of the web page.
10
39
• Change the reading level. Swipe down then up using a single motion to transition to the next reading level when reading blocks of text, or swipe up then down using a single motion to go back to the previous reading level.
• Zoom. To zoom out, touch the screen with two fingers and pinch them together. To zoom in, spread them apart. Ascending and descending tones alert you when zooming in or out.
To customize web page zooming, go to More options > Settings > Accessibility. You can also browse in Incognito mode. To open an Incognito tab, find and double-tap More options > New Incognito tab. To toggle between standard tabs and Incognito tabs, find and double-tap the Toggle tabs switcher, or find and double-tap the Incognito tabs (or Non-Incognito tabs) button at the top right corner.
ADJUST TEXT SIZE ON WEB PAGES (FOR LOW-VISION USERS)
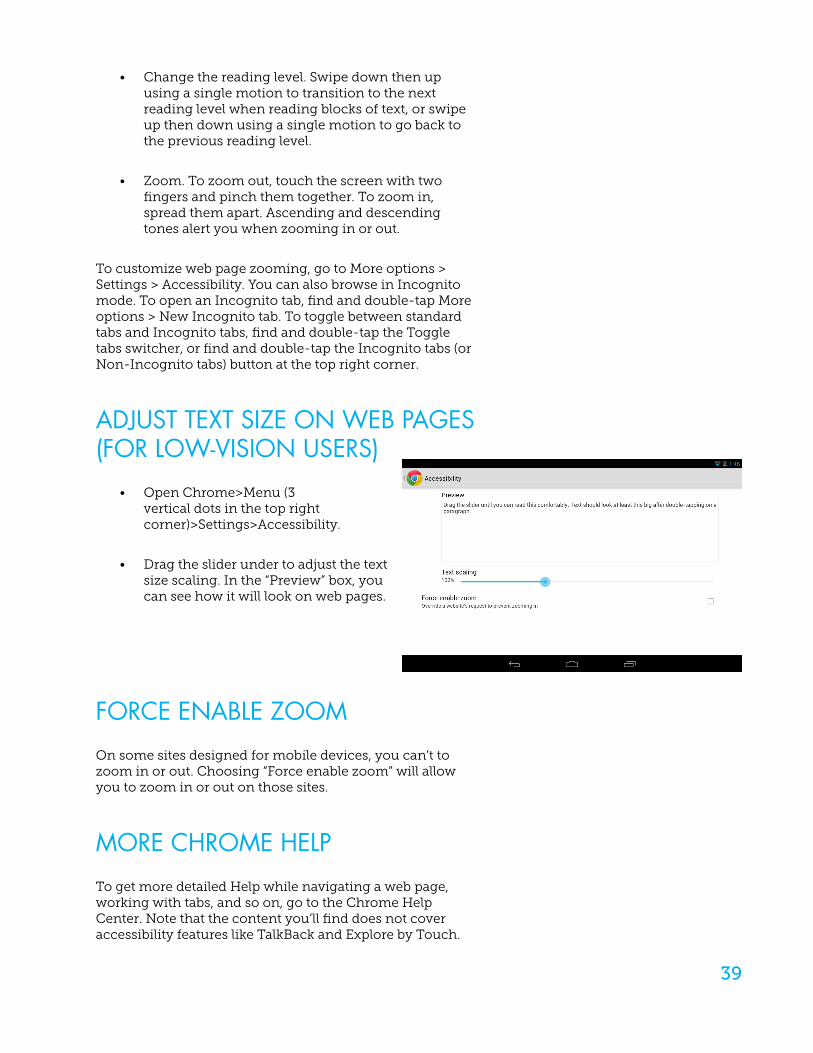
• Open Chrome>Menu (3 vertical dots in the top right corner)>Settings>Accessibility.
• Drag the slider under to adjust the text size scaling. In the “Preview” box, you can see how it will look on web pages.
FORCE ENABLE ZOOM
On some sites designed for mobile devices, you can’t to zoom in or out. Choosing “Force enable zoom” will allow you to zoom in or out on those sites.
MORE CHROME HELP
To get more detailed Help while navigating a web page, working with tabs, and so on, go to the Chrome Help Center. Note that the content you’ll find does not cover accessibility features like TalkBack and Explore by Touch.
40
WIKIPAD GAMING
BUILT FOR GAMING
Inside the Wikipad, the NVIDIA® Tegra® 3 mobile processor with quad-core CPU and 5th battery-saver core delivers a lightning fast gaming experience with twice the raw power of other leading tablets. For the first time you get the best of both worlds: the power of a console game platform in a nimble and sleek mobile device.
Our tablet’s built in Gyroscope, Compass, and 3-Axis Accelerometer improves motion sensing accuracy and allows the Wikipad to know exactly where it is and how fast it’s moving in space, making your gaming experience even better.
Wikipad consistently delivers the thrill of action because the controller attaches directly to the tablet for extremely low game button latency so every shot, click, and jump counts.
CONTROLLER
We designed the controller to feel great in your hands and have the same playability as your home console controller. The center of balance is engineered to reduce fatigue and feel almost weightless. Ultra responsive, the Wikipad controller is tough enough to take all the game play you can muster and its exceptional gripping action makes your tablet safer to hold.
ANDROID GAMING
Choose from over 100,000 great Android Games from the Google Play store, Amazon App Store and NVIDIA® TEGRAZONE™. Check out Wikipad website (www.wikipad.com/Games) for an updated list of controller compatible games.
11
41
BLUETOOTH
Through Bluetooth, you can do the following wirelessly on the tablet:
• Receive or send files from or to another connected Bluetooth device.
• Listen to audio files through stereo Bluetooth headphones.
CONNECT THE TABLET WITH BLUETOOTH DEVICES
You can connect your Wikipad with Bluetooth devices in the following ways:
• Connect another Bluetooth device.
• Get connected by another Bluetooth device.
Tip: Before the connection, consult the user manual of the Bluetooth device to get its Bluetooth pairing pass code. Or, try 0000 or 1234.
CONNECT ANOTHER BLUETOOTH DEVICE
On the Bluetooth device, make sure that the device is discoverable by another Bluetooth device. Consult the user manual of the Bluetooth device for information.
• On the Wikipad, search for the Bluetooth device.
• Open from the Home or Apps screen.
• Select “Bluetooth ON”, then is displayed on the status bar.
12
42
• Tap ”Search for Devices”, the devices are displayed under “Available Devices” after they are discovered.
• Pair with the device.
• On the Wikipad, tap the device that wants to connect, and select “Pair.”
• On the Wikipad, also select “Pair” while seeing a “Bluetooth pairing request” dialog.
• “Paired Devices” will be displayed on the Wikipad when the pairing is complete.
GET CONNECTED BY ANOTHER BLUETOOTH DEVICE
• On The Wikipad, make sure that it is discoverable by another Bluetooth device.
• Open “settings” from the Home or Apps screen.
• Select “Bluetooth ON”, then is displayed on the status bar.
• Tap Tablet name, then a message “Visible to all nearby Bluetooth devices (120 seconds)” appears under the Tablet name.
• On the Bluetooth device, search for and pair with the Wikipad. For information about the steps, please consult the device user manual.
RECEIVE FILES THROUGH BLUETOOTH
Make sure that:
• You have paired the Wikipad with the Bluetooth device.
• On the Wikipad and Bluetooth device, Bluetooth is on.
On the Bluetooth device, send files to the Wikipad through Bluetooth; Receive the files on the Wikipad.
43
LISTEN TO MUSIC THROUGH STEREO BLUETOOTH HEADPHONES
• Connect the stereo Bluetooth headphones (Follow the steps under “Connect another Bluetooth device”). Next time you switch on Bluetooth on the tablet and device, the Bluetooth connection is established automatically.
• Listen to music through the stereo Bluetooth headphones.
44
TRANSFER AND MANAGE FILES
It is possible to manage and transfer media files to the tablet by connecting it to your computer.
CONSERVE INTERNAL MEMORY
It is strongly recommended to purchase and install a Micro SD card before transferring or downloading media files.
INSERTING MICRO SD CARD
The Wikipad supports Micro SD cards up to 32GB.
*Note: You will need to download a “File Manager” from the Google Play Store to access and transfer files.
• Insert the card face up into the card slot until it clicks and locks into place.
• To access the Micro SD card, select “File Manager” from the Apps screen.
UNMOUNT & REMOVE THE MICRO SD CARD
• Open “Settings.”
• Select “Storage.”
• Select “Unmount Micro SD card.”
• It is now safe to remove the card from the tablet.
• To remove the card, gently push it in until it pops out.
13
45
CONNECTING THE WIKIPAD TO A PC OR MAC
WINDOWS
• Connect your tablet to the USB port on your computer. Its USB storage is mounted as a drive and appears on your computer screen.
• Copy files back and forth as you would using any other external device.
• When you finish, eject the tablet from within Windows before unplugging the USB cable.
MAC
• Install Android File Transfer from www.android.com/filetransfer, and follow the instructions there. (If you are using Android File Transfer for the first time, double-click it to open it. After the first connection, it opens automatically whenever you connect).
• Connect your Wikipad to your computer with a USB to MicroUSB cable. Android File Transfer starts, if it’s not already running, and opens a window that displays the contents of your tablet, along with storage space details at the bottom of the window.
• Work with this window much as you do in the Finder window: open and close folders, create new folders, and drag files to or from it and other Finder windows.
• Disconnect the USB cable when you finish.
46
MULTIMEDIA
GOOGLE PLAY STORE
Get all the apps and games you love on the Wikipad – with over 600,000 apps to choose from, Google Play has something for everyone. Find the most popular free and paid apps, explore handpicked collections, browse by category or simply search for your favorites.
PLAY BOOKS
Access the world’s largest online library with over 4 million books to choose from. Purchase and download a best seller or pick from hundreds of free public domain classics. You can read Romeo and Juliet, Tarzan, or The Hunger Games without carrying a single bulky book.
Wikipad’s book viewer allows you to see two pages at a time in landscape mode or a large full page in portrait mode. Bookmark the page you are on and come back to the same place when opening again. Already have an eBook collection from Amazon? Download their Kindle app and you can read them all!
PLAY MAGAZINES
Tap on the icon to experience all your favorite magazines like Vogue and GQ in full vibrant HD color. With hundreds of popular titles to choose from, you’re bound to find something for you. Buy single copies of new issues, subscribe to your favorites on Google Play or pay a premium to access unlimited magazines. No more standing in line at airports to pick up your favorite read!
14

47
PLAY MOVIES & TV
Hit movies and TV shows are instantly available on the Wikipad in full HD – there’s no waiting for downloads and syncing, or worrying about storage space. And because the Wikipad has a high-resolution wide screen, you’ll be watching your favorite content the way it’s meant to be seen.
Buy or rent Hollywood blockbusters or your favorite TV shows on your Wikipad. Catch up on what is coming to the theaters with the latest trailers.
Prefer a subscription service? Download the Netflix and Hulu Plus apps. Watch what you want, when you want by streaming instantly over the Internet right to your Wikipad.
MUSIC
Take your music anywhere with your Wikipad. When you upload your existing music library to Google Play – up to 20,000 songs for free – you can stream all your tracks and playlists from the cloud so you’ll never miss a beat. You can even sync your iTunes library, up load to the cloud and enjoy on all of your android devices!
Don’t want your iTunes collection on the cloud? You can still port over your entire library and then play your music with popular apps like iSyncr and PlayerPro. Working together these two apps give a seamless experience between your Wikipad and iTunes that keeps your playlists totally synchronized.
Prefer to stream? Android has apps for great subscription services like Pandora, Spotify, Rdio, and MOG.
48
SETTINGS
SETTINGS APP:
Customize and select options to increase battery performance, Wi-Fi options, manage apps and more.
CUSTOMIZING SOUND SETTINGS
To customize the sounds your Wikipad makes, go to Settings > Device > Sound:
• Volumes sets the master volume separately for music, notifications, and alarms. You can still use the physical volume control on the tablet to raise or lower volume of whatever sound is currently playing.
• Default notification announces the arrival of notifications unless you specify a different sound in an individual app.
• Touch sounds give audible feedback when you touch active icons or buttons on the screen.
Screen lock sound is triggered when you unlock the screen.
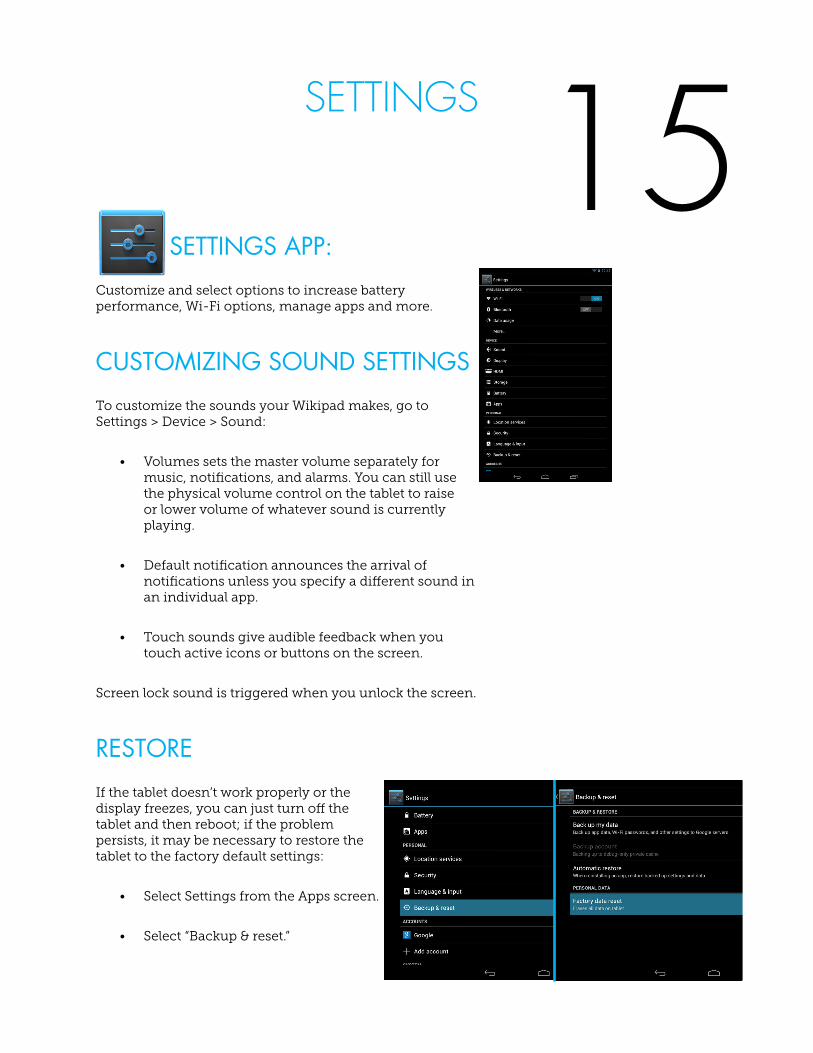
RESTORE
If the tablet doesn’t work properly or the display freezes, you can just turn off the tablet and then reboot; if the problem persists, it may be necessary to restore the tablet to the factory default settings:
• Select Settings from the Apps screen.
• Select “Backup & reset.”
15
49
• Select “Factory data reset” (this will erase data stored on the device so make sure to back up your data prior to using this option).
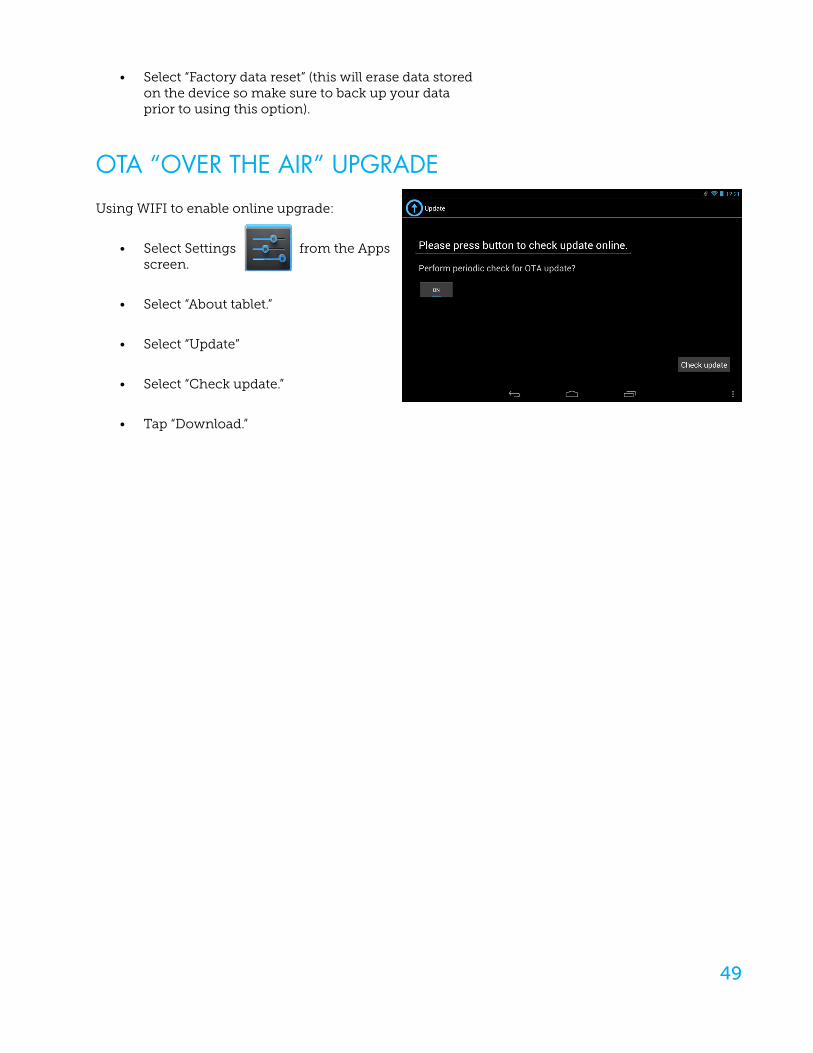
OTA “OVER THE AIR” UPGRADE
Using WIFI to enable online upgrade:
• Select Settings from the Apps screen.
• Select “About tablet.”
• Select “Update”
• Select “Check update.”
• Tap “Download.”
50
ACCESSIBILITY
ACCESSIBILITY SETTINGS
Wikipad’s accessibility features make it easier to use if you have visual impairments.
TALKBACK
TalkBack is a pre-installed screen reader service provided by Google. It uses spoken feedback to describe the results of actions, such as opening an app, and events, such as notifications.
EXPLORE BY TOUCH
Explore by Touch is a system feature that works with TalkBack, allowing you to touch your tablet’s screen and hear what’s under your finger via spoken feedback. This feature is helpful to users with no vision.
ACCESSIBILITY SETTINGS
Accessibility settings let you modify your tablet’s display and sound options, such as increasing the text size, changing the speed at which text is spoken, and more.
USERS WITH LOW VISION
If you have low vision and don’t plan to use Explore by Touch, you can make reading and navigating easier by increasing the text size – just open Chrome, go to Menu>Settings>Accessibility, and drag the slider to adjust the text size. You can also try magnification gestures, which allow you to zoom in and out, as well as temporarily magnify what’s under your finger. To try magnification gestures, go to Settings>Accessibility>Magnification gestures.
16
51
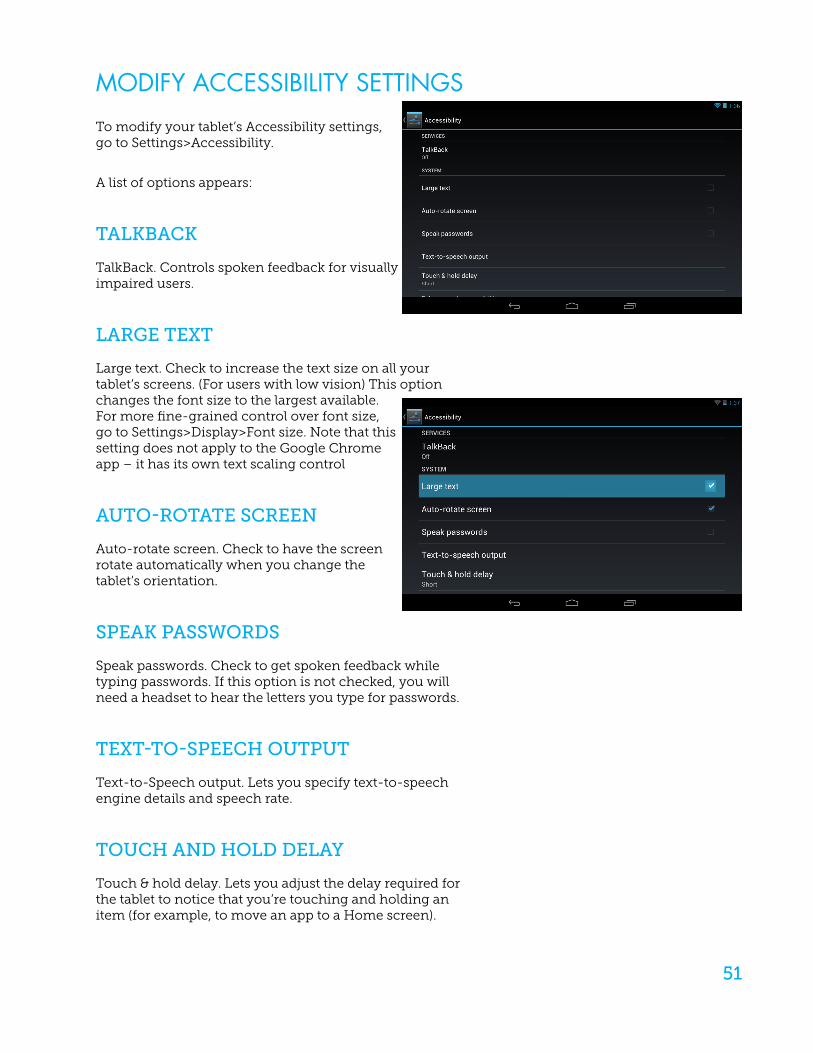
MODIFY ACCESSIBILITY SETTINGS
To modify your tablet’s Accessibility settings, go to Settings>Accessibility.
A list of options appears:
TALKBACK
TalkBack. Controls spoken feedback for visually impaired users.
LARGE TEXT
Large text. Check to increase the text size on all your tablet’s screens. (For users with low vision) This option changes the font size to the largest available. For more fine-grained control over font size, go to Settings>Display>Font size. Note that this setting does not apply to the Google Chrome app – it has its own text scaling control
AUTO-ROTATE SCREEN
Auto-rotate screen. Check to have the screen rotate automatically when you change the tablet’s orientation.
SPEAK PASSWORDS
Speak passwords. Check to get spoken feedback while typing passwords. If this option is not checked, you will need a headset to hear the letters you type for passwords.
TEXT-TO-SPEECH OUTPUT
Text-to-Speech output. Lets you specify text-to-speech engine details and speech rate.
TOUCH AND HOLD DELAY
Touch & hold delay. Lets you adjust the delay required for the tablet to notice that you’re touching and holding an item (for example, to move an app to a Home screen).
52
ENHANCE WEB ACCESSIBILITY
Enhance web accessibility. Enable this option to have the system download web-specific enhancements from Google.
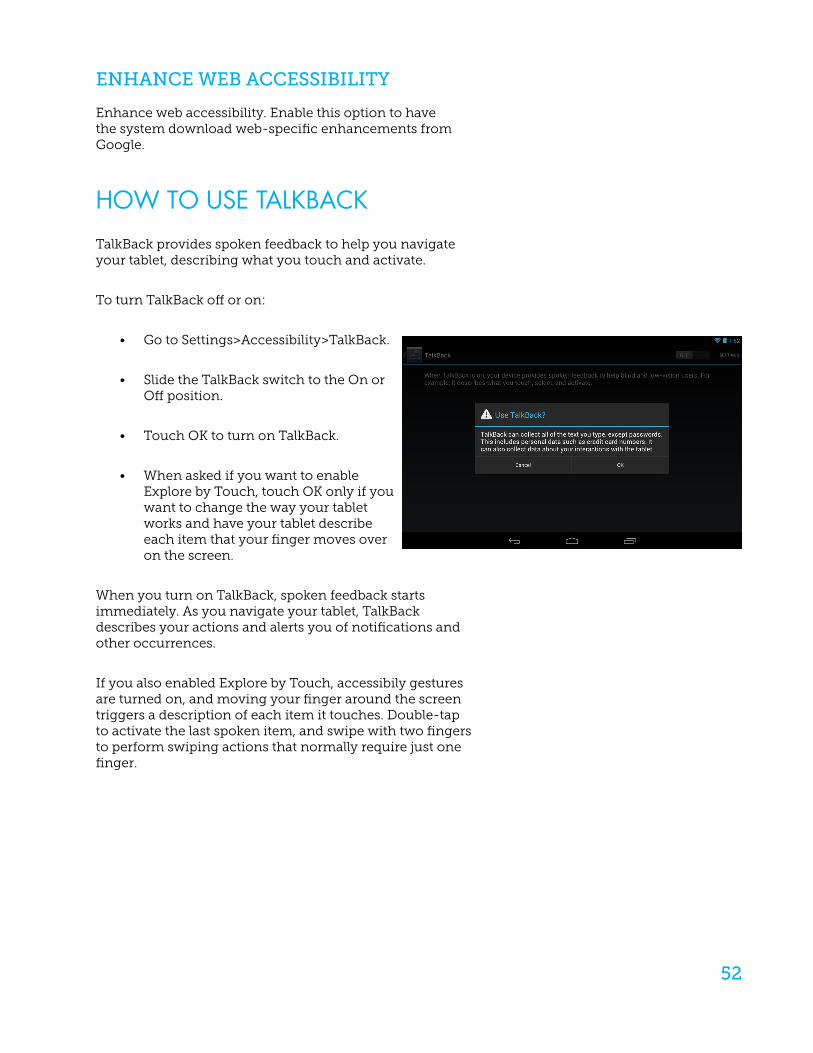
HOW TO USE TALKBACK
TalkBack provides spoken feedback to help you navigate your tablet, describing what you touch and activate.
To turn TalkBack off or on:
• Go to Settings>Accessibility>TalkBack.
• Slide the TalkBack switch to the On or Off position.
• Touch OK to turn on TalkBack.
• When asked if you want to enable Explore by Touch, touch OK only if you want to change the way your tablet works and have your tablet describe each item that your finger moves over on the screen.
When you turn on TalkBack, spoken feedback starts immediately. As you navigate your tablet, TalkBack describes your actions and alerts you of notifications and other occurrences.
If you also enabled Explore by Touch, accessibily gestures are turned on, and moving your finger around the screen triggers a description of each item it touches. Double-tap to activate the last spoken item, and swipe with two fingers to perform swiping actions that normally require just one finger.
53
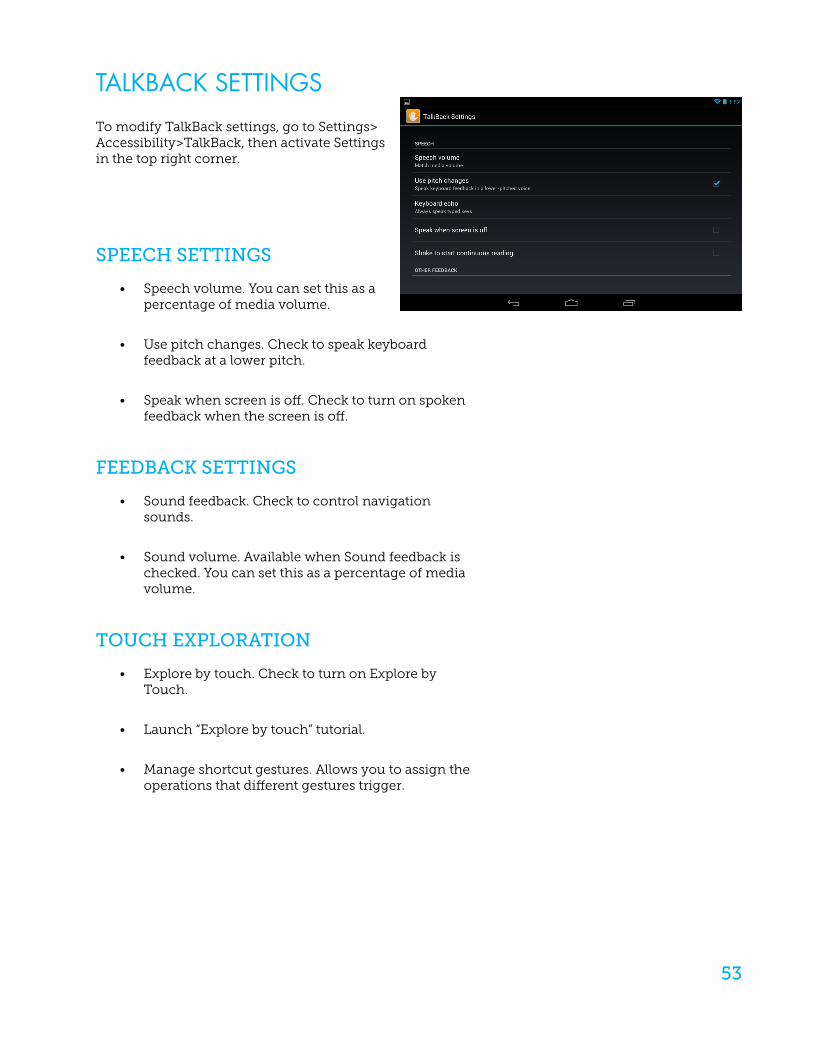
TALKBACK SETTINGS
To modify TalkBack settings, go to Settings> Accessibility>TalkBack, then activate Settings in the top right corner.
SPEECH SETTINGS
• Speech volume. You can set this as a percentage of media volume.
• Use pitch changes. Check to speak keyboard feedback at a lower pitch.
• Speak when screen is off. Check to turn on spoken feedback when the screen is off.
FEEDBACK SETTINGS
• Sound feedback. Check to control navigation sounds.
• Sound volume. Available when Sound feedback is checked. You can set this as a percentage of media volume.
TOUCH EXPLORATION
• Explore by touch. Check to turn on Explore by Touch.
• Launch “Explore by touch” tutorial.
• Manage shortcut gestures. Allows you to assign the operations that different gestures trigger.
54
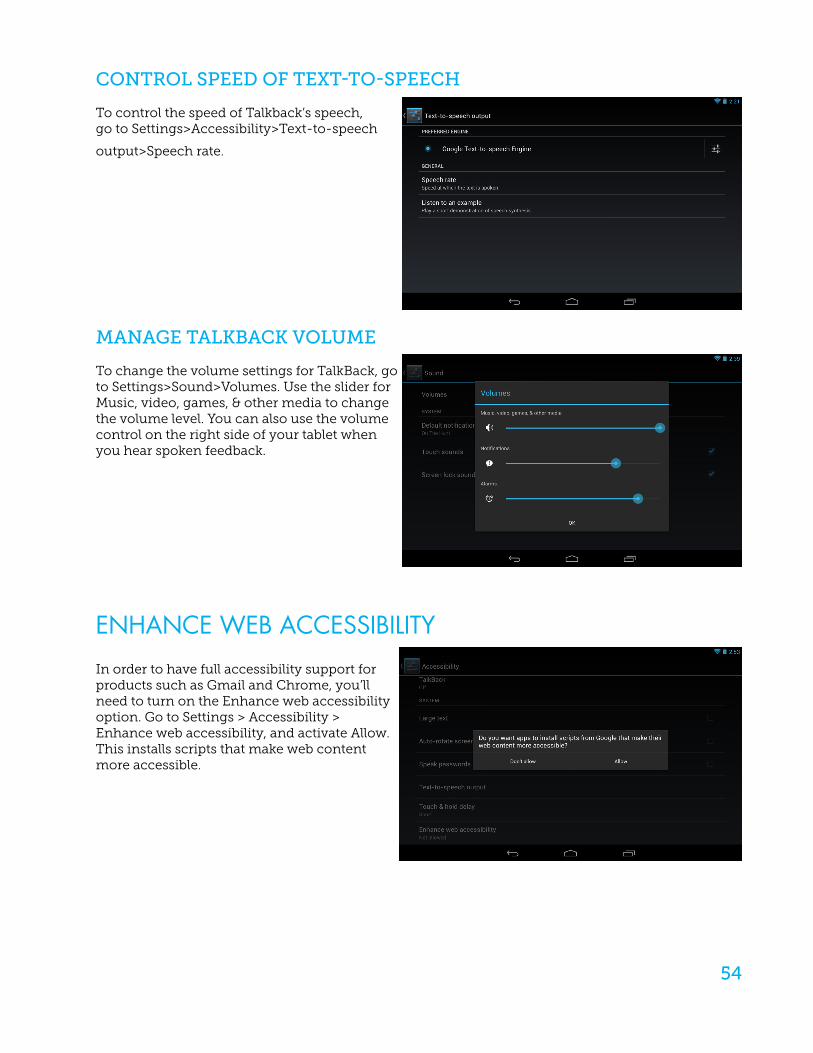
CONTROL SPEED OF TEXT-TO-SPEECH
To control the speed of Talkback’s speech, go to Settings>Accessibility>Text-to-speech
output>Speech rate.
MANAGE TALKBACK VOLUME
To change the volume settings for TalkBack, go to Settings>Sound>Volumes. Use the slider for Music, video, games, & other media to change the volume level. You can also use the volume control on the right side of your tablet when you hear spoken feedback.
ENHANCE WEB ACCESSIBILITY
In order to have full accessibility support for products such as Gmail and Chrome, you’ll need to turn on the Enhance web accessibility option. Go to Settings > Accessibility > Enhance web accessibility, and activate Allow. This installs scripts that make web content more accessible.
55
ACCESSIBILITY GESTURES
When TalkBack and Explore by Touch are turned on, you can use simple gestures to navigate your device:
• Drag one finger. Explore your screen and hear audible feedback for what is being touched.
• Double-tap anywhere on the screen. Opens or activates the item that you last touched.
• Swipe up or down using two fingers. Scroll lists and pages.
• Swipe left or right using two fingers. Change pages and screens.
• Swipe right (or down) using one finger. Move to the next item.
• Swipe left (or up) using one finger. Move to the previous item.
• Swipe down then up using a single motion. Transition to the next reading level when reading blocks of text, then swipe right to read forward or left to go back.
• Swipe up then down using a single motion. Transition to the previous reading level when reading blocks of text, then swipe right to read forward or left to go back.
• Swipe right then left using a single motion. Move to the next piece of information.
• Swipe left then right using a single motion. Move to the previous piece of information.
While you’re exploring with one finger, you can use another finger to double-tap to open an app, widget, and so on.
56
SECURITY
Android takes a multi-layered approach to security:
• Prevent. Apps in Google Play are scanned continuously to block harmful apps and policy violators. You can also choose to have apps installed from other sources verified.
• Control. App “sandboxes” keep apps from accessing other parts of your tablet’s operating system, or each other, unless you give permission at installation. Screen lock and encryption help prevent unauthorized access to the entire tablet.
• Defend. Once identified, dangerous apps can be removed remotely.
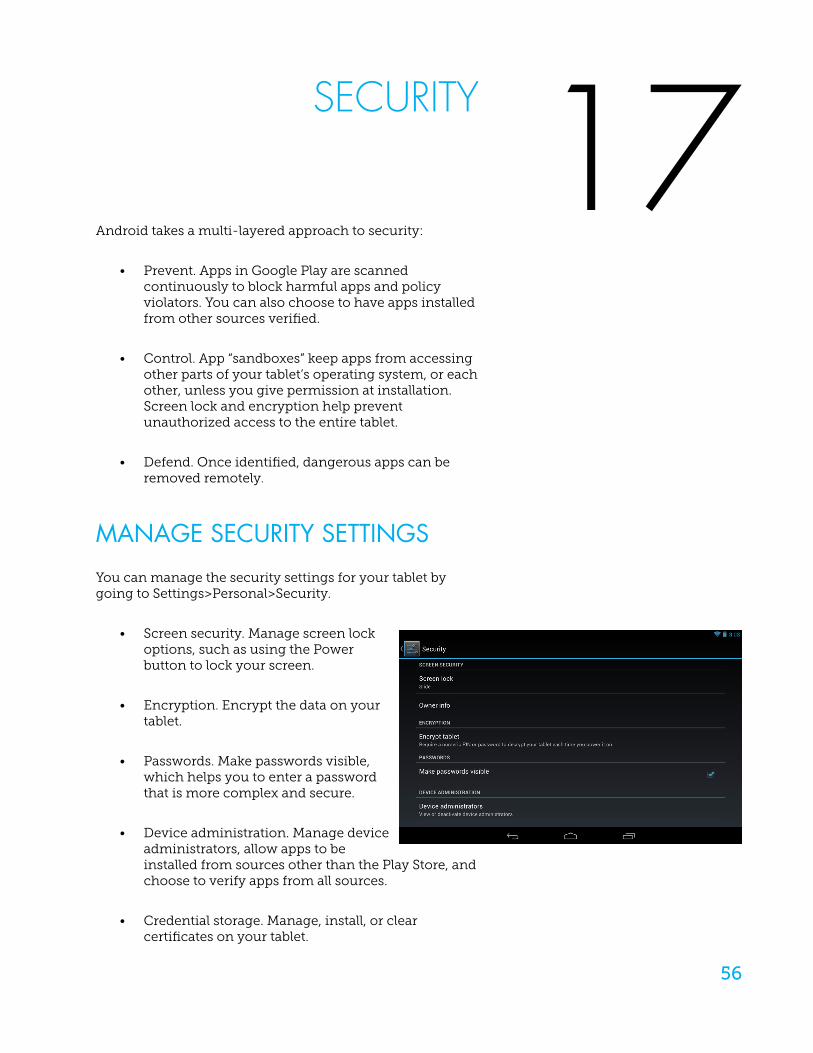
MANAGE SECURITY SETTINGS
You can manage the security settings for your tablet by going to Settings>Personal>Security.
• Screen security. Manage screen lock options, such as using the Power button to lock your screen.
• Encryption. Encrypt the data on your tablet.
• Passwords. Make passwords visible, which helps you to enter a password that is more complex and secure.
• Device administration. Manage device administrators, allow apps to be installed from sources other than the Play Store, and choose to verify apps from all sources.
• Credential storage. Manage, install, or clear certificates on your tablet.
17
57
MAXIMIZE WIKIPAD PERFORMANCE
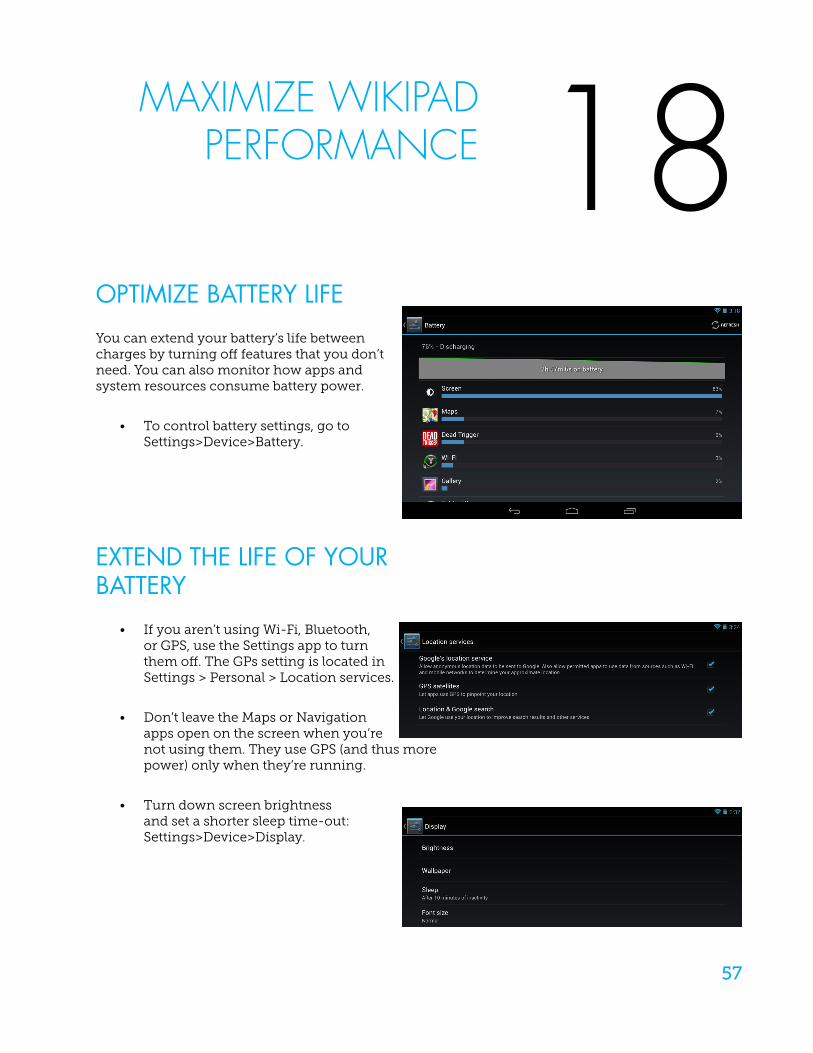
OPTIMIZE BATTERY LIFE
You can extend your battery’s life between charges by turning off features that you don’t need. You can also monitor how apps and system resources consume battery power.
• To control battery settings, go to Settings>Device>Battery.
EXTEND THE LIFE OF YOUR BATTERY
• If you aren’t using Wi-Fi, Bluetooth, or GPS, use the Settings app to turn them off. The GPs setting is located in Settings > Personal > Location services.
• Don’t leave the Maps or Navigation apps open on the screen when you’re not using them. They use GPS (and thus more power) only when they’re running.
• Turn down screen brightness and set a shorter sleep time-out: Settings>Device>Display.
18
58
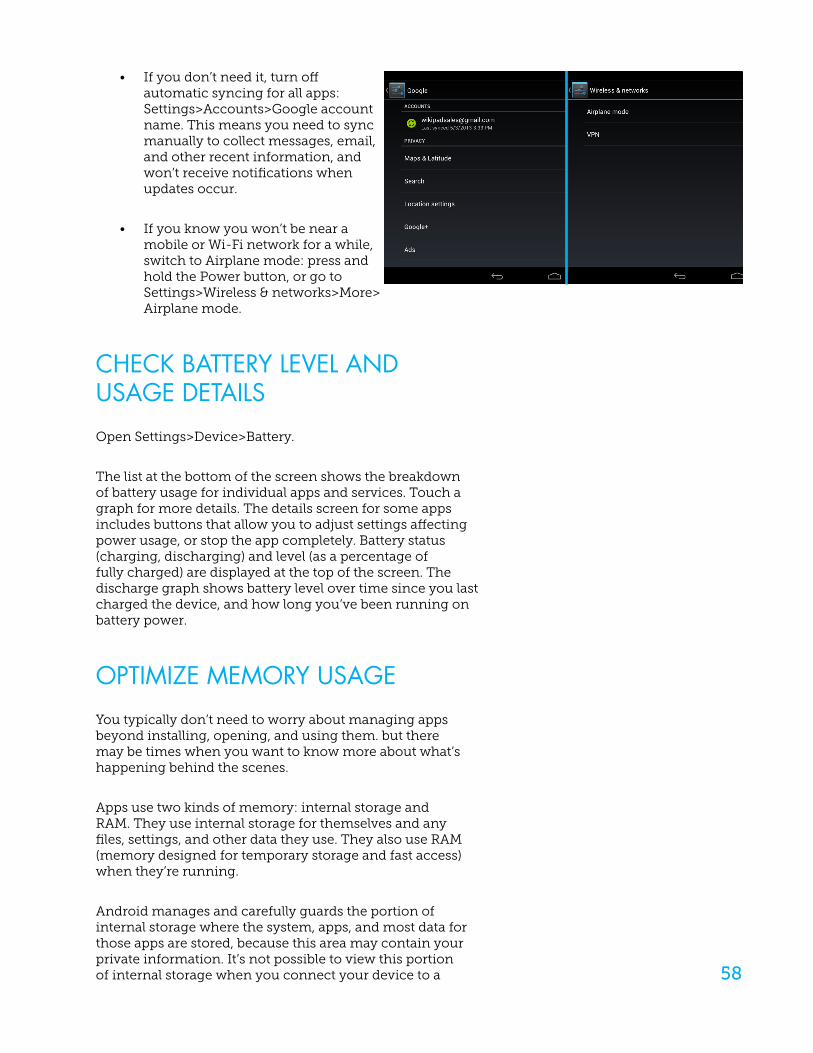
• If you don’t need it, turn off automatic syncing for all apps: Settings>Accounts>Google account name. This means you need to sync manually to collect messages, email, and other recent information, and won’t receive notifications when updates occur.
• If you know you won’t be near a mobile or Wi-Fi network for a while, switch to Airplane mode: press and hold the Power button, or go to Settings>Wireless & networks>More> Airplane mode.
CHECK BATTERY LEVEL AND USAGE DETAILS
Open Settings>Device>Battery.
The list at the bottom of the screen shows the breakdown of battery usage for individual apps and services. Touch a graph for more details. The details screen for some apps includes buttons that allow you to adjust settings affecting power usage, or stop the app completely. Battery status (charging, discharging) and level (as a percentage of fully charged) are displayed at the top of the screen. The discharge graph shows battery level over time since you last charged the device, and how long you’ve been running on battery power.
OPTIMIZE MEMORY USAGE
You typically don’t need to worry about managing apps beyond installing, opening, and using them. but there may be times when you want to know more about what’s happening behind the scenes.
Apps use two kinds of memory: internal storage and RAM. They use internal storage for themselves and any files, settings, and other data they use. They also use RAM (memory designed for temporary storage and fast access) when they’re running.
Android manages and carefully guards the portion of internal storage where the system, apps, and most data for those apps are stored, because this area may contain your private information. It’s not possible to view this portion of internal storage when you connect your device to a
59
computer with a USB cable. The other portion of internal storage, where music, downloaded files, and so on are stored, remains visible for your convenience.
Android also manages how apps use RAM. it may cache some things you’ve been using recently, for quicker access if you need them again, but it will erase the cache if it needs the RAM for new activities.
You affect the way apps use internal storage directly and indirectly in many ways—for example, by:
• Installing or uninstalling apps.
• Downloading files in Chrome, Gmail, and other apps.
• Creating files (for example, by taking pictures).
• Deleting downloaded files or files you created.
• Copying files between your device and a computer via USB or Bluetooth.
You rarely need to manage the way apps use RAM. But you can monitor apps’ RAM usage and stop them if they misbehave.
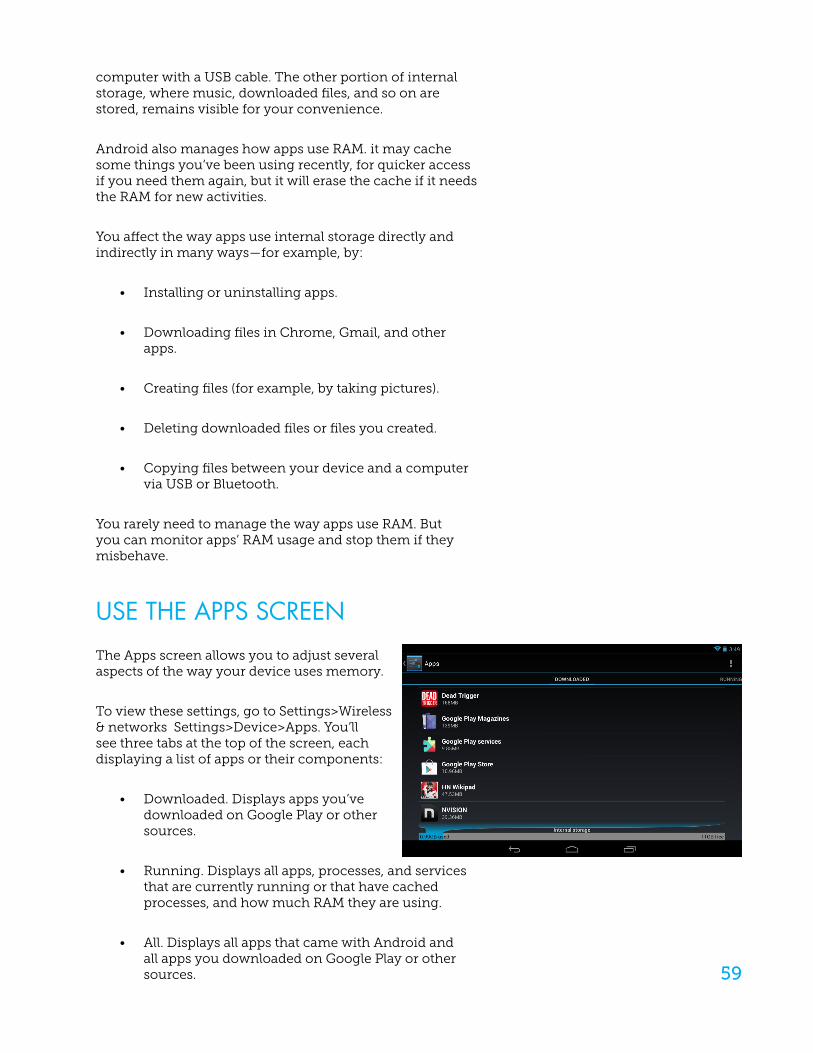
USE THE APPS SCREEN
The Apps screen allows you to adjust several aspects of the way your device uses memory.
To view these settings, go to Settings>Wireless & networks Settings>Device>Apps. You’ll see three tabs at the top of the screen, each displaying a list of apps or their components:
• Downloaded. Displays apps you’ve downloaded on Google Play or other sources.
• Running. Displays all apps, processes, and services that are currently running or that have cached processes, and how much RAM they are using.
• All. Displays all apps that came with Android and all apps you downloaded on Google Play or other sources.
60
To switch the order of the lists displayed in the Downloaded or All tabs, touch Menu>Sort by name or Sort by size.
To view details about an app or other item listed under any tab, touch its name. The information and controls available vary among different types of apps, but commonly include:
• Force stop button: stops an app that is misbehaving. stopping an app, process, or service may cause your device to stop working correctly. You may need to restart your device after doing this.
• Uninstall button: deletes the app and all of its data and settings.
• Disable button: Prevents the app from running, but does not uninstall it. This option is available for some apps and services that can’t be uninstalled.
• Clear data button: Delete an app’s settings and other data without removing the app itself.
• Clear cache: if the app stores data in a temporary area of the tablet’s memory, lists how much information is stored, and includes a button for clearing it.
• Launch by default: If you have configured an app to launch certain file types by default, you can clear that setting here.
• Permissions: Lists the kinds of information about your tablet and data the app has access to.
61
FREQUENTLY ASKED QUESTIONS
1. My device does not turn on.
• Make sure the battery is not used up.
• Make sure that the power adapter is securely connected.
• Make sure that you are using the power adapter that was included with your device.
• Make sure that the device is turned on.
2. The display freezes or does not respond.
• Touch and hold the power button to turn device off and turn it on again.
3. My device does not recognize the memory card.
• Make sure that you have inserted a certified memory card.
• Make sure that you have inserted the memory card correctly.
• With your memory card inserted, power off and reset the device.
4. My device shows a low-battery warning.
• The device is low on power and needs to be charged before you can use it.
19
62
5. I cannot access the web.
• Check the wireless signal indicator in the status bar at the bottom of the screen. If there is no signal, you are not connected.
• Make sure the device’s wireless communication function is set to on. If problem persists, contact your Wi-Fi administrator.
• Make sure to select the right network and input the right password.
6. There is no sound coming from the device.
• Unplug and reconnect the headset. Make sure that the connector is pushed in all the way.
• The volume may be deactivated or set too low.
• Check the software volume settings.