volkswagen golf mk4 - p3 cars · please download the latest copy of this document from warranty...
TRANSCRIPT
Please download the latest copy of this document from www.p3cars.com/install
WARRANTY & LIABILITY:Neither P3 Cars, nor its dealers or agents shall be liable in any way, for any damage, loss, injury or other claims, resulting from the installation or use of this product. By purchasing or installing this product, you assume all liability of any kind connected with the use and/or application of this product. If you are unsure that you can safely install and use this product, consult a quali�ed installer or mechanic. The warranty on this product covers only the product itself for a period of 6 months from the date of purchase, and it will be at our discretion to repair or replace the a�ected parts. No user serviceable parts inside. Warranty will be voided if product shows physical damage.
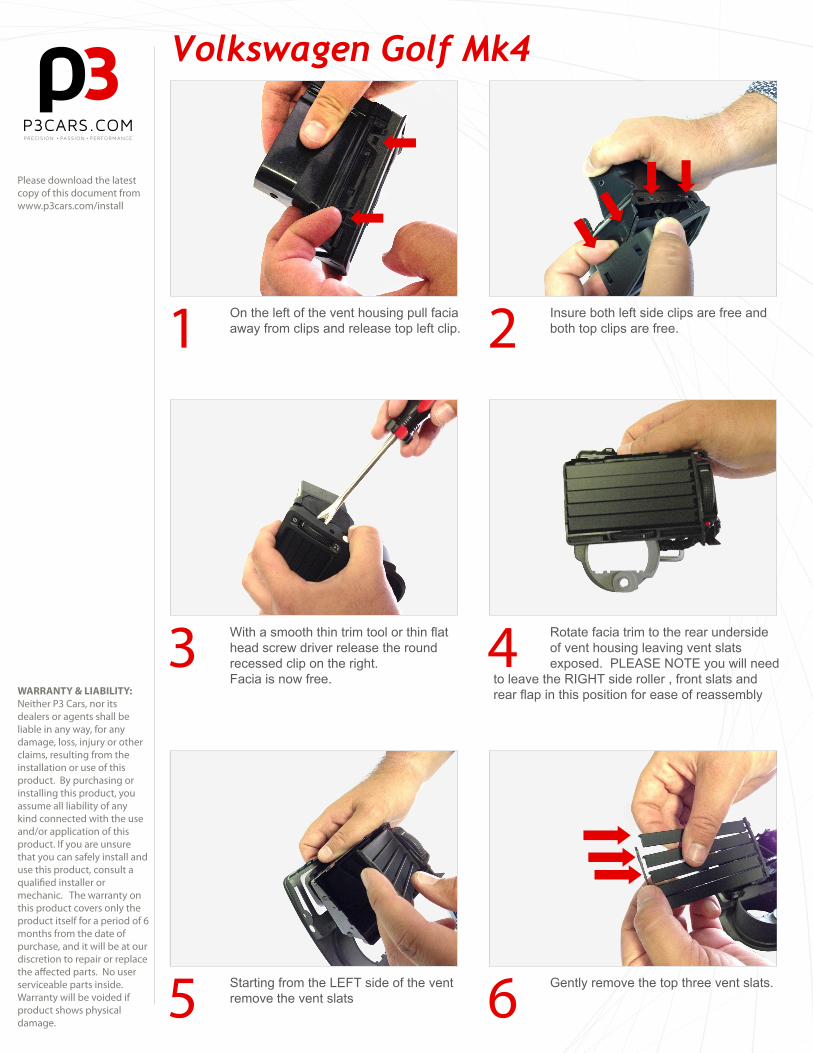
Gently remove the top three vent slats. Starting from the LEFT side of the vent remove the vent slats
Rotate facia trim to the rear underside of vent housing leaving vent slats exposed. PLEASE NOTE you will need
to leave the RIGHT side roller , front slats and rear flap in this position for ease of reassembly
With a smooth thin trim tool or thin flat head screw driver release the round recessed clip on the right.Facia is now free.
Insure both left side clips are free and both top clips are free.
On the left of the vent housing pull facia away from clips and release top left clip.
Volkswagen Golf Mk4
5 6
43
21
Please download the latest copy of this document from www.p3cars.com/install
WARRANTY & LIABILITY:Neither P3 Cars, nor its dealers or agents shall be liable in any way, for any damage, loss, injury or other claims, resulting from the installation or use of this product. By purchasing or installing this product, you assume all liability of any kind connected with the use and/or application of this product. If you are unsure that you can safely install and use this product, consult a quali�ed installer or mechanic. The warranty on this product covers only the product itself for a period of 6 months from the date of purchase, and it will be at our discretion to repair or replace the a�ected parts. No user serviceable parts inside. Warranty will be voided if product shows physical damage.
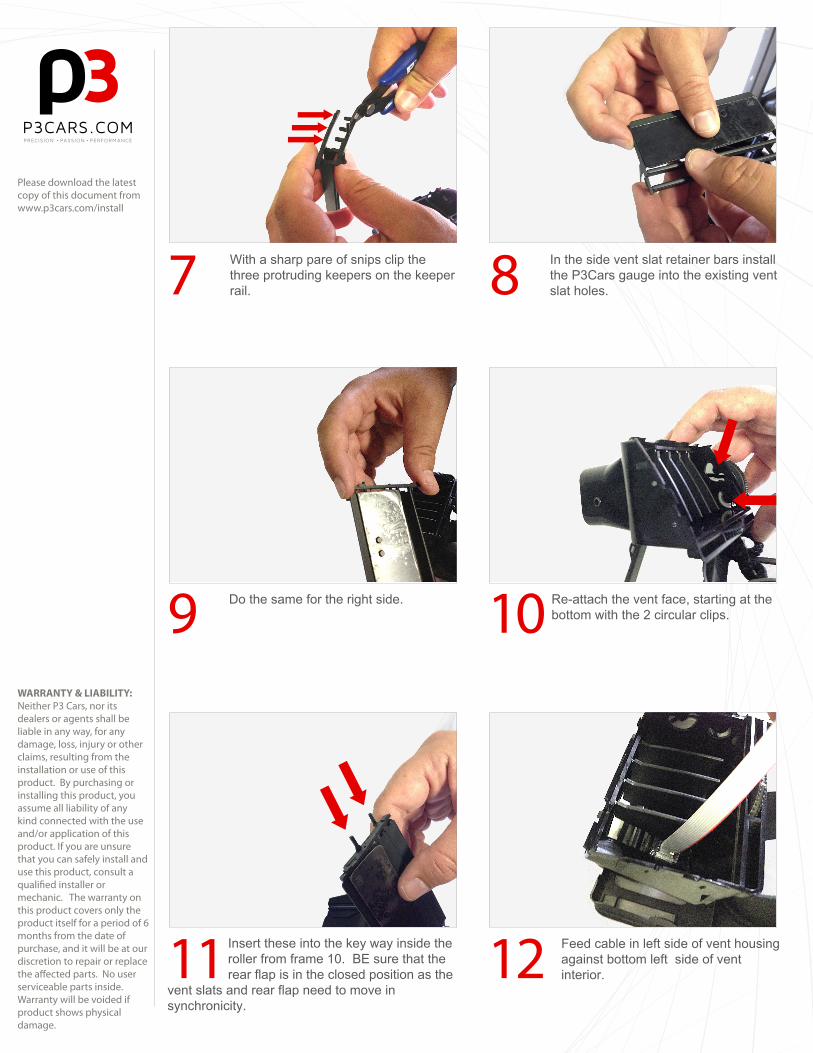
Feed cable in left side of vent housing against bottom left side of vent interior.
Insert these into the key way inside the roller from frame 10. BE sure that the rear flap is in the closed position as the
vent slats and rear flap need to move in synchronicity.
Re-attach the vent face, starting at the bottom with the 2 circular clips.
Do the same for the right side.
In the side vent slat retainer bars install the P3Cars gauge into the existing vent slat holes.
With a sharp pare of snips clip the three protruding keepers on the keeper rail.
1211
9 10
7 8

Please download the latest copy of this document from www.p3cars.com/install
WARRANTY & LIABILITY:Neither P3 Cars, nor its dealers or agents shall be liable in any way, for any damage, loss, injury or other claims, resulting from the installation or use of this product. By purchasing or installing this product, you assume all liability of any kind connected with the use and/or application of this product. If you are unsure that you can safely install and use this product, consult a quali�ed installer or mechanic. The warranty on this product covers only the product itself for a period of 6 months from the date of purchase, and it will be at our discretion to repair or replace the a�ected parts. No user serviceable parts inside. Warranty will be voided if product shows physical damage.
Installation complete!Please refer to the gauge usage and configuration guide for an explanation of features.If you have additional questions, email us at [email protected]
Clip side clips.
Clip top clips insuring that the P3Cars display protective covering is NOT stuffed behind facia.
Manually open rear flap and slide cable out bottom left then manually close flap against it.13 14
15
16