vital pulpotomy in molars - pulpdent · vital pulpotomy should be performed as soon as possible...
TRANSCRIPT
PROCEDURE
1. Obtain profound anesthesia to assure patient comfortand cooperation. Occasionally, it may be necessary touse supplementary periodontal ligament, palatal orlingual injections. Injection directly into the pulp shouldbe avoided because it can cause tissue laceration andforce contaminants from the coronal pulp tissue into theradicular pulp.
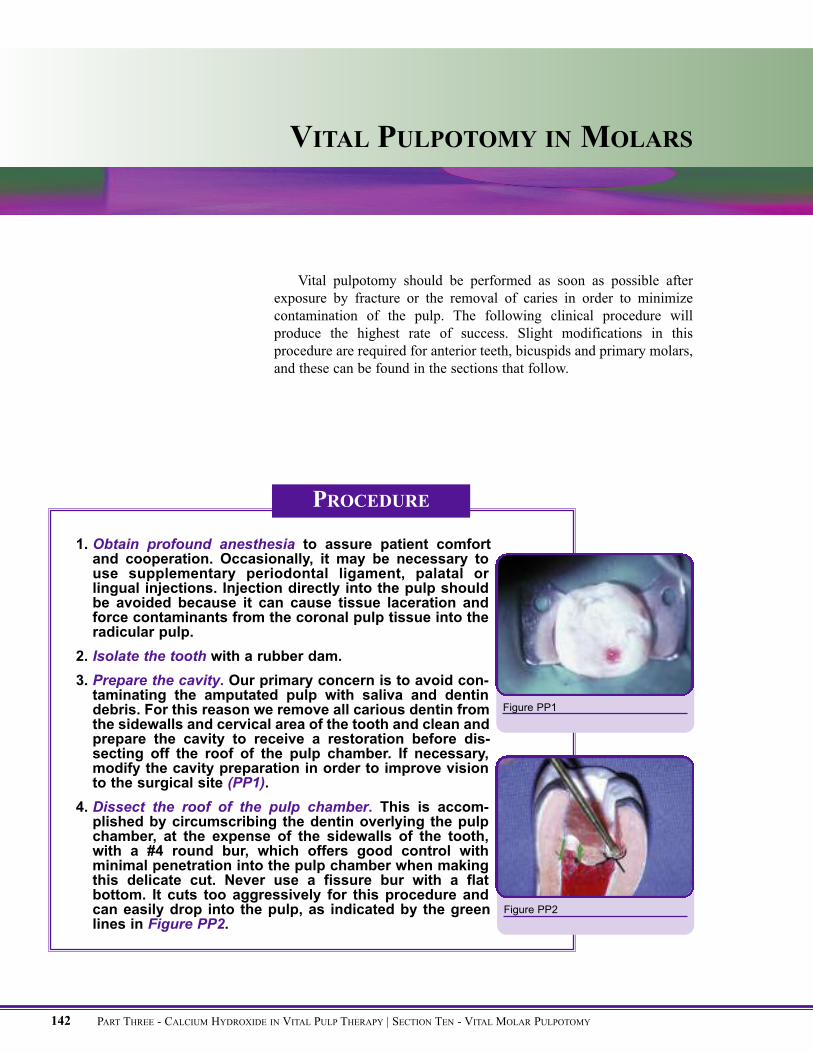
2. Isolate the tooth with a rubber dam.3. Prepare the cavity. Our primary concern is to avoid con-taminating the amputated pulp with saliva and dentindebris. For this reason we remove all carious dentin fromthe sidewalls and cervical area of the tooth and clean andprepare the cavity to receive a restoration before dis-secting off the roof of the pulp chamber. If necessary,modify the cavity preparation in order to improve visionto the surgical site (PP1).
4. Dissect the roof of the pulp chamber. This is accom-plished by circumscribing the dentin overlying the pulpchamber, at the expense of the sidewalls of the tooth,with a #4 round bur, which offers good control withminimal penetration into the pulp chamber when makingthis delicate cut. Never use a fissure bur with a flatbottom. It cuts too aggressively for this procedure andcan easily drop into the pulp, as indicated by the greenlines in Figure PP2.
VITAL PULPOTOMY IN MOLARS
PART THREE - CALCIUM HYDROXIDE IN VITAL PULP THERAPY | SECTION TEN - VITAL MOLAR PULPOTOMY142
Figure PP1
Figure PP2
Vital pulpotomy should be performed as soon as possible afterexposure by fracture or the removal of caries in order to minimizecontamination of the pulp. The following clinical procedure willproduce the highest rate of success. Slight modifications in thisprocedure are required for anterior teeth, bicuspids and primary molars,and these can be found in the sections that follow.
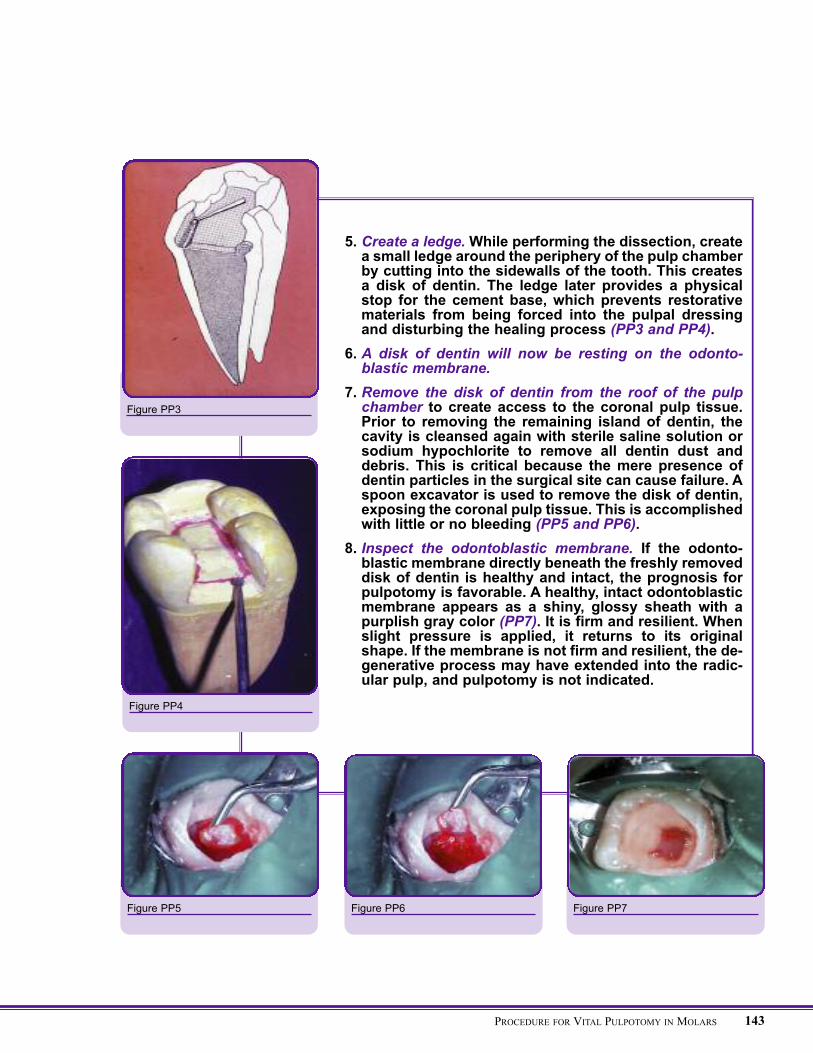
5. Create a ledge.While performing the dissection, createa small ledge around the periphery of the pulp chamberby cutting into the sidewalls of the tooth. This createsa disk of dentin. The ledge later provides a physicalstop for the cement base, which prevents restorativematerials from being forced into the pulpal dressingand disturbing the healing process (PP3 and PP4).
6. A disk of dentin will now be resting on the odonto-blastic membrane.
7. Remove the disk of dentin from the roof of the pulpchamber to create access to the coronal pulp tissue.Prior to removing the remaining island of dentin, thecavity is cleansed again with sterile saline solution orsodium hypochlorite to remove all dentin dust anddebris. This is critical because the mere presence ofdentin particles in the surgical site can cause failure. Aspoon excavator is used to remove the disk of dentin,exposing the coronal pulp tissue. This is accomplishedwith little or no bleeding (PP5 and PP6).
8. Inspect the odontoblastic membrane. If the odonto-blastic membrane directly beneath the freshly removeddisk of dentin is healthy and intact, the prognosis forpulpotomy is favorable. A healthy, intact odontoblasticmembrane appears as a shiny, glossy sheath with apurplish gray color (PP7). It is firm and resilient. Whenslight pressure is applied, it returns to its originalshape. If the membrane is not firm and resilient, the de-generative process may have extended into the radic-ular pulp, and pulpotomy is not indicated.
143PROCEDURE FOR VITAL PULPOTOMY IN MOLARS
Figure PP3
Figure PP4
Figure PP5 Figure PP6 Figure PP7
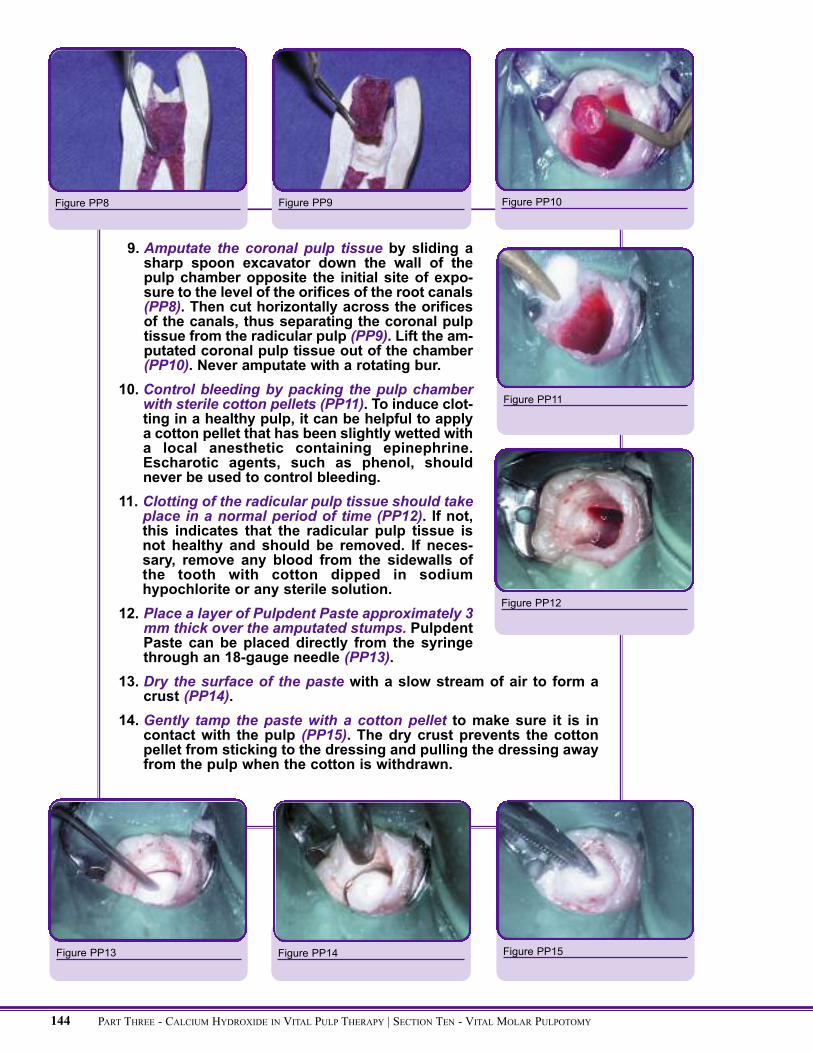
9. Amputate the coronal pulp tissue by sliding asharp spoon excavator down the wall of thepulp chamber opposite the initial site of expo-sure to the level of the orifices of the root canals(PP8). Then cut horizontally across the orificesof the canals, thus separating the coronal pulptissue from the radicular pulp (PP9). Lift the am-putated coronal pulp tissue out of the chamber(PP10). Never amputate with a rotating bur.
10. Control bleeding by packing the pulp chamberwith sterile cotton pellets (PP11). To induce clot-ting in a healthy pulp, it can be helpful to applya cotton pellet that has been slightly wetted witha local anesthetic containing epinephrine.Escharotic agents, such as phenol, shouldnever be used to control bleeding.
11. Clotting of the radicular pulp tissue should takeplace in a normal period of time (PP12). If not,this indicates that the radicular pulp tissue isnot healthy and should be removed. If neces-sary, remove any blood from the sidewalls ofthe tooth with cotton dipped in sodiumhypochlorite or any sterile solution.
12. Place a layer of Pulpdent Paste approximately 3mm thick over the amputated stumps. PulpdentPaste can be placed directly from the syringethrough an 18-gauge needle (PP13).
13. Dry the surface of the paste with a slow stream of air to form acrust (PP14).
14. Gently tamp the paste with a cotton pellet to make sure it is incontact with the pulp (PP15). The dry crust prevents the cottonpellet from sticking to the dressing and pulling the dressing awayfrom the pulp when the cotton is withdrawn.
Figure PP10
Figure PP11
Figure PP12
Figure PP13 Figure PP14
PART THREE - CALCIUM HYDROXIDE IN VITAL PULP THERAPY | SECTION TEN - VITAL MOLAR PULPOTOMY144
Figure PP8 Figure PP9
Figure PP15
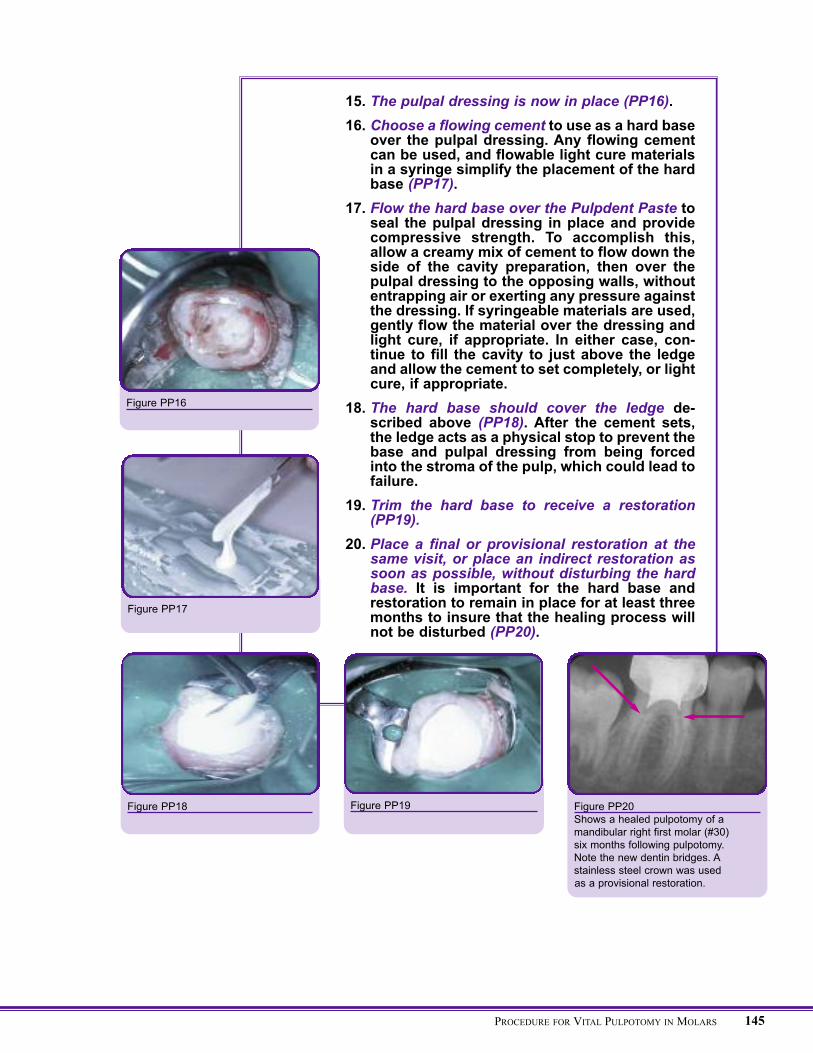
15. The pulpal dressing is now in place (PP16).16. Choose a flowing cement to use as a hard base
over the pulpal dressing. Any flowing cementcan be used, and flowable light cure materialsin a syringe simplify the placement of the hardbase (PP17).
17. Flow the hard base over the Pulpdent Paste toseal the pulpal dressing in place and providecompressive strength. To accomplish this,allow a creamy mix of cement to flow down theside of the cavity preparation, then over thepulpal dressing to the opposing walls, withoutentrapping air or exerting any pressure againstthe dressing. If syringeable materials are used,gently flow the material over the dressing andlight cure, if appropriate. In either case, con-tinue to fill the cavity to just above the ledgeand allow the cement to set completely, or lightcure, if appropriate.
18. The hard base should cover the ledge de-scribed above (PP18). After the cement sets,the ledge acts as a physical stop to prevent thebase and pulpal dressing from being forcedinto the stroma of the pulp, which could lead tofailure.
19. Trim the hard base to receive a restoration(PP19).
20. Place a final or provisional restoration at thesame visit, or place an indirect restoration assoon as possible, without disturbing the hardbase. It is important for the hard base andrestoration to remain in place for at least threemonths to insure that the healing process willnot be disturbed (PP20).
Figure PP16
Figure PP17
Figure PP20Shows a healed pulpotomy of amandibular right first molar (#30)six months following pulpotomy.Note the new dentin bridges. Astainless steel crown was usedas a provisional restoration.
Figure PP19Figure PP18
145PROCEDURE FOR VITAL PULPOTOMY IN MOLARS