version 1 - sangean usa · 1 hd radio technology manufactured under license from ibiquity digital...
TRANSCRIPT
Version 1
HDT-20
GB
1
HD Radio technology manufactured under license from iBiquity Digital Corporation. U.S. and Foreign Patents. HD Radio™ and the HD, HD Radio and “Arc” logos are proprietary trademarks of iBiquity Digital Corp.
IMPORTANT SAFETY INSTRUCTIONS1.2.3.4.5.6.7.
8.
9.
10.
11.12.
Read these instructions.Keep these instructions.Heed all warnings.Follow all instructions.Do not use this apparatus near water.Clean only with dry cloth.Do not block any ventilation openings. Install in accordance with themanufacturer’s instructions.Do not install near any heat sources such as radiators, heat registers, stoves, or other apparatus (including amplifiers) that produce heat.Do not defeat the safety purpose of the polarized or grounding-typeplug. A polarized plug has two blades with one wider than the other.A grounding type plug has two blades and a third grounding prong.The wide blade or the third prong are provided for your safety. If theprovided plug does not fit into your outlet, consult an electrician forreplacement of the obsolete outlet.Protect the power cord from being walked on or pinched particularlyat plugs, convenience receptacles, and the point where they exit from the apparatus.Only use attachments/accessories specified by the manufacturer.Use only with the cart, stand, tripod, bracket, or table specified by
13.
14.
15.
16.
17.
18.
19.
20.
21.
the manufacturer, or sold with the apparatus. When a cart is used, use caution when moving the cart/apparatus combination to avoid injury from tip-over. Unplug this apparatus during lightning storms or when unused forlong periods of time.Refer all servicing to qualified service personnel. Servicing is required when the apparatus has been damaged in any way, such as power-supply cord or plug is damaged. liquid has been spilled or objects have fallen into the apparatus, the apparatus has been exposed to rain or moisture, does not operate normally, or has been dropped.To Reduce the Risk of Fire or Electric Shock, Do not Expose This Appliance To Rain or Moisture.The Shock Hazard Marking and Associated Graphical Symbol is provided on the rear of unit.Apparatus shall not be exposed to dripping or splashing and no objects filled with liquids, shall be placed on the apparatus.Excessive sound pressure on earbuds and headphones could impair your hearing ability. The power plug should be close to the radio, and easy to be approached so that during an emergency you can easily disconnect the power from the radio, just unplug the power plug from the AC power outlet.Where the MAINS plug or an appliance coupler is used as the disconnect device, the disconnected device shall remain readily operable. To prevent possible hearing damage, do not listen at high volume levels for long periods of time.
GB
2
CAUTION: These servicing instructions are for use by qualified service personnel only. To reduce the risk of the electric shock, do not perform any servicing other than that contained in the operating instructions
unless you are qualified to so.
For United States:
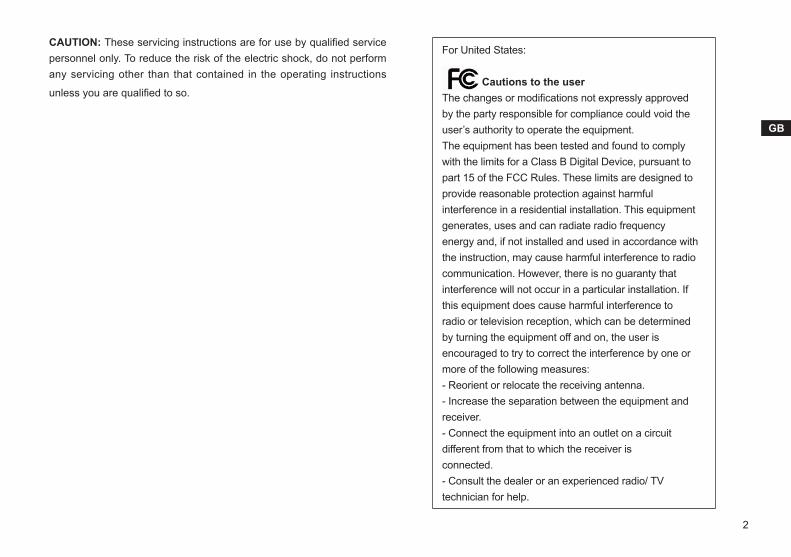
Cautions to the userThe changes or modifications not expressly approvedby the party responsible for compliance could void theuser’s authority to operate the equipment.The equipment has been tested and found to complywith the limits for a Class B Digital Device, pursuant topart 15 of the FCC Rules. These limits are designed toprovide reasonable protection against harmfulinterference in a residential installation. This equipmentgenerates, uses and can radiate radio frequencyenergy and, if not installed and used in accordance withthe instruction, may cause harmful interference to radiocommunication. However, there is no guaranty thatinterference will not occur in a particular installation. Ifthis equipment does cause harmful interference toradio or television reception, which can be determinedby turning the equipment off and on, the user isencouraged to try to correct the interference by one ormore of the following measures:- Reorient or relocate the receiving antenna.- Increase the separation between the equipment andreceiver.- Connect the equipment into an outlet on a circuitdifferent from that to which the receiver isconnected.- Consult the dealer or an experienced radio/ TVtechnician for help.
3
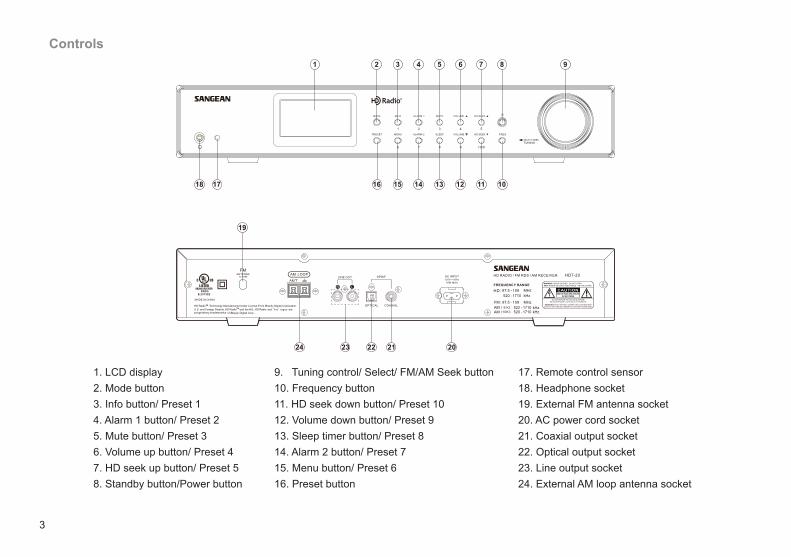
Controls
1. LCD display2. Mode button3. Info button/ Preset 14. Alarm 1 button/ Preset 25. Mute button/ Preset 36. Volume up button/ Preset 47. HD seek up button/ Preset 58. Standby button/Power button
9. Tuning control/ Select/ FM/AM Seek button10. Frequency button11. HD seek down button/ Preset 1012. Volume down button/ Preset 913. Sleep timer button/ Preset 814. Alarm 2 button/ Preset 715. Menu button/ Preset 616. Preset button
17. Remote control sensor18. Headphone socket19. External FM antenna socket20. AC power cord socket21. Coaxial output socket22. Optical output socket23. Line output socket24. External AM loop antenna socket
1
19
2 3 4 5 6 7 8 9
10111213141516
22 21 202324
1718
GB
4
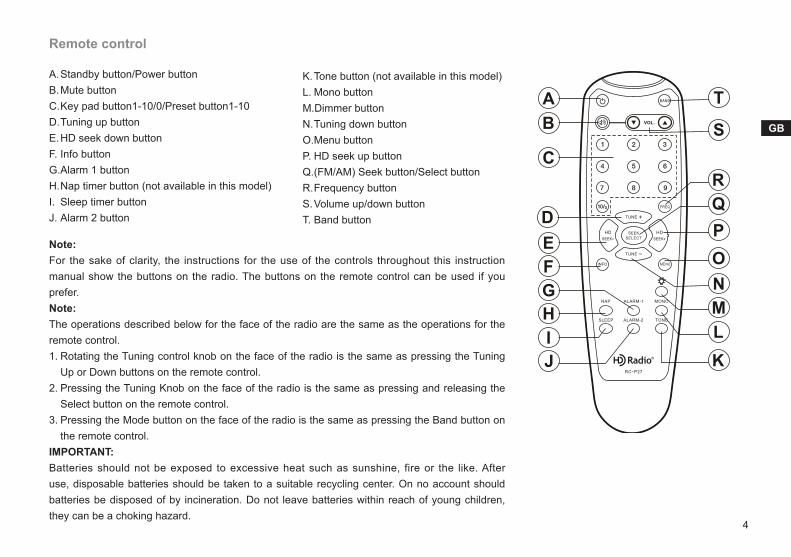
Remote control A. Standby button/Power buttonB. Mute buttonC. Key pad button1-10/0/Preset button1-10D. Tuning up buttonE. HD seek down buttonF. Info buttonG. Alarm 1 buttonH. Nap timer button (not available in this model)I. Sleep timer buttonJ. Alarm 2 button
Note: For the sake of clarity, the instructions for the use of the controls throughout this instruction manual show the buttons on the radio. The buttons on the remote control can be used if you prefer.Note: The operations described below for the face of the radio are the same as the operations for the remote control.1. Rotating the Tuning control knob on the face of the radio is the same as pressing the Tuning
Up or Down buttons on the remote control.2. Pressing the Tuning Knob on the face of the radio is the same as pressing and releasing the
Select button on the remote control.3. Pressing the Mode button on the face of the radio is the same as pressing the Band button on
the remote control.IMPORTANT:Batteries should not be exposed to excessive heat such as sunshine, fire or the like. After use, disposable batteries should be taken to a suitable recycling center. On no account should batteries be disposed of by incineration. Do not leave batteries within reach of young children, they can be a choking hazard.
K. Tone button (not available in this model)L. Mono buttonM.Dimmer buttonN. Tuning down buttonO. Menu buttonP. HD seek up buttonQ. (FM/AM) Seek button/Select buttonR. Frequency buttonS. Volume up/down buttonT. Band button
5
Power your radio
1. Connect the power cable with the radio and plug it in to a live outlet.2. Connect the FM Dipole Antenna into the FM antenna terminal.3. Connect the AM loop antenna into AM antenna terminal.4. Press the Standby/Power button to turn on the radio.Note:1. Use only the power cable/ FM Dipole antenna / AM loop antenna
supplied with the radio. Connecting an incompatible power supply and antennas will cause permanent damage to the radio.
2. The AM loop antenna should be located at least 20”away from the tuner to avoid possible interference.
IMPORTANT: The mains plug is used as the means of connecting the radio to the mains supply. The mains socket used for the radio must remain accessible during normal use. In order to disconnect the radio from the mains completely, the mains plug should be removed from the mains outlet completely.
Setting the clock
Clock setting can be done when the receiver is on or in Standby Mode (power off).
Setting the clock manually
1. Repeatedly press the Menu button until ‘Clock Update’ is shown on the display.
2. Rotate the Tuning control knob to select ‘Manual’ and press the Tuning control knob to enter the clock time setting. The hour digit will be highlighted on the display.
3. Rotate the Tuning control knob to set the desired hour. Then press the Tuning control knob to confirm the setting. The minute digit will be highlighted on the display.
4. Rotate the Tuning control knob to set the desired minute and press the Tuning control knob to confirm the setting. Now the month digit will be highlighted on the display.
5. Follow the steps above to set the month/day/year setting. When the clock time setting is completed, your radio will exit the menu.
Auto clock set mode 1. Repeatedly press the Menu button until ‘Clock Update’ is shown on
the display.2. Rotate the Tuning control knob to select ‘Auto’ and press the Tuning
control knob to confirm the setting. Your radio will synchronize its clock time whenever it tunes to a radio station using RDS with CT signals.
GB
6
Setting the time format
1. Repeatedly press the Menu button until ‘Set 12/24 hour’ is shown on the display.
2. Rotate the Tuning control knob to select 12 or 24 hour format and press the Tuning control knob to confirm the setting. The selected format is used in standby mode, on the playing mode screen and when setting the alarms.
Operating the radio
This radio is equipped with four tuning methods – Scan tuning, Manual tuning, Memory presets recall and Direct Entry.
Scan tuning FM / AM
1. Carefully extend antennas in advance. 2. Press the Standby/Power button to switch on your radio.3. Press the Mode button repeatedly to select the desired frequency
band.4. To scan up in frequency, first rotate the Tuning control knob in a
clockwise direction and then press the Tuning control knob. Your radio will scan in an upwards direction (low frequency to high frequency) and stop automatically when it finds a station of sufficient strength. To scan down in frequency, first rotate the Tuning control knob in a anti-clockwise direction and then press the Tuning control. Your radio will scan in a downwards direction and stop automatically when it finds a station of sufficient strength.
5. After a few seconds the display will update. The display will show the frequency of the signal found. If the signal is strong enough and there
is RDS/RBDS data present then the radio will display the station name.
Manual tuning – FM / AM
1. Press the Standby/Power button to switch on your radio.2. Press the Mode button repeatedly to select the desired frequency
band.3. Rotate the Tuning control knob to tune to a station. The frequency will
change in steps of 50kHz/100kHz/200 kHz in FM or 9 kHz/10 kHz in AM.
4. When the frequency band end is reached the radio will recommence tuning from the opposite frequency band.
5. Adjust the Volume button to the desired volume settings.6. To switch off your radio press the Standby/Power button.
7
Presetting stations
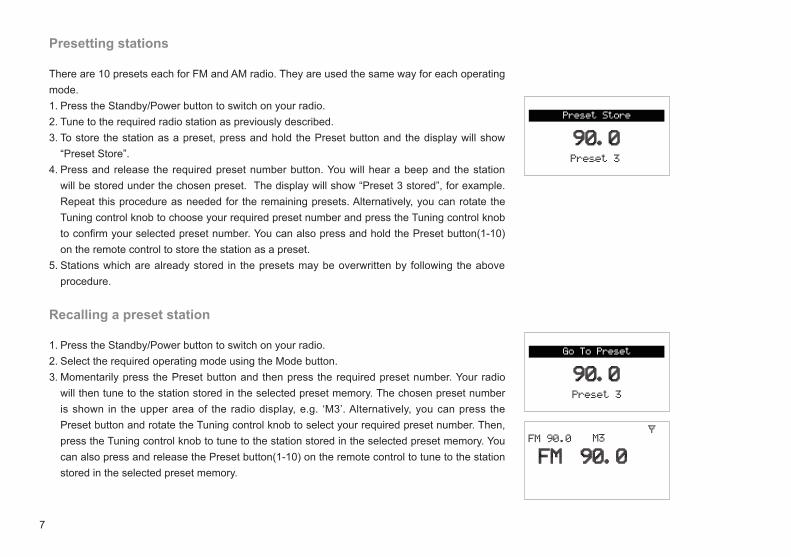
There are 10 presets each for FM and AM radio. They are used the same way for each operating mode.1. Press the Standby/Power button to switch on your radio.2. Tune to the required radio station as previously described.3. To store the station as a preset, press and hold the Preset button and the display will show
“Preset Store”.4. Press and release the required preset number button. You will hear a beep and the station
will be stored under the chosen preset. The display will show “Preset 3 stored”, for example. Repeat this procedure as needed for the remaining presets. Alternatively, you can rotate the Tuning control knob to choose your required preset number and press the Tuning control knob to confirm your selected preset number. You can also press and hold the Preset button(1-10) on the remote control to store the station as a preset.
5. Stations which are already stored in the presets may be overwritten by following the above procedure.
Recalling a preset station
1. Press the Standby/Power button to switch on your radio.2. Select the required operating mode using the Mode button. 3. Momentarily press the Preset button and then press the required preset number. Your radio
will then tune to the station stored in the selected preset memory. The chosen preset number is shown in the upper area of the radio display, e.g. ‘M3’. Alternatively, you can press the Preset button and rotate the Tuning control knob to select your required preset number. Then, press the Tuning control knob to tune to the station stored in the selected preset memory. You can also press and release the Preset button(1-10) on the remote control to tune to the station stored in the selected preset memory.
GB
8
Direct Entry Tuning
You can directly tune to a radio station by entering the station frequency.For example, to tune to station 93.30 FM, press the Mode button to select the FM band followed by pressing the FREQ button and the numerical buttons 9-3-3. To tune to 1120 AM, press the Mode button to select the AM band, followed by pressing the FREQ button and the numerical buttons 1-1-2-0.NOTE: The display will show ‘Error’ if the input frequency is incorrect or out of coverage.
Stereo/ Mono switching
If the FM radio station being listened to has a weak signal, some hiss may be audible. It is possible to reduce this hiss by forcing the radio to play the station in mono rather than stereo.1. Press the Mode button as needed to select FM radio mode and tune
to the required FM station as previously described.2. Repeatedly pressing the Menu button until ‘Force Mono’ is shown on
the display.3. Rotate the Tuning control knob to select Mono or Stereo and then
press the Tuning control knob to confirm your selection.
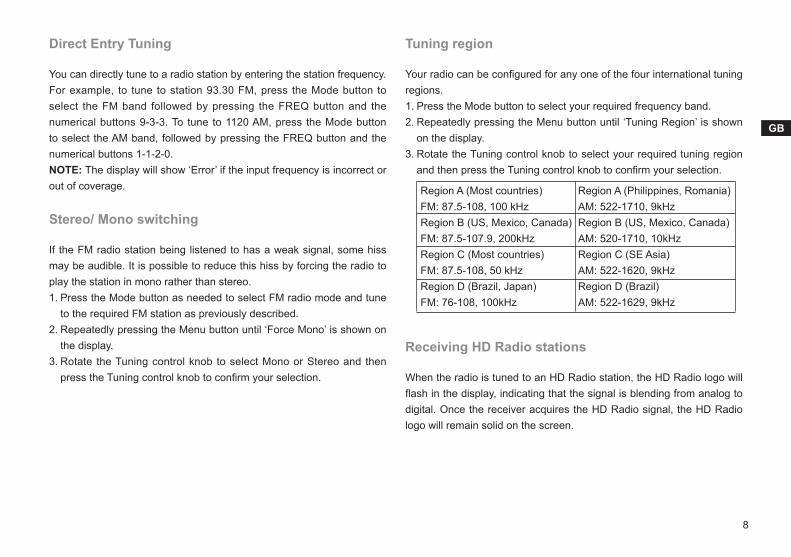
Tuning region
Your radio can be configured for any one of the four international tuning regions.1. Press the Mode button to select your required frequency band. 2. Repeatedly pressing the Menu button until ‘Tuning Region’ is shown
on the display.3. Rotate the Tuning control knob to select your required tuning region
and then press the Tuning control knob to confirm your selection.
Receiving HD Radio stations
When the radio is tuned to an HD Radio station, the HD Radio logo will flash in the display, indicating that the signal is blending from analog to digital. Once the receiver acquires the HD Radio signal, the HD Radio logo will remain solid on the screen.
Region A (Most countries) FM: 87.5-108, 100 kHz Region B (US, Mexico, Canada) FM: 87.5-107.9, 200kHz Region C (Most countries)FM: 87.5-108, 50 kHz Region D (Brazil, Japan)FM: 76-108, 100kHz
Region A (Philippines, Romania) AM: 522-1710, 9kHz Region B (US, Mexico, Canada)AM: 520-1710, 10kHz Region C (SE Asia)AM: 522-1620, 9kHz Region D (Brazil)AM: 522-1629, 9kHz
9
Receiving Multicast Stations
When the radio is tuned to an HD Radio station, it will determine that one or more Multicast stations are available and “HD1+”, for example, may appear on the display. “HD1” indicates the number of the current multicast program and plus (+) means that additional HD Radio programs are available. Rotate the Tuning control knob on the radio (or press the Tuning up/ down button on the remote control) to tune to HD2/HD3 Multicast channel.
HD SEEK function
Using the HD Seek Up/ Down button, the radio will seek to the next available HD Radio station. This function will also scan to the Multicast program if available.Press and release the HD Seek Up/ Down button will tune to the next available HD Radio station of sufficient signal strength.
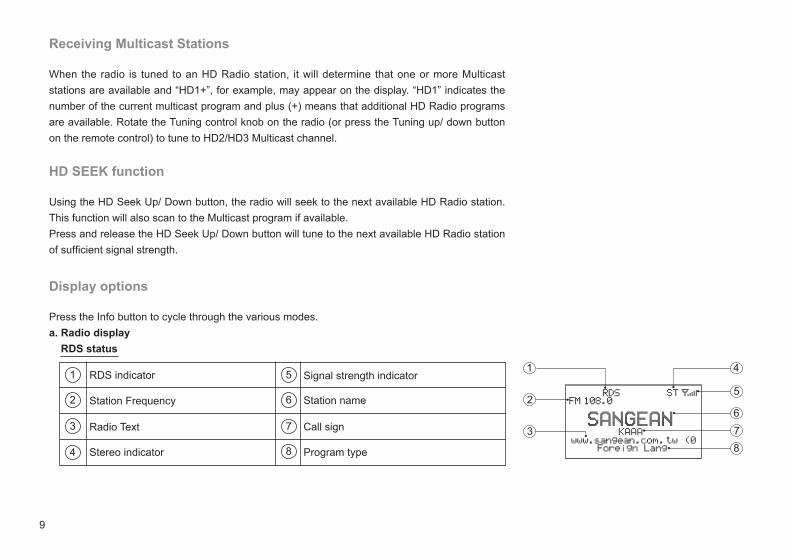
Display options
Press the Info button to cycle through the various modes.a. Radio display RDS status
2
1 4
5
678
3
123
45
67
8
9
10
11
RDS indicator
Station Frequency
Radio Text
Stereo indicator
Signal strength indicator
Station name
Call sign
Program type
1
2
3
4
5
6
7
8
GB
10
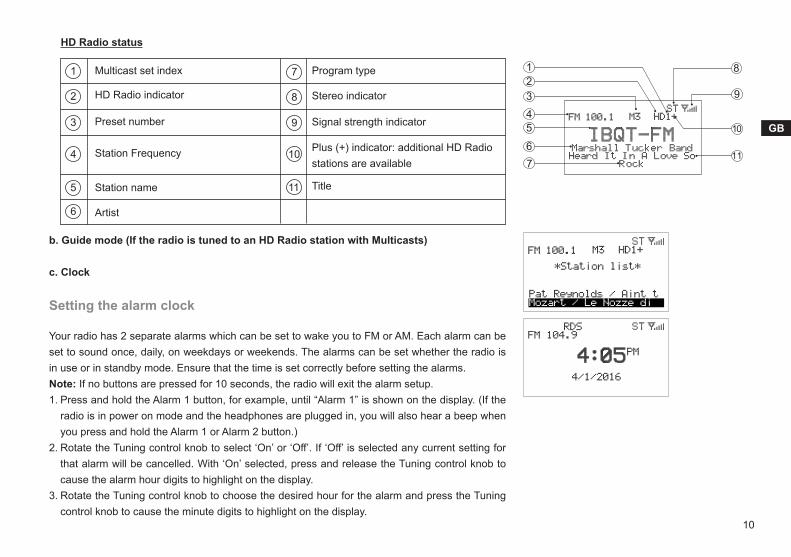
HD Radio status
b. Guide mode (If the radio is tuned to an HD Radio station with Multicasts)
c. Clock
Setting the alarm clock
Your radio has 2 separate alarms which can be set to wake you to FM or AM. Each alarm can be set to sound once, daily, on weekdays or weekends. The alarms can be set whether the radio is in use or in standby mode. Ensure that the time is set correctly before setting the alarms.Note: If no buttons are pressed for 10 seconds, the radio will exit the alarm setup.1. Press and hold the Alarm 1 button, for example, until “Alarm 1” is shown on the display. (If the
radio is in power on mode and the headphones are plugged in, you will also hear a beep when you press and hold the Alarm 1 or Alarm 2 button.)
2. Rotate the Tuning control knob to select ‘On’ or ‘Off’. If ‘Off’ is selected any current setting for that alarm will be cancelled. With ‘On’ selected, press and release the Tuning control knob to cause the alarm hour digits to highlight on the display.
3. Rotate the Tuning control knob to choose the desired hour for the alarm and press the Tuning control knob to cause the minute digits to highlight on the display.
1
2
3
4
5
6
7
8
9
10
11
Multicast set index
HD Radio indicator
Preset number
Station Frequency
Station name
Artist
Program type
Stereo indicator
Signal strength indicator
Plus (+) indicator: additional HD Radio stations are available
Title
2
1 4
5
678
3
123
45
67
8
9
10
11
11
4. Rotate the Tuning control knob to choose the desired minute for the alarm and press the Tuning control knob to confirm the setting. The display will show the frequency options for the alarm.
‘Once’- the alarm will sound once ‘Weekdays’-the alarm will sound on weekdays only ‘Weekends’- the alarm will sound only at weekends ‘Daily’-the alarm will sound everyday Rotate the Tuning control knob to select your required frequency and
press the Tuning control knob to confirm your setting. 5. Rotate the Tuning control knob to choose the desired source for
the alarm (FM or AM). Press the Tuning control knob to confirm the setting.
6. Rotate the Tuning control knob to choose your required wake-up station or press the desired Preset button (1-10). Then press the Tuning control knob to confirm your selection.
7. Rotate the Tuning control knob to choose your desired volume and press the Tuning control knob to confirm the setting. Your radio will show ‘Alarm 1 Saved’ for instance and exit the alarm setting screen. The ‘Alarm 1’ indicator will show on the display.
8. To view or quick change the ON/OFF status of the alarm, press and release the Alarm 1 (or Alarm 2) button.
When the alarm sounds
To cancel a sounding alarm, press the Standby/Power button to cancel a sounding alarm. When the radio alarm is activated, the alarm will go off in Humane Waking System mode. It will increase its volume from 0 to your set volume.The ‘Alarm 1’ indicator or ‘Alarm 2’ indicator will highlight on the display.
Disabling/ canceling alarm setting
To cancel the alarm setting before the alarm sounds, firstly, press the corresponding alarm button (i.e. alarm 1 or alarm 2 button) to enter the alarm setting screen and then press the same button again to highlight ‘Off’. The alarm indicator will disappear from the screen and the chosen alarm will now be disabled.
Sleep timer
Your radio can be set to turn off after a preset time has elapsed. The sleep timer setting can be adjusted between 15 and 180 minutes.1. Press and hold the Sleep timer button to enter the sleep setup. ‘Set
sleep time’ will appear on the display.2. Rotate the Tuning control knob to select the desired sleep time. The
options are 60, 90,120,150, 180, off, 15, 30. Press the Tuning control knob to confirm the setting. Use the Off option to cancel the sleep function. Your radio will switch into standby mode after the preset time has elapsed. An active sleep timer is shown using a sleep timer indicator ( ) on the playing display. To view the remaining time of an active sleep timer setting, press the sleep timer button.
3. To cancel the sleep time before the preset time has elapsed and to turn off the radio, press the Standby button to turn the unit off manually. To cancel the sleep timer and leave the radio playing, go back to the sleep timer settings (step 1 to 2) and select the Off option in step 2.
4. You can view or change the On/Off status of the Sleep timer by pressing the Sleep timer button.
GB
12
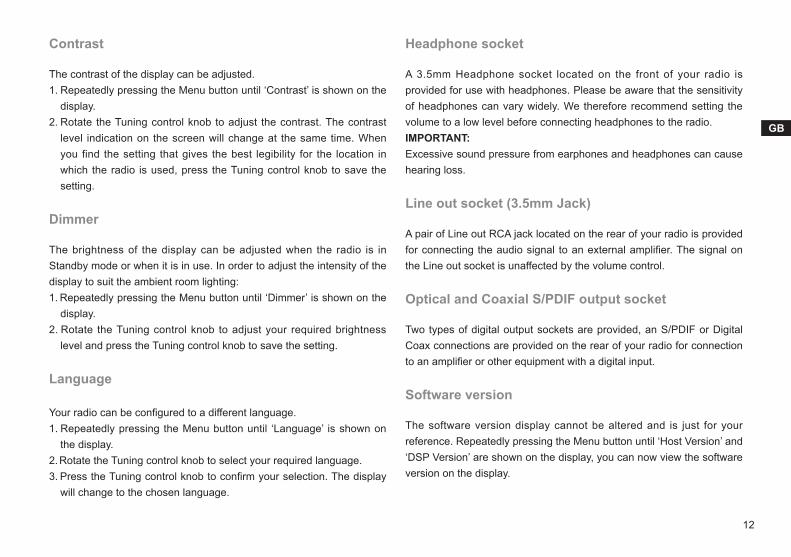
Contrast
The contrast of the display can be adjusted.1. Repeatedly pressing the Menu button until ‘Contrast’ is shown on the
display.2. Rotate the Tuning control knob to adjust the contrast. The contrast
level indication on the screen will change at the same time. When you find the setting that gives the best legibility for the location in which the radio is used, press the Tuning control knob to save the setting.
Dimmer
The brightness of the display can be adjusted when the radio is in Standby mode or when it is in use. In order to adjust the intensity of the display to suit the ambient room lighting:1. Repeatedly pressing the Menu button until ‘Dimmer’ is shown on the
display.2. Rotate the Tuning control knob to adjust your required brightness
level and press the Tuning control knob to save the setting.
Language
Your radio can be configured to a different language.1. Repeatedly pressing the Menu button until ‘Language’ is shown on
the display.2. Rotate the Tuning control knob to select your required language.3. Press the Tuning control knob to confirm your selection. The display
will change to the chosen language.
Headphone socket
A 3.5mm Headphone socket located on the front of your radio is provided for use with headphones. Please be aware that the sensitivity of headphones can vary widely. We therefore recommend setting the volume to a low level before connecting headphones to the radio.IMPORTANT: Excessive sound pressure from earphones and headphones can cause hearing loss.
Line out socket (3.5mm Jack)
A pair of Line out RCA jack located on the rear of your radio is provided for connecting the audio signal to an external amplifier. The signal on the Line out socket is unaffected by the volume control.
Optical and Coaxial S/PDIF output socket
Two types of digital output sockets are provided, an S/PDIF or Digital Coax connections are provided on the rear of your radio for connection to an amplifier or other equipment with a digital input.
Software version
The software version display cannot be altered and is just for your reference. Repeatedly pressing the Menu button until ‘Host Version’ and ‘DSP Version’ are shown on the display, you can now view the software version on the display.
13
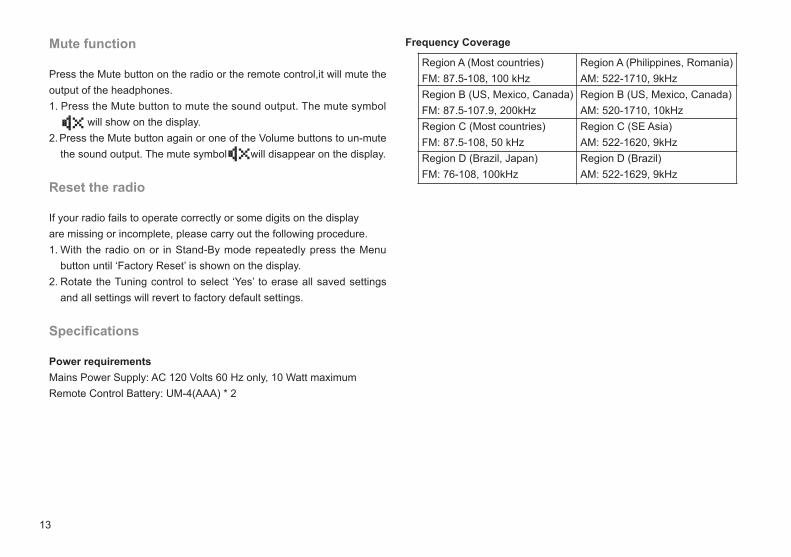
Mute function
Press the Mute button on the radio or the remote control,it will mute the output of the headphones.1. Press the Mute button to mute the sound output. The mute symbol will show on the display.2. Press the Mute button again or one of the Volume buttons to un-mute
the sound output. The mute symbol will disappear on the display.
Reset the radio
If your radio fails to operate correctly or some digits on the displayare missing or incomplete, please carry out the following procedure. 1. With the radio on or in Stand-By mode repeatedly press the Menu
button until ‘Factory Reset’ is shown on the display.2. Rotate the Tuning control to select ‘Yes’ to erase all saved settings
and all settings will revert to factory default settings.
Specifications
Power requirementsMains Power Supply: AC 120 Volts 60 Hz only, 10 Watt maximumRemote Control Battery: UM-4(AAA) * 2
Frequency Coverage
Region A (Most countries)FM: 87.5-108, 100 kHz Region B (US, Mexico, Canada)FM: 87.5-107.9, 200kHz Region C (Most countries)FM: 87.5-108, 50 kHz Region D (Brazil, Japan)FM: 76-108, 100kHz
Region A (Philippines, Romania)AM: 522-1710, 9kHz Region B (US, Mexico, Canada)AM: 520-1710, 10kHz Region C (SE Asia)AM: 522-1620, 9kHz Region D (Brazil)AM: 522-1629, 9kHz
GB
14
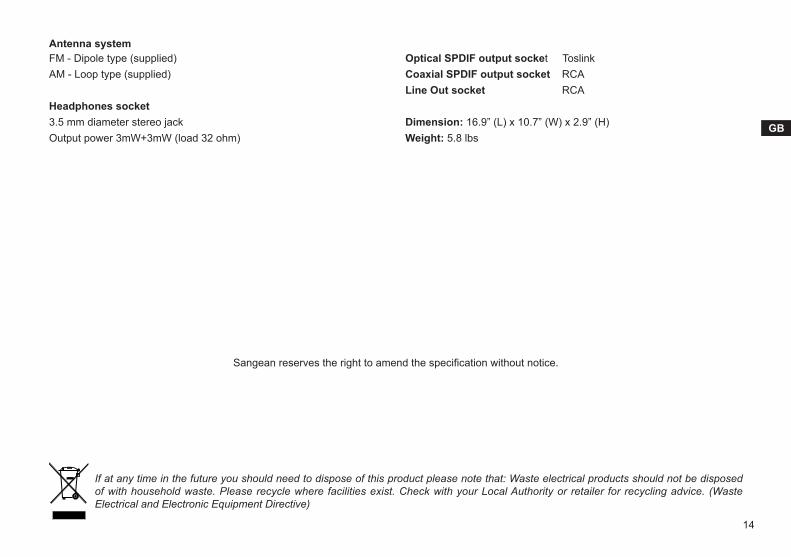
Antenna system FM - Dipole type (supplied)AM - Loop type (supplied)
Headphones socket 3.5 mm diameter stereo jackOutput power 3mW+3mW (load 32 ohm)
Optical SPDIF output socket ToslinkCoaxial SPDIF output socket RCALine Out socket RCA
Dimension: 16.9” (L) x 10.7” (W) x 2.9” (H)Weight: 5.8 lbs
Sangean reserves the right to amend the specification without notice.
If at any time in the future you should need to dispose of this product please note that: Waste electrical products should not be disposed of with household waste. Please recycle where facilities exist. Check with your Local Authority or retailer for recycling advice. (Waste Electrical and Electronic Equipment Directive)