user's guide - expression 12000xl - epson to use, copy, modify, distribute, and sell this...
TRANSCRIPT

User's Guide

CopyrightNo part of this publication may be reproduced, stored in a retrieval system, or transmitted in any form or by anymeans, electronic, mechanical, photocopying, recording, or otherwise, without the prior written permission ofSeiko Epson Corporation. No patent liability is assumed with respect to the use of the information containedherein. Neither is any liability assumed for damages resulting from the use of the information herein. Theinformation contained herein is designed only for use with this Epson product. Epson is not responsible for anyuse of this information as applied to other products.
Neither Seiko Epson Corporation nor its affiliates shall be liable to the purchaser of this product or third parties fordamages, losses, costs, or expenses incurred by the purchaser or third parties as a result of accident, misuse, orabuse of this product or unauthorized modifications, repairs, or alterations to this product, or (excluding the U.S.)failure to strictly comply with Seiko Epson Corporation's operating and maintenance instructions.
Seiko Epson Corporation and its affiliates shall not be liable for any damages or problems arising from the use ofany options or any consumable products other than those designated as Original Epson Products or EpsonApproved Products by Seiko Epson Corporation.
Seiko Epson Corporation shall not be held liable for any damage resulting from electromagnetic interference thatoccurs from the use of any interface cables other than those designated as Epson Approved Products by SeikoEpson Corporation.
General Notice: Other product names used herein are for identification purposes only andmay be trademarks of their respective owners. Epson disclaims any and all rights in thosemarks.
This information is subject to change without notice.
Copyright © 2017 Epson America, Inc.
1/17
CPD-53120
User's Guide
Copyright
2

Trademarks❏ EPSON® is a registered trademark, and EPSON EXCEED YOUR VISION or EXCEED YOUR VISION is a
trademark of Seiko Epson Corporation.
® ®❏ Microsoft andWindows are either registered trademarks or trademarks of Microsoft Corporation in the United States and/or other countries.
❏ Apple®, Mac OS®, and OS X® are trademarks of Apple Inc., registered in the U.S. and other countries.
❏ Adobe®, Adobe Reader®, and Acrobat® are registered trademarks of Adobe Systems Incorporated.
❏ Intel® is a registered trademark of Intel Corporation.
❏ Epson Scan 2 Software is based in part on the work of the Independent JPEG Group.
❏ libtiffCopyright © 1988-1997 Sam LefflerCopyright © 1991-1997 Silicon Graphics, Inc.Permission to use, copy, modify, distribute, and sell this software and its documentation for any purpose ishereby granted without fee, provided that (i) the above copyright notices and this permission notice appear inall copies of the software and related documentation, and (ii) the names of Sam Leffler and Silicon Graphicsmay not be used in any advertising or publicity relating to the software without the specific, prior writtenpermission of Sam Leffler and Silicon Graphics.THE SOFTWARE IS PROVIDED “AS-IS” AND WITHOUT WARRANTY OF ANY KIND, EXPRESS,IMPLIED OR OTHERWISE, INCLUDING WITHOUT LIMITATION, ANY WARRANTY OFMERCHANTABILITY OR FITNESS FOR A PARTICULAR PURPOSE.IN NO EVENT SHALL SAM LEFFLER OR SILICON GRAPHICS BE LIABLE FOR ANY SPECIAL,INCIDENTAL, INDIRECT OR CONSEQUENTIAL DAMAGES OF ANY KIND, OR ANY DAMAGESWHATSOEVER RESULTING FROM LOSS OF USE, DATA OR PROFITS, WHETHER OR NOT ADVISEDOF THE POSSIBILITY OF DAMAGE, AND ON ANY THEORY OF LIABILITY, ARISING OUT OF OR INCONNECTION WITH THE USE OR PERFORMANCE OF THIS SOFTWARE.
❏ General Notice: Other product names used herein are for identification purposes only and may be trademarksof their respective owners. Epson disclaims any and all rights in those marks.
User's Guide
Trademarks
3
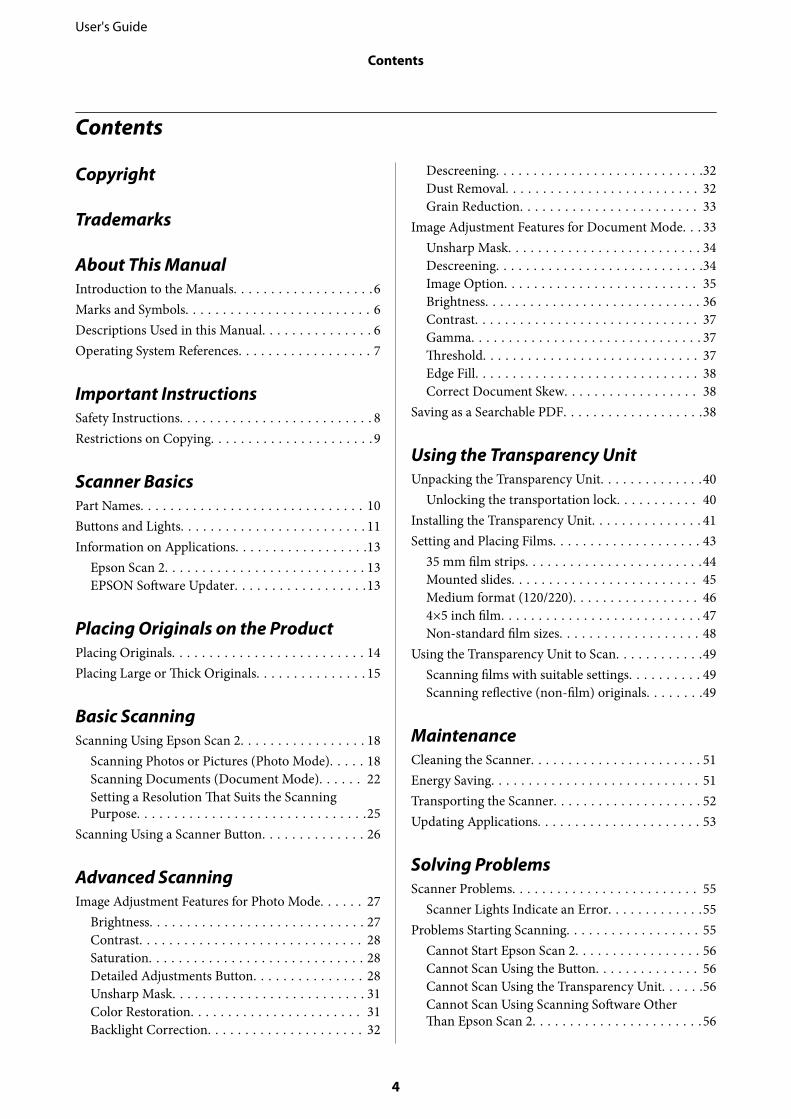
Contents
Copyright
Trademarks
About This ManualIntroduction to the Manuals. . . . . . . . . . . . . . . . . . .6Marks and Symbols. . . . . . . . . . . . . . . . . . . . . . . . . 6Descriptions Used in this Manual. . . . . . . . . . . . . . . 6Operating System References. . . . . . . . . . . . . . . . . . 7
Important InstructionsSafety Instructions. . . . . . . . . . . . . . . . . . . . . . . . . . 8Restrictions on Copying. . . . . . . . . . . . . . . . . . . . . . 9
Scanner BasicsPart Names. . . . . . . . . . . . . . . . . . . . . . . . . . . . . . 10Buttons and Lights. . . . . . . . . . . . . . . . . . . . . . . . . 11Information on Applications. . . . . . . . . . . . . . . . . .13
Epson Scan 2. . . . . . . . . . . . . . . . . . . . . . . . . . . 13EPSON Software Updater. . . . . . . . . . . . . . . . . .13
Placing Originals on the ProductPlacing Originals. . . . . . . . . . . . . . . . . . . . . . . . . . 14Placing Large or Thick Originals. . . . . . . . . . . . . . . 15
Basic ScanningScanning Using Epson Scan 2. . . . . . . . . . . . . . . . . 18
Scanning Photos or Pictures (Photo Mode). . . . . 18Scanning Documents (Document Mode). . . . . . 22Setting a Resolution That Suits the ScanningPurpose. . . . . . . . . . . . . . . . . . . . . . . . . . . . . . .25
Scanning Using a Scanner Button. . . . . . . . . . . . . . 26
Advanced ScanningImage Adjustment Features for Photo Mode. . . . . . 27
Brightness. . . . . . . . . . . . . . . . . . . . . . . . . . . . . 27Contrast. . . . . . . . . . . . . . . . . . . . . . . . . . . . . . 28Saturation. . . . . . . . . . . . . . . . . . . . . . . . . . . . . 28Detailed Adjustments Button. . . . . . . . . . . . . . . 28Unsharp Mask. . . . . . . . . . . . . . . . . . . . . . . . . . 31Color Restoration. . . . . . . . . . . . . . . . . . . . . . . 31Backlight Correction. . . . . . . . . . . . . . . . . . . . . 32
Descreening. . . . . . . . . . . . . . . . . . . . . . . . . . . .32Dust Removal. . . . . . . . . . . . . . . . . . . . . . . . . . 32Grain Reduction. . . . . . . . . . . . . . . . . . . . . . . . 33
Image Adjustment Features for Document Mode. . . 33Unsharp Mask. . . . . . . . . . . . . . . . . . . . . . . . . . 34Descreening. . . . . . . . . . . . . . . . . . . . . . . . . . . .34Image Option. . . . . . . . . . . . . . . . . . . . . . . . . . 35Brightness. . . . . . . . . . . . . . . . . . . . . . . . . . . . . 36Contrast. . . . . . . . . . . . . . . . . . . . . . . . . . . . . . 37Gamma. . . . . . . . . . . . . . . . . . . . . . . . . . . . . . . 37Threshold. . . . . . . . . . . . . . . . . . . . . . . . . . . . . 37Edge Fill. . . . . . . . . . . . . . . . . . . . . . . . . . . . . . 38Correct Document Skew. . . . . . . . . . . . . . . . . . 38
Saving as a Searchable PDF. . . . . . . . . . . . . . . . . . .38
Using the Transparency UnitUnpacking the Transparency Unit. . . . . . . . . . . . . .40
Unlocking the transportation lock. . . . . . . . . . . 40Installing the Transparency Unit. . . . . . . . . . . . . . . 41Setting and Placing Films. . . . . . . . . . . . . . . . . . . . 43
35 mm film strips. . . . . . . . . . . . . . . . . . . . . . . .44Mounted slides. . . . . . . . . . . . . . . . . . . . . . . . . 45Medium format (120/220). . . . . . . . . . . . . . . . . 464×5 inch film. . . . . . . . . . . . . . . . . . . . . . . . . . . 47Non-standard film sizes. . . . . . . . . . . . . . . . . . . 48
Using the Transparency Unit to Scan. . . . . . . . . . . .49Scanning films with suitable settings. . . . . . . . . . 49Scanning reflective (non-film) originals. . . . . . . .49
MaintenanceCleaning the Scanner. . . . . . . . . . . . . . . . . . . . . . . 51Energy Saving. . . . . . . . . . . . . . . . . . . . . . . . . . . . 51Transporting the Scanner. . . . . . . . . . . . . . . . . . . . 52Updating Applications. . . . . . . . . . . . . . . . . . . . . . 53
Solving ProblemsScanner Problems. . . . . . . . . . . . . . . . . . . . . . . . . 55
Scanner Lights Indicate an Error. . . . . . . . . . . . .55Problems Starting Scanning. . . . . . . . . . . . . . . . . . 55
Cannot Start Epson Scan 2. . . . . . . . . . . . . . . . . 56Cannot Scan Using the Button. . . . . . . . . . . . . . 56Cannot Scan Using the Transparency Unit. . . . . .56Cannot Scan Using Scanning Software OtherThan Epson Scan 2. . . . . . . . . . . . . . . . . . . . . . .56
User's Guide
Contents
4

Scanned Image Problems. . . . . . . . . . . . . . . . . . . . 57Uneven Colors, Dirt, Spots, and so on Appearwhen Scanning from the Scanner Glass. . . . . . . . 57The Image Quality is Rough. . . . . . . . . . . . . . . . 57Offset Appears in the Background of Images. . . . 57Text is Blurred. . . . . . . . . . . . . . . . . . . . . . . . . . 58Moiré Patterns (Web-Like Shadows) Appear. . . . 58Cannot Scan the Correct Area on theScanner Glass. . . . . . . . . . . . . . . . . . . . . . . . . . 58Cannot Preview in Thumbnail. . . . . . . . . . . . . . 59Cannot Achieve the Results Intended in AutoPhoto Orientation. . . . . . . . . . . . . . . . . . . . . . . 59Text is Not Recognized Correctly whenSaving as a Searchable PDF. . . . . . . . . . . . . . . . .59Binding Margins of a Booklet are Distortedor Blurred. . . . . . . . . . . . . . . . . . . . . . . . . . . . . 60Cannot Solve Problems in the Scanned Image. . . 60Striped Rings Appear in Scanned Images ofFilm or Slides. . . . . . . . . . . . . . . . . . . . . . . . . . .60Colors Differ From the Original Colors forFilm or Slide Images. . . . . . . . . . . . . . . . . . . . . .60Negative Film Preview Images Look Strange. . . . 61
Problems With Scanning Time. . . . . . . . . . . . . . . . 61Uninstalling and Installing Applications. . . . . . . . . 61
Uninstalling Your Applications. . . . . . . . . . . . . . 61Installing Your Applications. . . . . . . . . . . . . . . . 63
Technical SpecificationsGeneral Scanner Specifications. . . . . . . . . . . . . . . . 64Dimensional Specifications. . . . . . . . . . . . . . . . . . .64Electrical Specifications. . . . . . . . . . . . . . . . . . . . . 64Environmental Specifications. . . . . . . . . . . . . . . . . 65Interface Specifications. . . . . . . . . . . . . . . . . . . . . .65System Requirements. . . . . . . . . . . . . . . . . . . . . . . 66
Standards and ApprovalsStandards and Approvals for U.S. Model. . . . . . . . . 67Standards and Approvals for European Model. . . . . 67Standards and Approvals for Australian Model. . . . 67
Where to Get HelpHelp for Users in the U.S. and Canada. . . . . . . . . . . 68
User's Guide
Contents
5
About This Manual
Marks and Symbols
!Caution:
Instructions that must be followed carefully to avoid bodily injury.
cImportant:
Instructions that must be observed to avoid damage to your equipment.
Note:Provides complementary and reference information.
Related Information
& Links to related sections.
Descriptions Used in this Manual❏ Screenshots for the applications are from Windows 10 or Mac OS X v10.10.x. The content displayed on the
screens varies depending on the model and situation.
❏ Illustrations used in this manual are for reference only. Although they may differ slightly from the actualproduct, the operating methods are the same.
User's Guide
About This Manual
6
Operating System References
WindowsIn this manual, terms such as "Windows 10", "Windows 8.1", "Windows 8", or "Windows 7" refer to the following operating systems. Additionally, "Windows" is used to refer to all versions.
® Windows® 10 operating system
® Windows® 8.1 operating system
® Windows® 8 operating system
® Windows® 7 operating system
❏ Microsoft
❏ Microsoft
❏ Microsoft
❏ Microsoft
Mac
In this manual, "macOS v10.12.x" refers to macOS Sierra, "Mac OS X v10.11.x" refers to OS X El Capitan, "Mac OS X v10.10.x" refers to OS X Yosemite, "Mac OS X v10.9.x" refers to OS X Mavericks, and "Mac OS X v10.8.x" refers to OS X Mountain Lion. Additionally, "Mac" is used to refer to "macOS v10.12.x", "Mac OS X v10.11.x", "Mac OS X v10.10.x", "Mac OS X v10.9.x", "Mac OS X v10.8.x", "Mac OS X v10.7.x", and "Mac OS X v10.6.8".
User's Guide
About This Manual
7

Important Instructions
Safety InstructionsRead all these instructions, and follow all warnings and instructions marked on the product.
❏ Some of the symbols used on your product are to ensure safety and proper use of the product. Visit thefollowing Web site to learn the meaning of the symbols.http://support.epson.net/symbols
❏ Place the product on a flat, stable surface that extends beyond the base of the product in all directions. If youplace the product by the wall, leave more than 10 cm between the back of the product and the wall. The productwill not operate properly if it is tilted at an angle.
❏ Avoid places subject to dust, shocks, or vibrations.
❏ Place the product close enough to the computer for the interface cable to reach it easily. Do not place or storethe product or the power cord outdoors, near excessive dirt or dust, water, heat sources, or in locations subjectto shocks, vibrations, high temperature or humidity, direct sunlight, strong light sources, or rapid changes intemperature or humidity.
❏ Do not use with wet hands.
❏ Place the product near an electrical outlet where the power cord plug can be easily unplugged.
❏ The power cord should be placed to avoid abrasions, cuts, fraying, crimping, and kinking. Do not place objectson top of the cord and do not allow the power cord to be stepped on or run over. Be particularly careful to keepthe cord straight at the end.
❏ Use only the power cord supplied with the product and do not use the cord with any other equipment. Use ofother cords with this product or the use of the supplied power cord with other equipment may result in fire orelectric shock.
❏ Use only the type of power source indicated on the product’s label, and always supply power directly from astandard domestic electrical outlet.
❏ When connecting this product to a computer or other device with a cable, ensure the correct orientation of theconnectors. Each connector has only one correct orientation. Inserting a connector in the wrong orientationmay damage both devices connected by the cable.
❏ Avoid using outlets on the same circuit as photocopiers or air control systems that regularly switch on and off.
❏ If you use an extension cord with the product, make sure the total ampere rating of the devices plugged into theextension cord does not exceed the cord’s ampere rating. Also, make sure the total ampere rating of all devicesplugged into the wall outlet does not exceed the wall outlet’s ampere rating.
❏ Never disassemble, modify, or attempt to repair the product, or product option by yourself except as specificallyexplained in the product’s guides.
❏ Do not insert objects into any opening as they may touch dangerous voltage points or short out parts. Beware ofelectrical shock hazards.
❏ If damage occurs to the plug, replace the cord set or consult a qualified electrician. If there are fuses in the plug,make sure you replace them with fuses of the correct size and rating.
❏ Unplug the product and the power cord, and refer servicing to qualified service personnel under the followingconditions: The power cord or plug is damaged; liquid has entered the product; the product or the power cordhas been dropped or the case has been damaged; the product or the power cord does not operate normally orexhibits a distinct change in performance. (Do not adjust controls that are not covered by the operatinginstructions.)
User's Guide
Important Instructions
8
❏ Unplug the product and the power cord before cleaning. Clean with a damp cloth only. Do not use liquid oraerosol cleaners.
❏ If you are not going to use the product or options for a long period, be sure to unplug the power cord from theelectrical outlet.
❏ After replacing consumable parts, dispose of them correctly following the rules of your local authority. Do notdisassemble them.
❏ Because the product is heavy, one person should never attempt to lift or carry it alone. Two people should liftand carry the product.
❏ Do not place heavy objects on the scanner glass and do not press the glass with too much force.
Restrictions on CopyingObserve the following restrictions to ensure the responsible and legal use of your product.
Copying of the following items is prohibited by law:
❏ Bank bills, coins, government-issued marketable securities, government bond securities, and municipalsecurities
❏ Unused postage stamps, pre-stamped postcards, and other official postal items bearing valid postage
❏ Government-issued revenue stamps, and securities issued according to legal procedure
Exercise caution when copying the following items:
❏ Private marketable securities (stock certificates, negotiable notes, checks, etc.), monthly passes, concessiontickets, etc.
❏ Passports, driver’s licenses, warrants of fitness, road passes, food stamps, tickets, etc.
Note:Copying these items may also be prohibited by law.
Responsible use of copyrighted materials:
Products can be misused by improperly copying copyrighted materials. Unless acting on the advice of aknowledgeable attorney, be responsible and respectful by obtaining the permission of the copyright holder beforecopying published material.
User's Guide
Important Instructions
9
Scanner Basics
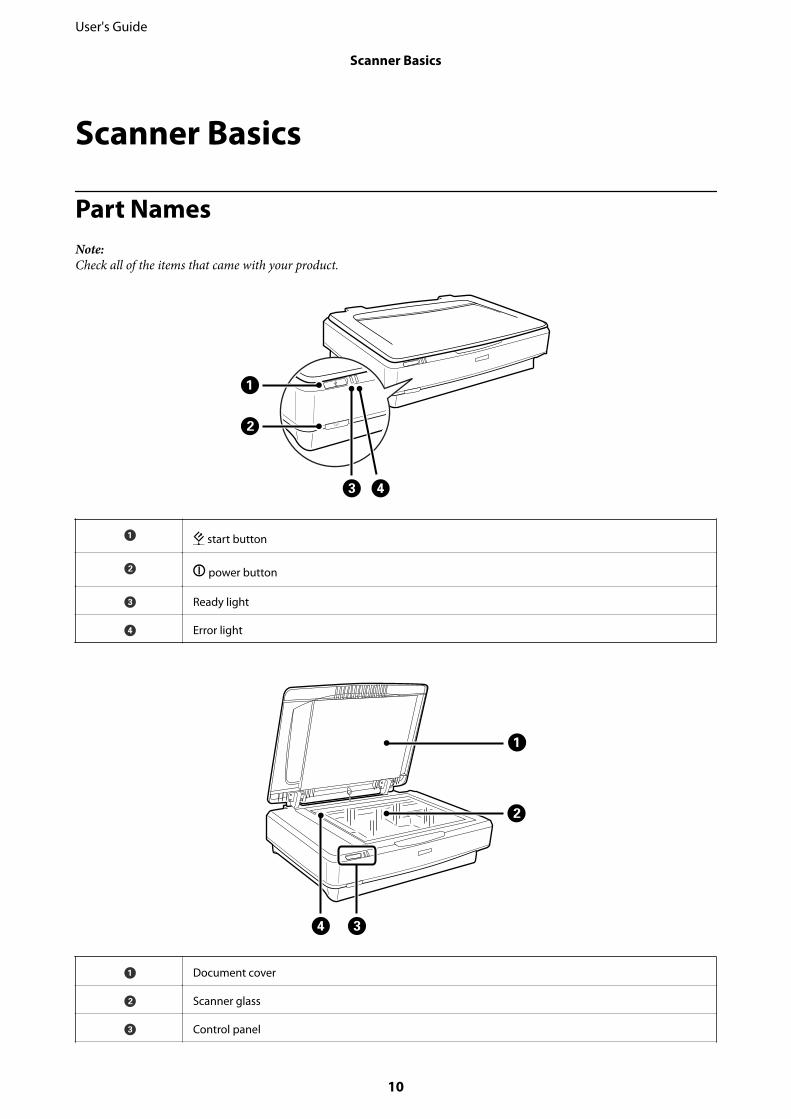
Part NamesNote:Check all of the items that came with your product.
A a start button
B . power button
C Ready light
D Error light
A Document cover
B Scanner glass
C Control panel
User's Guide
Scanner Basics
10
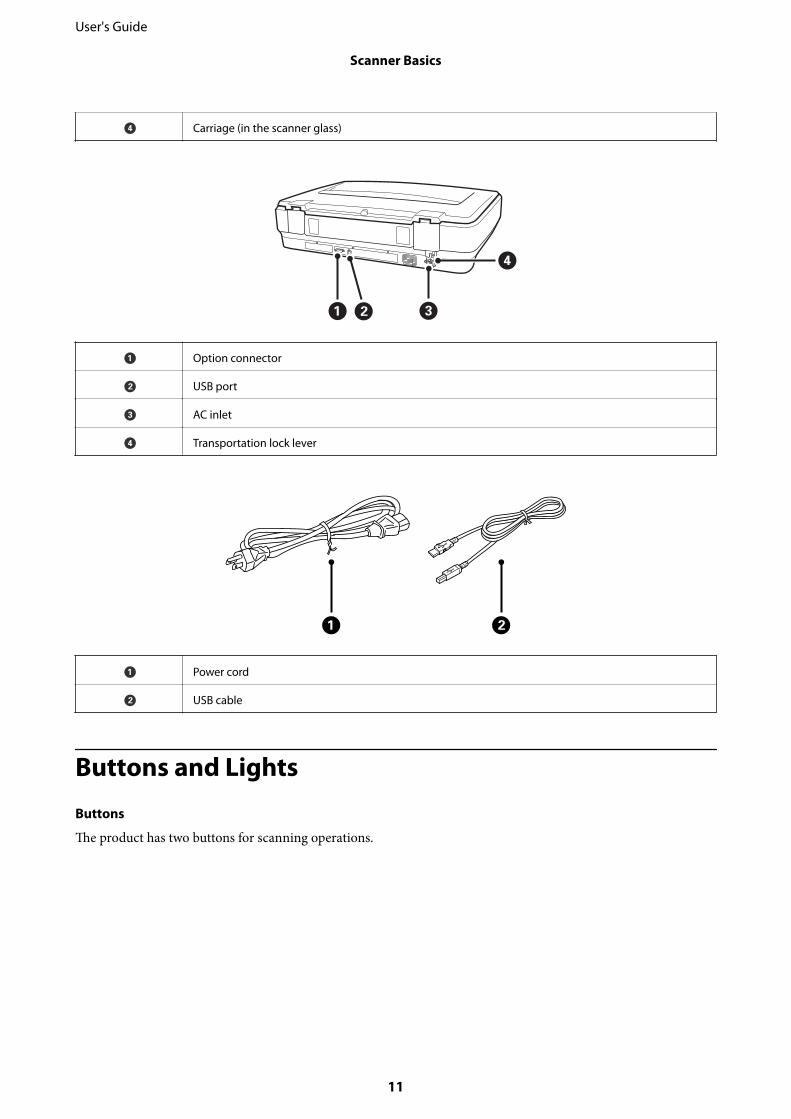
D Carriage (in the scanner glass)
A Option connector
B USB port
C AC inlet
D Transportation lock lever
A Power cord
B USB cable
Buttons and Lights
Buttons
The product has two buttons for scanning operations.
User's Guide
Scanner Basics
11
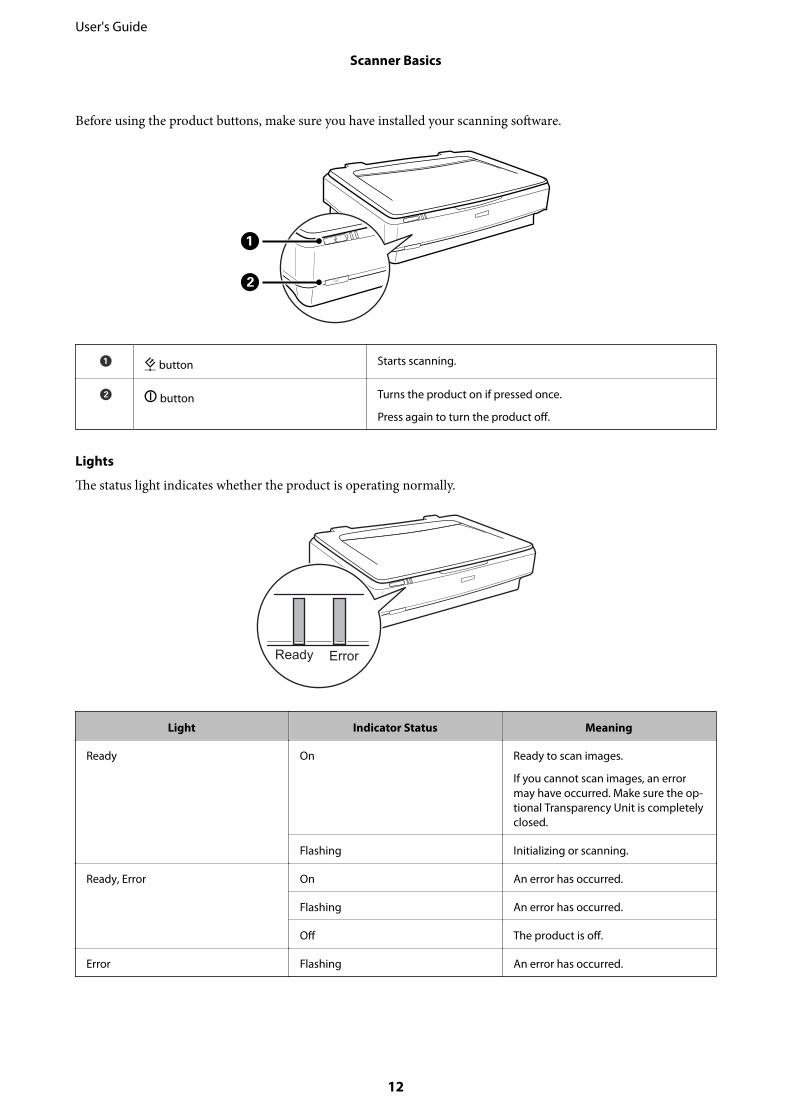
Before using the product buttons, make sure you have installed your scanning software.
A a button Starts scanning.
B . button Turns the product on if pressed once.
Press again to turn the product off.
Lights
The status light indicates whether the product is operating normally.
Light Indicator Status Meaning
Ready On Ready to scan images.
If you cannot scan images, an errormay have occurred. Make sure the op-tional Transparency Unit is completelyclosed.
Flashing Initializing or scanning.
Ready, Error On An error has occurred.
Flashing An error has occurred.
Off The product is off.
Error Flashing An error has occurred.
User's Guide
Scanner Basics
12

Related Information
& “Scanning Using a Scanner Button” on page 26& “Scanner Lights Indicate an Error” on page 55
Information on ApplicationsThis section introduces the software products available for your scanner. The latest software can be installed at theEpson Web site.
Epson Scan 2Epson Scan 2 is a driver for controlling your scanner, enabling a variety of scan settings. This also allows you tostart either as a standalone application or by using TWAIN-compliant application software.
See the Epson Scan 2 help for details on using the application.
Related Information
& “Scanning Using Epson Scan 2” on page 18
EPSON Software UpdaterEPSON Software Updater is an application that checks for new or updated applications on the internet and installsthem.
Related Information
& “Updating Applications” on page 53
User's Guide
Scanner Basics
13

Placing Originals on the Product
cImportant:
Do not place heavy objects on the scanner glass and do not press the glass with too much force.
Placing Originals1. Open the document cover.
2. Place your original face down on the scanner glass making sure the top corner of the side you want to scan isaligned with the d mark.
Note:If you are scanning multiple originals at once, position each original at least 20 mm (0.8 inch) apart from the others.
User's Guide
Placing Originals on the Product
14
3. Close the document cover gently so that your original does not move.
Note:❏ Always keep the scanner glass clean.
❏ Do not leave originals on the scanner glass for an extended period of time as they may stick to the glass.
Related Information
& “Basic Scanning” on page 18
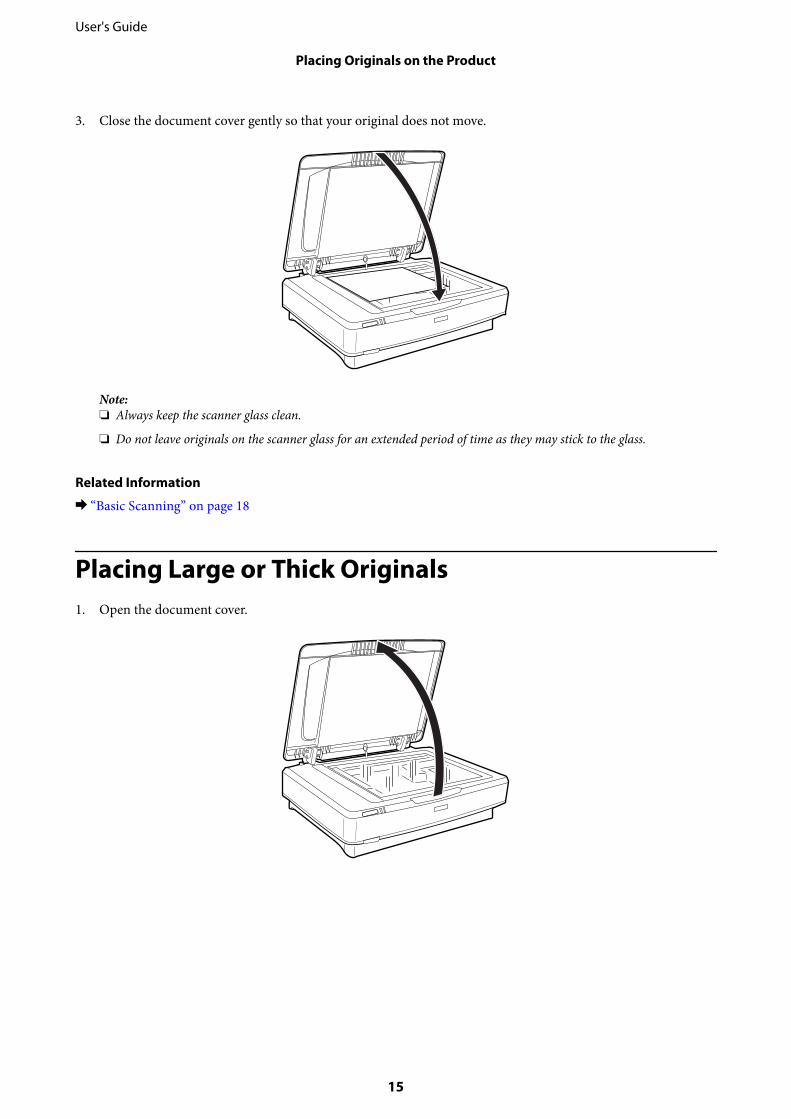
Placing Large or Thick Originals1. Open the document cover.
User's Guide
Placing Originals on the Product
15

If the size of the original exceeds the size of the document cover, you can lift the document cover straight upand remove it to make it easier to align the original. When you have finished scanning, replace the documentcover in the reverse order that you removed it.
cImportant:
❏ Before removing the document cover, make sure you raise it to the upright position to prevent the hingesfrom snapping back on the springs.
❏ Do not force the cover off the scanner; otherwise, the cover may be damaged.
2. Place a large or thick original face-down on the scanner glass. Make sure the top corner of the original isaligned with the d mark.
User's Guide
Placing Originals on the Product
16
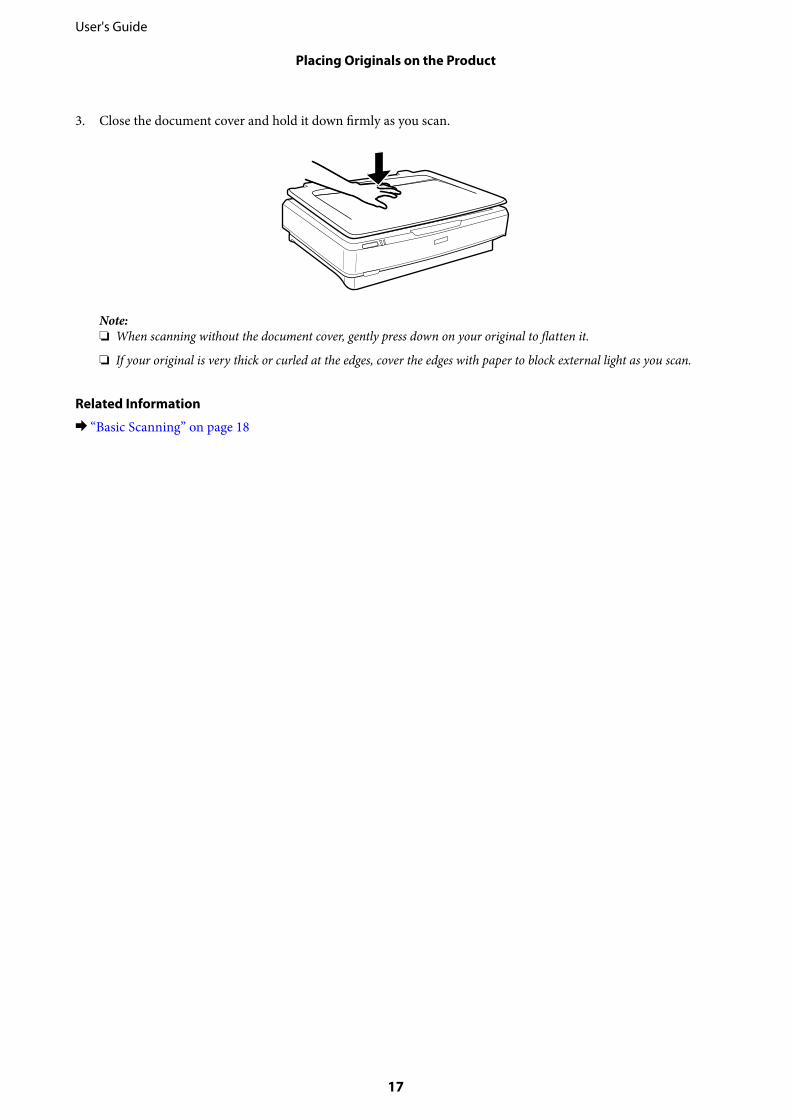
3. Close the document cover and hold it down firmly as you scan.
Note:❏ When scanning without the document cover, gently press down on your original to flatten it.
❏ If your original is very thick or curled at the edges, cover the edges with paper to block external light as you scan.
Related Information
& “Basic Scanning” on page 18
User's Guide
Placing Originals on the Product
17
Basic Scanning
Scanning Using Epson Scan 2
Scanning Photos or Pictures (Photo Mode)Using Photo Mode in Epson Scan 2, you can scan the originals using a wide variety of image adjustment featuresthat are suitable for photos or pictures.
1. Place the originals.When placing multiple originals on the scanner glass, you can scan them all at the same time. Make sure thereis a gap of at least 20 mm (0.8 in.) between the originals.
2. Start Epson Scan 2.
❏ Windows 10Click the start button, and then select All apps > EPSON > Epson Scan 2.
❏ Windows 8.1/Windows 8Enter the application name in the search charm, and then select the displayed icon.
❏ Windows 7Click the start button, and select All Programs or Programs > EPSON > Epson Scan 2 > Epson Scan 2.
❏ MacSelect Go > Applications > Epson Software > Epson Scan 2.
3. Select Photo Mode from the Mode list.
User's Guide
Basic Scanning
18

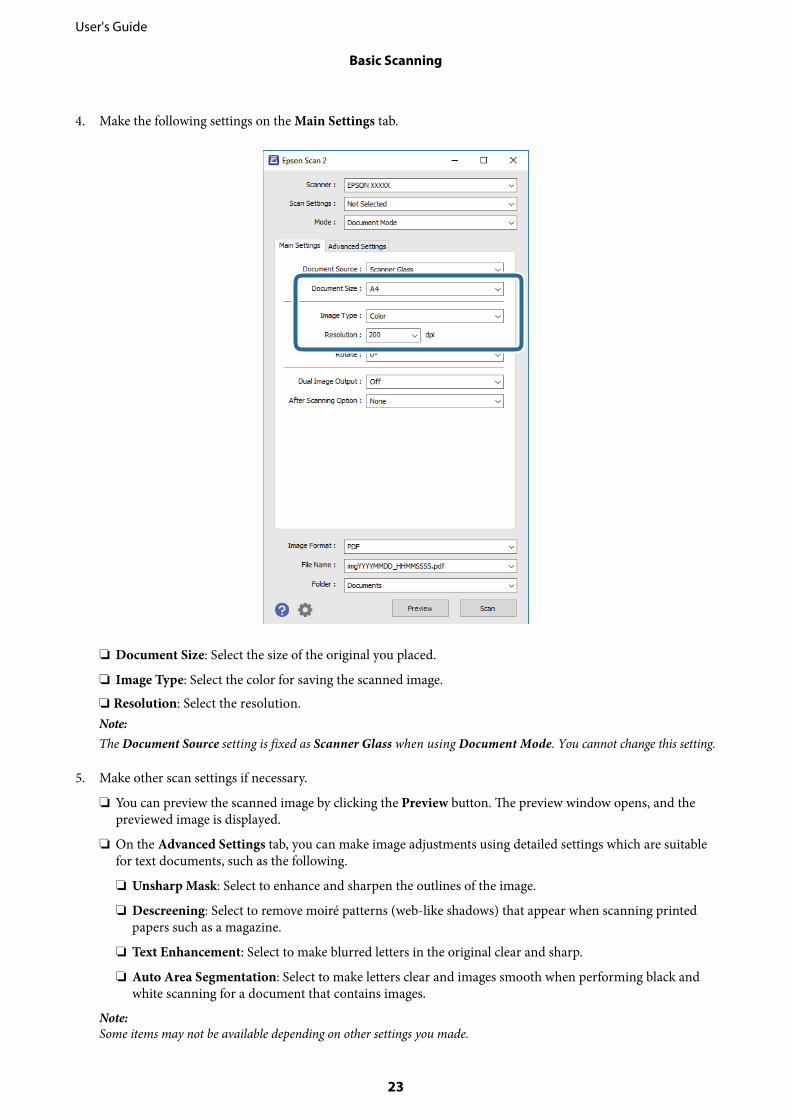
4. Make the following settings on the Main Settings tab.
❏ Image Type: Select the color for saving the scanned image.
❏ Resolution: Select the resolution.
Note:When scanning films using the Transparency Unit, set the Document Source and Document Type as well.
User's Guide
Basic Scanning
19

5. Click Preview.
The preview window opens, and the previewed image is displayed as thumbnails.
Note:To preview the entire scanned area, select Normal from the list on the top of the preview window.
6. Check the preview, and make image adjustment settings on the Advanced Settings tab if necessary.
User's Guide
Basic Scanning
20

You can adjust the scanned image using detailed settings which are suitable for photos or pictures, such as thefollowing.
❏ Brightness: Select to adjust the brightness for the scanned image.
❏ Contrast: Select to adjust the contrast for the scanned image.
❏ Saturation: Select to adjust the saturation (color vividness) for the scanned image.
❏ Unsharp Mask: Select to enhance and sharpen the outlines for the scanned image.
❏ Color Restoration: Select to correct images that have faded to return them to their original colors.
❏ Backlight Correction: Select to lighten scanned images that are dark due to backlight.
❏ Descreening: Select to remove moiré patterns (web-like shadows) that appear when scanning printedpapers such as a magazine.
❏ Dust Removal: Select to remove dust on the scanned image.
Note:❏ Some items may not be available depending on other settings you made.
❏ Depending on the original, the scanned image may not be adjusted correctly.
❏ When multiple thumbnails are created, you can adjust the image quality for each thumbnail. Depending on theadjustment items, you can adjust the quality of scanned images at the same time by selecting multiple thumbnails.
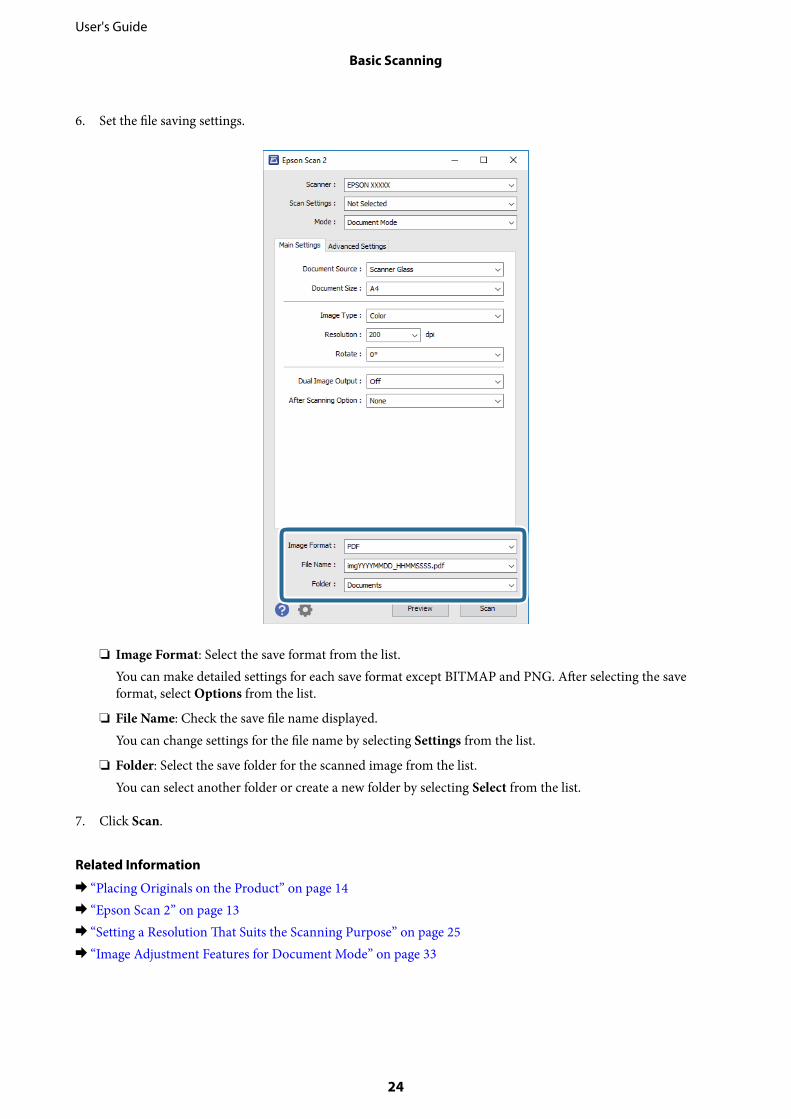
7. Set the file saving settings.
❏ Image Format: Select the save format from the list.You can make detailed settings for each save format except BITMAP and PNG. After selecting the saveformat, select Options from the list.
❏ File Name: Check the save file name displayed.You can change settings for the file name by selecting Settings from the list.
User's Guide
Basic Scanning
21

❏ Folder: Select the save folder for the scanned image from the list.You can select another folder or create a new folder by selecting Select from the list.
8. Click Scan.
Related Information
& “Placing Originals on the Product” on page 14& “Epson Scan 2” on page 13& “Setting a Resolution That Suits the Scanning Purpose” on page 25& “Image Adjustment Features for Photo Mode” on page 27
Scanning Documents (Document Mode)Using Document Mode in Epson Scan 2, you can scan the originals using detailed settings that are suitable for textdocuments.
Note:You cannot scan negatives with the Transparency Unit when using Document Mode.
1. Place the originals.
2. Start Epson Scan 2.
❏ Windows 10Click the start button, and then select All apps > EPSON > Epson Scan 2.
❏ Windows 8.1/Windows 8Enter the application name in the search charm, and then select the displayed icon.
❏ Windows 7Click the start button, and select All Programs or Programs > EPSON > Epson Scan 2 > Epson Scan 2.
❏ MacSelect Go > Applications > Epson Software > Epson Scan 2.
3. Select Document Mode from the Mode list.
User's Guide
Basic Scanning
22
4. Make the following settings on the Main Settings tab.
❏ Document Size: Select the size of the original you placed.
❏ Image Type: Select the color for saving the scanned image.
❏ Resolution: Select the resolution.Note:The Document Source setting is fixed as Scanner Glass when using Document Mode. You cannot change this setting.
5. Make other scan settings if necessary.
❏ You can preview the scanned image by clicking the Preview button. The preview window opens, and thepreviewed image is displayed.
❏ On the Advanced Settings tab, you can make image adjustments using detailed settings which are suitablefor text documents, such as the following.
❏ Unsharp Mask: Select to enhance and sharpen the outlines of the image.
❏ Descreening: Select to remove moiré patterns (web-like shadows) that appear when scanning printedpapers such as a magazine.
❏ Text Enhancement: Select to make blurred letters in the original clear and sharp.
❏ Auto Area Segmentation: Select to make letters clear and images smooth when performing black andwhite scanning for a document that contains images.
Note:Some items may not be available depending on other settings you made.
User's Guide
Basic Scanning
23
6. Set the file saving settings.
❏ Image Format: Select the save format from the list.You can make detailed settings for each save format except BITMAP and PNG. After selecting the saveformat, select Options from the list.
❏ File Name: Check the save file name displayed.You can change settings for the file name by selecting Settings from the list.
❏ Folder: Select the save folder for the scanned image from the list.You can select another folder or create a new folder by selecting Select from the list.
7. Click Scan.
Related Information
& “Placing Originals on the Product” on page 14& “Epson Scan 2” on page 13& “Setting a Resolution That Suits the Scanning Purpose” on page 25& “Image Adjustment Features for Document Mode” on page 33
User's Guide
Basic Scanning
24

Setting a Resolution
Advantages and Disadvantages of Increasing the Resolution
Resolution indicates the number of pixels (smallest area of an image) for each inch (25.4 mm), and is measured indpi (dots per inch). The advantage of increasing the resolution is that the details in the image become fine. Thedisadvantage is that the file size becomes large.
❏ File size becomes large(When you double the resolution, the file size becomes about four times larger.)
❏ Scanning, saving, and reading the image takes a long time
❏ Sending and receiving emails or faxes takes a long time
❏ The image becomes too large to fit the display or print on the paper
List of Recommended Resolutions
See the table and set the appropriate resolution for the purpose of your scanned image.
Purpose Resolution (Reference)
Displaying on a screen
Sending by email
Up to 200 dpi
Film Archiving 1,200 to 2,400 dpi
Using Optical Character Recognition (OCR)
Creating a text searchable PDF
200 to 300 dpi
Printing using a printer
Sending by fax
200 to 300 dpi
User's Guide
Basic Scanning
25

Scanning Using a Scanner ButtonYou can scan using the button on your scanner.
Note:Before using this feature, check the following.
❏ Epson Scan 2 is installed on your computer.
❏ The scanner is connected to your computer correctly.
1. Place the original.
2. Press the a button.
Epson Scan 2 starts.
3. Make scan settings if necessary, and then press the a button again.
Scanning starts.
Related Information
& “Part Names” on page 10& “Placing Originals on the Product” on page 14
User's Guide
Basic Scanning
26

Advanced Scanning
Image Adjustment Features for Photo ModeYou can adjust scanned images using the features on the Advanced Settings tab in Epson Scan 2.
For Photo Mode, you can use image adjustment features that are suitable for photos or pictures.
For most features, you can check the adjustment results in the preview window.
Note:Some items may not be available depending on other settings you made.
BrightnessYou can adjust the brightness for the whole image.
Note:This feature is not available depending on the settings on the Main Settings tab > Image Type or the settings on theAdvanced Settings tab.
User's Guide
Advanced Scanning
27

ContrastYou can adjust the contrast for the whole image. If you increase the contrast, the bright areas become brighter, andthe dark areas become darker. On the other hand, if you lower the contrast, the differences between the bright anddark areas of the image are less defined.
Note:This feature is not available depending on the settings on the Main Settings tab > Image Type or the settings on theAdvanced Settings tab.
SaturationYou can adjust the saturation (color vividness) for the whole image. When you increase the saturation, the colorsbecome vivid. On the other hand, when you lower the saturation, the color becomes neutral (gray).
Note:This feature is not available depending on the settings in Image Type on the Main Settings tab.
Detailed Adjustments ButtonYou can click this button to display the Detailed Adjustments screen.
Detailed Adjustments Screen
You can adjust the image quality for the scanned image by using a histogram or tone curve. This allows you tooutput high-quality images while keeping image degradation to a minimum.
Reset buttonReturns adjustments made on the Detailed Adjustments screen to their defaults.
User's Guide
Advanced Scanning
28
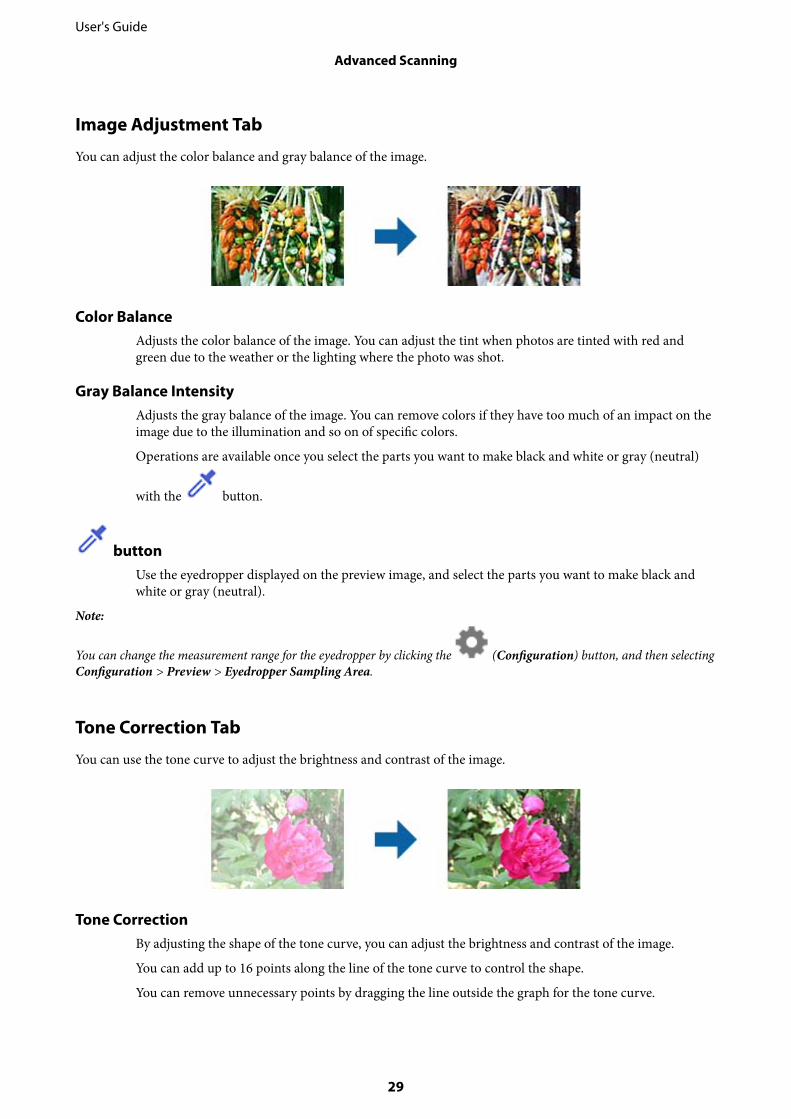
Image Adjustment Tab
You can adjust the color balance and gray balance of the image.
Color BalanceAdjusts the color balance of the image. You can adjust the tint when photos are tinted with red andgreen due to the weather or the lighting where the photo was shot.
Gray Balance IntensityAdjusts the gray balance of the image. You can remove colors if they have too much of an impact on theimage due to the illumination and so on of specific colors.
Operations are available once you select the parts you want to make black and white or gray (neutral)
with the button.
buttonUse the eyedropper displayed on the preview image, and select the parts you want to make black andwhite or gray (neutral).
Note:
You can change the measurement range for the eyedropper by clicking the (Configuration) button, and then selectingConfiguration > Preview > Eyedropper Sampling Area.
Tone Correction Tab
You can use the tone curve to adjust the brightness and contrast of the image.
Tone CorrectionBy adjusting the shape of the tone curve, you can adjust the brightness and contrast of the image.
You can add up to 16 points along the line of the tone curve to control the shape.
You can remove unnecessary points by dragging the line outside the graph for the tone curve.
User's Guide
Advanced Scanning
29
ChannelSelect the color (RGB) to be adjusted using the tone curve.
PresetStandard tone curves have already been registered. We recommend fine-tuning the tone curve afterselecting an item that best suits your needs.
When selecting Linear, the tone curve becomes a straight line (density is not corrected).
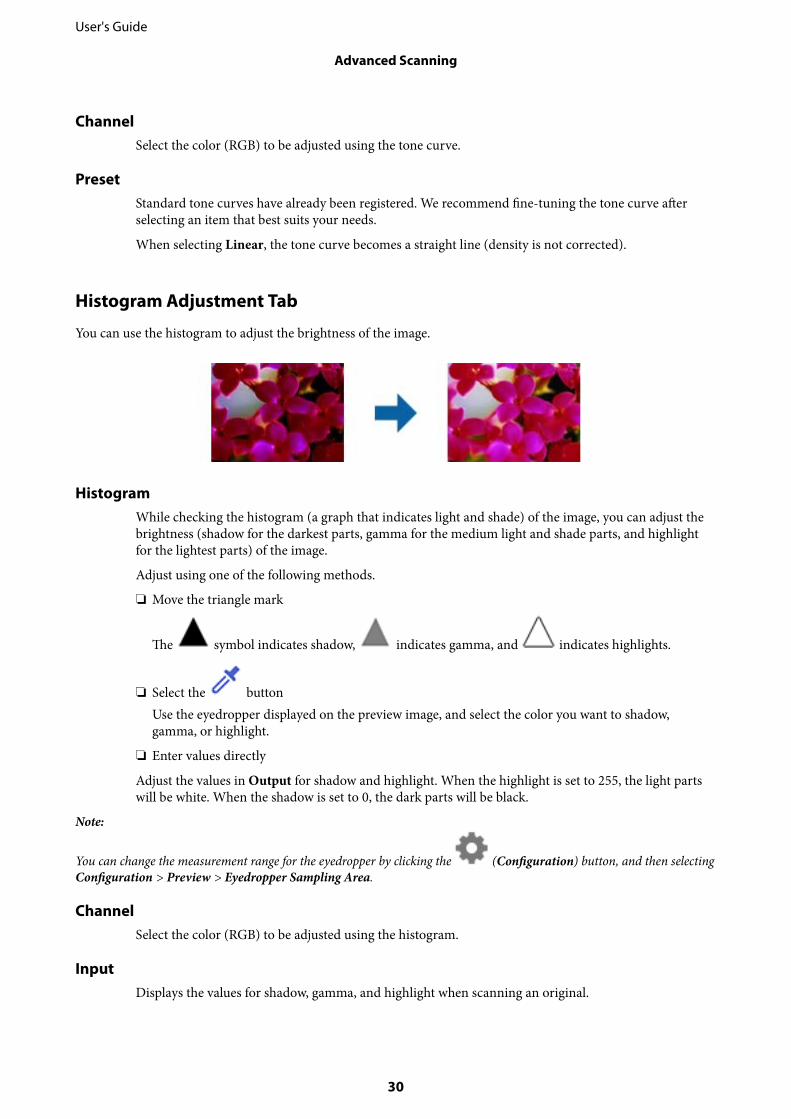
Histogram Adjustment Tab
You can use the histogram to adjust the brightness of the image.
HistogramWhile checking the histogram (a graph that indicates light and shade) of the image, you can adjust thebrightness (shadow for the darkest parts, gamma for the medium light and shade parts, and highlightfor the lightest parts) of the image.
Adjust using one of the following methods.
❏ Move the triangle mark
The symbol indicates shadow, indicates gamma, and indicates highlights.
❏ Select the buttonUse the eyedropper displayed on the preview image, and select the color you want to shadow,gamma, or highlight.
❏ Enter values directly
Adjust the values in Output for shadow and highlight. When the highlight is set to 255, the light partswill be white. When the shadow is set to 0, the dark parts will be black.
Note:
You can change the measurement range for the eyedropper by clicking the (Configuration) button, and then selectingConfiguration > Preview > Eyedropper Sampling Area.
ChannelSelect the color (RGB) to be adjusted using the histogram.
InputDisplays the values for shadow, gamma, and highlight when scanning an original.
User's Guide
Advanced Scanning
30
OutputDisplays the values for the previous shadow and highlight adjustments.
Tone CurveDisplays the density for the output value for the image input value.
Adjusts the density outside of the shadow or highlight parts set in Histogram.
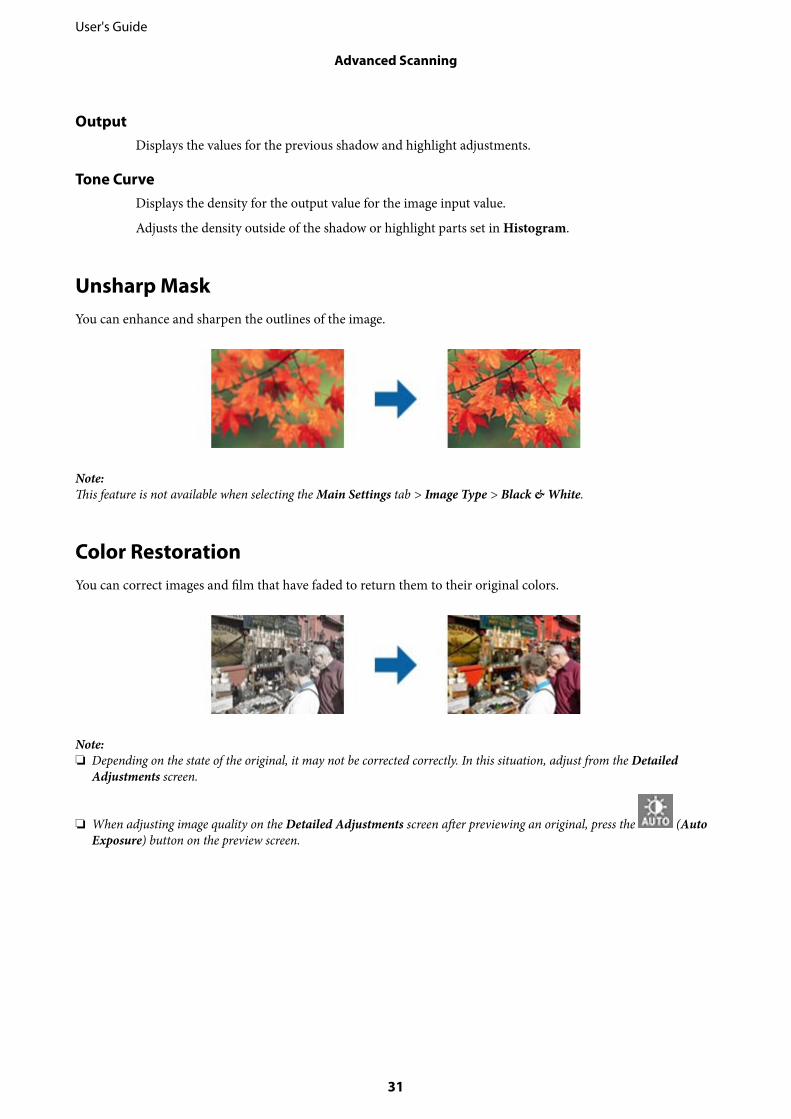
Unsharp MaskYou can enhance and sharpen the outlines of the image.
Note:This feature is not available when selecting the Main Settings tab > Image Type > Black & White.
Color RestorationYou can correct images and film that have faded to return them to their original colors.
Note:❏ Depending on the state of the original, it may not be corrected correctly. In this situation, adjust from the Detailed
Adjustments screen.
❏ When adjusting image quality on the Detailed Adjustments screen after previewing an original, press the (AutoExposure) button on the preview screen.
User's Guide
Advanced Scanning
31
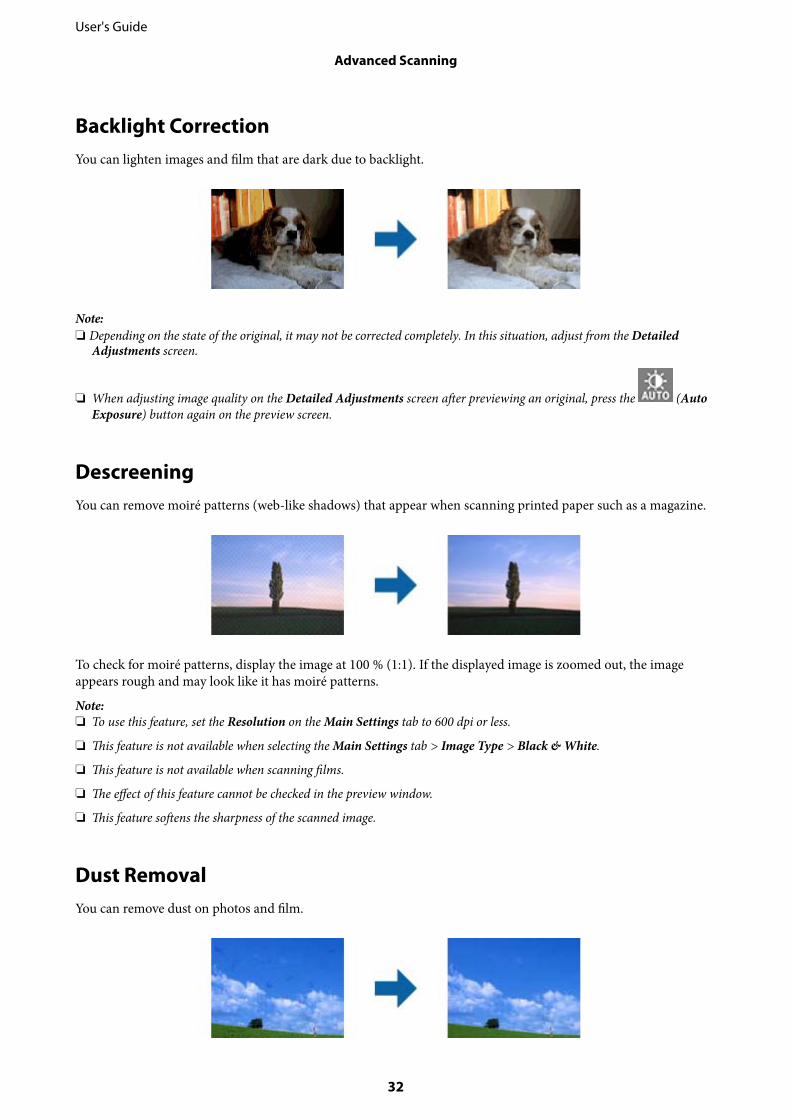
Backlight CorrectionYou can lighten images and film that are dark due to backlight.
Note:❏ Depending on the state of the original, it may not be corrected completely. In this situation, adjust from the Detailed
Adjustments screen.
❏ When adjusting image quality on the Detailed Adjustments screen after previewing an original, press the (AutoExposure) button again on the preview screen.
DescreeningYou can remove moiré patterns (web-like shadows) that appear when scanning printed paper such as a magazine.
To check for moiré patterns, display the image at 100 % (1:1). If the displayed image is zoomed out, the imageappears rough and may look like it has moiré patterns.
Note:❏ To use this feature, set the Resolution on the Main Settings tab to 600 dpi or less.
❏ This feature is not available when selecting the Main Settings tab > Image Type > Black & White.
❏ This feature is not available when scanning films.
❏ The effect of this feature cannot be checked in the preview window.
❏ This feature softens the sharpness of the scanned image.
Dust RemovalYou can remove dust on photos and film.
User's Guide
Advanced Scanning
32

Note:❏ Depending on the state of the original, it may not be corrected completely.❏ The effect of this feature cannot be checked in the preview window.❏ If the amount of free space in the memory is running low, you may not be able to scan.
Grain ReductionYou can reduce the grainy texture or roughness in images that occurs when scanning film.
❏ Depending on the state of the original, it may not be corrected correctly.
❏ This feature is not available when scanning photos.
❏ The effect of this feature cannot be checked in the preview window.
❏ This feature softens the sharpness of the scanned results.
Image Adjustment Features for Document ModeYou can adjust scanned images using the features on the Advanced Settings tab in Epson Scan 2.
For Document Mode, you can use image adjustment features that are suitable for text documents.
For most features, you can check the adjustment results in the preview window.
User's Guide
Advanced Scanning
33

Note:Some items may not be available depending on other settings you made.
Unsharp MaskYou can enhance and sharpen the outlines of the image.
Note:This feature is not available when selecting the Main Settings tab > Image Type > Black & White.
DescreeningYou can remove moiré patterns (web-like shadows) that appear when scanning printed paper such as a magazine.
User's Guide
Advanced Scanning
34

To check for moiré patterns, display the image at 100 % (1:1). If the displayed image is zoomed out, the imageappears rough and may look like it has moiré patterns.
Note:❏ To use this feature, set the Resolution on the Main Settings tab to 600 dpi or less.
❏ This feature is not available when selecting the Main Settings tab > Image Type > Black & White.
❏ This feature is not available when scanning films.
❏ The effect of this feature cannot be checked in the preview window.
❏ This feature softens the sharpness of the scanned image.
Image OptionYou can select the effect for the scanned image.
Text Enhancement
You can make blurred letters in the original clear and sharp. You can also reduce the offset or unevenness of thebackground.
You can select the level of the effect when selecting the Main Settings tab > Image Type > Color or Grayscale.
Note:To use this feature, set the Resolution on the Main Settings tab to 600 dpi or less.
Auto Area Segmentation
You can make letters clear and images smooth when performing black and white scanning for a document thatcontains images.
You can adjust the quality of the image part of the original from Brightness and Contrast.
Note:❏ You can only make settings for this feature when selecting the Main Settings tab > Image Type > Black & White.
❏ To use this feature, set the Resolution on the Main Settings tab to 600 dpi or less.
User's Guide
Advanced Scanning
35

Dropout
You can remove the color specified from the scanned image, and then save it in grayscale or black and white. Forexample, you can erase marks or notes you wrote in the margins with color pen when scanning.
If you select Customize from the color list in Dropout, you can make settings for the color you want to removewhile checking the preview window (for Windows only).
Note:This feature is not available when selecting the Main Settings tab > Image Type > Auto or Color.
Color Enhance
You can enhance the color specified for the scanned image, and then save it in grayscale or black and white. Forexample, you can enhance letters or lines that are in light colors.
If you select Customize from the color list in Color Enhance, you can make settings for the color you want toenhance while checking the preview window (for Windows only).
Note:This feature is not available when selecting the Main Settings tab > Image Type > Auto or Color.
BrightnessYou can adjust the brightness for the whole image.
Note:This feature is not available depending on the settings on the Main Settings tab > Image Type or the settings on theAdvanced Settings tab.
User's Guide
Advanced Scanning
36
ContrastYou can adjust the contrast for the whole image. If you increase the contrast, the bright areas become brighter, andthe dark areas become darker. On the other hand, if you lower the contrast, the differences between the bright anddark areas of the image are less defined.
Note:This feature is not available depending on the settings on the Main Settings tab > Image Type or the settings on theAdvanced Settings tab.
GammaYou can adjust the gamma (brightness of the intermediate range) for the whole image. If the image is too light ortoo dark, you can adjust the brightness.
Note:This feature is not available depending on the settings on the Main Settings tab > Image Type or the settings on theAdvanced Settings tab.
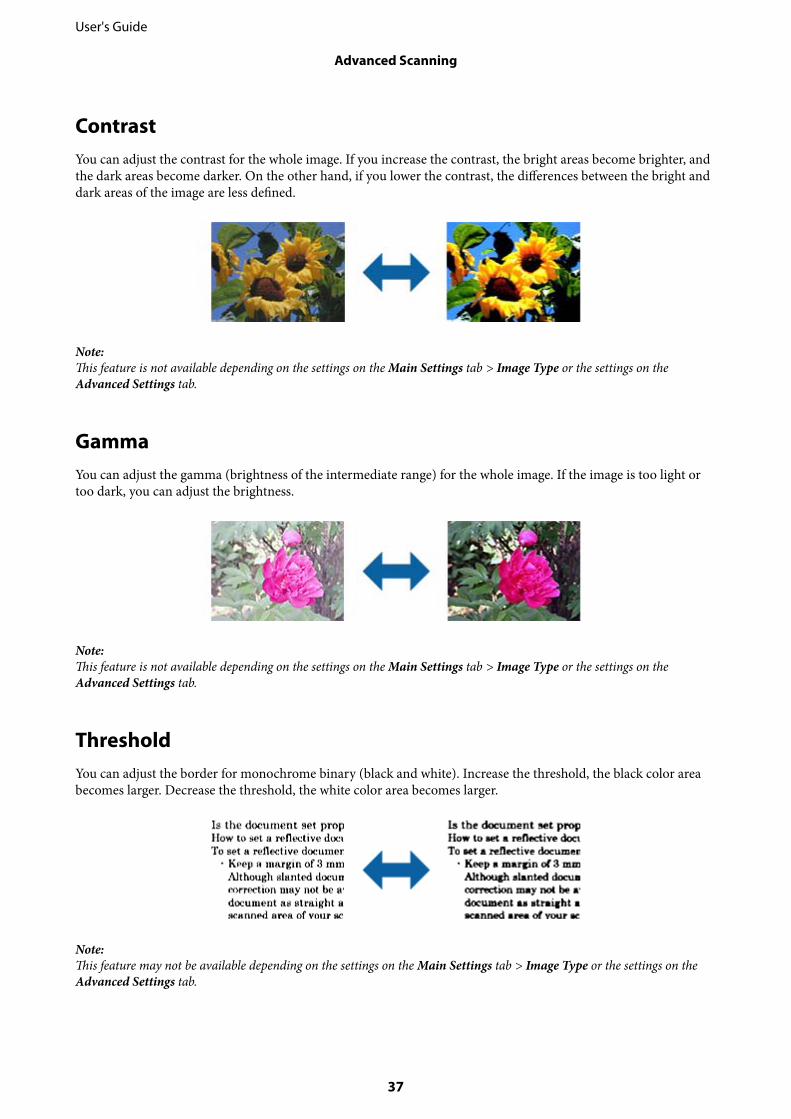
ThresholdYou can adjust the border for monochrome binary (black and white). Increase the threshold, the black color areabecomes larger. Decrease the threshold, the white color area becomes larger.
Note:This feature may not be available depending on the settings on the Main Settings tab > Image Type or the settings on theAdvanced Settings tab.
User's Guide
Advanced Scanning
37
Edge FillYou can remove the shadow created around the scanned image.
For double-sided scanning, the settings for the edge fill range are mirror-reversed for the back of the original.
If you select Settings, the Edge Fill Level screen is displayed, and you can adjust the edge fill ranges for the top,bottom, left, and right.
Note:The effect of this feature cannot be checked in the preview window.
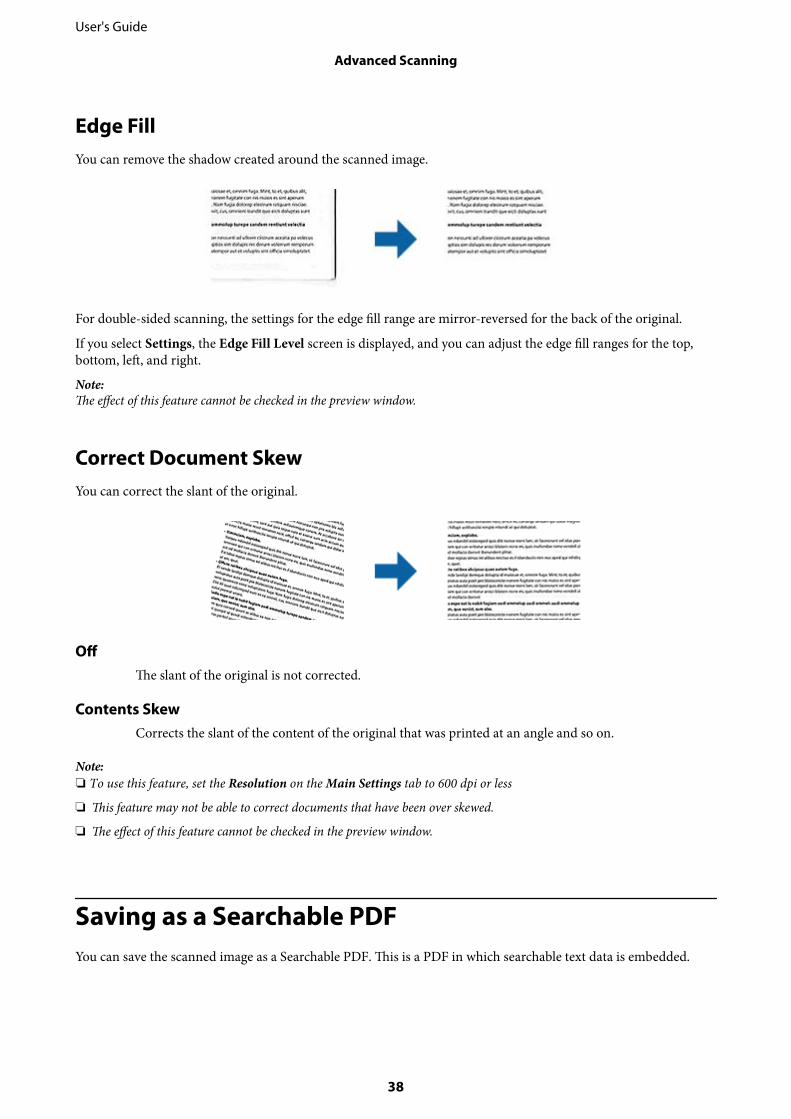
Correct Document SkewYou can correct the slant of the original.
OffThe slant of the original is not corrected.
Contents SkewCorrects the slant of the content of the original that was printed at an angle and so on.
Note:❏ To use this feature, set the Resolution on the Main Settings tab to 600 dpi or less
❏ This feature may not be able to correct documents that have been over skewed.
❏ The effect of this feature cannot be checked in the preview window.
Saving as a Searchable PDFYou can save the scanned image as a Searchable PDF. This is a PDF in which searchable text data is embedded.
User's Guide
Advanced Scanning
38

Note:❏ Text on the originals is recognized using Optical Character Recognition (OCR), and then embedded in the scanned
image.
❏ This feature is only available when the EPSON Scan OCR component (Windows) or Epson Scan 2 OCR component (Mac)is installed.
1. Place the original.
2. Start Epson Scan 2.
3. Make settings for each item on the Main Settings tab.
4. Click Preview.
5. Check the preview, and make other settings on the Advanced Settings tab if necessary.
6. Select Searchable PDF from the Image Format list.
7. Select Options from the Image Format list to open the Image Format Options window.
8. Select the Text tab on the Image Format Options window.
9. Check that the language of the original is selected in the Text Language list.
10. Click OK to close the Image Format Options window.
11. Check the save file name displayed in File Name.
12. Select the save folder for the scanned image from the Folder list.
13. Click Scan.
The scanned image is saved as a Searchable PDF.
Related Information
& “Scanning Using Epson Scan 2” on page 18& “Placing Originals on the Product” on page 14& “Text is Not Recognized Correctly when Saving as a Searchable PDF” on page 59
User's Guide
Advanced Scanning
39
Using the Transparency Unit
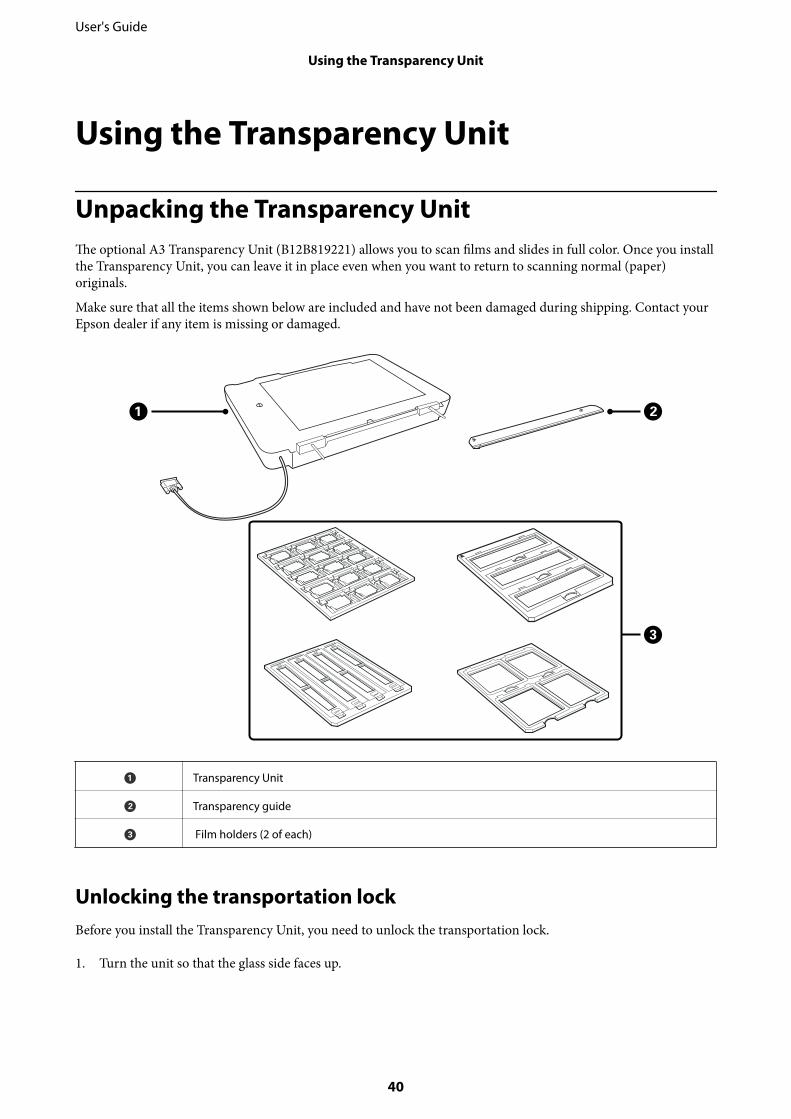
Unpacking the Transparency UnitThe optional A3 Transparency Unit (B12B819221) allows you to scan films and slides in full color. Once you installthe Transparency Unit, you can leave it in place even when you want to return to scanning normal (paper)originals.
Make sure that all the items shown below are included and have not been damaged during shipping. Contact yourEpson dealer if any item is missing or damaged.
A Transparency Unit
B Transparency guide
C Film holders (2 of each)
Unlocking the transportation lockBefore you install the Transparency Unit, you need to unlock the transportation lock.
1. Turn the unit so that the glass side faces up.
User's Guide
Using the Transparency Unit
40
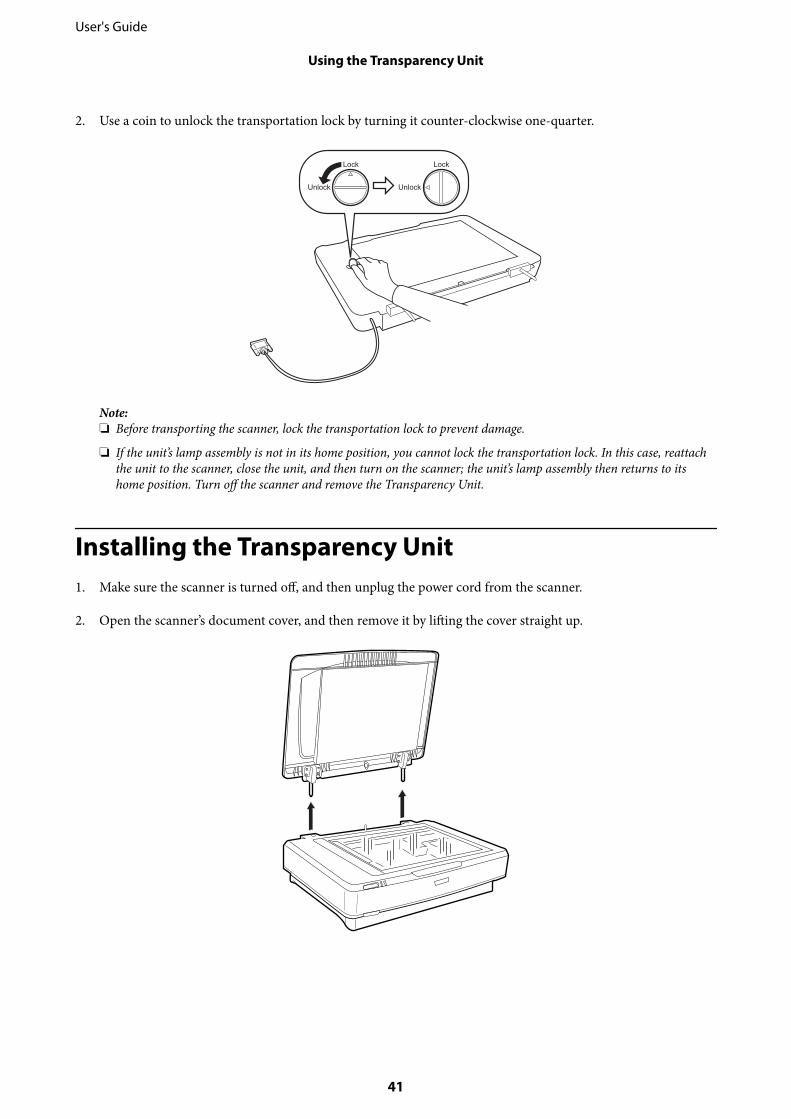
2. Use a coin to unlock the transportation lock by turning it counter-clockwise one-quarter.
Note:❏ Before transporting the scanner, lock the transportation lock to prevent damage.
❏ If the unit’s lamp assembly is not in its home position, you cannot lock the transportation lock. In this case, reattachthe unit to the scanner, close the unit, and then turn on the scanner; the unit’s lamp assembly then returns to itshome position. Turn off the scanner and remove the Transparency Unit.
Installing the Transparency Unit1. Make sure the scanner is turned off, and then unplug the power cord from the scanner.
2. Open the scanner’s document cover, and then remove it by lifting the cover straight up.
User's Guide
Using the Transparency Unit
41

3. Align the pins of the unit with the holes of the scanner, and then lower the unit until it rests securely on thescanner with the pins in the holes.
4. Remove the document mat from the Transparency Unit as shown below.
5. Place the transparency guide on the upper edge of the scanner glass as shown below.
6. Close the Transparency Unit.
User's Guide
Using the Transparency Unit
42
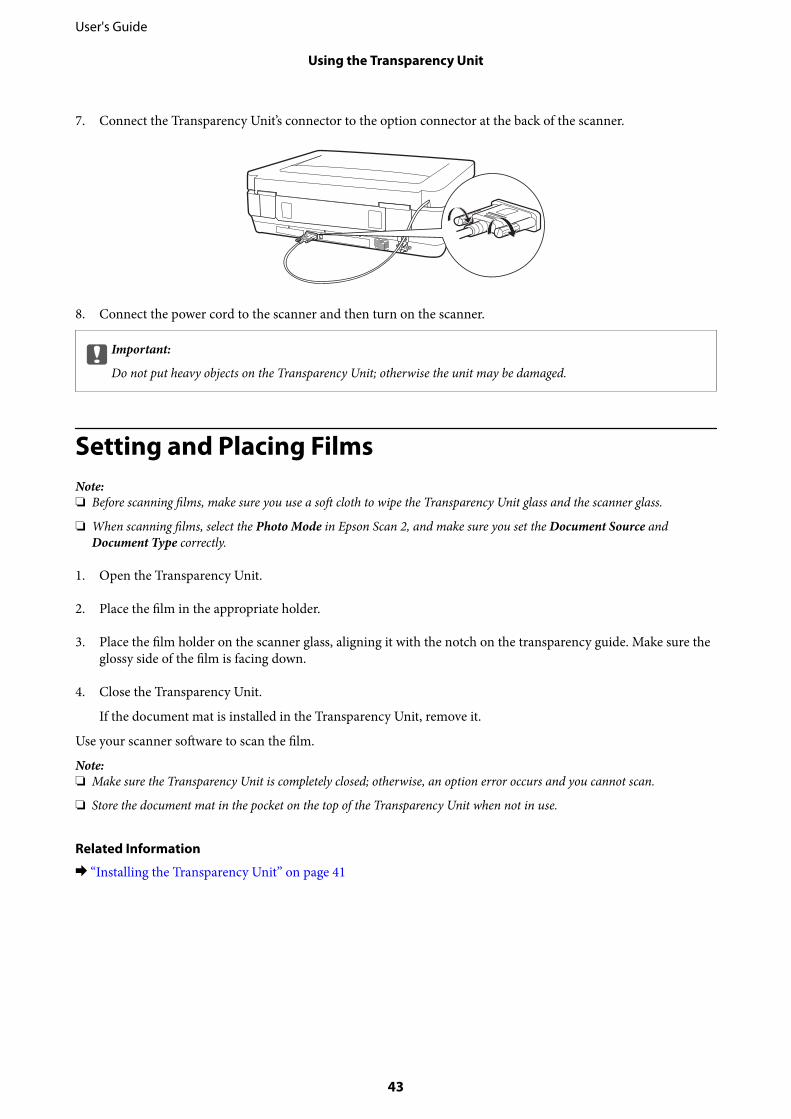
7. Connect the Transparency Unit’s connector to the option connector at the back of the scanner.
8. Connect the power cord to the scanner and then turn on the scanner.
cImportant:
Do not put heavy objects on the Transparency Unit; otherwise the unit may be damaged.
Setting and Placing FilmsNote:❏ Before scanning films, make sure you use a soft cloth to wipe the Transparency Unit glass and the scanner glass.
❏ When scanning films, select the Photo Mode in Epson Scan 2, and make sure you set the Document Source andDocument Type correctly.
1. Open the Transparency Unit.
2. Place the film in the appropriate holder.
3. Place the film holder on the scanner glass, aligning it with the notch on the transparency guide. Make sure theglossy side of the film is facing down.
4. Close the Transparency Unit.
If the document mat is installed in the Transparency Unit, remove it.
Use your scanner software to scan the film.
Note:❏ Make sure the Transparency Unit is completely closed; otherwise, an option error occurs and you cannot scan.
❏ Store the document mat in the pocket on the top of the Transparency Unit when not in use.
Related Information
& “Installing the Transparency Unit” on page 41
User's Guide
Using the Transparency Unit
43
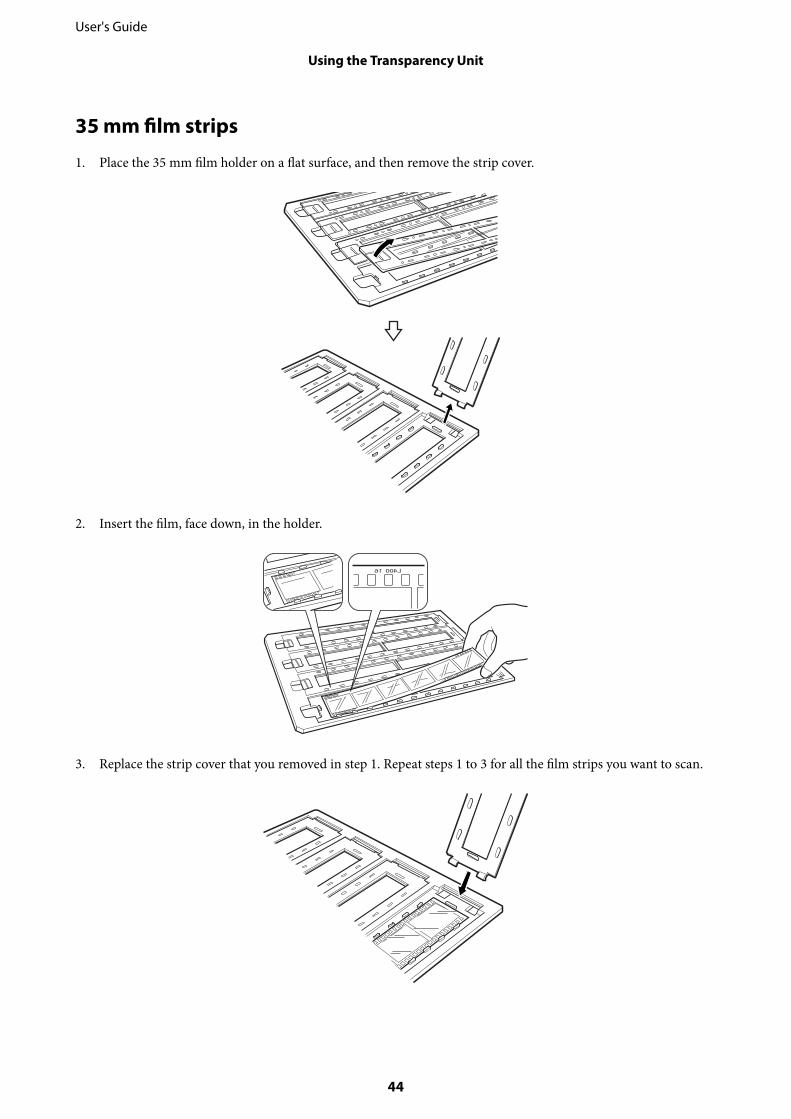
35 mm film strips
1. Place the 35 mm film holder on a flat surface, and then remove the strip cover.
2. Insert the film, face down, in the holder.
3. Replace the strip cover that you removed in step 1. Repeat steps 1 to 3 for all the film strips you want to scan.
User's Guide
Using the Transparency Unit
44
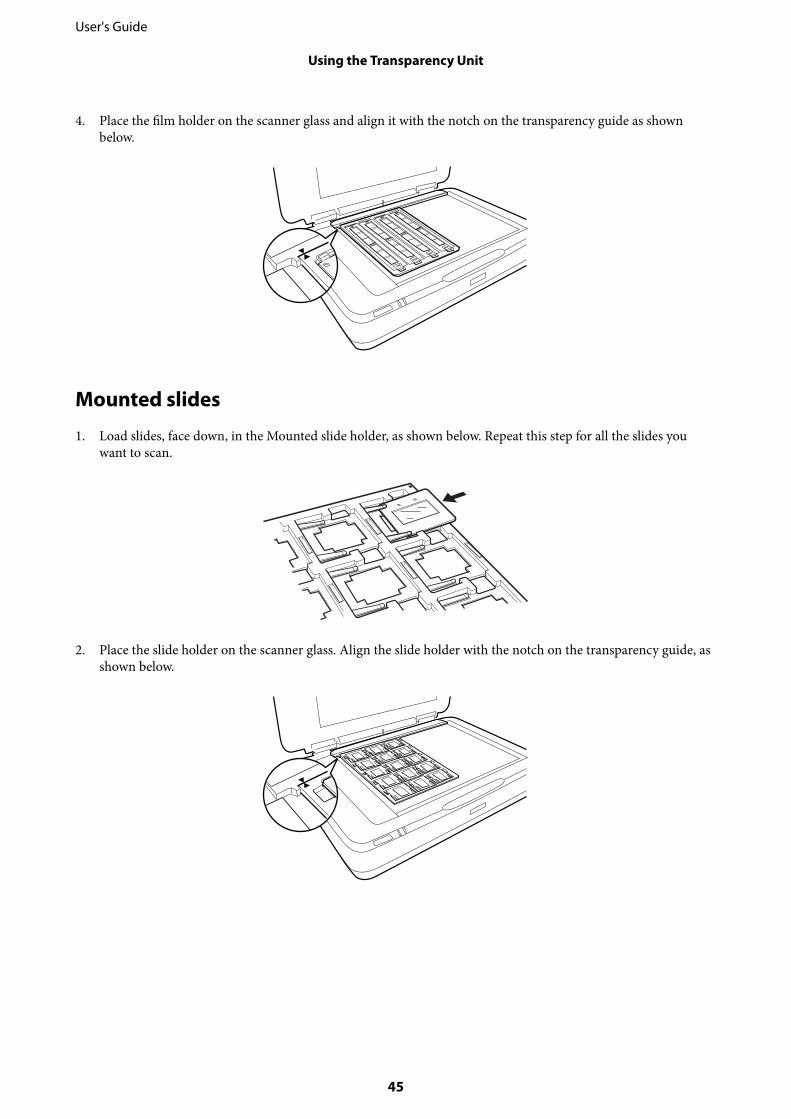
4. Place the film holder on the scanner glass and align it with the notch on the transparency guide as shownbelow.
Mounted slides
1. Load slides, face down, in the Mounted slide holder, as shown below. Repeat this step for all the slides youwant to scan.
2. Place the slide holder on the scanner glass. Align the slide holder with the notch on the transparency guide, asshown below.
User's Guide
Using the Transparency Unit
45

Medium format (120/220)
1. Place the Medium format holder on a flat surface, and then open the strip cover.
2. Insert the film, face down, in the holder.
3. Close the cover. Repeat steps 1 to 3 for all the films you want to scan.
User's Guide
Using the Transparency Unit
46
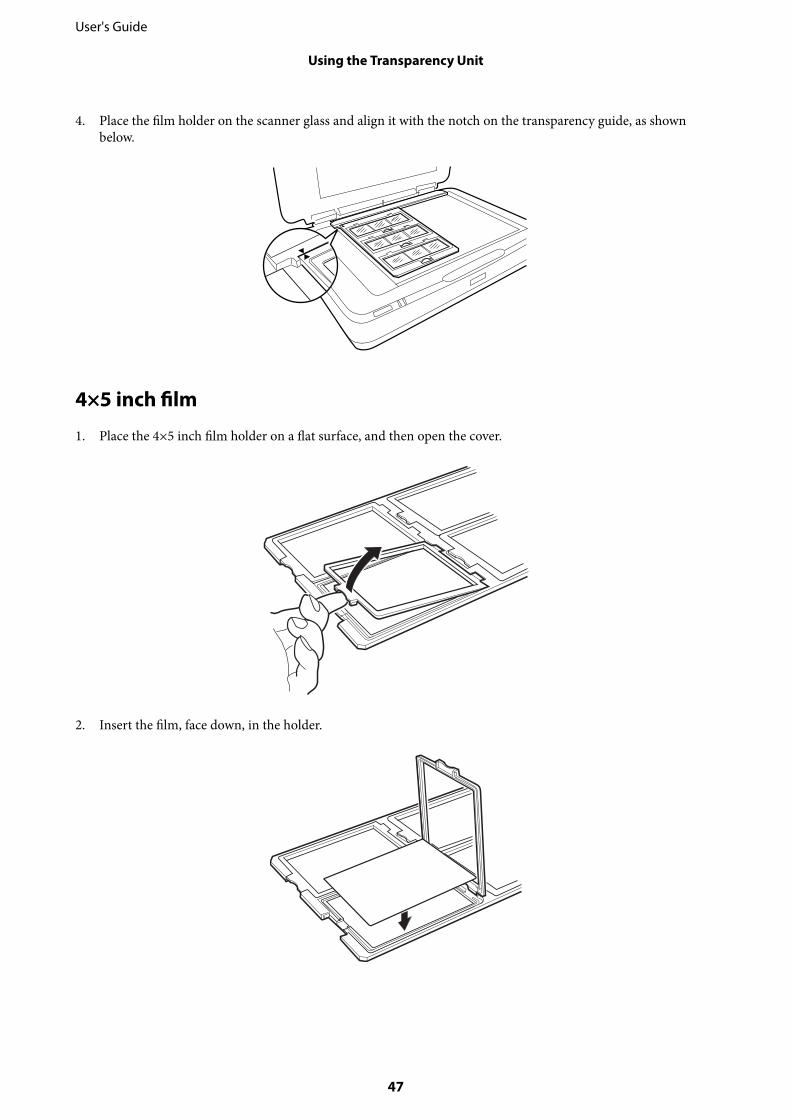
4. Place the film holder on the scanner glass and align it with the notch on the transparency guide, as shownbelow.
4×5 inch film
1. Place the 4×5 inch film holder on a flat surface, and then open the cover.
2. Insert the film, face down, in the holder.
User's Guide
Using the Transparency Unit
47

3. Close the cover. Repeat steps 1 to 3 for all the films you want to scan.
4. Place the holder on the scanner glass and align it with the notch on the transparency guide, as shown below.
Non-standard film sizesPlace the film directly on the scanner glass, making sure the glossy (smooth) side of the film is facing down.
If the document mat is installed in the Transparency Unit, remove it. Close the Transparency Unit.
Note:❏ An area 17.0 ±0.5 mm (0.7 ±0.02 inches) from the horizontal and 2.0 ±0.5 mm (0.08 ±0.02 inches) from the
vertical edges of the scanner glass cannot be scanned.
❏ When you place the film directly on the scanner glass, make sure you set the focus position to 0.0 in Epson Scan 2.
User's Guide
Using the Transparency Unit
48

Using the Transparency Unit to Scan
Scanning films with suitable settingsThis section explains how to make settings suitable for materials you want to scan.
1. Make sure the scanner is connected to your computer.
2. Place your films on the scanner glass.
3. Start Epson Scan 2.
4. Select Photo Mode from the Mode list.
5. Make the following settings on the Main Settings tab.
❏ Document Source: Select Transparency Unit.
❏ Document Type: Select the film type to match your films.
❏ Image Type: Select the color for saving the scanned image.
❏ Resolution: Select the resolution.
Note:When you specify a high resolution, the number of pixels in the data increases and the scanned image becomes fine intexture. However, increasing the resolution causes the data size to increase. Specify a suitable resolution according to thescanning purpose.
6. Click Preview.
7. Confirm the preview, and make other settings on the Advanced Settings tab if necessary.
8. Set the Image Format setting.
9. Confirm the save file name displayed in File Name.
10. Select the save folder for the scanned image from the Folder list.
11. Click Scan.
Related Information
& “Image Adjustment Features for Photo Mode” on page 27
Scanning reflective (non-film) originalsTo scan reflective originals using the Transparency Unit, always insert the document mat included with this unit.Also, make sure you remove the transparency guide from the scanner glass.
Insert the document mat as described below.
User's Guide
Using the Transparency Unit
49

1. Open the Transparency Unit, and then remove the transparency guide from the scanner glass.
2. Slide the mat into the upper side, and then insert the tabs into the slots on the lower side slots on theTransparency Unit.
3. Place your document on the scanner glass, and then close the Transparency Unit.
User's Guide
Using the Transparency Unit
50
Maintenance
Cleaning the ScannerTo keep your scanner operating at its best, clean it periodically using the following procedure.
cImportant:
❏ Do not press the glass surface of the scanner glass with any force.
❏ Be careful not to scratch or damage the glass surface of the scanner glass, and do not use a hard or abrasivebrush to clean it. A damaged glass surface can decrease the scan quality.
❏ Never use alcohol, thinner, or corrosive solvent to clean the scanner. These chemicals can damage the productcomponents and the case.
❏ Be careful not to spill liquid into the scanner mechanism or electronic components. This could permanentlydamage the mechanism and circuitry.
❏ Do not spray lubricants on the scanner.
❏ Never open the scanner case.
1. Turn off the scanner.
2. Unplug the power cord from the scanner.
3. Clean the outer case with a cloth dampened with mild detergent and water.
4. If the glass surface gets dirty, clean it with a soft dry cloth. If the glass surface is stained with grease or someother hard-to-remove material, use a small amount of glass cleaner and a soft cloth to remove it. Wipe off allremaining liquid.
Make sure that dust does not build up on the glass surface. Dust can cause spots and straight lines in yourscanned images.
cImportant:
Do not spray glass cleaner directly on the glass surface.
5. Clean the document cover if it gets dirty.
Related Information
& “Part Names” on page 10
Energy SavingThis product will enter sleep mode after a period of nonuse. This is to ensure that the product meetsEnergy Star standards of energy efficiency. More energy savings can be achieved by setting the time to sleep to a shorter interval.
User's Guide
Maintenance
51

1. Start Epson Scan 2 Utility.
❏ Windows 10Click the start button, and then select All apps > EPSON > Epson Scan 2 > Epson Scan 2 Utility.
❏ Windows 8.1/Windows 8Start screen > Apps > Epson > Epson Scan 2 Utility.
❏ Windows 7
Click the start button, and then select All Programs (or Programs) > EPSON > Epson Scan 2 > EpsonScan 2 Utility.
❏ MacSelect Go > Applications > EPSON Software > Epson Scan 2 Utility.
2. Click the Power Save tab.
3. Set the Sleep Timer (minutes) or Power Off Timer (minutes), and then click Set.
Transporting the ScannerBefore you transport the scanner for a long distance or store it for an extended period of time, you need to lock thecarriage to prevent damage.
!Caution:
Because the product is heavy, one person should never attempt to lift or carry it alone. Two people should lift andcarry the product.
User's Guide
Maintenance
52
1. Make sure the carriage is in the home position on the left side of the scanner. If the carriage is not in the homeposition, turn on the scanner and wait until the carriage moves to the home position.
2. Turn off the scanner, and then unplug the power cord.
3. Disconnect the USB cable from the scanner.
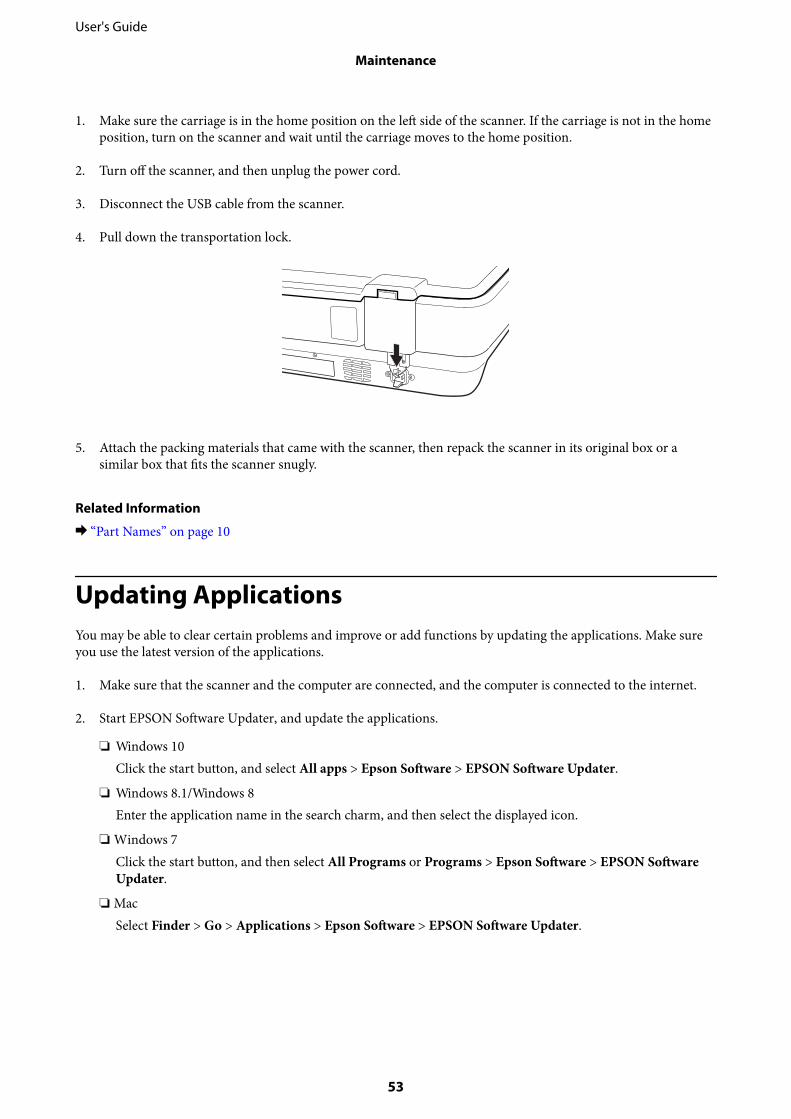
4. Pull down the transportation lock.
5. Attach the packing materials that came with the scanner, then repack the scanner in its original box or asimilar box that fits the scanner snugly.
Related Information
& “Part Names” on page 10
Updating ApplicationsYou may be able to clear certain problems and improve or add functions by updating the applications. Make sureyou use the latest version of the applications.
1. Make sure that the scanner and the computer are connected, and the computer is connected to the internet.
2. Start EPSON Software Updater, and update the applications.
❏ Windows 10Click the start button, and select All apps > Epson Software > EPSON Software Updater.
❏ Windows 8.1/Windows 8Enter the application name in the search charm, and then select the displayed icon.
❏ Windows 7Click the start button, and then select All Programs or Programs > Epson Software > EPSON SoftwareUpdater.
❏ MacSelect Finder > Go > Applications > Epson Software > EPSON Software Updater.
User's Guide
Maintenance
53

cImportant:
Do not turn off the computer or the scanner while updating.
Note:If you cannot find the application you want to update in the list, you cannot update using the EPSON Software Updater.Check for the latest versions of the applications on your local Epson website.
http://www.epson.com/support
User's Guide
Maintenance
54
Solving Problems
Scanner Problems
Scanner Lights Indicate an ErrorCheck the following if the scanner lights indicate an error.
❏ Make sure the scanner is connected to your computer properly.
❏ Try to rescan the original. The scanner returns to normal when it receives correct commands.
❏ Make sure Epson Scan 2 is installed correctly.
❏ Make sure the transportation lock has been released.
❏ Turn off the scanner and turn it on again. If this does not solve the problem, the scanner may bemalfunctioning, or the light source in the scanner unit may need to be replaced. Contact Epson.
Related Information
& “Buttons and Lights” on page 11
Problems Starting Scanning❏ Make sure the scanning software is fully installed.
See the Start Here sheet for instructions on installing the scanning software.
❏ Check the status light and make sure the product is ready to scan.
❏ Make sure your cables are securely connected to the product and a working electrical outlet.
❏ Check that the electrical outlet is working. Plug another device into the electrical outlet and check that you canturn on the power.
❏ Turn off the scanner and computer, and then check the interface cable connection between them to make sure itis secure.
❏ Make sure you select the correct scanner if a scanner list appears when starting to scan.
❏ Connect the product directly to the computer’s external USB port or through one USB hub only. The productmay not work properly when connected to the computer through more than one USB hub. If the problempersists, try connecting the product directly to the computer.
❏ If more than one product is connected to your computer it may not work. Connect only the product you wantto use, and then try scanning again.
❏ If the scanning software does not work properly, uninstall the software first and then reinstall it as described inthe Start Here sheet.
❏ If the light source has reached the end of its service life, it must be replaced by a professional. For details, contactEpson.
User's Guide
Solving Problems
55
Related Information
& “Uninstalling Your Applications” on page 61& “Help for Users in the U.S. and Canada” on page 68
Cannot Start Epson Scan 2❏ Make sure the scanner is connected to your computer properly.
❏ Make sure the USB cable is securely connected to the scanner and the computer.
❏ Use the USB cable that came with the scanner.
❏ If you are using the scanner with the Network Interface Unit, make sure the network cable is securelyconnected.
❏ Make sure the scanner is turned on.
❏ Wait until the status light stops flashing indicating that the scanner is ready to scan.
❏ Connect the scanner directly to the computer’s USB port. The scanner may not work properly when connectedto the computer through one or more USB hubs.
❏ If you are using any TWAIN-compliant applications, make sure that the correct scanner is selected as thescanner or source setting.
Cannot Scan Using the Button❏ Make sure the scanner is connected to your computer properly.
❏ Make sure Epson Scan 2 is installed correctly.
Cannot Scan Using the Transparency Unit❏ Make sure the document mat is removed from the scanner cover.
❏ Make sure the optional Transparency Unit is installed correctly.
❏ Make sure you are using Photo Mode and set the Document Type correctly.
❏ Make sure the film is set correctly in the film holder, and the film holder is properly positioned on the scannerglass.
❏ Make sure the transportation lock on the Transparency Unit is released.
Related Information
& “Installing the Transparency Unit” on page 41& “Using the Transparency Unit to Scan” on page 49& “Setting and Placing Films” on page 43
Cannot Scan Using Scanning Software Other Than Epson Scan 2❏ If you are using any TWAIN-compliant programs, make sure that the correct scanner is selected as the source
setting.
User's Guide
Solving Problems
56

❏ If you cannot scan using a TWAIN-compliant scanning program, uninstall the TWAIN-compliant scanningprogram and then reinstall it.
Scanned Image Problems
Uneven Colors, Dirt, Spots, and so on Appear when Scanning fromthe Scanner Glass❏ Clean the scanner glass.
❏ Remove any trash or dirt that adheres to the original.
❏ Do not press with too much force on the original or the document cover. If you press with too much force,blurring, smudges, and spots may occur.
Related Information
& “Cleaning the Scanner” on page 51
The Image Quality is Rough❏ Set the Mode in Epson Scan 2 according to the original you want to scan. Scan using the settings for documents
in Document Mode, and the settings for photos in Photo Mode.
❏ In Photo Mode in Epson Scan 2, set the Document Type on the Main Settings tab according to the originalyou want to scan.
❏ If the resolution is low, try increasing the resolution and then scanning.
❏ In Epson Scan 2, adjust the image using items on the Advanced Settings tab, and then scan.
Related Information
& “Setting a Resolution That Suits the Scanning Purpose” on page 25& “Image Adjustment Features for Photo Mode” on page 27& “Image Adjustment Features for Document Mode” on page 33
Offset Appears in the Background of ImagesImages on the back of the original may appear in the scanned image.
❏ In Epson Scan 2, select the Advanced Settings tab, and then adjust the Brightness.This feature may not be available depending on the settings on the Main Settings tab > Image Type or othersettings on the Advanced Settings tab.
❏ In Document Mode in Epson Scan 2, select the Advanced Settings tab, and then Image Option > TextEnhancement.
❏ When scanning from the scanner glass, place black paper or a desk pad over the original.
User's Guide
Solving Problems
57
Related Information
& “Image Adjustment Features for Photo Mode” on page 27& “Image Adjustment Features for Document Mode” on page 33
Text is Blurred❏ In Document Mode in Epson Scan 2, select the Advanced Settings tab, and then Image Option > Text
Enhancement.
❏ Select Document Mode as the Mode in Epson Scan 2. Scan using the settings for documents in DocumentMode.
❏ In Document Mode in Epson Scan 2, when Image Type on the Main Settings tab is set to Black & White,adjust Threshold on the Advanced Settings tab. When you increase the Threshold, the black color areabecomes larger.
❏ If the resolution is low, try increasing the resolution and then scanning.
Related Information
& “Image Adjustment Features for Photo Mode” on page 27& “Image Adjustment Features for Document Mode” on page 33& “Setting a Resolution That Suits the Scanning Purpose” on page 25
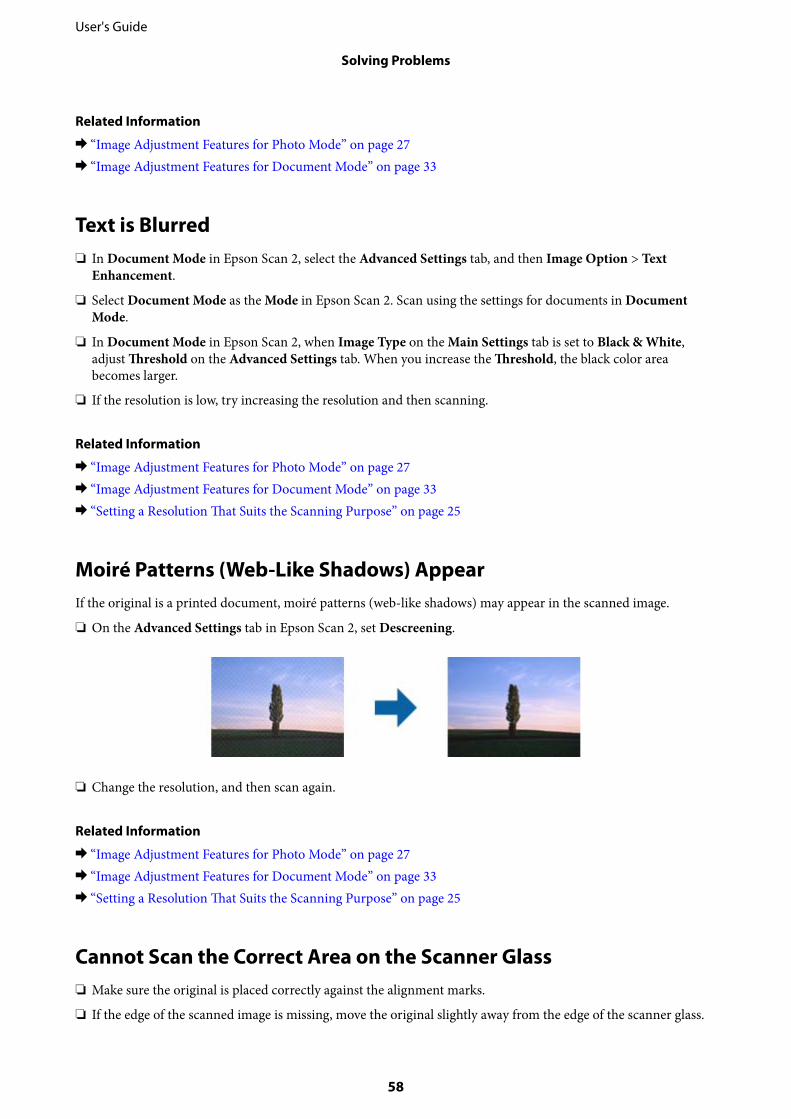
Moiré Patterns (Web-Like Shadows) AppearIf the original is a printed document, moiré patterns (web-like shadows) may appear in the scanned image.
❏ On the Advanced Settings tab in Epson Scan 2, set Descreening.
❏ Change the resolution, and then scan again.
Related Information
& “Image Adjustment Features for Photo Mode” on page 27& “Image Adjustment Features for Document Mode” on page 33& “Setting a Resolution That Suits the Scanning Purpose” on page 25
Cannot Scan the Correct Area on the Scanner Glass❏ Make sure the original is placed correctly against the alignment marks.
❏ If the edge of the scanned image is missing, move the original slightly away from the edge of the scanner glass.
User's Guide
Solving Problems
58
❏ When placing multiple originals on the scanner glass, make sure there is a gap of at least 20 mm (0.8 in.)between the originals.
Cannot Preview in Thumbnail❏ When placing multiple originals on the scanner glass, make sure there is a gap of at least 20 mm (0.8 in.)
between the originals.
❏ Check that the original is placed straight.
❏ Depending on the original, previewing may not be performed in Thumbnail. In this situation, scan in Normalpreview, and then create marquees manually.
Cannot Achieve the Results Intended in Auto Photo Orientation❏ Small photos are not rotated automatically.
❏ Film that is placed with the top and bottom inversed is not rotated automatically.
❏ Photos and film for which the top and bottom cannot be detected are not rotated automatically. Rotatemanually using the Rotate button.
Text is Not Recognized Correctly when Saving as a Searchable PDF❏ On the Image Format Options window in Epson Scan 2, check that Text Language is set correctly on the Text
tab.
❏ Check that the original is placed straight.
❏ Use an original with clear text. Text recognition may decline for the following types of originals.
❏ Originals that have been copied a number of times
❏ Originals received by fax (at low resolutions)
❏ Originals on which the letter spacing or line spacing is too small
❏ Originals with ruled lines or underlining over the text
❏ Originals with hand-written text
❏ Originals with creases or wrinkles
❏ In Document Mode in Epson Scan 2, when Image Type on the Main Settings tab is set to Black & White,adjust Threshold on the Advanced Settings tab. When you increase the Threshold, black becomes stronger.
❏ In Document Mode in Epson Scan 2, select the Advanced Settings tab, and then Image Option > TextEnhancement.
Related Information
& “Saving as a Searchable PDF” on page 38& “Image Adjustment Features for Photo Mode” on page 27& “Image Adjustment Features for Document Mode” on page 33
User's Guide
Solving Problems
59

Binding Margins of a Booklet are Distorted or BlurredWhen scanning a booklet on the scanner glass, characters may appear distorted or blurred on the binding margin.If this problem occurs, text is not recognized correctly when you save the scanned image as a Searchable PDF.
To decrease distortion or blurring on the binding margin, gently press down the document cover and hold it downwhile scanning to flatten the booklet. Make sure you do not move the booklet while scanning.
cImportant:
Do not press the document cover with too much force. Otherwise, the booklet or the scanner may be damaged.
Cannot Solve Problems in the Scanned ImageIf you have tried all of the solutions and have not solved the problem, initialize the Epson Scan 2 settings usingEpson Scan 2 Utility.
Note:Epson Scan 2 Utility is an application that comes with Epson Scan 2.
1. Start Epson Scan 2 Utility.
❏ Windows 10Click the start button, and then select All apps > EPSON > Epson Scan 2 Utility.
❏ Windows 8.1/Windows 8Enter the application name in the search charm, and then select the displayed icon.
❏ Windows 7
Click the start button, and then select All Programs or Programs > EPSON > Epson Scan 2 > Epson Scan2 Utility.
❏ MacSelect Go > Applications > Epson Software > Epson Scan 2 Utility.
2. Select the Other tab.
3. Click Reset.
Note:If initialization does not solve the problem, uninstall and re-install Epson Scan 2.
Striped Rings Appear in Scanned Images of Film or SlidesA ring-shaped pattern of stripes (called a Newton ring) sometimes appears on scanned images of transparentmaterials. This may occur if the film is curled.
Colors Differ From the Original Colors for Film or Slide ImagesClean the scanner.
User's Guide
Solving Problems
60
Related Information
& “Cleaning the Scanner” on page 51
Negative Film Preview Images Look Strange❏ Make sure the Document Type is set correctly for your film.
❏ If you are using Normal as the Normal/Thumbnail, the dark area around the film and the frame of the filmholder is perceived as white. This alters the exposure and causes images to appear darker. Create marquees on
the image area you want to scan, and then click the (Zoom) button to preview the area.
❏ For Normal/Thumbnail, use Thumbnail instead of Normal.
Problems With Scanning Time❏ Computers with Hi-Speed external USB ports can scan faster than those with external USB ports. If you are
using a Hi-Speed external USB port with your product, make sure it meets the system requirements.
❏ Scanning at a high resolution takes a long time.
❏ When using security software, exclude the TWAIN.log file from monitoring, or set the TWAIN.log as a read-only file. For more information on your security software’s functions, see the help and so on supplied with the software.The TWAIN.log file is saved in the following location.C:\Users\(user name)\AppData\Local\Temp
Uninstalling and Installing Applications
Uninstalling Your ApplicationsYou may need to uninstall and then reinstall your applications to solve certain problems or if you upgrade youroperating system. Log on to your computer as an administrator. Enter the administrator password if the computerprompts you.
Uninstalling Your Applications for Windows
1. Quit all running applications.
2. Disconnect the scanner from your computer.
User's Guide
Solving Problems
61

3. Open the Control Panel:
❏ Windows 10Right-click the start button or press and hold it, and then select Control Panel.
❏ Windows 8.1/Windows 8Select Desktop > Settings > Control Panel.
❏ Windows 7
Click the start button and select Control Panel.
4. Open Uninstall a program.
Select Uninstall a program in Programs.
5. Select the application you want to uninstall.
6. Uninstall the applications:
Click Uninstall/Change or Uninstall.
Note:If the User Account Control window is displayed, click Continue.
7. Follow the on-screen instructions.
Note:A message may be displayed prompting you to restart your computer. If it is displayed, make sure I want to restart mycomputer now is selected, and then click Finish.
Uninstalling Your Applications for Mac Note:Make sure you installed EPSON Software Updater.
1. Download the Uninstaller using EPSON Software Updater.
Once you have downloaded the Uninstaller, you do not need to download it again each time you uninstall theapplication.
2. Disconnect the scanner from your computer.
3. To uninstall the scanner driver, select System Preferences from the menu > Printers & Scanners (orPrint & Scan, Print & Fax), and then remove the scanner from the enabled scanner list.
4. Quit all running applications.
User's Guide
Solving Problems
62

5. Select Finder > Go > Applications > Epson Software > Uninstaller.
6. Select the application you want to uninstall, and then click Uninstall.
cImportant:
The Uninstaller removes all drivers for Epson scanners on the computer. If you use multiple Epson scanners andyou only want to delete some of the drivers, delete all of them first, and then install the necessary scannerdrivers again.
Note:If you cannot find the application you want to uninstall in the application list, you cannot uninstall using theUninstaller. In this situation, select Finder > Go > Applications > Epson Software, select the application you want touninstall, and then drag it to the trash icon.
Installing Your ApplicationsFollow the steps below to install the necessary applications.
Note:❏ Log on to your computer as an administrator. Enter the administrator password if the computer prompts you.
❏ When reinstalling applications, you need to uninstall them first.
1. Quit all running applications.
2. When installing Epson Scan 2, disconnect the scanner and the computer temporarily.
Note:Do not connect the scanner and the computer until you are instructed to do so.
3. Install the application by following the instructions on the Start Here sheet .
User's Guide
Solving Problems
63
Technical Specifications
General Scanner SpecificationsNote:Specifications are subject to change without notice.
Scanner type Flatbed A3 Color Image Scanner
Photoelectric device Color CCD line sensor
Document Size 310×437 mm (12.2×17.2 inches)
Scanning resolution 2400 dpi (main scan)
4800 dpi with Micro Step (sub scan)
Output resolution 50 to 6400 dpi
Image data 16 bits per pixel per color internal
1 to 16 bits per pixel per color external
Interface One Hi-speed USB port
Light source LED Lamp
Note:Optional optical resolution is the maximum scan resolution of the CCD elements, according to the ISO 14473 definitions.ISO 14473 defines optical resolution as the fundamental sampling rate of the scan sensor.
Dimensional Specifications
Dimensions * Width: 656.0 mm (25.8 inches)
Depth: 458.0 mm (18.4 inches)
Height: 158.0 mm (6.2 inches)
Weight Approx. 14.3 kg (31.5 lb)
* Without protruding parts.
Electrical Specifications
Rated input voltage AC 100 to 240 V
Rated input current 0.9 to 0.5 A
Rated input frequency 50 to 60 Hz
User's Guide
Technical Specifications
64

Power consumption Operating:
❏ Average 30 W or below (without the optional Transparency Unit)
❏ Average 40 W or below (with the optional Transparency Unit)
❏ Max. 40 W or below (without the optional Transparency Unit)
❏ Max. 50 W or below (with the optional Transparency Unit)
Ready mode:
❏ Approx. 20 W (without the optional Transparency Unit)
❏ Approx. 22 W (with the optional Transparency Unit)
Sleep mode:
❏ 2.8 W or below (without the optional Transparency Unit) (100 V, 115 V, 230 V)
❏ After approx 14 minutes from no operation (without ESC! Command)
Power supply OFF:
❏ 0.5 W or below (ErP Lot6: “Tier2” correspondence)
Environmental Specifications
Temperature Operating 5 to 35 °C (41 to 95 °F)
Storage –25 to 60 °C (–13 to 140 °F)
Humidity Operating 10 to 80% (without condensation)
Storage 10 to 85% (without condensation)
Operating conditions Ordinary office or home conditions. Avoid operating the scanner indirect sunlight, near a strong light source, or in extremely dustyconditions.
Interface SpecificationsUSB Interface
Interface type Hi-Speed USB
Electrical standard Full Speed mode (12 Mbits per second) and Hi-Speed mode (480 Mbits persecond) of Universal Serial Bus Specification Revision 2.0.
Connector type One Type B port
User's Guide
Technical Specifications
65

System Requirements
Windows Windows 10 (32-bit, 64-bit)
Windows 8.1 (32-bit, 64-bit)
Windows 8 (32-bit, 64-bit)
Windows 7 (32-bit, 64-bit)
Mac *1 *2 macOS v10.12.x
Mac OS X v10.11.x
Mac OS X v10.10.x
Mac OS X v10.9.x
Mac OS X v10.8.x
Mac OS X v10.7.x
Mac OS X v10.6.8
*1 Fast User Switching on Mac is not supported.
*2 The UNIX File System (UFS) for Mac is not supported.
User's Guide
Technical Specifications
66

Standards and Approvals
Standards and Approvals for U.S. Model
Safety UL60950-1
CAN/CSA-C22.2 No. 60950-1
EMC FCC Part 15 Subpart B Class B
CAN/CSA-CEI/IEC CISPR22 Class B
Standards and Approvals for European ModelThe following model is CE marked and in compliance with all the applicable EU Directives. For further details,visit the following website to access the full declaration of conformities containing reference to the Directives andharmonized standards used to declare conformity.
http://www.epson.eu/conformity
J331B
Standards and Approvals for Australian Model
EMC AS/NZS CISPR22 Class B
User's Guide
Standards and Approvals
67

Where to Get Help
Help for Users in the U.S. and CanadaIf you need to contact Epson for technical support services, use the following support options.
Internet Support
Visit www.epson.com/support (U.S.), www.epson.ca/support (Canada), or www.epson.com.jm/support (Caribbean) for solutions to common problems. You can download drivers and documentation, get FAQs and troubleshooting advice, or e-mail Epson with your questions.
Speak to a Support Representative
Before you call Epson for support, please have the following information ready:
❏ Product name
❏ Product serial number (located on a label on the product)
❏ Proof of purchase (such as a store receipt) and date of purchase
❏ Computer configuration
❏ Description of the problem
Then call:
❏ U.S.: (562) 276-4382, 6 AM to 8 PM, Pacific Time, Monday through Friday, and 7 AM to 4 PM, Pacific Time,Saturday
❏ Canada: (905) 709-3839, 6 AM to 8 PM, Pacific Time, Monday through Friday, and 7 AM to 4 PM, Pacific Time,Saturday
Days and hours of support are subject to change without notice. Toll or long distance charges may apply.
Note:For help using any other software on your system, see the documentation for that software for technical support.
Purchase Supplies and Accessories
You can purchase genuine Epson accessories at www.epson.com (U.S. sales) or www.epson.ca (Canadian sales).
You can also purchase accessories from an Epson authorized reseller. To find the nearest one, call 800-GO-EPSON(800-463-7766).
User's Guide
Where to Get Help
68