user guide · contact customer care at 1-888-963-8471. english i sample areas (dark-coloured...
TRANSCRIPT
BLOOD GLUCOSE MONITORING SYSTEMSYSTÈME DE SURVEILLANCE DE LA GLYCÉMIE
User GuideFor in vitro Diagnostic Use in AnimalsFeaturing the AlphaTRAK 2 Meter
Distributed by Zoetis Inc.
Kalamazoo, MI 49007
www.AlphaTRAKmeter.com
Contact Customer Care at 1-888-963-8471
English
i
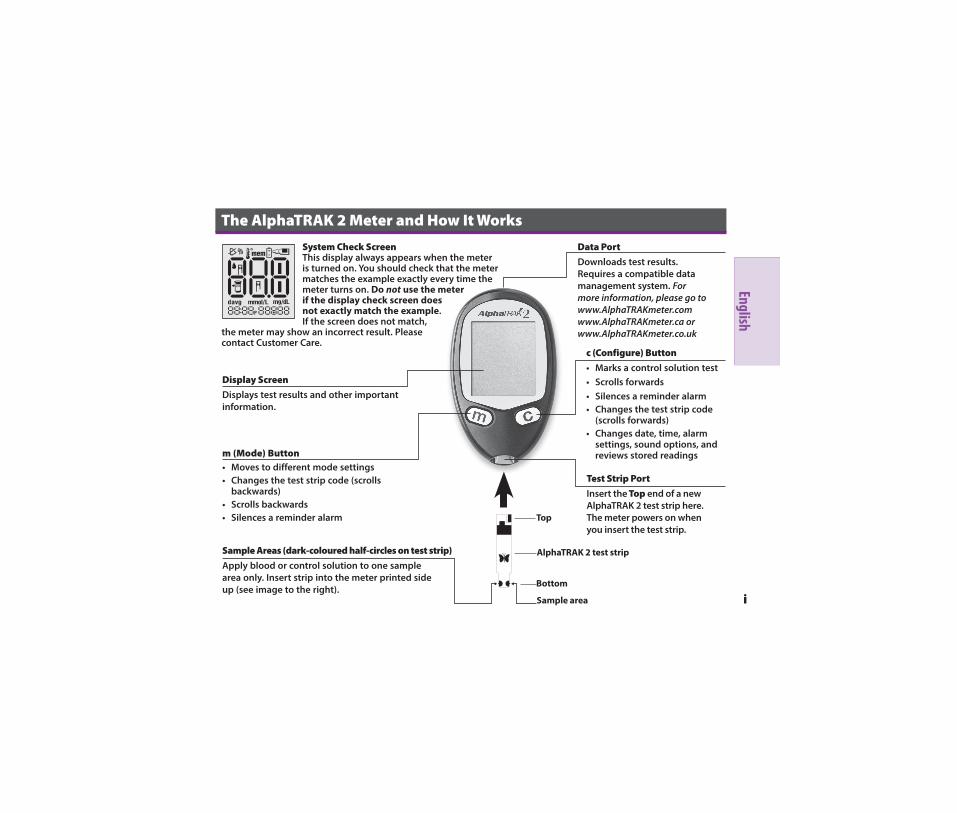
Sample Areas (dark-coloured half-circles on test strip)Apply blood or control solution to one sample area only. Insert strip into the meter printed side up (see image to the right).
Bottom
AlphaTRAK 2 test strip
Sample area
Top
Data PortDownloads test results. Requires a compatible data management system. For more information, please go to www.AlphaTRAKmeter.com www.AlphaTRAKmeter.ca or www.AlphaTRAKmeter.co.uk
Display ScreenDisplays test results and other important information.
m (Mode) Button• Moves to different mode settings• Changes the test strip code (scrolls
backwards)• Scrolls backwards• Silences a reminder alarm
The AlphaTRAK 2 Meter and How It Works
Test Strip PortInsert the Top end of a new AlphaTRAK 2 test strip here. The meter powers on when you insert the test strip.
System Check ScreenThis display always appears when the meter is turned on. You should check that the meter matches the example exactly every time the meter turns on. Do not use the meter if the display check screen does not exactly match the example. If the screen does not match,
the meter may show an incorrect result. Please contact Customer Care.
c (Configure) Button• Marks a control solution test• Scrolls forwards• Silences a reminder alarm• Changes the test strip code
(scrolls forwards)• Changes date, time, alarm
settings, sound options, and reviews stored readings
EnglishEngl
ish
The AlphaTRAK 2 Meter and How It Works . . . . . . . . . . . . . . . . . . . . . . . . . . . . . . . . . . . . i
Important Information About AlphaTRAK Blood Glucose Monitoring System . . . . . . . . . . . . . . . . . . . . . . . . . . . . . . . . . . . . . . . . . . . . . . . . . . . . . . . . . . 1Important Health Related Information . . . . . . . . . . . . . . . . . . . . . . . . . . . . . . . . . . . . . . . . .1
Setting Up the AlphaTRAK 2 Meter . . . . . . . . . . . . . . . . . . . . . . . . . . . . . . . . . . . . . . . . . . 3Purpose . . . . . . . . . . . . . . . . . . . . . . . . . . . . . . . . . . . . . . . . . . . . . . . . . . . . . . . . . . . . . . . . . . . . . . .3Set Sound Volume . . . . . . . . . . . . . . . . . . . . . . . . . . . . . . . . . . . . . . . . . . . . . . . . . . . . . . . . . . . . .4Set Time . . . . . . . . . . . . . . . . . . . . . . . . . . . . . . . . . . . . . . . . . . . . . . . . . . . . . . . . . . . . . . . . . . . . . . .5Set Date . . . . . . . . . . . . . . . . . . . . . . . . . . . . . . . . . . . . . . . . . . . . . . . . . . . . . . . . . . . . . . . . . . . . . . .6
Obtaining a Blood Sample . . . . . . . . . . . . . . . . . . . . . . . . . . . . . . . . . . . . . . . . . . . . . . . . . . . 8Purpose . . . . . . . . . . . . . . . . . . . . . . . . . . . . . . . . . . . . . . . . . . . . . . . . . . . . . . . . . . . . . . . . . . . . . . .8How to Lance . . . . . . . . . . . . . . . . . . . . . . . . . . . . . . . . . . . . . . . . . . . . . . . . . . . . . . . . . . . . . . . . .8
AlphaTRAK Blood Glucose Testing . . . . . . . . . . . . . . . . . . . . . . . . . . . . . . . . . . . . . . . . . . 10Purpose . . . . . . . . . . . . . . . . . . . . . . . . . . . . . . . . . . . . . . . . . . . . . . . . . . . . . . . . . . . . . . . . . . . . . 10Performing a Blood Glucose Test . . . . . . . . . . . . . . . . . . . . . . . . . . . . . . . . . . . . . . . . . . . . . 10Important Test Strip Information . . . . . . . . . . . . . . . . . . . . . . . . . . . . . . . . . . . . . . . . . . . . . 11
Understanding Blood Glucose Test Results . . . . . . . . . . . . . . . . . . . . . . . . . . . . . . . . . 14Low and High Blood Glucose Results . . . . . . . . . . . . . . . . . . . . . . . . . . . . . . . . . . . . . . . . . 15LO Result Display . . . . . . . . . . . . . . . . . . . . . . . . . . . . . . . . . . . . . . . . . . . . . . . . . . . . . . . . . . . . 16HI Result Display . . . . . . . . . . . . . . . . . . . . . . . . . . . . . . . . . . . . . . . . . . . . . . . . . . . . . . . . . . . . . 17
Error Codes . . . . . . . . . . . . . . . . . . . . . . . . . . . . . . . . . . . . . . . . . . . . . . . . . . . . . . . . . . . . . . . . . 18
Troubleshooting . . . . . . . . . . . . . . . . . . . . . . . . . . . . . . . . . . . . . . . . . . . . . . . . . . . . . . . . . . . . 22
AlphaTRAK Control Solution . . . . . . . . . . . . . . . . . . . . . . . . . . . . . . . . . . . . . . . . . . . . . . . . 24Purpose . . . . . . . . . . . . . . . . . . . . . . . . . . . . . . . . . . . . . . . . . . . . . . . . . . . . . . . . . . . . . . . . . . . . . 24Control Solution Information . . . . . . . . . . . . . . . . . . . . . . . . . . . . . . . . . . . . . . . . . . . . . . . . 24Out of Range Control Solution Results . . . . . . . . . . . . . . . . . . . . . . . . . . . . . . . . . . . . . . . . 25Performing an AlphaTRAK Control Solution Test . . . . . . . . . . . . . . . . . . . . . . . . . . . . . . 26
Using Meter Memory . . . . . . . . . . . . . . . . . . . . . . . . . . . . . . . . . . . . . . . . . . . . . . . . . . . . . . . 30Purpose . . . . . . . . . . . . . . . . . . . . . . . . . . . . . . . . . . . . . . . . . . . . . . . . . . . . . . . . . . . . . . . . . . . . . 30Viewing Blood Glucose Averages in Memory . . . . . . . . . . . . . . . . . . . . . . . . . . . . . . . . . 30Viewing Test Results in Memory . . . . . . . . . . . . . . . . . . . . . . . . . . . . . . . . . . . . . . . . . . . . . . 31
Setting Reminder Alarms (optional) . . . . . . . . . . . . . . . . . . . . . . . . . . . . . . . . . . . . . . . . 32Purpose . . . . . . . . . . . . . . . . . . . . . . . . . . . . . . . . . . . . . . . . . . . . . . . . . . . . . . . . . . . . . . . . . . . . . 32
Maintaining the AlphaTRAK 2 Meter . . . . . . . . . . . . . . . . . . . . . . . . . . . . . . . . . . . . . . . . 34Replacing the Battery . . . . . . . . . . . . . . . . . . . . . . . . . . . . . . . . . . . . . . . . . . . . . . . . . . . . . . . . 34Cleaning the AlphaTRAK 2 Meter . . . . . . . . . . . . . . . . . . . . . . . . . . . . . . . . . . . . . . . . . . . . . 36
Specifications . . . . . . . . . . . . . . . . . . . . . . . . . . . . . . . . . . . . . . . . . . . . . . . . . . . . . . . . . . . . . . . 37
Definition of Symbols . . . . . . . . . . . . . . . . . . . . . . . . . . . . . . . . . . . . . . . . . . . . . . . . . . . . . . . 39
References . . . . . . . . . . . . . . . . . . . . . . . . . . . . . . . . . . . . . . . . . . . . . . . . . . . . . . . . . . . . . . . . . . 40
Table of Contents
EnglishEngl
ish
1 2
Important Information About AlphaTRAK Blood Glucose Monitoring System
Important Health Related Information The AlphaTRAK 2 meter is intended for use outside the body only (in vitro diagnostic use) .
The AlphaTRAK Blood Glucose Monitoring System is intended for use in monitoring glucose samples taken from the dog or cat .
Glucose values are affected by stress, meals, exercise, health and medication intake . Severe dehydration and excessive water loss may cause false low results .
Caution: The AlphaTRAK 2 test strips are not intended for human blood glucose testing and may give inaccurate results when used in humans .
Do use the AlphaTRAK 2 meter for:• Testing blood glucose in dogs and cats• Testing with fresh whole blood samples• Testing with fresh whole capillary samples• Testing with fresh whole venous samples• Testing with whole blood collected in a syringe
or tube with EDTA or heparin anticoagulant if testing within 10 minutes
• Testing with whole blood collected in a syringe or tube with no anticoagulant, if testing is performed immediately
Do not use the AlphaTRAK 2 meter for:• Testing of arterial blood • Testing with serum• Testing with plasma • Diagnosis of diabetes
Warning:
• This system contains small parts that may be dangerous if swallowed .
Caution: Please read all the instructions provided in this user guide and practice the testing procedures before using the AlphaTRAK 2 meter . Blood glucose monitoring should be done with the guidance of a veterinarian/veterinary surgeon .
IMPORTANT: Use only AlphaTRAK 2 test strips and AlphaTRAK control solution with this meter . Using previous versions of the AlphaTRAK test strips or other brands of test strips and control solution with the AlphaTRAK 2 meter can produce inaccurate results .
Contact Customer Care at 1-888-963-8471
EnglishEngl
ish
3 4
Setting Up the AlphaTRAK 2 Meter
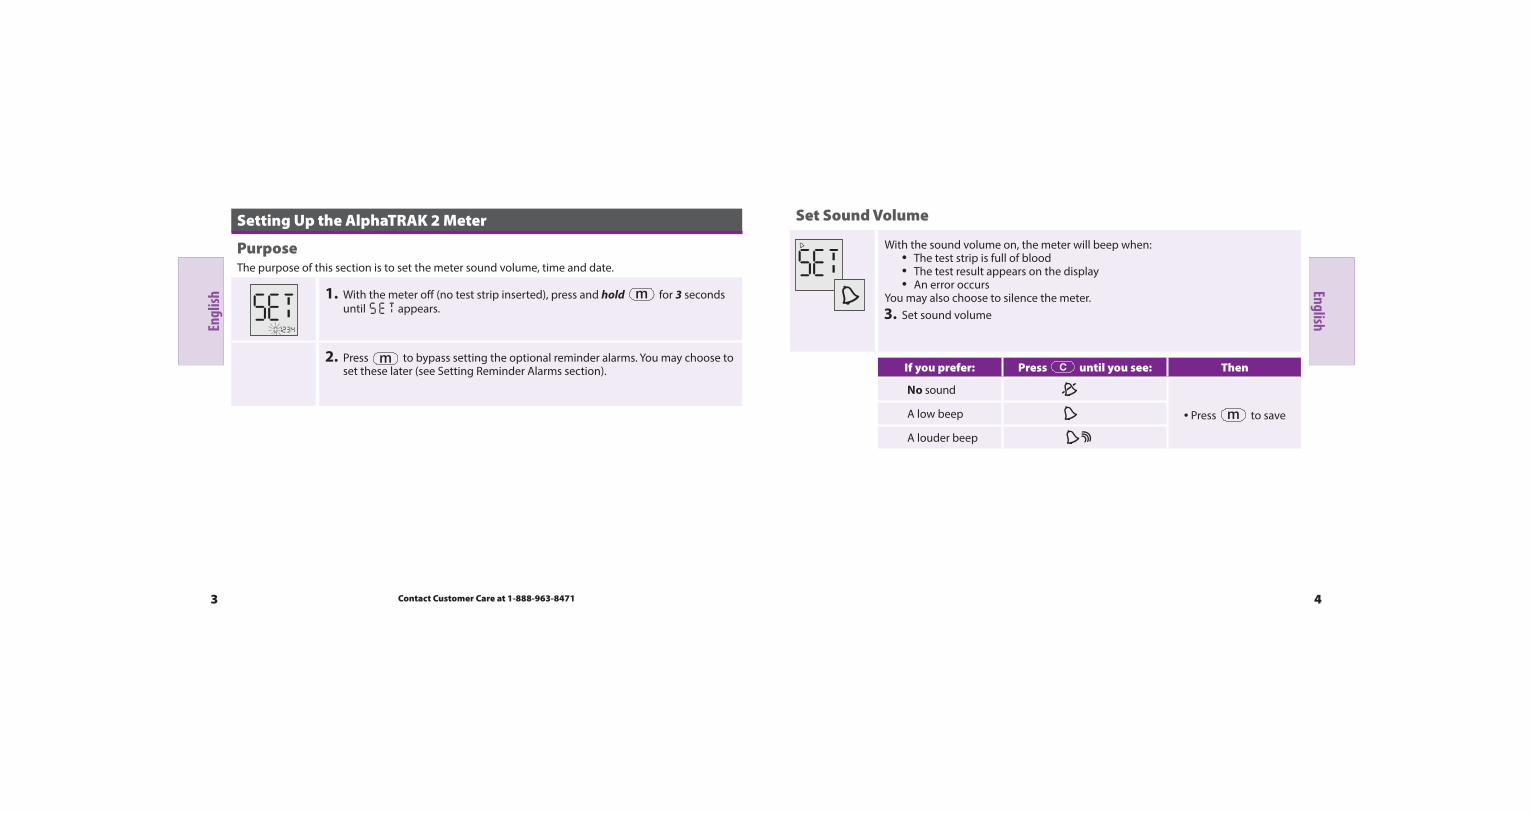
PurposeThe purpose of this section is to set the meter sound volume, time and date .
1. With the meter off (no test strip inserted), press and hold m for 3 seconds until appears .
2. Press m to bypass setting the optional reminder alarms . You may choose to set these later (see Setting Reminder Alarms section) .
Set Sound Volume
With the sound volume on, the meter will beep when:• The test strip is full of blood • The test result appears on the display• An error occurs
You may also choose to silence the meter . 3. Set sound volume
If you prefer: Press c until you see: Then
No sound
• Press m to saveA low beep
A louder beep
Contact Customer Care at 1-888-963-8471
EnglishEngl
ish
5 6
Set Time
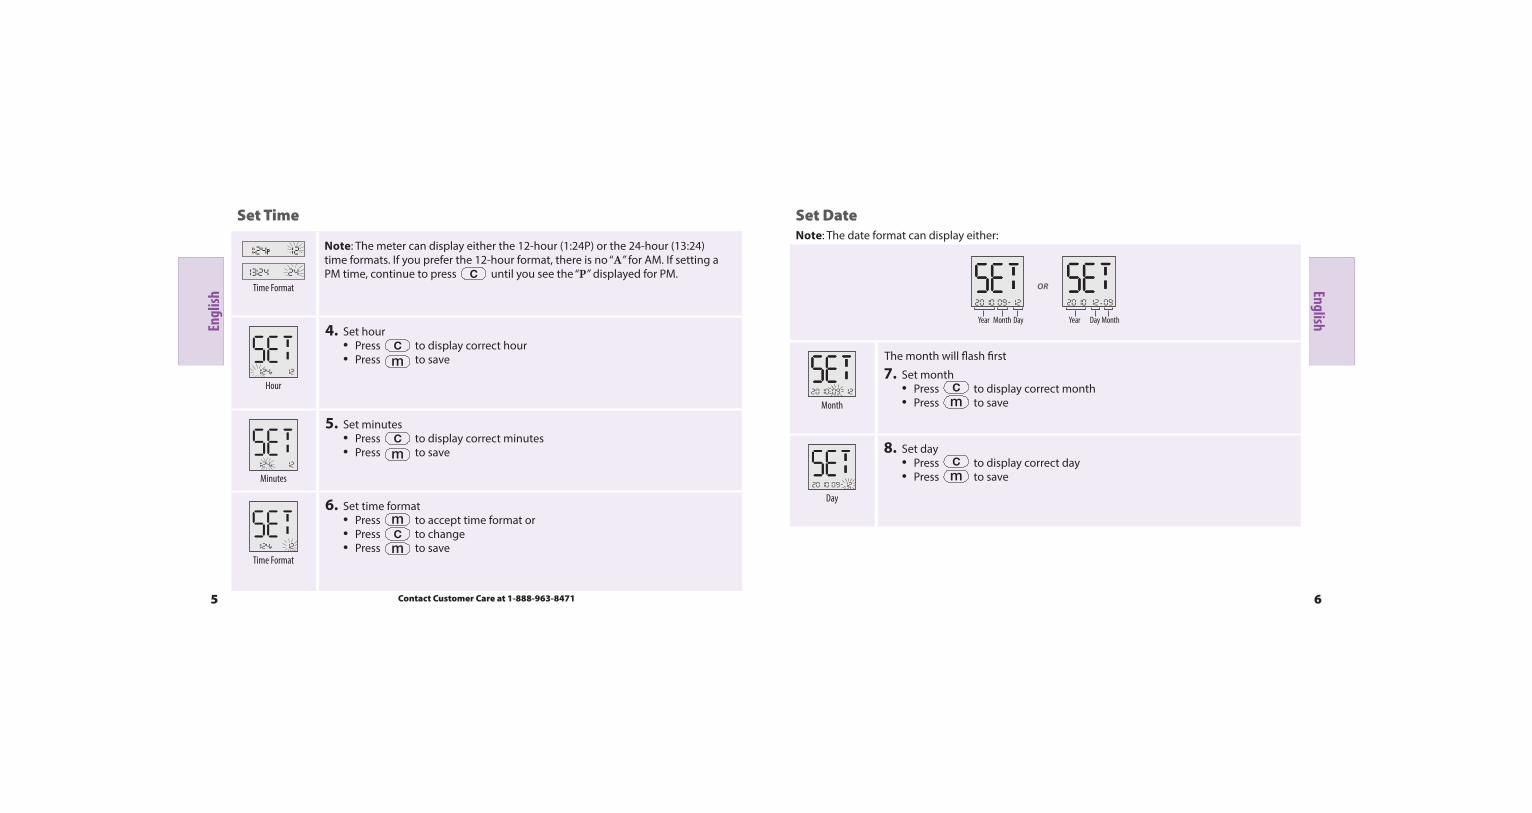
Time Format
Note: The meter can display either the 12-hour (1:24P) or the 24-hour (13:24) time formats . If you prefer the 12-hour format, there is no “A” for AM . If setting a PM time, continue to press c until you see the “P” displayed for PM .
Hour
4. Set hour• Press c to display correct hour• Press m to save
Minutes
5. Set minutes• Press c to display correct minutes• Press m to save
Time Format
6. Set time format• Press m to accept time format or • Press c to change • Press m to save
Set DateNote: The date format can display either:
Year
OR
Year Month Day Day Month
Month
The month will flash first
7. Set month• Press c to display correct month• Press m to save
Day
8. Set day• Press c to display correct day• Press m to save
Contact Customer Care at 1-888-963-8471
EnglishEngl
ish
7 8
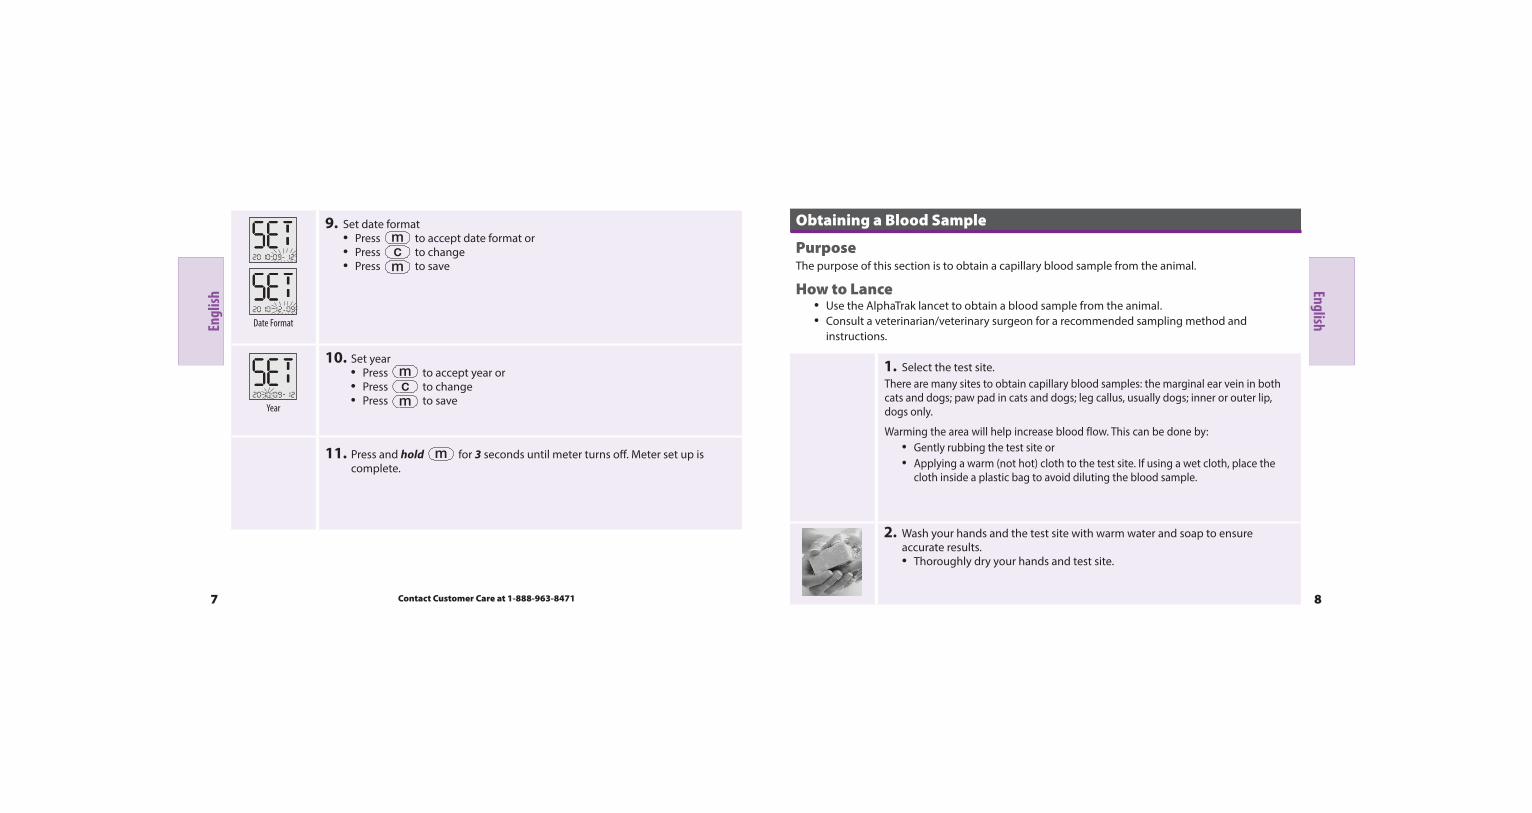
Date Format
9. Set date format• Press m to accept date format or• Press c to change• Press m to save
Year
10. Set year• Press m to accept year or• Press c to change • Press m to save
11. Press and hold m for 3 seconds until meter turns off . Meter set up is complete .
Obtaining a Blood Sample
PurposeThe purpose of this section is to obtain a capillary blood sample from the animal .
How to Lance• Use the AlphaTrak lancet to obtain a blood sample from the animal .• Consult a veterinarian/veterinary surgeon for a recommended sampling method and
instructions .
1. Select the test site .There are many sites to obtain capillary blood samples: the marginal ear vein in both cats and dogs; paw pad in cats and dogs; leg callus, usually dogs; inner or outer lip, dogs only .
Warming the area will help increase blood flow . This can be done by:• Gently rubbing the test site or• Applying a warm (not hot) cloth to the test site . If using a wet cloth, place the
cloth inside a plastic bag to avoid diluting the blood sample .
2. Wash your hands and the test site with warm water and soap to ensure accurate results .• Thoroughly dry your hands and test site .
Contact Customer Care at 1-888-963-8471
EnglishEngl
ish
9 10
3. Remove the round cover from the lancet and prick the test site .Optional: a thin layer of petroleum jelly may be applied prior to lancing the site . This can help the blood form into a droplet and avoid spilling into the hair . The AlphaTRAK lancing device may be used to assist in obtaining a blood sample .
4. Gently apply pressure to the test site with sterile gauze or cotton wool to help stop the blood flow .
If you accidentally prick yourself with a lancet, please follow normal first aid procedures. If bleeding persists, please contact your local healthcare professional.
AlphaTRAK Blood Glucose Testing
PurposeThe purpose of this section is to produce an accurate blood glucose test result .
Performing a Blood Glucose Test
1. Select the test site .
2. Wash your hands and the test site with warm water and soap to ensure accurate results .
• Thoroughly dry your hands and test site .
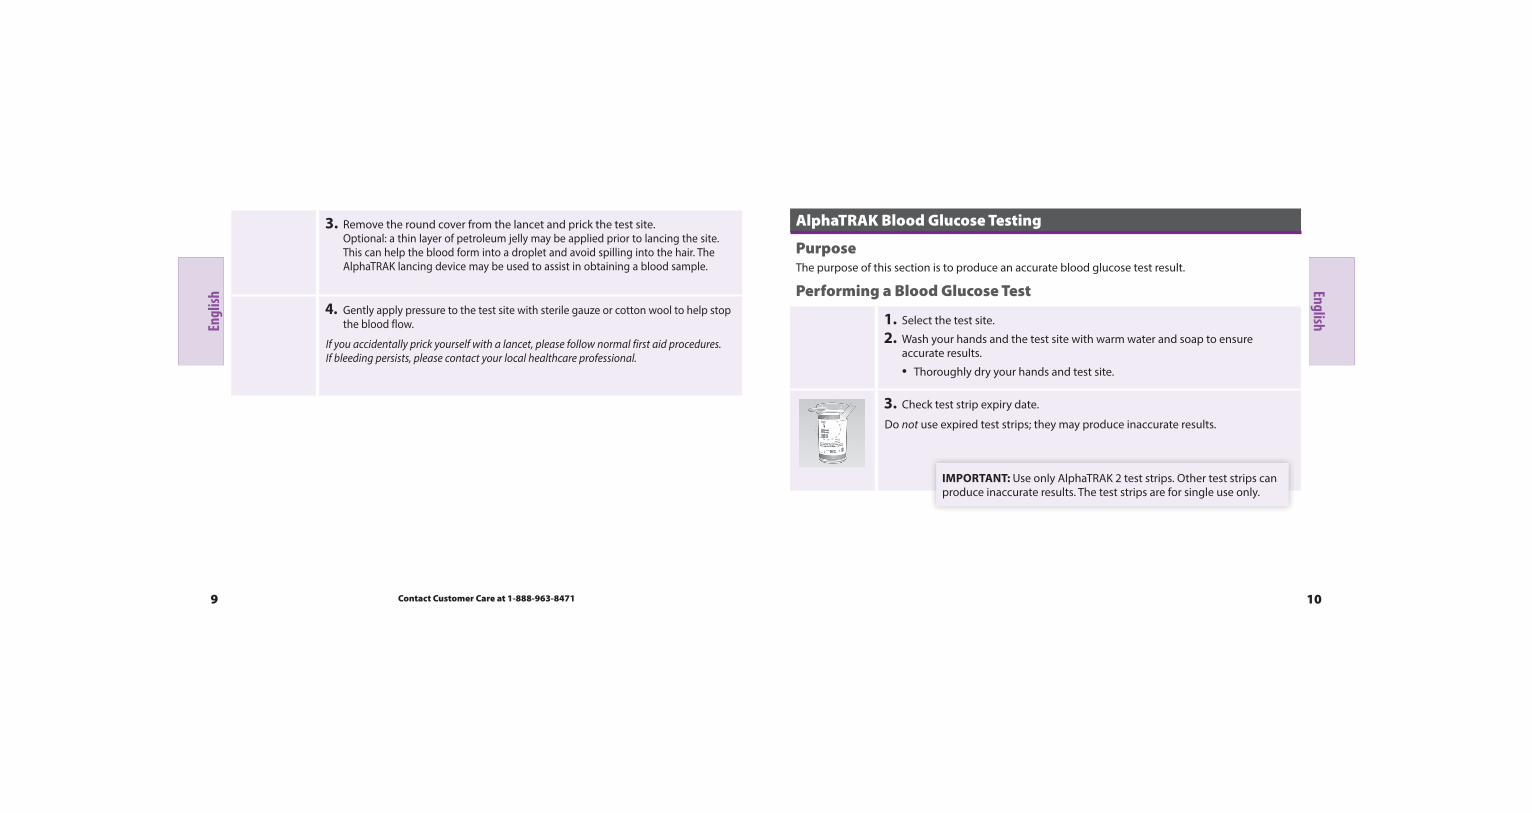
3. Check test strip expiry date .
Do not use expired test strips; they may produce inaccurate results .
IMPORTANT: Use only AlphaTRAK 2 test strips . Other test strips can produce inaccurate results . The test strips are for single use only .
Contact Customer Care at 1-888-963-8471
EnglishEngl
ish
11 12
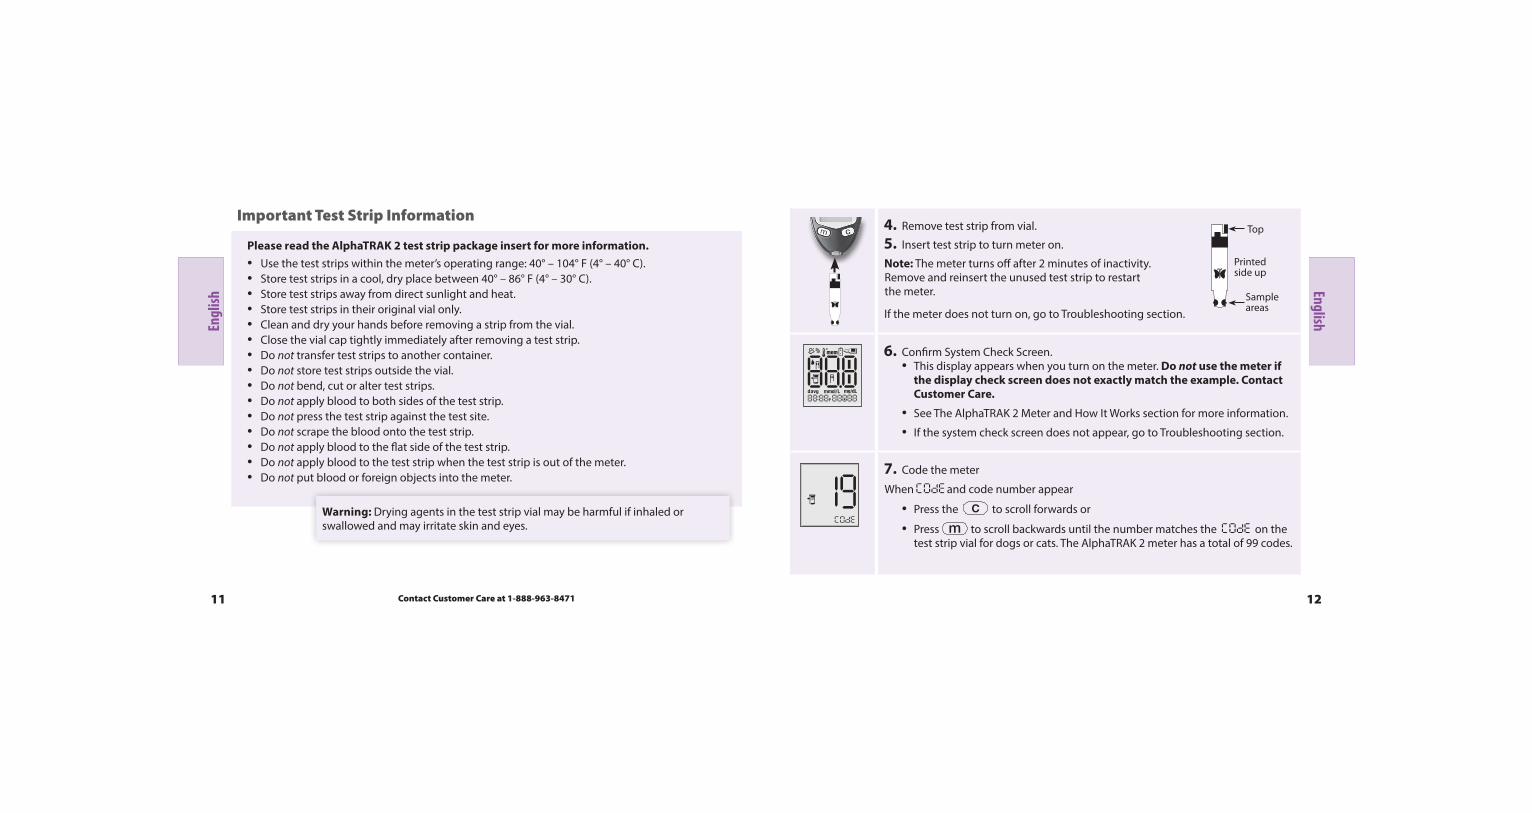
Important Test Strip Information
Please read the AlphaTRAK 2 test strip package insert for more information.• Use the test strips within the meter’s operating range: 40° – 104° F (4° – 40° C) .• Store test strips in a cool, dry place between 40° – 86° F (4° – 30° C) .• Store test strips away from direct sunlight and heat .• Store test strips in their original vial only .• Clean and dry your hands before removing a strip from the vial .• Close the vial cap tightly immediately after removing a test strip .• Do not transfer test strips to another container .• Do not store test strips outside the vial .• Do not bend, cut or alter test strips .• Do not apply blood to both sides of the test strip .• Do not press the test strip against the test site .• Do not scrape the blood onto the test strip .• Do not apply blood to the flat side of the test strip .• Do not apply blood to the test strip when the test strip is out of the meter .• Do not put blood or foreign objects into the meter .
Warning: Drying agents in the test strip vial may be harmful if inhaled or swallowed and may irritate skin and eyes .
4. Remove test strip from vial .
5. Insert test strip to turn meter on .
Note: The meter turns off after 2 minutes of inactivity . Remove and reinsert the unused test strip to restart the meter .
If the meter does not turn on, go to Troubleshooting section .
6. Confirm System Check Screen .• This display appears when you turn on the meter . Do not use the meter if
the display check screen does not exactly match the example. Contact Customer Care.
• See The AlphaTRAK 2 Meter and How It Works section for more information .
• If the system check screen does not appear, go to Troubleshooting section .
7. Code the meter
When and code number appear
• Press the c to scroll forwards or
• Press m to scroll backwards until the number matches the on the test strip vial for dogs or cats . The AlphaTRAK 2 meter has a total of 99 codes .
Top
Printed side up
Sample areas
Contact Customer Care at 1-888-963-8471
EnglishEngl
ish
13 14
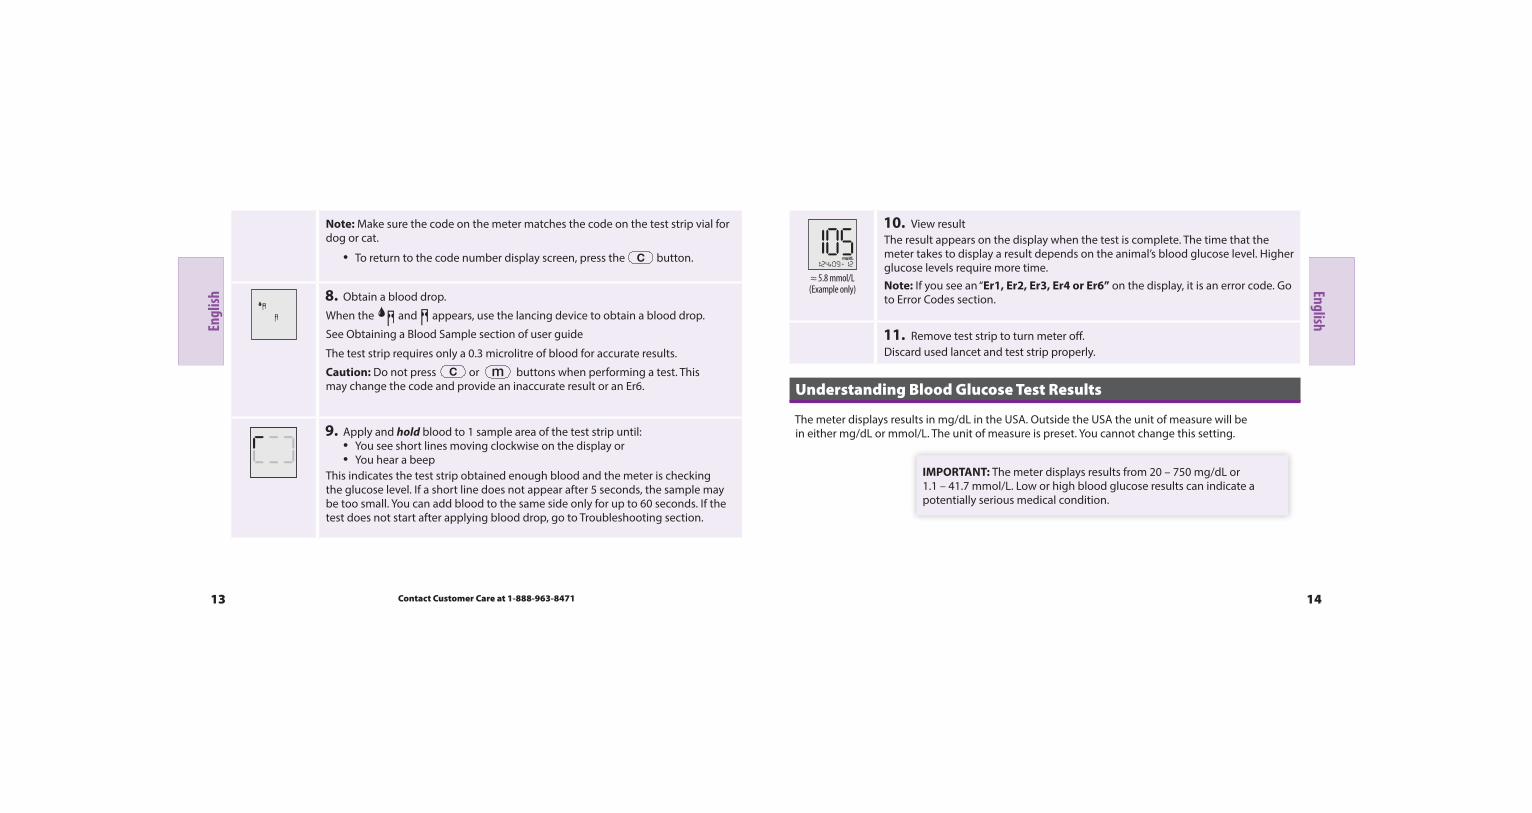
Note: Make sure the code on the meter matches the code on the test strip vial for dog or cat .
• To return to the code number display screen, press the c button .
8. Obtain a blood drop .
When the and appears, use the lancing device to obtain a blood drop .
See Obtaining a Blood Sample section of user guide
The test strip requires only a 0 .3 microlitre of blood for accurate results .
Caution: Do not press c or m buttons when performing a test . This may change the code and provide an inaccurate result or an Er6 .
9. Apply and hold blood to 1 sample area of the test strip until: • You see short lines moving clockwise on the display or• You hear a beep
This indicates the test strip obtained enough blood and the meter is checking the glucose level . If a short line does not appear after 5 seconds, the sample may be too small . You can add blood to the same side only for up to 60 seconds . If the test does not start after applying blood drop, go to Troubleshooting section .
≈ 5.8 mmol/L(Example only)
10. View resultThe result appears on the display when the test is complete . The time that the meter takes to display a result depends on the animal’s blood glucose level . Higher glucose levels require more time .Note: If you see an “Er1, Er2, Er3, Er4 or Er6” on the display, it is an error code . Go to Error Codes section .
11. Remove test strip to turn meter off . Discard used lancet and test strip properly .
Understanding Blood Glucose Test Results
The meter displays results in mg/dL in the USA . Outside the USA the unit of measure will be in either mg/dL or mmol/L . The unit of measure is preset . You cannot change this setting .
IMPORTANT: The meter displays results from 20 – 750 mg/dL or 1 .1 – 41 .7 mmol/L . Low or high blood glucose results can indicate a potentially serious medical condition .
Contact Customer Care at 1-888-963-8471
EnglishEngl
ish
15 16
Low and High Blood Glucose ResultsResult What It Means What To Do
Lower than 65 mg/dL (3 .6 mmol/L) for adult cats & dogs
Low blood glucose (hypoglycaemia)
Repeat the test with a new test strip even if the result is not consistent with the symptoms .
If the blood glucose result is not consistent with the symptoms, perform a control solution test with a new test strip . If the test results are within the range printed on the test strip vial, retest using blood and a new test strip .
If the blood glucose result is still not consistent with the symptoms, contact a veterinarian/veterinary surgeon .
Higher than 250 mg/dL (13 .9 mmol/L) for adult cats & dogs2
High blood glucose (hyperglycaemia)
Repeat the test with a new test strip even if the result is not consistent with the symptoms .
If the blood glucose result is not consistent with the symptoms, perform a control solution test with a new test strip . If the test results are within the range printed on the test strip vial, retest using blood and a new test strip .
If the blood glucose result is still not consistent with the symptoms, contact a veterinarian/veterinary surgeon .
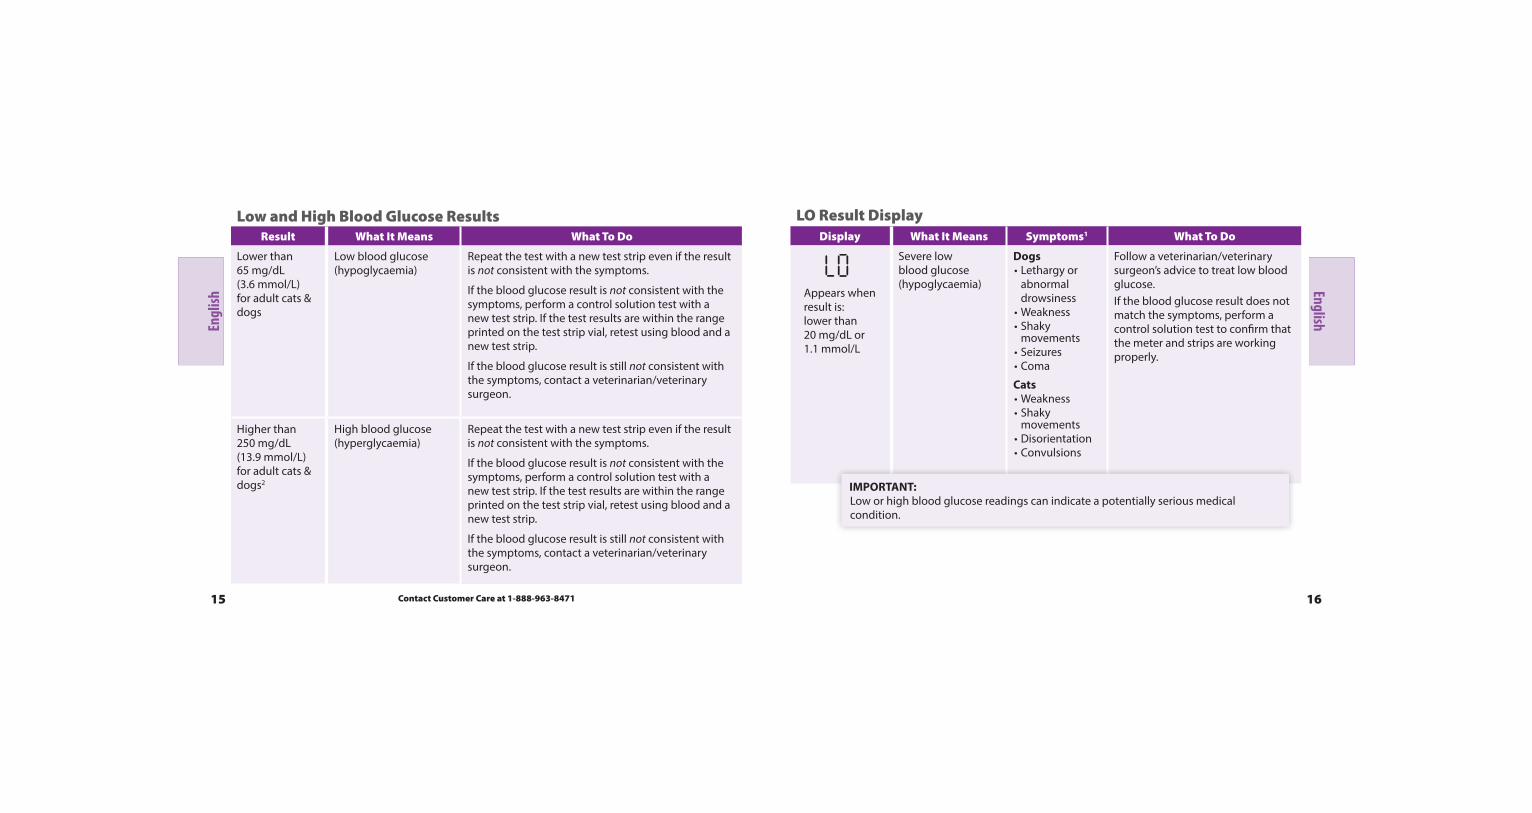
LO Result DisplayDisplay What It Means Symptoms1 What To Do
Appears when result is: lower than 20 mg/dL or 1 .1 mmol/L
Severe low blood glucose (hypoglycaemia)
Dogs•Lethargy or
abnormal drowsiness
•Weakness•Shaky
movements•Seizures•Coma
Cats•Weakness•Shaky
movements•Disorientation•Convulsions
Follow a veterinarian/veterinary surgeon’s advice to treat low blood glucose .If the blood glucose result does not match the symptoms, perform a control solution test to confirm that the meter and strips are working properly .
IMPORTANT: Low or high blood glucose readings can indicate a potentially serious medical condition .
Contact Customer Care at 1-888-963-8471
EnglishEngl
ish
17 18
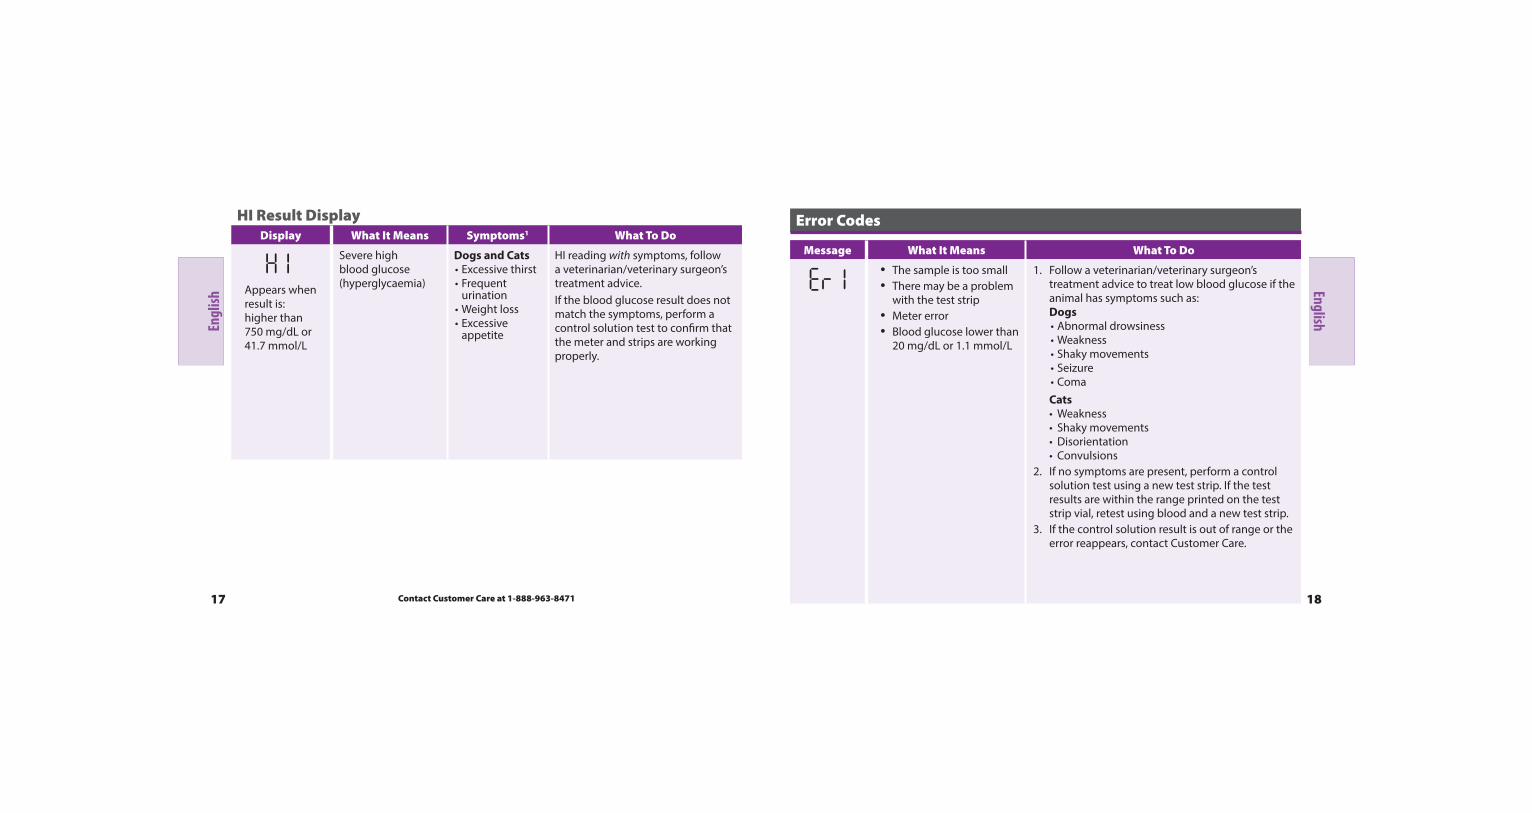
HI Result DisplayDisplay What It Means Symptoms1 What To Do
Appears when result is:higher than 750 mg/dL or 41 .7 mmol/L
Severe high blood glucose (hyperglycaemia)
Dogs and Cats•Excessive thirst•Frequent
urination•Weight loss•Excessive
appetite
HI reading with symptoms, follow a veterinarian/veterinary surgeon’s treatment advice . If the blood glucose result does not match the symptoms, perform a control solution test to confirm that the meter and strips are working properly .
Error Codes
Message What It Means What To Do
• The sample is too small• There may be a problem
with the test strip• Meter error• Blood glucose lower than
20 mg/dL or 1 .1 mmol/L
1 . Follow a veterinarian/veterinary surgeon’s treatment advice to treat low blood glucose if the animal has symptoms such as:Dogs•Abnormal drowsiness•Weakness•Shaky movements•Seizure•ComaCats•Weakness • Shaky movements •Disorientation•Convulsions
2 . If no symptoms are present, perform a control solution test using a new test strip . If the test results are within the range printed on the test strip vial, retest using blood and a new test strip .
3 . If the control solution result is out of range or the error reappears, contact Customer Care .
Contact Customer Care at 1-888-963-8471
EnglishEngl
ish
19 20
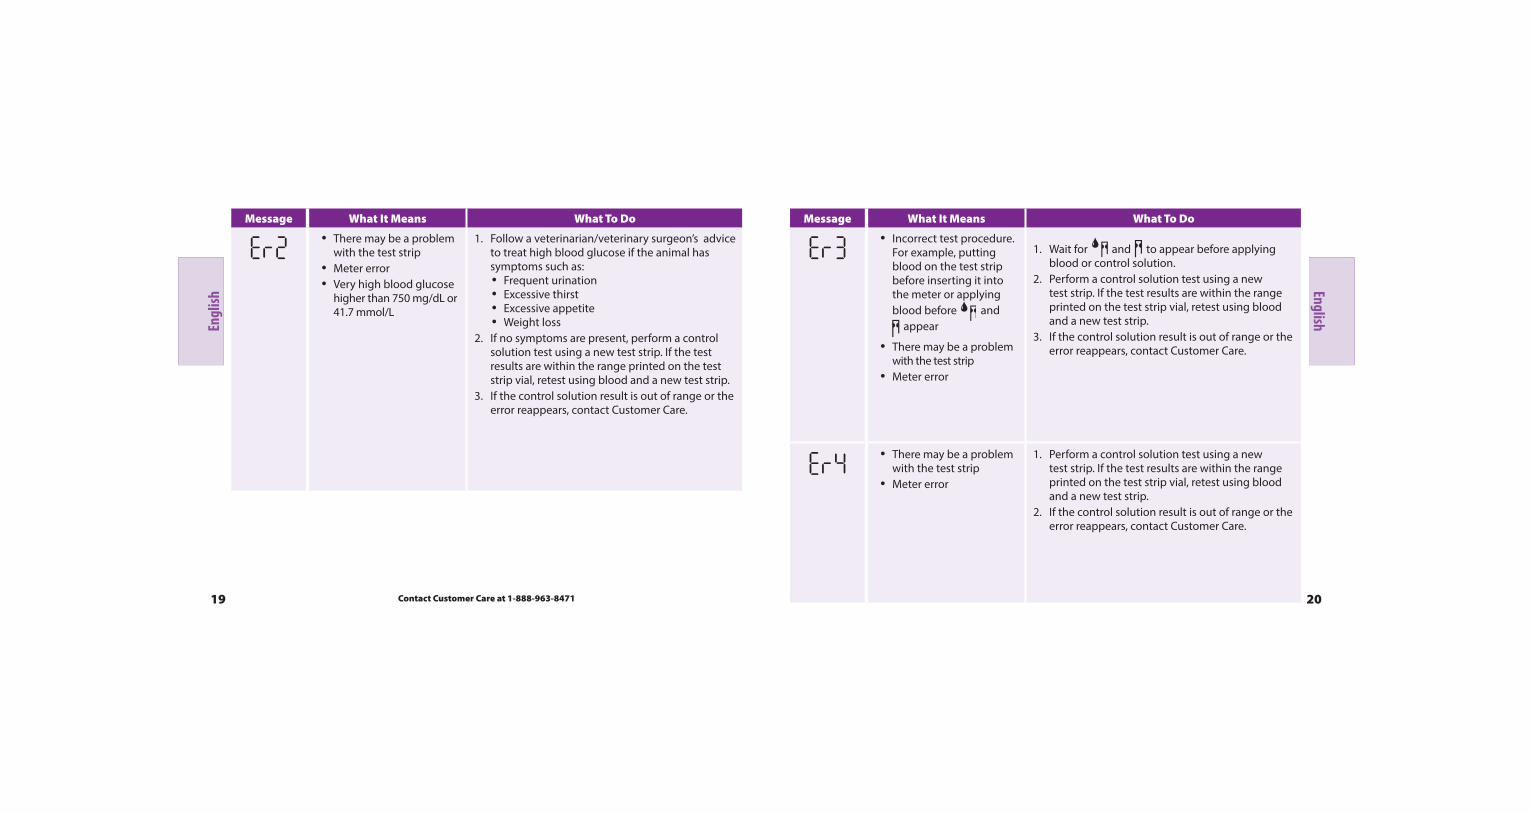
Message What It Means What To Do
• There may be a problem with the test strip
• Meter error• Very high blood glucose
higher than 750 mg/dL or41 .7 mmol/L
1 . Follow a veterinarian/veterinary surgeon’s advice to treat high blood glucose if the animal has symptoms such as:• Frequent urination• Excessive thirst• Excessive appetite• Weight loss
2 . If no symptoms are present, perform a control solution test using a new test strip . If the test results are within the range printed on the test strip vial, retest using blood and a new test strip .
3 . If the control solution result is out of range or the error reappears, contact Customer Care .
Message What It Means What To Do
• Incorrect test procedure . For example, putting blood on the test strip before inserting it into the meter or applying blood before and
appear
• There may be a problemwith the test strip
• Meter error
1 . Wait for and to appear before applying blood or control solution .
2 . Perform a control solution test using a new test strip . If the test results are within the range printed on the test strip vial, retest using blood and a new test strip .
3 . If the control solution result is out of range or the error reappears, contact Customer Care .
• There may be a problem with the test strip
• Meter error
1 . Perform a control solution test using a new test strip . If the test results are within the range printed on the test strip vial, retest using blood and a new test strip .
2 . If the control solution result is out of range or the error reappears, contact Customer Care .
Contact Customer Care at 1-888-963-8471
EnglishEngl
ish
21 22
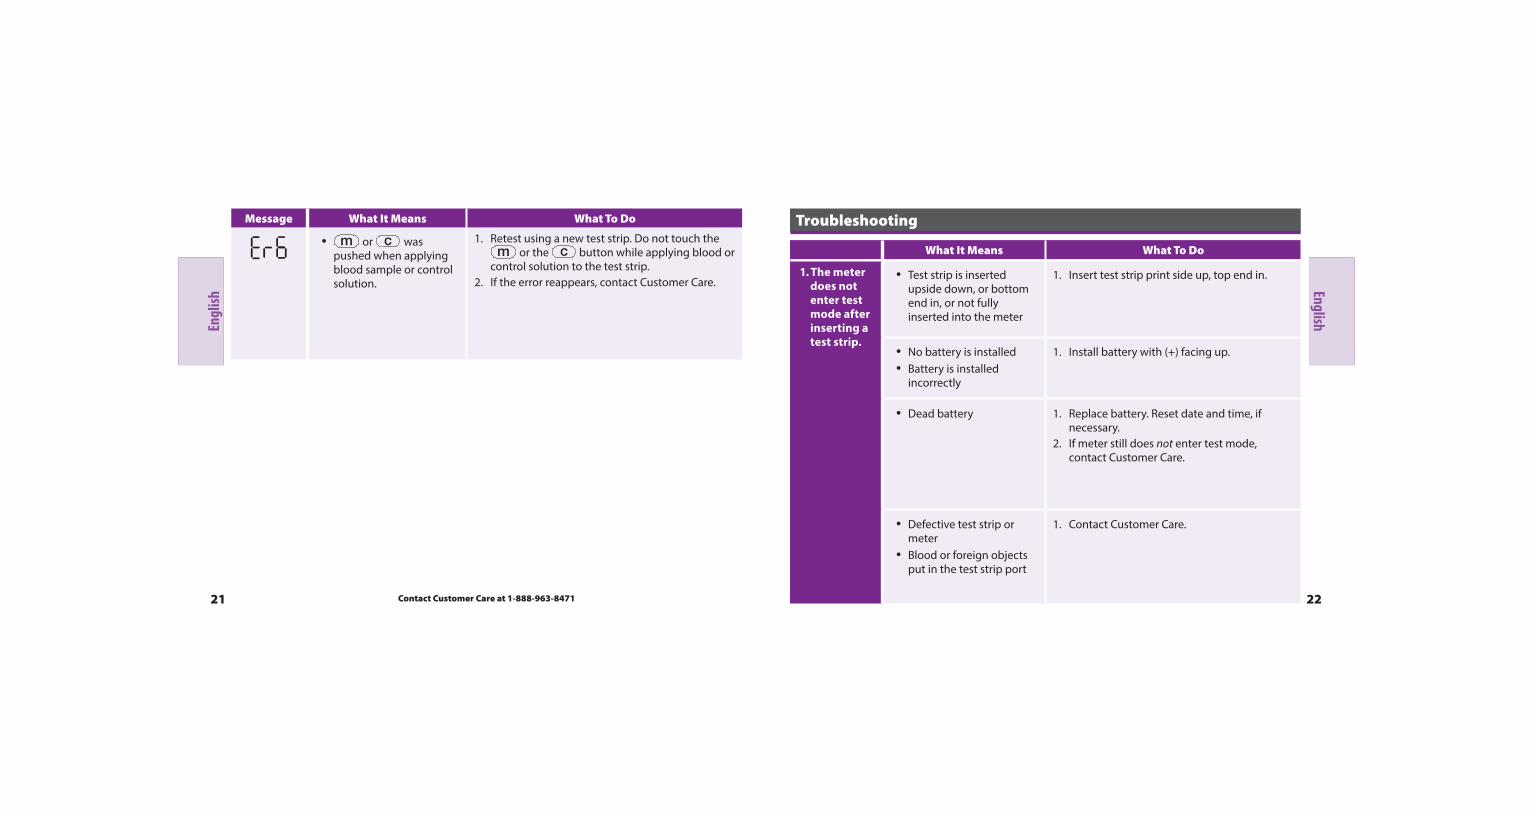
Message What It Means What To Do
• m or c was pushed when applying blood sample or control solution .
1 . Retest using a new test strip . Do not touch the m or the c button while applying blood or
control solution to the test strip . 2 . If the error reappears, contact Customer Care .
Troubleshooting
What It Means What To Do
1. The meter does not enter test mode after inserting a test strip.
• Test strip is inserted upside down, or bottom end in, or not fully inserted into the meter
1 . Insert test strip print side up, top end in .
• No battery is installed• Battery is installed
incorrectly
1 . Install battery with (+) facing up .
• Dead battery 1 . Replace battery . Reset date and time, if necessary .
2 . If meter still does not enter test mode, contact Customer Care .
• Defective test strip or meter
• Blood or foreign objects put in the test strip port
1 . Contact Customer Care .
Contact Customer Care at 1-888-963-8471
EnglishEngl
ish
23 24
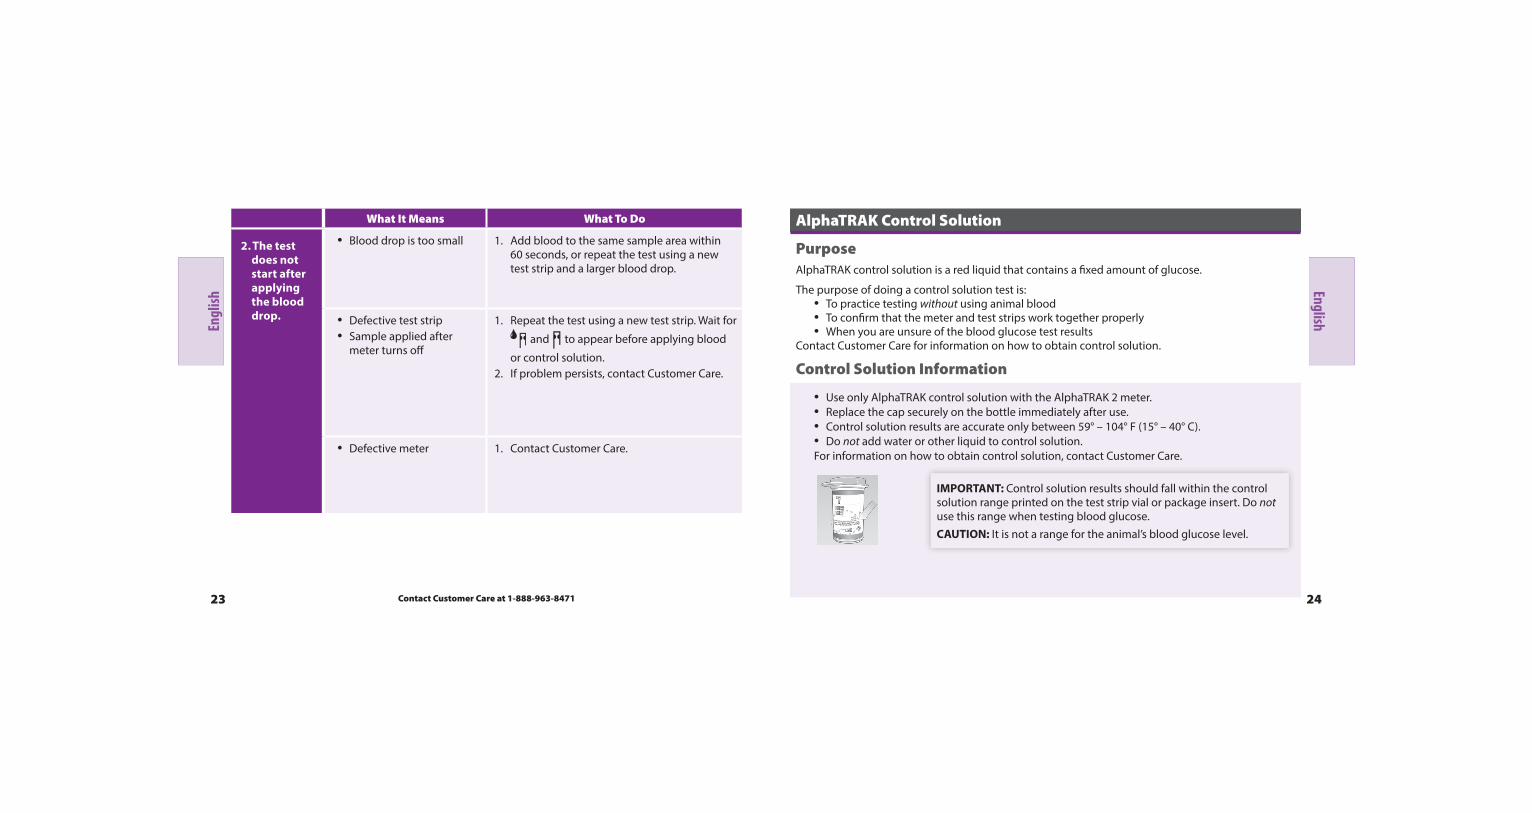
What It Means What To Do
2. The test does not start after applying the blood drop.
• Blood drop is too small 1 . Add blood to the same sample area within 60 seconds, or repeat the test using a new test strip and a larger blood drop .
• Defective test strip• Sample applied after
meter turns off
1 . Repeat the test using a new test strip . Wait for
and to appear before applying blood
or control solution .2 . If problem persists, contact Customer Care .
• Defective meter 1 . Contact Customer Care .
AlphaTRAK Control Solution
PurposeAlphaTRAK control solution is a red liquid that contains a fixed amount of glucose .
The purpose of doing a control solution test is:• To practice testing without using animal blood• To confirm that the meter and test strips work together properly• When you are unsure of the blood glucose test results
Contact Customer Care for information on how to obtain control solution .
Control Solution Information
• Use only AlphaTRAK control solution with the AlphaTRAK 2 meter .• Replace the cap securely on the bottle immediately after use .• Control solution results are accurate only between 59° – 104° F (15° – 40° C) .• Do not add water or other liquid to control solution .For information on how to obtain control solution, contact Customer Care .
IMPORTANT: Control solution results should fall within the control solution range printed on the test strip vial or package insert . Do not use this range when testing blood glucose . CAUTION: It is not a range for the animal’s blood glucose level .
Contact Customer Care at 1-888-963-8471
EnglishEngl
ish
25 26
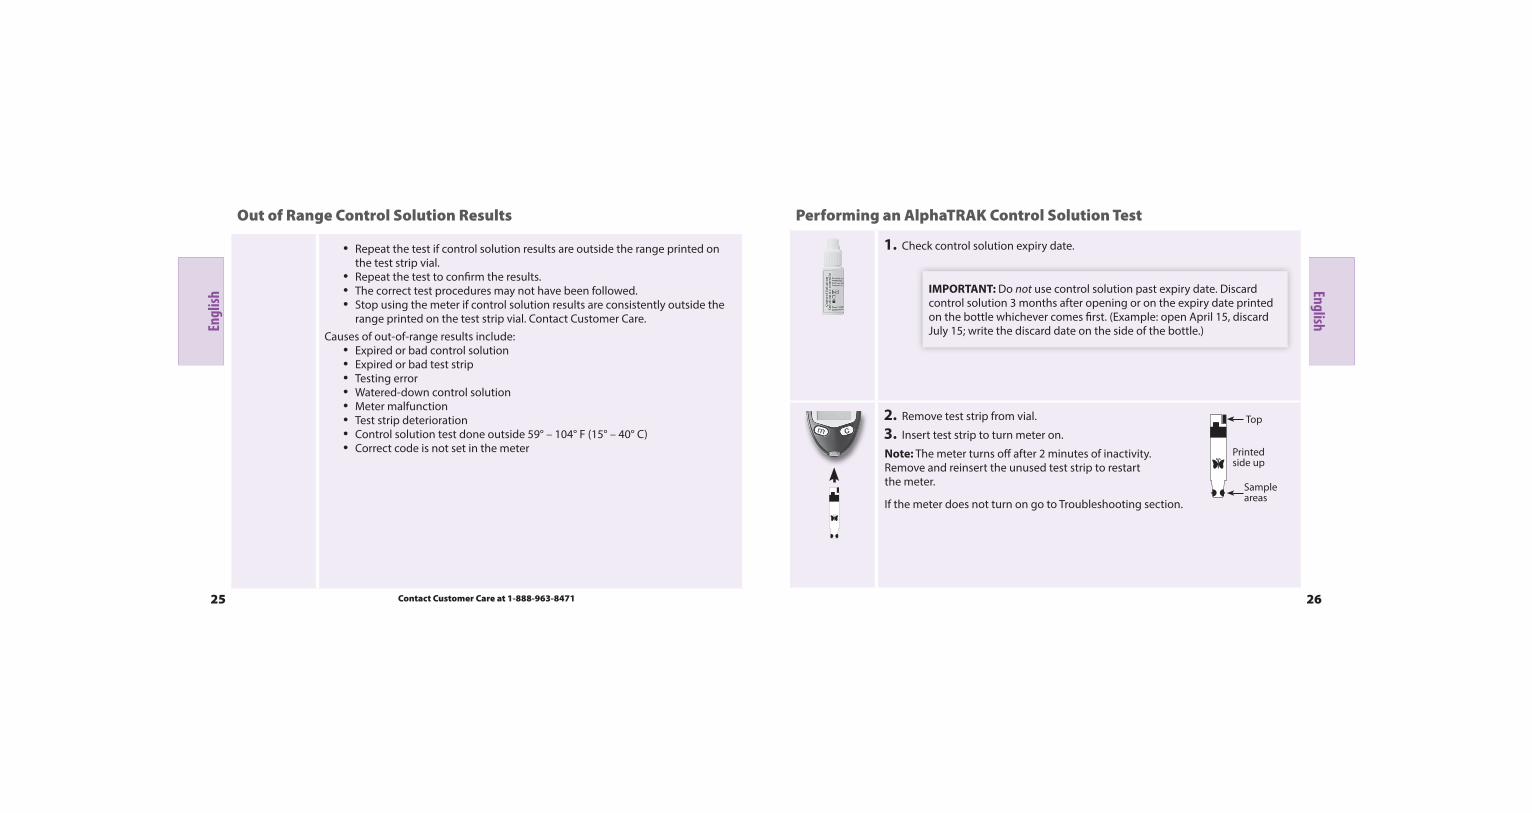
Out of Range Control Solution Results
• Repeat the test if control solution results are outside the range printed on the test strip vial .
• Repeat the test to confirm the results .• The correct test procedures may not have been followed .• Stop using the meter if control solution results are consistently outside the
range printed on the test strip vial . Contact Customer Care .Causes of out-of-range results include:
• Expired or bad control solution• Expired or bad test strip• Testing error• Watered-down control solution• Meter malfunction• Test strip deterioration• Control solution test done outside 59° – 104° F (15° – 40° C)• Correct code is not set in the meter
Performing an AlphaTRAK Control Solution Test
1. Check control solution expiry date .
2. Remove test strip from vial .
3. Insert test strip to turn meter on .
Note: The meter turns off after 2 minutes of inactivity . Remove and reinsert the unused test strip to restart the meter .
If the meter does not turn on go to Troubleshooting section .
IMPORTANT: Do not use control solution past expiry date . Discard control solution 3 months after opening or on the expiry date printed on the bottle whichever comes first . (Example: open April 15, discard July 15; write the discard date on the side of the bottle .)
Top
Printed side up
Sample areas
Contact Customer Care at 1-888-963-8471
EnglishEngl
ish
27 28
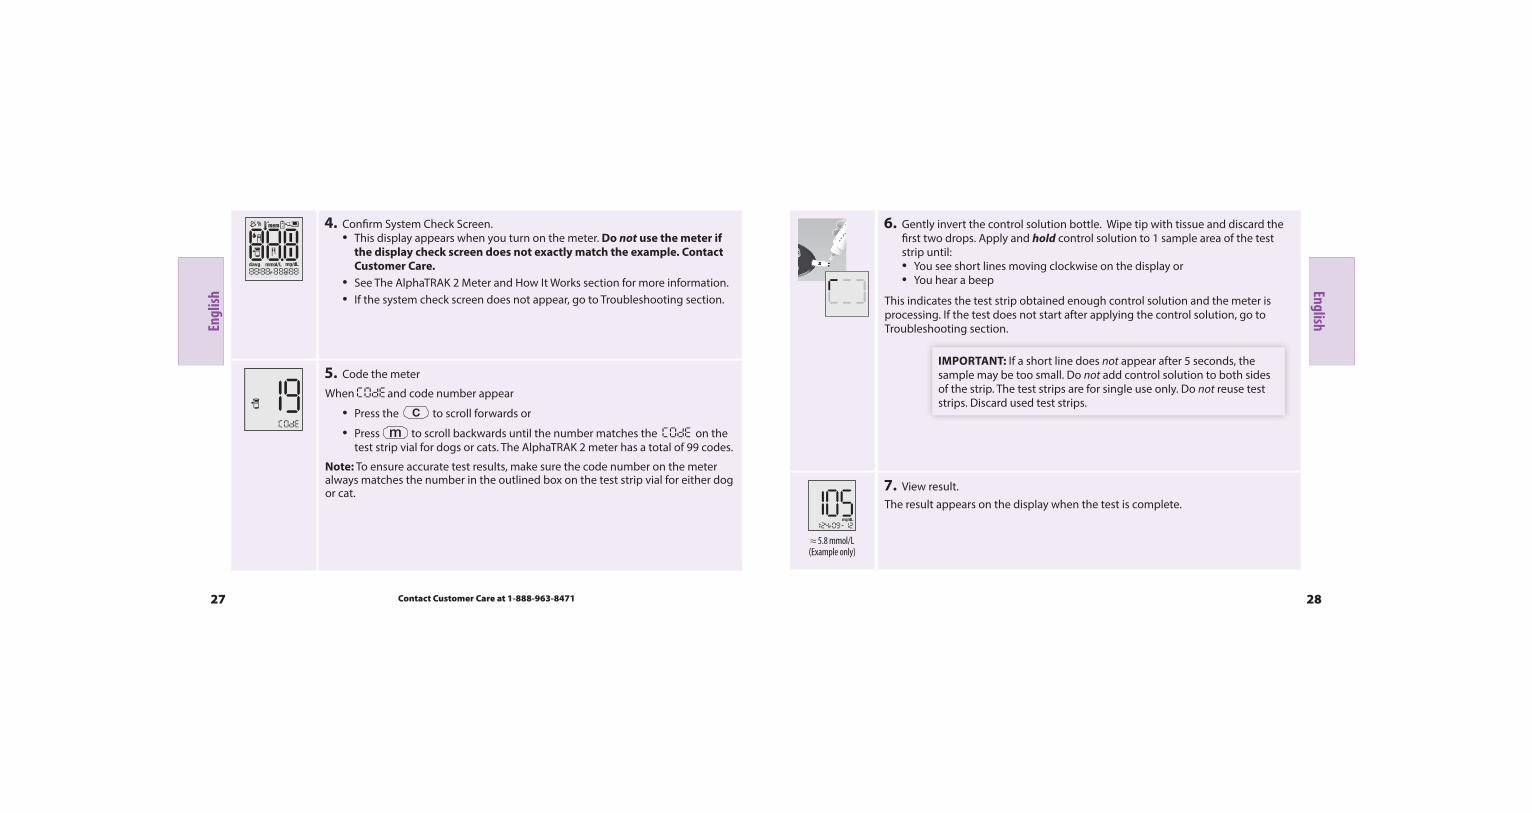
4. Confirm System Check Screen .• This display appears when you turn on the meter . Do not use the meter if
the display check screen does not exactly match the example. Contact Customer Care.
• See The AlphaTRAK 2 Meter and How It Works section for more information .• If the system check screen does not appear, go to Troubleshooting section .
5. Code the meter
When and code number appear
• Press the c to scroll forwards or
• Press m to scroll backwards until the number matches the on the test strip vial for dogs or cats . The AlphaTRAK 2 meter has a total of 99 codes .
Note: To ensure accurate test results, make sure the code number on the meter always matches the number in the outlined box on the test strip vial for either dog or cat .
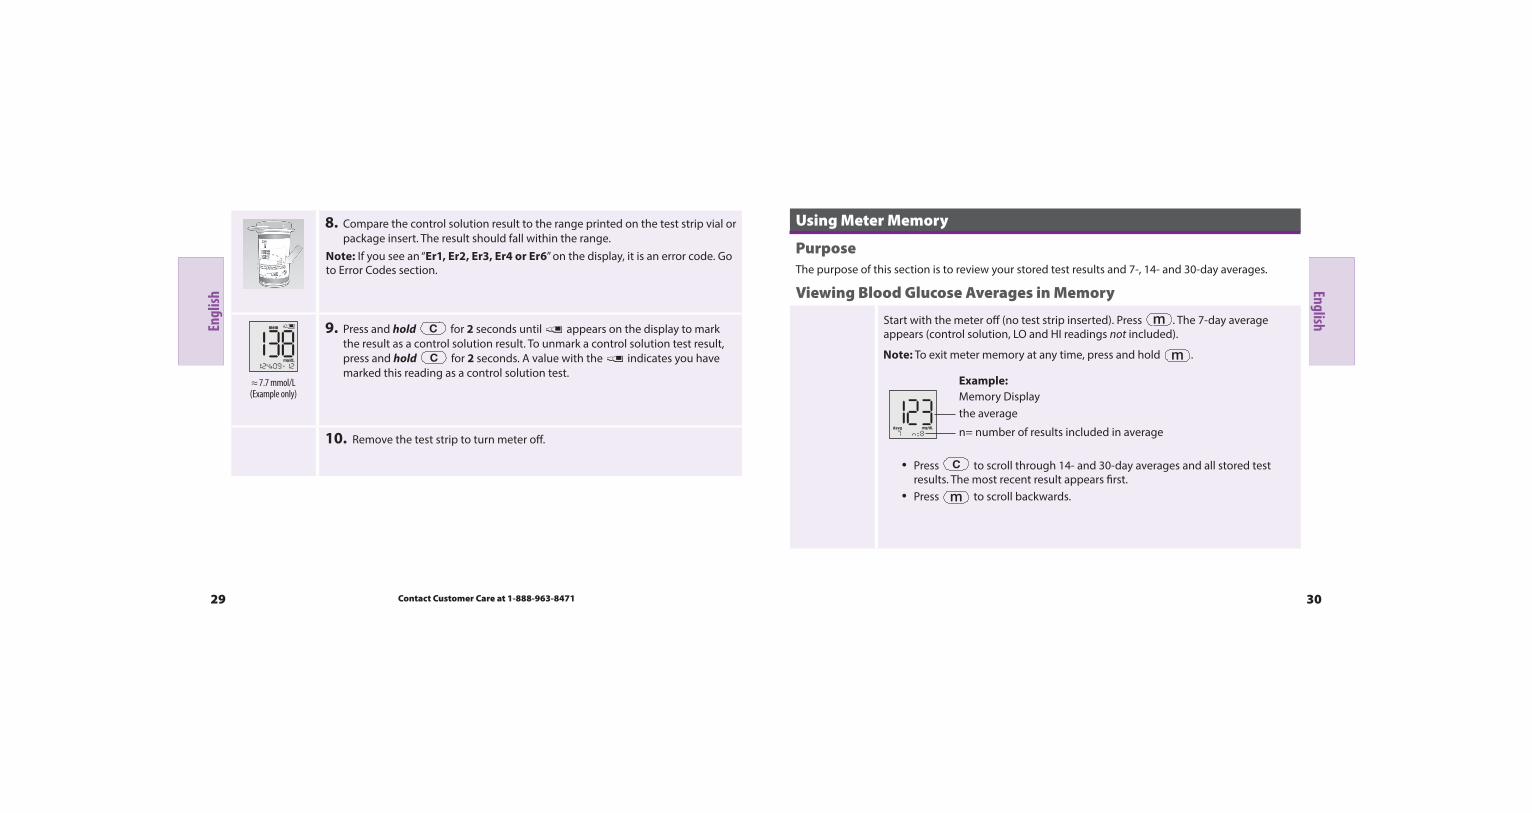
6. Gently invert the control solution bottle . Wipe tip with tissue and discard the first two drops . Apply and hold control solution to 1 sample area of the test strip until: • You see short lines moving clockwise on the display or• You hear a beep
This indicates the test strip obtained enough control solution and the meter is processing . If the test does not start after applying the control solution, go to Troubleshooting section .
≈ 5.8 mmol/L(Example only)
7. View result .The result appears on the display when the test is complete .
IMPORTANT: If a short line does not appear after 5 seconds, the sample may be too small . Do not add control solution to both sides of the strip . The test strips are for single use only . Do not reuse test strips . Discard used test strips .
Contact Customer Care at 1-888-963-8471
EnglishEngl
ish
29 30
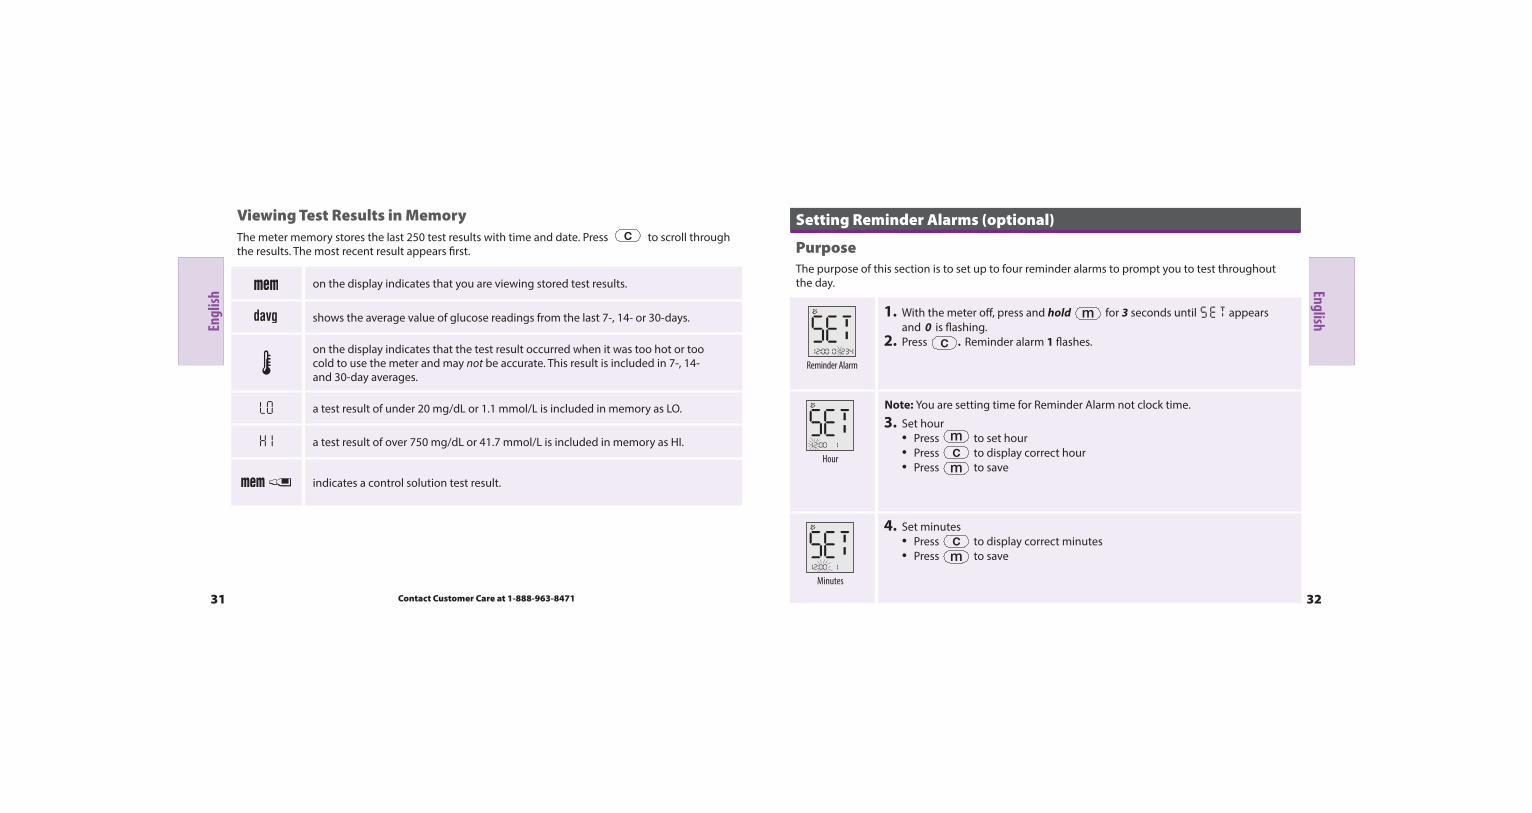
8. Compare the control solution result to the range printed on the test strip vial or package insert . The result should fall within the range .
Note: If you see an “Er1, Er2, Er3, Er4 or Er6” on the display, it is an error code . Go to Error Codes section .
≈ 7.7 mmol/L(Example only)
9. Press and hold c for 2 seconds until appears on the display to mark the result as a control solution result . To unmark a control solution test result, press and hold c for 2 seconds . A value with the indicates you have marked this reading as a control solution test .
10. Remove the test strip to turn meter off .
Using Meter Memory
PurposeThe purpose of this section is to review your stored test results and 7-, 14- and 30-day averages .
Viewing Blood Glucose Averages in Memory
Start with the meter off (no test strip inserted) . Press m . The 7-day average appears (control solution, LO and HI readings not included) .
Note: To exit meter memory at any time, press and hold m .
Example:Memory Displaythe average
n= number of results included in average
• Press c to scroll through 14- and 30-day averages and all stored testresults . The most recent result appears first .
• Press m to scroll backwards .
Contact Customer Care at 1-888-963-8471
EnglishEngl
ish
31 32
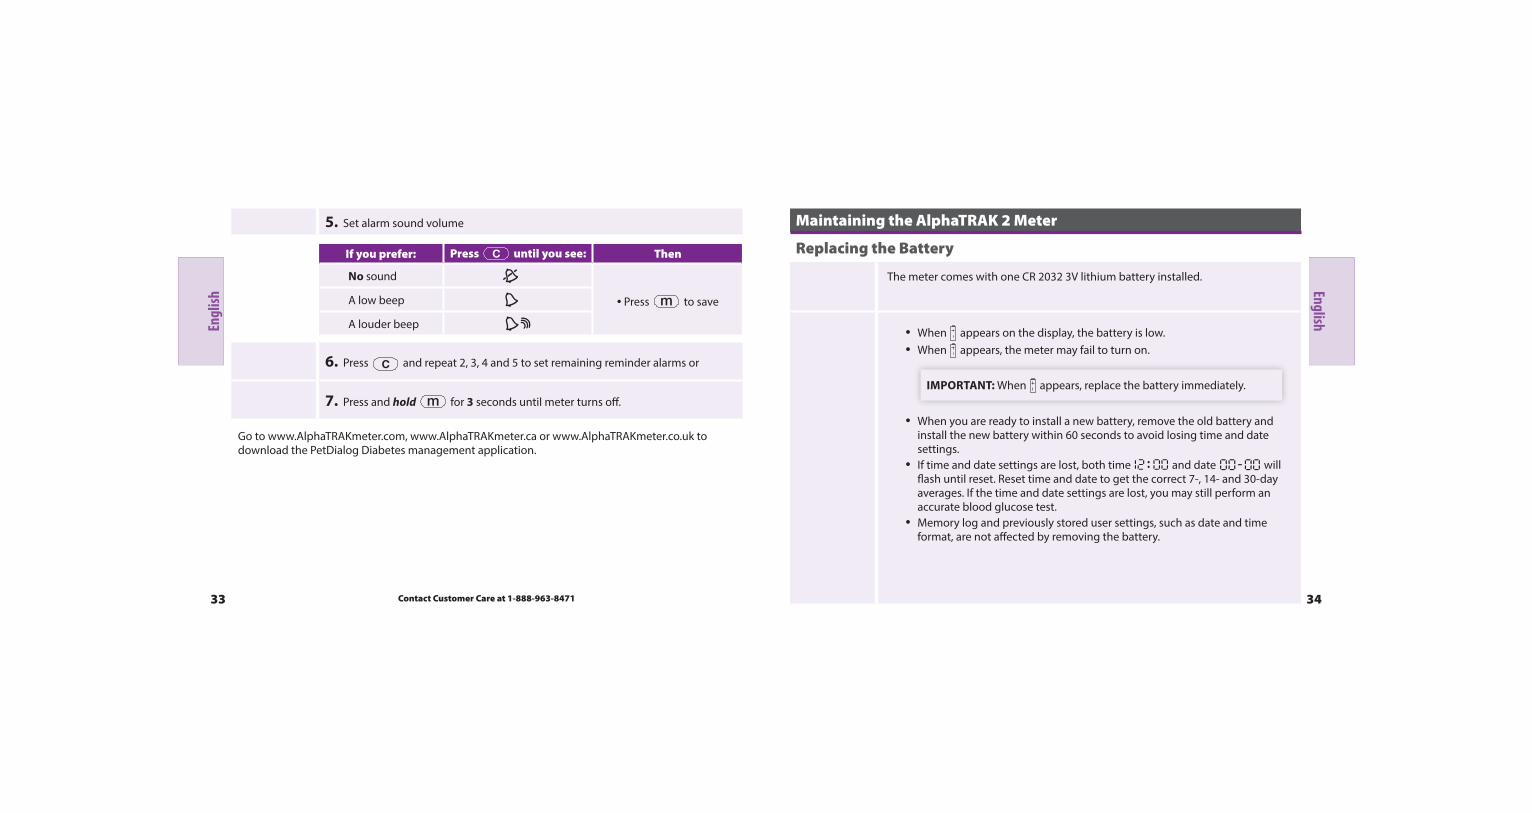
Viewing Test Results in MemoryThe meter memory stores the last 250 test results with time and date . Press c to scroll through the results . The most recent result appears first .
on the display indicates that you are viewing stored test results .
shows the average value of glucose readings from the last 7-, 14- or 30-days .
on the display indicates that the test result occurred when it was too hot or too cold to use the meter and may not be accurate . This result is included in 7-, 14- and 30-day averages .
a test result of under 20 mg/dL or 1 .1 mmol/L is included in memory as LO .
a test result of over 750 mg/dL or 41 .7 mmol/L is included in memory as HI .
indicates a control solution test result .
Setting Reminder Alarms (optional)
PurposeThe purpose of this section is to set up to four reminder alarms to prompt you to test throughout the day .
Reminder Alarm
1. With the meter off, press and hold m for 3 seconds until appears and 0 is flashing .
2. Press c . Reminder alarm 1 flashes .
Hour
Note: You are setting time for Reminder Alarm not clock time .
3. Set hour• Press m to set hour• Press c to display correct hour• Press m to save
Minutes
4. Set minutes• Press c to display correct minutes• Press m to save
Contact Customer Care at 1-888-963-8471
EnglishEngl
ish
33 34
5. Set alarm sound volume
If you prefer: Press c until you see: Then
No sound
• Press m to saveA low beep
A louder beep
6. Press c and repeat 2, 3, 4 and 5 to set remaining reminder alarms or
7. Press and hold m for 3 seconds until meter turns off .
Go to www .AlphaTRAKmeter .com, www .AlphaTRAKmeter .ca or www .AlphaTRAKmeter .co .uk to download the PetDialog Diabetes management application .
Maintaining the AlphaTRAK 2 Meter
Replacing the Battery
The meter comes with one CR 2032 3V lithium battery installed .
• When appears on the display, the battery is low . • When appears, the meter may fail to turn on .
• When you are ready to install a new battery, remove the old battery and install the new battery within 60 seconds to avoid losing time and date settings .
• If time and date settings are lost, both time and date will flash until reset . Reset time and date to get the correct 7-, 14- and 30-day averages . If the time and date settings are lost, you may still perform an accurate blood glucose test .
• Memory log and previously stored user settings, such as date and time format, are not affected by removing the battery .
IMPORTANT: When appears, replace the battery immediately .
Contact Customer Care at 1-888-963-8471
EnglishEngl
ish
35 36
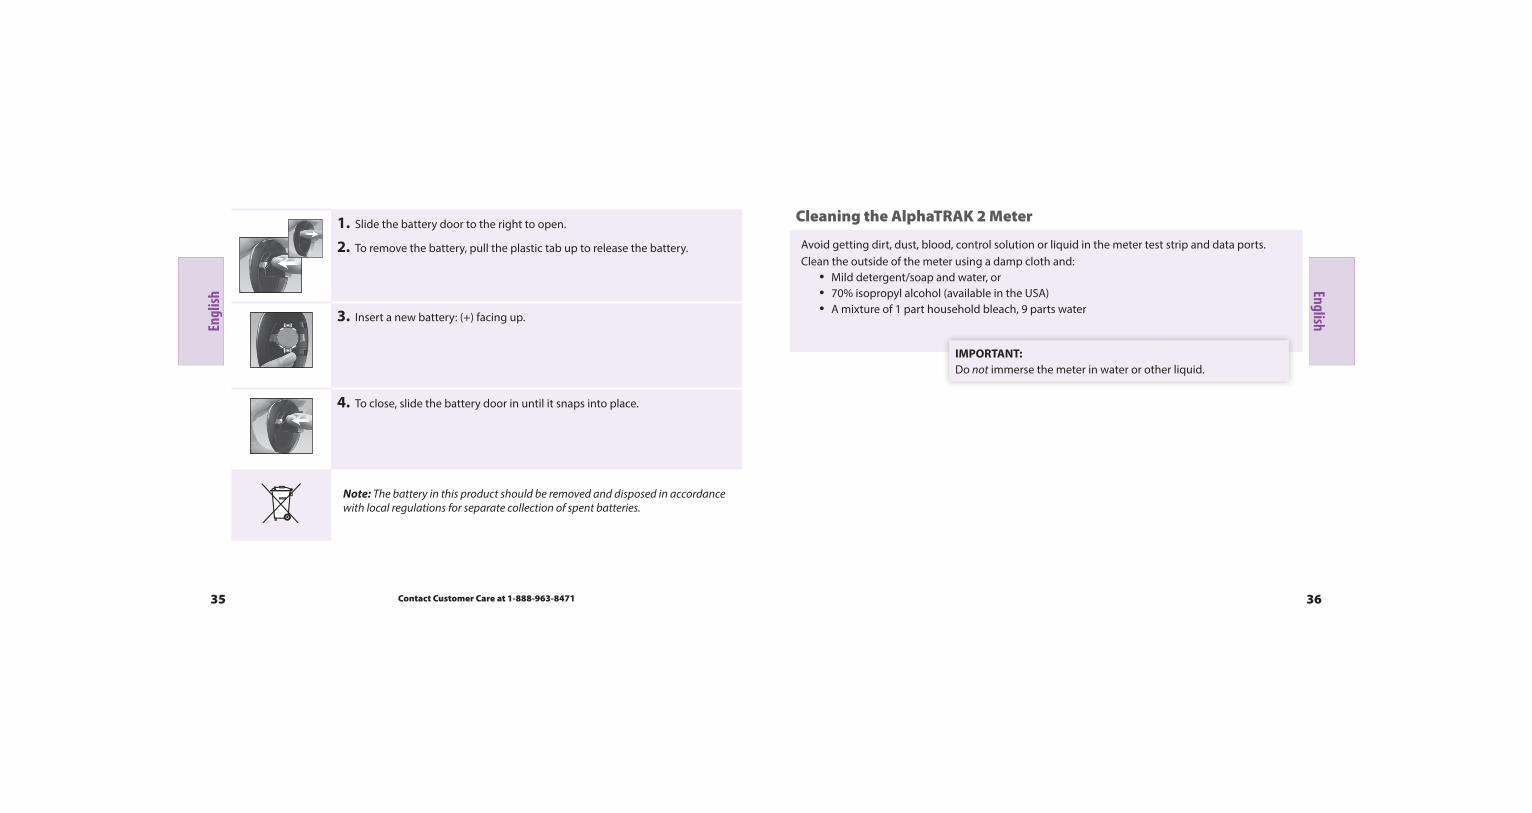
1. Slide the battery door to the right to open .
2. To remove the battery, pull the plastic tab up to release the battery .
3. Insert a new battery: (+) facing up .
4. To close, slide the battery door in until it snaps into place .
Note: The battery in this product should be removed and disposed in accordance with local regulations for separate collection of spent batteries.
Cleaning the AlphaTRAK 2 Meter
Avoid getting dirt, dust, blood, control solution or liquid in the meter test strip and data ports .Clean the outside of the meter using a damp cloth and:
• Mild detergent/soap and water, or • 70% isopropyl alcohol (available in the USA)• A mixture of 1 part household bleach, 9 parts water
IMPORTANT:Do not immerse the meter in water or other liquid .
Contact Customer Care at 1-888-963-8471
EnglishEngl
ish
37 38
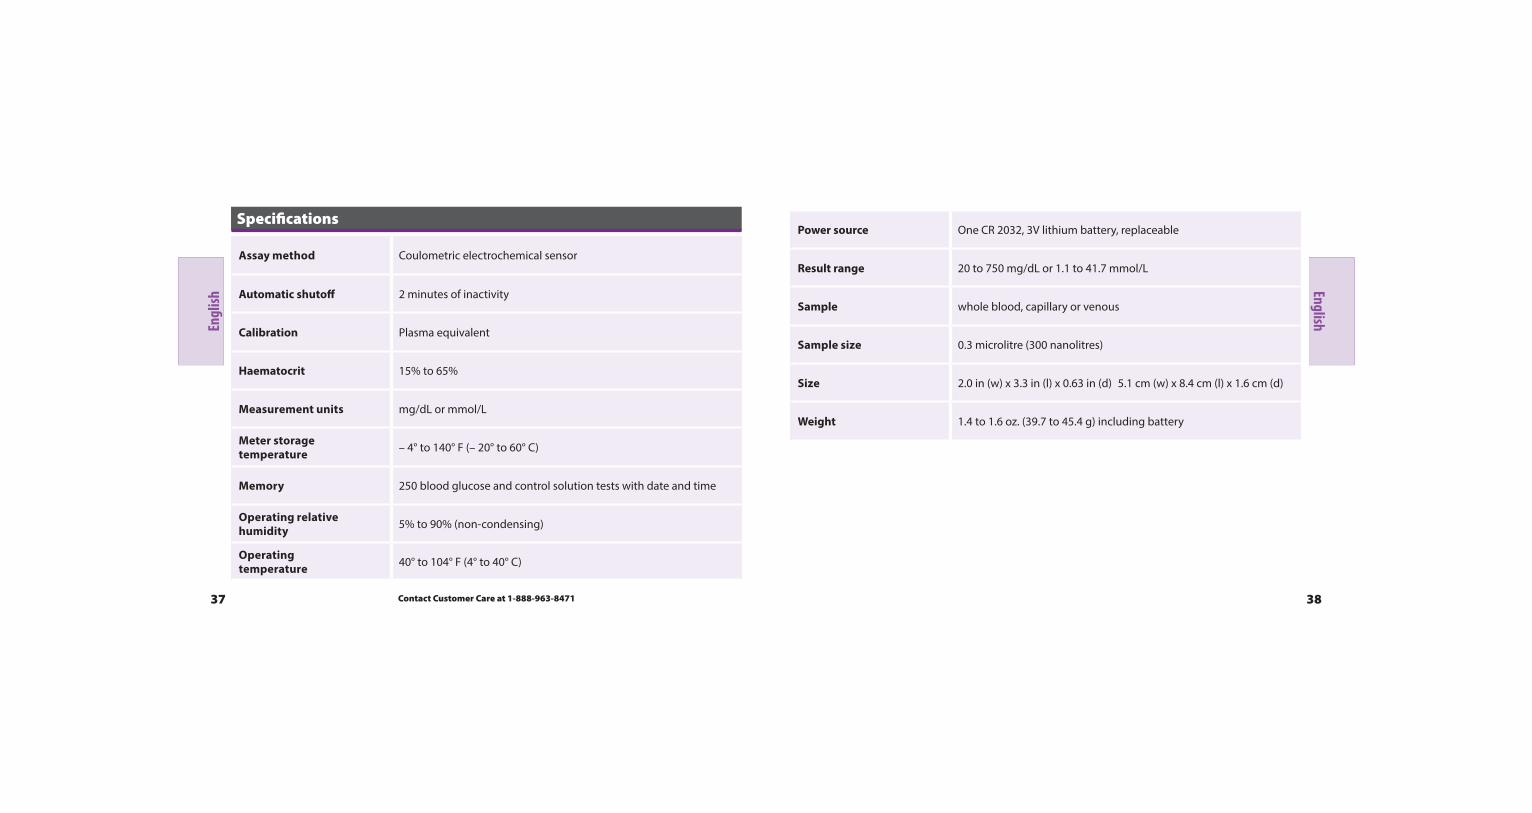
Power source One CR 2032, 3V lithium battery, replaceable
Result range 20 to 750 mg/dL or 1 .1 to 41 .7 mmol/L
Sample whole blood, capillary or venous
Sample size 0 .3 microlitre (300 nanolitres)
Size 2 .0 in (w) x 3 .3 in (l) x 0 .63 in (d) 5 .1 cm (w) x 8 .4 cm (l) x 1 .6 cm (d)
Weight 1 .4 to 1 .6 oz . (39 .7 to 45 .4 g) including battery
Specifications
Assay method Coulometric electrochemical sensor
Automatic shutoff 2 minutes of inactivity
Calibration Plasma equivalent
Haematocrit 15% to 65%
Measurement units mg/dL or mmol/L
Meter storage temperature – 4° to 140° F (– 20° to 60° C)
Memory 250 blood glucose and control solution tests with date and time
Operating relative humidity 5% to 90% (non-condensing)
Operating temperature 40° to 104° F (4° to 40° C)
Contact Customer Care at 1-888-963-8471
EnglishEngl
ish
39 40
References
1 . BSAVA Manual of Canine and Feline Endocrinology, Third Edition, British Small Animal Veterinary Association . Edited by Carmel Mooney and Mark E Peterson . 2004
2. Ettinger SJ, Feldman EC. Textbook of Veterinary Internal Medicine. Vol 2 . WB Saunders Company . pp 1529 - 1534 . 1995
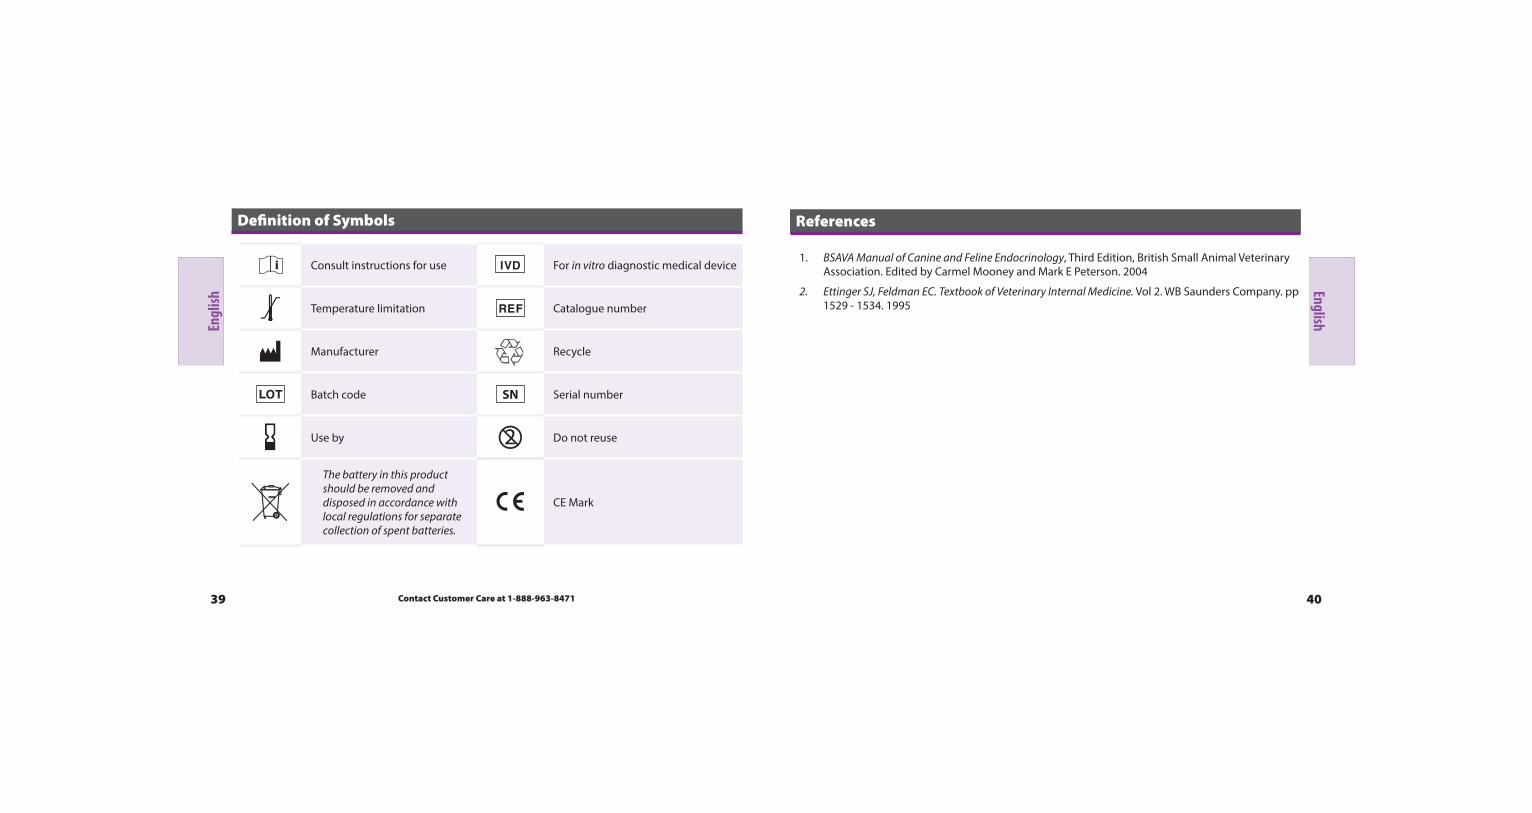
Definition of Symbols
Consult instructions for use For in vitro diagnostic medical device
Temperature limitation Catalogue number
Manufacturer Recycle
Batch code Serial number
Use by Do not reuse
The battery in this product should be removed and disposed in accordance with local regulations for separate collection of spent batteries.
CE Mark
Contact Customer Care at 1-888-963-8471