universal projector ceiling mount with polarized …starin.info/product...
TRANSCRIPT
www.Airflex5D.com | [email protected]
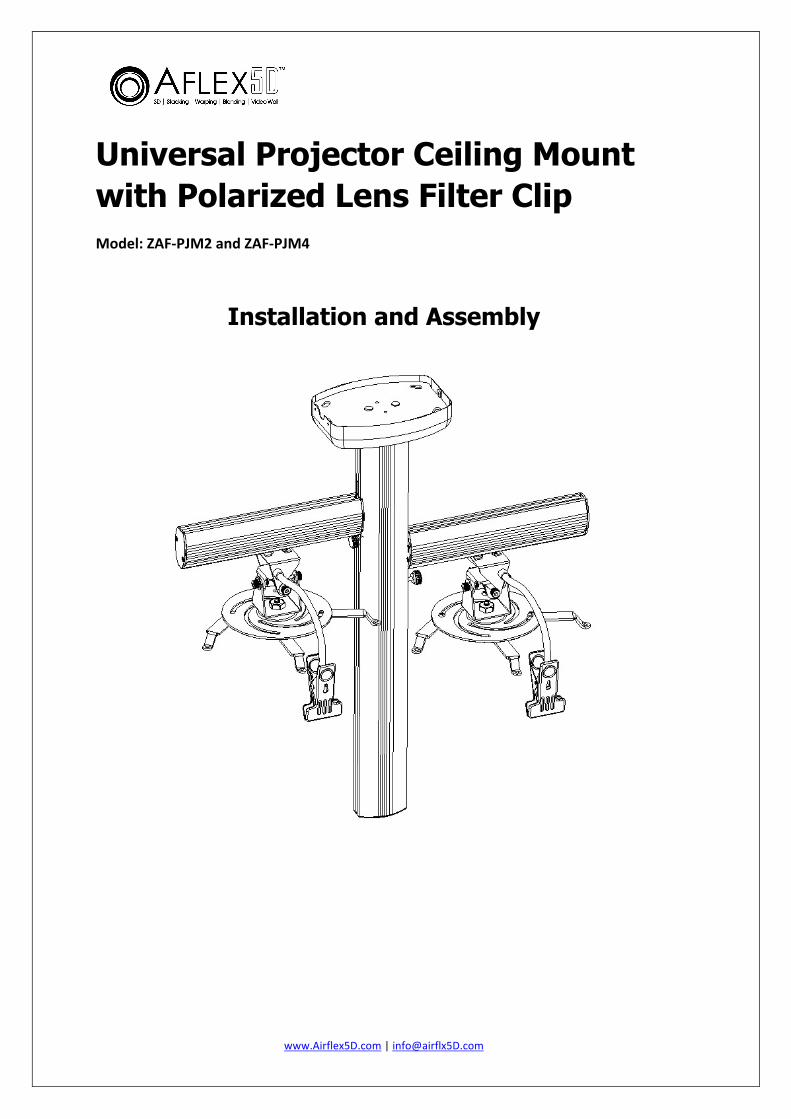
Universal Projector Ceiling Mount with Polarized Lens Filter Clip Model: ZAF-‐PJM2 and ZAF-‐PJM4
Installation and Assembly
www.Airflex5D.com | [email protected]
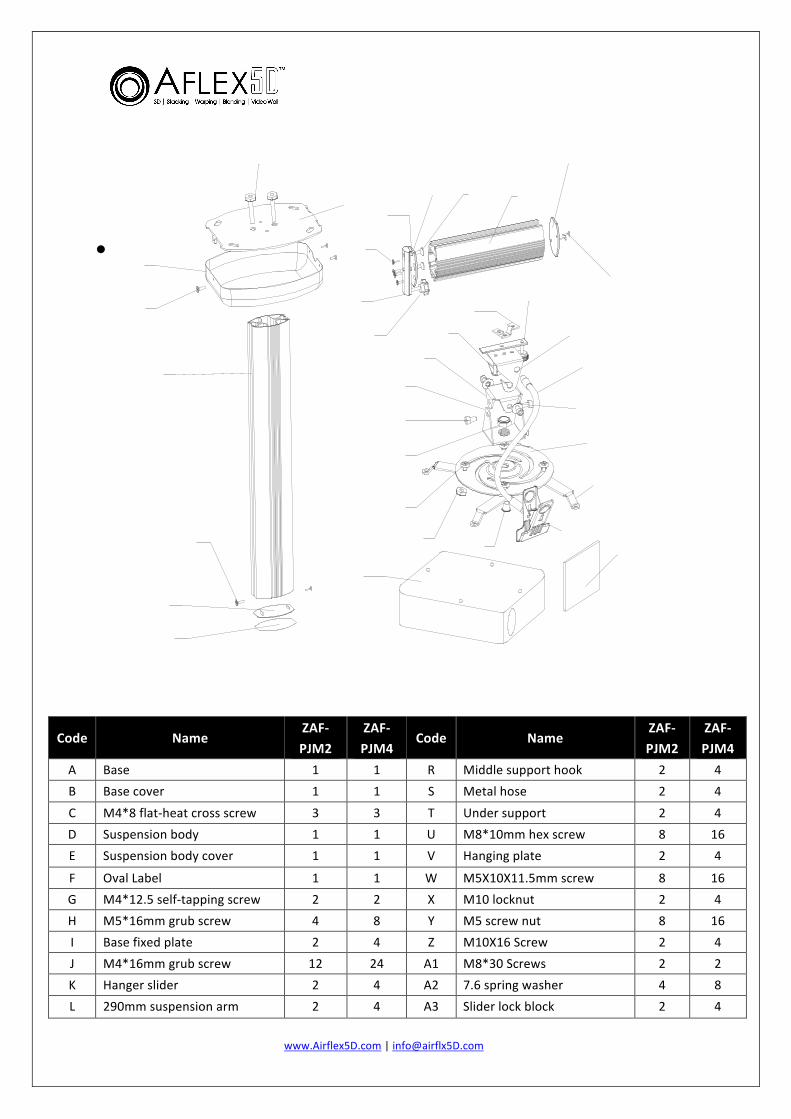
Code Name ZAF-‐
PJM2
ZAF-‐
PJM4 Code Name
ZAF-‐
PJM2
ZAF-‐
PJM4
A Base 1 1 R Middle support hook 2 4
B Base cover 1 1 S Metal hose 2 4
C M4*8 flat-‐heat cross screw 3 3 T Under support 2 4
D Suspension body 1 1 U M8*10mm hex screw 8 16
E Suspension body cover 1 1 V Hanging plate 2 4
F Oval Label 1 1 W M5X10X11.5mm screw 8 16
G M4*12.5 self-‐tapping screw 2 2 X M10 locknut 2 4
H M5*16mm grub screw 4 8 Y M5 screw nut 8 16
I Base fixed plate 2 4 Z M10X16 Screw 2 4
J M4*16mm grub screw 12 24 A1 M8*30 Screws 2 2
K Hanger slider 2 4 A2 7.6 spring washer 4 8
L 290mm suspension arm 2 4 A3 Slider lock block 2 4
www.Airflex5D.com | [email protected]
N M6*30 round screw knob 4 8 A4 M5 washer 4 8
M End cap 2 4 A5 Hanging angle 8 16
O Sliding plate 2 4 A6 Metal clip 2 4
P M5*18mm round head screw 4 8 A7 Projector 2 4
Q Upper support hook 2 4 A8 Polarized Filter 2 4
Note: Read entire instructions before starting installation and assembly of the mount.
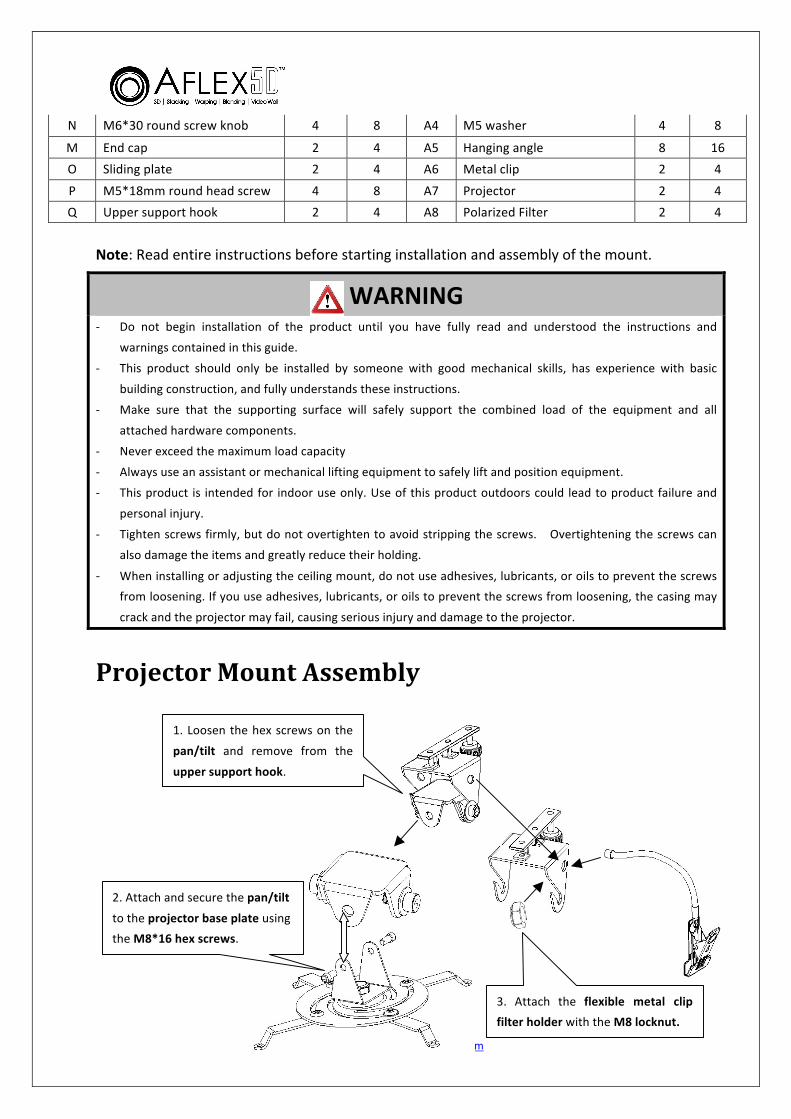
Projector Mount Assembly
WARNING -‐ Do not begin installation of the product until you have fully read and understood the instructions and
warnings contained in this guide.
-‐ This product should only be installed by someone with good mechanical skills, has experience with basic
building construction, and fully understands these instructions.
-‐ Make sure that the supporting surface will safely support the combined load of the equipment and all
attached hardware components.
-‐ Never exceed the maximum load capacity
-‐ Always use an assistant or mechanical lifting equipment to safely lift and position equipment.
-‐ This product is intended for indoor use only. Use of this product outdoors could lead to product failure and
personal injury.
-‐ Tighten screws firmly, but do not overtighten to avoid stripping the screws. Overtightening the screws can
also damage the items and greatly reduce their holding.
-‐ When installing or adjusting the ceiling mount, do not use adhesives, lubricants, or oils to prevent the screws
from loosening. If you use adhesives, lubricants, or oils to prevent the screws from loosening, the casing may
crack and the projector may fail, causing serious injury and damage to the projector.
2. Attach and secure the pan/tilt
to the projector base plate using
the M8*16 hex screws.
3. Attach the flexible metal clip
filter holder with the M8 locknut.
1. Loosen the hex screws on the
pan/tilt and remove from the
upper support hook.
www.Airflex5D.com | [email protected]
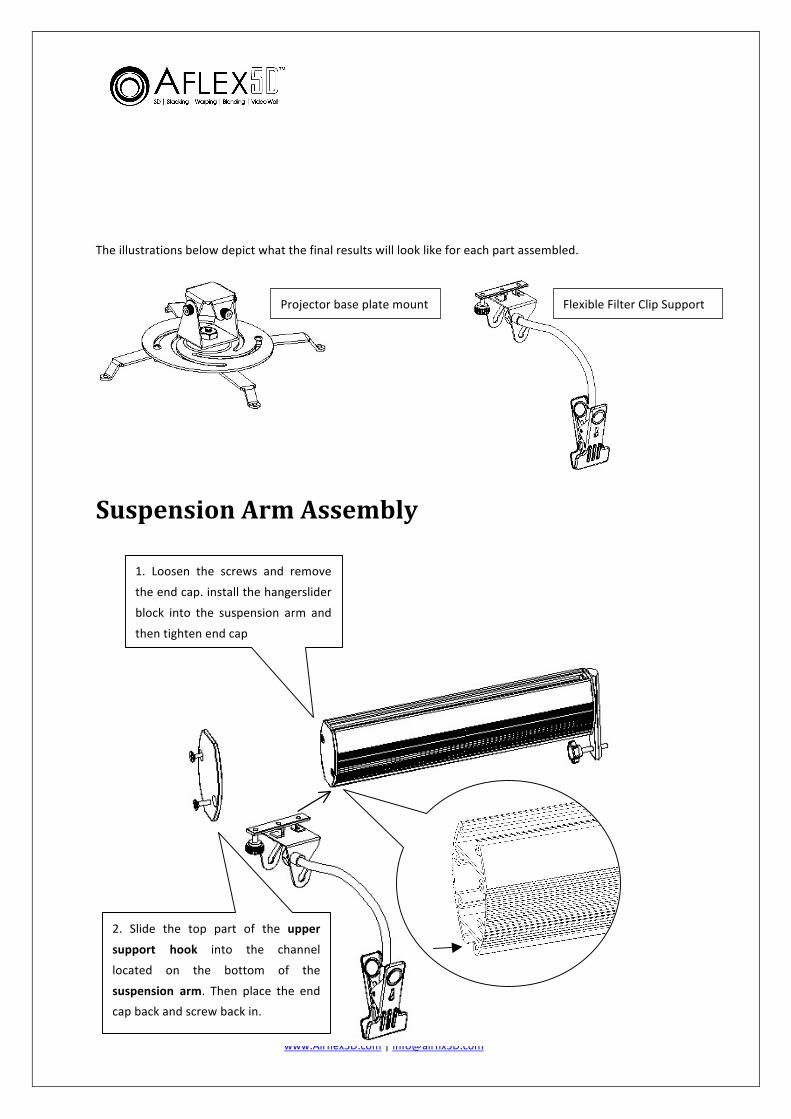
The illustrations below depict what the final results will look like for each part assembled.
Suspension Arm Assembly
1. Loosen the screws and remove
the end cap. install the hangerslider
block into the suspension arm and
then tighten end cap
2. Slide the top part of the upper
support hook into the channel
located on the bottom of the
suspension arm. Then place the end
cap back and screw back in.
Projector base plate mount Flexible Filter Clip Support
www.Airflex5D.com | [email protected]
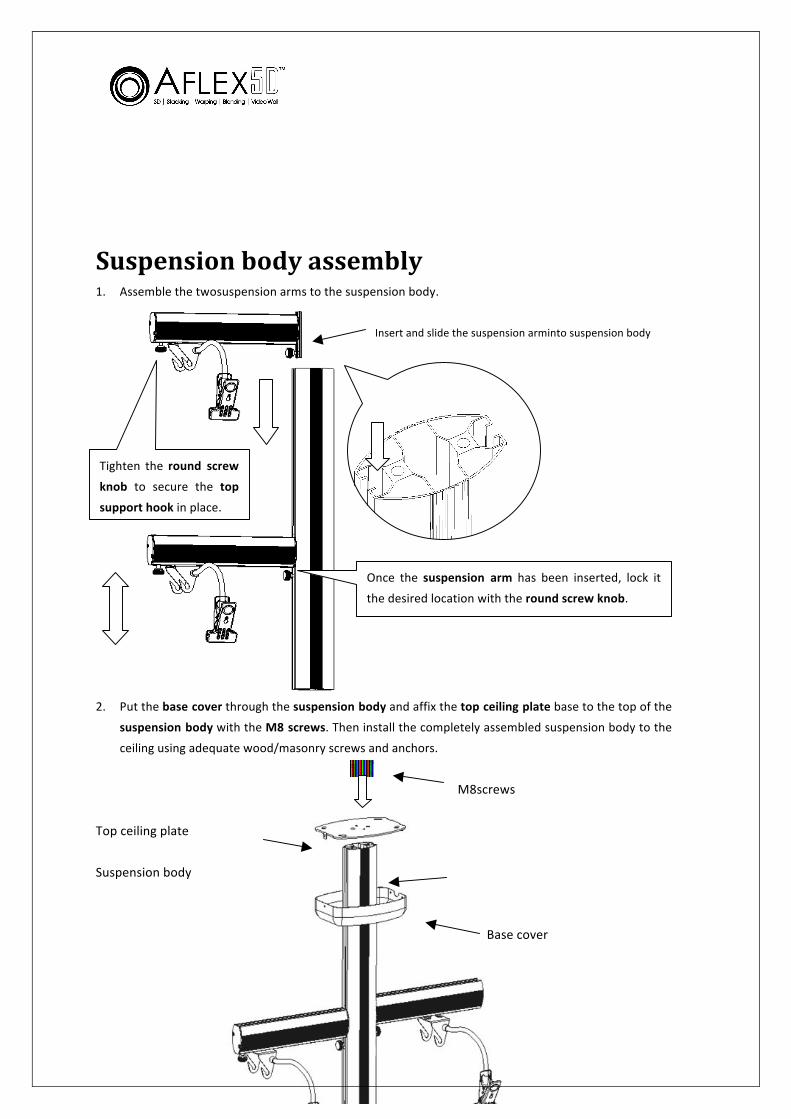
Suspension body assembly 1. Assemble the twosuspension arms to the suspension body.
Insert and slide the suspension arminto suspension body
2. Put the base cover through the suspension body and affix the top ceiling plate base to the top of the
suspension body with the M8 screws. Then install the completely assembled suspension body to the
ceiling using adequate wood/masonry screws and anchors.
M8screws
Top ceiling plate
Suspension body
Base cover
Once the suspension arm has been inserted, lock it
the desired location with the round screw knob.
Tighten the round screw
knob to secure the top
support hook in place.
www.Airflex5D.com | [email protected]
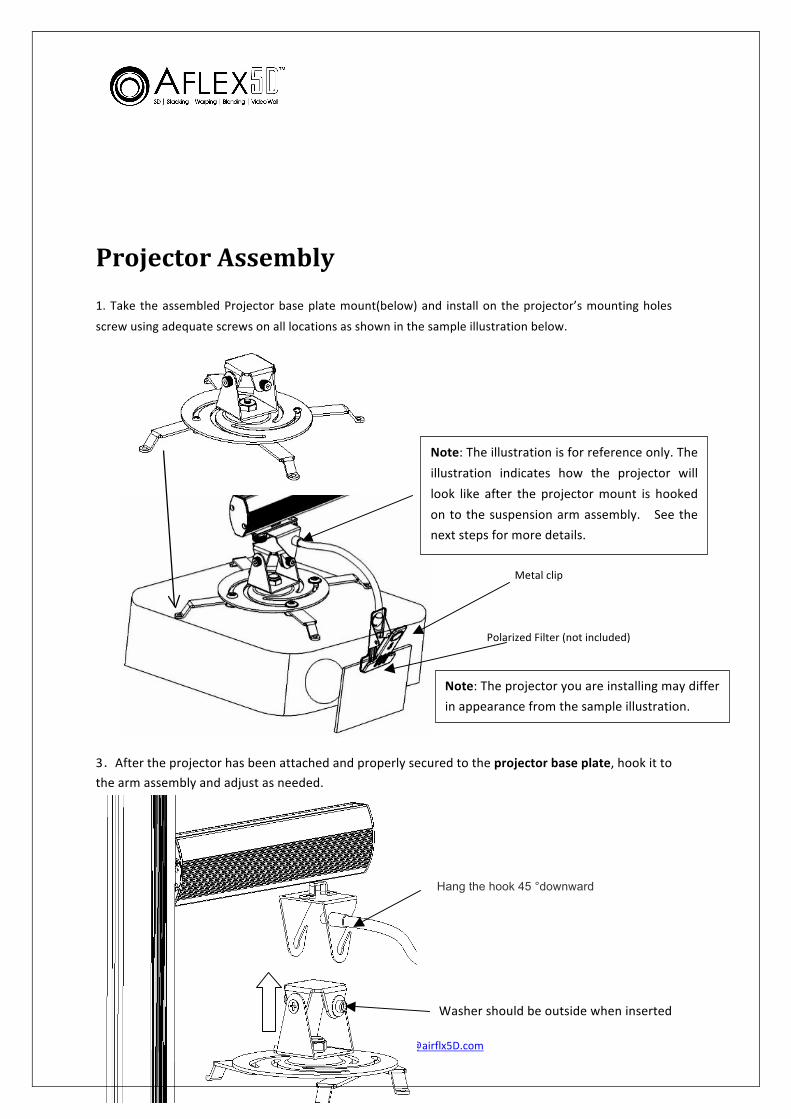
Projector Assembly
1. Take the assembled Projector base plate mount(below) and install on the projector’s mounting holes
screw using adequate screws on all locations as shown in the sample illustration below.
Metal clip
Polarized Filter (not included)
3.After the projector has been attached and properly secured to the projector base plate, hook it to
the arm assembly and adjust as needed.
Hang the hook 45 °downward
Washer should be outside when inserted
Note: The projector you are installing may differ
in appearance from the sample illustration.
Note: The illustration is for reference only. The
illustration indicates how the projector will
look like after the projector mount is hooked
on to the suspension arm assembly. See the
next steps for more details.
www.Airflex5D.com | [email protected]
in the hook
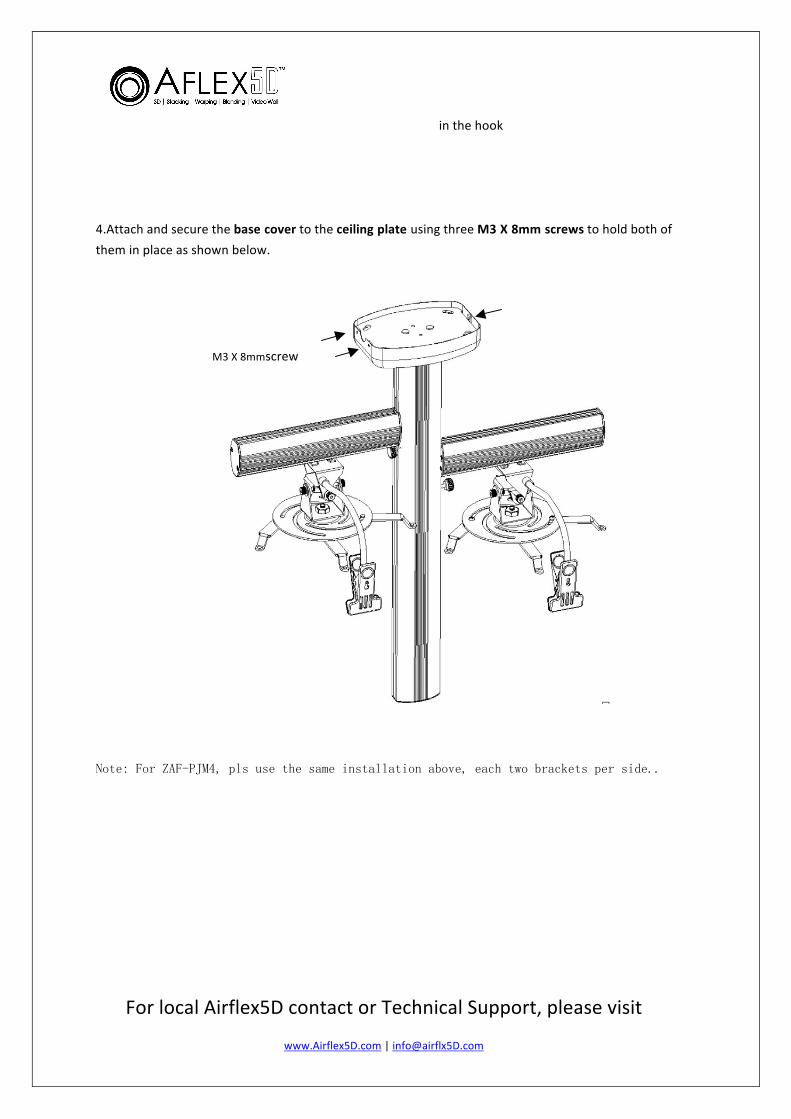
4.Attach and secure the base cover to the ceiling plate using three M3 X 8mm screws to hold both of
them in place as shown below.
Note: For ZAF-PJM4, pls use the same installation above, each two brackets per side..
For local Airflex5D contact or Technical Support, please visit
M3 X 8mmscrew

www.Airflex5D.com | [email protected] 9
On-‐Line User Guide or Download 线上说明书或下载 / 線上說明書或下載
オンラインユーザーマニュアル/ダウンロード
Manual del usuario on-‐line o descargar
On-‐Line-‐Benutzerhandbuch oder Herunterladen
Manuel de l'utilisateur en ligne ou télécharger
On-‐Line manuale d'uso o download
ออนไลน์ใช้คู่มือหรือดาวน์โหลด On-‐Line Руководство пользователя или скачать
On-‐line Manual de utilizare sau de descărcare
Hướngdẫnsửdụngtrựctuyến hay tảixuống
ععللىىااللخخططددللييللااللممسستتخخددممأأووتتححممييللऑनलाइनउपयोगकर्ताकेमैनुअलयाडाउनलोड 온라인사용자설명서또는다운로드
On-‐Line Instrukcja obsługi lub pobierania
On-‐Line Manual do Usuário ou Download
BukuPanduan Online atauunduh
www.Airflex5D.com/UG