unit: the microscope and cellular diversity2016utah19951997currrr18881928.weebly.com/uploads/... ·...
TRANSCRIPT

Course Biology Agricultural Science amp Technology
UNIT THE MICROSCOPE AND CELLULAR DIVERSITY State Standard State Objectives Unit Objectives A Learn how to use the compound microscope
B Learn the proper care and handling of the compound microscope
C Learn the names of the parts of a microscope and functions of each
D Learn how to prepare a wet mount slide for microscopic observation
E Learn to estimate the sizes of the field of view and objects observed in the microscope
F Learn to distinguish in the microscope prokaryotic and eukaryotic cells
Materials Needed (Equipment) bull Computer and LCD Projector bull ldquoMicroscoperdquo PowerPoint Presentation bull Copies of Worksheet ldquoThe Microscope and Cellular Diversity Labrdquo (enough for each
student to have one) o Activity 1
Compound Microscope Stereomicroscope Lens Paper Lens Cleaner Newsprint Transparent Ruler Microscope Slides Cover Slips Dropper Bottle with Water
o Activity 2 Prepared Slide of Stained Bacteria Microscope Slides and Cover Slips Culture of Live Cyanobacteria (Anabena) Culture of Live Cyanobacteria (Oscillatoria)
o Activity 3 Microscope Slides and Cover Slips Protoslo (methyl cellulose) Culture of Amoeba (live) Culture of Paramecium (live) Mixed Culture of Protists Elodea Plants Onions Dropper Bottle of I2KI (Iodine Solution) Toothpicks Dropper Bottle of 09 NaCl Dropper Bottle of 05 Methylene Blue
bull Copies of Worksheet ldquoHow to Measure Microscopic Objectsrdquo Lab (enough for each student to have one)
Supplies Needed Microscopes for student groups Flat ruler with designated millimeter marks for students to look at under
microscope (rulers included in dissection kits work great) Prepared human blood smear for each microscope group Optional Calculators for groups
bull Copies of Worksheet ldquoMicroscope Use Experimentrdquo (enough for each student to have one) Supplies Needed
Newsprint so students may cut out a letter ldquoerdquo It also works fine to print a word document that is filled with ldquoerdquos
Microscopes Slides and Cover Slips for groups Two different colored thread spools so students may cut off threads to look at
Additional Activities to Increase Student Comprehension ldquoCell Observation Exerciserdquo ldquoMicroscope and Cell Observation Labrdquo Facilities Teaching Classroom Laboratory Classroom (or space in teaching classroom to use microscopes in)
Interest Approach Ask students how life forms are arranged Compare the way that life forms are arranged as compared to how buildings are built Stack building blocks to show students how plant cells are arranged as compared to how animal cells are arranged in a body (no certain way) Objective A Learn how to use the compound microscope Curriculum (Content) (What to teach)
Instruction (Methodology) (How to teach)
Light Microscopy The light microscope so called because it employs visible light to detect small objects is probably the most well-known and well-used research tool in biology Yet many students and teachers are unaware of the full range of features that are available in light microscopes Since the cost of an instrument increases with its quality and versatility the best instruments are unfortunately unavailable to most academic programs However even the most inexpensive student microscopes can provide spectacular views of nature and can enable students to perform some reasonably sophisticated experiments
A beginner tends to think that the challenge of viewing small objects lies in getting enough magnification In fact when it comes to looking at living things the biggest challenges are in order
bull obtaining sufficient contrast bull finding the focal plane bull obtaining good resolution bull recognizing the subject when one
sees it
Demonstrate how to use a microscope for students in front of the class
The smallest objects that are considered to be living are the bacteria The smallest bacteria can be observed and cell shape recognized at a mere 100x magnification They are invisible in bright field microscopes though These pages will describe types of optics that are used to obtain contrast suggestions for finding specimens and focusing on them and advice on using measurement devices with a light microscope
Types of light microscopes
The bright field microscope is best known to students and is most likely to be found in a classroom Better equipped classrooms and labs may have dark field andor phase contrast optics Differential interference contrast Nomarski Hoffman modulation contrast and variations produce considerable depth of resolution and a three dimensional effect Fluorescence and confocal microscopes are specialized instruments used for research clinical and industrial applications
Other than the compound microscope a simpler instrument for low magnification use may also be found in the laboratory The stereo microscope or dissecting microscope usually has a binocular eyepiece tube a long working distance and a range of magnifications typically from 5x to 35 or 40x Some instruments supply lenses for higher magnifications but there is no improvement in resolution Such false magnification is rarely worth the expense
Bright Field Microscopy
With a conventional bright field microscope light from an incandescent source is aimed toward a lens beneath the stage called the condenser through the
specimen through an objective lens and to the eye through a second magnifying lens the ocular or eyepiece We see objects in the light path because natural pigmentation or stains absorb light differentially or because they are thick enough to absorb a significant amount of light despite being colorless A Paramecium should show up fairly well in a bright field microscope although it will not be easy to see cilia or most organelles Living bacteria wont show up at all unless the viewer hits the focal plane by luck and distorts the image by using maximum contrast
A good quality microscope has a built-in illuminator adjustable condenser with aperture diaphragm (contrast) control mechanical stage and binocular eyepiece tube The condenser is used to focus light on the specimen through an opening in the stage After passing through the specimen the light is displayed to the eye with an apparent field that is much larger than the area illuminated The magnification of the image is simply the objective lens magnification (usually stamped on the lens body) times the ocular magnification
Students are usually aware of the use of the coarse and fine focus knobs used to sharpen the image of the specimen They are frequently unaware of adjustments to the condenser that can affect resolution and contrast Some condensers are fixed in position others are focusable so that the quality of light can be adjusted Usually the best position for a focusable condenser is as close to the stage as possible The bright field condenser usually contains an aperture diaphragm a device that controls the diameter of the light beam coming up through the condenser so that when the diaphragm is stopped down (nearly closed) the light comes straight up through the center of the condenser lens and contrast is
high When the diaphragm is wide open the image is brighter and contrast is low
A disadvantage of having to rely solely on an aperture diaphragm for contrast is that beyond an optimum point the more contrast you produce the more you distort the image With a small unstained unpigmented specimen you are usually past optimum contrast when you begin to see the image
Using a bright field microscope
First think about what you want to do with the microscope What is the maximum magnification you will need Are you looking at a stained specimen How much contrastresolution do you require Next start setting up for viewing
Mount the specimen on the stage
The cover slip must be up if there is one High magnification objective lenses cant focus through a thick glass slide they must be brought close to the specimen which is why coverslips are so thin The stage may be equipped with simple clips (less expensive microscopes) or with some type of slide holder The slide may require manual positioning or there may be a mechanical stage (preferred) that allows precise positioning without touching the slide
Optimize the lighting
A light source should have a wide dynamic range to provide high intensity illumination at high magnifications and lower intensities so that the user can view comfortably at low magnifications Better microscopes have a built-in illuminator and the best microscopes have controls over light intensity and shape of the light
beam If your microscope requires an external light source make sure that the light is aimed toward the middle of the condenser Adjust illumination so that the field is bright without hurting the eyes
Adjust the condenser
To adjust and align the microscope start by reading the manual If no manual is available try using these guidelines If the condenser is focusable position it with the lens as close to the opening in the stage as you can get it If the condenser has selectable options set it to bright field Start with the aperture diaphragm stopped down (high contrast) You should see the light that comes up through the specimen change brightness as you move the aperture diaphragm lever
Think about what you are looking for
It is a lot harder to find something when you have no expectations as to its appearance How big is it Will it be moving Is it pigmented or stained and if so what is its color Where do you expect to find it on a slide For example students typically have a lot of trouble finding stained bacteria because with the unaided eye and at low magnifications the stuff looks like dirt It helps to know that as smears dry down they usually leave rings so that the edge of a smear usually has the densest concentration of cells
Focus locate and center the specimen
Start with the lowest magnification objective lens to home in on the specimen andor the part of the specimen you wish to examine It is rather easy to find and focus
on sections of tissues especially if they are fixed and stained as with most prepared slides However it can be very difficult to locate living minute specimens such as bacteria or unpigmented protists A suspension of yeast cells makes a good practice specimen for finding difficult objects
bull Use dark field mode (if available) to find unstained specimens If not start with high contrast (aperture diaphragm closed down)
bull Start with the specimen out of focus so that the stage and objective must be brought closer together The first surface to come into focus as you bring stage and objective together is the top of the cover slip With smears a cover slip is frequently not used so the first thing you see is the smear itself
bull If you are having trouble focus on the edge of the cover slip or an air bubble or something that you can readily recognize The top edge of the cover slip comes into focus first then the bottom which should be in the same plane as your specimen
bull Once you have found the specimen adjust contrast and intensity of illumination and move the slide around until you have a good area for viewing
Adjust eyepiece separation focus
With a single ocular there is nothing to do with the eyepiece except to keep it clean With a binocular microscope (preferred) you need to adjust the eyepiece separation just like you do a pair of binoculars Binocular vision is much more sensitive to light and detail than monocular vision so if you have a binocular microscope take
advantage of it
One or both of the eyepieces may be a telescoping eyepiece that is you can focus it Since very few people have eyes that are perfectly matched most of us need to focus one eyepiece to match the other image Look with the appropriate eye into the fixed eyepiece and focus with the microscope focus knob Next look into the adjustable eyepiece (with the other eye of course) and adjust the eyepiece not the microscope
Select an objective lens for viewing
The lowest power lens is usually 35 or 4x and is used primarily for initially finding specimens We sometimes call it the scanning lens for that reason The most frequently used objective lens is the 10x lens which gives a final magnification of 100x with a 10x ocular lens For very small protists and for details in prepared slides such as cell organelles or mitotic figures you will need a higher magnification Typical high magnification lenses are 40x and 97x or 100x The latter two magnifications are used exclusively with oil in order to improve resolution
Move up in magnification by steps Each time you go to a higher power objective re-focus and re-center the specimen Higher magnification lenses must be physically closer to the specimen itself which poses the risk of jamming the objective into the specimen Be very cautious when focusing By the way good quality sets of lenses are parfocal that is when you switch magnifications the specimen remains in focus or close to focused
Bigger is not always better All specimens have three dimensions and unless a specimen is extremely thin you will be
unable to focus with a high magnification objective The higher the magnification the harder it is to chase a moving specimen
Adjust illumination for the selected objective lens
The apparent field of an eyepiece is constant regardless of magnification used So it follows that when you raise magnification the area of illuminated specimen you see is smaller Since you are looking at a smaller area less light reaches the eye and the image darkens With a low power objective you may have to cut down on illumination intensity With a high power you need all the light you can get especially with less expensive microscopes
When to use bright field microscopy
Bright field microscopy is best suited to viewing stained or naturally pigmented specimens such as stained prepared slides of tissue sections or living photosynthetic organisms It is useless for living specimens of bacteria and inferior for non-photosynthetic protists or metazoans or unstained cell suspensions or tissue sections Here is a not-so-complete list of specimens that might be observed using bright-field microscopy and appropriate magnifications (preferred final magnifications are emphasized)
bull Prepared slides stained - bacteria (1000x) thick tissue sections (100x 400x) thin sections with condensed chromosomes or specially stained organelles (1000x) large protists or metazoans (100x)
bull Smears stained - blood (400x 1000x) negative stained bacteria (400x 1000x)
Activity ldquoMicroscope Use Experimentrdquo
Living preparations (wet mounts unstained) - pond water (40x 100x 400x) living protists or metazoans (40x 100x 400x occasionally) algae and other microscopic plant material (40x 100x 400x) Smaller specimens will be difficult to observe without distortion especially if they have no pigmentation
Interest Approach Objective B Learn the proper care and handling of the compound microscope Curriculum (Content) (What to teach)
Instruction (Methodology) (How to teach)
Use of the Microscope 1 Carry with both hands 2 Set microscope in from edge of desk 3 Use lens paper to clean eyepiece and objectives 4 Start with lowest power (shortest objective) in place 5 Turn coarse adjustment so that stage is as close to low power as possible -- now while looking turn coarse adjustment so stage starts to move away from objective 6 Clean up all spills and moisture from stage before putting away 7 Caution ndash Keep all water away from electrical parts 8 Never use coarse adjustment with high power objective while trying to focus because of danger of striking and breaking glass slide with objective
Care of the microscope
bull EVERYTHING on a good quality microscope is unbelievably expensive so be careful
bull Hold a microscope firmly by the stand only Never grab it by the eyepiece holder for example
bull Hold the plug (not the cable) when unplugging the illuminator
bull Since bulbs are expensive and have a limited life turn the illuminator off
ldquoMicroscoperdquo PowerPoint slides 12-15 Have a microscope ready to demonstrate on Go over these rules orally with students and have a microscope ready to demonstrate on
when you are done bull Always make sure the stage and lenses
are clean before putting away the microscope
bull NEVER use a paper towel a kimwipe your shirt or any material other than good quality lens tissue or a cotton swab (must be 100 natural cotton) to clean an optical surface Be gentle You may use an appropriate lens cleaner or distilled water to help remove dried material Organic solvents may separate or damage the lens elements or coatings
bull Cover the instrument with a dust jacket when not in use
bull Focus smoothly dont try to speed through the focusing process or force anything For example if you encounter increased resistance when focusing then youve probably reached a limit and you are going in the wrong direction
Objective C Learn the names of the parts of a microscope and functions of each Curriculum (Content) (What to teach)
Instruction (Methodology) (How to teach)
The Microscope Agricultural Biology Two major types of microscopes based on energy used by device ndashLight microscope bullUses visible light that is magnified as it passes through glass lenses bullSource Light bullMagnifies up to 2000 times by using glass lenses bullMaterials can be living or dead ndashElectron microscope bullElectron beam passes through magnetic lenses before magnified image is projected on photographic film or a fluorescent screen similar to television bullSource Electrons bullMagnifies up to 2 million times by using magnets bullMaterials should be dead You will use the compound microscope ndashWhy is it ldquocompoundrdquo bullTwo lenses collect and focus the light from the source as it is transmitted through the sample bullFor light to pass through the specimen the specimen must be very thin bullThe image of the specimen seen in the microscope is not only magnified but the resolution is improved Microscope Unit
ldquoMicrosocoperdquo PowerPoint slides 1-11 and 16-34
Question Box What are the parts of the microscope What is the function of each part
The Microscope bullResolution Ability to distinguish and separate fine details in a specimen such as two objects that are close to each other as being two rather than one ndashOur eyes can ldquoresolverdquo two objects that aat least 01 millimeters (mm) apart
re
ndashA good light microscope has a resolution up to 1000 times closer or 01 micrometers (microm) The Microscope
bullContrast Ability to distinguish detail different absorption of light by parts of the object being viewed ndashCan be increased by decreasing light intensity or by staining of the specimen bullProper selection of stains also increases oability to identify specific structures withspecimen
ur in
Microscopic Terms bullSlide Piece of glass upon which specimen is placed for viewing bullCover Slip Thin square piece of glass or plastic used to cover specimen bullField of View Area of specimen which is seen through lens system bright circle you see when looking into a microscope Microscopic Terms bullDepth of Field Ability of lens to furnish distinct image above and below focal plane Decreases with increase of magnification bullParfocal When objective is in focus it can be switched from one power to another with only small fine focus adjustments necessary Microscopic Terms bullMagnification Number of times an objectrsquos apparent size is increased by lens system ndashDetermined by multiplying power of
objective by the power of eyepiece (usually 10x) Power of objective x Power of eyepiece (usually 10x) Total magnification Microscopic Terms bullHigh Power High power objective on nosepiece (usually 40x) bullMedium Power Middle power objective on nosepiece (usually 10x) bullLow Power Lowest power objective on nosepiece (usually 4x) Functions of Microscope Parts
bullOcular Lenses Upper lenses nearest to eyes magnify image already magnified by objective brings light rays to a focus at the eye bullRotating Nose Piece Revolving part that supports three objectives with different magnifications bullObjective Lens Lens closest to specimen magnifies image of specimen bullStage Flat table-like area where slide or specimen is placed bullIris Diaphragm Lever Disc-shaped device located beneath stage controls
amount of light passing through specimen bullCondenser bullSubstage Light Source of light which passes through specimen bullBase Bottom stand which houses the light bullBody Contains mirrors to reflect light to eyepiece bullHead bullArm Basic frame used to carry microscope bullThumb Clip Hold slide on stage to prevent it from slipping around bullMechanical Stage bullCoarse Adjustment Knob Roughly focuses image by bringing the specimen and objective lenses closer together or farther apart bullFine Adjustment Knob Sharpens image of specimen by moving specimen and objective lenses very small distances closer together or farther apart bullMechanical Stage Control bullLight Control
Objective D Learn how to prepare a wet mount slide for microscopic observation Curriculum (Content) (What to teach)
Instruction (Methodology) (How to teach)
How do you prepare a wet mount slide
Introduction
A wet mount slide is the most common type of slide preparation for microscope work Wet mount slides are used to view living organisms as well as liquid substances of all kinds They are also used for any sort of specimen that needs to be kept moist If you work with microscopes or are planning to start you should learn how to make a wet mount microscope slide
Instructions
Difficulty Moderately Easy
Steps
Step One Use a flat glass slide to prepare a wet mount The slide should be clean and free of dust or other fine particles
2 Step Two
Suck up a few drops of your liquid specimen into a medicine dropper
3 Step Three
Pick up a flat glass slide with one hand grasping it by the outer edges
Question Box How do you prepare a wet mount slide so that it can be viewed under a microscope
4 Step Four
Place one drop of the liquid specimen in the medicine dropper on top of the slide Make sure the drop goes on the center portion of the slide
5 Step Five
Put down the medicine dropper Do not tilt the slide in your other hand while you are doing this
6 Step Six
Use your free hand to carefully pick up a cover slip (they are extremely fragile) Grasp the cover slip by the outer edges
7 Step Seven
Place the cover slip on top of the slide making sure the edges of the cover slip match up with the edges of the slide Do not press down on the cover slip
8 Step Eight
Continue to grasp the slidecover slip combination by the outer edges You should keep the slide as horizontal and steady as possible and place it on the viewing tray of your microscope
How to Prepare a Wet Mount (Vaseline mount) Living specimens do not survive long in the
Question Box What if the wet mount keeps drying out before we can look at it under the microscope
heat from an intense microscope illuminator bulb usually because the specimen dries up This problem is easily solved by preparing a Vaseline chamber Simply take a single cover slip and hold it between thumb and forefinger by the edges Pick up some Vaseline on the other forefinger and rub it over your thumb to make a film Scrape your thumb carefully on each edge of the cover slip to make a continuous Vaseline ledge
Place a drop or two of suspension on a clean slide and turn the cover slip over on top of the drop Press down the edges to seal the chamber against evaporation When preparing a Vaseline mount keep in mind that the image becomes degraded with thicker mounts especially at high powers in dark field or phase contrast Unless the specimen is large and fragile enough to be damaged by pressing down too hard on the cover slip keep the chamber depth very shallow
Activity Have students practice making a wet mount and pass it off to the teacher Also have students practice making a wet mount with Vaseline to ensure student comprehension
Objective E Learn to estimate the sizes of the field of view and objects observed in the microscope Curriculum (Content) (What to teach)
Instruction (Methodology) (How to teach)
Microscopic Measurement The magnifying power of most objectives and oculars is engraved on them On the ocular the marking can be found on the top edge or on the smooth cylinder that fits inside the body tube on the objectives magnification is on the side of the cylinder For example a marking 10x means that the particular lens forms an image ten times larger than the object being viewed The total magnification of a microscope is equal to the power of the eyepiece (ocular) X power of the objective used For example if a student is using a microscope with a 10 X ocular and a 43 X high power objective the total magnification of the specimen the student is viewing is equal to 10 X 43 or 430 X (times)
Formula for Total Microscope Magnification
Total magnification = Power of the eyepiece x
Power of the
objective
The size of a microscopic field of view can be determined on low power using a device called an optical micrometer An economy version of this can be made by placing a clear metric ruler on the stage of a microscope and using it to estimate the field of view The light microscope is used to look at cells or other similarly sized microscopic objects so small units of measure such as millimeters or micrometers are used It is important to remember that there are 1000 micrometers in 1 mm (millimeter) and 1000 millimeters in a meter
Finding the Size of a Microscope Field of View
Question Box How do you estimate how big objects under the microscope are
In the pictured field of view at the left it can be observed that there are approximately 3 12 divisions equal to a length of 35 mm Therefore this field of view is equal to 35 mm or 3500 micrometers
Finding the Size of Multiple Cells in a Field of View
The two cells in this field take up a field of view of one millimeter Therefore the size of the specimen is equal to 1 mm2 cells or 05 mm per cell There is 500 micrometers in 05 mm so the average size of each cell is 500 micrometers
Estimating Cell Size When the Field of View is Known
It is often difficult to approximate the approximate size of the field of view but this ameba considered lengthwise appears to occupy approximately 13 of the field of view The field of view in the left image is 3 mm Given that the ameba in the image takes up about 13 of that field we can find its approximate length by multiplying the 3 mm X 13 = 1 mm length or 1000 micrometers for the approximate length of this ameba The student is viewing the same ameba in the field of view at the right on a higher power The field of view gets smaller which makes the ameba appear larger in this field
Activity bull ldquoHow to Measure Microscopic Objectsrdquo Lab
Supplies Needed One lab sheet for each student Microscopes for student groups Flat ruler with designated millimeter marks for students to look at under
microscope (rulers included in dissection kits work great) Prepared human blood smear for each microscope group Optional Calculators for groups
Objective F Learn to distinguish in the microscope prokaryotic and eukaryotic cells
Curriculum (Content) (What to teach)
Instruction (Methodology) (How to teach)
ldquoThe Microscope and Cellular Diversity Labrdquo worksheet allows students to practice using the microscope while looking at different types of cells
Question Box What is the difference between prokaryotic and eukaryotic cells
Activity bull ldquoThe Microscope and Cellular Diversity Labrdquo
o Activity 1 Compound Microscope Stereomicroscope Lens Paper Lens Cleaner Newsprint Transparent Ruler Microscope Slides Cover Slips Dropper Bottle with Water
o Activity 2 Prepared Slide of Stained Bacteria Microscope Slides and Cover Slips Culture of Live Cyanobacteria (Anabena) Culture of Live Cyanobacteria (Oscillatoria)
o Activity 3 Microscope Slides and Cover Slips Protoslo (methyl cellulose) Culture of Amoeba (live) Culture of Paramecium (live) Mixed Culture of Protists Elodea Plants Onions Dropper Bottle of I2KI (Iodine Solution) Toothpicks Dropper Bottle of 09 NaCl Dropper Bottle of 05 Methylene Blue
Review and Evaluation Objectives will be reviewed before examinations Exams will be developed based on objectives as taught in class Instructional Support and References bull Bierer Loretta Kett 1991 Life Science The Challenge of Discovery Program DC Heath
and Company Lexington Massachusetts bull Oram Raymond F 1994 Biology Living Systems MacmillanMcGraw-Hill Publishing
Company Westerville Ohio bull Oswego City School District Regents Exam Prep Center
httpregentspreporgRegentsbiologybiologycfm
- Light Microscopy
-
- Types of light microscopes
- Bright Field Microscopy
-
- Using a bright field microscope
-
- Mount the specimen on the stage
- Optimize the lighting
- Adjust the condenser
- Think about what you are looking for
- Focus locate and center the specimen
- Adjust eyepiece separation focus
- Select an objective lens for viewing
- Adjust illumination for the selected objective lens
- When to use bright field microscopy
- Care of the microscope
-
- How to Prepare a Wet Mount (Vaseline mount)
-

o Activity 3 Microscope Slides and Cover Slips Protoslo (methyl cellulose) Culture of Amoeba (live) Culture of Paramecium (live) Mixed Culture of Protists Elodea Plants Onions Dropper Bottle of I2KI (Iodine Solution) Toothpicks Dropper Bottle of 09 NaCl Dropper Bottle of 05 Methylene Blue
bull Copies of Worksheet ldquoHow to Measure Microscopic Objectsrdquo Lab (enough for each student to have one)
Supplies Needed Microscopes for student groups Flat ruler with designated millimeter marks for students to look at under
microscope (rulers included in dissection kits work great) Prepared human blood smear for each microscope group Optional Calculators for groups
bull Copies of Worksheet ldquoMicroscope Use Experimentrdquo (enough for each student to have one) Supplies Needed
Newsprint so students may cut out a letter ldquoerdquo It also works fine to print a word document that is filled with ldquoerdquos
Microscopes Slides and Cover Slips for groups Two different colored thread spools so students may cut off threads to look at
Additional Activities to Increase Student Comprehension ldquoCell Observation Exerciserdquo ldquoMicroscope and Cell Observation Labrdquo Facilities Teaching Classroom Laboratory Classroom (or space in teaching classroom to use microscopes in)
Interest Approach Ask students how life forms are arranged Compare the way that life forms are arranged as compared to how buildings are built Stack building blocks to show students how plant cells are arranged as compared to how animal cells are arranged in a body (no certain way) Objective A Learn how to use the compound microscope Curriculum (Content) (What to teach)
Instruction (Methodology) (How to teach)
Light Microscopy The light microscope so called because it employs visible light to detect small objects is probably the most well-known and well-used research tool in biology Yet many students and teachers are unaware of the full range of features that are available in light microscopes Since the cost of an instrument increases with its quality and versatility the best instruments are unfortunately unavailable to most academic programs However even the most inexpensive student microscopes can provide spectacular views of nature and can enable students to perform some reasonably sophisticated experiments
A beginner tends to think that the challenge of viewing small objects lies in getting enough magnification In fact when it comes to looking at living things the biggest challenges are in order
bull obtaining sufficient contrast bull finding the focal plane bull obtaining good resolution bull recognizing the subject when one
sees it
Demonstrate how to use a microscope for students in front of the class
The smallest objects that are considered to be living are the bacteria The smallest bacteria can be observed and cell shape recognized at a mere 100x magnification They are invisible in bright field microscopes though These pages will describe types of optics that are used to obtain contrast suggestions for finding specimens and focusing on them and advice on using measurement devices with a light microscope
Types of light microscopes
The bright field microscope is best known to students and is most likely to be found in a classroom Better equipped classrooms and labs may have dark field andor phase contrast optics Differential interference contrast Nomarski Hoffman modulation contrast and variations produce considerable depth of resolution and a three dimensional effect Fluorescence and confocal microscopes are specialized instruments used for research clinical and industrial applications
Other than the compound microscope a simpler instrument for low magnification use may also be found in the laboratory The stereo microscope or dissecting microscope usually has a binocular eyepiece tube a long working distance and a range of magnifications typically from 5x to 35 or 40x Some instruments supply lenses for higher magnifications but there is no improvement in resolution Such false magnification is rarely worth the expense
Bright Field Microscopy
With a conventional bright field microscope light from an incandescent source is aimed toward a lens beneath the stage called the condenser through the
specimen through an objective lens and to the eye through a second magnifying lens the ocular or eyepiece We see objects in the light path because natural pigmentation or stains absorb light differentially or because they are thick enough to absorb a significant amount of light despite being colorless A Paramecium should show up fairly well in a bright field microscope although it will not be easy to see cilia or most organelles Living bacteria wont show up at all unless the viewer hits the focal plane by luck and distorts the image by using maximum contrast
A good quality microscope has a built-in illuminator adjustable condenser with aperture diaphragm (contrast) control mechanical stage and binocular eyepiece tube The condenser is used to focus light on the specimen through an opening in the stage After passing through the specimen the light is displayed to the eye with an apparent field that is much larger than the area illuminated The magnification of the image is simply the objective lens magnification (usually stamped on the lens body) times the ocular magnification
Students are usually aware of the use of the coarse and fine focus knobs used to sharpen the image of the specimen They are frequently unaware of adjustments to the condenser that can affect resolution and contrast Some condensers are fixed in position others are focusable so that the quality of light can be adjusted Usually the best position for a focusable condenser is as close to the stage as possible The bright field condenser usually contains an aperture diaphragm a device that controls the diameter of the light beam coming up through the condenser so that when the diaphragm is stopped down (nearly closed) the light comes straight up through the center of the condenser lens and contrast is
high When the diaphragm is wide open the image is brighter and contrast is low
A disadvantage of having to rely solely on an aperture diaphragm for contrast is that beyond an optimum point the more contrast you produce the more you distort the image With a small unstained unpigmented specimen you are usually past optimum contrast when you begin to see the image
Using a bright field microscope
First think about what you want to do with the microscope What is the maximum magnification you will need Are you looking at a stained specimen How much contrastresolution do you require Next start setting up for viewing
Mount the specimen on the stage
The cover slip must be up if there is one High magnification objective lenses cant focus through a thick glass slide they must be brought close to the specimen which is why coverslips are so thin The stage may be equipped with simple clips (less expensive microscopes) or with some type of slide holder The slide may require manual positioning or there may be a mechanical stage (preferred) that allows precise positioning without touching the slide
Optimize the lighting
A light source should have a wide dynamic range to provide high intensity illumination at high magnifications and lower intensities so that the user can view comfortably at low magnifications Better microscopes have a built-in illuminator and the best microscopes have controls over light intensity and shape of the light
beam If your microscope requires an external light source make sure that the light is aimed toward the middle of the condenser Adjust illumination so that the field is bright without hurting the eyes
Adjust the condenser
To adjust and align the microscope start by reading the manual If no manual is available try using these guidelines If the condenser is focusable position it with the lens as close to the opening in the stage as you can get it If the condenser has selectable options set it to bright field Start with the aperture diaphragm stopped down (high contrast) You should see the light that comes up through the specimen change brightness as you move the aperture diaphragm lever
Think about what you are looking for
It is a lot harder to find something when you have no expectations as to its appearance How big is it Will it be moving Is it pigmented or stained and if so what is its color Where do you expect to find it on a slide For example students typically have a lot of trouble finding stained bacteria because with the unaided eye and at low magnifications the stuff looks like dirt It helps to know that as smears dry down they usually leave rings so that the edge of a smear usually has the densest concentration of cells
Focus locate and center the specimen
Start with the lowest magnification objective lens to home in on the specimen andor the part of the specimen you wish to examine It is rather easy to find and focus
on sections of tissues especially if they are fixed and stained as with most prepared slides However it can be very difficult to locate living minute specimens such as bacteria or unpigmented protists A suspension of yeast cells makes a good practice specimen for finding difficult objects
bull Use dark field mode (if available) to find unstained specimens If not start with high contrast (aperture diaphragm closed down)
bull Start with the specimen out of focus so that the stage and objective must be brought closer together The first surface to come into focus as you bring stage and objective together is the top of the cover slip With smears a cover slip is frequently not used so the first thing you see is the smear itself
bull If you are having trouble focus on the edge of the cover slip or an air bubble or something that you can readily recognize The top edge of the cover slip comes into focus first then the bottom which should be in the same plane as your specimen
bull Once you have found the specimen adjust contrast and intensity of illumination and move the slide around until you have a good area for viewing
Adjust eyepiece separation focus
With a single ocular there is nothing to do with the eyepiece except to keep it clean With a binocular microscope (preferred) you need to adjust the eyepiece separation just like you do a pair of binoculars Binocular vision is much more sensitive to light and detail than monocular vision so if you have a binocular microscope take
advantage of it
One or both of the eyepieces may be a telescoping eyepiece that is you can focus it Since very few people have eyes that are perfectly matched most of us need to focus one eyepiece to match the other image Look with the appropriate eye into the fixed eyepiece and focus with the microscope focus knob Next look into the adjustable eyepiece (with the other eye of course) and adjust the eyepiece not the microscope
Select an objective lens for viewing
The lowest power lens is usually 35 or 4x and is used primarily for initially finding specimens We sometimes call it the scanning lens for that reason The most frequently used objective lens is the 10x lens which gives a final magnification of 100x with a 10x ocular lens For very small protists and for details in prepared slides such as cell organelles or mitotic figures you will need a higher magnification Typical high magnification lenses are 40x and 97x or 100x The latter two magnifications are used exclusively with oil in order to improve resolution
Move up in magnification by steps Each time you go to a higher power objective re-focus and re-center the specimen Higher magnification lenses must be physically closer to the specimen itself which poses the risk of jamming the objective into the specimen Be very cautious when focusing By the way good quality sets of lenses are parfocal that is when you switch magnifications the specimen remains in focus or close to focused
Bigger is not always better All specimens have three dimensions and unless a specimen is extremely thin you will be
unable to focus with a high magnification objective The higher the magnification the harder it is to chase a moving specimen
Adjust illumination for the selected objective lens
The apparent field of an eyepiece is constant regardless of magnification used So it follows that when you raise magnification the area of illuminated specimen you see is smaller Since you are looking at a smaller area less light reaches the eye and the image darkens With a low power objective you may have to cut down on illumination intensity With a high power you need all the light you can get especially with less expensive microscopes
When to use bright field microscopy
Bright field microscopy is best suited to viewing stained or naturally pigmented specimens such as stained prepared slides of tissue sections or living photosynthetic organisms It is useless for living specimens of bacteria and inferior for non-photosynthetic protists or metazoans or unstained cell suspensions or tissue sections Here is a not-so-complete list of specimens that might be observed using bright-field microscopy and appropriate magnifications (preferred final magnifications are emphasized)
bull Prepared slides stained - bacteria (1000x) thick tissue sections (100x 400x) thin sections with condensed chromosomes or specially stained organelles (1000x) large protists or metazoans (100x)
bull Smears stained - blood (400x 1000x) negative stained bacteria (400x 1000x)
Activity ldquoMicroscope Use Experimentrdquo
Living preparations (wet mounts unstained) - pond water (40x 100x 400x) living protists or metazoans (40x 100x 400x occasionally) algae and other microscopic plant material (40x 100x 400x) Smaller specimens will be difficult to observe without distortion especially if they have no pigmentation
Interest Approach Objective B Learn the proper care and handling of the compound microscope Curriculum (Content) (What to teach)
Instruction (Methodology) (How to teach)
Use of the Microscope 1 Carry with both hands 2 Set microscope in from edge of desk 3 Use lens paper to clean eyepiece and objectives 4 Start with lowest power (shortest objective) in place 5 Turn coarse adjustment so that stage is as close to low power as possible -- now while looking turn coarse adjustment so stage starts to move away from objective 6 Clean up all spills and moisture from stage before putting away 7 Caution ndash Keep all water away from electrical parts 8 Never use coarse adjustment with high power objective while trying to focus because of danger of striking and breaking glass slide with objective
Care of the microscope
bull EVERYTHING on a good quality microscope is unbelievably expensive so be careful
bull Hold a microscope firmly by the stand only Never grab it by the eyepiece holder for example
bull Hold the plug (not the cable) when unplugging the illuminator
bull Since bulbs are expensive and have a limited life turn the illuminator off
ldquoMicroscoperdquo PowerPoint slides 12-15 Have a microscope ready to demonstrate on Go over these rules orally with students and have a microscope ready to demonstrate on
when you are done bull Always make sure the stage and lenses
are clean before putting away the microscope
bull NEVER use a paper towel a kimwipe your shirt or any material other than good quality lens tissue or a cotton swab (must be 100 natural cotton) to clean an optical surface Be gentle You may use an appropriate lens cleaner or distilled water to help remove dried material Organic solvents may separate or damage the lens elements or coatings
bull Cover the instrument with a dust jacket when not in use
bull Focus smoothly dont try to speed through the focusing process or force anything For example if you encounter increased resistance when focusing then youve probably reached a limit and you are going in the wrong direction
Objective C Learn the names of the parts of a microscope and functions of each Curriculum (Content) (What to teach)
Instruction (Methodology) (How to teach)
The Microscope Agricultural Biology Two major types of microscopes based on energy used by device ndashLight microscope bullUses visible light that is magnified as it passes through glass lenses bullSource Light bullMagnifies up to 2000 times by using glass lenses bullMaterials can be living or dead ndashElectron microscope bullElectron beam passes through magnetic lenses before magnified image is projected on photographic film or a fluorescent screen similar to television bullSource Electrons bullMagnifies up to 2 million times by using magnets bullMaterials should be dead You will use the compound microscope ndashWhy is it ldquocompoundrdquo bullTwo lenses collect and focus the light from the source as it is transmitted through the sample bullFor light to pass through the specimen the specimen must be very thin bullThe image of the specimen seen in the microscope is not only magnified but the resolution is improved Microscope Unit
ldquoMicrosocoperdquo PowerPoint slides 1-11 and 16-34
Question Box What are the parts of the microscope What is the function of each part
The Microscope bullResolution Ability to distinguish and separate fine details in a specimen such as two objects that are close to each other as being two rather than one ndashOur eyes can ldquoresolverdquo two objects that aat least 01 millimeters (mm) apart
re
ndashA good light microscope has a resolution up to 1000 times closer or 01 micrometers (microm) The Microscope
bullContrast Ability to distinguish detail different absorption of light by parts of the object being viewed ndashCan be increased by decreasing light intensity or by staining of the specimen bullProper selection of stains also increases oability to identify specific structures withspecimen
ur in
Microscopic Terms bullSlide Piece of glass upon which specimen is placed for viewing bullCover Slip Thin square piece of glass or plastic used to cover specimen bullField of View Area of specimen which is seen through lens system bright circle you see when looking into a microscope Microscopic Terms bullDepth of Field Ability of lens to furnish distinct image above and below focal plane Decreases with increase of magnification bullParfocal When objective is in focus it can be switched from one power to another with only small fine focus adjustments necessary Microscopic Terms bullMagnification Number of times an objectrsquos apparent size is increased by lens system ndashDetermined by multiplying power of
objective by the power of eyepiece (usually 10x) Power of objective x Power of eyepiece (usually 10x) Total magnification Microscopic Terms bullHigh Power High power objective on nosepiece (usually 40x) bullMedium Power Middle power objective on nosepiece (usually 10x) bullLow Power Lowest power objective on nosepiece (usually 4x) Functions of Microscope Parts
bullOcular Lenses Upper lenses nearest to eyes magnify image already magnified by objective brings light rays to a focus at the eye bullRotating Nose Piece Revolving part that supports three objectives with different magnifications bullObjective Lens Lens closest to specimen magnifies image of specimen bullStage Flat table-like area where slide or specimen is placed bullIris Diaphragm Lever Disc-shaped device located beneath stage controls
amount of light passing through specimen bullCondenser bullSubstage Light Source of light which passes through specimen bullBase Bottom stand which houses the light bullBody Contains mirrors to reflect light to eyepiece bullHead bullArm Basic frame used to carry microscope bullThumb Clip Hold slide on stage to prevent it from slipping around bullMechanical Stage bullCoarse Adjustment Knob Roughly focuses image by bringing the specimen and objective lenses closer together or farther apart bullFine Adjustment Knob Sharpens image of specimen by moving specimen and objective lenses very small distances closer together or farther apart bullMechanical Stage Control bullLight Control
Objective D Learn how to prepare a wet mount slide for microscopic observation Curriculum (Content) (What to teach)
Instruction (Methodology) (How to teach)
How do you prepare a wet mount slide
Introduction
A wet mount slide is the most common type of slide preparation for microscope work Wet mount slides are used to view living organisms as well as liquid substances of all kinds They are also used for any sort of specimen that needs to be kept moist If you work with microscopes or are planning to start you should learn how to make a wet mount microscope slide
Instructions
Difficulty Moderately Easy
Steps
Step One Use a flat glass slide to prepare a wet mount The slide should be clean and free of dust or other fine particles
2 Step Two
Suck up a few drops of your liquid specimen into a medicine dropper
3 Step Three
Pick up a flat glass slide with one hand grasping it by the outer edges
Question Box How do you prepare a wet mount slide so that it can be viewed under a microscope
4 Step Four
Place one drop of the liquid specimen in the medicine dropper on top of the slide Make sure the drop goes on the center portion of the slide
5 Step Five
Put down the medicine dropper Do not tilt the slide in your other hand while you are doing this
6 Step Six
Use your free hand to carefully pick up a cover slip (they are extremely fragile) Grasp the cover slip by the outer edges
7 Step Seven
Place the cover slip on top of the slide making sure the edges of the cover slip match up with the edges of the slide Do not press down on the cover slip
8 Step Eight
Continue to grasp the slidecover slip combination by the outer edges You should keep the slide as horizontal and steady as possible and place it on the viewing tray of your microscope
How to Prepare a Wet Mount (Vaseline mount) Living specimens do not survive long in the
Question Box What if the wet mount keeps drying out before we can look at it under the microscope
heat from an intense microscope illuminator bulb usually because the specimen dries up This problem is easily solved by preparing a Vaseline chamber Simply take a single cover slip and hold it between thumb and forefinger by the edges Pick up some Vaseline on the other forefinger and rub it over your thumb to make a film Scrape your thumb carefully on each edge of the cover slip to make a continuous Vaseline ledge
Place a drop or two of suspension on a clean slide and turn the cover slip over on top of the drop Press down the edges to seal the chamber against evaporation When preparing a Vaseline mount keep in mind that the image becomes degraded with thicker mounts especially at high powers in dark field or phase contrast Unless the specimen is large and fragile enough to be damaged by pressing down too hard on the cover slip keep the chamber depth very shallow
Activity Have students practice making a wet mount and pass it off to the teacher Also have students practice making a wet mount with Vaseline to ensure student comprehension
Objective E Learn to estimate the sizes of the field of view and objects observed in the microscope Curriculum (Content) (What to teach)
Instruction (Methodology) (How to teach)
Microscopic Measurement The magnifying power of most objectives and oculars is engraved on them On the ocular the marking can be found on the top edge or on the smooth cylinder that fits inside the body tube on the objectives magnification is on the side of the cylinder For example a marking 10x means that the particular lens forms an image ten times larger than the object being viewed The total magnification of a microscope is equal to the power of the eyepiece (ocular) X power of the objective used For example if a student is using a microscope with a 10 X ocular and a 43 X high power objective the total magnification of the specimen the student is viewing is equal to 10 X 43 or 430 X (times)
Formula for Total Microscope Magnification
Total magnification = Power of the eyepiece x
Power of the
objective
The size of a microscopic field of view can be determined on low power using a device called an optical micrometer An economy version of this can be made by placing a clear metric ruler on the stage of a microscope and using it to estimate the field of view The light microscope is used to look at cells or other similarly sized microscopic objects so small units of measure such as millimeters or micrometers are used It is important to remember that there are 1000 micrometers in 1 mm (millimeter) and 1000 millimeters in a meter
Finding the Size of a Microscope Field of View
Question Box How do you estimate how big objects under the microscope are
In the pictured field of view at the left it can be observed that there are approximately 3 12 divisions equal to a length of 35 mm Therefore this field of view is equal to 35 mm or 3500 micrometers
Finding the Size of Multiple Cells in a Field of View
The two cells in this field take up a field of view of one millimeter Therefore the size of the specimen is equal to 1 mm2 cells or 05 mm per cell There is 500 micrometers in 05 mm so the average size of each cell is 500 micrometers
Estimating Cell Size When the Field of View is Known
It is often difficult to approximate the approximate size of the field of view but this ameba considered lengthwise appears to occupy approximately 13 of the field of view The field of view in the left image is 3 mm Given that the ameba in the image takes up about 13 of that field we can find its approximate length by multiplying the 3 mm X 13 = 1 mm length or 1000 micrometers for the approximate length of this ameba The student is viewing the same ameba in the field of view at the right on a higher power The field of view gets smaller which makes the ameba appear larger in this field
Activity bull ldquoHow to Measure Microscopic Objectsrdquo Lab
Supplies Needed One lab sheet for each student Microscopes for student groups Flat ruler with designated millimeter marks for students to look at under
microscope (rulers included in dissection kits work great) Prepared human blood smear for each microscope group Optional Calculators for groups
Objective F Learn to distinguish in the microscope prokaryotic and eukaryotic cells
Curriculum (Content) (What to teach)
Instruction (Methodology) (How to teach)
ldquoThe Microscope and Cellular Diversity Labrdquo worksheet allows students to practice using the microscope while looking at different types of cells
Question Box What is the difference between prokaryotic and eukaryotic cells
Activity bull ldquoThe Microscope and Cellular Diversity Labrdquo
o Activity 1 Compound Microscope Stereomicroscope Lens Paper Lens Cleaner Newsprint Transparent Ruler Microscope Slides Cover Slips Dropper Bottle with Water
o Activity 2 Prepared Slide of Stained Bacteria Microscope Slides and Cover Slips Culture of Live Cyanobacteria (Anabena) Culture of Live Cyanobacteria (Oscillatoria)
o Activity 3 Microscope Slides and Cover Slips Protoslo (methyl cellulose) Culture of Amoeba (live) Culture of Paramecium (live) Mixed Culture of Protists Elodea Plants Onions Dropper Bottle of I2KI (Iodine Solution) Toothpicks Dropper Bottle of 09 NaCl Dropper Bottle of 05 Methylene Blue
Review and Evaluation Objectives will be reviewed before examinations Exams will be developed based on objectives as taught in class Instructional Support and References bull Bierer Loretta Kett 1991 Life Science The Challenge of Discovery Program DC Heath
and Company Lexington Massachusetts bull Oram Raymond F 1994 Biology Living Systems MacmillanMcGraw-Hill Publishing
Company Westerville Ohio bull Oswego City School District Regents Exam Prep Center
httpregentspreporgRegentsbiologybiologycfm
- Light Microscopy
-
- Types of light microscopes
- Bright Field Microscopy
-
- Using a bright field microscope
-
- Mount the specimen on the stage
- Optimize the lighting
- Adjust the condenser
- Think about what you are looking for
- Focus locate and center the specimen
- Adjust eyepiece separation focus
- Select an objective lens for viewing
- Adjust illumination for the selected objective lens
- When to use bright field microscopy
- Care of the microscope
-
- How to Prepare a Wet Mount (Vaseline mount)
-
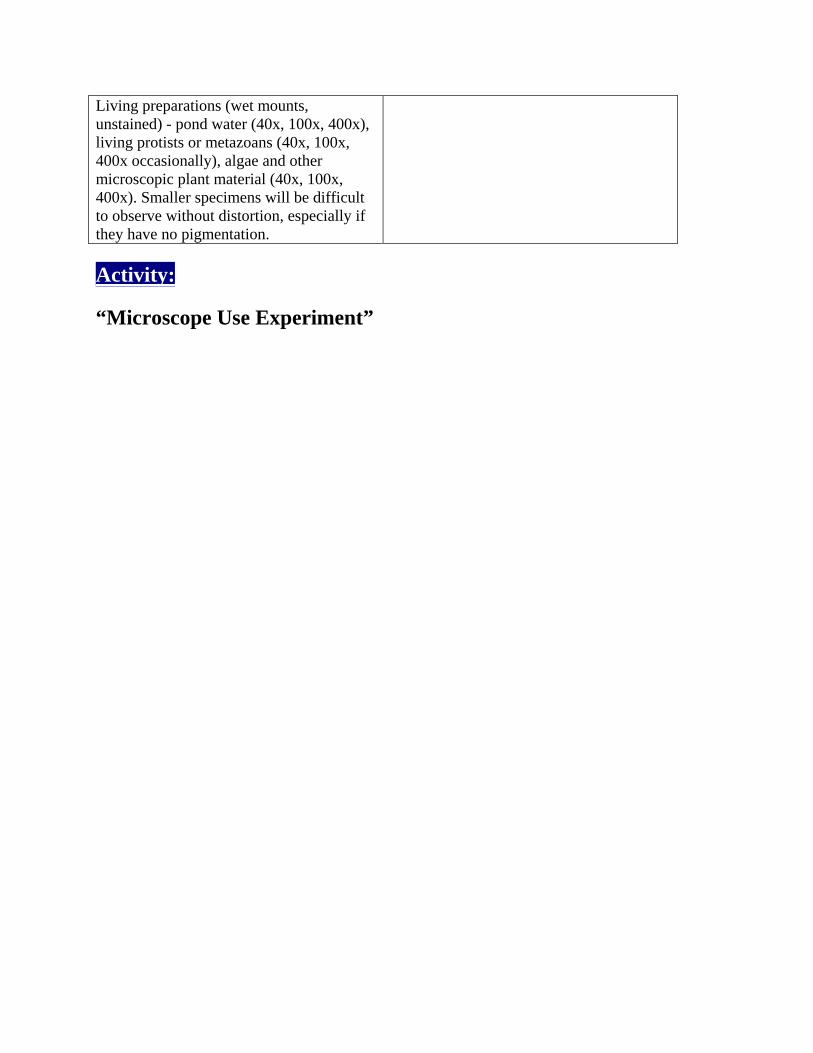
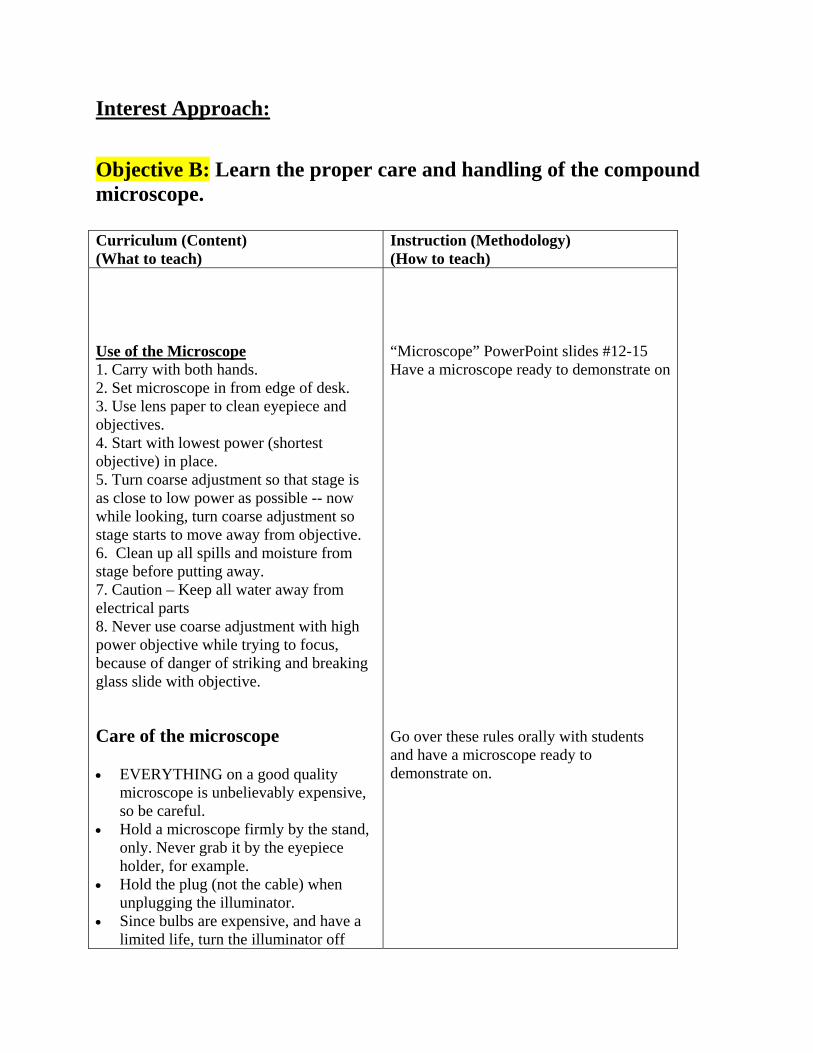
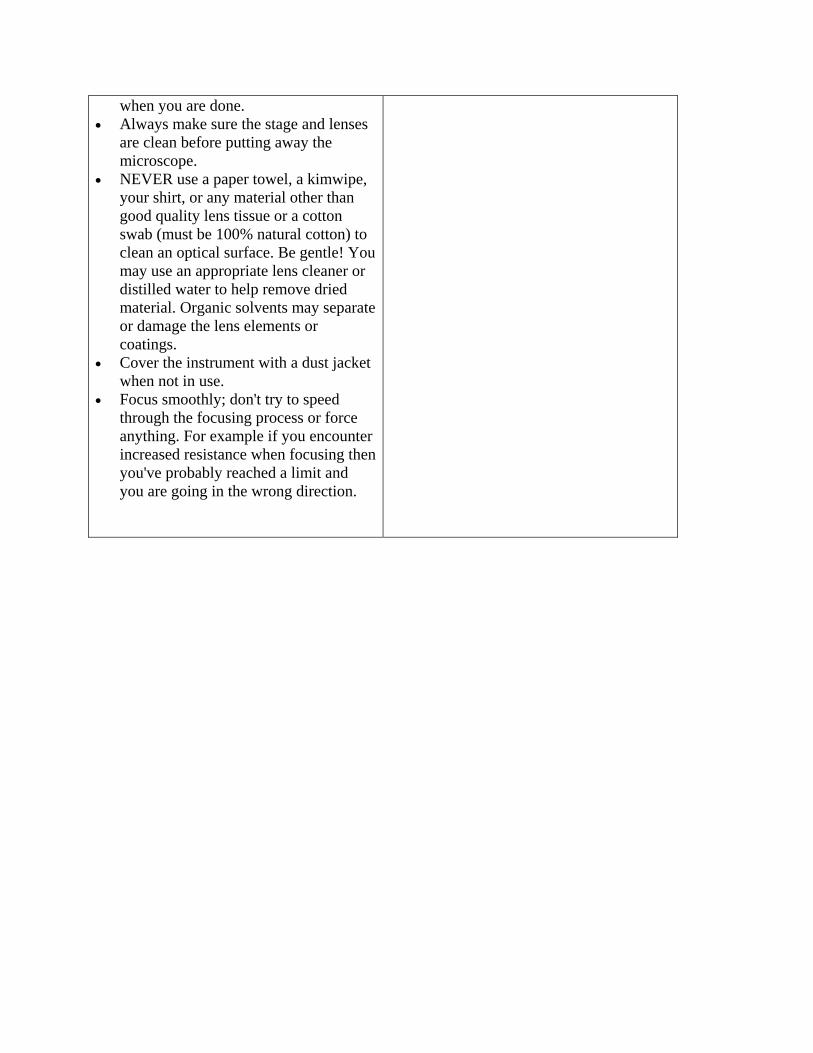
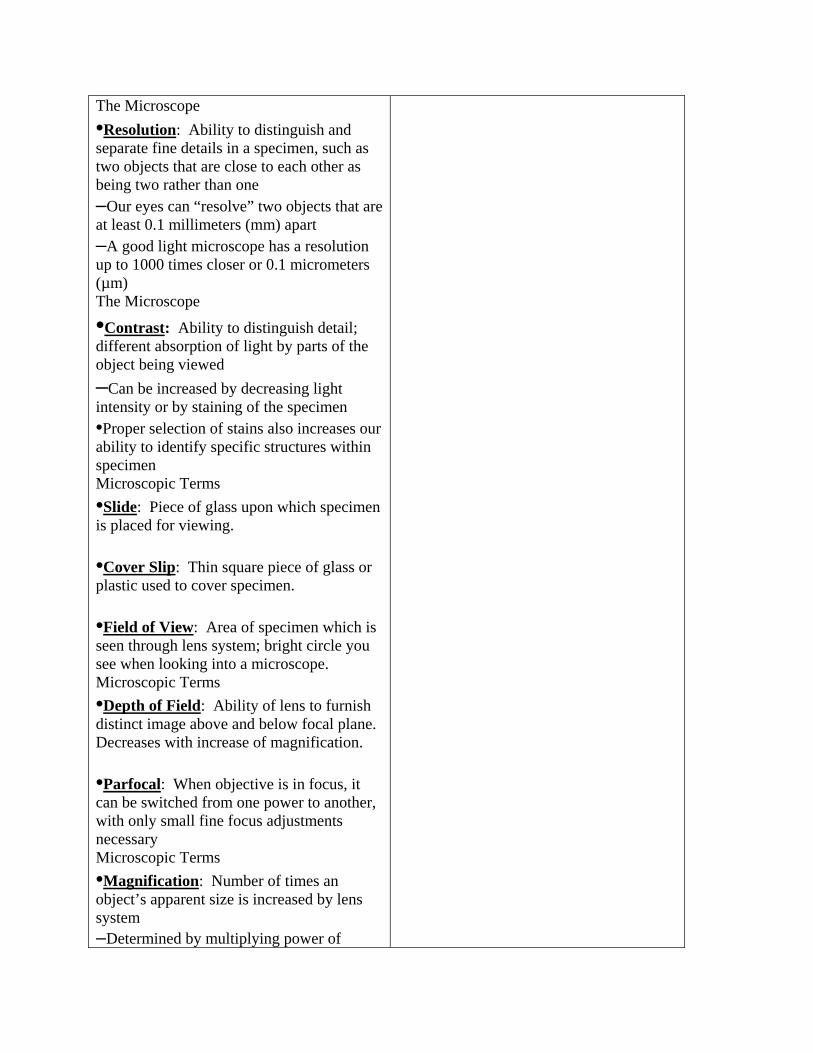