underwater photography sample
DESCRIPTION
TOC and Second Sample ChapterTRANSCRIPT
UNDERWATERPHOTOGRAPHYfor Compact Camera Users
A step-by-step guide to taking professional quality photos with a point-and-shoot camera
Maria Munn
6
Con
tent
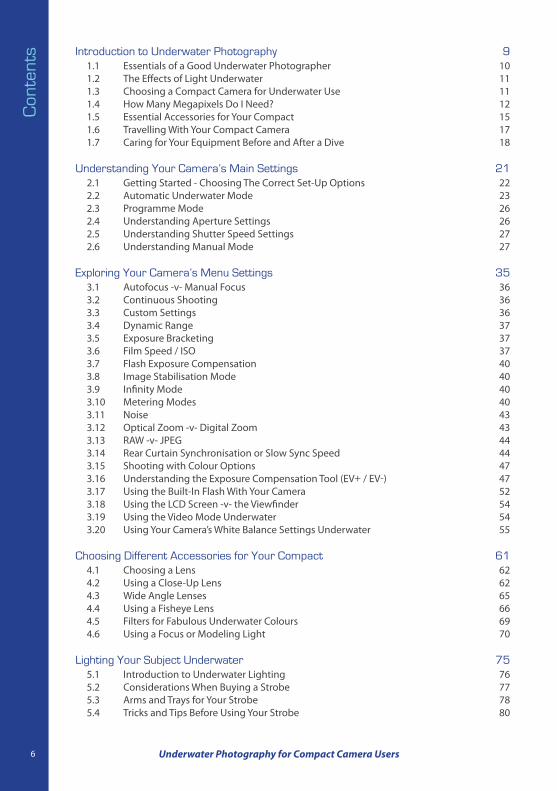
s Introduction to Underwater Photography 91.1 Essentials of a Good Underwater Photographer 101.2 The Effects of Light Underwater 111.3 Choosing a Compact Camera for Underwater Use 111.4 How Many Megapixels Do I Need? 121.5 Essential Accessories for Your Compact 151.6 Travelling With Your Compact Camera 171.7 Caring for Your Equipment Before and After a Dive 18
Understanding Your Camera’s Main Settings 212.1 Getting Started - Choosing The Correct Set-Up Options 222.2 Automatic Underwater Mode 232.3 Programme Mode 262.4 Understanding Aperture Settings 262.5 Understanding Shutter Speed Settings 272.6 Understanding Manual Mode 27
Exploring Your Camera’s Menu Settings 353.1 Autofocus -v- Manual Focus 363.2 Continuous Shooting 363.3 Custom Settings 363.4 Dynamic Range 373.5 Exposure Bracketing 373.6 Film Speed / ISO 373.7 Flash Exposure Compensation 403.8 Image Stabilisation Mode 403.9 Infinity Mode 403.10 Metering Modes 403.11 Noise 433.12 Optical Zoom -v- Digital Zoom 433.13 RAW -v- JPEG 443.14 Rear Curtain Synchronisation or Slow Sync Speed 443.15 Shooting with Colour Options 473.16 Understanding the Exposure Compensation Tool (EV+ / EV-) 473.17 Using the Built-In Flash With Your Camera 523.18 Using the LCD Screen -v- the Viewfinder 543.19 Using the Video Mode Underwater 543.20 Using Your Camera’s White Balance Settings Underwater 55
Choosing Different Accessories for Your Compact 614.1 Choosing a Lens 624.2 Using a Close-Up Lens 624.3 Wide Angle Lenses 654.4 Using a Fisheye Lens 664.5 Filters for Fabulous Underwater Colours 694.6 Using a Focus or Modeling Light 70
Lighting Your Subject Underwater 755.1 Introduction to Underwater Lighting 765.2 Considerations When Buying a Strobe 775.3 Arms and Trays for Your Strobe 785.4 Tricks and Tips Before Using Your Strobe 80
Underwater Photography for Compact Camera Users

7
Contents
Underwater Photography for Compact Camera Users
5.5 What is Backscatter? 815.6 One Strobe or Two 825.7 Using a Strobe to Capture Macro Subjects 835.8 Strobes for Wide Angle Scenes 86
Natural Light Photography – Ideal for Snorkelling 896.1 Natural Light Photography – Ideal for Snorkelling 90
Underwater Photography in Temperate Waters 957.1 Underwater Photography in Temperate Waters 96
Composing a Great Underwater Photograph 1018.1 Abstracts 1028.2 Camouflage 1048.3 Caves 1088.4 Close-Focus Wide-Angle Photographs 1118.5 Contrasting Colours Underwater 1128.6 Photographing Divers 1148.7 Eye-to-Eye Contact 1168.8 Fast Moving Subjects 1178.9 Fish Behaviour & Interaction 1178.10 Fish Portraits 1208.11 Landscape or Portrait Shots 1218.12 Leading/Diagonal Lines 1228.13 Which Way Should Your Subject Go? 1248.14 Looking Up or Down on a Subject? 1258.15 Photographing Macro Subjects 1278.16 Night Dives 1298.17 Reflections 1308.18 Rule of Thirds 1318.19 Same Photo, Different Idea 1348.20 Schooling Fish 1378.21 Shapes 1398.22 Sharks 1408.23 Silhouettes 1418.24 Split-Level Shots 1418.25 Wide Angle Reef Scenes 1428.26 Photographing Wreck Scenes 144
Downloading and Storing Your Images 1499.1 Downloading and Storing Your Images 150
Practice, Practice, Practice 15310.1 Practice, Practice, Practice 154
Guest Gallery 15511.1 Guest Gallery 156
Notes 167
Glossary 174
Index 176
21
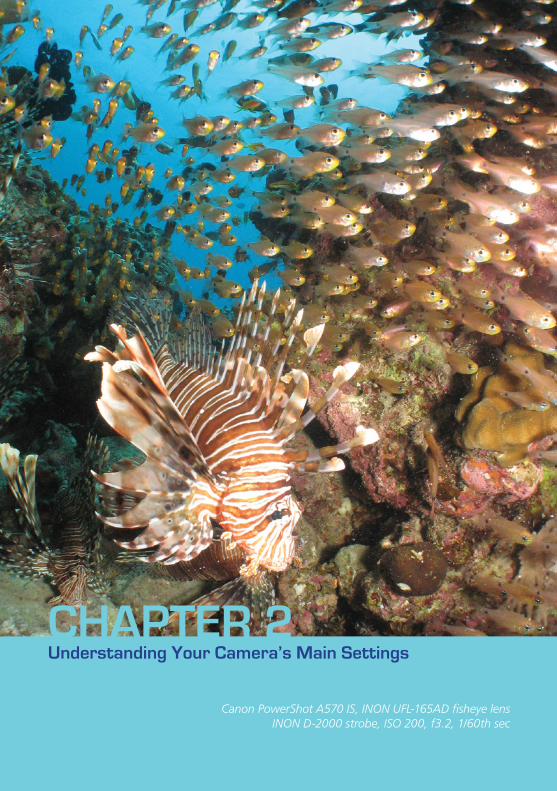
CHAPTER 2Understanding Your Camera’s Main Settings
Canon PowerShot A570 IS, INON UFL-165AD fisheye lens INON D-2000 strobe, ISO 200, f3.2, 1/60th sec
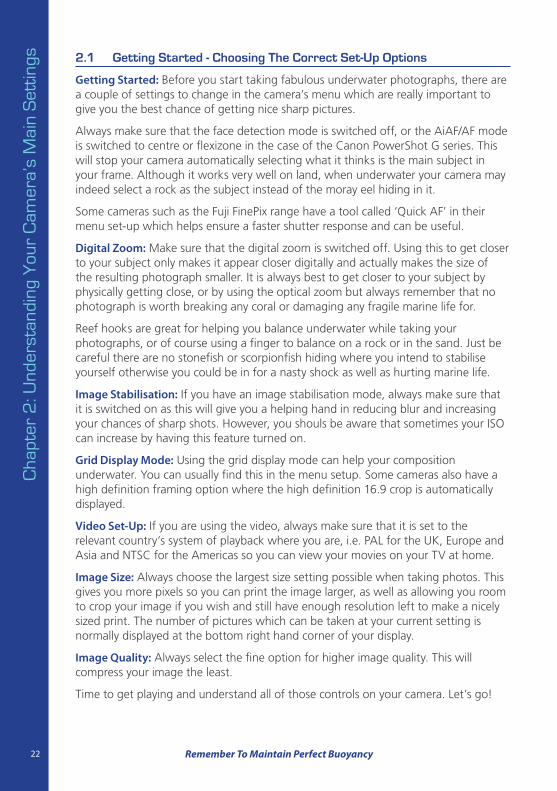
2.1 Getting Started - Choosing The Correct Set-Up Options
Getting Started: Before you start taking fabulous underwater photographs, there are a couple of settings to change in the camera’s menu which are really important to give you the best chance of getting nice sharp pictures.
Always make sure that the face detection mode is switched off, or the AiAF/AF mode is switched to centre or flexizone in the case of the Canon PowerShot G series. This will stop your camera automatically selecting what it thinks is the main subject in your frame. Although it works very well on land, when underwater your camera may indeed select a rock as the subject instead of the moray eel hiding in it.
Some cameras such as the Fuji FinePix range have a tool called ‘Quick AF’ in their menu set-up which helps ensure a faster shutter response and can be useful.
Digital Zoom: Make sure that the digital zoom is switched off. Using this to get closer to your subject only makes it appear closer digitally and actually makes the size of the resulting photograph smaller. It is always best to get closer to your subject by physically getting close, or by using the optical zoom but always remember that no photograph is worth breaking any coral or damaging any fragile marine life for.
Reef hooks are great for helping you balance underwater while taking your photographs, or of course using a finger to balance on a rock or in the sand. Just be careful there are no stonefish or scorpionfish hiding where you intend to stabilise yourself otherwise you could be in for a nasty shock as well as hurting marine life.
Image Stabilisation: If you have an image stabilisation mode, always make sure that it is switched on as this will give you a helping hand in reducing blur and increasing your chances of sharp shots. However, you shouls be aware that sometimes your ISO can increase by having this feature turned on.
Grid Display Mode: Using the grid display mode can help your composition underwater. You can usually find this in the menu setup. Some cameras also have a high definition framing option where the high definition 16.9 crop is automatically displayed.
Video Set-Up: If you are using the video, always make sure that it is set to the relevant country’s system of playback where you are, i.e. PAL for the UK, Europe and Asia and NTSC for the Americas so you can view your movies on your TV at home.
Image Size: Always choose the largest size setting possible when taking photos. This gives you more pixels so you can print the image larger, as well as allowing you room to crop your image if you wish and still have enough resolution left to make a nicely sized print. The number of pictures which can be taken at your current setting is normally displayed at the bottom right hand corner of your display.
Image Quality: Always select the fine option for higher image quality. This will compress your image the least.
Time to get playing and understand all of those controls on your camera. Let’s go!
22 Remember To Maintain Perfect Buoyancy
Cha
pter
2: U
nder
stan
ding
You
r C
amer
a’s
Mai
n S
ettin
gs
2.2 Automatic Underwater Mode
Automatic Underwater Mode – What It Means and When to Use It: There are two things camera manufacturers know we suffer from as underwater photographers - loss of the colour red within the first few metres and fast moving subjects.
Therefore a new setting was introduced by most of the compact camera manufacturers – the underwater mode, and in the case of Olympus compacts, three underwater settings, Underwater Wide 1 and 2 and Underwater Macro. SeaLife cameras have four different underwater settings including one which is especially for snorkellers.
The camera chooses the aperture and shutter speed it thinks is correct to expose your picture correctly in the given circumstances and adds an electronic filter to neutralise the cyan colour underwater. This setting should be used by itself and not with red filters, or with flash when very shallow, otherwise subjects can end up looking pink. However, this could work in your favour if you are taking pictures of red objects such as sponges or orange anthias, as the effect enhances their natural colour and gives the resulting photograph a far punchier look.
Shooting with the underwater mode is appropriate from about 1.5 metres underwater to about 10 metres, depending on the amount of available light. Using the mode in very shallow water could again make your subject more pink. Using this mode at depths greater than 10 metres may lose its effect and this is where manual white balance or an external strobe will be more appropriate to replace lost colours.
The main disadvantage of using this setting is the lack of control over the ISO which could result in images suffering from grain or digital noise where the pixels enlarge and are sometimes red. This usually happens when taking pictures in deeper or darker waters.
Users of Canon’s PowerShot G series or the PowerShot S90 have the ability to change some extra settings on the camera while in underwater mode such as ISO and exposure compensation. The vivid mode which can be found in My Colour Options (under the Function Set menu) can also be accessed to make the colours richer.
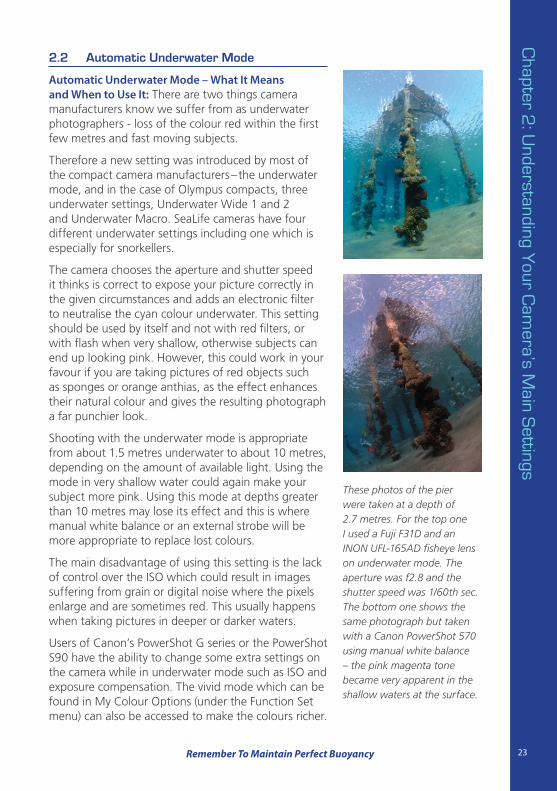
These photos of the pier were taken at a depth of 2.7 metres. For the top one I used a Fuji F31D and an INON UFL-165AD fisheye lens on underwater mode. The aperture was f2.8 and the shutter speed was 1/60th sec. The bottom one shows the same photograph but taken with a Canon PowerShot 570 using manual white balance – the pink magenta tone became very apparent in the shallow waters at the surface.
23Remember To Maintain Perfect Buoyancy
Chapter 2
: Understanding Y
our Cam
era’s Main S
ettings
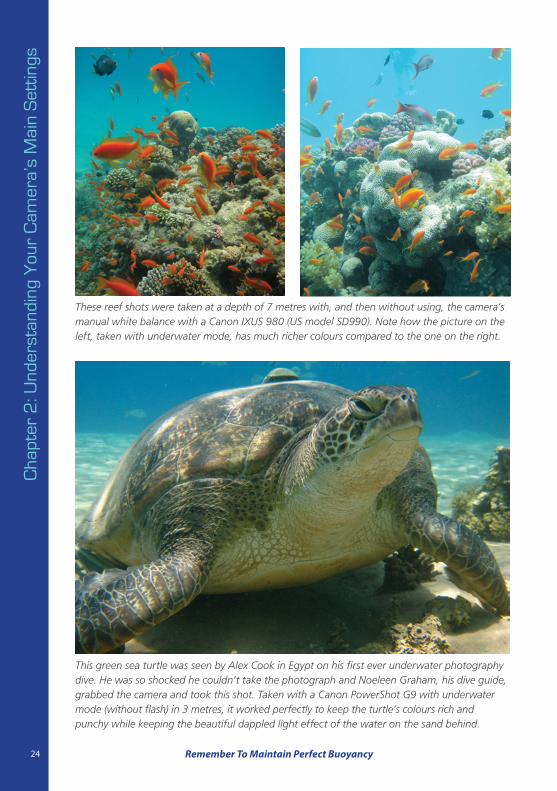
These reef shots were taken at a depth of 7 metres with, and then without using, the camera’s manual white balance with a Canon IXUS 980 (US model SD990). Note how the picture on the left, taken with underwater mode, has much richer colours compared to the one on the right.
This green sea turtle was seen by Alex Cook in Egypt on his first ever underwater photography dive. He was so shocked he couldn’t take the photograph and Noeleen Graham, his dive guide, grabbed the camera and took this shot. Taken with a Canon PowerShot G9 with underwater mode (without flash) in 3 metres, it worked perfectly to keep the turtle’s colours rich and punchy while keeping the beautiful dappled light effect of the water on the sand behind.
24 Remember To Maintain Perfect Buoyancy
Cha
pter
2: U
nder
stan
ding
You
r C
amer
a’s
Mai
n S
ettin
gs
25Remember To Maintain Perfect Buoyancy
Chapter 2
: Understanding Y
our Cam
era’s Main S
ettings
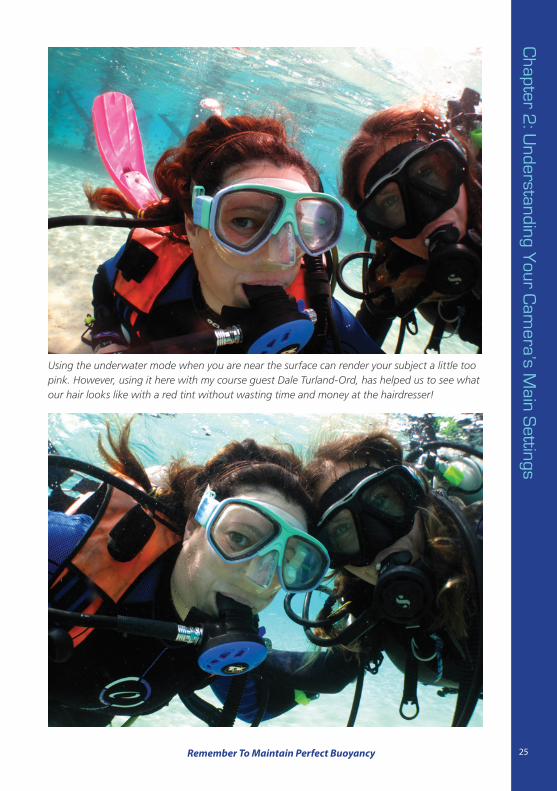
Using the underwater mode when you are near the surface can render your subject a little too pink. However, using it here with my course guest Dale Turland-Ord, has helped us to see what our hair looks like with a red tint without wasting time and money at the hairdresser!
Some compact camera users get fantastic results from using the underwater mode with either their built-in flash or an external flash-gun. I’ve seen some compacts (such as the newer Fuji FinePix F200 EXR) produce richer and more vibrant pictures using the underwater mode with the macro setting and the built-in flash.
Try using the setting in shallow waters and see what you think and whether you like the effect it gives you. It is a nice, hassle-free way to take some fabulous looking photographs when you are surrounded by lots of ambient light.
2.3 Programme Mode
On many compact cameras this is the only mode available, and it can be the most versatile and easiest to understand for anyone getting into underwater photography. Confusingly, some cameras such as Canon’s older IXUS range and the older Fuji FinePix range call this the ‘M’ mode, but it has the same functions and benefits as the ‘P’ or semi-automatic mode found in cameras such as Olympus, Nikon and Sony.
The camera chooses an aperture and a shutter speed for you to expose correctly. You have a choice of being able to use other settings to help enhance the resulting photograph such as ISO, white balance menus, exposure compensation, colours and macro mode.
This is a good choice when shooting with natural light near the surface or if you are using a strobe, as you have a better chance of exposing your subject to its best potential by being able to tweak settings.
For any beginner, this is a great mode to use and offers far more flexibility than the underwater scene mode.
2.4 Understanding Aperture Settings
The very mention of anything other than the programme or ‘green square’ mode can make anyone new to underwater photography freeze when attempting to move out of these settings. Having the confidence to use different aperture settings can help to create striking images when used together with a strobe or even your camera’s built-in flash. So where do you start and what does it all mean?
The aperture (the f number) helps control the depth-of-field of the area in front of and behind your subject – which remains in focus. A shallow depth-of-field gives more prominence to your subject by throwing the background and foreground out-of-focus. Using the maximum depth-of-field gives overall sharpness to an image and is ideal for close-up subjects.
All compacts have the ability to get sharp close-up subjects by using macro mode. This also helps the camera to focus on subjects when using a wide-angle lens for close-focus wide-angle shots.
Compacts naturally have a good depth-of-field as the camera’s sensor is so much smaller than SLR cameras. There are also fewer f numbers to choose from – the range normally starts at f2.8 in most models and typically goes to f8 or f10. Even though
2626 Remember To Maintain Perfect Buoyancy
Cha
pter
2: U
nder
stan
ding
You
r C
amer
a’s
Mai
n S
ettin
gs

this number seems much lower than f22 or f32 offered with SLR models, the range of depth-of-field achieved is more or less the same.
Choosing an aperture of f2.8, or using the camera’s standard programme mode (or M mode on the older Fuji FinePix or older Canon models) with a wide-angle lens is excellent for letting in the maximum amount of light possible.
An aperture of f8 suits close-up subjects where a large depth-of-field is required. For cameras which don’t have aperture priority or full manual controls, simply pressing the ‘tulip icon’ will automatically give the chosen subject the greatest depth-of-field possible. Using this button with the forced flash within a foot of a macro subject gives wonderful sharpness and punch.
Control over the aperture is extremely important when using an external strobe. Too much light will burn out lighter subjects and too little light will make any subject appear too dark. When photographing reef scenes with a wide-angle lens, a middle aperture of f5.6 usually produces effective results. As always, experimenting is key at different depths and environments to produce the correct exposure for any subject.
2.5 Understanding Shutter Speed Settings
Whereas the aperture determines how much light gets into the camera, the shutter speed determines the length of time it has to make the exposure on the camera’s sensor. This is measured in fractions of a second. A standard shutter speed for underwater use is 1/60th of a second to ensure that your picture remains sharp, but this, of course, is very dependent on your subject. If it is fast moving you will need a faster one to prevent it from being a blur. This can also be increased by changing your film speed to a higher one.
Some of the more advanced compacts have their own shutter speed priority mode (such as the older Fuji FinePix range) or a full manual mode where it can be changed independently from the camera’s aperture setting (such as the Canon PowerShot, Olympus, Sea & Sea, Panasonic, some of Sony’s cameras, Nikon’s Coolpix range or the Fuji’s newer FinePix range).
For those who have the ability to independently choose the shutter speed setting, the possibility of using the fastest speed in combination with your smallest aperture (i.e. f8 or the tulip icon) can create wonderful effects where the macro subject stands out from the background. Increasing the shutter speed is also useful for freezing the sun’s rays near the surface of the water. Just start from 1/60th sec and increase the shutter speed to 1/500th sec in clear water and see how the background gets darker. Some cameras have a faster shutter speed, however, when using either the built-in flash or an external strobe, this will only usually synchronise at 1/500th sec. Check your instruction manual for more information.
2.6 Understanding Manual Mode
Manual mode gives control over both aperture and the speed on the camera allowing them to be independently changed, creating a correctly exposed subject and a background to complement it. This is often the most daunting setting for a
27
Chapter 2
: Understanding Y
our Cam
era’s Main S
ettings
Remember To Maintain Perfect Buoyancy
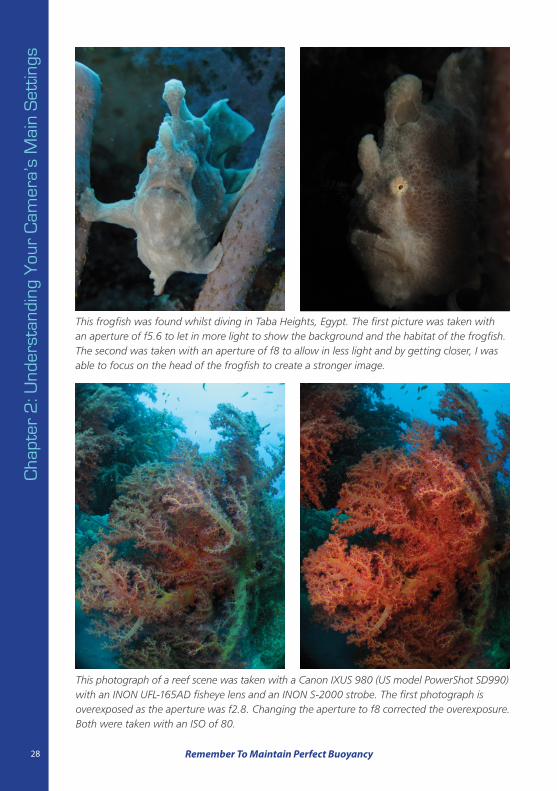
This frogfish was found whilst diving in Taba Heights, Egypt. The first picture was taken with an aperture of f5.6 to let in more light to show the background and the habitat of the frogfish. The second was taken with an aperture of f8 to allow in less light and by getting closer, I was able to focus on the head of the frogfish to create a stronger image.
This photograph of a reef scene was taken with a Canon IXUS 980 (US model PowerShot SD990) with an INON UFL-165AD fisheye lens and an INON S-2000 strobe. The first photograph is overexposed as the aperture was f2.8. Changing the aperture to f8 corrected the overexposure. Both were taken with an ISO of 80.
Remember To Maintain Perfect Buoyancy
Cha
pter
2: U
nder
stan
ding
You
r C
amer
a’s
Mai
n S
ettin
gs
28
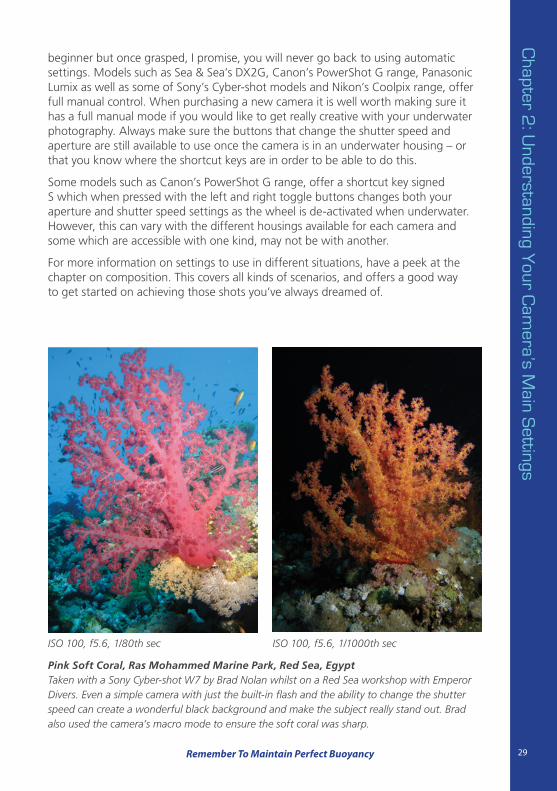
Pink Soft Coral, Ras Mohammed Marine Park, Red Sea, EgyptTaken with a Sony Cyber-shot W7 by Brad Nolan whilst on a Red Sea workshop with Emperor Divers. Even a simple camera with just the built-in flash and the ability to change the shutter speed can create a wonderful black background and make the subject really stand out. Brad also used the camera’s macro mode to ensure the soft coral was sharp.
ISO 100, f5.6, 1/80th sec ISO 100, f5.6, 1/1000th sec
beginner but once grasped, I promise, you will never go back to using automatic settings. Models such as Sea & Sea’s DX2G, Canon’s PowerShot G range, Panasonic Lumix as well as some of Sony’s Cyber-shot models and Nikon’s Coolpix range, offer full manual control. When purchasing a new camera it is well worth making sure it has a full manual mode if you would like to get really creative with your underwater photography. Always make sure the buttons that change the shutter speed and aperture are still available to use once the camera is in an underwater housing – or that you know where the shortcut keys are in order to be able to do this.
Some models such as Canon’s PowerShot G range, offer a shortcut key signed S which when pressed with the left and right toggle buttons changes both your aperture and shutter speed settings as the wheel is de-activated when underwater. However, this can vary with the different housings available for each camera and some which are accessible with one kind, may not be with another.
For more information on settings to use in different situations, have a peek at the chapter on composition. This covers all kinds of scenarios, and offers a good way to get started on achieving those shots you’ve always dreamed of.
29Remember To Maintain Perfect Buoyancy
Chapter 2
: Understanding Y
our Cam
era’s Main S
ettings
30
Cha
pter
2: U
nder
stan
ding
You
r C
amer
a’s
Mai
n S
ettin
gs
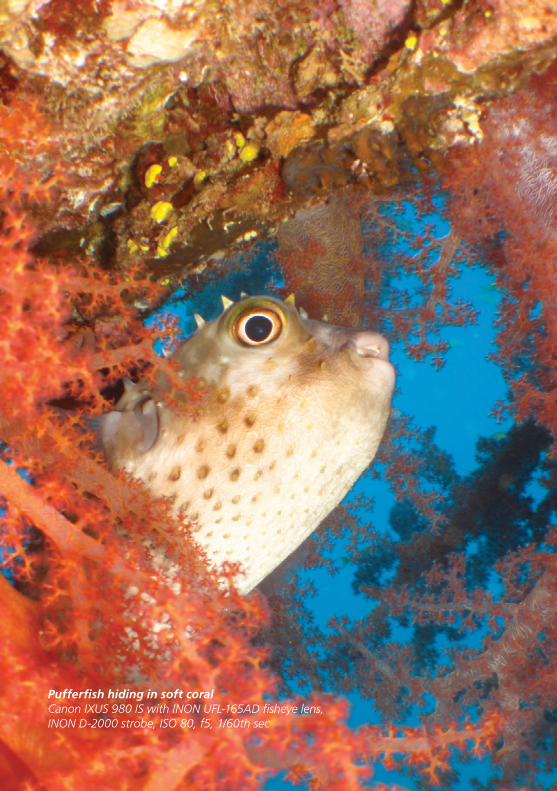
Pufferfish hiding in soft coralCanon IXUS 980 IS with INON UFL-165AD fisheye lens, INON D-2000 strobe, ISO 80, f5, 1/60th sec
1. 2.
3. 4.
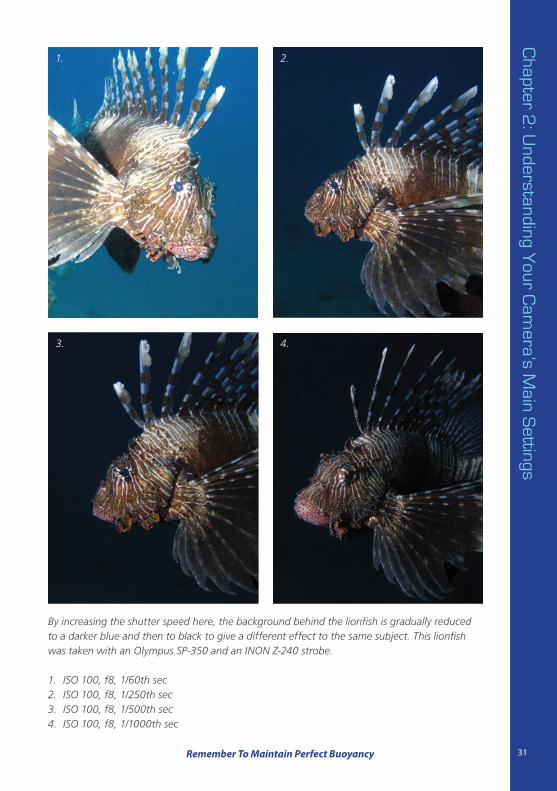
By increasing the shutter speed here, the background behind the lionfish is gradually reduced to a darker blue and then to black to give a different effect to the same subject. This lionfish was taken with an Olympus SP-350 and an INON Z-240 strobe.
1. ISO 100, f8, 1/60th sec2. ISO 100, f8, 1/250th sec3. ISO 100, f8, 1/500th sec4. ISO 100, f8, 1/1000th sec
31Remember To Maintain Perfect Buoyancy
Chapter 2
: Understanding Y
our Cam
era’s Main S
ettings
32 Remember To Maintain Perfect Buoyancy
Cha
pter
2: U
nder
stan
ding
You
r C
amer
a’s
Mai
n S
ettin
gs
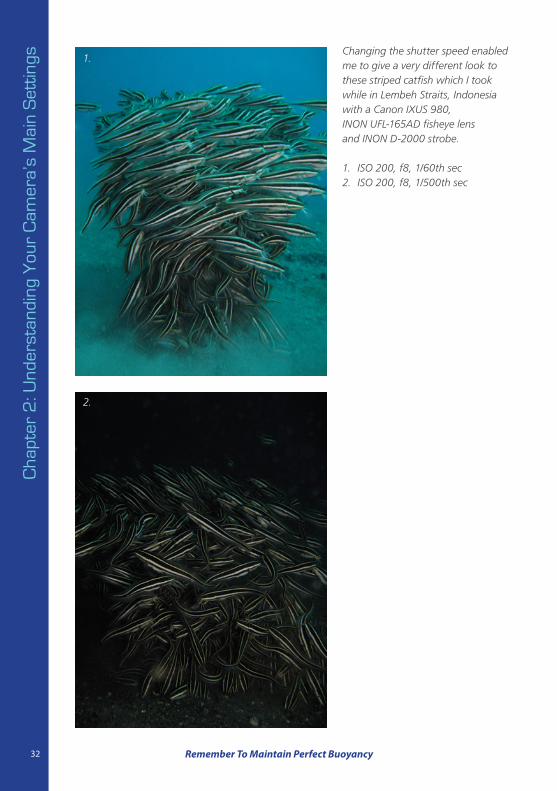
Changing the shutter speed enabled me to give a very different look to these striped catfish which I took while in Lembeh Straits, Indonesia with a Canon IXUS 980, INON UFL-165AD fisheye lens and INON D-2000 strobe.
1. ISO 200, f8, 1/60th sec 2. ISO 200, f8, 1/500th sec
1.
2.
33Remember To Maintain Perfect Buoyancy
Chapter 2
: Understanding Y
our Cam
era’s Main S
ettings
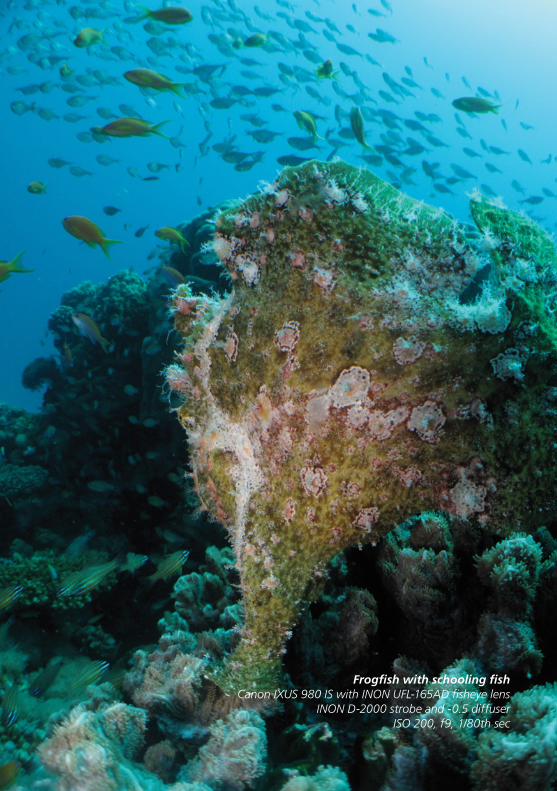
Frogfish with schooling fishCanon IXUS 980 IS with INON UFL-165AD fisheye lens
INON D-2000 strobe and -0.5 diffuserISO 200, f9, 1/80th sec
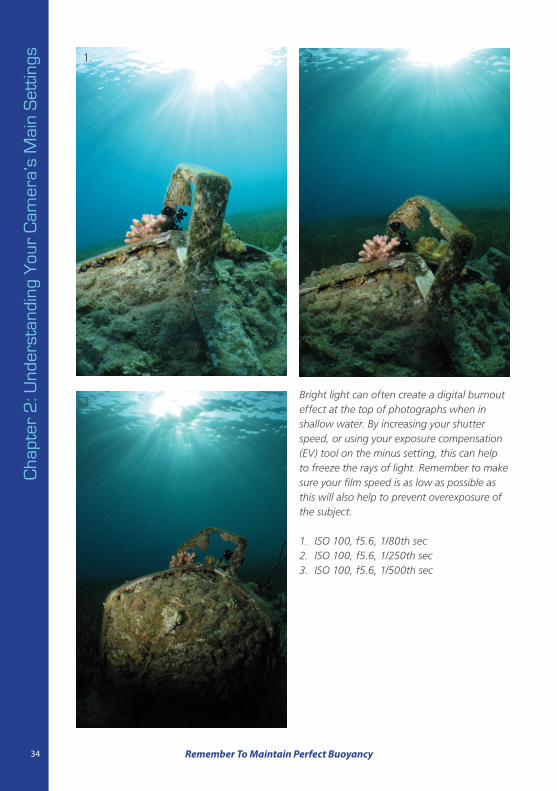
Bright light can often create a digital burnout effect at the top of photographs when in shallow water. By increasing your shutter speed, or using your exposure compensation (EV) tool on the minus setting, this can help to freeze the rays of light. Remember to make sure your film speed is as low as possible as this will also help to prevent overexposure of the subject.
1. ISO 100, f5.6, 1/80th sec2. ISO 100, f5.6, 1/250th sec3. ISO 100, f5.6, 1/500th sec
1. 2.
3.
34 Remember To Maintain Perfect Buoyancy
Cha
pter
2: U
nder
stan
ding
You
r C
amer
a’s
Mai
n S
ettin
gs
ISBN 978-0-9566412-0-5
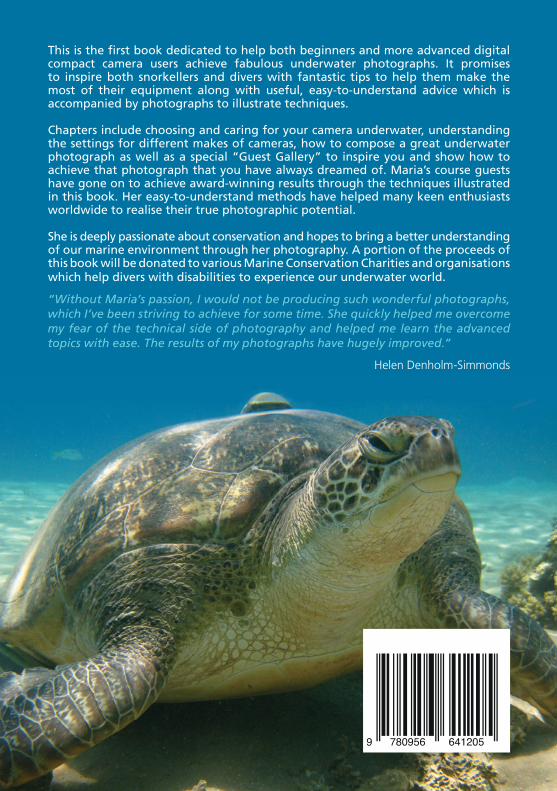
This is the � rst book dedicated to help both beginners and more advanced digital compact camera users achieve fabulous underwater photographs. It promises to inspire both snorkellers and divers with fantastic tips to help them make the most of their equipment along with useful, easy-to-understand advice which is accompanied by photographs to illustrate techniques.
Chapters include choosing and caring for your camera underwater, understanding the settings for different makes of cameras, how to compose a great underwater photograph as well as a special “Guest Gallery” to inspire you and show how to achieve that photograph that you have always dreamed of. Maria’s course guests have gone on to achieve award-winning results through the techniques illustrated in this book. Her easy-to-understand methods have helped many keen enthusiasts worldwide to realise their true photographic potential.
She is deeply passionate about conservation and hopes to bring a better understanding of our marine environment through her photography. A portion of the proceeds of this book will be donated to various Marine Conservation Charities and organisations which help divers with disabilities to experience our underwater world.
“Without Maria’s passion, I would not be producing such wonderful photographs, which I’ve been striving to achieve for some time. She quickly helped me overcome my fear of the technical side of photography and helped me learn the advanced topics with ease. The results of my photographs have hugely improved.”
Helen Denholm-Simmonds