thinprep · man-03939-001 rev. 004 page 2 of 13 intended use the thinprep® 3000 processor...
TRANSCRIPT


HOLOGIC, INC.250 CAMPUS DRIVEMARLBOROUGH, MA 01752 USATEL: 1-800-442-9892
1-508-263-2900FAX: 1-508-229-2795WEB: WWW.HOLOGIC.COM
For Use With Version 1.x.y Software
ThinPrep® 3000 ProcessorOperator’s Manual
MAN-02586-001

Caution: Federal law restricts this device to sale by or on the order of a physician, or any other practitioner licensed by the law of the State in which the practitioner practices to use or order the use of the device and are trained and experienced in the use of the ThinPrep® 3000 processor.
Preparation of microscope slides using the ThinPrep 3000 processor should be performed only by personnel who have been trained by Hologic or by organizations or individuals designated by Hologic.
Evaluation of microscope slides produced with the ThinPrep 3000 processor should be performed only by cytotechnologists and pathologists who have been trained to evaluate ThinPrep-prepared slides by Hologic or by organizations or individuals designated by Hologic.
© Hologic, Inc., 2017. All rights reserved. No part of this publication may be reproduced, transmitted, transcribed, stored in a retrieval system, or translated into any language or computer language, in any form, or by any means, electronic, mechanical, magnetic, optical, chemical, manual, or otherwise, without the prior written permission of Hologic, Inc., 250 Campus Drive, Marlborough, Massachusetts, 01752, United States of America.
Although this guide has been prepared with every precaution to ensure accuracy, Hologic assumes no liability for any errors or omissions, nor for any damages resulting from the application or use of this information.
This product may be covered by one or more U.S. patents identified at http://hologic.com/patentinformation
Hologic, CellFyx, PreservCyt, and ThinPrep are trademarks or registered trademarks of Hologic, Inc. and/or its subsidiaries in the United States and/or other countries. All other trademarks, registered trademarks, and product names are the property of their respective owners.
Caution: Changes or modifications to this unit not expressly approved by the party responsible for compliance could void the user’s authority to operate the equipment.
This equipment has been tested and found to comply with the limits for a Class A digital device, pursuant to Part 15 of the FCC Rules. These limits are designed to provide reasonable protections against harmful interference when the equipment is operated in a commercial environment. This equipment generates, uses, and can radiate radio frequency energy; and if not installed and used in accordance with the instruction manual, may cause harmful interference to radio communications. Operation of this equipment in a residential area is likely to cause harmful interference, in which case the user will be required to correct the interference at his own expense.
For Use with Model: ThinPrep® 3000Document Number: AW-07494-001 Rev. 006

Th
e Th
inP
rep®
Pro
cessor
Th
e T
hin
Pre
p®
Pro
cess
or

MAN-03939-001 Rev. 004 page 1 of 13
Instructions for Use

MAN-03939-001 Rev. 004 page 2 of 13
INTENDED USE The ThinPrep® 3000 Processor (TP-3000) is a device that produces cytologic preparations on glass microscope slides from gynecologic (cervical) samples, and is intended for use in cervical cytologic examinations of material collected for the ThinPrep Pap Test. TP-3000 prepared microscope slides are examined by trained cytotechnologists and pathologists for the presence of atypical cells, cervical neoplasia, including its precursor lesions (Low Grade Squamous Intraepithelial Lesions, High Grade Squamous Intraepithelial Lesions), and carcinoma as well as all other cytologic criteria as defined by The Bethesda System for Reporting Cervical/Vaginal Cytologic Diagnoses1 (Bethesda System).
SUMMARY AND EXPLANATION OF THE SYSTEM
The ThinPrep process begins with the patient’s gynecologic sample being collected by the clinician, which is then immersed and rinsed in a PreservCyt® Solution sample vial. The PreservCyt sample vial is then capped, labeled, and sent to a laboratory equipped with a TP-3000. At the laboratory, the PreservCyt sample vial is bar-coded along with the test request form to establish a sample chain of custody and is placed into a TP-3000. A gentle dispersion step mixes the cell sample by currents in the fluid that are strong enough to separate debris and disperse mucus, but gentle enough to have no adverse effect on cell appearance.
The cells are then captured on a Gynecological ThinPrep Pap Test Filter that is specifically designed to collect cells. The TP-3000 constantly monitors the rate of flow through the ThinPrep Pap Test Filter during the collection process in order to prevent the cellular presentation from being too scant or too dense. The TP-3000 will label the glass slide with the sample identification number read from the bar-code on the sample vial. A thin layer of cells is then transferred to a glass slide in a 20 mm-diameter circle. The slide is completed when its cells are fixed in place by a fixative solution (CellFyx™ Solution) that is applied automatically by the processor.
The ThinPrep Pap Test Slide Preparation Process
(1) Dispersion (2) Cell Collection (3) Cell Transfer
The cell sample is mixed by currents created in the preservation fluid that are strong enough to separate debris and disperse mucus, but gentle enough to have no adverse effect on cell appearance.
A gentle vacuum is applied to the ThinPrep Pap Test Filter to collect cells.
The ThinPrep Pap Test Filter is gently pressed against the ThinPrep Microscope Slide. Positive pressure applied to the inside of the filter assists in transferring the cells from the filter membrane to the surface of the slide.
1. Dispersion 2. Cell Collection 3. Cell Transfer

MAN-03939-001 Rev. 004 page 3 of 13
As with conventional Pap smears, slides prepared with the TP-3000 are examined in the context of the patient’s clinical history and information provided by other diagnostic procedures such as colposcopy, biopsy, and human papillomavirus (HPV) testing, to determine patient management.
The PreservCyt® Solution component of the ThinPrep 2000 System is an alternative collection and transport medium for gynecologic specimens tested with the Cervista®
HPV HR Test, the Cervista® HPV 16/18 Test, the Roche cobas® HPV Test and the Digene Hybrid Capture System HPV DNA. Refer to the respective manufacturer’s package inserts for instructions for using PreservCyt Solution for collection, transport, storage, and preparation of specimens for use in those systems. The PreservCyt Solution component of the ThinPrep 2000 System is an alternative collection and transport medium for gynecologic specimens tested with the Hologic APTIMA COMBO 2® CT/NG Assays, the Hologic APTIMA® Trichomonas vaginalis Assay, and the BD ProbeTec™ CT Qx Amplified DNA Assay. Refer to the respective manufacturer’s package inserts for instructions for using PreservCyt Solution for collection, transport, storage, and preparation of specimens for use in those systems.
The PreservCyt Solution component of the ThinPrep 2000 System is also an alternative collection and transport medium for gynecologic specimens tested with the Roche Diagnostics COBAS AMPLICORTM CT/NG assay. Refer to Hologic’s labeling (Document #MAN-02063-001) for instructions for using PreservCyt Solution for collection, transport, storage, and preparation of specimens and to the Roche Diagnostics COBAS AMPLICOR CT/NG package insert for instructions for use of that system.
LIMITATIONS Gynecologic samples collected for the TP-3000 should be collected using a broom-
type or endocervical brush/plastic spatula combination collection devices. Refer to the instructions provided with the collection device for warnings, contraindications, and limitations associated with specimen collection.
Preparation of slides on the TP-3000 should be performed only by personnel who have been trained by Hologic or by organizations or individuals designated by Hologic.
The staining procedure using the CellFyx® Fixative Solution has been demonstrated for Papanicolaou stain only.
Evaluation of slides prepared on the TP-3000 should be performed only by cytotechnologists and pathologists who have been trained to evaluate ThinPrep Pap Test slides by Hologic or by organizations or individuals designated by Hologic.
Supplies used for TP-3000 gynecologic slide preparations are those designed by Hologic specifically for use on the instrument. These supplies include PreservCyt® Solution vials for use with the ThinPrep Pap Test, ThinPrep Pap Test Filters, ThinPrep Microscope Slides, and CellFyx Fixative Solution. For proper performance of the system these supplies cannot be substituted. After use, supplies should be disposed of in accordance with local, state, and federal regulations.
All supplies, with the exception of CellFyx Fixative Solution, are single-use disposable items and cannot be reused.
The performance of HPV DNA and CT/NG testing on reprocessed sample vials has not been evaluated.

MAN-03939-001 Rev. 004 page 4 of 13
CONTRAINDICATIONS Chlamydia trachomatis and Neisseria gonorrhoeae testing using the Roche
Diagnostics COBAS AMPLICOR and Gen-Probe APTIMA COMBO 2® CT/NG assays should not be performed on a sample that has already been processed using the ThinPrep 3000 processor.
WARNINGS For In Vitro Diagnostic Use. Danger. PreservCyt Solution contains methanol. Toxic if swallowed. Toxic if
inhaled. Causes organ damage. Keep away from heat, sparks, open flames and hot surfaces. Other solutions must not be substituted for PreservCyt Solution. PreservCyt Solution should be stored and disposed of in accordance with local, state, and federal regulations.
PRECAUTIONS A TP-3000 generates, uses and can radiate radio frequency energy, and if not
installed and used in accordance with the Operator’s Manual, may cause interference to radio communications. Operation of this equipment in a residential area is likely to cause harmful interference, in which case, the user will be required to correct the interference at his/her own expense.
PreservCyt Solution with cytologic sample intended for ThinPrep Pap testing must be stored between 15oC (59oF) and 30oC (86oF) and tested within 6 weeks of collection.
PreservCyt Solution with cytologic sample intended for CT/NG testing using the Roche Diagnostics COBAS AMPLICOR CT/NG test must be stored between 4oC (39oF) and 25oC (77oF) and tested within 6 weeks of collection.
Excessively bloody samples may result in a higher unsatisfactory1 rate.

MAN-03939-001 Rev. 004 page 5 of 13
PreservCyt Solution was challenged with a variety of microbial and viral organisms. The following table presents the starting concentrations of viable organisms, and the number of viable organisms found after 15 minutes in the PreservCyt solution. The log reduction of viable organisms is also presented. As with all laboratory procedures, universal precautions should be followed.
Organism Initial Concentration Log Reduction after
15 min.
Candida albicans 5.5 x 10⁵ CFU/mL >4.7
Aspergillus niger* 4.8 x 10⁵ CFU/mL 2.7
Escherichia coli 2.8 x 10⁵ CFU/mL >4.4
Staphylococcus aureus 2.3 x 10⁵ CFU/mL >4.4
Pseudomonas aeruginosa 2.5 x 10⁵ CFU/mL >4.4
Mycobacterium tuberculosis** 9.4 x 10⁵ CFU/mL 4.9
Rabbitpox virus 6.0 x 10⁶ PFU/mL 5.5***
HIV-1 1.0 x 107.5 TCID50/mL 7.0***
* After 1 hour >4.7 log reduction ** After 1 hour >5.7 log reduction
*** Data is for 5 minutes
PERFORMANCE CHARACTERISTICS: REPORT OF CLINICAL STUDIES
A prospective multi-center clinical study was conducted at three sites to evaluate the performance of the TP-3000 in direct comparison to the ThinPrep® 2000 Processor (TP-2000). The objective of this clinical study was to demonstrate that gynecologic specimens prepared using both instruments were equivalent when used for the detection of atypical cells and cervical cancer or its precursor lesions in a variety of patient populations. In addition, an assessment of specimen adequacy was performed. The initial clinical study protocol was a single-masked, direct-to-vial, matched-pair study, for which the order of preparation for each instrument was randomized. At the laboratory, the PreservCyt sample vial was placed into both a TP-3000 and a TP-2000 and two slides were prepared (one per instrument) from the patient’s sample. All slides were examined and diagnosed independently. The same cytotechnologist and pathologist (if referred) reviewed each matched-paired slide set. To minimize slide recognition bias there was a minimum one-day lag between the cytotechnologist and pathologist review of all slides from a matched-pair set. Reporting forms containing patient history as well as a checklist of all possible categories of the Bethesda System were used to record the results of the screening. A panel of three independent pathologists adjudicated all discordant cases (a one-grade or higher cytologic difference) in a masked fashion to determine a consensus diagnosis.

MAN-03939-001 Rev. 004 page 6 of 13
LABORATORY AND PATIENT CHARACTERISTICS The cytology laboratories participating in the study were comprised of one referral center (designated as S1), one screening/referral center (designated as S2) and one screening center (designated as S3). The screening center in the study served patient populations (screening populations) with rates of abnormality (Low-grade Squamous Intraepithelial Lesion [LSIL] and more severe lesions) similar to the United States average of less than 5%.3 The referral center in the study served a high risk referral patient population (referral populations) characterized by high rates (>10%) of cervical abnormality. The screening/referral center’s abnormality rate was a combination of the two previously mentioned rates. Table 1 describes the laboratories and the patient populations.
Table 1: Site Characteristics
Laboratory Characteristics Clinical Study Demographics Site Type of Patient
Population Laboratory
Volume - Smears per
Year
Cases Patient Age Range
Post Menopausal
%
Previous Abnormal Pap Smear
%
Con-current Infection
%
S1 Referral 44,709 1188 18-85 11.8 51.8 35.2
S2 Screening/Refer
ral 62,195 1141 18-77 6.0 21.8 15.1
S3 Screening 90,639 1198 18-82 12.5 22.7 10.2
Cases with patient’s age less than 18 years or patients with a hysterectomy were excluded from this analysis.
CLINICAL STUDY RESULTS The diagnostic classes of the Bethesda System are used to present the comparison between the TP-3000 and TP-2000 findings from all of the clinical trial sites. Three independent pathologists served as an adjudication panel for the three clinical sites. The panel reviewed all discordant cases (a one-grade or higher cytologic difference) for descriptive diagnosis and specimen adequacy. Since a true reference cannot be determined in such studies and therefore true sensitivity cannot be calculated, the use of an independent adjudicated review provides an alternative to histologic confirmation by biopsy or human papillomavirus (HPV) testing as a means for determining the reference diagnosis. Consensus was determined when a minimum of 2 out of 3 independent pathologists rendered an equivalent diagnosis. If a majority vote could not be obtained, a consensus was achieved during a review by all three pathologists at a multi-headed scope. Table 2 shows the unadjudicated descriptive diagnosis results from all sites for the TP-3000 and TP-2000. Of the 3,527 total patients enrolled in the study, 3,224 were included in the descriptive diagnosis analysis after all data integrity sorting was applied. Few cases of cervical cancer were represented in the clinical study, as is typical in the United States patient population. 4

MAN-03939-001 Rev. 004 page 7 of 13
Table 2: Unadjudicated 7 x 7 Classification Table, All Categories
TP-3000 NEG ASCUS AGUS LSIL HSIL SQ CA GL CA TOTAL
TP- NEG 2570 104 6 26 3 0 0 2709 2000 ASCUS 119 90 0 23 6 0 0 238
AGUS 4 1 0 0 0 0 0 5 LSIL 17 29 1 132 10 0 0 189 HSIL 0 10 0 17 54 0 0 81 SQ CA 0 0 0 0 0 2 0 2 GL CA 0 0 0 0 0 0 0 0 TOTAL 2710 234 7 198 73 2 0 3224 Abbreviations for Diagnoses: NEG = Normal or negative, ASCUS = Atypical Squamous Cells of Undetermined Significance, AGUS = Atypical Glandular Cells of Undetermined Significance, LSIL = Low-grade Squamous Intraepithelial Lesion, HSIL = High-grade Squamous Intraepithelial Lesion, SQ CA = Squamous Cell Carcinoma, GL CA = Glandular Cell Adenocarcinoma
Tables 3 - 9 show the adjudicated descriptive diagnosis results from all sites for the TP-3000 and TP-2000.
Table 3: Adjudicated 7 x 7 Diagnostic Classification Table, All Categories (Includes adjudicated cases only)
TP-3000 NEG ASCUS AGUS LSIL HSIL SQ CA GL CA TOTAL
TP- NEG 258 25 0 5 1 0 0 289 2000 ASCUS 29 11 0 11 0 0 0 51
AGUS 0 0 0 0 0 0 0 0 LSIL 6 9 0 10 2 0 0 27 HSIL 1 2 0 3 3 0 0 9 SQ CA 0 0 0 0 0 0 0 0 GL CA 0 0 0 0 0 0 0 0 TOTAL 294 47 0 29 6 0 0 376 Abbreviations for Diagnoses: NEG = Normal or negative, ASCUS = Atypical Squamous Cells of Undetermined Significance, AGUS = Atypical Glandular Cells of Undetermined Significance, LSIL = Low-grade Squamous Intraepithelial Lesion, HSIL = High-grade Squamous Intraepithelial Lesion, SQ CA = Squamous Cell Carcinoma, GL CA = Glandular Cell Adenocarcinoma
The diagnostic data analysis from all sites is summarized in Table 4 for adjudicated cytologic results of LSIL+.
Table 4: Adjudicated Two-Category Diagnostic Classification Table, LSIL and More Severe Lesions
(Includes adjudicated cases only)
TP-3000 NEG/ASCUS/
AGUS LSIL+ TOTAL
TP- NEG/ASCUS/AGUS 323 17 340 2000 LSIL+ 18 18 36
TOTAL 341 35 376 The diagnostic data analysis from each site is summarized in Table 5 for adjudicated cytologic results of LSIL+. When the p-value is significant (p < 0.05), the method favored is indicated in the tables.

MAN-03939-001 Rev. 004 page 8 of 13
Table 5: Adjudicated Results by Site, LSIL and More Severe Lesions (Includes adjudicated cases only)
Site
Cases TP-3000 LSIL+
TP-2000 LSIL+
p-Value
Method Favored
S1 240 13 15 0.791 Neither
S2 65 16 16 1.000 Neither
S3 71 6 5 1.000 Neither
For LSIL and more severe lesions, the adjudicated diagnostic comparison was statistically equivalent at all sites.
The diagnostic data analysis from all sites is summarized in Table 6 for adjudicated cytologic results of HSIL+.
Table 6: Adjudicated Two-Category Diagnostic Classification Table, HSIL and More Severe Lesions
(Includes adjudicated cases only)
TP-3000 NEG/ASCUS/
AGUS/LSIL HSIL+ TOTAL
TP-
NEG/ASCUS/ AGUS/LSIL 364 3 367
2000 HSIL+ 6 3 9 TOTAL 370 6 376
The diagnostic data analysis from each site is summarized in Table 7 for adjudicated cytologic results of HSIL+. When the p-value is significant (p < 0.05), the method favored is indicated in the tables.
Table 7: Adjudicated Results by Site, HSIL and More Severe Lesions (Includes adjudicated cases only)
Site
Cases TP-3000 HSIL+
TP-2000HSIL+
p-Value Method Favored
S1 240 1 1 1.000 Neither
S2 65 3 5 0.625 Neither
S3 71 2 3 1.000 Neither
For HSIL and more severe lesions, the adjudicated diagnostic comparison was statistically equivalent at all sites.

MAN-03939-001 Rev. 004 page 9 of 13
Table 8 below shows the summary of the Bethesda System categories of the unadjudicated descriptive diagnosis data for all sites.
Table 8: Unadjudicated Summary of Descriptive Diagnosis
Descriptive Diagnosis TP-2000 TP-3000 Number of Patients: 3224 N % N %
Benign Cellular Changes: Infection: Trichomonas Vaginalis Candida spp. Coccobacilli Actinomyces spp. Herpes Other Reactive Cellular Changes Associated with: Inflammation Atrophic Vaginitis Radiation IUD Other
903
69 208 346
0 2 7
313 16 1 0
89
28.0
2.1 6.5
10.7 0.0 0.1 0.2
9.7 0.5 0.0 0.0 2.8
848
67 193 347
1 2 2
292 16 0 0
72
23.6
2.1 6.0
10.8 0.0 0.1 0.1
9.1 0.5 0.0 0.0 2.2
Epithelial Cell Abnormalities: Squamous Cell: ASCUS (combined)
Favor reactive Favor neoplastic Undetermined
LSIL HSIL Carcinoma Glandular Cell: Benign Endometrial cells in Postmenopausal Women AGUS (combined)
Favor reactive Favor neoplastic Undetermined
526
239 82 81 76
189 81 2
11 6 2 0 4
16.3
7.4 2.5 2.5 2.4 5.9 2.5 0.1
0.3 0.2 0.1 0.0 0.1
525
236 73 69 94
198 73 2
11 8 2 1 5
16.3
7.3 2.3 2.1 2.9 6.1 2.3 0.1
0.3 0.3 0.1 0.0 0.2
Note: Some patients had more than one descriptive diagnosis subcategory.
ASCUS=Atypical Squamous Cells of Undetermined Significance AGUS=Atypical Glandular Cells of Undetermined Significance

MAN-03939-001 Rev. 004 page 10 of 13
Table 9 shows the summary of the Bethesda System categories of the adjudicated descriptive diagnosis data for all sites.
Table 9: Adjudicated Summary of Descriptive Diagnosis (Includes adjudicated cases only)
Descriptive Diagnosis TP-2000 TP-3000 Number of Patients: 376 N % N %
Benign Cellular Changes: Infection: Trichomonas Vaginalis Candida spp. Coccobacilli Actinomyces spp. Herpes Other Reactive Cellular Changes Associated with: Inflammation Atrophic Vaginitis Radiation IUD Other
163
8 35 62 0 0 2
89 1 0 0 4
43.4
2.1 9.3
16.5 0.0 0.0 0.5
23.7 0.3 0.0 0.0 1.1
174
11 30 72 0 0 0
96 0 0 1 0
46.3
2.9 8.0
19.1 0.0 0.0 0.0
25.5 0.0 0.0 0.3 0.0
Epithelial Cell Abnormalities: Squamous Cell: ASCUS (combined)
Favor reactive Favor neoplastic Undetermined
LSIL HSIL Carcinoma Glandular Cell: Benign Endometrial cells in Postmenopausal Women AGUS (combined)
Favor reactive Favor neoplastic Undetermined
88
87 9
33 45 27 9 0
1 0 0 0 0
23.4
23.2 2.4 8.8
12.0 7.2 2.4 0.0
0.3 0.0 0.0 0.0 0.0
82
78 7
31 40 29 6 0
0 0 0 0 0
21.8
20.7 1.9 8.2
10.6 7.7 1.6 0.0
0.0 0.0 0.0 0.0 0.0
Note: Some patients had more than one descriptive diagnosis subcategory. ASCUS=Atypical Squamous Cells of Undetermined Significance AGUS=Atypical Glandular Cells of Undetermined Significance
The Bethesda System delineates specimen adequacy in three categories: satisfactory, satisfactory but limited by (SBLB) and unsatisfactory. Of the 3,527 total patients enrolled in the study, 3,489 were included in the specimen adequacy analysis after all data integrity sorting was applied.

MAN-03939-001 Rev. 004 page 11 of 13
Tables 10 and 11 show the summary of the Bethesda System categories of the unadjudicated and adjudicated specimen adequacy data for all sites.
Table 10: Unadjudicated Summary of Specimen Adequacy Results Specimen Adequacy TP-2000 TP-3000
Number of Patients: 3489 N % N % Satisfactory 2985 85.6 2951 84.6 Satisfactory for Evaluation but Limited by: Air-Drying Artifact Thick Smear Endocervical Component Absent Scant Squamous Epithelial Component Obscuring Blood Obscuring Inflammation No Clinical History Cytolysis Other
385 0 1
244 125 22 15
0 1 0
11.0 0.0 0.0 7.0 3.6 0.6 0.4 0.0 0.0 0.0
398 1 2
237 122 29 24
2 4 2
11.4 0.0 0.1 6.8 3.5 0.8 0.7 0.1 0.1 0.1
Unsatisfactory for Evaluation: Air-Drying Artifact Thick Smear Endocervical Component Absent Scant Squamous Epithelial Component Obscuring Blood Obscuring Inflammation No Clinical History Cytolysis Other
119 0 0 2
109 20
3 0 0 0
3.4 0.0 0.0 0.1 3.1 0.6 0.1 0.0 0.0 0.0
140 0 0 3
126 36
5 0 0 1
4.0 0.0 0.0 0.1 3.6 1.0 0.1 0.0 0.0 0.0
Note: Some patients had more than one subcategory.
Table 11: Adjudicated Summary of Specimen Adequacy Results (Includes adjudicated cases only)
Specimen Adequacy TP-2000 TP-3000 Number of Patients: 57 N % N %
Satisfactory 12 21.1 9 15.8 Satisfactory for Evaluation but Limited by: Air-Drying Artifact Thick Smear Endocervical Component Absent Scant Squamous Epithelial Component Obscuring Blood Obscuring Inflammation No Clinical History Cytolysis Other
24 0 0 6
24 0 1 0 0 0
42.1 0.0 0.0
10.5 42.1
0.0 1.8 0.0 0.0 0.0
18 0 0 4
18 1 3 0 0 0
31.6 0.0 0.0 7.0
31.6 1.8 5.3 0.0 0.0 0.0
Unsatisfactory for Evaluation: Air-Drying Artifact Thick Smear Endocervical Component Absent Scant Squamous Epithelial Component Obscuring Blood Obscuring Inflammation No Clinical History Cytolysis Other
21 0 0
13 21
0 1 0 0 0
36.8 0.0 0.0
22.8 36.8
0.0 1.8 0.0 0.0 0.0
30 0 0 9
30 10
3 0 0 0
52.6 0.0 0.0
15.8 52.6 17.5
5.3 0.0 0.0 0.0
Note: Some patients had more than one subcategory.
Table 12 shows the adjudicated specimen adequacy results, respectively, from all sites for the TP-3000 and TP-2000.
Table 12: Adjudicated Two-Category Diagnostic Classification Table, Specimen Adequacy Results
(Includes adjudicated cases only)
TP-3000 SBLB/SAT UNSAT TOTAL
TP-2000 SBLB/SAT 23 13 36 UNSAT 4 17 21 TOTAL 27 30 57

MAN-03939-001 Rev. 004 page 12 of 13
The adjudicated specimen adequacy results from each site are presented in Table 13 as SAT/SBLB versus UNSAT.
Table 13: Adjudicated Specimen Adequacy Results by Site (Includes adjudicated cases only)
SAT/SBLB UNSAT* Site
Cases
TP-3000Cases
TP-2000Cases
TP-3000Cases
TP-2000Cases
S1 50 24 33 26 17
S2 1 0 0 1 1
S3 6 3 3 3 3
All Sites 57 27 36 30 21
*Note: Excessively bloody samples may result in a higher unsatisfactory rate.
The TP-3000 provides similar results to the TP-2000 System in a variety of patient populations. The TP-3000 may be used as a replacement for the TP-2000 System in the preparation of cervical cytology samples on glass microscope slides used in the detection of atypical cells, cervical cancer, or its precursor lesions, as well as all other cytologic categories as defined by The Bethesda System.
TECHNICAL SERVICE AND PRODUCT INFORMATION For technical service and assistance related to use of the ThinPrep® 3000 Processor, contact Hologic: Telephone: 1-800-442-9892 Fax: 1-508-229-2795 For international or toll-free blocked calls, please contact 1-508-263-2900. Email: [email protected]
REQUIRED MATERIALS The TP-3000 consists of the following components: The ThinPrep® 3000 Processor (Model TP-3000)
ThinPrep 3000 Processor Operator’s Manual
Power Cord
Program Memory Card
Staining Rack Adapters
Accessory Kit
MATERIALS REQUIRED BUT NOT PROVIDED
Slide staining system
Coverslips and mounting media
20 ml PreservCyt® Solution vials
ThinPrep Pap Test Filters
CellFyx™ Fixative Solution
ThinPrep Microscope Slides

MAN-03939-001 Rev. 004 page 13 of 13
STORAGE Store PreservCyt Solution between 15°C (59°F) and 30°C (86°F). Do not use beyond the
expiration date printed on the container.
Store PreservCyt Solution with cytologic sample intended for ThinPrep Pap testing between 15°C (59°F) and 30°C (86°F) for up to 6 weeks.
Store PreservCyt Solution with cytologic sample intended for CT/NG using the Roche Diagnostics COBAS AMPLICOR CT/NG test testing between 4°C (39°F) and 25°C (77°F) for up to 6 weeks.
Store CellFyx Solution between 15C and 30C. Do not use beyond the expiration date printed on the container.
CellFyx Solution preserves cells on slides up to 5 days at 15C to 30C prior to staining.
BIBLIOGRAPHY 1. Kurman RJ, Solomon D. The Bethesda System for Reporting Cervical/Vaginal Cytologic
Diseases, Springer-Verlag, New York 1994.
2. United States Pharmacopeia (U.S.P.), Preservative Antimicrobial Effectiveness Test, U.S.P. XXII (51).
3. Jones HW. Impact of The Bethesda System, Cancer 77 pp. 1914-1918, 1995.
4. American Cancer Society. Cancer Facts and Figures, 1995.
2017 Hologic, Inc. All rights reserved.AW-07101-001 Rev. 006
Hologic, Inc.
250 Campus Drive Marlborough, MA 01752, USA 1-800-442-9892 www.hologic.com

Table o
f Co
nten
ts Tab
le o
f C
on
ten
ts

TABLE OF CONTENTS
Table of Contents
Chapter One
INTRODUCTION
SECTION A: Overview and Function of the ThinPrep® 3000 Processor 1.1
SECTION B: Overview of Instrument Systems 1.4
SECTION C: Material Requirements 1.8
SECTION D: ThinPrep 3000 Processor Technical Specifications 1.9
SECTION E: Internal Quality Control 1.12
SECTION F: ThinPrep 3000 Processor Hazards 1.12
SECTION G: Disposal 1.17
Chapter Two
THINPREP 3000 INSTALLATION
SECTION A: General 2.1
SECTION B: Action Upon Delivery 2.1
SECTION C: Preparation Prior to Installation 2.3
SECTION D: Storage and Handling Post Installation 2.3
SECTION E: Connect Power 2.4
SECTION F: How to Turn the Processor On/Off 2.4
SECTION G: System Startup 2.6
SECTION H: Setting the Time and Date 2.7
SECTION I: Setting the Slide Printer Output 2.10
SECTION J: Setting the Audible Key Press 2.11
ThinPrep® 3000 Processor Operator’s Manual i
TABLE OF CONTENTS
Chapter Three
PRESERVCYT AND CELLFYX SOLUTIONS
SECTION A: Introduction 3.1
SECTION B: PreservCyt® Solution 3.2
SECTION C: CellFyx™ Solution 3.5
Chapter Four
GYNECOLOGIC SAMPLE COLLECTION AND PREPARATION
SECTION A: Introduction 4.1
SECTION B: Specimen Collection 4.2
SECTION C: Special Precautions 4.4
SECTION D: Specimen Processing 4.4
SECTION E: Sample Processing Troubleshooting 4.6
Chapter Five
INSTRUMENT OPERATION
SECTION A: Chapter Overview 5.1
SECTION B: Optional Instructions for Ancillary Testing 5.2
SECTION C: Instrument Doors 5.4
SECTION E: Items Required to Begin Batch Processing 5.5
SECTION E: Begin Batch Processing 5.14
SECTION F: Completing a Batch 5.18
SECTION G: Reading the Batch Report 5.20
SECTION H: Pausing a Batch in Process 5.22
SECTION I: Canceling a Batch in Process 5.23
ii ThinPrep® 3000 Processor Operator’s Manual

TABLE OF CONTENTS
®
Chapter Six
INSTRUMENT MAINTENANCE
SECTION A: Recommended Maintenance Schedule 6.2
SECTION B: Fixative System Preventative Maintenance 6.5
SECTION C: Emptying the Slide Waste Bin 6.9
SECTION D: Lubricating the Sample Processing Arm O-Rings 6.10
SECTION E: Pneumatic System Testing 6.13
SECTION F: Cleaning the Slide Path 6.17
SECTION G: Replacing the Fixative Shield 6.23
SECTION H: General Cleaning 6.24
SECTION I: Pinch Valve Tubing Replacement 6.26
SECTION J: Waste System Maintenance 6.28
SECTION K: Emptying the Filter Waste Box 6.31
SECTION L: Replenishing CellFyx™ Solution 6.32
SECTION M: Replacing the Slide Printer Ribbon 6.34
SECTION N: Replacing the User-Accessible Fuses 6.36
SECTION O: Replacing the Results Printer Paper 6.38
Chapter Seven
TROUBLESHOOTING
SECTION A: Chapter Overview 7.1
SECTION B: Sample Errors 7.2
SECTION C: System Fault Errors, Reprocessing Required 7.30
SECTION D: ‘’Batch Canceled Due To’ Reporting 7.53
Chapter Eight
STAINING AND COVERSLIPPING
SECTION A: Introduction 8.1
SECTION B: Recommended Staining Guidelines 8.2
SECTION C: Coverslipping Recommendations 8.4
SECTION D: Common Artifacts 8.5
ThinPrep 3000 Processor Operator’s Manual iii

TABLE OF CONTENTS
Chapter Nine
THINPREP PAP TEST TRAINING PROGRAM 9.1
Chapter Ten
USER INTERFACE SCREENS
SECTION A: Overview of the User Interface Screens 10.1
SECTION B: Menu Trees 10.1
INDEX INDEX.1
SERVICE INFORMATION SERVICE.1
ORDERING INFORMATION ORDERING.1
MATERIAL SAFETY DATA SHEETS SERVICE.1
PreservCyt Solution
CellFyx Solution
Versa-Clean™ Solution
APPENDIX
ThinPrep 3000 Processor: Laboratory Flow
Barcode Label Specifications for the ThinPrep 3000 Processor
Sample Vial Label Application Guide
ThinPrep 3000 Processor Quick Reference Guide
iv ThinPrep® 3000 Processor Operator’s Manual

1. Intro
du
ction
1. In
tro
du
ctio
n

INTRODUCTION 1
C h a p t e r O n e
IntroductionCONTENTS
SECTION A: Overview and Function of the ThinPrep® 3000 Processor 1.1
SECTION B: Overview of Instrument Systems 1.4
SECTION C: Material Requirements 1.8
SECTION D: ThinPrep 3000 Processor Technical Specifications 1.9
SECTION E: Internal Quality Control 1.12
SECTION F: ThinPrep 3000 Hazards 1.12
SECTION G: Disposal 1.17
OVERVIEW AND FUNCTION OF THE THINPREP® 3000 PROCESSOR
The ThinPrep 3000 processor (refer to Figure 1-1) automates key steps in the batch processing of fluid-based gynecologic specimens for use with the ThinPrep® Pap test. The samples are collected, processed, transferred and fixed onto microscope slides in preparation for staining, cover slipping and screening. Key system components include The ThinPrep 3000 processor, sample vials of PreservCyt® Solution for use with the ThinPrep Pap test, ThinPrep Pap test filters for gynecologic use, CellFyx™ Solution, and ThinPrep microscope slides.
SECTION
A
ThinPrep® 3000 Processor Operator’s Manual 1.1

1 INTRODUCTION
Figure 1-1 The ThinPrep 3000 Processor
The ThinPrep® Pap Test The ThinPrep Pap test is a fluid-based method for the collection and preparation of gynecologic samples.
The ThinPrep Pap test begins at the physician’s office where, using a broom-type collection device or endocervical brush/plastic spatula, cervical cells are collected from the patient. Rather than smearing the patient’s sample directly onto a microscope slide, the collection device is immediately immersed and rinsed in a vial of PreservCyt Solution for use with the ThinPrep Pap test.
The sample vial is then capped and tightened. Patient information is recorded onto the vial of solution containing the sample and forwarded to a laboratory equipped to process the ThinPrep Pap test.
At the laboratory, matching barcoded labels are applied to the sample vial and accompanying test request form. The sample vial is then placed in a sample vial tray and loaded into the ThinPrep 3000 processor.
(Refer to Figure 1-2.) During the slide preparation process, a gentle dispersion step breaks up blood, mucus and non-diagnostic debris and thoroughly mixes the cell sample. The cells are then collected onto a ThinPrep Pap test filter. A thin layer of cells is then transferred to a ThinPrep microscope slide. The ThinPrep 3000 processor then applies CellFyx Fixative Solution to the slide, after which the slide is delivered to a staining rack.
ThinPrep microscope slides
ThinPrep Pap test filters
Gynecologic samples in ThinPrep Pap test PreservCyt Solution
ThinPrep 3000 processor
CellFyx Solution
1.2 ThinPrep® 3000 Processor Operator’s Manual

INTRODUCTION 1
Figure 1-2 The ThinPrep Sample Preparation Process
Dispersion
The sample vial is rotated, dispersing debris and mucus while thoroughly mixing the cell sample.
Cell Collection
A gentle vacuum is created in the ThinPrep Pap test filter, which collects cells on the exterior surface of the membrane.
Cell Transfer
The ThinPrep Pap test filter is inverted and the collected cells are gently and evenly transferred onto the ThinPrep microscope slide in a defined area.
ThinPrep® 3000 Processor Operator’s Manual 1.3

1 INTRODUCTION
OVERVIEW OF INSTRUMENT SYSTEMS
Figure 1-3 Overview of Instrument Systems
SECTION
B
Sample processing armFilter elevator
(TOP VIEW)
Power cord connection
Filter gripper
Filters
Filter tray handler
Results printer
Display & keypad Slide cartridges
Slide translator
Slide printer
Slide ejector
Slide output system
OCR reader Fixative
dispenser
Slide cell transfer arm
Filter waste bin
Sample vials
Sample vial gripper
Vial tray handler
Barcode reader
Sample processing station
THINPREP 3000 PROCESSOR(FRONT OF INSTRUMENT)
Electronic and pneumatic systems
Filter robot Sample vial robot
1.4 ThinPrep® 3000 Processor Operator’s Manual

INTRODUCTION 1
Vial Handling System
Figure 1-4 Vial Handling System
1. The sample vial is picked from the tray.2. The barcode is scanned and read.3. The sample vial is delivered to the sample processing station and the sample is dispersed by
spinning the vial.4. The vial is uncapped.5. The filter is introduced for cell collection.6. The vial is recapped.7. The sample vial is returned to the sample tray.
����
��
�
����
��
�
��
�
�
����
���
ThinPrep® 3000 Processor Operator’s Manual 1.5

1 INTRODUCTION
®
Filter Handling SystemFigure 1-5 Filter Handling System
1. A ThinPrep Pap test filter is picked from the tray.2. The filter is delivered to the filter elevator.3. The sample processing arm retrieves the filter.4. The filter is brought to the sample processing station and placed in the vial for sample collection.5. The sample processing arm rotates and precisely meets with the slide cell transfer arm, bearing a
slide. Cell transfer occurs.6. The used filter is returned to the filter elevator for disposal.
�
� �
�
��
Disposal chute
Filter elevator (detail)
New filter position Used filter
position
1.6 ThinPrep 3000 Processor Operator’s Manual

INTRODUCTION 1
Slide Handling System
Figure 1-6 Slide Handling System
1. Slide cartridge(s) loaded with slides are placed in the instrument.2. The slide translator picks a slide from the cartridge and carries it to the slide printer.3. The barcode number scanned from the sample vial is printed onto the slide, along with the time,
date and facility name (optional).4. The slide translator hands the slide off to the slide cell transfer arm.5. The slide cell transfer arm pivots to convey the slide to meet the ThinPrep Pap test filter for cell
transfer.6. The slide cell transfer arm delivers the slide to the fixative dispenser, where fixative is applied.7. The prepared slide is placed into a staining rack.
�������
����
�
�
��
�
��
ThinPrep® 3000 Processor Operator’s Manual 1.7

1 INTRODUCTION
MATERIAL REQUIREMENTS
Components of the ThinPrep 3000 Processor1. Slide printer ribbon 7. Waste bottle assembly
2. Staining racks 8. Filter waste box
3. CellFyx Solution 9. ThinPrep Pap test filter trays
4. Sample vials (with barcode) 10. Results printer paper
5. Sample vial trays 11. ThinPrep microscope slides
6. Slide waste bin 12. Slide cartridges
Figure 1-7 Material Requirements
SECTION
C
� �
�
�
�
�
��
��
���
��� ��
��������� �����
�
�
��������
��� ��� �
�����
1.8 ThinPrep® 3000 Processor Operator’s Manual

INTRODUCTION 1
THINPREP 3000 PROCESSOR TECHNICAL SPECIFICATIONS
ThinPrep 3000 Processor DimensionsNote: All measurements in this manual are rounded to the nearest whole number.
Figure 1-8 Dimensions
SECTION
D
�����
�����������
������������
�������������
Approximate weight: 700 lb/318 kg.
ThinPrep® 3000 Processor Operator’s Manual 1.9

1 INTRODUCTION
ThinPrep 3000 Processor ClearancesA minimum installation clearance of 1 foot (30.5 cm) at the rear, top, and sides of the instrument is required for ventilation. (Shown with service cover open.)
Figure 1-9 Clearances
��������������
������������
����������� �����
�������
�����������
�����
Shown with service door open
1.10 ThinPrep® 3000 Processor Operator’s Manual

INTRODUCTION 1
Environmental
Operating1 Temperature Range:
60–90°F/16–32°C
Non-Operating2 Temperature Range:
-20–122°F/ -29–50°COperating Humidity Range:
20–90% RH, non-condensingNon-Operating Humidity Range:
15–95% RH, non-condensingPollution Degree:
II, in accordance with IEC 664.The ThinPrep 3000 processor is for indoor use only in an office or a clean laboratory environment.
PowerVoltage:
100–240~ (Volts Alternating Current, no selection required)Mains supply voltage not to exceed ± 10% of the nominal voltage
Frequency:
47–63HzCurrent:
4A maximum; 500W maximumHeat Generated:
Approximately 1100BTU/HR
WARNING: Instrument Fusing
Fusing: ( )
External – 2 X T6.3AL 250V 5 x 20mm; 6.3A time delay low break capacityInternal – 1 X 15A 250V 3AB; 15A fast blow high break capacity fuse internal to system power supply (non-operator accessible)
1. Operating: The ThinPrep 3000 processor is plugged in and turned on.2. Non-Operating: The ThinPrep 3000 processor may be plugged in, but is not turned on.
ThinPrep® 3000 Processor Operator’s Manual 1.11

1 INTRODUCTION
Safety, EMI and EMC StandardsThe ThinPrep 3000 processor has been tested and certified by a U.S. nationally recognized testing laboratory (NRTL) to comply with Safety, Electro-Magnetic Interference (EMI) and Electro-Magnetic Compatibility (EMC) standards.
INTERNAL QUALITY CONTROL
Power On Self Test (POST)At the time the ThinPrep 3000 processor is powered on (refer to page 2.4) the system goes through a self-diagnostic test. Electrical, mechanical and software systems are tested to confirm each performs properly. The operator is alerted to any malfunction via a message on the user interface. If the instrument does not function or there are persistent errors, contact Hologic Technical Support.
THINPREP 3000 PROCESSOR HAZARDS
The ThinPrep 3000 processor is intended to be operated in the manner specified in this manual. Be sure to review and understand the information listed below in order to avoid harm to operators and/or damage to the instrument.
If this equipment is used in a manner not specified by the manufacturer, then the protection provided by the equipment may be impaired.
Warnings, Cautions and Notes
The terms WARNING, CAUTION and Note have specific meanings in this manual.
• A WARNING advises against certain actions or situations that could result in personal injury or death.
• A CAUTION advises against actions or situations that could damage equipment, produce inaccurate data or invalidate a procedure, although personal injury is unlikely.
• A Note provides useful information within the context of the instructions being provided.
SECTION
E
SECTION
F
1.12 ThinPrep® 3000 Processor Operator’s Manual

INTRODUCTION 1
Warning Symbol Used on the InstrumentThe ThinPrep 3000 processor has the exclamation mark within a triangle symbol placed on it specifically to warn the operator to refer to the operator’s manual. (Refer to the illustration below.) Be sure to review and understand the warnings listed below in order to avoid damage to the instrument and any harm to operators. One or more of the warnings may be pertinent to the area marked.
Warnings Used in this Manual
WARNING
Service Installation OnlyThis instrument is to be installed and/or moved by trained Hologic personnel only.
CAUTION
There is a miniature barcode laser scanner embedded inside this product for identifying samples. There is no intended access to this laser source for operators. Use of controls, adjustments or procedures other than those specified in this manual may result in hazardous radiation exposure.
WARNING
Instrument FusingFor continued protection against fire, replace only with fuses of the specified type and current rating. Refer to “Instrument Maintenance” on page 6.1 for instructions on replacing user accessible fuses.
Fixative reservoir
Slide cartridges
Tray latches
Slide waste bin
Tray latches
ThinPrep® 3000 Processor Operator’s Manual 1.13

1 INTRODUCTION
WARNING
Flammable Liquid and VaporFlammable liquid and vapor. Keep away from heat, sparks, open flames and hot surfaces.
WARNING
Strong oxidizers, such as bleach, are incompatible with PreservCyt Solution and therefore should not be used to clean the waste bottle.
WARNING
Toxic MixtureRefer to Safety Data Sheets (SDS) at www.hologicsds.com for safe handling instructions. Wear personal protective laboratory gear.
WARNING
Moving PartsThe instrument contains many internal moving parts. Keep hands, loose clothing, jewelry, etc., clear. Do not operate with the doors open.
WARNING
Power ConnectionTo ensure safe operation, the instrument must be connected to a three-wire grounded receptacle.
WARNING
Sharp Edges/Hot SurfacesThe instrument contains sharp edges and hot surfaces. Use extreme caution when handling items near these areas. Allow hot surfaces to cool before handling.
WARNING
Glass, Sharp EdgesThe instrument uses glass microscope slides, which have sharp edges. In addition, the slides may be broken in their packaging or in the machine. Use caution when handling glass slides and when cleaning the instrument.
WARNING
Protective Clothing
Wear protective clothing in accordance to universal precautions1 when operating the instrument.
1. US Department of Health and Human Services, Biosafety in Microbiological and Biomedical Labora-tories, 2nd Edition, May 1988. pp 109-111.
1.14 ThinPrep® 3000 Processor Operator’s Manual

INTRODUCTION 1
WARNING
Waste RemovalUse caution when emptying the waste bottle. Refer to “Emptying the Waste Bottle” on page 6.28 for instructions on removing and emptying the waste bottle.
WARNING
Do not process a cerebral spinal fluid (CSF) specimen or other sample type that is suspected of possessing prion infectivity (PrPsc) derived from a person with a TSE, such as Creutzfeldt-Jakob disease, on a ThinPrep processor. A TSE-contaminated processor cannot be effectively decontaminated and therefore must be properly disposed of in order to avoid potential harm to users of the processor or service personnel.
Location of Instrument Labels
The model/rating label for the instrument is located on the left side of the machine.
The serial number label is located inside the flip-down center door.
A label illustrating how to insert a batch printer roll is located on the inside of the cover over the batch printer.
A label illustrating how to orient and insert the slide cartridges is located inside the top cover.
Slide insertion label Printer ribbon label
Printer roll label
Model/rating label
Serial numberLaser source (inside)
ThinPrep® 3000 Processor Operator’s Manual 1.15

1 INTRODUCTION
A label illustrating how to remove and replace the slide printer ribbon is located inside the top hatch.
Attention - labels are located at different parts of the instrument. Refer to the explanation and list of warnings on the previous pages.
1.16 ThinPrep® 3000 Processor Operator’s Manual

INTRODUCTION 1
DISPOSAL
Disposal of Consumables• Used filters. Dispose of as regular waste.
• Swabs and towels for instrument cleaning. Dispose of as regular waste.
• Waste bottle contents. Dispose of all solvents as hazardous waste. Follow local, state, provincial and federal or country guidelines. As with all laboratory practices, universal precautions should be followed.
• PreservCyt Solution. Follow local, state, provincial and federal or country guidelines. Dispose of all solvents as hazardous waste.
• CellFyx Solution. Follow local, state, provincial and federal or country guidelines. Dispose of all solvents as hazardous waste.
• Versa-Clean Solution. Follow local, state, provincial and federal or country guidelines. Dispose of all solvents as hazardous waste.
• Pinch valve tubing. Dispose of as regular waste.
• Broken glass. Dispose of in a Sharps container.
• Super Lube. Dispose of as regular waste.
Disposal of the Instrument
Do not dispose in municipal waste.
Contact Hologic for information regarding proper disposal.
HOLOGIC, INC.250 CAMPUS DRIVEMARLBOROUGH, MA 01752 USATEL: 1-800-442-9892
1-508-263-2900FAX: 1-508-229-2795WEB: WWW.HOLOGIC.COM
SECTION
G
ThinPrep® 3000 Processor Operator’s Manual 1.17

1 INTRODUCTION
This page intentionally left blank
1.18 ThinPrep® 3000 Processor Operator’s Manual

2. Th
inP
rep 3000
Installatio
n2.
Th
inP
rep
300
0 In
stal
lati
on

THINPREP 3000 INSTALLATION 2
C h a p t e r T w o
ThinPrep 3000 Installation
CONTENTS
SECTION A: General 2.1
SECTION B: Action Upon Delivery 2.1
SECTION C: Preparation Prior to Installation 2.3
SECTION D: Storage and Handling Post Installation 2.3
SECTION E: Connect Power 2.4
SECTION F: How to Turn the Processor On/Off 2.4
SECTION G: System Startup 2.6
SECTION H: Setting the Time and Date 2.7
SECTION I: Setting the Slide Printer Output 2.10
SECTION J: Setting the Audible Key Press 2.11
GENERAL
The ThinPrep® 3000 Processor must be installed by Hologic service personnel. When installation is complete, the service personnel trains the operator(s), using the operator’s manual as the training guide. In the event the instrument must be moved after installation, please contact Hologic Technical Support.
CAUTION: Vibrating machinery, such as centrifuges, should not be installed near the instrument.
ACTION UPON DELIVERY
Inspect the packing carton(s) for damage. Report any damage immediately to the shipper and/or Hologic Technical Support as soon as possible.
Leave the equipment in the packing carton for Hologic service installation.
Store the equipment in a suitable environment until installation (cool, dry, vibration-free area).
SECTION
A
SECTION
B
ThinPrep® 3000 Processor Operator’s Manual 2.1

2 THINPREP 3000 INSTALLATION
Shipping Container Checklist
You will receive the following items when the ThinPrep® 3000 processor is delivered for installation.
(These items may vary according to your order.)
• ThinPrep 3000 processor 1
• ThinPrep 3000 Processor Operator’s Manual 1
• Power cord 1
• Program Memory Card 1
• Staining rack adapters 4
• Installation Kit, including: 1
Filter waste box 1
Fixative shield mount 1
Pinch valve tubing 4 pieces
Pneumatic test vial (in protective case) 1
Sample vial trays (4 per package) 2 packages
Slide cartridges 2
Staining racks (4 per package) 2 packages
Slide waste bin 2
Transport cover for the waste bottle 1
Aerosol spray bottle 1 bottle
(Consumable Items):Filter waste box liner 5
Slide printer ribbon 2
Results printer paper (5 rolls per box) 1 box
ThinPrep 3000 Maintenance Kit 1 kit
Versa-Clean™ Solution 1 bottle
2.2 ThinPrep® 3000 Processor Operator’s Manual
THINPREP 3000 INSTALLATION 2
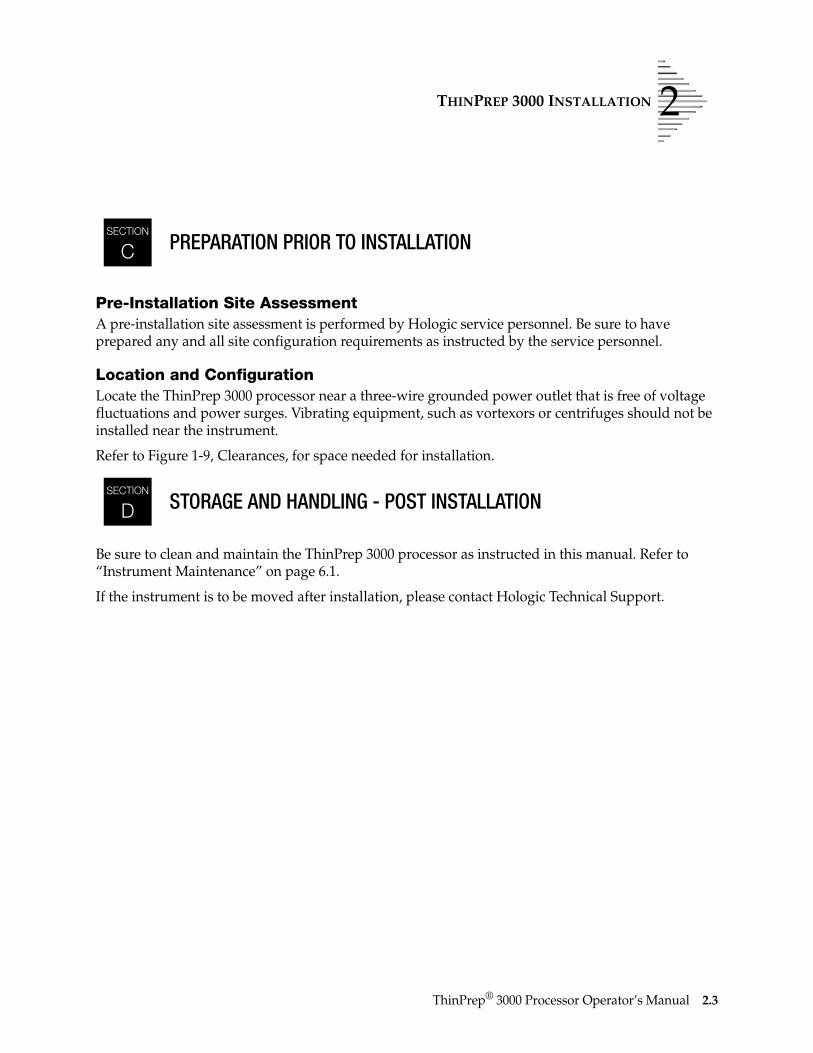
PREPARATION PRIOR TO INSTALLATION
Pre-Installation Site AssessmentA pre-installation site assessment is performed by Hologic service personnel. Be sure to have prepared any and all site configuration requirements as instructed by the service personnel.
Location and ConfigurationLocate the ThinPrep 3000 processor near a three-wire grounded power outlet that is free of voltage fluctuations and power surges. Vibrating equipment, such as vortexors or centrifuges should not be installed near the instrument.
Refer to Figure 1-9‚ Clearances, for space needed for installation.
STORAGE AND HANDLING - POST INSTALLATION
Be sure to clean and maintain the ThinPrep 3000 processor as instructed in this manual. Refer to “Instrument Maintenance” on page 6.1.
If the instrument is to be moved after installation, please contact Hologic Technical Support.
SECTION
C
SECTION
D
ThinPrep® 3000 Processor Operator’s Manual 2.3

2 THINPREP 3000 INSTALLATION
CONNECT POWER
Plug the IEC receptacle end of the power cord (provided with the processor) into the socket, located beneath the power switch (Figure 2-1). Plug the other end of the power cord into the wall outlet. To ensure safe operation of the instrument, use a three-wire grounded outlet.
Figure 2-1 Connect Power to the Instrument
WARNING: Grounded Outlet
*Serial port: For use by Hologic personnel only.
HOW TO TURN THE PROCESSOR ON/OFF
Turn the Processor OnTo turn the ThinPrep 3000 processor on, press the rocker switch, located by the power cord, as shown below.
SECTION
E
�����
SECTION
F
Serial port*
Rocker switch Power On position
IEC receptacle end
Power cord
2.4 ThinPrep® 3000 Processor Operator’s Manual

THINPREP 3000 INSTALLATION 2
Turn the Processor OffTo turn the instrument off, press the rocker switch to the opposite position. To completely remove power from the instrument, unplug the power cord from the wall outlet.
Note: The ThinPrep 3000 processor is intended to remain on.
Extended Shutdown (Taking the Instrument Out of Service)If the instrument is to be shut down for an extended time, turn it off as instructed above.
Remove and safely store any patient slides and sample vials that may be on-board the instrument.
Empty the waste bottle, the slide waste bin and the filter waste box (refer to Instrument Maintenance for each of these items).
Close all of the doors and unplug the power cord from the wall socket.
Instrument On
Instrument Off
Rocker switch
ThinPrep® 3000 Processor Operator’s Manual 2.5

2 THINPREP 3000 INSTALLATION
SYSTEM STARTUP
Upon startup, the instrument conducts an initial self test for several minutes. During this time, Self Test in Progress and a progress bar are displayed on the message screen:
At the conclusion of the self test, the main menu screen is displayed:
• Select Start Batch to begin processing samples.
• Select Menu to access the Utility menu: Status, Maintenance, Setup and Test menus.
• Select Print Results to print the batch report from the previous batch of samples processed.
SECTION
G
Message screen
User interfacePrompt keys
�����������
��� � ���������������
������������������
������������ ����������
�������������!���� "��!������#����������$
�%�&'���("�)*&%*�� ��������!���
2.6 ThinPrep® 3000 Processor Operator’s Manual

THINPREP 3000 INSTALLATION 2
SETTING THE TIME AND DATE
Setting the TimeIn this procedure, first select the desired time format, then set the time.
1. In the main menu screen, select Menu.2. Select Setup.3. Select More (option at the upper right of the display).
4. Press Select Time Format.
5. Select a time format: AM/PM or 24 HR.
Note: Time format is for the user interface display only. All reporting (slide printing and batch reports) will automatically have 24-hour formats on them.
SECTION
H
������� "���
���+��� "���"��!
������������,!�!� ���-
������+���.����� "���
����������.����� "���"��!
(!��/��0������� ���-
����������.�����
("*�" "���"��!
&)1� ���-
ThinPrep® 3000 Processor Operator’s Manual 2.7

2 THINPREP 3000 INSTALLATION
6. Press Back to return to the Set Time display screen. Select Set Time.
7. To set the hour, press the Hour Set prompt key until the correct hour appears.8. To set minutes, press the Minute Set prompt key until the correct minutes appears.9. Select Set to save.Note: Selecting Back at any time prior to selecting Set will delete all new entries and return to the
previous screen.
Setting the Date1. In the main menu screen, select Menu.2. Select Setup.3. Select More (option at the upper right of the display).
4. Press Select Date Format.
5. Select a date format: MM/DD/YY or DD.MM.YY.
1�!����
2��'�" "��!�����
��� ���-
������� "���
���+��� "���"��!
������������,!�!� ���-
������+���.����� "���
����������.����� "���"��!
(!��/��0������� ���-
2.8 ThinPrep® 3000 Processor Operator’s Manual

THINPREP 3000 INSTALLATION 2
6. Press Back to return to the Set Date display screen. Select Set Date.
7. To set the year, press the Year Set prompt key until the correct year appears.8. To set the month, press the Month Set prompt key until the correct month appears.9. To set the day, press the Date Set prompt key until the correct day appears.10. Select Set to save.Note: Selecting Back at any time prior to selecting Set will delete all new entries and return to the
previous screen.
������+���.�����
""*++*�� "���"��!
++�""��� ���-
������� "�������
�)*&%*�� +������
��� ���-
ThinPrep® 3000 Processor Operator’s Manual 2.9

2 THINPREP 3000 INSTALLATION
SETTING THE SLIDE PRINTER OUTPUT
The sample barcode number automatically prints on each slide. To record the date, time, and your facility’s name on the ThinPrep microscope slide, you must enter this information using this setup utility.
1. In the main menu screen, select Menu.2. Select Setup.3. Select Slide Printer Output.Note: Selecting Back at any time prior to selecting Set will delete all new entries and return to the
previous screen
4. To activate the date/time feature, press prompt key #1 until the highlighted box appears next to Date/Time Stamp.
5. Press prompt key #4 or #5 until Enable appears. (Selecting Disable deactivates the date/time fea-ture.)
6. To activate the facility’s name, press prompt key #1 until the highlighted box appears next to Facility Name.
7. Press prompt key #4 or #5 until Enable appears.8. To input your facility’s name, press prompt key “1” until the highlighted box appears next to
Enter Name.9. Use prompt keys #4 (steps from A to Z) and #5 (steps from Z to A) to move one letter at a time
through the alphabet.10. After selecting a letter, press prompt key #2 to move to the next letter space.Note: The field for the facility name is 14 characters’ long, all capital letters.
11. Select Set to save.
SECTION
I
1
2
3
+���*�������� 3��/��
.�������4��� +���/��3����4���((((((((((((((
��� ���-
4
5
6
2.10 ThinPrep® 3000 Processor Operator’s Manual

THINPREP 3000 INSTALLATION 2
SETTING THE AUDIBLE KEY PRESS
This is an option that sounds a ‘beep’ every time a key on the user interface panel is pressed.
1. In the main menu screen, select Menu.2. In the next display, select Setup.3. In the Setup menu, select More. Select Audible Key Press.
4. The key will toggle between the Enable and Disable choices for this function.
• To produce an audible beep with each key press, highlight Enable and then press Set.• To turn off the audible beep (if it has already been set on), highlight Disable and press Set.
SECTION
J
������+���.����� "���
����������.����� "���"��!
(!��/��0������� ���-
(!��/��0������� 3��/��
"���"��!
��� ���-
ThinPrep® 3000 Processor Operator’s Manual 2.11

2 THINPREP 3000 INSTALLATION
This page intentionally left blank
2.12 ThinPrep® 3000 Processor Operator’s Manual

3. PreservC
yt and
CellF
yx So
lutio
ns
3. P
rese
rvC
yt a
nd
Cel
lFyx
So
luti
on
s

PRESERVCYT® AND CELLFYX™ SOLUTIONS 3
C h a p t e r T h r e e
PreservCyt® and CellFyx™ Solutions
CONTENTS
SECTION A: Introduction 3.1
SECTION B: PreservCyt® Solution 3.2
SECTION C: CellFyx™ Solution 3.5
INTRODUCTION
The following sections describe the function and specifications of Hologic cytologic preservative fluid, PreservCyt Solution and fixative fluid, CellFyx Solution.
SECTION
A
ThinPrep® 3000 Processor Operator’s Manual 3.1

3 PRESERVCYT® AND CELLFYX™ SOLUTIONS
PRESERVCYT® SOLUTION
PreservCyt Solution is a methanol-based, buffered solution designed to preserve cells during trans-port and slide preparation on the ThinPrep® 3000 processor.
PreservCyt Solution is optimized for the ThinPrep processor slide preparation process and cannot be substituted with any other reagents.
PackagingPlease refer to the Ordering Information in this manual for part numbers and detailed information regarding the ordering of solutions and supplies for the ThinPrep 3000 processor.
Vials (20 mL) of PreservCyt Solution are contained in each ThinPrep Pap Test Kit.
CompositionPreservCyt Solution contains buffered methanol. It contains no reactive ingredients. It contains no active ingredients.
WARNING:
Toxic
Flammable
WARNING: Danger. PreservCyt Solution contains methanol. Toxic if swallowed. Toxic if inhaled. Causes damage to organs. Cannot be made non-poisonous. Keep away from heat, sparks, open flames and hot surfaces. Other solutions cannot be substituted for PreservCyt Solution.
SECTION
B
3.2 ThinPrep® 3000 Processor Operator’s Manual

PRESERVCYT® AND CELLFYX™ SOLUTIONS 3
Storage Requirements• Store PreservCyt Solution between 15°C (59°F) and 30°C (86°F). Do not use beyond the expi-
ration date printed on the container.
• Store PreservCyt Solution with cytologic sample intended for ThinPrep Pap testing between 15°C (59°F) and 30°C (86°F) for up to 6 weeks.
• Store PreservCyt Solution with cytologic sample intended for CT/NG testing using the Roche Diagnostics COBAS AMPLICOR CT/NG test between 4°C (39°F) and 25°C (77°F) for up to 6 weeks.
TransportationWhen transporting a PreservCyt Solution vial containing cells, make sure the vial is tightly sealed. To prevent leakage, align the mark on the cap with the mark on the vial as shown in the figure below.
Figure 3-1 PreservCyt Solution Vial
The shipping category for PreservCyt Solution is
“flammable liquids, n.o.s. (methanol)” (USA only)“flammable liquids, toxic, n.o.s. (methanol)” (outside the USA)
The shipping category for PreservCyt Solution containing cells is “diagnostic sample.”
Please refer to the Shipping Requirements and Recommendations guide at the end of this chapter.
StabilityDo not use PreservCyt Solution after the expiration date on the container label. Expired vials should be discarded using appropriate laboratory procedures. Also, refer to storage requirements above for cell preservation limits.
�
��
���
����
����
����
�����
����
����
��
����
����
����
����
�
����
�!
"�
����#
$����������
�
Line on cap and line on vial should meet or slightly overlap. If the cap on the vial does not have a line, ensure the cap is tightened securely.
ThinPrep® 3000 Processor Operator’s Manual 3.3

3 PRESERVCYT® AND CELLFYX™ SOLUTIONS
Handling/DisposalHandle all chemical-containing materials carefully in accordance with safe laboratory practices. When required by reagent composition, additional precautions are marked on the reagent containers or in the instructions for use.
Dispose of PreservCyt Solution according to the guidelines for disposing of hazardous waste. PreservCyt Solution contains methanol.
PreservCyt Solution was challenged with a variety of microbial and viral organisms. The following table presents the starting concentrations of viable organisms and the number of viable organisms found after 15 minutes in the PreservCyt Solution. The log reduction for viable organisms is also pre-sented. As with all laboratory procedures, universal precautions should be followed.
* After 1 hour >4.7 log reduction** After 1 hour >5.7 log reduction*** Data is for 5 minutes
Interfering SubstancesThe use of lubricants (e.g., KY Jelly) should be minimized prior to specimen collection. Lubricants can adhere to the filter membrane and may cause poor cell transfer to the slide.
Organism Initial Concentration Log Reduction after 15 min.
Candida albicans 5.5 x 10⁵ CFU/mL >4.7
Aspergillus niger* 4.8 x 10⁵ CFU/mL 2.7
Escherichia coli 2.8 x 10⁵ CFU/mL >4.4
Staphylococcus aureus 2.3 x 10⁵ CFU/mL >4.4
Pseudomonas aeruginosa 2.5 x 10⁵ CFU/mL >4.4
Mycobacterium tuberculosis** 9.4 x 10⁵ CFU/mL 4.9
Rabbitpox virus 6.0 x 10⁶ PFU/mL 5.5***
HIV-1 1.0 x 107.5 TCID50/mL 7.0***
3.4 ThinPrep® 3000 Processor Operator’s Manual

PRESERVCYT® AND CELLFYX™ SOLUTIONS 3
CELLFYX™ SOLUTION
CellFyx Solution is a methanol-based, fixative solution designed to preserve morphologic features of cells for up to 5 days at room temperature. CellFyx Solution is optimized for the ThinPrep 3000 pro-cessor slide preparation process and cannot be substituted with any other reagents.
PackagingPlease refer to the Ordering Information in this manual for part numbers and detailed information regarding the ordering of solutions and supplies for the ThinPrep 3000 processor.
CompositionCellFyx Solution contains methanol. It contains no reactive ingredients.
Storage Requirements• The storage condition for CellFyx Solution is up to two years from date of manufacture at
15°C to 30°C.
• Slides fixed with CellFyx are preserved for 5 days at room temperature.
StabilityDo not use CellFyx Solution after the expiration date on the container label. Expired bottles should be discarded using appropriate laboratory procedures.
Handling/DisposalHandle all chemical-containing materials carefully in accordance with safe laboratory practices. When required by reagent composition, additional precautions are marked on the reagent containers.
Dispose of CellFyx Solution according to the guidelines for disposing of hazardous waste. CellFyx Solution contains methanol.
WARNING: Danger. CellFyx Solution contains methanol. Toxic if swallowed. Toxic if inhaled. Causes damage to organs. Cannot be made non-poisonous. Keep away from heat, sparks, open flames and hot surfaces. Other solutions cannot be substituted for CellFyx Solution.
SECTION
C
ThinPrep® 3000 Processor Operator’s Manual 3.5

3 PRESERVCYT® AND CELLFYX™ SOLUTIONS
This page intentionally left blank
3.6 ThinPrep® 3000 Processor Operator’s Manual

ThinPrep® Solutions(1) Storage Guide(2)
AW-13654-001 Rev. 001
The National Fire Protection Association (NFPA) is the expert authority that local fire departments and fire safety code enforcement authorities look to for fire safety standards and codes. Their codes are developed through a consensus standards development process approved by the American National Standards Institute. The NFPA codes are used as guidelines by most fire code enforcement agencies. Since these codes are guidelines, your local Authority Having Jurisdiction (AHJ) for fire code enforcement may make the final determination. The summary chart below is based upon guidelines for facilities protected by standard sprinkler systems. (3)
The ThinPrep products NFPA ratings are listed in a table below this chart.
Use this chart to help you determine your maximum storage limits for flammable and combustible liquids.
Maximum Quantities of Flammable and Combustible Liquids in Laboratory Units Outside of Inside Liquid Storage Areas(4)
Lab Unit Fire Hazard Class
Flammable &
Combustible Liquid Class
NFPA Code
Quantities in Use Quantities in Use and Storage
Max per 100ft2 (9.2m2) of Lab Unit(5)
Max Quantity per Lab Unit
Max per 100ft2 (9.2m2) of Lab Unit(5)
Max Quantity per Lab Unit
Gallons Liters Vials(8) Gallons Liters Vials(8) Gallons Liters Vials(8) Gallons Liters Vials(8)
A (High) I 45-2015 10 38 1900 480 1820 91,000 20 76 3800 480 1820 91,000
I, II, IIIA 45-2015 20 76 3800 800 3028 151,400 40 150 7500 1600 6060 303,000
B(6) (Moderate)
I 45-2015 5 19 950 300 1136 56,800 10 38 1900 480 1820 91,000
I, II, IIIA 45-2015 10 38 1900 400 1515 75,750 20 76 3800 800 3028 151,400
C(7) (Low) I 45-2015 2 7.5 375 150 570 28,500 4 15 750 300 1136 56,800
I, II, IIIA 45-2015 4 15 750 200 757 37,8520 8 30 1500 400 1515 75,750
D(7) (Minimal) I 45-2015 1 4 200 75 284 14,200 2 7.5 375 150 570 28,500
I, II, IIIA 45-2015 1 4 200 75 284 14,200 2 7.5 375 150 570 28,500
Maximum Quantities of PreservCyt Solution (Class IC) That Can Be Stored per Fire Area(9) Outside a Safety Flammable Cabinet
Location NFPA Code Gallons Liters Vials(8)
General Warehouse(10)(12)(13) 30-2015 120 460 23,000
Liquid Warehouse(3,11) 30-2015 Unlimited Unlimited Unlimited
Office, to include Exam Rooms 30-2015 10 38 1900
Allowable Quantities of PreservCyt Solution That Can Be Stored in a Liquid Storage Room
Location NFPA Code Gallons Liters Vials(8)
Maximum allowable storage per ft2 in an inside storage room that is smaller than 150ft2 in size. 30-2015 5 19 950
Maximum allowable storage per ft2 in an inside storage room that is larger than 150ft2 and less than 500ft2 in size.
30-2015 10 38 1900
(1) Solution classifications: PreservCyt – Class IC; CytoLyt – Class II; CellFyx – Class IB
(2) This information is Hologic’s summary of the various regulations. To view the codes in their entirety, please refer to NFPA 30 and NFPA 45.
(3) A Liquid Warehouse shall have a sprinkler system that complies with the appropriate system indicated in NFPA 30.
(4) An Inside Liquid Storage Area is a storage room totally enclosed within a building and having no exterior walls.
(5) A Laboratory Unit is the area surrounded by firewalls per NFPA 30 Flammable and Combustible Liquids Code.
(6) Reduce quantities by 50% for B laboratory units located above the 3rd floor.
(7) Reduce quantities by 25% for C and D laboratory units located on the 4th-6th floors of a building and reduce quantities by 50% for C and D laboratory units above the 6th floor
(8) 20ml PreservCyt vials.
(9) A Fire Area is the area of a building separated from the remainder of the building by construction having a fire resistance of at least 1-hour and having all communicating openings properly protected by an assembly having a fire resistance rating of at least 1-hour per NFPA 30 Flammable and Combustible Liquids Code.

ThinPrep® Solutions(1) Storage Guide(2)
AW-13654-001 Rev. 001
(10) Allowable quantities in a warehouse can be increased with a sprinkler system rated higher than standard systems.
(11) A Liquid Warehouse is a separate, detached building or attached building used for warehousing-type operations for liquids.
(12) Quantities are permitted to be increased 100% where stored in approved flammable liquids storage cabinets.
(13) Quantities are permitted to be increased 100% in buildings equipped throughout with an automatic sprinkler system installed in accordance tiwh NFPA13, Standard for the Installation of Sprinkler Systems.
This table lists the NFPA ratings for all the ThinPrep products.
ThinPrep Product Health Hazard Flammability Hazard Instability Hazard Specific Hazard
ThinPrep PreservCyt Solution 2 3 0 N/A
ThinPrep CytoLyt Solution 2 2 0 N/A
ThinPrep CellFyx Solution 2 3 0 N/A
ThinPrep Rinse Solution 0 0 0 N/A
ThinPrep Bluing Solution 0 0 0 N/A
ThinPrep Rinse II Solution 2 3 0 N/A
ThinPrep Bluing II Solution 0 0 0 N/A
ThinPrep Stain EA Solution 2 3 0 N/A
ThinPrep Stain Orange G Solution 2 3 0 N/A
ThinPrep Nuclear Stain 2 0 0 N/A

Page 1 of 7 AW-13653-001 Rev. 001
ThinPrep® Solutions Shipping Requirements *
Scope:
These requirements include shipping:
Biological specimens (patient specimens) in ThinPrep® solutions Biological specimens in solutions other than ThinPrep® solutions Biological specimens not in solutions ThinPrep® PreservCyt™ Solution without biological specimens ThinPrep® CytoLyt™ Solution without biological specimens
Note: Shippers of Hazardous Materials or Dangerous Goods must be trained according to the
various Hazardous Materials/Dangerous Good regulations
A. Shipping Requirements when shipping patient samples in ThinPrep PreservCyt Solution only –
Ambient Temperature:
1. Patient samples / biological substances (pathogens) contained ThinPrep PreservCyt Solution are neutralized or inactivated by the solution and as such no longer pose a health risk. (For further information regarding this, refer to the ThinPrep 2000 or ThinPrep 5000 Operators’ Manual).
2. Materials that have been neutralized or inactivated are exempt from the Category B Class 6, Division 6.2 requirements.
3. Solutions that contain neutralized or inactivated pathogens, and meet the criteria of one or more of the other hazards risks, must be shipped according to the shipping requirements for that hazard risk(s).
4. ThinPrep PreservCyt Solution is a Flammable liquid when shipped domestic or international Therefore, follow the instructions in Section C below, Shipping ThinPrep® PreservCyt™ Solution Only (such as from a laboratory to a physician).
B Shipping Biological Specimens in Solutions (other than ThinPrep PreservCyt Solution) or Without Solutions
Definitions:
Biological Substance, Category B: Materials containing or suspected to contain infectious substances that do not meet Category A criteria. IATA Dangerous Goods regulations were revised with an effective date of January 1, 2015. Note: The term “diagnostic specimen” has been replaced with “biological substance, Category B”
Exempt specimens: Specimens that with the minimal likelihood that pathogens are present (fixed tissue, etc.)
* These instructions are Hologic’s interpretation of the various regulations as of the effective date. However, Hologic will not be responsible for any non-conformance to the actual regulations.
Notes:
When biological specimens are shipped in a solution of a quantity of 30 ml or less and are packed in accordance with these guidelines, no further requirements in the Hazardous Materials (Dangerous Goods) Regulations need be met. However, training is recommended.” 1

Page 2 of 7 AW-13653-001 Rev. 001
Shipping Requirements Category B or Exempt 1 – Ambient Temperature:
1. Packaging must consist of three components
a. a primary receptacle, leak proof b. secondary packaging, leak proof c. a rigid outer packaging
2. The primary receptacle cannot contain more that 1L of a liquid substance (500 ml if using
FedEx).
3. If multiple fragile primary receptacles are placed in a single secondary packaging, they must be either individually wrapped or separated to prevent contact between them.
4. Absorbent material must be placed between the primary receptacle and the secondary
packaging. The absorbent material (cotton balls, cellulose wadding, absorbent packets, paper towels) must be in sufficient quantity to absorb the entire contents of the primary receptacle(s) so that any release of the liquid substance will not compromise the integrity of the cushioning material or the outer packaging.
5. The outer packaging must not contain more than 4L or 4kg of material. This quantity excludes
ice, dry ice, or liquid nitrogen when used to keep specimens cold.
6. An itemized list of contents must be enclosed between the secondary packaging and the outer packaging.
7. The packaging must successfully pass a 4 ft. drop test (Section 6.6.1 IATA regulations).
8. The UN3373 mark must be displayed on the external surface of the outer packaging (one
surface of the outer packaging must have a minimum dimension of 100 mm x 100 mm FedEx minimum is 7”x 4”x 2”) on a background of a contrasting color and must be clearly visible and legible. The mark must be in the form of a diamond with each side having a length of at least 50 mm. Lettering must be at least 6mm high.
9. The proper shipping name “Biological Substance, Category B” in letters at least 6mm high must
be marked on the outer package adjacent to the diamond shaped UN3373 mark.
NOTES: FedEx will not accept clinical samples or diagnostic specimens packaged in
FedEx envelopes, FedEx tubes, FedEx Paks, or FedEx Boxes, Styrofoam boxes, plastic bags, or paper envelopes.
FedEx will accept clinical samples in FedEx Clinical Paks, FedEx Medium Clinical Boxes or FedEx Large Clinical Boxes.2

Page 3 of 7 AW-13653-001 Rev. 001
10. If using FedEx, the FedEx USA Airbill, Section 6, Special Handling must be completed with
dangerous goods/dry ice information: Does this shipment contain dangerous goods?
YES- Shipper’s Declaration not required
11. The outer container of all diagnostic/clinical specimen packages must display the following:
a. Sender’s name and address b. Recipient’s name and address c. The words “Biological Substance, Category B” d. The UN 3373 label
Shipping Requirements Category B or Exempt 1 – Frozen or Refrigerated Specimens:
NOTE: FedEx defers to IATA regulations for the shipping of refrigerated or frozen diagnostic specimens.2
Follow all packaging directions for Category B or Exempt – Ambient Temperature plus:
1. Place ice or dry ice outside of the secondary packaging. Interior supports must be provided to secure the secondary packaging in the original position after the ice or dry ice has dissipated. If ice is used, the outside packaging or overpack must be leak proof. If dry ice is used, the packaging must be designed and constructed to permit the release of CO2 gas to prevent a buildup of pressure that could rupture the packaging.
2. Always affix the Class 9, UN 1845 dry ice label as well as the UN 3373, Biological Substance, Category B label to these shipments
3. If using FedEx, the FedEx USA Airbill, Section 6, Special Handling must be completed with
dangerous goods/dry ice information: Does this shipment contain dangerous goods?
YES- Shipper’s Declaration not required
Enter kg of dry ice used (if applicable)
4. The outer container of all diagnostic/clinical specimen packages must display the following:
a. Sender’s name and address b. Recipient’s name and address c. The words “Biological Substance, Category B” d. The UN 3373 label e. Class 9 label, including UN 1845, and net weight if packaged with dry ice
C Shipping ThinPrep® PreservCyt™ Solution Only (such as from a laboratory to a physician)
Domestic Ground Shipments - Limited Quantities:

Page 4 of 7 AW-13653-001 Rev. 001
Limited Quantity domestic ground shipping recommendations:
1. ThinPrep® PreservCyt™ Solution must be shipped in the vials.
2. Place the vials in a good quality cardboard box, such as the ThinPrep® box that holds 250 vials. Pack vials in a manner (adding protective packing material as necessary) as to limit movement of individual vials.
3. Mark the package as “Flammable liquids, n.o.s., (Methanol Solution), 3, UN1993, Ltd. Qty.” add orientation arrows on the ends, and the Limited Quantity label:
4. Print “UN1993, Flammable liquids, n.o.s., (Methanol Solution), 3, PG III, Ltd. Qty.” on the Shipping papers.
Domestic Ground Shipments - Other than Limited Quantities:
When shipping packages in excess of “Limited Quantity” amounts:
1. Do not include “Ltd Qty” in the wording on the package or on the Shipping papers as indicated in c and d above.
2. Affix a Class 3 “Flammable Liquid” hazard label to the outer package in close proximity of the wording described in “C” above. See the example of the label on the last page of these recommendations.
3. Mark the package as “Flammable liquids, n.o.s., (Methanol Solution), 3, UN1993, Net Qty.”
Domestic Air Shipments: In addition to 1 and 2 above in Domestic Ground Shipments – Other than Limited Quantities, the following are recommendations for domestic air shipments:
3. Maximum allowable package sizes are: i. Sixty (60) liters (3000-vials) for passenger aircraft, and ii. Two hundred twenty (220) liters (11,000-vials) for cargo aircraft.
Notes: ThinPrep® PreservCyt™ Solution is classified as a Class 3 Flammable liquid, assigned to Packing Group III (PG III). 49 CFR 173.150 (Limited Quantities) allows ThinPrep® PreservCyt™ Solution in vials to be shipped in Limited Quantities when shipped via ground transportation in a sturdy box. The total volume in a package cannot exceed 5 liters or weigh more than 30 kg (66 lbs). Limited Quantities are exempt from labeling requirements.

Page 5 of 7 AW-13653-001 Rev. 001
4. Single packages containing more than sixty (60) liters (3000-vials) of total product must be clearly marked “FOR CARGO AIRCRAFT ONLY”.
5. The vials must be shipped in United Nations (UN) certified 4G packaging for any quantity in an aircraft. (e.g., ThinPrep® PreservCyt™ Solution 250-vial box or equivalent.)
6. A Class 3 “Flammable Liquid” label must be affixed to the outer package near the words “Flammable liquids, n.o.s., (Methanol Solution)”.
All Domestic Shipments:
The following are recommendations for all domestic ground and air shipments:
1. If the ThinPrep® PreservCyt™ Solution is shipped in a package also containing non-hazardous
material, the hazardous material must be listed first, or be printed in a contrasting color (or highlighted) to differentiate it from the non-hazardous material.
2. The total volume of ThinPrep® PreservCyt™ Solution and the number of vials must appear on the shipping papers.
International Ground Shipments - Limited Quantities: When shipping internationally, ThinPrep® PreservCyt™ Solution is classified with a primary hazard of Class 3 (Flammable Liquid), and with a secondary hazard of Class 6.1 (Toxic). It is assigned to PG III. The reference used for the international ground recommendations is the ADR - European Agreement Concerning the International Carriage of Dangerous Good by Road (United Nations). A “Limited Quantity” is defined as a package containing a maximum net quantity of 5-liters and not weighing more than 20 kg (40 lbs). The recommendations for international ground shipments are as follows:
1. ThinPrep® PreservCyt™ Solution must be shipped in the vials.
2. Place the vials in a good quality cardboard box, such as the Cytyc box that holds 250 vials. Pack vials in a manner (adding protective packing material as necessary) as to limit movement of individual vials.
3. Mark the package with “UN1992, Flammable liquids, toxic, n.o.s., (Methanol Solution), 3, 6.1, PGIII Ltd. Qty” orientation arrows on the ends and the Limited Quantity label that has a “Y” on it.
4. The shipping papers should include all the information indicated in “3” above.
International Ground Shipments – Other then Limited Quantities:

Page 6 of 7 AW-13653-001 Rev. 001
1. Do not include “Ltd Qty” in the wording on the package or on the Shipping papers as
indicated in c and d above.
2. Affix both a Class 3 “Flammable Liquid” label and a secondary Class 6.1 “Toxic” label to the package adjacent to the markings. (Copies of the labels can be found on the last page of this document.)
Class 6.1 “Toxic” secondary hazard label.
3. Mark the package with “UN1992, Flammable liquids, toxic, n.o.s., (Methanol Solution), 3, 6.1, PG III, Net Qty”.
International Air Shipments:
The references used for the International Air recommendations are: In addition to a and b above in International Ground Shipments, the following are the recommendations for international air shipments:
1. Maximum allowable package sizes are: i. Sixty (60) liters (3000-vials) for passenger aircraft, and ii. Two hundred twenty (220) liters (11,000-vials) for cargo aircraft.
2. Packages containing more than sixty (60) liters of product must be clearly marked “FOR CARGO AIRCRAFT ONLY”
3. The vials must be shipped in United Nations (UN) certified 4G packaging for any quantity in an aircraft. (e.g., ThinPrep® PreservCyt™ Solution 250-vial box or equivalent.) Pack vials in a manner (adding protective packing material as necessary) as to limit movement of individual vials.
4. Limited Quantity exemption can only be used if the package has a maximum net quantity of 2-liters.
5. Packaging manufacturer’s specifications markings are not required when shipping Limited Quantity.
6. Mark the package with “UN1992, Flammable liquids, toxic, n.o.s., (Methanol Solution), 3, 6.1,
PGIII, Net. Qty”.
7. When a “Cargo Aircraft Only” marking is required, it must be affixed on the same package surface and near the hazard labels.
8. The shipper is responsible for the completion of a “Shipper’s Declaration for Dangerous Goods” form.
D. Shipping ThinPrep® CytoLyt™ Solution Only (such as from a laboratory to a physician)
Domestic Ground Shipments:

Page 7 of 7 AW-13653-001 Rev. 001
ThinPrep® CytoLyt™ Solution has a flash point of 109° F. For domestic ground transportation only, a flammable liquid with a flashpoint at or above 100° F that does not meet the definition of any other hazard class may be reclassed as a combustible liquid. As such, ThinPrep® CytoLyt™ Solution, shipped via ground, is exempt from the requirements of the DOT Hazardous Materials Regulations.
Domestic Air Shipments:
When shipping ThinPrep® CytoLyt™ Solution via air, follow the Domestic Air Shipments recommendations for Shipping ThinPrep® PreservCyt™ Solution Only that can be found in Section C of this document.
International Ground and Air shipments:
When shipping ThinPrep® CytoLyt™ Solution via ground or air, follow the International Ground or Air Shipments recommendations for Shipping ThinPrep® PreservCyt™ Solution Only guidelines that can be found in Section C of this document.
E. Shipping ThinPrep® CytoLyt™ Solution With Patient Sample (such as from a physician to a laboratory)
Domestic Shipments:
ThinPrep® CytoLyt™ Solution containing a patient sample is classified as a Biological Substance, Category B. Follow the recommendations in Section B of this document.
International Shipments:
ThinPrep® CytoLyt™ Solution containing a patient sample is classified as a Biological Substance, Category B. Follow the recommendations in Section B of this document.
References: 49 CFR 100 to 185, Transportation Dangerous Goods Regulations, 56th Edition, 2015, International Air Transportation Association
(IATA) International Civil Aviation Organization’s (ICAO) Technical Instructions for the Safe Transport of
Dangerous Goods by Air
Foot Notes: 1. See Packing Instruction 650 in the IATA Dangerous Goods Regulations 2. FedEx Document 33539PL: “Packaging Clinical Samples” and “Packaging UN 3373 Shipments”

4. Sam
ple C
ollectio
n
and
Prep
aration
4. S
amp
le C
olle
ctio
n
and
Pre
par
atio
n

GYNECOLOGIC SAMPLE COLLECTION AND PREPARATION 4
C h a p t e r F o u r
Gynecologic Sample Collection and Preparation
CONTENTS
SECTION A: Introduction 4.1
SECTION B: Specimen Collection 4.2
SECTION C: Special Precautions 4.4
SECTION D: Specimen Processing 4.4
SECTION E: Sample Processing Troubleshooting 4.6
INTRODUCTION
The ThinPrep® 3000 processor prepares microscope slides from ThinPrep Pap test gynecologic sam-ples. The collected specimen includes cell samples from the ectocervix and the endocervix.
SECTION
A
ThinPrep® 3000 Processor Operator’s Manual 4.1

4 GYNECOLOGIC SAMPLE COLLECTION AND PREPARATION
4.2 ThinPrep® 3000 Processor Operator’s Manual
SPECIMEN COLLECTION
Collect Gynecologic Sample Using the Broom-Like DevicePhysician/clinician instructions for collecting gynecologic samples.
1. Obtain an adequate sampling from the cervix using a broom-like device. Insert the central bristles of the broom into the endocervical canal deep enough to allow the shorter bristles to fully contact the ecto-cervix. Push gently, and rotate the broom in a clockwise direction five times.
2. Rinse the broom as quickly as possible into the PreservCyt® Solution vial by pushing the broom into the bottom of the vial 10 times, forcing the bristles apart. As a final step, swirl the broom vigorously to further release material. Discard the collection device.
3. Tighten the cap so that the torque line on the cap meets or passes the torque line on the vial.
4. Record the patient’s name and ID number on the vial. Record the patient information and medical history on the cytology request form.
Note: If the sample is to be processed immediately, allow the sample to stand in the PreservCyt Solution vial for at least 15 minutes before processing.
If the sample is to be sent elsewhere for processing, continue with the next step.
5. Place the vial and requisition in a specimen bag for transport to the lab-oratory.
Refer to the instructions provided with the collection device for warnings, contraindications, and limitations associated with specimen collection.
SECTION
B

GYNECOLOGIC SAMPLE COLLECTION AND PREPARATION 4
Collect Gynecologic Sample, Using the Endocervical Brush/Spatula DevicePhysician/clinician instructions for collecting gynecologic samples.1. Obtain an adequate sampling from the ectocervix using a plastic spat-ula.
2. Rinse the spatula as quickly as possible into the PreservCyt Solution vial by swirling the spatula vigorously in the vial 10 times. Discard the spatula.
3. Obtain an adequate sampling from the endocervix using an endocervi-cal brush device. Insert brush into the cervix until only the bottom-most fibers are exposed. Slowly rotate ¼ or ½ turn in one direction. DO NOT OVER-ROTATE.
4. Rinse the brush as quickly as possible in the PreservCyt Solution by rotating the device in the solution 10 times while pushing against the PreservCyt vial wall. Swirl vigorously to further release material. Dis-card the brush.
5. Tighten the cap so that the torque line on the cap meets or passes the torque line on the vial.
6. Record the patient’s name and ID number on the vial.Record the patient information and medical history on the cytology requisition form.
Note: If the sample is to be processed immediately, allow the sample to stand in the PreservCyt Solution vial for at least 15 minutes before processing.
If the sample is to be sent elsewhere for processing, continue with the next step.
7. Place the vial and requisition in a specimen bag for transport to the lab-oratory.
Refer to the instructions provided with the collection device for warnings, contraindications, and limitations associated with specimen collection.
ThinPrep® 3000 Processor Operator’s Manual 4.3

4 GYNECOLOGIC SAMPLE COLLECTION AND PREPARATION
SPECIAL PRECAUTIONS
PreservCyt® Solution
After sample transfer to the PreservCyt Solution vial, the sample should stand for at least 15 minutes before processing.
For more information on PreservCyt Solution, refer to Chapter 3, “PreservCyt® and CellFyx™ Solutions”.
Interfering SubstancesThe use of lubricants (e.g., KY Jelly) should be minimized prior to specimen collection. Lubricants can adhere to the filter membrane and may cause poor cell transfer to the slide.
Handling/DisposalHandle all chemical-containing materials carefully in accordance with safe laboratory practices. When required by reagent composition, additional precautions are marked on the reagent containers or the instructions for use.
Dispose of PreservCyt Solution according to the guidelines for disposing of hazardous waste. PreservCyt Solution contains methanol.
SPECIMEN PROCESSING
Materials RequiredRefer to Materials Required in “MATERIAL REQUIREMENTS” on page 1.8 and “ITEMS REQUIRED TO BEGIN BATCH PROCESSING” on page 5.5 for a list and explanation of materials required.
Specimen Preparation• The gynecologic sample should be deposited in the PreservCyt Solution immediately
upon collection.
SECTION
C
SECTION
D
4.4 ThinPrep® 3000 Processor Operator’s Manual

GYNECOLOGIC SAMPLE COLLECTION AND PREPARATION 4
• The PreservCyt sample vial fluid level should be within the frosted area of the sample vial.
Figure 4-1 PreservCyt Sample Vial Fluid Level
Specimen Stability• Store PreservCyt Solution with cytologic sample intended for ThinPrep Pap testing between
15°C (59°F) and 30°C (86°F) for up to 6 weeks.
Run on ThinPrep 3000 ProcessorProcess samples on the ThinPrep 3000 processor. Refer to “Instrument Operation” on page 5.1.
��� ��
������
Frosted area
ThinPrep® 3000 Processor Operator’s Manual 4.5

4 GYNECOLOGIC SAMPLE COLLECTION AND PREPARATION
SAMPLE PROCESSING TROUBLESHOOTING
REPROCESSING A THINPREP PAP TEST SAMPLE VIAL FOLLOWING AN UNSATISFACTORY RESULTNote: This section specifically addresses reprocessing ThinPrep Pap test samples following an
“unsatisfactory for evaluation” result. The ‘reprocessing’ of samples described in this section should not be confused with the reprocessing related to specimen sample errors outlined in Chapter 7 of this manual. Reprocessing as described in Chapter 7 refers to the re-running of a specimen.
Laboratory personnel may reprocess ThinPrep Pap test specimens where slides have been inter-preted as inadequate (“Unsatisfactory for Evaluation”) for diagnosis following cytotechnologist screening. The instructions below must be followed in order to properly reprocess these specimens.
Note: Reprocessing a ThinPrep Pap test specimen may only be performed once.
Note: Good laboratory practices should be followed to avoid introducing contaminants into the PreservCyt Solution sample vial.
Reprocessing Protocol
1 Prepare a wash solution of sufficient volume to add 30 mL to every Thin-Prep Pap test specimen being reprocessed. The wash solution is made by mixing 9 parts CytoLyt Solution with 1 part glacial acetic acid.
2 Prior to performing this step, assure there is sufficient volume in the Thin-Prep Pap test specimen to result in a pellet, following centrifugation. Pour the contents of the ThinPrep Pap test specimen into a centrifuge tube appropriately labeled to maintain chain of custody. Retain the vial.
3 Pellet the contents of the centrifuge tube by centrifugation at 1200 x g for 5 minutes.
Note: Once centrifugation is complete, the cell pellet should be clearly vis-ible but the cells may not be tightly packed together (the pellet may appear fluffy).
SECTION
E
4.6 ThinPrep® 3000 Processor Operator’s Manual

GYNECOLOGIC SAMPLE COLLECTION AND PREPARATION 4
4 a. Carefully pour off the supernatant from the centrifuge tube to avoid loss of cells. Dispose of according to local regulations.
b. Vortex the centrifuge tube briefly.c. Pour 30 mL of the CytoLyt Solution and 10% glacial acetic acid mixture
into the centrifuge tube and cap securely.d. Invert the centrifuge tube by hand several times to mix.
5 Pellet the cells again by centrifugation—1200 x g for 5 minutes.
6 a. Carefully pour off the supernatant from the centrifuge tube to avoid loss of cells. Dispose of according to local regulations.
b. Vortex the centrifuge tube briefly.
7 a. Using the volume markings on the centrifuge tube, pour the necessary quantity of unused (i.e., containing no patient specimens) PreservCyt Solution to the cells and fill to a final volume of 20 mL. Secure the cap tightly.
b. Invert the centrifuge tube several times to mix and transfer the sample back into the retained specimen vial.
8 Process the specimen using a ThinPrep 3000 processor according to the pro-cedure for running gynecologic specimens. Evaluate the resultant slide according to The Bethesda System for Reporting Cervical/Vaginal Cytologic Diagnosis. If after reprocessing, negative results from specimen do not fit with the clinical impression, a new specimen may be necessary.
����
ThinPrep® 3000 Processor Operator’s Manual 4.7

4 GYNECOLOGIC SAMPLE COLLECTION AND PREPARATION
This page intentionally left blank
4.8 ThinPrep® 3000 Processor Operator’s Manual

5. Instru
men
t O
peratio
n5.
Inst
rum
ent
Op
erat
ion

INSTRUMENT OPERATION 5
C h a p t e r F i v e
Instrument Operation
CONTENTS
SECTION A: Chapter Overview 5.1
SECTION B: Optional Instructions for Ancillary Testing 5.2
SECTION C: Instrument Doors 5.4
SECTION D: Items Required to Begin Batch Processing 5.5
SECTION E: Begin Batch Processing 5.14
SECTION F: Completing a Batch 5.18
SECTION G: Reading the Batch Report 5.20
SECTION H: Pausing a Batch in Process 5.22
SECTION I: Canceling a Batch in Process 5.23
CHAPTER OVERVIEW
Routine instrument operation consists of loading supplies, starting the batch process and unloading the prepared slides and processed sample vials when the batch is complete. A batch report (or ‘results printout’) is automatically generated at the completion of each batch. Any samples that may require further operator attention are flagged on the batch report, along with a description of the type of process or sample error. The action of pausing or canceling a batch is available at any time during processing.
SECTION
A
ThinPrep® 3000 Processor Operator’s Manual 5.1
5 INSTRUMENT OPERATION
®
OPTIONAL INSTRUCTIONS FOR ANCILLARY TESTING
Testing for certain sexually transmitted diseases (STD) and for Human Papilloma Virus (HPV) in conjunction with cytology may be enabled by the removal of an aliquot of up to 4 mL (Aliquot Removal) from the PreservCyt sample vial before preparing the ThinPrep Pap test slide.
Laboratory personnel must follow the specific instructions in this section to appropriately remove the desired aliquot volume and prepare the PreservCyt sample vial for the ThinPrep Pap test. Adher-ence to these instructions must be maintained to ensure there is no adverse effect on the ThinPrep Pap test result.
Because cytology/HPV testing and STD testing address different clinical questions, Aliquot Removal may not be suitable for all clinical situations. Physicians and other persons responsible for ordering clinical tests should be familiar with the following:
• There is no evidence of degradation of cytology results by Aliquot Removal, however, this cannot be ruled out for all specimens. As with any subsampling step in anatomic pathology, chance misallocation of diagnostic cells may occur if they are very rare. If negative results from the specimen do not fit with the clinical impression, a new specimen may be necessary.
• Aliquot Removal from low-cellularity specimens may leave insufficient material in the PreservCyt sample vial for preparation of a satisfactory ThinPrep Pap test slide.
• Aliquot Removal may leave insufficient material In the PreservCyt sample vial for perfor-mance of ancillary testing (e.g., reflexive HPV testing) using the residual specimen following preparation of a ThinPrep Pap test slide.
• Co-collection of separate samples for the ThinPrep Pap test and STD testing may be consid-ered in lieu of Aliquot Removal.
• When opting for concurrent cytologic and STD testing, providers should consider risk and clinical history (e.g., disease prevalence, patient age, sexual history or pregnancy) as well as specimen suitability (e.g., exudates or bleeding) that can impact diagnostic reliability.
Sexually Transmitted Diseases Treatment Guidelines 2002 (Centers for Disease Control and Preven-tion, MMWR 2002: 51(No. RR-6)) provides clinical guidance for the management and treatment of individual patients, including use of Pap testing.
It is contraindicated to perform Chlamydia trachomatis and Neisseria gonorrhoeae testing, using the Roche Diagnostics COBAS AMPLICOR CT/NG test, if the sample has already been processed using the ThinPrep 3000 processor.
SECTION
B
5.2 ThinPrep 3000 Processor Operator’s Manual

INSTRUMENT OPERATION 5
ThinPrep® 3000 Processor Operator’s Manual 5.3
Removing an Aliquot (of up to 4 mL) from the PreservCyt Sample Vial prior to Performing the ThinPrep Pap TestNote: Only one aliquot may be removed from the PreservCyt sample vial prior to performing the
ThinPrep Pap test, regardless of the volume of the aliquot (maximum aliquot volume = 4 mL).
Note: Good laboratory practices should be followed to avoid introducing contaminants into either the PreservCyt sample vial or the aliquot. It is recommended to use powder-free gloves and an individually wrapped, disposable pipetting device with an aerosol barrier tip that is sized appropriately for the volume being withdrawn and dispensed. You should not use serological pipettes. In order to minimize the potential for cross-contamination, aliquot removal should be performed in an appropriate location outside an area where amplification is performed.
1. Vortex the vial at high speed for 8 to 12 seconds.
CAUTION: The desired aliquot must be removed immediately after vortexing the vial to ensure homogeneity of the sample.
2. Carefully remove the vial cap.3. Using a pipetting device, withdraw an aliquot of up to 4 mL from the vial. Take care to avoid
contaminating gloves with solution. If gloves should become contaminated, replace with a clean pair before proceeding to the next specimen.
4. Dispense the aliquot into a suitably sized and labeled polypropylene tube and close tightly to prevent leakage/evaporation.
5. Store the aliquot under conditions appropriate for ancillary test(s). Refer to manufacturer or lab-oratory instructions for performing ancillary test(s) on the aliquot.
6. Dispose of the pipetting device in accordance with local, state, and federal regulations.7. Using a new pipetting device, withdraw a quantity of unused PreservCyt Solution from its con-
tainer that is equal in volume to that of the aliquot removed from the vial in step 3.8. Transfer the volume of unused PreservCyt Solution to the vial from which the aliquot was
removed in step 3.9. Secure the vial cap. (The line on the cap and line on the vial should meet or slightly overlap.)10. Dispose of the pipetting device in accordance with local, state, and federal regulations.11. Refer to the remaining steps in this chapter to complete the ThinPrep Pap test.

5 INSTRUMENT OPERATION
INSTRUMENT DOORS
• Top door provides access to the slide cartridges, slide printer cover, staining racks, fixative dispense area and the CellFyx™ Solution reservoir. This door locks with the front door during batch processing or when the processor is moving mechanisms.
• Slide printer cover provides access to the slide printer ribbon and the slide printer assembly.
• Center door flips down to access the slide waste bin and for replacement of the pinch valve tubing. The instrument serial number is located here.
• Front door provides access to the filter trays and area, the center door and the sample vial trays and area. This door locks with the top door during batch processing or when the proces-sor is moving mechanisms.
• Left and right cart doors provide access to storage for accessories and consumables.
SECTION
C
Top door
Slide printer cover
Center door
Front door
Center cart door
Left & right cart doors
5.4 ThinPrep® 3000 Processor Operator’s Manual

INSTRUMENT OPERATION 5
ITEMS REQUIRED TO BEGIN BATCH PROCESSING
To begin batch processing, it is necessary to have the following items ready for use:
1. Trays of Gyn ThinPrep® Pap test filters2. ThinPrep microscope slides and slide cartridges3. Staining racks4. Barcoded ThinPrep Pap test sample vials5. Sample vial trays
SECTION
D
�
�
�
�
��������
������
��� ��� �
�����
ThinPrep® 3000 Processor Operator’s Manual 5.5

5 INSTRUMENT OPERATION
Gyn ThinPrep Pap Test Filters Gyn ThinPrep® Pap test filters are disposable, clear plastic cylinders used in the collection and trans-fer of cells from gynecologic specimens onto ThinPrep microscope slides.
The filters come in trays of 100. Two trays can be loaded into the instrument. (A minimum of one is required.)
Loading the Gyn ThinPrep Pap test filters
CAUTION: Only replace filter trays if they are empty. Partially loaded trays should remain in place.
1. Open the tray latches as shown below.2. Remove any empty filter trays, if present.3. Remove and discard the clear plastic cover from the new tray(s) of filters.4. Insert the new tray(s) of filters. Slide the tray all the way to the back of the shelf until it hits the
stops at the rear.5. Secure the trays by closing their respective latches. Note: Do not handle the filters directly unless necessary. Only touch the outer surface. Do not touch
the membrane on the bottom.
Note: The top tray is designated tray A and the bottom tray is tray B. Raised letters on the instru-ment cover near the latches help identify each tray.
Tray latch closed
Tray latch open
5.6 ThinPrep® 3000 Processor Operator’s Manual

INSTRUMENT OPERATION 5
ThinPrep Microscope Slides and Slide CartridgesThinPrep microscope slides are specially designed glass slides for use with the ThinPrep processor. Only ThinPrep slides are to be used.
WARNING: Sharp Edges. Glass
Two metal slide cartridges are used to insert the ThinPrep microscope slides into the processor. Each slide cartridge holds approximately 100 slides, or one package of ThinPrep microscope slides.
Clean the slide cartridge prior to loading slidesBefore loading a cartridge with microscope slides wipe the inside of the cartridge with a lint-free cloth to remove glass dust. Clean the bottom surface where the slides sit, to ensure proper slide pick-ing. (Refer to “CLEANING THE SLIDE PATH” on page 6.17.)
Loading the ThinPrep microscope slides into the slide cartridgeNote: The slides must be oriented correctly to work with the automated functions of the
ThinPrep 3000 processor. The microscope slide package and the slide cartridge are keyed to ensure accurate loading of slides. A visual check of the slides after being loaded into the cartridge is recommended.
1. Remove the cover of the slide package.2. Fold back the cellophane wrapper. 3. Hold the package of slides horizontally in your hand as shown.
ThinPrep® 3000 Processor Operator’s Manual 5.7

5 INSTRUMENT OPERATION
4. Place an open slide cartridge over the slide package so that its metal grooves fall into the cutout slots.
5. Holding them together, gently flip the slide cartridge and slide package over.6. After the slides are transferred into the slide cartridge, remove and discard the wrapper and plas-
tic package.
5.8 ThinPrep® 3000 Processor Operator’s Manual

INSTRUMENT OPERATION 5
7. Tilt the cartridge up slightly and make sure the slides are aligned squarely, evenly and are sitting flat on the bottom of the cartridge. Confirm correct orientation of the slides. Gently close the slide cartridge door over the slides. The latch will click when the cartridge is completely closed.
Loading the slide cartridges into the processor
CAUTION: Only reload slide cartridges when prompted by the instrument. Do not manually load a partially filled cartridge.
With the slide cartridge clasp up and facing as shown, slide it into slot “A” or “B”.
Staining RacksStaining racks are plastic frames that hold the processed ThinPrep microscope slides. The slides remain in the staining racks until batch processing ends.
The processor can hold up to four staining racks. Each rack has a capacity of 20 processed ThinPrep slides.
Loading the empty staining racks1. Pull the lever back with one hand.2. With the other hand, insert the staining rack in the direction of arrow as shown below, releasing
the lever to secure it. Make sure it sits flat on the cradle.
Clasp
ThinPrep® 3000 Processor Operator’s Manual 5.9

5 INSTRUMENT OPERATION
3. Place an empty staining rack into each of the four cradles.
Incorrect
Correct
CradleLever
5.10 ThinPrep® 3000 Processor Operator’s Manual

INSTRUMENT OPERATION 5
Removing the staining racks1. Positioning the thumb and index finger of one hand, grasp the rack as shown below.
CAUTION: Avoid touching the slides with your fingers when removing the staining racks.
2. With the other hand, pull the lever down.
CAUTION: Slides are not securely held in the staining rack. Use caution when removing the racks.
3. Gently slide the rack toward the lever.
4. Tilt the staining rack as shown above. 5. Carefully lift out the staining rack. Avoid dislodging any processed slides.
ThinPrep® 3000 Processor Operator’s Manual 5.11

5 INSTRUMENT OPERATION
Barcoded Sample Vials WARNING: Toxic Mixture Flammable Liquid and Vapor
The PreservCyt® Solution sample vials for use with the ThinPrep Pap test contain the collected cervi-cal cell samples in a preservative solution. During processing, the ThinPrep 3000 processor collects the cells from the vials.
Vial preparationSee the Sample Vial Label Application Guide in the Appendix for recommended barcode label application.
Place the barcode labels vertically on the ThinPrep Pap test label, using the edge for alignment, as shown below. During application, avoid placing the barcode label over patient information, multiple labels, or on the torque features. Sticking labels on incorrectly can cause a failure to read the barcode or a failure of the instrument removing the vial from the tray.
The uncovered strip of the sample vial allows you to see the frosted band which indicates the maxi-mum/minimum acceptable fluid fill range for a sample. Make sure the fluid level is within this range. Refer to Chapter 7, “Troubleshooting”, if the level is too high or too low.
Additionally, check to make sure there is no foreign matter in the vial. Refer to Chapter 7, “Trouble-shooting”, if an object is in the sample vial.
Inserting vials into the sample vial traysPlace sample vials into the numbered holes of the sample vial tray (the tray does not have to be full to run a batch; the vials can be in any order). The ThinPrep 3000 processor can process up to 80 samples, (two full sample vial trays) per batch.
������
Torque features
5.12 ThinPrep® 3000 Processor Operator’s Manual

INSTRUMENT OPERATION 5
Loading the sample vial trays1. Open the tray latches as shown below.
WARNING: Sharp Edges & Hot Surfaces. Moving Parts
2. Remove any previously processed sample vial trays, if present.3. Load the sample vial trays into the empty slots so that the ThinPrep Pap test logo on the tray is
facing outward. (The trays only fit in one way.) Be sure to slide each tray fully into the instrument until it hits the stops at the rear.
4. Secure the trays by closing their respective latches.Refer to “READING THE BATCH REPORT” on page 5.20 for batch report information.
Note: The top tray is designated tray A and the bottom tray is tray B. Raised letters on the instru-ment cover near the latches help identify each tray. A results report for each tray, A and B, prints out at the conclusion of the batch. It is important to correlate the report with the correct tray.
��
�
��
��
��
�
�
��
Tray latch closed
Tray latch open
ThinPrep® 3000 Processor Operator’s Manual 5.13

5 INSTRUMENT OPERATION
BEGIN BATCH PROCESSING
1. Confirm that the main menu, shown below, is displayed. If this menu is not displayed, follow the prompts1 to return to the main menu.
2. In the main menu, follow the screen prompt to load samples and supplies. In order to begin pro-cessing, the following items must be properly loaded:• Sample vial tray(s) containing barcoded sample vials
• Filter tray(s) of ThinPrep Pap test filters
• Slide cartridge(s) containing ThinPrep microscope slides
• Empty staining racks
3. Close both the front and top door of the instrument. Processing will not begin if they are not com-pletely shut.
4. Press Start Batch to begin batch processing.5. The instrument performs a check of supplies needed to process a batch.
6. Processing begins when the following screen is displayed:
1. Prompt: Text that appears on the display next to the prompt keys.
SECTION
E
����������� ����������
�������������!���� "��!�������5����������5
��������!����%�&'6("22*�7*77
����-�������!��/���������8���
���������!� ��!��
������ 9�����������������
��
5.14 ThinPrep® 3000 Processor Operator’s Manual

INSTRUMENT OPERATION 5
If the instrument does not detect materials necessary to process a batch, the “Items Must Be Addressed” message screen appears.
Items Must Be Addressed
Listed on the screen are the specific materials to be addressed before beginning a batch. Only the items that need attention will be listed. You may see a display with some or all of the items shown above.
No batch will be processed until these items are addressed.
1. Press Cancel to cancel the batch entirely.2. Press Continue to attend to the required items. Wait for the doors to unlock.Requirements for any items appearing on this display are listed below:
Refer to “ITEMS REQUIRED TO BEGIN BATCH PROCESSING” on page 5.5 for instructions on loading items.
FiltersThe processor does not detect at least one tray of Gyn ThinPrep Pap test filters.
• A minimum of one tray of filters must be loaded before batch processing can begin. Empty fil-ter trays must be removed.
SlidesThe processor does not detect at least one slide cartridge containing slides.
• A minimum of one slide cartridge containing slides must be inserted before batch processing can begin.
• If slide cartridges are present, check that both contain slides and that neither has a slide jam, which would prevent slide picking.
Staining racksThe processor does not detect any empty staining racks.
• At least one empty staining rack must be loaded before processing can begin.
• Be sure to remove any staining racks with slides from previous batches.
• If this message occurs during a batch, remove any staining racks containing processed slides and replace them with empty ones before pressing Continue.
9����"!����(���������.�����������������������-� ������!����������(��.� ���:�.�!��3���8�������������8�������� ������9����������.� ���:�������
ThinPrep® 3000 Processor Operator’s Manual 5.15

5 INSTRUMENT OPERATION
Sample traysThe processor does not detect at least one tray of sample vials.
• A minimum of one sample tray must be loaded before batch processing can begin.
CAUTION: Never add fixative unless prompted by the instrument. Only add one bottle to the fix-ative reservoir. Do not overfill.
Refer to “REPLENISHING CELLFYX SOLUTION” on page 6.32, for filling the fixative reservoir.
Fixative The fixative reservoir is low on CellFyx Solution.
• The fixative reservoir must be filled with one bottle of CellFyx Solution before processing can begin.
Fixative capThe processor does not detect the cap on top of the fixative reservoir.
• The cap must be tightly screwed onto the top of the fixative reservoir before processing can begin.
Empty waste bottle and waste binsThe level of waste fluid within the waste bottle is above the maximum level. Make sure the slide waste bin is present and loaded correctly.
• The waste bottle must be emptied before processing can begin.
• Empty the filter waste box, and slide waste bin at this time.
• The slide waste bin must be properly loaded before processing can begin.
Insert clean fixative shieldAt the time the instrument prompts for CellFyx Solution replenishment, it will also display a mes-sage to insert a clean fixative shield. This is important in preventing unwanted fixative buildup.
Refer to “REPLACING THE FIXATIVE SHIELD” on page 6.23.
After addressing items and closing all doors on the instrument, press Continue.
If materials cannot be loaded at this time, press Cancel to end batch processing and return to the main menu.
5.16 ThinPrep® 3000 Processor Operator’s Manual

INSTRUMENT OPERATION 5
Please Address Items
This message notifies you that these items are low in supply. Although the processor can start batch processing, the full batch of sample vials may not be completed. The following items may appear on this screen:
Filters SlidesStaining RacksSample Trays
• Select Load to address the listed item(s). If supplies are loaded, the “Checking Consumables Please Wait” screen is displayed.
• Select Continue to bypass loading item(s) at this time, beginning batch processing.
Note: If the user does not respond to this message within five minutes, the batch will start by itself.
Close Doors and Press Continue
This message notifies you that an instrument door is open.
• Confirm that both the front door and top door are closed.
• After closing any open doors, select Continue to begin batch processing.
������(������9�����.�����������������������-� �������������
������!�
�����+������������������!�
������!�
ThinPrep® 3000 Processor Operator’s Manual 5.17

5 INSTRUMENT OPERATION
Processing begins when the following screen is displayed:
COMPLETING A BATCH
1. At the completion of batch processing, “Batch Complete, Unload Staining Racks & Remove Vial Trays” is displayed on the message screen. If a sample error occurred, a bottom line reads “Address Samples with Processing Errors”. A batch report will print from the results printer.
Note: The instrument will beep once per minute to indicate the batch is complete. If an error occurred, it will beep three times per minute. The beeps cease when the operator presses Con-tinue. The display transitions to the System Ready screen.
2. Carefully unload the staining racks containing processed slides from the instrument as described in “Removing the staining racks” on page 5.11.
3. Tear off the printed batch report by pulling it toward you, against the edge of the paper opening.4. Separate tray “A” (top) batch report from tray “B” (bottom) batch report. Match them with the
correct sample tray. (The tray slots are marked A and B on the instrument near the tray latches.)Refer to “READING THE BATCH REPORT” on page 5.20 for batch report information.
5. Review the batch report for sample vials not processed. They will be marked with an asterisk and listed in the Reprocessing Required field. Refer to “SYSTEM FAULT ERRORS Reprocessing Required” on page 7.30, for follow-up action if sample vials were not processed.
���������!� ��!��
������ 9�����������������
��
SECTION
F
������������������;����������������-�<
����:�=��������3���8�������
(������������>�������������3�����
������!�
5.18 ThinPrep® 3000 Processor Operator’s Manual

INSTRUMENT OPERATION 5
6. Fold and insert the appropriate batch report into its corresponding sample vial tray for identifica-tion.
Note: Place the report so that the time and date can be seen. This will aid in locating a sample if nec-essary.
7. Remove the processed sample vial trays.8. Remove the sample vials not processed from the tray(s). Address the issue, if possible. Refer to
Chapter 7. Include these sample vials in another batch for reprocessing.
Routine Maintenance RequiredEvery 800 slides (10 full batches) the instrument will prompt for Operator Maintenance:
CAUTION: It is important to perform these maintenance tasks at this time, to ensure proper instrument operation.
Press Continue. Refer to “PNEUMATIC SYSTEM TESTING” on page 6.13, and “CLEANING THE SLIDE PATH” on page 6.17 for instructions.
��!����"������������?!����
���������������������������!����!��������� ������!�
ThinPrep® 3000 Processor Operator’s Manual 5.19

5 INSTRUMENT OPERATION
READING THE BATCH REPORT
A sample batch report is shown. The samples needing operator attention are marked with an asterisk.
SECTION
G
TP 3000 Batch Result
04/28/00 07:35
TP3 XX.XXXXXXXX
Serial No.: 00001A00A0
Tray A
Reprocessing Required
Reason Position
Slide Misprint A 5
A13
Sample ID# Position
000000010526 A 1
000000010527 A 2
000000010528 A 3
000000010529 A 4
000000010530 A 5*
000000010531 A 6
000000018376 A 7
000000018377 A 8
000000018378 A 9
000000018379 A10
000000018380 A11
000000018381 A12
A13*
000000018383 A14
000000010525 A15
000000010532 A16
000000010533 A17
000000010534
000000010535
000000010536 A20
000000010537 A21
000000010538 A22
000000010539 A23
000000010540 A24
000000010541 A25
000000018384
518Total Samples Processed
------------
No Barcode
DateInstrument/batch identification Software
revision
Time batch was started
Identifies sample error by tray location
Error reportingLists reason for error
Processed sample identification
Sample ID (barcode)
Total samples processed tally
Sample tray
Instrument serial number
5.20 ThinPrep® 3000 Processor Operator’s Manual

INSTRUMENT OPERATION 5
Reading the Batch ReportA batch report is automatically printed out at the conclusion of processing samples.
Note: Results are printed when the instrument can no longer process any more samples. This condi-tion may be caused by:
• all samples processed - batch complete
• batch canceled by the operator
• two consecutive sample errors
• a mechanism failure.
The reason for termination of a batch will be printed on the batch report as the error reported for the last sample processed.
Instrument/batch identificationThe top of the report lists instrument specific data: the date and time the batch was started (the time will print in 24-hour format, even if you have configured your display to show a.m. and p.m.), the version of software running on the ThinPrep 3000 processor and the instrument serial number.
Refer to Chapter 7, “Troubleshooting”, for detailed sample status, error description and resolution.
Error reportingThis area reports any samples that may be problematic or did not result in a slide being prepared. Samples that require reprocessing are listed by their tray position with a reason why the instru-ment did not prepare a slide for that sample.
Sample identificationThe next area lists the samples encountered by the instrument during processing. They are listed by their sample ID (barcode) number in the left column and the exact tray position of the vial in the right column. Those marked with an asterisk indicate an error was detected while processing that sample.
If sample processing was interrupted and unable to resume, only the processed vials will appear on the report. If there are more sample vials in your batch than are reported on the results printout, they must be removed and placed into a tray for another batch.
Printing ResultsOnly the last batch that was processed is kept in instrument memory. If you need more than one copy of a report, or a report did not generate (i.e., due to paper-out condition), it can be printed. From the main menu display, press Print Results.
ThinPrep® 3000 Processor Operator’s Manual 5.21

5 INSTRUMENT OPERATION
PAUSING A BATCH IN PROCESS
Processing of a batch may be halted and resumed using the “Pause” function. (For example, an oper-ator may wish to remove completed staining racks for staining while the instrument finishes processing the batch.)
1. Select Pause.
2. “Batch Paused, Please Wait” is displayed under Batch Status as the processor interrupts batch processing. “Batch Paused” is displayed once the batch is paused. The doors of the instrument may be opened at this time.
Note: The system may take up to 3 minutes before “Batch Paused” is displayed. This allows the samples in process to finish before the system is made available for access.
CAUTION: Do not remove or replace the sample vial tray(s) or the batch will be canceled.
3. To resume batch processing, select Continue.
SECTION
H
�����9��������� ��!��
������ ���������!����������
�������!���������8���
&@
�������!���
������!�
�����������
5.22 ThinPrep® 3000 Processor Operator’s Manual

INSTRUMENT OPERATION 5
CANCELING A BATCH IN PROCESS
A batch that has begun processing may be canceled by using the “Pause” function. (For example, an operator may wish to start a small batch over again if a large number of samples is delivered to the lab, or to process rush samples.)
1. From the Batch In Progress display, select Pause.
The “Batch Paused” screen is displayed after the processor has interrupted batch processing.
Note: The system may take up to 3 minutes before “Batch Paused” is displayed. This allows the samples in process to finish before the system is made available for access.
2. To cancel the batch, select Cancel Batch. The instrument checks the status of consumables and prints the batch report.
3. The following message is displayed when the batch is canceled:
SECTION
I
�����9��������� ��!��
������ ���������!����������
�������!���������8���
&@
�������!���
������!�
�����������
�����9���������
������ ���������!����������
����������!�����& ������8���
ThinPrep® 3000 Processor Operator’s Manual 5.23

5 INSTRUMENT OPERATION
4. Carefully unload the staining racks from the processor.5. Tear off the printed batch report by pulling it toward you, against the edge of the paper opening.6. Separate “A” (top) batch report from “B” (bottom) batch report. 7. Review the batch report for sample vials not processed.8. Fold and insert the appropriate batch report into its sample vial tray for identification.9. Remove sample vial tray(s).10. Remove the sample vials not processed from the tray(s). Include these sample vials in another
batch for reprocessing.
�������������+!�����������������;���
������!�
5.24 ThinPrep® 3000 Processor Operator’s Manual

6. Main
tenan
ce 6. M
ain
ten
ance

INSTRUMENT MAINTENANCE 6
C h a p t e r S i x
Instrument Maintenance
CONTENTS
SECTION A: Recommended Maintenance Schedule 6.2
SECTION B: Fixative System Preventative Maintenance 6.5
SECTION C: Emptying the Slide Waste Bin 6.9
SECTION D: Lubricating the Sample Processing Arm O-Rings 6.10
SECTION E: Pneumatic System Testing 6.13
SECTION F: Cleaning the Slide Path 6.17
SECTION G: Replacing the Fixative Shield 6.23
SECTION H: General Cleaning 6.24
SECTION I: Pinch Valve Tubing Replacement 6.26
SECTION J: Waste System Maintenance 6.28
SECTION K: Emptying the Filter Waste Box 6.31
SECTION L: Replenishing CellFyx™ Solution 6.32
SECTION M: Replacing the Slide Printer Ribbon 6.34
SECTION N: Replacing the User-Accessible Fuses 6.36
SECTION O: Replacing the Results Printer Paper 6.38
ThinPrep® 3000 Processor Operator’s Manual 6.1

6 INSTRUMENT MAINTENANCE
RECOMMENDED MAINTENANCE SCHEDULE
Regular maintenance of the ThinPrep® 3000 processor will greatly reduce the risk of sample handling or mechanism errors. A brief outline of recommended maintenance is listed below. The same proce-dures in chart form are on the next two pages, which may be removed and copied as needed.
Daily Maintenance• Fixative spray preventative maintenance
• Empty the slide waste bin
• Check filter waste box
• Lubricate the sample processing arm O-rings
Monthly Maintenance• General cleaning
Twice-Yearly Maintenance• Pinch valve tubing replacement
Instrument-Prompted MaintenanceRefer to the Ordering Information in this manual for ordering supplies.
• Pneumatic system testing
• Cleaning the slide path
• Replacing the fixative shield
• Empty waste bottle, filter waste box and slide waste bin
• Replenishing CellFyx Solution
• Replacing the slide printer ribbon
As-Needed Maintenance• Results printer paper replenishment: replenish when the red line appears along the edge of
the paper roll.
• Fuse replacement: replace blown fuses.
SECTION
A
6.2 ThinPrep® 3000 Processor Operator’s Manual

INSTRUMENT MAINTENANCE 6
®
Thi
nPre
p® 3
000
Pro
cess
or
Rec
om
men
ded
Mai
nten
ance
Sch
edul
e
Mo
nth:
Year
:
In
stru
men
t #
Dai
ly M
aint
enan
ce1
23
45
67
89
1011
1213
1415
1617
1819
2021
2223
2425
2627
2829
3031
Fixa
tive
spra
y
Em
pty
slid
e w
aste
bin
Che
ck fi
lter
was
te b
ox
Lub
ricat
e th
e sa
mp
le
pro
cess
ing
arm
o-
rings
Inst
rum
ent-
pro
mp
ted
Mai
nten
ance
(Initi
al a
nd D
ate)
Pne
umat
ic s
yste
m t
est
Cle
an s
lide
pat
h
Em
pty
was
te b
ottle
, slid
e w
aste
bin
, fil
ter
was
te b
ox
Cel
lFyx
Sol
utio
n re
ple
nish
men
t.
Inse
rt c
lean
fixa
tive
shie
ld.
Slid
e p
rinte
r rib
bon
This
pag
e is
for
pho
toco
py
pur
pos
es.
pag
e 6.
5
pag
e 6.
9
pag
e 6.
31
pag
e 6.
10
pag
e 6.
13
pag
e 6.
17
pag
e 6.
28, p
age
6.9,
pag
e 6.
31
pag
e 6.
32
pag
e 6.
34
ThinPrep 3000 Processor Operator’s Manual 6.3

6 INSTRUMENT MAINTENANCE
Thi
nPre
p® 3
000
Pro
cess
or
Rec
om
men
ded
Mai
nten
ance
Sch
edul
e
Ye
ar:
Inst
rum
ent
#
(Initi
al a
nd D
ate)
Mo
nthl
y M
aint
enan
ceJ
FM
AM
JJ
AS
ON
D
Gen
eral
Cle
anin
g
Twic
e-ye
arly
Mai
nten
ance
(Initi
al a
nd D
ate)
Pin
ch v
alve
tub
ing
rep
lace
men
t
This
pag
e is
for
pho
toco
py
pur
pos
es.
pag
e 6.
24
pag
e 6.
26
6.4 ThinPrep® 3000 Processor Operator’s Manual

INSTRUMENT MAINTENANCE 6
FIXATIVE SYSTEM PREVENTATIVE MAINTENANCE
CellFyx Solution fixes the prepared slides inside the instrument. The fixative properties of being very tacky as well as quick-drying can cause the slender air brush dispenser to clog easily. Long idle peri-ods (when fixative is not being sprayed) may cause a clog to form. Before beginning a batch, the instrument tests that the fixative dispense path is clear. If a clog is detected, the display will change to the following screen.
1. Lift the fixative dispenser lever three or four times, as shown below.
2. Observing the tip of the nozzle, select Spray. The fixative spray from the nozzle should appear in a fine, evenly distributed fan of mist as shown in the following illustration.
Note: Laying a tissue across the top of the fixative shield will capture the spray and indicate the spray pattern.
3. If that does not clear the device, hold the spray lever up and select Prime. A small drop of fixa-tive solution will form at the nozzle tip. Let it sit about 30–60 seconds, to dissolve the blockage. Lift and release the lever a few times.
SECTION
B
����� �!���
����� .� ���:�������� �:��
���� ���-
Fixative spray lever
Fixative nozzle
Fixative shield
ThinPrep® 3000 Processor Operator’s Manual 6.5

6 INSTRUMENT MAINTENANCE
4. Observing the tip of the nozzle, press the Spray key.
• If a fine, evenly distributed fan of fixative is sprayed, the solution is running freely through the system.
• If there is no spray visible or the spray is uneven, repeat steps 3 and 4 several times.
Further Maintenance (If Needed)
Clearing clogs via the user interfaceFixative System menu:
If performing the preventative maintenance cycle does not result in the fixative nozzle spraying freely, the following steps will help dissolve fixative clogs.
1. Lift the dispense lever on the nozzle three or four times and select Clear. (This performs a series of spray & prime functions.) The fixative spray from the nozzle should appear in a fine, evenly distributed fan of mist as illustrated above.
2. If the fixative solution does not spray, or does not appear evenly distributed, repeat step 1 two or three more times.
Note: The fixative pressure tanks need a few seconds to recharge before the fixative can spray again. When a key is pressed, a “Please Wait” message will display until the system is ready.
Desired spray pattern
Spray pattern indicates a clog
����� �!���
����� �:��
���� ���-
Auto combination of spray/prime functions
No air, just fixative
Normal spray dispense, a mix of air/fixative
No fixative, just air
Resets the fixative supply pressure, if the cap has been off
Return to the Maintenance Menu
6.6 ThinPrep® 3000 Processor Operator’s Manual

INSTRUMENT MAINTENANCE 6
3. If a clog remains, hold the spray lever up and press the Prime button until a drop of fixative can be seen at the spray nozzle. Stop pressing Prime and hold the lever up for 30 to 60 seconds.
CAUTION: The spray nozzle that delivers fixative solution to the slides is very delicate. DO NOT attempt to disassemble it. If recommended maintenance does not dissolve a clog, contact Hologic Technical Support.
4. Toggle the spray lever up and down a few times and press Spray. Observe for the desired spray pattern.
5. When the fixative sprays freely, return to the main menu to continue instrument operation.If this fails to resolve the problem, continue with the following procedure.
Dissolving Clogs with warm waterIf an airbrush cannot be unclogged via the user interface the following steps may be performed.
1. Fill a microcentrifuge tube or any other small container with warm water.2. Place the tube under the airbrush and lift the tube so the nozzle is submerged in the water, as
shown below.Note: A small amount of water will be displaced out of the tube or container. Do not allow water to
spill into the instrument.
3. Allow the nozzle to soak in the warm water for approximately 60 seconds. Toggle the spray lever up and down several times. This will help dissolve the fixative that is clogging the nozzle.
����� �!���
����� ������8��� �:��
���� ���-
ThinPrep® 3000 Processor Operator’s Manual 6.7

6 INSTRUMENT MAINTENANCE
4. Remove the container from the nozzle. Prime and spray as outlined previously, until the proper spray pattern is achieved.
5. Repeat steps 3 and 4 as needed. A longer soak time of 5–10 minutes and holding the spray lever up will help.
6. When the fixative sprays freely, return to the main menu to continue instrument operation.If the clog persists, contact Technical Support.
6.8 ThinPrep® 3000 Processor Operator’s Manual

INSTRUMENT MAINTENANCE 6
®
EMPTYING THE SLIDE WASTE BIN
The slide waste bin collects unusable slides. Empty it daily. Additionally, the message screen prompts you to empty the slide waste bin at the conclusion of each batch and when the waste bottle needs to be emptied.
WARNING: Sharp Edges Glass
1. Open the front door on the ThinPrep 3000 processor.2. Open the center door.3. Remove the slide waste bin.4. Dispose of the glass waste according to your laboratory’s guidelines.5. Return the slide waste bin to its original location.
SECTION
C
Center door
ThinPrep 3000 Processor Operator’s Manual 6.9

6 INSTRUMENT MAINTENANCE
LUBRICATING THE SAMPLE PROCESSING ARM O-RINGS
Once a day, or at the start of each shift, lubricate the sample processing arm (filter seal) O-rings. This maintenance lubricates the O-rings for ease of filter loading and disposal. Filter load failure errors and filter handling errors may occur if the sample processing arm O-rings are dry.
Refer to the Ordering Information in this manual for ordering silicone lubricant.
The pneumatic test vial is used for this maintenance; lubricant is required. The procedure takes about two minutes.
1. From the main menu, select Menu.2. Select Maintenance.
3. Select Lube O-Rings.
The following screen will be displayed.
SECTION
D
���! "����������
����!�
���� ���-
!/�,6����� ������(�����
.� ���:������� "���"��!
����(�:���� ���-
�������=���������(��������2������!�
������
6.10 ThinPrep® 3000 Processor Operator’s Manual

INSTRUMENT MAINTENANCE 6
4. Wet the end of a swab with lubricant (Super Lube) and spread a light layer all around the inside surface of the pneumatic test vial.
5. Load the pneumatic test vial into tray position A1, which is the first slot of the upper sample vial tray.
6. Rotate the test vial clockwise until the locator pins catch against the molded stops of the tray.
7. Load the tray into the instrument, close the tray latch and close all doors.8. Press Continue. The doors will lock.
The following sequence of screens will be displayed.
� ���
� ��� �����
���������� ���
�
� ������
� ���
��
��������
�� ����
ThinPrep® 3000 Processor Operator’s Manual 6.11

6 INSTRUMENT MAINTENANCE
“SPA O-Rings Lubrication In Progress” appears on the message screen throughout the duration of the procedure.
9. The message screen displays completion of the lubrication.
Press Continue. The doors will unlock.
CAUTION: The pneumatic test vial should always be stored in its protective box when not in use. Handle the vial with care.
10. Unload the sample tray. Remove the pneumatic test vial. With a lint-free cloth, wipe off any lubri-cant in and on the test vial. Return the test vial to its storage box.
��������"������������,6����� !/�
��(����,6����� !/������������������
��(����,6����� !/���������������
������!�
6.12 ThinPrep® 3000 Processor Operator’s Manual

INSTRUMENT MAINTENANCE 6
PNEUMATIC SYSTEM TESTING
The pneumatic system must be tested to verify proper operation. The message “Please Run Pneumatic Test” will display when this is required. It is important to run the test when prompted. The test will take approximately 9 minutes to com-plete. Lubricant is required for this maintenance procedure.
1. From the main menu, select Menu.2. Select Test.Refer to the Ordering Information in this manual for ordering silicone lubricant.
3. Select Pneumatic Test.
The following screen will be displayed.
SECTION
E
���! "����������
����!�
���� ���-
���!��������� "���
+��������� "���"��!
���������� ���-
�������=���������(��������2������!�
������
ThinPrep® 3000 Processor Operator’s Manual 6.13

6 INSTRUMENT MAINTENANCE
4. Wet the end of a swab with lubricant and spread a light layer all around the inside surface of the pneumatic test vial.
5. Load the pneumatic test vial into tray position A1, which is the first slot of the upper sample vial tray.
6. Rotate the test vial clockwise until the locator pins catch against the molded stops of the tray.
7. Load the tray into the instrument, close the tray latch and close all doors.8. Press Continue.
The results printer will print the start of a report for this procedure. The time, date and serial number of the instrument will be printed, with the message “Pneumatic Test Started”.
� ���
� ��� �����
���������� ���
�
� ������
� ���
��
��������
�� ����
6.14 ThinPrep® 3000 Processor Operator’s Manual

INSTRUMENT MAINTENANCE 6
The following sequence of screens will be displayed.
“Pneumatic Test In Progress” appears on the message screen throughout the duration of the sys-tem testing.
9. The message screen displays the test results.
The pneumatic system test report completes printing, as shown below.
��������"���������������!���������
����/�������"�������!���������
���!�������������������
���!����������������
���!������������!��� ������!����!����������!������!�
������4�������2(��(����!�����������������)*&%*�� 2��&'���!�����������������)*&%*�� 2���)���!������������!��������!������!�
ThinPrep® 3000 Processor Operator’s Manual 6.15

6 INSTRUMENT MAINTENANCE
10. If the instrument passes pneumatic system testing, select Continue. The main menu screen will display.
CAUTION: The pneumatic test vial should always be stored in its protective box when not in use. Handle the vial with care.
11. Unload the sample tray. Remove the pneumatic test vial. With a lint-free cloth, wipe off any lubri-cant in and on the test vial. Return the test vial to its storage box.If the instrument fails pneumatic system testing, the test that failed will be listed under Pneu-matic Test Results. (There are 21 system tests; the message may be different from that shown below.)
The printed test report will show the same message.
12. Press Continue to return to the main menu.13. Repeat the pneumatic system test one more time.
CAUTION: Do not process samples on the instrument after failing pneumatic system testing. Contact Hologic Technical Support.
14. If the pneumatic test fails again, contact Hologic Technical Support before resuming instrument operation.
���!����������������
���!������������!��� ������!�������'AB���������-
������4�������2(��(����!�����������������)*&%*�� 2��)'���!�����������������)*&%*�� 2��')���!������������!���������'AB���������-
6.16 ThinPrep® 3000 Processor Operator’s Manual

INSTRUMENT MAINTENANCE 6
CLEANING THE SLIDE PATH
CAUTION: Proper instrument operation depends on routinely cleaning the slide path, as prompted.
Frequent cleaning of the mechanisms which handle the slides will greatly reduce the risk of sample errors or slide handling problems. The message “Please Clean Slide Path” will display when this is required. It is important to perform this maintenance when prompted.
Note: Only de-ionized or distilled water should be used to moisten swabs or lint-free cloth for cleaning the instrument.
Microscope Slide Areas
Interior of Slide CartridgeEach time a cartridge is loaded with microscope slides, wipe the inside of the cartridge with a lint-free cloth to remove glass dust. Clean the bottom surface where the slides sit, to help ensure proper slide picking.
WARNING: Sharp Edges Glass
SECTION
FSECTION
F
ThinPrep® 3000 Processor Operator’s Manual 6.17

6 INSTRUMENT MAINTENANCE
Inside of Slide Cartridge WellRemove the slide cartridges and pull the black bezel off by pulling it upward. With a damp, lint-free cloth, wipe the surfaces to remove dust and any slide debris.
Slide Printer AreaOpen the lid covering the slide printer. If a slide is there, remove it. Using a water dampened swab, clean the black urethane pads on the arms of the slide pick mechanism. Also, clean any glass dust from the metal surface surrounding the urethane pads. Clean under the print head, around the slide retainer and around the thumbscrew.
The thumbscrew at the front releases the assembly from the chassis on one side. Swing the module up to clean underneath. With a dry cloth or swab, brush any glass dust off of the slide translator car-riage and the rails it rides on. Clean off the black cam plate. If the carriage is in the way, move it left or right by pulling the top section of the drive belt.
Urethane Padded Arms
Slide Retainer
Thumbscrew
6.18 ThinPrep® 3000 Processor Operator’s Manual

INSTRUMENT MAINTENANCE 6
Note: If the arms of the slide translator carriage are raised, gently press them down while lowering the printer assembly back down.
Note: Retighten the thumbscrew when done.
Note: Replace the bezel around the slide cartridge well.
Slide Cell Transfer Arm and Slide Clamps
CAUTION: Frequent cleaning of the slide cell transfer arm to remove fixative build up will reduce the risk of mis-seated or stuck slides.
The slide cell transfer arm is located centrally in the instru-ment (refer to Slide Handling System illustration on page 1.7). Use the ThinPrep 3000 Maintenance Kit to clean the slide cell transfer arm and slide ejector path. Directions are below. The first time you use the kit, the cleaning solu-tion must be mixed.
Prepare the Versa-Clean™ Solution. 1. Fill the plastic aerosol spray bottle with 100 mL of plain
water and add 3.33 mL of Versa-Clean Solution.2. Close and shake the bottle to mix. Pump the overcap/
piston assembly up and down 7 - 10 strokes to pressurize the bottle.
Note: Do not substitute other cleaning solutions for Versa-Clean Solution.
Clean the Slide Cell Transfer Arm1. Remove the staining racks and fixative shield. Remove
the lower filter and sample vial trays.Refer to page page 6.23 for information on how to remove and replace the fixative shield.
Drive Belt
Rail
Cam Plate
Slide Translator Carriage
ThinPrep® 3000 Processor Operator’s Manual 6.19

6 INSTRUMENT MAINTENANCE
2. Put an ordinary paper towel under the slide cell transfer arm to catch the cleaning solution that drips off of the mechanism.
3. From the Maintenance menu, select System Access.
4. Select Open [Slide Clamps] to disengage the slide clamps. You will hear them click open.Note: To prevent overheating the solenoids, do not leave the slide clamps open for more than 15
minutes.
5. Spray the cleaner on the silver surface of the arm, spraying from top to bottom. Let it sit for 30 seconds to dissolve the fixative residue.
The slide clamps are fragile. Only use foam tipped swabs to clean and dry them. DO NOT USE FORCE! Thoroughly swab the slide presence switch plunger and opening.
!/�,6����� ������(�����
.� ���:������� "���"��!
����(�:���� ���-
,�� ���������� �����
,�� 3:��=��:� �����
(�����(:����/�� ������!������������!�8���.�������
6.20 ThinPrep® 3000 Processor Operator’s Manual

INSTRUMENT MAINTENANCE 6
6. Wipe the solution off the arm using lint-free wipes. Wipe from the top to the bottom, moving gently around the slide clamps.
7. Using foam tipped swabs, wipe out the grooves in the slide holder part of the arm, around the joints and underside of the slide clamps, the loose link holes and the slide presence switch.
8. Close the slide clamps. Do a final wipe down of the arm using the alcohol pad. Also use that to wipe the slide ejector path, rollers and the tip of the slide ejector.
9. Open the clamps once more. Wipe them with the alcohol pad, then thoroughly dry around and under them with foam tipped swabs. Close the clamps.
10. The alcohol will evaporate completely within one minute of cleaning the surface.
11. Remove any towels or cleaning supplies from the instrument.
Loose Link Hole
Slide Presence Switch Plunger
Slide Clamps
Loose Link Hole
An open slide clamp. Clean all surfaces and surrounding area.
ThinPrep® 3000 Processor Operator’s Manual 6.21

6 INSTRUMENT MAINTENANCE
Fixative spray areaUsing a swab or lint-free cloth moistened with water, clean around the fixative spray area as shown above. The staining rack cradles should be cleaned of spray and any glass dust. Replace the fixative shield when finished.
Slide ejector tip
Slide ejector path
Rollers
Fixative spray area
Staining rack cradles
6.22 ThinPrep® 3000 Processor Operator’s Manual

INSTRUMENT MAINTENANCE 6
REPLACING THE FIXATIVE SHIELD
The fixative shield collects excess CellFyx Solution from the fixative spray noz-zle during its distribution onto the slide. Each time the fixative is replenished with a bottle of CellFyx Solution, dispose of the old fixative shield and replace it with a new one.
Remove the Fixative Shield
WARNING: Toxic Mixture Highly Flammable Liquid and Vapor
1. The fixative shield assembly is removed by sliding it straight out from below the spray nozzle. The plastic base of the assembly has a notch at either side, useful for gripping with your fingers to pull the block out.
Each CellFyx Solution package contains six 115-mL bottles of CellFyx and six fixative shields.
2. Observe how the shield fits snugly against its plastic mounting block. Then separate the cylindri-cal fixative shield from the plastic base.
SECTION
G
Fixative spray noz-zle
Fixative shield
ThinPrep® 3000 Processor Operator’s Manual 6.23

6 INSTRUMENT MAINTENANCE
Insert the fixative shield1. Insert the replacement fixative shield into the cutout area of the plastic base.
Push it in until it is seated firmly against the base. The pin on the left side indicates the top surface of the plastic base.
2. Slide the fixative shield assembly back into position as shown above. The positioning pins on the back side of the block can be felt to snap into place when the assembly is correctly pushed against the wall of the fixative area.
GENERAL CLEANING
ExteriorCAUTION: Do not use strong solvents such as acetone or xylene, as they may damage the paint or plastic surfaces.
We suggest you wipe down the exterior of the ThinPrep 3000 processor monthly or as needed with a lint-free wipe dampened with water. Clean the inside front door and under the top door and slide printer cover.
System AccessTo gain the most room for cleaning, maintaining or accessing the interior of the instrument, a System Access function is available via the Maintenance menu. This moves the upper filter and sample vial trays to their topmost position and parks them on the robotic arms, allowing maximum access.
1. From the main menu, select Menu.2. Select Maintenance.
3. Select System Access. The following screens will display.
SECTION
H
!/�,6����� ������(�����
.� ���:������� "���"��!
����(�:���� ���-
6.24 ThinPrep® 3000 Processor Operator’s Manual

INSTRUMENT MAINTENANCE 6
4. When the screen above displays, the doors will unlock. The instrument may be accessed. When finished, close the doors and press Continue.The following screen will display.
The instrument returns all trays and mechanisms to their ready position. When complete, the main menu screen appears.
��������"��������<������8���
,�� ���������� �����
,�� 3:��=��:� �����
(�����(:����/�� ������!������������!�8���.�������
1�����"���������<������8���
������������ ����������
�������������!���� "��!������#����������$
��������!����%�&'���(" �)*&%*��
ThinPrep® 3000 Processor Operator’s Manual 6.25

6 INSTRUMENT MAINTENANCE
PINCH VALVE TUBING REPLACEMENT
The pinch valve tubing is the tubing connection between the pneumatic system and the waste sys-tem. For optimal performance, the pinch valve tubing should be replaced every six months.
1. From the Maintenance menu, select System Access.Refer to the Ordering Information in this manual for replacement tubing.
The doors will lock while the processor moves trays and mechanisms out of the way for access to the instrument. The doors will unlock and the following screen is displayed:
CAUTION: Only use Hologic-supplied tubing for replacement.
Press Open [Evac Valve] to open the pinch valve.2. Open the front door and then open the center door. The pinch valve tubing is located to the right
of the Slide Waste Bin.3. Detach tubing from points A and B, as shown.
SECTION
I
!/�,6����� ������(�����
.� ���:������� "���"��!
����(�:���� ���-
,�� ���������� �����
,�� 3:��=��:� �����
(�����(:����/�� ������!������������!�8���.�������
�
�
6.26 ThinPrep® 3000 Processor Operator’s Manual

INSTRUMENT MAINTENANCE 6
4. Hold the tubing on each side of the pinch valve and slide it in an upward motion, as shown below.
5. Discard the old tubing.6. Slide the new tubing back down into the pinch valve opening. Make sure it is completely seated
in the valve, with no kinks.7. Connect the replacement tubing to points A and B.8. Press the Close [Evac Valve] key on the display to close the pinch valve.9. Close the center door and close the front door to the instrument.10. Select Continue on the displayed menu.11. The instrument doors will lock and the mechanisms will be returned to idle mode state. The Sys-
tem Ready screen will display and the doors will unlock.
12. To test the new tubing installation, process a new, unused PreservCyt® Solution sample vial.
���� !
�"! #���$%
ThinPrep® 3000 Processor Operator’s Manual 6.27

6 INSTRUMENT MAINTENANCE
WASTE SYSTEM MAINTENANCE
Waste resulting from sample processing is routed to and stored in the waste bottle.
Emptying the Waste BottleThe message screen will notify you when to empty the waste bottle. The batch will not begin until the waste bottle has been emptied.
1. Open the middle door on the processor cabinet.2. To remove the waste cap, rotate the waste cap with one hand while holding the waste bottle in
place with the other hand. (Not much pressure is needed to unscrew the cap; do not exert too much force on the door hinge as you remove the waste cap.)
• If the waste tubing becomes dislodged from the waste cap during this process, reconnect the tubing before continuing.
WARNING: Hazardous Waste Toxic Mixture Flammable Liquid and Vapor
SECTION
J
!MAX
MAX
Waste tubing
Waste cap
Waste bottle
9����"!����(���������
3���8�������������8��������������!�
������
6.28 ThinPrep® 3000 Processor Operator’s Manual

INSTRUMENT MAINTENANCE 6
3. Place the transport cover onto the waste bottle for transport-ing.
4. Remove the waste bottle from the instrument.5. Dispose of the liquid waste from the waste bottle according to
your laboratory guidelines. Dispose of all solvents as hazard-ous waste. Follow local, state, provincial and federal or county guidelines. As with all laboratory procedures, universal pre-cautions should be followed.
CAUTION: The waste bottle must never contain bleach when it is connected to the processor.
• PreservCyt Solution was challenged with a variety of microbial and viral organisms. The fol-lowing table presents the starting concentrations of viable organisms and the number of via-ble organisms found after 15 minutes in the PreservCyt Solution. The log reduction for viable organisms is also presented. As with all laboratory procedures, universal precautions should be followed.
* After 1 hour >4.7 log reduction** After 1 hour >5.7 log reduction*** Data is for 5 minutes
Refer to the Ordering Information in this manual for ordering silicone lubricant.
6. Before reattachment, inspect the O-ring seal on the inside of the waste cap for debris.
Organism Initial Concentration Log Reduction after 15 min.
Candida albicans 5.5 x 10⁵ CFU/mL >4.7
Aspergillus niger* 4.8 x 10⁵ CFU/mL 2.7
Escherichia coli 2.8 x 10⁵ CFU/mL >4.4
Staphylococcus aureus 2.3 x 10⁵ CFU/mL >4.4
Pseudomonas aeruginosa 2.5 x 10⁵ CFU/mL >4.4
Mycobacterium tuberculosis** 9.4 x 10⁵ CFU/mL 4.9
Rabbitpox virus 6.0 x 10⁶ PFU/mL 5.5***
HIV-1 1.0 x 107.5 TCID50/mL 7.0***
��� ��
Transport cover
ThinPrep® 3000 Processor Operator’s Manual 6.29

6 INSTRUMENT MAINTENANCE
• If debris is present, clean the seal with water using a lint-free wipe.
• Apply a thin layer of lubricant to the O-ring.
7. Return the waste bottle back to its original location and retighten the waste cap onto the bottle.
• Verify that the waste cap is firmly tightened and confirm that the waste tubing is not pinched or twisted.
• Once the waste bottle is connected to the instrument, the process is complete.
8. Select Continue to return to the main menu.
O-ring seal
6.30 ThinPrep® 3000 Processor Operator’s Manual

INSTRUMENT MAINTENANCE 6
EMPTYING THE FILTER WASTE BOX
The filter waste box collects ThinPrep Pap test filters after use. The message screen will prompt you to empty the filter waste box at the time the waste bottle is to be emptied.
1. Open the center door on the ThinPrep 3000 processor cabinet.2. Carefully pull the filter waste box out of the cabinet. Look for loose filters that might have missed
the waste box and remove them as well.Refer to the Ordering Information in this manual for ordering liners.
3. Remove the waste box liner.4. Tie the waste box liner to prevent filters from falling out of the bag.5. Dispose of the used filters and liner according to your laboratory’s guidelines.6. Insert a new waste box liner into the filter waste box.7. Return the filter waste box to its original location.
SECTION
K
Waste box liner
ThinPrep® 3000 Processor Operator’s Manual 6.31

6 INSTRUMENT MAINTENANCE
REPLENISHING CELLFYX SOLUTION
CellFyx Solution is a methanol-based fixative that is designed to preserve the morphologic features of the cell nucleus and cytoplasm. It is formulated for use with the ThinPrep 3000 processor.
WARNING: Toxic Mixture Highly Flammable Liquid and Vapor
Do not use any other fixative solution with the instrument.
The message screen will notify you when to replenish fixative.
To fill the fixative reservoir, press Continue. The doors will unlock if they are currently locked.
Pressing Cancel will cancel the current message, but a batch will not start until the reservoir has been replenished.
Filling the Fixative Reservoir1. Open the top door on the instrument and locate the fixative reservoir.2. Unscrew and remove the cap on top of the fixative reservoir.3. Pour one bottle of CellFyx Solution (115 mL) into the fixative reservoir. Replace and tighten the
cap on top of the fixative reservoir.
CAUTION: Only add one bottle to the fixative reservoir when prompted by the instrument. Do not overfill. The instrument will be damaged if the fixative level reaches or goes above the air vent fit-ting on the inside of the fixative reservoir.
SECTION
L
9����"!����(���������
������!�(��.� ���:�.�!��
9����������.� ���:������� ������
Air vent fitting
6.32 ThinPrep® 3000 Processor Operator’s Manual

INSTRUMENT MAINTENANCE 6
Note: If the solution drips or spills, take care to wipe it off the surface of the instrument at that time. Do not let CellFyx Solution remain on the machine.
Insert Clean Fixative ShieldRemove the fixative shield and dispose of it. Replace it with a new fixative shield. Refer to “REPLACING THE FIXATIVE SHIELD” on page 6.23 for instructions on removing and replacing the fixative shield.
Repressurize the Fixative Reservoir1. From the Maintenance menu, select Fixative.If, during fixative maintenance, the Level button is pressed and the fixative reservoir is low, a mes-sage, “Add Fixative Fluid” appears on the display.
2. From the Fixative maintenance menu, select Level.
3. The pressure in the fixative reservoir resets, allowing the instrument to detect the fixative level.The level function only takes a minute to complete. A “Please Wait” message appears while the instrument performs Level.
4. When the level function has finished, press Spray. A “Fixative Clogged” message will appear. Continue to press Spray until the message no longer appears. A couple of times is sufficient.
5. Press the Back key to return to the main menu.Note: Any time the cap to the fixative reservoir is removed and replaced, the find level function
should be run, to ensure correct instrument operation.
����� �!���
����� �:��
���� ���-
ThinPrep® 3000 Processor Operator’s Manual 6.33

6 INSTRUMENT MAINTENANCE
REPLACING THE SLIDE PRINTER RIBBON
The slide printer ribbon is used to print the sample ID number and labora-tory information directly onto the slides prior to sample processing. The message screen will notify you when to replace the slide printer ribbon cartridge.
Note: Slides that are printed too lightly for the OCR camera to read are discarded. The instrument will print a second slide. If the second OCR read fails, the sample is not processed. A “Slide Misprint” error is recorded on the batch report. If you notice an increase in slides discarded, but no “Slide Misprint” messages on the batch report, the printer ribbon may be wearing out and causing a mix of normal and too-lightly printed slides. Try replacing the slide printer rib-bon.
1. Open the top door on the instrument.2. Open the slide printer cover and locate the ribbon cartridge. Note the routing of the printer rib-
bon under the print head.3. Remove the old cartridge by holding the tab and carefully pulling it out.4. Remove the new printer ribbon cartridge from its package.5. Turn the ribbon feed knob on the new cartridge in the direction of the arrow to remove slack.
SECTION
M
�������������+!�����������������//��
������!�
6.34 ThinPrep® 3000 Processor Operator’s Manual

INSTRUMENT MAINTENANCE 6
6. Insert the cartridge with the tab in the center facing outward, as shown.
• When inserting the cartridge, the printing ribbon should be routed slightly below the print head and above the ribbon separator, as shown below.
7. Turn the ribbon feed knob in the direction of the arrow to tighten the ribbon (clockwise). Confirm that the printing ribbon is not routed below the ribbon separator.
Guide
Tab
Lock
Print head
Ribbon separator
Ribbon feed knob
Ribbon cartridge
ThinPrep® 3000 Processor Operator’s Manual 6.35

6 INSTRUMENT MAINTENANCE
REPLACING THE USER-ACCESSIBLE FUSES
There are two user-accessible fuses located in the instrument. If the instrument fails to operate, replace these fuses as outlined below:
1. Turn off the instrument.2. Remove the power cord from the wall outlet.3. Remove the power cord from the receptacle on the instrument.
WARNING: Instrument Fusing
4. Using a small slotted screwdriver, carefully pry open the cover of the power entry module as shown below.
5. Gently pull down the cover. It is hinged at the bottom end.6. Insert the screwdriver under the fuse holder to pull it out.
SECTION
N
Co ver
6.36 ThinPrep® 3000 Processor Operator’s Manual

INSTRUMENT MAINTENANCE 6
7. Remove the existing fuses and discard them.Refer to the Ordering Information in this manual for ordering fuses.
8. Insert two new 250V T6.3AL 5x20 mm fuses into the fuse holder as shown.
9. Insert the fuse holder back into the power entry module. The module can only be installed in one orientation.
10. Close the access cover.
Fuse holder
ThinPrep® 3000 Processor Operator’s Manual 6.37
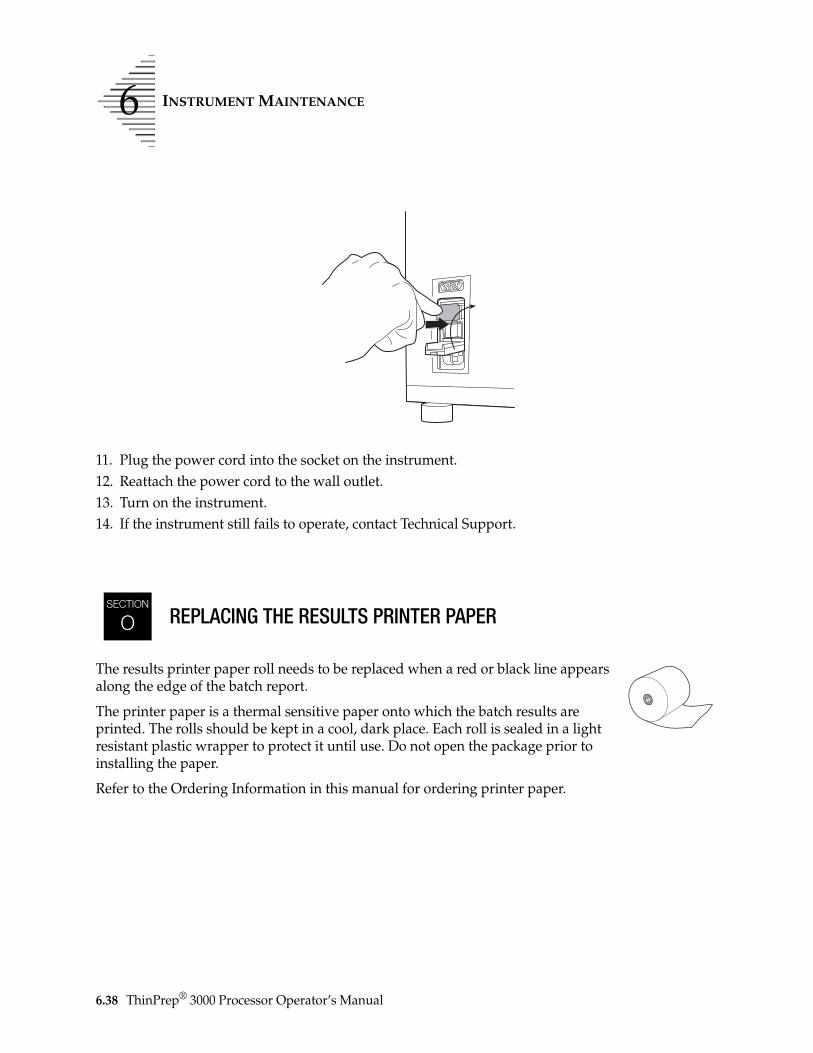
6 INSTRUMENT MAINTENANCE
11. Plug the power cord into the socket on the instrument.12. Reattach the power cord to the wall outlet.13. Turn on the instrument.14. If the instrument still fails to operate, contact Technical Support.
REPLACING THE RESULTS PRINTER PAPER
The results printer paper roll needs to be replaced when a red or black line appears along the edge of the batch report.
The printer paper is a thermal sensitive paper onto which the batch results are printed. The rolls should be kept in a cool, dark place. Each roll is sealed in a light resistant plastic wrapper to protect it until use. Do not open the package prior to installing the paper.
Refer to the Ordering Information in this manual for ordering printer paper.
SECTION
O
6.38 ThinPrep® 3000 Processor Operator’s Manual

INSTRUMENT MAINTENANCE 6
1. Open the lid above the user interface panel.2. If there is still paper left on the roll, press the left side of the green release lever down. Pull the
end of the paper out from under the platen. Return the lever to the set position.
3. Lift up the metal roll holder. It is hinged on the left side.4. Remove the used paper roll from the metal roll holder and discard. A translucent plastic washer
at the left side of the roller keeps the roll of paper from skewing as it is used up. Do not discard this plastic piece.
ThinPrep® 3000 Processor Operator’s Manual 6.39

6 INSTRUMENT MAINTENANCE
This page intentionally left blank
5. Slide the new thermal paper roll onto the metal roll holder.Note: The paper has a thermal sensitive side, on which the results are printed. If the batch report is
not printing properly, check to see if the paper is loaded correctly. The orientation of the roll should be as shown, with the feeding edge being pulled from the bottom of the roll.
6. Lower the metal roll holder down.7. Insert the paper through the metal slot located directly in front of the metal roll holder as shown
below. The paper should unroll from the bottom. The printer will auto advance a small amount of paper, when it senses the leading edge beneath the platen.
8. If the paper feeds crookedly through the roller, press the left side of the green paper release lever down, and straighten the paper in its path. Return the lever to set position to hold the paper in place.
Note: The lever must be in the SET position for the results printer to work.
6.40 ThinPrep® 3000 Processor Operator’s Manual

INSTRUMENT MAINTENANCE 6
9. Select Menu from the main menu.10. Select Maintenance.11. Press and hold Paper Advance to advance the paper three to four inches. Lead it through the
opening of the cover.
12. Gently lower the lid back into place.13. Select Back to return to the main menu. To test the legibility of the printer, press Print Results to
print a copy of the last batch report.
SET RELEASE
!/�,6����� ������(�����
.� ���:������� "���"��!
����(�:���� ���-
� � � � �� � � � � � � � �
ThinPrep® 3000 Processor Operator’s Manual 6.41

6 INSTRUMENT MAINTENANCE
This page intentionally left blank
6.42 ThinPrep® 3000 Processor Operator’s Manual

7. Trou
blesh
oo
ting
7. T
rou
ble
sho
oti
ng

TROUBLESHOOTING 7
C h a p t e r S e v e n
Troubleshooting
CONTENTS
SECTION A: Chapter Overview 7.1
SECTION B: Sample Errors 7.2
SECTION C: System Fault Errors 7.30
SECTION D: Batch Canceled Due To’ Reporting 7.53
CHAPTER OVERVIEW
Instrument troubleshooting falls into two categories: Sample Errors and System Fault Errors. This chapter addresses common error messages and corrective operator actions associated with each.
Note: Regular instrument maintenance, as described in Chapter 6, will reduce many instances of sample and system error.
Sample Errors 7.2
Special Sample Status
Sample Is Dilute 7.4
Reprocessing Required
Cap Tighten Failure 7.6
Duplicate Barcode 7.8
Filter Load Failure 7.10
Fixative Clog 7.12
Insufficient Vial Fluid 7.14
No Barcode 7.16
Out of Consumables 7.18
Pneumatic Failure 7.20
Slide Misprint 7.22
SECTION
A
ThinPrep® 3000 Processor Operator’s Manual 7.1

7 TROUBLESHOOTING
Reprocessing Required (continued)
Too Much Vial Fluid 7.24
Vial Cap Too Tight 7.26
Waste System Failure 7.28
System Fault Errors 7.30
Reprocessing Required
Vial Handling Operation 7.32
Filter Handling Operation 7.38
Slide Handling Operation 7.44
‘Batch Canceled Due To’ Reporting 7.53
SAMPLE ERRORS
At the conclusion of batch processing sample errors are reported on the batch report. Sample errors occur when a sample vial is being processed. They are “sample specific” and usually only affect the sample vial being processed.
Sample errors are listed at the beginning of a batch report and can appear under two different head-ings: Special Sample Status or Reprocessing Required. The reason for the error and the vial position are listed. Additionally, the vial position is marked with an asterisk on the processed sam-ples listing. Reprocessing Required vials require operator attention to address the type of error that occurred; all must be inserted into another batch for processing (a slide will not have been made).
SECTION
B
7.2 ThinPrep® 3000 Processor Operator’s Manual

TROUBLESHOOTING 7
Figure 7-1 Batch Report Example with Special Sample Status and Reprocessing Required
TP 3000 Batch Result
04/28/00 07:35
TP3 XX.XXXXXXXX
Serial No.: 00001A00A0
Tray A
Reprocessing Required
Reason Position
Slide Misprint A 5
A13
Sample ID# Position
000000010526 A 1
000000010527 A 2
000000010528 A 3
000000010529 A 4
000000010530 A 5*
000000010531 A 6
000000018376 A 7
000000018377 A 8
000000018378 A 9
000000018379 A10
000000018380 A11
000000018381 A12
A13*
000000018383 A14
000000010525 A15
000000010532 A16
000000010533 A17
000000010534
000000010535
000000010536 A20
000000010537 A21
000000010538 A22
000000010539 A23
000000010540 A24
000000010541 A25
000000018384
518Total Samples Processed
------------
No Barcode
DateInstrument/batch identification Software
revision
Time batch was started
Identifies sample error by tray location
Error reportingLists reason for error
Processed sample identification
Sample ID (barcode)
Total samples processed tally
Sample tray
Instrument serial number
ThinPrep® 3000 Processor Operator’s Manual 7.3

7 TROUBLESHOOTING
Sample Is Dilute Special Sample Status
This error message indicates the entire sample was utilized in preparing the slide. This is usually caused by a low concentration of cells in the sample. This message usually indicates a problem with the sample that was collected, rather than an issue with the instrument and its mechanisms. A slide is made from the sample vial.
Possible Cause• Low concentration of cells in the vial• Pneumatic system failure
Corrective Action1. If the slide is satisfactory for screening purposes, no further action is required.2. If the slide is inadequate, follow laboratory procedure for reporting unsatisfactory specimens.3. If the error persists on subsequent samples, perform pneumatic system testing. Refer to “PNEU-
MATIC SYSTEM TESTING” on page 6.13.
7.4 ThinPrep® 3000 Processor Operator’s Manual

TROUBLESHOOTING 7
Sample Is Dilute Special Sample Status
Inspect the slide that was prepared.
Follow laboratory procedure for reporting unsatisfactory specimens.Is the ThinPrep
slide satisfactory?
No further action required.Does the error
message persist with subsequent
samples?
Perform the pneumatic system test
Did the pneu-matic system
test pass?
Contact Hologic Technical Support.
No further action required.
No
Yes
Yes
No
Yes
No
ThinPrep® 3000 Processor Operator’s Manual 7.5

7 TROUBLESHOOTING
Cap Tighten Failure Reprocessing Required
The sample vial cap cannot be tightened by the vial gripper. The sample is not processed. If three consecutive Cap Tighten Failure errors occur within a batch, the batch is terminated.
Any combination of three consecutive instances of Cap Tighten Failure error and Vial Cap Too Tight error (refer to page 7.26) will terminate the batch.
Possible Cause
• The plastic outer packaging of the vial was not removed.
• Vial labeling covers torque features.
• The vial cap is damaged.
• A mechanism fault
Corrective Action1. The batch report indicates the position of the vial under the Reprocessing Required listing as Cap
Tighten Failure.2. Examine the vial cap and remove plastic outer packaging, if it is present. Examine the cap for
defect or damage.3. Reprocess the sample vial.4. If the error persists with subsequent batches, contact Hologic Technical Support.
Preventative Action
When loading sample vial trays, ensure that all vials are unwrapped of their outer packaging and do not exhibit any obvious damage.
7.6 ThinPrep® 3000 Processor Operator’s Manual

TROUBLESHOOTING 7
Cap Tighten Failure Reprocessing Required
No further action required.
Before reprocessing, remove any extra outer packaging on the vial.
Does the message persist?
Reprocess the sample.
Contact Hologic Technical Support.
Yes
No
ThinPrep® 3000 Processor Operator’s Manual 7.7

7 TROUBLESHOOTING
Duplicate Barcode Reprocessing Required
The instrument has detected two sample vials in the batch with the same sample identification num-ber (barcode). The sample with the duplicate identification number will not be processed. No slide is made from the vial bearing the duplicate barcode.
Possible Causes
• Duplicate barcode labels were inadvertently applied to different sample vials in the same batch.
Corrective Action1. The batch report indicates the position of the sample vial under Reprocessing Required listing as
Duplicate Barcode. Compare the barcode number of the flagged sample vial to the barcode num-bers of the other sample vials processed.
Note: It is important that both vials with the identical sample ID be removed from the sample tray and marked with their tray position. The slide processed from the first incidence of this num-ber is then associated with the first sample vial. (The instrument always processes samples vials in ascending order from posi-tion A1 to B40. The first occurrence of the identical sample ID number will always be at an earlier tray position and a slide will have been made.) The patient information must be checked and reconciled for both vials.
2. The second sample needs to be reprocessed, as no slide was made. Following the reconciliation of the patient information with the correct vials, apply a new barcode label to the second vial and insert it into a new batch to be processed.
Note: Do not stack labels. Attempt to remove the old barcode label. If it cannot be removed, completely obliterate the barcode with a permanent marker or pen. Place the new barcode label else-where on the vial.
3. If this error persists with subsequent batches, contact Hologic Tech-nical Support.
��������������!��
�)*&%*�� �B��'���AA�AAAAAAAA������4�������2(��(������
�������������?!����
������ ��������+!������������� �2'
�����9+C ���������������2�'&@ �2�������2�'&B �&�������2�'&% ���������2�'&7 �)�������2�'�� �'�������2�'�2 �@�������2%�B@ �B�������2%�BB �%�������2%�B% �7�������2%�B7 �2��������2%�%� �22�������2%�%2 �2&�������2%�%& �2��������2%�%� �2)�������2�'&B �2'D�������2�'�& �2@�������2�'�� �2B�������2�'�) �2%�������2�'�' �27�������2�'�@ �&��������2�'�B �&2�������2�'�% �&&�������2�'�7 �&�
7.8 ThinPrep® 3000 Processor Operator’s Manual

TROUBLESHOOTING 7
Duplicate Barcode Reprocessing Required
��������������!��
�)*&%*�� �B��'���AA�AAAAAAAA������4�������2(��(������
�������������?!����
������ ��������+!������������� �2'
�����9+C ���������������2�'&@ �2�������2�'&B �&�������2�'&% ���������2�'&7 �)�������2�'�� �'�������2�'�2 �@�������2%�B@ �B�������2%�BB �%�������2%�B% �7�������2%�B7 �2��������2%�%� �22�������2%�%2 �2&�������2%�%& �2��������2%�%� �2)�������2�'&B �2'D�������2�'�& �2@�������2�'�� �2B�������2�'�) �2%�������2�'�' �27�������2�'�@ �&��������2�'�B �&2�������2�'�% �&&�������2�'�7 �&�
Locate the sample vial indicated on the batch report. Mark the vial with its tray posi-tion. Check its barcode against barcodes on
already processed vials in that batch.
Mark the tray position on each vial. The slide that was processed is associated with the first sample vial. (i.e., the first vial with that barcode number - the lower tray position
number.)
The patient information must be checked and reconciled for both vials.
Apply a new bar code label to the second vial. (Remove/obliterate old barcode.)
Reprocess the sample.
Does the message persist?
Contact Hologic Technical Support.
No further action required.
Contact Hologic Technical Support.
Is the barcode a duplicate?
No
Yes
Yes
No
ThinPrep® 3000 Processor Operator’s Manual 7.9

7 TROUBLESHOOTING
Filter Load Failure Reprocessing Required
A filter was not properly pressed on to the sample processing arm from the filter elevator. That filter is disposed of and a new filter is picked and presented. Three attempts are made on the same vial before the Filter Load Failure error occurs. The batch is canceled. The sample was not processed and a slide was not made.
Possible Cause• The O-rings on the sample processing arm are not sufficiently lubricated.• A mechanism fault has occurred.
Corrective Action1. The batch report indicates the position of the vial under the Reprocessing Required listing as Fil-
ter Load Failure.2. Look to see if there is a dropped filter or other cause for interference in the filter area. 3. Perform the Lube O-Rings maintenance, taking care to lubricate the inner surface of the pneu-
matic test vial prior to testing. Refer to “LUBRICATING THE SAMPLE PROCESSING ARM O-RINGS” on page 6.10.
4. Reprocess the sample.5. If the message persists with subsequent processing, contact Hologic Technical Support.
Preventative Action
Perform the Lube O-Rings maintenance daily or at the start of each shift. Perform the pneumatic test when prompted.
7.10 ThinPrep® 3000 Processor Operator’s Manual

TROUBLESHOOTING 7
Filter Load Failure Reprocessing Required
Filter Load Failure error.
Discard dropped filters.Are dropped filters found in the filter
area?
Contact Hologic Technical Support.
Perform Lube O-Rings maintenance.
Reprocess the sample.
Does the message persist?
No further action required.
No
Yes
Yes
No
ThinPrep® 3000 Processor Operator’s Manual 7.11

7 TROUBLESHOOTING
Fixative Clog Reprocessing Required
A fixative clog developed, causing the batch to terminate. The sample must be reprocessed; no slide was made.
Possible Cause
• The instrument has been idle for an hour or more, enabling the fixative solution to form a clog in the spray nozzle.
• The fixative spray nozzle was not fully cleared by the previous maintenance.
• Pneumatic system failure
Corrective Action1. Perform the fixative system preventative maintenance, as described in “FIXATIVE SYSTEM PRE-
VENTATIVE MAINTENANCE” on page 6.5. 2. When the spray is flowing freely, reprocess the sample.3. If the fixative maintenance display appears, even if the fixative seems to be flowing freely, per-
form a pneumatic system test.4. If the pneumatic test passes, reprocess the sample.
Preventative Action
Always perform the fixative maintenance when prompted by the instrument.
7.12 ThinPrep® 3000 Processor Operator’s Manual

TROUBLESHOOTING 7
Fixative Clog Reprocessing Required
Perform the Fixative System Maintenance, as described in Chap-
ter 6, Section B.
Perform a pneumatic system test.
Contact Hologic Technical Support.
Contact Hologic Technical Support.
No further action required.
Yes
No
Yes
No
No
Yes
No further action required.
Reprocess the sample.
Does the message persist?
Did the test
pass?
Does the message persist?
Reprocess the sample.
ThinPrep® 3000 Processor Operator’s Manual 7.13

7 TROUBLESHOOTING
Insufficient Vial Fluid Reprocessing Required
The vial does not contain enough sample fluid to properly process the sample. The sample was not processed and a slide was not made.
Possible Cause
• Previous testing with the sample vial may have reduced the volume of sample fluid in the vial below the minimum required.
• A displaced or missing cap liner may have caused fluid to leak out of the sample vial.
• A pneumatic system failure has occurred.
WARNING: Toxic Mixture Flammable Liquid and Vapor
Corrective Action1. The batch report indicates the position of the vial under the Reprocessing Required listing as
Insufficient Vial Fluid. Check the fluid level in the vial.2. Add additional PreservCyt Solution to the vial if fluid level is below the frosted area indicated on
the vial. Do not fill beyond the frosted area.3. Reprocess the sample vial.4. If error recurs with the sample vial, perform the pneumatic system test. Refer to “PNEUMATIC
SYSTEM TESTING” on page 6.13.
Preventative ActionPrior to sample processing, ensure that the sample fluid level is within the frosted area of the sample vial.
��� ��
������
Frosted area
7.14 ThinPrep® 3000 Processor Operator’s Manual

TROUBLESHOOTING 7
®
Insufficient Vial Fluid Reprocessing Required
WARNING: Toxic Mixture Flammable Liquid and Vapor
Visually check the fill level of the vial. Add PreservCyt Solution, if needed.
Reprocess the sample.
Does the message persist?
Perform the pneumatic system test.
No further action required.
Contact Hologic Technical Support.
Contact Hologic Technical Support.
No further action required.
Did the pneu-matic system
test pass?
Reprocess the sample.
Yes
No
Yes
No
Yes
No
Does the message persist?
ThinPrep 3000 Processor Operator’s Manual 7.15

7 TROUBLESHOOTING
No Barcode Reprocessing Required
The barcode scanner cannot scan the barcode information on the sample vial. The sample is not pro-cessed. If two consecutive No Barcode errors occur within a batch, the batch is terminated.
Possible Cause
• The barcode label is missing.
• The barcode label is not applied to the vial properly.
• The barcode label may be damaged.
• Wrong type of barcode was applied.
Corrective Action1. The Batch Report indicates the position of the sample vial under the Reprocessing Required list-
ing as No Barcode. Confirm that a barcode label is correctly applied to the sample vial.2. If the barcode label is missing, place a label onto the vial as outlined in “Barcoded Sample Vials”
on page 5.12. Be sure to review the patient information, it must agree with the sample ID. Repro-cess the sample vial.
3. If a barcode label is present, check the condition of the label. A smudged, wrinkled or torn bar-code label may not be scanned. Replace the label if this is the case. (Be sure to update the patient information with a matching label, as well.) Reprocess the sample vial.
Note: Do not stack labels. Attempt to remove the old barcode label. If it cannot be removed, com-pletely obliterate the barcode with a permanent marker or pen. Place the new barcode label elsewhere on the vial.
4. Confirm that a bar code label for use with the ThinPrep 3000 processor is applied to the sample vial. Apply a correct type of bar code label and update the patient information with a matching label.
5. If the barcode label is not missing or damaged, attempt to reprocess the sample vial as is. 6. If the No Barcode error persists with subsequent batches, contact Hologic Technical Support.
Preventative ActionBefore the vial is placed into the sample vial tray, confirm that a barcode label is properly positioned on the vial. Follow the recommended label application protocol in “Barcoded Sample Vials” on page 5.12.
7.16 ThinPrep® 3000 Processor Operator’s Manual

TROUBLESHOOTING 7
No Barcode Reprocessing Required
Examine the sample vial(s) that had a No Barcode error.
Affix a barcode label of the correct type. Update the patient
information.
Check the orientation and condition of the label. Replace if
necessary. Remove/obliterate old barcode label. (Update the patient
information.)
Contact Hologic Technical Support.
No further action required.
Does the message persist?
Is the barcode label of the correct type for use with the
TP-3000?
Is there a barcode label
adhered to the vial?
No
No
Yes
Yes
No
Yes
Reprocess the sample.
ThinPrep® 3000 Processor Operator’s Manual 7.17

7 TROUBLESHOOTING
Out of Consumables Reprocessing Required
Required consumable item(s) are not in place to process sample vials, consequently the sample vial cannot be processed.
If the instrument detects that there are not enough consumable items to complete processing a sam-ple, the “Items Must Be Addressed” message screen appears, listing the consumables required for further processing.
You may follow the screen prompts and load supplies into the instrument or you may press Cancel to end the batch. The batch terminates and the last sample in process will not have a slide made. It is listed on the batch report as Out of Consumables.
Possible Cause
• Instrument is out of ThinPrep Pap test filters.
• Instrument is out of slides, or cannot detect slide cartridges.
• Staining racks are full.
Corrective Action1. Check and load items as prompted by the message screen.
Preventative Action
Items appear on the message screen after Start Batch is selected. Follow the message screen prompts to load necessary items.
7.18 ThinPrep® 3000 Processor Operator’s Manual

TROUBLESHOOTING 7
Out of Consumables Reprocessing Required
Items Must Be Addressed: Filters
Empty Waste Bottle and Waste Bins Insert Clean Fixative Shield Cancel
Slides Staining Racks Continue Sample Trays Add Fixative Fluid
The batch halts processing and the message screen shown below appears.
Note: Only items needing attention will be listed. The display may show some or all of the items listed below.
Press Continue. Wait for the instrument to
unlock the doors. Load the supplies listed on the screen. Close the doors and press Con-
tinue.
Press Cancel. The batch will terminate. The last sample in process
will not have a slide made. It will be listed on
the report as "Out of Consumables".
Do you wish to load supplies and continue process-ing, or cancel the
batch?
Reprocess the sample.
Load supplies Cancel the batch
ThinPrep® 3000 Processor Operator’s Manual 7.19

7 TROUBLESHOOTING
Pneumatic Failure Reprocessing Required
A pneumatic error was detected while a sample was being processed. The sample was not processed and a slide was not made.
Possible Cause
• The ThinPrep Pap test filter is damaged.
• Pneumatic pressure is out of range.
• Failure of instrument mechanisms.
Corrective Action1. Perform a pneumatic system test. Refer to “PNEUMATIC SYSTEM TESTING” on page 6.13.2. If the test passes, reprocess the sample.3. If the pneumatic test fails, or if the message persists with subsequent processing, contact Hologic
Technical Support.
7.20 ThinPrep® 3000 Processor Operator’s Manual

TROUBLESHOOTING 7
Pneumatic Failure Reprocessing Required
Perform a pneumatic
system test.
Contact Hologic Technical Support.
Contact Hologic Technical Support.
No further action required.
Does the message persist?
Reprocess the sample.
Did the test pass?
No
Yes
No
Yes
ThinPrep® 3000 Processor Operator’s Manual 7.21

7 TROUBLESHOOTING
Slide Misprint Reprocessing Required
The slide ID reader was not able to confirm that the patient identification number from the barcode label was properly printed onto the microscope slide. The sample is not processed. If two consecutive misprint errors occur within a batch, the batch is terminated.
Possible Cause
• The printer ribbon needs replacing.
• The slide printer did not correctly or legibly print the barcode number onto the frosted end of the microscope slide.
• The printer ribbon cartridge was installed improperly.
• The microscope slide(s) may have a defect on the frosted area, such as a chip, void or dark spot.
• The microscope slides are not loaded correctly into the Slide Cartridge.
• The thumbscrew on the slide printer chassis is not secured.
• There is a problem with the slide print mechanism or slide ID reader.
Corrective Action
WARNING: Sharp Edges Glass
1. The Batch report indicates the position of the vial under the Reprocessing Required listing as Slide Misprint. Inspect the slide(s) in the slide waste bin. If the printed text is too light, the ribbon should be changed. See “REPLACING THE SLIDE PRINTER RIBBON” on page 6.34. Reprocess the sample vial.
2. If the slide(s) in the waste bin appear to be marred or defective, check the slide cartridges to determine if other slides are defective. If so, replenish the cartridge with new slides. While the cartridge is open, confirm that the slides are oriented correctly. Refer to “ThinPrep Microscope Slides and Slide Cartridges” on page 5.7.
3. Improper installation of the printer ribbon cartridge can deposit ink on the slide surface and cause a “Slide Misprint” error message. Refer to “REPLACING THE SLIDE PRINTER RIBBON” on page 6.34 for installing a printer ribbon cartridge.
4. Confirm that the thumbscrew on the slide printer chassis is tightened. Refer to “CLEANING THE SLIDE PATH” on page 6.17, cleaning the slide path.
5. Reprocess the sample vial.6. If the error persists with subsequent batches, contact Hologic Technical Support.
Preventative ActionInspect the quality of the printed text on the slides from time to time. Change the printer ribbon car-tridge when the text becomes too light.
7.22 ThinPrep® 3000 Processor Operator’s Manual

TROUBLESHOOTING 7
ThinPrep® 3000 Processor Operator’s Manual 7.23
Slide Misprint Reprocessing Required
Slide misprint error. Two in a row will terminate the batch.
No further action required.
Replace the printer ribbon. Refer to
Chapter 6, Section M.
Reload the slide car-tridge. Refer to
Chapter 5, Section D.
Install the printer rib-bon correctly. Refer to Chapter 6, Section M.
Tighten the thumb-screw. Refer to
Chapter 6, Section F.
Contact Hologic Technical Support.
Reprocess the sample.
Does the message persist?
Is the thumbscrew on the slide printer chassis secure?
Are the slides in the
slide cartridges oriented cor-
rectly?
Is the printer ribbon installed
correctly?
Is the printing on the
slides in the slide waste bin too
light?
Yes
No
No
No
No
Yes
Yes
Yes
No
Yes

7 TROUBLESHOOTING
Too Much Vial Fluid Reprocessing Required
The vial has too much sample fluid to properly process a sample. The sample was not processed and a slide was not made.
Possible Cause
• There is too much fluid in the sample vial for the instrument to process a ThinPrep slide.
• Mechanism or pneumatic system fault.
Corrective Action1. The Batch Report indicates the position of the vial under the Reprocessing Required listing as Too
Much Vial Fluid. Check the sample.
• If the fluid level is above the frosted area of the vial remove excess fluid (save it in an appro-priate container) and reprocess.
2. Perform the pneumatic system test. Refer to “PNEUMATIC SYSTEM TESTING” on page 6.13. If the test passes, reprocess the sample.
3. If the pneumatic test fails, or if the message persists with subsequent processing, contact Hologic Technical Support.
Preventative ActionIf PreservCyt Solution is added to a sample vial, ensure that the fluid does not exceed the maximum level, which is indicated by the frosted area of the vial.
��� ��
������
Frosted area
7.24 ThinPrep® 3000 Processor Operator’s Manual

TROUBLESHOOTING 7
Too Much Vial Fluid Reprocessing Required
Too Much Vial Fluid error. Remove the vial from the try and
inspect it.
Remove excess fluid and store in an appropriate container.
Is the volume above the frosted area of the vial?
Did the pneumatic system test
pass?
Contact Hologic Technical Support.
Does the message persist?
Contact Hologic Technical Support.
Perform the pneumatic system test.
No further action required.
Reprocess the sample.
Yes
No
Yes
Yes
No
No
ThinPrep® 3000 Processor Operator’s Manual 7.25

7 TROUBLESHOOTING
Vial Cap Too Tight Reprocessing Required
The instrument cannot remove the cap from the sample vial. The sample vial was not processed and a slide was not made.
Possible Cause
• The cap is screwed onto the vial too tightly.
• A mechanism fault inhibits the removal of the sample vial cap.
Corrective Action1. The batch report indicates the position of the vial under the Reprocessing Required listing as Vial
Cap Too Tight. 2. Before reprocessing, loosen the cap. Tighten again and align the mark on the cap with the line on
the vial. 3. Reprocess the sample vial.4. If the error persists with subsequent batches, contact Hologic Technical Support.
Preventative ActionAvoid overtightening the cap onto the sample vial.
Provide the ThinPrep Pap Test Quick Reference Guide sampling instruction sheet to the physician or clinic.
��� ��
������
Line on cap and line on vial should meet or slightly overlap.If the cap on the vial does not have a line, ensure the cap is tightened securely.
7.26 ThinPrep® 3000 Processor Operator’s Manual

TROUBLESHOOTING 7
Vial Cap Too Tight Reprocessing Required
Before reprocessing, loosen the cap. Tighten again to align the mark on the
cap with the line on the vial.
Reprocess the sample.
Does the message persist?
Yes Contact Hologic Technical Support.
No further action required.
No
ThinPrep® 3000 Processor Operator’s Manual 7.27

7 TROUBLESHOOTING
Waste System Failure Reprocessing Required
The waste evacuation system is not functioning properly. The liquid waste cannot be removed during sample processing. The sample cannot be processed. A slide was not made.
Possible Cause
• The waste bottle is full.
• Damaged or kinked pinch valve tubing
• Tubing connected incorrectly
• Pneumatic system failure
• Damaged ThinPrep Pap test filter
Corrective Action1. Check the waste bottle fluid level. Empty the waste bottle if fluid is above the maximum level
line. 2. Check the pinch valve tubing connection. Reconnect the tubing if it is disconnected, or connected
to the wrong fitting. (Refer to “PINCH VALVE TUBING REPLACEMENT” on page 6.26.) Replace tubing if it is damaged.
3. Contact Hologic Technical Support if the error persists.
Preventative ActionEmpty the waste bottle when prompted to do so by the instrument. Refer to “WASTE SYSTEM MAINTENANCE” on page 6.28.
Replace the pinch valve tubing as recommended in “PINCH VALVE TUBING REPLACEMENT” on page 6.26.
Perform the pneumatic system testing on a weekly basis as outlined in “PNEUMATIC SYSTEM TESTING” on page 6.13.
7.28 ThinPrep® 3000 Processor Operator’s Manual

TROUBLESHOOTING 7
Waste System Failure Reprocessing Required
Inspect the waste bottle
fluid level
Inspect the pinch valve tubing and con-
nection.
Empty the waste bot-tle as described in
Chapter 6, Section J.
Perform the pneumatic sys-tem test. Refer to Chapter 6,
Section E.
Contact Hologic Technical Support.
No further action required.
Does the message persist?
Reconnect or replace the pinch tubing as
described in Chapter 6, Section I.
Reprocess the sample.
Did the test pass?
Is the tubing damaged
or discon-nected?
Is it full?No
Yes
Yes
No
No
Yes
Yes
No
Contact Hologic Technical Support.
ThinPrep® 3000 Processor Operator’s Manual 7.29

7 TROUBLESHOOTING
SYSTEM FAULT ERRORS Reprocessing Required
System fault errors indicate a mechanical malfunction has occurred within the instrument while han-dling a consumable item, during sample processing, or during system self test. The sample is not processed if the fault occurs during batch processing. The instrument also stops processing the remainder of the batch.
A message will appear on the display, indicating the area of the error: vial operation, filter operation or slide operation. Many of these conditions may be cleared by the operator and are described on the following pages.
SECTION
C
�
�
�
�������
���� �� ��������
Slide operation
Vial operation
Filter operation
7.30 ThinPrep® 3000 Processor Operator’s Manual

TROUBLESHOOTING 7
System Fault Recovery Overview
A System Fault occurs.
Message is displayed: "Batch Canceled Due to
Vial/Filter/Slide Error.
Press Continue. The doors unlock. Remove sample trays
and any prepared slides. Unpro-cessed samples go into a new
batch.
Contact Hologic Technical Support.
Press Continue. The doors unlock. Remove sample trays and any prepared
slides.
Was recovery
successful?
The instrument displays a "Check Mechanism"
message.
Close the doors and press Continue. An "Attempting Recovery" message is displayed.
The instrument resets, rehomes all mechanisms.
The doors unlock. Perform a general check of the indicated area of error. (Look for a dropped
filter or a jammed slide, dropped sample vial etc.)
Press Continue. The instrument moves mechanisms to allow internal access.
The instrument halts and a message indi-cates the area of error: Vial/Filter/ Slide. The batch report will print.
Yes No first time
No second time
ThinPrep® 3000 Processor Operator’s Manual 7.31

7 TROUBLESHOOTING
Vial Handling Operation
1. The sample vial is picked from the tray.
2. The barcode is scanned and read.
3. The sample vial is delivered to the sample processing station and the sample is dispersed by spinning the vial.
4. The vial is uncapped.
5. The filter is introduced for cell collection.
6. The vial is recapped.
7. The sample vial is returned to the sample tray.
����
��
�
����
��
�
��
�
�
����
��
�
7.32 ThinPrep® 3000 Processor Operator’s Manual

TROUBLESHOOTING 7
Vial handling system faultA system fault involving sample vial processing or transport will terminate processing and the fol-lowing screen will be displayed:
Possible Cause
• Labels applied improperly to the sample vial
• A foreign object is in the sample vial.
• Barcode scanning problem or error
• Damaged sample vial
• Mechanism fault
Corrective Action1. (If desired, the audible beep can be stopped by pressing Alarm Off.) Press Continue. The follow-
ing screen displays:
WARNING: Sharp Edges & Hot Surfaces
2. Open the front door when it unlocks.3. Remove the sample vial trays and look in the vial bay (Area A) to see if there is a dropped sample
vial or a vial stuck in the sample processing station. Retrieve the vial and cap for reprocessing.
������.�!�����������������=���1�������3����
(����,��
2'AAAAAAE F ������!�
Error/sample status codes (record for Hologic Technical Support)
,��+��������:�(��+��������=����.���(���(
�����+���������������!�8���.������� ������!�
ThinPrep® 3000 Processor Operator’s Manual 7.33
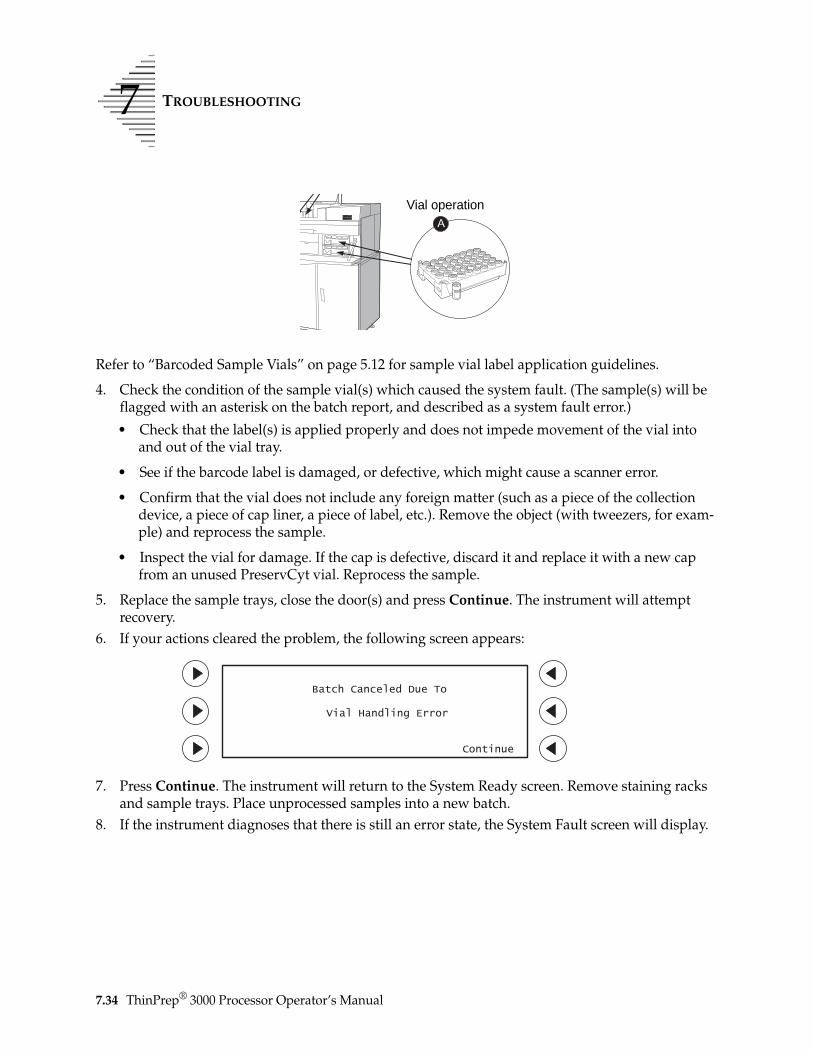
7 TROUBLESHOOTING
Refer to “Barcoded Sample Vials” on page 5.12 for sample vial label application guidelines.
4. Check the condition of the sample vial(s) which caused the system fault. (The sample(s) will be flagged with an asterisk on the batch report, and described as a system fault error.)
• Check that the label(s) is applied properly and does not impede movement of the vial into and out of the vial tray.
• See if the barcode label is damaged, or defective, which might cause a scanner error.
• Confirm that the vial does not include any foreign matter (such as a piece of the collection device, a piece of cap liner, a piece of label, etc.). Remove the object (with tweezers, for exam-ple) and reprocess the sample.
• Inspect the vial for damage. If the cap is defective, discard it and replace it with a new cap from an unused PreservCyt vial. Reprocess the sample.
5. Replace the sample trays, close the door(s) and press Continue. The instrument will attempt recovery.
6. If your actions cleared the problem, the following screen appears:
7. Press Continue. The instrument will return to the System Ready screen. Remove staining racks and sample trays. Place unprocessed samples into a new batch.
8. If the instrument diagnoses that there is still an error state, the System Fault screen will display.
�
Vial operation
�������������+!���
=���1�������3����
������!�
7.34 ThinPrep® 3000 Processor Operator’s Manual

TROUBLESHOOTING 7
ThinPrep® 3000 Processor Operator’s Manual 7.35
Repeat steps 1 through 7, above, to try to clear any obvious mechanical jams or interference. If the system does not recover, the following screen is displayed:
Any mechanical faults should be addressed by Hologic Technical Support. If errors recur, or do not appear as described here, contact Hologic Technical Support.
������.�!�����������������.�����1�������3����
(����,��
2'AAAAAAE F ������!�
����������-"��������
������!�

7 TROUBLESHOOTING
7.36 ThinPrep® 3000 Processor Operator’s Manual
Vial Handling System Fault RecoveryWARNING: Sharp Edges Hot Surfaces
A System Fault occurs.
Are there any
dropped or stuck vials?
continued
If the cap is defective replace it with a new cap from an unused Preserv-
Cyt vial. Reprocess the sample.
With tweezers, remove any foreign object from the sample vial. Be sure
the PreservCyt volume remains within the frosted area of the vial.
Retrieve and reprocess the sample.
Inspect the vial which was being han-dled when the fault occurred. (Marked with an asterisk on the batch report.)
The doors unlock. Remove the sample trays and inspect
the vial bay area.
Press Continue. The instrument moves mechanisms to allow internal
access.
The instrument halts, with a display of “Vial Handling Error”. The batch report
prints.
Yes
No
No
Yes
Yes
No
No
Yes
Fix any incorrectly applied labels. Refer to Chapter 5, Section C, for
proper label application.
Are the labels applied
properly?
Is there any foreign
matter in the vial?
Is the vial cap dam-
aged?

TROUBLESHOOTING 7
Vial Handling System Fault Recovery (continued)
Vial Handling Errors Continued
Replace sample vial trays into the instru-ment. Close the doors and press Continue.
The instrument will attempt recovery.
"Batch Canceled Due to Vial Handling Error" message.
Press Continue.
Unload sample trays and staining racks. Unprocessed samples go into a new batch
for processing.
Allow the instrument to attempt to recover.
"Check Mechanism" message displays. Press Continue.
Remove the sample trays and any prepared slides.
Contact Hologic Technical Support.
Repeat the steps outlined above
once more. Press Continue.
See Filter Error Handling Section.
See Slide Error Handling Section.
Did it recover?
Does "Vial Handling Error" display?
Does "Filter Handling Error" display?
Does "Slide Handling Error" display?
Yes No
No
Yes
Yes
Yes
No
ThinPrep® 3000 Processor Operator’s Manual 7.37

7 TROUBLESHOOTING
Filter Handling Operations
1. A ThinPrep Pap test filter is picked from the tray.2. The filter is delivered to the filter elevator.3. The sample processing arm retrieves the filter.4. The filter is brought to the sample processing station and introduced to the
prepared sample.5. The sample processing arm rotates and precisely meets with the slide cell transfer arm, bearing a
slide. Cell transfer occurs.6. The used filter is returned to the filter elevator for disposal.
�
� �
�
��
Disposal chute
Filter elevator (detail)
New filter position Used filter
position
7.38 ThinPrep® 3000 Processor Operator’s Manual

TROUBLESHOOTING 7
Filter handling system faultIf the instrument detects an error due to a filter operation malfunction, processing will halt and the following screen will be displayed:
Possible Cause
• Error finding, transporting or disposing of filter
• Filter dropped
• A non-gynecological filter was detected. (Error code 16 13 42 30)
• Filter stuck on processing arm
• Filter stuck in filter tray
• Mechanism fault
Operator Corrective Action1. If desired, the audible beep can be stopped by pressing Alarm Off. Press Continue. The follow-
ing screen is displayed.
2. Open the front door when it unlocks.
WARNING: Sharp Edges Hot Surfaces
3. Remove the filter trays and look in the filter bay (Area B) to see if there are any filters lying in or near the filter tray area. Discard any misplaced filters.
������.�!�����������������.�����1�������3����
(����,��
2'AAAAAAE F ������!�
Error/sample status codes (record for Hologic Technical Support)
,��+��������:�(��+��������.������.���(����
�����+���������������!�8���.������� ������!�
ThinPrep® 3000 Processor Operator’s Manual 7.39
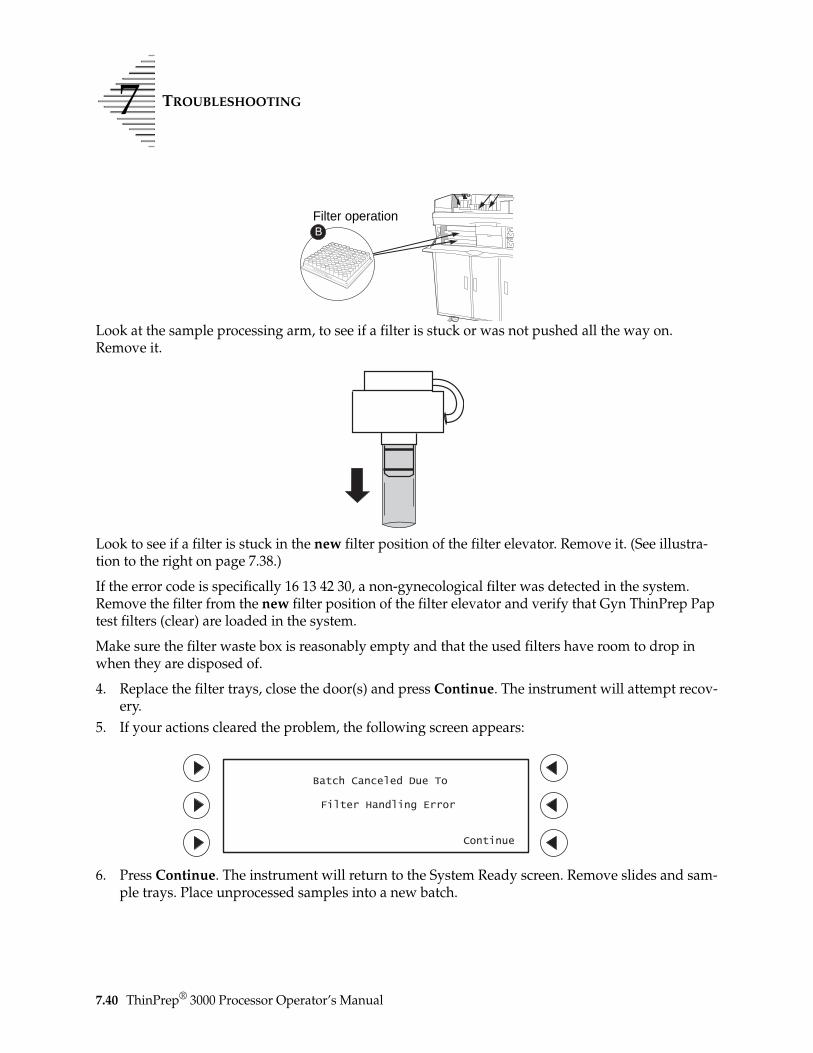
7 TROUBLESHOOTING
Look at the sample processing arm, to see if a filter is stuck or was not pushed all the way on. Remove it.
Look to see if a filter is stuck in the new filter position of the filter elevator. Remove it. (See illustra-tion to the right on page 7.38.)
If the error code is specifically 16 13 42 30, a non-gynecological filter was detected in the system. Remove the filter from the new filter position of the filter elevator and verify that Gyn ThinPrep Pap test filters (clear) are loaded in the system.
Make sure the filter waste box is reasonably empty and that the used filters have room to drop in when they are disposed of.
4. Replace the filter trays, close the door(s) and press Continue. The instrument will attempt recov-ery.
5. If your actions cleared the problem, the following screen appears:
6. Press Continue. The instrument will return to the System Ready screen. Remove slides and sam-ple trays. Place unprocessed samples into a new batch.
�Filter operation
�������������+!���
.�����1�������3����
������!�
7.40 ThinPrep® 3000 Processor Operator’s Manual

TROUBLESHOOTING 7
ThinPrep® 3000 Processor Operator’s Manual 7.41
7. If the instrument diagnoses that there is still an error state, the System Fault screen will display.
Repeat steps 1 through 6, above, to try to clear any obvious mechanical jams or mishandled fil-ters. If the system does not recover, the following screen is displayed:
8. Press Continue. The main menu will display. Remove sample trays and staining racks.Any mechanical faults should be addressed by Hologic Technical Support. If errors recur, or do not appear as described here, contact Hologic Technical Support.
������.�!�����������������.�����1�������3����
(����,��
2'AAAAAAE F ������!�
����������-"��������
������!�

7 TROUBLESHOOTING
7.42 ThinPrep® 3000 Processor Operator’s Manual
Filter Handling System Fault RecoveryWARNING: Sharp Edges Hot Surfaces
A System Fault occurs.
The instrument halts, with a display of "Filter Handling Error". The batch report prints.
Press Continue. The instrument moves mechanisms to allow internal access.
The doors unlock. Remove the filter trays and inspect the filter bay area.
Replace filter trays into the machine. Close the doors and press Continue. The instrument will attempt recovery.
Discard filter(s).
Remove the filter from the processing arm and discard.
Continued
Remove the filter from the filter elevator and discard.
Are there any dropped filters?
Is a filter stuck on
the processing arm?
Is a filter stuck in the filter elevator?
Yes
Yes
Yes
No
No
No

TROUBLESHOOTING 7
Filter Handling System Fault Recovery (continued)
Filter Handling Errors Continued
"Batch Canceled Due to Filter Error" message. Press Continue.
Unload sample trays and staining racks. Unprocessed samples go into a new batch for processing.
Allow the instrument to attempt to recover.
"Check Mechanism" message displays. Press Continue.
Remove the sample trays and any prepared slides.
Contact Hologic Technical Support.
See Slide Error Handling Section.
See Vial Error Han-dling Section.
Repeat the steps outlined above
once more. Press Continue.
Did it recover?
Does "Filter Handling Error" display?
Does "Vial Handling Error" display?
Does "Slide Handling Error"
display?
Yes No
Yes
Yes
No
No
Yes
ThinPrep® 3000 Processor Operator’s Manual 7.43

7 TROUBLESHOOTING
Slide Handling Operations
1. Slide cartridge(s) loaded with slides, are placed in the instrument.2. The slide translator picks a slide from the cartridge and carries it to the slide printer.3. The barcode number scanned from the sample vial is printed onto the slide, along with the time,
date and facility name (optional).4. The slide translator hands the slide off to the slide cell transfer arm.5. The slide cell transfer arm pivots to convey the slide to meet the ThinPrep Pap test filter for cell
transfer.6. The slide cell transfer arm delivers the slide to the fixative dispenser, where fixative is applied.7. The prepared slide is placed into a staining rack.
�������
����
�
�
��
�
��
7.44 ThinPrep® 3000 Processor Operator’s Manual

TROUBLESHOOTING 7
Slide handling system faultA system fault involving microscope slide transport or processing will halt the batch and the follow-ing screen will be displayed:
Possible Cause:
• Slide(s) jammed when picked from slide cartridge.
• Slide misprint or caught in printer area
• Slide fails to be released from slide transport arm.
• Slide holder mechanism not clean enough (error code 16 17 67 xx or 16 17 68 xx)
• Slide not properly ejected into the staining rack
• Mechanism fault
Corrective Action:1. If desired, the audible beep can be stopped by pressing Alarm Off. Press Continue. The follow-
ing screen displays:
2. Open the front door and top door when they are unlocked.
������.�!����������������������1�������3����
(����,��
2'AAAAAAE F ������!�
Error/sample status code (record for Hologic Technical Support)
,��+����,�34
�����,�34��������������"��!��������:������.���(���� � ,�3
�����+���������������!�8���.������� ������!�
ThinPrep® 3000 Processor Operator’s Manual 7.45

7 TROUBLESHOOTING
WARNING: Glass Sharp Edges
3. Look in the slide handling area (Area C) for stuck or broken slides.
a. Check the staining racks to see if a slide was not ejected properly. (As example, the slide bumped the rack and was not ejected, or the staining rack was not aligned correctly.)
If this is the case, manually remove the slide.
b. Check the Slide Cell Transfer Arm to see if a slide was not released from the slide clamps or is stuck due to fixative buildup. To get a clearer view of this apparatus, you may remove the staining racks, fixative shield, the filter trays and/or the sample vial trays.
Press the OPEN prompt on the user interface to open the slide clamps of the slide cell transfer arm.
If a slide is present, manually remove it.
Press the CLOSE prompt on the user interface to close the slide clamps.
�
�������
���� �� ��������
Slide operation
The staining rack should be seated flat on its bottom surface.
Incorrect installation Correct installation
7.46 ThinPrep® 3000 Processor Operator’s Manual

TROUBLESHOOTING 7
If the numeric error code is specifically 16 17 67 xx or 16 17 68 xx, the slide cell transfer arm must be thoroughly cleaned, especially the slide presence switch and the slide clamps. Refer to “CLEANING THE SLIDE PATH” on page 6.17.
Note: The slide path must be cleaned regularly, as prompted.
c. Open the slide printer lid covering the slide printer area. Visually inspect the area to see if a slide has collided with the printer or fallen off the track (it may be above or below the print platform). Loosen the thumbscrew and lift the slide printer assembly to look for a slide under-neath. Manually remove any slide located here.
Retighten the thumbscrew when done.
d. Lift out the slide cartridges and see if a slide jammed while exiting the cartridge. Manually remove the slide and check that the remaining slides are positioned correctly in the cartridge.
Slide presence switch
Slide clamps
Slide cell transfer arm, detail.
The slide cell transfer arm, viewed from the vial bay with the sample trays removed.
Slide printer area Slide printer assembly module
ThinPrep® 3000 Processor Operator’s Manual 7.47

7 TROUBLESHOOTING
Refer to “ThinPrep Microscope Slides and Slide Cartridges” on page 5.7 for a description of the correct slide/cartridge loading procedure.
Keep the slide cartridges free of glass chips or slide dust for optimal operation.
e. See if the fixative spray nozzle is working freely. Ordinarily a fixative clog or low CellFyx Solution level will prompt a message specifically for that. Sometimes a clog will require fur-ther attention to fully dissolve it. Refer to “FIXATIVE SYSTEM PREVENTATIVE MAINTE-NANCE” on page 6.5 for detailed steps on reversing clogs. If the nozzle will not spray freely in a few attempts, contact Hologic Technical Support.
4. Close the door(s) and press Close to shut the slide clamps. Press Continue. The instrument will attempt recovery.
If your actions cleared the problem, the following screen will be displayed:
5. Press Continue. The instrument will return to the System Ready screen. Remove slides and sam-ple trays. Place unprocessed samples into a new batch.
If the instrument diagnoses that there is still an error state, the System Fault screen will display.
Repeat steps 1 through 5, above, to try to clear any obvious mechanical jams or interference. If the system does not recover, the following screen is displayed:
�������������+!���
�����1�������3����
������!�
7.48 ThinPrep® 3000 Processor Operator’s Manual

TROUBLESHOOTING 7
ThinPrep® 3000 Processor Operator’s Manual 7.49
6. Press Continue. The main menu will display. Remove sample trays and staining racks.Any mechanical failures should be addressed by Hologic Technical Support. If errors recur, or do not appear as described here, contact Hologic Technical Support.
����������-"��������
������!�

7 TROUBLESHOOTING
7.50 ThinPrep® 3000 Processor Operator’s Manual
Slide Handling System Fault RecoveryWARNING: Glass Sharp Edges
A System Fault occurs.
The instrument halts, with a display of “Slide Handling Error”. The batch
report prints.
Press Continue. The instrument moves mechanisms to allow internal
access.
The doors unlock. Open the top door and inspect the slide handling path.
Open the front door. Remove the fil-ter trays and/or sample trays to see
the Slide Cell Transfer Arm.
Open the printer lid. Inspect the slide printer area for a jammed, misplaced or broken
slide. Unfasten the assembly access thumbscrew and look under it as well.
Manually remove the slide. Check to see that the slide
printer ribbon is installed cor-rectly and that the slide pick fin-gers are clean of glass dust, etc.
Press the Open prompt key. Manually remove the slide from
the arm. Check to ensure that the mechanism is clean and free of
fixative build up. Press the Close prompt key when finished.
Adjust the racks to sit flat and straight. Refer to the weekly
cleaning maintenance in Chap-ter 6, Section F.
Are the staining racks clean
and properly in place?
Is a slide present on the arm?
Is a slide present in the printer
area?
No
Yes
No
Yes
No
Yes
continued

TROUBLESHOOTING 7
Slide Handling System Fault Recovery (continued)
Slide Handling System Fault (continued)
Lift the slide cartridges out and see if slides are jammed at the exit slot.
Return all components to their operat-ing state – cartridges, slide printer
assembly, trays. Close the doors and press Continue. The instrument will
attempt recovery.
Carefully open the cartridge and remove the jammed slides. Refer to Chapter 5, Section D for correct placement of slides into the car-
tridges.
“Batch Canceled Due to Slide Handling Error” message. Press
Continue.
Unload sample trays and stain-ing racks. Unprocessed sam-ples go into a new batch for
processing.
Repeat the steps outlined above
once more. Press Continue.
See Vial Handling System Fault Section.
See Filter Handling System Fault Section
Continued
Are slides jammed in
the cartridge?
Did it recover?
Does “Slide Handling Error”
display?
Does “Vial Handling
Error” display?
Does “Filter Handling Error” display?
Yes
Yes
Yes
No
No
Yes No
Yes
No
ThinPrep® 3000 Processor Operator’s Manual 7.51

7 TROUBLESHOOTING
Slide Handling System Fault Recovery (continued)
Slide Handling Fault (continued)
Allow the instrument to attempt to recover.
“Check Mechanism” message displays. Press Continue.
Remove the sample trays and any prepared slides.
Contact Hologic Technical Support.
7.52 ThinPrep® 3000 Processor Operator’s Manual

TROUBLESHOOTING 7
‘BATCH CANCELED DUE TO’ REPORTING
For batches that concluded because of an interruption during processing, the batch report will indi-cate a reason for the halt. Batches may be canceled by the operator, by sample error or a system fault.
SECTION
D
��������������!��
��*&%*�2 �B��'�����AA�AAAAAAAA������4�������2(��(�����(
�������������+!�����������������//��
�������������?!����
������ �������������"������ (2)�����"������ (2'
�����9+C ���������������2�'&@ (2�������2�'&B (&�������2�'&% (��������2�'&7 ()�������2�'�� ('�������2�'�2 (@�������2%�B@ (B�������2%�BB (%�������2%�B% (7�������2%�B7 (2��������2%�%� (22�������2%�%2 (2&�������2%�%& (2��������2%�%� (2)D�������2�'&' (2'D
��������������������'2%
Identifies the reason a batch was halted
Identifies samples that require reprocessing
Sample ID (barcode)
Total samples processed tally
Identifies sample error by tray loca-tion
ThinPrep® 3000 Processor Operator’s Manual 7.53

7 TROUBLESHOOTING
Batch Canceled Due To:
Barcode scan failure
The instrument was unable to successfully scan two consecutive sample vial barcodes. See “No Bar-code Reprocessing Required” on page 7.16.
Cancellation by user
• An operator intentionally canceled a batch by pressing Pause and then pressing Cancel Batch.
• An operator may have unintentionally canceled a batch by pressing Pause and then removing one or both sample trays.
Cap tighten failureThe system was unable to tighten the vial cap while the vial is in the tray. Three consecutive errors will cancel the batch. See “Cap Tighten Failure Reprocessing Required” on page 7.6. Any three con-secutive instances of Cap Tighten Failure and Vial Cap Too Tight in combination will cancel the batch.
Failure to scan tray ID(This is only if you are using Tray ID Barcode Scan mode.)
• The instrument failed to properly scan the sample vial tray barcode.
• A sample vial tray did not have a barcode on it.
Filter load failure
A filter was not properly pressed onto the sample processing arm. See “Filter Load Failure Reprocessing Required” on page 7.10.
Fixative clogged
The fixative dispense system was unable to spray or unable to determine fluid level. See “Fixative Clog Reprocessing Required” on page 7.12.
Insufficient consumables
The supply of a consumable item was used up before the batch was complete. See “Out of Con-sumables Reprocessing Required” on page 7.18.
Sample processing errorAn error occurred during sample processing.
• See “Pneumatic Failure Reprocessing Required” on page 7.20.
• See “Waste System Failure Reprocessing Required” on page 7.28.
Slide printer ribbon
Two or more consecutive slide misprints may have occurred. See “Slide Misprint Reprocessing Required” on page 7.22.
7.54 ThinPrep® 3000 Processor Operator’s Manual

TROUBLESHOOTING 7
Vial fluid level errorThree or more consecutive vial fluid level errors will cancel the batch.
• Sample vials did not have enough fluid volume. See “Insufficient Vial Fluid Reprocess-ing Required” on page 7.14.
• Sample vials had too much fluid volume. See “Too Much Vial Fluid Reprocessing Required” on page 7.24.
ThinPrep® 3000 Processor Operator’s Manual 7.55

7 TROUBLESHOOTING
This page intentionally left blank
7.56 ThinPrep® 3000 Processor Operator’s Manual

8. Stain
ing
and
C
overslip
pin
g8.
Sta
inin
g a
nd
C
ove
rslip
pin
g

STAINING AND COVERSLIPPING 8
C h a p t e r E i g h t
Staining and Coverslipping
CONTENTS
SECTION A: Introduction 8.1
SECTION B: Recommended Staining Guidelines 8.2
SECTION C: Coverslipping Recommendations 8.4
SECTION D: Common Artifacts 8.5
INTRODUCTION
Hologic has established a recommended set of guidelines for staining and coverslipping slides prepared on the ThinPrep® 3000 processor.
ThinPrep microscope slides are prepared and fixed inside the ThinPrep 3000 processor. They are ready for staining when they are delivered to the staining racks.
SECTION
A
ThinPrep® 3000 Processor Operator’s Manual 8.1

8 STAINING AND COVERSLIPPING
RECOMMENDED STAINING GUIDELINES
Staining times are different for ThinPrep-prepared slides in comparison to conventional preparations and should be adjusted accordingly.
• Use graded concentrations of alcohol (50% or 70%) to lower the potential for osmotic shock or possible cell shedding during staining.
• The use of mild bluing solutions and dilute acid baths will optimize nuclear staining and min-imize possible cell shedding. Hologic recommends the use of a dilute Lithium Carbonate solu-tion, or Ammonium Hydroxide solution as the bluing solution.
• Avoid the use of strong salt solutions, like Scotts Tap Water Substitute.
• Bath solution heights should completely cover the slides to reduce the chance of cell shedding during staining.
• For optimal results, slides should be agitated for at least 10 dips in each bath.
Below are the maximum concentrations to be used for the following solutions during the staining process:
Hydrochloric acid (HCl) 0.025%
Lithium Carbonate (bluing) baths 10 mg per 1 liter1
Acetic acid 0.1%
Ammonium Hydroxide 0.1%
1. Refer to Bales, CE. and Durfee, GR. Cytologic Techniques in Koss, L, ed. Diagnostic Cytology and its Histopathologic Basis. 3rd Edition. Philadelphia: JB Lippincott. Vol. II: pp 1187-1260 for details.
SECTION
B
8.2 ThinPrep® 3000 Processor Operator’s Manual

STAINING AND COVERSLIPPING 8
Recommended Staining Protocol for the ThinPrep® 3000 System
* Place slides directly from the ThinPrep 3000 processor into distilled water to remove the CellFyx™ Solution.
Note: Hologic does not use commercially prepared clarifier or bluing reagent.
Step Solution Time
1 Distilled H2O (dH2O)* 10 minutes with agitation
2 Richard-Allan Hematoxylin I 45 seconds with agitation
3 Distilled H2O (dH2O) 15 seconds with agitation
4 Distilled H2O (dH2O) 15 seconds with agitation
5 Clarifier (.025% glacial acetic acid) 30 seconds with agitation
6 Distilled H2O (dH2O) 30 seconds with agitation
7 Bluing Reagent (10 mg LiCarb/1 L) 30 seconds with agitation
8 Distilled H2O 30 seconds with agitation
9 50% Reagent Alcohol 30 seconds with agitation
10 95% Reagent Alcohol 30 seconds with agitation
11 Richard-Allan Cytology Stain 1 minute with agitation
12 95% Reagent Alcohol 60 seconds with agitation
13 95% Reagent Alcohol 90 seconds with agitation
14 100% Reagent Alcohol 30 seconds with agitation
15 100% Reagent Alcohol 30 seconds with agitation
16 100% Reagent Alcohol 30 seconds with agitation
17 Xylene 1 minute with agitation
18 Xylene 1 minute with agitation
19 Xylene 3 minutes with agitation
ThinPrep® 3000 Processor Operator’s Manual 8.3

8 STAINING AND COVERSLIPPING
COVERSLIPPING RECOMMENDATIONS
Each laboratory should evaluate their choice of mounting media to ensure compatibility with ThinPrep slides. However, Permount® mounting media has been evaluated by Hologic and is recommended for use with ThinPrep-processor-prepared slides. Surgipath Clearium® is also acceptable mounting media for use with ThinPrep-processor-prepared slides. Hologic also recommends that 24 mm x 30 mm or 24 mm x 40 mm glass coverslips be used. Plastic coverslip material used with automated coverslipping instrumentation is also acceptable.
SECTION
C
8.4 ThinPrep® 3000 Processor Operator’s Manual

STAINING AND COVERSLIPPING 8
COMMON ARTIFACTS
Halo ArtifactIn some cases of dense specimens, only the outer edge of cellular material may transfer to the ThinPrep slide forming a thin ‘halo’ or ring of cellular material on the slide. Evaluate the slide for adequacy and diagnostic category according to established laboratory guidelines.
Compression ArtifactSome samples may display what appears to be ‘air-dry’ artifact on the perimeter of the cell spot. This artifact is not air-drying but rather it is due to the compression of cells between the edge of the ThinPrep Pap test filter and the glass slide.
Staining ArtifactSome samples may display a staining artifact which mimics air-drying in appearance. This artifact appears as a red or orange central staining primarily in cell clusters or groups. This artifact is due to incomplete rinsing of the counterstains. Fresh alcohol baths or an additional rinse step after the cytoplasmic stains is required to reduce this artifact.
Edge of the Cylinder ArtifactSome samples may display a narrow rim of cellular material just beyond the circumference of the cell spot. This artifact is a result of cells from the outer edge of the wet filter cylinder being transferred to the glass slide. This may be more evident on highly cellular samples because there will be more cells to be transferred in the liquid.
Wrinkle ArtifactWrinkles appear as elongated areas of low cellular density.
SECTION
D
ThinPrep® 3000 Processor Operator’s Manual 8.5

8 STAINING AND COVERSLIPPING
This page intentionally left blank
8.6 ThinPrep® 3000 Processor Operator’s Manual

9. Th
e Th
inP
rep P
ap
Test Trainin
g P
rog
ram 9. T
he
Th
inP
rep
Pap
Te
st T
rain
ing
Pro
gra
m

THINPREP PAP TEST TRAINING PROGRAM 9
C h a p t e r N i n e
ThinPrep Pap Test Training Program
ObjectiveThe ThinPrep Pap Test Training Program was developed by Hologic to assist laboratories in the conversion process from the conventional Pap smear to the ThinPrep Pap Test. Hologic offers information, support and training for the conversion process, including communicating the change to the clinician, cytopreparatory training, ThinPrep Pap Test morphology training and guidelines to assist with training the entire cytology staff in the laboratory.
DesignMorphology Training is designed to communicate the differences between the conventional Pap smear and the ThinPrep Pap Test. The participants use a series of slide modules to familiarize themselves with a spectrum of normal and abnormal cytological entities on ThinPrep Pap Test samples.
This program is based on a cumulative learning process. Interpreting the morphologic criteria of ThinPrep Pap Test samples requires review and application of cytology skills and knowledge. A systematic approach allows for frequent assessment of an individual’s understanding of the ThinPrep characteristics. The training program incorporates both pre- and post-tests in order to assess learning progress.
The training begins with the ThinPrep morphology lecture, which is designed to familiarize the participants with the microscopic presentation of cervical samples prepared using the ThinPrep System. The format summarizes the morphologic features common to specific diagnostic entities described in The Bethesda System for Reporting Cervical/Vaginal Cytologic Diagnoses1.
Following the introductory session, a module of known ThinPrep Pap Test cases are reviewed by all participants. This module presents a wide variety of diseases and disease states and provides the participant a base reference for the full range of diagnostic categories to be encountered. Review of “look-alike” cases is also included. Through the use of the ThinPrep Gyn Morphology Atlas, which highlights common diagnostic entities and their differential diagnoses, participants will begin to recognize key look-alike entities on ThinPrep slides and the criteria that can be used in their proper classification.
A series of modules of unknown ThinPrep Pap Test cases is used to assess the ThinPrep screening and interpretive skills of each participant. Participants are required to screen and diagnose each set of cases and record their results on the provided answer sheet. Once complete, the cases and correct responses are reviewed individually by each participant.
ThinPrep® 3000 Processor Operator’s Manual 9.1

9 THINPREP PAP TEST TRAINING PROGRAM
A final set of unknown ThinPrep Pap Test slides is provided. This final set of slides is modeled after current CLIA guidelines and will be scored by Hologic-designated personnel. Successful completion of these slides is necessary to receive a certificate of completion.
CLIA Proficiency Test Program standards are used as guidelines in establishing pass/fail scoring criteria. Individuals receiving a 90% or better on the Final Assessment are qualified to screen/interpret ThinPrep Pap Test cases, and to begin training additional cytotechnologists and pathologists in their laboratory under the supervision of the laboratory Technical Supervisor, if needed. Participants of the training program receiving less than 90% on the Final Assessment would require remedial training in their individual laboratories. This training involves the screening/diagnosing of an additional ThinPrep Pap Test slide module provided by Hologic and requires a score of 90% or better to complete Hologic’s ThinPrep Pap Test Training Program.
Cytology Staff TrainingHologic supports cytology staff training by providing information and resources, such as slides, answer sheets, and online educational material, for use by the lab in training additional staff. The laboratory Technical Supervisor is ultimately responsible for ensuring adequate training for individuals prior to screening and interpreting ThinPrep Pap Test cases.
Bibliography1. Nayar R, Wilbur DC. (eds). The Bethesda System for Reporting Cervical Cytology: Definitions, Criteria, and Explanatory Notes. 3rd ed. Cham, Switzerland: Springer: 2015
9.2 ThinPrep® 3000 Processor Operator’s Manual

10. User In
terface S
creens
10. U
ser
Inte
rfac
e S
cree
ns

USER INTERFACE SCREENS 10
C h a p t e r T e n
User Interface Screens
CONTENTS
SECTION A: Overview of the User Interface Screens 10.1
SECTION B: Menu Trees 10.1
OVERVIEW OF THE USER INTERFACE SCREENS
Operation of the ThinPrep® 3000 processor is via menu options selected by pressing the prompt keys. The 42-character by 8-line message screen shows instrument information including setup, operation, status, maintenance functions, tests and error messages. Most operator interaction is via the menu command trees listed on the following pages.
MENU TREES
Main/Menu/Setup p. 10.2
Main/Menu/Maintenance 10.4
Main/Menu/Status 10.5
Main/Menu/Test 10.6
Start Batch/Address Items 10.7
Start Batch/Pause; Cancel 10.8
System Fault 10.9
SECTION
A
Message screen
User interfacePrompt keys
SECTION
B
ThinPrep® 3000 Processor Operator’s Manual 10.1

10 USER INTERFACE SCREENS
Main/ Menu/
Setup
(Refer to Chapter 2, Sections H, I, J for operation.)
10.2 ThinPrep® 3000 Processor Operator’s Manual

USER INTERFACE SCREENS 10
(Continued from previous page)
(Only English is available at this time)
ThinPrep® 3000 Processor Operator’s Manual 10.3

10 USER INTERFACE SCREENS
®
Main/ Menu/
Maintenance
(Refer to Chapter 6, Sections B, D, F, H, I, O for operation.)
(No display, the results printer advances paper as long as the key is pressed.)
* Opens and closes the slide clamps on the Slide Cell Transfer Arm. (Use this function when cleaning the arm and troubleshooting slide release errors.)
** Opens and closes the pinch valve of the tubing connecting the pneumatic and waste systems. (Use this function when replacing the pinch valve tubing.)
10.4 ThinPrep 3000 Processor Operator’s Manual

USER INTERFACE SCREENS 10
(Prints Error History Report)
(View Error History on Screen)
Main/ Menu/
Status
(Useful for Technical Support, Instrument Maintenance, and Troubleshooting)
ThinPrep® 3000 Processor Operator’s Manual 10.5

USER INTERFACE SCREENS Main/
1010.6 ThinPrep® 3000 Processor Operator’s Manual
OR
These tests are for Field Service usage
These tests are for Field Service usage
Example only. Contact Hologic Technical Support if the Pneumatic Test is not successful.
Menu/ Test
(Refer to Chapter 6, Section E for operation.)

USER INTERFACE SCREENS 10
®
Item(s) in Low Supply. Item(s) Not Detected.
(Doors Unlock)
(Unlocks the Doors, Items may be loaded.)
Start Batch/ Address Items
(Refer to Chapter 5, Section D for operation.)
ThinPrep 3000 Processor Operator’s Manual 10.7

10 USER INTERFACE SCREENSStart Batch/
Pause Cancel
10.8 ThinPrep® 3000 Processor Operator’s Manual
OR
(Refer to Chapter 5, Section G, H for operation.)

USER INTERFACE SCREENS 10
Error Code Supply Status * 1 of 3 screens will display:
Vial Handling Error in Area A Filter Handling Error in Area B Slide Handling Error in Area C
(Continued on next page)
System Fault
(Refer to Chapter 7, Section C for Operation.)
ThinPrep® 3000 Processor Operator’s Manual 10.9

10 USER INTERFACE SCREENS
®
Mechanical Error Resolved Mechanical Error Encountered
(Continued from previous page)
System Fault
10.10 ThinPrep 3000 Processor Operator’s Manual

Ind
ex Ind
ex

INDEX
Index
AAncillary testing 5.2Audible key press 2.11
Bbar code labels Ordering.3, Ordering.4barcode labels 5.12Batch Canceled Due To... 7.53Batch Report 5.20, 7.3begin batch processing 5.14
CCap Tighten Failure 7.6CellFyx Solution 1.2, 3.5, 5.16, Ordering.3CellFyx Solution, replenish 6.32cleaning the slide path 6.17clearances, ThinPrep 3000 Processor 1.10clearing clogs via the user interface 6.6Close Doors and Press Continue 5.17common artifacts 8.5completing a batch 5.18coverslipping recommendations 8.4Customer Service Service.1
Ddimensions, ThinPrep 3000 Processor 1.9Disposal
consumables 1.17dissolving clogs with warm water 6.7Duplicate Barcode 7.8
ThinPrep® 3000 Processor Operator’s Manual Index.1

INDEX
Eextended shut down 2.5
FFilter handling 7.38filter handling error 7.39Filter handling system 1.6Filter Load Failure 7.10filter waste box 6.31, Ordering.2filter waste box liner Ordering.3Filter, ThinPrep Pap test 1.2filters 5.15fixative cap 5.16Fixative Clog 7.12fixative reservoir 6.32fixative shield 5.16, 6.33, Ordering.2fixative system preventative maintenance 6.5fuses 1.11, 6.36, Ordering.3
Ggeneral cleaning 6.24
IInstallation 2.1instrument doors 5.4instrument maintenance 6.1Instrument systems overview 1.4Insufficient Vial Fluid 7.14Items Must be Addressed 5.15
Llabel locations, instrument 1.15location and configuration, instrument 2.3Lube O-rings maintenance 6.10
Index.2 ThinPrep® 3000 Processor Operator’s Manual

INDEX
Mmaintenance kit Ordering.3Maintenance schedule 6.2Materials required 1.8, 4.4, 5.5microscope slides 1.2, 5.7, 5.15, 6.17
NNo Barcode 7.16
OOperator’s Manual Ordering.2Ordering Information Ordering.1Out of Consumables 7.18
Ppausing a batch in process 5.22pinch valve tubing Ordering.2pinch valve tubing replacement 6.26Please Address Items 5.17Pneumatic Failure 7.20pneumatic system test 6.13pneumatic test vial 6.10, 6.14, Ordering.2power 1.11, 2.4Power On Self Test 1.12PreservCyt Solution 1.2, 3.2, 6.29printer paper 6.38, Ordering.3
Rreading the batch report 5.20replacing the fixative shield 6.23Reprocessing following an ’Unsat’ 4.6Reprocessing Required 7.1results printer paper 6.38
ThinPrep® 3000 Processor Operator’s Manual Index.3

INDEX
SSample collection
Broom-like device 4.2Endocervical brush/Spatula device 4.3
Sample collection and preparation 4.1sample errors 7.1Sample Is Dilute 7.4sample trays 5.16sample vial tray Ordering.2sample vials 5.12Service Information Service.1, Service.2setting the date 2.8setting the time 2.7shipping container checklist 2.2silicone lubricant Ordering.3slide cartridges 5.7, 6.17, Ordering.2slide cell transfer arm 6.19slide clamps 6.19Slide handling 7.44slide handling error 7.45Slide handling system 1.7Slide Misprint 7.22Slide printer output 2.10slide printer ribbon Ordering.3slide printer ribbon, replacing 6.34slide waste bin 6.9, Ordering.2Special Sample Status 7.1spray bottle Ordering.2staining rack adapters Ordering.2staining racks 5.9, 5.15, Ordering.2staining, recommended guidelines 8.2supplies for the Processor Ordering.2system access 6.24System Fault Errors 7.2, 7.30System Startup 2.6
Index.4 ThinPrep® 3000 Processor Operator’s Manual

INDEX
TTechnical specifications 1.9Technical Support Service.1temperature 1.11ThinPrep Pap Test 1.2ThinPrep Pap Test Filters 5.6Too Much Vial Fluid 7.24Troubleshooting 7.1turn the processor off 2.5turn the processor on 2.4
UUser Interface Screens 10.1
VVersa-Clean Solution 6.19, Ordering.3Vial Cap Too Tight 7.26Vial Handling 7.32Vial handling error 7.33Vial handling system 1.5
WWarnings, Cautions and Notes 1.12waste bin 5.16waste bottle 5.16, 6.28, Ordering.2waste bottle transport cover 6.29, Ordering.2Waste System Failure 7.28
ThinPrep® 3000 Processor Operator’s Manual Index.5

INDEX
This page intentionally left blank
Index.6 ThinPrep® 3000 Processor Operator’s Manual

Service In
form
ation
Ser
vice
Info
rmat
ion

SERVICE INFORMATION
Service Information
Mailing AddressHologic, Inc.
250 Campus Drive
Marlborough, MA 01752 USA
Remittance AddressHologic, Inc.
PO Box 3009
Boston, MA 02241-3009 USA
Business HoursHologic’s business hours are 8:30 a.m. to 5:30 p.m. EST Monday through Friday excluding holidays.
Customer ServiceProduct orders, which include standing orders, are placed through Customer Service by phone during business hours at 1-800-442-9892 Option 5.
Orders can also be faxed to the attention of Customer Service at 1-800-409-7591.
A copy of Hologic’s limited warranty and other terms and conditions of sale may be obtained by contacting Customer Service at the numbers listed above.
Technical Support
For questions about ThinPrep® processor issues and related application issues, representatives from Technical Support are available by phone 7:00 a.m. to 7:00 p.m. EST Monday through Friday at 1-800-442-9892 Option 6 (USA and Canada).
ThinPrep® 3000 Processor Operator’s Manual Service.1

SERVICE INFORMATION
For Technical Support outside USA and Canada:
Service contracts can also be ordered through Technical Support.
Protocol for Returned GoodsFor returns on warranty-covered ThinPrep 3000 processor accessory and consumable items, contact Technical Support.
For returns on warranty-covered ThinPrep Pap test consumable items, contact Customer Service to obtain a Return Goods Authorization (RGA) Number. Hologic will not accept any returned warranty-covered consumable items without this number.
The transportation of PreservCyt® Solution and CellFyx™ Fixative Solution is regulated by the DOT and will not be guaranteed by air freight companies for second-day or overnight delivery.
Asia +852 3526 0718 Netherlands 0800 022 6782
Australia +61 2 9888 8000 Norway 800 155 64
Austria 0800 291 919 Portugal 800 841 034
Belgium 0800 773 78 Spain 900 994 197
Denmark 8088 1378 South Africa 0800 980 731
Finland 0800 114 829 Sweden 020 797 943
France 0800 913 659 Switzerland 0800 298 921
Germany 0800 183 0227 UK 0800 032 3318
Ireland (Rep) 1 800 554 144 Rest of the world 0041.21.633.39.26
Italy 800 786 308 Intl Fax number 0041.21.633.39.10
Service.2 ThinPrep® 3000 Processor Operator’s Manual

Ord
ering
Info
rmatio
nO
rder
ing
Info
rmat
ion

ORDERING INFORMATION
Ordering Information
Mailing AddressHologic, Inc.
250 Campus Drive
Marlborough, MA 01752 USA
Remittance AddressHologic, Inc.
PO Box 3009
Boston, MA 02241-3009 USA
Business HoursHologic’s business hours are 8:30 a.m. to 5:30 p.m. EST Monday through Friday excluding holidays.
Customer ServiceProduct orders, which include standing orders, are placed through Customer Service by phone during business hours at 1-800-442-9892 Option 5.
Orders can also be faxed to the attention of Customer Service at 1-800-409-7591.
WarrantyA copy of Hologic’s limited warranty and other terms and conditions of sale may be obtained by contacting Customer Service at the numbers listed above.
Protocol for Returned Goods
For returns on warranty-covered ThinPrep® 3000 processor accessory and consumable items, contact Technical Support.
For returns on warranty-covered ThinPrep Pap test consumable items, contact Customer Service to obtain a Return Goods Authorization (RGA) Number. Hologic will not accept any returned warranty-covered consumable items without this number.
The transportation of PreservCyt® Solution and CellFyx™ Fixative Solution is regulated by the DOT and will not be guaranteed by air freight companies for second-day or overnight delivery.
ThinPrep® 3000 Processor Operator’s Manual Ordering.1

ORDERING INFORMATION
Supplies for the ThinPrep® 3000 Processor
Item Description Quantity Part Number
Filter Waste Box Replacement filter waste box 1 50815-001
Fixative Shield Mount Additional fixative shield mount 1 03178-001
Pinch Valve Tubing Replacement pinch valve tubing kit (4 tubes)
1 kit 74030-001
Pneumatic Test Vial Additional pneumatic test vial 1 02956-001
Sample Vial Tray, 4-pack Additional sample vial trays 1 pkg 70264-001
Slide Cartridge Additional slide cartridge 1 70348-001
Staining Rack, 4-pack Additional staining racks 1 pkg 70265-001
Staining Rack Adapters Attachment accessory:LeicaSakuraShandon
111
02975-00102994-00102976-001
Slide Waste Bin Additional slide waste bin 1 50814-001
Waste Bottle and Harness Assembly
Replacement waste bottle and harness assembly
1 70213-001
Waste Bottle Transport Cover
Additional waste bottle transport cover 1 50247-001
ThinPrep 3000 Processor Operator’s Manual
Additional operator’s manual (for use in U.S.) 1 MAN-02586-001
Aerosol Spray Bottle Spray bottle for Versa-Clean Solution 1 bottle 51432-001
Ordering.2 ThinPrep® 3000 Processor Operator’s Manual

ORDERING INFORMATION
Consumable Items for the ThinPrep 3000 Processor
* Filter waste box liner, replacement bags:Order standard 14” x 14” x 26” (36 cm x 36 cm x 66 cm) gusseted poly waste bags from your local lab supplier, based on your internal laboratory guidelines.
Item Description Quantity Part Number
CellFyx Solution CellFyx Solution bottles, boxed (115 mL each) and 6 fixative shield replacements
6 bottles, 6 fixative shields
70207-001
Filter Waste Box Liner Plastic bag insert for filter waste box * See below for ordering specifications
Fuse 5x20 mm, 6.3 Amp time delay glass, low break capacity replacement fuse
2 50077-021
Silicone Lubricant Silicone lubricant, 2-oz. tube 1 tube 51298-001
Sample Identification Barcode Labels
Self-adhesive barcode labels ** See next page for ordering specifications
Slide Printer Ribbon Replacement printing ribbon for slide printer 1 MME-02836
Thermal Paper Roll Replacement thermal paper for batch reporting Box of 5 50516-001
ThinPrep 3000 Maintenance Kit
Pads, swabs, wipes for cleaning the slide cell transfer arm.
1 kit 70670-001
Versa-Clean™ Solution Cleaning solution concentrate 1 Bottle 51431-001
ThinPrep® 3000 Processor Operator’s Manual Ordering.3

ORDERING INFORMATION
** Barcode requirements:The barcode standard used is Code 128, subset C, with .013 “x” dimension. (Narrow bar width.)
1. Black bars on blue-white face stock with rubber based adhesive on back.Refer to the Barcode Label Specifications for the ThinPrep 3000 Processor sheet in the Appendix for a copy of this information suitable for photocopy/facsimile use.
2. Label contents: a minimum of 5 and a maximum of 11 printed digits starting with a number defined by the laboratory, with each successive label incrementing by 1.
Note: Up to 2 leading or trailing alpha characters may be used. The instrument will not print letters to the microscope slide. Only the numeric accession number will be printed.
3. Printed as both a barcode and a 0.10-in.- (0.25-cm-) high human-readable number centered length wise on the label within 0.125 in (0.317 cm).
4. Print quality must meet requirements outlined in ANSI X3. 182.
Label dimensions:
Vendors:Label Arts, Inc. (will take international orders)P.O. Box 727Kemp, TX 75143Tel. in US: 1-800-634-99431-903-498-6041Fax 1-903-498-8169
The barcode standard selected for use with the ThinPrep 3000 processor is one that is commonly used in many laboratories.
��������
(4X) R .08 ± .06 in..20 ± .15 cm
.63 ± .06 in.
1.6 ± .15 cm
1.75 ± .06 in.
4.44 ± .15 cm
10 “X” min.
.44 in.
1.12 cm bar hgt.
1.45 in. (3.68 cm) nomi-nal for 14-digit barcode with .013-in. (0.03-cm) “X” dimension
Ordering.4 ThinPrep® 3000 Processor Operator’s Manual

ORDERING INFORMATION
Consumable Items for the ThinPrep Pap Test
Item Description Quantity Part Number
ThinPrep Pap Test Kit Materials for both the laboratory and the physician’s officeVials of PreservCyt Solution for use with the ThinPrep Pap testThinPrep Pap test filtersThinPrep microscope slides
Collection devices:Broom-like collection devices orCytobrush and plastic spatula
500 Tests
500
500500
500
500
70096-001
70096-003
ThinPrep Pap Test Kit (for use with the ThinPrep Imaging System)
Materials for both the laboratory and the physician’s officeVials of PreservCyt Solution for use with the ThinPrep Pap testThinPrep Pap test filtersThinPrep Imaging System microscope slides
Collection devices:Broom-like collection devices orCytobrush and plastic spatula
500 Tests
500
500500
500
500
70662-001
70662-003
ThinPrep Pap Test Physician Office Kit
Materials for the physician’s officeVials of PreservCyt Solution for use with the ThinPrep Pap test
Collection devices:Broom-like collection device orCytobrush and plastic spatula
500
500
500
70136-001
70136-002
ThinPrep Pap Test Laboratory Kit
Materials for the laboratoryThinPrep Pap test filtersThinPrep microscope slides
500500
70137-001
ThinPrep Pap Test Laboratory Kit (for use with the ThinPrep Imaging System)
Materials for the laboratoryThinPrep Pap test filtersThinPrep Imaging System microscope slides
500500
70664-001
Broom-like Collection Kit Broom-like collection devices 500 70101-001
Cytobrush/Plastic Spatula Cytobrush and plastic spatula collection devices 500 70124-001
ThinPrep® 3000 Processor Operator’s Manual Ordering.5

ORDERING INFORMATION
This page intentionally left blank
Ordering.6 ThinPrep® 3000 Processor Operator’s Manual

Safety D
ata Sh
eets Saf
ety
Dat
a S
hee
ts

SAFETY DATA SHEETS
Safety Data Sheets
PreservCyt® Solution
CellFyx™ Solution
Fisher® brand Versa-Clean™
The Safety Data Sheets (SDS) for each solution may be requested from Hologic Technical Support at 1-800-442-9892 Option 6 (USA and Canada), or found on-line at www.hologicsds.com.
ThinPrep® 3000 Processor Operator’s Manual SDS.1

SAFETY DATA SHEETS
This page intentionally left blank
SDS.2 ThinPrep® 3000 Processor Operator’s Manual

Ap
pen
dix A
pp
end
ix

THINPREP 3000 PROCESSOR: LABORATORY FLOW
ThinPrep® 3000 Processor Operator’s Manual Lab Flow.1
ThinPrep 3000 Processor: Laboratory Flow

THINPREP 3000 PROCESSOR: LABORATORY FLOW
Lab Flow.2 ThinPrep® 3000 Processor Operator’s Manual
This page intentionally left blank
The
Thi
nPre
p® 3
000
Pro
cess
or:
Lab
ora
tory
Flo
wTh
e Th
inP
rep®
Pap
test
sam
ple
vial
and
test
re
ques
t for
m a
rriv
e at
the
labo
rato
ry.
Pat
ien
t N
ame
Pat
ien
t N
ame
Cas
e R
epor
t:P
atie
nt
Nam
eS
amp
le I
D#
1234
The
sam
ple
vial
s ar
e lo
aded
into
the
sam
ple
vial
tray
s fo
r pro
cess
ing.
The
sam
ple
vial
tray
s ar
e lo
aded
into
the
Thin
Pre
p 30
00 p
roce
ssor
.
The
Thin
Pre
p 30
00 p
roce
ssor
prin
ts th
e sa
mpl
e ID
num
ber t
hat i
s re
ad fr
om th
e sa
mpl
e vi
al b
arco
de la
bel o
nto
the
slid
e, th
en p
roce
sses
the
sam
ple.
The
Thin
Pre
p sl
ide
is s
tain
ed
and
cove
rslip
ped.
Cas
e re
port
form
and
slid
e ar
e pa
ired
by th
e sa
mpl
e ID
nu
mbe
rs a
nd fo
rwar
ded
to th
e cy
tote
chno
logi
st.
Mat
chin
g ba
rcod
ed la
bels
con
tain
ing
uniq
ue ID
num
bers
are
pl
aced
on
the
sam
ple
vial
and
the
test
requ
est f
orm
.
Dat
a E
ntry

BARCODE LABEL SPECIFICATIONS FOR THE THINPREP 3000 PROCESSOR
ThinPrep® 3000 Processor Operator’s Manual Barcode.1
Barcode Label Specifications for the ThinPrep 3000 Processor

BARCODE LABEL SPECIFICATIONS FOR THE THINPREP 3000 PROCESSOR
Barcode.2 ThinPrep® 3000 Processor Operator’s Manual
This page intentionally left blank
Bar Code Label SpecificationsFor the ThinPrep® 3000 Processor
A unique feature of the ThinPrep® 3000 processor is the ability to maintain chain of custody from the patient sample vial to the ThinPrep microscope slide. Chain of custody is achieved by the ThinPrep 3000 processor printing a numeric identifier on a ThinPrep microscope slide, which corresponds to the barcode on the sample vial. The numeric identifier is printed on the slide prior to processing. Note: If an alpha prefix or suffix is used in the sample ID number, the ThinPrep 3000 processor will not transfer letters, only numbers, to the microscope slide.
Many laboratories currently utilize barcode labels for specimen tracking. The barcode standard selected for use with the ThinPrep 3000 processor is one that is commonly used in many labo-ratories. The following information provides specifications for the barcode labels used with the ThinPrep 3000 processor.
Barcode Requirements
The barcode standard used is Code 128, Subset C, with .013 "X" dimension (narrow bar width).
1.) Black bars on blue-white face stock with rubber based adhesive on back.2.) Label Contents: Up to 11-digit number, with a minimum of 5 digits.3.) Printed as both a bar code and a 0.10-in.- (0.25-cm-) high human-readable number centered lengthwise on the label within 0.125 in. (0.317 cm).4.) Print quality must meet requirements outlined in ANSI X3. 182.
Label Dimensions
��������
�� ��������������������������������������
�������������������������
���� ������
������������������������
���������������������
������������
����������������������� !������"�����#�����"$�%��&������������������ ��"��$�'���
Hologic, Inc. 250 Campus Drive, Marlborough, MA 01752 | T: 1.508.263.2900 | hologic.com

SAMPLE VIAL LABEL APPLICATION GUIDE
ThinPrep® 3000 Processor Operator’s Manual Sample Vial.1
Sample Vial Label Application Guide

SAMPLE VIAL LABEL APPLICATION GUIDE
Sample Vial.2 ThinPrep® 3000 Processor Operator’s Manual
This page intentionally left blank
Sam
ple
Via
l Lab
el A
pp
licat
ion
Gui
de
for
use
with
the
Thi
nPre
p® 3
000
Pro
cess
or
Reco
mm
ende
d Ph
ysic
ian
Prot
ocol
The
Pre
serv
Cyt
® S
olut
ion
lab
el h
as a
n ar
ea p
rovi
ded
for
reco
rdin
g p
atie
nt
info
rmat
ion.
For
han
d-w
ritte
n en
trie
s, u
se
per
man
ent
mar
kers
or
inks
tha
t w
ill n
ot
easi
ly r
ub o
ff o
r b
lur.
If yo
ur o
ffic
e or
clin
ic p
rep
ares
pat
ient
in
form
atio
n vi
a ad
hesi
ve la
bel
, pla
ce t
he
lab
el o
ver
the
Pre
serv
Cyt
Sol
utio
n vi
al
lab
el. A
dd
ition
al la
bel
s m
ay b
e ap
plie
d,
how
ever
tak
e ca
re n
ot t
o ov
erla
p m
ultip
le
lab
els.
• A
pp
ly la
bel
s sm
ooth
ly a
nd e
venl
y, a
ll ed
ges
shou
ld b
e fla
t an
d c
onta
ctin
g th
e su
rfac
e of
the
via
l.
• A
void
ove
rlap
pin
g or
sta
ckin
g la
bel
s on
top
of e
ach
othe
r.
• W
hen
pos
sib
le, l
imit
the
num
ber
of
lab
els
pla
ced
ont
o th
e vi
al.
• D
o no
t p
lace
lab
els
on t
op o
f the
via
l ca
p o
r on
the
bot
tom
of t
he v
ial.
Pro
per
ap
plic
atio
n of
lab
els
onto
th
e sa
mp
le v
ial c
an a
vert
som
e er
ror
cond
ition
s d
urin
g sl
ide
pro
cess
ing.
The
follo
win
g p
roto
cols
rec
omm
end
the
b
est
pla
cem
ent
of la
bel
s on
the
Pre
serv
Cyt
S
olut
ion
vial
for
use
with
the
Thi
nPre
p P
ap
Test
.
Reco
mm
ende
d La
bora
tory
Pro
toco
lP
lace
sam
ple
iden
tific
atio
n b
arco
de
lab
els
leng
thw
ise
on t
he P
rese
rvC
yt S
olut
ion
vial
. U
se t
he e
dge
of t
he s
amp
le v
ial l
abel
as
a gu
ide
for
app
lyin
g th
e la
bel
s.
If ad
diti
onal
lab
els
wer
e p
lace
d o
nto
the
sam
ple
via
l by
the
phy
sici
an p
rior
to
arriv
ing
at t
he la
bor
ator
y, a
dhe
re t
he
bar
cod
e la
bel
dire
ctly
ont
o th
e sa
mp
le v
ial
leng
thw
ise.
Avo
id o
verla
pp
ing
lab
els.
Mak
e ce
rtai
n no
m
ore
than
tw
o la
bel
s ar
e st
acke
d t
oget
her.
To r
educ
e th
e p
ossi
bili
ty o
f ins
trum
ent
vial
ha
ndlin
g er
ror,
• M
ake
sure
the
bar
cod
e la
bel
is
und
amag
ed a
nd r
ead
able
.
• W
hen
app
lyin
g th
e la
bel
to
the
vial
, sm
ooth
all
edge
s d
own.
(Lift
ed e
dge
s m
ay s
tick
or t
ear
dur
ing
hand
ling.
)
• A
pp
ly t
he la
bel
ver
tical
ly o
n th
e sa
mp
le
vial
.
• D
o no
t p
lace
any
lab
els
on t
he c
ap o
r th
e b
otto
m o
f the
via
l.
*The
torq
ue fe
atur
es o
n th
e vi
al e
nabl
es th
e pr
oces
sor t
o gr
ip, u
ncap
and
reca
p th
e vi
al.
Leav
e th
e ta
bs a
nd c
ap fr
ee o
f any
obs
truct
ion.
Torq
ue ta
bs*
Fros
ted
area
indi
cate
s m
in/m
ax a
ccep
tabl
e flu
id le
vel
Are
a fo
r pat
ient
in
form
atio
n
Exa
mpl
e of
la
bels
pla
ced
on th
e sa
mpl
e vi
al la
bel

1. Apply Sample ID bar code to sample vials. Place vials in trays for processing.
2. Power on the ThinPrep 3000 Processor, if not already on.
Wait for System Ready main menu screen.
3. Perform Lube O-Rings maintenance (only needed at the start of a shift).
4. Check/load supplies:
• Filter trays (if a partial tray is present, do not remove it)
• Slide cartridges
• Empty staining racks
• Sample vial trays
5. Perform Fixative Spray Preventative Maintenance if the instrument has been idle for more than an hour. See Daily Maintenance Section.
6. Close all doors.
7. Press Start Batch.
• If the instrument detects missing or depleted supplies, read the message on the display and load or replenish those items. Close all doors and press Continue to begin processing.
• If the instrument prompts for mainte-nance, read the message on the display and replace or empty the item(s) listed. Close all doors and press Continue to begin processing.
8. When the Batch Complete screen appears at the end of processing, open the instrument doors. Carefully remove staining racks and sample vial tray(s). Tear off the batch report and match report(s) to trays A and B. Identify any samples requiring reprocessing or further attention.
The ThinPrep® 3000 Processor Quick Reference Guide
������������� � �����������
���������������
������������
��������������
���������������
�����������������������������
�������
���� �� �
��������
����
��
�������
���������������
������������
�����������������
��������������������������
��������� !����������"
Routine Operation
© 2017, Hologic, Inc.Part No. AW-03369-001 Rev. 002
Daily MaintenanceLubricate O-RingsLubricate the inner surface of the pneumatic test vial. Load it into tray position A1 of an empty sample vial tray. From the Maintenance menu, select Lube O-Rings.
Fixative Spray Preventative MaintenanceWhen the fixative menu screen appears, toggle the fixative dispense lever 3-4 times and press Spray. Repeat as needed.
Empty Slide Waste BinRemove the slide waste bin. If slides are present, check the print quality to see if the printer ribbon prints darkly enough. Dispose of any slides. Replace the slide waste bin.
Check Filter Waste BinLook in the filter waste bin to see if it needs to be emptied. Dispose of filters according to your laboratory guidelines.
Instrument-Prompted MaintenancePneumatic System Testing Lubricate the inside surface of the pneumatic test vial. Load the test vial into tray position A1 of an empty sample vial tray. From the test menu, select Pneumatic Test.
Clean the Slide PathClean the slide translator, slide printer area, slide cell transfer arm, fixative spray area, staining rack area.
Empty Waste BottleDetach the waste bottle from the tubing connections, cap and remove. Dispose of liquid waste according to your laboratory guidelines. Lubricate the waste cap o-ring; reconnect the waste bottle.
Add Fixative Fluid / Insert Clean Fixative ShieldFill the fixative reservoir with a bottle of CellFyx™ Solution. Remove the plastic fixative shield and dispose of the removable cylinder. Replace it with a new one. From the Fixative Maintenance screen, press Level to recalibrate the fixative level.
Slide Printer Ribbon Replace printer cartridge when prompted. Always be sure the ribbon is seated in the ribbon guide properly.
Refer to the ThinPrep 3000 Processor Operator's Manual for complete operating instructions.

Vial Operation (Area A) Sharp Edges/Hot Surfaces
Removing the sample vial tray ends the batch being processed. Never remove sample vial trays unless the batch is complete, canceled or unable to complete due to a system fault.
A System Fault may be caused by:
• A dropped vial• Labels applied improperly• A foreign object in the sample vial• Damage to the cap or vial• Mechanical fault
Label Application Proper application of labels onto the sample vial can avert some
types of errors during slide processing. Some sample and sys-tem errors may actually be the result of a damaged or poorly placed adhesive label.
• Place the label vertically, on the PreservCyt® label. Do not cover patient information. If other labels are present, place the label where there is no overlap.
• When applying the label to the vial, smooth all edges down. (Lifted edges may stick or tear during handling.)
• Do not place any labels on the cap or the bottom of the vial.
The ThinPrep® 3000 Processor Quick Reference Guide
���
Filter Operation (Area B) Sharp Edges/Hot Surfaces
A system fault may be caused by:
• A dropped filter• A filter stuck on the processing
arm or in the filter elevator• Mechanical fault
TROUBLESHOOTING
Slide Operation (Area C) Sharp Edges/Glass
Load slides into the cartridge properly. Make sure the notched end of the cartridge matches the notched area on the box of slides before flipping the slides into the cartridge. Be sure the cartridge clicks shut entirely. The slide should issue from the cartridge frosted side up, the word “ThinPrep” reading left to right.
If slides jam when leaving the cartridge, remove cartridge from the cartridge well and make sure there is no glass dust or debris impeding the slide path.
If slides jam when being ejected into the staining rack, make sure the staining rack is properly seated flat in its cradle. Make sure the slide transfer arm and slide clamps are clean and free of fixative build up. (See Operator’s Manual, Maintenance section.)
If a Slide Misprint error occurs, check the printer ribbon to see if it needs to be changed and that it is installed correctly. Check that the slides are loaded correctly in the cartridge and are not defective.
�
���������������� ��������������
����������������
�
�������
���� �� ��������
If a system fault occurs, wait for the doors to unlock. Open the front door, remove the vial trays and inspect the bay for any dislodged vials or obvious obstruction. Let the instrument attempt to recover. If it does not, contact Hologic Technical Support.
If a system fault occurs, wait for the doors to unlock. Open the front door, remove the filter trays and inspect the bay for any dislodged filters or obvi-ous obstruction. Let the instrument attempt to recover. If it does not, con-tact Hologic Technical Support.

