the very unofficial dummies guide to scapy - palkeo · scapy is a powerful interactive packet...
TRANSCRIPT

The Very Unofficial Dummies
Guide To Scapy
Author: Adam Maxwell (@catalyst256)
Find me at http://itgeekchronicles.co.uk
By Adam Maxwell (@catalyst256) 1 http://itgeekchronicles.co.uk
Table of Contents
Chapter 1 - Introduction ...................................................................................................................... 1
Chapter 2 - Installing Scapy ................................................................................................................. 2
Chapter 3 - Creating a packet .............................................................................................................. 4
Chapter 4 – Sending & Receiving Packets .......................................................................................... 6
Chapter 5 – Getting more out of your packets ................................................................................ 13
Chapter 6 – Reading & Writing Packets to pcap .............................................................................. 20
Chapter 7 – Layering Packets ............................................................................................................ 26
Chapter 8 – Even more uses for Scapy ............................................................................................. 30
Chapter 9 – And now the end is near and so I face the final chapter ........................................... 32
Appendix A – Common Scapy Commands ....................................................................................... 34
Appendix B – ICMP Types .................................................................................................................. 42
Appendix C – TCP Header Information ............................................................................................ 44
Appendix D – DNS Record Types ...................................................................................................... 45
Appendix E – BPF (Berkeley Packet Filter) ........................................................................................ 47
Disclaimer: This is by no means an expert’s guide to Scapy in fact until recently
I had never used Scapy before. The aim of this guide is to provide people who
have no experience/knowledge of Scapy with some guidance to creating packets
and giving them the confidence to go further. Some of the details in here might
be wrong, but I will do my best to ensure that information is correct and where
examples are provided that they have been tested.
Chapter 1 - Introduction
Hello and welcome to this very unofficial dummies guide to Scapy, and when I use the term “dummies” I mean no offence, as I am referring more to myself than you (honest). I started getting more into InfoSec in January 2012 after spending 15 years working in IT (mostly infrastructure type roles), as part of my on-going development I started to look into this tool called Scapy. What is Scapy??
“Scapy is a powerful interactive packet manipulation program. It is able to forge or decode packets of a wide
number of protocols, send them on the wire, capture them, match requests and replies, and much more. It can easily handle most classical tasks like scanning, tracerouting, probing, unit tests, attacks or network discovery (it can replace hping, 85% of nmap, arpspoof, arp-sk, arping, tcpdump, tethereal, p0f, etc.). It also performs very well at a lot of other specific tasks that most other tools can't handle, like sending invalid frames, injecting your own 802.11 frames, combining techniques (VLAN hopping+ARP cache poisoning, VOIP decoding on WEP encrypted channel ...), etc.” (Sourced from https://www.secdev.org/projects/Scapy/).
Sound interesting? well it did to me but then at the same time it kind of scared me, the information I could find on the internet was “involved” and I couldn’t find any kind of guides that made it easy for a beginner (like me) to get comfortable using Scapy. So I decided to write one, both as a learning tool for myself but maybe for other people who are interested in learning more about this seriously cool tool. Now bear in mind this is my first guide so it might be a bit disjointed but it’s a work in progress so it should get better over time. So I guess you want to know what you might be able to find in this guide?? Here is an overview of some of the topics we are going to cover through the course of the guide;
● Installing Scapy (the pre-reqs and any other helpful software)

By Adam Maxwell (@catalyst256) 2 http://itgeekchronicles.co.uk
● Creating a packet
● Send/Receiving packets
● Basic Scapy commands
● Capturing packets (and reading packet capture files into Scapy)
● Layering packets
● More Examples
Throughout this guide I will provide examples (that I’ve tried and tested) as well as output from Wireshark so you can “see” what the packets look like. At the end of the guide I’m going to include a section of appendixes that you might found useful, ranging from DNS record types to Scapy commands. Throughout this guide anything that is in italics is a command to type or run. I’ve also used some funky icons in order to provide some pleasing visuals. Below is a table showing the icons and their meanings.
Wonder what this could mean?? If you spot this icon it’s a warning, either that I’m not 100% sure what I’m writing about or I’ve encountered an issue with something along the way.
Information only people, I’ve used this to denote pieces of information you might find useful.
So you ready to start creating some packets??? Let’s get Scapy installed and see what all the fuss is
about..
Chapter 2 - Installing Scapy
I am only going to cover installing Scapy on Ubuntu (I’ve followed this same process of Ubuntu 10.x through to 12.x). If you want to know how to install it on other version of nix or windows you can find the instructions at http://www.secdev.org/projects/Scapy/doc/installation.html
If you experience issues installing Scapy, you can boot a vanilla Backtrack 5 R2 install that comes with Scapy 2.0.1 pre-installed.
You might also want to install Wireshark on the same machine as Scapy, this will allow you to capture packets as you create them so you can actually see the results as you go (this guide won’t cover how to use Wireshark).
The main prerequisite to run Scapy is Python 2.5, one of the cool things about Scapy is that once you get the hang of creating packets within the application you can then use it in python scripts/code and have even more fun with it. So this is what you need to get started with Scapy;
1. Install Python 2.5+
2. Download and install Scapy
3. (Optional): Install additional software for special features.
4. Run Scapy with root privileges.
1. Install Python 2.5+ - The official documentation for Scapy states Python 2.5 to run Scapy 2.x, I’m currently running Python 2.7 and never had a problem with it. If you are unsure what version of Python you are using then from a terminal type: max@dumbass:~$ python -V Python 2.7.3 If you haven’t got Python 2.5+ already installed then from Ubuntu you can simply type:
By Adam Maxwell (@catalyst256) 3 http://itgeekchronicles.co.uk
max@dumbass:~$ sudo apt-get install python 2. Download and install Scapy - Once you have python installed you need to get scapy. now there are a few ways you can do this so I will go through the ones I’ve used: max@dumbass:~$ sudo apt-get install python-scapy
max@dumbass:~$ cd /tmp
$ wget scapy.net $unzip scapy-latest.zip $ cd scapy-2.*
$ sudo python setup.py install
3. (Optional): Install additional software for special features - Now by this point you should have Scapy installed, you can test this by simply typing this in a terminal: max@dumbass:~$ sudo scapy WARNING: No route found for IPv6 destination :: (no default route?) Welcome to Scapy (2.2.0) To exit out of Scapy, just type: Welcome to Scapy (2.2.0) >>> exit() Version 2.2.0 seems to be latest stable build and for the remainder of this guide that’s the version we will use. Now when you just ran Scapy you might have noticed some errors about components missing, Scapy can do a lot of extra things such as providing 3D maps, graphs, charts etc but you need some extra packages. Here’s the command to get all those extra goodies: max@dumbass:~$ sudo apt-get install tcpdump graphviz imagemagick python-gnuplot python-crypto python-pyx (this is all one line) 4. Run Scapy with root privileges - Now this is the easy one, and if fact if you’ve already done this but nevertheless the command is this: max@dumbass:~$ sudo scapy And this time you should hopefully see this: WARNING: No route found for IPv6 destination :: (no default route?) Welcome to Scapy (2.2.0) >>> So that covers the install of Scapy, hopefully it was painless and you are all set to get started, if you have had some “issues” let me know and I will try and help, or you could use the oracle that is GOOGLE.

By Adam Maxwell (@catalyst256) 4 http://itgeekchronicles.co.uk
Chapter 3 - Creating a packet
Appendix A towards the back of the guide will provide a list of “common” Scapy functions and protocols.
The examples throughout this guide should work (and they have been tested) against Scapy version 2.x.
That’s right it’s time to play.. so to start with we are going to jump straight in and write your very first packet. Now you might be thinking “Don’t I need to understand more about Scapy??” well maybe you do but I learn best by doing and this is my guide. For each packet we create I will provide a breakdown of what and why we use the commands listed. Hopefully as we work through the guide you will slowly build your knowledge and start experimenting yourself (with Scapy that is). So packet number 1 is going to be....... a simple (yet useful) ICMP packet. To start with we are going to create a single ICMP packet with the well-known message “HelloWorld” contained as the payload.
The IP addresses used in this guide are only relevant to my home network, you need to change them to the appropriate local addresses you use. Please also make sure you only send packets to devices you own or allowed to poke at.
Welcome to Scapy (2.2.0) >>> send(IP(dst="10.1.99.2")/ICMP()/"HelloWorld") . Sent 1 packets. >>> So let’s break this down shall we; send - this tells Scapy that you want to send a packet (just a single packet) IP - the type of packet you want to create, in this case an IP packet (dst=”10.1.99.2”) - the destination to send the packet to (in this case my router) /ICMP() - you want to create an ICMP packet with the default values provided by Scapy /”HelloWorld”) - the payload to include in the ICMP packet (you don’t have to provide this in order for it to work. Now I’ve explained that a bit quick, so let’s put it into some context by seeing what Wireshark saw: No. Time Source Destination Protocol Length Info 5 2012-05-16 21:25:34.306827 10.1.99.22 10.1.99.2 ICMP 52 Echo (ping) request id=0x0000, seq=0/0, ttl=64 Frame 5: 52 bytes on wire (416 bits), 52 bytes captured (416 bits) Arrival Time: May 16, 2012 21:25:34.306827000 BST Epoch Time: 1337199934.306827000 seconds [Time delta from previous captured frame: 50.948599000 seconds] [Time delta from previous displayed frame: 50.948599000 seconds] [Time since reference or first frame: 77.326326000 seconds] Frame Number: 5 Frame Length: 52 bytes (416 bits) Capture Length: 52 bytes (416 bits) [Frame is marked: False] [Frame is ignored: False] [Protocols in frame: eth:ip:icmp:data] [Coloring Rule Name: ICMP] [Coloring Rule String: icmp || icmpv6] Ethernet II, Src: Dell_e7:90:ae (00:22:19:e7:90:ae), Dst: Netgear_83:ab:70 (30:46:9a:83:ab:70) Destination: Netgear_83:ab:70 (30:46:9a:83:ab:70) Address: Netgear_83:ab:70 (30:46:9a:83:ab:70) .... ...0 .... .... .... .... = IG bit: Individual address (unicast) .... ..0. .... .... .... .... = LG bit: Globally unique address (factory default) Source: Dell_e7:90:ae (00:22:19:e7:90:ae) Address: Dell_e7:90:ae (00:22:19:e7:90:ae) .... ...0 .... .... .... .... = IG bit: Individual address (unicast)
By Adam Maxwell (@catalyst256) 5 http://itgeekchronicles.co.uk
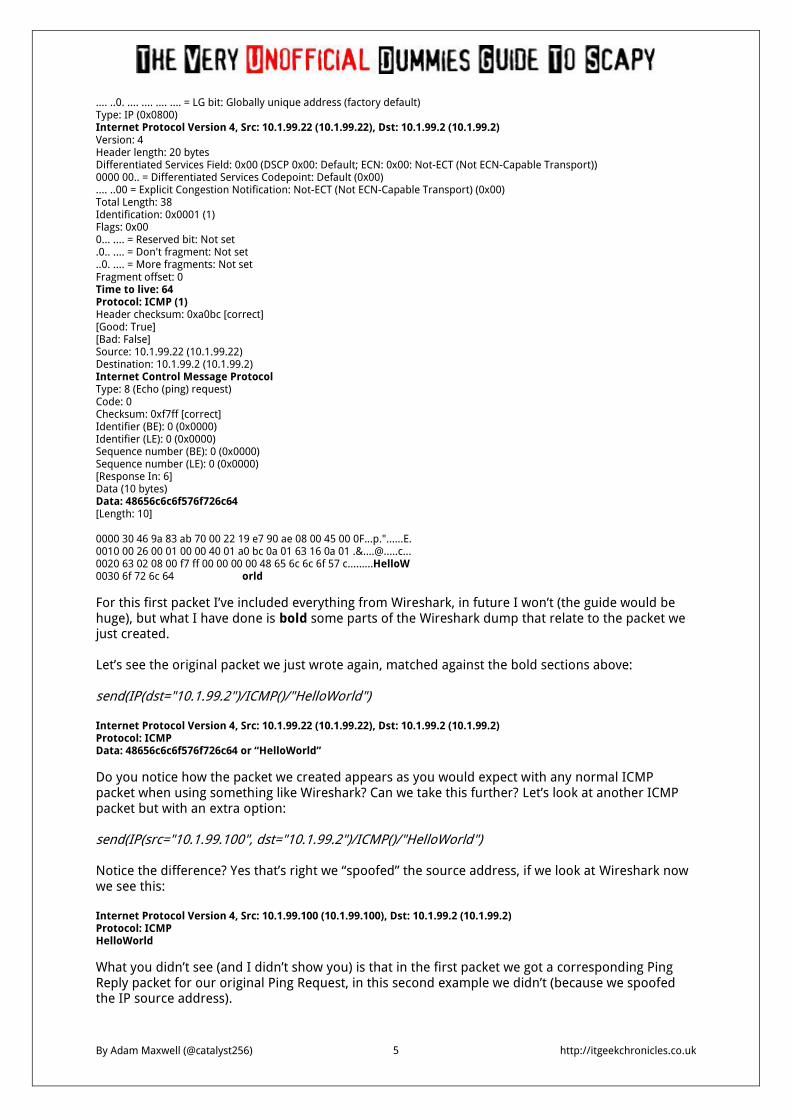
.... ..0. .... .... .... .... = LG bit: Globally unique address (factory default) Type: IP (0x0800) Internet Protocol Version 4, Src: 10.1.99.22 (10.1.99.22), Dst: 10.1.99.2 (10.1.99.2) Version: 4 Header length: 20 bytes Differentiated Services Field: 0x00 (DSCP 0x00: Default; ECN: 0x00: Not-ECT (Not ECN-Capable Transport)) 0000 00.. = Differentiated Services Codepoint: Default (0x00) .... ..00 = Explicit Congestion Notification: Not-ECT (Not ECN-Capable Transport) (0x00) Total Length: 38 Identification: 0x0001 (1) Flags: 0x00 0... .... = Reserved bit: Not set .0.. .... = Don't fragment: Not set ..0. .... = More fragments: Not set Fragment offset: 0 Time to live: 64 Protocol: ICMP (1) Header checksum: 0xa0bc [correct] [Good: True] [Bad: False] Source: 10.1.99.22 (10.1.99.22) Destination: 10.1.99.2 (10.1.99.2) Internet Control Message Protocol Type: 8 (Echo (ping) request) Code: 0 Checksum: 0xf7ff [correct] Identifier (BE): 0 (0x0000) Identifier (LE): 0 (0x0000) Sequence number (BE): 0 (0x0000) Sequence number (LE): 0 (0x0000) [Response In: 6] Data (10 bytes) Data: 48656c6c6f576f726c64 [Length: 10] 0000 30 46 9a 83 ab 70 00 22 19 e7 90 ae 08 00 45 00 0F...p."......E. 0010 00 26 00 01 00 00 40 01 a0 bc 0a 01 63 16 0a 01 .&[email protected]... 0020 63 02 08 00 f7 ff 00 00 00 00 48 65 6c 6c 6f 57 c.........HelloW 0030 6f 72 6c 64 orld
For this first packet I’ve included everything from Wireshark, in future I won’t (the guide would be huge), but what I have done is bold some parts of the Wireshark dump that relate to the packet we just created. Let’s see the original packet we just wrote again, matched against the bold sections above: send(IP(dst="10.1.99.2")/ICMP()/"HelloWorld") Internet Protocol Version 4, Src: 10.1.99.22 (10.1.99.22), Dst: 10.1.99.2 (10.1.99.2) Protocol: ICMP Data: 48656c6c6f576f726c64 or “HelloWorld”
Do you notice how the packet we created appears as you would expect with any normal ICMP packet when using something like Wireshark? Can we take this further? Let’s look at another ICMP packet but with an extra option: send(IP(src="10.1.99.100", dst="10.1.99.2")/ICMP()/"HelloWorld") Notice the difference? Yes that’s right we “spoofed” the source address, if we look at Wireshark now we see this: Internet Protocol Version 4, Src: 10.1.99.100 (10.1.99.100), Dst: 10.1.99.2 (10.1.99.2) Protocol: ICMP HelloWorld
What you didn’t see (and I didn’t show you) is that in the first packet we got a corresponding Ping Reply packet for our original Ping Request, in this second example we didn’t (because we spoofed the IP source address).

By Adam Maxwell (@catalyst256) 6 http://itgeekchronicles.co.uk
Having fun yet??? So what else can we add into this simple packet without making it too complicated?? How about changing the TTL (Time to Live) for the ICMP packet?? In the original Wireshark dump I highlighted Time to live: 64 which is the default TTL, but what if we wanted to change that? Is that possible?? Well with Scapy yes, yes it is and here how: send(IP(src="10.1.99.100", dst="10.1.99.2", ttl=128)/ICMP()/"HelloWorld") Can this be any easier?? and what does that look like to wireshark?? Internet Protocol Version 4, Src: 10.1.99.100 (10.1.99.100), Dst: 10.1.99.2 (10.1.99.2) Time to live: 128
Anyway back to these ICMP packets, so before we call it quits on these bad boys, let’s just explore one last option (I promise it will get more exciting soon). OK so what do you think this ICMP packet does?? send(IP(src="10.1.99.100", dst="10.1.99.2", ttl=128)/ICMP(type=0)/"HelloWorld") Well if you are thinking that it’s just sent a Ping Reply (ICMP Type 0) to 10.1.99.2 then you are correct, here are the Wireshark highlights. Internet Protocol Version 4, Src: 10.1.99.100 (10.1.99.100), Dst: 10.1.99.2 (10.1.99.2) Internet Control Message Protocol Type: 0 (Echo (ping) reply)
For reference I've included a list of the other ICMP types in Appendix B (which you can find at the back of the book). Hopefully by now you are realising how powerful Scapy is, the method I’ve shown you here is not the only way you can create packets, because Scapy is based on Python what you can do with Scapy is only limited by your imagination (and some limitations of the application). In chapter 7 I will provide you with another way to write Scapy packets in a different way but for the time being we will continue using the same format as we have done with the ICMP packets. Summary In this chapter we have looked at creating a simple ICMP packet, then modifying some of the packet headers. Out of the box Scapy (thanks to the developers) will use default values based on the packet type if you don't supply them thus enabling you to focus on the parts you want to change rather than having to include all the options yourself. In the next chapter we will look at Sending & Receiving Scapy packets.
Chapter 4 – Sending & Receiving Packets
So you all set to move onto the next level of Scapy?? Well here we go then, in this chapter we are going to look at sending and receiving packets via Scapy. The “send”n”receive” functions are the heart of Scapy (after all you won't get far just sending packets), and they work as a “couple” and return two lists. The first element is a list of couples (packet sent, answer), and the second element is the list of unanswered packets. Both of these two elements are lists, but Scapy wraps them up in an object to present them better, and to provide them with some methods that do the most frequently needed actions. There are 3 main functions to s&r (sending and receiving) these are:
By Adam Maxwell (@catalyst256) 7 http://itgeekchronicles.co.uk
● sr() - The sr() function is for sending packets and receiving answers. The function returns
a couple of packet and answers, and the unanswered packets.
● sr1() - This function is a variant that only returns one packet that answered the sent
packet (or the packet set) sent.
When using sr() or sr1() the packets must be layer 3 packets (IP, ARP, etc.)
● srp() - The function srp() does the same for layer 2 packets (Ethernet, 802.3, etc).
Throughout this chapter we are going to use both the sr() function and the sr1() function and we will again be using the ICMP packet for the exercises. So this is how you write a simple ICMP packet in Scapy using the sr() function. h=sr1(IP(dst="10.1.99.2")/ICMP()) So most of this should familiar to you from the previous chapter, let’s look at the differences; h – This is the name of my packet, if you are familiar with Python this is how you declare a name (name=) sr1– This is the Scapy function that we discussed at the start of the chapter. >>> h=sr1(IP(dst="10.1.99.2")/ICMP()) Begin emission: .Finished to send 1 packets. * Received 2 packets, got 1 answers, remaining 0 packets Now that we have sent a packet (yes, yes I know ICMP isn't very “sexy”), let’s start to look at what the sr1() function allows us to do. To see the “answered” packet (remember the sr functions can show the answered and unanswered packets, but sr1() is only interested in the first answered packet), simply type: >>> h (remember h is the name we gave our packet) You should see something like this: >>> h <IP version=4L ihl=5L tos=0x0 len=28 id=7394 flags= frag=0L ttl=64 proto=icmp chksum=0x83e2 src=10.1.99.2 dst=10.1.99.25 options=[] |<ICMP type=echo-reply code=0 chksum=0xffff id=0x0 seq=0x0 |<Padding load='\x00\x00\x00\x00\x00\x00\x00\x00\x00\x00\x00\x00\x00\x00e@\x07-' |>>> Now if you remember back to the previous chapter this is the same information that Wireshark showed us, if you want a slightly better formatted version you can type: >>> h.show() This will return you something similar to this: >>> h.show() ###[ IP ]### version= 4L

By Adam Maxwell (@catalyst256) 8 http://itgeekchronicles.co.uk
ihl= 5L tos= 0x0 len= 28 id= 7394 flags= frag= 0L ttl= 64 proto= icmp chksum= 0x83e2 src= 10.1.99.2 dst= 10.1.99.25 \options\ ###[ ICMP ]### type= echo-reply code= 0 chksum= 0xffff id= 0x0 seq= 0x0 ###[ Padding ]### load= '\x00\x00\x00\x00\x00\x00\x00\x00\x00\x00\x00\x00\x00\x00e@\x07-' >>> If we were to run the same Scapy command again, but this time add our own payload using this command: >>> h=sr1(IP(dst="10.1.99.2")/ICMP()/"HelloWorld") We would see this in h.show(): >>> h.show() ###[ IP ]### version= 4L ihl= 5L tos= 0x0 len= 38 id= 7395 flags= frag= 0L ttl= 64 proto= icmp chksum= 0x83d7 src= 10.1.99.2 dst= 10.1.99.25 \options\ ###[ ICMP ]### type= echo-reply code= 0 chksum= 0x0 id= 0x0 seq= 0x0 ###[ Raw ]### load= 'HelloWorld' ###[ Padding ]### load= '\x00\x00\x00\x00\xe7\x03N\x99' >>> See isn't this nice and easy, and fun..

By Adam Maxwell (@catalyst256) 9 http://itgeekchronicles.co.uk
Let's move onto another example, this time using the sr() function so that we can see the “unanswered” packets as well. In Scapy type this command; notice that we have moved away from ICMP packets. >>> p=sr(IP(dst="10.1.99.2")/TCP(dport=23)) Now things are getting more interesting.. Let’s break this down again so we can see the changes: p – This time I've called my packet p (no real reason, just fancied a change) sr – We changed to the sr() function so we can see the unanswered packets as well /TCP – Yes that's right we moved onto TCP packets instead of ICMP dport=23 - A TCP packet needs a destination, so you can use dport to specify one and I've chosen port 23 (Telnet) as my example. The commands for showing a packet using sr() are different because we have the opportunity to look at both the answered and unanswered packets. If you type: >>> p You will notice that you get a different output.. shall we have a look? >>> p=sr(IP(dst="10.1.99.2")/TCP(dport=23)) Begin emission: .Finished to send 1 packets. * Received 2 packets, got 1 answers, remaining 0 packets >>> p (<Results: TCP:1 UDP:0 ICMP:0 Other:0>, <Unanswered: TCP:0 UDP:0 ICMP:0 Other:0>) >>> If you try and use p.show() you now get an error message: >>> p.show() Traceback (most recent call last): File "<console>", line 1, in <module> AttributeError: 'tuple' object has no attribute 'show' >>> Don't worry you haven't broken it, we just need to get at the information in a different way with the sr() function. In order to see the returned packets you need to do this with Scapy: >>> ans,unans=_
In Python _ (underscore) is the latest result.
>>> ans.summary() You get the following back from Scapy: >>> ans.summary() IP / TCP 10.1.99.25:ftp_data > 10.1.99.2:telnet S ==> IP / TCP 10.1.99.2:telnet > 10.1.99.25:ftp_data RA / Padding
By Adam Maxwell (@catalyst256) 10 http://itgeekchronicles.co.uk
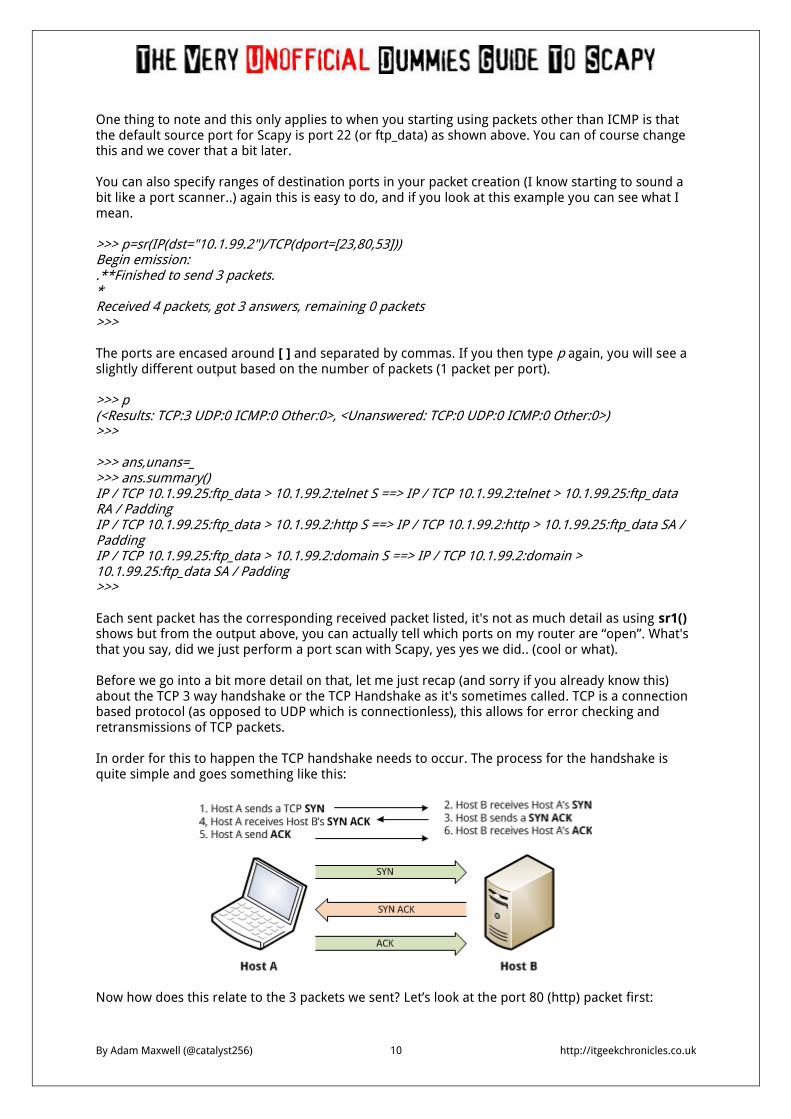
One thing to note and this only applies to when you starting using packets other than ICMP is that the default source port for Scapy is port 22 (or ftp_data) as shown above. You can of course change this and we cover that a bit later. You can also specify ranges of destination ports in your packet creation (I know starting to sound a bit like a port scanner..) again this is easy to do, and if you look at this example you can see what I mean. >>> p=sr(IP(dst="10.1.99.2")/TCP(dport=[23,80,53])) Begin emission: .**Finished to send 3 packets. * Received 4 packets, got 3 answers, remaining 0 packets >>> The ports are encased around [ ] and separated by commas. If you then type p again, you will see a slightly different output based on the number of packets (1 packet per port). >>> p (<Results: TCP:3 UDP:0 ICMP:0 Other:0>, <Unanswered: TCP:0 UDP:0 ICMP:0 Other:0>) >>> >>> ans,unans=_ >>> ans.summary() IP / TCP 10.1.99.25:ftp_data > 10.1.99.2:telnet S ==> IP / TCP 10.1.99.2:telnet > 10.1.99.25:ftp_data RA / Padding IP / TCP 10.1.99.25:ftp_data > 10.1.99.2:http S ==> IP / TCP 10.1.99.2:http > 10.1.99.25:ftp_data SA / Padding IP / TCP 10.1.99.25:ftp_data > 10.1.99.2:domain S ==> IP / TCP 10.1.99.2:domain > 10.1.99.25:ftp_data SA / Padding >>> Each sent packet has the corresponding received packet listed, it's not as much detail as using sr1() shows but from the output above, you can actually tell which ports on my router are “open”. What's that you say, did we just perform a port scan with Scapy, yes yes we did.. (cool or what). Before we go into a bit more detail on that, let me just recap (and sorry if you already know this) about the TCP 3 way handshake or the TCP Handshake as it's sometimes called. TCP is a connection based protocol (as opposed to UDP which is connectionless), this allows for error checking and retransmissions of TCP packets. In order for this to happen the TCP handshake needs to occur. The process for the handshake is quite simple and goes something like this:
Now how does this relate to the 3 packets we sent? Let’s look at the port 80 (http) packet first:
By Adam Maxwell (@catalyst256) 11 http://itgeekchronicles.co.uk
IP / TCP 10.1.99.25:ftp_data > 10.1.99.2:http S ==> IP / TCP 10.1.99.2:http > 10.1.99.25:ftp_data SA / Padding Notice the two different sets of bold characters? That's the SYN (S) from my laptop and the router replies with a SYN-ACK (SA). This means that a connection is half established, it's not fully established because we only sent 1 packet to the router on port 80. Now let’s look at the packet we sent to port 23 (telnet): IP / TCP 10.1.99.25:ftp_data > 10.1.99.2:telnet S ==> IP / TCP 10.1.99.2:telnet > 10.1.99.25:ftp_data RA / Padding Notice the difference? The packet from my laptop is the SYN (S) but my router responds with a RST-ACK (RA) which is a RESet & ACKnowledge flag within the TCP packet. A RST is used to tell the source computer to reset a connection, in this case my router doesn't support port 23 (telnet) and as such the TCP handshake can't be established. Hopefully that makes sense?? Appendix C will some more information on the different kind of flags that can appear in TCP packets.
There is a useful nmap port scanning guide, which will explain the different port scan techniques and how nmap scans. Hopefully it might make some of this a bit clearer. http://nmap.org/book/man-port-scanning-techniques.html
Does this mean that Scapy can be used as a port scanner? The short answer is yes, but remember you need to understand what you are looking for, Scapy is designed to send/receive packets and the interpretation of the data is down to you. Applications like NMAP are designed to provide you with a user friendly output, but sometimes you might want “more” information. So let’s turn our example above into a port scanner, because Scapy is flexible in what it does you can set the flags on the TCP packets as you want. One of the most common and popular port scans is the SYN scan, so let’s get Scapy to do one of those for us. The command for a SYN scan is again one line of code and here it is: >>> p=sr(IP(dst="10.1.99.2")/TCP(sport=666,dport=[22,80,21,443], flags="S")) Now I've added a couple more options in this example, the first is sport=”666”, remember I said that Scapy defaults to port 22 (ftp_data) by default, well for the purpose of this exercise I decided to change it (yes 666 was just the first number I came up, and no I don't worship the devil), the second option was flags=”S” which tells Scapy just to send SYN packets. Shall we see the results?? >>> p=sr(IP(dst="10.1.99.2")/TCP(sport=666,dport=[22,80,21,443], flags="S")) Begin emission: ***Finished to send 4 packets. * Received 4 packets, got 4 answers, remaining 0 packets >>> p (<Results: TCP:4 UDP:0 ICMP:0 Other:0>, <Unanswered: TCP:0 UDP:0 ICMP:0 Other:0>) >>> ans,unans=_ >>> ans.summary() IP / TCP 10.1.99.25:666 > 10.1.99.2:ssh S ==> IP / TCP 10.1.99.2:ssh > 10.1.99.25:666 SA / Padding IP / TCP 10.1.99.25:666 > 10.1.99.2:http S ==> IP / TCP 10.1.99.2:http > 10.1.99.25:666 SA / Padding IP / TCP 10.1.99.25:666 > 10.1.99.2:ftp S ==> IP / TCP 10.1.99.2:ftp > 10.1.99.25:666 RA / Padding IP / TCP 10.1.99.25:666 > 10.1.99.2:https S ==> IP / TCP 10.1.99.2:https > 10.1.99.25:666 RA / Padding >>>
By Adam Maxwell (@catalyst256) 12 http://itgeekchronicles.co.uk
So 4 ports means 4 packets, all with the source port of 666 and from the results above you can probably (if you were paying attention) tell which ports are open on my router. Now the purpose of this guide is to show you want Scapy can do, sending SYN packets is fine but a TCP handshake always starts with one, so let’s try changing that to an ACK packet. Here's what that would look like: >>> p=sr(IP(dst="10.1.99.2")/TCP(sport=888,dport=[21,22,80,443], flags="A")) Begin emission: .***Finished to send 4 packets. * Received 5 packets, got 4 answers, remaining 0 packets >>> p (<Results: TCP:4 UDP:0 ICMP:0 Other:0>, <Unanswered: TCP:0 UDP:0 ICMP:0 Other:0>) >>> ans,unans=_ >>> ans.summary() IP / TCP 10.1.99.25:888 > 10.1.99.2:ftp A ==> IP / TCP 10.1.99.2:ftp > 10.1.99.25:888 R / Padding IP / TCP 10.1.99.25:888 > 10.1.99.2:ssh A ==> IP / TCP 10.1.99.2:ssh > 10.1.99.25:888 R / Padding IP / TCP 10.1.99.25:888 > 10.1.99.2:http A ==> IP / TCP 10.1.99.2:http > 10.1.99.25:888 R / Padding IP / TCP 10.1.99.25:888 > 10.1.99.2:https A ==> IP / TCP 10.1.99.2:https > 10.1.99.25:888 R / Padding >>> Other than the source port which I've changed just for the sake of it, you notice the A (ACK) flag on the sent packet, with a R (RST) flag on the response? That's because I've sent a packet to my router that it's only supposed to receive after a SYN-ACK packet and so it's reset it. Changing your TCP flags on packets is a useful ability, some devices (such as firewalls) respond differently when you port scan them, understanding the responses you get back (or should get back) can help you find your way around them (so to speak). What other “quick” changes to our TCP packets can we make with Scapy??, well if we follow the same vein as performing port scans, what if we wanted to randomize the source port? and maybe put a timeout on the responses? or add an interval between each scan? Well let’s have a look what that would look like. >>>p=sr(IP(src="10.1.99.100", dst="10.1.99.2")/TCP(sport=RandShort(), dport=[20,21,80,3389]),inter=0.5,retry=2,timeout=1) Begin emission: ..........Finished to send 4 packets. Begin emission: ....Finished to send 4 packets. Begin emission: ....Finished to send 4 packets. Received 18 packets, got 0 answers, remaining 4 packets >>> Unfortunately the code for this packet spanned two lines, so I will go through the changes. Similar to the work we did in the previous chapter, once again I’ve spoofed the source IP (src=”10.1.99.100”), and I’ve also randomised the source port (sport=RandShort(). The last 3 options inter,retry and timeout I will explain in a bit more detail. Inter: If there is a limited rate of answers, you can specify a time interval to wait between two packets with the inter parameter. If some packets are lost or if specifying an interval is not enough, you can resend all the unanswered packets, either by calling the function again, directly with the unanswered list, or by specifying a retry parameter.
By Adam Maxwell (@catalyst256) 13 http://itgeekchronicles.co.uk
Retry: If retry is 3, Scapy will try to resend unanswered packets 3 times. If retry is -3, scaly will resend unanswered packets until no more answers are given for the same set of unanswered packets 3 times in a row. Timeout: The timeout parameter specifies the time to wait after the last packet has been sent. Now if you have just run through the example above, you might notice something different. If you type p Scapy responds with this: >>> p (<Results: TCP:0 UDP:0 ICMP:0 Other:0>, <Unanswered: TCP:4 UDP:0 ICMP:0 Other:0>) Notice all the packets are “unanswered”, well that’s because we spoofed the source IP address so the packets went back to the “fake” IP address, if we want to see the unanswered packets we need to do the following: >>> ans,unans=_ >>> unans.show() 0000 IP / TCP 10.1.99.100:4087 > 10.1.99.2:http S 0001 IP / TCP 10.1.99.100:1794 > 10.1.99.2:3389 S 0002 IP / TCP 10.1.99.100:9637 > 10.1.99.2:ftp_data S 0003 IP / TCP 10.1.99.100:4522 > 10.1.99.2:ftp S Notice the random source port?? Summary: We have covered a lot in this chapter; hopefully most of it makes sense to you? In this chapter we have covered sending and receiving packets using the sr1() function, how to view the information in the response and then we moved onto the sr() function which allows us to send multiple packets. We also looked at the methods for retrieving the reply packets as well as ways to change the packet values, in a similar way to how we did with the ICMP packets earlier on. This is by no means the most you can get out of Scapy, the examples I’ve provided are just the basics so it gives you a foundation to build on. In the next chapter we will look at some of the other “basic” tasks you can accomplish with Scapy, hopefully these examples will build on what you have already learnt and give you a better understanding of how flexible and powerful Scapy can be.
Chapter 5 – Getting more out of your packets
So feeling the love for Scapy yet? Well if you are good; if you are still a doubter then let’s see what we can do to resolve that. In this chapter we are going to look at some of the other things Scapy can do in terms of packets. These examples are again written in the same way as throughout the guide and I will break them down for you as we go. The humble DNS Query: We are going to start with a simple DNS query, again most of this should look familiar, as all we are doing is changing some of the packet information to handle DNS queries. So here is the code: >>> sr1(IP(dst="10.1.99.2")/UDP()/DNS(rd=1,qd=DNSQR(qname="www.citrix.com"))) So let’s look at this in more detail. The first part you should be familiar with:

By Adam Maxwell (@catalyst256) 14 http://itgeekchronicles.co.uk
sr1 - This is the send & receives function that only returns the first answered packet (IP(dst=”10.1.99.2”) - Again we are using an IP packet and the destination IP is my router (which is also my DNS provider) /UDP() - Well as you may or may not know, DNS is a UDP packet (port 53) so we need to specify that in our packet. /DNS - This is telling Scapy that we want to create a DNS packet. rd=1 - Is telling Scapy that recursion is desired qd=DNSQR(qname=”www.citrix.com”) - Now I’m not a 100% sure but qd= I believe means Query Domain and DNSQR is DNS Question Record, qname=”” is the name of what you are querying. The response back from Scapy looks a little like this: <IP version=4L ihl=5L tos=0x0 len=99 id=0 flags=DF frag=0L ttl=64 proto=udp chksum=0x606d src=10.1.99.2 dst=10.1.99.25 options=[] |<UDP sport=domain dport=domain len=79 chksum=0x4e6c |<DNS id=0 qr=1L opcode=QUERY aa=0L tc=0L rd=1L ra=1L z=0L rcode=ok qdcount=1 ancount=2 nscount=0 arcount=0 qd=<DNSQR qname='www.citrix.com.' qtype=A qclass=IN |> an=<DNSRR rrname='www.citrix.com.' type=CNAME rclass=IN ttl=26081 rdata='www.gslb.citrix.com.' |<DNSRR rrname='www.gslb.citrix.com.' type=A rclass=IN ttl=60 rdata='66.165.176.15' |>> ns=None ar=None |>>> >>> The parts I’ve highlighted in bold are the parts we specified in our DNS packet, if you look to the right of the DNSQR section you will see the an=<DNSRR, which is the DNS Resource Record (as in the response to our question). OK by default Scapy is just asking for A records (Appendix D will provide more information about
DNS record types), so let’s see if we can change that and ask for NS records for citrix.com. Here’s the
Scapy packet for it.
sr1(IP(dst="10.1.99.2")/UDP()/DNS(rd=1,qd=DNSQR(qname="citrix.com",qtype= "NS"))) So what have we done differently? Well we changed the qname and removed the www. part from it and then we added the extra field called qtype which allows us to specify the type of DNS record we are looking for, for the given domain. The returned packet in Scapy looks like this: <IP version=4L ihl=5L tos=0x0 len=212 id=0 flags=DF frag=0L ttl=64 proto=udp chksum=0x5ffc src=10.1.99.2 dst=10.1.99.25 options=[] |<UDP sport=domain dport=domain len=192 chksum=0x5c56 |<DNS id=0 qr=1L opcode=QUERY aa=0L tc=0L rd=1L ra=1L z=0L rcode=ok qdcount=1 ancount=4 nscount=0 arcount=4 qd=<DNSQR qname='citrix.com.' qtype=NS qclass=IN |> an=<DNSRR rrname='citrix.com.' type=NS rclass=IN ttl=171773 rdata='ctxdns04.citrix.com.' |<DNSRR rrname='citrix.com.' type=NS rclass=IN ttl=171773 rdata='ctxdns03.citrix.com.' |<DNSRR rrname='citrix.com.' type=NS rclass=IN ttl=171773 rdata='ctxdns01.citrix.com.' |<DNSRR rrname='citrix.com.' type=NS rclass=IN ttl=171773 rdata='ctxdns02.citrix.com.' |>>>> ns=None ar=<DNSRR rrname='ctxdns02.citrix.com.' type=A rclass=IN ttl=25883 rdata='68.156.138.136' |<DNSRR rrname='ctxdns03.citrix.com.' type=A rclass=IN ttl=25883 rdata='203.166.19.161' |<DNSRR rrname='ctxdns01.citrix.com.' type=A rclass=IN ttl=25883 rdata='66.165.176.24' |<DNSRR rrname='ctxdns04.citrix.com.' type=A rclass=IN ttl=25883 rdata='62.200.22.27' So that’s how you use Scapy to query DNS servers, now I have to admit as I write these examples out I do have several attempts to get them right myself, but that’s the whole point of this guide. Traceroute - the Scapy way: Now this is a bit of an easy one for me, mostly because Scapy comes pre-built with a traceroute function. It is cool in its own way and here is why:
By Adam Maxwell (@catalyst256) 15 http://itgeekchronicles.co.uk
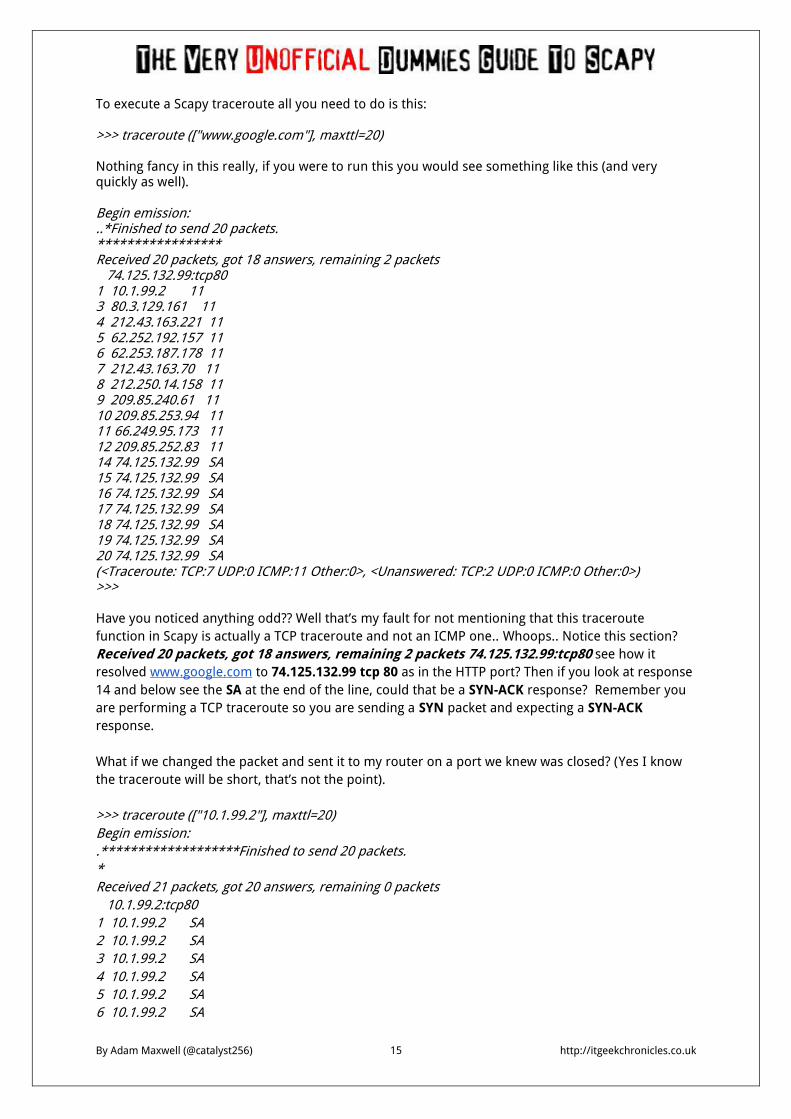
To execute a Scapy traceroute all you need to do is this: >>> traceroute (["www.google.com"], maxttl=20) Nothing fancy in this really, if you were to run this you would see something like this (and very quickly as well). Begin emission: ..*Finished to send 20 packets. ***************** Received 20 packets, got 18 answers, remaining 2 packets 74.125.132.99:tcp80 1 10.1.99.2 11 3 80.3.129.161 11 4 212.43.163.221 11 5 62.252.192.157 11 6 62.253.187.178 11 7 212.43.163.70 11 8 212.250.14.158 11 9 209.85.240.61 11 10 209.85.253.94 11 11 66.249.95.173 11 12 209.85.252.83 11 14 74.125.132.99 SA 15 74.125.132.99 SA 16 74.125.132.99 SA 17 74.125.132.99 SA 18 74.125.132.99 SA 19 74.125.132.99 SA 20 74.125.132.99 SA (<Traceroute: TCP:7 UDP:0 ICMP:11 Other:0>, <Unanswered: TCP:2 UDP:0 ICMP:0 Other:0>) >>> Have you noticed anything odd?? Well that’s my fault for not mentioning that this traceroute
function in Scapy is actually a TCP traceroute and not an ICMP one.. Whoops.. Notice this section?
Received 20 packets, got 18 answers, remaining 2 packets 74.125.132.99:tcp80 see how it
resolved www.google.com to 74.125.132.99 tcp 80 as in the HTTP port? Then if you look at response
14 and below see the SA at the end of the line, could that be a SYN-ACK response? Remember you
are performing a TCP traceroute so you are sending a SYN packet and expecting a SYN-ACK
response.
What if we changed the packet and sent it to my router on a port we knew was closed? (Yes I know
the traceroute will be short, that’s not the point).
>>> traceroute (["10.1.99.2"], maxttl=20)
Begin emission:
.*******************Finished to send 20 packets.
*
Received 21 packets, got 20 answers, remaining 0 packets
10.1.99.2:tcp80
1 10.1.99.2 SA
2 10.1.99.2 SA
3 10.1.99.2 SA
4 10.1.99.2 SA
5 10.1.99.2 SA
6 10.1.99.2 SA

By Adam Maxwell (@catalyst256) 16 http://itgeekchronicles.co.uk
7 10.1.99.2 SA
8 10.1.99.2 SA
9 10.1.99.2 SA
10 10.1.99.2 SA
11 10.1.99.2 SA
12 10.1.99.2 SA
13 10.1.99.2 SA
14 10.1.99.2 SA
15 10.1.99.2 SA
16 10.1.99.2 SA
17 10.1.99.2 SA
18 10.1.99.2 SA
19 10.1.99.2 SA
20 10.1.99.2 SA
(<Traceroute: TCP:20 UDP:0 ICMP:0 Other:0>, <Unanswered: TCP:0 UDP:0 ICMP:0 Other:0>)
Oh wait that’s used port 80 again, that’s the Scapy default when using a TCP traceroute, I wonder if
we can change that??
>>> traceroute (["10.1.99.2"],dport=23,maxttl=20)
Yep that seemed to work, let’s have a look at the results:
Begin emission:
*******************Finished to send 20 packets.
*
Received 20 packets, got 20 answers, remaining 0 packets
10.1.99.2:tcp23
1 10.1.99.2 RA
2 10.1.99.2 RA
3 10.1.99.2 RA
4 10.1.99.2 RA
5 10.1.99.2 RA
6 10.1.99.2 RA
7 10.1.99.2 RA
8 10.1.99.2 RA
9 10.1.99.2 RA
10 10.1.99.2 RA
11 10.1.99.2 RA
12 10.1.99.2 RA
13 10.1.99.2 RA
14 10.1.99.2 RA
15 10.1.99.2 RA
16 10.1.99.2 RA
17 10.1.99.2 RA
18 10.1.99.2 RA
19 10.1.99.2 RA
20 10.1.99.2 RA
(<Traceroute: TCP:20 UDP:0 ICMP:0 Other:0>, <Unanswered: TCP:0 UDP:0 ICMP:0 Other:0>)
By Adam Maxwell (@catalyst256) 17 http://itgeekchronicles.co.uk
Notice the change to tcp23 and how all the responses were RA (Reset & Acknowledge). OK so why
20 packets each time? Unlike other traceroute programs that wait for each node to reply before
going to the next, Scapy sends all the packets at the same time. This has the disadvantage that it
can’t know when to stop (thus the maxttl parameter).
So what does this really mean?? Well what happens if we want to traceroute multiple destinations?
Let’s give it a try:
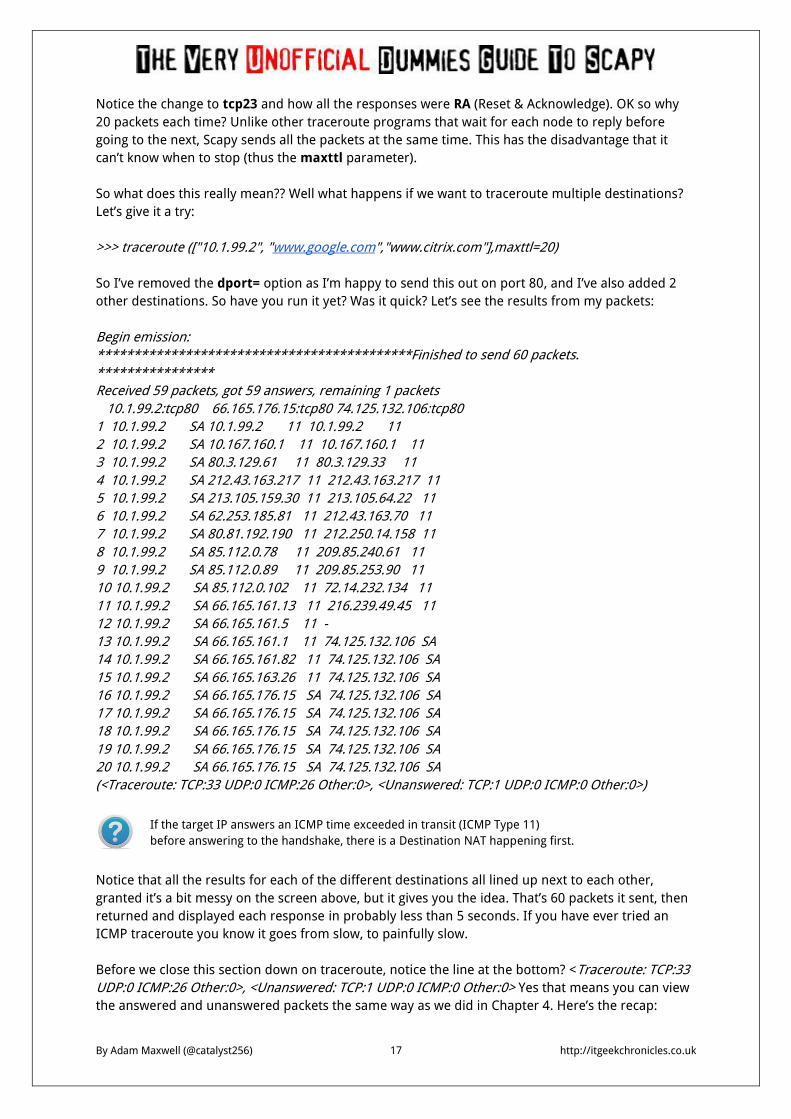
>>> traceroute (["10.1.99.2", "www.google.com","www.citrix.com"],maxttl=20)
So I’ve removed the dport= option as I’m happy to send this out on port 80, and I’ve also added 2
other destinations. So have you run it yet? Was it quick? Let’s see the results from my packets:
Begin emission:
*******************************************Finished to send 60 packets.
****************
Received 59 packets, got 59 answers, remaining 1 packets
10.1.99.2:tcp80 66.165.176.15:tcp80 74.125.132.106:tcp80
1 10.1.99.2 SA 10.1.99.2 11 10.1.99.2 11
2 10.1.99.2 SA 10.167.160.1 11 10.167.160.1 11
3 10.1.99.2 SA 80.3.129.61 11 80.3.129.33 11
4 10.1.99.2 SA 212.43.163.217 11 212.43.163.217 11
5 10.1.99.2 SA 213.105.159.30 11 213.105.64.22 11
6 10.1.99.2 SA 62.253.185.81 11 212.43.163.70 11
7 10.1.99.2 SA 80.81.192.190 11 212.250.14.158 11
8 10.1.99.2 SA 85.112.0.78 11 209.85.240.61 11
9 10.1.99.2 SA 85.112.0.89 11 209.85.253.90 11
10 10.1.99.2 SA 85.112.0.102 11 72.14.232.134 11
11 10.1.99.2 SA 66.165.161.13 11 216.239.49.45 11
12 10.1.99.2 SA 66.165.161.5 11 -
13 10.1.99.2 SA 66.165.161.1 11 74.125.132.106 SA
14 10.1.99.2 SA 66.165.161.82 11 74.125.132.106 SA
15 10.1.99.2 SA 66.165.163.26 11 74.125.132.106 SA
16 10.1.99.2 SA 66.165.176.15 SA 74.125.132.106 SA
17 10.1.99.2 SA 66.165.176.15 SA 74.125.132.106 SA
18 10.1.99.2 SA 66.165.176.15 SA 74.125.132.106 SA
19 10.1.99.2 SA 66.165.176.15 SA 74.125.132.106 SA
20 10.1.99.2 SA 66.165.176.15 SA 74.125.132.106 SA
(<Traceroute: TCP:33 UDP:0 ICMP:26 Other:0>, <Unanswered: TCP:1 UDP:0 ICMP:0 Other:0>)
If the target IP answers an ICMP time exceeded in transit (ICMP Type 11)
before answering to the handshake, there is a Destination NAT happening first.
Notice that all the results for each of the different destinations all lined up next to each other,
granted it’s a bit messy on the screen above, but it gives you the idea. That’s 60 packets it sent, then
returned and displayed each response in probably less than 5 seconds. If you have ever tried an
ICMP traceroute you know it goes from slow, to painfully slow.
Before we close this section down on traceroute, notice the line at the bottom? <Traceroute: TCP:33
UDP:0 ICMP:26 Other:0>, <Unanswered: TCP:1 UDP:0 ICMP:0 Other:0> Yes that means you can view
the answered and unanswered packets the same way as we did in Chapter 4. Here’s the recap:
By Adam Maxwell (@catalyst256) 18 http://itgeekchronicles.co.uk
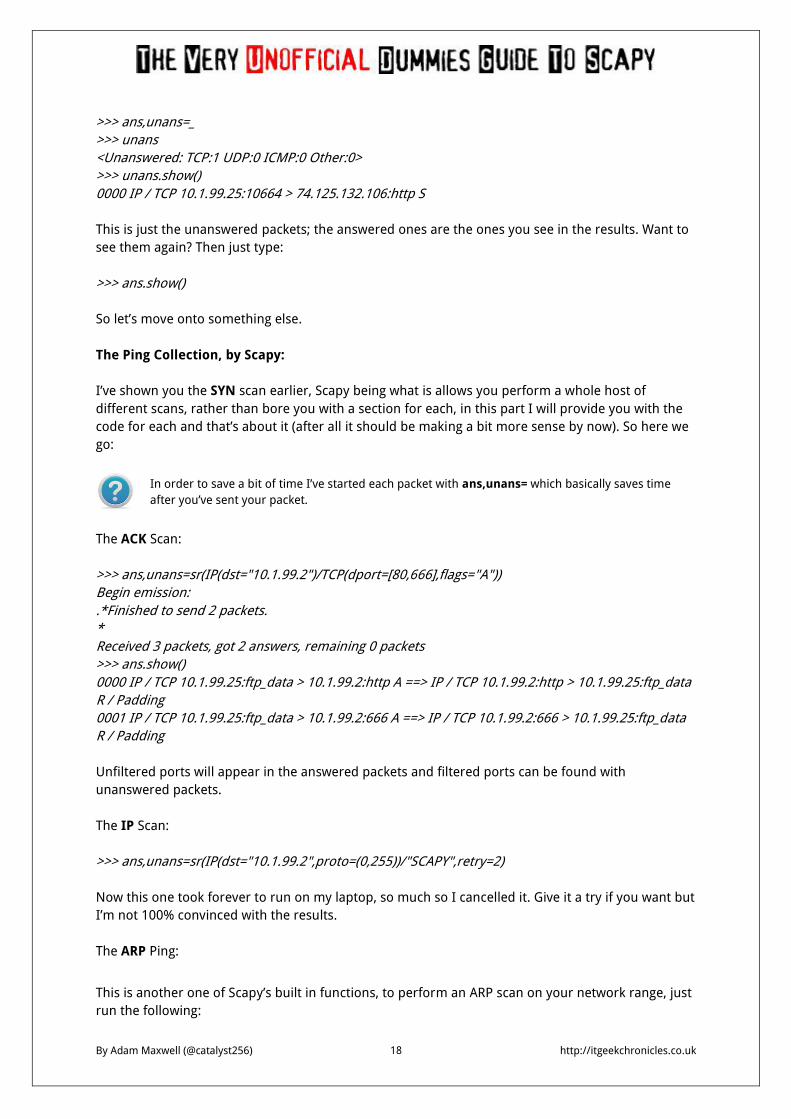
>>> ans,unans=_
>>> unans
<Unanswered: TCP:1 UDP:0 ICMP:0 Other:0>
>>> unans.show()
0000 IP / TCP 10.1.99.25:10664 > 74.125.132.106:http S
This is just the unanswered packets; the answered ones are the ones you see in the results. Want to
see them again? Then just type:
>>> ans.show()
So let’s move onto something else.
The Ping Collection, by Scapy:
I’ve shown you the SYN scan earlier, Scapy being what is allows you perform a whole host of
different scans, rather than bore you with a section for each, in this part I will provide you with the
code for each and that’s about it (after all it should be making a bit more sense by now). So here we
go:
In order to save a bit of time I’ve started each packet with ans,unans= which basically saves time
after you’ve sent your packet.
The ACK Scan:
>>> ans,unans=sr(IP(dst="10.1.99.2")/TCP(dport=[80,666],flags="A"))
Begin emission:
.*Finished to send 2 packets.
*
Received 3 packets, got 2 answers, remaining 0 packets
>>> ans.show()
0000 IP / TCP 10.1.99.25:ftp_data > 10.1.99.2:http A ==> IP / TCP 10.1.99.2:http > 10.1.99.25:ftp_data
R / Padding
0001 IP / TCP 10.1.99.25:ftp_data > 10.1.99.2:666 A ==> IP / TCP 10.1.99.2:666 > 10.1.99.25:ftp_data
R / Padding
Unfiltered ports will appear in the answered packets and filtered ports can be found with
unanswered packets.
The IP Scan:
>>> ans,unans=sr(IP(dst="10.1.99.2",proto=(0,255))/"SCAPY",retry=2)
Now this one took forever to run on my laptop, so much so I cancelled it. Give it a try if you want but
I’m not 100% convinced with the results.
The ARP Ping:
This is another one of Scapy’s built in functions, to perform an ARP scan on your network range, just
run the following:

By Adam Maxwell (@catalyst256) 19 http://itgeekchronicles.co.uk
>>> arping("10.1.99.*")
The output (which obviously depends on your network) will look similar to this:
***Finished to send 256 packets. * Received 4 packets, got 4 answers, remaining 252 packets 30:46:9a:83:ab:70 10.1.99.2 00:25:64:8b:ed:1a 10.1.99.18 00:26:55:00:fc:fe 10.1.99.12 d8:9e:3f:b1:29:9b 10.1.99.22 (<ARPing: TCP:0 UDP:0 ICMP:0 Other:4>, <Unanswered: TCP:0 UDP:0 ICMP:0 Other:252>)
The ICMP, TCP and UDP ping shown below, all generate warnings about MAC address destination not found. These errors seem to be generated when the hosts don’t respond to an ARP request for the IP. If you are scanning a large range then you will see a lot of these errors (even though they are not really errors).
The ICMP Ping:
Everyone’s favourite scan, the foundation for network discovery everywhere:
>>> ans,unans=sr(IP(dst="10.1.99.1-254")/ICMP())
This one went a bit bonkers on my laptop, I got a lot of “WARNING: MAC address to reach
destination not found. Using broadcast” errors, that could just be my laptop, give it try.
TIP: If you need to exit out of a packet run, you can use CTRL+c.
The TCP Ping:
This is a simple TCP ping against a subnet using port 80 (HTTP) and sending just a SYN flag.
>>>ans,unans=sr( IP(dst=”10.1.99.*”)/TCP(dport=80, flags=”S”) )
Again on this one I got a lot of “WARNING: Mac address to reach destination not found. Using
broadcast” error messages during the scan.
The UDP Ping:
This simple one liner will produce ICMP port unreachable errors from live hosts. You can pick any
port which is most likely to be closed, so I went with port 0.
>>> ans,unans=sr( IP(dst="10.1.99.*"/UDP(dport=0) )
Again on this one I got a lot of “WARNING: Mac address to reach destination not found. Using

By Adam Maxwell (@catalyst256) 20 http://itgeekchronicles.co.uk
broadcast” error messages during the scan..
Summary:
In this chapter we have looked at some of the basic uses of Scapy, DNS queries, TCP traceroute and
more are available to you and enable you to get more out of Scapy. Remember Scapy is all about
enabling you to have greater control over the packets you send and tailoring them to your needs.
All the examples in this chapter have been based on the sr() and sr1() functions, so by now you
should be able to write simple Scapy packets and display the results. We also added the
“ans,unans=” to the start of some of the later examples, which again is the same output just a
different way to writing packets.
In this next chapter we are going to look at reading and writing pcap files in Scapy and some of the
basic tasks we can accomplish.
Chapter 6 – Reading & Writing Packets to pcap
One of the nice features about Scapy (yes I keep saying that, but there are a lot) is its ability to
import and export the packets you created to pcap files. Now if you are thinking that pcap is just a
file extension then you would be wrong (as I was until I wrote this). pcap is actually an API for
capturing network traffic.
Below is a subset of the Wikipedia definition of pcap (well worth a read):
In the field of computer network administration, pcap (packet capture) consists of an application programming
interface (API) for capturing network traffic. Unix-like systems implement pcap in the libpcap library; Windows uses a
port of libpcap known as WinPcap. Monitoring software may use libpcap and/or WinPcap to capture packets travelling over a network and, in newer
versions, to transmit packets on a network at the link layer, as well as to get a list of network interfaces for possible
use with libpcap or WinPcap.
libpcap and WinPcap provide the packet-capture and filtering engines of many open source and commercial network
tools, including protocol analyzers (packet sniffers), network monitors, network intrusion detection systems, traffic-
generators and network-testers.
libpcap and WinPcap also support saving captured packets to a file, and reading files containing saved packets;
applications can be written, using libpcap or WinPcap, to be able to capture network traffic and analyze it, or to read a
saved capture and analyze it, using the same analysis code.
A capture file saved in the format that libpcap and WinPcap use can be read by applications that understand that
format, such as tcpdump, Wireshark, CA NetMaster, or Microsoft Network Monitor 3.x. The MIME type for the file format created and read by libpcap and WinPcap is application/vnd.tcpdump.pcap. The
typical file extension is .pcap, although .cap and .dmp are also in common use. (sourced from:
http://en.wikipedia.org/wiki/Pcap)
In this chapter we are going to cover a few areas that deal with the reading and writing of packets
into and out of pcap files. These are;
Sniffing packets

By Adam Maxwell (@catalyst256) 21 http://itgeekchronicles.co.uk
Reading pcap files Writing pcap files Viewing packets with Wireshark Replaying a pcap file
Sniffing Packets:
So let’s start with some good old fashion packet sniffing, Scapy comes with a built-in sniffer function
that we are going to explore first.
So to do a simple sniff across all interfaces (this is the default action if you don’t define a interface)
simply type:
>>>sniff()
Give it a few seconds and then press CTRL+c and you should see something similar to this:
<Sniffed: TCP:43 UDP:24 ICMP:2 Other:0>
Because we didn’t define any kind of parameters for the sniff command it’s just gone off sniffing
everything (as you would expect), now let’s see how we can view what it’s collected:
These commands are similar to what we have used before:
>>> a=_ >>> a.nsummary()
Once you’ve executed the a.nsummary() command you will see a list of all the packets collected, this
is the output of some of mine:
0003 Ether / IP / UDP / DNS Qry "daisy.ubuntu.com." 0004 Ether / IP / UDP / DNS Qry "daisy.ubuntu.com." 0005 Ether / IP / UDP / DNS Qry "daisy.ubuntu.com." 0006 Ether / IP / UDP / DNS Qry "daisy.ubuntu.com." 0007 Ether / IP / UDP / DNS Qry "daisy.ubuntu.com." 0008 Ether / IP / UDP / DNS Ans "91.189.95.54" 0009 Ether / IP / UDP / DNS Ans "91.189.95.54" 0010 Ether / IP / UDP / DNS Ans "91.189.95.54" 0011 Ether / IP / UDP / DNS Ans "91.189.95.55"
Each “sniffed” packet in this view (remember it’s a summary view) is displayed in this format:
packet number (0000), frame type (Ether), internet layer (IP), transport layer (TCP), application layer
(DNS), packet data (daisy.ubuntu.com)
If you want to see the specific details about a packet you can type the following:
By Adam Maxwell (@catalyst256) 22 http://itgeekchronicles.co.uk
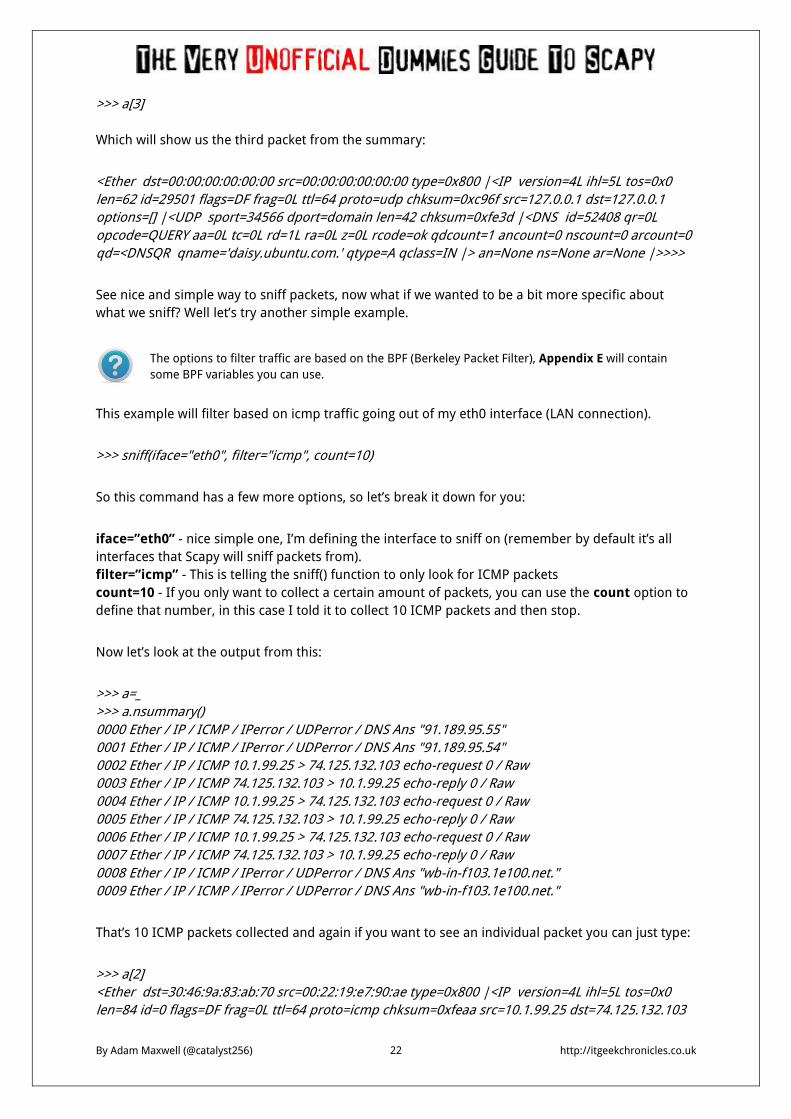
>>> a[3]
Which will show us the third packet from the summary:
<Ether dst=00:00:00:00:00:00 src=00:00:00:00:00:00 type=0x800 |<IP version=4L ihl=5L tos=0x0
len=62 id=29501 flags=DF frag=0L ttl=64 proto=udp chksum=0xc96f src=127.0.0.1 dst=127.0.0.1
options=[] |<UDP sport=34566 dport=domain len=42 chksum=0xfe3d |<DNS id=52408 qr=0L
opcode=QUERY aa=0L tc=0L rd=1L ra=0L z=0L rcode=ok qdcount=1 ancount=0 nscount=0 arcount=0
qd=<DNSQR qname='daisy.ubuntu.com.' qtype=A qclass=IN |> an=None ns=None ar=None |>>>>
See nice and simple way to sniff packets, now what if we wanted to be a bit more specific about
what we sniff? Well let’s try another simple example.
The options to filter traffic are based on the BPF (Berkeley Packet Filter), Appendix E will contain
some BPF variables you can use.
This example will filter based on icmp traffic going out of my eth0 interface (LAN connection).
>>> sniff(iface="eth0", filter="icmp", count=10)
So this command has a few more options, so let’s break it down for you:
iface=”eth0” - nice simple one, I’m defining the interface to sniff on (remember by default it’s all
interfaces that Scapy will sniff packets from). filter=”icmp” - This is telling the sniff() function to only look for ICMP packets count=10 - If you only want to collect a certain amount of packets, you can use the count option to
define that number, in this case I told it to collect 10 ICMP packets and then stop.
Now let’s look at the output from this:
>>> a=_ >>> a.nsummary() 0000 Ether / IP / ICMP / IPerror / UDPerror / DNS Ans "91.189.95.55" 0001 Ether / IP / ICMP / IPerror / UDPerror / DNS Ans "91.189.95.54" 0002 Ether / IP / ICMP 10.1.99.25 > 74.125.132.103 echo-request 0 / Raw 0003 Ether / IP / ICMP 74.125.132.103 > 10.1.99.25 echo-reply 0 / Raw 0004 Ether / IP / ICMP 10.1.99.25 > 74.125.132.103 echo-request 0 / Raw 0005 Ether / IP / ICMP 74.125.132.103 > 10.1.99.25 echo-reply 0 / Raw 0006 Ether / IP / ICMP 10.1.99.25 > 74.125.132.103 echo-request 0 / Raw 0007 Ether / IP / ICMP 74.125.132.103 > 10.1.99.25 echo-reply 0 / Raw 0008 Ether / IP / ICMP / IPerror / UDPerror / DNS Ans "wb-in-f103.1e100.net." 0009 Ether / IP / ICMP / IPerror / UDPerror / DNS Ans "wb-in-f103.1e100.net."
That’s 10 ICMP packets collected and again if you want to see an individual packet you can just type:
>>> a[2] <Ether dst=30:46:9a:83:ab:70 src=00:22:19:e7:90:ae type=0x800 |<IP version=4L ihl=5L tos=0x0
len=84 id=0 flags=DF frag=0L ttl=64 proto=icmp chksum=0xfeaa src=10.1.99.25 dst=74.125.132.103
By Adam Maxwell (@catalyst256) 23 http://itgeekchronicles.co.uk
options=[] |<ICMP type=echo-request code=0 chksum=0x82a5 id=0x14fc seq=0x1 |<Raw
load='k\x10\xc2OD\xfa\x03\x00\x08\t\n\x0b\x0c\r\x0e\x0f\x10\x11\x12\x13\x14\x15\x16\x17\x18\x
19\x1a\x1b\x1c\x1d\x1e\x1f !"#$%&\'()*+,-./01234567' |>>>>
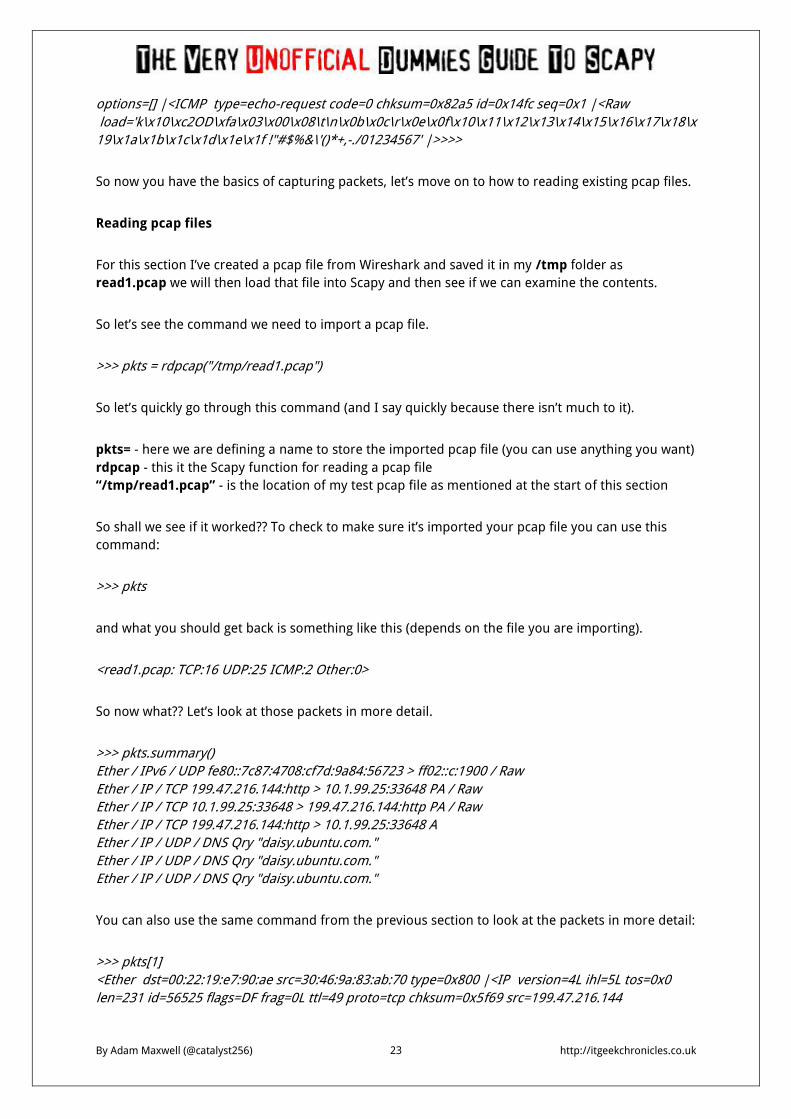
So now you have the basics of capturing packets, let’s move on to how to reading existing pcap files.
Reading pcap files
For this section I’ve created a pcap file from Wireshark and saved it in my /tmp folder as
read1.pcap we will then load that file into Scapy and then see if we can examine the contents.
So let’s see the command we need to import a pcap file.
>>> pkts = rdpcap("/tmp/read1.pcap")
So let’s quickly go through this command (and I say quickly because there isn’t much to it).
pkts= - here we are defining a name to store the imported pcap file (you can use anything you want) rdpcap - this it the Scapy function for reading a pcap file “/tmp/read1.pcap” - is the location of my test pcap file as mentioned at the start of this section
So shall we see if it worked?? To check to make sure it’s imported your pcap file you can use this
command:
>>> pkts
and what you should get back is something like this (depends on the file you are importing).
<read1.pcap: TCP:16 UDP:25 ICMP:2 Other:0>
So now what?? Let’s look at those packets in more detail.
>>> pkts.summary() Ether / IPv6 / UDP fe80::7c87:4708:cf7d:9a84:56723 > ff02::c:1900 / Raw Ether / IP / TCP 199.47.216.144:http > 10.1.99.25:33648 PA / Raw Ether / IP / TCP 10.1.99.25:33648 > 199.47.216.144:http PA / Raw Ether / IP / TCP 199.47.216.144:http > 10.1.99.25:33648 A Ether / IP / UDP / DNS Qry "daisy.ubuntu.com." Ether / IP / UDP / DNS Qry "daisy.ubuntu.com." Ether / IP / UDP / DNS Qry "daisy.ubuntu.com."
You can also use the same command from the previous section to look at the packets in more detail:
>>> pkts[1] <Ether dst=00:22:19:e7:90:ae src=30:46:9a:83:ab:70 type=0x800 |<IP version=4L ihl=5L tos=0x0
len=231 id=56525 flags=DF frag=0L ttl=49 proto=tcp chksum=0x5f69 src=199.47.216.144

By Adam Maxwell (@catalyst256) 24 http://itgeekchronicles.co.uk
dst=10.1.99.25 options=[] |<TCP sport=http dport=33648 seq=2841451166L ack=1464285890
dataofs=8L reserved=0L flags=PA window=126 chksum=0x2f0e urgptr=0 options=[('NOP', None),
('NOP', None), ('Timestamp', (1438757224, 2941902))] |<Raw load='HTTP/1.1 200 OK\r\nX-DB-
Timeout: 120\r\nPragma: no-cache\r\nCache-Control: no-cache\r\nContent-Type: text/plain\r\nDate:
Sun, 27 May 2012 11:41:41 GMT\r\nContent-Length: 15\r\n\r\n{"ret": "punt"}' |>>>>
So let’s move on to how to write pcap files in Scapy.
Writing pcap files
I will cover this from the start, just so you understand the whole process. First of lets collect a few
packets that we will later write to a pcap file.
>>> pkts=sniff(iface="eth0",filter="tcp and port 80",count=10)
Again we are using the sniff() function within Scapy and writing the collected packets in pkts. I’ve
changed it slightly so that this time we are collecting http traffic. What we need to do next is write
those packets into a pcap file so we can use Wireshark to dissect them better.
>>> wrpcap("/tmp/write1.pcap",pkts)
Let’s breakdown this command for you, wrpcap is the Scapy function for writing files to pcap,
“/tmp/write1.pcap” is the filename and pkts is what to write to the pcap file.
If I do an ls -ll *.pcap on my /tmp folder you can see the 2 files I’ve used today.
-rw------- 1 root root 11292 May 27 12:41 read1.pcap -rw-r--r-- 1 root root 2291 May 27 13:08 write1.pcap
Although I can’t show you, I have loaded the write1.pcap into Wireshark and it does only show me
the 10 http packets that I collected using sniff().
Viewing packets with Wireshark
Once again there is a nifty little function already coded into Scapy, that will allow you to view your
generated packets directly in Wireshark (which does have more advanced packet dissection
abilities).
Wireshark works with Layer 2 packets (usually called “frames”), in order to avoid strange results with
Wireshark we are going to add an Ether() header to the ICMP packets used in this example. The
Ether() header will be covered in more detail in the next chapter (Layering packets).
So first off let’s generate some packets:
>>> packets=Ether()/IP(dst="www.google.com")/ICMP()
By Adam Maxwell (@catalyst256) 25 http://itgeekchronicles.co.uk
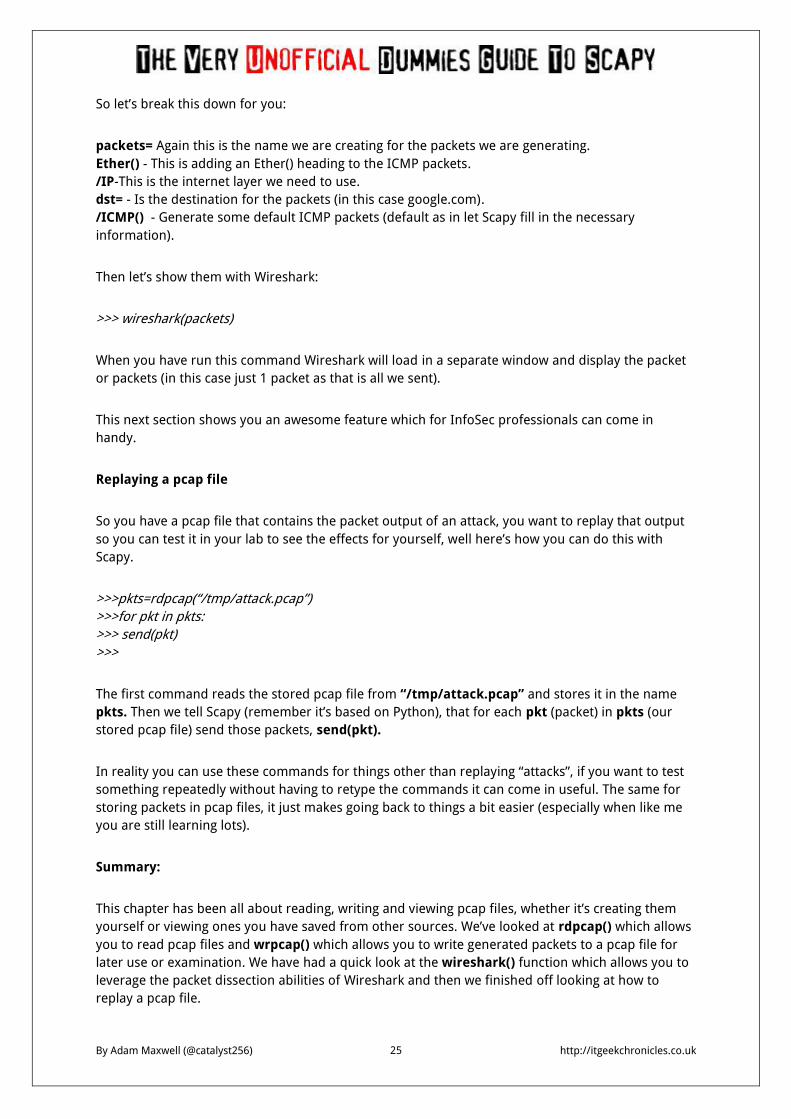
So let’s break this down for you:
packets= Again this is the name we are creating for the packets we are generating. Ether() - This is adding an Ether() heading to the ICMP packets. /IP-This is the internet layer we need to use. dst= - Is the destination for the packets (in this case google.com). /ICMP() - Generate some default ICMP packets (default as in let Scapy fill in the necessary
information).
Then let’s show them with Wireshark:
>>> wireshark(packets)
When you have run this command Wireshark will load in a separate window and display the packet
or packets (in this case just 1 packet as that is all we sent).
This next section shows you an awesome feature which for InfoSec professionals can come in
handy.
Replaying a pcap file
So you have a pcap file that contains the packet output of an attack, you want to replay that output
so you can test it in your lab to see the effects for yourself, well here’s how you can do this with
Scapy.
>>>pkts=rdpcap(“/tmp/attack.pcap”) >>>for pkt in pkts: >>> send(pkt) >>>
The first command reads the stored pcap file from “/tmp/attack.pcap” and stores it in the name
pkts. Then we tell Scapy (remember it’s based on Python), that for each pkt (packet) in pkts (our
stored pcap file) send those packets, send(pkt).
In reality you can use these commands for things other than replaying “attacks”, if you want to test
something repeatedly without having to retype the commands it can come in useful. The same for
storing packets in pcap files, it just makes going back to things a bit easier (especially when like me
you are still learning lots).
Summary:
This chapter has been all about reading, writing and viewing pcap files, whether it’s creating them
yourself or viewing ones you have saved from other sources. We’ve looked at rdpcap() which allows
you to read pcap files and wrpcap() which allows you to write generated packets to a pcap file for
later use or examination. We have had a quick look at the wireshark() function which allows you to
leverage the packet dissection abilities of Wireshark and then we finished off looking at how to
replay a pcap file.
By Adam Maxwell (@catalyst256) 26 http://itgeekchronicles.co.uk
It might have seemed like a chapter missing substance and one that I’ve skipped through quickly,
but remember I am still new to Scapy and this guide is just to provide the basics.
In the next chapter we are going to look at how you can layer packets to create all manner of weird
and wonderful things.
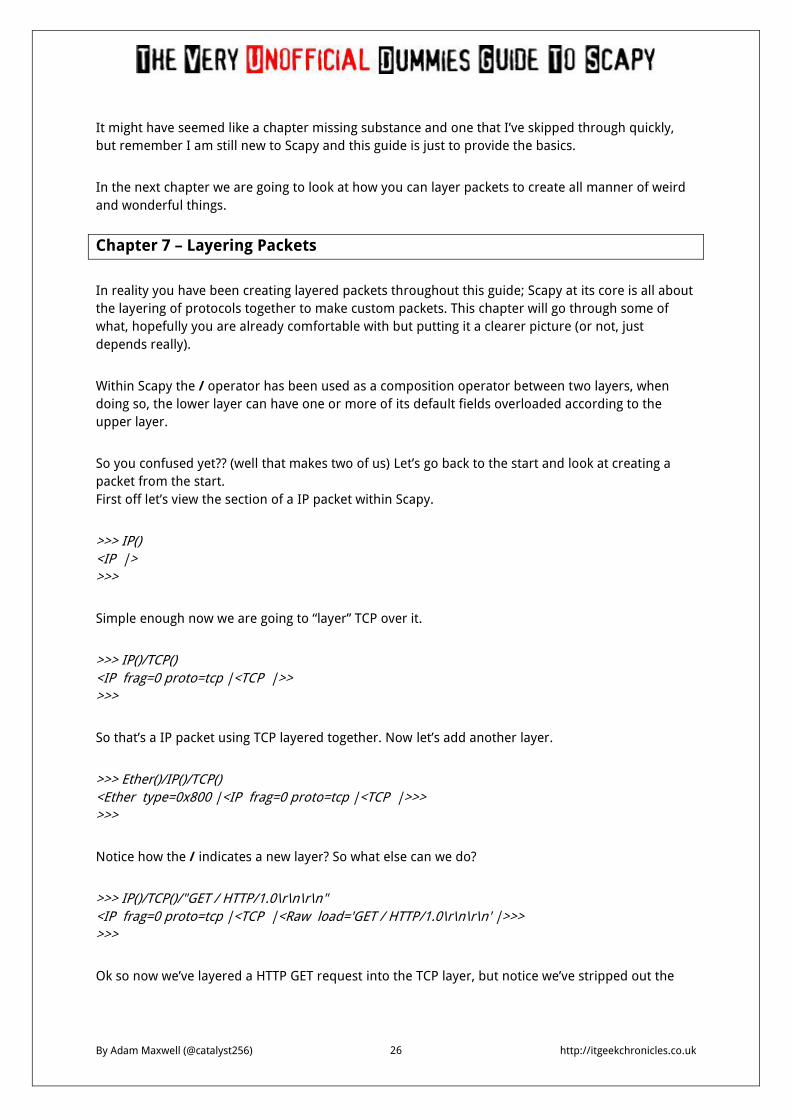
Chapter 7 – Layering Packets
In reality you have been creating layered packets throughout this guide; Scapy at its core is all about
the layering of protocols together to make custom packets. This chapter will go through some of
what, hopefully you are already comfortable with but putting it a clearer picture (or not, just
depends really).
Within Scapy the / operator has been used as a composition operator between two layers, when
doing so, the lower layer can have one or more of its default fields overloaded according to the
upper layer.
So you confused yet?? (well that makes two of us) Let’s go back to the start and look at creating a
packet from the start. First off let’s view the section of a IP packet within Scapy.
>>> IP() <IP |> >>>
Simple enough now we are going to “layer” TCP over it.
>>> IP()/TCP() <IP frag=0 proto=tcp |<TCP |>> >>>
So that’s a IP packet using TCP layered together. Now let’s add another layer.
>>> Ether()/IP()/TCP() <Ether type=0x800 |<IP frag=0 proto=tcp |<TCP |>>> >>>
Notice how the / indicates a new layer? So what else can we do?
>>> IP()/TCP()/"GET / HTTP/1.0\r\n\r\n" <IP frag=0 proto=tcp |<TCP |<Raw load='GET / HTTP/1.0\r\n\r\n' |>>> >>>
Ok so now we’ve layered a HTTP GET request into the TCP layer, but notice we’ve stripped out the

By Adam Maxwell (@catalyst256) 27 http://itgeekchronicles.co.uk
Ether() part because we didn’t specify it.
Remember that each command we type at this point is changing the original values we might have
set earlier, this is because we are not storing this anywhere (yet).
Let’s try something else.
>>> Ether()/IP()/IP()/UDP() <Ether type=0x800 |<IP frag=0 proto=ipencap |<IP frag=0 proto=udp |<UDP |>>>> >>>
Ok so I’ve just created a double /IP packet, no idea why, but then Scapy lets you create packets
however you want (that’s part of the fun). So let’s look at another way to build these packets so we
can send them.
So first off lets create some layers, we are going to do this the “long” way because I hope you will
learn a bit more about the power of Scapy and it’s close relation to Python.
>>> a=Ether() >>> b=IP() >>> c=TCP()
So we’ve created 3 variables, each one a different protocol type. Scapy will by default provide values
for each of the protocols. To see what they are for each we simply type the following commands:
>>>a.show() >>>b.show() >>>c.show()
Let’s work through these one at a time:
>>> a.show() ###[ Ethernet ]### WARNING: Mac address to reach destination not found. Using broadcast. dst= ff:ff:ff:ff:ff:ff src= 00:00:00:00:00:00 type= 0x0 >>>
Ok looks like a standard default Ether() layer, but remember the Ether() layer is what provides the
MAC address information, remember those error messages I got when I tried some of the scans? It
seems that they are because the dst MAC address is set to ff:ff:ff:ff:ff:ff (broadcast). I wonder if we
can change any of these??
>>> a=Ether(src="00:22:19:e7:90:ae")

By Adam Maxwell (@catalyst256) 28 http://itgeekchronicles.co.uk
So this command should change the source MAC address of my Ether() layer, let’s see if it worked.
>>> a.show() ###[ Ethernet ]### WARNING: Mac address to reach destination not found. Using broadcast. dst= ff:ff:ff:ff:ff:ff src= 00:22:19:e7:90:ae type= 0x0 >>>
Yes that worked, getting the idea?? Let’s move onto the next layer.
>>>b.show() ###[ IP ]### version= 4 ihl= None tos= 0x0 len= None id= 1 flags= frag= 0 ttl= 64 proto= ip chksum= None src= 127.0.0.1 dst= 127.0.0.1 \options\ >>>
Again this looks familiar, let’s see if we can change some of the fields to new values.
>>> b=IP(ttl=10, src="10.1.99.25", dst="10.1.99.2")
So for this layer, we have changed the TTL for the packet, changed the SRC IP address to my laptop
and then specified a DST IP address (my router). Let’s have a look at the IP layer now.
>>> b.show() ###[ IP ]### version= 4 ihl= None tos= 0x0 len= None id= 1 flags= frag= 0 ttl= 10 proto= ip chksum= None src= 10.1.99.25

By Adam Maxwell (@catalyst256) 29 http://itgeekchronicles.co.uk
dst= 10.1.99.2 \options\ >>>
So now for the last layer, the TCP layer, let’s have a look at its default fields.
###[ TCP ]### sport= ftp_data dport= http seq= 0 ack= 0 dataofs= None reserved= 0 flags= S window= 8192 chksum= None urgptr= 0 options= {} >>>
From this we can see that the Scapy default (as we discussed earlier in the guide) for the sport is
ftp_data and the dport is http. Let’s change those values shall we.
>>> c=TCP(sport=22, dport=22, flags="A")
I also changed the flag to A (or ACK) so it will make it easier to spot when we send this packet.
We will just double check to make sure our new values have been updated.
>>> c.show() ###[ TCP ]### sport= ssh dport= ssh seq= 0 ack= 0 dataofs= None reserved= 0 flags= A window= 8192 chksum= None urgptr= 0 options= {}
What’s next of this great adventure? Well lets join all the layers up together and send them on their
merry way.
>>> d=sendp(a/b/c) .
By Adam Maxwell (@catalyst256) 30 http://itgeekchronicles.co.uk
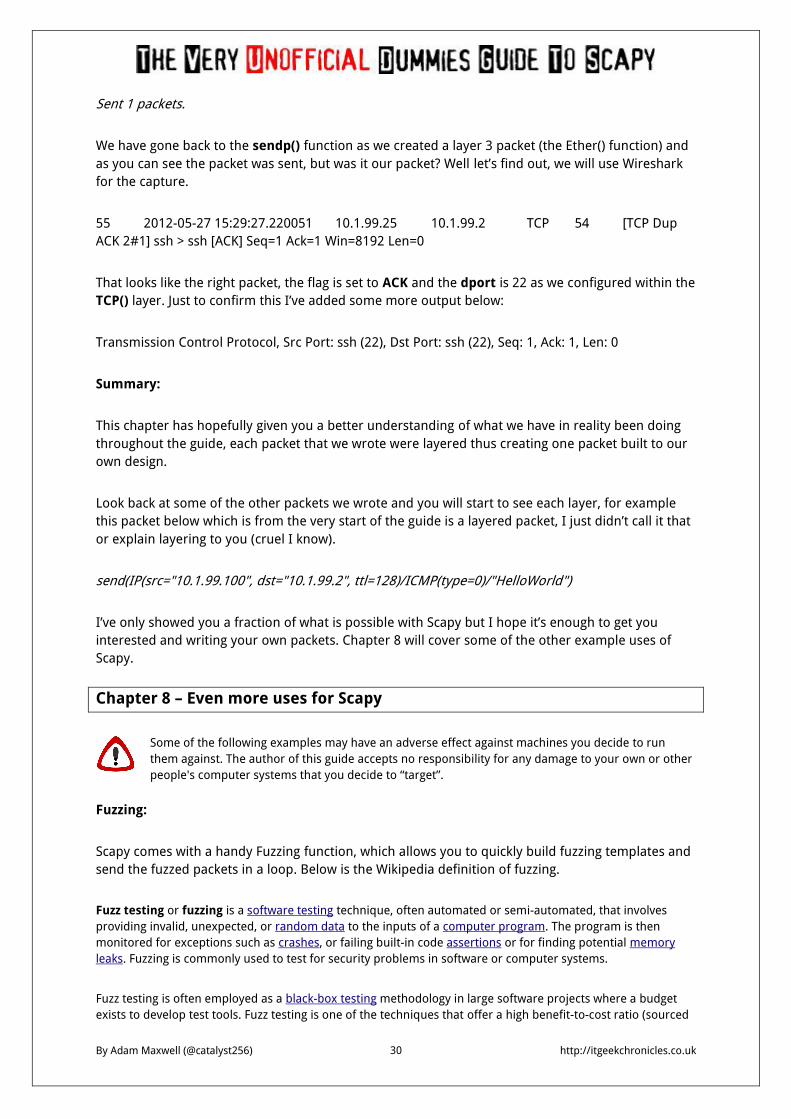
Sent 1 packets.
We have gone back to the sendp() function as we created a layer 3 packet (the Ether() function) and
as you can see the packet was sent, but was it our packet? Well let’s find out, we will use Wireshark
for the capture.
55 2012-05-27 15:29:27.220051 10.1.99.25 10.1.99.2 TCP 54 [TCP Dup
ACK 2#1] ssh > ssh [ACK] Seq=1 Ack=1 Win=8192 Len=0
That looks like the right packet, the flag is set to ACK and the dport is 22 as we configured within the
TCP() layer. Just to confirm this I’ve added some more output below:
Transmission Control Protocol, Src Port: ssh (22), Dst Port: ssh (22), Seq: 1, Ack: 1, Len: 0
Summary:
This chapter has hopefully given you a better understanding of what we have in reality been doing
throughout the guide, each packet that we wrote were layered thus creating one packet built to our
own design.
Look back at some of the other packets we wrote and you will start to see each layer, for example
this packet below which is from the very start of the guide is a layered packet, I just didn’t call it that
or explain layering to you (cruel I know).
send(IP(src="10.1.99.100", dst="10.1.99.2", ttl=128)/ICMP(type=0)/"HelloWorld")
I’ve only showed you a fraction of what is possible with Scapy but I hope it’s enough to get you
interested and writing your own packets. Chapter 8 will cover some of the other example uses of
Scapy.
Chapter 8 – Even more uses for Scapy
Some of the following examples may have an adverse effect against machines you decide to run
them against. The author of this guide accepts no responsibility for any damage to your own or other
people's computer systems that you decide to “target”.
Fuzzing:
Scapy comes with a handy Fuzzing function, which allows you to quickly build fuzzing templates and
send the fuzzed packets in a loop. Below is the Wikipedia definition of fuzzing.
Fuzz testing or fuzzing is a software testing technique, often automated or semi-automated, that involves
providing invalid, unexpected, or random data to the inputs of a computer program. The program is then
monitored for exceptions such as crashes, or failing built-in code assertions or for finding potential memory
leaks. Fuzzing is commonly used to test for security problems in software or computer systems.
Fuzz testing is often employed as a black-box testing methodology in large software projects where a budget
exists to develop test tools. Fuzz testing is one of the techniques that offer a high benefit-to-cost ratio (sourced
By Adam Maxwell (@catalyst256) 31 http://itgeekchronicles.co.uk
from: http://en.wikipedia.org/wiki/Fuzzing).
In this example we are going to write a “fuzzed” packet that consists of a normal IP layer, then a
“fuzzed” UDP and NTP layer. In this example the UDP checksum will be correct, the UDP destination
port will be overloaded by NTP to be 123 and the NTP version will be forced to version 4. All the
other ports will be randomised.
>>>send(IP(dst=”your_target”)/fuzz(UDP()/NTP(version=4)(loop=1)
................^C
Sent 16 packets.
You will need to perform a CTRL+c to break the transmissions of the packets.
ARP Cache Poisoning
Now for this to work, you also have to perform a VLAN hopping attack, this is essentially the classic
ARP cache poisoning attack that will prevent a client from joining the gateway.
The classic ARP cache poisoning looks something like this:
>>>send( Ether(dst=clientMAC)/ARP(op=”who-has”, psrc=gateway, pdst=client).
inter=RandNum(10,40), loop=1)
ARP cache poisoning with double 802.1q encapsulation:
>>> send( Ether(dst=clientMAC)/Dot1Q(vlan=1)/Dot1Q(vlan=2)
/ARP(op="who-has", psrc=gateway, pdst=client),
inter=RandNum(10,40), loop=1 )
There is also a Scapy function called arpcachepoison() that you can use, the code is below and will
send a ARP response to the target with your MAC address and the victim’s IP address.
>>>arpcachepoison(target, victim, interval=60)
VLAN Hopping
The Scapy documentation states that this will only work in very specific conditions, but a double
802.1q encapsulation will make a packet jump to another VLAN:
>>> sendp(Ether()/Dot1Q(vlan=2)/Dot1Q(vlan=7)/IP(dst=target)/ICMP())
The first VLAN is your current VLAN and the second VLAN (vlan=7) is the destination VLAN. This is
one of the Scapy tricks that I’m going to try out soon.
By Adam Maxwell (@catalyst256) 32 http://itgeekchronicles.co.uk
Before we close this chapter I’m just going to show you how you can include Scapy functions into
your Python code. I’ve seen this being used in different applications and it’s something that I’m
going to look to at working with as well.
So now a nice simple bit of Python code for you.
#! /usr/bin/env python
import sys
from scapy.all import sr1,IP,ICMP
p=sr1(IP(dst=sys.argv[1])/ICMP())
if p:
p.show()
If you are familiar with Python, then this might make sense to you already. If you aren’t then let me
explain how it works.
The first line is standard in all (well almost all) Python scripts, it allows your computer to know
where Python is installed when you run the script. After that we import sys which is a Python library
for certain functions. We then import some of the Scapy functions we want to use from scapy.all
import sr1, IP, ICMP. What this means is that we are enabling ourselves to use the sr1() function,
the IP() function and the ICMP() functions from Scapy (all make sense).
The next line is the same as we have used in this guide, we are creating a ICMP packet to send and
receive the first response back (that’s the sr1 function). The sys.argv[1] indicates that when we save
this code you would enter the IP address as the argument i.e. scapy-ping.py 10.1.99.2 the last 2
lines of code print the response out using the p.show() function as we have done before.
Summary:
Well that’s it for this chapter, I hope this has fuelled your imagination and interest in what else
Scapy can do. There is a saying which I like that goes “You are only limited by your imagination”,
so please imagine the possibilities and make it happen. I know I am going to.
Chapter 9 – And now the end is near and so I face the final chapter
So we are at the end of this my first how-to guide, I hope you have enjoyed reading this as much as I
enjoyed writing it, which considering how much I hate writing documentation at work it isn’t a bad
achievement (well for me anyway).
The whole purpose of this guide was to provide people with little or no knowledge of Scapy (which
include me), a place to start learning about this fantastic tool. It’s certainly something that I’m going
to continue to use and I will update this guide as I learn new things you can do.
This is by no means an “experts” guide, the topics I’ve covered only scratch the surface of what

By Adam Maxwell (@catalyst256) 33 http://itgeekchronicles.co.uk
Scapy can do, but I’ve only been using Scapy since I started writing this guide, which at this point in
time is about 2 weeks.
I would like to take this opportunity to thank Philippe Biondi (the creator of Scapy) and the team
over at secdev.org for the work and effort they have put in to make this application what it is.
Without people like them, people like us would have to find something else to do with our spare
time.. :)
I would also like to thank Nick Barron (@hvcco) for giving up some of his spare time to proof read
this document in an attempt to ensure I make less of a fool of myself by publishing a steaming bag
of poo (yes I used the word poo, it is my guide remember).
Finally I would like to thank you, the people that read this guide for taking a chance on me and
sitting through this guide (unless you just skipped to the last page).
I would love to hear any comments or feedback you may have about this guide, or indeed if you
want to share some of your experiences with Scapy so that I can learn as much as possible.
Happy packet crafting..
By Adam Maxwell (@catalyst256) 34 http://itgeekchronicles.co.uk
Appendix A – Common Scapy Commands
Some may argue that I have should have included this earlier in the guide, but I didn’t want to
overload you with lots of commands, some of which we won’t have used. In this appendix, I will
provide a dump of the protocols and commands available within Scapy so that you can go forth and
experiment. It may be easier to get these out of Scapy yourself but I’m trying to build a complete
guide here.
These are the two most important commands in Scapy, they are ls() and lsc(). Actually they are
Python functions, which is why they must be called with ending parentheses.
The command ls() will display all of the available protocols (see below, it’s a long list). If you want to
view the detail of what you can change in any of these protocols then you can simply type:
>>>ls(protocol)
So typing ls(ARP) would show you this output.
hwtype : XShortField = (1)
ptype : XShortEnumField = (2048)
hwlen : ByteField = (6)
plen : ByteField = (4)
op : ShortEnumField = (1)
hwsrc : ARPSourceMACField = (None)
psrc : SourceIPField = (None)
hwdst : MACField = ('00:00:00:00:00:00')
pdst : IPField = ('0.0.0.0')
ARP ARP
ASN1_Packet None
BOOTP BOOTP
CookedLinux cooked linux
DHCP DHCP options
DHCP6 DHCPv6 Generic Message)
DHCP6OptAuth DHCP6 Option - Authentication
DHCP6OptBCMCSDomains DHCP6 Option - BCMCS Domain Name List
DHCP6OptBCMCSServers DHCP6 Option - BCMCS Addresses List
DHCP6OptClientFQDN DHCP6 Option - Client FQDN
DHCP6OptClientId DHCP6 Client Identifier Option
DHCP6OptDNSDomains DHCP6 Option - Domain Search List option
DHCP6OptDNSServers DHCP6 Option - DNS Recursive Name Server
DHCP6OptElapsedTime DHCP6 Elapsed Time Option
DHCP6OptGeoConf
DHCP6OptIAAddress DHCP6 IA Address Option (IA_TA or IA_NA suboption)
DHCP6OptIAPrefix DHCP6 Option - IA_PD Prefix option
DHCP6OptIA_NA DHCP6 Identity Association for Non-temporary Addresses Option
DHCP6OptIA_PD DHCP6 Option - Identity Association for Prefix Delegation
DHCP6OptIA_TA DHCP6 Identity Association for Temporary Addresses Option
DHCP6OptIfaceId DHCP6 Interface-Id Option
DHCP6OptInfoRefreshTime DHCP6 Option - Information Refresh Time

By Adam Maxwell (@catalyst256) 35 http://itgeekchronicles.co.uk
DHCP6OptNISDomain DHCP6 Option - NIS Domain Name
DHCP6OptNISPDomain DHCP6 Option - NIS+ Domain Name
DHCP6OptNISPServers DHCP6 Option - NIS+ Servers
DHCP6OptNISServers DHCP6 Option - NIS Servers
DHCP6OptOptReq DHCP6 Option Request Option
DHCP6OptPref DHCP6 Preference Option
DHCP6OptRapidCommit DHCP6 Rapid Commit Option
DHCP6OptReconfAccept DHCP6 Reconfigure Accept Option
DHCP6OptReconfMsg DHCP6 Reconfigure Message Option
DHCP6OptRelayAgentERO DHCP6 Option - RelayRequest Option
DHCP6OptRelayMsg DHCP6 Relay Message Option
DHCP6OptRemoteID DHCP6 Option - Relay Agent Remote-ID
DHCP6OptSIPDomains DHCP6 Option - SIP Servers Domain Name List
DHCP6OptSIPServers DHCP6 Option - SIP Servers IPv6 Address List
DHCP6OptSNTPServers DHCP6 option - SNTP Servers
DHCP6OptServerId DHCP6 Server Identifier Option
DHCP6OptServerUnicast DHCP6 Server Unicast Option
DHCP6OptStatusCode DHCP6 Status Code Option
DHCP6OptSubscriberID DHCP6 Option - Subscriber ID
DHCP6OptUnknown Unknown DHCPv6 OPtion
DHCP6OptUserClass DHCP6 User Class Option
DHCP6OptVendorClass DHCP6 Vendor Class Option
DHCP6OptVendorSpecificInfo DHCP6 Vendor-specific Information Option
DHCP6_Advertise DHCPv6 Advertise Message
DHCP6_Confirm DHCPv6 Confirm Message
DHCP6_Decline DHCPv6 Decline Message
DHCP6_InfoRequest DHCPv6 Information Request Message
DHCP6_Rebind DHCPv6 Rebind Message
DHCP6_Reconf DHCPv6 Reconfigure Message
DHCP6_RelayForward DHCPv6 Relay Forward Message (Relay Agent/Server Message)
DHCP6_RelayReply DHCPv6 Relay Reply Message (Relay Agent/Server Message)
DHCP6_Release DHCPv6 Release Message
DHCP6_Renew DHCPv6 Renew Message
DHCP6_Reply DHCPv6 Reply Message
DHCP6_Request DHCPv6 Request Message
DHCP6_Solicit DHCPv6 Solicit Message
DNS DNS
DNSQR DNS Question Record
DNSRR DNS Resource Record
DUID_EN DUID - Assigned by Vendor Based on Enterprise Number
DUID_LL DUID - Based on Link-layer Address
DUID_LLT DUID - Link-layer address plus time
Dot11 802.11
Dot11ATIM 802.11 ATIM
Dot11AssoReq 802.11 Association Request
Dot11AssoResp 802.11 Association Response
Dot11Auth 802.11 Authentication
Dot11Beacon 802.11 Beacon
Dot11Deauth 802.11 Deauthentication
Dot11Disas 802.11 Disassociation
Dot11Elt 802.11 Information Element
Dot11ProbeReq 802.11 Probe Request
Dot11ProbeResp 802.11 Probe Response
Dot11QoS 802.11 QoS

By Adam Maxwell (@catalyst256) 36 http://itgeekchronicles.co.uk
Dot11ReassoReq 802.11 Reassociation Request
Dot11ReassoResp 802.11 Reassociation Response
Dot11WEP 802.11 WEP packet
Dot1Q 802.1Q
Dot3 802.3
EAP EAP
EAPOL EAPOL
Ether Ethernet
GPRS GPRSdummy
GRE GRE
GRErouting GRE routing informations
HAO Home Address Option
HBHOptUnknown Scapy6 Unknown Option
HCI_ACL_Hdr HCI ACL header
HCI_Hdr HCI header
HDLC None
HSRP HSRP
ICMP ICMP
ICMPerror ICMP in ICMP
ICMPv6DestUnreach ICMPv6 Destination Unreachable
ICMPv6EchoReply ICMPv6 Echo Reply
ICMPv6EchoRequest ICMPv6 Echo Request
ICMPv6HAADReply ICMPv6 Home Agent Address Discovery Reply
ICMPv6HAADRequest ICMPv6 Home Agent Address Discovery Request
ICMPv6MLDone MLD - Multicast Listener Done
ICMPv6MLQuery MLD - Multicast Listener Query
ICMPv6MLReport MLD - Multicast Listener Report
ICMPv6MPAdv ICMPv6 Mobile Prefix Advertisement
ICMPv6MPSol ICMPv6 Mobile Prefix Solicitation
ICMPv6MRD_Advertisement ICMPv6 Multicast Router Discovery Advertisement
ICMPv6MRD_Solicitation ICMPv6 Multicast Router Discovery Solicitation
ICMPv6MRD_Termination ICMPv6 Multicast Router Discovery Termination
ICMPv6NDOptAdvInterval ICMPv6 Neighbor Discovery - Interval Advertisement
ICMPv6NDOptDstLLAddr ICMPv6 Neighbor Discovery Option - Destination Link-Layer Address
ICMPv6NDOptEFA ICMPv6 Neighbor Discovery Option - Expanded Flags Option
ICMPv6NDOptHAInfo ICMPv6 Neighbor Discovery - Home Agent Information
ICMPv6NDOptIPAddr ICMPv6 Neighbor Discovery - IP Address Option (FH for MIPv6)
ICMPv6NDOptLLA ICMPv6 Neighbor Discovery - Link-Layer Address (LLA) Option (FH for MIPv6)
ICMPv6NDOptMAP ICMPv6 Neighbor Discovery - MAP Option
ICMPv6NDOptMTU ICMPv6 Neighbor Discovery Option - MTU
ICMPv6NDOptNewRtrPrefix ICMPv6 Neighbor Discovery - New Router Prefix Information Option (FH for MIPv6)
ICMPv6NDOptPrefixInfo ICMPv6 Neighbor Discovery Option - Prefix Information
ICMPv6NDOptRDNSS ICMPv6 Neighbor Discovery Option - Recursive DNS Server Option
ICMPv6NDOptRedirectedHdr ICMPv6 Neighbor Discovery Option - Redirected Header
ICMPv6NDOptRouteInfo ICMPv6 Neighbor Discovery Option - Route Information Option
ICMPv6NDOptShortcutLimit ICMPv6 Neighbor Discovery Option - NBMA Shortcut Limit
ICMPv6NDOptSrcAddrList ICMPv6 Inverse Neighbor Discovery Option - Source Address List
ICMPv6NDOptSrcLLAddr ICMPv6 Neighbor Discovery Option - Source Link-Layer Address
ICMPv6NDOptTgtAddrList ICMPv6 Inverse Neighbor Discovery Option - Target Address List
ICMPv6NDOptUnknown ICMPv6 Neighbor Discovery Option - Scapy Unimplemented
ICMPv6ND_INDAdv ICMPv6 Inverse Neighbor Discovery Advertisement
ICMPv6ND_INDSol ICMPv6 Inverse Neighbor Discovery Solicitation
ICMPv6ND_NA ICMPv6 Neighbor Discovery - Neighbor Advertisement
ICMPv6ND_NS ICMPv6 Neighbor Discovery - Neighbor Solicitation

By Adam Maxwell (@catalyst256) 37 http://itgeekchronicles.co.uk
ICMPv6ND_RA ICMPv6 Neighbor Discovery - Router Advertisement
ICMPv6ND_RS ICMPv6 Neighbor Discovery - Router Solicitation
ICMPv6ND_Redirect ICMPv6 Neighbor Discovery - Redirect
ICMPv6NIQueryIPv4 ICMPv6 Node Information Query - IPv4 Address Query
ICMPv6NIQueryIPv6 ICMPv6 Node Information Query - IPv6 Address Query
ICMPv6NIQueryNOOP ICMPv6 Node Information Query - NOOP Query
ICMPv6NIQueryName ICMPv6 Node Information Query - IPv6 Name Query
ICMPv6NIReplyIPv4 ICMPv6 Node Information Reply - IPv4 addresses
ICMPv6NIReplyIPv6 ICMPv6 Node Information Reply - IPv6 addresses
ICMPv6NIReplyNOOP ICMPv6 Node Information Reply - NOOP Reply
ICMPv6NIReplyName ICMPv6 Node Information Reply - Node Names
ICMPv6NIReplyRefuse ICMPv6 Node Information Reply - Responder refuses to supply answer
ICMPv6NIReplyUnknown ICMPv6 Node Information Reply - Qtype unknown to the responder
ICMPv6PacketTooBig ICMPv6 Packet Too Big
ICMPv6ParamProblem ICMPv6 Parameter Problem
ICMPv6TimeExceeded ICMPv6 Time Exceeded
ICMPv6Unknown Scapy6 ICMPv6 fallback class
IP IP
IPOption None
IPOption_Address_Extension IP Option Address Extension
IPOption_EOL None
IPOption_LSRR IP Option Loose Source and Record Route
IPOption_MTU_Probe IP Option MTU Probe
IPOption_MTU_Reply IP Option MTU Reply
IPOption_NOP None
IPOption_RR IP Option Record Route
IPOption_Router_Alert IP Option Router Alert
IPOption_SDBM IP Option Selective Directed Broadcast Mode
IPOption_SSRR IP Option Strict Source and Record Route
IPOption_Security None
IPOption_Stream_Id IP Option Stream ID
IPOption_Traceroute None
IPerror IP in ICMP
IPerror6 IPv6 in ICMPv6
IPv6 IPv6
IPv6ExtHdrDestOpt IPv6 Extension Header - Destination Options Header
IPv6ExtHdrFragment IPv6 Extension Header - Fragmentation header
IPv6ExtHdrHopByHop IPv6 Extension Header - Hop-by-Hop Options Header
IPv6ExtHdrRouting IPv6 Option Header Routing
ISAKMP ISAKMP
ISAKMP_class None
ISAKMP_payload ISAKMP payload
ISAKMP_payload_Hash ISAKMP Hash
ISAKMP_payload_ID ISAKMP Identification
ISAKMP_payload_KE ISAKMP Key Exchange
ISAKMP_payload_Nonce ISAKMP Nonce
ISAKMP_payload_Proposal IKE proposal
ISAKMP_payload_SA ISAKMP SA
ISAKMP_payload_Transform IKE Transform
ISAKMP_payload_VendorID ISAKMP Vendor ID
IrLAPCommand IrDA Link Access Protocol Command
IrLAPHead IrDA Link Access Protocol Header
IrLMP IrDA Link Management Protocol
Jumbo Jumbo Payload

By Adam Maxwell (@catalyst256) 38 http://itgeekchronicles.co.uk
L2CAP_CmdHdr L2CAP command header
L2CAP_CmdRej L2CAP Command Rej
L2CAP_ConfReq L2CAP Conf Req
L2CAP_ConfResp L2CAP Conf Resp
L2CAP_ConnReq L2CAP Conn Req
L2CAP_ConnResp L2CAP Conn Resp
L2CAP_DisconnReq L2CAP Disconn Req
L2CAP_DisconnResp L2CAP Disconn Resp
L2CAP_Hdr L2CAP header
L2CAP_InfoReq L2CAP Info Req
L2CAP_InfoResp L2CAP Info Resp
L2TP None
LLC LLC
LLMNRQuery Link Local Multicast Node Resolution - Query
LLMNRResponse Link Local Multicast Node Resolution - Response
MGCP MGCP
MIP6MH_BA IPv6 Mobility Header - Binding ACK
MIP6MH_BE IPv6 Mobility Header - Binding Error
MIP6MH_BRR IPv6 Mobility Header - Binding Refresh Request
MIP6MH_BU IPv6 Mobility Header - Binding Update
MIP6MH_CoT IPv6 Mobility Header - Care-of Test
MIP6MH_CoTI IPv6 Mobility Header - Care-of Test Init
MIP6MH_Generic IPv6 Mobility Header - Generic Message
MIP6MH_HoT IPv6 Mobility Header - Home Test
MIP6MH_HoTI IPv6 Mobility Header - Home Test Init
MIP6OptAltCoA MIPv6 Option - Alternate Care-of Address
MIP6OptBRAdvice Mobile IPv6 Option - Binding Refresh Advice
MIP6OptBindingAuthData MIPv6 Option - Binding Authorization Data
MIP6OptCGAParams MIPv6 option - CGA Parameters
MIP6OptCGAParamsReq MIPv6 option - CGA Parameters Request
MIP6OptCareOfTest MIPv6 option - Care-of Test
MIP6OptCareOfTestInit MIPv6 option - Care-of Test Init
MIP6OptHomeKeygenToken MIPv6 option - Home Keygen Token
MIP6OptLLAddr MIPv6 Option - Link-Layer Address (MH-LLA)
MIP6OptMNID MIPv6 Option - Mobile Node Identifier
MIP6OptMobNetPrefix NEMO Option - Mobile Network Prefix
MIP6OptMsgAuth MIPv6 Option - Mobility Message Authentication
MIP6OptNonceIndices MIPv6 Option - Nonce Indices
MIP6OptReplayProtection MIPv6 option - Replay Protection
MIP6OptSignature MIPv6 option - Signature
MIP6OptUnknown Scapy6 - Unknown Mobility Option
MobileIP Mobile IP (RFC3344)
MobileIPRRP Mobile IP Registration Reply (RFC3344)
MobileIPRRQ Mobile IP Registration Request (RFC3344)
MobileIPTunnelData Mobile IP Tunnel Data Message (RFC3519)
NBNSNodeStatusResponse NBNS Node Status Response
NBNSNodeStatusResponseEnd NBNS Node Status Response
NBNSNodeStatusResponseService NBNS Node Status Response Service
NBNSQueryRequest NBNS query request
NBNSQueryResponse NBNS query response
NBNSQueryResponseNegative NBNS query response (negative)
NBNSRequest NBNS request
NBNSWackResponse NBNS Wait for Acknowledgement Response
NBTDatagram NBT Datagram Packet

By Adam Maxwell (@catalyst256) 39 http://itgeekchronicles.co.uk
NBTSession NBT Session Packet
NTP NTP
NetBIOS_DS NetBIOS datagram service
NetflowHeader Netflow Header
NetflowHeaderV1 Netflow Header V1
NetflowRecordV1 Netflow Record
NoPayload None
PPI Per-Packet Information header (partial)
PPP PPP Link Layer
PPP_ECP None
PPP_ECP_Option PPP ECP Option
PPP_ECP_Option_OUI PPP ECP Option
PPP_IPCP None
PPP_IPCP_Option PPP IPCP Option
PPP_IPCP_Option_DNS1 PPP IPCP Option
PPP_IPCP_Option_DNS2 PPP IPCP Option
PPP_IPCP_Option_IPAddress PPP IPCP Option
PPP_IPCP_Option_NBNS1 PPP IPCP Option
PPP_IPCP_Option_NBNS2 PPP IPCP Option
PPPoE PPP over Ethernet
PPPoED PPP over Ethernet Discovery
Packet None
Pad1 Pad1
PadN PadN
Padding Padding
PrismHeader Prism header
PseudoIPv6 Pseudo IPv6 Header
RIP RIP header
RIPAuth RIP authentication
RIPEntry RIP entry
RTP RTP
RadioTap RadioTap dummy
Radius Radius
Raw Raw
RouterAlert Router Alert
SCTP None
SCTPChunkAbort None
SCTPChunkCookieAck None
SCTPChunkCookieEcho None
SCTPChunkData None
SCTPChunkError None
SCTPChunkHeartbeatAck None
SCTPChunkHeartbeatReq None
SCTPChunkInit None
SCTPChunkInitAck None
SCTPChunkParamAdaptationLayer None
SCTPChunkParamCookiePreservative None
SCTPChunkParamECNCapable None
SCTPChunkParamFwdTSN None
SCTPChunkParamHearbeatInfo None
SCTPChunkParamHostname None
SCTPChunkParamIPv4Addr None
SCTPChunkParamIPv6Addr None
SCTPChunkParamStateCookie None

By Adam Maxwell (@catalyst256) 40 http://itgeekchronicles.co.uk
SCTPChunkParamSupportedAddrTypes None
SCTPChunkParamUnrocognizedParam None
SCTPChunkSACK None
SCTPChunkShutdown None
SCTPChunkShutdownAck None
SCTPChunkShutdownComplete None
SMBMailSlot None
SMBNegociate_Protocol_Request_Header SMBNegociate Protocol Request Header
SMBNegociate_Protocol_Request_Tail SMB Negociate Protocol Request Tail
SMBNegociate_Protocol_Response_Advanced_Security SMBNegociate Protocol Response Advanced Security
SMBNegociate_Protocol_Response_No_Security SMBNegociate Protocol Response No Security
SMBNegociate_Protocol_Response_No_Security_No_Key None
SMBNetlogon_Protocol_Response_Header SMBNetlogon Protocol Response Header
SMBNetlogon_Protocol_Response_Tail_LM20 SMB Netlogon Protocol Response Tail LM20
SMBNetlogon_Protocol_Response_Tail_SAM SMB Netlogon Protocol Response Tail SAM
SMBSession_Setup_AndX_Request Session Setup AndX Request
SMBSession_Setup_AndX_Response Session Setup AndX Response
SNAP SNAP
SNMP None
SNMPbulk None
SNMPget None
SNMPinform None
SNMPnext None
SNMPresponse None
SNMPset None
SNMPtrapv1 None
SNMPtrapv2 None
SNMPvarbind None
STP Spanning Tree Protocol
SebekHead Sebek header
SebekV1 Sebek v1
SebekV2 Sebek v3
SebekV2Sock Sebek v2 socket
SebekV3 Sebek v3
SebekV3Sock Sebek v2 socket
Skinny Skinny
TCP TCP
TCPerror TCP in ICMP
TFTP TFTP opcode
TFTP_ACK TFTP Ack
TFTP_DATA TFTP Data
TFTP_ERROR TFTP Error
TFTP_OACK TFTP Option Ack
TFTP_Option None
TFTP_Options None
TFTP_RRQ TFTP Read Request
TFTP_WRQ TFTP Write Request
UDP UDP
UDPerror UDP in ICMP
USER_CLASS_DATA user class data
VENDOR_CLASS_DATA vendor class data
VENDOR_SPECIFIC_OPTION vendor specific option data
VRRP None
X509Cert None

By Adam Maxwell (@catalyst256) 41 http://itgeekchronicles.co.uk
X509RDN None
X509v3Ext None
_DHCP6GuessPayload None
_DHCP6OptGuessPayload None
_ICMPv6 ICMPv6 dummy class
_ICMPv6Error ICMPv6 errors dummy class
_ICMPv6ML ICMPv6 dummy class
_IPOption_HDR None
_IPv6ExtHdr Abstract IPV6 Option Header
_MobilityHeader Dummy IPv6 Mobility Header
I know it’s a bit of a space filler but I wanted you to have the information available in this guide. The
other command lsc() will display all the Scapy command functions (see below, it’s a shorter list this
time).
arpcachepoison Poison target's cache with (your MAC,victim's IP) couple
arping Send ARP who-has requests to determine which hosts are up
bind_layers Bind 2 layers on some specific fields' values
corrupt_bits Flip a given percentage or number of bits from a string
corrupt_bytes Corrupt a given percentage or number of bytes from a string
defrag defrag(plist) -> ([not fragmented], [defragmented],
defragment defrag(plist) -> plist defragmented as much as possible
dyndns_add Send a DNS add message to a nameserver for "name" to have a new "rdata"
dyndns_del Send a DNS delete message to a nameserver for "name"
etherleak Exploit Etherleak flaw
fragment Fragment a big IP datagram
fuzz Transform a layer into a fuzzy layer by replacing some default values by random objects
getmacbyip Return MAC address corresponding to a given IP address
hexdiff Show differences between 2 binary strings
hexdump --
hexedit --
is_promisc Try to guess if target is in Promisc mode. The target is provided by its ip.
linehexdump --
ls List available layers, or infos on a given layer
promiscping Send ARP who-has requests to determine which hosts are in promiscuous mode
rdpcap Read a pcap file and return a packet list
send Send packets at layer 3
sendp Send packets at layer 2
sendpfast Send packets at layer 2 using tcpreplay for performance
sniff Sniff packets
split_layers Split 2 layers previously bound
sr Send and receive packets at layer 3
sr1 Send packets at layer 3 and return only the first answer
srbt send and receive using a bluetooth socket
srbt1 send and receive 1 packet using a bluetooth socket
srflood Flood and receive packets at layer 3
srloop Send a packet at layer 3 in loop and print the answer each time
srp Send and receive packets at layer 2
srp1 Send and receive packets at layer 2 and return only the first answer
srpflood Flood and receive packets at layer 2
srploop Send a packet at layer 2 in loop and print the answer each time
traceroute Instant TCP traceroute
tshark Sniff packets and print them calling pkt.show(), a bit like text wireshark
wireshark Run wireshark on a list of packets
wrpcap Write a list of packets to a pcap file
Some of these functions we have used others I will let you play around with yourself.
By Adam Maxwell (@catalyst256) 42 http://itgeekchronicles.co.uk
Appendix B – ICMP Types
Earlier in the guide we started building some basic ICMP packets, during one of the exercises we
changed the ICMP Type, the code we used at the time was this:
send(IP(src="10.1.99.100", dst="10.1.99.2", ttl=128)/ICMP(type=0)/"HelloWorld")
Below is a list of the different ICMP types that you can change within Scapy.
Type Code Description
0 – Echo Reply 0 Echo reply (used to ping)
1 and 2
Reserved
3 – Destination Unreachable
0 Destination network unreachable
1 Destination host unreachable
2 Destination protocol unreachable
3 Destination port unreachable
4 Fragmentation required, and DF flag set
5 Source route failed
6 Destination network unknown
7 Destination host unknown
8 Source host isolated
9 Network administratively prohibited
10 Host administratively prohibited
11 Network unreachable for TOS
12 Host unreachable for TOS
13 Communication administratively prohibited
14 Host Precedence Violation
15 Precedence cutoff in effect
4 – Source Quench 0 Source quench (congestion control)
5 – Redirect Message
0 Redirect Datagram for the Network
1 Redirect Datagram for the Host
2 Redirect Datagram for the TOS & network
3 Redirect Datagram for the TOS & host
6
Alternate Host Address
7
Reserved
8 – Echo Request 0 Echo request (used to ping)
9 – Router Advertisement 0 Router Advertisement
10 – Router Solicitation 0 Router discovery/selection/solicitation
11 – Time Exceeded 0 TTL expired in transit
1 Fragment reassembly time exceeded
12 – Parameter Problem: Bad IP header
0 Pointer indicates the error
1 Missing a required option
2 Bad length
13 – Timestamp 0 Timestamp
14 – Timestamp Reply 0 Timestamp reply
15 – Information Request 0 Information Request
16 – Information Reply 0 Information Reply
17 – Address Mask Request 0 Address Mask Request
18 – Address Mask Reply 0 Address Mask Reply
19
Reserved for security
20 through 29
Reserved for robustness experiment
30 – Traceroute 0 Information Request
31
Datagram Conversion Error

By Adam Maxwell (@catalyst256) 43 http://itgeekchronicles.co.uk
32
Mobile Host Redirect
33
Where-Are-You (originally meant for IPv6)
34 Here-I-Am (originally meant for IPv6)
35
Mobile Registration Request
36
Mobile Registration Reply
37
Domain Name Request
38
Domain Name Reply
39 SKIP Algorithm Discovery Protocol, Simple Key-Management for Internet Protocol
40 Photuris, Security failures
41 ICMP for experimental mobility protocols such as Seamoby [RFC4065]
42 through 255
Reserved

By Adam Maxwell (@catalyst256) 44 http://itgeekchronicles.co.uk
Appendix C – TCP Header Information
LISTEN - In case of a server, waiting for a connection request from any remote client.
SYN-SENT - waiting for the remote peer to send back a TCP segment with the SYN and ACK flags set. ('SYN-SENT' state is
usually set by TCP clients).
SYN-RECEIVED - waiting for the remote peer to send back an acknowledgment after having sent back a connection
acknowledgment to the remote peer. ('SYN-RECEIVED' state is usually set by TCP servers).
ESTABLISHED -The port is ready to receive/send data from/to the remote peer.
FIN-WAIT-1 - Indicated that the server is waiting for the application process on its end to signal that it is ready to close.
FIN-WAIT-2 - Indicates that the client is waiting for the server's fin segment (which indicates the server's application process
is ready to close and the server is ready to initiate its side of the connection termination).
CLOSE-WAIT - The server receives notice from the local application that it is done. The server sends its fin to the client.
LAST-ACK - Indicates that the server is in the process of sending its own fin segment (which indicates the server's application
process is ready to close and the server is ready to initiate its side of the connection termination).
TIME-WAIT - Represents waiting for enough time to pass to be sure the remote peer received the acknowledgment of its
connection termination request. According to RFC 793 a connection can stay in TIME-WAIT for a maximum of four minutes
known as a MSL (maximum segment lifetime).
CLOSED - Connection is closed

By Adam Maxwell (@catalyst256) 45 http://itgeekchronicles.co.uk
Appendix D – DNS Record Types
Type Value (decimal) Description Function
A 1 address record Returns a 32-bit IPv4 address, most commonly used to map hostnames to an IP address of the host, but also used forDNSBLs, storing subnet masks in RFC 1101, etc.
AAAA 28 IPv6 address record
Returns a 128-bit IPv6 address, most commonly used to map hostnames to an IP address of the host.
AFSDB 18 AFS database record
Location of database servers of an AFS cell. This record is commonly used by AFS clients to contact AFS cells outside their local domain. A subtype of this record is used by the obsolete DCE/DFS file system.
APL 42 Address Prefix List Specify lists of address ranges, e.g. in CIDR format, for various address families. Experimental.
CERT 37 Certificate record Stores PKIX, SPKI, PGP, etc.
CNAME 5
Canonical name record
Alias of one name to another: the DNS lookup will continue by retrying the lookup with the new name.
DHCID 49 DHCP identifier Used in conjunction with the FQDN option to DHCP
DLV 32769 DNSSEC Lookaside Validation record For publishing DNSSEC trust anchors outside of the DNS delegation chain. Uses the same format as the DS record. RFC 5074 describes a way of using these records.
DNAME
39 delegation name
DNAME creates an alias for a name and all its subnames, unlike CNAME, which aliases only the exact name in its label. Like the CNAME record, the DNS lookup will continue by retrying the lookup with the new name.
DNSKEY 48 DNS Key record The key record used in DNSSEC. Uses the same format as the KEY record.
DS 43 Delegation signer The record used to identify the DNSSEC signing key of a delegated zone
HIP 55 Host Identity Protocol Method of separating the end-point identifier and locator roles
of IP addresses.
IPSECKEY 45 IPSEC Key Key record that can be used with IPSEC
KEY 25 key record
Used only for SIG(0) (RFC 2931) and TKEY (RFC 2930).[5] RFC 3445 eliminated their use for application keys and limited their use to DNSSEC.[6] RFC 3755 designates DNSKEY as the replacement within DNSSEC.[7] RFC 4025designates IPSECKEY as the replacement for use with IPsec.[8]
KX 36 Key eXchanger record
Used with some cryptographic systems (not including DNSSEC) to identify a key management agent for the associated domain-name. Note that this has nothing to do with DNS Security. It is Informational status, rather than being on the IETF standards-track. It has always had limited deployment, but is still in use.
LOC 29 Location record
Specifies a geographical location associated with a domain name
MX 15 mail exchange record Maps a domain name to a list of message transfer agents for
that domain
NAPTR
35 Naming Authority Pointer Allows regular expression based rewriting of domain names which can then be used as URIs, further domain names to lookups, etc.
NS 2 name server record Delegates a DNS zone to use the given authoritative name servers
NSEC 47 Next-Secure record Part of DNSSEC—used to prove a name does not exist. Uses the same format as the (obsolete) NXT record.
NSEC3 50 NSEC record version 3 An extension to DNSSEC that allows proof of nonexistence for a name without permitting zonewalking
NSEC3PARAM 51 NSEC3 parameters Parameter record for use with NSEC3

By Adam Maxwell (@catalyst256) 46 http://itgeekchronicles.co.uk
PTR 12 pointer record
Pointer to a canonical name. Unlike a CNAME, DNS processing does NOT proceed, just the name is returned. The most common use is for implementing reverse DNS lookups, but other uses include such things as DNS-SD.
RRSIG 46 DNSSEC signature Signature for a DNSSEC-secured record set. Uses the same format as the SIG record.
RP 17 Responsible person Information about the responsible person(s) for the domain. Usually an email address with the @ replaced by a .
SIG 24 Signature Signature record used in SIG(0) (RFC 2931) and TKEY (RFC 2930).[7] RFC 3755 designated RRSIG as the replacement for SIG for use within DNSSEC.[7]
SOA 6 start of [a zone of] authority record
Specifies authoritative information about a DNS zone, including the primary name server, the email of the domain administrator, the domain serial number, and several timers relating to refreshing the zone.
SPF
99 Sender Policy Framework Specified as part of the SPF protocol as an alternative to of storing SPF data in TXT records. Uses the same format as the earlier TXT record.
SRV
33 Service locator Generalized service location record, used for newer protocols instead of creating protocol-specific records such as MX.
SSHFP 44 SSH Public Key Fingerprint
Resource record for publishing SSH public host key fingerprints in the DNS System, in order to aid in verifying the authenticity of the host. RFC 6594 defines ECC SSH keys and SHA-256 hashes. See the IANA SSHFP RR parameters registry for details.
TA 32768 DNSSEC Trust Authorities Part of a deployment proposal for DNSSEC without a signed DNS root. See the IANA database and Weiler Spec for details. Uses the same format as the DS record.
TKEY
249 secret key record A method of providing keying material to be used with TSIG that is encrypted under the public key in an accompanying KEY RR.[9]
TSIG
250 Transaction Signature Can be used to authenticate dynamic updates as coming from an approved client, or to authenticate responses as coming from an approved recursive name server[10] similar to DNSSEC.
TXT 16 Text record
Originally for arbitrary human-readable text in a DNS record. Since the early 1990s, however, this record more often carries machine-readable data, such as specified by RFC 1464, opportunistic encryption, Sender Policy Framework, DKIM,DMARC DNS-SD, etc.

By Adam Maxwell (@catalyst256) 47 http://itgeekchronicles.co.uk
Appendix E – BPF (Berkeley Packet Filter)
These examples were sourced from http://biot.com/capstats/bpf.html
To capture all packets arriving at or departing from laptop: "host laptop"
To capture traffic between helios and either hot or ace: "host helios and \( hot or ace \)"
To capture all IP packets between ace and any host except helios: "ip host ace and not helios"
To capture all traffic between local hosts and hosts at Berkeley: "net ucb-ether"
To capture all ftp traffic through internet gateway snup: (note that the
expression is quoted to prevent the shell from (mis-)interpreting the
parentheses):
"gateway snup and (port ftp or ftp-data)"
To capture traffic neither sourced from nor destined for local hosts (if
you gateway to one other net, this stuff should never make it onto your
local net).
"ip and not net localnet"
To capture the start and end packets (the SYN and FIN packets) of each
TCP conversation that involves a non-local host.
"tcp[tcpflags] & (tcp-syn|tcp-fin) != 0 and not src and dst net
localnet"
To capture all IPv4 HTTP packets to and from port 80, i.e. print only
packets that contain data, not, for example, SYN and FIN packets and
ACK-only packets. (IPv6 is left as an exercise for the reader.)
"tcp port 80 and (((ip[2:2] - ((ip[0]&0xf)<<2)) - ((tcp[12]&0xf0)>>2))
!= 0)"
To capture IP packets longer than 576 bytes sent through gateway snup: "gateway snup and ip[2:2] > 576"
To capture IP broadcast or multicast packets that were not sent via
Ethernet broadcast or multicast:
"ether[0] & 1 = 0 and ip[16] >= 224"
To capture all ICMP packets that are not echo requests/replies (i.e., not
ping packets):
"icmp[icmptype] != icmp-echo and icmp[icmptype] != icmp-
echoreply"