the ultimate guide to colored pencil excerpt
DESCRIPTION
The Ultimate Guide to Colored Pencil ExcerptTRANSCRIPT
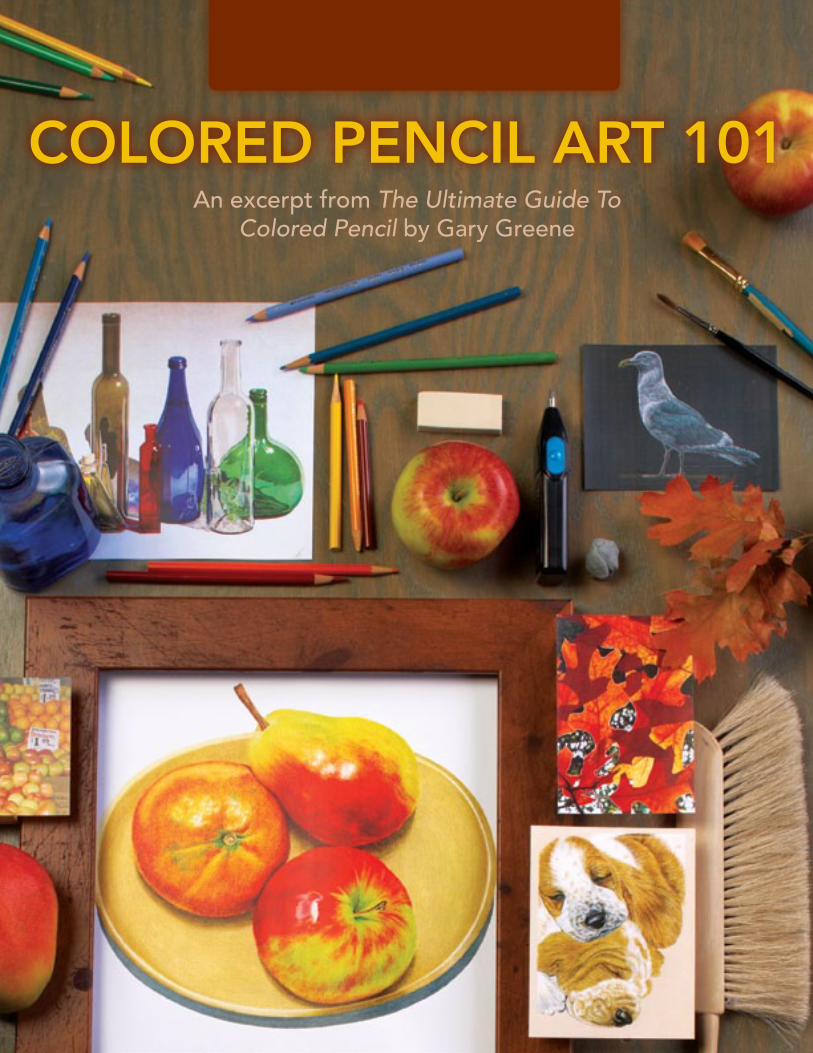
An excerpt from The Ultimate Guide To Colored Pencil by Gary Greene
Colored PenCil art 101

Before discussing specific techniques, there are several pointers you should know that are applicable to all colored pencil art.
different StrokesColored pencil can be applied in a variety of ways: hatching, cross-hatching, stippling and so on, but all of the demonstrations in this book use either circular or linear strokes. These strokes are the most effective with colored pencil painting.
What stroke to use depends on the size and shape of the subject. Circular strokes work best with flat areas, while linear strokes are usually used in areas with obvi-ous contours.
How to Hold the PencilBoth circular and linear strokes are made with the pencil held in a normal (most com-fortable) writing position, approximately perpendicular to the paper surface. Except in special instances, color should never be applied with the point horizontal to the painting surface.
Circular strokes
Linear strokes
Colored Pencil 101
From The Ultimate Guide To Colored Pencil © Gary Greene

In order for subjects to look natural and to give them dimensionality, colored pencil strokes, and (if needed) subsequent strokes
of water or solvent, should always be applied in the same direction and follow the contours, texture or grain of the subject.
Following Contours
Contours drawn with linear strokes
Stroke direction follows the contours
From The Ultimate Guide To Colored Pencil © Gary Greene
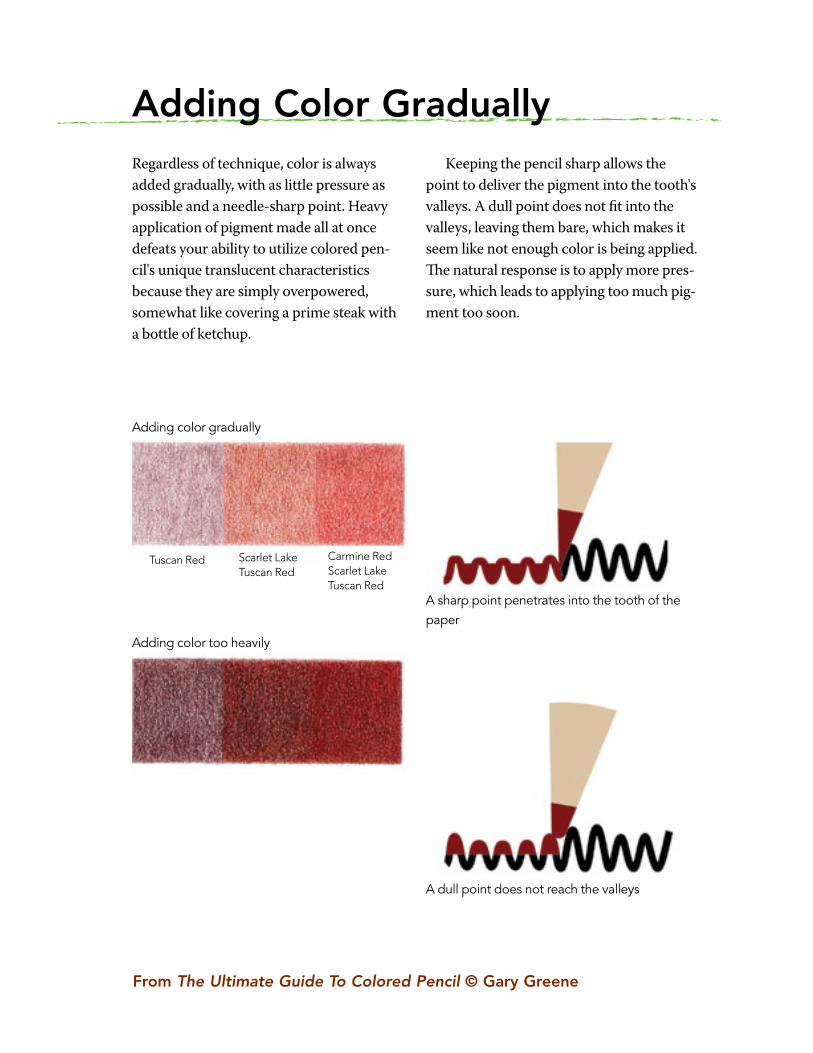
Regardless of technique, color is always added gradually, with as little pressure as possible and a needle-sharp point. Heavy application of pigment made all at once defeats your ability to utilize colored pen-cil's unique translucent characteristics because they are simply overpowered, somewhat like covering a prime steak with a bottle of ketchup.
Keeping the pencil sharp allows the point to deliver the pigment into the tooth's valleys. A dull point does not fit into the valleys, leaving them bare, which makes it seem like not enough color is being applied. The natural response is to apply more pres-sure, which leads to applying too much pig-ment too soon.
adding Color Gradually
Adding color gradually
Adding color too heavily
Tuscan Red Scarlet LakeTuscan Red
Carmine RedScarlet LakeTuscan Red
A sharp point penetrates into the tooth of the paper
A dull point does not reach the valleys
From The Ultimate Guide To Colored Pencil © Gary Greene

Color ContaminationIn the process of painting, regardless of technique, individual areas should be worked to completion, rather than covering large areas and going back over them with subsequent layers. This reduces smudg-ing and provides a better estimation of the painting's progress.
Colors can become “contaminated” by inadvertently mixing one with another.
Because of colored pencil’s translucency, contamination can occur with any color. However, the contamination is more notice-able when a dark color is dragged into a light color, as shown below. To avoid contaminat-ing lighter colored areas, paint them first when they are adjacent to darker colors.
Dark color dragged into a light color Light color dragged into a dark color
From The Ultimate Guide To Colored Pencil © Gary Greene
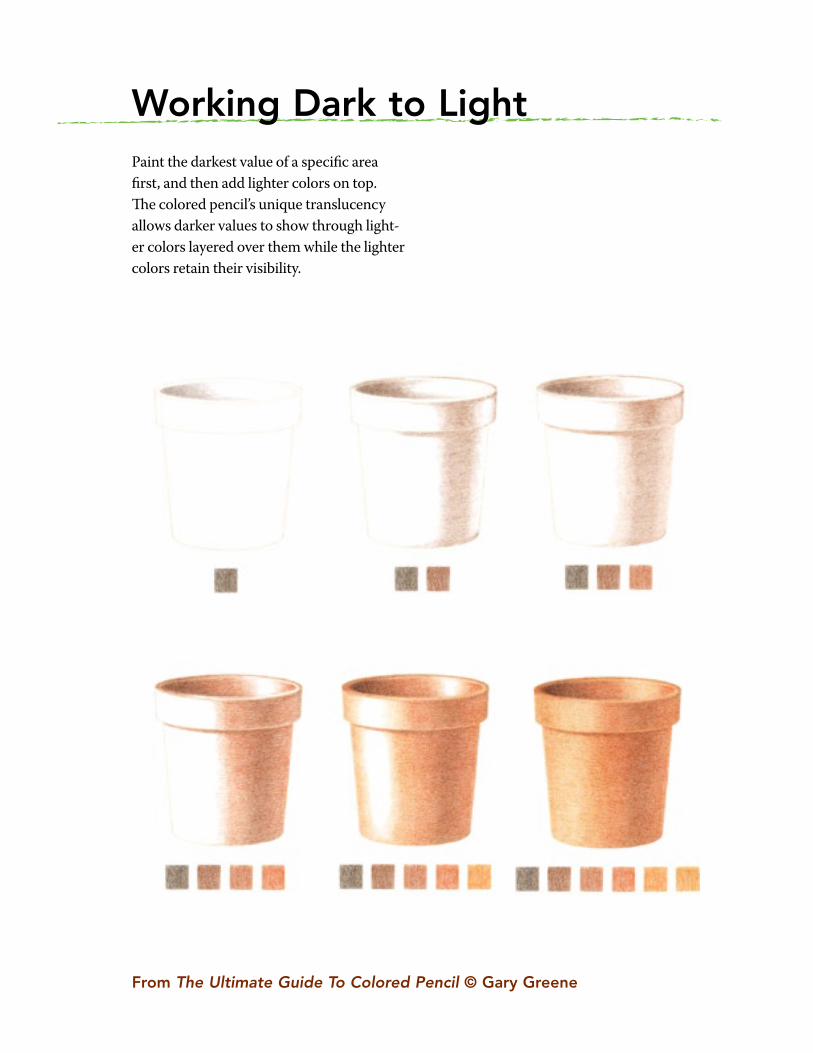
Paint the darkest value of a specific area first, and then add lighter colors on top. The colored pencil’s unique translucency allows darker values to show through light-er colors layered over them while the lighter colors retain their visibility.
Working dark to light
From The Ultimate Guide To Colored Pencil © Gary Greene

IndIvIdualIty18 x 25 inches (46 x 64cm)Colored pencil on white museum board
Highlights with Bare PaperWhen painting on white paper, leave it free of color for primary, or specular, highlights (the bright spot of light that appears on shiny objects). Only the specular highlights in the painting below are bare white paper. Secondary highlights (those that are not as intense) are mostly white pencil mixed with some of the color of the immediate area.
Secondaryhighlight
Primary (specular)highlight
From The Ultimate Guide To Colored Pencil © Gary Greene

adjusting a Wax or oil-Based Colored Pencil Values and hues can be adjusted by dabbing them with a kneaded eraser or using an electric eraser, then re-applying color over the erased area. For more precise adjust-ments, sharpen an electric eraser strip and use it with an erasing shield.
adjusting Water-Soluble Colored Pencil Water-soluble colored pencil is not quite as adjustable, especially after water is added. Although water-soluble colored pencil can be lifted or erased when dry, adjustments can also be made while it is still wet, by lightly scrubbing with a brush or cotton
Making adjustments
Column 1: Lifted
with kneaded eraser
Column 2: Erased
with electric eraser
a. Color lifted
and erased
b. Same color
re-layered
c. Second color
re-layered
over lifted and
erased area
d. Second color
re-layered
over b.
a. a.
b. b.
c. c.
d. d.
Wax or oil-Based Colored PenCil
From The Ultimate Guide To Colored Pencil © Gary Greene

swab, as with watercolors. Care must be taken not to overdo lifting wet pigment, especially on hot-press surfaces, or on sur-faces other than watercolor paper. Once the color is dry, traditional erasing is not pos-sible, nor is lifting with water.
adjusting Colored Pencil With Solvent Areas with solvent applied to the pigment can be easily lightened and adjusted with a kneaded or electric eraser.
Water-soluBle Colored PenCil Colored PenCil With solvent
a.
b.
c.
d.
a. Before wetting
b. Pigment lifted
c. Wetting previously lifted pigment
d. Pigment removed wet
a.
b.
c.
d.
e.
a. Before adding solvent
b. After applying Bestine rubber cement thinner
c. Erased with electric eraser
d. Second color applied
e. Solvent re-applied
From The Ultimate Guide To Colored Pencil © Gary Greene
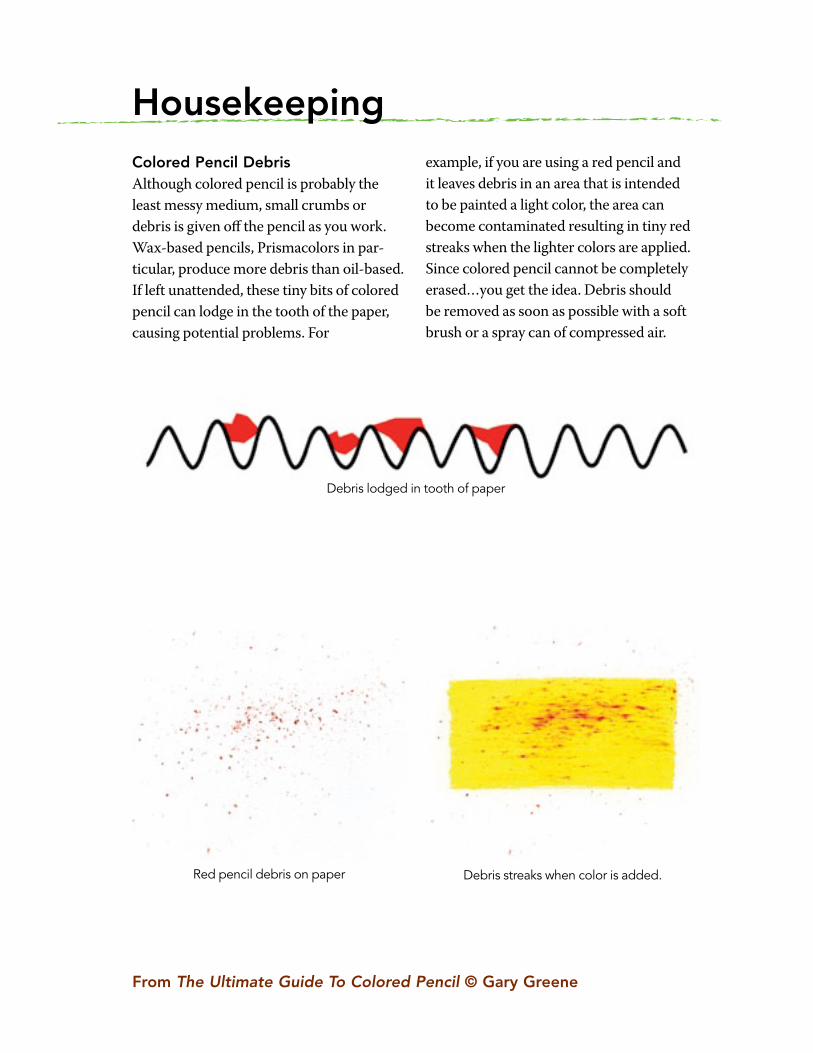
Colored Pencil debrisAlthough colored pencil is probably the least messy medium, small crumbs or debris is given off the pencil as you work. Wax-based pencils, Prismacolors in par-ticular, produce more debris than oil-based. If left unattended, these tiny bits of colored pencil can lodge in the tooth of the paper, causing potential problems. For
example, if you are using a red pencil and it leaves debris in an area that is intended to be painted a light color, the area can become contaminated resulting in tiny red streaks when the lighter colors are applied. Since colored pencil cannot be completely erased…you get the idea. Debris should be removed as soon as possible with a soft brush or a spray can of compressed air.
Housekeeping
Red pencil debris on paper Debris streaks when color is added.
Debris lodged in tooth of paper
From The Ultimate Guide To Colored Pencil © Gary Greene

Cleaning Up rough edgesUsing soft pencils on a toothy surface results in rough boundaries, or edges, between different objects in your painting. These rough edges are especially noticeable when the burnishing technique is employed. Because of their hardness and thin cores, Verithin pencils are best suited to clean up rough edges.
Preventing SmudgingIf the heel of your hand contacts your paper on the colored areas, smudging may occur, especially with strong colors such as reds, violets, dark blues and such. Smudging col-ored pencil is minimal when compared to pastels, but if it is left unattended, smudged
rough edges and Smudging
Before cleaning up rough edges
After cleaning up the edges
From The Ultimate Guide To Colored Pencil © Gary Greene
colored pencil can also lead to color con-tamination. A sheet of tracing paper under your hand, or not resting your hand on painted areas, prevents smudging. Light smudging can be easily removed with a kneaded eraser.

Purchase The Ultimate Guide To Colored Pencil by Gary Greene
www.northlightshop.com
facebook.com/ArtistsNetwork
twitter.com/ArtistsNetwork
pinterest.com/ArtistsNetwork
Follow us on