the great british bake off how to avoid a soggy bottom and other secrets to achieving a good bake
DESCRIPTION
recipe bookTRANSCRIPT

CONTENTS
Cover
About the Book
List of Recipes
Title Page
Introduction
Cakes and Biscuits
A Slice of History
Types of Cake
Cake-making Methods
Giving Rise to Your Cake
All About Eggs
Recipe Substitutions
Troubleshooting
Biscuits
Bread
The Humble Loaf
The Power of Flour
The Properties of Yeast
Making Bread
Baking Your Loaf
Sourdough
Sweet Doughs
Pastry
Early Pastry
The Importance of Fat
Making Pastry
Troubleshooting
‘Fancy’ Types of Pastry
Desserts
The Rise of the Dessert
Creamy Desserts
Soufflés
Whisking Eggs
Flavours and Fillings
Sugar
Cream and Buttercream
Vanilla
Chocolate
Index
Copyright
About the Book
Banish sunken sponges, burned caramel and soggy bottoms from yourkitchen forever!
This book answers over 150 essential baking questions, looking at the commontechniques we use and the history of how they came about.
Why do cakes sometimes sink in the middle?How can I tell if my bread is perfectly risen?Why haven’t I been able to whisk my egg whites properly?
There are also 30 classic recipes demonstrating the key skills that every bakershould know – all to help you perfect your baking at home.
List of Recipes
A Modern Pound Cake
A Simple White Loaf
Angel Food Cake
Bara Brith
Boiled Fruit Cake
Choux Pastry
Cocoa Macaroons
Clotted Cream
Crème Anglaise
Croissants
Flourless Chocolate Roulade
French Vanilla Buttercream
Gooseberry Pie
Gingernuts
Hot-water Crust Pastry
Italian Meringue Buttercream
Italian Meringue Macaroons
Olive Oil Pastry
Puff Pastry
Pastry Cream
Rough Puff Pastry
Sally Lunn Bun
Scones
Shortbread

Shortcrust Pastry
Sourdough Bread
Sourdough Starter
Sugar-free Fruit Cake
Sweet Pastry
The Grant Loaf
INTRODUCTION
Whether you are already an avid baker wanting to improve your skillsor just thinking about making a cake for the first time and interested tofind out more, this book is for you.
How to Avoid a Soggy Bottom is not your usual cookery book, however. It’s ahelpful guide and a friendly companion to your well-stocked cookbookcollection. By gently guiding you through the rules of baking, it will show youhow to improve your techniques and hopefully give you the confidence toexperiment with your own recipes or adapt recipes from your favourite books.Ultimately, it’s going to make your baking better.
Every good baker should have a thorough knowledge of the art, science andhistory of their craft because learning about the origins of the processes and theprinciples behind them will really help you to understand why you do things acertain way or why things might not have worked. With this in mind, this bookinvestigates the chemistry as well as the history behind the age-old methods weuse – why baking powder was invented and how it works; how brewing came toplay such an important role in breadmaking; why you cream a sponge cake, butuse the rubbing-in method to make scones; and how gluten affects the texture ofyour pastry.
To help you along the way, there are tried-and-tested recipes that use the keyskills explained in each chapter. Have a go at making yeasted and creamedsponge cakes, kneaded and unkneaded loaves, and rich pastries made withbutter, olive oil and lard to see what they do to the bake’s flavour and texture.These recipes will give you a good foundation to build on so that you can takeyour baking to new heights.
With this book in one hand and your wooden spoon in the other, you needn’tfear the risk of over-whisked egg whites, damp biscuits, grainy caramel or,indeed, a soggy bottom ever again.
Gerard Baker
Cake-making is actually incredibly straightforward. By combining basicingredients – flour, eggs, sugar and fat – you can create an astounding numberof very different cakes. So why do we see such varying results, some intentionaland some less so?
One explanation is the way in which the ingredients are combined. Thetechniques you use when you cream, rub in or whisk your cake mixture will allinfluence the outcome of your bake. How heat reacts with the differentingredients will also affect whether your cake is baked through, has risencorrectly and has the light and airy or dense, sticky texture you were hoping for.Understanding these techniques and the principles behind them will thereforehelp you to ensure you get the result you want every time.
The differences between biscuits, cakes and breads were not clearly defined formany centuries, as we made biscuit-like breads and bread-like cakes, but slowlyour knowledge of cake- and biscuit-making has evolved until they have becomedistinct crafts. From the search for a practical raising agent to replace yeast, tothe introduction of eggs to create an airy sponge and the use of cookie dough totest an oven’s temperature, baking has always adapted as we continue to inventever-more ingenious techniques and ideas.
CAKES
A SLICE OF HISTORY
Where does ‘cake’ come from?
While the Greeks and Romans of southern Europe can be credited as theinventors of early cakes, the word ‘cake’ actually comes from northern Europe,and from the Old Norse word kaka, first seen in texts in the thirteenth century.(Both the English word ‘cake’ and the German equivalent, kuchen, derive fromthis Old Norse word.) However, kaka was nothing like what we understand bythe word ‘cake’ today – in fact, it described a rough, round, dry, biscuit-like bread(oatcakes being one of the best surviving examples).
What were early cakes like?
While the early inhabitants of northern Europe made biscuit-breads, it was theclever Romans and Greeks who learned to bake more doughy, sweet bakesusing yeast mixed with coarse flour and sweetened with dried fruits or honey.These early cakes must have been dense and heavy with a strong yeasty tang –much more like today’s breads than cake.
From kaka to kuchen to the Victoria sandwich: how did wearrive at our modern-day ‘cake’?

It wasn’t until the fifteenth century that the texture of cakes became anythinglike the light, spongy varieties we enjoy today. Little, airy delicacies, such assponge fingers and biscuits began to appear, but rather than using yeast tomake them rise, these lighter cakes were made with eggs, beaten by hand for upto an hour and sweetened with the exotic delicacy of sugar. However, as eggswere not readily available, these tasty morsels were considered a luxury andenjoyed only by the privileged few. Eggs would not become common in cakebaking until the eighteenth century and then gradually became the raising agentof choice until the invention of baking powder (for more on raising agents andeggs, see here and here).
As baking techniques developed, the muddled evolution of breads, pastries,cakes and biscuits continued and the differences between the four types wasoften hard to define. This conundrum is perhaps most evident in some of ourfavourite regional cakes. Welsh Bara Brith (see here) is a good example of anearly bread-like cake; Eccles cakes and Banbury cakes are more like pastry thancakes; while the flat, round Goosnargh cakes (similar to shortbread) might nowbe described more accurately as biscuits.
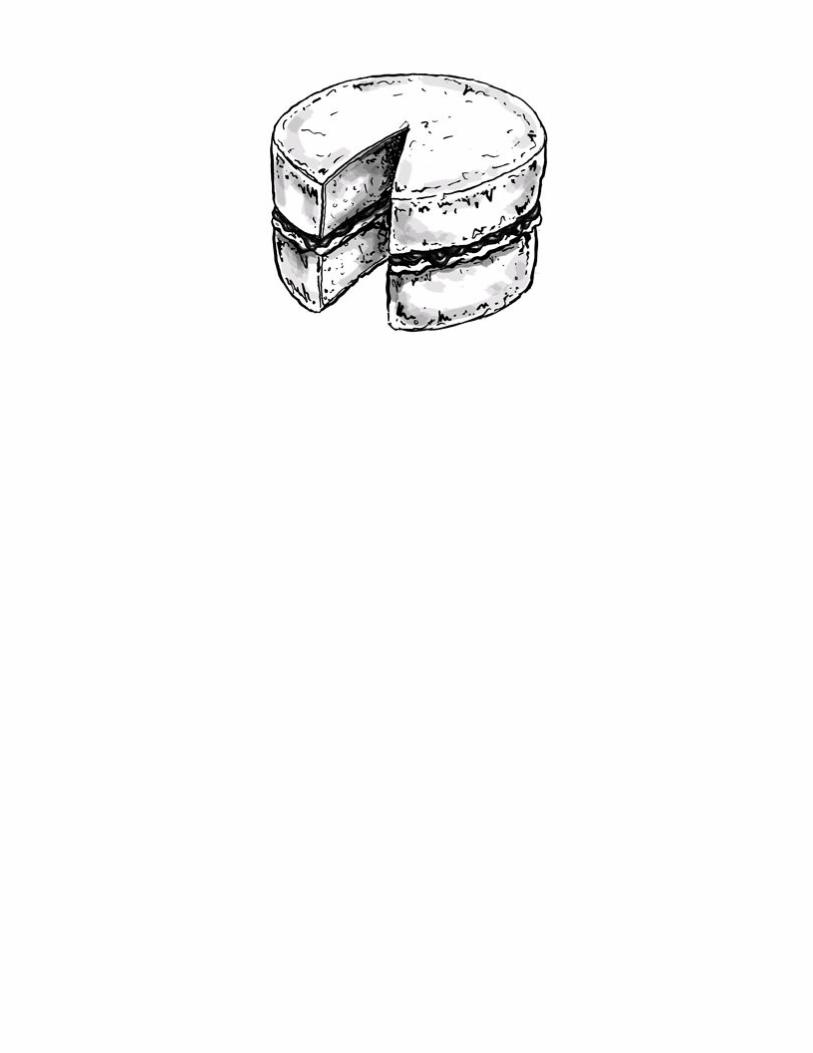
Finally, it was the cake-loving Victorians whom we must thank for givingBritain one of its most cherished and most baked cakes, the Victoria sandwich.The classic recipe for the jam-filled sponge was laid out by Mrs Beeton in herBook of Household Management in 1861 and has been proudly served atafternoon teas, school fêtes and bake sales ever since.
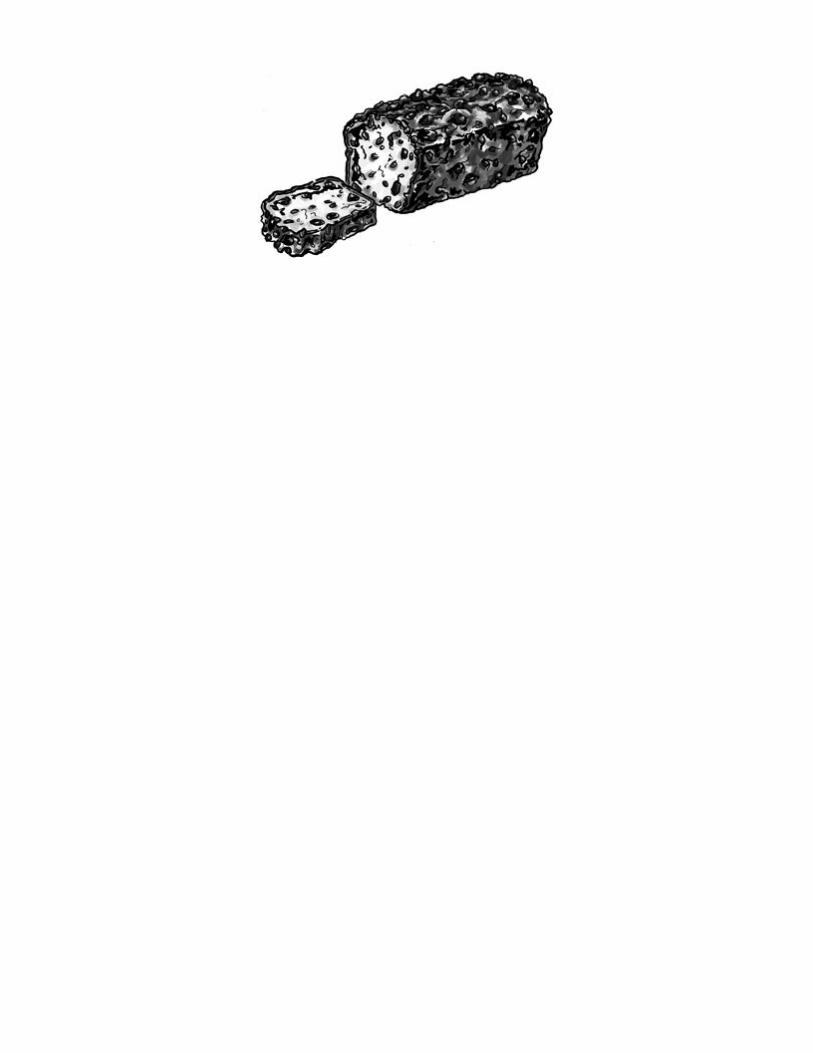
BARA BRITHBara Brith (meaning ‘speckled bread’) is a fruity teatime snack and perhaps oneof the best examples of a sweet bread-like ‘cake’ raised using yeast. Debates stillabound in Wales as to whether it should be classed as a bread or a cake, andsome modern recipes now omit the yeast and use self-raising flour, but therecipe below, which does contain yeast, remains true to tradition.
Makes 1 × 1kg loaf
10g fresh yeast or 5g dried yeast or 5g fast-action dried yeast
160ml warm milk
45g soft dark brown sugar
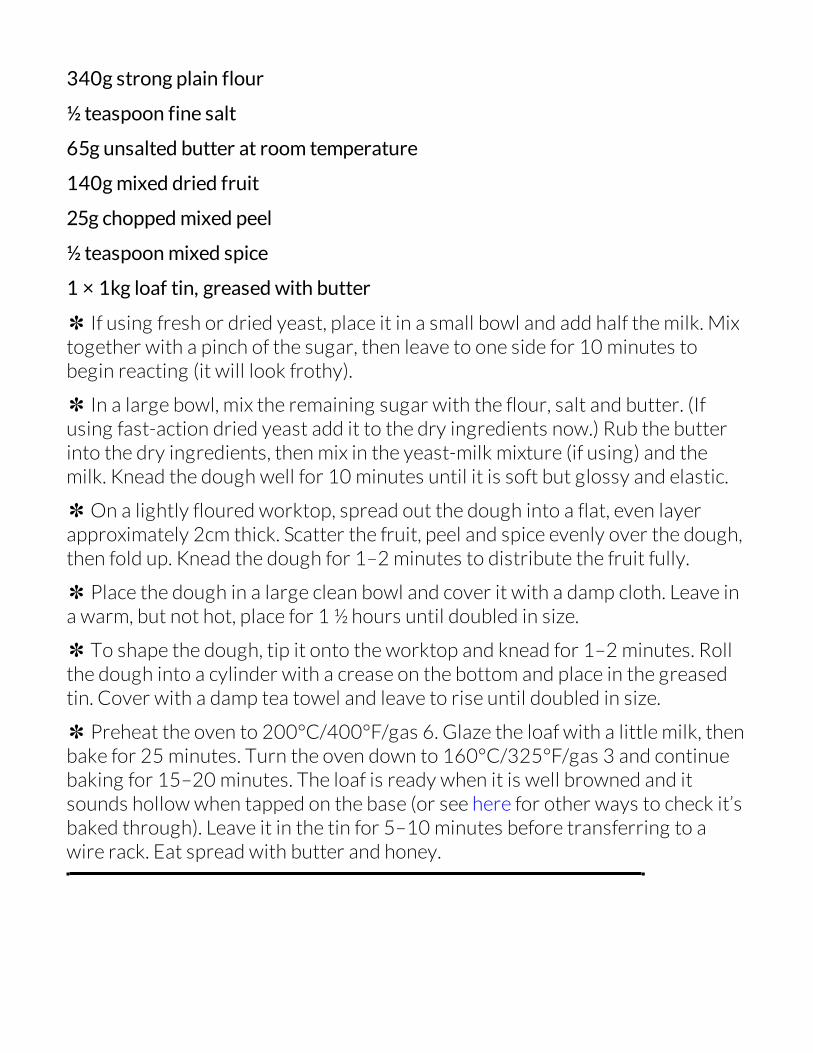
340g strong plain flour
½ teaspoon fine salt
65g unsalted butter at room temperature
140g mixed dried fruit
25g chopped mixed peel
½ teaspoon mixed spice
1 × 1kg loaf tin, greased with butter
✽ If using fresh or dried yeast, place it in a small bowl and add half the milk. Mixtogether with a pinch of the sugar, then leave to one side for 10 minutes tobegin reacting (it will look frothy).
✽ In a large bowl, mix the remaining sugar with the flour, salt and butter. (Ifusing fast-action dried yeast add it to the dry ingredients now.) Rub the butterinto the dry ingredients, then mix in the yeast-milk mixture (if using) and themilk. Knead the dough well for 10 minutes until it is soft but glossy and elastic.
✽ On a lightly floured worktop, spread out the dough into a flat, even layerapproximately 2cm thick. Scatter the fruit, peel and spice evenly over the dough,then fold up. Knead the dough for 1–2 minutes to distribute the fruit fully.
✽ Place the dough in a large clean bowl and cover it with a damp cloth. Leave ina warm, but not hot, place for 1 ½ hours until doubled in size.
✽ To shape the dough, tip it onto the worktop and knead for 1–2 minutes. Rollthe dough into a cylinder with a crease on the bottom and place in the greasedtin. Cover with a damp tea towel and leave to rise until doubled in size.
✽ Preheat the oven to 200°C/400°F/gas 6. Glaze the loaf with a little milk, thenbake for 25 minutes. Turn the oven down to 160°C/325°F/gas 3 and continuebaking for 15–20 minutes. The loaf is ready when it is well browned and itsounds hollow when tapped on the base (or see here for other ways to check it’sbaked through). Leave it in the tin for 5–10 minutes before transferring to awire rack. Eat spread with butter and honey.

TYPES OF CAKE
What is a sponge cake?
Light in texture with a tender crumb, a sponge cake – as its name suggests – hasa light and ‘holey’ texture that will spring back when gently pressed. A sponge ismade by whisking eggs with sugar and then mixing in flour. Some sponges maycontain a form of fat too, but this is an optional addition. What is most essentialis the amount of air created in the mixture, which is what gives it a light texture.There are three methods for achieving a good, spongy crumb: whisking,creaming and the all-in-one method (see here and here). The Victoria sandwich(which does contain fat) is the best-known modern example of a simple spongecake and can be made using either the creaming or the all-in-one method.
What is a pound cake?
A pound cake is a version of the recipe used to make a creamed Victoriasandwich, but it uses equal weights – traditionally, one pound each – of butter,sugar, eggs and flour (self-raising flour nowadays). It is baked as a large cakeand as 1lb equals 454g, a proper pound cake would weigh 4lbs, or a whopping2kg.
The weights of the butter, sugar and flour are normally based on the ratio of oneegg for every 50g of butter used. But as we all know, eggs vary considerably insize, and even if cookery writers give notes at the beginning of a book to specifythe size of eggs to use, two medium eggs might weigh different amounts.Because of this, professional bakers measure eggs by weight, so that the recipecan be reproduced identically every time it is made. You’ll see that in the recipebelow, the quantities of butter, sugar and flour are based on the weight of theeggs removed from their shells.
A MODERN POUND CAKEA true pound cake would require a very big round tin – 30cm or larger. Thisrecipe makes a smaller version that can be baked either as one large cake, or intwo shallower layers that can be sandwiched together with buttercream or jam.There are lots of ways to vary the basic cake (see here). Make sure that youringredients are all at room temperature before you begin.
Makes 1 large cake or a sandwich cake
3 medium eggs at room temperature
unsalted butter at warm room temperature
caster sugar
self-raising flour
pinch of salt (optional)
1 × 18cm round, deep cake tin, or 2 × 18cm sandwich tins, greased with butterand lined with baking paper
✽ Preheat the oven to 180°C/350°F/gas 4. Crack the eggs into a bowl andweigh them. Measure equal weights of butter, sugar and flour.
✽ Set a large bowl on a cloth on the worktop (the cloth will stop it slipping). Putthe butter in the bowl and beat it with a clean wooden spoon or hand-heldelectric mixer until it is soft, light and fluffy. Add the caster sugar and cream thesugar and butter together until the mixture is once again light and fluffy.
✽ Beat the eggs well with a fork to break them up. Add in small portions to thebutter and sugar mixture, beating well after each addition until the mixture islight and glossy. When you have added three-quarters of the egg, make the nextadditions much smaller, to avoid breaking the emulsion between the butter andegg. (If this happens, the finished cake won’t rise as well.) Once you have beatenin the last of the egg, sift in the flour. Using a large metal spoon, carefully fold inthe flour until the mixture is even and there are no lumps.
✽ Transfer the mixture to the cake tin and smooth the surface gently with aspatula or palette knife. Make a small depression in the middle of the cake to
help prevent the cake from doming in the centre during baking.
✽ Place in the centre of the oven. If you are making one large cake, bake for 20minutes, then turn the heat down to 150°C/300°F/gas 2 and bake for a further35–40 minutes. If you are making two small cakes, bake them for 20–25minutes.
✽ The cake is ready when it feels firm to a light touch. Transfer the cake, still inthe tin, to a wire rack and cool for 5 minutes or so before turning out (this helpsprevent the cake from sticking).
For a vanilla-flavoured cake:
Add the seeds scraped from 1 vanilla pod to the creamed butter and sugarmixture.
For a chocolate cake:
Replace one-fifth the weight of flour with cocoa powder, and sift this with theremaining flour before folding into the cake.
For a coffee cake:
Dissolve 2 teaspoons instant coffee powder in 1 teaspoon hot water and cool;add this with the eggs.
For a lemon cake:
Finely grate the zest from 2 unwaxed lemons and add to the butter beforecreaming.
For an almond and cherry cake:
Add 25g ground almonds per egg, and the same weight of glacé cherries aseggs. Rinse and dry the cherries, then dust with flour before adding to the cakeafter you have folded in the flour and ground almonds. Add an optional ½teaspoon pure almond essence to the eggs before beating. Sprinkle the cakewith 50g flaked or nibbed almonds and 1 tablespoon demerara sugar beforebaking.
For a seed cake:
Add 1 teaspoon caraway seeds with sugar.
You can also use this mixture to make fairy cakes using a 12-hole fairy cake tin,lined with cases. They will take much less time to bake, so watch carefully andremove from the oven when golden, risen and firm to the touch.
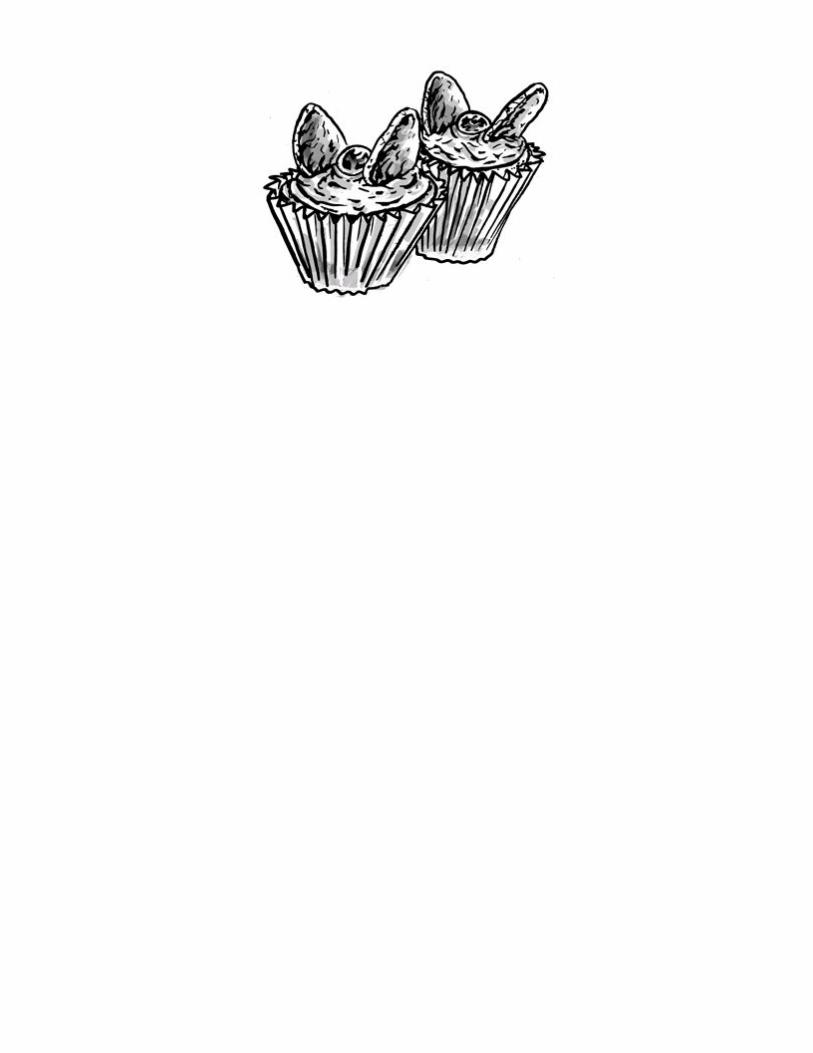
Are fairy cakes and cupcakes the same thing?
The fairy cake is so-named because it is a tiny, light cake – suitable for fairies or,more likely, small children to enjoy. It is difficult to identify who first made fairycakes and when (recipes like these crop up in kitchens across the country), butwe do know that small cakes or buns have been baked for hundreds of years.The origins of these little, single-portion cakes are owing to the nature of earlyovens. For although these days we might think nothing of switching on the ovento bake a cake or a batch of buns, two or three generations ago people had toplan their baking sessions a bit more carefully. When ovens were heated withwood, bakers had to bake according to its temperature, which would vary fromwhen the fire was first lit to when it was cooling down. Thus, cooks made bakesof different sizes: a batch of mixture was divided into one large loaf and a varietyof miniature cakes or buns. The smaller bakes could be cooked in the hot ovenbefore the larger ones went in to cook in the cooler, slower oven. These smallercakes were therefore easier to make, compared to the larger versions thatneeded not only more time to bake, but also more skill when managing the fire.
We also don’t know exactly when the name ‘fairycakes’ was first used.However, many recipes were developed after the Second World War by writersemployed by cooker manufacturers to show off their equipment, and so-calledfairy cakes appeared regularly in these compilations. Once again, the popularityof these little cakes was influenced by the technology of the ovens used to cookthem. Traditional post-war fairy cakes are rather plain (and economical) – only alittle glacé icing or buttercream would have been added to fairy cakes if youwere lucky and could afford the added cost.
The name ‘cupcakes’ may historically come from the small, cheap earthenwarecups or pots in which simple cakes were once baked. Amelia Simmons’spioneering book American Cookery, published in 1796, mentions little cakes
baked in such ‘cups’, and in 1806 British cook Maria Rundell published a recipein which her cake was measured using teacups. The other possibility is that thename comes from the use of measuring cups in American baking recipes. Whilefairy cakes are made using a basic pound cake recipe (see here), cupcakes aremore frequently made using a higher proportion of flour and liquid and less fat.They have a drier texture and a finer crumb, which is why they’re often toppedwith lashings of icing.
What is a fruit cake?
A fruit cake is a typically British rich, heavy cake, made using the creamingmethod, in which at least half the weight of the cake is made up of dried fruit(including raisins, sultanas, glacé cherries and candied peel). Fruit cakes areassociated with celebrations – they form the basis of wedding cakes andChristmas cakes and are often heavily decorated with marzipan and a rich icing.
Lighter versions of fruit cakes do exist: Madeira cakes are often baked withcherries in the mixture; and both Genoa and Dundee cakes contain a smallerratio of fruit to batter than rich fruit cakes.
When did we start to use fruit and spices in our cakes?
The fruit cake is unlikely to have appeared before the Middle Ages as it was onlyduring the thirteenth century that fruit, nuts and spices arrived in Britain andsubsequently appeared in our baking. Early medieval versions of the fruit cakecan be traced back to Scotland – the ‘black bun’ was a rich fruit cake baked onspecial occasions.
Why do you boil the ingredients in some fruit cake recipes?
The method of boiling then cooling dried fruit before adding it to the dryingredients is used as a means of making moist fruit cakes with a lower fatcontent. As well as containing less fat in proportion to the other ingredients,they also often contain as little as a quarter of the amount of flour normally usedin a cake and the result is a tender, soft crumb.
The liquid you use to plump the fruit can vary from water or tea, to ale or evenwhisky or cherry brandy (which is particularly good) in more luxurious recipes –whatever you fancy.
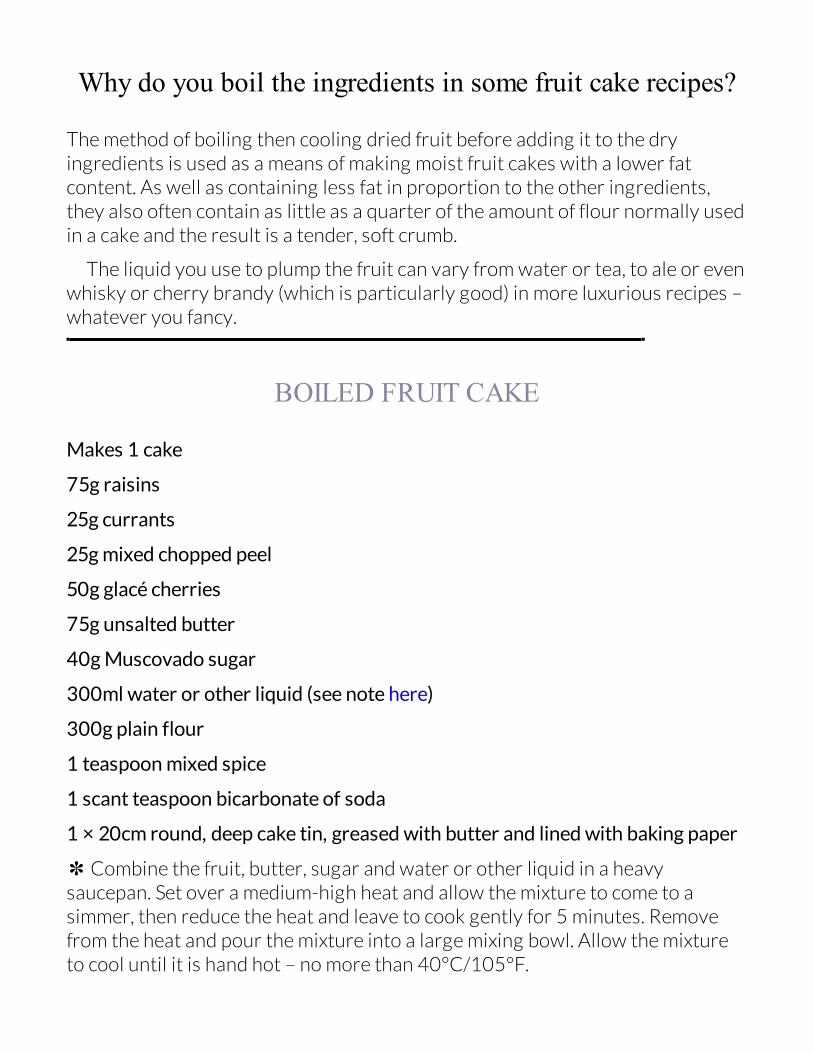
BOILED FRUIT CAKE
Makes 1 cake
75g raisins
25g currants
25g mixed chopped peel
50g glacé cherries
75g unsalted butter
40g Muscovado sugar
300ml water or other liquid (see note here)
300g plain flour
1 teaspoon mixed spice
1 scant teaspoon bicarbonate of soda
1 × 20cm round, deep cake tin, greased with butter and lined with baking paper
✽ Combine the fruit, butter, sugar and water or other liquid in a heavysaucepan. Set over a medium-high heat and allow the mixture to come to asimmer, then reduce the heat and leave to cook gently for 5 minutes. Removefrom the heat and pour the mixture into a large mixing bowl. Allow the mixtureto cool until it is hand hot – no more than 40°C/105°F.
✽ Preheat the oven to 180°C/350°F/gas 4.
✽ Sift the flour, spice and bicarbonate of soda together into a separate bowl,mix in to the fruit mixture and transfer to the cake tin. Bake for 1 ½ hours untilwell risen and a skewer inserted into the centre comes out clean. Cool in the tinand transfer to an airtight box only when completely cold. Eat within two weeks.
What is ‘stir-up Sunday?’
This is an important day for many bakers! In the British Christian calendar theterm refers to the last Sunday before Advent, the day on which Christmaspreparations begin in earnest. Although the phrase ‘stir up’ derives from theopening phrase from the ‘Collect’ in the 1549 edition of the Book of CommonPrayer that calls people to worship, in the kitchen, the phrase has come todescribe the preparations of our Christmas mincemeat, pudding and cake.
The bittersweet dried fruit and alcohol used in modern Christmas cakesbenefit from being given time to mature once baked so that the flavours becomemore rounded, and subtle. Because of this, stir-up Sunday might in fact be toolate a date for a cake to have time to develop – a well-wrapped cake will keepeasily for two or three months, and can be fed with alcohol throughout that time.
If you do choose to make your cake earlier in the year, make sure that youkeep it in an airtight tin and in a cool place otherwise it might dry out or absorbflavours from other foods stored nearby. If you begin in October, you can then

add a couple of tablespoons of rum each week up to December, then stop andallow the cake to mature before decorating it on Christmas Eve.
Don’t be tempted to cut corners with the quality of any booze you put intoyour cake. Remember, it will only taste as good as the cheapest ingredient!
CAKE-MAKING METHODS
Why are there different methods of combining a cake’singredients?
Most cakes are essentially made up of four base ingredients: flour, fat, sugar andeggs. They are used in different proportions, but what changes the texture andconsistency of the cake is the ratio of fat to flour and the method used tocombine the ingredients. There are five main methods of making a cake:creaming, whisking, the ‘all-in-one’ method, rubbing in and melting. Find outbelow how and why each is used to create different results.
What is the ‘all-in-one’ method?
The all-in-one method is the simplest way to make a cake. It involves less timeand effort for the baker than creaming, but because no air has beenincorporated in the mixture, the texture of the cake will not feel as light and thecrumb will not be as fine or close. All the ingredients are put into a bowl andbeaten with a wooden spoon or electric whisk until they are just mixed. Youshouldn’t beat the mixture much because if you did the gluten contained in theflour would be activated (see here) and the cake would end up tough. A littleextra baking powder will compensate for the lack of air in mixtures using thismethod, and therefore ensures the cake rises, but don’t overdo it or your cakewill be dry. The all-in-one method is the easiest for beginners as there is less riskof the cake sinking in the middle.
What is the ‘creaming’ method?
Creaming is also used to make sponge cakes which contain fat, and involvesbeating softened butter or other type of fat to incorporate air, lightening it bothin texture and in colour (because the air beaten into the butter reflects light).The creamed butter is then beaten thoroughly with sugar, usually caster, whichadds even more air through the mixture. Once the butter and sugar mixture islight and fluffy, the eggs are beaten in gradually. This is crucial; the eggs must beadded slowly so that the emulsion between the fat, sugar and egg is maintained.The mixture will continue to absorb air as the eggs are beaten in.
When the eggs are completely incorporated, the flour is carefully folded in.Do this gently to avoid breaking too many of the air bubbles created in the mix.
What is the whisking method?
The whisking method is used to make sponge cakes that contain little or no fat,such as Swiss rolls, roulades and Genoese sponges. The sugar is whisked withthe eggs to incorporate plenty of air, which will give these cakes a very lightspongy texture. The key is to make sure the mixture is very thick and pale beforeadding the remaining ingredients. (See also the recipe for a flourless whiskedchocolate sponge on here.)
What are the rubbing-in and melting methods?
These are two alternative ways of making cakes that are used to combineslightly different proportions and types of fat, flour and sugar from those used inthe all-in-one and creaming methods.
Mixtures that have been rubbed in tend to be dense and bread-like, such asrock cakes or scones (see also here). They have about half the proportion of fat
to flour than a creamed sponge cake.
During the rubbing-in method, the fat is literally rubbed into the flour usingfingertips, creating a fine crumb-like texture, before adding sugar and liquid. Bydoing this, you are less likely to overwork the gluten in the flour (see here formore on gluten in flour), avoiding a tough finished cake and giving instead acrumbly but soft texture.
The melting method is used for moist, sticky cakes, such as gingerbread orparkin. It is the best way of dealing with ingredients that are difficult to combineat room temperature, such as honey, syrups and treacle. These ingredients areheated with the fat over a low heat before adding the dry ingredients.
GIVING RISE TO YOUR CAKE
When was baking powder first used?
After yeast and eggs, baking powder arrived as a means of making a cake rise.We have the Americans to thank for inspiring its invention, as well as for the‘self-raising’ flours that incorporate it. Both have been around for only the lastcouple of hundred years; the first writer to mention powders rather than yeastfor cake-making was Amelia Simmons in her book American Cookery, publishedin 1796, which also happened to be the first recipe book to appear from thatcountry.
The invention of baking powder came about as a response to a particularproblem faced by early American bakers. At that time, the yeast used to leavenbread dough (ale barm, see here) often turned acidic as it aged and producedheavy bread with a strong flavour.
Turning to chemistry, these ingenious eighteenth-century bakers realisedthat if they added an alkaline substance to the dough it would neutralize theacid. When an alkali was added to bread dough, these bakers also noticed that agas was released (carbon dioxide) and the bread became lighter and tastedbetter. The first alkali used was the primitive pearlash, which derived from woodash, then as the baking industry developed worldwide, many differentcompounds were used as an alternative.
Later, during the 1850s, two New York bakers, John Dwight and AustinChurch, marketed another alkali, bicarbonate of soda, as a raising agent. Theywere the first people to produce it on an industrial scale, revolutionising bothdomestic and professional baking.
Today, baking powder usually combines bicarbonate of soda (an alkali) withcream of tartar (an acid) and a filler, usually corn or potato flour, which absorbsany moisture that might otherwise cause the two active ingredients to reacttogether and render the powder useless.
Baking powders can contain several different chemicals. The next time you
buy baking powder, check the label. Those powders that include aluminiumcompounds can give a cake or biscuit a metallic aftertaste – a good reason toavoid them.
How can I tell if my baking powder is still active?
Baking powder can degrade in the cupboard, especially if it is not sealed in anairtight container because, if it comes into contact with any moisture, the activeingredients will react to produce carbon dioxide. Even if the level of moisturepresent in the air is small, the powder will react without you noticing, and whenyou next try to use it, it will fail you. To test if your baking powder is still active,add a teaspoon to a glass of warm water. You should see it quickly producebubbles and become frothy. If it does not, it’s gone off and you should replace it.
Can I make my own baking powder?
It’s easy to do this, but mix only as much as you need for the recipe in hand tokeep it fresh. Thoroughly mix 1 teaspoon (5g) of bicarbonate of soda with 2teaspoons (10g) of cream of tartar and use immediately.
Can I make my own self-raising flour?
You know you should check your ingredients before you start baking, butsomehow you just don’t get round to it and suddenly you realise … the cupboardis bare! Even if you do have some self-raising flour, check its ‘use-by’ date; if theflour has passed it, its raising agents will no longer be active so reject it and buyfresh. Otherwise, if you can’t get to the shops, why not make your own?
As a rule of thumb, 1 teaspoon (5g) of baking powder will raise 110g of plainflour, but baking powder packets give a handy guide to how much to use foreach recipe. Make sure that the two are mixed well before you add them to otheringredients or your bake will rise unevenly.
Why do some recipes call for bicarbonate of soda or cream oftartar instead of baking powder?
Bicarbonate of soda and cream of tartar sometimes appear in recipes on theirown. This is because ingredients such as fruit, honey and treacle are acidic innature so they react with the alkaline bicarbonate of soda by themselves. Thisreleases carbon dioxide into the mixture and has the effect of leavening thebatter just as if you had used baking powder (which is a mix of acid and alkali,see also here). Cream of tartar is used mainly on its own in recipes where eggwhites provide volume or lift. The acidic cream of tartar helps to stabilize theegg whites and make them more voluminous.
Is baking powder gluten-free?
Some are and are sold as such, so you should check the label if you want to avoidgluten. If they are not labelled ‘gluten-free’, it is best to assume that they containgluten because it can be present in the type of filler used.
ALL ABOUT EGGS
Is it important to use fresh eggs for baking?
Eggs don’t actually need to be very fresh to bake with. In fact, older eggs areeasier to beat because they are more liquid.
To find out how fresh your eggs are, you can test them. If you crack a veryfresh egg onto a flat plate, the yolk will stand proud from the white and you willsee that the white consists of a firm circle of material with only a little clearliquid white surrounding it. Crack an older egg and you will see that the yolk ismuch less pert, and the white is very liquid.
If you store your eggs in the fridge, make sure you bring them back to roomtemperature before you use them for baking to prevent your cake mixturecurdling (see here).
Can I freeze eggs?
Yes, you can. Not whole in their shells, though! The best way to freeze eggs forlater use is first to beat them well with a small pinch of salt (this helps breakdown the eggs) and pour them into an airtight container. Freeze them inmultiples of two or four so that you can defrost just what you need for aparticular recipe.
Defrost the eggs before using them: the best way to do this is to leave them inyour fridge overnight. Pass them through a sieve before adding them to yourbake, to make sure you’ve removed any lumps or bits of shell.
Can I use any eggs for baking?
All bird eggs can be used in baking as they have similar properties, althoughthey vary in size. If you are using large or small eggs in place of medium, forexample, first beat them well, to combine the white and yolk, then use a weightof 50g mixed egg for each whole medium egg specified in the recipe. If yourrecipe uses only egg whites, or yolks, separate the eggs and use 35g of thewhite or 25g yolk per each medium egg in the recipe; add 5g more of each if alarge egg is stipulated.
Any excess white or yolk can be used either as a glaze or, if there’s a lot leftover, it can be mixed with a tiny pinch of salt and frozen. In practice, though, it’seasier to incorporate any leftover egg in a batch of scrambled eggs or anomelette.
If you are collecting eggs for baking from free-range birds, be sure to washcarefully any that come in from wet or muddy ground. Dry them thoroughly sothat they don’t go mouldy in the fridge. The egg shell is porous and may absorbunfriendly bacteria and flavours that could affect your baking. Bear in mind thatif hens are fed strong-tasting vegetables, this flavour can transfer to the egg,especially garlic.
Can I bake without eggs?
It’s hard to find substances to replace the role of eggs in cakes. This is becauseeggs help create the texture of the cake: the emulsifiers in the yolks and theproteins contained in the whites contribute to the strength of the cake crumb.
There are various natural, or naturally derived, substances that can be used incake or tart recipes to mimic the texture of eggs – banana purée and tofu aretwo popular options. For baking purposes there are artificial egg substitutesbased on potato starch and gums. These are particularly useful for people whohave an allergy to eggs.
RECIPE SUBSTITUTIONS
Can I use granulated instead of caster sugar?
Because granulated sugar and caster sugar are simply different-sized crystals ofthe same sugar, you would think you could use them more or lessinterchangeably. However, they don’t acutally behave in the same way becausegranulated sugar doesn’t dissolve as quickly as caster sugar when it’s mixedwith fat and liquid ingredients. This can cause problems when making spongecakes – especially in creamed mixtures where the smaller grains of caster sugarallow more air to be incorporated into the mix. If you do use granulated sugar increamed sponges, you’ll notice an uneven surface texture and also that thesugar grains cause spotting because they have not dissolved very well.
Granulated sugar is less of a problem in whisked sponges as the sugar is morelikely to dissolve in the liquid mixture (though it is still not as suitable as castersugar). If you only have granulated sugar in the cupboard, the best thing to do isto make sure that it is fully dissolved before adding the flour to the mixture andbaking. A trick you could try is to beat the sugar and eggs together lightly, andthen leave them in a bowl over warm water for half an hour to soften the sugarbefore you whisk them fully.
Can I use icing sugar in place of caster sugar?
Icing sugar is not completely interchangeable with caster sugar, or granulatedfor that matter. This is because icing sugar is ground sugar mixed with anti-caking agents to stop it going lumpy. Interestingly, icing sugar available in theUK is more finely ground than that sold on the Continent, where icing sugar ismore akin to finely ground caster sugar and still retains some texture.
Icing sugar can be used in place of caster sugar in any creamed, rubbed-in or
melted mixtures as the anti-caking agent will be incorporated into the mixture.It’s not advisable to use icing sugar in syrups.
Can I bake cakes without sugar?
It may sound an odd question, but sugar is more important in some cakes thanothers. Sugar not only provides sweetness, it also affects the volume, colour andtexture of a cake. While many cakes can’t be made successfully without refinedsugar, there are some alternatives for baking without it.
Some fruit cake recipes use puréed fruit, such as apricots, bananas and dates,to sweeten the mixture (see the recipe). These fruits do still contain largeamounts of sugar of course, just in a more natural form. You can also use honeyor agave syrup in place of refined sugar as more natural sweeteners, althoughthey are really just other forms of sugar. Honey contains the simple sugarsglucose and fructose that the bee produces from the sucrose contained in nectar(see here on how best to use honey in your recipes).
For a truly sugar-free bake, use sugar substitutes that are based on syntheticcompounds. Most sugar substitutes are sweeter, weight for weight, than sugar,which means that if you choose to replace it, you will be using less of thesubstitute and may need to adjust your recipe to compensate for the lost volumeand the difference in texture. Similarly, some substitutes, such as aspartame,may be affected by heat so may not work as well. Usually, the labelling of sugarsubstitutes will inform you how suitable they are for your own baking and youmay just need to practise a few times to see what works.
SUGAR-FREE FRUIT CAKE
Makes 1 cake
110g stoned prunes
50g dried apricots
225g plain flour
2 teaspoons baking powder
1 teaspoon ground cinnamon ½ teaspoon grated nutmeg
3 medium eggs
80ml sunflower oil
finely grated zest and juice of 1 orange
700g mixed chopped dried fruit
75g flaked almonds
1 × 20cm round, deep cake tin greased with butter and lined with baking paper
✽ Preheat the oven to 180°C/350°F/gas 4. Cut up the prunes and apricots andsimmer them in 120ml water until soft. Purée the fruit in a blender or foodprocessor and cool.
✽ Sift the flour, baking powder and spices into a bowl. In another bowl, beat theeggs and oil together with the orange zest and juice. Finally, add the cooled fruitpurée, flour mixture, dried fruit and almonds and mix well to combine evenly.
✽ Turn into the cake tin. Make a slight depression in the centre to prevent thecake doming. Bake for 45–55 minutes until a skewer inserted in the centrecomes out clean. Cool in the tin for an hour before removing carefully. Whenfully cool, remove the paper and store in an airtight tin for a couple of daysbefore cutting.
Can I make a cake without fat?
To make a cake with no fat at all is pretty tricky, but cakes containing almost nofat can be made using only the egg white. These kinds of cakes are very pale andlight; the angel food cake popular in America is one example. Here, egg whitesare whisked to provide lift and to bind the cake, but because there is no egg yolkpresent to emulsify the mixture and lend moisture, the cake will stale quickly.Perfect for trifle, then!

A whisked sponge cake is another type of cake that contains a limited amountof fat. It does contain whole eggs, and therefore some fat, which exists in the eggyolk. However, it still contains much less than a creamed sponge, which usuallyconsists of around 25 per cent fat.
ANGEL FOOD CAKEThis is traditionally baked in a tall domed mould, but can also be made in a ring-shaped cake tin.
Makes 1 ring-shaped cake
100g plain flour
300g caster sugar
300ml egg whites (from about 12 medium eggs)
1 teaspoon lemon juice or cream of tartar
1 teaspoon pure vanilla extract
1 × 25cm ring-shaped cake tin, greased with butter and lightly dusted with plainflour
✽ Preheat the oven to 180°C/350°F/gas 4. Sift the flour with half the sugar intoa small bowl and set aside.
✽ Combine the egg whites and lemon juice or cream of tartar in the bowl of afree-standing electric mixer, or a large bowl if you are using a hand-held mixer.Beat until the whites form soft peaks. Add the remaining sugar all at once alongwith the vanilla extract, then continue beating until the mixture is glossy and youhave stiff peaks.
✽ Using a large whisk or metal spoon, fold in the flour mixture a little at a timeuntil it is all incorporated and there are no lumps.
✽ Transfer the mixture to the tin and place in the centre of the oven. Bake for35–40 minutes until the cake is a medium brown and firm to a (light) touch.Transfer the cake, in its tin, to a wire rack and cool for 10 minutes. Then turn outand leave to cool completely. When cold, the cake can be decorated to yourliking.
Variation: To make an enriched whisked sponge, or Genoese, melt 50gunsalted butter and add this to the mixture after the flour has been fullyincorporated, folding it in gently.
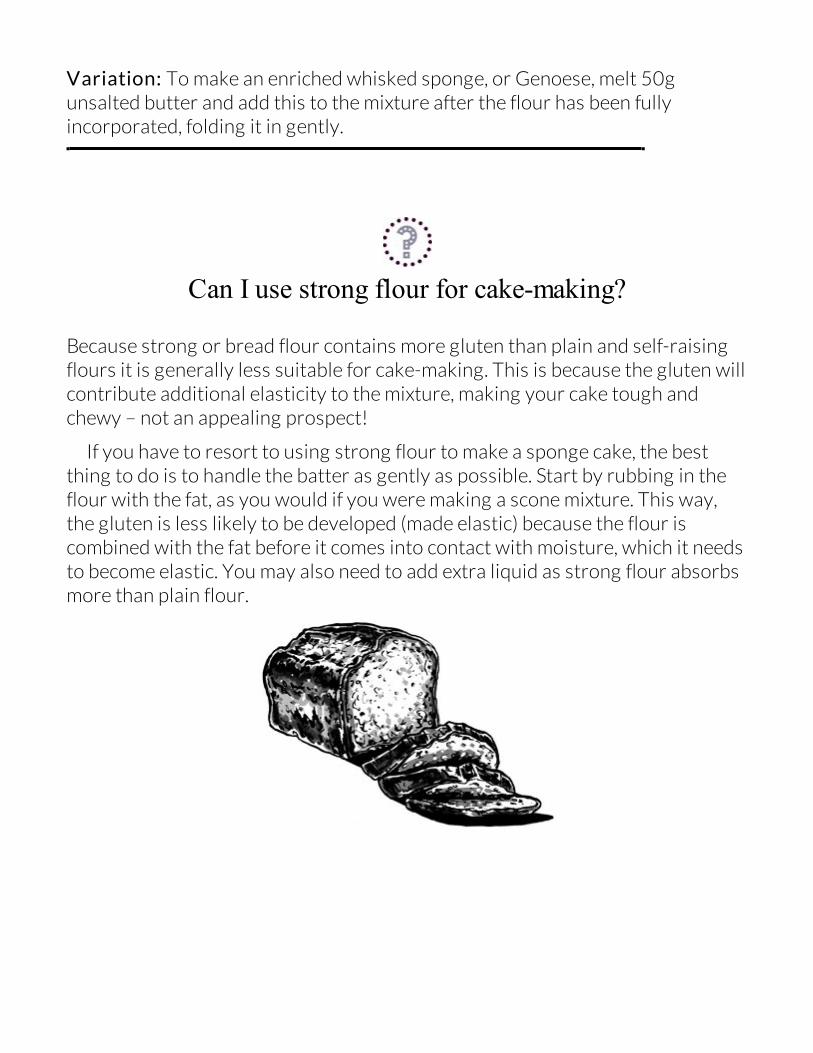
Can I use strong flour for cake-making?
Because strong or bread flour contains more gluten than plain and self-raisingflours it is generally less suitable for cake-making. This is because the gluten willcontribute additional elasticity to the mixture, making your cake tough andchewy – not an appealing prospect!
If you have to resort to using strong flour to make a sponge cake, the bestthing to do is to handle the batter as gently as possible. Start by rubbing in theflour with the fat, as you would if you were making a scone mixture. This way,the gluten is less likely to be developed (made elastic) because the flour iscombined with the fat before it comes into contact with moisture, which it needsto become elastic. You may also need to add extra liquid as strong flour absorbsmore than plain flour.
TROUBLESHOOTING
What happens if my oven isn’t quite at the right temperature?
In order to cook through, all cakes need to reach an internal temperature of atleast 90°C/195°F, and those that contain a high proportion of sugar will becooked only when the temperature reaches 100°C/212°F. At this temperature,all of the starch in the cake will be fully cooked and the structure of the spongestrong enough to hold without collapsing.
The only way to ensure that cakes bake properly is to have the oven set to thecorrect temperature – writers and chefs do spend a lot of time testing recipes tomake sure that they work after all!
Most sponges and cakes that are designed to have a light, airy texture shouldbe cooked quickly – at a temperature of around 170–200°C/325–400°F. Thehigher temperature means that the starch can expand quickly at the same timeas the fat melts, allowing the sponge to form properly and continue to expandevenly until the mixture sets. If you bake a large sponge cake at too low atemperature, you will end up with a dense cake that does not rise evenly andthat might taste raw and look pallid.
How can I tell if my cake is ready?
All bakers have their own methods to check for doneness, using sight, smell andsometimes just plain instinct to tell whether a cake is ready or not. Of course,some methods are more scientific than others!
In fact the most reliable way of telling if your cake is ready is to measure itsinternal temperature using a temperature probe. This method is a great help fora beginner because there is nothing more crushing than making a cake thatsinks as it cools. As mentioned in the previous question, the centre of a cake will
reach 90–100°C/195–212°F when it is fully cooked.
Although recipes normally suggest a baking time, it is difficult to give preciseguidelines. Ovens differ in their power and the speed at which they will cook aparticular cake. Also, where you place a cake in the oven will affect the cooking –we have all come a cropper using an oven that has a hot spot to one side. This isjust as true with fan ovens as it is with conventional or gas. And you shouldexpect a cake to take longer to cook if you are baking more than one at a time.
When you are trying out a recipe for the first time, follow it to the letter,making sure you preheat the oven and arrange the shelves so that the cake canbe placed in the centre. An oven thermometer is a very handy purchase as youroven’s thermostat may be out by 10 degrees or so. Observe the cake as it bakesand, if the oven temperature in the recipe is correct, the cake should begin tobrown only towards the end of the cooking time.
A cake that is baked at the correct temperature in the correct tin will riseevenly and the surface will darken and shrink slightly as it nears the end of thesuggested time. The cooked cake will be set and gently resistant when pressedlightly. The smell of cooked cake is distinctive and, with experience, it will set offyour own internal cake timer.
Another way to test if your cake is cooked is by using a thin skewer or woodencocktail stick. When the cake has baked for the time designated in the recipe,remove it from the oven, insert the skewer into its centre, then gently pull it outagain. If the cake is cooked, the skewer will come out clean. If raw cake mixture isattached to the skewer, you need to bake the cake a little more before retesting.
Small sponge cakes cooked in shallow sandwich tins will cook quickly – half anhour is usually plenty of time to cook this type of cake – while a deep cake, suchas a Madeira cake, or a heavy, dense cake, such as a fruit cake, may take an houror several respectively. The oven temperature for these types will be lower toallow the heat to penetrate through to the centre of the cake withoutovercooking the outer layers. The centre, though, will still need to come up tothe required temperature before it is cooked.
What if my cake is browning too much as it cooks?
If your cake is turning brown long before you expect it to be ready, the safestoption is to reduce the oven temperature to 140°C/275°F/gas 1 (the originalheat will hopefully have already activated the raising agents).
It is best to leave the cake at this temperature to finish baking – it might welltake a little longer but better than having a burnt cake! To be sure it is done, testyour cake with a temperature probe as recommended on here.
If you’re still worried about it and your cake has quite a while still to bake, youcan also lay a sheet of foil loosely over the surface of the cake, which will reflectheat and prevent it from burning.
How can I stop my creamed mixtures curdling?
There are two common reasons for a creamed mixture curdling or splitting.Firstly, your ingredients might be too cold. All of them should be at a warm roomtemperature before you begin, so take them out of the fridge well in advance.The butter needs to be very soft to be creamed successfully. If other ingredients,especially eggs, are cold, they will cool and harden the butter when mixed in.This makes it more likely that the emulsion between your butter and the liquid inthe eggs will break down and split. You would then need to rewarm the mixtureto regain the emulsion – which is possible but not without a good deal of bother.
Secondly, it may be that you have added the eggs too quickly. If you have evermade mayonnaise, you will know how important it is to add the egg slowly andbeat the mixture thoroughly after each addition. Bear this principle in mindwhen you are making a cake too, as the mixture will trap good quantities of aironly if the emulsion is maintained. Too much egg added at any one time willresult in the emulsion breaking down, and the mixture will curdle, so add just alittle at a time.
Can I do anything to recover a curdled mixture?
You certainly can so there’s no need to throw the mixture out with theeggshells! You can try adding another egg yolk to the mixture, or even aspoonful of warm water, both of which can help.
If you notice that the mixture looks as if it is about to curdle (it will lookgrainy), you can stir in a tablespoon of flour. If your mix does curdle, this doesn’tmean the end of it: the baked cake will simply not be as light as it otherwisewould have been, but it will taste just the same so don’t start reaching for yourbin.
Why do cakes sometimes sink in the middle?
Watching a cake sink as it cools is possibly a baker’s worst nightmare. If ithappens, the centre can be hollowed out and used to hold a filling (or hiddenunder a thick layer of cream or icing!), or the cake can be cut into chunks andused in trifle. But why has it sunk?
Essentially, it is because the cake is underbaked. If the mixture has not heatedthrough so that the egg, flour and fat structure is firm and fully cooked, themixture will collapse back on itself and sink as it cools. Cakes sink in the centrebecause this is the last part of the cake to reach the temperature required tofully solidify the structure.
Why has my cake domed?
The ideal shape for a sponge cake is flat, or perhaps very slightly domed. Thereare several reasons why a sponge cake may rise majestically in the centre as itbakes. Think back to the appearance of your cake mixture. Was it possible youmade a mistake when weighing? If your cake mixture is too dry, it will set beforethe cake has fully expanded. The expansion will take place in the centre of thecake as this is the last part of the cake to cook fully. So when measuring youringredients, be sure to weigh them carefully. A dry, stiff mixture may also be
caused by using eggs that are too small. Check your recipe – if a number of eggsis given, ensure that this equates to the right weight of liquid. For example, if youare making a pound cake, or a cake where the eggs should make up 25 per centof the weight of the cake mixture, be sure that the eggs do weigh that whencracked. To make up any difference you can add additional beaten egg or milk tothe mix, but don’t add more than 1 tablespoon of milk per egg used as any morewill overly dilute the mixture.
Another simple explanation is that you’ve used a cake tin that is too small. Bydoing so, the outer edge of the cake sets and stiffens as it reaches the top of thetin while the remaining cake mixture continues to cook and rise. The tinprevents it from pushing through the crust other than where it is softest – in themiddle. This is why long-baked or deep sponge cakes sometimes eruptvolcanically as the uncooked centre emerges through the lightly set crust of themiddle.
Why do my cakes stick?
The answer to this question may seem very simple but you’d be suprised howoften a cake will stick to the inside of the tin if the tin isn’t lined correctly. Ifyou’re an experienced baker you may feel you know how to do this properly, butit’s always worth reminding yourself! First, grease the base of the tin, then thesides. Then cut a piece of baking paper to fit the base. If you also dust the insideof the cake tin with a small amount of plain or self-raising flour, you’ll get acleaner edge to your cake: it helps the cake mixture to rise evenly by creating abarrier between the batter and the tin and ensuring there are no air bubbles orgaps to interfere with the rise. (Dusting the flour inside also shows up any gapsin the greasing.)
For delicate sponges, cakes that contain a lot of sugar, or those cakes thatrequire a longer bake, such as fruit cakes and deep sponges, it’s always wise toline the sides of the cake tin too.
First, grease the tin well. Cut two pieces of paper to fit the base of the tin. Layone in the base of the tin and lightly grease this. Then cut a strip for the sides2cm wider than the height of the tin, and snip it at intervals along one edge. Fit
the strip of paper around the sides, allowing the snipped edge to fold over ontothe base. Grease the side strip. Finally, place the other cut sheet of paper on thebase, on top of the snipped edge, and grease this.
For an extra layer of protection, the tin for fruit cakes, which are often in theoven for a couple of hours, can be wrapped on the outside with a sheet of brownpaper, newspaper or foil, which slows the penetration of heat into the cake andprevents the outer layers from overcooking, or burning.
Why have my glacé cherries sunk in my cake?
Fruit and other additions to a cake mixture may sink if the batter is too soft tosupport them, so the mixture is usually made denser or heavier to cope with this.(The typical cherry cake is made with a Madeira cake mixture, which has moreflour than the usual creamed sponge.)
However, the type of batter is not always the problem; often it’s the type andsize or stickiness of the fruit used that’s the reason for it sinking. Glacé cherriesare notorious for this as they are generally large and sticky, so the best tip forcherries is to rinse and dry them thoroughly before tossing them in a little flourtaken from the recipe.
A small scattering of other dried fruit, such as raisins, will be less likely to sink.They are less sticky and smaller so don’t slip about in the mixture as easily. Inthe case of fresh fruit, such as apple, plum or rhubarb, a firmer mixture is best,such as a rubbed-in cake mixture which will absorb the moisture that escapesfrom the fruit as it bakes.
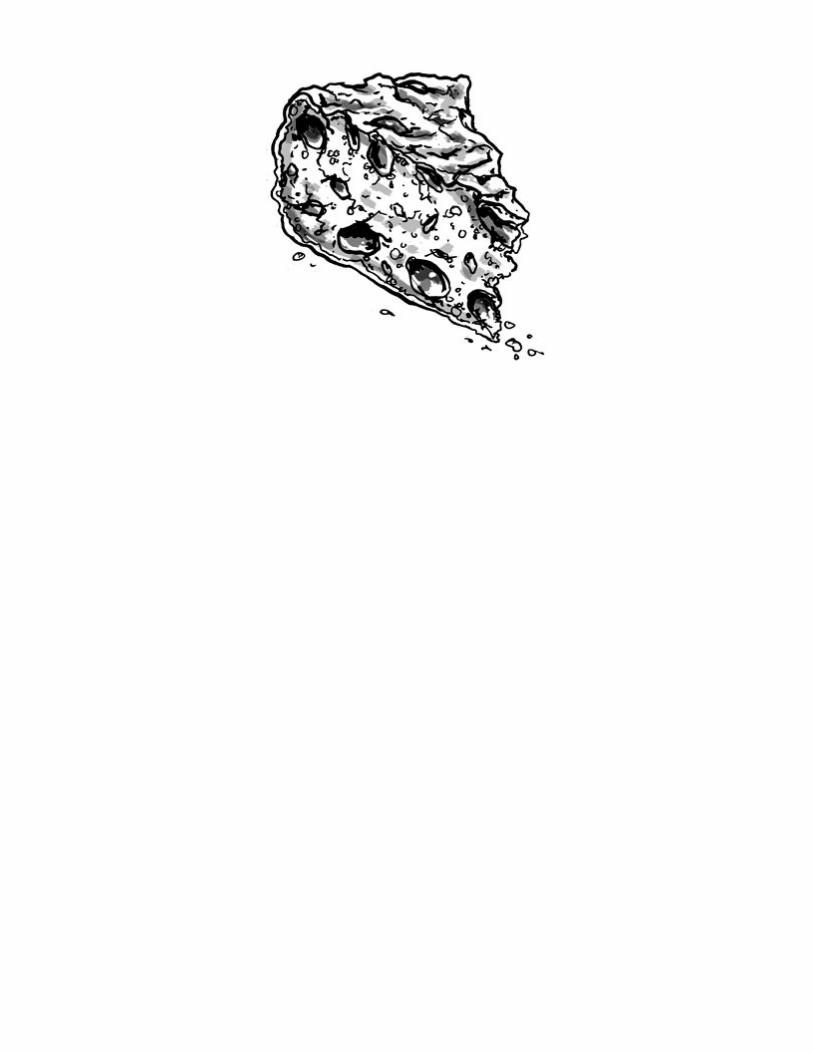
BISCUITS
From biscotti to bourbons: where do biscuits fall in bakinghistory?
The word ‘biscuit’ is derived from the Latin for ‘twice-cooked’ (bis meaning twiceand coctus the past tense of the verb coquere, meaning to cook) Biscuits wereoriginally hard, dry rusks made from plain doughs. Italian biscotti are a good,surviving example of the way that biscuits were traditionally made using earlyovens: first by cooking a dough rather like a choux paste on the stove, or bakinga firmer dough as a loaf, then cutting it and baking again to a crisp brittle biscuit.
It is possible that this technique grew out of a need to preserve cakes thatwould otherwise go off too quickly. In the medieval English court, a simple flourdough flavoured with rosewater or spices was made into thin wafers or biscuits.During his reign in the early sixteenth century, Henry VIII had a Wafery built atHampton Court especially for the production of these thin and delicate sweettreats, the preserve of the Royal table.
Biscuits have often been used as a more durable source of ready-to-eatcarbohydrate than bread. The unsweetened ship’s biscuit used for centuries bysailors was baked not twice, but four times to ensure that it kept hard duringlong voyages. Even today, plain biscuits containing a good proportion of fat (forextra calories) are used in military and polar rations, although biscuits forpopular consumption – whether sweet or savoury – are generally only bakedonce.
What’s the difference between biscuits and cookies?
Although in Britain we tend to use these terms to denote more or less the same
thing, we do make the distinction that cookies are larger than biscuits andunderbaked so that they are still slightly soft in the centre rather than fully crisp.To Americans, a cookie is sweet and may be either soft or crisp, while what wecall a savoury biscuit is called a cracker in the USA. And to further confusethings, their ‘biscuit’ is similar to our scone!
It is thought that cookies developed as test pieces of dough used for checkingthat the oven temperature was neither too hot nor too cool for baking a largercake or bread (which would have been difficult to judge without modernthermometers).
One of the most popular cookies, the chocolate chip, was first invented in1937 by Ruth Graves Wakefield, who ran a restaurant in Massachusetts calledthe Toll House. Such was the success of her cookies that Ruth’s reputationspread and Nestlé began to manufacture bars of chocolate sold with a specialcutter designed to cut chunks of chocolate that were the perfect size for thechips in the Toll House cookies. The recipe was printed on the inside of thewrapper.
What are melted biscuits?
The melting technique resembles methods found in early biscuit recipes whereingredients were warmed together before being spooned onto trays for baking.Today we tend to use this method when we make biscuits that contain honey,syrup or treacle, which are difficult to blend with other ingredients when cold.
A melted biscuit dough can be firm – as in the case of gingernuts – or soft,such as for brandysnaps depending on the proportion of flour used. More flourgives a firmer, sturdier biscuit.
GINGERNUTS
Makes 45–50 biscuits
200g self-raising flour
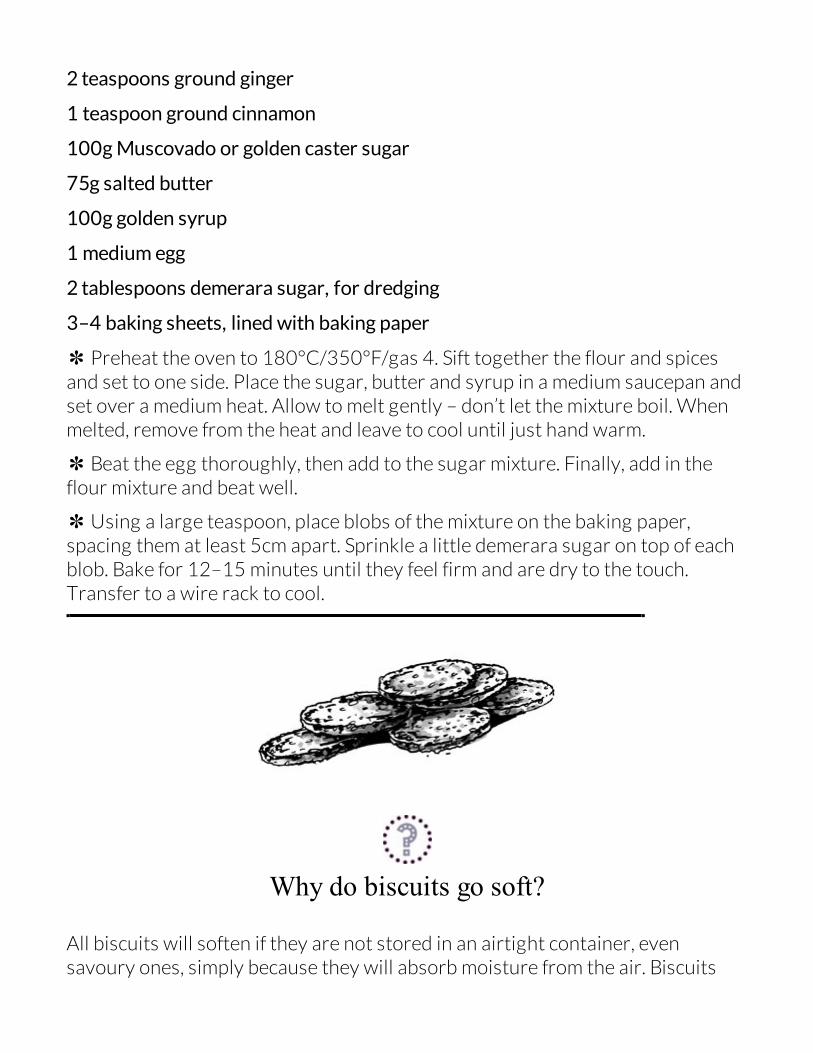
2 teaspoons ground ginger
1 teaspoon ground cinnamon
100g Muscovado or golden caster sugar
75g salted butter
100g golden syrup
1 medium egg
2 tablespoons demerara sugar, for dredging
3–4 baking sheets, lined with baking paper
✽ Preheat the oven to 180°C/350°F/gas 4. Sift together the flour and spicesand set to one side. Place the sugar, butter and syrup in a medium saucepan andset over a medium heat. Allow to melt gently – don’t let the mixture boil. Whenmelted, remove from the heat and leave to cool until just hand warm.
✽ Beat the egg thoroughly, then add to the sugar mixture. Finally, add in theflour mixture and beat well.
✽ Using a large teaspoon, place blobs of the mixture on the baking paper,spacing them at least 5cm apart. Sprinkle a little demerara sugar on top of eachblob. Bake for 12–15 minutes until they feel firm and are dry to the touch.Transfer to a wire rack to cool.
Why do biscuits go soft?
All biscuits will soften if they are not stored in an airtight container, evensavoury ones, simply because they will absorb moisture from the air. Biscuits
that contain sugar of one kind or another soften more quickly because sugar ishygroscopic (this means that sugar absorbs water from the air).
Although we use a biscuit tin these days to keep our biscuits crisp, historicallyother devices have been invented not only to dry the biscuits once made, butalso to store them. The ‘breadflake’ was one such example: this was a largevertical rack that would have been stood in front of an open fire. Biscuits oroatcakes could be stacked on it for drying rather like a giant magazine rack.When stored on a breadflake they would keep crisp for a long time.
So, what can you do if your biscuits have gone soft? The easiest way to refreshand crisp them again is to place them on a baking sheet and to warm them for 10minutes in an oven preheated to 140°C/280°F/gas 2. Transfer them to a wirerack to cool and then put them into an airtight tin as soon as you can.
Why is shortbread called a ‘bread’ when it’s actually abiscuit?
The story of shortbread, too, begins in the twelfth century with the concept ofbaking bread twice to make a hard ‘biscuit bread’. Over time, as biscuits evolved,the yeast in the dough was replaced by butter, which gave the bread a ‘shorter’texture (see next question). This particular type of biscuit became known asshortbread.
What does the ‘short’ in shortbread mean?
In the sixteenth century, flat, thin biscuits baked from a rich pastry containingeggs, with yeast for leavening, were known as ‘short cakes’ – ‘short’ being an oldEnglish word meaning ‘crumbly’ in texture. The term was also used to describebiscuits, and short or shortcrust pastry, with its high proportion of fat, issimilarly named.
Why does shortbread have tails?
The invention of shortbread is often attributed to Mary Queen of Scots, but it isunlikely that she ever got her hands in the mixing bowl. It is said that Mary wasparticularly fond of ‘petticoat tails’ – triangular segments cut from a large roundshortbread that was originally flavoured with caraway seeds.
There are two surviving theories as to the origins of the description ‘petticoattail’. One is that the triangles were thought to resemble the triangular pieces ofcloth used to make petticoats, known as ‘petticoat tallies’ – a ‘tally’ was the wordfor a pattern. However, the idea persists that the name is a corruption of theFrench petites gatelles (‘little cakes’).
Traditionally shortbread is made into one of three forms: tails, rounds andfingers, although it is now frequently shaped into more imaginative forms,usually in decorative moulds made from wood and intricately carved. Onceturned out, the shortbread retains the imprint of whatever has been carved inrelief on the inside of the mould. As shortbread dough is crumbly, it is easilypressed into a shape, and the pressure then consolidates the dough.
Shortbread dough can also be rolled out and cut into shapes (as in the recipebelow) using cutters.
SHORTBREADOld recipes for shortbread frequently include caraway seeds or other spices andusually some form of citrus peel. They are lovely and well worth trying. Thisrecipe uses both.
You can either rub in the mixture using your fingers or blend together in afood processor. As there is virtually no water in the dough, there is no chance ofdeveloping the gluten in the flour, so the biscuits will be deliciously crisp anddelicate whichever method you use.
Makes approximately 20 biscuits or two large shortbreads made with a 15cm-diameter mould
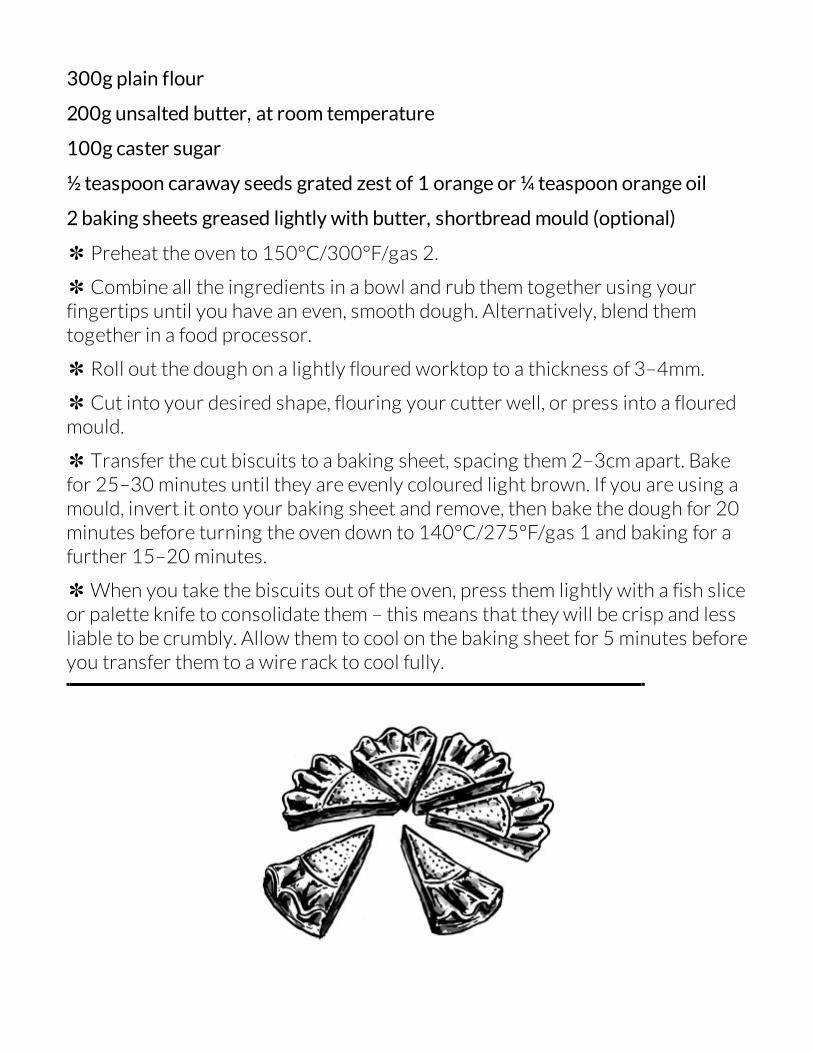
300g plain flour
200g unsalted butter, at room temperature
100g caster sugar
½ teaspoon caraway seeds grated zest of 1 orange or ¼ teaspoon orange oil
2 baking sheets greased lightly with butter, shortbread mould (optional)
✽ Preheat the oven to 150°C/300°F/gas 2.
✽ Combine all the ingredients in a bowl and rub them together using yourfingertips until you have an even, smooth dough. Alternatively, blend themtogether in a food processor.
✽ Roll out the dough on a lightly floured worktop to a thickness of 3–4mm.
✽ Cut into your desired shape, flouring your cutter well, or press into a flouredmould.
✽ Transfer the cut biscuits to a baking sheet, spacing them 2–3cm apart. Bakefor 25–30 minutes until they are evenly coloured light brown. If you are using amould, invert it onto your baking sheet and remove, then bake the dough for 20minutes before turning the oven down to 140°C/275°F/gas 1 and baking for afurther 15–20 minutes.
✽ When you take the biscuits out of the oven, press them lightly with a fish sliceor palette knife to consolidate them – this means that they will be crisp and lessliable to be crumbly. Allow them to cool on the baking sheet for 5 minutes beforeyou transfer them to a wire rack to cool fully.
The huge variety of breads that we eat today, regardless of where we live, owe alot to ancient methods and early ingredients. Sourdough and slow-fermentedbreads made with yeast, and griddle- and stone-baked soda breads, are some ofthe earliest types of leavened breads, invented by those without ovens, yet theynow grace artisan bakeries across the country.
Although wheat flour is most widely used in British bread-making today, awhole host of regional variations were once enjoyed throughout the country;differences in landscape, weather, altitude and soil in our small islands meantthat bread was made from what grew best locally. Barley, rye and oat flourswere all widely used as the main grain in regions where wheat productionwasn’t possible or where these other grains were simply more productive. Theoats is still dominant in Scottish agriculture and cuisine as it is one of the fewgrains to withstand their harsh winters, hence the continued popularity ofoatcakes, one of the earliest forms of bread.
You need just four very simple ingredients to make bread: flour, yeast, salt andwater. Above all, you also need time. Bread-making isn’t something you shouldhurry. As this chapter explains, those ingredients all have defined roles inhelping you to bake a perfectly risen loaf and they need to be given the time towork. Similarly, the stage of allowing your kneaded dough to rest and rise –prove – is vital in helping to ensure you bake a loaf with an evenly brownedcrust and a lovely chewy crumb with good flavour.
THE HUMBLE LOAF
How did bread arrive in Britain?
The Romans introduced bread to the British Isles when they invaded in around50 BC. They used a variety of grains, grinding them by hand to create differenttypes of bread made from wheat, rye, acorns and groats. But it was not until theMiddle Ages that bread-making really began to establish itself, and we can tracethe development of a trade as bakeries began to open across Britain. It isperhaps strange to think that bread, something we take for granted as aneveryday foodstuff, was at this time a status symbol. The bread consumedvaried according to the grain affordable to each social class: the nobility ate soft,small loaves called manchets, made of the highest quality finely milled wheat;merchants enjoyed more rustic wheaten cobs, while the poor made do with branloaves.
Hardship often forced medieval bakers to use their ingenuity to scrapetogether the necessary ingredients for their breads, leading to some less-than-pleasant results. When grains were scarce, powdered fish and animal boneswere sometimes added to loaves to provide bulk. Unscrupulous bakers oftenused similarly unsavoury ingredients, including sawdust and sand, to bulk outtheir bread and increase their profits. But such practices were outlawed inLondon from around 1266, and regulated by the Bakers’ Guild (formed around1155 under Henry II). Such was the importance of bread in daily life that theGuild was given legal power to punish breadmakers for a variety of offencesuntil as late as 1815, at which point regulatory power was taken over byParliament.
The invention of the modern roller mill in the 1870s meant that wheat flourbecame commonly available and the white loaf became a staple in British diets.
What are flatbreads?
The word ‘flat’ might make you think that these breads are not leavened, but infact many of them do contain some sort of raising agent.
‘Flatbread’ is a general term used to describe thin, flat breads, often with asomewhat chewy texture, such as pitta, naan, chapaati and pizza. Flatbreadsmay also be crisp – Middle Eastern lavosh and Norwegian flatbrød are bothcrunchy.
The characteristic that unites flatbreads is their short cooking time: they areall cooked in direct contact with a very hot surface – a griddle or other pan, orthe floor or wall of an oven. During the brief cooking, flatbreads may puff up –some slightly, others dramatically – but they don’t rise as a yeasted bread doughdoes.

THE POWER OF FLOUR
Does it matter whether I use strong flour or plain flour tomake bread?
Every bread baker wants to open their oven and lift out a beautifully risen loafwith a good crumb, and their choice of flour is one of the most importantelements in achieving this. It is the protein content in the flour, in the form ofgluten (see here), that gives bread the strength to rise and affects the structureof the loaf’s crumb.
Flour companies help bread makers by producing flours rich in the necessaryproteins, which are labelled as ‘strong’ or ‘bread’ flour. You can see from thetable below how much the protein content in the main types of flour varies, andwhy it so important to use the right flour:
Extra-strong bread flour (white and wholemeal) is also widely available, andusually made from Canadian flour with 15–16 per cent protein. It’s most oftenused for making bagels and for bread with a bread-maker where kneading isreduced and the dough is usually proved only once. The dough can absorb morewater and rise higher to make a bigger, lighter-textured loaf.
Most wheat bread recipes need flours with about 12 per cent protein content.Bread made using flour other than strong bread flour won’t rise as much andcould be heavier, flatter and denser, as it is in Irish soda bread, for example,which uses flour with less protein. The best baguettes are made from Frenchflour with a slightly lower protein content than British bread flour, as this allowsthe crust to crack when the dough can’t rise any more and it tears when it’sover-stretched. Flour with lower protein content can also be used for sweetbread doughs as these contain other ingredients which lighten the dough and
help them to rise (see here).
What is gluten and why is it important?
Flour contains two proteins: gliadin and glutenin. When liquid is added to theseproteins and mixed, the gliadin and glutenin molecules bond with each other andin the presence of oxygen form gluten, which in turn determines the structure ofthe bread. While the gliadin bonds are weak, glutenin has the ability to organiseitself into a strong network of chains that are not easily broken – this is knownas the gluten network.
The gluten network can be stretched and becomes more elastic as it iskneaded. It is this elasticity that gives the dough the strength to retain thecarbon dioxide produced by the yeast, thus allowing the dough to rise and holdits shape as it proves then bakes (see here).
Can I substitute other types of flour for wheat?
Almost all grains contain gluten, including spelt, barley and rye, but in differentquantities and types. Spelt flour performs much like wheat flour so is reasonablyinterchangeable in spite of the fact that the gluten content is lower. It is possibleto make bread from either barley or rye flour on their own, but both will havevery different qualities to a wheat loaf. Barley flour will produce a slightly grey,flat bread while rye will be sticky and very difficult to handle. If you areinterested in trying these flours, start off by using them to replace 25 per cent ofthe white wheat flour in a standard recipe and go from there – just enjoyexperimenting!

Why is it more difficult to make wholemeal bread?
Wholemeal flour contains all the parts of the wholewheat grain, or berry. Thewheatgerm and bran left in the flour add flavour and texture, as well asnutrients, but the bran component of wholemeal flour can also make wholemealdoughs hard to knead as the small, relatively brittle pieces of bran disrupt theformation of a strong gluten network. Additionally, bran absorbs water slowly,so that the dough tends to dry as you work it.
The key to making a good wholemeal loaf is to add the correct amount ofliquid (which can be 10–20 per cent more than is required for a white dough),and to use a different kneading technique. Rather than kneading continuously, itis better to knead wholemeal dough in three or four short bursts. This allows thegluten network to build gradually while being less disrupted by the bran,resulting in a lighter, well-risen loaf.
How is gluten-free flour made and can it be used to makegood bread?
Grains such as rice contain proteins that can do a similar job to gluten, and sogluten-free flour is usually made up of rice flour plus small quantities of potato,tapioca and buckwheat flours. Plant gums are used to create the bonds thatmimic the structure of the gluten network (see here).
Gluten-free flour will make a reasonable loaf, but the flour tends to requiremore water and the other ingredients need to compensate for the lack of glutenin order for the loaf to rise. It’s best to follow a recipe that has been createdusing gluten-free flour.
Does flour go off?
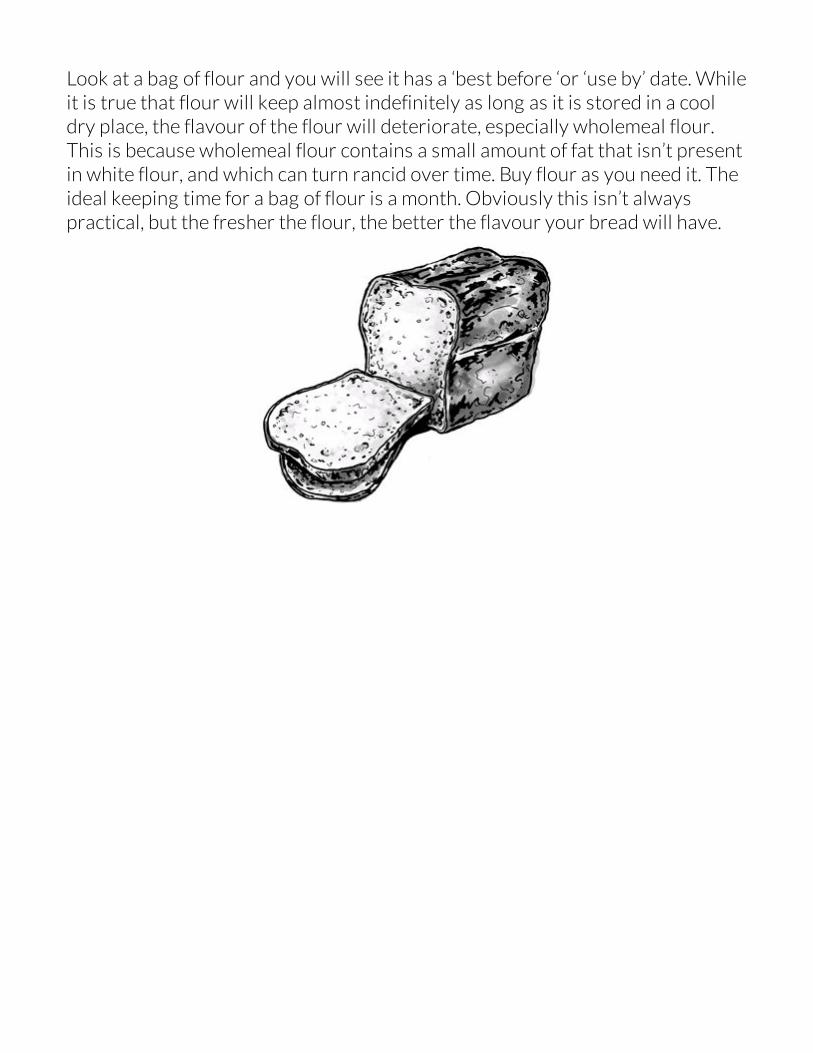
Look at a bag of flour and you will see it has a ‘best before ‘or ‘use by’ date. Whileit is true that flour will keep almost indefinitely as long as it is stored in a cooldry place, the flavour of the flour will deteriorate, especially wholemeal flour.This is because wholemeal flour contains a small amount of fat that isn’t presentin white flour, and which can turn rancid over time. Buy flour as you need it. Theideal keeping time for a bag of flour is a month. Obviously this isn’t alwayspractical, but the fresher the flour, the better the flavour your bread will have.
THE PROPERTIES OF YEAST
What is yeast?
A yeast is a living organism; it is in fact a type of fungi. Yeast cells cover thesurface of many foods, including grains and fruits and given the chance – withsome moisture, a little warmth and food (in the form of flour or sugar) – yeastwill start to grow.
How does yeast help to make a dough rise?
Yeast converts the starch in flour into simple sugars – maltose and then glucose– which it uses as fuel or food. As it feeds, the yeast produces waste products,including alcohol and carbon dioxide. The creation and then expansion of thiscarbon dioxide gas is what makes the dough rise. The gas bubbles becometrapped by the dough (in the gluten network, see here), which then sets aroundthem as the loaf bakes.
Yeast is most active at warm temperatures (see here) so this process willoccur most rapidly if you make your bread in warm conditions. A cold room willslow the yeast activity, and in some cases, halt it altogether.
Is fresh yeast better than dried?
Neither is ‘better’ and you can use them in the same way; the two types simplyhave slightly different properties. Dried yeast (sold in two different forms, seenext question) is still alive, just dormant and has been mixed with additives such
as amylase, an enzyme, and ascorbic acid, which are included to make it workquickly. Fresh yeast may simply take a little longer to get going and two riseswill produce a better loaf than a single rise.
If you are following a recipe that uses fresh yeast and want to substitute driedyeast, the simple formula is to use half the weight. In other words, if the recipecalls for 14g fresh yeast, replace this with 7g dried yeast. By volume, 7g is 1 ½teaspoons, measured level. A sachet of fast-action yeast normally weighs 7g.
What is the difference between regular and fast-action driedyeast?
Regular dried yeast needs to be soaked in water before use, whereas fast-actiondried yeast (also called easy-blend or instant) can be sprinkled directly onto theflour and other dry ingredients. When liquid is then added (usually warm), thefast-action yeast produces carbon dioxide bubbles quickly and energetically.
Fast-action yeast is usually blended with flour improver, enzymes andadditives that make the yeast work more quickly than regular dried yeast orfresh yeast, thus a loaf will need only one rising, rather than the usual two.
Although this type of yeast can be convenient, because of the added flourimprovers and enzymes, and the speed at which it works, it can work less well intraditional recipes and affect the texture of the finished loaf. Loaves made withfast-action dried yeast can have a drier texture than loaves made with fresh orregular dried yeast, especially if too much is used.
Why is yeast sometimes referred to as brewer’s yeast?
If you get a chance to look around an old manor house, you’ll see that the brewhouse and bakery are often next door to each other. This is because bakers andbrewers used to work hand in hand.
When traditional ale is produced, a yeasty froth gathers on top of thefermenting liquid, known as ‘the wort’. This used to be scooped off, washed andadded to the bread dough to leaven it. The leavening yeast was known as ‘barm’and bread made this way was sweeter than bread made using modern-dayyeast. Recipes printed as late as the 1880s advised the home cook to make surethat the ‘barm’ for their bread-making was sweet and clean, from a fresh brew,rather than old and strongly flavoured, which would not make good bread. Inthe nineteenth century, this process was refined and industrialized to enable usto manufacture the yeast we use today for baking bread.
A SIMPLE WHITE LOAF
Makes 2 large loaves
800g strong white bread flour
14g fresh yeast or 7g sachet dried yeast or 7g sachet fast-action dried yeast
2 teaspoons salt
550ml water at 30°C/85°F
2 × 1kg bread tins, greased with butter or lard
✽ Place the flour in a large bowl and, if using fast-action dried yeast, stir in thesalt thoroughly before adding the fast-action dried yeast.
✽ If using fresh yeast or dried yeast, in a small bowl, wet the yeast with a little ofthe warm water and stir it to a cream. Add the remaining water, then add thismixture to the flour. Mix well together.
✽ Tip the mixture onto a clean worktop. Knead for 10–15 minutes until thedough is shiny and elastic. Don’t worry if it sticks to your hands initially; justkeep cleaning them with a plastic scraper. Try not to add a significant quantity ofextra flour to prevent the dough from sticking – this will only make the doughfirm up and dry slightly.
✽ Put the dough back in the bowl and cover with a damp cloth. Leave the doughto rise at a warm, but not hot, room temperature for 1–2 hours until it hasdoubled in size.
✽ Turn out the dough onto a lightly floured worktop and knead it for 2–3
minutes to even it out. Divide the dough into two equal portions. Knead eachlightly to form a cylinder that has a crease at its base. Place in the tins creasedown and cover them with a damp tea towel. Leave the loaves to rise at thesame warm room temperature for 45–60 minutes until they have doubled insize – this will be when the dough just mounds over the rim of the tins by 1–2cm.
✽ Preheat the oven to 220°C/425°F/gas 7 and adjust the shelves so that theloaves have room to rise.
✽ When the oven is hot, remove the tea towel and sprinkle the loaves with alittle flour. Carefully slice a shallow groove along the centre of each loaf. Place inthe oven and bake for 20 minutes, then turn the loaves around so that they cookevenly. Reduce the temperature to 180°C/350°F/gas 4 and bake for a further20–25 minutes.
✽ The loaves are ready if they sound hollow when tapped on the base.
✽ Turn the loaves out onto a wire rack and allow them to cool fully before using.When cold, store in an airtight tin for up to three days. You can also try thesevariations:
For milk bread:
Replace the water with full-fat milk.
For a rich loaf:
Replace the water with 450ml full-fat milk and add 100g softened butter and 1egg, beaten, which should be added to the flour with the yeast and milk mixture.
For baps:
Use half milk and half water and add 50g butter or lard cut into small chunkswhich should be added to the dough along with the liquids and kneadedtogether.
Divide the risen dough into 18 even balls and roll each into a flat disc. Leaveto rise for another 30 minutes, then bake in a preheated 200°C/400°F/gas 6oven for 20 minutes.

Why shouldn’t I mix yeast directly with salt or sugar?
Yeast is a very simple living organism and as such it is easily affected by whatyou do to it. Strong ingredients such as sugar and salt will kill the yeast if theycome into direct contact with it. Recipes, therefore, usually tell you to mix thesalt or sugar into the flour or a liquid before combining with the yeast, so thatthe yeast only comes into contact with a dilute concentration of either.
MAKING BREAD
What does kneading do to bread?
When a bread dough is kneaded, either by hand or in a large free-standingelectric mixer using the dough hook, it is repeatedly stretched, folded andcompressed. This kneading action strengthens the gluten network, making thedough elastic. The more stretchy the dough, the more carbon dioxide gas it canhold within the gluten network, creating a greater rise.
If you don’t knead the dough and bake it after a short rise, you will still havean edible bread, but the loaf may be flat and the texture will be dense. There are,in fact, bakers who advocate no-knead bread, claiming that it has a superiortaste. One such influential baker and British nutritionalist Doris Grant, author ofYour Daily Bread (1944), did much to popularise this method – although it cameabout entirely by accident. Grant argued that kneading diminished the flavourand texture of bread (a fact she had discovered after forgetting to knead herwholemeal dough before baking it). To prove her point she created a simplewholemeal loaf that isn’t kneaded but is moist, nutty and keeps well.
THE GRANT LOAF
The structure of breads like the Grant loaf differs from that of a kneaded bread –they won’t have the springy texture. Instead, they will be more like a loaf madeusing low-gluten flour, or soda bread.
Makes 3 large loaves
1.5kg stoneground wholemeal flour
14g fresh yeast or 1 × 7g sachet dried yeast or 1 × 7g sachet fast-action driedyeast
15g salt, or more to taste
1.2 litres water, at 35–38°C/95–100°F
3 teaspoons brown sugar or honey
3 × 1kg loaf tins, greased and warmed
✽ Place the flour in a large bowl and, if using fast-action dried yeast, stir in thesalt thoroughly before adding the fast-action dried yeast. (In very cold weather,warm the flour slightly – enough to take off the chill).
✽ If using fresh or dried yeast, place 3 tablespoons of the warm water in a cupand add the fresh or dried yeast. Leave for 2 minutes for the yeast to soak, thenadd the sugar or honey. In about 10–15 minutes this should have produced athick, creamy froth. Put this into the flour and add the rest of the water.
✽ Mix well – by hand is best – for a minute or so, working from sides to middle,until the dough feels elastic and leaves the sides of the mixing bowl clean; thishelps to make a well-built loaf.
✽ Divide the dough, which should be slippery, but not wet, into the loaf tins thathave been warmed and greased. Put the tins in a warm place, cover with a clothand leave for about 20 minutes until the dough is within 1cm of the top of thetins. (Even in a modern house, this might take longer than 20 minutes and up to45 minutes depending on the how warm your house is.)
✽ Preheat the oven to 200°C/400°F/gas 6. Bake for 30 minutes then turn theoven down to 170°C/325°F/gas 3 and bake for a further 30 minutes. (A loaf ofthis size can take a while longer than the recipe suggests and every oven isdifferent. Allow 1 hour, and then test the bread using a probe: the core of theloaves should register 90°C/195°F or more.)
How will I know if I have kneaded my dough sufficiently?
Most bread recipes suggest a kneading time of 10 minutes by hand (6–7minutes with a mixer) to achieve a satiny-smooth, elastic dough. Hand kneadingmay take more or less time than this, depending on how energetically you workthe dough. So it is useful to have another guide by which to check if your doughis thoroughly kneaded. One test is to take a golf-ball size piece of dough andstretch it between your fingers until it forms a thin, translucent sheet. If it tearseasily or is too firm to stretch, it isn’t ready and you’ll need to carry on kneading.
Can I speed up the dough proving time?
Proving is the process of leaving the dough aside for a certain period – itactivates the yeast and causes the dough to rise. To speed up the proving time,you need to activate the yeast faster. Yeast responds to food, moisture andwarmth and will grow more rapidly if more food is available (see here, for moreon yeast). It also works most quickly at a specific temperature – 35°C/95°F.However, the waste products (such as alcohol) that yeast expels at thistemperature are strongly flavoured and if you leave your bread dough to rise atthis high temperature, you run the risk of masking the delicate taste of the flouryou have used to make the dough.
This is why most bakers prefer to prove their bread dough at coolertemperatures, between 20–24°C/68–75°F (warm room temperature), forlonger, to get the perfect balance of texture and flavour.
There are ways to hurry things along a little bit, without affecting the flavour.If you mix some additional sugar with the liquid (approximately 1 teaspoon per250ml) before adding the yeast to it, this extra ‘food’ will help the yeast get alittle head start. Additives such as ascorbic acid (vitamin C) are also often usedto give the yeast a boost, as are enzymes such as amylase (these are both addedto fast-action yeasts, which is why they work more quickly than fresh orordinary dried yeasts).
How do I slow down the rising of my dough?
Alternatively, you might want to slow down the rate of development of yourbread dough because you don’t have the time to bake it from scratch all in onego.
One way of reducing the speed at which dough develops is to use less yeast –and to use fresh yeast not dried (see here). If you use half the amount of yeastspecified in the recipe you will double the proving time. Bear in mind, though,that if you use too little yeast, the bread will take so long to develop that othermicrobes may grow and alter the flavour of your loaf.
Bakers often slow the fermentation deliberately, taking 1–2 days, to achieve adeeper, richer flavour. Anything longer, say a fermentation that lasts for 2–3days, will lead to a very different bread, more reminiscent of a sourdough (seehere).
What does ‘knocking back’ mean?
Recipes often tell you to ‘knock back’ or ‘punch down’ your dough after it hashad its first rise (prove). Although it sounds violent, this just means giving thedough a light knead before you shape it. This kneading remixes the componentsof the dough and reorganises the gluten network (see here), breaking downlarge, uneven gas bubbles, so that the shaped loaf will rise evenly a second timeand then again during baking.
How can I tell if my bread dough is perfectly risen?
Many recipes tell you to leave your dough to rise for a specific number of hours.But rising can take different lengths of time, depending on the temperature ofyour ingredients when you began. Recipes also often tell you to leave the loaf to
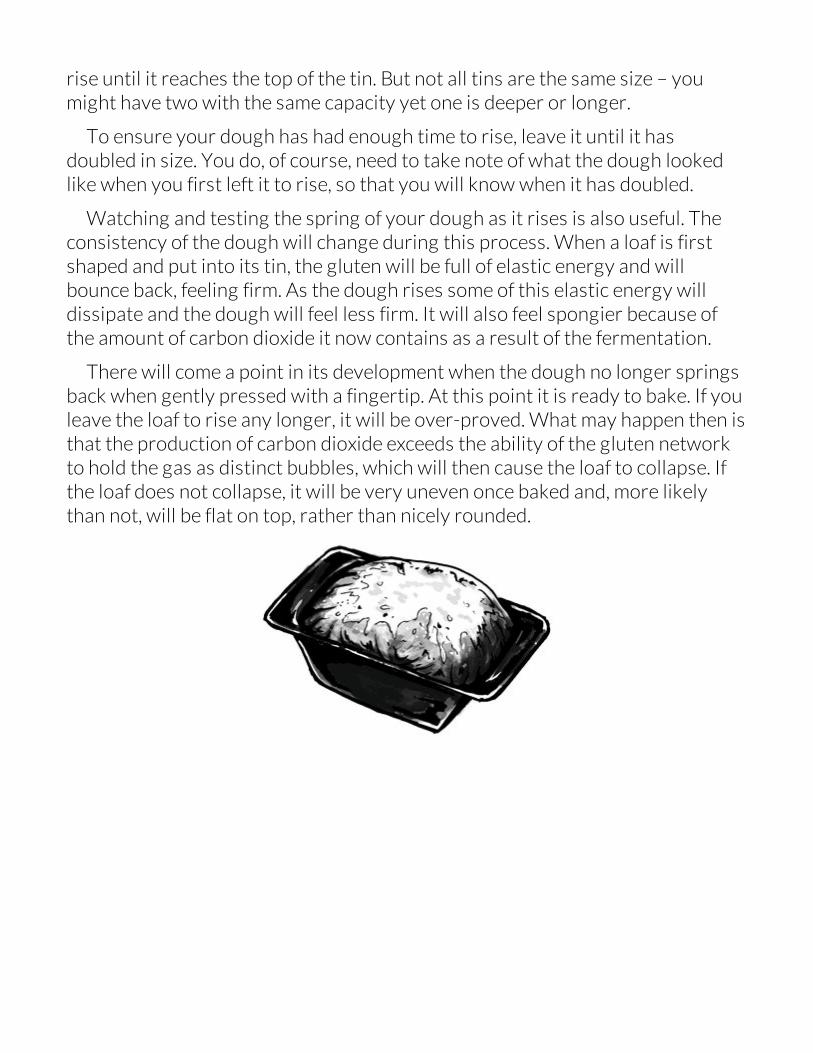
rise until it reaches the top of the tin. But not all tins are the same size – youmight have two with the same capacity yet one is deeper or longer.
To ensure your dough has had enough time to rise, leave it until it hasdoubled in size. You do, of course, need to take note of what the dough lookedlike when you first left it to rise, so that you will know when it has doubled.
Watching and testing the spring of your dough as it rises is also useful. Theconsistency of the dough will change during this process. When a loaf is firstshaped and put into its tin, the gluten will be full of elastic energy and willbounce back, feeling firm. As the dough rises some of this elastic energy willdissipate and the dough will feel less firm. It will also feel spongier because ofthe amount of carbon dioxide it now contains as a result of the fermentation.
There will come a point in its development when the dough no longer springsback when gently pressed with a fingertip. At this point it is ready to bake. If youleave the loaf to rise any longer, it will be over-proved. What may happen then isthat the production of carbon dioxide exceeds the ability of the gluten networkto hold the gas as distinct bubbles, which will then cause the loaf to collapse. Ifthe loaf does not collapse, it will be very uneven once baked and, more likelythan not, will be flat on top, rather than nicely rounded.
BAKING YOUR LOAF
Why is bread always baked in a hot oven?
When you put your loaf into the oven, the heat needs to be high enough to startthe bread rising and expanding immediately. This so-called ‘oven spring’ occursin the first 5–10 minutes of baking. It stops when the bubbles trapped in thedough are fully expanded and the heat of the oven has killed the yeast cells andset the starch in the outer layers of the bread (this gets the drying and browningof the crust started). So it’s important to make sure the oven is fully heated tothe temperature specified in the recipe (some recipes even suggest heating itslightly higher than that specified and then reducing it after you place your loafinside as some heat will be lost when you open the oven door).
Why do some recipes suggest creating steam in the ovenwhen baking bread?
A steamy atmosphere in your oven at the beginning of baking will influence thetexture and appearance of your loaf. The steam condenses on the relatively coolloaf, forming a layer of water. This layer slows the crust formation, preventing itfrom becoming rigid, and the loaf can expand for longer before the crust startsto develop.
Professional bakers often inject steam into their ovens, but you can easilymimic this at home. Simply pre-warm a sturdy roasting tin in the bottom of theoven and then, when the loaf is placed in the hot oven, quickly pour a small glassof hot water into the roasting tin (be careful not to hit the hot shelf with yourhand) and shut the oven door immediately. Pour in another glass of hot waterbefore the first 5 minutes of baking are over.
How can I tell if my loaf is baked?
Because oven temperatures can vary, and different baking tins give differentresults, it is helpful to know how to check if a loaf is cooked through. Thetraditional way is to tip the loaf out of the tin and tap the base. A clear, hollowsound indicates that the loaf is evenly cooked through, whereas a dull thudmeans the loaf needs more baking.
A more precise way to test if your loaf is cooked is to use a temperatureprobe. When the loaf has baked for the suggested cooking time, remove it fromthe oven, then insert the probe into the centre to check the internaltemperature. To be thoroughly cooked, the loaf should register at least90°C/195°F.
Why does my loaf have a hole running down the middle?
We’ve all seen this, even with commercial bread: when you slice a loaf, youdiscover a hole or tunnel running through the middle, as if a mouse has eaten itsway through it. There are three possible reasons for this.
First, the dough may have been too floury when shaped. Usually, a tin loaf isshaped by rolling the dough into a neat cylinder, then it is placed in the tin withthe crease underneath so that the shaped loaf rises evenly. If you’ve used toomuch flour at the shaping stage, the dough won’t bond as it rises, leaving a holewhen it is baked.
The second, more common, reason is that the loaf is under-baked. When a loafis put into a hot oven the starch component of the flour is transformed by theoven heat from a soft gel to a firm sponge. The centre of a loaf needs to reacharound 90°C/194°F for this to occur fully, so it ends up light and airy, not dampand dense. If it doesn’t get hot enough during baking, when the loaf is cooled theheavy centre will shrink back to the firm, fully baked outer layers of the loaf,leaving a hole in the middle.
The last reason is that the loaf may not have been kneaded enough, whichmeans the gluten structure won’t have been properly developed, thedistribution of carbon dioxide gas bubbles will not have been even andconsequently the dough will not have risen evenly.
How can I make a crustier loaf?
The crust on a loaf of bread is often the best bit – so much so that the cuts onsome bread shapes are made especially to develop as much crust as possible. Ifyou want to make a loaf with a good crust, you have to choose the right type ofbread and bake it in a certain way.
Professional bakers have several ways of achieving a good crust. First, theyusually bake on a solid-floored oven. You can mimic this by using a baking stone:preheat it in the oven, then slip the bread onto the stone for baking. A strongbaking sheet, preheated, will also do the job. Baking on a hot surface will ensurethat the base of the loaf bakes thoroughly and ends up crusty.
Secondly, to ensure that the top of the loaf becomes well browned,professional bakers add steam to the oven during the first 5 minutes or so ofbaking (see also here).
A longer bake also ensures that a good thick crust forms. The outer surface ofthe loaf reaches and stays at a higher temperature for longer than the centre soa higher proportion of it is dried out, creating a thicker crust than there wouldhave been for a shorter bake.
Bread doughs enriched with fat, eggs or milk won’t make crusty loavesbecause the fat and lecithin contained within these ingredients will soften thecrust. For a good crust, the best recipe to use is a straight flour, water, yeast andsalt mixture.
What is the ‘perfect crumb’?
‘Crumb’ is the term that bakers use to describe the inside of a loaf of bread.Bakers talk of trying to achieve the ‘perfect crumb’, which usually means a well-risen loaf with an even, light texture. If the dough is too dry, the texture of thebread will be close and tight. This is because the dough is too firm to allow thecarbon dioxide bubbles to expand properly during the rising process, whichresults in a heavy crumb.
The temperature at which a dough is risen will also affect the evenness of thecrumb. Ideally, a loaf should be allowed to rise at a moderate room temperature(see here) so heat will penetrate the dough gradually. If the temperature is toohigh, the outer layers of the loaf will develop too quickly, resulting in an unevencrumb with many different sizes of bubble – this is one reason why you shouldto knock back a risen dough (see here).
What’s the best way to store bread?
To keep homemade bread as fresh as possible you need to prevent moistureloss otherwise it will stale quickly. To do so, store it at room temperature in abread box or other sealed container (not plastic) that will keep it airtight. Boughtloaves should not be kept airtight because they have a high water content so aremore susceptible to sweating and going mouldy if kept in an airtight container.Bread kept in the fridge will lose moisture more quickly than bread kept at roomtemperature as the cold draws it out, so don’t store bread in the fridge unlessyou are intending to use it for toast. If you make a loaf and don’t intend to eat itall within 2–3 days, cut it in half, wrap one half tightly and freeze it as soon as itis cool.
To freshen bread that has begun to age, spray the surface with a little waterand reheat in a low oven. Don’t heat it too much or you’ll dry it out further. Allowthe loaf to cool and firm before slicing.
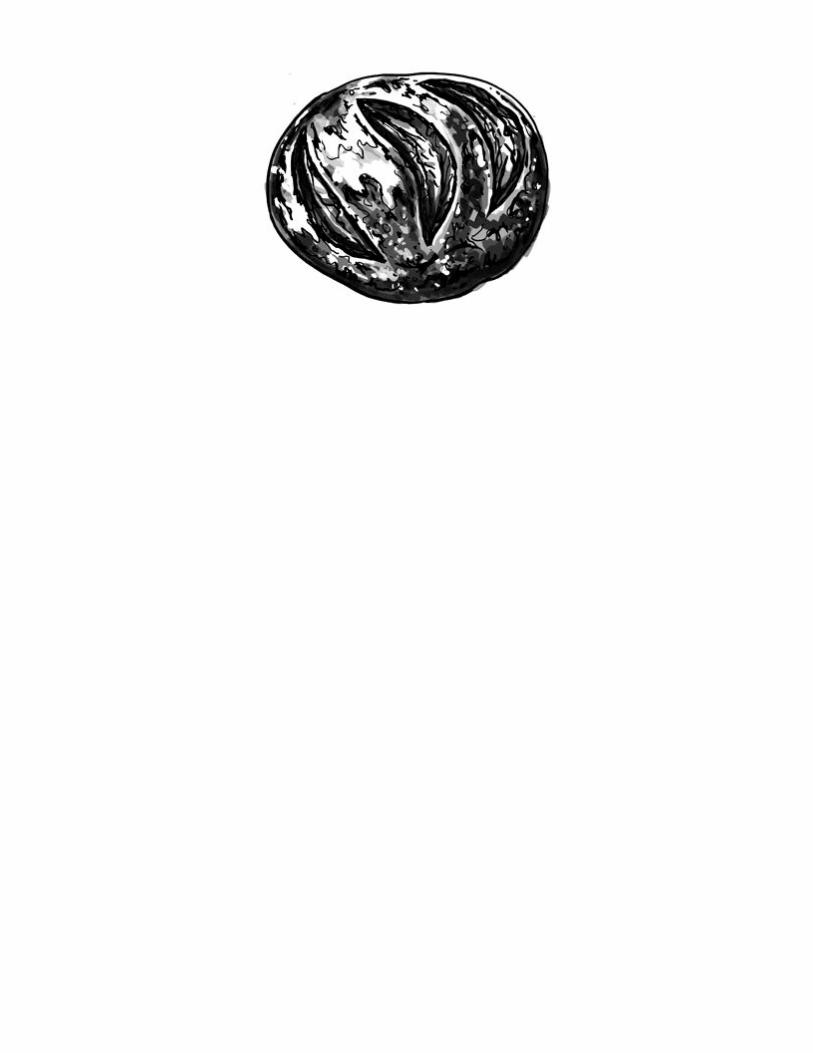
SOURDOUGH
What is sourdough?
Sourdough is the name used to describe a bread that is leavened using asourdough starter or culture. The starter is made up of wild yeasts, which aregathered from natural sources (such as the air and in flour), rather than thepurified, manufactured varieties. A portion of the starter is mixed with the breadingredients and the resulting sourdough bread derives much of its flavour fromthe yeasts.
Are sourdoughs really sour?
Sourdough is, in a way, a misnomer because not all naturally leavened breadsare ‘sour’. In technical terms, all will be mildly acidic – that is, of a low pH value –but that doesn’t mean they will necessarily taste sour or acidic.
So where does the sourness come from and how can we control it? Wildyeasts contain a variety of yeast types whereas the fresh or dried yeast wenormally use contain a single type. This variety contributes additional flavour tothe bread as well as influencing its texture and acidity. A good deal of thedifference in the flavour of sourdough loaves lies in how the sourdough starteror ‘leaven’ is treated and maintained and how the fungi and bacteria levels arebalanced (see the next question).
Can I make my own sourdough starter or leaven?
Absolutely! You can ‘grow’ your own wild yeast at home to make a sourdoughstarter. All you need is a suitable source of ‘food’, water, an ambient roomtemperature (18°C/64°F to 23°C/73°F) and a little time. In about 2 weeks youshould be able to bake your loaf.
The ‘food’ can be a stoneground organic rye or a wheat and rye flour mix. Thisis minimally processed, meaning that more varieties of yeast will be present inthe resulting starter.
To maintain a healthy starter you need to provide conditions that favour theyeasts (fungi), and that limit the growth of bacteria. The way to do this is torefresh the starter with fresh flour and water each day – known as ‘feeding’ it –and to keep your starter at room temperature. It is this balance that is the driverbehind sourdough success. You need both the fungi and the bacteria, but in theright proportions. It can be tricky to get the balance right, which is why makingsourdough does take practice.
Why is it important to keep the bacteria count in my starterlow?
Bacteria adds flavour but it also secretes an enzyme into the starter as it growswhich, if left unchecked, would destroy the gluten in the flour. No gluten wouldmean no gluten network and the resulting loaf would be heavy and flat (for moreon gluten and the gluten network see here).
SOURDOUGH STARTER
Makes approximately 300g
100g organic rye flour, plus more for feeding
170ml water, boiled and cooled, plus more for feeding
✽ Combine the flour and water in a 1-litre bowl. Beat the ingredients togetherwell until there are no lumps, then scrape the sides of the bowl clean, making a
mound of batter in the base of the bowl.
✽ Take note of how the batter smells and looks, then cover the bowl looselywith a clean tea towel and leave it at an ambient room temperature. The wildyeast cells present in the flour will absorb water from the batter, rehydrate andcome back to life from their dormant state.
✽ After 24 hours, beat the mixture well, then re-cover. You may not noticemuch action in your batter for a day or two, but you will probably notice achange in the smell. Lift the tea towel and sniff carefully. If the yeast has begunto metabolise the starches, your nose should detect a sharp whiff of carbondioxide and alcohol.
✽ For the next 4 days (6 days in total), beat the mixture once a day, then re-cover.
✽ If, after 3 or 4 days, the batter remains inert, or if white, black or greenmoulds grow on the surface, throw it away and start again with fresh flour andwater. Getting the balance right does take practice and for whatever reason,your flour could be free from viable yeast cells – odd, but it can happen – or theconditions for activating the yeast weren’t quite right (see here). But don’tdespair, if your original batter has failed to activate, try mixing the batter recipeagain. Cover loosely with a tea towel and leave as before in a warmish place.
✽ Assuming that on day 6 you have now isolated a lively mixture of yeasts, youcan build up the vigour of the cultures by continually refreshing the mixture withwater and flour over the following week or so. Each day, pour away half thestarter and add half the initial quantities of flour and water.
✽ By day 12, you should have a vigorous, fresh starter that is populated with ahealthy variety of yeasts, with additional bacteria present in sufficient numbersto add flavour but not too much acidity.
Where should I keep my starter?
The best place is in a loosely closed, rather than a tightly sealed, jar. (If your
starter is very active it will grow quite substantially and may spill over the rim ofthe jar so do keep an eye on it.) If you’re using your starter to make breadregularly you will be harvesting and feeding it every day. However, once theyeast and bacteria present have used up any available food, they will godormant and wait for conditions to improve (i.e. for you to feed them and thenharvest them again for baking). If you’re not using your starter straightaway,you can maintain it in this dormant state in the fridge for a few days. Toreactivate it, simply bring it back to room temperature and start the feedingprocess again. After a few days it should be bubbly and ready for use again.
Don’t freeze your starter, though, because many of the yeast cells will bekilled in the process.
Why does my starter sometimes smell bad?
Sourdough that smells overly sour or bad – like stale beer or wine – has beenover- or under-fed. Overfeeding it allows the starter to build up too large apopulation of bacteria and it becomes contaminated with too many yeast by-products. In an under-fed starter, the acid–yeast balance is wrong: the aciddominates and the starter will smell overly acidic (the yeast will also eventuallydie). A properly refreshed starter will smell pleasantly acidic. If your starter doesbegin to smell bad, the best thing to do is to throw it away and start again withfresh flour and boiled water.
SOURDOUGH BREAD
Makes 1 large or 2 small loaves
500g organic strong white bread flour
15g fine salt
250g sourdough starter (see here)
250ml water, at room temperature coarse semolina and additional flour, fordusting
✽ Mix the flour with the salt in a large bowl. Separately, mix the starter andwater together until well blended. Add to the flour and stir to amalgamate.When nearly mixed, tip out onto a lightly floured board. Knead the dough withboth hands until it is even and there are no lumps of flour. Don’t worry if thedough is quite wet; it will firm up as the flour absorbs the water fully and thegluten develops.
✽ Knead the dough, occasionally scraping it from your hands, until it is shinyand very elastic. This can take up to 15 minutes, so you may want to considerusing a large free-standing electric mixer fitted with a dough hook. Place thedough in a large bowl, cover with a damp, clean tea towel and leave to rise atroom temperature for 2–3 hours until it has doubled in size.
✽ Turn out the dough onto a lightly floured surface and shape into one large ortwo small balls. Dust a clean, dry, coarse tea towel with a mixture of 1tablespoon each of flour and semolina, rubbing the mixture into the surface ofthe cloth. Line one large or two small baskets or colanders with the cloth. Placethe ball(s) of dough, crease uppermost, in the basket(s). Draw the cloth gentlyover the dough, then leave to rise again until doubled in size. This will probablytake 2 hours.
✽ When the dough is nearly ready, preheat your oven to 220°C/425°F/gas 7.Arrange the shelves so that they will give the loaf or loaves space to rise and puta roasting tin in the base of the oven if you want a crusty loaf. Place a sturdybaking sheet for each loaf in the oven to preheat.
✽ When the loaf is risen and the oven is hot, open up the cloth and sprinkle thedough with a little flour (this will be the base of the loaf). Transfer the loaf to thebaking sheet, ensuring the crease of the dough is on the bottom.
✽ Slash the top of the loaf carefully using a sharp, serrated knife or razor blade(this will allow the loaf to expand quickly), then put the loaf in the oven. If youwant a crustier loaf, follow the advice about adding steam on here, but be carefulnot to use so much water that it causes the oven to cool down.
✽ Bake a large loaf for 50 minutes, turning the oven down to 180°C/350°F/gas4 after 30 minutes. Bake small loaves for 30–35 minutes only. Test forreadiness by tapping the bottom of the loaf. If it sounds hollow, and is wellbrowned and firm, it is cooked through. Remove the loaf to a wire rack and allowit to cool fully before cutting.
SWEET DOUGHS
What sorts of sweet breads can I bake?
The great British ‘bun’ is perhaps the best example of a bread made from a sweetdough. Plump, spicy fruited sugary buns have been made in this country since atleast the fifteenth century and many of our traditional buns, such as the stickyChelsea, Bath and Marlborough buns, are named after the places in which theywere first made and became fashionable.
Other popular buns were made for special celebrations, often associated withthe Church. The most obvious example that comes to mind is the hot cross bun,which was made to be eaten on Good Friday. Hot cross buns should be rich inspice and heavy with fruit, butter and citrus – a luxury treat.
The word ‘bun’ has been used in English since the fifteenth century and isthought to derive from the old French word bugne, meaning ‘swelling’, whichdescribes its shape. A bun used to refer to a quantity of bread rather than aspecific type, which meant that buns could be either hard or soft, but from theearly twentieth century the word ‘bun’ came to mean ‘a bread made from a soft,sweetened yeasted dough’.
You might notice that some sweet dough recipes sometimes call for plainflour rather than the strong flour normally used for bread. The lower proteinand gluten content give a more delicate, yielding crumb; the dough will rise justas well, but will be lighter and more cake-like than a traditional bread dough. Tofurther soften the dough and to enrich it, milk powder, eggs and butter can beadded, as in the Sally Lunn or Bath bun. The French brioche is another exampleof a heavily enriched sweet dough. Its high egg and butter content gives it a richand soft crumb.
What is a Sally Lunn?
The Sally Lunn is a light, rich round tea bun that has been made in Britain for atleast 300 years. Its exact origins, and quite how it came to be named are unclearand historians have put forward several theories.
Some say there was indeed an original baker called Sally Lunn, who owned apastry shop and shouted about her wares in the street. The bun was created tocommemorate her. Others claim the recipe bears strong resemblance to aFrench Alsatian bake called solilem.
Most sources do agree, however, that the bun comes from France, that itshould be made with cream or milk to enrich the dough and a little lemon zest ormixed spice, and ought to be eaten sliced and spread with clotted cream orbutter. It can be made as one large bun or several small ones.
SALLY LUNN BUN
Makes one 22cm bun
15g fresh yeast or 1 × 7g sachet dried yeast or 1 × 7g sachet fast-action driedyeast
3 tablespoons milk at room temperature
350g strong flour
1 tablespoon caster sugar
½ teaspoon salt
180ml double cream, warmed to 30ºC in a small pan
3 medium eggs at room temperature
grated zest of ½ unwaxed lemon or 50g candied lemon peel
for the glaze
3 tablespoons milk
2 tablespoons caster sugar
1 × 22cm springform cake tin, greased with butter and lined with baking paper
✽ If using fresh or dried yeast, place the yeast and milk in a small bowl and add alarge pinch of the flour. Leave this in a warm place for 10 minutes, or until the
yeast begins to froth. Mix the remaining flour, sugar and salt together in a largebowl. If using fast-action dried yeast, add it to the bowl of flour after you havemixed in the sugar and salt.
✽ Heat the cream in a small pan until it reaches 30°C/80°F, then add the eggsand beat in the lemon zest until the eggs are thoroughly blended.
✽ Mix the egg mixture, and yeast mixture if using, with the flour using a largespoon and bring all of the ingredients together to form a smooth, soft dough.
✽ Tip this onto a lightly floured work surface and knead for 5 minutes or untilthe dough is shiny and free of any floury lumps. Place the dough back into alarge bowl and leave it in a warm place, covered with cling film or a clean dampcloth, in a warm place for 1 hour or until the dough has doubled in size.
✽ Once the dough has doubled in size, tip it once again onto a lightly flouredwork surface and knead it for a minute or two to knock out any large bubbles.Form the dough into a smooth ball and place this, crease down, into theprepared tin.
✽ Cover the dough once again with cling film or a clean damp cloth and allow itto rise for 20–30 minutes until it has doubled in size. While the bun rises for thesecond time, preheat the oven to 200°C/400°F/gas 6, making sure that there isplenty of space in the centre of the oven for the bun to rise as it bakes.
✽ When the dough is risen, place the cake tin on a baking tray and bake it for 25minutes, until it is risen and a brown crust has formed. Test the bun by gentlytapping the surface to check it sounds hollow.
✽ When cooked, place the bun on a wire rack to cool. For the glaze, place themilk and sugar in a small pan and heat gently to dissolve the sugar. When itsimmers, use a clean pastry brush to spread it over the surface of the bun, and asit dries, brush on more glaze until it is all used up. The glaze will dry to a shinygloss.
✽ When cool, slice the Sally Lunn into horizontal slices, and serve alongsideclotted cream and your favourite jam.
Is a scone a bread, a cake or a biscuit?
The word ‘scone’ is thought to derive from the Scottish schoonbrot or sconbrotmeaning ‘fine white bread’. Traditional Scots scones or ‘bannocks’ were flat,large and made from unleavened oats, and sharing a cooking technique withflatbreads. They were cooked on a ‘girdle’ (griddle) in a large round, then cutinto pieces before serving. Today they can be made from wheat, barley oroatmeal, but unlike sweet buns, they are leavened with baking powder ratherthan yeast.
What’s the best way to make scones?
Scones are very easy to make but there are several things to watch out for.Firstly, the degree to which the fat and flour are combined will affect the textureof your scones.
If the fat is rubbed in by hand, or blended roughly, the texture of the scones willbe coarse. So it’s best to use a food processor to blend the flour, sugar and fattogether – a very finely blended mixture will give a lighter texture.
However, don’t be tempted to use the food processor to mix the milk with theflour and fat mixture. Once wetted, the gluten in the flour can easily be activatedin a machine and will result in tough scones. Minimal handling of the mixture isessential for a light, tender scone, so switch to using your more gentle hands atthis stage.
Another thing to watch out for is the amount of baking powder you add;baking powder will give a good rise but if you use too much, its flavour willdominate the scone. Self-raising flour is used in the recipe overleaf to avoid thisproblem, it will still give a good rise to the scones.
You can use strong flour to make scones – the result is a well-risen, lightscone – but take care not to overwork the dough as the extra gluten in strongflour can easily be activated, toughening the finished result.
Scones are often served with clotted cream and jam as a ‘cream tea’. Althoughcream teas can be found in most British tearooms, they are frequently
associated with the counties of Devon and Cornwall which both have veryspecific ‘rules’ as to how to assemble the jam and cream correctly. In Devon, thecream goes on to the scone first, with the jam sitting on top; while in Cornwallthe jam is followed by the cream. The debate continues to rage … For an extra-special homemade treat, why not have a go at making your own clotted cream(see recipe on here)?
SCONES
Makes 20 small or 10 large scones
500g self-raising flour
70g caster sugar
125g chilled, slightly salted butter, cut into small cubes
210ml full-fat milk
flour or beaten egg, to finish
1 round cutter, preferably straight-sided – 4–5cms for small scones and 7–8cms for larger; a baking sheet, lined with baking paper
✽ Preheat the oven to 200°C/400°F/gas 6 if making small scones or180°C/350°F/gas 4 if making large ones.
✽ Put the flour in the bowl of a food processor and add the sugar and butter.Blend until the mixture is very fine and there are no lumps of fat remaining. Themixture should look like a light yellow flour, indicating that the fat is very evenlydistributed.
✽ Tip the mixture into a large bowl and make a well in the centre. Add the milkand stir briskly with a fork until the mixture is even – don’t try to gather thedough together until it is very evenly blended and there are no lumps of flourpresent. Once all of the liquid is incorporated, bring the dough together into asmooth, even dough – avoid kneading, which would toughen the scones.
✽ Turn out the dough onto a lightly floured surface and roll out to a thickness of3–4cm. The way in which you cut out the scones will have an effect on theirrising in the oven. A straight-sided cutter, dipped in flour, is best so that thedough is cut smoothly and not compressed, and the sides of each scone are
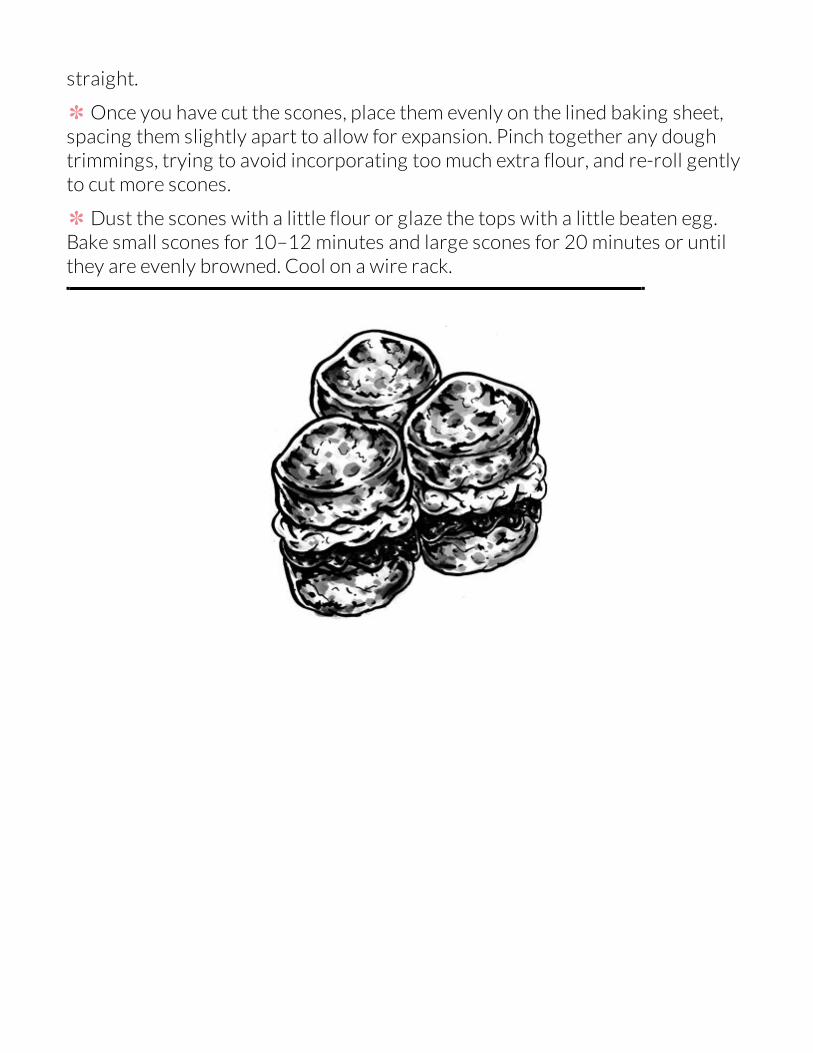
straight.
✽ Once you have cut the scones, place them evenly on the lined baking sheet,spacing them slightly apart to allow for expansion. Pinch together any doughtrimmings, trying to avoid incorporating too much extra flour, and re-roll gentlyto cut more scones.
✽ Dust the scones with a little flour or glaze the tops with a little beaten egg.Bake small scones for 10–12 minutes and large scones for 20 minutes or untilthey are evenly browned. Cool on a wire rack.
Honest, hearty and occasionally a little bit rough around the edges, the versatilepie has provided sustenance for the British for centuries. Although pastry wasinitially developed for practical reasons – as a means of protecting the foodinside it – the use of pastry in British cooking has grown to encompass some ofour most iconic bakes, from pork pies and sausage rolls to treacle tarts. Today,pastry-making has progressed from its modest origins to become a highly skilledart form: modern patisserie is a glamorous mixture of elaborate design andcreativity with ever more intricate bakes making their appearance on our teaand dessert tables.
Pastry dough is primarily made from fat and flour and by finding out how theyinteract with each other, you’ll be able to appreciate why the fat needs to bekept at a certain temperature and why you shouldn’t over-work the flour.Making pastry isn’t difficult, but you do need to follow certain rules to avoidunder- or over-cooking it, and of course, to avoid every pastry-maker’s biggestfear, the soggy bottom. Once you understand the properties of each type ofpastry, from the crisp, buttery durable shortcrust to the lighter, flakier types oflaminated pastry, you will soon be able to fill them to your heart’s content.
EARLY PASTRY
Who invented pastry?
Given the simplicity of its ingredients it is perhaps no surprise that, like bread,the first documented evidence of pastry-making in Britain dates from Romantimes. Roman cookery books, such as Apicius, and accounts of feasts byPetronius mention fruit in pastries and egg-shaped pastries each filled with atiny new-born chick. As butter was not yet available Romans used olive oil orlard as the fat to bind their mixture, but they also devised more delicate sweetpastries, made with honey.
Yet the majority of early savoury pastry wasn’t intended to be eaten. Madecrudely out of a flour-and-water paste, it was shaped into a covering or case inwhich to bake food, protecting the contents from the harsh heat of early stovesand ovens, while keeping in the juices. In medieval Britain, stiff pastry casescalled ‘coffyns’ (from the same root as the modern word for funeral caskets)were used to keep food moist while it baked. These encasements were usuallymade with rye flour and similar in appearance to our hand-raised hot watercrust pies, although coffyns weren’t normally eaten. Instead, the pastry, onceemptied, was used as a thickener in stews, eaten by servants or fed to domesticanimals.
When did savoury pastry become an edible delicacy?
It wasn’t until the middle of the sixteenth century that the crude flour-and-waterpastries began to be enriched with butter and milk, and a version of shortcrustpastry emerged as an edible casing for minced stuffings or small birds. These piecases were either eaten immediately or, if the cooking juices were drained offand replaced with melted butter or dripping, preserved. The pies could then be

kept for weeks and were frequently sent as gifts to friends and relatives.
In 1596 the first recipe for puff pastry appeared in Thomas Dawson’sElizabethan cookbook, The Good Housewife’s Jewel. It is likely that the method formaking puff pastry was already widely known, but this is the first time itappeared in print.
Where did sweet pastry originate?
Lack of written documentation makes it difficult to pinpoint exactly who firstfeasted on sweet pastries, but it is certain that the Ancient Greeks did: playswritten in Greek from around 5 BC mention small fruit-filled pastries.
Evidence of thin, layered baklava and filo pastry can be traced to the southernMediterranean in the first century and the delicate pastries were brought backto the rest of the Continent by the Crusaders.
By the early-sixteenth century, sweet pastry had become well established andpastries of all description took pride of place on royal tables and in wealthyhomes, where they were often extravagantly decorated and gilded. And innorthern Europe, from the end of the sixteenth century, small tarts were madewith a rich pastry of fine white flour, butter, sugar and saffron. These tartswould have been considered luxury items, not only because of the time taken tomake and bake them, pounding the dough into a fine layer before lining the tin,but also because of the quality of the flour and other expensive ingredients theyused.
What does ‘Viennoiserie’ mean?
You may well find references to ‘Viennoiserie’ in bread-making and patisseriebooks. The word is French, literally meaning ‘things of Vienna’, and dates from1839 when the first Viennese bakery opened in Paris. It refers to sweet, butter-

rich pastries made from yeast-risen doughs that are very often laminated likepuff pastry. As such, they fall midway between pastry and bread. Danish pastriesand croissants are two good examples of Viennoiserie.
THE IMPORTANCE OF FAT
Can any fat be used for pastry making?
So long as it has a fat content above 80 per cent (check the label), any fat can beused to make pastry, and is interchangeable with other fats with a similar make-up. The results will vary slightly, though, because each fat has a differentconsistency at room temperature, but as a guide for bakers, the texture of a fatat room temperature is a good clue to the texture of the finished pastry. Fatssuch as margarines that are quite soft at room temperature will inevitablyproduce a softer pastry, meaning it will also be more difficult to handle unless itis thoroughly chilled.
Butter, lard, suet, dripping, margarine, oil and vegetable shortenings are allsuitable for making pastry. Looking at local pastry recipes from around Europe,we can see that cooks simply used the fat that was most readily available in aparticular area.
Of course, the availability of different types of fat depended partly on thelandscape of a region. The lush green pastures of southern England, so suited todairy farming, resulted in local recipes that featured pastry made with cow’sbutter. By contrast, in southern Europe, where olives are produced in largequantities, you will come across recipes that specify a fruity olive oil for use inpastry. The Spanish pestinos is a delicious deep-fried pastry made with olive oil,spices and honey. And in the high mountains of the Alps, where goat herdingwas more common, butter made with goats’ milk was used instead. While cows’and goats’ butter can be used interchangeably in recipes, goats’ milk will givethe pastry a distinct flavour.
The main thing to remember is that the type of fat simply changes the result.Butter, for example, makes the most delicious-tasting pastry, whereas lard,dripping and suet make a light, very short pastry that has a plainer flavour thanbutter pastry but is crisper and stronger. Olive oil pastry too has a distinctiveflavour and is very soft and crumbly and can be quite difficult to handle.
Does the fat content matter?
Fat gives pastry flavour, moistness and richness, but its main job is to interruptthe structure of the flour and water dough to make the baked pastry fragile andtender (crumbly or flaky depending on how the fat is used) rather than hard(think of crackers). While different types of fat (butter, olive oil etc.) affect thefinal outcome of your pastry, the content of the fat itself also impacts on itstexture.
You may be surprised to learn that some fats contain water, but in fact bothbutter and margarine do and there are set limits for the minimum fat andmaximum water content that full-fat butters and margarines must contain: 80per cent and 16 per cent respectively in the UK.
If a fat contains a lot of water, it will produce a tough pastry because thegluten in the flour is more likely to develop as it comes into contact with thewater (see also here for more on gluten and here for more on gluten and pastry).For this reason, low-fat margarines (with less than 80 per cent fat) will not makegood pastry because the fat has been replaced by water, mixed with chemicalsthat emulsify the two together.
Can butter be too old to use?
All fats have a tendency to oxidise when in contact with air, which makes theircolour darken and dulls their flavour. In addition, butter contains a small amountof milk sugar (lactose), which can degrade along with other components andturn rancid.
If, when you open a pack of butter and cut into it, the surface is much darkerthan the interior, the butter is ageing. Waste not, want not – cut away the darkerlayer and taste the remaining butter. If it tastes OK, it should be fine to use, butfor something you plan to eat soon, not a fruit cake that you intend to store forweeks or months.
Unsalted butter ages more quickly than salted because the salt inhibits thegrowth of microbes. If you come across a good offer on unsalted butter in theshops, buy a quantity and freeze it (cut into 125g pieces) – it will keep for up to 2months.
What is margarine and why was it invented?
During the 1860s, the rapid industrialization of Europe led to populationpressures in growing cities, which began to cause food shortages. In France,Napoleon III offered a reward to anyone who could produce a cheap buttersubstitute. Money often encourages ingenuity, though not necessarily in themost appetizing ways; early versions blended milk with animal fat, such asdripping, and discarded offal, such as cow’s udders, in an attempt to mimic thetexture and flavour of real butter.
But in 1869 a French chemist called Hippolyte Mège-Mouriès finally patentedthe first recognizable version of margarine, made by solidifying meat andvegetable fats, and it began to be produced commercially. Beef fat continued tobe used as one of the main ingredients for several decades, however, and itwasn’t until the early-twentieth century that the process of hardening vegetableoils by combining them with hydrogen was discovered. Eventually thedepression of the 1930s and food shortages of the Second World War causedinternational problems with the supply of animal fat, and manufacturers beganto switch to the entirely vegetable-based products we use today.
Can I use margarine to make pastry?
The degree to which a margarine’s vegetable oils are hydrogenated (combinedwith hydrogen) determines how hard or soft it will be at room temperature.Margarines that are fully hydrogenated are often sold as ‘vegetableshortenings’ – solid blocks resembling lard or dripping. These contain very little
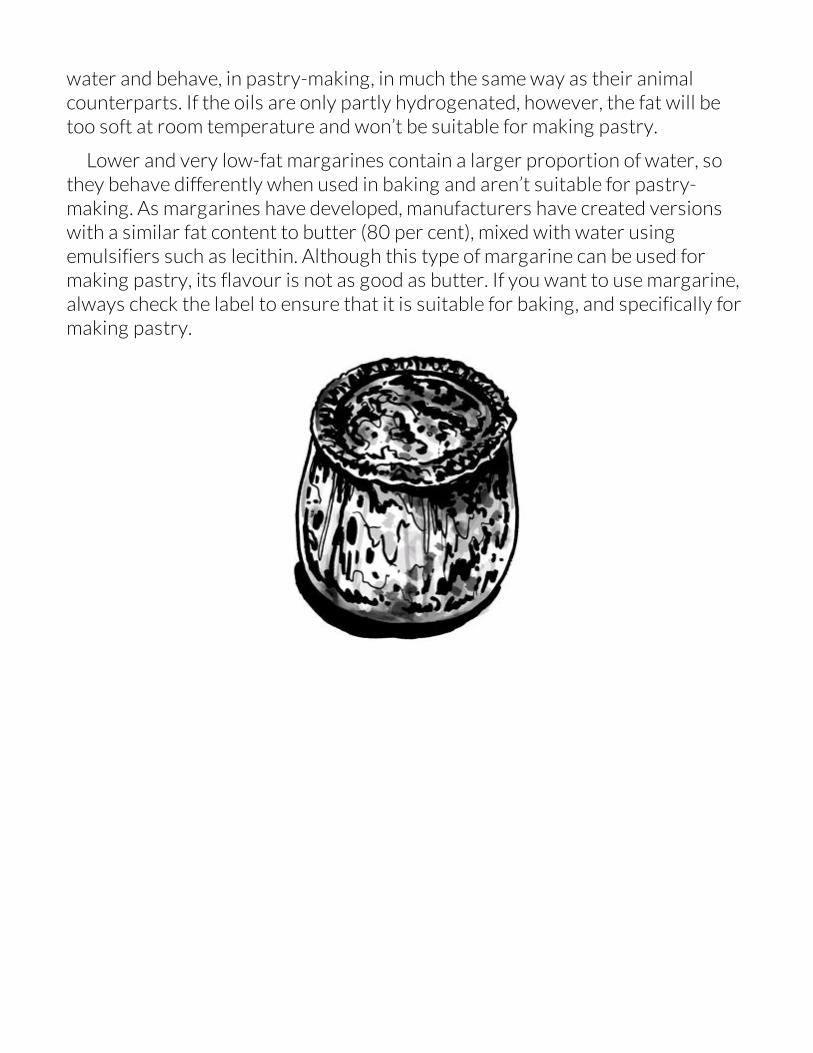
water and behave, in pastry-making, in much the same way as their animalcounterparts. If the oils are only partly hydrogenated, however, the fat will betoo soft at room temperature and won’t be suitable for making pastry.
Lower and very low-fat margarines contain a larger proportion of water, sothey behave differently when used in baking and aren’t suitable for pastry-making. As margarines have developed, manufacturers have created versionswith a similar fat content to butter (80 per cent), mixed with water usingemulsifiers such as lecithin. Although this type of margarine can be used formaking pastry, its flavour is not as good as butter. If you want to use margarine,always check the label to ensure that it is suitable for baking, and specifically formaking pastry.
MAKING PASTRY
What is the best flour to use for making pastry?
Different types of flour are used for making different pastries – there is no onetype that suits them all.
Regular plain flour is best for shortcrust and sweet pastries because of itsrelatively low proportion of protein (see here). As long as you handle yourdough delicately, the gluten won’t develop elasticity and make the pastry tough.For puff pastry and its relations, however, this very quality – the ability of glutento develop elasticity – is crucial, so puff pastry is normally made with strongbread flour. This is because the dough has to be rolled very thinly and so needsto be strong enough to avoid tearing. The same is true of filo pastry, which ismade by stretching the dough until it is paper-thin.
SHORTCRUST PASTRY
Makes enough to line a 25cm tart or flan tin
250g plain flour
150g slightly salted butter, chilled, cut into small cubes
80–100ml cold water
✽ If you are mixing by hand, tip the flour into a large bowl and add the cubes ofbutter. Using just your fingertips, crumble or ‘rub’ the butter and flour togetheruntil you have a fine breadcrumb-like texture. How finely you mix the butter andflour together will affect the texture of the finished pastry – if you leave thelumps of butter larger, the result will be flakier.
✽ When you are satisfied with the crumb, add 80ml cold water in stages, mixingbetween each addition so that the butter-flour mix hydrates evenly – this wayyou are less likely to overwork the pastry than if you add all the water at once.
You may need a little more water to bring the dough together, but take care notto add too much as this will make the pastry tough.
✽ Once the dough can be easily brought together with your fingertips, pinch itcarefully into a ball, then form it into a smooth, flattened lump. Wrap this in clingfilm and leave to rest in a cool place or the fridge for a minimum of 15 minutesbefore rolling out.
✽ To make this pastry in a food processor, pulse the flour and butter togetheruntil the mixture resembles fine crumbs. Don’t be tempted to add the water tothe mixture in the food processor as the machine will easily overwork the dough,making it tough. Instead, tip the crumbs into a large bowl and add the water instages, mixing each addition in as in stage 2 above.
OLIVE OIL PASTRY
Makes enough to line a 25cm tart or flan tin
250g plain flour
½ teaspoon salt
4 tablespoons (60ml) extra virgin olive oil
100–120ml cold water
✽ In a large bowl, mix together the flour and salt. Add the oil and use a largefork to mix the flour and oil together until the oil is evenly incorporated.
✽ Add the water a little at a time, making sure that each addition is evenlyincorporated before adding more. When you can pinch the dough together withyour fingertips, bring it to a ball and wrap in cling film. Leave it to rest in a coolplace for 15 minutes before using.
What is hot-water crust pastry?
So called because the water and fat mixture has to be heated before it is mixedwith the other ingredients, hot-water crust is a fatty pastry, traditionally madewith lard. It is also quite a hard and strong pastry that is crisp and waterresistant and able to stand up to heavy filling mixtures without collapsing. It ismost commonly used for making raised (also known as ‘hand-raised’) pies, suchas pork and game pies.
HOT-WATER CRUST PASTRY
In this recipe, the initial mixing is done with a large fork rather than your handsbecause of the hot water and lard – so take care. Be sure to have your fillingprepared in advance so that the pastry can be filled and topped while still warm,otherwise the pastry won’t seal well and the juices from the meat filling willescape.
Makes enough to line a 12-hole deep muffin tin
280g plain flour
½ level teaspoon salt
80g lard cut into small chunks
125ml water
✽ Put the flour into a large bowl and stir in the salt.
✽ Place the water and lard in a medium-sized pan and place on a high heat.
✽ When the water and lard mixture comes to the boil, pour it into the flourmixture and stir with a large fork to combine the ingredients together evenlyand quickly.
✽ Tip the mixture onto a lightly floured surface and knead briefly until themixture is thoroughly combined and there are no floury lumps. The pastry isnow ready to use.
Do I need to have cold hands to make shortcrust pastry?
The first thing you hear about pastry-making tends to be that cold hands makegood pastry. But don’t worry, there’s no need to stick your fingers in the fridge!The most important thing is to keep the mixture cool as you rub the fat and flourtogether, which requires the right technique.
Rubbing in by hand will, inevitably, transfer some heat through yourfingertips to the fat and cause it to soften. By working quickly and with a lighttouch, you can minimize the heat you transfer. The best way to keep the mixturecool is to use a food processor. Apart from the heat created by the friction of theblades, the heat transferred to the fat will be minimal. Beware, though – it is veryeasy to overwork the dough by leaving the machine running for too long.
If the fat does get too warm during the rubbing-in process, you will find youneed less water to bring the dough mixture together. Although you might thinkthat this will give you a lovely short pastry, it will most likely mean that thepastry will be too short. It will be dry and crumbly making it tricky to roll out andthe baked pastry may fall apart when cut or be cloying in the mouth.
If you think your rubbed-in mixture is too warm or feels tacky, all it not lost.Chill the fat-flour mix in the fridge before tackling the next step of adding water.That way, you will be able to add just enough water to make a perfect dough.
Is it better to make shortcrust pastry in a food processor?
Many experienced pastry chefs use a food processor to make pastry. It iscertainly faster than rubbing in by hand, but it can also be easy to overwork thedough so is not necessarily a better method. To prevent this, don’t add the waterwhile the machine is running. Instead, once the processor has mixed the butterand flour, tip it into a bowl and gradually mix in the water by hand. This willensure that you don’t add too much water, which would make the pastry tough(see here).
Is it really necessary to chill pastry?
The short answer is yes – and you might need to chill it twice. You should chillpastry before rolling it if you have rubbed the ingredients together by hand orthe weather is warm. If the dough feels at all sticky, chill it for half an hour beforerolling it out. If, however, the dough isn’t sticky or you’ve mixed the fat and flourtogether using a machine such as a food processor, you may not need to chill thedough at all before you roll it out.
You will, however, always need to chill the pastry to ‘relax, it once it has beenrolled out for good reason. Although plain flour contains a relatively smallpercentage of gluten, what gluten is present can still be activated by the rollingprocess, causing the dough to become elastic – not ideal when you want to line atin right to the edge and the elasticity causes the pastry to shrink back as thetart bakes in the oven. By resting the rolled dough in the fridge or a cool placefor a few minutes, the stretchy gluten relaxes.
Why does chilled pastry crack when it is rolled out?
Pastry that has been over-chilled will ‘set’ as the fat solidifies, so when you rollout the flattened lump, the edges will crack. To help prevent this, work thechilled pastry a little with a rolling pin to soften it before rolling out. Place thedough on a lightly floured surface. Sprinkle your rolling pin with flour and hit thedough with short, sharp knocks. The shock waves that run through the pastrywill begin to soften the fats and enable the pastry to be rolled out withoutoverworking the gluten. This is less likely to overwork the dough than if youknead it by hand, which could toughen it.
If your pastry continues to crack, it could be a sign that you didn’t add enoughwater to make a pliable dough. To remedy this, chop up the pastry, sprinkle itwith a little more water and re-combine into a dough. The end result will requirea good deal of resting (a couple of hours), but dry pastry can be salvaged.

Can pastry be frozen?
Absolutely, but you must be sure to use it within a month and thaw it completelybefore rolling out. Pastry that has no added salt or was made with unsaltedbutter tends to discolour in the freezer (or fridge) more quickly because itdoesn’t have the preservative boost of salt. But as long as you use the unsaltedpastry within a month, it will still be fine, despite a little discolouration.
If you freeze pastry that’s been made with baking powder or self-raising flour,you’ll find that it won’t have the same texture once thawed and baked. This isbecause the chemical reaction of the raising agent continues, albeit slowly, inthe raw dough as it freezes. The active ingredients will be exhausted by the timethe pastry is thawed and baked, so this type of pastry will not tolerate freezingas well.
What sort of pastry should I use for pies or tarts?
You can use any type of pastry for pies, from plain shortcrust and rich shortcrust(with egg yolk added) to rough puff, flaky and puff pastry as well as filo pastry,but you do need to bear in mind how the pastry is being used – whether it needsto hold a filling, or whether it is simply being placed on top as a pie lid.
The challenge with double-crust pies (pies with a top and bottom), quichesand tarts is to make a crust that is sturdy enough to hold the filling withoutcollapsing, but without being tough. A shortcrust pastry is the best suited to thisas it’s the most robust dough and because you can strengthen it by blind baking(see here).
Whatever pastry you use, however, nothing will bake well with a completelyliquid filling. The filling will need something, like breadcrumbs, ground almondsor cornflour, to absorb extra liquid as the pie bakes and very wet fillings, such ascustard bases, should always be poured into a pastry case that’s been bakedblind.
A puff pastry is not ideal for a double-crust pie as it is too delicate andwouldn’t crisp properly – it needs to be able to expand to let the layers rise, butpuff, flaky and rough puff pastry work well as pie lids.
Flaky pastry and rough puff pastry can also be used to make tarts with slightlywet fillings, such as fruit, but they will soak up any excess liquid so need to bebaked blind before being filled.
GOOSEBERRY PIE
Serves 8
380g plain flour
190g unsalted butter, chilled, cut into small cubes
130–150ml cold water
1kg gooseberries, washed, topped and tailed
150–180g caster sugar, to taste
1 egg, beaten
2 tablespoons granulated sugar, for glazing
1 × 22–25cm diameter deep pie dish
✽ Make the pastry according to the method for the shortcrust pastry on here,and chill for 30 minutes.
✽ Meanwhile, prepare the gooseberries and taste one. If they are very green,you will need to use the larger quantity of caster sugar. If they are beginning toripen and have a yellow tinge, they will need a little less; some berries won’tneed any sugar at all.
✽ Preheat the oven to 200°C/400°F/gas 6. Roll out the pastry on a lightlyfloured board or worktop and cut out a circle just larger than the top of the piedish – 10cm larger is enough. Using a pastry brush, dampen the edge of the dishwith a little beaten egg (egg wash) or water. Cut up the trimmings of pastry anduse to line the edge of the dish; moisten this edging.
✽ Pile the gooseberries in the dish and sprinkle with the caster sugar. The fruitwill come up higher than the top of the pie dish, but don’t worry as it will cook
down as it bakes.
✽ Lift the sheet of pastry onto the pie and press the edge to seal to the pastryedging. Using a sharp knife, trim the pastry at the outer rim of the pie dish andpinch to seal. Use any leftover pastry to make leaves or other shapes todecorate the top, sticking them on with egg wash, and cut a small cross in thecentre to release steam as the fruit cooks. (Chill the pie now to relax the pastry,if the weather is warm.)
✽ Brush egg wash all over the pastry lid and sprinkle liberally with granulatedsugar. Place the pie dish on a preheated baking sheet and bake for 45 minutes.When the time is up, insert a sharp knife into the centre of the pie to check thatthe fruit is soft.
✽ You could also stir 2 beaten egg yolks into the fruit mixture to thicken thefilling.
What’s the difference between regular shortcrust and sweetpastry?
The pastry used for tarts and sweet pastries is usually richer and sweeter thanthat for savoury pies. A sweet pastry is enriched with more butter as well as eggyolks and sugar. A higher percentage of butter doesn’t just add to the taste, italso makes the texture shorter and more biscuit-like. Indeed, the French recipefor a pâte sablée – the richest of the sweet pastry recipes – is similar to ashortbread biscuit (for more on short pastry and shortbread, see here). Eggyolks add a rich gold colour and flavour, while sugar enhances the texture aswell as providing a touch of sweetness (caster sugar will make the pastryslightly more crumbly; icing sugar will give a fine-textured, crisper pastry).
Careful, though, a sweet pastry dough needs very careful handling andchilling before rolling out because it contains such a high percentage of fat toflour.
Why is sweet pastry sometimes made using the creamingmethod?
Sweet pastry is often made by beating or creaming the fat and icing sugartogether before adding the egg and then the flour. The pastry is creamed partlyto achieve a very fine texture, but also because it is difficult to mix in that muchbutter by hand while maintaining an even texture to the dough and withoutoverworking it. If the butter is not mixed in well, the baked pastry will be flakyand soft rather than biscuit-like.
SWEET PASTRYIt’s easier to make a large batch and freeze half, though you should use thiswithin a month.
Makes enough to line 2x 25cm tart/flan tins
400g unsalted butter, at room temperature
250g icing sugar, sifted
2 egg yolks
2 dessertspoons of white rum or brandy
550g plain flour
✽ Beat together the softened butter and icing sugar in a large bowl until themixture is well blended and light (do not use an electric mixer – you riskoverbeating, resulting in a tough pastry). Add the egg yolk and rum and beatwell until they are fully incorporated. Finally, sift the flour into the bowl. Mixthoroughly but do not over beat.
✽ When the dough or paste is thoroughly blended and lump-free, scrape it ontoa sheet of cling film and form it into a flattened round. Chill for at least 1 hourbefore using.
Why do you sometimes need to roll out pastry between sheetsof paper?
Rolling out pastry between sheets of baking paper rather than on a flouredsurface means that you aren’t tempted to add extra flour to your dough. Addingflour at this stage would unbalance your carefully weighed-out proportions offat to flour and make the texture of your pastry denser and heavier.
This technique is also useful when rolling out sheets of pastry for lining largetart tins – where you need to get the pastry evenly thin – and for handlingbutter-rich shortcrust and sweet pastry. The paper allows you to work thedough with minimal contact.
TROUBLESHOOTING
Which are the best tins for tarts and quiches?
When baking pastry it is important that the heat reaches the dough quickly toallow the starch to expand and absorb the fat as it melts. If the starch does notheat up quickly enough, the fat will melt and run out. This loss of the fat willmean that the baked pastry will be tough. The best tins to use are made of eitherdark metal or glass. Dark metal absorbs the heat of the oven, while glass allowsheat to penetrate through, and holds it well once hot. Shiny metal tins reflectaway some of the heat of the oven and the dough will take longer to cook.
Why do you sometimes leave the pastry hanging over theedge when lining a tart tin?
This can help prevent the pastry from shrinking back during baking so that itends up lower than the rim of the tart tin; any excess pastry can be trimmed levelwith the tin after baking. This technique also means that you can fill the tart caseright to the top.
An alternative is to add a pinch of baking powder to your pastry for each125g plain flour used. This reduces the likelihood of the pastry collapsing backon itself, however, it also means that the pastry will be more cake-like in texturewhen baked.
The best thing you can do is make sure you have chilled thoroughly yourrolled out pastry to relax the gluten, before baking it (see here).

Why do recipes ask you to blind bake pastry?
Baking a pastry case blind will ensure that your pastry is fully cooked, crisp andsturdy enough to hold a filling. You will need some small metallic or ceramicbeads known as ‘baking beans’, but if you don’t have them you can use driedpulses, such as lentils, dried peas and beans.
Once you’ve rolled out the pastry and lined the tin, allow the case to rest in acool place for 10–15 minutes while you preheat the oven to 220°C/425°F/gas7 for shortcrust, 200°C/400°F/gas 6 for sweet pastry.
Line the case with baking paper, making sure to press it into the corners. Pourin enough baking beans to cover the base of the case. Bake in the hot oven for15–20 minutes until the pastry is set and beginning to dry.
Carefully lift out the paper with the beans and pour the beans into a bowl tocool. At this point, you can return the paper to the case and set the round base ofa small cake tin on it, which will prevent the pastry from rising. Put the pastrycase back in the oven for an additional 15–20 minutes until the pastry is evenlybrowned. The cake tin base will heat the pastry from above and leave you with afirm, crisp and thoroughly cooked bottom.
If you find the edges are browning a little too much, reduce the oventemperature to 150°C/300°F/gas 2 and allow it to brown through evenly untilthe base is dry and nicely coloured.
How can I patch up cracks in my tart case?
Chances are we’ve all had a pastry case that has cracked during baking. Thereare several reasons this can happen. If your pastry tore as you lined the tartcase, it will crack along these lines as it bakes. Cracking can occur because thepastry is too short and has not had enough water added to bind the doughthoroughly. Finally, if you remove the paper lining from a tart case being bakedblind, the pastry can crack if it is still a little soft.
The cracking of pastry is annoying, but it is not a major problem. You will nodoubt have some pastry trimmings left over, so you can patch up the tart case
and return it to the oven. This is best done to a tart case that is almost fullycooked because the firmer pastry will be less likely to crack as you patch it up.While the pastry case is still hot (roughly 10 minutes before the end of thebaking time), mould small pieces of raw dough between your fingers and smearit into the cracks. You’ll notice that it will begin to melt a little, but as long as youreturn the tart case to the oven straight away to bake through fully, the crackswill seal. Then you can continue with the recipe and fill the case as usual.
How do I avoid a soggy bottom?
The most effective way of ensuring a pastry case cooks perfectly is to ‘blindbake’ the pastry case (see here), that is, bake the case separately before you addthe filling, using baking beans to weigh it down so cooks evenly. Don’t skip thisimportant step in a recipe as a ‘soggy bottom’ can really affect the taste of a tart,pie or quiche. Take heart – it’s easily avoided if you prepare your pastry caseproperly.
Pastry that is undercooked will be raw, grey and soft – a very unappetisingsoggy bottom indeed. The reason for this is that the pastry has not reached asufficient temperature during baking to set the starch, and the water has notbeen driven off. To help prevent this, place your tart tin on a preheated bakingstone or a heavy baking sheet, or, if you have a bread oven, place your tart tin onits solid floor. This will get direct heat to the bottom of your pastry case asquickly as possible (see here).
Yet, even with a perfectly cooked pastry case, the filling can make the pastrywet and soggy, especially when you’ve baked a tart in advance that you intendto eat after it has cooled. There are several ways that you can avoid this. Thefirst is to seal – waterproof – the pastry using either beaten egg or meltedchocolate. Both work well. Simply brush the egg or melted chocolate onto thebaked case and return it to the oven for five minutes until the egg or chocolatehas cooked into a shiny layer.
Another sneaky way of limiting this sogginess when making a custard-basedquiche or tart, is to part-cook the filling before it goes in – a warm custard fillingwill set and finish quickly in the oven, resulting in a crisp and delicious base.

‘FANCY’ TYPES OF PASTRY
What is a laminated pastry dough?
Laminated simply means that layers of fat are created between thin sheets ofdough (made with flour, water and fat), which cause the pastry to separate intofine layers when baked. Steam from water in the dough causes the pastry to riseduring baking so that the pastry ‘puffs up’, before the dough sheets set, bakeand turn crisp in the final stages of cooking.
There are three types of laminated dough: rough puff, puff and flaky pastry.All three are rolled and folded, to achieve the layering, or lamination, and arebest made with a medium to strong bread flour to give the required elasticity tothe dough (see here). The names puff and flaky are sometimes usedinterchangeably, so the distinction between them is not always clear, but theyare made in slightly different ways (see recipes on here), and the technique forrough puff is different again.
There’s no getting around it, laminated doughs are time-consuming and quitetricky to make. Mastering the technique of making any of the following doughswill take practice, but as with any type of pastry, the joys of sitting down to ahomemade version do make it worth the effort.
What is rough puff pastry?
Rough puff pastry is simpler and faster to make than the other two types oflaminated dough, as well as being slightly less rich, but it still has lots of lovelyairy layers. It uses the technique of rubbing fat into flour ‘roughly’ instead offinely, so that large pieces of fat are left in the mixture. After the water is added,the dough is folded and rolled only two or three times.
As it is the simplest of the three doughs to make it’s worth giving rough puff ago before trying the other two so that you can get a handle on the folding.
What is puff pastry?
Puff pastry is the hardest of the laminated doughs to make well and is thusrightly considered to be the finest expression of the pastry maker’s skill.Although variations of the recipe historically also contain egg yolks, the classicrecipe used today has barely changed in the past 100 years – it’s that good.
To make puff pastry, a block of fat is positioned on the sheet of dough, whichis folded over it. The dough is then rolled and folded up to six times, whichresults in 700 or so layers being created, all of which puff up as the pastry bakes.
What is flaky pastry?
Flaky pastry is similar to puff but the finished texture is not quite as light andairy as there are not as many layers in the dough. To make flaky pastry, the fat isdotted onto the surface of the sheet of dough, rather than incorporated as aslab. Flaky pastry is easier to make than puff because breaking the fat into flakesand incorporating it into the dough that way is less time-consuming and lesscomplicated than trying to incorporate a large block
ROUGH PUFF PASTRY
Makes 1.3kg
500g strong white flour
500g cold unsalted butter, cut into small cubes
300ml water
1 teaspoon lemon juice
✽ Combine the flour and butter in a large bowl. Using your fingertips, rub thebutter and flour together, but stop when only half the butter is incorporated.You should still see large pieces of butter.
✽ Add half the water and stir to a rough mixture, then add the remaining waterin batches until you have a dough that will come together easily without beingtoo sticky. Form into a rough ball and turn this out onto a lightly flouredworktop.
✽ Roll out the dough, away from you, into a long rectangle 20 × 60cms. Divideit into three sections, marking with a table knife but not cutting it. Fold the topthird down over the middle third, then fold the bottom third up over this,creating a square pastry sandwich. Wrap in cling film and chill for 30 minutes.
✽ Place the pastry square on the worktop so that the folded ends are to the leftand right. Roll out again into a long rectangle and repeat the folding. Wrap incling film and chill, then repeat the rolling and folding process once more, tomake a total of three times. Wrap and chill the pastry again for at least an hourbefore using.
PUFF PASTRY
Makes 1kg
400g strong plain flour
1 tsp fine salt
50g unsalted butter, at room temperature
1 tsp lemon juice
200–250ml cold water
350g unsalted butter, chilled
✽ Place the flour and salt in a large mixing bowl and add 50g butter and rub itinto the flour until there are no lumps remaining.
✽ Add the lemon juice to 200ml cold water and add this to the flour mixture in
stages, mixing the dough with a large fork. If necessary, add additional water tobring the mixture together to form a smooth, but not sticky, ball of dough. Placethe dough in the fridge, wrapped in cling film, to chill and relax for 30 minutes.
✽ Once the dough has rested, prepare the butter slab you are going toincorporate into the dough: sandwich the 350g chilled butter between twosheets of cling film or baking paper on a work surface and, using a rolling pin,beat the butter into a 15cm square. Keep this at cool room temperature whileyou move onto the next stage.
✽ Scatter your work surface with a little plain flour and place your ball of doughon it. Flatten the ball slightly, and cut a cross in the top. Pull the four flaps ofdough apart, flattening them back to form a rough square. Lightly flour thedough and roll it out to a 30–35cm square. Use a pastry brush to remove anyexcess flour from the surface and place the block of butter on the dough.
✽ Fold the flaps of dough over the block of butter so that it is completelyenclosed, making sure that the seams are completely sealed, then turn thedough over. Dust the dough lightly with flour and roll it out into a rectangleapproximately 15cm wide and 45cm long. Divide it into three sections, markingwith a table knife but not cutting it. Fold the top third down over the middlethird, then fold the bottom third up over this, creating a square pastry sandwich.Wrap in cling film and chill for 30 minutes.
✽ Place the pastry square on the worktop so that the folded ends are to the leftand right. Roll out again into a long rectangle and repeat the folding. Chill, thenrepeat the rolling and folding process a further four times, to make a total of sixtimes. Chill the pastry again for at least an hour before using.
Flaky pastry
Rather than forming a slab of butter as you do for puff pastry, divide the 350g ofbutter into three equal portions. Once your ball of dough has been made andchilled, roll the dough into a 15 × 45cm rectangle. Divide the dough into threesections and dot one portion of butter (cut into small flakes) onto the top twothirds. Fold the bottom third over the central third and fold the top third backover the central, so that you have three layers of dough and two layers of butter.Chill the dough, wrapped in cling film, for 30 minutes and then roll it out againto another 15 × 45cm rectangle. Dot the butter onto the dough again, roll andfold as before, and chill. Repeat with the final piece of butter. Then, chill thedough for 30 minutes, and repeat the action of rolling the dough and folding a
further three times (without butter) to complete the process, chilling for 30minutes between each rolling.
I’ve seen puff pastry recipes referring to ‘double-book’ folds– what do they mean?
This term describes a method of folding the pastry in between rollings. The puffpastry recipe on here uses a standard technique that gives you three mainportions of dough folded over each other. The double-book fold, on the otherhand, divides the dough into four portions (without cutting) and folds the outerquarters over the middle two and then sandwiches the middle two together –giving the impression of a closed book.
If using double-book folds rather than the standard technique, the dough isfolded and rolled three times rather than six.
Where did the croissant originate?
Despite common assumptions, the croissant is not, in fact, French. Croissant-like pastries were being consumed in Austria long before they appeared inFrance. According to one legend, the story of the croissant began in Vienna in1683. Bakers, working through the night, heard digging and Turks were foundtrying to tunnel under the city wall in an attempt to siege the city. A pastry in theshape of the crescent on the Turkish flag was created to commemorate theevent and was named the kipferl, meaning crescent. The French version did notarrive in France until the opening of a Viennese bakery in Paris in 1839, whichbegan selling kipferl. The French quickly renamed the pastry the ‘croissant’, alsomeaning crescent.
Around the turn of the twentieth century, the croissant evolved from the
brioche-style dough of the kipferl into the light puff pastry we know today.
CROISSANTSThis recipe is made over two days. The evening before you bake, make a simpledough and allow it to rise overnight in the fridge. The following morning, layerthe dough with butter, then roll, shape and bake.
The temperature at which the croissants prove, or finish rising, is key to theirsuccess. A warm room temperature of 23–25°C/73–77°F is ideal: the butterwill be soft enough to allow the yeasted dough to rise, but not so warm that itmelts out and ruins the recipe. Fast-action yeast is not suitable for this recipe.
Makes 16–18 croissants
1 tablespoon milk powder
250g strong plain flour
250g plain flour
30g caster sugar
10g fine salt
350g unsalted butter
20g fresh or dried yeast, not fast action
300ml cold water
beaten egg, for glazing
2–3 baking sheets, lined with baking paper
✽ Mix together the milk powder, flours, sugar and salt in a large bowl with 50gof the butter, and rub this in until there are no lumps of butter remaining. Creamtogether the yeast and a little of the cold water in a jug; when it is softened, addthe rest of the water. Add to the flour mixture and combine to form a smoothdough – do not knead the dough any more than is necessary to mix it. Coverwith a clean cloth and leave at room temperature to rise for 30 minutes.
✽ Punch the dough to knock out any gas, then cover the bowl with cling film.Place in the fridge to rise overnight.
✽ The next morning, shape the remaining 300g butter into a square pat about2cm thick. Keep the butter at a cool room temperature so it will be easier to rollout.
✽ Remove the dough from the fridge and form into a smooth ball. Set it on alightly floured worktop. Use a sharp knife to cut a deep cross in the ball. Sprinkleyour hands with a little flour, then fold the four flaps of dough outwards to makea rough diamond. Roll out each flap so that the square of butter can be fittedinto the centre of the dough. Fold the dough over the butter and seal the edgestogether with your fingers so that no butter is visible.
✽ Now, you need to roll and fold the dough. Turn the dough over so that thesealed edges are underneath. Using minimal flour, roll out the square of doughaway from you into a long rectangle roughly 20 × 60cm. Brush the surface witha pastry brush to remove excess flour, then fold the bottom third of the doughup over the middle third. Fold the top third down so that you now have threelayers of dough. Try at all times to ensure that you have a neat, even square.Transfer the dough to a lightly floured tray and chill for 30 minutes to rest.
✽ Repeat the rolling out and folding process two more times, ensuring that yourest the dough thoroughly between each rolling.
✽ Roll out the dough to a rectangle 40 × 75cm. You will find that the dough isvery elastic, so allow it time to relax as you roll. Even a rest of 1 minute willenable you to roll the dough thinner.
✽ Trim the edges of the dough rectangle, then cut the sheet in half lengthwaysto make two long thin rectangles. Brush the dough to remove any excess flour.Cut the rectangles into long triangles, each with a base of about 15cm.
✽ Roll up each triangle from its base towards the tip. Place on the baking sheetsand curve the ends inwards to make a crescent shape. Once all the croissantsare shaped, allow them to prove for 1 ½–2 hours at a warm room temperature(do not place them near a direct source of heat or they will rise unevenly and yourun the risk of the butter melting out from the dough).
✽ Preheat the oven to 220°C/425°F/gas 7. Bake the croissants for 12–15minutes until risen and well browned. Cool on a wire rack.
What is choux pastry?
Choux pastry is a very light pastry used for making both sweet and savouryconcoctions, such as éclairs, profiteroles, choux buns and puffs. It differs frommost other pastries because it is cooked twice and is really more of a batter orpaste than a dough. The initial cooking occurs when the flour is mixed withboiling water and butter. This creates a partly cooked paste that is thensoftened by adding eggs. The choux mixture is then piped or spooned intoshapes, and once shaped, it is cooked a second time, this time in the oven.
As the choux pastry dough is soft, when it is baked the relatively highproportion of liquid it contains turns the centre of the pastry shape into a steampocket. As the pastry cooks, steam makes the dough expand to many times itsoriginal size. At this stage, the pastry is soft and will collapse easily if thetemperature of the dough cools or the pastries are knocked. So don’t open theoven door until you can see that the pastry is beginning to brown well and iscooked through. You just have to resist the urge. When baked sufficiently theeggs and fat in the pastry will have set the flour into a crisp, golden case, whichis sturdy enough to be filled. If you undercook the pastry it will collapse when itcomes out of the oven and turn soggy (see here for how to avoid this).
CHOUX PASTRY
Makes 30–40 choux buns suitable for profiteroles
100g unsalted butter, cubed
½ teaspoon sugar
150g plain flour, sifted
4 medium eggs (240ml cracked weight)
✽ Combine the butter, sugar and 250ml water in a medium saucepan over amedium heat. Allow the butter to melt, then increase the heat to high and bringthe mixture to the boil.
✽ Add the flour to the boiling mixture and draw the pan to one side. Stir with aclean wooden spoon until the flour is fully incorporated. Return the pan to low
heat and stir the ball of dough for a couple of minutes so that it dries slightly.
✽ Transfer the dough to the bowl of a large freestanding electric mixer (or, ifusing a hand-held mixer, place in a large mixing bowl set on a cloth to stop itsliding about). Break the eggs into a separate bowl and beat them togetherlightly.
✽ Start beating the dough. Add batches of the egg, thoroughly mixing in eachaddition before adding the next. At this stage, lots of air can be incorporated intothe mixture, so don’t stint on the beating. When fully mixed, the paste should beglossy and soft enough to just fall from a wooden spoon.
✽ Use immediately, or cover and keep in the fridge for up to 1 day. If you dokeep the dough, you may find you have to beat it slightly before using, to makepiping easier.
How can I keep my choux buns crisp?
Of course no one wants a bun that is brittle and hard – but equally you want toavoid one that is too soft to handle once cooked. So how do you achieve thatperfect combination of crisp outer edge and soft, doughy inside?
When your choux buns or éclairs are cooked, they still contain a mass ofcooked, but wet pastry just under the surface of the crust. The steam trappedinside by the crust will eventually leak out, softening the crust as it does so. Youshould, therefore, pierce the buns as soon as they come out of the oven. Use asmall sharp knife to do this, pricking a hole in the base of each bun – workquickly so you can let most of the steam out before it has a chance to soften thecrust – then leave to cool upside down on a wire rack.
If you are going to keep the buns a while before filling them, let them coolcompletely and keep them in an airtight container. Before you fill them, crispthem up for 5 minutes in an oven preheated to 200°C/400°F/gas 6 beforecooling again and filling.
Cooked choux buns can be also frozen successfully for up to one month.
Simply thaw the buns, spread out on a baking tray, and crisp up for 5 minutes inan oven preheated to 200°C/400°F/gas 6 before cooling again and filling.
Why do choux buns sometimes topple over when they cook?
Small choux buns may tip over if they are top-heavy. This can occur when thechoux pastry is piped – if the mounds of piped dough are higher than they areround, they will be likely to split as they rise and then topple. If the pipedmounds are flatter, they are more likely to rise and expand into a perfect round.Don’t worry if you are not a perfect piper – once you have piped the dough outon the baking sheets, if any look high, use a wet table knife to press the top togently flatten the mound and round off the peak.
When compared with cakes, biscuits, pastries and breads, desserts are fairlyrecent additions to our recipe repertoire, yet they have become theshowstopper finale to a memorable meal.
A trio of simple ingredients – eggs, milk and cream – can be whipped and heatedinto a glorious alchemy of flavours, but the techniques involved must be appliedprecisely. Don’t be put off – this chapter will show you how to avoid a crackedcheesecake, grainy custard or a collapsing crème caramel. And once you haveconfidence in whisking egg whites accurately, you can create light-as-airmeringues than can be transformed into striking desserts.
The building blocks shared here will give you a base on which to build muchmore extravagant desserts – just add fruit, chocolate or sauces – until you havecreated something truly impressive.
THE RISE OF THE DESSERT
When did we start serving a sweet course at the end of ourmeals?
The dessert as we know it is a relatively modern invention. At the medievaltable, sweet items such as dried fruits and honeyed pastries were eatenalongside savoury foods.
Sugar was still a very expensive commodity during the sixteenth century anda luxury afforded only by the wealthy. However, those who could afford to buy itused to show off by serving ‘sweetmeats’, such as crystallized or honeyed fruit,or elaborate sugar or marzipan sculptures placed on the table at the end of theirmeal while the dishes were being cleared. In fact, the word ‘dessert’ actuallyderives from the French desservir, which means literally ‘un-serve’ or ‘clear thetable’. And indeed, the practice of serving a dessert in Britain is understood tohave been influenced by the French. During the early eighteenth century, theFrench courts began serving grand and elaborate pyramids of fruits orsweetmeats as a means of impressing guests and onlookers with ademonstration of excess and abundance. Mrs Beeton, writing during thenineteenth century, also noted that desserts were served to impress, remarkingon the expense of the ingredients, such as candied fruit and chocolate.
Is there a difference between a ‘dessert’ and a ‘pudding’?
These days, the two words are often used interchangeably to describe the sweetcourse of a meal and cover a wide range of baked, steamed or boiled and iceddishes. However, they once had slightly different meanings.
Originally, ‘dessert’ consisted solely of sweetmeats while the word ‘pudding’has long been used to describe both sweet and savoury mixtures, including
black and white pudding and the Scotch haggis. You can see the connection ifyou trace the etymology of the word ‘pudding’ – it came from the Latin botellus,meaning ‘sausage’, which is also the root of the French word boudin (a type ofblood sausage). These puddings were enclosed in a sausage skin or stomachlining, or even pastry, and baked slowly in a warm oven.
What is a custard?
The word custard derives from the French word croustade, which was used todescribe an empty pastry case, prior to being filled, most usually with a custard-like mixture, as it is in a quiche. Custard can take many different forms, but at itsmost basic it is a mixture of eggs and milk which is heated to thicken it.
Understanding custard and, above all, being able to able to make a goodcustard, is an important skill for any baker as it crops up in so many areas ofbaking both in savoury and sweet guises.
Custard features heavily in dessert making, where it can be baked to createthe dessert itself, as in crème brûlée and crème caramel (see here), or simplyused to help build a dessert, as it is in a trifle. Ice creams are very often madewith a custard rather than a cream base as the emulsion of eggs and milk isbetter suited to creating a smooth texture when the mixture is frozen, And inBritain, custard can also be made as a thick or runny sauce to accompanydesserts and tarts.
In pastry making, custard is further thickened with flour to make crèmepatissière (pastry cream), which can be used to fill sweet tarts, éclairs and chouxbuns or items of viennoiserie (see here for a pastry cream recipe).
And if that weren’t enough, we can even use custard to decorate and fill ourcakes as the French also created a buttercream out of crème patissière (see herefor French buttercream recipe).
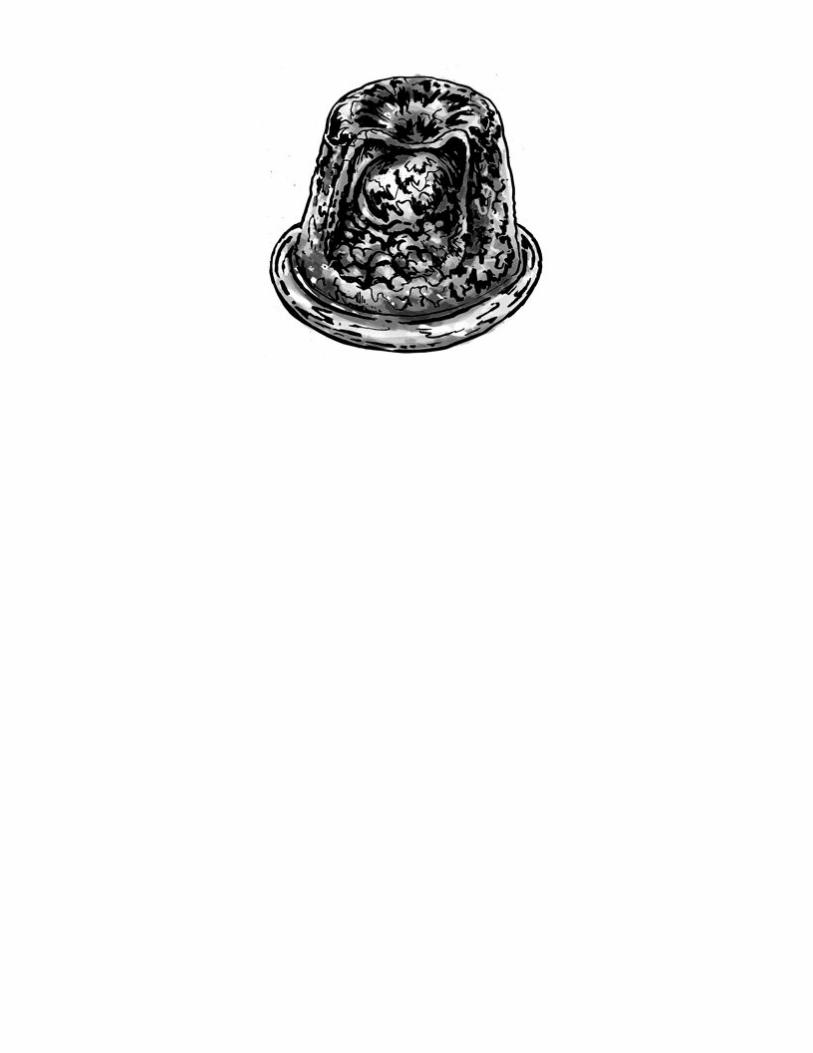
CREAMY DESSERTS
What is the difference between crème brûlée and crèmecaramel?
These are both baked desserts made from custard and caramel, but theirflavour, texture and ingredients are subtly different.
Crème brûlée is the epitome of rich baked custards. It consists of sweetenedsingle or double cream thickened with egg yolk that is baked lightly, then cooledand covered with a layer of dark caramel. The caramel may be made separatelyand poured over the surface or, more traditionally, by melting and caramelizinga layer of sugar directly on the surface of the custard, either by grilling or usinga kitchen blowtorch. Once the caramel has set hard, the dessert is chilled brieflybefore serving.
Crème caramel, on the other hand, is a silky, fine custard made from milk,sugar and whole eggs, or a mixture of whole eggs and yolks. This custard isbaked on top of a caramel. During baking the caramel melts and forms a sauce,which flavours and colours the base of the custard. After cooling, the dessert isturned out and served base uppermost, surrounded by the sauce (see here formore on caramel and how to make the sauce).
Egg whites are added to a crème caramel mixture to set it so that the custardcan be turned out without collapsing. A custard made with cream and egg yolks,as iin a crème brûlée, is too soft to unmould. If too many egg yolks are added tothicken the mixture, however, they mask the delicate flavour of the cream – it’s atricky balance to get right.
Why are custard desserts baked in a bain marie?
Like many other custard-based desserts, crème brûlée and crème caramel areboth baked in a bain marie (a water bath). This technique prevents the custardfrom getting too hot, as the water acts as an insulating barrier and keeps thecustard away from the heat source. If the custard were to get too hot, the waterin it would begin to convert to steam, which would cause the custard to rise uplike a soufflé and split around the edges. Similarly, if the eggs and milk get toohot, they may curdle.
You don’t need any special equipment, a roasting tin with handles at the twoends is a good receptacle to use for your bain marie, so that you risk boilingwater sloshing over the edge of the tin and scalding your hands as you transferthe tin in and out of the oven. Place the ramekins or baking dish in the roastingtin and then pour in hot water to come a third of the way up the sides of the dishor dishes (any higher than this and they might float and bump about).
Baked custard recipes will generally suggest cooling the dish or ramekins on awire rack. Don’t be tempted to skip this as the custard will inevitably continue tocook after it’s removed from the oven, but the racks will help to minimize thisand prevent your custard from being overcooked.
Why are some cheesecakes baked and others not – what’s thedifference?
Cheesecakes fall into two main categories: baked and chilled. Bakedcheesecakes rely on eggs, or egg yolks, to set the mixture to a rich thick cream,solid enough to be sliced; while chilled cheesecakes usually contain few if anyeggs, and are more mousse-like and fresh, using gelatine as a setting agent.
Baked cheesecakes, or tarts, are very common in British baking history. Theyinclude the Yorkshire curd tart, a simple, soft fresh curd tart baked in a pastrycase and traditionally made with the curds left over from cheese-making.
American cheesecakes derive their thick, rich texture from the sweet creamycheese used in the filling. If the origins of your cheesecake recipe lie in theJewish immigrant neighbourhoods of New York, it is likely to use cream cheeseas well as soured cream; if it originated in Italian districts, it is more likely to use
ricotta. In European-style cheesecakes, lighter cheeses – of varying degrees ofripeness or sharpness – are more often used.
How can I stop my cheesecake’s base falling apart?
While traditional cheesecakes were baked either in a pastry case or without anyshell whatsoever, in Britain especially, we now tend to use some form of biscuitbase. The most common biscuits to use are digestives, which are similar to theGraham crackers often specified in American recipes. These simple biscuits havea relatively unobtrusive taste and so mix easily with any flavour you choose foryour filling.
The key to ensuring that your biscuit base does not fall apart is to bake it first,even though it will be baked again with the filling. You should do this even if youare making a chilled cheesecake.
Use biscuits and unsalted butter in a ratio of 2:1. (You can use less butter – aslow as 25 per cent of the weight of biscuits – but you’ll find that the less you use,the more crumbly the base will be when baked.) Crush your biscuits, either byplacing them in a bag and bashing with a rolling pin or by blending them to a finecrumb in a food processor. Mix in melted butter plus some spice or flavouring ifyou desire – ginger works well for a lemon cheesecake, for example. Spoon thebiscuit mixture into a springform tin lined with baking paper and press it downusing something flat (e.g. a potato masher or ramekin). Keep pressing until it iseven and flat on the base of the tin. Then bake the base to firm it up – 15–20minutes in an oven preheated to 190°C/375°F/gas 5, until the surface is dryand a shade or two browner.
Remove from the oven and, while it is still hot, carefully compact the baseagain with your masher or ramekin, as it will have risen slightly as it baked.When cool, you can use this for either a baked or chilled cheesecake and it willgive a much firmer and easier-to-cut base.

Why do baked cheesecakes sometimes go grainy and split inthe middle?
A baked cheesecake is really only a very thick custard, so like any custard, it cansplit or go grainy. If overbaked, the edges – and ultimately the centre – of thecheesecake will soufflé (puff up) and coarsen, eventually turning grainy. Thecentre will probably crack as it cools too.
To avoid cracking and overcooking, bake your cheesecake carefully until thecentre reaches 83°C/181°F (the temperature needed to cook custard). Recipeswill often tell you to allow baked custards and creams to cook until the edges areset but the centre still has a slight wobble – that is, still a bit undercooked. Thisis because the centre continues to absorb heat from the base and edges of themixture after the cheesecake has come out of the oven. Cheesecakes can alsosplit if cooled too quickly, so when its centre is still slightly undercooked, switchoff the oven and leave the oven door open slightly to leave it to finish cookingand cool slowly.
Another way to prevent the edges from setting too quickly before the centreis cooked is to bake the cheesecake slowly. An oven temperature of 150–160°C/300–325°F/gas 2–3 is sufficient for a small cheesecake (less than 22cmin diameter), while larger ones should be cooked at 140°C/275°F/gas 1. This isbecause the heat will take longer to penetrate the mixture so the outer portionof the cheesecake will not overcook and go grainy. Heat penetrates the centre ofsmaller cheesecakes more quickly, so they can be cooked at a slightly highertemperature. The resulting cheesecake will retain a melting texture throughoutand shouldn’t crack in the centre.
SOUFFLÈS
Why do soufflés have such a scary reputation?
Baked soufflés are often said to be one of the toughest culinary challenges, andindeed they can be tricky to prepare and bake, not least because they oftenrequire the cook to be in the kitchen constantly during the cooking process butthey are worth the effort.
Sweet soufflés are made with a custard base (often flavoured with fruit orchocolate) that uses the raising power of egg whites to provide lift and volume.The egg whites expand in the oven, causing the mixture to rise above the level ofthe dish with a flat, even surface. A soufflé mixture is delicate and light, and caneasily be disrupted as it rises by a change in temperature or movement, so becareful at all times and avoid opening the oven while it is baking. Soufflés needto be served and eaten hot as soon as they come out the oven as they quicklydeflate!
Why do baked soufflés stick around the edges?
The shape of the dish and the way it is prepared can affect the way a soufflérises. A straight-sided dish is best because it allows the mixture to rise evenlywith less risk of sticking.
To avoid sticking or an uneven rise, prepare your dish or ramekin carefully.First, use a pastry brush to butter the bottom of the dish, then draw the brushup the sides so that you can see lines of butter (it doesn’t have to be a thicklayer). Be sure to butter right to the rim of the dish, as this is where soufflésusually stick.
When you have finished buttering the dish, put in some caster sugar and tipand rotate the dish so that the butter is completely covered with a thin layer of
sugar. Tip out any excess sugar. Once sugared, the channels of butter will helpthe soufflé to rise.
Finally, brush a little more butter around the rim of the dish but do not sugarthis. Then chill the dishes before filling – this way you won’t disrupt the butterlayer when you spoon in the soufflé mixture.
You can also run a fingernail or the tip of a knife around the rim of the dishjust before baking the soufflé.
Is there any way to rescue a soufflé that is sticking?
The next time you bake a soufflé, observe it in the oven: look at the edge of thedish and, as soon as the surface sets, you will see the mixture begin to mound alittle. As the soufflé begins to cook, you should see the mixture rise around theedge. If at any point the mixture is sticking, you have a second or two to open theoven door and quickly run a knife around the stuck mixture. Return the souffléto the oven immediately.
Your soufflé should still bake perfectly because at this early stage of cookingthe main body of the mixture has not begun to heat up. Later in the cookingprocess, the soufflé would be more likely to collapse if you interfere with it.
Why do some recipes recommend baking soufflés in a bainmarie?
This is a good idea when baking small individual soufflés because the heat of theoven can easily penetrate and cook the core of a small soufflé fully before it isproperly risen and browned. The bain marie will protect the soufflé from thedirect oven heat, allowing the mixture to rise as it cooks.
Can I rebake a soufflé?
As soufflés are very delicate baked desserts, containing little or no flour, they donot like being rebaked. Some soufflé preparations have traditionally been madefirmer, however, so that they can be unmoulded and sauced before reheating.Called a soufflé Suissesse or a pudding soufflé, these are more frequently madeusing savoury ingredients. Most soufflé recipes do not contain enough flour toform strong bubbles and, if they are allowed to cool, the bubble walls willcollapse and the soufflé won’t rise again if you rebake it.
Can I make soufflés in advance?
Most soufflé mixtures can’t be kept for anything more than a few minutes beforebaking because the air bubbles would coalesce, becoming large enough to riseup in the mixture and escape. The soufflés would first coarsen and then fall. Ifthis happens there is nothing you can do.
The one exception to this is a chocolate soufflé where the proportion ofchocolate to eggs is 25g chocolate per 60g egg. These mousse-like soufflés willhold because the chocolate sets the bubbles of air incorporated into the mixturealong with the egg whites, thus preventing collapse before the soufflé is baked.
Some chefs and writers advocate mixing and freezing soufflés so that they canbe baked from frozen. In practice, this can be tricky as the soufflé must becooked for longer so that it heats thoroughly, otherwise the centre will be coldor even icy. You can, however, prepare the soufflé dishes and base several hoursahead. Then you only have to whisk and incorporate the egg white at the lastminute – which won’t take much time – and bake. (Note that the base needs tobe at room temperature or gently warmed before the egg white is added to it toensure that the two mix well.)
WHISKING EGGS
What’s in an egg white?
Egg white is largely water (90 per cent), with various proteins making up therest. For convenience you can buy egg white in cartons to use in baking anddesserts in place of fresh eggs. As a medium egg white weighs approximately30g, you can simply convert the number of egg whites you need for a recipe andweigh out the required amount.
Pasteurized egg white, which has been heated to kill off a proportion of anybacteria that may be present, is designed to be used where the white is notcooked – in a mousse, for example.
What happens when egg whites are whisked?
Whisking egg whites breaks down the protein structure so that the proteinstrands lengthen and air bubbles get trapped inside them. You’ll notice thatsome recipes suggest adding a drop of lemon juice or pinch of cream of tartarbefore you beat the whites. This is because they help to stabilize the bubblesand the whites will be less likely to go grainy if overbeaten.
Why haven’t I been able to whisk my egg whites properly?
You’ll see that cookery books tell you to use a scrupulously clean bowl andwhisk when making meringues or other recipes containing beaten egg whites,such as soufflés and mousses. There’s a good reason for this. Any grease, fat or
oil (this includes egg yolk) will stop the egg whites forming a foam. The fat willprevent the protein strands reforming around the air bubbles. So, whenseparating an egg, make sure that you do not break the yolk into the whites. Ifyou do, remove all specks of yolk before whisking the whites to a foam.
The equipment you use is also crucial to success. Copper or silver bowls havetraditionally been used because these metals help to prevent the egg whitesfrom overwhisking. Nowadays, porcelain or glass bowls are more practical andwork best because they are easy to clean thoroughly; plastic bowls are oftenvery difficult to get spotlessly clean.
How can you tell if you’ve underwhisked or overwhisked eggwhites?
Underwhisked egg whites will not give you the right volume or texture in yourfinished bake – but how do you tell and what can you do about it? It’s importantto look at the texture of the whisked mixture and the peaks that form when youlift out the whisk – these give you the best clue as to the stage the mixture hasreached.
When your recipe tells you to whip egg whites to soft peaks, usually neededfor soufflés and mousses, watch what happens when you pull the whisk from thebowl – if the whites fall back on themselves and the peaks droop, then you havethe soft peaks required. At this stage, the whites will fall out of the bowl ifupturned, so it’s best not to try this!
For stiff peaks, used for meringues and for piping detailed shapes andbaskets, the whites are whisked beyond soft peaks up to the point when theystiffen and form firm, erect peaks when the whisk is pulled out. Egg whiteswhisked to stiff peaks should not fall out of the bowl when you upturn it – if youdare to try.
If you continue to beat the egg whites beyond this stage, you will overwhiskthem: the foam will eventually break down as it first turns grainy and then grey.All is not lost, however, if this happens. You can rescue the whites by coveringand chilling them – they will eventually re-liquefy and can be used again, or you
can add the same number of egg yolks as whites and use this whole egg mixturefor another recipe.
Who invented meringues?
The first documented recipe appears in 1691 in an influential cookbook LeCuisinier Roial et Bourgeois by François Massialot, chef to Louis XIV’s brotherPhilippe the Duke of Orléans. Although his recipe coins the name ‘meringue’, hewas not the first to mix egg whites and sugar. English cookery writer ElinorFettiplace describes a meringue-like white biscuit in her book, ElizabethanCountry House Cooking, published in 1604.
What is the difference between simple, cooked and Italianmeringues?
These three types of meringue are all widely used in desserts and patisserie.Made in different ways, each has its own characteristics.
Simple meringue is the one most commonly used in home baking. The eggwhites are whisked to soft peak stage, half the sugar is whisked in, to reach thestiff peak stage, and then the rest of the sugar is folded in. This makes a glossy,firm meringue – suitable for shaped or piped meringues, pies, toppings andpavlova as well as soufflés or mousse – and it must be used straight awayotherwise the mixture will re-liquefy.
Italian meringue produces more volume and can be kept for several hours. It’smade by whisking the egg whites to the soft peak stage and then slowlywhisking in a hot sugar syrup; the heat slightly cooks and stabilizes the whites.This meringue is often used for more elaborately piped desserts, and for petitsfours as well as for vacherins and meringue baskets because it keeps its shapewell.
Cooked meringue – often called chef’s meringue because it’s very firm but stillflexible and ideal for hot soufflés – is made by whisking the egg whites and sugarin a bowl over hot water to give a huge mass of meringue.
What’s the best way to fold whisked egg whites into ameringue mixture or soufflé?
The best tool to use for this is a large metal spoon or spatula because you canuse only a few strokes and are, therefore, less likely to overwork and destroy thestructure.
Begin by adding a third of the whisked whites to the mixture and incorporatethis fully before adding the rest of the egg whites. This will lighten the mixtureand make it easier to combine the remaining whites.
Why do my meringues weep liquid after baking?
This happens when the meringue has been over- or underwhisked or when thesugar is not fully dissolved in the egg white, and so the meringue begins tobreak down almost as soon as it is baked. At first, the mixture will soften andweep a clear liquid; this will, in a few short hours, dissolve the entire meringue.
Weeping is most likely to occur if you have used a balloon whisk or hand-heldelectric mixer because it’s more difficult to dissolve the sugar if the meringue ismade in this way. If you have one, it is best to use a table-top mixer to makemeringues because it gives the best results. Make sure your egg whites are trulyat room temperature before you start whisking, which will help the sugardissolve fully. Use really fine caster sugar, never granulated, and avoid thecoarser kinds of unrefined golden caster sugar, which take longer to dissolve(for more on sugar and its properties and effects in baking, see here).
What is the key to making successful French-stylemacaroons?
The dainty French-style macaroon biscuits (macarons) made from whisked eggwhites and almonds are notoriously fiddly to make. Commercial manufacturersuse very dry, finely ground almonds to achieve the perfect texture and gloss.This is harder to recreate at home, but you can certainly dry your almondsbefore you use them, which will give a better texture to your macaroons. Simplyspread the ground almonds thinly on clean trays and leave at warm roomtemperature for a couple of hours before you use them. Sieve the almonds toremove any lumps – the finer the almonds are, the better your macaroons willbe.
Getting the meringue component of macaroons right is also very important.As with many recipes, because egg whites from similarly sized eggs can vary agood deal in volume, it’s better to weigh the whites to ensure you have thecorrect amount. And it’s vital not to overbeat the whites, so that the macaroonmixture will be soft enough to spread.
Some macaroons are made with simple meringue, while others use Italianmeringue. Because Italian meringue is more stable it gives you a little more timeto make your macaroons. The recipes below and on here use simple meringueand then Italian meringue to make macaroons – try them both and see what youthink.
How do I ensure my macaroons have that lovely glossy flattop?
If you want that characteristic chic, flat top, the trick is to allow your macaroonsplenty of time to dry before baking. A ‘skin’ will form on the surface and, duringbaking, this will make the interior expand outwards rather than upwards,resulting in a smooth, flat macaroon.
COCOA MACAROONS
Makes about 30 unfilled shells
120g dried ground almonds (see here for how to dry almonds)
170g icing sugar
5 level teaspoons cocoa powder
95g egg whites – approximately 3 medium egg whites
pinch of cream of tartar
2 tablespoons caster sugar
1 piping bag, fitted with a 10–12mm plain nozzle;
3 baking sheets, lined with baking paper
✽ Sift together the ground almonds, icing sugar and cocoa twice, to combineevenly. Discard any large pieces of almond that remain.
✽ Put the egg whites in a large bowl, add the cream of tartar and beat using ahand whisk for 20 strokes until they are just frothy. Add the caster sugar andcontinue to whisk until you have soft peaks. Tip in the almond mixture and foldin gently using a large metal spoon.
✽ Transfer the mixture to the piping bag. Pipe flat discs of mixtureapproximately 2.5–3cm in diameter onto the lined baking sheets, spacing them1cm apart. Lightly bang the sheet on your worksurface to flatten the macaroonsa little. Set the baking sheets in a warm dry place and leave until the surface ofeach macaroon has a dry ‘skin’ (see here). This can take between 30 minutes and1 ½ hours, depending on the relative humidity of your kitchen. Keep checkingusing your fingertip – if it sticks to the macaroons, they are not ready.
✽ When the macaroons have set, preheat the oven to 150°C/300°F/gas 2.Bake for 18 minutes in a conventional oven. If using a fan oven, bake for 15minutes until the meringues are risen and a shade darker.
✽ Remove the baking sheets from the oven and allow the macaroons to cool for15 minutes before removing them from the sheets to a wire rack. Leave to coolfully before sandwiching with either a fruit preserve or a flavoured buttercream.
The macaroons can be kept unfilled in an airtight box, layered between sheets ofbaking paper, for up to 2 days.
ITALIAN MERINGUE MACAROONS
Makes about 45 unfilled shells
200g dried ground almonds (see here for how to dry almonds)
200g icing sugar
150g egg whites – approximately 5 medium egg whites
pinch of cream of tartar
200g caster sugar
50ml cold water
2–3 drops edible food colouring of your choice (optional)
1 temperature probe or sugar thermometer; 1 piping bag, fitted with a 10–12mm plain nozzle; 3 baking sheets, lined with baking paper
✽ Sift together the almonds and the icing sugar twice. Discard any large piecesof almond that remain. Mix half (75g) the egg whites into the almond mixture.
✽ Put the remaining egg whites and cream of tartar in the bowl of a large, free-standing electric mixer. Turn it on to beat slowly so that the egg whitesgradually begin to thicken and then form soft peaks.
✽ Meanwhile, put the caster sugar in a small saucepan and moisten it with thewater. Place on high heat and allow the sugar to dissolve without stirring. Thenbring to the boil and simmer for 2 minutes. Now test the temperature of thesugar syrup with the probe (or thermometer). When the syrup reaches118°C/245°F, remove from the heat and pour it in a steady stream onto the eggwhites while they are still beating.
✽ Allow the meringue to continue beating gently until it cools, adding anycolouring you want to use when the meringue is cold, ensuring that it is evenlyblended.
✽ Add the almond mixture and fold in gently using a large metal spoon. Stir untilit is soft enough to flow gently from the spoon, then transfer to the piping bag.
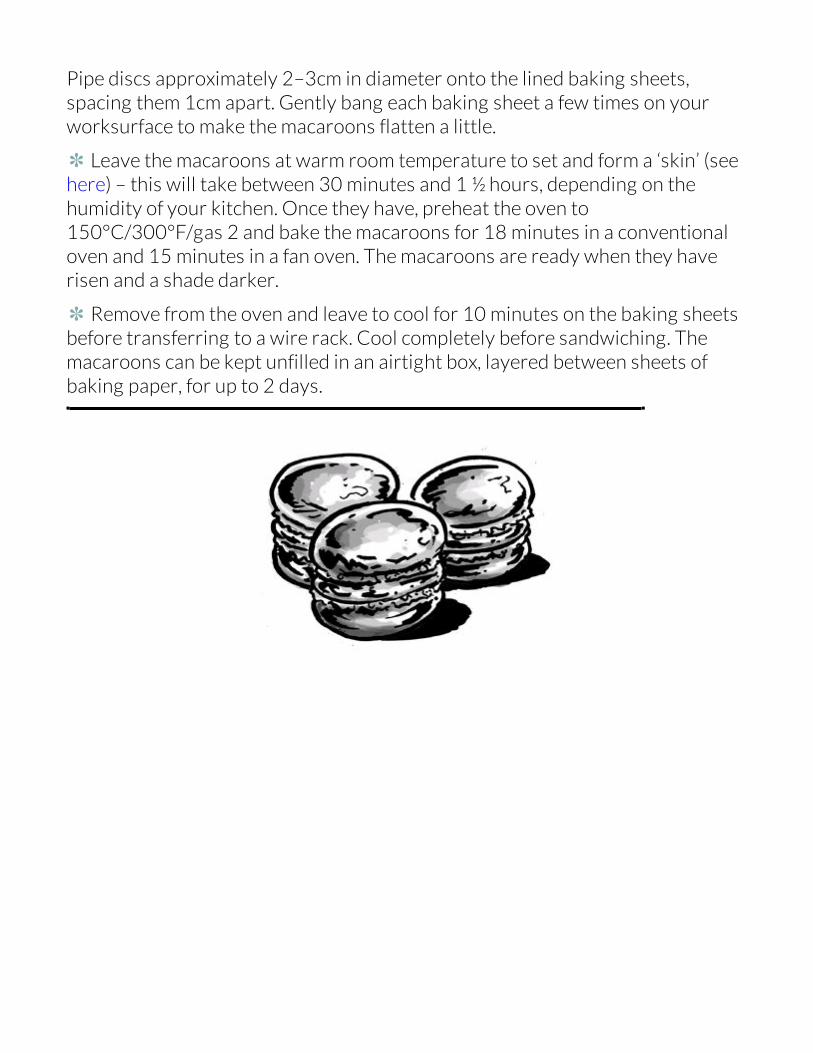
Pipe discs approximately 2–3cm in diameter onto the lined baking sheets,spacing them 1cm apart. Gently bang each baking sheet a few times on yourworksurface to make the macaroons flatten a little.
✽ Leave the macaroons at warm room temperature to set and form a ‘skin’ (seehere) – this will take between 30 minutes and 1 ½ hours, depending on thehumidity of your kitchen. Once they have, preheat the oven to150°C/300°F/gas 2 and bake the macaroons for 18 minutes in a conventionaloven and 15 minutes in a fan oven. The macaroons are ready when they haverisen and a shade darker.
✽ Remove from the oven and leave to cool for 10 minutes on the baking sheetsbefore transferring to a wire rack. Cool completely before sandwiching. Themacaroons can be kept unfilled in an airtight box, layered between sheets ofbaking paper, for up to 2 days.
In this last chapter, we focus on the key, classic ingredients: sugar, cream,vanilla and chocolate. Where would the baker be without them?
These ingredients will transform a bake, bringing flavour and texture, richnessand aroma to your recipe. Think of how dull a choux bun would be, without acream filling and chocolate topping, and how it is transformed into an elegantcroquembouche with the small additions of caramel and vanilla cream. Sugarmay be a basic baking ingredient now, but for many centuries honey was theonly sweet flavouring (other than fruit) available to British bakers. Yet from thelate-fifteenth century sugar transformed European baking into an elaborate andelegant art form, as bakers realized its full potential in crystal and melted form.
Cream, too, has the power to enhance both sweet and savoury cooking,providing it with a touch of luxury. The simple act of whipping cream cancompletely change its form and opens up an array of ways to use it: fromsandwiching a sponge cake and filling a roulade, to combining it with chocolateto make a luxurious ganache.
Chocolate is, of course, a vital and increasingly popular ingredient in baking butit does need to be handled with care. By finding out where chocolate comesfrom, how it is produced and what makes up the properties of the differenttypes of chocolate available, you’ll understand how best to use it in your bakesto make them as delicious as the bar itself.
SUGAR
What exactly is sugar?
Sugar occurs in all living things and is essential to the nutrition of plants andanimals, including humans. It is a form of carbohydrate so provides us withenergy.
Of the many different forms of sugar, the most basic are glucose and fructose.Both are simple sugars, or monosaccharides, which means they cannot bebroken down any further by hydrolysis (reacting with water).
Disaccharide sugars contain two monosaccharide sugars. Our familiargranulated white sugar is a disaccharide sugar made from one glucose and onefructose molecule.
The different mono- and disaccharide sugars vary in sweetness because ofhow our taste buds respond to the particular shape of the molecules. If you wereto taste the various forms of sugar one after another, you would understandhow remarkably different they are.
How is sugar made?
The familiar types of sugar we use in our cooking are extracted from the sap oftwo plants: a giant grass (sugar cane) and a root (sugar beet). In order to extractthe sap, the cane or beet is shredded and then pressed, or spun in a centrifuge,to squeeze out the juice. This juice was once boiled in large vats, but these daysit is processed in a vacuum chambers, boiled and evaporated to concentrate itand produce a sugar syrup. Some sugar crystals are then added to the syrup to‘seed’ the mixture, which encourages more sugar crystals to form. As they form,some or all of the residual liquid (known as molasses) is drawn off. Theremaining mass of sugar crystals is then blow dried with hot air. The sugar can
then either be left as it is, as a brown unrefined sugar, or further refined (seenext question).
What is the difference between unrefined and refined sugar?
Raw, or unrefined, sugar is a naturally light brown sugar that has undergone theminimum of processing. The colour and the type of unrefined sugar depends onthe amount of molasses that has been removed. Types of raw sugars includeDemerara, molasses and Muscovado (see next question for more information onthese). Be aware that sugars that are labelled as ‘brown sugar’ are actuallyrefined white sugars that have had varying degrees of molasses added back intothem to colour them and make them look either light or dark brown. Unrefinedbrown sugars will add additional caramel flavour to a bake and, depending onhow rich in molasses they are, they will also make the bake more fudgy intexture. Unrefined sugars also dissolve more slowly than refined and containmore moisture, which is good for fruit cakes and gingerbread; less so forpastries.
Refined, brilliant-white sugar is created by bubbling sulphur dioxide gasthrough the initial mixture of cane or beet juice, which bleaches it and removesall the colour.
What do the names of the different types of sugar mean?
Cane sugars were often named after the place where they were first produced:Demerara sugar was originally made in Demerara, a region in what is nowGuyana, South America, which was one of the earliest Dutch colonies in theCaribbean; Barbados sugar, also a brown sugar, was made by the Dutch from1700, taking over from cotton and tobacco as the main industry of the island.
Demerara sugar crystals are hard, large and light brown in colour with a richaroma. Demerara gives an excellent, crunchy topping to cakes and muffins,
sprinkled on top of the mixture before it is baked because the size of the crystalsprevents the sugar from melting.
Barbados sugar, also sometimes called molasses sugar, is the coarsest anddarkest of the unrefined sugars, with a sticky quality that makes it excellent formaking gingerbread and dark fruit cakes.
Muscovado is a similarly dark unrefined sugar, which some argue derives itsname from the Spanish for, ‘more finished’, suggesting that the sugar is slightlymore refined than Barbados sugar. Muscovado is available in dark and lightforms according to the amount of molasses each contains (dark is about 13 percent molasses and light about 6 per cent). The dark form has the richest tasteand strongest aroma and, like molasses sugar, is used in darker fruit cakes andpuddings.
Does sugar go off?
If kept in an airtight container, sugar will keep indefinitely. Unrefined sugars, ifnot kept airtight, will solidify into one hard block or large lumps. This is becausethe moisture they contain evaporates. To rescue a brick of sugar, put it in a bowl,cover with a damp tea towel and leave it overnight.
What is caramel?
Caramel is melted and browned sugar. But while sugar can be heated in a drypan to melt it, it is more often dissolved in water first to make caramel.Dissolving the sugar in water means that the melted sugar can be subjected togreater temperatures.
Sugar syrup passes through different stages during heating on its way tobecoming caramel and each occurs within a specific temperature range. Thesestages of sugar syrup have different uses, as shown in the table below.
When the sugar dissolves and the syrup boils the water evaporates. The morethe water is evaporated, the greater the concentration of sugar and the thickerthe syrup becomes, until it reaches saturation point. The more concentrated thesyrup, the less moisture it will have, which means it will set harder.
A sugar thermometer will help you to make sure you take the pan off the heat atthe correct moment. Once the caramel reaches your desired temperature, dipthe base of the pan into cold water to stop the caramel overheating.
Why does caramel sometimes go grainy?
If you make a concentrated sugar syrup you might notice that, as the waterbegins to evaporate from the edge, small crystals of sugar start to appear. Thisis because when a crystalline substance like sugar is dissolved and thenconcentrated it can quite easily turn back into crystalline form. Transparentsheets of sugar crystals can also appear on the surface, rather like ice that formson a frozen pond.
The graininess is less likely to occur if you are using a gas hob because the gasflame usually heats the outside of the pan as the flame licks up the sides, meltingany crystals of sugar that may start to form at the edge.
There are two ways to lessen the risk of your caramel becoming ‘grainy’. First,make sure that you dissolve the sugar completely in the water before beginningthe process of heating it to a caramel. Second, carefully wash down the interiorof the pan with clean boiling water as the caramel cooks, using a clean pastrybrush. Any crystals that do form will be dissolved and absorbed back into theboiling syrup.
Most importantly, do not stir the caramel as it cooks because this willencourage the syrup that collects on the sides of the pan to crystallize. Somechefs add golden syrup to the sugar syrup in order to help guard againstcrystallization, and also to produce a more flexible caramel (see also here forinfo on golden syrup used spun sugar).
What is meant by the terms ‘dry’ and ‘wet’ caramel?
To make a hard or ‘dry’ caramel, sugar syrup is heated to a high temperaturethen allowed to cool and harden to a brittle, glassy substance used for creating
spun sugar and pralines, among other things.
If you want to make a ‘wet’ caramel that can be used for making crèmecaramel or caramel sauce, for example, you need to add some water to the hotcaramel. Take great care when doing this! First, remove the pan from the heatand dip its base in a tub of cold water – this will stop the caramel cookingimmediately and prevent it burning. Then, carefully add a small quantity ofboiling water to the pan – say 100ml for every 200g of sugar used in the recipe.Cover your hand with an oven glove and stand back as the mixture will splutterand the pan will hiss with steam. Then return the pan to a gentle heat to allowthe caramel to dissolve, and simmer to your desired consistency, be it a lightsyrup for soaking sliced oranges in or a thick syrup for serving alongside abaked cream.
What’s the best way to make a caramel for crème caramel?
A thick ‘wet’ caramel syrup that will remain liquid when the custard is added is agood choice. As long as the syrup is dense enough, the custard will float on topof it and bake perfectly. The caramel sauce will have a pourable texture when thecold custard is turned out of its mould.
To make a thick caramel syrup, combine 160g granulated sugar and 6tablespoons of water in a clean stainless-steel pan (not a non-stick pan, whichwould cause the syrup to crystallize). Dissolve the sugar slowly over a low heat,stirring with a wooden spoon. When there are no sugar granules left, stopstirring and bring to the boil. Boil rapidly for a few minutes until the sugar turnsa dark caramel colour. Remove from the heat and dip the pan’s base in a bowl ofcold water to prevent the caramel overcooking and burning.
Is there a trick to making caramel for spun sugar?
Mixing in a little golden syrup with the sugar and water makes a flexible caramel

that seems to be more stable for longer. Simply add 1 tablespoon of goldensyrup for each 100g caster sugar in your recipe then make the caramel as usual.
What is praline?
Popular for centuries in France, praline was originally a sweet made by coatingwhole almonds in grainy caramel. Today it can describe any mixture of nuts(though it is still most usually almonds) cooked in clear caramel, then cooled.Once set hard, the praline is either ground and added to sweet dishes or brokeninto pieces for use as a decoration.
Can I substitute honey for sugar in baking?
Yes, you can, but there are three things you need to bear in mind. First, honeycomes in a variety of flavours, ranging from very bland and merely subtle, tovery strong and overwhelming, so when choosing a honey you need to be sureyou choose a mild kind and be prepared for your bake to taste of it! Stronger-flavoured honey can work well with chocolate and cinnamon, and in apple andother fruited cakes, but you should use a mild honey to blend with vanilla.
Honey will also add more sweetness to a recipe because it’s sweeter thansugar. A good rule of thumb is to use three-quarters of honey for the amount ofsugar given – so 75g honey for each 100g sugar.
It contains around 15–20 per cent water, so if your recipe contains additionalliquid, such as milk, then you need to reduce the quantity of liquid by 20 percent. If there is no additional liquid in the recipe, such as in a sponge, honey willmake a less fine sponge because of its extra water content, but the recipe willstill work.
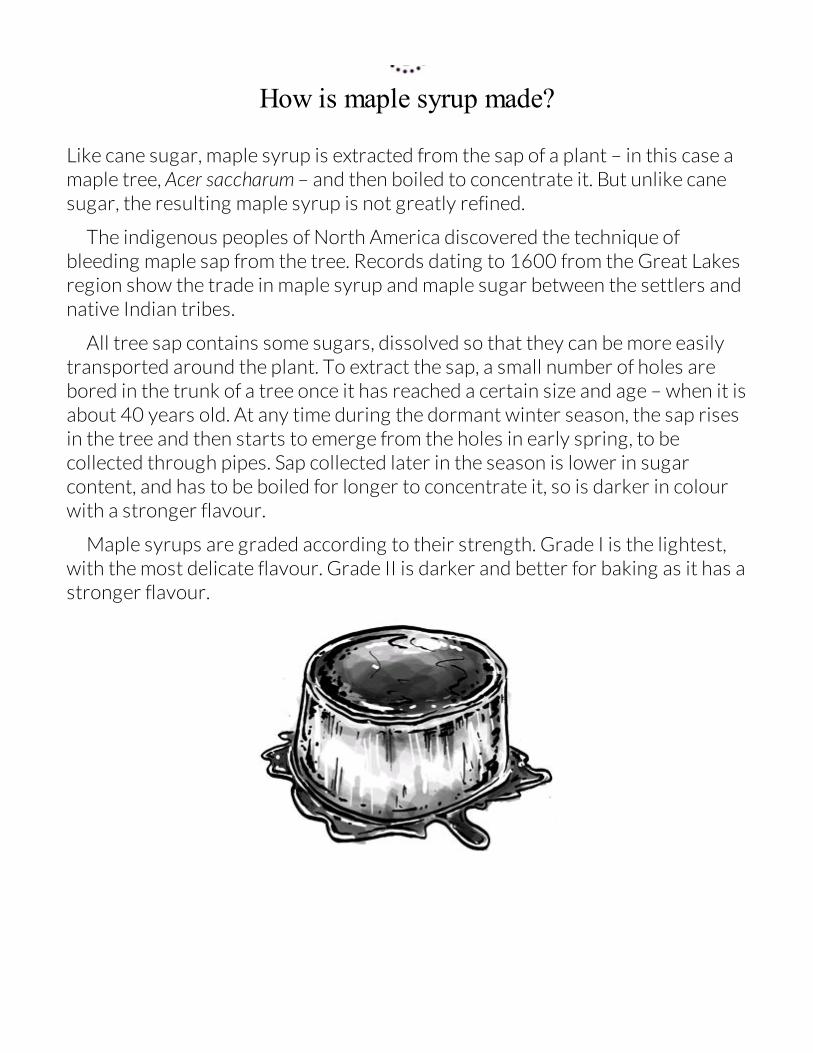
How is maple syrup made?
Like cane sugar, maple syrup is extracted from the sap of a plant – in this case amaple tree, Acer saccharum – and then boiled to concentrate it. But unlike canesugar, the resulting maple syrup is not greatly refined.
The indigenous peoples of North America discovered the technique ofbleeding maple sap from the tree. Records dating to 1600 from the Great Lakesregion show the trade in maple syrup and maple sugar between the settlers andnative Indian tribes.
All tree sap contains some sugars, dissolved so that they can be more easilytransported around the plant. To extract the sap, a small number of holes arebored in the trunk of a tree once it has reached a certain size and age – when it isabout 40 years old. At any time during the dormant winter season, the sap risesin the tree and then starts to emerge from the holes in early spring, to becollected through pipes. Sap collected later in the season is lower in sugarcontent, and has to be boiled for longer to concentrate it, so is darker in colourwith a stronger flavour.
Maple syrups are graded according to their strength. Grade I is the lightest,with the most delicate flavour. Grade II is darker and better for baking as it has astronger flavour.
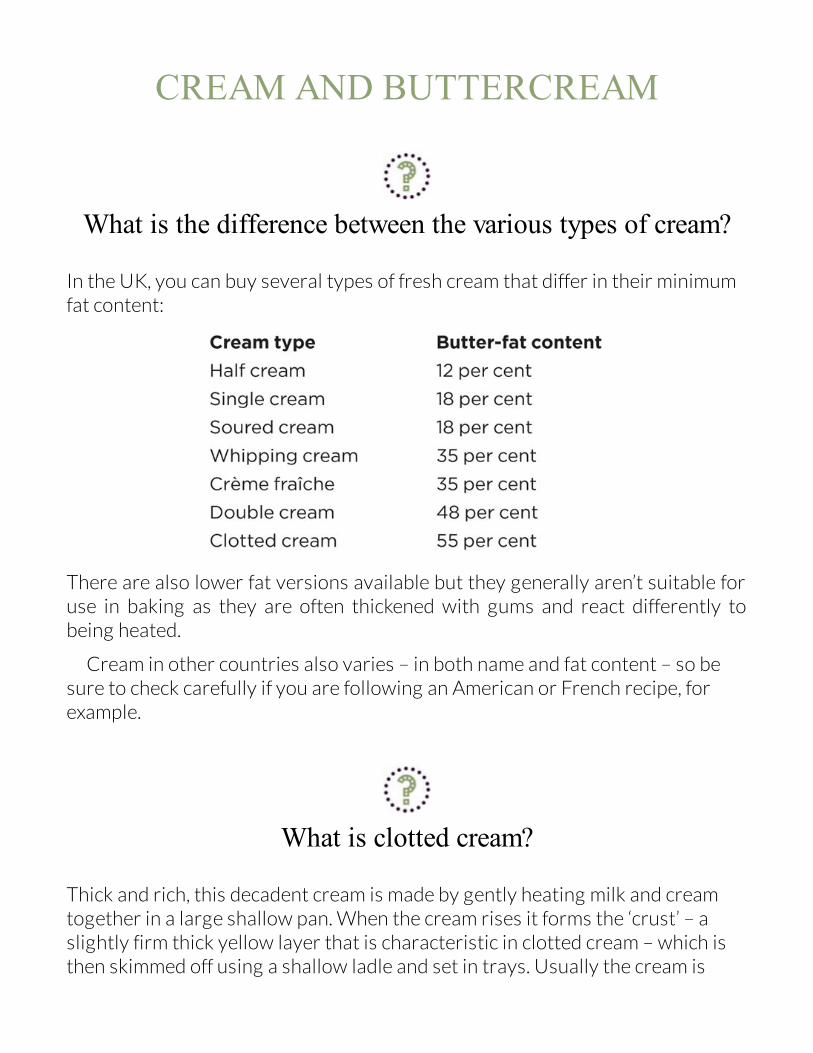
CREAM AND BUTTERCREAM
What is the difference between the various types of cream?
In the UK, you can buy several types of fresh cream that differ in their minimumfat content:
There are also lower fat versions available but they generally aren’t suitable foruse in baking as they are often thickened with gums and react differently tobeing heated.
Cream in other countries also varies – in both name and fat content – so besure to check carefully if you are following an American or French recipe, forexample.
What is clotted cream?
Thick and rich, this decadent cream is made by gently heating milk and creamtogether in a large shallow pan. When the cream rises it forms the ‘crust’ – aslightly firm thick yellow layer that is characteristic in clotted cream – which isthen skimmed off using a shallow ladle and set in trays. Usually the cream is
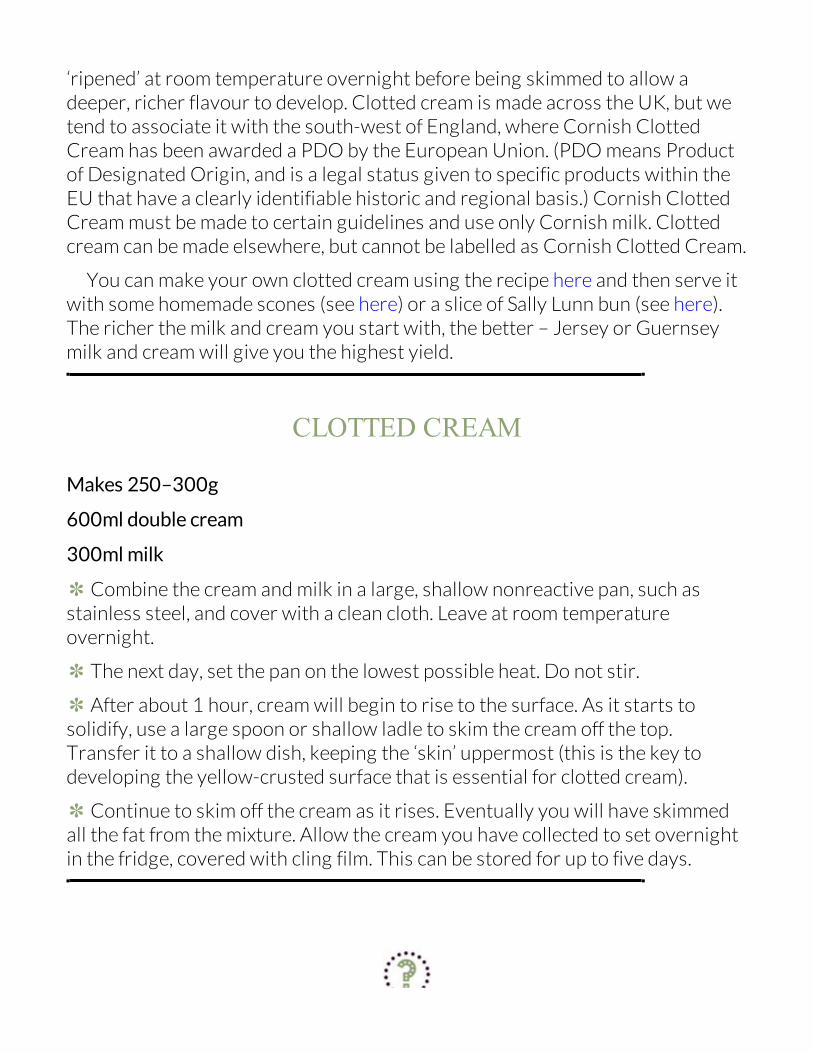
‘ripened’ at room temperature overnight before being skimmed to allow adeeper, richer flavour to develop. Clotted cream is made across the UK, but wetend to associate it with the south-west of England, where Cornish ClottedCream has been awarded a PDO by the European Union. (PDO means Productof Designated Origin, and is a legal status given to specific products within theEU that have a clearly identifiable historic and regional basis.) Cornish ClottedCream must be made to certain guidelines and use only Cornish milk. Clottedcream can be made elsewhere, but cannot be labelled as Cornish Clotted Cream.
You can make your own clotted cream using the recipe here and then serve itwith some homemade scones (see here) or a slice of Sally Lunn bun (see here).The richer the milk and cream you start with, the better – Jersey or Guernseymilk and cream will give you the highest yield.
CLOTTED CREAM
Makes 250–300g
600ml double cream
300ml milk
✽ Combine the cream and milk in a large, shallow nonreactive pan, such asstainless steel, and cover with a clean cloth. Leave at room temperatureovernight.
✽ The next day, set the pan on the lowest possible heat. Do not stir.
✽ After about 1 hour, cream will begin to rise to the surface. As it starts tosolidify, use a large spoon or shallow ladle to skim the cream off the top.Transfer it to a shallow dish, keeping the ‘skin’ uppermost (this is the key todeveloping the yellow-crusted surface that is essential for clotted cream).
✽ Continue to skim off the cream as it rises. Eventually you will have skimmedall the fat from the mixture. Allow the cream you have collected to set overnightin the fridge, covered with cling film. This can be stored for up to five days.
What is crème fraîche?
Crème fraîche is made by adding a bacterial culture to cream and leaving it tosour and thicken. Unlike a cream cheese, it usually isn’t strained, so its watercontent is higher than cream cheese, and the mixture is lighter and more fluid.
You can make your own crème fraîche at home, using a powdered yoghurtculture, which is available from health food shops or smallholding suppliers. Oryou can use live plain yoghurt, available in most supermarkets, which has thesame bacteria that are present in the powdered culture.
To make crème fraîche with live yoghurt, first heat some double cream to32°C/90°F over a medium heat, then pour into a glass or stainless steel bowl.Stir in the live yoghurt in the ratio of one part yoghurt for three parts cream.Leave the mixture at room temperature, covered with a cloth, overnight, andthen refrigerate for up to five days.
Can I use crème fraîche in place of cream?
Crème fraîche has different properties to cream, so you won’t be able to use it toreplace cream in most baking recipes. The one exception is that full-fat crèmefraîche can be used in place of whipped cream. However, crème fraîche shouldnot be whipped because it can’t retain air as cream does when whipped, and sowill become more liquefied, not thicker. Any mixture you make with crèmefraîche will, therefore, be denser.
You can, of course, substitute crème fraîche for soured cream in fillings andtoppings or in cake mixtures, where its mild acidity will work just as well.
What is butter icing?
A butter icing is a very simple, quick icing made from beaten butter and icingsugar. It can contain added milk to give a looser, creamier texture, plusflavourings. Used to sandwich and top sponges and fairy cakes, butter icing ismuch thicker and not as creamy as buttercream, but is a handy recipe to have onstandby if you need to finish a cake in a hurry.
To ice 24 fairy cakes or 12 cupcakes, or to sandwich and top one 20cmsponge cake, beat 125g unsalted butter with 400g sifted icing sugar and 3–4tablespoons of milk.
Why do recipes for buttercream vary – isn’t it a simpleformula?
Not to be confused with butter icing, a classic British buttercream is made fromunsalted butter, icing sugar and egg yolks. The sugar is melted with water andthen boiled until it reaches 110°C/225°F (you’ll need a sugar thermometer toget this right). The hot sugar syrup is poured over beaten egg yolks, in a steadystream, while the mixture is whisked. This thick, mousse-like mix, now pale andcold, is whisked with the butter and any flavourings to create the buttercream.
There are many versions of buttercream, including French and Italianmeringue buttercreams, which are slightly trickier to make than Britishbuttercream. These recipes use a cooked base – a thickened milk custard, likecrème patissière, in the case of French buttercream. For an Italian meringuebuttercream, an Italian meringue beaten with unsalted butter.
FRENCH VANILLA BUTTERCREAM
Makes approximately 550g
250ml full-fat milk
125g caster sugar
1 vanilla pod, split
25g cornflour
250g unsalted butter, at room temperature
✽ Place 4 tablespoons of the milk in a medium bowl and set to one side. Pourthe remaining milk into a medium saucepan set over a medium heat and add thecaster sugar and vanilla pod. Heat the mixture until it begins to steam, thenleave to infuse off the heat for 10 minutes.
✽ Remove the vanilla pod, scraping the seeds into the pan (if you wash and drythe pod you can place it in a jar of caster sugar to flavour the sugar – see here).Put the pan of flavoured milk back on the heat and bring to a gentle simmer.
✽ Meanwhile, mix the cornflour with the reserved cold milk. When theflavoured milk simmers, pour it onto the cornflour mixture and stir to combine.Return the mixture to the pan and simmer over low heat for 2–3 minutes so thatthe cornflour cooks through, stirring constantly.
✽ Remove the pan from the heat and pour the mixture into a clean bowl. Place aclean cloth over the bowl to prevent a skin from forming, then leave to coolcompletely.
✽ Beat the cold vanilla mixture to lighten it, then sieve to remove any lumps. In aseparate bowl, beat the soft butter to lighten it. Add the vanilla mixture in smallquantities, beating well with each addition. The buttercream can now be used.
ITALIAN MERINGUE BUTTERCREAM
This recipe does make a large quantity of buttercream, but it is hard to dividesome of the ingredients into smaller quantities. If you want to make less, makethe full quantity of meringue, but use half the meringue for another recipe andthen reduce the butter quantity by half.
Makes approximately 675g
3 medium egg whites, at room temperature
225g caster sugar
4 tablespoons water
20g liquid glucose
375g unsalted butter, at room temperature
seeds from 2 vanilla pods or 50g dark chocolate, melted and cooled
✽ First, put the egg whites in the bowl of a large, free-standing electric mixer.
✽ Combine the caster sugar, water and glucose in a small pan and allow thewater to soften the sugar for a few minutes. Then place the pan on a mediumheat and allow the sugar to dissolve without stirring. Occasionally moisten theinside of the pan using a clean, wetted pastry brush to prevent the sugar fromre-crystallizing. Bring the syrup to a simmer and cook until it reaches110°C/230°F on a sugar thermometer.
✽ Now turn on the mixer and beat the egg whites to soft peaks. When the syrupreaches 120°C/248°F, remove the pan from the heat and pour onto the eggwhites in a constant stream, beating slowly but continuously. Beat the meringuefor a few more minutes until it is cool.
✽ To finish the buttercream, beat the soft butter in a large bowl to lighten it.Beat in the vanilla seeds or chocolate, then gradually beat in the meringuemixture. The buttercream is now ready to use.
What is the difference between glacé icing, royal icing andfondant icing?
All three icings are essentially made from icing sugar and water, but byemploying varying methods and additional ingredients they can be used tocreate very different effects.
Glacé icing is the most basic of the three and is made from sifted icing sugarmixed with a liquid – usually water, orange or lemon juice. For a smooth icingthat can be piped, mix 100g icing sugar with 2 ½ teaspoons of water or juice.Add more liquid, a few drops at a time, if you want a runny icing that can bedrizzled. It will firm up a little as it dries but will not harden completely. You canuse glacé icing to ice fairy cakes or as a quick decoration for biscuits and fruitcakes.
Royal icing is a more robust option, made from icing sugar beaten with egg
whites and lemon juice, which sets to a hard finish once dried. If you want toavoid using raw egg whites, you can use royal icing sugar instead. This containsdried egg whites. Royal icing can be used to cover cakes, for piping work and fordecorating biscuits. You can control how hard your royal icing will set by addinga little glycerine: ½ teaspoon of glycerine per 500g icing sugar will create anicing that can be used to cover a cake but it won’t be rock hard.
Fondant icing is made from icing sugar, water and liquid glucose, mixed to asoft dough that can be rolled out to cover a cake or make decorations. You canbuy it ready-made, or you buy fondant icing sugar, which is made from icingsugar and dried glucose syrup. Mixed with water or juice it makes a glossy, satinicing that is more substantial than glacé icing and can be used to coat cakes orbe made into modelling paste for sugar craft. Blocks of fondant modelling icing,also called ready-roll or sugar-paste icing, are now widely available to buy in arange of colours.
VANILLA
Why is vanilla such a luxury ingredient?
Seed-filled vanilla pods come from an orchid, Vanilla planifolia, that originates inthe tropics of Central America and has been used for centuries to provideseductive sweet and spicy flavouring. The Aztecs had been flavouring theirchocolate drinks with vanilla long before the first Europeans arrived in the1500s and took up the idea. Interestingly, although vanilla itself is bitter, it isalways associated with sweet foods.
In its natural habitat, the orchid flowers are pollinated by a particular speciesof Mexican bee. The first attempts to cultivate the plants outside of Mexicofailed, until it was discovered that the flowers could be pollinated by hand usinga pointed stick or blade of grass. That is pretty much how it is still done today.
Once the flowers are pollinated and the pods have appeared, these areharvested and fermented, which takes a number of months. This whole processis labour-intensive and time-consuming, which explains why vanilla pods are soexpensive.
What is the difference between vanilla essence and extract?
The substance that gives vanilla its beautiful taste is called vanillin. This can beextracted from vanilla pods or it can be made artificially.
If it has been extracted from a natural source, it will be labelled ‘natural’vanilla flavouring or extract.
Synthetic vanillin, as with other artificially created flavourings, is made intoessence and by law has to be labelled as such. Synthetic vanilla flavouring lacksthe depth of vanilla extract or vanilla pods, but it is cheaper to buy.
Vanilla paste, which is the scraped-out inside of a vanilla pod, is another goodoption.
Can I reuse vanilla pods?
Yes, but not in the same way. Once you have used a vanilla pod to flavour, say, acustard, rinse it well to remove all traces of dairy products or eggs. Then dry itthoroughly on clean kitchen paper in a low oven for 1–2 hours. Push the podinto a jar containing caster sugar, so that the sugar can absorb the subtle vanillaflavours.
You can then use the vanilla sugar to replace plain caster sugar in all kinds ofbaking and other sweet cookery. One particularly delicious use for vanilla sugaris in pastry cream (see here).
What is the difference between pastry cream and crèmeanglaise?
Both of these are custards made with eggs and milk, flavoured in the same ways– most commonly with vanilla or chocolate – but their ingredients and uses arequite different. Pastry cream, also called crème patissière, is a sweetenedmixture of milk and eggs that is stiffened with a little flour. Crème anglaise (theposh term for a proper egg custard) is a richer mixture of egg yolks, usuallymade with single cream and milk; it doesn’t contain any flour so has a pourableconsistency. The thicker pastry cream is used as a filling, for all sorts of cakes,tarts and pastries such as choux buns or éclairs, whereas crème anglaise isserved as a sauce – normally, but not always, chilled – to accompany desserts.
PASTRY CREAM
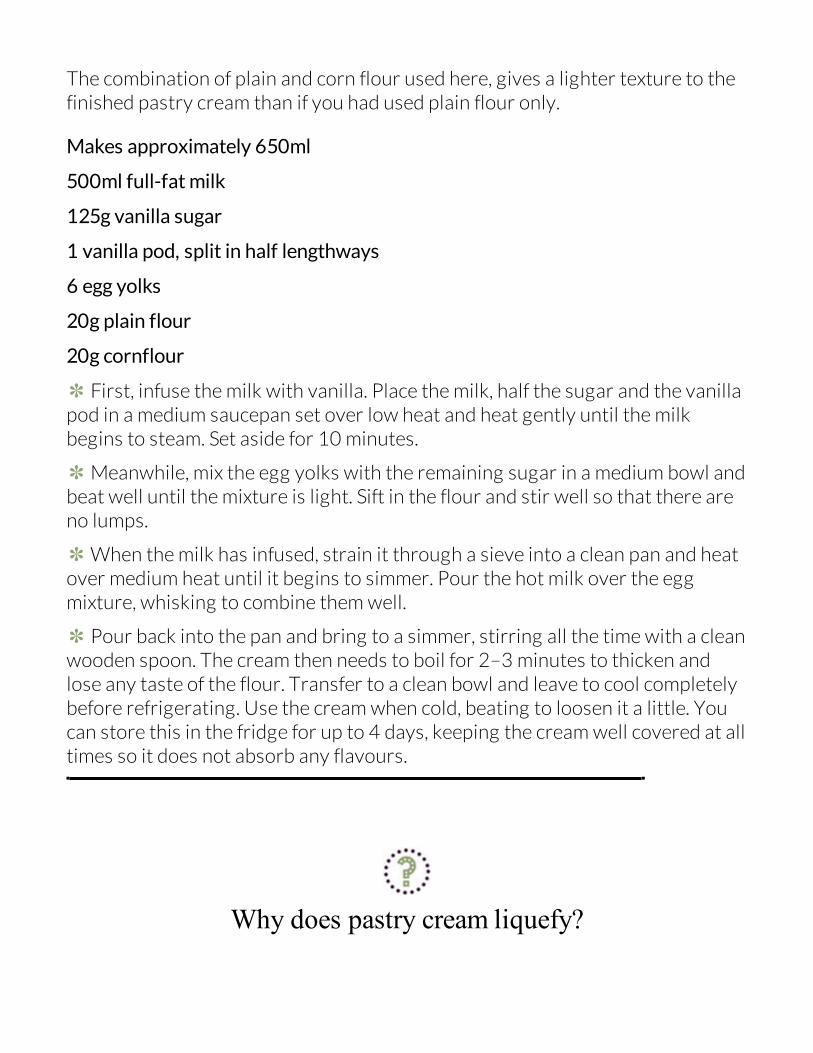
The combination of plain and corn flour used here, gives a lighter texture to thefinished pastry cream than if you had used plain flour only.
Makes approximately 650ml
500ml full-fat milk
125g vanilla sugar
1 vanilla pod, split in half lengthways
6 egg yolks
20g plain flour
20g cornflour
✽ First, infuse the milk with vanilla. Place the milk, half the sugar and the vanillapod in a medium saucepan set over low heat and heat gently until the milkbegins to steam. Set aside for 10 minutes.
✽ Meanwhile, mix the egg yolks with the remaining sugar in a medium bowl andbeat well until the mixture is light. Sift in the flour and stir well so that there areno lumps.
✽ When the milk has infused, strain it through a sieve into a clean pan and heatover medium heat until it begins to simmer. Pour the hot milk over the eggmixture, whisking to combine them well.
✽ Pour back into the pan and bring to a simmer, stirring all the time with a cleanwooden spoon. The cream then needs to boil for 2–3 minutes to thicken andlose any taste of the flour. Transfer to a clean bowl and leave to cool completelybefore refrigerating. Use the cream when cold, beating to loosen it a little. Youcan store this in the fridge for up to 4 days, keeping the cream well covered at alltimes so it does not absorb any flavours.
Why does pastry cream liquefy?
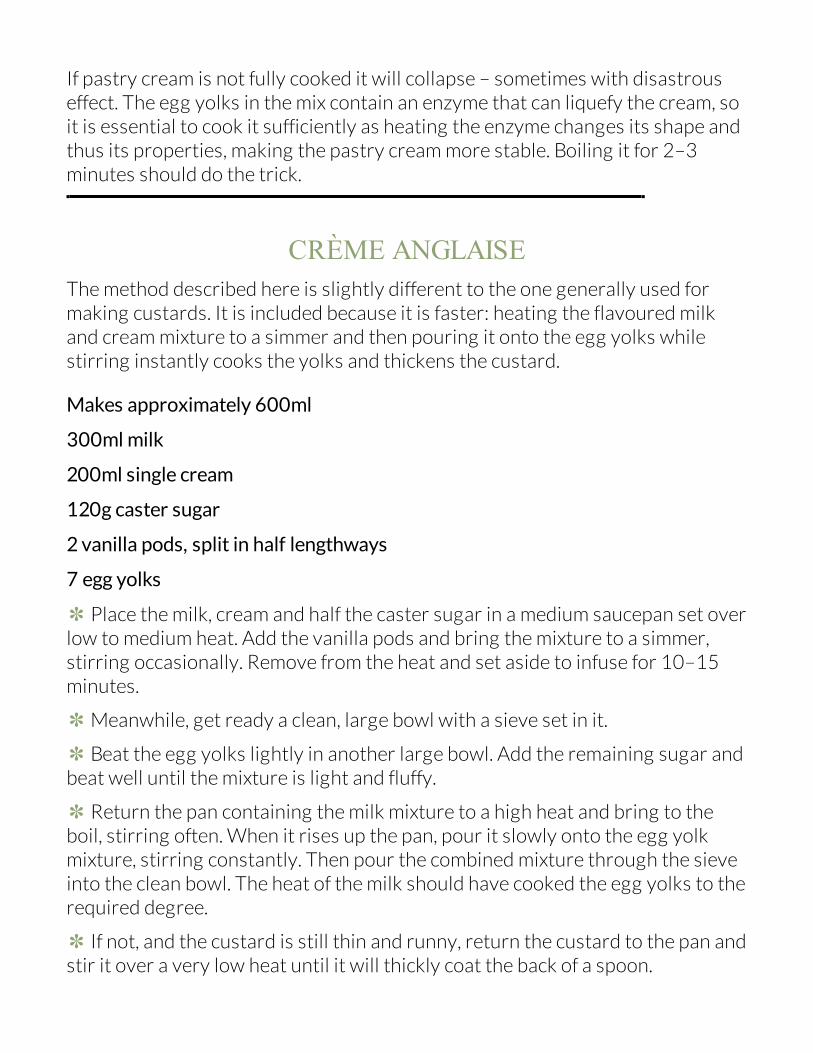
If pastry cream is not fully cooked it will collapse – sometimes with disastrouseffect. The egg yolks in the mix contain an enzyme that can liquefy the cream, soit is essential to cook it sufficiently as heating the enzyme changes its shape andthus its properties, making the pastry cream more stable. Boiling it for 2–3minutes should do the trick.
CRÈME ANGLAISEThe method described here is slightly different to the one generally used formaking custards. It is included because it is faster: heating the flavoured milkand cream mixture to a simmer and then pouring it onto the egg yolks whilestirring instantly cooks the yolks and thickens the custard.
Makes approximately 600ml
300ml milk
200ml single cream
120g caster sugar
2 vanilla pods, split in half lengthways
7 egg yolks
✽ Place the milk, cream and half the caster sugar in a medium saucepan set overlow to medium heat. Add the vanilla pods and bring the mixture to a simmer,stirring occasionally. Remove from the heat and set aside to infuse for 10–15minutes.
✽ Meanwhile, get ready a clean, large bowl with a sieve set in it.
✽ Beat the egg yolks lightly in another large bowl. Add the remaining sugar andbeat well until the mixture is light and fluffy.
✽ Return the pan containing the milk mixture to a high heat and bring to theboil, stirring often. When it rises up the pan, pour it slowly onto the egg yolkmixture, stirring constantly. Then pour the combined mixture through the sieveinto the clean bowl. The heat of the milk should have cooked the egg yolks to therequired degree.
✽ If not, and the custard is still thin and runny, return the custard to the pan andstir it over a very low heat until it will thickly coat the back of a spoon.
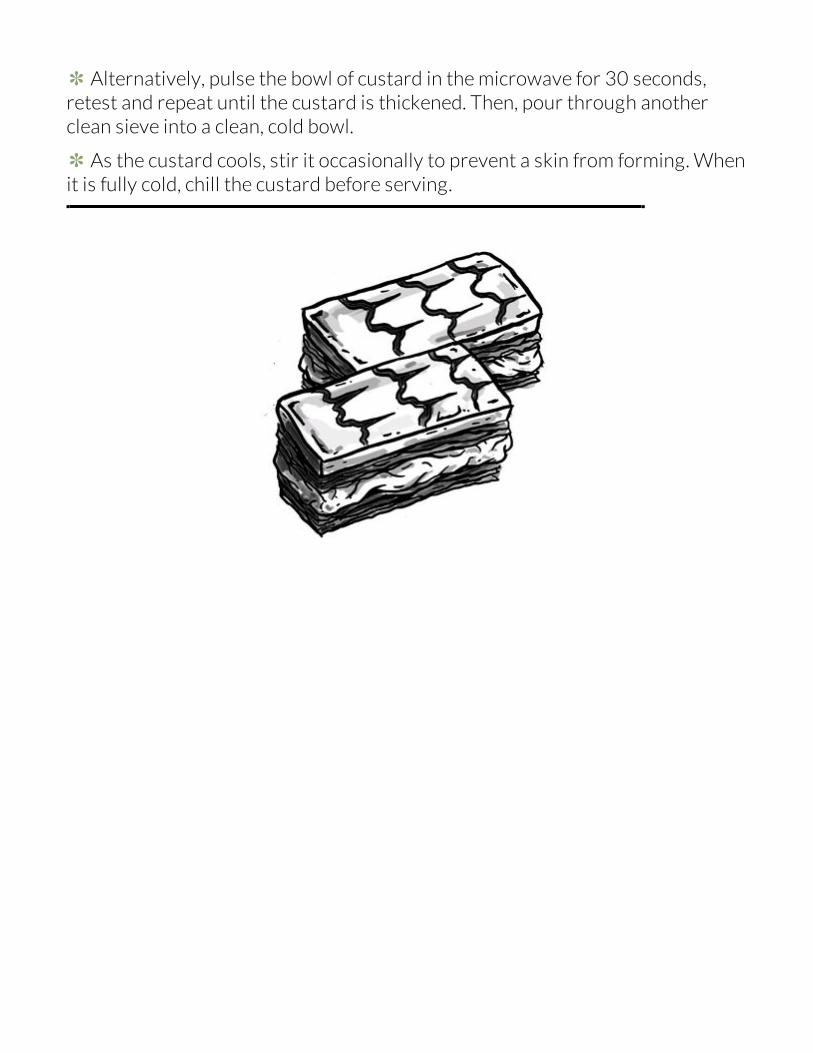
✽ Alternatively, pulse the bowl of custard in the microwave for 30 seconds,retest and repeat until the custard is thickened. Then, pour through anotherclean sieve into a clean, cold bowl.
✽ As the custard cools, stir it occasionally to prevent a skin from forming. Whenit is fully cold, chill the custard before serving.
CHOCOLATE
How does a bean become a bar?
Chocolate comes from the cacao, or cocoa bean, which is in fact the seed of asmall tree that is native to the Central American tropics. Somewhatappropriately, the name of the tree – Theobroma cacao – means ‘food of thegods’ in Greek.
After the white-pink flowers of the cacao tree are pollinated, some developinto fruits, in the form of large pods 15–30cm long containing several dozenseeds or beans. Once ripe, the pods are collected and split open. Before thebeans can be used to make chocolate (or cocoa powder), they have to befermented by exposure to the sun. After the beans are processed in this way,they are dried and then shipped for roasting, grinding and manufacture.
The cocoa bean is the source of three main products: cocoa butter, cocoapowder and chocolate. Chocolate and cocoa powder feature in many types ofbaking, while cocoa butter is primarily used in food manufacture and cosmetics.
How was chocolate discovered?
The seeds of the cacao tree, from which chocolate is made, have been used forthousands of years in Central America, where many successive cultures valuedtheir stimulant properties. Seeds, or beans, have been found in ancient sites inMexico, where the Mayan and later Aztec civilisations revered the tree andbelieved it had magical and divine properties.
The Mayans and Aztecs did not eat chocolate, though; they drank it. Wholebeans were dried and roasted, then ground to a paste and mixed with cold wateruntil a foam appeared. This made quite a bitter drink, which was flavoured withspices including chilli and vanilla and sweetened with honey gathered from
tropical bees.
When did chocolate come to Europe?
The explorer Christopher Columbus was the first European to see cacao beans,but it was the Conquistador Hernando Cortés who first tasted the rich, frothydrink made from the beans.
Moctezuma II, the Aztec emperor, welcomed the Spanish in 1519, littleknowing what was to come: his new friends ravaged the Aztec empire withmeasles and stole their gold, before returning to Europe with the cacao beans.News of Aztec gold, as well as chocolate, soon spread throughout Europe’scapital cities but the new drink did not take off quickly and it was only when itbegan to be sweetened with sugar that it became popular throughout Spain.From there the taste for sweetened chocolate spread to France and then toBritain – the first chocolate house opened in London in 1657 followed by otherfashionable houses where the wealthy met and drank a variety of chocolatebeverages, some of them fairly bitter.
The chocolate drank in those days, however, was very different to the drinkwe serve today. Until the nineteenth century, the whole cacao bean was used tomake the drink, which means that it was probably rather greasy. When theDutch confectioner Coenraad Johannes van Houton developed a press capableof separating cocoa butter out of the cocoa mass (see here for more on cocoamass), he produced a dry cocoa powder which was used to make a refined hotchocolate.
The first solid dark chocolate bar was moulded at the J. S. Fry & Sons factoryin Bristol in 1847. In 1876, Daniel Peter, a Swiss confectioner, developed thefirst milk chocolate by adding dried milk powder to the chocolate mass. Not longafter, a machine that was capable of grinding the mass much more finely wasdeveloped by the Swiss company Lindt, and so chocolate finally began to takeshape.
Do all types of chocolate taste the same?
Not at all! Like wine, chocolate has an amazing range and complexity of flavoursand many factors come into play in influencing the taste of a chocolate.
There are three main cultivated varieties of chocolate bean, but the majorityof the trees grown today are of the Forastero type. This produces a dark andrelatively plain chocolate that you would instantly recognise as it is used tomake popular high-street brands. The lesser-grown varieties, which are used inmore expensive chocolate, are Criollo and Trinitario (a hybrid of the Forasteroand Criollo) and these have a greater range of flavour notes, including fruity andacidic.
Chocolate’s flavour will vary according to the type of cacao bean used, butfurther differences in flavour are created by other factors: the bean’s region oforigin, its growing conditions and whether the bean has been blended withothers all affect the flavour.
Although at first the differences between types of choclate may seem toosubtle to appreciate, with time and practice you should be able to pick up on thedifferent ‘notes’, which make up a chocolate’s flavour.
What do the percentages of cocoa solids on chocolate meanfor bakers?
The list of ingredients that appears on the back of a chocolate bar wrapper willusually give the percentage of cocoa solids or cocoa mass (sometimes calledliquor). Really good-quality chocolate or chocolate made for cooking willadvertise the percentage of cocoa solids in large type on the front of thewrapper.
Encouraged by food programmes and other media, we have recently beendrawn towards simpler, purer foods, with fewer additives. Chocolate has notbeen immune to this, and there has been a move to increase the percentage ofcocoa mass in chocolate bars and reduce the sugar content. Yet, for baking, it
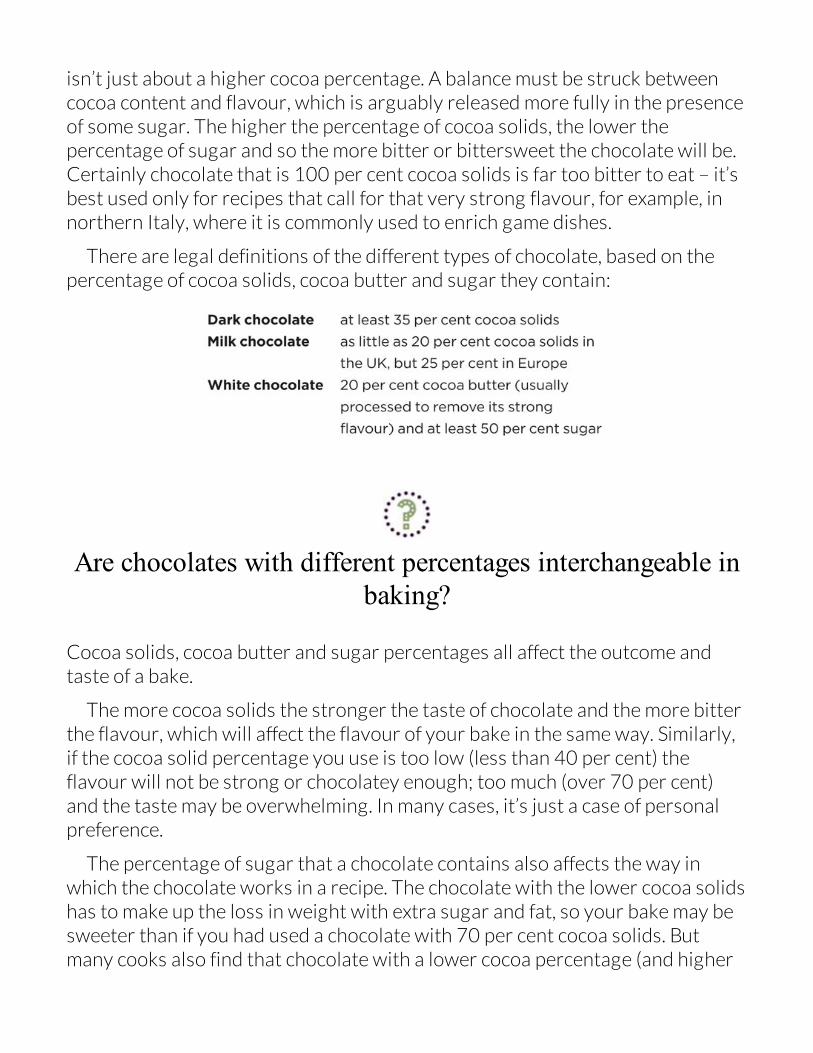
isn’t just about a higher cocoa percentage. A balance must be struck betweencocoa content and flavour, which is arguably released more fully in the presenceof some sugar. The higher the percentage of cocoa solids, the lower thepercentage of sugar and so the more bitter or bittersweet the chocolate will be.Certainly chocolate that is 100 per cent cocoa solids is far too bitter to eat – it’sbest used only for recipes that call for that very strong flavour, for example, innorthern Italy, where it is commonly used to enrich game dishes.
There are legal definitions of the different types of chocolate, based on thepercentage of cocoa solids, cocoa butter and sugar they contain:
Are chocolates with different percentages interchangeable inbaking?
Cocoa solids, cocoa butter and sugar percentages all affect the outcome andtaste of a bake.
The more cocoa solids the stronger the taste of chocolate and the more bitterthe flavour, which will affect the flavour of your bake in the same way. Similarly,if the cocoa solid percentage you use is too low (less than 40 per cent) theflavour will not be strong or chocolatey enough; too much (over 70 per cent)and the taste may be overwhelming. In many cases, it’s just a case of personalpreference.
The percentage of sugar that a chocolate contains also affects the way inwhich the chocolate works in a recipe. The chocolate with the lower cocoa solidshas to make up the loss in weight with extra sugar and fat, so your bake may besweeter than if you had used a chocolate with 70 per cent cocoa solids. Butmany cooks also find that chocolate with a lower cocoa percentage (and higher
sugar percentage) will mix more easily and create a looser mixture whenincorporated with other ingredients. If you want to substitute one type ofchocolate for another you may find that you also need to adapt the sugarquantity accordingly.
What is cocoa powder and how is it made?
The process of making cocoa powder involves removing most of the fat – thecocoa butter – from the bean after it has been roasted. The beans, or pieces ofthe bean called nibs, are crushed and pressed. The crushing process squeezesthe cocoa butter from the cocoa mass (also known as cocoa solids or liquor). Theremaining solidified cocoa mass is then cooled, pulverized and sifted to producethe fine powder with which we are familiar.
Is cocoa powder gluten free?
It should be, but often it’s not. This is because while the cacao bean itself doesnot contain any wheat or gluten, cocoa powder can be manufactured in factoriesthat also process flour or baked goods that contain gluten. Check the small printon the packaging carefully to be sure.
What is the difference between cocoa powder and drinkingchocolate and can I bake with both?
Cocoa powder is the pure, ground extract of the cacao bean with most of thecocoa butter removed. Drinking chocolate, while based on cocoa powder, alsocontains sugar as well as flavourings, emulsifiers and sometimes milk powders.
These enable it to be made into a drink more quickly than with plain cocoa, butthey mean it’s not suitable for baking.
Can I use cocoa powder as a replacement for flour inchocolate sponge recipes?
Cocoa powder is the most highly concentrated source of chocolate flavour,which is why it is so useful in the kitchen, especially for recipes where additionalfat is not required or wanted.
Cocoa powder can replace flour in certain cases but only in small quantities(2–3 tablespoons) as cocoa is much drier and harsher in taste than flour andlacks gluten (so the mixture will rely on the eggs to set it) – you may have toadjust the liquid and sugar too. It is usually easier to replace flour with acombination of cocoa and ground nuts in larger sponges.
FLOURLESS CHOCOLATE ROULADEThis recipe uses a simple whisked mixture of eggs and sugar combined withcocoa powder to make a very light sponge. The mixture is very delicate and bestsuited to making sheets of sponge or thin cakes, which can then be sandwichedwith cream and covered in chocolate. You’ll need 350ml whipped double creamto make a roulade with the sponge sheet, or 250ml to sandwich two roundsponges.
Makes one sponge sheet or 2 round sponge layers
9 medium eggs at room temperature
2 tablespoons hot water
250g caster sugar
75g cocoa powder
1 baking tray or Swiss roll tin 30 × 40cm, or 2 × 25cm round cake tinsor sandwich tins, greased with butter and lined with baking paper
✽ Preheat the oven to 200°C/400°F/gas 6.
✽ Place the eggs and hot water in the bowl of a large free-standing electricmixer and beat lightly together. Add the sugar and whisk for about 10 minutesuntil the mixture is thick and mousse-like and the whisk leaves a ribbon-like trailwhen lifted.
✽ While the eggs are being whisked, sift the cocoa powder two or three timesthrough a very fine sieve. Then tip the cocoa into the eggs and fold in usingeither a large balloon whisk or metal spoon, ensuring that the cocoa isthoroughly incorporated.
✽ Transfer the mixture to the tin(s), gently easing it into an even layer using theback of a spoon or spatula, and place in the oven. Bake for 10–12 minutes untilthe sponge is cooked and firm to the touch. Remove from the oven and set on awire rack to cool for 10 minutes before removing from the tin.
Note: If you don’t have a large electric mixer, whisk the egg, water and sugar ina heatproof bowl set over another bowl of hot water, or a pan of very gentlysimmering water (the base of the bowl should not touch the water).
Why does my roulade crack when I roll it?
Roulades have a tendency to crack so it’s nothing to be ashamed of! If you havea roulade that does crack when you roll it up, it may be that the sponge is toothick. A thinner layer will be less likely to crack, so try baking the sponge in aslightly larger tin.
Overcooking the mixture or using too hot an oven will cause the mixture tobecome too dry so it will tend to crack. One way you can try to prevent this is tocover the baked sponge with a clean, slightly damp, tea towel to keep thesponge moist as it cools and use an oven thermometer to make sure your ovenis at the correct temperature.
Incidentally, roulades are of course not the same thing as a Swiss roll type ofwhisked sponge, which doesn’t usually crack.
How is white chocolate made?
White chocolate is made from essentially the same ingredients as otherchocolates, but it does not contain any cocoa solids, which gives other types ofchocolate their colour, flavour and texture. As such, white chocolate is creamierand more fat-rich, as it contains a larger proportion of cocoa butter and milkthan plain and milk chocolates. The flavour of white chocolate comes fromadded vanilla – and the milk itself, of course, which lends a noticeable dairytaste.
Can white chocolate be used in baking?
White chocolate can be used in baking, but its flavour is easily masked by otheringredients, so it is best added as chunks, as you might include in muffins orcookies. It can also blend well with fruits such as raspberries and mango, andeven mint – flavours that balance out the sweet richness of the white chocolate.
White chocolate can be more difficult to handle because it melts at a lowertemperature than milk or dark and it can overcook and stiffen if it gets too warm.Best, then, to break the white chocolate into small pieces and melt it in a glassbowl stood over a pan of hot, but not simmering or boiling water. Alternatively,you can melt it gently on a low setting in the microwave – simply pulse thepower in 15-second blasts, stirring the chocolate in between to allow it to meltevenly.
What are chocolate-flavoured cake coverings made from?
Chocolate cake coverings are manufactured from vegetable and dairy fat
mixtures that are emulsified, flavoured and sweetened to resemble chocolate.They are used commercially in the production of cheap desserts andconfectionery, but they can lack the crisp texture and clear flavour of realchocolate and are often waxy or oily and sweet.
Why does chocolate sometimes develop a white powder onthe surface?
The white bloom that you might see on the surface of a chocolate bar is in factmade up from cocoa butter crystals, and it’s perfectly safe to eat. This tends tooccur when chocolate is kept at too warm a temperature – you will often see itappear on the surface of chocolate that has been melted and allowed to setagain. Best, then, to keep your chocolate at a steady cool room temperature, andto eat it as soon as you can after buying, although preferably not before youhave baked your chosen dessert!
Chocolate will deteriorate naturally as it ages. As chocolate bars are relativelydry, bacterial or fungal attack is rare, but the aroma, texture and flavour of thechocolate will suffer long before it actually goes off. If it’s kept cool and dry, itshould keep for many years, but it will eventually lose so much of its taste that itwill be unpleasant. To be sure you are using only chocolate at its very best,always check the ‘best before’ date.
What is couverture?
Chocolates sold for use in cooking, baking and pastry work are usually labelledwith both the total percentage of cocoa and the word ‘couverture’ or thepercentage of cocoa butter.
Couverture (from the French word meaning ‘coating’) is a term used bychocolatiers to denote a chocolate that is made with between 32 and 39 percent cocoa butter. The higher the cocoa butter content, the more liquid and
pliable the chocolate will be when melted, and the easier it will be to mould intothin sheets for covering a dessert or mixing with other ingredients.
What is the best way to melt chocolate?
Gently and slowly – you should never rush chocolate. It is best done in aheatproof bowl set over a pan of warm, body-temperature water (37°C/99°F),no hotter. Take care not to let any of the water, or steam from it, come intocontact with the chocolate or it may ‘seize’ (see here). Remove from the heatwhen the chocolate has softened sufficiently and stir it until it is smooth. Youcan also use a microwave set on a medium heat in short pulses of 15 seconds,stirring the chocolate in between each pulse. White chocolate, incidentally, willmelt at a lower temperature than dark chocolate so needs to be watched evenmore carefully.
If you are melting chocolate together with butter, cream or another fattyingredient, you can do this in a pan directly over a very gentle heat. Take carenot to allow the mixture to heat above 40°C/104°F because the chocolate caneasily be overheated and turn grainy.
How is chocolate tempered?
When couverture chocolate (see here) is manufactured, the cocoa butter isblended and cooled before being heated and cooled again at closely controlledtemperatures, which gives the chocolate a texture that snaps when you break it.If chocolate is not tempered when it is melted, the crystals of cocoa butter willform in random, unstable sizes and will not give the crisp, glossy finish thatconfectioners look for.
Careful melting, reheating and then cooling of the chocolate again at precisetemperatures stabilises the crystals and gives a shiny finish. You can do this athome, but you will need a sugar thermometer.
✽ Place chopped chocolate into a large mixing bowl and heat gently, either overa pan of warm water or in a microwave until it melts and reaches 50°C/122°F(45°C/113°F for white chocolate).
✽ Pour most of the chocolate into a clean bowl and stir it until it cools to 26°C,then return the chocolate to the original bowl and heat to 32°C/89.6°F(28°C/82.4°F for white chocolate), before cooling again.
It is also possible to very gently melt chocolate so that its temperature reaches31°C/87.8°F but does not exceed 32°C/89.6°F. Within this range, unstablecrystals of cocoa butter will melt and, when the mixture cools, will betransformed into stable crystals. As you can imagine, this is difficult to do athome without the strict temperature control of a tempering machine, althoughsmall versions are available for the home baker.
Why does chocolate sometimes go oily and stiff whenheated?
Chocolate will go hard and ‘seize’ for several reasons. The usual cause is thatwater has crept into it: the smallest amount, even steam, can cause the cocoasolids and cocoa butter to split out of emulsion with one another. The chocolateloses its liquid sheen and turns into a stiff, oily, grainy mass. At a hightemperature, the cocoa butter will remain liquid and oily, and the cocoa masswill eventually clump into a hard lump.
It is distressing to see this happen when you are carefully melting chocolatefor your dessert, but it’s sometimes possible to reverse this process by adding asmall quantity of butter, melting it and stirring it through the mixture. This willhopefully bring the chocolate back into its former smoothness, although it willno longer be suitable for fine work. You can, however, incorporate it intoanother recipe, particularly one that contains a large amount of fat or liquid.Brownies would be a good choice, or a chocolate sauce.
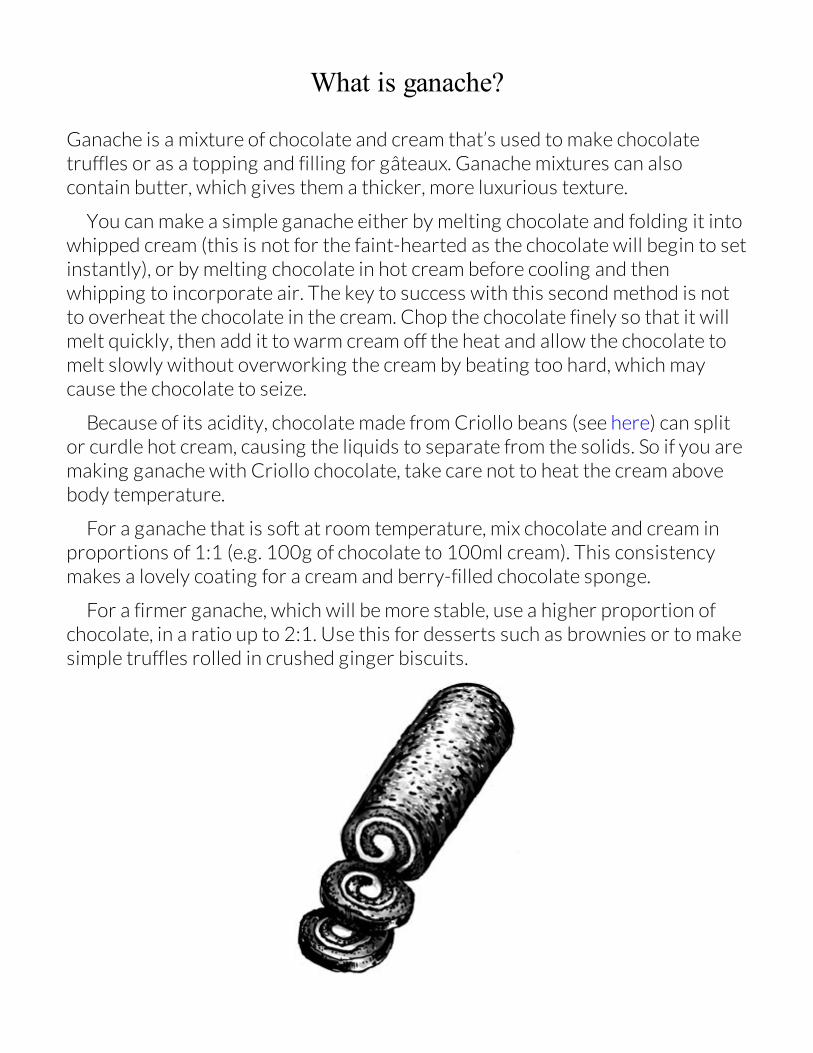
What is ganache?
Ganache is a mixture of chocolate and cream that’s used to make chocolatetruffles or as a topping and filling for gâteaux. Ganache mixtures can alsocontain butter, which gives them a thicker, more luxurious texture.
You can make a simple ganache either by melting chocolate and folding it intowhipped cream (this is not for the faint-hearted as the chocolate will begin to setinstantly), or by melting chocolate in hot cream before cooling and thenwhipping to incorporate air. The key to success with this second method is notto overheat the chocolate in the cream. Chop the chocolate finely so that it willmelt quickly, then add it to warm cream off the heat and allow the chocolate tomelt slowly without overworking the cream by beating too hard, which maycause the chocolate to seize.
Because of its acidity, chocolate made from Criollo beans (see here) can splitor curdle hot cream, causing the liquids to separate from the solids. So if you aremaking ganache with Criollo chocolate, take care not to heat the cream abovebody temperature.
For a ganache that is soft at room temperature, mix chocolate and cream inproportions of 1:1 (e.g. 100g of chocolate to 100ml cream). This consistencymakes a lovely coating for a cream and berry-filled chocolate sponge.
For a firmer ganache, which will be more stable, use a higher proportion ofchocolate, in a ratio up to 2:1. Use this for desserts such as brownies or to makesimple truffles rolled in crushed ginger biscuits.

INDEX
The page references in this index correspond to the printed edition from whichthis ebook was created. To find a specific word or phrase from the index, pleaseuse the search feature of your ebook reader.
A
angel food cake 39–40
B
bain marie 152–3, 159
‘baking beans’ 128
baking powder 11, 28–31
gluten and 31
home made 30
scones 100, 101
baklava 107
baps 74
Bara Brith 12–14
barley flour 61, 66
barm 71
bicarbonate of soda 29, 31
biscuits 51–9
or cookies 52–3
melted 53
origins of 51–2
rescuing soft biscuits 55
bread 60–103
adulterated flour 62–3
baking process 82–6
crustier loaf 85
early breads 62–3
no-knead bread 75–7
perfect crumb 86
stale bread 86–7
storage 86–7
sweet breads 96–100
white bread 72–4
wholemeal bread 66–7
see also dough
brioche 97
buns 96–100
butter 109, 111
butter icing 189
buttercream 189–93
C
cake-making methods
all-in-one 25–6
creaming 26
melting 27
rubbing-in 27
trouble shooting 42–50
whisking 26–7
cakes 10–50
made with strong flour 41
origins of 10–12
without fat 39–40
caramel 173, 177–82
cheesecakes
baked 153–6
bases 154–5
chilled 153
chocolate 173
baking with 206–7, 208–211
cake coverings (commercial) 212
couverture 213–16
drinking chocolate 208
fillings and flavourings 212–17
in Italian meringue buttercream 192
origin and history 201–3
percentage of cocoa solids 205–7
types and flavours 204
white chocolate 206, 211–12
chocolate roulades, flourless 209–211
chocolate soufflés 160
choux pastry 142–5
Christmas cakes 24
cocoa butter 201
cocoa macaroons 167–9
cocoa powder 207–210
gluten and 207
cookies 52–3
couverture 213–15
cream
clotted cream 186–7
as filling 173
in ganache 216–17
types of 185
cream of tartar 29, 31
crème anglaise 197, 199–200
crème brûlée 151–2
crème caramel 151–2, 181–2
crème fraîche 188–9
croissants 138–42
cupcakes 20–21
custard desserts 149–53, 197–200
D
Dawson, Thomas, The Good Housewife’s Jewel 107
desserts 144–85
creamy desserts 149–53
defined 149
early forms of 148
dough
croissants 140–41
kneading 75, 77–8, 140
‘knocking back’ 79–80

rising and proving 78–81
sweet doughs 96–100
see also bread
durum wheat 64
E
eggless baking 34
eggs
baking with 11, 32–4
in custard desserts 149–53, 197–200
egg whites in baking 157–71, 161–71
in a rich loaf 74
whisking egg whites 161–3
Eton Mess 147
European Union, Cornish clotted cream 186
F
fairy cakes 19–21
fats, pastry making and 109–111
Fettiplace, Elinor, Elizabethan Country House Cooking 164
fillings and flavourings 172–217
filo pastry 107, 114, 121
flatbreads 63
flour
adulterated 62–3
for bread 61, 64–8
gluten and 41, 65–6
gluten-free 67
keeping power of 68
and pastry making 114
protein in 64
see also self-raising flour
fondant icing 194
food processors, pastry making and 119
French vanilla buttercream 190–91
fruit cakes 21–4
boiled 22–3
sugar free 37–8
G
ganache 216–17
gingernuts 53–4
glacé icing 193
gluten
baking powder and 31
bread flours and 41, 65–6
cocoa powder and 207
pastries 114, 120
gooseberry pie 122–4
Grant loaf 75–7
H
honey 11, 110, 173
used instead of sugar 183

I
icing sugar 193–4
Italian meringue buttercream 191–2
L
leavening see baking powder; yeast
Lindt, chocolate 203
M
macaroons 166–71
cocoa macaroons 167–9
Italian meringue macaroons 169–71
see also meringues
manchet loaves 62
maple syrup 183–4
margarine 112–13
Massialot, François, recipe for meringues 163–4
meringues 163–6
Italian meringues 164
see also macaroons milk bread 74
mousse 161, 162, 163
O
oat flour 61
olive oil, pastry 109–110, 116
P
pastry 104–145
blind baking 128–9
early pastry 106–8
freezing 121
hot water crust 116–17
laminated dough 132–8
olive oil 109–110, 116
savoury pastry 106
shortcrust 114–15, 118–26
sweet pastry 107–8, 124–6
see also puff pastry; Viennoiserie
pastry cream 197–9
pastry making
chilling the pastry 119–20, 126
creaming method 125
fats 109–111
rolling out 126
techniques 114–45
pavlova 147
pies 105, 121–4
fillings 121–2
pie crusts 122
pound cake 15–19
praline 182
puddings, defined 149
puff pastry 107, 114, 121–2, 132, 133, 135–7
book and double-book folds 138
flaky pastry 121, 122, 132, 134, 137–8
rough puff pastry 121, 122, 133, 134–5
see also pastry; Viennoiserie
R
roulades, chocolate 209–211
royal icing 193
rye flour 61, 66
S
Sally Lunns 97–100
scones 100–103
self-raising flour
home made 30
pastries 121, 122
scones 101
see also flour
shortbread 55–9
shortcrust pastry 114–15, 118–26
Simmons, Amelia, American Cookery 20, 28
soda bread 61
soggy bottoms, tarts 130–31
soufflés 157–60, 164, 165
chocolate 160
sourdough 61, 88–95
spelt 66
spice, in cakes 21
sponge cakes 15–21, 26
flourless chocolate 208
starters, for sourdough 89–93
‘Stir-up Sunday’ 24
strong flour
for bread making 64–5
cake-making with 41
pastries 114
sugar 11, 174–82
and desserts 148
as flavouring 173
how it is made 174–5
keeping power of 177
percentage of in chocolate 205
refined and unrefined 175–7
spun sugar 182
substitutes for 36–8
types of 35–6
T
tarts and quiches 127–31
truffles (chocolate) 217
V
van Houten, chocolate 203
vanilla 195–6
French vanilla buttercream 190–91
Italian meringue
buttercream 192–3
vanilla cream 173
Viennoiserie 108
see also pastry; puff pastry
Y
yeast
in breadmaking 61, 69–74
brewer’s yeast 71–2
in cakes 10–14
dried and fast-action 70–71
sourdough and 88
sourdough ‘starters’ 89–93
This ebook is copyright material and must not be copied, reproduced, transferred, distributed, leased,licensed or publicly performed or used in any way except as specifically permitted in writing by thepublishers, as allowed under the terms and conditions under which it was purchased or as strictly permittedby applicable copyright law. Any unauthorised distribution or use of this text may be a direct infringement ofthe author’s and publisher’s rights and those responsible may be liable in law accordingly.
Version 1.0Epub ISBN 9781448141111
www.randomhouse.co.uk
10 9 8 7 6 5 4 3 2 1
Published in 2013 by BBC Books, an imprint of Ebury Publishing.A Random House Group Company.
Text © Love Productions 2013Illustrations by Tom Hovey © Woodlands Books Ltd 2013
Gerard Baker has asserted his right to be identified as the author of this Work in accordance with theCopyright, Designs and Patents Act 1988
All rights reserved. No part of this publication may be reproduced, stored in a retrieval system, ortransmitted in any form or by any means, electronic, mechanical, photocopying, recording or otherwise,without the prior permission of the copyright owner.
The Random House Group Limited Reg. No. 954009
Addresses for companies within the Random House Group can be found at www.randomhouse.co.uk
A CIP catalogue record for this book is available from the British Library.
ISBN: 978 1 849 90589 3
Commissioning Editor: Muna ReyalProject Editor: Laura HigginsonEditors: Imogen Fortes, Lindsay Davies and Norma MacmillanEditorial Consultant: Linda CollisterProduction: Helen EversonDesign and typesetting: Smith & GilmourIllustrations: Tom Hovey
To buy books by your favourite authors and register for offers, visit www.randomhouse.co.uk