step by step editing of my front cover
TRANSCRIPT
Step by Step editing of my
Front cover image
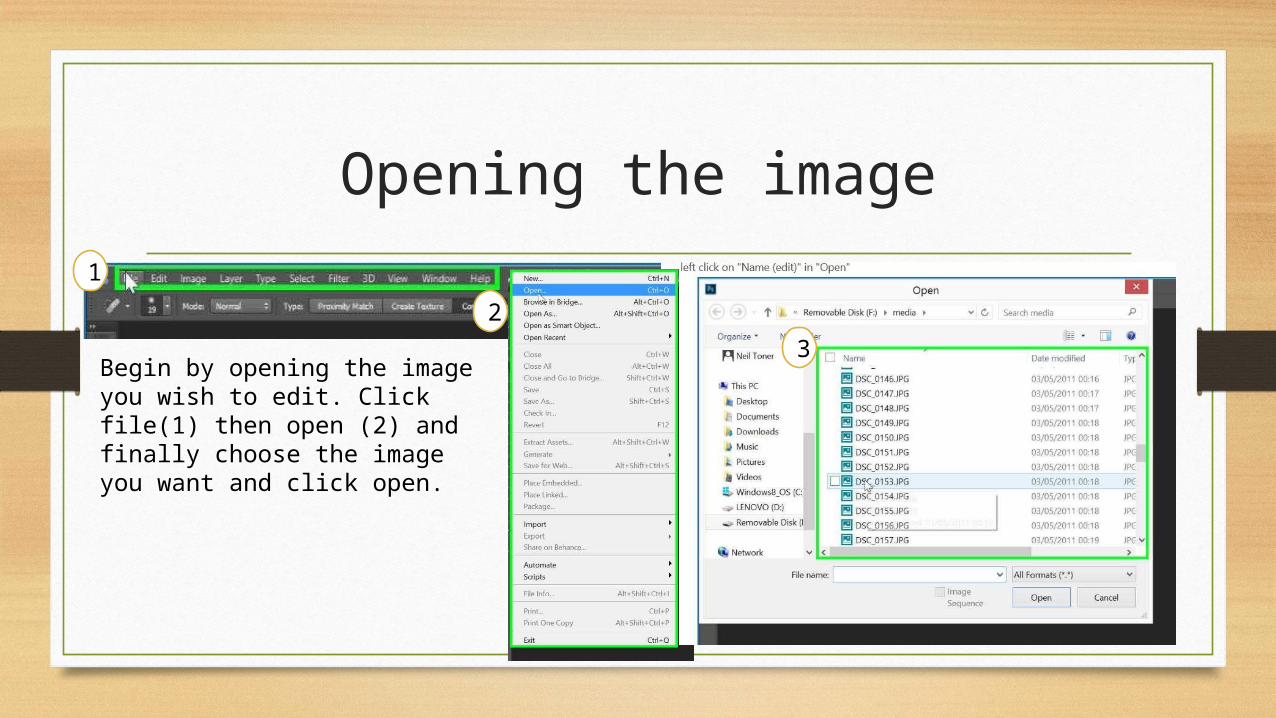
Opening the image
1
2
3Begin by opening the image you wish to edit. Click file(1) then open (2) and finally choose the image you want and click open.
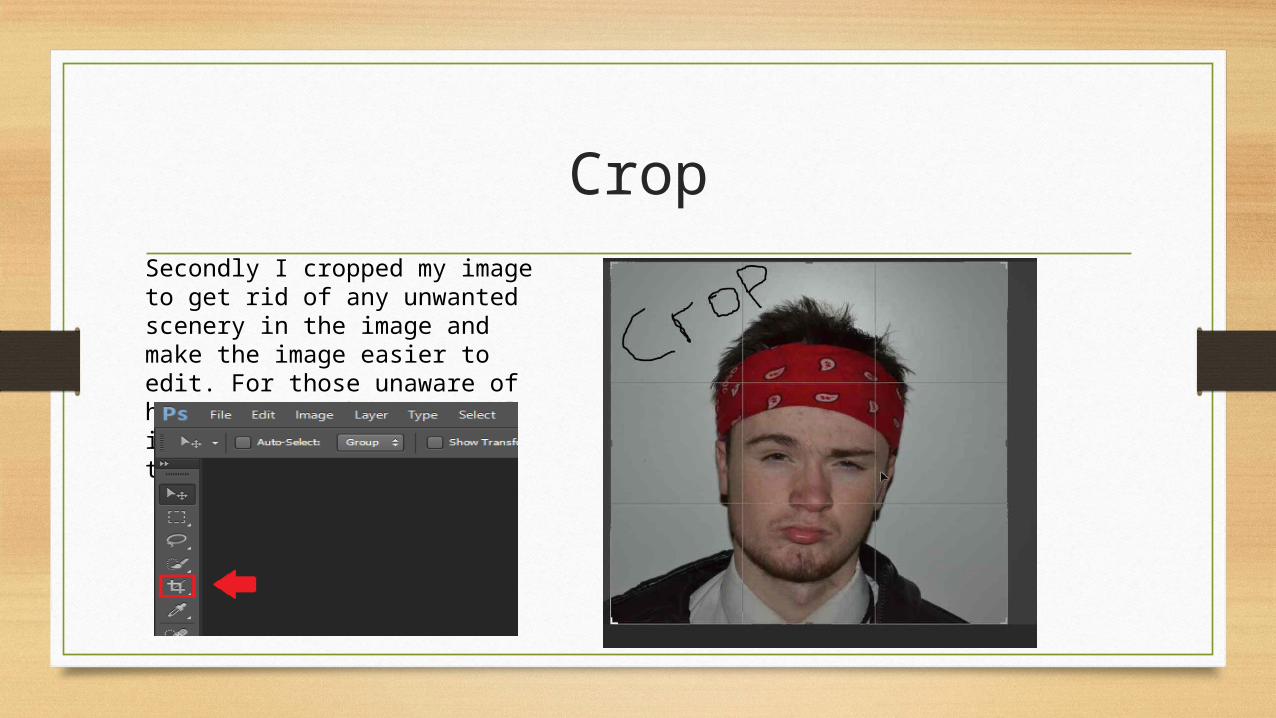
CropSecondly I cropped my image to get rid of any unwanted scenery in the image and make the image easier to edit. For those unaware of how to crop; the crop tool is situated to the left toolbar.
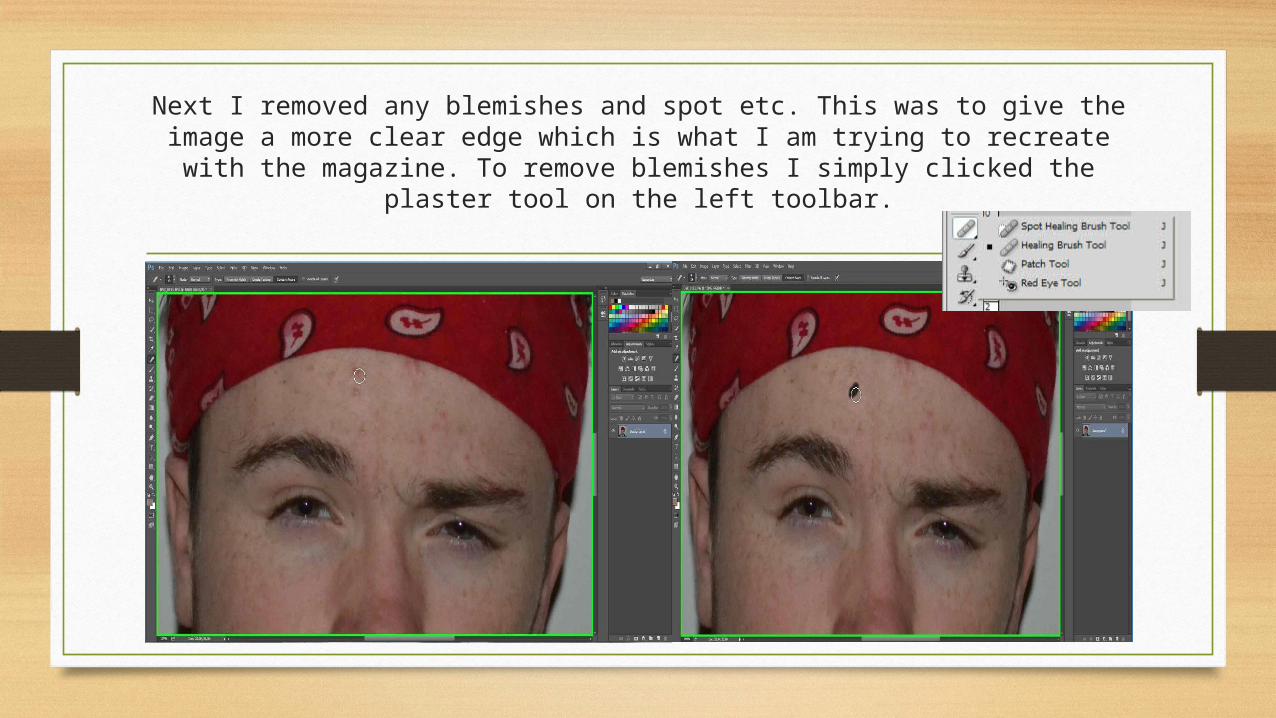
Next I removed any blemishes and spot etc. This was to give the image a more clear edge which is what I am trying to recreate with the
magazine. To remove blemishes I simply clicked the plaster tool on the left toolbar.
Converting Black and White
1
4
3
2
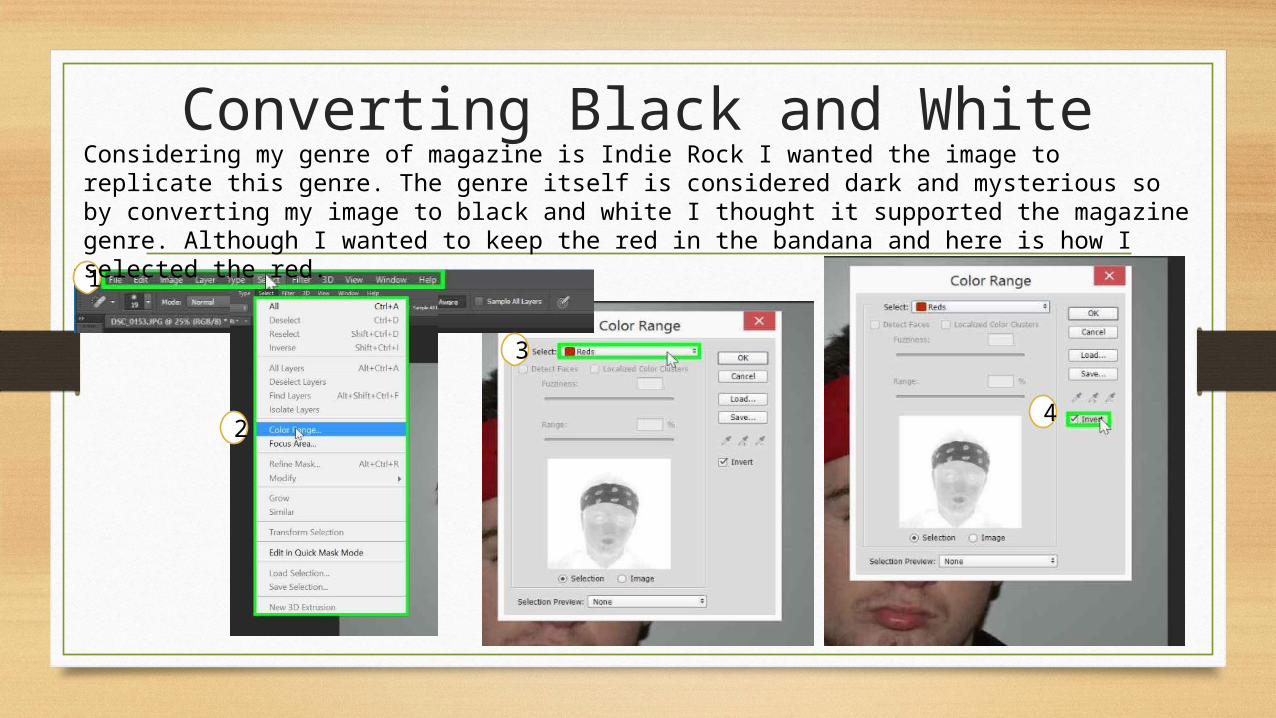
Considering my genre of magazine is Indie Rock I wanted the image to replicate this genre. The genre itself is considered dark and mysterious so by converting my image to black and white I thought it supported the magazine genre. Although I wanted to keep the red in the bandana and here is how I selected the red.
Converting Black and White
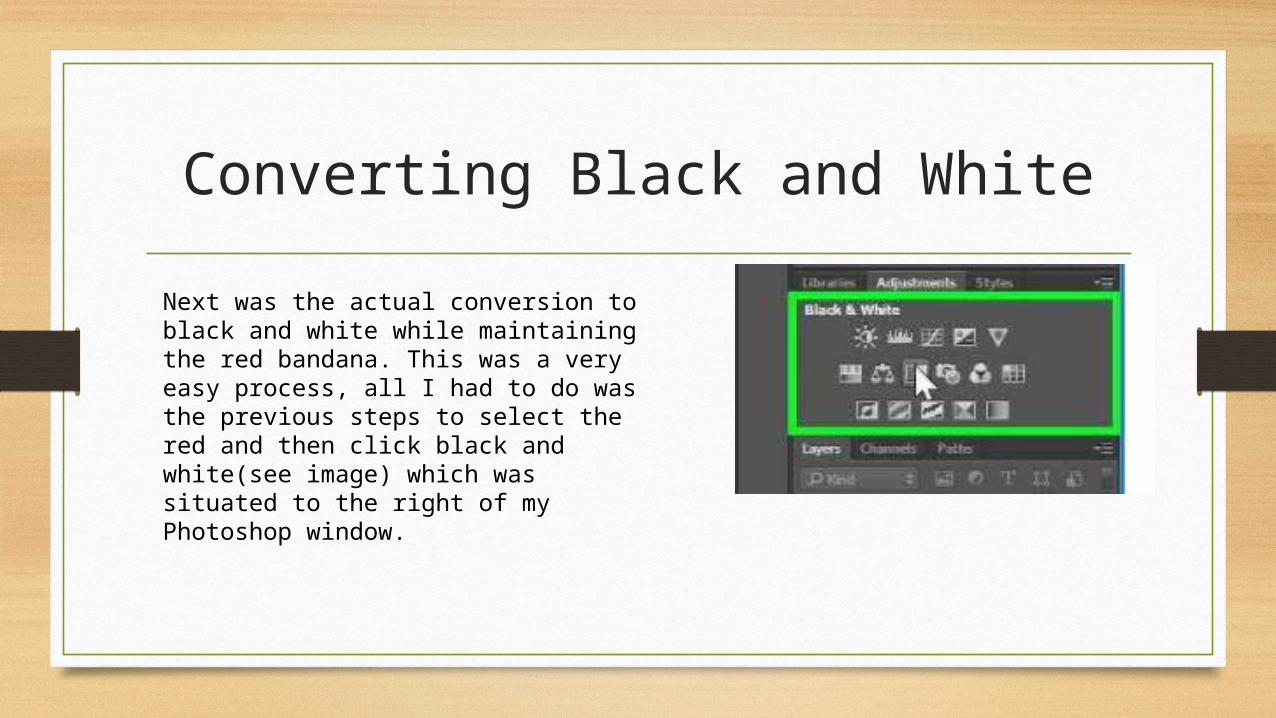
Next was the actual conversion to black and white while maintaining the red bandana. This was a very easy process, all I had to do was the previous steps to select the red and then click black and white(see image) which was situated to the right of my Photoshop window.
Save
3
1
2
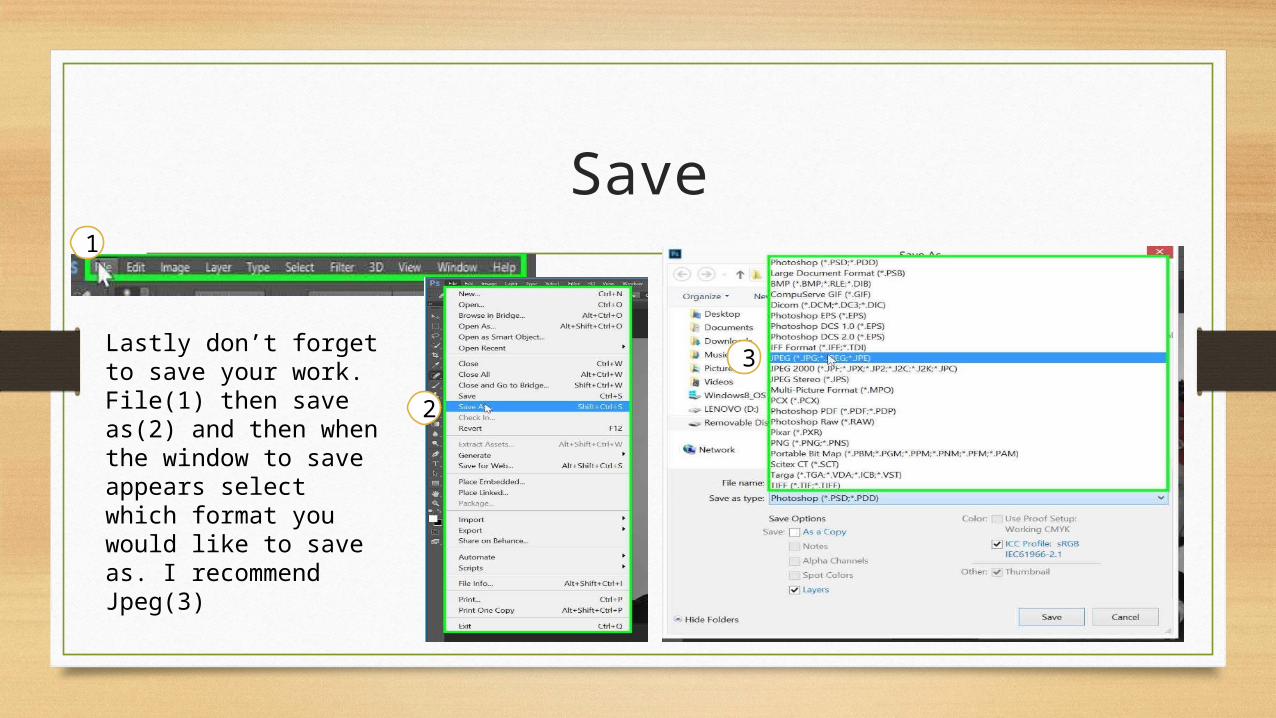
Lastly don’t forget to save your work. File(1) then save as(2) and then when the window to save appears select which format you would like to save as. I recommend Jpeg(3)