standard operating procedure for various … manual.pdfstandard operating procedure for various...
TRANSCRIPT

STANDARD OPERATING PROCEDURE FOR VARIOUS
INSTRUMENTS
OVEN
1) INSPECT THE OVEN
A. Make sure the electric power connections are made correctly and that the power cable is not
damaged.
B. Make sure that the area around the oven is clear. The oven should have 6 inches clearance
around it.
C. Inspect the inside of the oven to make sure it is clean and that no one has left their specimen
or fixtures in it.
2) START HEATING
A. Turn on the oven by pressing the main power switch in the lower right. the controller will

perform a brief self test during which the display shows.
B. Press and hold the x or x buttons to increase and decrease the temperature is to set the point.
3) LOAD THE SPECIMEN
A. Before you put anything in the oven make sure it is safe to heat this part to the desired
temperature.
B. Make sure you have everything you are going to need i.e. safety equipments, tools etc.
C. Make sure there is a clear and safe place to put the part when you eventually take it out.
D. Protective equipments such as gloves, aprons are available and located near the oven.
E. Open the oven store. The power to the heating elements is automatically turned off.
F. Load your specimen. Make sure it is not touching the heating elements or electric short might
occur when you close the door.
G. Close the door
H. Clean up the area around the oven and store the protective equipments
4) REMOVING THE SPECIMEN
A. Protective equipments are located near the oven. Use what you think is appropriate for the
material's temperature
B. Open the oven store.
C. Remove your specimen carefully. Place it on a heat resistant surface.
D. Close the door.
E. Clean up the area around the oven and store the protective equipment properly
5) FINISHING UP
A. Turn off the oven.
B. Clean up the area inside the oven.
C. Put all tools and protective equipments back in their proper places
D. Remove your oven in use and displace of it.

MICROTOME
1) Wind back the coarse feeding mechanism and lock the hand wheel.
2) Clamp cassette in position, orientating the tissue as desired.
3) Ensuring that the knife holder is at safe distance from the cassette, carefully place a
blade into the holder and tighten securely.
4) Loosen back lever of knife holder and advance towards the cassette until there is a 0.2-
0.5mm interval between blade edge and cassette surface.
5) Tighten back the lever of knife holder.
6) Unlock wheel and trim away surplus wax from tissue surface by advancing the coarse
feed mechanism before commencing each turn of the wheel.
7) Trim all tissue carefully until the desired surface is exposed.
8) Reduce section thickness to 3-5 microns using adjustment knob.
9) Cut tissue sections and place them on tissue floatation bath to remove wax.

HAEMOCYTOMETER
1. Clean haemocytometer & coverslip with 70 % ethanol, followed by distilled water.
2. Set up the haemocytometer ensuring the coverslip is resting on the raised supports &
adhered to the haemocytometer.
3. Mix the cell suspension to suspend cells.
4. Transfer a small volume of cell suspension to each counting chamber using a Pasteur
pipette.
5. Let the cells settle onto the counting chamber grid, about 5-10 min.
NOTE: PLACE THE HAEMOCYTOMETER ONTO THE MICROSCOPE STAGE &
FOCUSSED ON LOW POWER (40X).
6. When counting the cells that fall on the grid lines , only count the cells on the TOP &
RIGHT HAND LINES of each square.
NOTE: DONOT COUNT THE ONES ON THE BOTTOM OR LEFT HAND LINES.
This prevents cells from being counted twice.

SPECTROPHOTOMETER
1. Carefully clean the sample holder,especially after using corrosive or salt solution.
2. Mop up any spilt liquid and brush any spilt chemical from the spectrophotometer and
adjacent areas.
3. Wash the cuvettes immediately after use.Rinse the cuvettes with deionised water atleast
3 times,allow them to drain and dry them inverted
SAFETY CHECKS- 1. Check that electrical connections are fully coupled that cords are not
frayed and that there is no liquid on or about the spectrophotometer.
2. Unidentified spilt chemicals should be removed with extreme caution .

CENTRIFUGE
Before using centrifuge check to see opposite terminal ring‟s and shields are of the same
weight. This can be done easily since the weights are inscribed on the terminal rings
shields.
Check that the shields contain rubber cushions.
Check that opposing sets of terminal rings and shields balance each other.
Place experimental sample into the centrifuge tube and balance it against another water
balance tube using the beam balance and squirt bottle.
Place into terminal rings positioning balanced tubes opposite to one another.
Once tubes are in place and all rotor positions are filled. Close the lid of centrifuge.
Set the desired time on timer.
Select appropriate speed setting on centrifuge with the speed selection knob. This
simultaneously turns ON the centrifuge.
Once centrifuge is turned ON, lid must be kept closed.
Do not re-open it until it comes to a complete stop at end of run.
Then centrifuge has stopped. Carefully remove tubes without agitating contents.
Close the lid of centrifuge.
Properly dispose of any waste material disposable bin and clean up the area around the
centrifuge.

LAMINAR AIR FLOW
Before one hour of your work start the laminar air flow main power switch ON.
Then clean the platform of laminar air flow with 70% ethanol.
Close the door of laminar.
Now switch on the UV light of laminar air flow for at least 45-60 minutes.
After then wash your hand with any disinfectant to avoid contamination.
Switch off the UV light.
Start laminar air flow and open the door of laminar air flow.
Flame the burner and start your work.
After completion of your work. Wash your hands.
Clean the platform with 70% ethanol.
Close the door and switch off the power of laminar air flow.

WEIGHING BALANCE
Clean your hand before using the Weighing Balance
Clean the container & wipe
Basic Weighing Function
Turn on the balance scale
Place container on balance
Tare the Balance
Place the sample in container & note down the weight

GEL ELECTROPHORESIS
Pre-Operation
Select a good location for the placement and use of the equipment. Place the unit on the
laboratory bench in such a way that the power supply (on/off switch) is easy to reach, so
it is not necessary to reach across the apparatus, and the power-indicator light is easily
seen. Select a location where it will not be easily knocked over or tripped on. Avoid
unintentional grounding points and conductors such as sinks, metal plates, jewelry, other
metal objects or surfaces.
Inspect the apparatus to be used. Examine the insulation on the high voltage leads for
signs of deterioration (e.g., exposed wires, cracks or breaks, etc.) Check the buffer tanks
for cracks or leaks, and missing covers.
Ensure that all switches, lights, and all safety interlock features are in proper working
condition and that “Danger-High Voltage” warning signs are in place on the power
supply and buffer tanks.
Report any and all machine deficiencies prior to use and use only apparatuses in proper
working condition.

Make sure adequate clearance is established around the apparatus. Never allow the leads
to dangle below the laboratory bench.
Locate all emergency power source shut-off locations.
Operation
Don all appropriate personal protective equipment (gloves, laboratory coat, and eye
protection).
Be aware that high voltage surges can occur when the apparatus is first turned on, even
if the voltage is set to zer.
Changes in load, equipment failure, or power surges could raise the voltage at any time.
Make sure that the power is off before connecting the electrical leads. Connect both
supply leads at the same time (to prevent one lead from being live in your hand) to the
power supply before turning on the power supply. Otherwise, connect one lead at a
time using one hand only.
Ensure that your gloved hands are dry while connecting leads. A thin film of moisture
can act as a good conductor of electricity.
Always think and look before touching any part of the apparatus. Never touch any part
of the apparatus while the power is “ON”, not even the plastic parts.
If the electrophoresis buffer (the conductive fluid) is spilled or is leaking from the gel
box, stop the run, turn off the equipment, clean up the bench top and inspect the device
immediately before proceeding.
Never open the gel box lid or reach inside the gel box until the power has been turned
off. Do not rely on safety interlocks, as they may fail.
Do not override safety devices.

Post-Operation
Turn off the main power supply switch and wait 15 seconds before removing the lid
and/or making any disconnection or connections. This ensures proper time was allowed
to ensure complete voltage discharge.
Properly dispose of the conductive fluid and gels.
Hazards of Gels
Ethidium Bromide, commonly used to visualize nucleic acid, is a potent mutagen and
should be handled with caution, even when mixed in the gel. Ethidium Bromide can be
absorbed through the skin so it is also important to avoid any direct contact with the
chemical.
Various catalysts, denaturants, stains and solubilizing agents contain a variety of
chemicals, including formamide, phenol and acrylamide. This can result in unforeseen
results. For example, a Canadian university analyzed agarose gels and found heavy
metals, even though no metals or metal-containing reagents were used in the gel
preparation. Presumably, the metals leached from the electrical contacts while the
electrophoresis took place.
Acrylamide is a potent nerve toxin in its unpolymerized state and poses significant
hazards. Although it is less toxic when polymerized, when making gels, the
polymerization process is never fully complete and small amounts of acrylamide
monomer are always present.
Handle gels with caution, wear gloves and wash hands often.
Measure, mix and handle all hazardous powdered chemicals or gel prep mixtures
with hazardous components in the fume hood (e. g., acrylamide monomer,
ethidium bromide, phenol, ammonium persulfate and formaldehyde).
Purchase pre-made gels or pre-mixed acrylamide and ethidium bromide solutions
instead of making your own.

Consider using ethidium bromide substitutes.
Always review the material safety data sheet and other sources of hazard
information prior to working with any hazardous material.

INCUBATOR
Hazards and risk associated with the use of incubator and precautions to be taken.
All containers/materials placed in incubator should be labeled with name,date and
contents.
Containers/materials should be removed after the appropriate time of incubation to
prevent overcrowding or contamination of the incubator.
Any spillage should be reported immediately to the laboratory‟s technician and should
be cleaned up in a manner appropriate to the material spilled.
Where temperature in excess of 370 degree celcius are in use, appropriate gloves must
be worn.
Any faults associated with an incubator should be reported immediately to the
laboratory‟s technician.
If an incubator is faulty, it should be switched off until repaired.
Incubator should be subject to servicing based on manufacturers recommendations.
Any cuts/burns sustained should be dealt with by first aid personnel and reported.

Hazard associated with the use of incubators
Heat, electricity, chemicals, microorganisms, damaged containers
Risks associated with the use of incubators
Microbial contamination of body, clothing.
Burns to skin electrical shock
Chemical contamination of body ,clothing.
People at risk when using incubators
Students, Academic Staff, Technicians.

UV-TRANSILLUMINATOR
General Safety Guidelines:
UV radiation can irreversibly damage the eyes and skin. You must take precautions by adhering
to standard operating procedure (SOP) and using personal protective equipment (PPE) where
applicable.
The use of UV in the laboratory is governed by „The control of Artificial Optical Radiation at
Work Regulations 2010‟
UV light emitted from a transilluminator has peak outputs at 254nm or 312nm – within
biologically active UV-C and UV-B regions.

The following safety precautions are advised:
UV boxes should be kept in low occupancy areas, preferably in separate rooms.
Minimize contact time with the UV source.
Maximize distance by working at arms‟ length and avoid stooping over the work surface
Wear a full face shield designed for UV filtration (this is provided)
Wearing safety spectacles in addition to the full face shield improves protection and is
recommended.
Wear a full button lab coat with neck protection and full sleeves.
Wear nitrile gloves at all times whilst UV light is in operation.
Symptoms of UV over exposure:
Skin reddening, blistering and discomfort. A sandy, gritty feeling may be felt in the eyes.

MAGNETIC STIRRER
Maintenance and Usage Recommendations
Magnetic stirrer should be used on level surfaces.
If hazardous vapours will not be produced, hot plates should be in an area free of
drafts to ensure heating efficiency.
Keep the top surface of the magnetic stirrer clean. Use a non-abrasive cleaner to
clean the surface and the outside of the unit.
Replace the top surface if damage.
Maintain the instrument logbook, containing this SOP, temperature control record
and/or maintenance repair logs, and associated instruction manuals in the
immediate vicinity of the instrument.

Magnetic Stirrer Operation
Stir bar should be placed in the sample vessel prior to mixing.
Place the vessel on the stirrer so that it is centred. For stirrers with multiple
stirring blocks, centre the sample vessel over a stirring block.
Turn the instument on (refer to instruction manual for instrument-specific
procedures).
Set the stirring speed (refer to instruction manual for instrument-specific
procedures).
Note that the stirring speed will be affected by liquid viscosity, the size of the stir
bar, vessel size, and thickness of vessel bottom.
When stirring is complete, turn magnetic stirrer off and remove sample.

HOT PLATE
Maintenance and Usage Recommendations
hot plate should be used on level surfaces.
If hazardous vapours will not be produced, hot plates should be in an area free of
drafts to ensure heating efficiency.
Keep the top surface of the hot plate clean. Use a non-abrasive cleaner to clean
the surface and the outside of the unit.
Replace the top surface if damaged.
Do not use metal foil on hot plates.
Maintain the instrument logbook, containing this SOP, temperature control record
and/or maintenance repair logs, and associated instruction manuals in the
immediate vicinity of the instrument.
Hot Plate Operation

Note that during initial operation of a hot plate, some odour and vapours may be
produced from the heating element, which is normal.
Place the sample vessel on the hot plate so that it is centred, where practical. For
hot plates with multiple heating elements, centre the vessel over a heating
element, where practical.
Turn the instrument on and set the thermostat to the desired setting (as specified
in the study plan). Refer to the instrument‟s instruction manual for instrument-
specific procedures.
Allow around 10 minutes for hot plate and liquid temperatures to stabilize..
If necessary, adjust the temperature by adjusting the thermostat.
When heating is complete, turn the unit off.
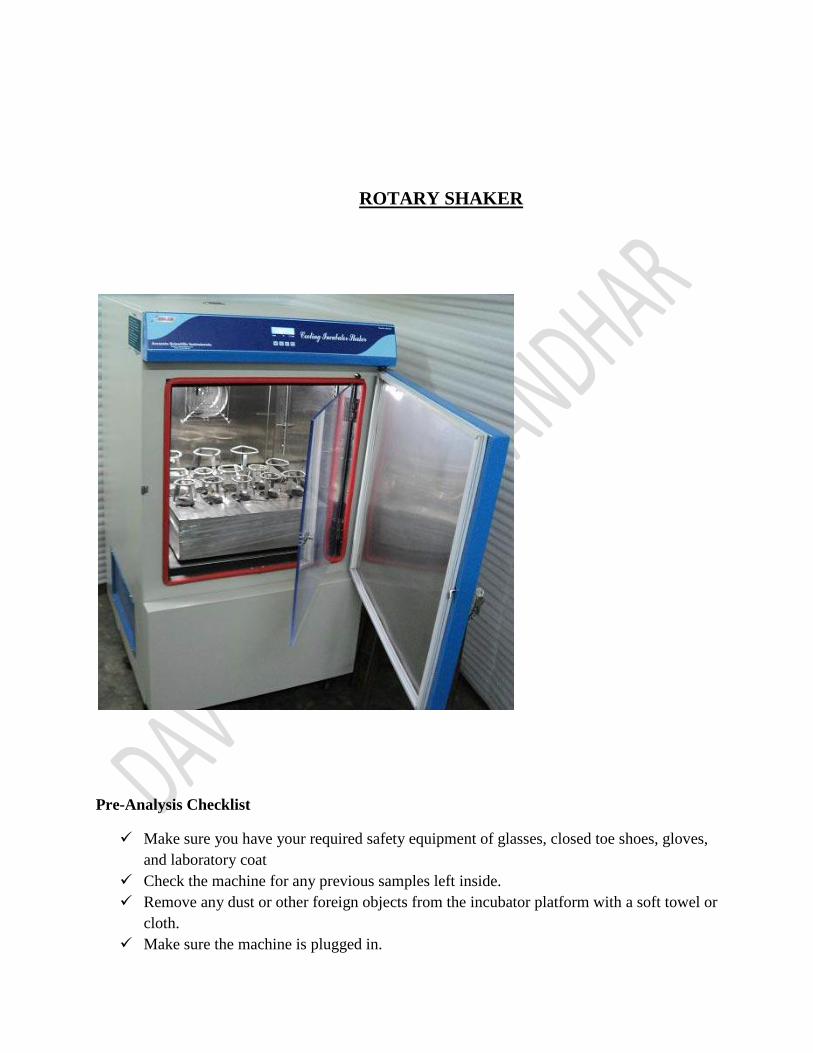
ROTARY SHAKER
Pre-Analysis Checklist
Make sure you have your required safety equipment of glasses, closed toe shoes, gloves,
and laboratory coat
Check the machine for any previous samples left inside.
Remove any dust or other foreign objects from the incubator platform with a soft towel or
cloth.
Make sure the machine is plugged in.

Equipment Operation Loading the Shaker
Put your sample material in an acceptable container with a lid.
Gently press the container in one of the spring housings until it is securely in place.
Shaker operation
Close the lid of the incubator and turn on the machine using the power switch to the right
hand side. The LED display will momentarily show the model number. (NOTE: the
shaker will not operate of the lid is open)
Once the machine is powered on, the incubator may start running. Pressing the start/stop
button will cause the shaking to stop.
Press the select button until the RPM indicator is illuminated on the left hand side of the
control panel.
Use the arrow keys to set the RPM of the shaker. A value from 50 to 400 RPM is
available. The number will set when no buttons are pressed.
Press the select key until the ºC INDICATOR illuminates.
Set the temperature using the arrow keys. Temperature range is from 4º to 60ºC
Press the select key until the HRS INDICATOR is illuminated.
Use the arrow keys to set the TIME of the shaker. This can be a value from .1 to 99.9.
The number will set when no buttons are pressed. If a continuous run time is desired,
simply press the start stop button.
Press the START/STOP key. The shaker will start in untimed mode.
Press the START/STOP key again. The shaker will stop and the display will read OFF.
Press the START/STOP key a third time; the time indicator will light and the shaker will
now start the timed run.
The machine will come to a stop once the timed run has ended. If running in untimed
mode, the START/STOP key can be pressed at any desired time.
Machine Shutdown
Make sure the machine has come to a complete stop and open the lid.
Remove any samples you need. Use a hot glove if high temperatures were set.
Turn off the power by flipping the switch on the right side of the machine
