singer brocade handbag - singer sewing co.® brocade handbag shopping list: you can never have too...
TRANSCRIPT
SINGER® Brocade Handbag
Shopping List:
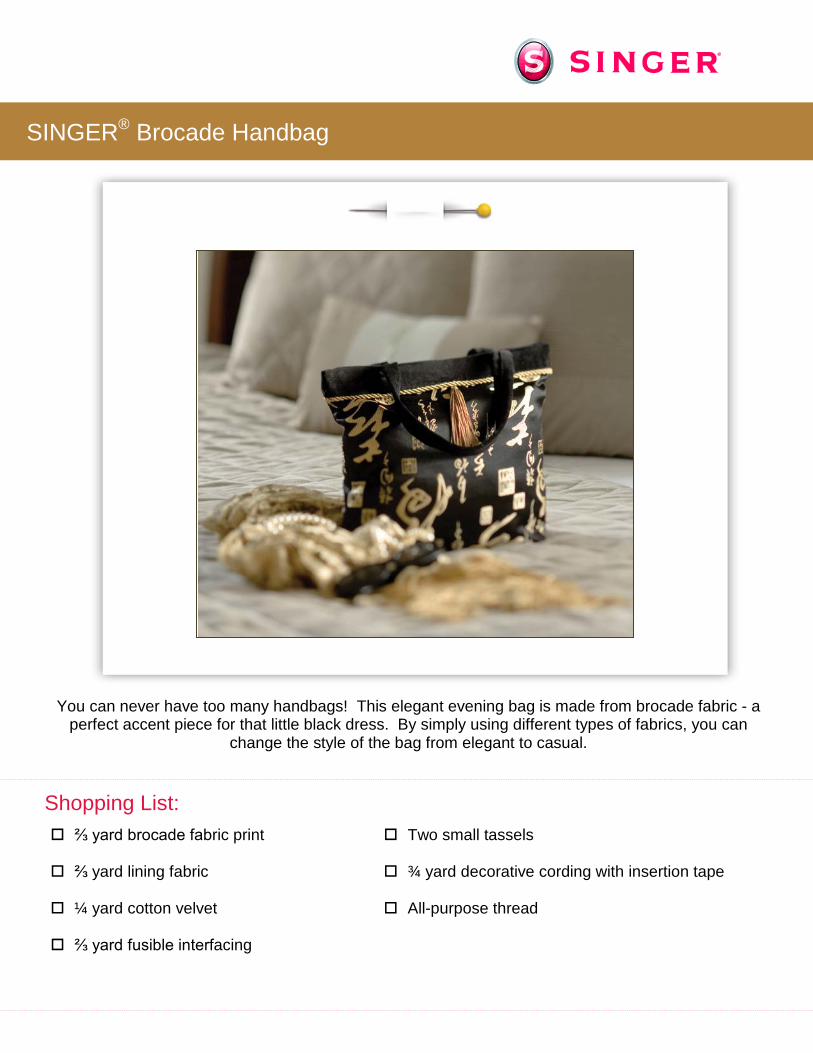
You can never have too many handbags! This elegant evening bag is made from brocade fabric - a perfect accent piece for that little black dress. By simply using different types of fabrics, you can
change the style of the bag from elegant to casual.
⅔ yard brocade fabric print
⅔ yard lining fabric
¼ yard cotton velvet
⅔ yard fusible interfacing
Two small tassels
¾ yard decorative cording with insertion tape
All-purpose thread

2
Cutting Directions:
1. Cut one 13” x 21” piece from the brocade fabric (for the outer bag)
2. Cut one 13” x 21” piece from the lining fabric (for the bag lining)
3. Cut one 13” x 21” piece of fusible interfacing
4. From the cotton velvet: Cut two pieces 2½” x 16” (for the straps) Cut one 3½” x 24” piece (for the top band)
Sewing Directions:
1. Apply the fusible interfacing to the wrong side of the brocade piece, following the manufacturer’s instructions.
2. Place a straight pin in the center of each of the short ends of the brocade fabric.
3. Place a tassel at one of the pin markings, having the tassel’s loop extend toward the raw edge, and the top of the tassel about ⅝” below the raw edge.
4. Thread the top of the machine and the bobbin with all-purpose thread. Remove the all purpose foot and attach the zipper foot. Set the machine for straight stitch, with the needle in left position.
5. Stitch across the loop of the tassel to secure it in place. Repeat this procedure at the opposite end of the bag for the other tassel.
6. With right sides together, fold the brocade fabric in half, bringing the short ends together. Pin one of the sides.
(Close up of tassel area)
3
7. Remove the zipper foot and attach the all purpose foot. Set the machine for straight stitch in center needle position.
8. Stitch the pinned side using a ½” seam allowance.
9. Press the seam open.
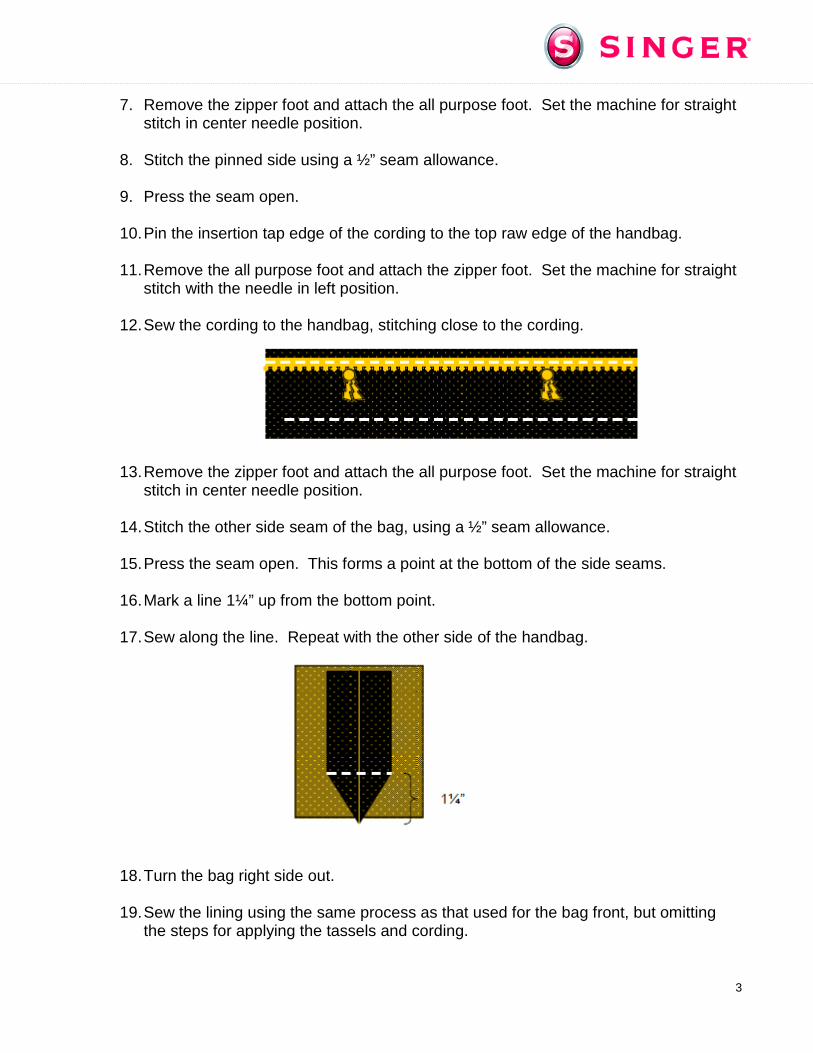
10. Pin the insertion tap edge of the cording to the top raw edge of the handbag.
11. Remove the all purpose foot and attach the zipper foot. Set the machine for straight stitch with the needle in left position.
12. Sew the cording to the handbag, stitching close to the cording.
13. Remove the zipper foot and attach the all purpose foot. Set the machine for straight stitch in center needle position.
14. Stitch the other side seam of the bag, using a ½” seam allowance.
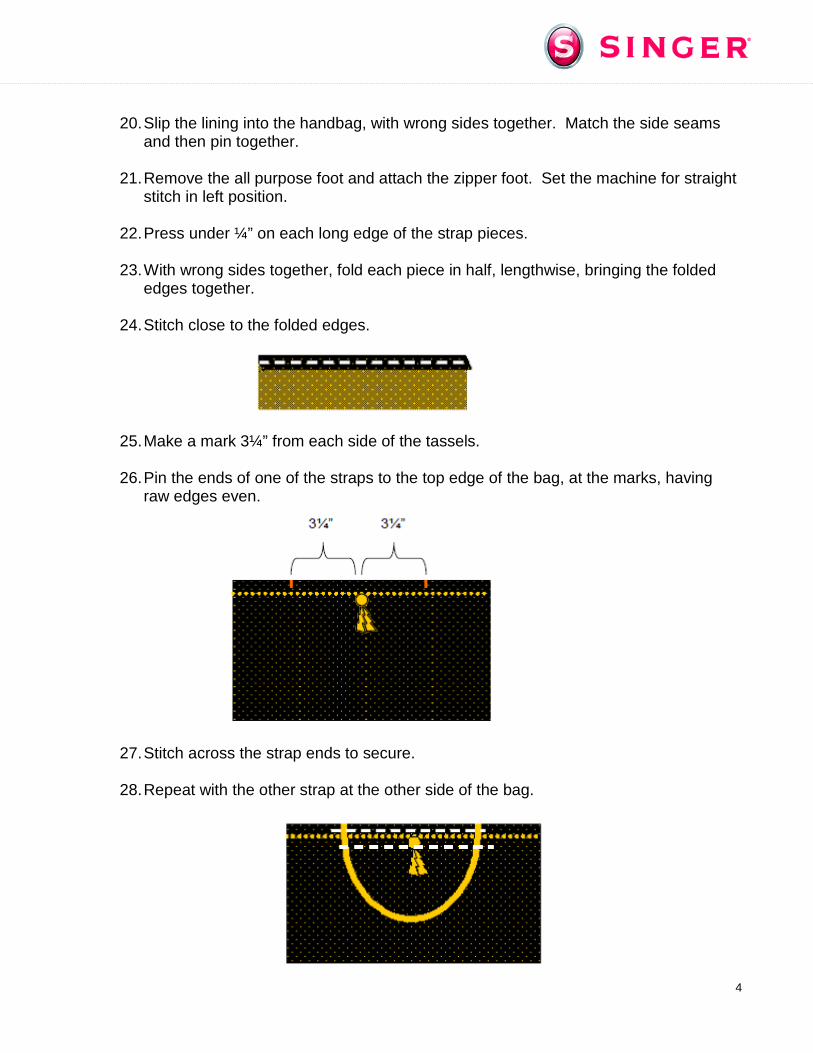
15. Press the seam open. This forms a point at the bottom of the side seams.
16. Mark a line 1¼” up from the bottom point.
17. Sew along the line. Repeat with the other side of the handbag.
18. Turn the bag right side out.
19. Sew the lining using the same process as that used for the bag front, but omitting the steps for applying the tassels and cording.
4
20. Slip the lining into the handbag, with wrong sides together. Match the side seams
and then pin together.
21. Remove the all purpose foot and attach the zipper foot. Set the machine for straight stitch in left position.
22. Press under ¼” on each long edge of the strap pieces.
23. With wrong sides together, fold each piece in half, lengthwise, bringing the folded edges together.
24. Stitch close to the folded edges.
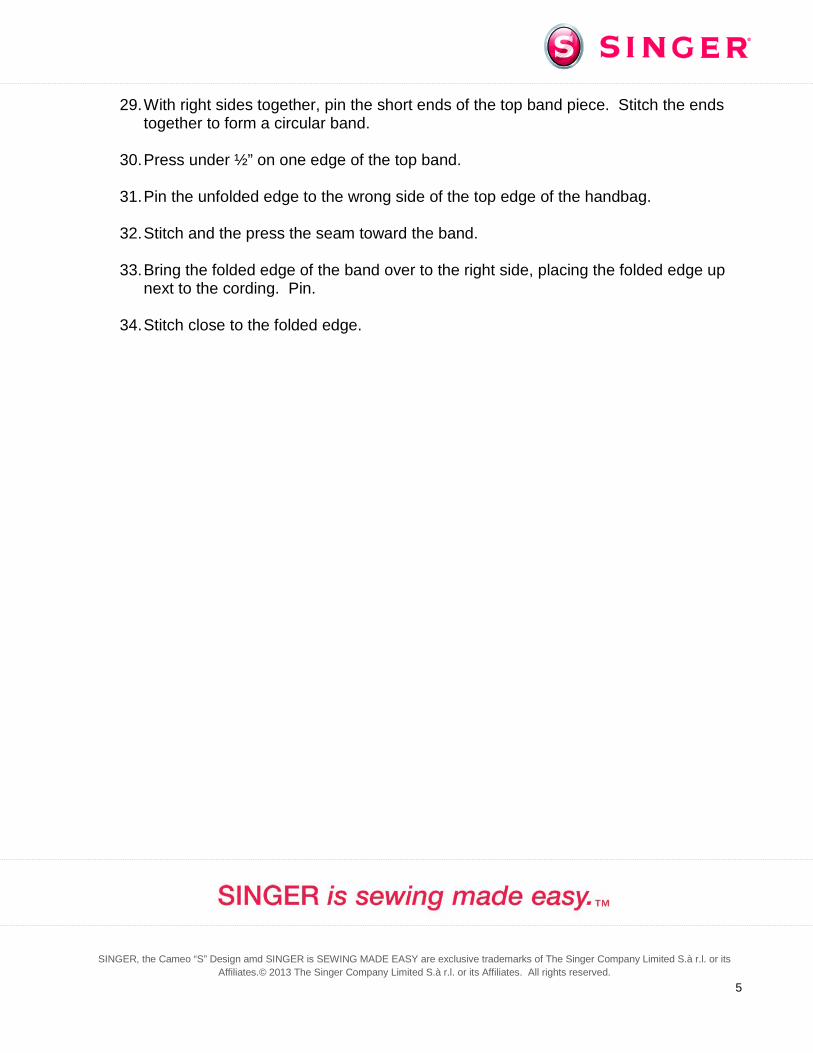
25. Make a mark 3¼” from each side of the tassels.
26. Pin the ends of one of the straps to the top edge of the bag, at the marks, having raw edges even.
27. Stitch across the strap ends to secure.
28. Repeat with the other strap at the other side of the bag.
5
29. With right sides together, pin the short ends of the top band piece. Stitch the ends together to form a circular band.
30. Press under ½” on one edge of the top band.
31. Pin the unfolded edge to the wrong side of the top edge of the handbag.
32. Stitch and the press the seam toward the band.
33. Bring the folded edge of the band over to the right side, placing the folded edge up next to the cording. Pin.
34. Stitch close to the folded edge.
SINGER, the Cameo “S” Design amd SINGER is SEWING MADE EASY are exclusive trademarks of The Singer Company Limited S.à r.l. or its Affiliates.© 2013 The Singer Company Limited S.à r.l. or its Affiliates. All rights reserved.