sewing soft leather baby shoes
DESCRIPTION
baby shoesTRANSCRIPT
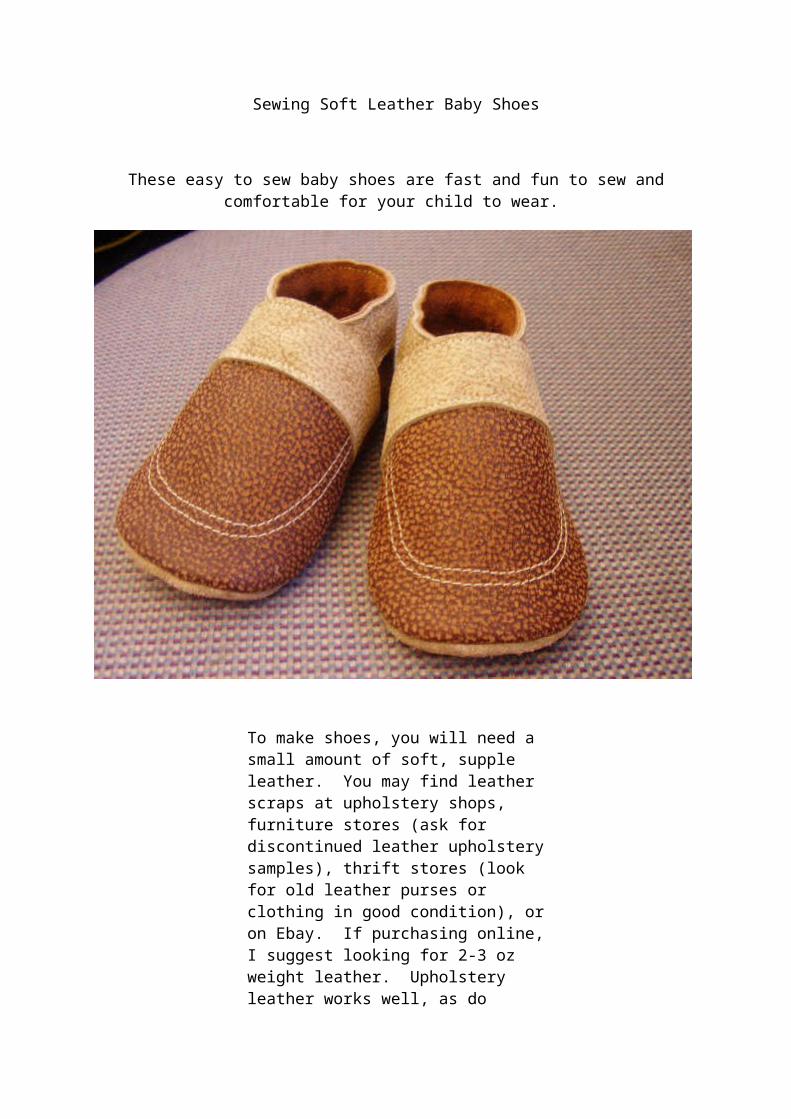
Sewing Soft Leather Baby Shoes
These easy to sew baby shoes are fast and fun to sew and comfortable for your child to wear.
To make shoes, you will need a small amount of soft, supple leather. You may find leather scraps at upholstery shops, furniture stores (ask for discontinued leather upholstery samples), thrift stores (look for old leather purses or clothing in good condition), or on Ebay. If purchasing online, I suggest looking for 2-3 oz weight leather. Upholstery leather works well, as do sheepskin and garment weight cowhide leathers. A personal favorite of mine is deerskin leather, which is the most wonderfully soft and supple leather available. It is slightly more difficult to sew, due to the soft and stretchy nature of this leather, so it might be best to try a firmer cowhide for a first project.
Other notions you will need include a leather
needle, polyester thread or jeanstitch thread, a small amount of 1/4" wide elastic, a pen, a washable glue stick and paperclips.
********************************************
Using a regular ballpoint pen, trace your pattern pieces onto the wrong side of the leather. Transfer the pattern markings with a pen to the wrong side of the leather. There is a single pattern piece for the upper and the sole. You will trace each of these once, then flip them over and trace again in the opposite orientation to make both a left and a right shoe. The remaining pieces are interchangeable (left or right) and you will trace and cut out two of each piece. Cut out using a rotary cutter or scissors. Be sure to cut the slits in the uppers for the elastic to run through. Precision in cutting is very important for good results. For fun-looking shoe details, try using a decorative cutting blade (scalloped or wave rotary blade or scissors) to cut trim pieces, casings, stripes, etc.
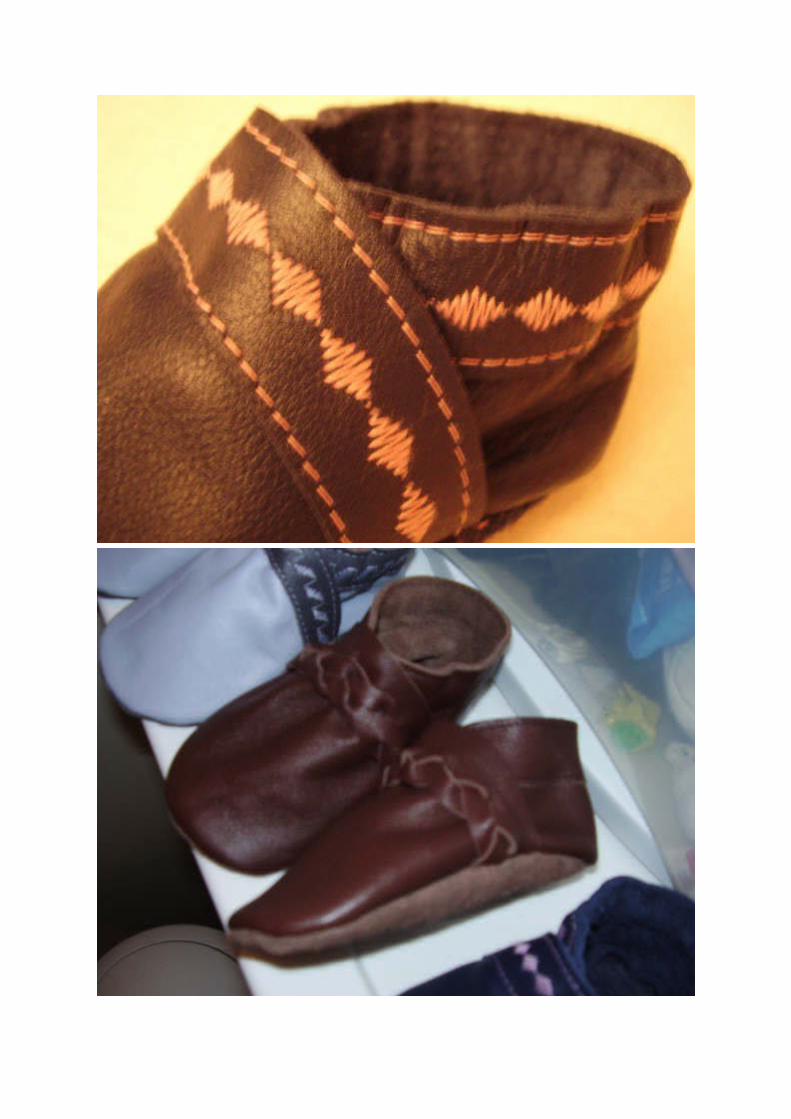
If you wish to do decorative stitching or appliques on the shoe uppers, or on the front edge trim piece or the back elastic casings, you will do so now, before beginning assembly of the shoes. You may choose to stitch on appliques, braided or woven bands, or whatever decorative elements appeal to you. I especially like the look of simple decorative stitching done in a variegated thread, such as I've done on this pair of shoes below. The leather may be reversed to use the sueded side out for a simple, attractive contrast trim.
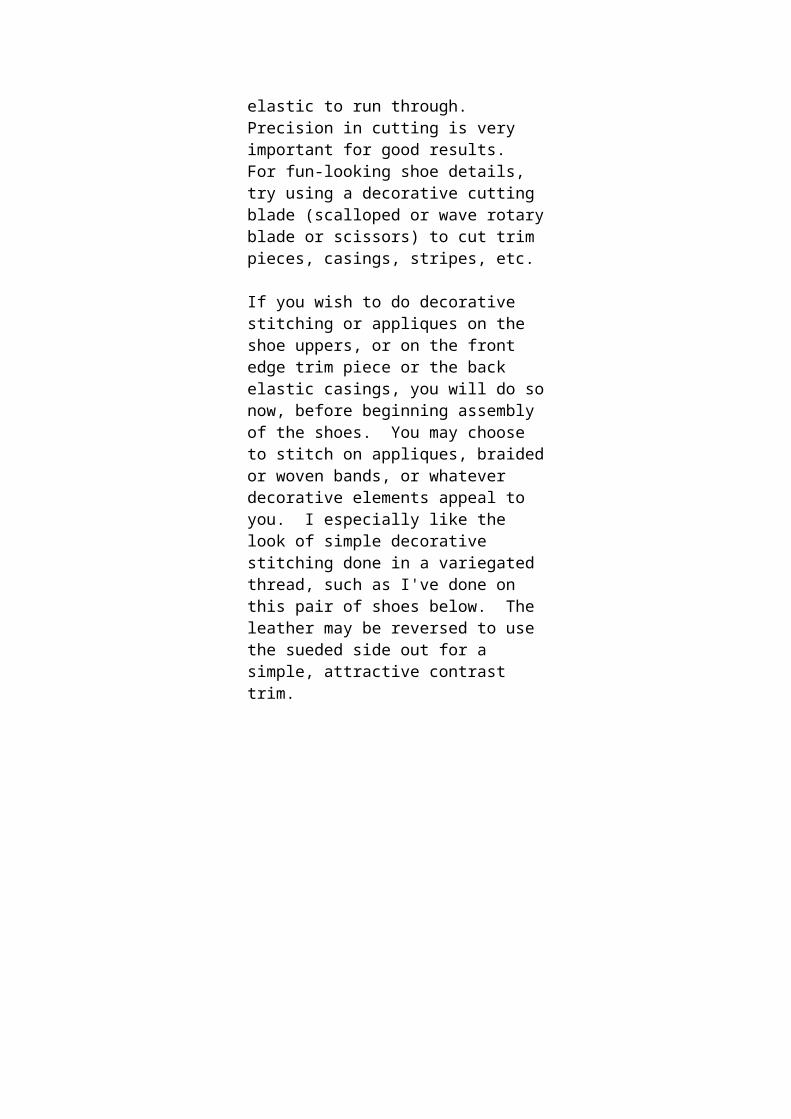
Simple topstitching, especially in double rows, can look very nice as well. Use the stitch width guides on your machine or place a piece of tape on the machine bed to use as a guide to follow for even stitching. If there is not a guide to follow, place a piece of masking tape on the machine bed and use that as a stitch width guide.
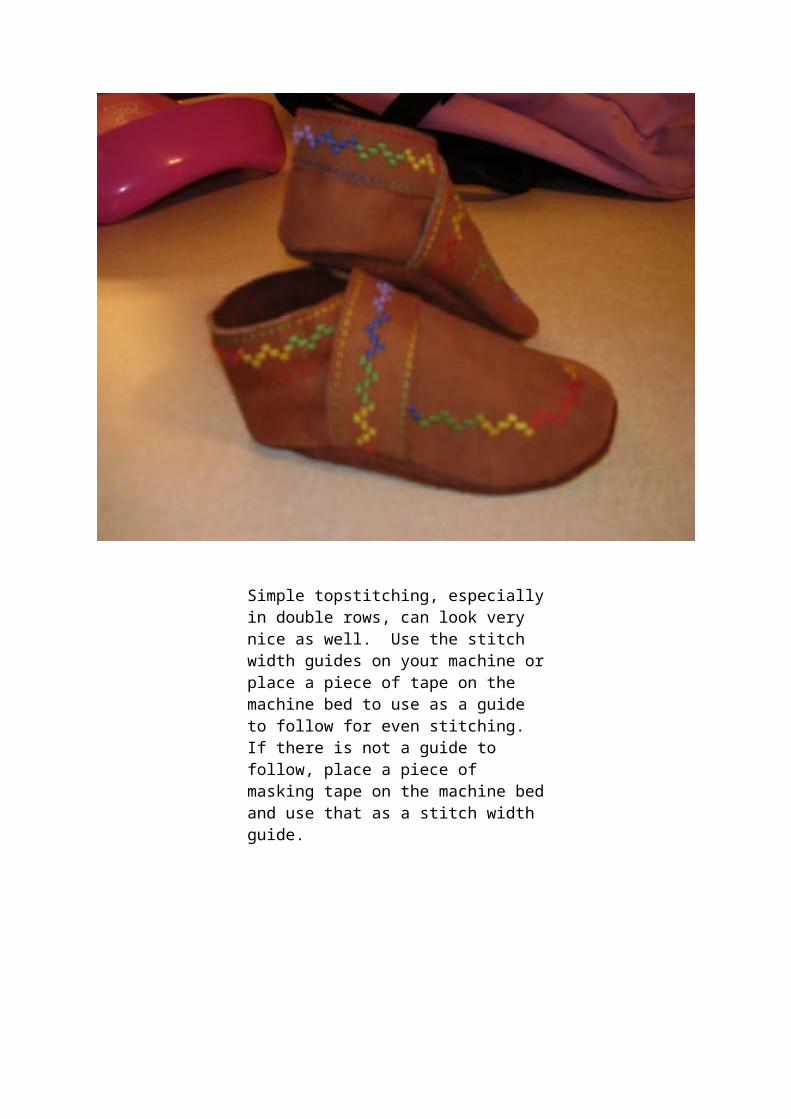
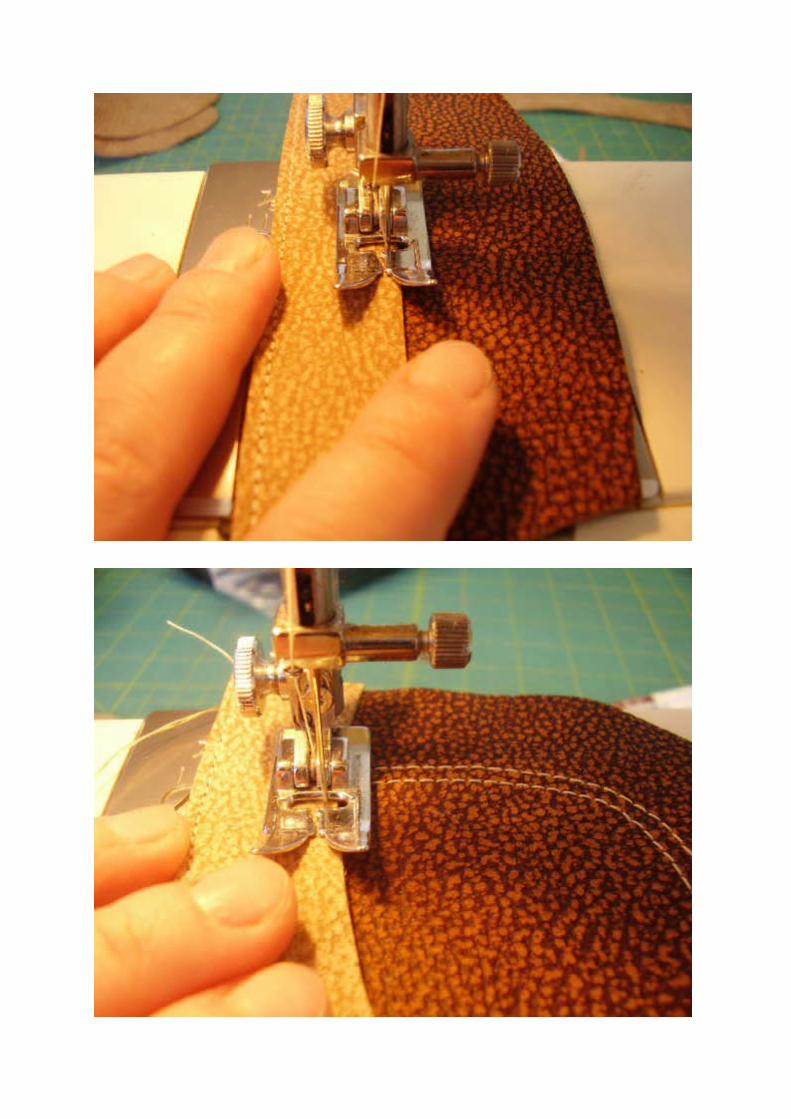
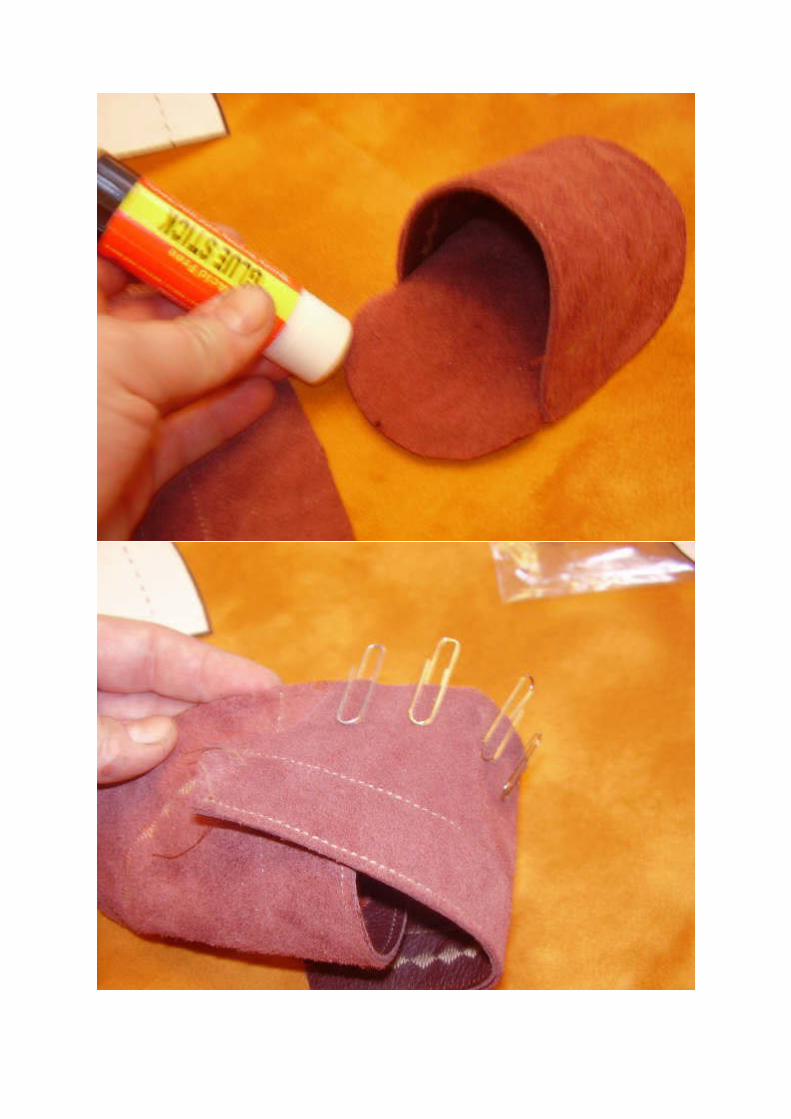
Next, using washable glue stick, temporarily baste the casings onto the shoe backs and the edge trim pieces (if you have not used appliques or other trim instead) onto the shoe uppers to prevent the layers from shifting when you sew them.
Sitch the casings and edge trim on, stitching very close to the edge as shown below.
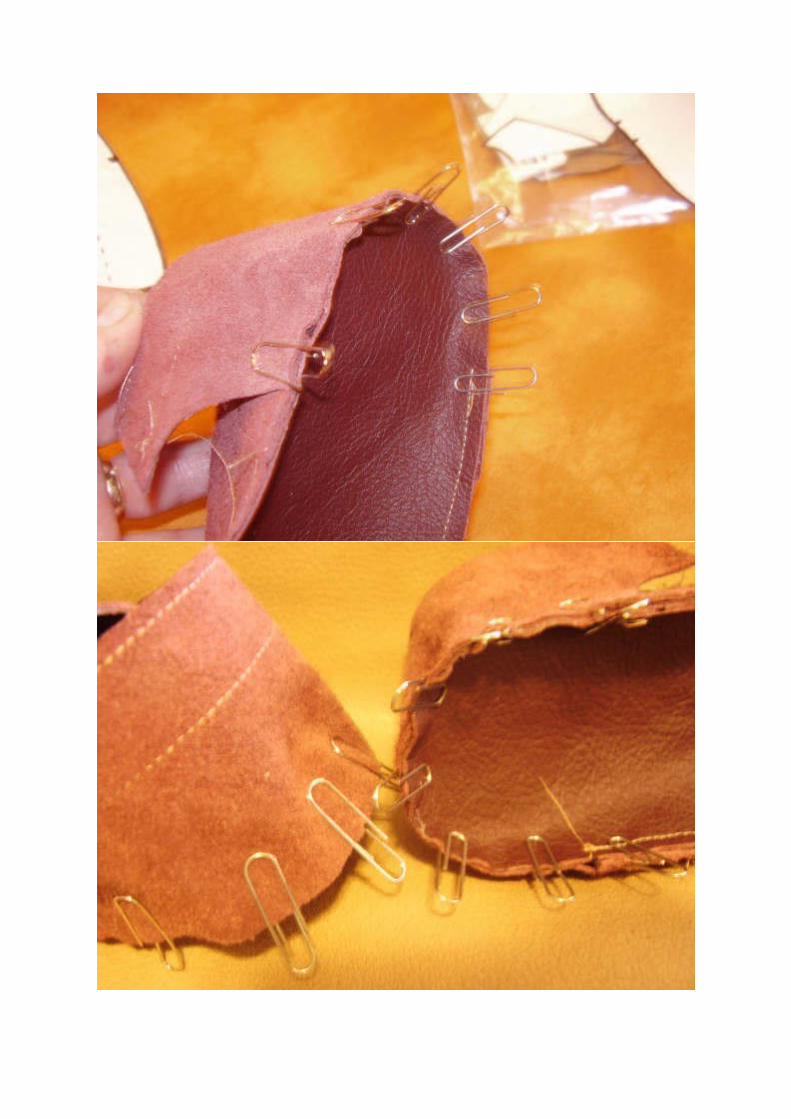
Once you have the uppers decorated and the edging/casings sewn on, it's time to assemble the shoes! I use a washable glue stick and paper clips to secure the upper to the sole, matching markings at sides and center front. You may also use a temporary basting tape to secure the pieces before sewing. Take care to match up the correct uppers and soles (left and right) and be sure you put the suede side of the sole toward the leather side of the upper. When you turn the shoes right sides out, you will want the good leather side of the uppers facing out and the non-skid sueded side of the soles facing out.
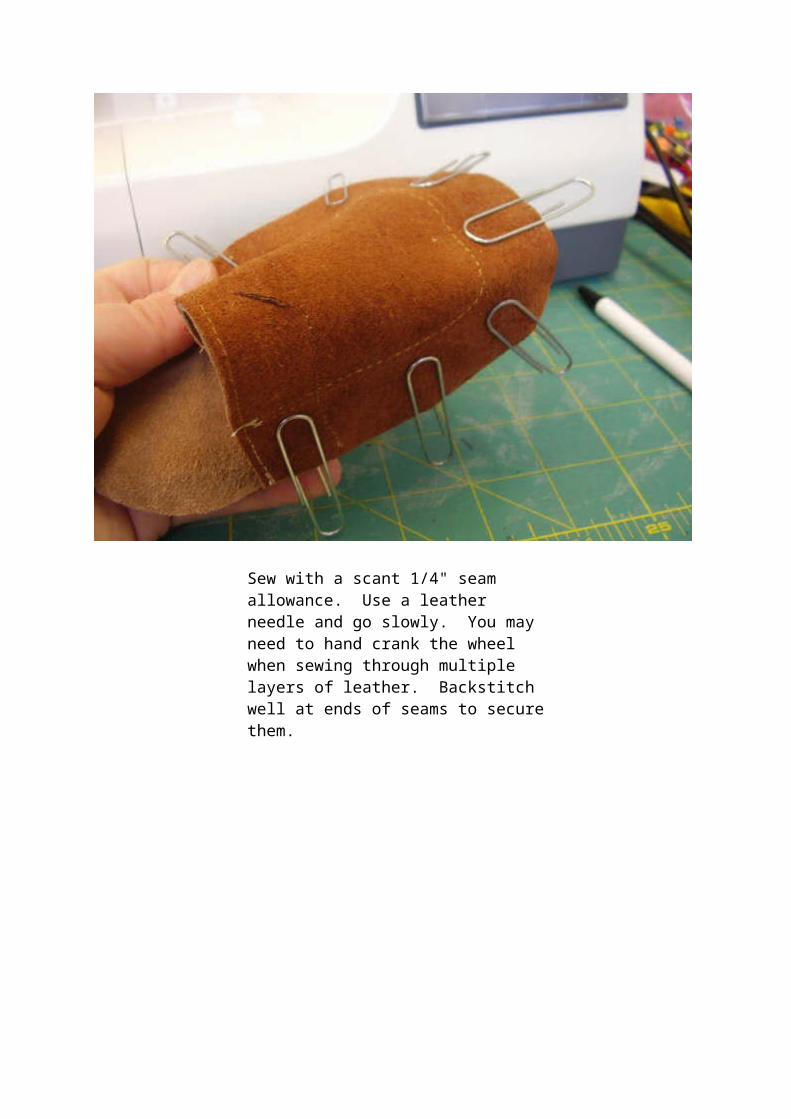
Sew with a scant 1/4" seam allowance. Use a leather needle and go slowly. You may need to hand crank the wheel when sewing through multiple layers of leather. Backstitch well at ends of seams to secure them.
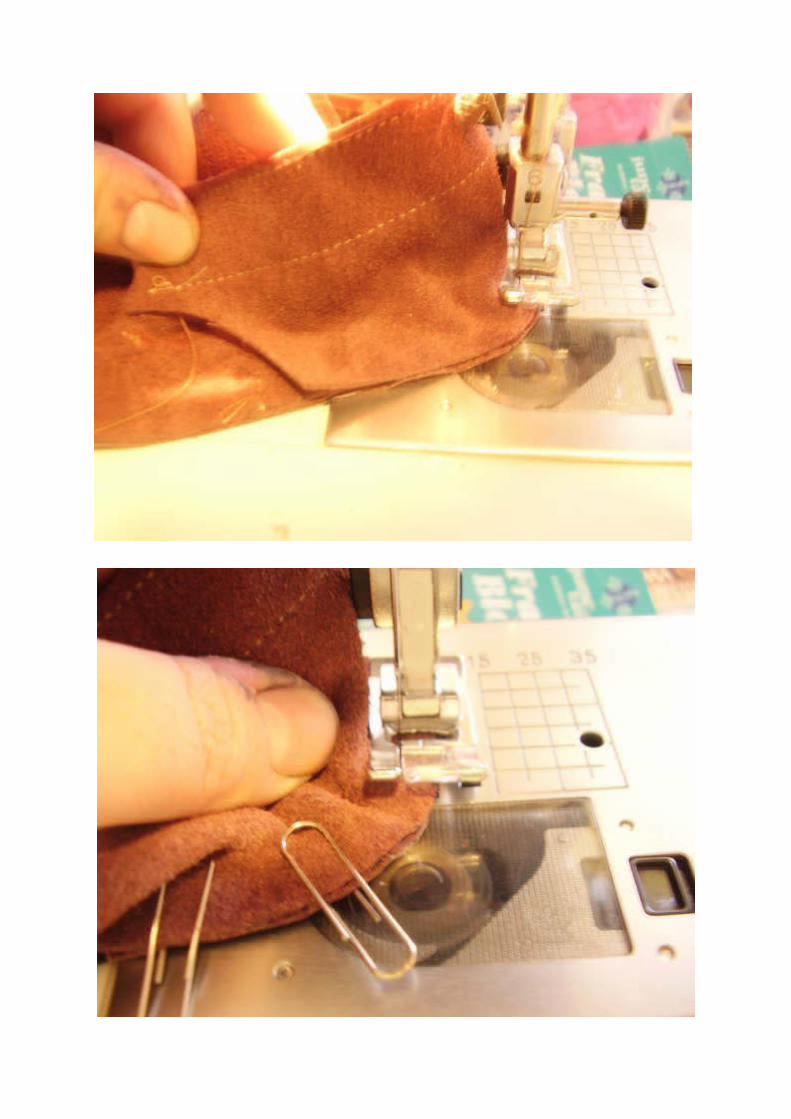
The photo below shows the upper, stitched to the sole. You are now ready to assemble the back heel piece.
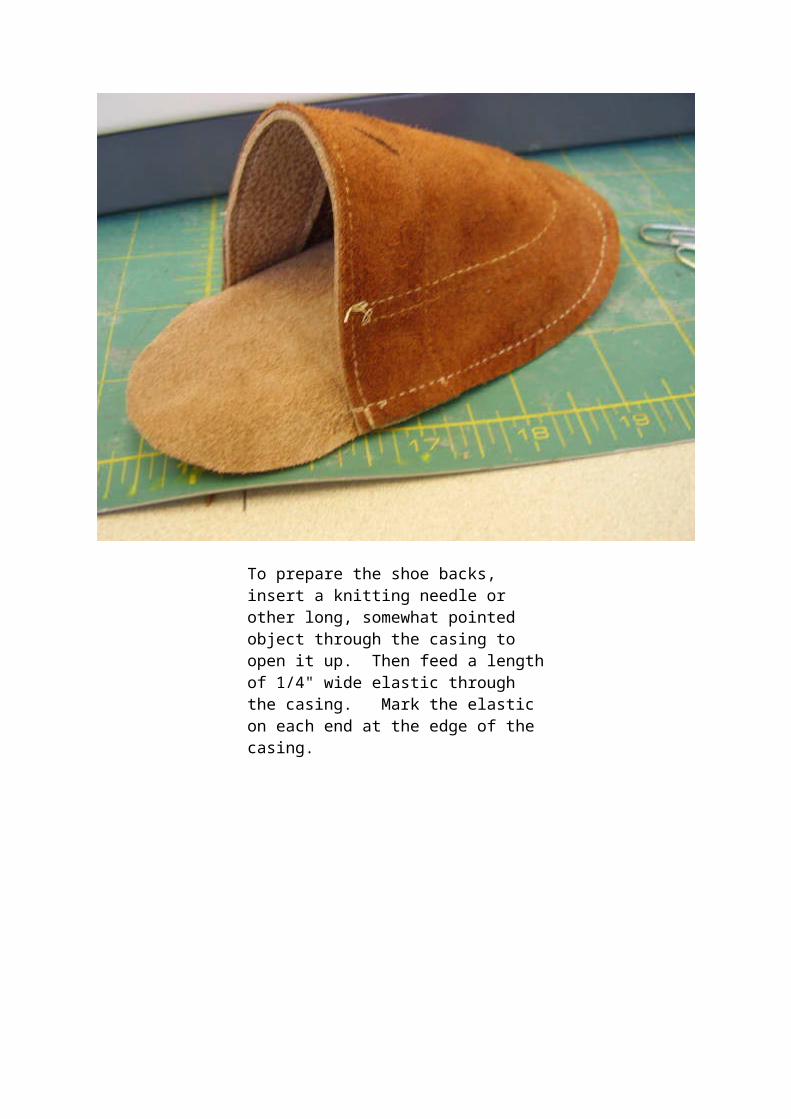
To prepare the shoe backs, insert a knitting needle or other long, somewhat pointed object through the casing to open it up. Then feed a length of 1/4" wide elastic through the casing. Mark the elastic on each end at the edge of the casing.

Next you will position the back heel piece in place, matching the center marks at the back of the shoe sole and the second set of markings along the side of the sole
.
Baste in place with glue stick and hold with paper clips, as with the front. The sides will overlap the upper by about 1 cm.


You will then sew the back heel piece to the sole, again using a scant 1/4" seam allowance.

Now you're almost finished! Use a tweezers to pull one end of the elastic through the slit in the bottom side of the upper.
Stretch out the elastic and trim close to the markings
Overlap the two end pieces by aproximately 1 cm and pin.Zig Zag stitch the ends together securely.
Rotate the elastic within the casing so that the seam is hidden.

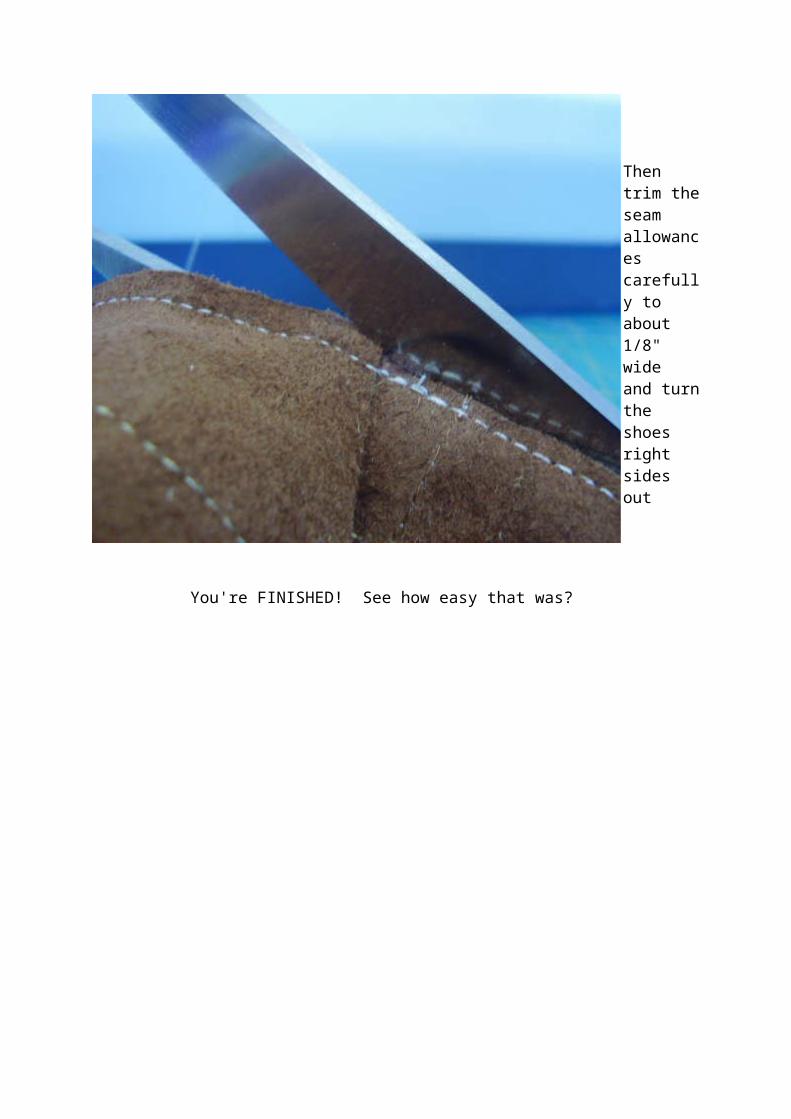
Then trim the seam allowances carefully to about 1/8" wide and turn the shoes right sides out
You're FINISHED! See how easy that was?

Enjoy your new soft leather baby shoes!
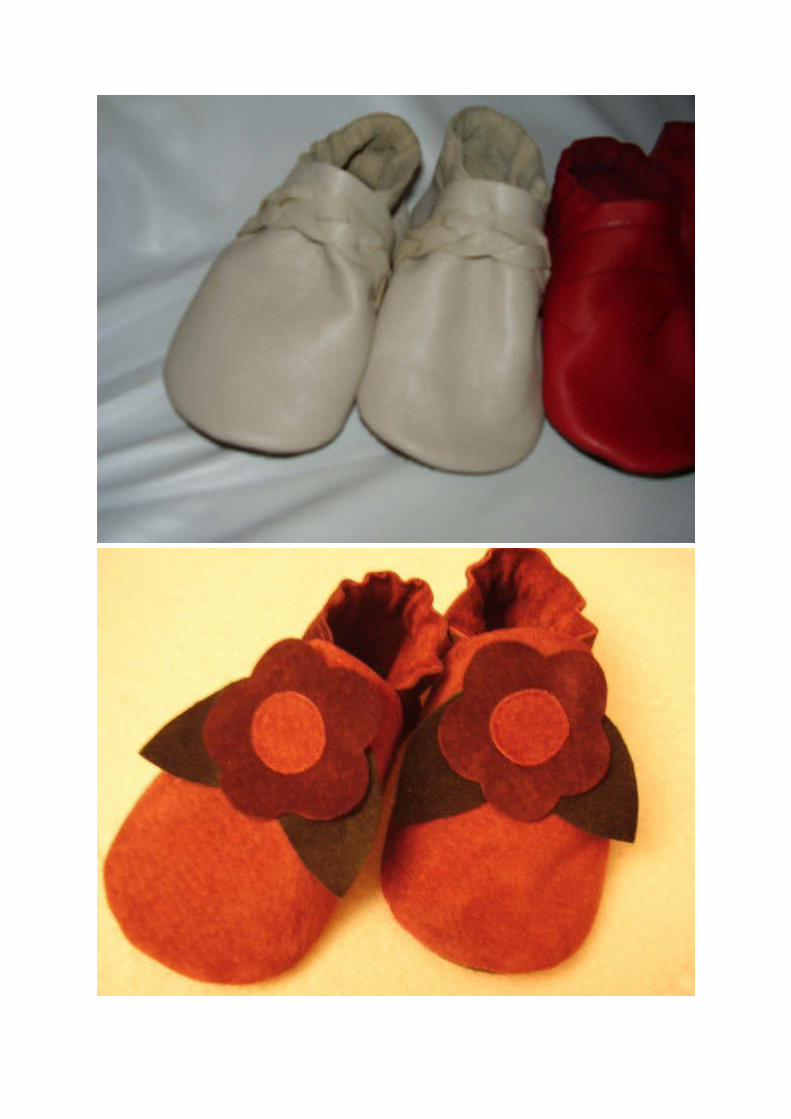
Try some different designs, appliques, decorative stitching, braided or woven trim, color blocking, fringe etc.