sas 9.3 intelligence platformsupport.sas.com/documentation/cdl/en/bimtag/65708/pdf/default/... ·...
TRANSCRIPT

SAS® 9.3 Intelligence PlatformMiddle-Tier Administration GuideThird Edition
SAS® Documentation

The correct bibliographic citation for this manual is as follows: SAS Institute Inc. 2012. SAS® 9.3 Intelligence Platform: Middle-Tier Administration Guide, Third Edition. Cary, NC: SAS Institute Inc.
SAS® 9.3 Intelligence Platform: Middle-Tier Administration Guide, Third Edition
Copyright © 2012, SAS Institute Inc., Cary, NC, USA
All rights reserved. Produced in the United States of America.
For a hardcopy book: No part of this publication may be reproduced, stored in a retrieval system, or transmitted, in any form or by any means, electronic, mechanical, photocopying, or otherwise, without the prior written permission of the publisher, SAS Institute Inc.
For a Web download or e-book: Your use of this publication shall be governed by the terms established by the vendor at the time you acquire this publication.
The scanning, uploading, and distribution of this book via the Internet or any other means without the permission of the publisher is illegal and punishable by law. Please purchase only authorized electronic editions and do not participate in or encourage electronic piracy of copyrighted materials. Your support of others' rights is appreciated.
U.S. Government Restricted Rights Notice: Use, duplication, or disclosure of this software and related documentation by the U.S. government is subject to the Agreement with SAS Institute and the restrictions set forth in FAR 52.227–19, Commercial Computer Software-Restricted Rights (June 1987).
SAS Institute Inc., SAS Campus Drive, Cary, North Carolina 27513.
Electronic book 2, February 2013
SAS® Publishing provides a complete selection of books and electronic products to help customers use SAS software to its fullest potential. For more information about our e-books, e-learning products, CDs, and hard-copy books, visit the SAS Publishing Web site at support.sas.com/publishing or call 1-800-727-3228.
SAS® and all other SAS Institute Inc. product or service names are registered trademarks or trademarks of SAS Institute Inc. in the USA and other countries. ® indicates USA registration.
Other brand and product names are registered trademarks or trademarks of their respective companies.

Contents
What's New in Middle-Tier Administration for the SAS 9.3 Intelligence Platform . . . . . . . . . . . . . . . . . . . . . . . . . . . . . . . . . . . . . . . . . . . . . . . . . . . . . . . . . . . . . . . . . . . . vii
Recommended Reading . . . . . . . . . . . . . . . . . . . . . . . . . . . . . . . . . . . . . . . . . . . . . . . . . . . . xi
Chapter 1 • Working in the Middle-Tier Environment . . . . . . . . . . . . . . . . . . . . . . . . . . . . . . . . . . . . . 1Understanding the Middle-Tier Environment . . . . . . . . . . . . . . . . . . . 2Third-Party Software Components . . . . . . . . . . . . . . . . . . . . . . . . . . . 4SAS Web Infrastructure Platform . . . . . . . . . . . . . . . . . . . . . . . . . . . . 5SAS Content Server . . . . . . . . . . . . . . . . . . . . . . . . . . . . . . . . . . . . . 12SAS Web Applications . . . . . . . . . . . . . . . . . . . . . . . . . . . . . . . . . . . 13Starting the Web Applications . . . . . . . . . . . . . . . . . . . . . . . . . . . . . . 16
Chapter 2 • Best Practices for Configuring Your Middle Tier . . . . . . . . . . . . . . . . . . . . . . . . . . . . . . 19Best Practices for Middle-Tier Configuration . . . . . . . . . . . . . . . . . . 20Sample Middle-Tier Deployment Scenarios . . . . . . . . . . . . . . . . . . . 21Tuning the Web Application Server . . . . . . . . . . . . . . . . . . . . . . . . . 36Configuring a Cluster of Web Application Servers . . . . . . . . . . . . . . 37Configuring HTTP Sessions in Environments with
Proxy Configurations . . . . . . . . . . . . . . . . . . . . . . . . . . . . . . . . . . 37Using an HTTP Server to Serve Static Content . . . . . . . . . . . . . . . . 39Using a Proxy Plug-in between the Web Application
Server and the HTTP Server . . . . . . . . . . . . . . . . . . . . . . . . . . . . 39Using Apache Cache Control for Static Content . . . . . . . . . . . . . . . . 40
Chapter 3 • Middle-Tier Security . . . . . . . . . . . . . . . . . . . . . . . . . . . . . . . . . . . . . . . . . . . . . . . . . . . . . 41Middle-Tier Security . . . . . . . . . . . . . . . . . . . . . . . . . . . . . . . . . . . . . 42Using the SAS Anonymous Web User with SAS Authentication . . . 42Multicast Security . . . . . . . . . . . . . . . . . . . . . . . . . . . . . . . . . . . . . . . 43Using Single Sign-On among Web Applications . . . . . . . . . . . . . . . . 44Using Secure Sockets Layer (SSL) for Web Applications . . . . . . . . 45Configuring and Deploying Restrictive Policy Files . . . . . . . . . . . . . . 46
Chapter 4 • Interacting with the Server Tier . . . . . . . . . . . . . . . . . . . . . . . . . . . . . . . . . . . . . . . . . . . . 57Configuration Shared between the Middle Tier and the Server Tier . 57SMTP Mail Server . . . . . . . . . . . . . . . . . . . . . . . . . . . . . . . . . . . . . . . 58JDBC Data Sources . . . . . . . . . . . . . . . . . . . . . . . . . . . . . . . . . . . . . 59Client-Side Pooling and Server-Side Pooling Options . . . . . . . . . . . 62Job Execution Services . . . . . . . . . . . . . . . . . . . . . . . . . . . . . . . . . . . 63
Chapter 5 • Administering the SAS Web Infrastructure Platform . . . . . . . . . . . . . . . . . . . . . . . . . . . 69SAS Web Infrastructure Platform . . . . . . . . . . . . . . . . . . . . . . . . . . . 70Using Configuration Manager . . . . . . . . . . . . . . . . . . . . . . . . . . . . . . 73Setting Global Properties for SAS Applications Using
SAS Application Infrastructure Properties . . . . . . . . . . . . . . . . . . 77Specifying Connection Parameters for HTTP and
HTTPS Sessions . . . . . . . . . . . . . . . . . . . . . . . . . . . . . . . . . . . . . 84Configuring Auditing for SAS Web Applications . . . . . . . . . . . . . . . . 86Using the SAS Web Administration Console . . . . . . . . . . . . . . . . . . 92
Chapter 6 • Using the SAS Web Infrastructure Platform Utilities . . . . . . . . . . . . . . . . . . . . . . . . . . 103Using the DAVTree Utility to Manage WebDAV Content . . . . . . . . 104Using the Package Cleanup Utility to Remove Packages . . . . . . . 108Using JMX Tools to Manage SAS Resources . . . . . . . . . . . . . . . . 115
Chapter 7 • Administering SAS Web Applications . . . . . . . . . . . . . . . . . . . . . . . . . . . . . . . . . . . . . . 123Using the SAS Deployment Manager . . . . . . . . . . . . . . . . . . . . . . . 124Rebuilding the SAS Web Applications . . . . . . . . . . . . . . . . . . . . . . 125Redeploying the SAS Web Applications . . . . . . . . . . . . . . . . . . . . . 129Reconfiguring the Web Application Server . . . . . . . . . . . . . . . . . . . 137Working with Exploded EAR Files in a Development Environment 138Administering Logging for SAS Web Applications . . . . . . . . . . . . . 139
Chapter 8 • Administering SAS Logon Manager . . . . . . . . . . . . . . . . . . . . . . . . . . . . . . . . . . . . . . . 147About SAS Logon Manager . . . . . . . . . . . . . . . . . . . . . . . . . . . . . . 148Configuring Web Authentication . . . . . . . . . . . . . . . . . . . . . . . . . . . 148Configuring Custom Log On, Log Off, and Time Out Messages . . 149Configuring the HTTP Session Time-out Interval . . . . . . . . . . . . . . 151
iv Contents

Configuring the Display of a Warning Message for Inactive User Sessions . . . . . . . . . . . . . . . . . . . . . . . . . . . . . . . . 155
Configuring Middle Tier Security Policies . . . . . . . . . . . . . . . . . . . . 157Disabling Concurrent Logon Sessions . . . . . . . . . . . . . . . . . . . . . . 159Configuring Application Response Measurement
(ARM) Capabilities . . . . . . . . . . . . . . . . . . . . . . . . . . . . . . . . . . . 160
Chapter 9 • Administering the SAS Content Server . . . . . . . . . . . . . . . . . . . . . . . . . . . . . . . . . . . . . 163About the SAS Content Server . . . . . . . . . . . . . . . . . . . . . . . . . . . . 164Moving Content or Backing Up the SAS Content Server . . . . . . . . 165Deploying Content Manually to the SAS Content Server . . . . . . . . 165Using the SAS Content Server Administration Console . . . . . . . . . 172Implementing Authorization for the SAS Content Server . . . . . . . . 179Reconfiguring the SAS Content Server to Use a
Database for Storage . . . . . . . . . . . . . . . . . . . . . . . . . . . . . . . . . 183
Chapter 10 • Administering the SAS BI Web Services . . . . . . . . . . . . . . . . . . . . . . . . . . . . . . . . . . 191Overview of SAS BI Web Services for SAS 9.3 . . . . . . . . . . . . . . . 191SAS BI Web Services in SAS 9.3 . . . . . . . . . . . . . . . . . . . . . . . . . . 192Managing Generated Web Services . . . . . . . . . . . . . . . . . . . . . . . . 192Configuring SAS BI Web Services for Java . . . . . . . . . . . . . . . . . . 193Overview of Security for Web Services . . . . . . . . . . . . . . . . . . . . . . 198Securing SAS BI Web Services for Java . . . . . . . . . . . . . . . . . . . . 200
Chapter 11 • Administering SAS Web Application Themes . . . . . . . . . . . . . . . . . . . . . . . . . . . . . . 203Overview . . . . . . . . . . . . . . . . . . . . . . . . . . . . . . . . . . . . . . . . . . . . . 204Steps for Defining and Deploying a New Theme . . . . . . . . . . . . . . 207Deploying SAS Web Application Themes on a
Different Web Application Server . . . . . . . . . . . . . . . . . . . . . . . . 221Deleting a Custom Theme from the Metadata . . . . . . . . . . . . . . . . 223Migrating Custom Themes . . . . . . . . . . . . . . . . . . . . . . . . . . . . . . . 224
Chapter 12 • Administering SAS Flex Application Themes . . . . . . . . . . . . . . . . . . . . . . . . . . . . . . 233Overview of SAS Flex Application Themes . . . . . . . . . . . . . . . . . . 233Deploying SAS Flex Application Themes on a
Different Web Application Server . . . . . . . . . . . . . . . . . . . . . . . . 235
Contents v

Chapter 13 • Administering Multicast Options . . . . . . . . . . . . . . . . . . . . . . . . . . . . . . . . . . . . . . . . . 237Overview of Multicasting . . . . . . . . . . . . . . . . . . . . . . . . . . . . . . . . . 238How Much Multicast Network Traffic is Generated? . . . . . . . . . . . . 239Configuring Multicast Options . . . . . . . . . . . . . . . . . . . . . . . . . . . . . 239Configuring a Multicast Authentication Token . . . . . . . . . . . . . . . . . 243Configuring the JGroups Bind Address . . . . . . . . . . . . . . . . . . . . . . 246
Chapter 14 • SAS Configuration Scripting Tools . . . . . . . . . . . . . . . . . . . . . . . . . . . . . . . . . . . . . . . 251Overview . . . . . . . . . . . . . . . . . . . . . . . . . . . . . . . . . . . . . . . . . . . . . 252Special Considerations . . . . . . . . . . . . . . . . . . . . . . . . . . . . . . . . . . 253Scripting Tool for WebLogic Server . . . . . . . . . . . . . . . . . . . . . . . . 254Scripting Tool for JBoss Application Server . . . . . . . . . . . . . . . . . . 276Scripting Tool for WebSphere Application Server . . . . . . . . . . . . . . 290
Appendix 1 • Configuring the SAS Environment File . . . . . . . . . . . . . . . . . . . . . . . . . . . . . . . . . . . 321About the SAS Environment File . . . . . . . . . . . . . . . . . . . . . . . . . . 321Configuring the SAS Environment File . . . . . . . . . . . . . . . . . . . . . . 322
Glossary . . . . . . . . . . . . . . . . . . . . . . . . . . . . . . . . . . . . . . . . . . . . . . . . . . . . . . . . . . . . . . . . . . . 325Index . . . . . . . . . . . . . . . . . . . . . . . . . . . . . . . . . . . . . . . . . . . . . . . . . . . . . . . . . . . . . . . . . . . . . . . 333
vi Contents

Whatʼs New
What's New in Middle-Tier Administration for the SAS 9.3 Intelligence Platform
Overview
The SAS 9.3 middle-tier software has the following changes and enhancements:
n SAS Middle Tier Supported on 64-Bit Systems Only
n SAS BI Web Services for .NET Is No Longer Shipped
n Web Application Logging with Log4j
n Changes to the Audit Service
n New Configuration Scripting Tools
n Predefined Role for SAS Comment Manager
n New SAS Logon Manager Security Policy to Disable Concurrent Logon Sessions
n Documentation Enhancements
vii

SAS Middle Tier Supported on 64-Bit Systems Only
The SAS 9.3 middle-tier software is supported on 64-bit operating systems only.
SAS BI Web Services for .NET Is No Longer Shipped
SAS has discontinued the SAS BI Web Services for .NET product. Customers that used the functionality provided by this application are encouraged to transition to the SAS BI Web Services for Java product.
Web Application Logging with Log4j
In the SAS 9.2 release, logging for the SAS Web applications was performed with a logging service. For the SAS 9.3 release, logging is performed with log4j. Logging configuration is performed in two ways. First, each Web application reads a log4j configuration file. Second, some Web applications enable dynamic logging changes that can be set in the SAS Web Administration Console.
Changes to the Audit Service
In the SAS 9.2 release, audit records could be stored to a log file or to a database. In the SAS 9.3 release, all SAS deployments are configured to use the SAS Web Infrastructure Platform database. The SAS 9.3 release also has an update to the SAS Web Administration Console to display user-level audit information.
viii Middle-Tier Administration
New Configuration Scripting Tools
For the SAS 9.3 release, the SAS middle-tier software includes a configuration scripting tool for each of the three supported Web applications servers. The primary purpose of the configuration scripting tools is to support configuring a Web application server for sites that do not permit running the SAS Deployment Wizard on a middle-tier machine.
In the first maintenance release of SAS 9.3, the syntax for invoking a single command on JBoss and WebSphere Application Server changed. In addition, the commands or operations are no longer pre-production status.
Predefined Role for SAS Comment Manager
In the SAS 9.2 release, editing and deletion capabilities in the SAS Comment Manager were accomplished by creating a role and assigning users to that role. In SAS 9.3, users requiring these capabilities should be assigned to a new predefined role, Comments:Administrator.
New SAS Logon Manager Security Policy to Disable Concurrent Logon Sessions
For the SAS 9.3 release, SAS Logon Manager can be configured to prevent concurrent logon sessions. This option might be attractive for deployments in highly regulated environments.
New SAS Logon Manager Security Policy to Disable Concurrent Logon Sessions ix

Documentation Enhancements
n In the second maintenance release of SAS 9.3, information about the Web application start-up sequence is enhanced. For deployments that use IBM WebSphere Application Server, there is a sequence for five applications, but the remaining Web applications can be started in any sequence.
n In the second maintenance release of SAS 9.3, procedural information about configuring third-party vendor software such as HTTP servers and proxy plug-ins is removed. Documentation that describes the procedural steps is provided at http://support.sas.com/thirdpartysupport.
n In the first maintenance release of SAS 9.3, the configuration scripting tools chapter is enhanced to include more procedural information. Step-action procedures that describe how to run the tools to configure the middle-tier software are new.
n In the first maintenance release of SAS 9.3, procedural information about configuring Secure Sockets Layer (SSL) is removed. Documentation that describes the procedural steps is provided at http://support.sas.com/thirdpartysupport.
n SAS Logon Manager is documented in its own chapter. New configuration steps are provided for configuring custom logon, log off, and time-out messages. More information is provided about configuring HTTP session time-out intervals.
n The configuration steps for rebuilding and redeploying the SAS Web applications has been revised. More information about when the Web application server can be running, or must be stopped, is provided.
n Information about configuring the JGroups bind address has been added. This information was previously provided by SAS Technical Support in a SAS Note.
x Middle-Tier Administration

Recommended Reading
n SAS Intelligence Platform: Overview
n SAS Intelligence Platform: System Administration Guide
n SAS Intelligence Platform: Security Administration Guide
n SAS Management Console: Guide to Users and Permissions
n SAS Integration Technologies: Overview
n SAS offers instructor-led training and self-paced e-learning courses to help you administer the SAS Intelligence Platform. For more information about the courses available, see support.sas.com/admintraining.
For a complete list of SAS books, go to support.sas.com/bookstore. If you have questions about which titles you need, please contact a SAS Book Sales Representative:
SAS BooksSAS Campus DriveCary, NC 27513-2414Phone: 1-800-727-3228Fax: 1-919-677-8166E-mail: [email protected] address: support.sas.com/bookstore
xi

xii Recommended Reading

1Working in the Middle-Tier Environment
Understanding the Middle-Tier Environment . . . . . . . . . . . . . . . . . . . . . . . . . 2
Third-Party Software Components . . . . . . . . . . . . . . . . . . . . . . . . . . . . . . . . . . . . . 4Web Application Server . . . . . . . . . . . . . . . . . . . . . . . . . . . . . . . . . . . . . . . . . . . . . . . . . 4Java Development Kit . . . . . . . . . . . . . . . . . . . . . . . . . . . . . . . . . . . . . . . . . . . . . . . . . . . 5
SAS Web Infrastructure Platform . . . . . . . . . . . . . . . . . . . . . . . . . . . . . . . . . . . . . . . 5Services and Applications in the SAS Web
Infrastructure Platform . . . . . . . . . . . . . . . . . . . . . . . . . . . . . . . . . . . . . . . . . . . . . . . . 5SAS Foundation Services . . . . . . . . . . . . . . . . . . . . . . . . . . . . . . . . . . . . . . . . . . . . . . 9SAS Web Infrastructure Platform Services . . . . . . . . . . . . . . . . . . . . . . . . . 10SAS Workflow . . . . . . . . . . . . . . . . . . . . . . . . . . . . . . . . . . . . . . . . . . . . . . . . . . . . . . . . . . 11
SAS Content Server . . . . . . . . . . . . . . . . . . . . . . . . . . . . . . . . . . . . . . . . . . . . . . . . . . . . . . 12
SAS Web Applications . . . . . . . . . . . . . . . . . . . . . . . . . . . . . . . . . . . . . . . . . . . . . . . . . . . 13SAS Web Report Studio . . . . . . . . . . . . . . . . . . . . . . . . . . . . . . . . . . . . . . . . . . . . . . . 13SAS Information Delivery Portal . . . . . . . . . . . . . . . . . . . . . . . . . . . . . . . . . . . . . . 14SAS BI Dashboard . . . . . . . . . . . . . . . . . . . . . . . . . . . . . . . . . . . . . . . . . . . . . . . . . . . . . 14SAS Documentation for the Web . . . . . . . . . . . . . . . . . . . . . . . . . . . . . . . . . . . . . 15SAS BI Portlets . . . . . . . . . . . . . . . . . . . . . . . . . . . . . . . . . . . . . . . . . . . . . . . . . . . . . . . . . 15
Starting the Web Applications . . . . . . . . . . . . . . . . . . . . . . . . . . . . . . . . . . . . . . . . . 16Main Steps for Starting the Web Applications . . . . . . . . . . . . . . . . . . . . . . 16Deploying and Starting Web Applications in the Correct Order . . 16
1

Understanding the Middle-Tier Environment
The middle tier of the SAS Intelligence Platform enables users to access intelligence data and functionality with a Web browser. This tier provides Web-based interfaces for report creation and information distribution, while passing analysis and processing requests to the SAS servers.
The middle tier of the SAS Intelligence Platform provides an environment for running applications such as SAS Web Report Studio and SAS Information Delivery Portal. These applications run in a Web application server and have a graphical user interface that users navigate with a Web browser. These applications rely on servers on the SAS server tier to perform SAS processing, including data query and analysis.
The following figure shows how the middle tier interacts with the other tiers of the SAS Intelligence Platform. For a description of these components, see SAS Intelligence Platform: Overview.
Figure 1.1 Architecture of the SAS Intelligence Platform
SAS OLAP Cubes
Third-party
Data Stores
Enterprise Resource
Planning (ERP) Systems
Data Sources SAS Servers
SAS Metadata Server
SAS Workspace
Server
SAS OLAP Server
SAS Stored
Process Server
Running SAS processes for
distributed clients
Middle Tier Clients
Desktop clients:
• SAS Add-In for Microsoft Office
• SAS Data Integration Studio
• SAS Enterprise Guide
• SAS Enterprise Miner
• SAS Forecast Studio
SAS Information Map Studio •
• SAS Model Manager
• SAS Management Console
• SAS OLAP Cube Studio
• JMP
• SAS Workflow Studio
• Other SAS analytics and
solutions
Web browser (to surface
Web applications)
Web Application
Server
SAS Scalable
Performance
Data (SPD) Server
SAS Framework
Data Server
SAS Pooled
Workspace Server SAS Scalable
Performance Data
(SPD) Engine Tables
SAS Data Sets
SAS Remote Services
RMI Server
SAS Web Inf rastructurePlatform
• SAS Web Report Studio
•
SAS BI Portlets•
SAS Information
Delivery Portal
• SAS BI Dashboard
• SAS Help Viewer for the
Web
• Other SAS Web
applications and solutions HTTP
HTTPSASContentServer
Other infrastructure applications & services
2 Chapter 1 / Working in the Middle-Tier Environment

The middle tier includes the following software elements:
n a Web application server
n a Java Development Kit
n SAS Web applications, which can include SAS Web Report Studio, the SAS Information Delivery Portal, the SAS BI Dashboard, and other SAS products and solutions
n the SAS Web Infrastructure Platform, which includes the SAS Content Server and other infrastructure applications and services
n a Java remote method invocation (RMI) server, which provides access to SAS Foundation Services and associated extension services
The SAS Intelligence Platform architecture provides the flexibility to distribute these components according to your organization's requirements. For small implementations, the middle-tier software, SAS Metadata Server, and other SAS servers, such as the SAS Workspace Server and SAS Stored Process Server, can all run on the same machine. In contrast, a large enterprise might have multiple servers and a metadata repository that are distributed across multiple platforms. The middle tier in such an enterprise might distribute the Web applications to many Web application server instances on multiple machines.
Understanding the Middle-Tier Environment 3

The following figure illustrates the middle-tier components:
Figure 1.2 Middle-Tier Components
SAS Remote Services RMI Server Relational database
(for alerts, comments,
workflows, and SAS
Content Server)
SAS Foundation Services
(SAS Remote Services)
Web Application Server
SAS Information
Delivery Portal
JPS Extension
SAS BI
Dashboard
SAS
BI Portlets
SAS
Help Viewer
for the Web
Other SAS
Web applications
and solutions
SAS Web
Report
Studio
SAS
Information
Delivery Portal
SAS Web Infrastructure Platform
Other JPS
Extensions
SAS BI Web
Services
SAS Shared
Web Assets
SAS Logon
Manager
SAS Web
Infrastructure
Services
SAS Comment
Manager
SAS Content
Server
SAS
Preferences
Manager
SAS Workflow
Engine
SAS Stored
Process Web
Application
SAS Web
Administration
Console
Third-Party Software Components
Web Application Server
The Web application server provides the execution environment for the SAS Web applications. The following third-party servers are supported:
n JBoss Application Server
n IBM WebSphere Application Server
n Oracle WebLogic Server
For information about the supported versions of these products and supported platforms, see the SAS third-party Web page at http://support.sas.com/resources/thirdpartysupport/v93.
4 Chapter 1 / Working in the Middle-Tier Environment

The following applications and services run in the Web application server environment:
n applications and services that are part of the SAS Web Infrastructure Platform
n the SAS Web Report Studio, SAS Information Delivery Portal, SAS BI Dashboard, and SAS Help Viewer for the Web applications
Depending on which products and solutions you have purchased, your site might have additional Web applications.
Java Development Kit
If you are using JBoss or WebLogic Server, a Java Development Kit (JDK) must be installed for compiling the SAS Web applications. WebSphere Application Server is shipped with a JDK. For information about the supported versions of the JDK, see the SAS third-party Web site at http://support.sas.com/resources/thirdpartysupport/v93.
SAS Web Infrastructure PlatformThe SAS Web Infrastructure Platform is a collection of services and applications that provide common infrastructure and integration features for the SAS Web applications.
Services and Applications in the SAS Web Infrastructure Platform
Services and applications in the Web Infrastructure Platform provide the following benefits:
n consistent installation, configuration, and administration tasks for Web applications
n consistent user interactions with Web applications, such as logon
n integration among Web applications as a result of sharing common resources
The following services and applications are included in the SAS Web Infrastructure Platform:
SAS Web Infrastructure Platform 5

Table 1.1 Services and Applications in the SAS Web Infrastructure Platform
Application or Service Features
SAS BI Web Services for Java Can be used to enable your custom applications to invoke and obtain metadata about SAS Stored Processes. Web services enable distributed applications that are written in different programming languages and that run on different operating systems to communicate using standard Web-based protocols. The most common protocol is the Simple Object Access Protocol (SOAP).The SAS BI Web Services for Java interface is based on the XML For Analysis (XMLA) Version 1.1 specification.
SAS Content Server Stores digital content (such as documents, reports, and images) that can be created and used by the SAS Web applications.
SAS Logon Manager Provides a common user authentication mechanism for SAS Web applications. It displays a dialog box for user ID and password entry, authenticates the user, and launches the requested application. SAS Logon Manager supports a single sign-on authentication model. When this model is enabled, it provides access to a variety of computing resources (including servers and Web pages) during the application session without repeatedly prompting the user for credentials.You can configure SAS Logon Manager to display custom messages and to specify whether a logon dialog box is displayed when users log off.
SAS Preferences Manager Provides a common mechanism for managing preferences for SAS Web applications. The application enables administrators to set default preferences for how locale, theme, alert notification, time, date, and currency are displayed. In the SAS Information Delivery Portal, users can view the default settings and update their individual preferences.
SAS Shared Web Assets Contains graph applet JAR files that are shared across SAS Web applications. They display graphs in stored processes and in the SAS Stored Process Web application.
6 Chapter 1 / Working in the Middle-Tier Environment

Application or Service Features
SAS Stored Process Web Application
Provides a mechanism for Web clients to run SAS Stored Processes and return the results to a Web browser. The SAS Stored Process Web application is similar to the SAS/IntrNet Application Broker, and has similar syntax and debug options. Web applications can be implemented using the SAS Stored Process Web application, the Stored Process Service API, or a combination of both. Here is how the SAS Stored Process Web Application processes a request:
1 A user enters information in an HTML form using a Web browser and then submits it. The information is sent to a Web server, which invokes the first component, the SAS Stored Process Web application.
2 The Stored Process Web application accepts data from the Web server, and contacts the SAS Metadata Server for retrieval of stored process information.
3 The stored process data is then sent by the Stored Process Web application to a stored process server via the object spawner.
4 The stored process server invokes a SAS program that processes the information.
5 The results of the SAS program are sent back through the Web application and Web server to the Web browser.
SAS Web Infrastructure Platform 7

Application or Service Features
SAS Web Administration Console
Provides features for monitoring and administering middle-tier components. This browser-based interface enables administrators to perform the following tasks:n Monitor users who are logged on to SAS Web
applications, and send e-mail to them.n View user-level audit information such as the number of
users, successful logons, unsuccessful logons, and find the time of a user’s last logon.
n Use the Restart Wizard to send e-mail to users to log off within a specified deadline, log the users off after the deadline, and prevent new users from logging on to SAS Web applications before the deadline.
n Use the Quiesce System feature to allow existing users to stay logged on, and quiesce the system by preventing new users from logging on to SAS Web applications.
n Create, delete, and manage permissions for folders on the SAS Content Server
n View configuration information for each middle-tier component.
SAS Web Infrastructure Platform Services
Provides a common infrastructure for SAS Web applications. The infrastructure supports activities such as auditing, authentication, configuration, status and monitoring, e-mail, theme management, and data sharing across SAS Web applications.
SAS Workflow Provides the Web services that implement workflow management. The SAS Workflow services are used by SAS applications and solutions for tightly integrated workflow management.
In the middle tier, the SAS Web Infrastructure Platform plays an important and critical role with a collection of middle-tier services and applications that provide basic integration services.
In the Web application server, two sets of services are available to all SAS Web applications:
n SAS Foundation Services
8 Chapter 1 / Working in the Middle-Tier Environment

n SAS Web Infrastructure Platform Services
SAS Foundation Services
The SAS Foundation Services is a set of core infrastructure services that enables Java programmers to write distributed applications that are integrated with the SAS platform. This suite of Java application programming interfaces provides core middleware infrastructure services. These services include the following:
n client connections to SAS Application Servers
n dynamic service discovery
n user authentication
n profile management
n session management
n activity logging
n metadata and content repository access
n connection management
n WebDAV service
Extension services for information publishing, event management, and SAS Stored Process execution are also provided. All of the SAS Web applications that are described in this document use the SAS Java Platform Services. If you have correctly installed and configured the Web applications, the platform services are defined in your SAS metadata repository.
You can verify this metadata in the SAS Management Console. Depending on the Web applications that were installed, the SAS Portal Local Services (used by the SAS Information Delivery Portal) are displayed in the SAS Management Console.
In addition, other applications and portlets might have deployment of their own local services.
SAS Web Infrastructure Platform 9

SAS Web Infrastructure Platform Services
The SAS Web Infrastructure Platform Services provide common infrastructure and integration features that can be shared by any SAS application. Here is a description of the features:
n Audit provides a single, common auditing capability.
n Authentication is a common method for authenticating middle-tier applications. A corresponding Web service provides connectivity based on WS security standards for Web service clients.
n Configuration is a standard way to define, store, and retrieve configuration information for SAS applications.
n Directives provide application integration so that SAS applications can share intelligence and data. Applications can link to one another without requiring specific information about a particular deployment location.
n Mail is a single, common mechanism for Simple Mail Transfer Protocol (SMTP)-based mail.
n Status and monitoring is a collective set of services providing information about the configured or functioning system.
n Comment service enables users to add comments, with or without an attachment. This feature enables the capture of human intelligence and supports collaborative decision making related to business data.
n Alerts service enables users to register to receive time-sensitive, action-oriented messages when a specified combination of events and conditions occurs. Alerts can be sent to the user's e-mail address or displayed in the SAS Information Delivery Portal.
n Themes provide access to theme definitions for presentation assets used in Web applications.
n SAS Workflow Services enable applications to interact with business processes that run in the SAS Workflow Engine.
10 Chapter 1 / Working in the Middle-Tier Environment

n Registry provides access to services for desktop clients; a client needs to know only a single endpoint to determine other required locations.
SAS Workflow
SAS Workflow provides services that work together to model, automate, integrate, and streamline business processes. It provides a platform for more efficient and productive business solutions. SAS Workflow is used by SAS solutions that benefit from business process management.
SAS Workflow Studio is a desktop client application that is used to design and deploy workflows. The SAS middle tier hosts the workflow engine and the workflow services.
For deployments that use the default SAS Web Infrastructure Platform database provided by SAS Framework Data Server, there is a limitation on the number of groups and roles that SAS Workflow user can belong to. Users of SAS Workflow, and SAS solutions that use SAS Workflow, are limited to being members of 26 roles and groups. Attempting to assign more than 26 roles and groups to a user can cause queries to fail in the SAS Framework Data Server.
For deployments that use WebSphere Application Server and have a SAS solution, such as SAS Enterprise Case Management, that uses SAS Workflow, change the following settings to improve performance:
1 Increase the memory settings in the JVM options:
a Select Servers Server Types WebSphere application servers and then select SASServer1. If SASWorkflow9.3 is deployed on a different server, then select that server instance instead.
b Select Java and Process Management Process definition and then click Java Virtual Machine. In the Generic JVM arguments field, change the settings to the following values:
-Xms4096m -Xmx4096m -Xss512k
Remove the -Xmso JVM option if it is present.
SAS Web Infrastructure Platform 11

2 Set optimistic locking and increase the connection pool size for the SharedServices data source:
a Select Resources JDBC Data sources and then select SharedServices.
b Click Custom properties and then click New. Enter the following settings:
Name: websphereDefaultIsolationLevel
Value: 2
Type: java.lang.String
c Select SharedServices from the breadcrumb at the top of the page and then select Connection pool properties. Change the values for the following settings:
Maximum connections: 100
Minimum connections: 1
3 Increase the settings for JMS connection pooling:
a Select Resources JMS Queue connection factories and then select SASQueueConnectionFactory.
b Click Connection pool properties. Change the values for the following settings:
Maximum connections: 50
Minimum connections: 10
SAS Content Server
The SAS Content Server is part of the SAS Web Infrastructure Platform. This server stores digital content (such as documents, reports, and images) that is created and used by SAS Web applications. For example, the SAS Content Server stores report definitions that are created by users of SAS Web Report Studio, as well as images and other elements that are used in reports. A process called content mapping ensures that
12 Chapter 1 / Working in the Middle-Tier Environment

report content is stored using the same folder names, folder hierarchy, and permissions that the SAS Metadata Server uses to store corresponding report metadata.
In addition, the SAS Content Server stores documents and other files that are to be displayed in the SAS Information Delivery Portal or in SAS solutions.
To interact with the SAS Content Server, client applications use Web-based Distributed Authoring and Versioning (WebDAV) based protocols for access, versioning, collaboration, security, and searching. Administrative users can use the browser-based SAS Web Administration Console to create, delete, and manage permissions for folders on the SAS Content Server. Administrative users can also search the SAS Content Server by using industry-standard query syntax, including XML Path Language (XPath) and DAV Searching and Locating (DASL).
SAS Web ApplicationsThe SAS Web applications described in this section have user interfaces that are used by people other than administrators. These applications require a Web browser on each client machine and run in a Web application server that is installed on a middle-tier machine. These applications communicate with the user by sending data to and receiving data from the user's Web browser. For example, these applications display a user interface by sending HTML that includes HTML forms, Java Applets, or Adobe Flash content. The user can interact and submit input to the application by sending an HTTP response, usually by clicking a link or submitting an HTML form.
SAS Web Report Studio
SAS Web Report Studio is a Web application that anyone can use to view, interact with, create, and distribute public and private reports. Reports can be scheduled to run unattended on a recurring basis and then distributed using e-mail. SAS Web Report Studio requires the SAS BI Report Services (which includes the report output generation tool) and the SAS BI Report Services Configuration (which creates libraries used by the SAS Web Report Studio).
SAS Web Applications 13

SAS Information Delivery Portal
The SAS Information Delivery Portal is a Web application that enables you to aggregate data from a variety of sources and present the data in a Web browser. The Web browser content might include the output of SAS Stored Processes, links to Web addresses, documents, syndicated content from information providers, SAS Information Maps, SAS reports, and Web applications. The portal also provides a secure environment for sharing information with users.
Using the portal, you can distribute different types of content and applications as appropriate to internal users, external customers, vendors, and partners. You can use the portal along with the Publishing Framework to perform the following tasks:
n Publish content to SAS publication channels or WebDAV repositories
n Subscribe to publication channels
n View packages published to channels
The portal's personalization features enable users to organize information about their desktops in a way that makes sense to them.
For more information, see the SAS Information Delivery Portal Help, which is available from within the product.
SAS BI Dashboard
SAS BI Dashboard 4.3 enables users to create, maintain, and view dashboards to monitor key performance indicators that convey how well an organization is performing. SAS BI Dashboard 4.3 includes an easy-to-use, drag and drop interface for creating dashboards that include graphics, text, colors, and hyperlinks. The application leverages Flash in the Rich Internet Application (RIA) architecture.
The Dashboard Viewer enables users to:
n Interact with data through interactive highlighting
n Quickly get to a subset of data through prompts and filters
14 Chapter 1 / Working in the Middle-Tier Environment

Dashboards can link to:
n SAS reports and analytical results
n Scorecards and objects associated with solutions such as SAS Strategy Management
n Stored Processes
n Indicators
n Virtually any item that is addressable by a Uniform Resource Identifier (URI)
With the ability to save favorite dashboards and add comments, users can collaborate and easily access dashboards with customized information. All content is displayed in a role-based, secure, customizable, and extensible environment.
SAS Documentation for the Web
Your installation can include the SAS Help Viewer for Midtier Applications. SAS Help Viewer for Midtier Applications enables users to view and navigate SAS online Help in the various SAS Web applications. This component combines the help viewer with the help content for various SAS Web applications and creates an EAR file that can be deployed on a Web application server. Users access the help contents for each application through the help menu that is provided with each SAS Web application.
The SAS Help Viewer for Midtier Applications also provides an administrative interface that is used to view the status of the documentation products. Administrators can use this interface to determine whether the documentation products were installed correctly, or whether there was a configuration problem. The administration interface is available from http://server:port/SASWebDoc.
SAS BI Portlets
The SAS BI Portlets are based on JSR 168 and are available with SAS Enterprise Business Intelligence Server. These portlets are seamlessly integrated into the SAS Information Delivery Portal. SAS BI Portlets enable users to access, view, or work with content items that reside in either the SAS metadata server or the SAS Content Server.
SAS Web Applications 15

Starting the Web Applications
Main Steps for Starting the Web Applications
To start the Web applications, follow these steps:
1 Start the SAS servers and services in the correct order. For more information about the sequence, see “Overview of Server Operation” in SAS Intelligence Platform: System Administration Guide.
2 Start a browser session and point the browser to the Web application that you want to access. For the correct URL, see the Instructions.html document, which resides in the Documents subdirectory of your configuration directory. The exact URL varies with the Web application server that you are using and the configuration that you have defined for your environment.
3 Log on to the Web application. For instructions about logging on to a Web application, see the online Help that is provided with the application.
Deploying and Starting Web Applications in the Correct Order
The SAS Deployment Wizard deploys SAS Web applications to the Web application server. However, you can also deploy Web applications manually from the Web application server. The Web applications are in the SAS-config-dir\Lev1\Web\Staging directory.
There is no required start-up order for deploying the Web applications to JBoss or WebLogic Server. Although you can deploy and start the Web applications in any order of your choice, it is recommended that you follow the sequence used for WebSphere Application Server. For WebSphere Application Server, the sequence for starting the first five Web applications is important because the start-up sequence matters between these five Web applications. The recommended sequence for 1 to 5 can be used
16 Chapter 1 / Working in the Middle-Tier Environment

directly as the number to enter in the Startup order field for WebSphere Application Server.
1 SAS Web Application Themes (sas.themes.ear)
2 SAS Web Infrastructure Platform Services (sas.wip.services9.3.ear)
3 SAS Web Infrastructure Platform Applications (sas.wip.apps9.3.ear)
4 SAS Content Server (sas.wip.scs9.3.ear)
5 SAS Information Delivery Portal 4.3 (sas.portal4.3.ear)
The remaining Web applications can be deployed or started in any order, including starting them before the applications in the previous list.
Starting the Web Applications 17

18 Chapter 1 / Working in the Middle-Tier Environment

2Best Practices for Configuring Your Middle Tier
Best Practices for Middle-Tier Configuration . . . . . . . . . . . . . . . . . . . . . . . 20
Sample Middle-Tier Deployment Scenarios . . . . . . . . . . . . . . . . . . . . . . . . . 21Overview of Middle-Tier Deployment Scenarios . . . . . . . . . . . . . . . . . . . 21Scenario 1: Web Applications Deployed in a
Single Web Application Server . . . . . . . . . . . . . . . . . . . . . . . . . . . . . . . . . . . . . 22Scenario 2: Static Content Deployed in a Reverse Proxy . . . . . . . . . 25Scenario 3: Web Applications Deployed across a
Web Application Server Cluster . . . . . . . . . . . . . . . . . . . . . . . . . . . . . . . . . . . . 28Additional Considerations for a Deployment . . . . . . . . . . . . . . . . . . . . . . . . 33
Tuning the Web Application Server . . . . . . . . . . . . . . . . . . . . . . . . . . . . . . . . . . . 36
Configuring a Cluster of Web Application Servers . . . . . . . . . . . . . . . . 37
Configuring HTTP Sessions in Environments with Proxy Configurations . . . . . . . . . . . . . . . . . . . . . . . . . . . . . . . . . . . . . . . . . . . . . . 37
Resolve HTTP Session Requests in a Secure Environment . . . . . 37
Using an HTTP Server to Serve Static Content . . . . . . . . . . . . . . . . . . . . . 39
Using a Proxy Plug-in between the Web Application Server and the HTTP Server . . . . . . . . . . . . . . . . . . . . . . . . . . . . 39
Using Apache Cache Control for Static Content . . . . . . . . . . . . . . . . . . . 40
19

Best Practices for Middle-Tier Configuration
This chapter provides sample middle-tier topologies and guidelines for achieving better efficiency and performance with the middle-tier components in the SAS Intelligence Platform. The middle tier provides an environment for running the following SAS Web clients:
n SAS Information Delivery Portal
n SAS Web Report Studio
n SAS BI Dashboard
Configuration instructions vary depending on the Web application server installed at your site. For configuration instructions that pertain to the topics discussed in this chapter, see the following third-party vendor Web sites:
n JBoss Application Server: http://www.jboss.org/docs
n IBM WebSphere Application Server: http://www.ibm.com/support/documentation/us/en
n Oracle WebLogic Server: http://www.oracle.com/technology/documentation/index.html
For deployments that use WebSphere Application Server, if you want to configure the middle-tier environment manually, then configure a separate cell for the SAS Web applications. The SAS Web applications make use of resources that are configured at the cell level. Configuring a separate cell avoids interference between the SAS Web applications and other Web applications.
For deployments that use WebLogic Server, if you want to configure the middle-tier environment manually, then configure a separate domain for the SAS Web applications. The SAS Web applications make use of resources that are configured at the domain level. Configuring a separate domain avoids interference between the SAS Web applications and other Web applications.
20 Chapter 2 / Best Practices for Configuring Your Middle Tier

For deployments that use JBoss, if you want to configure the middle-tier environment manually, then configure separate Web application server instances for the SAS Web applications. Do not deploy the SAS Web applications to Web application server instances that are used for other Web applications. Likewise, do not deploy other Web applications to the Web application server instances that are used for the SAS Web applications.
Sample Middle-Tier Deployment Scenarios
Overview of Middle-Tier Deployment Scenarios
This section describes sample topologies for the middle-tier components. These sample topologies can help you design a middle-tier configuration that meets the needs of your organization with regard to performance, security, maintenance, and other factors.
As with all tiers in the SAS Intelligence Platform, deployment of the middle tier involves careful planning. When you design and plan the middle tier, you must balance performance requirements against a number of other criteria. To understand these criteria and to evaluate sample deployment scenarios, see the following subsections:
n “Scenario 1: Web Applications Deployed in a Single Web Application Server” on page 22
n “Scenario 2: Static Content Deployed in a Reverse Proxy” on page 25
n “Scenario 3: Web Applications Deployed across a Web Application Server Cluster” on page 28
n “Additional Considerations for a Deployment” on page 33
The topologies that are presented here range from simple to complex. Scenario 1 represents the deployment that results from using the SAS Deployment Wizard to configure the Web application server and deploy the SAS Web applications. Scenarios
Sample Middle-Tier Deployment Scenarios 21

2 and 3 provide advanced features, such as greater security and efficiency, but require more effort to implement and to maintain.
All scenarios include the SAS server tier. The server tier consists of a SAS Metadata Server that resides on a dedicated machine. The server tier also includes additional systems that run various SAS Application Servers, including SAS Workspace Servers, SAS Pooled Workspace Servers, SAS Stored Process Servers, and SAS OLAP Servers.
Scenario 1: Web Applications Deployed in a Single Web Application Server
Overview
Scenario 1 illustrates the most basic topology. All of the SAS middle-tier components are installed on a single system. All the SAS Web applications run in a single Web application server. The SAS Remote Services application is also installed on the same middle-tier server, but runs as a server application outside the Web application server.
22 Chapter 2 / Best Practices for Configuring Your Middle Tier

The following figure illustrates the topology for Scenario 1.
Figure 2.1 Scenario 1: Middle-Tier on a Single System
SAS Workspace ServerSAS Pooled Workspace ServerSAS OLAP ServerSAS Stored Process Server
SAS ServersMiddle TierClients
SAS Remote ServicesRMI Server
SAS Metadata Server
SAS FrameworkData Server
Web Browser Web Application Server SAS Web Infrastructure Platform SAS Content Server SAS Stored Process SAS Package Viewer SAS Web Application Themes SAS Themes for Flex Applications SAS Information Delivery Portal SAS BI Portlets SAS Web Report Studio SAS BI Dashboard SAS Help Viewer for the Web SAS Workflow SAS Web Administration Console SAS Shared Web Assets SAS Theme Designer for Flex
Sample Middle-Tier Deployment Scenarios 23

Here are the advantages and disadvantages of this topology:
Table 2.1 Scenario 1 Advantages and Disadvantages
Topic Advantages Disadvantages
Security None The SAS Web applications are exposed to attacks from Web clients.If SSL is enabled, the middle-tier server has the computational load of encrypting data, in addition to the load of hosting the SAS Web applications.
Scalability None This topology does not support hundreds of concurrent users.
Availability None This topology has no provision for planned or unplanned down time.
Maintainability The SAS Deployment Wizard can automate the configuration and deployment.This topology is simple to maintain and is ideal for development environments where frequent changes might be required.
None
Further Considerations for Scenario 1
As the maintainability advantages in the previous table indicates, scenario 1 is easy to implement. This middle-tier topology can be completely installed and configured by the SAS Deployment Wizard. SAS provides another topology that can be completely installed and configured by the SAS Deployment Wizard, yet provides better scalability and performance.
A variation of this scenario is to use the SAS Deployment Wizard to distribute the SAS Web applications across two Web application server instances (managed servers) on the same middle-tier server. This distribution of Web applications is different from clustering in that there is still only one instance of each application. By distributing the
24 Chapter 2 / Best Practices for Configuring Your Middle Tier

applications to two managed servers, this alternative configuration allows more memory availability for the applications deployed on each managed server and also increases the number of users that can be supported. Some SAS Solutions are configured with multiple servers by the SAS Deployment Wizard automatically. However, you can choose to configure multiple managed servers by running the wizard with the custom prompting level and selecting this feature.
Scenario 2: Static Content Deployed in a Reverse Proxy
This sample topology delivers static HTML content to clients from an HTTP server that is configured as a reverse proxy. This strategy reduces the work load on the Web application server. Examples of HTTP servers that can be configured as reverse proxies are Apache HTTP Server and Microsoft Internet Information Services (IIS).
When a browser makes a request for a SAS Web application, a part of the request is for static content such as HTML files, images, cascading style sheets, and JavaScript scripts. The SAS Themes Web application provides this static content. For Web applications that use Flex, there is static content that is provided by SAS Themes for Flex Applications. In this scenario, the static content for SAS Themes and SAS Themes for Flex Applications is unpacked and delivered by the reverse proxy. The reverse proxy simply returns the requested content to the browser, and the browser displays the document.
Note: If you unpack and deploy the static content on the reverse proxy, then you must redeploy this content if you later install a SAS software upgrade or apply maintenance that includes new files for the static content.
If the reverse proxy can be configured to cache content, then the performance improvement is even greater. The portion of the request that is for dynamic content still requires some type of data manipulation by the SAS Web applications and the Web application server must perform that work before returning the requested page.
Sample Middle-Tier Deployment Scenarios 25

The following figure illustrates the topology for scenario 2.
Figure 2.2 Scenario 2: Using a Reverse Proxy
SAS Workspace ServerSAS Pooled Workspace ServerSAS OLAP ServerSAS Stored Process Server
SAS ServersMiddle TierClients
SAS Remote ServicesRMI Server
SAS Metadata Server
SAS FrameworkData Server
Web Browser
HTTP Server
Web ApplicationServer Plug-in
Module
SAS Web ApplicationThemes
SAS Themesfor Flex Applications
Web Application Server SAS Web Infrastructure Platform SAS Content Server SAS Stored Process SAS Package Viewer SAS Information Delivery Portal SAS BI Portlets SAS Web Report Studio SAS BI Dashboard SAS Help Viewer for the Web SAS Workflow SAS Web Administration Console SAS Shared Web Assets SAS Theme Designer for Flex
In a typical configuration, the HTTP server is configured with a module or plug-in that enables the reverse proxy function of communicating with the Web application server. By having the reverse proxy as the single point of contact for browser requests, the Web application server is not directly exposed to clients. The reverse proxy provides a layer of security for the SAS Web applications.
26 Chapter 2 / Best Practices for Configuring Your Middle Tier

Although this topology must be manually configured and maintained, here are the advantages and disadvantages of this topology:
Table 2.2 Scenario 2 Advantages and Disadvantages
Topic Advantages Disadvantages
Security The reverse proxy provides a layer of security.The network on the middle-tier server can be configured to reject HTTP packets that do not originate from the reverse proxy.SSL can be enabled on the client side of the reverse proxy without affecting the work load on the Web application server or the performance of the SAS Web applications.The Web application server and SAS Web applications can be configured to perform Web authentication for single sign-on to SAS Web applications and other Web resources in the network.
Adding firewalls to the network is a good next step.
Performance Response time is improved because processing static content is offloaded from the Web application server to the reverse proxy.
As with scenario 1, all of the SAS Web applications are deployed to a single Web application server instance. However, a second managed server instance can be configured, as mentioned in the scenario 1 section.
Scalability There are no advantages in this scenario, but the topology provides an upward path to clustering Web application servers.
This topology does not support hundreds of concurrent users.
Availability None This topology has no provision for planned or unplanned down time.
Sample Middle-Tier Deployment Scenarios 27

Topic Advantages Disadvantages
Maintainability The SAS Deployment Wizard can still automate the configuration and deployment of the Web application server and the SAS Web applications.
After manual or automatic installation and configuration with the SAS Deployment Wizard, there are manual steps to perform.The reverse proxy must be configured with the connection information for the SAS Web applications.
For instructions about how to configure an HTTP server as a reverse proxy for SAS Web applications deployed on JBoss, WebSphere Application Server, or WebLogic Server, see the SAS third-party Web site at http://support.sas.com/resources/thirdpartysupport/v93.
Scenario 3: Web Applications Deployed across a Web Application Server Cluster
Overview
The sample topology in scenario 3 includes a cluster of Web application servers in a network that implements a secure demilitarized zone (DMZ).
28 Chapter 2 / Best Practices for Configuring Your Middle Tier

The following figure illustrates the topology for scenario 3. Note that the Web application servers and SAS Web applications are distributed across multiple middle-tier machines.
Figure 2.3 Scenario 3: Clustered Web Application Servers and a Demilitarized Zone
SAS Workspace ServerSAS Pooled Workspace ServerSAS OLAP ServerSAS Stored Process Server
SAS ServersMiddle TierClients
SAS Remote ServicesRMI Server
ProtocolFirewall
DomainFirewall
SAS Metadata Server
SAS FrameworkData Server
Web Browser
HTTP Server
Web ApplicationServer Plug-in
Module
SAS Web ApplicationThemes
SAS Themesfor Flex Applications
Web Application Server SAS Web Infrastructure Platform SAS Content Server SAS Stored Process SAS Package Viewer SAS Information Delivery Portal SAS BI Portlets SAS Web Report Studio SAS BI Dashboard SAS Help Viewer for the Web SAS Workflow SAS Web Administration Console SAS Shared Web Assets SAS Theme Designer for Flex
Note: As indicated in the figure, if you configure a cluster of Web application servers, then you must deploy all the SAS Web applications to each node in the cluster. Each node must be configured identically.
In the figure, note that the SAS Remote Services application resides on a machine that is separate from the cluster of Web application servers. This separation serves to illustrate that the SAS Remote Services application is a server application that does not participate in clustering. The SAS Remote Services Application could just as well reside on any one of the machines in the cluster.
Sample Middle-Tier Deployment Scenarios 29

Although this topology requires manual configuration and greater maintenance than the topologies in the previous scenarios, here are the advantages and disadvantages of this topology:
Table 2.3 Scenario 3 Advantages and Disadvantages
Topic Advantages Disadvantages
Security The SAS Web applications and the Web application server cluster are protected by the DMZ.The Web application server and SAS Web applications can be configured to perform Web authentication for single sign-on to SAS Web applications and other Web resources in the network.
None
Performance Response time is improved because processing static content performed by the reverse proxy and because of the greater computing capacity of the Web application server cluster.
None
Scalability Once the cluster of Web application servers is established, additional managed servers can be added to the cluster to support larger numbers of concurrent users.
None
Availability Clustering provides fault isolation that is not possible with a single Web application server. If a node in the cluster fails, then only the users with active sessions on that node are affected.You can plan downtime for maintenance by taking managed servers offline. New requests are then directed to the SAS Web applications deployed on the remaining nodes while maintenance is performed.
None
30 Chapter 2 / Best Practices for Configuring Your Middle Tier

Topic Advantages Disadvantages
Maintainability Configuration and deployment of the first Web application server and the SAS Web applications can still be automated with the SAS Deployment Wizard. This first Web application server can be cloned to speed the creation of the cluster.
The reverse proxy must be configured with the connection information for the SAS Web applications.Creating the Web application server cluster requires additional configuration.
Understanding Clusters
In order to provide greater scalability, availability, and robustness, WebLogic Server, WebSphere Application Server, and JBoss support some form of clustering. With clustering, multiple Web application server instances participate in a load-balancing scheme to handle client requests. Workload distribution is usually managed by the same application server plug-in module that enables the use of a reverse proxy for static content.
The Web application server instances (managed servers) in a cluster can coexist on the same machine (vertical clustering), or the managed servers can run on a group of middle-tier server machines (horizontal clustering). The SAS Web applications can be deployed on both vertical and horizontal clusters.
A different approach to load distribution involves merely deploying individual SAS Web applications on separate, non-clustered Web application servers. Though this approach reduces the memory load for any given server, a clustering strategy is preferable. Deployment is easier to manage with a cluster because all machines and server instances are identically configured. Furthermore, Web application servers provide deployment management services that facilitate management of a cluster. It is relatively easy to add additional nodes and increase the size of the cluster.
Requirement for Session Affinity
For SAS Web applications to be deployed into a clustered environment, the Web application servers must implement session affinity. Session affinity is an association between a Web application server and a client that requests an HTTP session with that server. This association is known in the industry by several terms, including session affinity, server affinity, and sticky sessions. With session affinity, once a client has been
Sample Middle-Tier Deployment Scenarios 31
assigned to a session with a Web application server, the client remains with that server for the duration of the session. By default, session affinity is enabled in WebSphere Application Server and WebLogic Server.
Although WebSphere Application Server, WebLogic Server, and JBoss provide the ability to migrate HTTP sessions from one server to another, the SAS Web applications do not support this capability. Business intelligence sessions often contain large data elements, such as results sets from ad hoc queries, reporting, and analytical tasks, that cannot be migrated easily among Web application servers.
Understanding Demilitarized Zones
Many organizations use a series of firewalls to create a demilitarized zone (DMZ) between their servers and the client applications. A DMZ provides a network barrier between the servers and the clients. A DMZ provides this protection whether the clients reside within the organization's computing infrastructure (intranet) or reside outside the organization on the Internet.
In the previous figure, the outer firewall that connects to the public network is called the domain firewall. Typically, only the HTTP (80) and HTTPS (443) network ports are open through this firewall. Servers that reside directly behind this firewall are exposed to a wide range of clients through these limited ports, and as a result the servers are not fully secure.
An additional firewall, the protocol firewall, is configured between the non-secure machines in the DMZ and the machines in the secure middle-tier network. The protocol firewall has additional network ports opened. However, the range of IP addresses that are allowed to make connections is typically restricted to the IP addresses of the servers that reside in the DMZ.
The DMZ usually contains HTTP servers, reverse proxies, and load-balancing software and hardware. Do not deploy Web application servers or any SAS servers that handle important business logic, data, or metadata in the DMZ.
If your applications are accessed by clients through the Internet, then you should include a DMZ as part of your deployment in order to safeguard critical information. For deployments on a corporate intranet, you might want to implement a DMZ as an additional layer of security.
32 Chapter 2 / Best Practices for Configuring Your Middle Tier

Additional Considerations for a Deployment
Load-Balancing Software and Hardware for the HTTP Servers
In scenario 3, the Web application servers are clustered to balance the load and to provide increased availability. While this scenario provides redundancy for the application servers, the HTTP server that is deployed as a reverse proxy remains a potential bottleneck and single point of failure. To improve availability and increase capacity, you can distribute HTTP traffic across multiple reverse proxies by placing load-balancing software or hardware in front of those servers. A single load-balancing component can accept client HTTP requests and distribute those requests across a cluster of reverse proxies.
A number of vendors sell load-balancing software and hardware products for HTTP servers, including IBM, Cisco, and Nortel. If you are interested in this type of load-balancing, you can explore the product lines for these and other vendors.
Secure Sockets Layer
If you are moving sensitive information across the Internet, then you might want to use HTTPS and Secure Socket Layer (SSL) to encrypt your communication links. SSL uses Public Key Cryptography, which is based on the implementation of a public and private key pair. Each of your servers that handles encrypted communications manages certificates that contain both the private key and the public key. A description of how Public Key Cryptography and SSL work is beyond the scope of this document. However, there are many good sources for that information.
Here are some factors to consider when determining whether and how to use SSL:
n Which links do you want to encrypt? In the figures shown for the various scenarios, each arrow represents a potential communications link that might be encrypted. You should consider encrypting the following:
o Encrypt any data that is capable of moving across the public Internet. If connections to your site go through a virtual private network (VPN), then those connections are already encrypted. Otherwise, traffic to and from your site is open to packet analysis by Internet users.
Sample Middle-Tier Deployment Scenarios 33

o Encrypt all traffic that moves between the client and your HTTP server that resides in the DMZ.
o Always encrypt traffic that is used to transmit credit card numbers, Social Security numbers, and any other sensitive information.
To achieve strong security, encrypt links all the way to the Web application server. If you are concerned about internal packet analysis, you can encrypt everything. However, total encryption comes with a cost, as explained in the remaining considerations.
n Some load-balancing schemes might rely on packet content for routing. When that is the case, encryption can impede the work that is performed by load-balancing software or hardware because encryption renders the packet content undecipherable.
n Cryptography requires resource-intensive computation, and this resource requirement typically reduces the amount of traffic that your servers are able to handle.
n The certificates that are used with SSL expire at fixed intervals. When a user's certificate expires, the user must obtain a new certificate before logging on to your applications. If you want a highly available system, then you should prepare for certificate renewal in advance to avoid unexpected downtime.
n You must decide whether to use certificates that are generated by a Certification Authority (CA), or whether self-signed certificates are adequate for your application. Self-signed certificates can save you money, but you are responsible for managing their distribution to clients.
Web Authentication
By default, SAS Web applications use the form-based authentication that is provided by the SAS Logon Manager Web application. When credentials are provided to the SAS Logon Manager Web application, the credentials are sent to the SAS Metadata Server for authentication. The metadata server then authenticates the credentials against its authentication provider. The default provider is the host operating system.
As an alternative, you can configure the SAS Web applications to authenticate on the middle tier. When users log on to a SAS Web application, the Web application server
34 Chapter 2 / Best Practices for Configuring Your Middle Tier

handles the initial authentication. In this configuration, the Web application server's JAAS login module authentication provider verifies the user's identity. Then, the SAS Logon Manager Web application makes a trusted user connection to the metadata server to check that the authenticated user has a SAS identity in metadata.
Performing Web authentication facilitates single sign-on. Most likely, your organization has several applications behind a common set of reverse proxy and HTTP servers. By having a common server handle authentication, users do not need to re-authenticate for access to each application.
For more information, see the following topics:
n For a detailed explanation of different types of authentication, see “Authentication Mechanisms” in the SAS Intelligence Platform: Security Administration Guide.
n For information about setting up the middle-tier applications to use Web authentication, see the SAS third-party Web site at http://support.sas.com/resources/thirdpartysupport/v93.
n For information about achieving a single sign-on approach to authentication, see “Using Single Sign-On among Web Applications” on page 44 .
Heap Size for SAS Remote Services Application
Middle-tier applications use the SAS Remote Services application to pass session and user context between Web applications. The SAS Remote Services application enables the user to pass seamlessly through to the target without the requirement for a separate logon.
During installation, the SAS Deployment Wizard enables you to specify the desired initial and maximum heap size for the SAS Remote Services application by using the JVM option format. You must run the SAS Deployment Wizard at the Custom prompting level to set these values.
JVM options of the SAS Remote Services application are set to handle a moderately high number of concurrent users. For a very large number of concurrent users and a distributed topology, you should tune the JVM options to accommodate the deployment.
Sample Middle-Tier Deployment Scenarios 35

If you use the Windows service, you can increase the initial and maximum heap size of the SAS Remote Services application. Edit the wrapper.conf file located in the SAS-config-dir\Lev1\Web\Applications\RemoteServices directory.
Alternatively, you can add the recommended JVM options to one of the following scripts:
n On Windows:
SAS-config-dir\Lev1\Web\Applications\RemoteServices\RemoteServices.bat
n On UNIX and z/OS:
SAS-config-dir/Lev1/Web/Applications/RemoteServices/RemoteServices.sh
Tuning the Web Application Server
In addition to specifying Java Virtual Machine options, you can improve the performance of SAS Web applications by configuring other aspects of your Web application server's behavior. For example, two obvious ways to improve the performance of any Web application are:
n to limit the frequency with which servers check for updated JavaServer Pages and servlets
n to make sure that the server can create sufficient threads to service incoming requests
SAS provides a set of JVM option settings in the Instructions.html file that is generated by the SAS Deployment Wizard. Use those settings as a starting point for your tuning. In addition, SAS provides additional tuning information in SAS 9.3 Web Applications: Tuning for Performance and Scalability that is available with the Web application server documentation at
http://support.sas.com/resources/thirdpartysupport/v93.
36 Chapter 2 / Best Practices for Configuring Your Middle Tier

Configuring a Cluster of Web Application Servers
Cluster configuration varies widely between Web application server vendors. Consult your vendor's documentation for configuration instructions. Note, however, that you must deploy all the SAS Web applications to all nodes of the cluster. For a visual representation, see “Scenario 3: Web Applications Deployed across a Web Application Server Cluster” on page 28 .
It is possible to configure a cluster that consists of just one node. You might set up a single-node cluster when your sole objective is to route browser requests to an HTTP server instead of to the Web application server. For this configuration, you set the address of the single-node cluster equal to the address of the HTTP server.
Configuring HTTP Sessions in Environments with Proxy Configurations
Resolve HTTP Session Requests in a Secure Environment
SAS Web Report Studio 4.3 uses absolute URL addresses that must be associated with the correct HTTP session. The SAS Logon Manager knows only the address that is stored in metadata, and the SAS Logon Manager redirects requests to that location.
If that address differs from the URL specified by the user, then the user's session is not tracked correctly. (For example, suppose the user specifies the internal address http://shortname/application instead of the external address http://shortname.example.com/application.)
When SAS Web Report Studio receives an HTTP request, the request is redirected to the SAS Logon Manager. The SAS Logon Manager authenticates the request, and redirects it back to SAS Web Report Studio.
Configuring HTTP Sessions in Environments with Proxy Configurations 37

An exception applies to this process if your environment has any front-end processor (for example, Apache, Web clustering, IBM Tivoli Access Manager WebSEAL, or CA SiteMinder) configured. In these scenarios, or if a reverse proxy is configured with WebSEAL, the HTTP session request comes via an internal address. For example, the request might come via http://host:port/application instead of an external address http://proxiedhost/application. This sequence of events triggers a redirection filter, which typically sends the request to a location in the metadata where the request format is expected in the form of shortname.example.com. However, the redirection filter is not required because the proxy sends the request to the same location, and the same address is always used.
To ensure successful resolution of HTTP session requests in a secure environment (any environment with a front-end processor), the redirection filter must be disabled for SAS Web Report Studio. In addition, it is highly recommended that you disable this filter for all SAS applications.
To disable the redirection filter for all SAS Web applications, follow these steps:
1 In SAS Management Console, navigate to Plug-ins Application Management Configuration Manager SAS Application Infrastructure Properties and right-click to display the SAS Application Infrastructure Properties dialog box.
2 Click the Advanced tab.
3 Click Add to display the Define New Property Window.
4 Enter the property name as shown, and specify the property value:
Property Name: App.RedirectionFilterDisabled
Property Value: True
5 Click OK to exit the Define New Property window.
6 Click OK to exit the SAS Application Infrastructure Properties dialog box.
7 To enable this change to go into effect, restart your Web application server.
38 Chapter 2 / Best Practices for Configuring Your Middle Tier

Using an HTTP Server to Serve Static Content
Your middle-tier deployment can use an HTTP server to handle requests for the static content in the SAS Themes Web application. This HTTP server can be configured as a proxy to forward requests for dynamic content to your Web application server, or the content can be deployed on a standard HTTP server. This strategy makes efficient use of the HTTP server, and enables the Web application server to devote its resources to dynamic content. The performance benefits are particularly notable for large-scale deployments that include a cluster of Web application servers. For an overview of this configuration, see “Sample Middle-Tier Deployment Scenarios ” on page 21 .
For information about using the SAS Web applications with an HTTP server, see http://support.sas.com/thirdpartysupport.
Using a Proxy Plug-in between the Web Application Server and the HTTP Server
WebLogic Server, WebSphere Application Server, and JBoss provide plug-in modules that enable integration with an HTTP server, such as Apache HTTP Server or Microsoft Internet Information Services (IIS).
The plug-ins are useful for either or both of the following:
n to forward requests for dynamic content to the Web application server or servlet container. In this scenario, the HTTP server handles all the static content and relies on the Web application server for dynamic content.
n to forward requests and distribute those requests among a cluster of Web application servers using a load-balancing algorithm.
For information about using the SAS Web applications with a proxy plug-in, see http://support.sas.com/thirdpartysupport.
Using a Proxy Plug-in between the Web Application Server and the HTTP Server 39

Using Apache Cache Control for Static Content
To avoid sending unnecessary requests to the server each time a client requests a static content item, you can configure Apache HTTP Server to set cache time-out values for static content.
Typically, after a browser initially downloads a static resource from the HTTP server, the browser sends a conditional HTTP GET request each time the browser encounters that resource again. For example, when a browser first downloads a SAS Web Report Studio logo image, the browser stores a local copy of the image. For each subsequent page that references the logo, the browser requests that the image be sent again if the image has been modified since the previous download. This sequence occurs for every static element and can result in large numbers of HTTP requests. Because the static content for is not modified often, most of these requests are unnecessary.
When you specify a cache time-out for each static element, clients (browser, proxy, or server cache) can avoid sending unnecessary requests to the HTTP server in order to check the validity of the content. When the browser first accesses a static element, the browser stores that element locally for the duration of the time-out value that is configured. During this time, subsequent queries to the HTTP server are suppressed for that element. The browser resumes queries as appropriate when the time-out period elapses within the session.
You can configure Apache HTTP Server to set cache time-out values for static content. This is true whether Apache HTTP Server is configured to serve that static content or is merely a reverse proxy to your Web application server.
40 Chapter 2 / Best Practices for Configuring Your Middle Tier

3Middle-Tier Security
Middle-Tier Security . . . . . . . . . . . . . . . . . . . . . . . . . . . . . . . . . . . . . . . . . . . . . . . . . . . . . . 42
Using the SAS Anonymous Web User with SAS Authentication . . . . . . . . . . . . . . . . . . . . . . . . . . . . . . . . . . . . . . . . . . . . . . . . . . . . . . . . . . . . . 42
Multicast Security . . . . . . . . . . . . . . . . . . . . . . . . . . . . . . . . . . . . . . . . . . . . . . . . . . . . . . . . 43
Using Single Sign-On among Web Applications . . . . . . . . . . . . . . . . . . . 44
Using Secure Sockets Layer (SSL) for Web Applications . . . . . . . . 45
Configuring and Deploying Restrictive Policy Files . . . . . . . . . . . . . . . 46About Restrictive Policy Files . . . . . . . . . . . . . . . . . . . . . . . . . . . . . . . . . . . . . . . . . 46Example Policy Files for JBoss and WebSphere
Application Server . . . . . . . . . . . . . . . . . . . . . . . . . . . . . . . . . . . . . . . . . . . . . . . . . . . . 47Create Restrictive Policies for JBoss . . . . . . . . . . . . . . . . . . . . . . . . . . . . . . . . 49Create Restrictive Policies for WebSphere . . . . . . . . . . . . . . . . . . . . . . . . . 49Restore Your SAS Environment to Use Default Policies . . . . . . . . . . 51Disable Restrictive Policy Handling for JBoss . . . . . . . . . . . . . . . . . . . . . . 52Disable Restrictive Policy Handling for
WebSphere Application Server . . . . . . . . . . . . . . . . . . . . . . . . . . . . . . . . . . . . . 52Customize Permissions for Socket Access . . . . . . . . . . . . . . . . . . . . . . . . . 53Access Permissions for Custom Portlets and
Web Applications . . . . . . . . . . . . . . . . . . . . . . . . . . . . . . . . . . . . . . . . . . . . . . . . . . . . . 53
41
Middle-Tier Security
To determine how to implement middle-tier security, you should consider your organization's internal security policies, the security mechanisms that are in place in your environment, the types of users who need to access the Web applications, and the types of content that you plan to make available.
Important concepts and tasks concerning middle-tier security are as follows:
n Authentication. For a detailed discussion of different types of authentication and configuration guidelines, see “Authentication Mechanisms” in the SAS Intelligence Platform: Security Administration Guide. For information about configuring Web authentication for JBoss, IBM WebSphere, or Oracle WebLogic, see http://support.sas.com/resources/thirdpartysupport/v93/.
n SAS Anonymous Web User. See “Using the SAS Anonymous Web User with SAS Authentication” on page 42.
n Multicast Security. See “Multicast Security” on page 43.
n Single Sign-On. See “Using Single Sign-On among Web Applications” on page 44.
n Secure Sockets Layer (SSL). See “Using Secure Sockets Layer (SSL) for Web Applications ” on page 45.
n Restrictive Policy Files. See “Configuring and Deploying Restrictive Policy Files ” on page 46.
Using the SAS Anonymous Web User with SAS Authentication
The SAS Anonymous Web User (webanon) is an optional account that can be used to grant Web clients anonymous access to certain SAS Web Infrastructure Platform applications (SAS BI Web Services and SAS Stored Process Web Application). This
42 Chapter 3 / Middle-Tier Security

anonymous account, which is configured with the SAS Deployment Wizard, is applicable only when SAS authentication is being used. If Web authentication is used, the Web application server processes authentication requests, and this anonymous account has no effect.
If the webanon account is configured, it is used when a Web service is configured for SAS authentication, and credentials are not supplied. If the webanon account is not configured, there are no credentials for authentication, and the request fails.
In a default deployment, this anonymous account is configured as an internal user account. To determine whether to enable the webanon user account, administrators must decide whether they want to require clients to provide credentials for all requests. When clients provide credentials to an incoming request, these credentials are always used for authentication whether the account has been enabled or not.
The webanon user is defined in the following locations:
n in metadata. In default deployments, the SAS Anonymous Web Service User is an internal user account that is known only to SAS and that is authenticated internally in metadata. When internal authentication is used, it is not necessary for this user to have a local or network account.
n in the operating system of the metadata server machine, only if you selected the External authentication option for this user during a custom installation.
Multicast Security
A multicast group communications protocol is used to communicate among middle-tier SAS applications in a single SAS deployment (the set of applications connected to the same SAS Metadata Server). During installation, the SAS Deployment Wizard supplies you with a default multicast address and port number that it generates based on the machine's (metadata server) IP address. The combination of multicast IP address and multicast UDP port should be different for each SAS deployment and also different from those used by other multicast applications at your site.
Multicast Security 43
The IP address and multicast UDP port number for the multicast host must match the values in the Web application server's start-up script (for example, SASServer1.bat) and the environment.properties file located in the SAS-config-dir\Lev1\Web\Applications\RemoteServices directory.
The multicast group communication includes all information needed to bootstrap SAS middle-tier applications. Because this includes sending the SAS environment credentials (such as the sasadm account name and its password), scoping and encryption options are provided in the SAS Deployment Wizard. The defaults are most appropriate for deployments in the firewall, isolated data center environment. After installation, if you choose to modify the scoping or encryption options, you can do so by specifying the options for the -Dmulticast.security parameter for your Web application server.
For more information, see “Administering Multicast Options” on page 238.
Using Single Sign-On among Web Applications
Single Sign-On (SSO) is an authentication model that enables users to access a variety of computing resources without being repeatedly prompted for their user IDs and passwords. SSO can enable a user to access SAS servers that run on different platforms without interactively providing the user's ID and password for each platform. SSO can also enable someone who is using one application to launch other applications based on the authentication that was performed when the user initially logged in.
SAS provides these SSO features:
n To bypass the logon prompt when launching a desktop application (such as SAS Information Map Studio, SAS Enterprise Guide, SAS Data Integration Studio, SAS OLAP Cube Studio, or SAS Management Console), use Integrated Windows authentication. The client and the metadata server must be in the same Windows domain or in domains that trust each other.
44 Chapter 3 / Middle-Tier Security

n To bypass the logon prompt when launching a SAS Web application (such as SAS Web Report Studio or SAS Information Delivery Portal), use Web authentication.
n Seamless access to data servers and processing servers is provided by mechanisms including SAS token authentication, Integrated Windows authentication, credential reuse, and credential retrieval.
For more information about SSO, see the SAS Intelligence Platform: Security Administration Guide.
Using Secure Sockets Layer (SSL) for Web Applications
Secure Sockets Layer (SSL) is a protocol that provides network security and privacy. Developed by Netscape Communications, SSL uses encryption algorithms that include RC2, RC4, DES, TripleDES, IDEA, MD5, and others. In addition to providing encryption services, SSL uses trusted certificates to perform client and server authentication, and it uses message authentication codes to ensure data integrity. SSL is supported by both Firefox and Internet Explorer.
This documentation assumes that you have a basic understanding of SSL and that you know how to obtain and use trusted certificates. See your Web application server's documentation for SSL implementation details at the following Web sites:
n http://www.jboss.org/docs
n http://www.oracle.com/technology/documentation/index.html
n http://www.ibm.com/support/documentation/us/en/
Also, see http://support.sas.com/resources/thirdpartysupport/v93.
Note: Transport Layer Security (TLS) is the successor to SSL V3.0. The Internet Engineering Task Force (IETF) adopted SSL V3.0 as the de facto standard and renamed it TLS. Throughout this document, any reference to SSL also applies to TLS.
Using Secure Sockets Layer (SSL) for Web Applications 45

Configuring and Deploying Restrictive Policy Files
About Restrictive Policy Files
An express or typical installation completed with the SAS Deployment Wizard creates a SAS environment that does not use restrictive policy files to limit the access given to SAS Web applications. By default, the sas.all.permissions.policy file is used to allow access to the SAS Web applications. As a result, SAS Web applications can access the necessary content.
Java 2 Security provides a policy-based, fine-grain access control mechanism that increases overall system integrity by checking for permissions before allowing access to certain protected system resources. By default, Java 2 Security is turned off. If your site requires Web applications to use Java 2 Security, the custom installation option in the SAS Deployment Wizard enables you to configure your SAS environment with restrictive policy files.
A custom installation of SAS software gives you the opportunity to select the use of restrictive policy files for JBoss or WebSphere Application Server. Although WebLogic Server provides restrictive policy files, implementation of these policy files is problematic, and they cannot be used in the SAS environment. Therefore, SAS does not support restrictive policy files for WebLogic Server.
Your Instructions.html file provides basic guidelines for creating policy files from existing sample files, saving those files, and rebuilding the applications. If you chose not to enforce restrictive policy files at the time of initial installation, choose from one of the following methods for configuring restrictive policy files:
n Use the SAS Deployment Manager to remove the existing configuration of your SAS environment. Then, reconfigure the environment by choosing the custom installation option in SAS Deployment Wizard. The custom installation option enables you to configure restrictive policy files. This method, which is highly recommended, offers the most dependable and thorough approach to ensure that your SAS environment is set up correctly to use the Java 2 Security and restrictive policy files.
46 Chapter 3 / Middle-Tier Security

n Manually configure and enforce the use of restrictive policy files. Follow this method if your site has significantly large amounts of custom content, and the previously described method is not feasible at your site.
CAUTION! SAS strongly discourages the use of restrictive policy files on SAS middle-tier applications because they provide no end-user security, they are difficult to maintain, and they can be very detrimental to application performance.
The SAS Deployment Wizard implements the following restrictive policies by using different methods for JBoss and WebSphere Application Server:
n JBoss: When policy files are edited and the SAS Web applications are rebuilt by using the SAS Deployment Manager, the edits made to the policy files are united into a single policy file (sas.restrictive.permissions.policy) that is applied to JBoss.
n WebSphere Application Server: Policy files for WebSphere Application Server are applied to each EAR file. Each policy file's inputs are placed into the corresponding EAR file as a was.policy file.
Example Policy Files for JBoss and WebSphere Application Server
SAS applications provide policy files (example.policy) for JBoss and WebSphere Application Server in the SAS-config-dir\Lev1\Web\Common\SASServer1\Application-name\PolicyFileInputs\ears directory. These example.policy files contain default restrictive policy settings. Do not edit policy files directly. Instead, copy the example.policy file, rename the copied file to policy, and edit the policy file. If the policy file exists, it is used to implement restrictive policies.
Note: The united example.policy file for JBoss is located in the SAS-config-dir\Lev1\Web\Common\SASServer1\JBoss\PolicyFileInputs\ears directory.
The following table shows the directory paths for the JBoss and WebSphere Application Server policy files with security restrictions for SAS applications.
Configuring and Deploying Restrictive Policy Files 47

Table 3.1 Policy Files with Security Restrictions
ApplicationLocation of example.policy below \Lev1\Web\Common\SASServer1 Directory
SAS Information Delivery Portal
SASPortal4.3\PolicyFileInputs\ears\sas.portal
SAS Web Report Studio
SASWebReportStudio4.3\PolicyFileInputs\ears\sas.webreportstudio
SAS Content Server SASContentServer9.3\PolicyFileInputs\ears\sas.wip.scs
SAS Stored Process SASStoredProcess9.3\PolicyFileInputs\ears\sas.storedprocess
SAS WebInfrastructure Platform Applications
SASWebInfrastructurePlatformApplications9.3\PolicyFileInputs\ears\sas.wip.apps
SAS WebInfrastructure Platform Services
SASWebInfrastructurePlatformServices9.3\PolicyFileInputs\ears\sas.wip.services
SAS Workflow SASWorkflow9.3\PolicyFileInputs\ears\sas.workflow
SAS BI Dashboard SASBIDashboard4.3\PolicyFileInputs\ears\sas.bidashboard
SAS BI Portlets SASBIPortlets4.3\PolicyFileInputs\ears\sas.biportlets
SAS Package Viewer SASPackageViewer4.3\PolicyFileInputs\ears\sas.packageviewer
SAS Help Viewer for the Web
SASWebDoc9.3\PolicyFileInputs\ears\sas.webdocmd
48 Chapter 3 / Middle-Tier Security

Create Restrictive Policies for JBoss
To create a restrictive policy file for JBoss, follow these steps for each applicable SAS application's policy file:
1 Copy the example.policy file in the same directory and name the copied file policy.
2 Edit the policy file that you created from the original example.policy file. Policy files must use UTF-8 character encoding.
3 A restrictive policy file that is unique to JBoss is located in SAS-config-dir\Lev1\Web\Common\SASServer1\JBoss\PolicyFileInputs\ears\jboss.policy. If you need to modify this file, copy it to policy, and then edit it.
4 Run the SAS Deployment Manager to rebuild SAS Web applications. Select JBoss and any applications for which you have edited the restrictive policy file. Rebuilding for JBoss re-creates the Java 2 security policy file, and the sas.restrictive.permissions.policy.
5 Redeploy each SAS Web application that was modified previously.
6 If you performed an auto-configuration of JBoss, restart the JBoss application server. If you want to follow a manual process, copy the sas.restrictive.permissions.policy file located in the SAS-config-dir\Lev1\Web\Common\jboss directory to the JBOSS_HOME\server\SASServer1\conf directory. Then restart JBoss.
Create Restrictive Policies for WebSphere
To convert an environment that does not use restrictive policies to an environment where restrictive policies are applied, modify the was.policy file for each SAS application that has a EAR file associated with it.
Configuring and Deploying Restrictive Policy Files 49

Although the following task applies to the policy file for SAS Information Delivery Portal, you can follow the same steps by substituting the appropriate directories for the policy file that applies to each SAS application.
To convert from all permissions to restrictive permissions for SAS applications, follow these steps:
1 The webappsrv.policy.use_restrictive property that is stored in metadata must be updated and set to true. You can do this with the Metadata Browser window that is started with the METABROWSE command from a Base SAS session. Contact SAS Technical Support for more information about using the Metadata Browser window.
2 In the Integrated Solutions Console, navigate to Security Secure administration, applications, and infrastructure. Enable Java 2 Security by selecting the check box Use Java 2 Security to restrict application access to local resources. Save your changes.
3 Copy the SAS-config-dir\Lev1\Web\Common\SASServer1\SASPortal4.3\PolicyFileInputs\ears\sas.portal\example.policy file to SAS-config-dir\Lev1\Web\Common\SASServer1\SASPortal4.3\CustomContent\ears\sas.portal\META-INF\was.policy.
TIP You must create the META-INF directory that is specified in the destination path. Also, the file is renamed from example.policy to was.policy.
4 Edit the was.policy file that you copied from the original example.policy file. Policy files must use UTF-8 character encoding. Remove comments from the was.policy file.
5 Rename the SAS-home-dir\SASInformationDeliveryPortal\4.31\Configurable\ears\sas.portal\META-INF\was.policy.websphere.orig to was.policy.websphere.bak. You must perform this step so that the Web application is built with the was.policy file from the CustomContent directory path.
50 Chapter 3 / Middle-Tier Security

6 Run the SAS Deployment Manager to rebuild the SAS Web applications (select the applications for which the policy files were modified). The edited was.policy files are inserted into the appropriate EAR files. When you rebuild the Web applications, SAS Deployment Manager rebuilds a complete EAR file that includes any custom content, including the was.policy file.
7 Redeploy each SAS Web application that was modified previously.
8 Restart the Web application server.
Restore Your SAS Environment to Use Default Policies
If you customized your SAS environment by implementing the use of restrictive policy files, and you determined that the policy restrictions are unnecessary or that the performance impact is debilitating, you can restore your SAS environment to use default policies. To turn off restrictive policies and the use of Java 2 Security in your SAS environment, follow these steps:
1 Use the SAS Deployment Manager to remove the current configuration of your SAS environment.
2 Use the SAS Deployment Wizard to configure your SAS environment by not selecting the option to use restrictive policy files.
It is highly recommended that you use the SAS Deployment Manager and the SAS Deployment Wizard to complete the process of disabling restrictive policy files. However, if your site contains large amounts of custom content, or there are other reasons that require you to manually disable restrictive policy handling, see the following topics:
n “Disable Restrictive Policy Handling for JBoss” on page 52.
n “Disable Restrictive Policy Handling for WebSphere Application Server” on page 52.
Configuring and Deploying Restrictive Policy Files 51

Disable Restrictive Policy Handling for JBoss
To manually disable the use of SAS restrictive policy files for JBoss, follow these steps:
1 On Windows, access the SASServer1.bat file located in the JBOSS_HOME\bin directory. On UNIX, the file is named SASServer1.sh.
2 In the JAVA_OPTS variable that is located in the start_as_script section, remove the following parameters:
—Djava.security.manager -Djava.security.policy=JBOSS_HOME\server\SASServer1\sas.restrictive.permissions.policy
3 Restart the JBoss application server.
If JBoss is running as a Windows service, follow these steps to remove restrictive policy files:
1 Edit the JBOSS_HOME\server\SASServer1\wrapper.conf file.
2 Remove the following parameters in the wrapper.conf file:
wrapper.java.additional.nn=-Djava.security.managerwrapper.java.additional.nn=Djava.security.policy=JBOSS_HOME\server\SASServer1\sas.restrictive.permissions.policy
3 Restart the JBoss application server.
Disable Restrictive Policy Handling for WebSphere Application Server
To manually disable SAS restrictive policy handling for WebSphere Application Server, follow these steps:
1 Using the Integrated Solutions Console, navigate to Security Secure administration, applications, and infrastructure.
52 Chapter 3 / Middle-Tier Security

2 To disable Java 2 security deselect the check box for Use Java 2 security to restrict application access to local resources.
3 Restart the WebSphere application server.
Customize Permissions for Socket Access
For each application (Web or stand-alone) that needs to communicate with a SAS server, the Java policy files for the calling application include a permission to communicate with the SAS server. By default, the example.policy files for each SAS Web application contain wildcard permission for socket access:
permission.java.net.SocketPermission "*", "accept,connect,listen,resolve”;
This wildcard permission enables the Java code in the applications to connect to any host or port that is accessible to your site's network topology. If you want to provide strong protection with custom access, you can create specific socket permissions for the hosts and ports that are accessed by an individual SAS Web application.
Access Permissions for Custom Portlets and Web Applications
About Access Permissions for Custom Portlets and Web Applications
If you implement a remote portlet or foundation service-enabled Web application, you must add additional permissions to each Web application component's codebase and define a codebase and permissions for the remote portlet or foundation service-enabled Web application.
The following sections show the permission statements that you must specify in each application or portlet's policy file in order to enable communication with its required servers and services.
Configuring and Deploying Restrictive Policy Files 53

CodeBase: <Remote Portlet or Web Application>
The localhost is the machine where the Web application server resides along with the metadata server and SAS Remote Services. When using a localhost, specify the permissions for the remote portlet or Web application's CodeBase:
n Access to the SAS Metadata Server:
When running on localhost, create an entry that contains the fully qualified host name.
// permission java.net.SocketPermission // "localhost:8561", "listen, connect, accept, resolve";
permission java.net.SocketPermission <SAS Metadata Server's machine>:8561, "listen, connect, accept, resolve";
n Access to the Java RMI server and remote SAS Foundation Services:
When running on localhost, create an entry that contains the fully qualified host name.
// permission java.net.SocketPermission // "localhost:1024-", "listen, connect, accept, resolve";
permission java.net.SocketPermission <SAS Services application's machine name>:1024-, "listen, connect, accept, resolve";
n Access to the remote portlet or Web application's local SAS Foundation Services:
Always create an entry for both the localhost and fully qualified host name.
permission java.net.SocketPermission "localhost:1024-", "listen, connect, accept, resolve";permission java.net.SocketPermission <remote portlet or Web application's machine name>:1024-, "listen, connect, accept, resolve";
n Access for foundation service-enabled applications that call this application to pass objects (via RMI to this application):
Create one entry per machine.
permission java.net.SocketPermission <portal Web application's machine name>:1024-,
54 Chapter 3 / Middle-Tier Security

"listen, connect, accept, resolve";
n Access to a SAS Stored Process Server, SAS Workspace Server, or SAS OLAP Server:
Create one entry per machine.
permission java.net.SocketPermission <SAS Workspace Server's machine name>:1024-, "connect, resolve";permission java.net.SocketPermission <SAS Stored Process Server's machine name>:1024-, "connect, resolve";permission java.net.SocketPermission <SAS OLAP Server's machine name>:1024-, "connect, resolve";
n Access to the host and port where the SAS Web Application Themes is running:
// ---------- Socket Access to Themes ------------ permission java.net.SocketPermission Theme_host:Theme_Port:, "connect, resolve";
CodeBase: Portal
Access for foundation service-enabled applications that are called by this application to pass objects (via RMI) (for example, remote portlets, Web applications, and applications):
Create one entry per machine.
permission java.net.SocketPermission <remote portlet/Web application's machine name>:1024-, "listen, connect, accept, resolve";
CodeBase: SASServices
The remoteservices.policy file is located in the SAS-config-dir\Lev1\Web\Applications\RemoteServices directory. The following applies to connections with applications that use SAS Foundation Service session sharing:
permission java.net.SocketPermission <remote portlet/Web application's machine name>:1024-, "listen, connect, accept, resolve";
Configuring and Deploying Restrictive Policy Files 55

56 Chapter 3 / Middle-Tier Security

4Interacting with the Server Tier
Configuration Shared between the Middle Tier and the Server Tier . . . . . . . . . . . . . . . . . . . . . . . . . . . . . . . . . . . . . . . . . . . . . . . . . . . . . . . 57
SMTP Mail Server . . . . . . . . . . . . . . . . . . . . . . . . . . . . . . . . . . . . . . . . . . . . . . . . . . . . . . . . . 58
JDBC Data Sources . . . . . . . . . . . . . . . . . . . . . . . . . . . . . . . . . . . . . . . . . . . . . . . . . . . . . . 59About the Data Sources Used by the Middle Tier . . . . . . . . . . . . . . . . . . 59Connection Information for the JDBC Data Source . . . . . . . . . . . . . . . . 60The Shared Services Database on SAS
Framework Data Server . . . . . . . . . . . . . . . . . . . . . . . . . . . . . . . . . . . . . . . . . . . . . 61Using Other Relational Databases with the SAS Middle Tier . . . . 62
Client-Side Pooling and Server-Side Pooling Options . . . . . . . . . . . . 62
Job Execution Services . . . . . . . . . . . . . . . . . . . . . . . . . . . . . . . . . . . . . . . . . . . . . . . . . 63
Configuration Shared between the Middle Tier and the Server Tier
The Web applications and services that form the SAS middle tier require specific configured connections to back-end servers. You might want to modify the connections and settings in the following ways:
n Change the connection to an SMTP mail server.
n Modify the data source that provides a connection to a relational database.
57

n Define pooling options for connections to SAS Workspace Servers.
n Integrate Application Response Measurement (ARM) capabilities between the SAS middle tier and SAS servers.
SMTP Mail Server
The Web Infrastructure Platform includes a SAS Mail Service that is used by SAS Web applications and services to send e-mail messages such as alert notifications and administrative status updates. The SAS Mail Service relies on a single Java Mail Session that is defined in the Web application server on which the service is deployed. This Java Mail Session provides the single point of configuration to an external SMTP mail server that your site designates to use for application e-mail. Because the SAS Mail Service relies on this single configuration location, if the SMTP mail server changes, you can modify the appropriate settings in a single place.
The Java Mail Session depends on configuration information that defines the mail transport capabilities. The SAS Mail Service requires that the following minimum set of mail properties be specified:
mail.transport.protocolThis property must be set to smtp.
mail.smtp.hostThis property must be set to the host name of the SMTP mail server.
mail.smtp.portThis property must be set to the corresponding port (typically 25 for SMTP servers).
mail.debugThis property is set to false. You can set the value to true for assistance with debugging mail transactions.
In a standard installation of SAS middle-tier components, the configuration of the Java Mail Session is typically automated using prompted values that are provided by the installer. To modify the settings for the Java Mail Session (for example, if the host name
58 Chapter 4 / Interacting with the Server Tier

of the SMTP mail server changes), see the appropriate documentation for your Web application server.
If the mail server information, such as host name or port number, is changed, then it must be changed in SAS metadata as well. To set the new values, follow these steps:
1 Log on to SAS Management Console and select Application Management Configuration Manager.
2 Right-click SAS Application Infrastructure and select Properties.
3 Click Advanced, and then set the new values for Email.Host or Email.Port.
JDBC Data Sources
About the Data Sources Used by the Middle Tier
The SAS Web Infrastructure Platform, and some solutions, provide a set of features that rely on a relational database to store service data. These relational tables differ from the data that is analyzed, modeled, or otherwise processed by SAS applications, which typically is derived from a site's enterprise or legacy sources. Instead, the relational tables in the SAS Web Infrastructure Platform database are intrinsic to or used primarily for the operations of a particular application, product, or service.
SAS Web applications and services access data from the SAS Web Infrastructure Platform database through JDBC. SAS Web Infrastructure Platform provides support for the following third-party vendor databases:
n Oracle Database
n IBM DB2
n Microsoft SQL Server
n MySQL
JDBC Data Sources 59

n PostgreSQL
Your site can choose to use the database that you are familiar with. However, some SAS solutions have requirements for specific databases. Consider these requirements when you select a database to use as the data source for the SAS Web Infrastructure Platform. As a default option, the SAS Framework Data Server can be configured as the data source for SAS Web Infrastructure Platform.
Connection Information for the JDBC Data Source
The database used by the SAS Web Infrastructure Platform must be configured in the Web application server as a JDBC data source. The JDBC data source is configured with the JDBC driver and connection information for the selected database. These settings are provided to the SAS Deployment Wizard during installation and configuration. You need to know the JDBC connection parameters if you make changes later, such as changing the connection to access a database on another machine. JDBC connection settings typically require a user ID and password for access to the data source.
The default database for SAS Web Infrastructure Platform is the SAS Framework Data Server. The JDBC connection parameters for the SAS Framework Data Server are provided in the following table:
Table 4.1 JDBC Connection Parameters for SAS Framework Data Server
Connection Parameter Setting
JNDI name: sas/jdbc/SharedServices
JDBC URL: jdbc:sastkts://serverName:port?stmtpooling=0&constring=(DSN=SharedServices;encoding=UNICODE_FSS)
In the URL, substitute the server name and port number of the SAS Framework Data Server at your site. The default port is 22031.
JDBC driver class: com.sas.tkts.TKTSDriver
60 Chapter 4 / Interacting with the Server Tier

These settings are configured during initial deployment. However, you need to know the connection information if you make changes later, such as moving the SAS Framework Data Server to another host system.
Note: You must specify the user name and password values as required to access the data source.
The SAS Drivers for JDBC are used to connect to the SAS Framework Data Server. The JAR files in the following list must be in the same directory as the JDBC driver to connect with the SAS Framework Data Server:
n sas.core.jar
n sas.core.nls.jar
n sas.icons.jar
n sas.icons.nls.jar
n sas.intrnet.javatools.jar
n sas.intrnet.javatools.nls.jar
n sas.nls.collator.jar
n sas.oda.tkts.jar
n sas.oda.tkts.nls.jar
n sas.security.sspi.jar
n sas.svc.connection.jar
n sas.svc.connection.nls.jar
To modify the settings for a JDBC data source, see the documentation for your Web application server.
The Shared Services Database on SAS Framework Data Server
The database file is located in the following directories:
JDBC Data Sources 61

On Windows:
SAS-config-dir\Lev1\FrameworkServer\Content\SHAREDSERVICES.FDB
On UNIX and z/OS:
SAS-config-dir/Lev1/FrameworkServer/Content/SHAREDSERVICES.FDB
CAUTION! Do not change the name or contents of the DSN. Doing so prevents SAS Web Infrastructure Platform from functioning.
Using Other Relational Databases with the SAS Middle Tier
SAS Web Infrastructure Platform can be configured to use a third-party vendor relational database for storage. In addition, some SAS solutions and applications might require a database other than SAS Framework Data Server. The other relational databases that can be used vary depending on the set of SAS applications that your site has installed. Contact your on-site SAS support personnel for more information.
Client-Side Pooling and Server-Side Pooling Options
A collection of reusable workspace server and stored process server processes is referred to as a pool. By reusing server processes, pooling avoids the cost that is associated with creating a new process for each connection. If your client application uses frequent, short-duration connections to SAS, pooling might greatly improve your server performance.
SAS supports the following types of pooling:
server-side poolingis the process by which the SAS Object Spawner maintains a collection of workspace servers that are available for clients. The usage of servers in this pool is governed by the authorization rules that are set on the servers in the SAS metadata.
62 Chapter 4 / Interacting with the Server Tier

client-side poolingis the process by which the client application maintains a collection of reusable workspace server processes.
For a comparison of client-side pooling and server-side pooling, see “Choices in Workspace Server Pooling” in the “Server Configuration, Data Retrieval, and Risk” chapter in the SAS Intelligence Platform: Security Administration Guide.
For more detailed information about pooling, see “Understanding Server Pooling” in the SAS Intelligence Platform: Application Server Administration Guide.
For instructions on configuring client-side pooling properties, see “Configuring Client-Side Pooling” in the SAS Intelligence Platform: Application Server Administration Guide.
Job Execution Services
The job execution service provides a common, standardized way for applications to create, submit, store, retrieve, and queue jobs for SAS servers. The job execution service can be configured with the Configuration Manager plug-in to SAS Management
Job Execution Services 63

Console. The settings define the job thread pool and the execution thread pools for all logical servers that the job execution service uses for delegating work.
Figure 4.1 Job Execution Services Settings
Table 4.2 Job Execution Service Settings Descriptions
Setting Default Value Description
Job Queue Minimum Threads
3 Initial number of job queue threads to create for incoming job requests.
Job Queue Maximum Threads
26 Maximum number of job queue threads to create if the demand requires additional resources.
64 Chapter 4 / Interacting with the Server Tier

Setting Default Value Description
Enable role-based security Disabled If enabled, then the job execution service checks the identity and the job characteristics to make sure the identity making the request meets the assigned permissions. For more information, see Table 4.3 on page 67.
Enable job persistence Enabled Jobs are kept in memory only if persistence is disabled. If persistence is disabled and the SAS Web Infrastructure Platform Services Web application or the Web application server is stopped, then there are no records written to the SAS Web Infrastructure Platform database about any jobs that were submitted. When persistence is enabled, the job execution services can restart any jobs that were submitted, queued, or running. For jobs that are complete, clients can fetch the results after a restart, when persistence is enabled.
Enable Distributed-IP Scheduler job runner
Enabled If enabled, then the distributed in-process scheduler is used for running scheduled jobs. Disable this setting if Platform Suite for SAS is available and the preferred scheduling method.
Available Server Contexts SASApp Use the controls to select the server context to configure.
Enable for interactive execution
Disabled If enabled, then the servers in the associated server context perform interactive workspace tasks and interactive stored process tasks only. If disabled, then the servers can perform batch and interactive job execution.
Server Minimum Threads 1 Initial number of task threads to create for incoming job requests.
Server Maximum Threads varies Maximum number of task threads to create if the demand requires additional resources.
Job Execution Services 65

Setting Default Value Description
Server Resources You can associate resources with servers and then a job can specify that it requires a resource. For example, you can associate a printer name with SASApp. When a client submits a job, and specifies that it requires the printer resource, the job execution service makes sure that the job runs on that server even when other servers are available.
The default settings are designed to provide good performance in a variety of operating environments. Before modifying the settings, consider enabling the auditing features of the job execution services to review the performance with the default settings. For information about enabling auditing, see “Configuring Auditing for SAS Web Applications” on page 86.
To modify any of these settings, follow these steps:
1 Log on to SAS Management Console as an administrator.
2 On the Plug-ins tab, navigate to Application Management Configuration Manager SAS Application Infrastructure Web Infra Platform Services 9.3.
3 Right-click JobExecutionService and select Properties.
4 Click the Settings tab.
5 Modify the settings and then click OK.
Settings are not applied and made active automatically. You need to restart the SAS Web Infrastructure Platform Services or the Web application server.
66 Chapter 4 / Interacting with the Server Tier
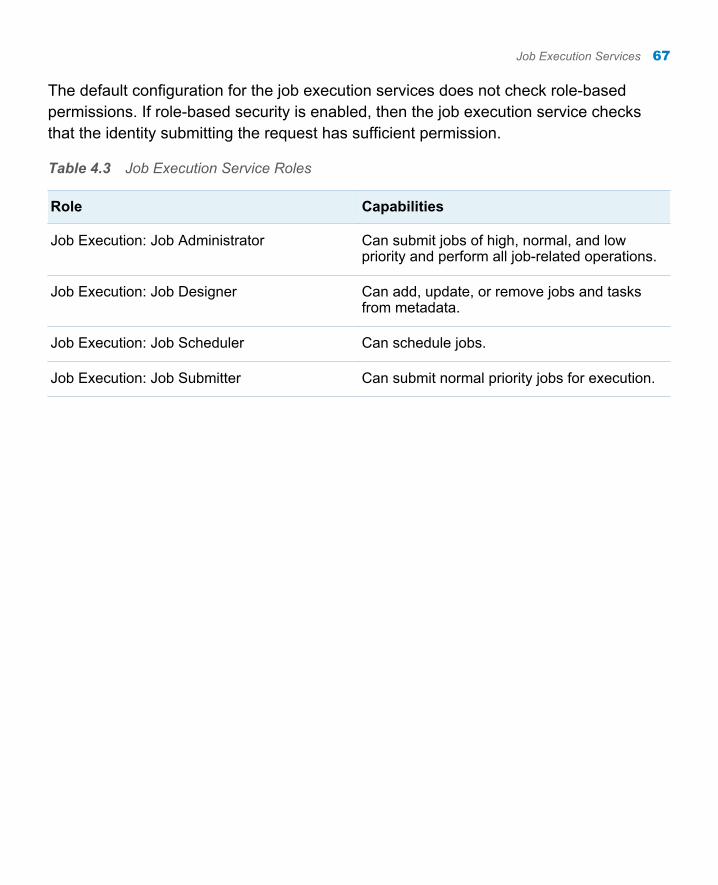
The default configuration for the job execution services does not check role-based permissions. If role-based security is enabled, then the job execution service checks that the identity submitting the request has sufficient permission.
Table 4.3 Job Execution Service Roles
Role Capabilities
Job Execution: Job Administrator Can submit jobs of high, normal, and low priority and perform all job-related operations.
Job Execution: Job Designer Can add, update, or remove jobs and tasks from metadata.
Job Execution: Job Scheduler Can schedule jobs.
Job Execution: Job Submitter Can submit normal priority jobs for execution.
Job Execution Services 67

The following figure shows the default capabilities associated with the job administrator role.
Figure 4.2 Job Administrator Capabilities
68 Chapter 4 / Interacting with the Server Tier

5Administering the SAS Web Infrastructure Platform
SAS Web Infrastructure Platform . . . . . . . . . . . . . . . . . . . . . . . . . . . . . . . . . . . . . . 70About the SAS Web Infrastructure Platform . . . . . . . . . . . . . . . . . . . . . . . . 70SAS Preferences Manager . . . . . . . . . . . . . . . . . . . . . . . . . . . . . . . . . . . . . . . . . . . 70SAS Comment Manager . . . . . . . . . . . . . . . . . . . . . . . . . . . . . . . . . . . . . . . . . . . . . . 72
Using Configuration Manager . . . . . . . . . . . . . . . . . . . . . . . . . . . . . . . . . . . . . . . . . . 73Overview of Configuration Manager . . . . . . . . . . . . . . . . . . . . . . . . . . . . . . . . . 73Summary of Steps for Using Configuration Manager . . . . . . . . . . . . . . 74Example: Configure a Property for SAS Web Report Studio . . . . . 75
Setting Global Properties for SAS Applications Using SAS Application Infrastructure Properties . . . . . . . . . . . . . . . . . . 77
Purpose of the SAS Application Infrastructure Properties . . . . . . . . 77Changing a SAS Application Infrastructure Property . . . . . . . . . . . . . . 79SAS Application Infrastructure Property Descriptions . . . . . . . . . . . . . 79Using the SMS Alert Notification Type . . . . . . . . . . . . . . . . . . . . . . . . . . . . . . 82
Specifying Connection Parameters for HTTP and HTTPS Sessions . . . . . . . . . . . . . . . . . . . . . . . . . . . . . . . . . . . . . . . . . . . . . . . . . . . . . . . . . . 84
Using the BI Dashboard Properties . . . . . . . . . . . . . . . . . . . . . . . . . . . . . . . . . . 84
Configuring Auditing for SAS Web Applications . . . . . . . . . . . . . . . . . . 86Overview of Auditing . . . . . . . . . . . . . . . . . . . . . . . . . . . . . . . . . . . . . . . . . . . . . . . . . . . 86Audit Record Storage . . . . . . . . . . . . . . . . . . . . . . . . . . . . . . . . . . . . . . . . . . . . . . . . . . 86Guidelines for Auditing the SAS Middle Tier . . . . . . . . . . . . . . . . . . . . . . . . 87Enable Auditing for Additional Services . . . . . . . . . . . . . . . . . . . . . . . . . . . . . 88
69

Archive Process for Audit Records . . . . . . . . . . . . . . . . . . . . . . . . . . . . . . . . . . 89Purging Audit Records . . . . . . . . . . . . . . . . . . . . . . . . . . . . . . . . . . . . . . . . . . . . . . . . . 91
Using the SAS Web Administration Console . . . . . . . . . . . . . . . . . . . . . . . 92About the SAS Web Administration Console . . . . . . . . . . . . . . . . . . . . . . . 92Access the SAS Web Administration Console . . . . . . . . . . . . . . . . . . . . . 94Monitor Users . . . . . . . . . . . . . . . . . . . . . . . . . . . . . . . . . . . . . . . . . . . . . . . . . . . . . . . . . . . 94Managing User Login Sessions with System
Maintenance Tools . . . . . . . . . . . . . . . . . . . . . . . . . . . . . . . . . . . . . . . . . . . . . . . . . . . 96Audit Reports . . . . . . . . . . . . . . . . . . . . . . . . . . . . . . . . . . . . . . . . . . . . . . . . . . . . . . . . . . . 99Viewing Information about Web Applications . . . . . . . . . . . . . . . . . . . . . 100
SAS Web Infrastructure Platform
About the SAS Web Infrastructure Platform
The SAS Web Infrastructure Platform is a collection of services and applications that provide common infrastructure and integration features to be used by SAS Web applications. These services and applications provide the following benefits:
n consistency in installation, configuration, and administration tasks for Web applications
n greater consistency in users' interactions with Web applications
n integration among Web applications as a result of the ability to share common resources
For a description of the SAS Web Infrastructure Platform services and applications, see “SAS Web Infrastructure Platform” on page 5.
SAS Preferences Manager
The SAS Preferences Manager is a Web application that provides a central facility for users to manage their preferences and settings.
You can invoke the application by using the following URL address:
70 Chapter 5 / Administering the SAS Web Infrastructure Platform

http://server:port/SASPreferences
Users of SAS Information Delivery Portal can invoke the SAS Preferences Manager from within the portal. For instructions, see the product Help.
The following figure shows a generic preferences application. The actual preferences that are available vary depending on the software that is installed. The SAS Preferences Manager at your site might have additional settings.
Display 5.1 SAS Preferences Manager Console
Here are the generic settings:
GeneralSpecify a theme for the applications. A theme includes settings for colors, fonts, and graphics.
Users can also specify the format for notifications that are generated by SAS applications and solutions.
LanguageSelect the locale (language and country) that you prefer.
FormatSelect the preferred format for dates, time, and currency.
PortalSpecify the position of the portal navigation bar in the SAS Information Delivery Portal. You can also specify the sort order for packages that are published in the portal. You can sort packages in descending order (newest packages are at the top) or in ascending order (oldest packages are at the top).
SAS Web Infrastructure Platform 71

SAS Comment Manager
The SAS Comment Manager can be used by SAS Web applications to capture user comments. For example, in SAS Web Report Studio, the File Comments menu item enables users to add comments to reports and graphs.
By default, all users who can log on to an application that uses the SAS Comment Manager can view and create comments. As an administrator, you might also want to edit and delete comments. Editing and deleting comments are considered administrative functions.
To edit and delete comments, you must belong to the predefined role, Comments:Administrator. This role includes the capabilities of editing or deleting comments. Users that have a need to edit or delete comments should be assigned to this role.
Note: Due to possible conflicts that can occur when multiple users delete comments in the same comment thread, the best practice is to limit the number of users to just a few.
To edit or delete a comment, follow these steps:
1 Select the comment in the left pane of SAS Comment Manager.
2 To edit the comment, in the right pane, click Edit. An Edit Comment page opens in which you can make changes. When you are finished, click Save.
3 To delete the comment, in the right pane, click Delete. You are prompted to confirm the deletion.
72 Chapter 5 / Administering the SAS Web Infrastructure Platform

The following figure shows an example of SAS Comment Manager with a comment displayed.
Display 5.2 SAS Comment Manager
Using Configuration Manager
Overview of Configuration Manager
Configuration Manager is a plug-in available in SAS Management Console. Using the Configuration Manager, you can perform various administrative tasks such configuring properties and values and specifying settings for the SAS Web applications.
Configuration Manager offers a consistent interface to set properties for all SAS Web applications. Each SAS Web application has its own properties window with tabs. For example, the following display shows the Settings tab of the Web Report Studio 4.3 Properties dialog box.
Here is a brief description of the five tabs available in the properties dialog box associated with a SAS application:
Using Configuration Manager 73

Note: For more information about using these tabs, see the online Help for the Configuration Manager plug-in in SAS Management Console.
n The General tab provides basic information about the application.
n The Connection tab enables you to modify the parameters for connections to SAS Web applications. For more information, see “Specifying Connection Parameters for HTTP and HTTPS Sessions” on page 84.
n The Settings tab offers default values for settings that can be modified. For modifying values in the Settings tab, and to understand how the lock and unlock icons function, see “Setting Global Properties for SAS Applications Using SAS Application Infrastructure Properties” on page 77.
n The Advanced tab includes a limited number of default property names and values. You can modify existing properties and their values, or add custom properties and values for SAS Web applications.
n The Authorization tab enables you to specify permissions for users and groups and apply Access Control Templates.
Although certain XML configuration files (for example, LocalProperties.xml file for SAS Web Report Studio) are available and supported for SAS Web applications, it is recommended that you use the Configuration Manager to configure and set properties.
Summary of Steps for Using Configuration Manager
Here are the main steps for using Configuration Manager:
1 To access Configuration Manager, in SAS Management Console, navigate to Plug-ins Application Management Configuration Manager SAS Application Infrastructure.
2 To access the properties for an application, right-click the application's node and select Properties.
74 Chapter 5 / Administering the SAS Web Infrastructure Platform

3 Add or modify properties as needed. You might need to unlock particular properties before you can change them. See “Setting Global Properties for SAS Applications Using SAS Application Infrastructure Properties” on page 77.
4 Changes to properties do not take effect immediately on the run-time system. To apply these changes, you must perform one of the following tasks:
n Stop and then restart the Web applications whose properties you changed.
n Use the application's JMX management bean to reload the configuration (if the application supports JMX beans). For more information about JMX, see “Using JMX Tools to Manage SAS Resources ” on page 115.
n Alternatively, stop and then restart SAS Services Application and the Web application server.
Example: Configure a Property for SAS Web Report Studio
Suppose that you want to add the property, wrs.ReportViewPrefs.LeftPanelOpenState for SAS Web Report Studio 4.3, and specify the value for this property. To configure this property and its value, follow these steps:
1 Log on to SAS Management Console.
2 In SAS Management Console, navigate to Plug-ins Application Management Configuration Manager Application Management Web Report Studio 4.3. Right-click and select Properties to display the Web Report Studio 4.3 Properties dialog box.
3 Click the Advanced tab.
4 Click Add to display the Define New Property dialog box.
5 Enter the property name as shown and specify the property value:
Property Name: wrs.ReportViewPrefs.LeftPanelOpenState
Using Configuration Manager 75

Property Value: user
6 Click OK to exit the Define New Property dialog box.
7 Click OK to exit the Web Report Studio 4.3 Properties dialog box.
Changes to properties do not take effect immediately on the run-time system. For details, see “Summary of Steps for Using Configuration Manager” on page 74.
The following display shows the property name, wrs.ReportViewPrefs.LeftPanelOpenState, and its property value specified on the Advanced tab.
Display 5.3 Advanced Tab for SAS Web Report Studio 4.3 Properties
76 Chapter 5 / Administering the SAS Web Infrastructure Platform

The dimmed fields indicate that the values are inherited from the SAS Application Infrastructure, and these values are shared with other Web applications. The values in the dimmed fields can be changed only in the SAS Application Infrastructure properties.
Setting Global Properties for SAS Applications Using SAS Application Infrastructure Properties
Purpose of the SAS Application Infrastructure Properties
The Configuration Manager plug-in within SAS Management Console enables you to configure properties that apply to all SAS applications that inherit their settings from SAS Application Infrastructure. Most SAS Application Infrastructure settings are locked, and the lock prevents individual SAS applications from overriding the settings. When you unlock a SAS Application Infrastructure setting, the setting can be overridden by individual applications. When you lock a SAS Application Infrastructure setting again, all applications inherit that setting from the SAS Application Infrastructure.
Setting Global Properties for SAS Applications Using SAS Application Infrastructure
Properties 77

The following display shows the settings that can be set for SAS Application Infrastructure.
Display 5.4 Settings Tab for SAS Application Infrastructure Properties
The locked icon indicates that a field is locked. When a field has a locked icon, the value or setting for that particular field cannot be overridden on the Settings tab for other SAS applications that inherit the setting. By default, all fields on the Settings tab of the SAS Application Infrastructure Properties dialog box are locked.
78 Chapter 5 / Administering the SAS Web Infrastructure Platform

Changing a SAS Application Infrastructure Property
1 Log on to SAS Management Console as an administrator.
2 On the Plug-ins tab, navigate to Application Management Configuration Manager SAS Application Infrastructure.
3 Right-click SAS Application Infrastructure and select Properties.
4 Click the Settings tab.
5 Select the property to change from the left panel. Use the menus or text fields to set the property.
6 Click OK.
Settings are not applied and activated automatically. You must restart the SAS Web Infrastructure Platform Services and the applications that use the changed property. If unsure, restart the Web application server.
SAS Application Infrastructure Property Descriptions
The following table identifies the settings that are available for the SAS Application Infrastructure.
Table 5.1 SAS Application Infrastructure Settings
Setting Default Value Description
Application > User Interface
Setting Global Properties for SAS Applications Using SAS Application Infrastructure
Properties 79

Setting Default Value Description
Default theme SAS Default This setting controls the default theme that is used by the SAS Web applications. For information about creating an alternative theme, see “Administering SAS Web Application Themes” on page 204.
Display Quick Help Tips Off
Default Logon Target none Use the menu to select the application to which default URL requests are directed upon successful authentication. In this way, a site can be configured to direct users to SAS Web Report Studio, SAS Information Delivery Portal, or some solution, as a default target depending on requirements. The typical choices are identified in the following list:n AdminHome — SAS Web Administration
Consolen WRSLogon — SAS Web Report Studion PortalLogon — SAS Information Delivery
Portaln DisplayDashboard — SAS BI Dashboardn MobileAdmin — SAS BI Dashboard
Mobile Device Administration
Application > Regional Settings
Default locale varies Use the menu to select the default locale.
Application > Pooling
Activate client-side pooling
No For information about the advantages and disadvantages, see “Choices in Workspace Server Pooling” in Chapter 12 of SAS Intelligence Platform: Security Administration Guide. For information about configuring client-side pooling, see Chapter 9, “Configuring Client-side Pooling,” in SAS Intelligence Platform: Application Server Administration Guide.
80 Chapter 5 / Administering the SAS Web Infrastructure Platform

Setting Default Value Description
Notifications > General Configuration
Alert notifications type Portal Use the menu to select the default notification types. For information about using the SMS setting, see “Using the SMS Alert Notification Type” on page 82.
Character set for e-mail messages
UTF-8
Allow multi-part e-mail messages
Yes
Alert prefix type Default
Alert prefix
E-mail digest frequency
Notifications > Administrative and Error Messages
Sender of messages noreply@smtpserver
Used as the sender e-mail address for administrative messages.
Recipient of administrative messages
varies Administrative and error messages are sent to all e-mail addresses in the list.
Formats > Formats
Short date format varies Use the menu to set the default format for date, time, and datetime values.
Time format
Long date format
Time/Date format
Formats > Currency Formats
Setting Global Properties for SAS Applications Using SAS Application Infrastructure
Properties 81
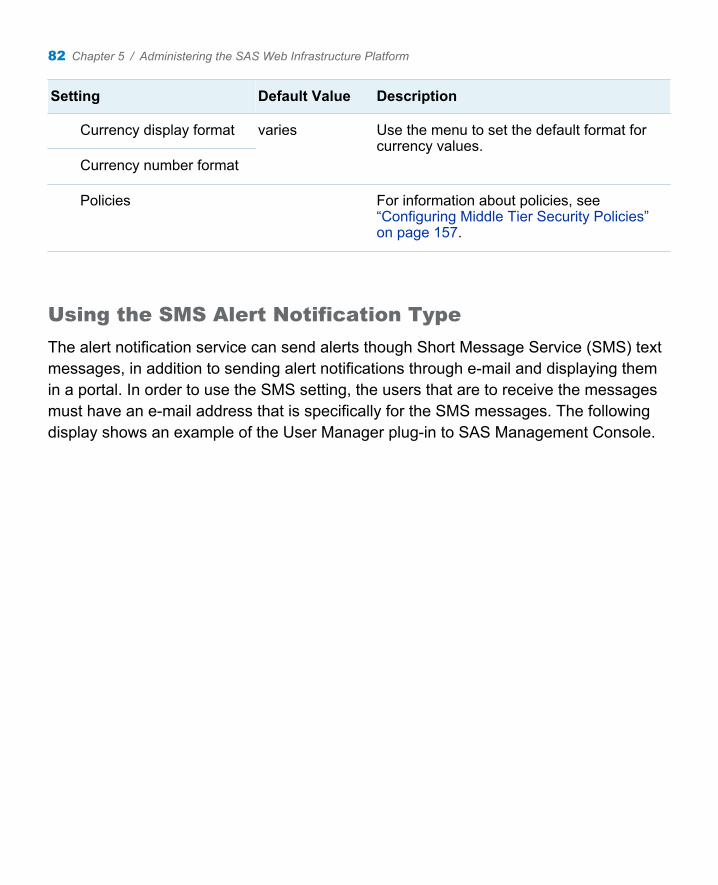
Setting Default Value Description
Currency display format varies Use the menu to set the default format for currency values.
Currency number format
Policies For information about policies, see “Configuring Middle Tier Security Policies” on page 157.
Using the SMS Alert Notification Type
The alert notification service can send alerts though Short Message Service (SMS) text messages, in addition to sending alert notifications through e-mail and displaying them in a portal. In order to use the SMS setting, the users that are to receive the messages must have an e-mail address that is specifically for the SMS messages. The following display shows an example of the User Manager plug-in to SAS Management Console.
82 Chapter 5 / Administering the SAS Web Infrastructure Platform

In the display, a user has an e-mail address with the type set to sms and the address is provided in an SMS format.
Display 5.5 SMS E-mail Address
Make sure that you know the SMS E-mail gateway for the provider. Some SMS E-mail gateways for providers in the North American market are as follows:
n Verizon: [email protected]
n AT&T: [email protected]
n Sprint: [email protected]
n T-Mobile: [email protected]
Setting Global Properties for SAS Applications Using SAS Application Infrastructure
Properties 83

In addition to making sure that recipients of the SMS messages have a SMS-style e-mail address, you might need to set two properties related to SMS.
Table 5.2 Advanced Properties for SMS Messages
Property Name Default Value Description
Notifications.SMSMessageLength 120 characters Modify this value as needed to increase or decrease the size of SMS messages that SAS software sends to the mail server.
Policy.EnforceSMSMessageLength
false If set to true, then messages are truncated to the length of the previous property.
Specifying Connection Parameters for HTTP and HTTPS Sessions
Using the BI Dashboard Properties
The Connection tab in the properties dialog box for SAS applications enables you to modify the parameters for connecting to a SAS Web application. The selections that are displayed on the Connection tab determine the URL that is used to access the application's resources or services.
The following display shows the Connection tab for SAS BI Dashboard properties.
84 Chapter 5 / Administering the SAS Web Infrastructure Platform

Display 5.6 Connection Tab for BI Dashboard Properties
If your site changes its configuration after initial deployment, you might need to edit the connection information parameters. Here are some situations where the connection parameters are updated on the Connection tab:
n If a SAS Web application is moved to a different machine, you must modify the host name property for its connection.
n If you configure Secure Sockets Layer (SSL) for improved security, you must edit the Protocol property to modify the connection protocol to HTTPS for each affected application.
n If clustering or load balancing is configured, the connection parameters should be updated.
Specifying Connection Parameters for HTTP and HTTPS Sessions 85

n If you deploy SAS Web Application Themes to a different Web application server, you should modify the theme metadata by specifying the name of the theme, and update other parameters such as host name and port number.
Changing the values for the Host Name, Port, or Service fields on the Connection tab enables the SAS Web Application Infrastructure to seamlessly redirect clients to the proper locations in a custom environment. For the host name, you can supply an IP address. If you enter an IP version 6 address, you must enclose the address in brackets.
For example: [FE80::202:B3FF:FE1E:8329]
Configuring Auditing for SAS Web Applications
Overview of Auditing
SAS Web applications and other SAS middle-tier services provide auditing features. Depending on the application and its configuration, these auditing features can record all actions performed both by the direct users of the system and by the system itself. Some applications might provide a more complete audit, detailing not only the actions that are performed but also the states of the objects that are affected by those actions.
Log on, log off, and unsuccessful log on attempts create audit records for all deployments. Additional actions that can be audited for SAS Web Infrastructure Platform are described in this section. If a SAS solution is installed, see the solution documentation for information about additional actions that can be audited.
Audit Record Storage
Audit records are stored in the SAS Web Infrastructure Platform database. These audit records are stored in two relational tables, SAS_AUDIT and SAS_AUDIT_ENTRY. Two additional tables, SAS_AUDIT_ARCHIVE and SAS_AUDIT_ENTRY_ARCHIVE, provide archival audit data.
86 Chapter 5 / Administering the SAS Web Infrastructure Platform

Do not access the tables directly for audit reporting. The SAS Web Administration Console provides an interface for viewing log on, log off, unsuccessful log on attempts, and last user logon information.
Depending on the auditing configuration of the deployed SAS applications, audit records can contain different types of audit information. However, all audit records contain the following information:
n user ID that performed the audited action.
n action that occurred. This is stored as an action code.
n data and time that the audited action occurred.
Guidelines for Auditing the SAS Middle Tier
The auditing process in the SAS middle tier is designed to be efficient for both processing time and storage. However, you might want to limit the number of audited events to minimize any effect on performance and minimize the size of the audit trail. The SAS middle tier auditing features provide the tools to help you balance the need to gather sufficient security or historical records with the ability to store and process it.
Consider these guidelines to make efficient use of the SAS middle tier auditing features:
n Evaluate the purpose of auditing an action. Make sure that records for an audited action can be used to serve a business purpose.
n When auditing for security, audit generally and then audit specifically. Analyze the records from general audit options to provide the basis for targeting specific audited actions.
n When auditing for historical information, audit for actions that are important to your business only. Avoid cluttering valuable audit records with less relevant audited actions. Narrowing the focus to valuable actions also reduces the amount of audit trail administration.
n Align the audit requirements to the most strictly regulated application. If your SAS deployment includes a number of SAS applications, the applications might have varying requirements. Make sure that the audited actions match the most strictly regulated application.
Configuring Auditing for SAS Web Applications 87

When auditing is enabled and audit records are generated, the audit trail size increases according to two factors:
n the number actions that are enabled for auditing
n how frequently the audited actions are performed
If the SAS Web Infrastructure Platform database becomes completely full and audit records cannot be inserted, the audited actions cannot be successfully executed until the audit trail is purged. The system administrator must control the rate of increase and size of the audit trail. To control the size of the audit trail, consider the following strategies:
n Be selective about which actions are enabled for auditing. If the number of audited actions is reduced, then unnecessary and useless audit records are not generated and are not stored in the audit trail.
n Design archive rules to move important, but not critically important, information out of the audit trail. This process archives the audit records of interest and removes them from the main audit table. For information about archiving, see “Archive Process for Audit Records” on page 89.
n Purge the audit archive tables as needed.
Enable Auditing for Additional Services
All SAS products that include the SAS Web Infrastructure Platform provide audit records for logon, log off, and unsuccessful log on attempts. Other standard services can also be audited:
n mail service
n content service
n job execution service
n workspace service
n scheduling service
n impersonation service
88 Chapter 5 / Administering the SAS Web Infrastructure Platform

To enable auditing for any of these services, follow these steps:
1 Edit the
SAS-install-dir\SASWebInfrastructurePlatform\9.3\Static\wars\sas.wip.services\WEB-INF\spring-config\aop-config.xml file.
2 Review the comments to locate the service that you want to audit. Each of the services is commented out in the initial deployment. The following example shows the job execution service:
<!-- Job Execution Service auditing <bean class="com.sas.svcs.aop.auditing.jes.SuccessfulSubmitJobAuditAdvice"> <property name="auditRecorder" ref="auditService" /></bean>
3 Add closing comment markup and then remove the original closing comment markup (––>) from the bottom of the code block. Save your changes.
4 Rebuild the SAS Web Infrastructure Platform with the SAS Deployment Manager.
Note: Subsequent upgrade activities can overwrite this file. For example, if you later install a maintenance release that includes aop-config.xml, then you must repeat this procedure.
5 Redeploy the SAS Web Infrastructure Platform Services Web application (sas.wip.services9.3.ear).
Enabling auditing for other SAS applications requires editing different files, but the steps are similar to the previous procedure. For example, auditing for SAS Workflow is controlled with the SAS-install-dir\SASWebInfrastructurePlatform\9.3\Static\wars\sas.workflow\WEB-INF\spring-config\aop-config.xml file.
Archive Process for Audit Records
Once the audit features are enabled, records are added to the SAS_AUDIT and SAS_AUDIT_ENTRY tables. The records can be archived to the SAS_AUDIT_ARCHIVE and SAS_AUDIT_ENTRY_ARCHIVE tables. An archive job is used to control which records to archive. The archive job reads the archive rules in the
Configuring Auditing for SAS Web Applications 89

SAS_AUDIT_ARCHIVE_RULE table. The archive job always starts when SAS Web Infrastructure Platform Services starts. In addition, the default archive job is scheduled to start every Monday at the start of day, but the archive job schedule can be configured.
The following table describes the columns in table SAS_AUDIT_ARCHIVE_RULE. Rows must be added to this table to identify the objects, actions, and age for the archive job to process.
Table 5.3 SAS_AUDIT_ARCHIVE_RULE Column Description
Column Name Description
OBJECT_TYPE_ID Object type. Each object type is assigned an ID in table SAS_TYPE_OBJECT.
ACTION_TYPE_ID Type of change. Each action type is assigned an ID in table SAS_TYPE_ACTION.
FREQUENCY_NO A numeric value in milliseconds. Records that meet the criteria for OBJECT_TYPE_ID and ACTION_TYPE_ID, and are also older than this value, are archived.
To control the archive job schedule, you can add a JVM option to the Web application server. The -Dsas.audit.archive.cron JVM option can be used to specify the schedule. The schedule is set with a syntax that is similar to cron:
-Dsas.audit.archive.cron="second minute hour day_of_month month day_of_week"
The following example schedules the archive job to run each day at midnight:
-Dsas.audit.archive.cron="0 0 0 * * *"
You can confirm the archive job runs and reads the archive rules by adding a logging context to com.sas.svcs.audit at the INFO level.
90 Chapter 5 / Administering the SAS Web Infrastructure Platform

The following table identifies the common object types and actions that you might want to include in the SAS_AUDIT_ARCHIVE_RULE table:
Table 5.4 Common Audit Object Types and Actions
Audit Action Object Type ID Value Action Type ID Value
User log on -1 8
Use log off -1 9
Sent E-mail -1 44
Add job 11 0
Submit job 10 3
Retrieve job 11 45
Cancel job 10 47
Release job 10 48
Update job 11 1
Remove job 11 37
Start scheduled job 86 3
Remove scheduled job 86 37
Purging Audit Records
After auditing has been enabled for some time and the audit archive process runs, you might want to delete records from the SAS_AUDIT_ARCHIVE and SAS_AUDIT_ENTRY_ARCHIVE tables. Purging records that are no longer needed recovers some archival space and facilitates better audit trail management. For information about deleting records from the SAS Web Infrastructure Platform database, see the documentation for the database.
Configuring Auditing for SAS Web Applications 91

Using the SAS Web Administration Console
About the SAS Web Administration Console
The SAS Web Administration Console provides a central location for the following activities:
n monitoring users
n enabling an environment for system maintenance tasks
n monitoring audit reports
n managing folders and permissions for the SAS Content Server
n managing SAS Web applications
The following display shows an expanded view of a main page for the SAS Web Administration Console.
Display 5.7 Main Page in SAS Web Administration Console
92 Chapter 5 / Administering the SAS Web Infrastructure Platform

Here is a description of what you can accomplish with the SAS Web Administration Console:
n The Users page enables you to view and monitor authenticated users and system users that are currently logged on to a SAS Web application. See “Monitor Users ” on page 94.
n The System Maintenance page provides the Restart Maintenance Wizard and the Quiesce System feature. When you want to perform system maintenance, the Restart Maintenance Wizard enables you to send e-mail to users to log off from their sessions within a specified deadline, to log off users after the deadline, and to prohibit new users from logging on to their applications. The Quiesce System feature is useful when you want to allow existing users to stay logged on to their user sessions, but you want to quiesce the system by preventing new users from logging on to SAS Web applications. See “Managing User Login Sessions with System Maintenance Tools” on page 96.
n The Audit page enables you to review user log on and logoff activity and failed log on attempt counts. You can also search by user ID for a user’s last logon time.
n The SAS Content Server page enables you to manage folders and permissions for content in the SAS Content Server. You manage content by using either the SAS Content Server Administration Console (within the SAS Web Administration Console) or by using a stand-alone SAS Content Server Administration Console. You must be an unrestricted user in order to access the SAS Content Server Administration Console.
To access the SAS Content Server feature in the SAS Web Administration Console, select Environment Management SAS Content Server in the navigation pane.
For instructions on administering the SAS Content Server, see “Using the SAS Content Server Administration Console ” on page 172.
n The Application Management page enables you to view the current configuration for Web applications that have been deployed at your site. For more information, see “Viewing Information about Web Applications” on page 100.
Note: The SAS Web Administration Console can be extended by other SAS applications. Depending on the software that is installed at your site, your SAS Web Administration Console might be different from the one shown here. For more
Using the SAS Web Administration Console 93

information about the console at your site, see the administration guides for your applications.
Access the SAS Web Administration Console
To access the SAS Web Administration Console, enter the following URL in your Web browser and substitute the server name and port number of your Web application server:
http(s)://server:port/SASAdmin
To use this application, you must log on as someone who is a member of the SAS Administrators group (for example, sasadm@saspw).
Note: The SAS Content Server Administration Console has its own logon requirements. For more information, see “Using the SAS Content Server Administration Console ” on page 172.
Monitor Users
About the Users That Appear in the SAS Web Administration Console
The Users page in the SAS Web Administration Console lists the following types of users:
Authenticated usersare users who are currently authenticated on the system.
System usersare system-level users who are required to perform particular tasks, such as running a stored process or accessing metadata. The information provided on the Users page is for informational purposes only. You cannot manage these users from the SAS Web Administration Console.
94 Chapter 5 / Administering the SAS Web Infrastructure Platform

Send E-Mail to One or More Users
You can send e-mail to any of the users who are currently logged on to a SAS Web application. This feature is useful if you want to notify users of an impending system operation or a system outage.
To send e-mail to a user, follow these steps:
1 Select Environment Management Users in the navigation pane.
2 In the Users pane, select the check box next to an authenticated user's name.
You can select multiple check boxes in order to send e-mail to several users. To select all of the check boxes, select the check box in the heading of the last column.
3 Click the action menu in the heading of the last column and select Send E-mail.
4 If necessary, enter the e-mail address of the recipient. If you enter more than one address, separate the addresses with a semicolon.
The addresses are already listed for users who have an e-mail address defined in SAS metadata.
5 Enter the subject and text of the message.
6 If you have more than one recipient, specify whether you want to send a single message to all recipients or to send a separate message to each recipient.
7 Click Send.
Force Users to Log Off
In some cases, users might not be actively working with a SAS Web application, and yet their sessions remain active in the system. You can force the termination of these user sessions by using the SAS Web Administration Console.
To force users to log off, follow these steps:
1 Select Environment Management Users in the navigation pane.
2 In the Users pane, select the check box next to an authenticated user's name.
Using the SAS Web Administration Console 95

You can select multiple check boxes in order to force off several users. To select all of the check boxes, select the check box in the heading of the last column.
3 Click the action menu in the heading of the last column and select Force Log Off.
A confirmation page displays the user ID, e-mail address, and last logon time for the selected user. Review this information to ensure that you want to continue with the logoff operation.
4 Click OK to force the logoff.
Managing User Login Sessions with System Maintenance Tools
Overview
Tasks such as making changes to the metadata, restarting a metadata server, restarting the object spawner, or restarting a Web application can be performed safely only when users are not logged on to applications or when new users are prohibited from logging on to the applications. The Maintenance Restart Wizard enables you to perform a sequence of tasks to prepare the system for maintenance.
The SAS Web Administration Console cannot stop, pause, or start servers. For instructions about system maintenance tasks such as stopping, pausing, or starting servers, see the SAS Intelligence Platform: System Administration Guide.
Note: Do not close the Web browser during a quiesced state or when you are completing the steps in the Restart Maintenance Wizard. If the Web browser is closed during these sessions, restart your Web application server.
The following display shows the System Maintenance page in the SAS Web Administration Console.
96 Chapter 5 / Administering the SAS Web Infrastructure Platform

Display 5.8 System Maintenance Page
Maintenance Restart Wizard
Use the Maintenance Restart Wizard to prepare a system for maintenance and resume system operations as described in the following list:
n Notify authenticated users who are logged on to applications that system maintenance is planned, and specify a deadline by which they need to log off from their applications.
n Enable the shutdown of the system after a specified deadline.
n Enable the system to prohibit new users from logging on to their applications.
n If the notification deadline has passed, and users and have not terminated their sessions, the system forces authenticated users to exit and terminate their sessions. All users are logged off.
n Quiesce the system by temporarily putting the system into an inactive state. When the system is quiesced, users' logon capabilities are disabled.
n Begin maintenance operations such as restarting the metadata server, the object spawner, or a Web application.
n Resume system operation by removing the quiesced state from the system, and enabling users to log on to the system and their applications.
Using the SAS Web Administration Console 97

To use the Maintenance Restart Wizard, log on to the SAS Web Administration Console. Navigate to Environment Management System Maintenance. Click Restart System and follow the Wizard's instructions.
The following display shows the main page for the Maintenance Restart Wizard.
Display 5.9 Maintenance Restart Wizard
Quiesce the System
You can quiesce a system by allowing existing users to stay logged on to their applications, and prohibiting new users from logging on to their applications.
To quiesce the system, log on to the SAS Web Administration Console. Navigate to Environment Management System Maintenance. Click Quiesce System. When you are finished with your maintenance operations, click Resume system to remove the quiesced state and enable users to log on to their applications. The following display shows the message that is displayed when a system is quiesced.
98 Chapter 5 / Administering the SAS Web Infrastructure Platform
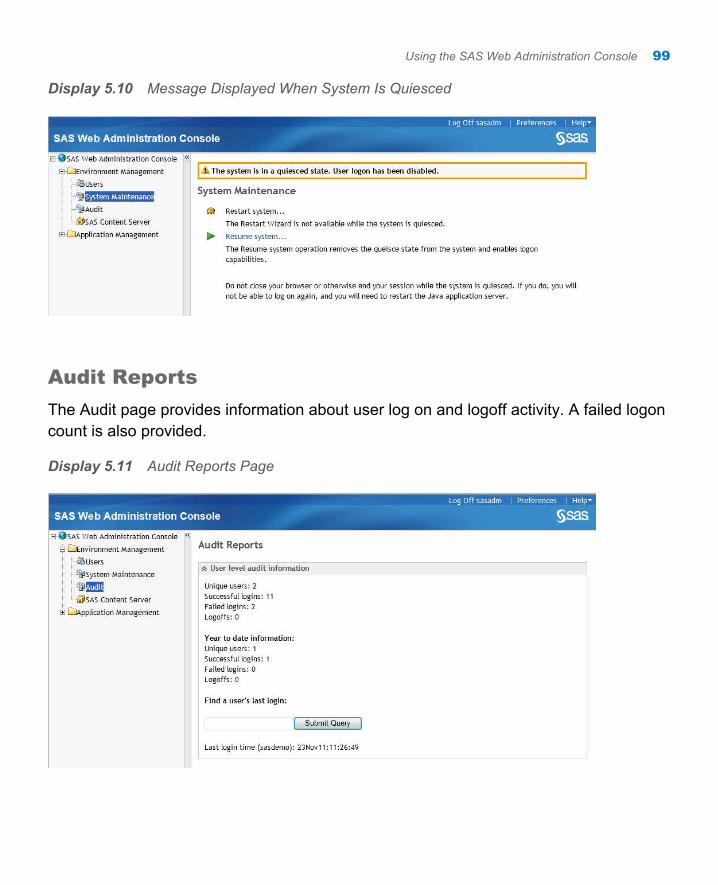
Display 5.10 Message Displayed When System Is Quiesced
Audit Reports
The Audit page provides information about user log on and logoff activity. A failed logon count is also provided.
Display 5.11 Audit Reports Page
Using the SAS Web Administration Console 99

To search for a user’s last logon time, follow these steps:
1 Select Environment Management Audit in the navigation pane.
2 In the Audit Reports pane, enter an authenticated user's ID in the text field and click Submit Query.
Viewing Information about Web Applications
The SAS Web Administration Console provides information about the SAS Web applications that are installed and configured at your site. This application is used for viewing application information from any machine with a Web browser without the need to have SAS Management Console installed on the machine.
To display the applications, expand the Application Management node in the navigation pane.
The tree view on the left side of the page displays a hierarchical list of configured applications. The list varies depending on the software that is installed.
When you click the name of an application, the right side of the page displays the following types of information:
Application settingsdisplays settings that are currently configured for the application. For example, SAS Information Delivery Portal settings include the locale that is in use, the location where portlets are deployed, the e-mail host, and default settings for various user preferences.
You cannot change any of the application settings here. To change settings, use the Application Management Configuration Manager plug-in in SAS Management Console.
Directivesprovides the internal direction to the application's URL. This information is used internally to route applications. You might use this information to troubleshoot applications under the guidance of SAS Technical Support.
100 Chapter 5 / Administering the SAS Web Infrastructure Platform

Loggingdisplays a form that is used to configure logging for applications that are instrumented for dynamic logging control.
Using the SAS Web Administration Console 101

102 Chapter 5 / Administering the SAS Web Infrastructure Platform

6Using the SAS Web Infrastructure Platform Utilities
Using the DAVTree Utility to Manage WebDAV Content . . . . . . . . 104About the DAVTree Utility . . . . . . . . . . . . . . . . . . . . . . . . . . . . . . . . . . . . . . . . . . . 104Start the Utility and Connect to a WebDAV Location . . . . . . . . . . . . 104Add Resources to WebDAV . . . . . . . . . . . . . . . . . . . . . . . . . . . . . . . . . . . . . . . . . 105Edit a Text File in WebDAV . . . . . . . . . . . . . . . . . . . . . . . . . . . . . . . . . . . . . . . . . 107Copy or Move a File in WebDAV . . . . . . . . . . . . . . . . . . . . . . . . . . . . . . . . . . . 107Advanced Features . . . . . . . . . . . . . . . . . . . . . . . . . . . . . . . . . . . . . . . . . . . . . . . . . . . 107
Using the Package Cleanup Utility to Remove Packages . . . . . . . 108Overview of the Package Cleanup Utility . . . . . . . . . . . . . . . . . . . . . . . . . . 108Deleting Packages . . . . . . . . . . . . . . . . . . . . . . . . . . . . . . . . . . . . . . . . . . . . . . . . . . . . 109List Packages . . . . . . . . . . . . . . . . . . . . . . . . . . . . . . . . . . . . . . . . . . . . . . . . . . . . . . . . . 111Arguments . . . . . . . . . . . . . . . . . . . . . . . . . . . . . . . . . . . . . . . . . . . . . . . . . . . . . . . . . . . . . 112Utility Logging and Debugging . . . . . . . . . . . . . . . . . . . . . . . . . . . . . . . . . . . . . . 113Examples . . . . . . . . . . . . . . . . . . . . . . . . . . . . . . . . . . . . . . . . . . . . . . . . . . . . . . . . . . . . . . 114
Using JMX Tools to Manage SAS Resources . . . . . . . . . . . . . . . . . . . . . 115About JMX and MBeans . . . . . . . . . . . . . . . . . . . . . . . . . . . . . . . . . . . . . . . . . . . . . 115Accessing the SAS MBeans . . . . . . . . . . . . . . . . . . . . . . . . . . . . . . . . . . . . . . . . 115Understanding How to Use the SAS MBeans . . . . . . . . . . . . . . . . . . . . . 117
103

Using the DAVTree Utility to Manage WebDAV Content
About the DAVTree Utility
The DAVTree utility is a stand-alone Java application that provides a tree view of WebDAV resources. The utility enables you to manipulate content by copying files to a WebDAV repository or by creating text files such as forms and templates.
The utility presents information in a tree view. When you select a resource item in the tree on the left side of the window, the WebDAV properties for the resource are displayed on the right side.
Here is an example DAVTree interface:
In the interface, you see only the content that you are authorized to see.
Start the Utility and Connect to a WebDAV Location
To use this utility, follow these steps:
1 Run the following command on Windows:
SAS-config-dir\Levn\Web\Utilities\DAVTree.bat
104 Chapter 6 / Using the SAS Web Infrastructure Platform Utilities

On UNIX and z/OS:
SAS-config-dir/Levn/Web/Utilities/DAVTree.sh.
The DAVTree utility appears.
2 Select File Open.
The DAV Location dialog box appears.
3 In the URL field, enter the URL for a WebDAV location. For example, enter the following URL and substitute the server name and port number of your WebDAV server (SAS Content Server):
http://server:port/SASContentServer/repository/default/
4 If the WebDAV server was set up with a proxy, enter the proxy host and port.
5 Click OK. You are prompted for credentials.
6 Enter your administrator credentials in the logon dialog box.
You can later connect to a different WebDAV location by repeating steps 2 through 6 and providing the URL for the new location.
Add Resources to WebDAV
Copy Files to DAVTree
You can copy both text files and binary files to the repository. To copy a file, click and drag the file from the file system to a folder in the DAVTree interface. This action can be performed on Windows systems and on UNIX systems that provide a graphical interface.
Note: To delete a resource, select the resource in the tree and then select Edit Delete. You are prompted to confirm the deletion.
Create a Text File
1 Position the cursor on the folder where you want to create the text file.
2 Select Edit Add.
Using the DAVTree Utility to Manage WebDAV Content 105

You are prompted to confirm the action, and then an Add dialog box appears. Here is an example dialog box with data entered in the fields.
3 Select Resource.
4 In the field to the left of the Resource radio button, enter the name of the text file. If a file already exists with the name that you provide, the file is overwritten.
The example shows a file with the name myFile.txt.
5 In the field below the Resource radio button, enter the text that you want the file to contain. Press ENTER to start a new line.
The example shows a file that contains the text string “Contents of myFile.txt.”
6 If you want to define a custom WebDAV property, click New property. Two text fields appear in the gray properties panel. In the left field, add the property name. In the right field, enter the property value.
7 Click OK.
Create a Folder
1 Position the cursor on the folder where you want to create the new folder.
2 Select Edit Add.
You are prompted to confirm the action, and then an Add dialog box appears.
3 Select Collection.
106 Chapter 6 / Using the SAS Web Infrastructure Platform Utilities

4 In the field to the left of the Collection radio button, enter the name that you want to give the folder.
5 Click OK.
Edit a Text File in WebDAV
To edit a text file, follow these steps:
1 Right-click the text file and select Edit. The Edit File dialog box appears and displays the contents of the file.
2 Make your changes to the text.
3 Click Save.
Copy or Move a File in WebDAV
To move a file from one location to another in WebDAV, in DAVTree click and drag the file to the desired location.
To copy rather than move a file, press and hold the CTRL key while dragging.
Advanced Features
The DAVTree utility can be used as a diagnostic tool. The utility provides features such as locking files, versioning files, and modifying WebDAV properties.
CAUTION! These are advanced WebDAV functions. These advanced WebDAV functions, which are not covered in this documentation, should be performed only by someone who has WebDAV expertise.
Using the DAVTree Utility to Manage WebDAV Content 107

Using the Package Cleanup Utility to Remove Packages
Overview of the Package Cleanup Utility
The Package Cleanup utility provides a simple, command-line interface for deleting or listing packages that have been published in a publication channel or in a WebDAV repository.
The SAS Publishing Framework supports channels that you define in the SAS Metadata Repository. Once channels have been defined, users can publish packages to the channels. For example, portal users can subscribe to available channels, view the persisted packages, and publish content (files, links, stored processes, and information maps).
Channels can be defined with archive or WebDAV persistent stores. When a package is published to a channel that is defined with a persistent store, the package is first persisted to that location and then it is published to all subscribers of that channel. All persisted packages have an expiration date. However, expired packages are not deleted automatically; you must explicitly delete them. You can use the Package Cleanup utility for this purpose.
Here is the path to the utility:
On Windows:
SAS-config-dir\Levn\Web\Utilities\PackageCleanup.bat
On UNIX and z/OS:
SAS-config-dir/Levn/Web/Utilities/PackageCleanup.sh.
The Package Cleanup utility enables you to review basic information about a persisted package and delete both the metadata and the actual package. Deletions are based on the expiration date of the package. This utility supports the deletion of packages from
108 Chapter 6 / Using the SAS Web Infrastructure Platform Utilities

either type of persistent store (archive or WebDAV). The utility also supports the deletion of packages that are not defined in any channel.
The Package Cleanup utility also supports a listing feature. The utility can be used to display information about packages that are published in a particular channel, packages that are not defined in any channel, and packages that exist on a WebDAV server.
Note: You must have the appropriate permissions on a channel in order to delete packages from the channel. See the “Authorization Model” chapter in the SAS Intelligence Platform: Security Administration Guide.
Deleting Packages
Delete Packages
To delete packages, follow these steps:
1 Run the command and specify the deletion date. You can also provide one of the following arguments:
n a channel name in order to delete packages that are defined in a specific channel
n a WebDAV URL in order to delete packages that are in the specified WebDAV location
Note: If you do not provide the channel or WebDAV URL, then the utility deletes only orphaned packages that are not defined for any channel or WebDAV URL.
After you run the command, the utility displays a list of packages that match your deletion criteria and prompts you to confirm deletion.
2 Respond to the prompt to confirm deletion of the packages or to exit without deleting any packages.
Minimal Syntax for Deleting Packages
Here is the minimal syntax for deleting packages that are defined in a channel:
PackageCleanup -d expiration-date -ch channel-name
Using the Package Cleanup Utility to Remove Packages 109

-metauser Metadata-Server-username -metapass Metadata-Server-password -domain authentication-domain
The utility deletes all packages in the specified channel that expire before the date and time specified.
Here is the minimal syntax for deleting packages that are not defined in a channel:
PackageCleanup -d expiration-date -metauser Metadata-Server-username -metapass Metadata-Server-password -domain authentication-domain
Here is the minimal syntax for deleting packages that are defined in a WebDAV server:
PackageCleanup -url WebDAV-URL -username WebDAV-Server-username -password WebDAV-Server-password -d expiration-date -metauser Metadata-Server-username -metapass Metadata-Server-password -domain authentication-domain
Delete Specific Packages
To delete a specific package, specify -package package-name (or -pkg package-name) along with the date. The PACKAGE option enables you to specify the name of the package to delete.
Change Prompt Behavior
When you run the utility command, the utility displays a list of packages that match your deletion criteria and prompts you to confirm deletion of all the packages that are listed.
You can override this default behavior in order to be prompted for each package individually.
To override the default, specify -prompteach. You are then prompted to delete each package that meets the deletion criteria. After each package is processed, the utility displays a final list of all packages that were selected. You can then choose to delete all of those packages or exit without deleting any packages.
110 Chapter 6 / Using the SAS Web Infrastructure Platform Utilities

You can also turn off prompting altogether by specifying -noprompt. When you run the utility in batch mode, you must use the -noprompt option (unless shell programming is provided to respond to the prompts). It is best to run with prompts when you are learning how to use the application. With prompts, you can review proper date formatting and correct package deletion candidates with the option to exit without deleting any packages.
List Packages
To obtain a list of packages, run the command and specify the -list option. You can also provide one of the following arguments:
n a channel name in order to list packages that are defined in a specific channel
n a WebDAV URL in order to list packages that are in the specified WebDAV location
Note: If you do not provide the channel or WebDAV URL, then the utility displays only orphaned packages that are not defined for any channel or WebDAV URL.
The LIST option lists the following information for each package:
n package name
n date and time that the package was created
n date and time that the package expires
Here is the minimal syntax for listing packages that are defined in a channel:
PackageCleanup -list -ch channel-name -metauser Metadata-Server-username -metapass Metadata-Server-password -domain authentication-domain
Here is the minimal syntax for listing packages that are not defined in a channel:
PackageCleanup -list -metauser Metadata-Server-username -metapass Metadata-Server-password -domain authentication-domain
Using the Package Cleanup Utility to Remove Packages 111

Here is the minimal syntax for listing packages that are defined in a WebDAV server:
PackageCleanup -list -url WebDAV-URL -username WebDAV-Server-username -password WebDAV-Server-password -metauser Metadata-Server-username -metapass Metadata-Server-password -domain authentication-domain
Arguments
The utility supports the following arguments:
-channel | -chchannel-nameSpecify the channel that contains the packages that you want to list or delete.
-deletionDate | -d"expiration-date"Specify the expiration date and time for the packages to be deleted. You can also use this argument when you list packages. The utility deletes or lists packages that have an expiration date before the date and time that you specify. The date and time should be enclosed in quotation marks. Format: “yyyy.MM.dd at hh:mm”
-listThe utility displays a list of packages (no deletion occurs).
-metauser Metadata-Server-usernameSpecify the user name to use when connecting to the SAS Metadata Server.
-metapass Metadata-Server-passwordSpecify the password to use when connecting to the SAS Metadata Server.
-domain authentication-domainSpecify the authentication domain for the SAS Metadata Server.
-package | -pkg package-nameSpecify the name of a package to delete.
-url WebDAV-URLSpecify the WebDAV URL to use to locate packages to delete.
112 Chapter 6 / Using the SAS Web Infrastructure Platform Utilities

-username WebDAV-usernameSpecify the user name to use to connect to a WebDAV server.
-password WebDAV-passwordSpecify the password to use to connect to a WebDAV server.
-logfile | -log file-nameSpecify the name of a log file to create. If the log file already exists, then the log lines are appended to the current file.
-nopromptThe utility does not prompt for confirmation of deletions.
-deletenodateThe utility lists or deletes packages that have no expiration date defined.
-prompteachThe utility prompts you to confirm each package individually for deletion.
-debugThe utility produces debugging information for all the SAS Foundation Services.
-helpThe utility displays this help information. (You must also provide the -metauser, -metapass, and -domain arguments in order to get the help information.)
Utility Logging and Debugging
By default, application activity is sent to the Java standard out console. If you want to log to a file, use the LOGFILE option. For example, you might specify -logfile c:\mylog.file. If the log file already exists, then the log lines are appended to the current file.
Use the DEBUG option to enable debugging-level information. This option provides debugging information for all of the Foundation Services as well as the utility. This option should be used only when you experience problems with the utility and want to determine the cause.
Using the Package Cleanup Utility to Remove Packages 113
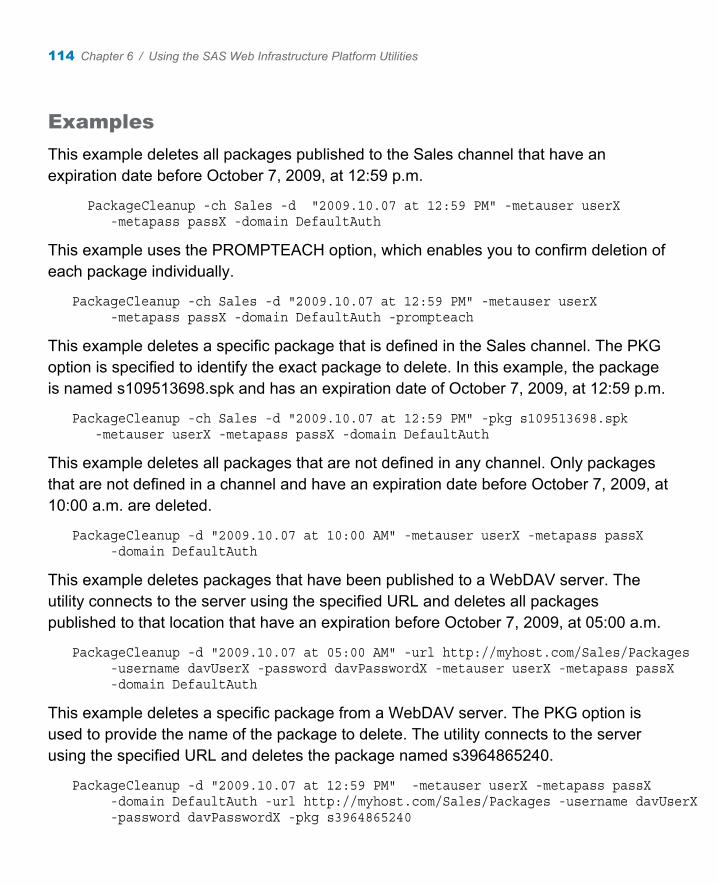
Examples
This example deletes all packages published to the Sales channel that have an expiration date before October 7, 2009, at 12:59 p.m.
PackageCleanup -ch Sales -d "2009.10.07 at 12:59 PM" -metauser userX -metapass passX -domain DefaultAuth
This example uses the PROMPTEACH option, which enables you to confirm deletion of each package individually.
PackageCleanup -ch Sales -d "2009.10.07 at 12:59 PM" -metauser userX -metapass passX -domain DefaultAuth -prompteach
This example deletes a specific package that is defined in the Sales channel. The PKG option is specified to identify the exact package to delete. In this example, the package is named s109513698.spk and has an expiration date of October 7, 2009, at 12:59 p.m.
PackageCleanup -ch Sales -d "2009.10.07 at 12:59 PM" -pkg s109513698.spk -metauser userX -metapass passX -domain DefaultAuth
This example deletes all packages that are not defined in any channel. Only packages that are not defined in a channel and have an expiration date before October 7, 2009, at 10:00 a.m. are deleted.
PackageCleanup -d "2009.10.07 at 10:00 AM" -metauser userX -metapass passX -domain DefaultAuth
This example deletes packages that have been published to a WebDAV server. The utility connects to the server using the specified URL and deletes all packages published to that location that have an expiration before October 7, 2009, at 05:00 a.m.
PackageCleanup -d "2009.10.07 at 05:00 AM" -url http://myhost.com/Sales/Packages -username davUserX -password davPasswordX -metauser userX -metapass passX -domain DefaultAuth
This example deletes a specific package from a WebDAV server. The PKG option is used to provide the name of the package to delete. The utility connects to the server using the specified URL and deletes the package named s3964865240.
PackageCleanup -d "2009.10.07 at 12:59 PM" -metauser userX -metapass passX -domain DefaultAuth -url http://myhost.com/Sales/Packages -username davUserX -password davPasswordX -pkg s3964865240
114 Chapter 6 / Using the SAS Web Infrastructure Platform Utilities

This example lists packages (does not delete) by using the LIST option. Note that the -d argument is not required when listing packages. This example lists all packages that are published in the Sales channel.
PackageCleanup -list -ch Sales -metauser userX -metapass passX -domain DefaultAuth
This example uses the LIST option to list all packages with an expiration date before October 7, 2009, at 12:00 p.m.
PackageCleanup -ch Sales -d "2009.10.07 at 12:00 PM" -metauser userX -metapass passX -domain DefaultAuth -prompteach -list
Using JMX Tools to Manage SAS Resources
About JMX and MBeans
SAS servers implement common administrative interfaces. These interfaces enable you to perform basic administrative functions such as stopping, pausing, and resuming servers. You can also use the interfaces to monitor the health of the servers via real-time and historical metrics. Java Management Extensions (JMX) is a Java technology that supplies tools for managing and monitoring applications, system objects, devices (such as printers), and service-oriented networks. JMX managed beans, known as MBeans, have been implemented to provide a standard way of managing SAS resources.
Accessing the SAS MBeans
About Accessing the SAS MBeans
You can use any of the standard JMX monitoring tools to access the MBeans that manage SAS resources. To use these tools, you must do the following:
1 Enable access to the MBeans from the Web application server. See “Configure the Web Application Server to Enable JMX Client Access” on page 116.
Using JMX Tools to Manage SAS Resources 115

2 Use an application to connect and access the SAS MBeans. Follow the specific instructions for your JMX tool. For information about using the JConsole tool, see “Manage SAS Resources Using JConsole” on page 116.
Configure the Web Application Server to Enable JMX Client Access
You configure the Web application server to enable access to the MBeans by setting specific Java system options.
Specify the following Java Virtual Machine (JVM) argument to access the MBeans locally:
com.sun.management.jmxremote
Specify the following JVM argument to access the MBeans from a remote system. Replace portNum with the port number to use for JMX RMI connections:
com.sun.management.jmxremote.port=portNum
Remote monitoring and management requires security to ensure that unauthorized persons cannot control or monitor your application. It is recommended that you set the following JVM arguments when MBeans are accessed remotely:
com.sun.management.jmxremote.authenticate=true | false
com.sun.management.jmxremote.ssl=true | false
For information about these arguments, see the Java documentation.
Manage SAS Resources Using JConsole
JConsole is a JMX tool that is included with the standard Java Development Kit (JDK). The information provided through JMX technology enables JConsole to provide information about application performance and functions. You can use JConsole to interact with the JMX MBeans that are available to manage SAS resources. The console's simple user interface displays all MBeans in a tree navigator on the left side of the window. When you select a specific MBean, its attributes, operations, notifications, and other information are displayed on the right side of the window.
To access information about SAS resources using JConsole, follow these steps:
1 Start JConsole by running the following command:
116 Chapter 6 / Using the SAS Web Infrastructure Platform Utilities

JDK-HOME\bin\jconsole
2 Connect to the MBean server as follows:
n If you are accessing the MBeans locally, the Local tab should display every JVM that is running on the local system that was started with the same user ID as JConsole. Select the appropriate JVM and click Connect.
n If you are accessing the MBeans remotely, follow these steps:
1 Select the Remote tab.
2 Enter the host on which the JVM is running, along with the port where the RMI connector was registered.
3 You might need to specify credentials if authentication to the MBean server is required.
4 Click Connect to connect to the MBean server.
3 Select the MBeans tab. This tab displays a tree view of all the registered MBeans.
4 Expand the com.sas.services domain to see all MBeans registered in this domain.
5 Select the ServerFactory MBean.
6 In the right pane, select the Operations tab. You can now see the operations (listing, stopping, pausing, and so on) so that you can list the defined SAS servers and manage your running SAS servers. When you invoke one of the manage-server operations, a new MBean is registered that is connected to the specified, running SAS server. The newly registered MBean can then be used to manage and monitor that particular SAS server.
Understanding How to Use the SAS MBeans
About the SAS MBeans
There are three primary MBeans provided by the SAS Web Infrastructure Platform for managing and monitoring SAS resources:
Using JMX Tools to Manage SAS Resources 117

n ServerFactory MBean
n Spawner MBean
n Server MBean
The following sections describe these MBeans.
ServerFactory MBean
The ServerFactory MBean is the starting point for managing SAS servers. This MBean is registered during deployment of the SAS Web Infrastructure Platform and is named as follows:
com.sas.services:type=ServerFactory
During initialization, the ServerFactory MBean connects to the SAS Metadata Server. This enables the MBean to list all SAS servers defined in the metadata. The MBean can then be used to register additional MBeans that enable the running servers to be managed and monitored directly. The ServerFactory MBean does not have any attributes, but supports three operations:
listDefinedServers()provides a list of SAS IOM servers that are defined in the Metadata Server. Information that is returned for each defined server includes the server name, host, port, and server type. To begin actively managing a server, specify the name of the server on the manageServerByName operation.
manageServerByName(String ServerName, String Host)registers a Server MBean that enables you to actively manage the specified IOM server. The newly registered MBean connects to the running IOM server and can then be used to manage and monitor that server. The host name can be left blank if the IOM server is defined to run on only one host. If defined to run on multiple hosts, the proper host name should be provided.
The manageServerByName() operation does not work on a server that is spawned by the SAS Object Spawner.
manageServer(String Host, Integer Port, String Username, String Password)registers a Server MBean that enables you to actively manage the specified IOM server. The IOM server that is managed is identified by the host and port provided
118 Chapter 6 / Using the SAS Web Infrastructure Platform Utilities

on the manageServer operation. The newly registered MBean can be used to manage and monitor that specific IOM server. This operation is useful when the IOM server is not defined in the Metadata Server.
Spawner MBean
The Spawner MBean is created whenever an IOM Spawner is identified in one of the ServerFactory MBean's manageServer operations. The name of the registered MBean uses the form:
com.sas.services:type=Server,serverType=Spawner, name="Server Name", host=Host Name,port=Port
The Spawner MBean enables you to manage and monitor the running Object Spawner. You can perform SAS Spawner operations such as stop, pause, and resume.
Here are some commonly used Spawner MBean attributes:
n the number of times the counters have been reset
n the amount of time the server has been idle
n the number of currently connected clients
n the server start time
n the number of currently abandoned servers
n the number of currently launched servers
n the total number of servers that have been launched
n the number of currently failed servers
n the process identifier of the server process
n the amount of time spent in server method calls
n the number of method calls that the server has processed
Using JMX Tools to Manage SAS Resources 119

Server MBean
The Server MBean is created whenever a SAS server is identified in one of the ServerFactory MBean's manageServer operations or when a server is managed via the Spawner MBean's manageLaunchedServer(s) operation.
A server MBean can represent a SAS Workspace Server, a SAS Stored Process Server, a SAS Framework Data Server, a SAS Metadata Server, or a SAS OLAP Server. The name of the registered SAS Server MBean uses one of these three forms:
com.sas.services:type=Server, serverType=Workspace, logicalServer= "LogicalServerName", name="Server Name", instanceid="Unique instance ID"
com.sas.services:type=Server, serverType=StoredProcess, logicalServer= "LogicalServerName", name="Server Name", instanceid="Unique instance ID"
com.sas.services:type=Server, serverType=Table, logicalServer= "LogicalServerName", name="Server Name", host=Host Name, port=Port Number
The Server MBean enables you to manage and monitor the running SAS server. You can perform server operations such as stop, pause, and resume.
Here are some commonly used Server MBean attributes:
n the number of times the counters have been reset
n the amount of time the server has been idle
n the number of currently connected clients
n the server start time
n the last time the counters were reset
n the execution state of the server
n the amount of time spent in server method calls
n the number of method calls that the server has processed
n the number of clients that the server has serviced
n the process identifier of the server process
120 Chapter 6 / Using the SAS Web Infrastructure Platform Utilities

n the identity under which the server process is executing
Using JMX Tools to Manage SAS Resources 121

122 Chapter 6 / Using the SAS Web Infrastructure Platform Utilities

7Administering SAS Web Applications
Using the SAS Deployment Manager . . . . . . . . . . . . . . . . . . . . . . . . . . . . . . . 124
Rebuilding the SAS Web Applications . . . . . . . . . . . . . . . . . . . . . . . . . . . . . . 125When to Rebuild the SAS Web Applications . . . . . . . . . . . . . . . . . . . . . . 125Rebuild Web Applications . . . . . . . . . . . . . . . . . . . . . . . . . . . . . . . . . . . . . . . . . . . 126Names of the Web Applications and EAR Files . . . . . . . . . . . . . . . . . . 128
Redeploying the SAS Web Applications . . . . . . . . . . . . . . . . . . . . . . . . . . . 129Redeploying Web Applications . . . . . . . . . . . . . . . . . . . . . . . . . . . . . . . . . . . . . 129JBoss Application Server . . . . . . . . . . . . . . . . . . . . . . . . . . . . . . . . . . . . . . . . . . . . 130Oracle WebLogic Server . . . . . . . . . . . . . . . . . . . . . . . . . . . . . . . . . . . . . . . . . . . . . 131IBM WebSphere Application Server . . . . . . . . . . . . . . . . . . . . . . . . . . . . . . . . 135
Reconfiguring the Web Application Server . . . . . . . . . . . . . . . . . . . . . . . . 137
Working with Exploded EAR Files in a Development Environment . . . . . . . . . . . . . . . . . . . . . . . . . . . . . . . . . . . . . . . . . . . . 138
Administering Logging for SAS Web Applications . . . . . . . . . . . . . . 139Logging for SAS Web Applications . . . . . . . . . . . . . . . . . . . . . . . . . . . . . . . . . 139Change the Location of the Log Files . . . . . . . . . . . . . . . . . . . . . . . . . . . . . . 141Change the Logging Levels . . . . . . . . . . . . . . . . . . . . . . . . . . . . . . . . . . . . . . . . . 142Understanding How the Web Applications
Provide a Logging Context . . . . . . . . . . . . . . . . . . . . . . . . . . . . . . . . . . . . . . . . 144
123

Using the SAS Deployment Manager
The SAS Deployment Manager enables a SAS administrator to perform several tasks. The following list identifies the tasks that are typical for the middle tier:
n Rebuild Web applications. You can rebuild Web applications that have previously been configured but whose configuration has changed. This option rebuilds the Web application based on the current configuration. See “Rebuilding the SAS Web Applications” on page 125.
n Remove the existing configuration. You can remove the product configuration for one or more products in the deployment. This option enables you to remove the product configuration for an application that you are no longer using or that you are moving to another machine. You can then use the SAS Deployment Wizard to reinstall or reconfigure the application. For details, see “Removing a SAS Configuration” in the SAS Intelligence Platform: Installation and Configuration Guide.
Note the following about removing a configuration:
o Installed products are not removed.
o If you remove the configuration for the SAS Information Delivery Portal, do not select the Remove all User Content option unless you have made a backup copy of the content repository. If you choose this option, you must re-create the content later from your backup. When you choose to remove portal content, all pages, portlets, and other items created by the users are removed.
o If you remove the configuration for the Web Infrastructure Platform, the contents of the SAS Content Server repository (located in the SAS-config-dir\Lev1\AppData\SASContentServer\Repository directory) are not deleted. If you do not need the contents of this directory, you should manually delete the contents before rebuilding the Web Infrastructure Platform with the SAS Deployment Manager.
124 Chapter 7 / Administering SAS Web Applications
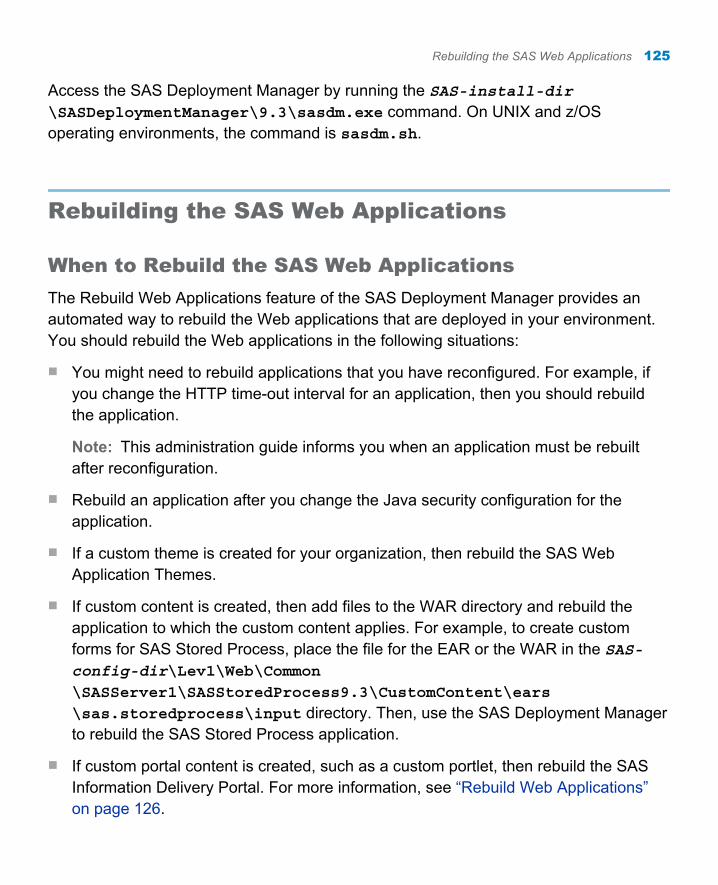
Access the SAS Deployment Manager by running the SAS-install-dir\SASDeploymentManager\9.3\sasdm.exe command. On UNIX and z/OS operating environments, the command is sasdm.sh.
Rebuilding the SAS Web Applications
When to Rebuild the SAS Web Applications
The Rebuild Web Applications feature of the SAS Deployment Manager provides an automated way to rebuild the Web applications that are deployed in your environment. You should rebuild the Web applications in the following situations:
n You might need to rebuild applications that you have reconfigured. For example, if you change the HTTP time-out interval for an application, then you should rebuild the application.
Note: This administration guide informs you when an application must be rebuilt after reconfiguration.
n Rebuild an application after you change the Java security configuration for the application.
n If a custom theme is created for your organization, then rebuild the SAS Web Application Themes.
n If custom content is created, then add files to the WAR directory and rebuild the application to which the custom content applies. For example, to create custom forms for SAS Stored Process, place the file for the EAR or the WAR in the SAS-config-dir\Lev1\Web\Common\SASServer1\SASStoredProcess9.3\CustomContent\ears\sas.storedprocess\input directory. Then, use the SAS Deployment Manager to rebuild the SAS Stored Process application.
n If custom portal content is created, such as a custom portlet, then rebuild the SAS Information Delivery Portal. For more information, see “Rebuild Web Applications” on page 126.
Rebuilding the SAS Web Applications 125

n Rebuild SAS Help Viewer for Midtier Applications after your initial deployment if you install or upgrade a SAS Web application that offers online Help. (SAS Help Viewer for Midtier Applications combines SAS Help Viewer for the Web software with various help content into its EAR file.)
The following Web applications use SAS Help Viewer for Midtier Applications:
o SAS Information Delivery Portal Help
o SAS Web Report Studio Help
o SAS Web Report Viewer Help
o SAS BI Dashboard Help
o SAS Comment Manager Help
n After installing a maintenance release or hot fixes, rebuild the EAR files for all Web applications that were updated at your site. Follow the instructions in the maintenance documentation or the hot fix instructions. Because the EAR files are rebuilt, you might lose any customizations that you added to the EAR files after initial deployment.
Rebuild Web Applications
The Rebuild Web Applications option in the SAS Deployment Manager enables you to rebuild one or more Web applications. The rebuild process updates two directories for each rebuilt Web application:
n SAS-config-dir\Lev1\Web\Staging. An EAR file for each rebuilt Web application is placed in this directory.
The approximate size of the collection of EAR files for EBI is 2 GB.
n SAS-config-dir\Lev1\Web\Staging\exploded. An exploded version of each rebuilt Web application is placed in this directory.
The approximate size of the entire exploded directory is 2 GB. The size is similar to the size of all the EAR files in the Staging directory.
126 Chapter 7 / Administering SAS Web Applications

Note: You can delete any unwanted directories in the exploded directory to save disk space.
To rebuild one or more Web applications, follow these steps:
1 The Web application server can be running or stopped.
n For WebLogic Server, the administration server and nodemanager can be running or stopped.
n For WebSphere Application Server, the dmgr and nodeagent can be running or stopped.
2 Make sure that the SAS Metadata Server is running.
3 Start the SAS Deployment Manager.
4 Select Rebuild Web Applications and click Next.
5 Specify the configuration directory and the level (for example, Lev1) on the Select Configuration Directory/Level page. Click Next.
6 Enter the user ID and password for an unrestricted administrative user (for example, sasadm@saspw) on the Specify Connection Information page. Click Next.
7 Select the check boxes for the Web applications that you want to rebuild and click Next.
8 Review the Summary page and click Start. The SAS Deployment Manager builds the EAR files for the selected applications. For the names and location of the EAR files, see “Names of the Web Applications and EAR Files” on page 128.
9 If you are rebuilding theme content, you might need to stop and restart the Web application server as follows:
n If SAS Web Application Themes is deployed as an EAR in a Web application server, then the first time a custom theme is deployed, the Web application server must be stopped and restarted. Any subsequent modifications to the custom theme do not require a restart of the Web application server unless the theme descriptors have been changed.
Rebuilding the SAS Web Applications 127

n If SAS Web Application Themes is exploded and deployed in an HTTP server (such as Apache HTTP Server), then the Web application server does not need to be restarted based on any theme changes.
After rebuilding the Web applications, the next action is typically to redeploy them. See “Redeploying the SAS Web Applications” on page 129.
Names of the Web Applications and EAR Files
The files for the SAS Web applications are stored in the following directories:
n SAS-config-dir\Lev1\Web\Staging
n SAS-config-dir\Lev1\Web\Staging\exploded
When the SAS Deployment Manager is used to rebuild a Web application, the files for the Web application in the previous directories are overwritten. The following table identifies the product configuration name that is used in the SAS Deployment Manager for the Web applications that are part of the SAS Enterprise Business Intelligence Server. Use this table to understand which Web applications and EAR files are updated when a product configuration is selected in the SAS Deployment Manager.
Table 7.1 Product Configuration, Web Application, and EAR Filenames
Product Configuration Application EAR File
BI Dashboard 4.3 SAS BI Dashboard sas.bidashboard4.3.ear
BI Portlets 4.3 SAS BI Portlets sas.biportlets4.3.ear
Flex Application Themes
SAS Flex Application Themes
sas.flexthemes3.4.ear
SAS Theme Designer for Flex
sas.themedesigner3.4.ear
Help Viewer for Midtier App 9.3
SAS Help Viewer for Midtier Applications
sas.webdocmd9.3.ear
128 Chapter 7 / Administering SAS Web Applications

Product Configuration Application EAR File
Information Delivery Portal 4.3
SAS Information Delivery Portal
sas.portal4.3.ear
SAS Package Viewer sas.packageviewer4.3.ear
SAS Themes SAS Web Application Themes
sas.themes.ear
Web Infrastructure Platform 9.3
SAS Content Server sas.wip.scs9.3.ear
SAS Stored Process sas.storedprocess9.3.ear
SAS Web Administration Console
sas.wip.admin9.3.ear
SAS Web Infrastructure Platform Applications
sas.wip.apps9.3.ear
SAS Web Infrastructure Platform Resources
sas.wip.resources9.3.ear
SAS Web Infrastructure Platform Services
sas.wip.services9.3.ear
SAS Workflow sas.workflow9.3.ear
Web Report Studio 4.3
SAS Web Report Studio sas.webreportstudio4.3.ear
Redeploying the SAS Web Applications
Redeploying Web Applications
When the SAS Deployment Manager rebuilds SAS Web applications, the rebuilt EAR files are placed in the SAS-config-dir\Lev1\Web\Staging directory. All EAR files
Redeploying the SAS Web Applications 129

are placed in a single directory even if your deployment includes multiple Web application servers (for example, SASServer1 and SASServer2).
If you have Web application servers that were installed and configured by the SAS Deployment Wizard in your environment, make a note of the server names and the Web applications that are installed on each server. For example, if you have six applications located on SASServer1 and three Web applications located on SASServer2, make a list of the applications that are installed on each of these servers. Alternatively, you can refer to your Instructions.html file, which specifies the following:
n the list of Web applications to be deployed
n the location of the applications
n the Web application server where each application should be deployed
When you redeploy the SAS Web applications, you can refer to your list or the Instructions.html file, to ensure that you redeploy each Web application to the correct server.
JBoss Application Server
JBoss is configured to run the SAS Web applications from exploded EAR files. To redeploy a SAS Web application to JBoss, follow these steps:
1 Shut down JBoss.
2 Create a directory where you can store unused EAR files. Do not create this directory below the deployment directory or below the JBOSS_HOME\server\SASServer1\deploy_sas. Instead, choose a different location to store these unused EAR files.
3 Move the unused application EAR files from the deploy_sas directory to the directory that you created for unused EAR files.
4 If applicable, repeat the previous step for each JBoss application server.
130 Chapter 7 / Administering SAS Web Applications

5 Copy the rebuilt EAR files for the applications that are deployed on this server from the SAS-config-dir\Lev1\Web\Staging\exploded directory to the JBOSS_HOME\server\SASServer1\deploy_sas directory.
For Windows deployments, you can use the xcopy /e /i command for each Web application to copy an exploded EAR file to the deploy_sas directory. The following example shows how to copy SAS BI Dashboard:
xcopy /e /i SAS-config-dir\Lev1\Web\Staging\exploded\sas.bidashboard4.3.ear sas.bidashboard4.3.ear
For UNIX deployments, you can use the cp -r command for each Web application to copy an exploded EAR file to the deploy_sas directory. The following example shows how to copy SAS BI Dashboard:
cp -r SAS-config-dir/Lev1/Web/Staging/exploded/sas.bidashboard4.3.ear .
6 Repeat the previous step for any additional JBoss application servers (for example, SASServer2).
7 Start JBoss.
For complete deployment instructions, see the JBoss documentation at http://www.jboss.org/docs.
Oracle WebLogic Server
Redeploying SAS Applications Using the WebLogic Administration Console
There are a number of ways to redeploy applications in WebLogic Server. The following steps describe how to redeploy Web applications with the WebLogic Server Administration Console:
1 Stop and delete all SAS applications. See “Stop and Delete All SAS Applications” on page 132.
2 Shut down the SAS managed servers. See “Stop the Managed Servers” on page 133.
Redeploying the SAS Web Applications 131

3 Reinstall the SAS applications. See “Reinstall the SAS Applications” on page 133.
4 Restart the managed servers. See “Start the Managed Servers” on page 134.
5 Start the SAS applications. See “Start the SAS Applications” on page 135.
For complete deployment instructions about WebLogic, see the WebLogic documentation at http://www.oracle.com/technology/documentation/index.html.
Stop and Delete All SAS Applications
To stop and delete all SAS applications, follow these steps:
1 In the WebLogic Administration Console, select Deployments in the Domain Structure panel.
2 In the Deployments panel, select all applications by selecting the check box next to Name.
3 On the Stop menu, select Force Stop Now.
4 In the Summary of Deployments tab, select Yes.
5 Wait until all applications are displayed in Prepared state. Refresh the view as needed until all applications reach the Prepared state.
6 When the managed servers are running, delete all applications by selecting Lock and Edit in the Change Center panel.
7 In the Deployments panel, select all applications by selecting the check box next to Name.
8 Click Delete.
9 In the Delete Application Assistant panel, select Yes.
10 When the message "Selected deployments were deleted," is displayed, select Activate Changes in the Delete Application Assistant panel.
132 Chapter 7 / Administering SAS Web Applications

Stop the Managed Servers
It is recommended that you stop the managed servers. Leave the WebLogic administration server running.
To shut down the managed servers, use the WebLogic Server Administration Console and follow these steps:
1 In the Domain Structure panel, select Environment Servers in the Domain Structure.
2 Leave the administration server running; do not stop it. Then, for each other server, complete the following steps:
a In the Summary of Servers table, select the server (for example, SASServer1).
b Select the Control tab.
c From the menu for Shutdown, select Force Shutdown Now.
d Click Yes to the prompt Forcibly Shutdown Servers.
e Verify that the server has been shut down.
Reinstall the SAS Applications
All Web applications should be deployed from the EAR files in the SAS-config-dir\Lev1\Web\Staging directory.
To redeploy the Web applications, use the WebLogic Server Administration Console and follow these steps:
1 Locate the Instructions.html file in the SAS-config-dir\Lev1\Documents directory, and make a note of the list of SAS applications and their associated servers. This information is available in the Web Application Server section. You need this information when you redeploy and install the EAR files.
2 In the Domain Structure panel, select Deployments.
3 Click Lock and Edit in the Change Center panel.
Redeploying the SAS Web Applications 133

4 In the Summary of Deployments panel, click Install.
5 In the Install Application Assistant panel, browse and navigate to the SAS-config-dir\Lev1\Web\Staging directory.
6 In the Install Application Assistant panel, under Locate deployment to install and prepare for deployment, select an EAR file and click Next.
7 In the options available for Choose targeting style, retain the default (Install this deployment as an application), and click Next.
8 See the Instructions.html file to identify the server associated with the EAR file that you are deploying. Typically, for most SAS applications, the target server is SASServer1.
9 In the Install Application Assistant panel, under Select deployment targets, select the target server and click Next. Typically, SAS applications are deployed to SASServer1.
10 Under Optional Settings, General, enter a name for the EAR file or the directory for this deployment.
11 If the administration server and the managed server are on the same machine, under Source accessibility, select I will make the deployment accessible from the following location and click Next. Note that this is not a staged mode.
12 Under Review your choices and click Finish, select No, I will review the configuration later, and click Finish.
13 In the Change Center panel, select Activate Changes. The application should be displayed in a New state.
14 Repeat these steps to redeploy the other SAS Web applications.
Start the Managed Servers
To start the managed servers, use the WebLogic Server Administration Console and follow these steps:
134 Chapter 7 / Administering SAS Web Applications

1 In the Domain Structure panel, select Environment Servers.
2 In the Change Center panel, select Activate Changes.
3 On the Settings page, select the Control tab.
4 In the Servers table under Summary of Servers, click on the server name (for example, SASServer1).
5 In the Server Status table, click Start.
6 In the Server Life Cycle Assistant panel, click Yes.
7 In the Server Status table, verify that the task has been completed.
8 If applicable, repeat these steps for other managed servers.
Start the SAS Applications
To start the SAS Web applications use the WebLogic Server Administration Console and follow these steps:
1 In the Domain Structure panel, select Deployments. All SAS Web applications should be displayed in a Prepared state.
2 In the Deployments panel, select all applications by selecting the check box next to Name.
3 From the Start menu, select Servicing All Requests.
4 In the Start Application Assistant, select Yes.
IBM WebSphere Application Server
There are two methods to redeploy a SAS Web application to WebSphere Application Server. In the first method, you can update an installed application and select Replace the entire application. With this method, you can maintain all of the application settings, such as the class loader policy and mode for the EAR and WAR modules. For
Redeploying the SAS Web Applications 135

information about this operation, see the IBM WebSphere Application Server documentation at http://www.ibm.com/support/documentation/us/en.
In the second method, you undeploy and redeploy each application individually until all of the rebuilt Web applications have been redeployed.
Although you can redeploy the EAR files in any order of your choice, it is recommended that you follow the sequence of EAR files specified for WebSphere Application Server. See “Deploying and Starting Web Applications in the Correct Order” on page 16.
To redeploy a SAS Web application to WebSphere by undeploying and redeploying each application individually, follow these steps:
1 Uninstall and reinstall the Web application.
a Shut down the WebSphere application server, but leave the dmgr and nodeagent running.
b Follow the IBM WebSphere Application Server instructions for uninstalling and reinstalling a Web application. When you reinstall the application, specify the following two settings on the Select installation options page:
Deploy enterprise beansDo not select this check box. SAS Web applications do not use Enterprise Java Beans.
Deploy Web servicesSelect this check box. This ensures that the Web services deploy tool is run.
2 Set the class loader order.
a In the Integrated Solutions Console, select Applications Application Types WebSphere enterprise applications. Then select the SAS Web application that you are redeploying.
b Click Class loading and update detection.
c For the Class loader order, select the Classes loaded with local class loader first (parent last) radio button.
136 Chapter 7 / Administering SAS Web Applications
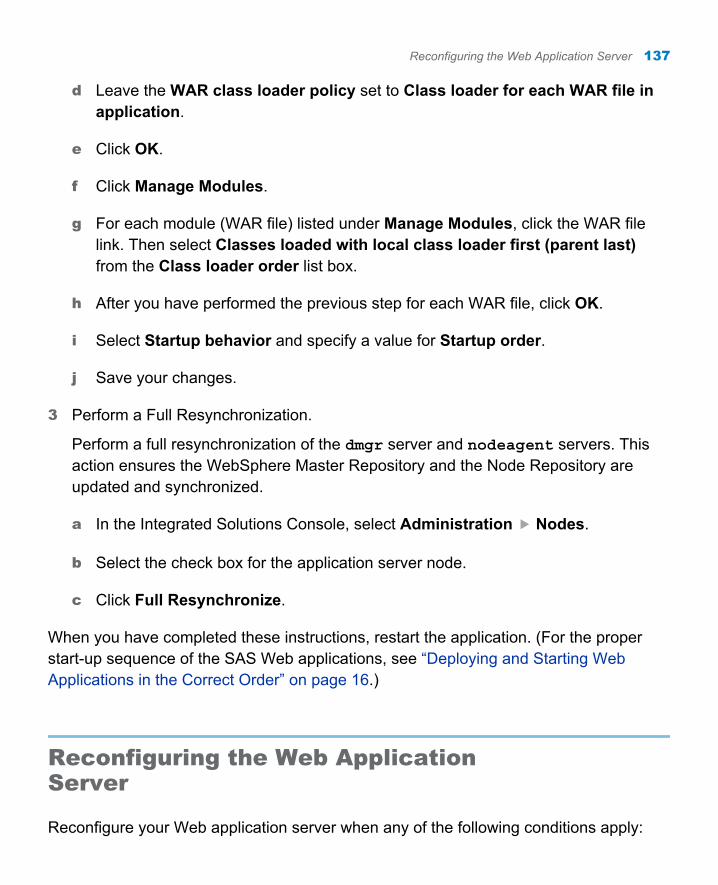
d Leave the WAR class loader policy set to Class loader for each WAR file in application.
e Click OK.
f Click Manage Modules.
g For each module (WAR file) listed under Manage Modules, click the WAR file link. Then select Classes loaded with local class loader first (parent last) from the Class loader order list box.
h After you have performed the previous step for each WAR file, click OK.
i Select Startup behavior and specify a value for Startup order.
j Save your changes.
3 Perform a Full Resynchronization.
Perform a full resynchronization of the dmgr server and nodeagent servers. This action ensures the WebSphere Master Repository and the Node Repository are updated and synchronized.
a In the Integrated Solutions Console, select Administration Nodes.
b Select the check box for the application server node.
c Click Full Resynchronize.
When you have completed these instructions, restart the application. (For the proper start-up sequence of the SAS Web applications, see “Deploying and Starting Web Applications in the Correct Order” on page 16.)
Reconfiguring the Web Application Server
Reconfigure your Web application server when any of the following conditions apply:
Reconfiguring the Web Application Server 137

n A new SAS Web application is added to your deployment.
n A Web application is unconfigured and reconfigured.
n A software bundle is added to an existing configuration.
It is important to reconfigure your Web application server in the same manner that it was initially configured. If you manually configured the Web application server when you initially deployed, then configure it manually again. If the SAS Deployment Wizard automatically configured your Web application server, then choose the automatic configuration option again.
If the environment was initially configured with the Web Application Server: Multiple Managed Servers option in the SAS Deployment Wizard, then reconfigure the Web application server by using the Custom path in the SAS Deployment Wizard and selecting the Web Application Server: Multiple Managed Servers again. Reconfiguring a Web application server can cause the loss of some customizations, and they need to be reapplied.
For more information, see “Managing Your SAS Deployment” in the SAS Intelligence Platform: Installation and Configuration Guide.
Working with Exploded EAR Files in a Development Environment
It can be useful to run a SAS Web application from an exploded EAR file rather than an EAR file when you want to debug or develop new JavaServer Pages (JSP). SAS provides the Web applications as exploded EAR files in SAS-config-dir\Lev1\Web\Staging\exploded. Deployment of modified EAR files from an exploded directory varies with the Web application server as follows:
JBoss Application ServerJBoss has direct support for deployment of exploded EAR files. To deploy an exploded EAR file, move the exploded directory to the deploy_sas directory. Because the exploded directory name must be the same as the original EAR file, the original EAR file must be removed from the deployment directory.
138 Chapter 7 / Administering SAS Web Applications

Oracle WebLogic ServerWebLogic Server has direct support for deployment of exploded EAR files. To deploy an exploded EAR file using the WebLogic Server Administrative Console, select the full path to the exploded EAR.
IBM WebSphere Application ServerWebSphere Application Server explodes deployed EAR files on its own. Deployed files must be either EAR files or WAR files.
Starting with WebSphere Application Server 6.1, you can update an existing deployed application with individual files or modules. By selecting the full path to the JSP or WAR directory, individual components of a modified, exploded EAR file can be used in a deployed application. You can use the Integrated Solutions Console to update a deployed application.
Administering Logging for SAS Web Applications
Logging for SAS Web Applications
The SAS Web applications use log4j to perform logging. As each Web application begins running, the log4j configuration file for the Web application is read from SAS-config-dir\Lev1\Web\Common\LogConfig. After the log4j configuration file is read, the Web applications that permit dynamic logging changes check for modifications that were set with the SAS Web Administration Console.
The following table identifies if customizations can be performed by editing the log4j configuration file, using the SAS Web Administration Console, or both:
Task
Log4j Configuration File
SAS Web Administration Console
Change the logging levels. Yes Yes
Add a logging category. Yes Yes
Administering Logging for SAS Web Applications 139

Task
Log4j Configuration File
SAS Web Administration Console
Changes persist after Web application server restarts. Yes No
Add or change an appender to log to console, file, socket, or ARM.
Yes No
Change a log filename or location. Yes No
Change the layout pattern for the log message. Yes No
Track user logons. You can monitor usage patterns by logging activity for SAS Web application logons.
Yes No
For information about the log4j configuration file, see http://logging.apache.org/log4j/index.html and http://logging.apache.org/log4j/1.2/manual.html.
Logging categories use the fully qualified class name of the class where the logging message originates. Categories for the following classes are common to all SAS Web applications:
n com.sas
n com.sas.services
n com.sas.services.deployment
n com.sas.services.discovery
n com.sas.services.util
TIP To troubleshoot SAS Logon Manager authentication, set the com.sas.svcs.authentication context to DEBUG level for SAS WIP Services. Set the com.sas.services.user context to DEBUG level for SAS Remote Services. You must restart SAS Remote Services and the Web application server.
140 Chapter 7 / Administering SAS Web Applications

Change the Location of the Log Files
To modify the location of a log file, follow these steps:
1 Change directory to SAS-config-dir\Lev1\Web\Common\LogConfig and edit the log4j file for the application to modify.
2 Locate the file appender and modify the value of the file parameter:
<appender class="org.apache.log4j.FileAppender" name="SAS_FILE"> <param name="append" value="true"/> <param name="file" value="C:/SAS/Config/Lev1/Web/Logs/SASLogon9.3.log"/> <layout class="com.sas.svcs.logging.CustomPatternLayout"> <param name="ConversionPattern" value="%d [%t] %-5p [%u] %c - %m%n"/> </layout></appender>
TIP The CustomPatternLayout that is provided by SAS accepts the log4j conversion characters and two conversion characters that are added by SAS. The %u conversion character is used to report the client identity that is in the security context. The %s conversion character is used to report the session identifier that is in the security context. The log4j conversion characters are described at http://logging.apache.org/log4j/1.2/apidocs/org/apache/log4j/PatternLayout.html.
3 Restart the Web application so that it uses the new configuration.
Administering Logging for SAS Web Applications 141

Change the Logging Levels
Logging Level Descriptions
The log4j file has five levels of detail: DEBUG, INFO, WARN, ERROR, and FATAL. Enabling a level also enables the less detailed levels above the selected level. The default level is set to WARN, which means that WARN, ERROR, and FATAL messages are recorded. In large-scale deployments, the size of the log file can grow rapidly when INFO messages are enabled. However, you might want to enable the INFO messages during the development and testing phases.
CAUTION! Excessive logging can degrade performance. Therefore, you should not use the DEBUG level unless you are directed to do so by SAS Technical Support.
If you need to debug a problem, it is recommended that you dynamically change the log output temporarily.
Here is a brief description of each level:
DEBUGdisplays the informational events that are most useful for debugging an application.
INFOdisplays informational messages that highlight the progress of the application.
WARNdisplays potentially harmful situations.
ERRORdisplays error events that might allow the application to continue to run.
FATALdisplays very severe error events that might cause the application to end abnormally.
142 Chapter 7 / Administering SAS Web Applications

Using log4j Files
To modify the logging level by editing a log4j configuration file, follow these steps:
1 Change directory to SAS-config-dir\Lev1\Web\Common\LogConfig and edit the log4j file for the application to modify.
2 Locate the category for the class that you want to modify and modify the value of the priority parameter:
<category additivity="false" name="com.sas.workflow"> <priority value="WARN"/> <appender-ref ref="SAS_CONSOLE"/> <appender-ref ref="SAS_FILE"/></category>
3 Restart the Web application so that it uses the new configuration.
Using SAS Web Administration Console
Note: Changing the logging level with the SAS Web Administration Console is supported by some of the SAS Web applications.
1 Log on to SAS Web Administration Console.
2 Expand Application Management and then select the Web application.
3 Expand the Logging section.
4 Select the radio button for the class and logging level that you want to change.
5 Click Submit Changes. The change takes effect immediately. You do not need to restart the Web application.
Administering Logging for SAS Web Applications 143

Understanding How the Web Applications Provide a Logging Context
The SAS Web Infrastructure Platform implements a framework that provides separate logging contexts for the individual SAS Web applications. It is useful to understand how SAS implements individual logging contexts in case you need to modify any of the related configuration files. In addition, you might want to create a logging context for Web applications that are developed at your site.
The SAS Web applications implement this capability as follows:
n The web.xml file for the Web application contains the following listener element:
<listener> <listener-class>com.sas.svcs.logging.LoggingContextListener </listener-class></listener>
The listener element must directly follow the filter and filter-mapping elements and directly precede the servlet element. This listener is added as the first listener within the <web-app> element if there are multiple listeners.
The web.xml file also contains this tag:
<context-param> <param-name>log4j-config-name-prefix</param-name> <param-value>YourWebAppName</param-value></context-param>
In the tag, YourWebAppName should be a name that contain no spaces or special characters (for example, SASWebReportStudio). This name is prefixed to -log4j.xml to form the filename of the application-specific log4j configuration file.
n Web application servers use a JVM option, -Dcom.sas.log.config.url, that identifies the directory where the log4j configuration files are located. The framework within the SAS Web Infrastructure Platform uses this property to locate the log4j file for a particular Web application. The framework then loads the configuration into a private logging context for the Web application. Any loggers that the Web application obtains from a locally deployed Logging Service also share this same private logging context. Check your Web application server start-up script or configuration file to determine the appropriate directory location.
144 Chapter 7 / Administering SAS Web Applications

Here is an example directory for a default deployment:
SAS-config-dir\Levn\Web\Common\LogConfig
The name of the log4j file has this form:
YourWebAppName-log4j.xml
where YourWebAppName is the string that was provided in the <context-param> element of the web.xml file.
n A copy of the sas.svcs.commons.jar, which contains the com.sas.svcs.logging.LoggingContextListener class, must be in the Web application's CLASSPATH. This is accomplished by placing the JAR file within the WEB_INF/lib directory for the Web application.
Administering Logging for SAS Web Applications 145

146 Chapter 7 / Administering SAS Web Applications

8Administering SAS Logon Manager
About SAS Logon Manager . . . . . . . . . . . . . . . . . . . . . . . . . . . . . . . . . . . . . . . . . . . 148
Configuring Web Authentication . . . . . . . . . . . . . . . . . . . . . . . . . . . . . . . . . . . . . 148Overview of Web Authentication . . . . . . . . . . . . . . . . . . . . . . . . . . . . . . . . . . . . 148Configuration Instructions . . . . . . . . . . . . . . . . . . . . . . . . . . . . . . . . . . . . . . . . . . . 149
Configuring Custom Log On, Log Off, and Time Out Messages . . . . . . . . . . . . . . . . . . . . . . . . . . . . . . . . . . . . . . . . . . . . . . . . . . . . . . . . . . . . 149
Step 1: Customize the Message . . . . . . . . . . . . . . . . . . . . . . . . . . . . . . . . . . . . 149Step 2: Configure SAS Application Infrastructure . . . . . . . . . . . . . . . . 150Step 3: Rebuild and Redeploy SAS Web
Infrastructure Platform . . . . . . . . . . . . . . . . . . . . . . . . . . . . . . . . . . . . . . . . . . . . . 150
Configuring the HTTP Session Time-out Interval . . . . . . . . . . . . . . . . 151
Configuring the Display of a Warning Message for Inactive User Sessions . . . . . . . . . . . . . . . . . . . . . . . . . . . . . . . . . . . . . . . . . . . . 155
Understanding Inactive Users and Time-out Warnings . . . . . . . . . . 155Step 1: Configure the SAS Application Infrastructure . . . . . . . . . . . . 156Step 2: Set the Interval for the Inactive Session Warning . . . . . . . 156Step 3: Enable the Inactive Session Warning . . . . . . . . . . . . . . . . . . . . . 156
Configuring Middle Tier Security Policies . . . . . . . . . . . . . . . . . . . . . . . . . 157
Disabling Concurrent Logon Sessions . . . . . . . . . . . . . . . . . . . . . . . . . . . . . 159
Configuring Application Response Measurement (ARM) Capabilities . . . . . . . . . . . . . . . . . . . . . . . . . . . . . . . . . . . . 160
147

About SAS Logon Manager
The SAS Logon Manager is a Web application that handles all authentication requests for SAS Web applications. As a result, users see the same logon page when they access the SAS Web applications.
The purpose of the SAS Logon Manager is to authenticate and direct a successful logon to the appropriate Web application. The application also serves as the central point for handling changes to authentication mechanisms, such as the addition of Windows SSPI or third party single sign-on products.
Configuring Web Authentication
Overview of Web Authentication
By default, SAS Web applications use the form-based authentication that is provided by the SAS Logon Manager Web application. When credentials are provided to the SAS Logon Manager Web application, the credentials are sent to the SAS Metadata server for authentication. The metadata server then authenticates the credentials against its authentication provider. The default provider is the host operating system.
As an alternative, you can configure the SAS Web applications to authenticate on the middle tier. When users log on to a SAS Web application, the Web application server handles the initial authentication. In this configuration, the Web application server’s JAAS login module authentication provider verifies the user’s identity. Then, the SAS Logon Manager Web application makes a trusted user connection to the metadata server to check that the authenticated user has a SAS identity in metadata.
Performing Web authentication facilitates single sign-on. Most likely, your organization has several applications behind a common set of reverse proxy and HTTP servers. By having a common server handle authentication, users do not need to re-authenticate for access to each application.
148 Chapter 8 / Administering SAS Logon Manager

Configuration Instructions
Instructions for configuring the SAS Web applications and the Web application server for Web authentication are provided at the following URLs:
n http://support.sas.com/resources/thirdpartysupport/v93/appservers/
jbossdoc.html
n http://support.sas.com/resources/thirdpartysupport/v93/appservers/
webspheredoc.html
n http://support.sas.com/resources/thirdpartysupport/v93/appservers/
weblogicdoc.html
Configuring Custom Log On, Log Off, and Time Out Messages
Step 1: Customize the Message
You can configure a customized message that is displayed when users of SAS Web applications log on, log off, or the session reaches the time out interval. To enable the display of a custom message, follow these steps:
1 Edit one or both of the SAS-install-dir\SASWebInfrastructurePlatform\9.3\Static\wars\sas.svcs.logon\logoff_custom.jsp and logon_custom.jsp files.
The time out message is customized in the logoff_custom.jsp file. Each file is included as part of an HTML page. Therefore, each should contain valid HTML code.
2 Save your changes.
Configuring Custom Log On, Log Off, and Time Out Messages 149

Step 2: Configure SAS Application Infrastructure
1 Log on to SAS Management Console.
2 On the Plug-ins tab, select Application Management Configuration Manager, right-click SAS Application Infrastructure, and select Properties.
3 Click the Settings tab.
4 Select Policies in the left pane.
5 Set any or all of these properties to Yes:
n Display custom logon message
n Display custom logoff message
n Display custom timeout message
Click OK.
6 Exit from SAS Management Console.
Step 3: Rebuild and Redeploy SAS Web Infrastructure Platform
1 Rebuild the SAS Web Infrastructure Platform with the SAS Deployment Manager.
2 Redeploy the SAS Web Infrastructure Platform Applications Web application (sas.wip.apps9.3.ear). Also redeploy the services (sas.wip.services9.3.ear), SAS Content Server (sas.wip.scs9.3.ear), and stored process Web application (sas.storedprocess9.3.ear).
3 Verify that the custom logoff message is displayed when you log on and log off from the Web application.
150 Chapter 8 / Administering SAS Logon Manager

Configuring the HTTP Session Time-out Interval
A session time-out interval logs off users' inactive sessions after a specific period of time that is defined in the Web application server configuration. The default value for a session time-out interval is 30 minutes. You can customize the session time-out interval for your environment by modifying one or more of the web.xml files, and specifying a different time-out interval.
To specify a session time-out interval, follow these steps:
1 Use the table that follows this procedure to identify the files to modify.
2 Modify the following code in the appropriate files:
<session-config> <session-timeout>time-out-interval</session-timeout></session-config>
Replace time-out-interval with the time-out interval in minutes. As a recommendation, the number should be no smaller than 5.
When you are finished, save and close the file.
3 Use the SAS Deployment Manager to rebuild the EAR files that contain the SAS Web applications.
4 Redeploy the Web applications whose files you modified.
Configuring the HTTP Session Time-out Interval 151

The following table lists the file or files that should be modified to specify a different time-out interval for each Web application.
Table 8.1 Files to Modify for the Time-out Interval
Web Application File Location
SAS Help Viewer for Midtier Applications
SAS-install-dir\Documentation\9.3\Static\wars\sas.webdoc\WEB-INF\web.xml
SAS-install-dir\Documentation\9.3\Static\wars\sas.webdoc\WEB-INF\web.spring-enabled.xml
SAS BI Dashboard SAS-install-dir\SASBIDashboard\4.31\Configurable\wars\sas.bidashboard\WEB-INF\web.xml.orig
Event generation framework in SAS BI Dashboard
SAS-install-dir\SASBIDashboard\4.31\Configurable\wars\sas.eventsgenerationframework\WEB-INF\web.xml.orig
SAS BI Portlets SAS-install-dirSASBIPortlets\4.3\Configurable\wars\sas.biportlets\WEB-INF\web.xml-thirdparty.orig
SAS-install-dirSASBIPortlets\4.31\Configurable\wars\sas.biportlets\WEB-INF\web.xml-idp.orig
JSR 168 for SAS BI Portlets
SAS-install-dirSASBIPortlets\4.31\Configurable\wars\sas.jsr168remoteportlet\WEB-INF\web.xml.orig
Flex Themes for SAS*
SAS-install-dir\SASFlexApplicationThemes\3.4\Configurable\FlexThemes\wars\sas.flexthemes\WEB-INF\web.xml.orig
SAS Theme Designer for Flex
SAS-install-dir\SASFlexApplicationThemes\3.4\Configurable\ThemeDesigner\wars\sas.themedesigner\WEB-INF\web.xml.orig
152 Chapter 8 / Administering SAS Logon Manager

Web Application File Location
SAS Package Viewer SAS-install-dir\SASInformationDeliveryPortal\4.31\Configurable\wars\sas.packageviewer\WEB-INF\web.xml.orig
SAS Information Delivery Portal
SAS-install-dir\SASInformationDeliveryPortal\4.31\Configurable\wars\sas.portal\WEB-INF\web.xml.orig
SAS BI Web Services*
SAS-install-dir\SASWebInfrastructurePlatform\9.3\Configurable\wars\sas.biws\WEB-INF\web.xml.orig
SAS Preferences* SAS-install-dir\SASWebInfrastructurePlatform\9.3\Configurable\wars\sas.preferences\WEB-INF\web.xml.orig
SAS Shared Applications*
SAS-install-dir\SASWebInfrastructurePlatform\9.3\Configurable\wars\sas.shared.apps\WEB-INF\web.xml.orig
SAS Stored Process* SAS-install-dir\SASWebInfrastructurePlatform\9.3\Configurable\wars\sas.storedprocess\WEB-INF\web.xml.orig
SAS Logon Manager* SAS-install-dir\SASWebInfrastructurePlatform\9.3\Configurable\wars\sas.svcs.logon\WEB-INF\web.xml.orig
SAS Content Server* SAS-install-dir\SASWebInfrastructurePlatform\9.3\Configurable\wars\sas.svcs.scs\WEB-INF\web.xml.orig
SAS Web Infrastructure Platform Client Access *
SAS-install-dir\SASWebInfrastructurePlatform\9.3\Configurable\wars\sas.wip.access\WEB-INF\web.xml.orig
SAS Web Administration Console *
SAS-install-dir\SASWebInfrastructurePlatform\9.3\Configurable\wars\sas.wip.admin\WEB-INF\web.xml.orig
Configuring the HTTP Session Time-out Interval 153

Web Application File Location
SAS Web Infrastructure Platform Services *
SAS-install-dir\SASWebInfrastructurePlatform\9.3\Configurable\wars\sas.wip.services\WEB-INF\web.xml.orig
SAS SOAP Services *
SAS-install-dir\SASWebInfrastructurePlatform\9.3\Configurable\wars\sas.wip.soapservices\WEB-INF\web.xml.orig
SAS Workflow Web Service *
SAS-install-dir\SASWebInfrastructurePlatform\9.3\Configurable\wars\sas.workflow.webservice\WEB-INF\web.xml.orig
SAS Workflow * SAS-install-dir\SASWebInfrastructurePlatform\9.3\Configurable\wars\sas.workflow\WEB-INF\web.xml.orig
SAS Shared Web Assets*
SAS-install-dir\SASWebInfrastructurePlatform\9.3\Static\wars\sasweb\WEB-INF\web.xml
SAS Web Report Studio
SAS-install-dir\SASWebReportStudio\4.31\Configurable\wars\sas.webreportstudio\WEB-INF\web.jboss.xml.orig
SAS-install-dir\SASWebReportStudio\4.31\Configurable\wars\sas.webreportstudio\WEB-INF\web.weblogic.xml.orig
SAS-install-dir\SASWebReportStudio\4.31\Configurable\wars\sas.webreportstudio\WEB-INF\web.websphere.xml.orig
* The session-config element described in Step 2 must be added to the web.xml.orig file for this application.
154 Chapter 8 / Administering SAS Logon Manager

Configuring the Display of a Warning Message for Inactive User Sessions
Understanding Inactive Users and Time-out Warnings
Inactive users are logged off their Web applications when their sessions are inactive for 30 minutes or for the amount of time specified by the administrator in the web.xml files. Before logging out inactive sessions, you can alert users about the impending logoff by displaying a warning message. When the warning message is displayed, users can click the Continue button to activate and extend their sessions. The following applications support the display of a warning message:
n SAS Web Report Studio
n SAS Information Delivery Portal
n SAS BI Dashboard
n SAS Package Viewer
n SAS Shared applications
n SAS Preferences
n SAS Web Administration Console
n SAS Stored Process
If you want to specify a different session time-out interval for each SAS application, complete this task for each SAS application by defining the App.SessionTimeoutWarningInterval property and a custom value in minutes.
Configuring the Display of a Warning Message for Inactive User Sessions 155

Step 1: Configure the SAS Application Infrastructure
To configure the SAS application infrastructure:
1 Log on to SAS Management Console.
2 On the Plug-ins tab, select Application Management Configuration Manager, right-click SAS Application Infrastructure, and select Properties.
3 In the SAS Application Infrastructure Properties dialog box, click the Advanced tab.
Step 2: Set the Interval for the Inactive Session Warning
This set of steps is optional. If you do not specify a value for the App.SessionTimeoutWarningInterval, a default value of 5 minutes applies to the Policy.DisplaySessionTimeoutWarning property. The value specified for the App.SessionTimeoutWarningInterval must be smaller than the value or values specified for session time-out intervals in the web.xml files.
To set the interval for the inactive session warning:
1 Click Add to define a new property.
2 Enter App.SessionTimeoutWarningInterval in the Property Name field.
3 Enter the number of minutes for the inactive session warning in the Property Value field and click OK.
Step 3: Enable the Inactive Session Warning
To enable the inactive session warning:
1 Click Add to define another new property.
156 Chapter 8 / Administering SAS Logon Manager

2 Enter Policy.DisplaySessionTimeoutWarning in the Property Name field.
3 Set the value to true and click OK.
To enable these properties to take effect, restart the Web application server.
Configuring Middle Tier Security Policies
The policies identified in the following table are configured with SAS Management Console. For more information, see “Setting Global Properties for SAS Applications Using SAS Application Infrastructure Properties” on page 77.
Table 8.2 Middle Tier Security Policies
Policy NameDefault Value Description
Check for metadata updates Check on navigation
This is a deprecated property. Do not change the value unless you are directed to by SAS technical support.
Profile refresh interval 600000 This is a deprecated property. Do not change the value unless you are directed to by SAS technical support.
Allow client password storage Yes Indicates whether the site permits remote SAS clients to store user password credentials locally on the client. Many sites prohibit end-user clients from caching or persisting passwords for use in distributed applications.
Allow user log on from web logoff page
Yes Determines whether to display a Log On button on the logoff successful page. Some sites, especially those that deploy walk-up kiosks, might want to ensure that their application users close the browser for added security.
Configuring Middle Tier Security Policies 157

Policy NameDefault Value Description
Allow user logon from web timeout page
Yes Determines whether to display a Log On button on the session timed out page. Some sites, especially those that deploy walk-up kiosks, might want to ensure that their application users close the browser for added security.
Display custom logon message No Determines whether to display a custom message or custom page on the standard logon page.
Display custom logoff message No Determines whether to display a custom message or custom page on the standard logoff successful page.
Display custom timeout message
No Determines whether to display a custom message or custom page on the standard session timed out page.
Display logoff security message
Yes Determines whether to display a security message on the logoff successful page. Some sites, especially those that deploy walk-up kiosks, might want to ensure that their application users close the browser for added security.
Display timeout security message
Yes Determines whether to display a security message on the session timed out page. Some sites, especially those that deploy walk-up kiosks, might want to ensure that their application users close the browser for added security. For more information about time out values, see “Configuring the HTTP Session Time-out Interval” on page 151.
158 Chapter 8 / Administering SAS Logon Manager
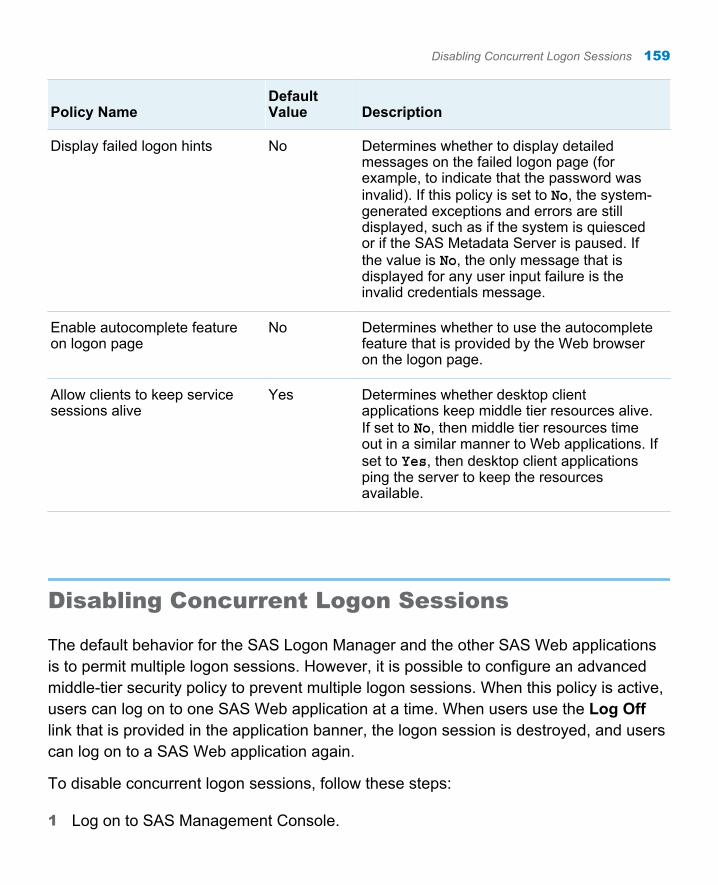
Policy NameDefault Value Description
Display failed logon hints No Determines whether to display detailed messages on the failed logon page (for example, to indicate that the password was invalid). If this policy is set to No, the system-generated exceptions and errors are still displayed, such as if the system is quiesced or if the SAS Metadata Server is paused. If the value is No, the only message that is displayed for any user input failure is the invalid credentials message.
Enable autocomplete feature on logon page
No Determines whether to use the autocomplete feature that is provided by the Web browser on the logon page.
Allow clients to keep service sessions alive
Yes Determines whether desktop client applications keep middle tier resources alive. If set to No, then middle tier resources time out in a similar manner to Web applications. If set to Yes, then desktop client applications ping the server to keep the resources available.
Disabling Concurrent Logon Sessions
The default behavior for the SAS Logon Manager and the other SAS Web applications is to permit multiple logon sessions. However, it is possible to configure an advanced middle-tier security policy to prevent multiple logon sessions. When this policy is active, users can log on to one SAS Web application at a time. When users use the Log Off link that is provided in the application banner, the logon session is destroyed, and users can log on to a SAS Web application again.
To disable concurrent logon sessions, follow these steps:
1 Log on to SAS Management Console.
Disabling Concurrent Logon Sessions 159

2 On the Plug-ins tab, select Application Management Configuration Manager, right-click SAS Application Infrastructure, and select Properties.
3 In the SAS Application Infrastructure Properties dialog box, click the Advanced tab.
4 Click Add to define a new property.
5 Enter Policy.DisableConcurrentUserLogins in the Property Name. Enter true in the Property Value field.
6 Click OK.
Settings are not applied and made active automatically. You must restart the SAS Web Infrastructure Platform Services or the Web application server.
When this setting is enabled, each logon session is recorded and cached. When an additional request to log on is made, the existing session is found and the logon request is rejected. Sessions are removed from this cache in one of the following ways:
n The user logs off the SAS Web application using the Log Off link in the application banner.
n The user session times out.
n The user session is terminated by an administrator that uses the SAS Web Administration Console to Force Log Off the user.
If a user closes a Web browser, the session persists (and prevents subsequent log on attempts) until the session times out or an administrator forces a logoff with the SAS Web Administration Console.
Configuring Application Response Measurement (ARM) Capabilities
ARM processing for SAS Logon Manager is disabled by default in a standard deployment. To modify configuration information to enable ARM processing, follow these steps:
160 Chapter 8 / Administering SAS Logon Manager

1 Edit the SAS-config-dir\Lev1\Web\Common\LogConfig\SASLogon-log4j.xml file and add the following lines:
<appender name="ArmAppender" class="com.sas.arm.log4jappender.ArmAppender"> <param name="AppName" value="IOM.APP"/> <param name="GroupName" value="SAS"/></appender><logger name="com.sas.arm.log4j.logger"> <level value="debug"/> <appender-ref ref="ArmAppender"/></logger>
Note: All appenders in the file must precede all loggers and categories. Otherwise, the configuration fails.
2 Edit the SAS-install-dir\SASWebInfrastructurePlatform\9.3\Static\wars\sas.svcs.logon\WEB-INF\spring-config\aop-config.xml file. Remove the XML comments around the definition and reference of the arm-processor bean.
<!-- may also specify include-arm-processor="true" --><sas-aop:client-context-propagation include-target-processor="true" include-arm-processor="true" />
3 Edit the SASWebInfrastructurePlatform\9.3\Static\wars\sas.wip.services\WEB-INF\spring-config\services-remote-config.xml file. Remove the XML comments around the definition and reference of the arm-processor bean.
<!-- may also specify include-arm-processor="true" --><sas-aop:server-context-propagation include-target-processor="true" include-arm-processor="true" />
4 Rebuild and redeploy the SAS Web Infrastructure Platform Web application.
Upon successful start of the application server, the ARM monitoring of logon and logoff activities is enabled.
Configuring Application Response Measurement (ARM) Capabilities 161

162 Chapter 8 / Administering SAS Logon Manager

9Administering the SAS Content Server
About the SAS Content Server . . . . . . . . . . . . . . . . . . . . . . . . . . . . . . . . . . . . . . . 164
Moving Content or Backing Up the SAS Content Server . . . . . . . 165
Deploying Content Manually to the SAS Content Server . . . . . . . 165Overview . . . . . . . . . . . . . . . . . . . . . . . . . . . . . . . . . . . . . . . . . . . . . . . . . . . . . . . . . . . . . . . 165Security Considerations for SAS Content Server Scripts . . . . . . . . 167Load Content Manually to the SAS Content Server . . . . . . . . . . . . . . 168Update Content Manually for the SAS Content Server . . . . . . . . . . 169Adjust Directive URLs Manually . . . . . . . . . . . . . . . . . . . . . . . . . . . . . . . . . . . . 170Log Files Generated by the Scripts . . . . . . . . . . . . . . . . . . . . . . . . . . . . . . . . . 171
Using the SAS Content Server Administration Console . . . . . . . . 172About the SAS Content Server Administration Console . . . . . . . . . 172Access the SAS Content Server Administration Console . . . . . . . 172A Brief Tour of the Console Interface . . . . . . . . . . . . . . . . . . . . . . . . . . . . . . 173Modify Permissions for WebDAV Folders and Files . . . . . . . . . . . . . 175Create a New Folder . . . . . . . . . . . . . . . . . . . . . . . . . . . . . . . . . . . . . . . . . . . . . . . . . 177Add Files to the SAS Content Server . . . . . . . . . . . . . . . . . . . . . . . . . . . . . . 178Delete Folders or Files . . . . . . . . . . . . . . . . . . . . . . . . . . . . . . . . . . . . . . . . . . . . . . . 179
Implementing Authorization for the SAS Content Server . . . . . . . 179Overview of SAS Content Server Authorization . . . . . . . . . . . . . . . . . . 179Example Scenario: SAS Content Server Authorization . . . . . . . . . . 180
Reconfiguring the SAS Content Server to Use a Database for Storage . . . . . . . . . . . . . . . . . . . . . . . . . . . . . . . . . . . . . . . . . . . . . . . . . . . 183
Overview . . . . . . . . . . . . . . . . . . . . . . . . . . . . . . . . . . . . . . . . . . . . . . . . . . . . . . . . . . . . . . . 183
163

JCRCopyRepository File . . . . . . . . . . . . . . . . . . . . . . . . . . . . . . . . . . . . . . . . . . . . . 184Reconfigure SAS Content Server . . . . . . . . . . . . . . . . . . . . . . . . . . . . . . . . . . 186
About the SAS Content Server
The SAS Content Server is a content repository that stores digital content (such as documents, reports, and images) created and used by SAS client applications. Examples of such content include reports and documents created by users of SAS Web Report Studio and the SAS Information Delivery Portal.
The Web-based Distributed Authoring and Versioning (WebDAV) protocol is currently the main method used to access the SAS Content Server. In addition to the basic features of HTTP, the WebDAV protocol is an extension to HTTP and provides Write access, version control, search, and other features.
The SAS Content Server starts automatically when the Web application server is started and depends on the SAS Services Application. The SAS Services Application deploys a set of services called Remote Services that are used by SAS Information Delivery Portal, the SAS Stored Process Web application, and other Web applications. The SAS Services Application must be started before you start your Web application server.
Three JVM options are related to the SAS Content Server deployment. In the event that the deployment of SAS Content Server changes, the JVM options can be used to set the new values.
Table 9.1 SAS Content Server JVM Options
JVM Option Description
-Dsas.scs.scheme Use http or https.
-Dsas.scs.host Use the host name of the Web application server.
-Dsas.scs.port Use the port number of the Web application server instance.
164 Chapter 9 / Administering the SAS Content Server

For deployments that use WebSphere Application Server with approximately 900 concurrent users, you can avoid performance issues and transaction time out errors by modifying the JDBC data source definition. Use the administration console to modify the SharedServices data source with a connection pool custom property. Add a custom connection pool property with a name of defaultConnectionTypeOverride and a value of unshared.
Moving Content or Backing Up the SAS Content Server
The SAS Content Server should be backed up whenever the metadata server is backed up. For instructions about how to back up the SAS Content Server, see “Best Practices for Backing Up Your SAS System” in the SAS Intelligence Platform: System Administration Guide.
Use the WebDAVDump and WebDAVRestore utilities to:
n Back up specific locations such as a subset of the WebDAV content.
n Create a backup for input to a system other than the SAS Content Server.
n Move content from one SAS Content Server to another one.
n Share content that is available in the SAS Content Server.
For instructions about using the WebDAVDump and the WebDAVRestore utilities, see SAS Note 38667.
Deploying Content Manually to the SAS Content Server
Overview
SAS Web applications such as the SAS Information Delivery Portal and SAS Web Report Studio require the availability of content for its users. The SAS Content Server
Deploying Content Manually to the SAS Content Server 165

provides a WebDAV content repository that stores digital content (such as documents, reports, and images) that is created and used by SAS client applications.
To enable the availability of the content in the SAS Content Server, you can load content, update existing content, and adjust Web applications that store SBIP URLs. These tasks can be automated or they can be performed manually.
The following table shows the choices available in the SAS Deployment Wizard, and the results or manual tasks that follow these choices.
Table 9.2 Selecting Automatic Options or Manual Performance of Tasks
Options Selected in SAS Deployment WizardResults and Instructions for Manual Tasks
Web Application Server: Automatic Configuration
Web Application Server: Automatic Deployment
The Web application server is configured automatically. SAS Web applications are deployed automatically, and content is loaded to the SAS Content Server. If applicable, Web applications that store SBIP URLs are adjusted automatically.
Web Application Server: Automatic Configuration
Manually deploy Web applications, load the content to the SAS Content Server, and adjust any Web applications that store SBIP URLs.
The Web application server is configured automatically. Instructions are provided on how to manually deploy SAS Web applications, load content to the SAS Content Server, and adjust any Web applications that store SBIP URLs.
Manually configure the Web application server, deploy the Web applications, load the content to the SAS Content Server, and adjust any Web applications that store SBIP URLs.
Instructions are provided on how to perform all tasks manually.
The following table shows when you can load or update content (and adjust URLs) either automatically or manually.
166 Chapter 9 / Administering the SAS Content Server

Table 9.3 Criteria for Deploying Content to the SAS Content Server
Configuration of Web Application Server
Deployment of Web Applications Load Content Update Content Adjust URLs
Automatic Automatic Automatic Automatic Automatic
Automatic Manual Manual Manual Manual
Manual Manual Manual Manual Manual
The following table shows the files associated with loading content to the SAS Content Server or updating content. The filename for the batch or script file includes the order number.
Security Considerations for SAS Content Server Scripts
The scripts that are described in this section for loading content, updating content, and adjusting URLs use the SAS Administrator and SAS Trusted User credentials. For deployments that performed a manual deployment of the SAS Web applications, these scripts include the user IDs and an encoded form of the password. For deployments that performed an automatic deployment of the SAS Web applications, the scripts include the user IDs, but do not include the passwords in any form.
Passwords in these files, whether added by the SAS Deployment Wizard, or by a SAS administrator, are not updated with the Update passwords feature of the SAS
Deploying Content Manually to the SAS Content Server 167

Deployment Manager. Running the scripts with an expired password, or no password, provides a log result like the following example:
Output 9.1 Log File Example for Invalid Credentials
config.init: [echo] ant.version=Apache Ant version 1.7.0 compiled on December 13 2006 [echo] ant.file=/opt/SASHome/SASWebInfrastructurePlatform/9.3/Config/webinfpltfm_config.xml [echo] file.encoding=ISO646-US [echo] about to read property file because config.init.set=${config.init.set}[GetObjectProperties] Error connecting to the metadata server: Access denied.[GetObjectProperties] Host: hostname.example.com[GetObjectProperties] Port: 8561[GetObjectProperties] User: sasadm@saspw[GetObjectProperties] m_mdFactory: com.sas.metadata.remote.MdFactoryImpl@74db2c[GetObjectProperties] Error finding foundation repository: Encountered metadata exception.
BUILD FAILED/opt/SASHome/SASDeploymentManager/9.3/products/cfgwizard__93345__prt__xx__sp0__1/Utilities/configuration_targets.xml:95: null
If you need to update or add a password, use the PWENCODE procedure. The following code example shows how to generate the encoded form of the password changeit. Copy and paste the result into the scripts.
Example Code 9.1 PWENCODE Procedure Example
proc pwencode in="changeit" method=sas002; run;
The SAS log shows the value to copy and paste into the script:
{SAS002}4DE4CF4F130AC6BE4A6934E0596C8222
After you run the scripts, remove the encoded form of the passwords from the scripts as an additional security measure.
Load Content Manually to the SAS Content Server
If you deploy SAS Web applications manually, you need to load content manually to the SAS Content Server. For information about how to load content manually for SAS Web applications, see your Instructions.html file.
Use the following batch file or shell script to load content manually:
n On Windows:
168 Chapter 9 / Administering the SAS Content Server

SAS-config-dir\Lev1\Web\Utilities\manualLoadContent-OrderNumber.bat
n On UNIX and z/OS:
SAS-config-dir/Lev1/Web/Utilities/manualLoadContent.sh-OrderNumber.sh
If Web applications were deployed manually, this script contains the credentials for the SAS Administrator, as well as the SAS Trusted User. The password is always encrypted in the file. After loading content successfully, remove credentials for the SAS Administrator and the SAS Trusted User.
If Web applications were deployed automatically, the script does not contain the required credentials. You must manually enter the required credentials in this script file.
Update Content Manually for the SAS Content Server
If you deploy updated SAS Web applications manually, you must manually update the DAV content in the SAS Content Server. For more information, see your UpdateInstructions.html file, which is located in the SAS-config-dir /Lev1/Documents directory.
You must update content manually before portal content is promoted to SAS Information Delivery Portal 4.3. In this case, data explorations must be converted to reports, and directive URLs should be adjusted manually. For more information, see “Promote the Entire Portal Application Tree” in Chapter 12 of SAS Intelligence Platform: Web Application Administration Guide.
Use the following batch file or shell script to update the DAV content manually:
n On Windows:
SAS-config-dir\Lev1\Web\Utilities\manualUpdateContent-OrderNumber.bat
n On UNIX and z/OS:
SAS-config-dir/Lev1/Web/Utilities/manualUpdateContent-OrderNumber.sh
Deploying Content Manually to the SAS Content Server 169

If Web applications were deployed manually, this script contains the credentials for the SAS Administrator, as well as the SAS Trusted User. The password is always encrypted in the file. After loading content successfully, remove credentials for the SAS Administrator and the SAS Trusted User.
If Web applications were deployed automatically, the script does not contain the required credentials. You must manually enter the required credentials in this script file.
Adjust Directive URLs Manually
Directive URLs are updated either during the migration of a product from one version to another version, or when a product's content is modified and updates are required. When the script is run to adjust URLs, it updates references to metadata that has moved either during migration or an upgrade. These references are stored as SBIP URLs.
You must update content manually before portal content is promoted to SAS Information Delivery Portal 4.3. In this case, data explorations must be converted to reports and directive URLs should be adjusted manually. For more information, see “Promote the Entire Portal Application Tree” in Chapter 12 of SAS Intelligence Platform: Web Application Administration Guide.
Here are some examples of instances that require adjusting URLs manually:
n When a migration is performed, some reports might be moved to a user’s home folder. If there were references to the data in those reports (in the form of SBIP URLs), then those references are updated by the script.
n During a migration or an upgrade, data explorations are converted to reports. If there were references to the data explorations (in the form of SBIP URLs), then those references are updated by the script.
After updating content manually for the SAS Content Server, adjust directive URLs manually by running the appropriate script or batch file:
n On Windows:
SAS-config-dir\Lev1\Web\Utilities\manualAdjustURLs-OrderNumber.bat
170 Chapter 9 / Administering the SAS Content Server

n On UNIX and z/OS:
SAS-config-dir/Lev1/Web/Utilities/manualAdjustURLs-OrderNumber.sh
The instructions for running the script or batch file are provided in the Instructions.html migration or the UpdateInstructions.html file during an upgrade. The script contains the credentials for the SAS Administrator, as well as the SAS Trusted User. The password is always encrypted. When you have successfully loaded the content, remove the credentials for the SAS Administrator and the SAS Trusted User.
Log Files Generated by the Scripts
When any of the scripts in the previous sections are run, log files are produced for each SAS Web application that is affected. Log messages are written to a file called product-name_script-name_date-and-time.log For UNIX and z/OS machines, the log filename always includes the date and timestamp. For Windows machines, the log filename includes the date and timestamp for machines that use an English locale only.
These log files are located in the following directories:
On Windows:
SAS-config-dir\Lev1\Logs\Configure
On UNIX and z/OS:
SAS-config-dir/Lev1/Logs/Configure
Deploying Content Manually to the SAS Content Server 171

Using the SAS Content Server Administration Console
About the SAS Content Server Administration Console
The SAS Content Server Administration Console enables you to manage files and WebDAV folders in the SAS Content Server. Using the console, you can perform the following management tasks:
n view folders
n control access to WebDAV folders and files by setting permissions
n create folders
n delete folders
Access the SAS Content Server Administration Console
To access the console, enter the following URL in your Web browser and substitute the server name and port number of your SAS Content Server:
http://server:port/SASContentServer/dircontents.jsp
Note: This console is also part of the SAS Web Administration Console. You can administer the SAS Content Server by using either interface. For more information about accessing the SAS Web Administration Console, see “Using the SAS Web Administration Console ” on page 92.
Log on to the console with an unrestricted user ID (for example, sasadm@saspw). The term "(Admin)" after your name at the top of the page indicates that you are logged on as an unrestricted user. This provides full administrator rights to use the console.
172 Chapter 9 / Administering the SAS Content Server

As a security precaution, make sure that you log off when you are finished using the console. If you go to another URL or close the tabbed page in your browser without logging off, your console logon remains in effect. This means that the console can be accessed again without re-entering a user name and password.
A Brief Tour of the Console Interface
The following display shows an example SAS Content Server Administration Console as it appears in a browser window:
Display 9.1 SAS Content Server Administration Console
Objects in the console are either folders or files. By default, the initial view of the console displays the following folders:
sascontentcontains content that has been added to SAS Content Server by SAS applications. You see a folder only if the folder contains content.
sasdavcontains content that has been added to the SAS Content Server. By default, sasdav contains the following folders:
n sasdav/Users contains personal repository folders for users. A user's folder is created automatically when the user logs on to a SAS Web application. Users have full rights to their own folders.
n sasdav/Templates contains templates that are used for e-mail notification in SAS solutions.
Using the SAS Content Server Administration Console 173

sasfolderscontains content that has been defined in the SAS Folders tree in the SAS Metadata Server. You see a folder only if the folder contains content.
CAUTION! Administrators should not manage folders and content here. The content within this folder and subfolders is mapped to SAS Folders in the SAS Metadata Server. It is recommended that you use the SAS Management Console to add and manage folders.
Depending on the software that is installed at your site, your console might contain additional folders.
To navigate in the console, follow these steps:
1 Click an item in the list to display information about that item.
2 Use the breadcrumb trail above the list to return to a parent folder. For example, in the breadcrumb trail, click sasdav to return to the sasdav folder.
The console displays the following information for each item listed:
Item namedisplays the name of the folder or file.
Primary typeis an internal value that designates the type of object in the repository.
Date createdis the date when the object was created.
Date modifiedis the date when the object was modified.
Deletewhen the delete button is clicked, the selected objects are deleted.
Permissionswhen the permissions icon is clicked, opens a page where permissions can be modified for the object.
174 Chapter 9 / Administering the SAS Content Server

Modify Permissions for WebDAV Folders and Files
The sasfolders directory should be accessed only by trusted or unrestricted users. These users are recognized as unrestricted administrators for the SAS Content Server, and do not require the Access Control List (ACL) to grant them access to this directory. If other types of users attempt to access this location, their permissions are verified before they are granted any access.
The sasdav directory can be accessed by regular users, and ACLs can be used to grant access to specific users and groups.
Principals can be granted permissions for folders and files. In the SAS Content Server, a principal is either a user or a group of users defined in the SAS Metadata Server. Principals can be given permissions that allow them to perform specific tasks such as reading an object, writing to an object, deleting an object, and so on.
You set permissions for an object by specifying which principals have which types of access. To modify permissions for an object, follow these steps:
1 Click the permission icon next to the item that you want to modify. A permissions page appears.
2 For each principal listed, modify the permissions by changing each permission to Yes or No.
Note: You might see a principal named jcr:authenticated. This principal refers to any user who can log on to a SAS Web application. By default, authenticated users have Read and Inherit Read permissions only.
3 To add more principals to the page, do one of the following:
n If you know the principal's name, enter it in the field and click Save changes.
n Click Search for Principals to search for a name. When you find the principal that you want to add, select the check box next to the principal's name and then click Return.
Using the SAS Content Server Administration Console 175

After the principal's name appears on the permission page, you can set permissions for the principal.
The following display shows a portion of the console with permissions for a folder:
Display 9.2 Folder Permissions in the SAS Content Server
The following permissions are available for you to apply to objects:
Table 9.4 Permissions for Objects
Permissions Purpose
Read Allows the principal to read the object. For folders, this permission allows the principal to see the members of the folder.
Write Allows the principal to write an object. For folders, this permission allows the principal to create new objects in a folder.
Delete Allows the principal to delete the object.
Admin Allows the principal to change the permissions on an object.
Inherit Read Objects created in this folder inherit this setting for their Read permission (and Inherit Read permission for subfolders).
176 Chapter 9 / Administering the SAS Content Server

Permissions Purpose
Inherit Write Objects created in this folder inherit this setting for their Write permission (and Inherit Write permission for subfolders).
Inherit Delete Objects created in this folder inherit this setting for their Delete permission (and Inherit Delete permission for subfolders).
Inherit Admin Objects created in this folder inherit this setting for their Admin permission (and Inherit Admin permission for subfolders).
Note: Inherited permissions are assigned when objects are created. Each object has its own set of permissions. Inherited permissions are static; dynamic inheritance does not occur.
If you are applying permissions to folders, then the following options are available:
Table 9.5 Results of Applying Permissions to Folders
Permissions for Folders Results
Subfolders and files Changed permissions are applied to subfolders and files that exist below the current folder.
This folder only Changed permissions are applied to subfolders and files that exist in the current folder.
Overwrite permissions for all Changed permissions are applied to all folders and files.
Create a New Folder
To add a folder below the current folder, enter the name of the new folder in the field and click Add Folder.
Using the SAS Content Server Administration Console 177

Note: Although you can add a folder to the sasfolders location, the folder that you add is not added to the SAS Metadata Server. The best practice is to add folders to metadata using SAS Management Console.
Add Files to the SAS Content Server
You cannot use the SAS Content Server Administration Console to add files to folders. To add files, you can use one of the following methods:
n Use Microsoft Web folders to add content to the appropriate folder. You must use a browser on a Windows client machine in order to use this method.
For example, the sasdemo user might open the following location as a Web folder:
http://myServer:8080/SASContentServer/repository/default/sasdav/Users/sasdemo/
Then, copy and paste content into the folder.
n Use the SAS DAVTree utility to drag and drop folders or files into console folders.
To use this utility, run the following command:
SAS-config-dir\Levn\Web\Utilities\DAVTree.bat
On UNIX and z/OS, the utility command is DAVTree.sh.
For more information about using DAVTree, see “Using the DAVTree Utility to Manage WebDAV Content ” on page 104.
n Use the SAS Publishing Framework to publish files to the WebDAV repository.
Portal users can publish portal content to the WebDAV repository by using the portal's publish and subscribe tools.
n Programmatically publish content to WebDAV.
Usage of these tools and techniques is beyond the scope of this documentation (with the exception of the DAVTree utility).
178 Chapter 9 / Administering the SAS Content Server
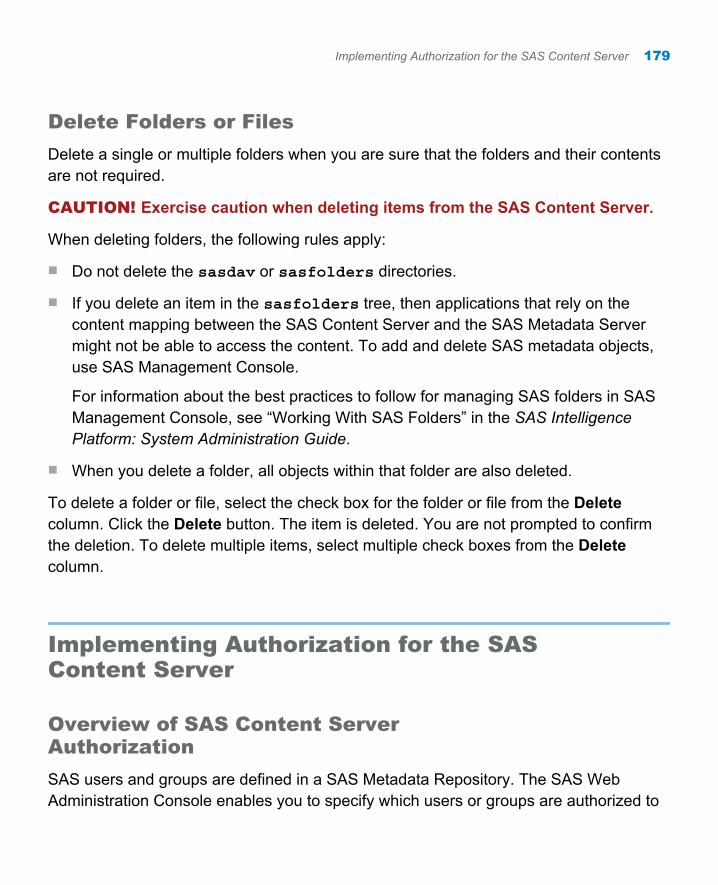
Delete Folders or Files
Delete a single or multiple folders when you are sure that the folders and their contents are not required.
CAUTION! Exercise caution when deleting items from the SAS Content Server.
When deleting folders, the following rules apply:
n Do not delete the sasdav or sasfolders directories.
n If you delete an item in the sasfolders tree, then applications that rely on the content mapping between the SAS Content Server and the SAS Metadata Server might not be able to access the content. To add and delete SAS metadata objects, use SAS Management Console.
For information about the best practices to follow for managing SAS folders in SAS Management Console, see “Working With SAS Folders” in the SAS Intelligence Platform: System Administration Guide.
n When you delete a folder, all objects within that folder are also deleted.
To delete a folder or file, select the check box for the folder or file from the Delete column. Click the Delete button. The item is deleted. You are not prompted to confirm the deletion. To delete multiple items, select multiple check boxes from the Delete column.
Implementing Authorization for the SAS Content Server
Overview of SAS Content Server Authorization
SAS users and groups are defined in a SAS Metadata Repository. The SAS Web Administration Console enables you to specify which users or groups are authorized to
Implementing Authorization for the SAS Content Server 179

access specific folders in the SAS Content Server repository, and what type of access permissions they have for the folders.
Use the SAS Web Administration Console to create folders and associate access controls with the folders.
Note: This topic does not describe authentication for the SAS Content Server. By default, SAS Content Server users are authenticated by using SAS token authentication.
Before you can associate access controls with a folder, you must complete these tasks:
1 Use the SAS Web Administration Console to create the folder on the SAS Content Server.
2 Ensure that the appropriate user and group definitions exist on the SAS Metadata Server for the SAS Content Server users and groups for whom you want to control access to the folder.
After you have created the WebDAV folders and have ensured that the appropriate user and group definitions are created on the SAS Metadata Server, use SAS Web Administration Console to associate access controls with the folders.
Example Scenario: SAS Content Server Authorization
Within your portal implementation, you might use the publish and subscribe capabilities to publish (write) and subscribe to (read) group folders on a WebDAV publication channel.
The following scenario shows the application's publish and subscribe setup for sales and executive teams that need different access to read (subscribe to) and write (publish) information that is stored in three different directories on the SAS Content Server. On the SAS Metadata Server, these teams are represented by two groups, Americas Sales and Sales Executives.
This publish and subscribe scenario has a requirement for three different content areas, or group folders, on the SAS Content Server:
180 Chapter 9 / Administering the SAS Content Server

n Catalog Sales: The /sasdav/Catalog Sales directory contains catalog sales information. The Americas Sales and Sales Executives groups can both read (subscribe to) and write (publish) information.
n Field Sales: The /sasdav/Field Sales directory contains direct sales information. The Americas Sales and Sales Executives groups can both read, but only the Sales Executives group can write information.
n Sales Execs: The /sasdav/Sales Execs directory contains executive-level sales information. Only the Sales Executives group can read and write information.
The following table summarizes this scenario's group-based folders on the SAS Content Server, and the permissions for each group:
Table 9.6 Summary of WebDAV Folders on the SAS Content Server
Folder Americas Sales Sales Executives
/sasdav/Catalog Sales Read, Write Read, Write
/sasdav/Field Sales Read Read, Write
/sasdav/Sales Execs (none) Read, Write
To create this sample configuration, follow these steps:
1 In SAS Management Console, define the users, groups, and login credentials that need to access the SAS Content Server. When you define login credentials, you must specify the same authentication domain name that you specified for the SAS Content server during installation.
For this example, the following users, groups, and logins are defined:
Table 9.7 Example Users, Groups, and Logins
Group Metadata Identities
User Metadata Identities User ID
Authentication Domain
America Sales salesusr1 salesusr1 DefaultAuth
Implementing Authorization for the SAS Content Server 181

Group Metadata Identities
User Metadata Identities User ID
Authentication Domain
Sales Executives execusr1 execusr1 DefaultAuth
SAS Trusted User sastrust sastrust DefaultAuth
For example, the America Sales group contains a user named salesusr1 as a member, and salesusr1 has an associated login with a user ID of salesusr1 and an authentication domain of DefaultAuth. The America Sales group might include other members as well.
2 In the SAS Web Administration Console, create your new directory under the sasdav directory. For this example, navigate to the sasdav directory, and then create these three subdirectories: Catalog Sales, Field Sales, and Sales Execs.
3 In the SAS Web Administration Console, configure the access permissions for the folders that you created. For this example, set the access permissions for each subdirectory, using the following tables as guides:
Table 9.8 WebDAV Permissions for /sasdav/Catalog Sales
Group Read Write DeleteInherit Read
Inherit Write
Inherit Delete
Americas Sales
Yes Yes No Yes Yes No
Sales Executives
Yes Yes No Yes Yes No
Table 9.9 WebDAV Permissions for /sasdav/Field Sales
Group Read Write DeleteInherit Read
Inherit Write
Inherit Delete
Americas Sales
Yes No No Yes No No
182 Chapter 9 / Administering the SAS Content Server

Group Read Write DeleteInherit Read
Inherit Write
Inherit Delete
Sales Executives
Yes Yes No Yes Yes No
Table 9.10 WebDAV Permissions for /sasdav/Sales Execs
Group Read Write DeleteInherit Read
Inherit Write
Inherit Delete
Americas Sales
No No No No No No
Sales Executives
Yes Yes No Yes Yes No
Reconfiguring the SAS Content Server to Use a Database for Storage
Overview
The SAS Content Server supports using a database for storage. The default configuration for the SAS Content Server is to use the file system for storage, but SAS Deployment Wizard provides the Use configured database for content storage check box on the SAS Content Server: Repository Directory page. If that option is enabled, the wizard configures the SAS Content Server to use the same database that is used by the SAS Web Infrastructure Platform. The default configuration for the SAS Web Infrastructure Platform is to use the SAS Framework Data Server for database storage. However, the SAS Web Infrastructure Platform can be configured to use a third-party vendor database such as Oracle, MySQL, PostgreSQL, DB/2, or SQL Server.
When a third-party vendor database is used, make sure that the database is configured to accept large binary objects such as documents and images. For example, on MySQL, the max_allowed_packet variable must be set at least as large as the largest
Reconfiguring the SAS Content Server to Use a Database for Storage 183
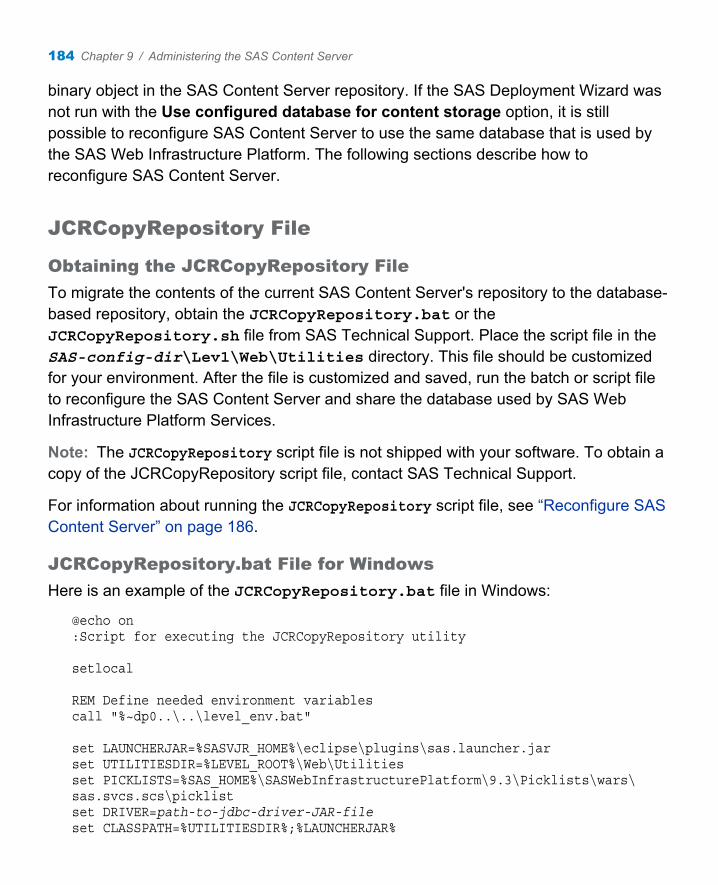
binary object in the SAS Content Server repository. If the SAS Deployment Wizard was not run with the Use configured database for content storage option, it is still possible to reconfigure SAS Content Server to use the same database that is used by the SAS Web Infrastructure Platform. The following sections describe how to reconfigure SAS Content Server.
JCRCopyRepository File
Obtaining the JCRCopyRepository File
To migrate the contents of the current SAS Content Server's repository to the database-based repository, obtain the JCRCopyRepository.bat or the JCRCopyRepository.sh file from SAS Technical Support. Place the script file in the SAS-config-dir\Lev1\Web\Utilities directory. This file should be customized for your environment. After the file is customized and saved, run the batch or script file to reconfigure the SAS Content Server and share the database used by SAS Web Infrastructure Platform Services.
Note: The JCRCopyRepository script file is not shipped with your software. To obtain a copy of the JCRCopyRepository script file, contact SAS Technical Support.
For information about running the JCRCopyRepository script file, see “Reconfigure SAS Content Server” on page 186.
JCRCopyRepository.bat File for Windows
Here is an example of the JCRCopyRepository.bat file in Windows:
@echo on:Script for executing the JCRCopyRepository utility
setlocal
REM Define needed environment variablescall "%~dp0..\..\level_env.bat"
set LAUNCHERJAR=%SASVJR_HOME%\eclipse\plugins\sas.launcher.jarset UTILITIESDIR=%LEVEL_ROOT%\Web\Utilitiesset PICKLISTS=%SAS_HOME%\SASWebInfrastructurePlatform\9.3\Picklists\wars\sas.svcs.scs\picklistset DRIVER=path-to-jdbc-driver-JAR-fileset CLASSPATH=%UTILITIESDIR%;%LAUNCHERJAR%
184 Chapter 9 / Administering the SAS Content Server

"%JAVA_JRE_COMMAND%" ^ -classpath "%CLASSPATH%" ^ -Djava.system.class.loader=com.sas.app.AppClassLoader ^ -Dsas.app.launch.config="%PICKLISTS%" ^ -Dsas.app.repository.path="%SASVJR_REPOSITORYPATH%" ^ -Dsas.app.class.path="%UTILITIESDIR%;%DRIVER%" ^ -Djava.security.auth.login.config=%LEVEL_ROOT%\Web\Common\login.config^ -Xmx256m ^ -Dscs.jndi.jndiName=sas/jdbc/SharedServices ^ -Dscs.jndi.jdbcUrl=jdbc-url ^ -Dscs.jndi.driver=jdbc-driver-class^ -Dscs.jndi.user=database-user ^ -Dscs.jndi.pwd=password ^ org.apache.jackrabbit.core.JCRCopyRepository %1 %2endlocalif [%2] EQU [exit] exit %ERRORLEVEL%
JCRCopyRepository.sh File for UNIX and z/OS
Here is an example of the JCRCopyRepository.sh file in UNIX:
#!/bin/sh## JCRCopyRepository.sh#. `dirname $0`/../../level_env.shLAUNCHERJAR=$SASVJR_HOME/eclipse/plugins/sas.launcher.jar
UTILITIESDIR=$LEVEL_ROOT/Web/UtilitiesPICKLISTS=$SAS_HOME/SASWebInfrastructurePlatform/9.3/Picklists/wars/sas.svcs.scs/picklistDRIVER=path-to-jdbc-driver-JAR-fileCLASSPATH=$UTILITIESDIR:$LAUNCHERJAR
"$JAVA_JRE_COMMAND" \ -classpath "$CLASSPATH" \ -Djava.system.class.loader=com.sas.app.AppClassLoader \ -Dsas.app.launch.config="$PICKLISTS" \ -Dsas.app.repository.path="$SASVJR_REPOSITORYPATH" \ -Dsas.app.class.path="$UTILITIESDIR:$DRIVER" \ -Djava.security.auth.login.config=../Common/login.config\ -Xmx256m \ -Dscs.jndi.jndiName=sas/jdbc/SharedServices \ -Dscs.jndi.jdbcUrl=jdbc-url \ -Dscs.jndi.driver=jdbc-driver-class \ -Dscs.jndi.user=database-user \ -Dscs.jndi.pwd=password \
Reconfiguring the SAS Content Server to Use a Database for Storage 185

org.apache.jackrabbit.core.JCRCopyRepository $1 $2
exit 0
Reconfigure SAS Content Server
To reconfigure the SAS Content Server to use the same database that is used by SAS Web Infrastructure Platform, follow these steps.
1 Stop the Web application server. Typically, this is SASServer1 in the Web application server's configuration directory.
2 Rename the SAS Content Server repository from Repository to RepositoryFS.
On Windows:
move C:\SAS-config-dir\Lev1\AppData\SASContentServer\Repository C:\SAS-config-dir\Lev1\AppData\SASContentServer\RepositoryFS
On UNIX and z/OS:
mv SAS-config-dir/Lev1/AppData/SASContentServer/Repository SAS-config-dir/Lev1/AppData/SASContentServer/RepositoryFS
3 In the previous step, you moved the Repository directory. Now, re-create the directory:
On Windows:
mkdir C:\SAS-config-dir\Lev1\AppData\SASContentServer\Repository
On UNIX and z/OS:
mkdir SAS-config-dir/Lev1/AppData/SASContentServer/Repository
Note: If you are performing this procedure to configure SAS Web application clustering, then create a directory named SASServer2 and use it as the repository directory for the rest of this procedure.
4 The contents of the repository.xml file should identify the database that is used for SAS Web Infrastructure Platform Services. Copy the
186 Chapter 9 / Administering the SAS Content Server

repository.DatabaseName.xml file from the SAS-install-dir/SASWebInfrastructurePlatform/9.3/Static/wars/sas.svcs.scs/WEB-INF/templates directory to the directory that you created in the previous step. Then, rename this file as repository.xml.
Example Code 9.2 Copy Command Example for Windows
copy C:\SAS_HOME\SASWebInfrastructurePlatform\9.3\Static\wars\sas.svcs.scs\WEB-INF\templates\repository.tkts.xml C:\SAS-config-dir\Lev1\AppData\SASContentServer\Repository\repository.xml
Example Code 9.3 Copy Command Example for UNIX
cp /$SAS_HOME/SASWebInfrastructurePlatform/9.3/Static/wars/sas.svcs.scs/WEB-INF/templates/repository.tkts.xml SAS-config-dir/Lev1/AppData/SASContentServer/Repository/repository.xml
TIP The SAS Framework Data Server uses the repository.tkts.xml file.
5 Edit the repository.xml file and perform the following changes:
a Change all instances of @repository.jndi.url@ to sas/jdbc/SharedServices.
For deployments that use JBoss, change the value to include the java: namespace prefix, java:sas/jdbc/SharedServices.
b Comment out the extidTypes attribute in the AccessManager element:
<AccessManager class="org.apache.jackrabbit.core.CoreAccessManager"><!-- <@extid.comment.start@param name="extidTypes" value="@extid.types.list@"/@extid.comment.end@>-->
6 Obtain the values for the database name, host, port, and user ID from the Web application server.
n JBoss
Open the SharedServices-ds.xml file located in the JBOSS_HOME/server/SASServer1/deploy/ directory. The user ID can be located in the JBOSS_HOME/server/SASServer1/conf/login-config.xml file, in the <application-policy name="webinfpltfm-encryptDBPassword"> section. You
Reconfiguring the SAS Content Server to Use a Database for Storage 187
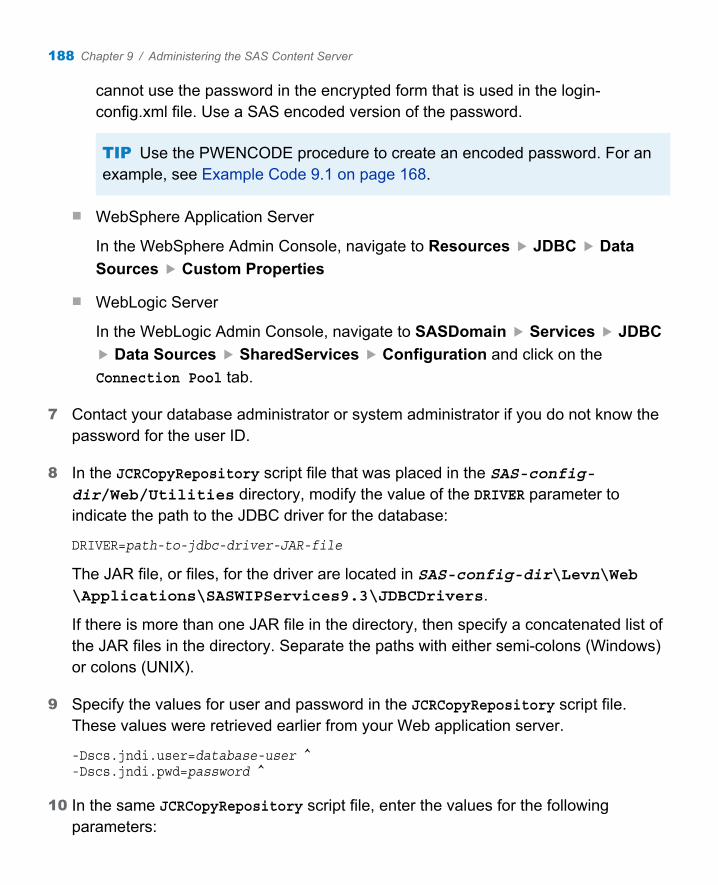
cannot use the password in the encrypted form that is used in the login-config.xml file. Use a SAS encoded version of the password.
TIP Use the PWENCODE procedure to create an encoded password. For an example, see Example Code 9.1 on page 168.
n WebSphere Application Server
In the WebSphere Admin Console, navigate to Resources JDBC Data Sources Custom Properties
n WebLogic Server
In the WebLogic Admin Console, navigate to SASDomain Services JDBC Data Sources SharedServices Configuration and click on the Connection Pool tab.
7 Contact your database administrator or system administrator if you do not know the password for the user ID.
8 In the JCRCopyRepository script file that was placed in the SAS-config-dir/Web/Utilities directory, modify the value of the DRIVER parameter to indicate the path to the JDBC driver for the database:
DRIVER=path-to-jdbc-driver-JAR-file
The JAR file, or files, for the driver are located in SAS-config-dir\Levn\Web\Applications\SASWIPServices9.3\JDBCDrivers.
If there is more than one JAR file in the directory, then specify a concatenated list of the JAR files in the directory. Separate the paths with either semi-colons (Windows) or colons (UNIX).
9 Specify the values for user and password in the JCRCopyRepository script file. These values were retrieved earlier from your Web application server.
-Dscs.jndi.user=database-user ^-Dscs.jndi.pwd=password ^
10 In the same JCRCopyRepository script file, enter the values for the following parameters:
188 Chapter 9 / Administering the SAS Content Server

-Dscs.jndi.jdbcUrl=jdbc-url ^-Dscs.jndi.driver=jdbc-driver-class ^
The values specified for the JDBC URL and the driver are determined by the type of database used in your environment. The following table shows the examples of values for the different types of databases:
Table 9.11 Parameters and Values for JDBC URL and Driver
Database Parameters Values
SAS Framework Data Server
-Dscs.jndi.jdbcUrl jdbc:sastkts://host:22031?constring=(DSN=SharedServices;encoding=UNICODE_FSS)
-Dscs.jndi.driver com.sas.tkts.TKTSDriver
Oracle -Dscs.jndi.jdbcUrl For Oracle:jdbc:oracle:thin:@host:1521:orclFor XE:jdbc:oracle:thin:@host:1521:xe
-Dscs.jndi.driver oracle.jdbc.driver.OracleDriver
PostgreSQL -Dscs.jndi.jdbcUrl jdbc:postgresql://host:5432/SharedServices
-Dscs.jndi.driver org.postgresql.Driver
DB2 -Dscs.jndi.jdbcUrl jdbc:db2//host:50000/database
-Dscs.jndi.driver com.ibm.db2.jcc.DB2Driver
SQL Server -Dscs.jndi.jdbcUrl jdbc:sqlserver://host:1433;DataBaseName=SharedServices;SelectMethod=cursor
-Dscs.jndi.driver com.microsoft.sqlserver.jdbc.SQLServerDriver
Reconfiguring the SAS Content Server to Use a Database for Storage 189

Database Parameters Values
MySQL -Dscs.jndi.jdbcUrl jdbc:mysql://host:3306/SharedServices
-Dscs.jndi.driver com.mysql.jdbc.Driver
11 In the command window, navigate to the SAS-config-dir/Lev1/Web/Utilities directory.
12 Run the JCRCopyRepository script command by providing the complete directory path of the old and new repository directories.
On Windows:
JCRCopyRepository.bat C:\SAS-config-dir\Lev1\AppData\SASContentServer\RepositoryFS C:\SAS-config-dir\Lev1\AppData\SASContentServer\Repository
On UNIX:
./JCRCopyRepository.sh SAS-config-dir/Lev1/AppData/SASContentServer/RepositoryFS SAS-config-dir/Lev1/AppData/SASContentServer/Repository
13 To enable the changes to take effect, restart the Web application server. Typically, this is the SASServer1.
190 Chapter 9 / Administering the SAS Content Server

10Administering the SAS BI Web Services
Overview of SAS BI Web Services for SAS 9.3 . . . . . . . . . . . . . . . . . . . 191
SAS BI Web Services in SAS 9.3 . . . . . . . . . . . . . . . . . . . . . . . . . . . . . . . . . . . . . 192
Managing Generated Web Services . . . . . . . . . . . . . . . . . . . . . . . . . . . . . . . . . 192
Configuring SAS BI Web Services for Java . . . . . . . . . . . . . . . . . . . . . . . . 193
Overview of Security for Web Services . . . . . . . . . . . . . . . . . . . . . . . . . . . . . 198
Securing SAS BI Web Services for Java . . . . . . . . . . . . . . . . . . . . . . . . . . . 200SAS Authentication . . . . . . . . . . . . . . . . . . . . . . . . . . . . . . . . . . . . . . . . . . . . . . . . . . . 200Web Authentication . . . . . . . . . . . . . . . . . . . . . . . . . . . . . . . . . . . . . . . . . . . . . . . . . . . 200Editing the web.xml File for Third-Party Authentication . . . . . . . . . . 201Transport-level Security . . . . . . . . . . . . . . . . . . . . . . . . . . . . . . . . . . . . . . . . . . . . . . 201
Overview of SAS BI Web Services for SAS 9.3
A Web service is an interface that enables communication between distributed applications. Web services enable cross-platform integration by enabling applications that are written in various programming languages to communicate by using a standard Web-based protocol, typically the Simple Object Access Protocol (SOAP) or
191

Representational State Transfer (REST). This functionality makes it possible for businesses to bridge the gaps between different applications and systems.
SAS BI Web Services in SAS 9.3
SAS BI Web Services in SAS 9.3 contains the following key changes:
1 Beginning with SAS 9.3, SAS BI Web Services is supported only in a Java application server deployment. Previously, in SAS 9.2, there were two implementations of SAS BI Web Services: one written in Java that requires a servlet container, and another written in C# that uses the .NET framework.
2 Artifacts are not required to be generated in SAS 9.3; only the metadata that is associated with the generated Web service is published.
3 All stored processes are presented as Web services without the need for any additional processing. If the metadata about a Web service is not required to be published to the SAS metadata server, the additional step to generate the metadata is no longer required. Beginning with SAS 9.3, for more information about stored processes, see SAS 9.3 Stored Processes: Developer’s Guide.
4 In SAS 9.2, advanced configuration properties for the Web Service Maker were specified on the Advanced tab for WebServiceMaker Properties in SAS Management Console. In SAS 9.3, the values for these properties can be modified on the Settings tab for WebServiceMaker Properties.
5 Four new configuration properties are available in SAS 9.3.
Managing Generated Web Services
You can select a set of stored processes in SAS Management Console and use the Web Service Maker to deploy them as Web services. The Web Service Maker
192 Chapter 10 / Administering the SAS BI Web Services

generates a new Web service that contains one operation for each stored process that you selected. For information about developing Web services, see the SAS BI Web Services: Developer’s Guide. For information about using the Deploy as Web Service Wizard in SAS Management Console, see the product Help.
When you generate a Web service, the Web Service Maker publishes metadata about the new Web service to the SAS Metadata Server. The Web Service Maker stores information about the URL of the Web service, keywords that are associated with the Web service, and which stored processes are used by the Web service. You can view and update some of this information by using SAS Management Console and the Configuration Manager plug-in in. To import or export a generated Web service, use the SAS Management Console folder view.
To delete a Web service that was generated by the Web Service Maker, use SAS Management Console. Navigate to Application Management Configuration Manager SAS Application Infrastructure BI Web Services for Java 9.3 WebServiceMaker. Expand the node, right-click the generated Web service, and select Delete. Deleting a generated Web service removes the metadata that is associated with the generated Web service. This action cannot be reversed.
Note: You must grant permissions on the /System/Services folder to users who want to create SAS BI Web Services. You can also delete a Web service directly from the /System/Services folder. Users need ReadMetadata and WriteMemberMetadata to create and delete Web services. By default, a default group named BI Web Services Users is created, which has these permissions. You can add users to this group to allow them to create and delete Web services, or use your own groups and permission settings.
Configuring SAS BI Web Services for Java
SAS BI Web Services for Java is initially configured during installation using the SAS Deployment Wizard. To modify this initial configuration, use the Configuration Manager plug-in for SAS Management Console.
Configuring SAS BI Web Services for Java 193

To modify common configuration properties that apply to XMLA, WebServiceMaker, and generated Web services, go to SAS Management Console. Navigate to Application Management Configuration Manager SAS Application Infrastructure BI Web Services for Java 9.3. Right-click to select Properties and select the Settings tab.
In the Application General Configuration section, you can modify the following configuration properties:
Acceptable SYSCC ListWhen a Web service operation is invoked, it in turn calls the appropriate SAS Stored Process running on the server tier. SAS execution always returns the SYSCC macro variable upon completion. By default, if this completion code is not 0, a SOAP fault is generated and returned to the invoking client. Alternatively, a comma-separated list of acceptable SAS completion codes can be specified to alter this behavior. Also, a hyphen separating two values can be used to conveniently specify a range of acceptable completion codes. In this case, the acceptable list of completion codes are treated as warnings rather than errors and do not cause a SOAP fault.
Note that SYSCC can be set directly by SAS code developers. Likewise, some SAS procedures set this value, so see the appropriate SAS documentation to determine possible values that might be returned and whether these values are errors or warnings. For example, if a SAS procedure states that a SYSCC value less than 4 is a warning and you are willing to accept those values, set this property as follows: 0-4. Therefore, if the SAS stored process returns a value of 4 or less, it is considered successful as far as the Web service is concerned and the client receives an appropriate response rather than a fault.
Enable dynamic prompts validationWhen invoking Web service operations for stored processes that have been configured with dynamic prompt data parameters, you can turn off validation to obtain better throughput if you are certain that these stored processes have been written in a robust manner to handle any possible data passed by clients. Dynamic prompt validation is enabled by default so that the middle-tier Web service validates client data against data providers to ensure that incoming data meets the specified criteria before calling the appropriate stored process on the server.
194 Chapter 10 / Administering the SAS BI Web Services

SAS Stored Process timeoutSet this property if you want to limit the amount of time that a stored process is allowed to run. If the stored process fails to execute in the specified time, it is canceled and a SOAP fault is returned to the invoking client. A value of zero indicates no time-out period.
Enable allowing anonymous executionSpecify whether you want to enable or disable anonymous execution.
To modify configuration properties that are specific to the Web Service Maker, navigate to the WebServiceMaker folder. Then, navigate to the Settings tab within the Properties dialog box.
Base namespaceThis property is the base namespace that is concatenated with the service name to create a target namespace to uniquely identify generated Web services. For example, if the base namespace is set to http://tempuri.org, and a client creates a new service named test without specifying an overriding namespace for this new service, then the target namespace for this Web service becomes http://tempuri.org/test.
Attachment conformanceSpecifies the attachment conformance that should be enabled for generated Web services. There are two options: Message Transmission Optimization Mechanism (MTOM) and SOAP Messages with Attachments (SWA). The default is MTOM.
Validate Request With SchemaSetting this property to True causes the incoming request to be validated against the service’s schema. The default is false because this operation can be CPU intensive.
Validate Response With SchemaSetting this property to True causes the resulting output created by the service execution to be validated against the service’s schema. The default is false because this operation can be CPU intensive.
Attachment Optimized ThresholdThe default value is 2048 bytes. This attachment threshold is the number of bytes contained in the attachment that causes the data to be included as an out-of-band
Configuring SAS BI Web Services for Java 195

XOP/Include MTOM attachment. An attachment containing fewer bytes is transferred inline as base64 encoding for optimization.
To modify configuration properties that are specific to a generated Web service, navigate to the folder for that service. Then navigate to the Advanced tab within the Properties dialog box. Specify the name of each configuration property and its value in the Define New Property dialog box.
The following advanced configuration properties are available:
AcceptSysccListSee “Acceptable SYSCC List” on page 194. This property overrides its analogous common configuration property.
DynamicPromptsSupportSee “Enable dynamic prompts validation” on page 194. This property overrides its analogous common configuration property.
MaxSTPExecTimeSee “SAS Stored Process timeout” on page 195. This property overrides its analogous common configuration property.
AnonymousExecutionEnabled by default. This property requires the SAS Anonymous Web user or Webanon account to have been created previously.
BaseNameSpaceThis property is the base namespace that is concatenated with the service name to create a target namespace to uniquely identify generated Web services. For example, if the base namespace is set to http://tempuri.org, and a client creates a new service named test without specifying an overriding namespace for this new service, then the target namespace for this Web service becomes http://tempuri.org/test.
AttachmentConformanceThis property specifies the attachment conformance that should be enabled for generated Web services. There are two options: Message Transmission Optimization Mechanism (MTOM) and SOAP Messages with Attachments (SWA). The default is MTOM.
196 Chapter 10 / Administering the SAS BI Web Services

ValidateRequestWithSchemaSetting this property to true causes the incoming request to be validated against the service’s schema. The default is false, because this operation can be CPU intensive.
ValidateResponseWithSchemaSetting this property to true causes the resulting output that is created by the service execution to be validated against the service’s schema. The default is false because this operation can be CPU intensive.
AttachmentOptimizedThresholdThe default is 2048 bytes. This attachment threshold is the number of bytes contained in the attachment that causes the data to be included as an out-of-band XOP/Include MTOM attachment. An attachment containing fewer bytes is used as base 64 encoding for optimization.
Changes to properties do not take effect immediately. To apply these changes, perform one of the following tasks:
n Either stop and restart the Web application server, or stop and restart the SAS BI Web Services for Java Web application (sas.wip.services9.3.ear).
n Use a Java Management Extensions (JMX) console to communicate with the com.sas.svcs:service=biws,type=ConfigMBean management bean.
The following image shows the use of the JMX console bundled with the JDK to reload the configuration metadata into a running SAS BI Web Services for Java application:
Configuring SAS BI Web Services for Java 197

Overview of Security for Web Services
A default installation of SAS BI Web Services for Java is not highly secure. The default security mechanism is SAS authentication. All requests and responses are sent as clear text. If users want to authenticate as a specific user, then they can send a user name and password as clear text as part of the WS-Security headers. If you use a RESTful request that is supported in SAS 9.3, send the user name and password in a base64 encoded Authorization HTTP header. Authentication is performed by authenticating client credentials at the SAS Metadata Server. Whenever user names and passwords
198 Chapter 10 / Administering the SAS BI Web Services

must be sent as clear text or base64 encoded, SSL should be enabled to provide transport layer security.
If you want to use SSL on the Web application server to secure the transmission of credentials with the Web services, and you also want to use the Deploy as Web Service Wizard in SAS Management Console, then you need to import the server certificate to SAS Management Console. To import the server certificate to SAS Management Console, follow these steps:
1 Create a Java keystore on the local machine and import the server certificate of the server that you want to communicate with. For more information about how to perform this step, see http://docs.oracle.com/javase/1.5.0/docs/tooldocs/windows/keytool.html.
2 Pass the keystore location and password into SAS Management Console using Java JVM arguments. The arguments that need to be set are:
javax.net.ssl.trustStore= "fully qualified path to keystore created with keytool from step 1"javax.net.ssl.trustStorePassword= "trust store password"
To complete this step, add the following JavaArgs arguments to the sasmc.ini file, which is found at C:/Program Files/SAS/SASManagementConsole/9.3:
JavaArgs_14=-Djavax.net.ssl.trustStore = "fully qualified path to keystore created with keytool from step 1"JavaArgs_15=-Djavax.net.ssl.trustStorePassword = "trust store password"
If you are using XMLA Web services or generated Web services, an anonymous user can be configured. The anonymous Web user is configured during SAS Deployment Wizard configuration. Anonymous users cannot use the Web Service Maker; credentials must always be provided to use the Web Service Maker. If you are using XMLA Web services, you can pass user credentials as XMLA properties in the payload.
SAS BI Web Services can also be secured by configuring the Web application server to perform Web authentication. This provides a way for SAS BI Web Services to identify the calling user with basic Web authentication that uses HTTP transport-level security.
Overview of Security for Web Services 199

Note: Web authentication can be used with both XMLA Web services and generated Web services. Web authentication cannot be used with the WebServiceMaker Web service when SAS Management clients are involved because these clients authenticate by using one-time passwords.
Securing SAS BI Web Services for Java
SAS Authentication
The default security configuration for SAS BI Web Services for Java is SAS authentication. In this mode the Web application server does not perform any authentication on behalf of the application. Instead, SAS BI Web Services for Java authenticates client credentials against the configured SAS Metadata Server. Client credentials are obtained by one of the following ways (in this order):
1 Use credentials that are passed in the UsernameToken WS-Security SOAP header. For RESTful invocation, use the credentials passed in the Authorization HTTP header.
2 Use credentials that are passed in the payload as properties (XMLA only).
3 Use anonymous credentials that are configured with the Webanon SAS metadata login account (XMLA and generated Web services).
Typically, the WebServiceMaker service is invoked via the Deploy As Web Service wizard in SAS Management Console. Therefore, this service must be able to process SAS one-time passwords. For this reason the WebServiceMaker service functions only in SAS authentication mode.
Web Authentication
As an alternative to SAS authentication, the application server can be configured to perform the authentication on behalf of the SAS BI Web Services for Java application.
200 Chapter 10 / Administering the SAS BI Web Services

This is known as Web authentication. Beginning with SAS 9.3, Web authentication can also be used with RESTful Web services.
Editing the web.xml File for Third-Party Authentication
If you configure third-party authentication with products such as CA SiteMinder, and use the JavaScript Objects Notation (JSON) and REST Web services, edit the web.xml file. This file is located in the SAS-Installation-Directory \SASWebInfrastructurePlatform\9.3\Configurable\wars\sas.wip.services9.3ear\sas.biws.war\WEB-INF directory. Remove or comment out the following configuration section in the web.xml file (within the SAS BI Web Services WAR file):
<filter> <filter-name>SecurityFilter</filter-name> <filter-class>org.springframework.web.filter.DelegatingFilterProxy </filter-class> <init-param> <param-name>targetBeanName</param-name> <param-value>basicAuthFilter</param-value> </init-param> <init-param> <param-name>targetFilterLifecycle</param-name> <param-value>true</param-value> </init-param></filter><filter-mapping> <filter-name>SecurityFilter</filter-name> <url-pattern>/rest/*</url-pattern></filter-mapping><filter-mapping> <filter-name>SecurityFilter</filter-name> <url-pattern>/json/*</url-pattern></filter-mapping>
Transport-level Security
HTTP transport-level security can be used instead of message-level security. The following security constraints should be applied to the web.xml deployment descriptor (sas.biws.war module with the sas.wip.services9.3.ear application) as follows:
<security-constraint>
Securing SAS BI Web Services for Java 201
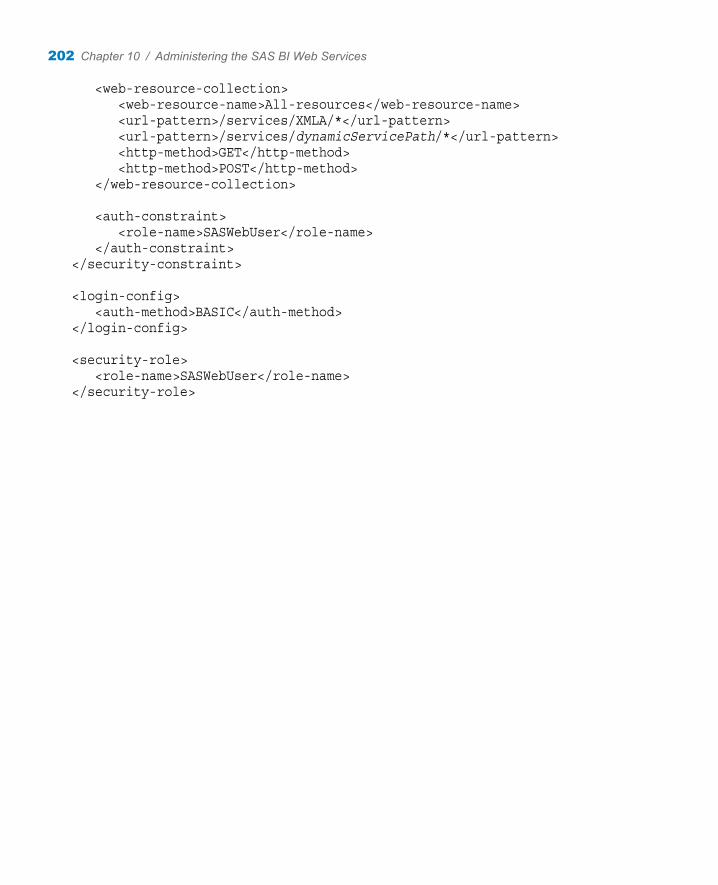
<web-resource-collection> <web-resource-name>All-resources</web-resource-name> <url-pattern>/services/XMLA/*</url-pattern> <url-pattern>/services/dynamicServicePath/*</url-pattern> <http-method>GET</http-method> <http-method>POST</http-method> </web-resource-collection>
<auth-constraint> <role-name>SASWebUser</role-name> </auth-constraint></security-constraint>
<login-config> <auth-method>BASIC</auth-method></login-config>
<security-role> <role-name>SASWebUser</role-name></security-role>
202 Chapter 10 / Administering the SAS BI Web Services

11Administering SAS Web Application Themes
Overview . . . . . . . . . . . . . . . . . . . . . . . . . . . . . . . . . . . . . . . . . . . . . . . . . . . . . . . . . . . . . . . . . . 204Introduction to SAS Web Application Themes . . . . . . . . . . . . . . . . . . . . 204Theme Components . . . . . . . . . . . . . . . . . . . . . . . . . . . . . . . . . . . . . . . . . . . . . . . . . . 204The SAS Default Theme . . . . . . . . . . . . . . . . . . . . . . . . . . . . . . . . . . . . . . . . . . . . . 206How Custom Themes Are Created and Deployed . . . . . . . . . . . . . . . 206
Steps for Defining and Deploying a New Theme . . . . . . . . . . . . . . . . . 207Overview . . . . . . . . . . . . . . . . . . . . . . . . . . . . . . . . . . . . . . . . . . . . . . . . . . . . . . . . . . . . . . . 207Step 1: Design the Theme . . . . . . . . . . . . . . . . . . . . . . . . . . . . . . . . . . . . . . . . . . . 208Step 2: Create a Work Area for the Theme . . . . . . . . . . . . . . . . . . . . . . . 209Step 3: Make Desired Changes to the Styles,
Graphics, and Theme Templates . . . . . . . . . . . . . . . . . . . . . . . . . . . . . . . . . 214Step 4: Rebuild SAS Web Application Themes . . . . . . . . . . . . . . . . . . . 218Step 5: Deploy SAS Web Application Themes in
Your Test Environment . . . . . . . . . . . . . . . . . . . . . . . . . . . . . . . . . . . . . . . . . . . . 218Step 6: Test the New Theme . . . . . . . . . . . . . . . . . . . . . . . . . . . . . . . . . . . . . . . . 219Step 7: Move the New Theme from Test to
Production Environment . . . . . . . . . . . . . . . . . . . . . . . . . . . . . . . . . . . . . . . . . . . 219Step 8: Assign the Default Theme . . . . . . . . . . . . . . . . . . . . . . . . . . . . . . . . . . 220
Deploying SAS Web Application Themes on a Different Web Application Server . . . . . . . . . . . . . . . . . . . . . . . . . . . . . . . . . . . . 221
Overview . . . . . . . . . . . . . . . . . . . . . . . . . . . . . . . . . . . . . . . . . . . . . . . . . . . . . . . . . . . . . . . 221Modify Theme Metadata from the SAS Management Console . 221Modify Theme Metadata with the UpdateTheme.sas Program . 222
203

Deleting a Custom Theme from the Metadata . . . . . . . . . . . . . . . . . . . . . 223
Migrating Custom Themes . . . . . . . . . . . . . . . . . . . . . . . . . . . . . . . . . . . . . . . . . . . . 224Overview . . . . . . . . . . . . . . . . . . . . . . . . . . . . . . . . . . . . . . . . . . . . . . . . . . . . . . . . . . . . . . . 224Migrating Cascading Style Sheets . . . . . . . . . . . . . . . . . . . . . . . . . . . . . . . . . . 224Migrating Images . . . . . . . . . . . . . . . . . . . . . . . . . . . . . . . . . . . . . . . . . . . . . . . . . . . . . 225Migrating Theme Templates . . . . . . . . . . . . . . . . . . . . . . . . . . . . . . . . . . . . . . . . 225Migrating Theme Descriptors . . . . . . . . . . . . . . . . . . . . . . . . . . . . . . . . . . . . . . . 226Special Considerations for SAS Logon Manager . . . . . . . . . . . . . . . . . 226
Overview
Introduction to SAS Web Application Themes
SAS Web Application Themes provide a way to define a consistent look and feel across SAS Web applications. You can use themes to apply uniform visual customizations and company branding to all SAS Web applications that support the theme infrastructure. A typical custom theme might include a banner with a standard corporate color scheme and company logo, a navigation bar with colors that coordinate with the banner, and new colors for borders and title bars.
Theme Components
A theme is a collection of resources that control the appearance of a SAS Web application. The following figure shows the components of a theme:
204 Chapter 11 / Administering SAS Web Application Themes

Figure 11.1 Components of a Theme
Here is an explanation of each theme component:
theme templatesare HTML fragments that render specific portions of pages in SAS Web applications. The templates contain dynamic substitution variables of the form %VARIABLE-NAME that are replaced by application-specific values when the templates are used in SAS Web applications.
cascading style sheetsdetermine the colors, fonts, backgrounds, alignment, and spacing for page elements in SAS Web applications. A cascading style sheet (CSS) is a standard mechanism for defining consistent and reusable presentation for Web-based content.
theme descriptorsare XML files that describe the style sheets, templates, and images that make up a theme.
imagesinclude graphics for icons, a company logo, and banner and page backgrounds. You can incorporate your own customized graphics files as part of a new theme. Images can be in any format supported in the browser, including GIF, PNG, and JPEG.
Note: The application title that appears in the banner of the SAS Web application is not part of the theme. You also cannot use themes to change the application name that appears in the title bar of the browser window.
Overview 205

The SAS Default Theme
The initial theme that is installed with the theme infrastructure is named Default. This theme is typically used as the basis for creating new themes, so you should understand its structure before you attempt to create a custom theme. Specifications for the Default theme are provided in SAS-config-dir\Lev1\Web\Utilities\SASThemeExtensions\specs\Default\index.html.
How Custom Themes Are Created and Deployed
The SAS-config-dir\Lev1\Web\Utilities\SASThemeExtensions directory contains the scripts and resources needed to create a new theme:
n The NewTheme script creates a directory structure for your new theme, and populates it with configuration files that are modified to create a new theme definition. The new theme is based on the SAS default theme that is shipped with the software.
n The specs directory provides documentation for the general color palette and color and image guidelines that are specific to each user interface component. This document is useful when you are designing and defining your custom theme.
Developing a custom theme involves creating CSS files, image files, theme template files, and theme descriptor files. It is possible to create a new theme by authoring these files from scratch, but the task is laborious and requires a thorough understanding of Web page design. The theme infrastructure provides a templating mechanism to simplify the process.
Instead of editing CSS and theme descriptor files directly, template files (extension .vtl) are provided that contain key and value pairs that isolate the elements of the theme that you are likely to want to customize. In addition, context files (extension .vctxt) enable you to create a centralized set of definitions for key values that you can use in place of explicit values to simplify the process of maintaining the template files. When you use the SAS Deployment Manager to rebuild the SAS Web Application Themes, the context files are merged into the template files to create a complete set of shared and product-specific style sheets and theme descriptors. The
206 Chapter 11 / Administering SAS Web Application Themes

build process also packages your new theme into the sas.themes.ear archive file that you deploy to make themes available in your production environment.
Once the theme archive is deployed, users can use the Preferences page in their SAS Web application to apply the new theme (or any of the other themes in the archive). You can also specify the custom theme as the default for all SAS Web applications. This means that the theme is applied automatically for users who do not make a selection on the Preferences page.
Note: Previously, SAS Web Report Studio 3.1 used product-specific branding. Product-specific branding is not available for SAS Web Report Studio 4.3. Use themes to create branding in SAS Web Report Studio 4.3. A few properties for branding that existed in SAS WebReport Studio 3.1 are supported in SAS Web Report Studio 4.3. For information about these properties and usage, see “Customizing Report Styles for SAS Web Report Studio” in Chapter 6 of SAS Intelligence Platform: Web Application Administration Guide.
Steps for Defining and Deploying a New Theme
Overview
SAS provides a default theme for your use. You also have the choice of designing and deploying a custom theme for your environment.
To develop and deploy a new theme, follow these steps:
1 “Step 1: Design the Theme” (See page 208.)
2 “Step 2: Create a Work Area for the Theme” (See page 209.)
3 “Step 3: Make Desired Changes to the Styles, Graphics, and Theme Templates” (See page 214.)
4 “Step 4: Rebuild SAS Web Application Themes” (See page 218.)
Steps for Defining and Deploying a New Theme 207

5 “Step 5: Deploy SAS Web Application Themes in Your Test Environment ” (See page 218.)
6 “Step 6: Test the New Theme” (See page 219.)
7 “Step 7: Move the New Theme from Test to Production Environment” (See page 219.)
8 “Step 8: Assign the Default Theme” (See page 220.)
Note: You might choose to perform steps 3 through 6 iteratively, making limited changes to the theme during each iteration, so that you can more readily determine the effects of each set of changes to the theme. To deploy multiple themes in your environment, follow steps 1 to 6 to design and create your themes. Then follow step 7 to move each theme from test to production environment.
You can deploy multiple themes in your corporate environment. Before deploying the new theme in a production environment, you should first test it in a test environment to ensure that SAS Web applications function as expected with the new theme applied.
Step 1: Design the Theme
Overview
The first step in creating a custom theme is to plan the visual elements. Usually, the new theme is based on an existing design, your organization's intranet standards, another in-house written application, or a purchased application or solution. Some organizations have a standard color palette with color specifications.
Review the specifications for the Default theme at SAS-config-dir\Lev1\Web\Utilities\SASThemeExtensions\specs\Default\index.html, and identify the component keys and image keys for the visual elements that you want to change in the new theme. Establish a set of colors that are compatible with your organization, and choose the images (for example, logos, banner images) you want to use in the new theme.
Generally, you can make the largest impact by updating the background colors, border colors, and text attributes for Web application pages and SAS Information Delivery
208 Chapter 11 / Administering SAS Web Application Themes

Portal portlets. In addition, you might want to replace the SAS logo in the banner with our own organization's logo. If you select a different color palette, consider that you might need to adjust the colors in images to match the new palette.
The Color Palette page at SAS-config-dir\Lev1\Web\Utilities\SASThemeExtensions\specs\Default\html\colorPalette.html lists all 55 color keys of the default theme and specifies the default hexadecimal color value for each color key. It also provides links to documentation on each user interface element where the color is applied.
Options in Designing the Theme
When you create a new theme, there are three ways to define your theme:
n Use the Color Palette and replace the 55 default SAS colors with your organization's palette. The colors are applied automatically across the user interface.
n Specify the color to be used for each interface component. You must specify the color for each context key of the user interface component. This approach takes more time, but it provides maximum flexibility and control.
n Start with the Color Palette, and make individual changes to selected user interface components. This approach overrides how the color palette is applied in some cases.
If you choose to set colors for the context key of each user interface component, the Web pages at SAS-config-dir\Lev1\Web\Utilities\SASThemeExtensions\specs\Default\index.html provide tools and resources to assist you with this process.
Step 2: Create a Work Area for the Theme
To create a work area that contains a copy of the Default theme as a basis for your new theme, use one of the following scripts provided in the SAS-config-dir\Lev1\Web\Utilities\SASThemeExtensions directory:
n for Windows: NewTheme.bat theme-name true
n for UNIX and z/OS: NewTheme.sh theme-name true
Steps for Defining and Deploying a New Theme 209

To use the Color Palette option, the true parameter is required in the command.
Note: The theme name must not contain spaces.
The following figure shows the theme-name directory, which is the root directory for theme resources. The \theme-name\MetadataTools directory contains SAS programs for managing the theme. The Velocity directory contains several subdirectories with files.
Figure 11.2 Subdirectories within SASThemeExtensions Directory
The following figure shows the subdirectory structure that is created under the SAS-config-dir\Lev1\Web\Utilities\SASThemeExtensions\themes\theme-name\themes\theme-name directory.
210 Chapter 11 / Administering SAS Web Application Themes

Figure 11.3 Subdirectories for Images, Styles, and Templates
Here is an explanation of the folders and their contents:
\theme-name\themes\theme-name\imagescontains the standard collection of images for SAS Web applications that use the theme infrastructure. The images are divided into the following subdirectories by category:
Commoncontains images that are commonly used in SAS Web applications.
Componentscontains images for the collection of components (widgets) that are shared by SAS Web applications.
Steps for Defining and Deploying a New Theme 211

WRScontains images for SAS Web Report Studio.
\theme-name\themes\theme-name\stylescontains a cascading style sheet file named custom.css that can be used to define additional style elements for the theme. This file is empty when the work area is created.
\theme-name\themes\theme-name\templatescontains theme templates, which are HTML fragments that render specific portions of pages in SAS Web applications. The template files are divided into the following subdirectories by category:
Commoncontains theme templates for page elements that are commonly used in SAS Web applications.
Componentscontains theme templates for the collection of components that are shared by SAS Web applications.
WRScontains theme templates for elements in SAS Web Report Studio pages.
The following figure shows the subdirectories below the SAS-config-dir\Lev1\Web\Utilities\SASThemeExtensions\themes\theme-name\Velocity directory.
212 Chapter 11 / Administering SAS Web Application Themes

Figure 11.4 Subdirectories within the Velocity Directory
Here is an explanation of the contents of the directories:
\theme-name\Velocity\Stylesheets\_shared\contexts\themescontains a context file named theme-name.vctxt that defines context values for font families and standard colors that can be used in CSS templates.
\theme-name\Velocity\Stylesheets\Common\contexts\themes\theme-name
contains CSS template files that are used to build style sheets for page elements that are commonly used in SAS Web applications, including portal.theme-name.vtl, sasStyle.theme-name.vtl, and sasScorecard.theme-name.vtl.
Steps for Defining and Deploying a New Theme 213

\theme-name\Velocity\Stylesheets\Components\contexts\themes\theme-name
contains a CSS template file named components.theme-name.vtl that is used to build style sheets for the collection of components that are shared by SAS Web applications.
\theme-name\Velocity\Stylesheets\WRS\contexts\themes\theme-namecontains a CSS template file named wrs.theme-name.vtl that is used to build style sheets for SAS Web Report Studio.
\theme-name\Velocity\ThemeDescriptors\contextscontains a context file named theme-name.themeDescriptor.vctxt that defines context values that can be used in theme descriptor templates.
\theme-name\Velocity\ThemeDescriptors\contexts\custom\theme-namecontains theme descriptor template files for building the XML files that define the available collections of style sheets, theme templates, and images, including ComponentsThemes.vtl, CustomThemes.vtl, SASThemes.vtl, SolutionsThemes.vtl, and WRSThemes.vtl. The SemanticThemes.vtl file is added in the second maintenance release for SAS 9.3.
If you were to build the new theme at this point, it would be a fully functional duplicate of the Default theme.
Step 3: Make Desired Changes to the Styles, Graphics, and Theme Templates
Changing Colors
To make style changes to specific page features, you must first identify the component key associated with that feature and then locate the CSS template file that sets the value for that key.
For example, suppose your new theme design calls for changing the color for the title text in the banner at the top of SAS Web applications. The Banner specifications at the Themes Web site SAS-config-dir\Lev1\Web\Utilities\SASThemeExtensions\specs\Default\Components\html\Banner.html
214 Chapter 11 / Administering SAS Web Application Themes

show that the context key for the title text is Banner_Title_Text_Color and it displays its context value.
Each Themes Web page displays the context keys and context values.
You can specify a new color explicitly, as follows:
Banner_Title_Text_Color=#e69b00
Because components.theme-name.vtl is a CSS template file, another option is to use the generic color values that are defined in the theme-name.vctxt file in the \Velocity\Stylesheets\_shared\contexts\themes subdirectory of the work area for the new theme. For example, you might specify the following value instead of an explicit value:
Banner_Title_Text_Color=${Color53}
The corresponding color value is substituted in the resulting CSS when the new theme is built.
The general form for using a context value in a template file is ${context-value-name}. Using context values instead of explicit values can make it easier to maintain the theme because you can change all component keys that use a given value by making one change to the context file.
Changing Graphics
Image files are located in three subdirectories located in the SAS-config-dir\Lev1\Web\Utilities\SASThemeExtensions\specs\Default folder. These
Steps for Defining and Deploying a New Theme 215

subfolders are: Common, Components, and WRS. The properties of each image are defined in the Theme Descriptors files.
The process for customizing images is similar to that for customizing styles. For example, suppose your new theme design calls for changing the background image for the banner at the top of SAS Web applications. A review of the Banner specifications at SAS-config-dir\Lev1\Web\Utilities\SASThemeExtensions\specs\Default\index.html shows that the image key for the banner background is banner_background. A search for that string in the work area for the new theme shows the following IMAGE element in the ComponentsThemes.vtl file in the Velocity\ThemeDescriptors\custom\theme-name subdirectory of the work area:
<Image name="banner_background" ... file="BannerBackground.gif"/>
You can change the image used for the banner background image in either of the following ways:
n by replacing the existing BannerBackground.gif file in the themes\theme-name\images\Components subdirectory of the work area with a revised image with the same name. Make sure that the new image has the following criteria:
o The filename of the new graphic is identical to the filename of the graphic being replaced.
o The new graphic is in the same format as the original image (for example, .jpg or .gif).
o The dimensions of the new graphic and its pixels are same as the graphic being replaced.
If you need to change the size, filename, or the image format of the graphic, modify the theme descriptor. For example, if you replace the logo.gif file with a new file called myLogo.jpg that has a width of 300 pixels and height of 70 pixels, modify the ComponentsThemes.vtl file as follows:
<Image name="logo" description="My Logo" altTextKey="desktop.logo.text"appliesTo="ALL" width="300" height="70" file="myLogo.jpg"/>
n by changing the FILE= attribute in the IMAGE element in the ComponentsThemes.vtl context file to point to a different image file.
216 Chapter 11 / Administering SAS Web Application Themes

Note: You should not change the value of the NAME= attribute in the IMAGE element. SAS Web applications depend on the NAME= attributes remaining constant.
Another common image change is to replace the SAS logo in the standard banner with your organization's logo. You can change the graphic used for the banner logo either by replacing the existing logo.gif file in the themes\theme-name\images\Components subdirectory of the work area with a copy of your logo with that filename or by changing the target of the FILE= attribute for the IMAGE element in the ComponentsThemes.vtl context file for which the NAME= attribute has the value logo.
Note: In the second maintenance release for SAS 9.3, the SAS Logon Manager application uses graphics from the themes\theme-name\images\semantic directory. For more information, see “Special Considerations for SAS Logon Manager” on page 226.
When customizing images, you should ensure that the replacement graphics have approximately the same dimensions as the original graphics. Otherwise, the images might disrupt the appearance of the applications in which they are used.
Changing Theme Templates
You should make changes to theme templates only in situations where you want to change the layout of a page element (for example, to change the logo's placement in the banner or to adjust the padding between rows in a menu). If you decide to alter a theme template, proceed with caution. SAS Web applications rely on the template structure being consistent with the versions that are shipped with the software. Improper changes to theme templates might prevent SAS Web applications from functioning properly. In particular, do not change the dynamic substitution variables in theme templates because SAS Web applications expect the existing values.
Dynamic substitution variables should not be changed in theme templates because SAS Web applications expect the existing values. However, if you need to change a dynamic substitution variable, here is an example where %BANNER_TITLE is the dynamic substitution variable:
<td nowrap id=”bantitle”class="banner_title">%BANNER_TITLE</td>
Steps for Defining and Deploying a New Theme 217

Note: When a new release of themes is installed at your site or an upgrade is performed, the existing theme template files are replaced by the new theme template files. If you have customized theme template files and want to retain them for future use, copy them to a different location before the installation or upgrade.
Additional Considerations
Another change that you might want to make when creating your new theme is to update the theme_displayName= element in the theme-name.themeDescriptor.vctxt file in the Velocity\ThemeDescriptors\contexts subdirectory of the work area. Provide a descriptive name for the new theme. The name is used in the selection list of available themes in the Preferences page in SAS Web applications.
Step 4: Rebuild SAS Web Application Themes
To rebuild the EAR file for SAS Web Application Themes and register your themes in metadata, follow the steps provided in “Rebuild Web Applications” on page 126.
The rebuilt SAS Web Application Themes archive file ( sas.themes.ear) can be found in the SAS-config-dir\Lev1\Web\Staging directory. It should now contain a new Web archive (WAR) file for the new theme named sas.theme.theme-name.war.
Step 5: Deploy SAS Web Application Themes in Your Test Environment
To deploy the rebuilt SAS Web Application Themes to your Web application server in a test environment, see “Redeploying the SAS Web Applications” on page 129.
If you chose to configure your Web application server manually or deployed the SAS Web applications manually, see your Instructions.html generated by the SAS Deployment Wizard.
218 Chapter 11 / Administering SAS Web Application Themes

Step 6: Test the New Theme
After you have completed the deployment procedures, follow these steps to test the new theme:
1 Navigate to the portal in the production environment.
2 Log on and select Options Preferences. The new theme should appear as a selection on the Preferences page.
3 Select the new theme and observe the effect of the changes that you made in “Step 3: Make Desired Changes to the Styles, Graphics, and Theme Templates” on page 214. To view the new theme, log off from the portal. Then log on to the portal to view the new theme that was applied.
4 Repeat the procedures outlined in “Steps for Defining and Deploying a New Theme ” on page 207 until you are satisfied with the display of the new theme.
If you test the new theme several times, log off from the portal and log on again to view the updated theme each time.
Step 7: Move the New Theme from Test to Production Environment
To move a theme from a test to a production environment, follow these steps:
n Copy the entire contents of the SAS-config-dir\Lev1\Web\Utilities\SASThemeExtensions directory to the same directory path on the production machine.
n Run SAS Deployment Manager, and use the Rebuild Web Applications option to register the theme in the metadata. See “Step 4: Rebuild SAS Web Application Themes” on page 218.
n Rebuild SAS Web Application Themes and deploy to your Web application server. See “Step 5: Deploy SAS Web Application Themes in Your Test Environment ” on page 218.
Steps for Defining and Deploying a New Theme 219

n Assign the new theme as the default theme. See “Step 8: Assign the Default Theme” on page 220.
Step 8: Assign the Default Theme
Overview
If you want your new or custom theme to be the default theme for all users who have not selected a theme for themselves in their application's Preferences, then you should set the new theme as the default.
There are two ways to modify the theme metadata:
n Use SAS Management Console. See “Assign the Default Theme from SAS Management Console” on page 220.
n Use the UpdateDefaultTheme.sas program. See “Assign the Default Theme with the UpdateDefaultTheme.sas Program” on page 221.
Assign the Default Theme from SAS Management Console
To assign a new theme as the default theme by using the SAS Management Console, follow these steps:
1 Deploy the new EAR file by using the appropriate procedures for your Web application server.
2 In SAS Management Console, on the Plug-ins tab, navigate to Application Management Configuration Manager SAS Application Infrastructure and right-click to display the SAS Application Infrastructure Properties dialog box.
3 Click the Settings tab.
4 In the Default Theme field, enter the name of your theme.
5 Click OK to exit the SAS Application Infrastructure Properties window.
6 To enable the new theme to go into effect, restart SAS Remote Services and the Web Infrastructure Platform in the Web application server.
220 Chapter 11 / Administering SAS Web Application Themes

Assign the Default Theme with the UpdateDefaultTheme.sas Program
To assign a theme as the default theme, use the UpdateDefaultTheme.sas program located in the SAS-config-dir\Lev1\Web\Utilities\SASThemeExtensions\themes\theme-name\MetadataTools directory. After the UpdateDefaultTheme.sas program has been run, the new theme will be in effect for users who have not selected a different theme on their Preferences page.
If SAS is not installed on the middle tier machine, copy the UpdateDefaultTheme.sas program to the metadata server, and submit the SAS program on that machine.
Deploying SAS Web Application Themes on a Different Web Application Server
Overview
Typically, SAS Web Application Themes are deployed along with other SAS Web applications on the same Web application server. If you want to deploy themes to a different Web application server, you should modify the theme metadata.
There are two ways to modify the theme metadata:
n Use SAS Management Console. See “Modify Theme Metadata from the SAS Management Console” on page 221.
n Use the UpdateTheme.sas program. See “Modify Theme Metadata with the UpdateTheme.sas Program” on page 222.
Modify Theme Metadata from the SAS Management Console
To deploy SAS Web Application themes to a different Web application server and modify the theme metadata, follow these steps:
Deploying SAS Web Application Themes on a Different Web Application Server 221

1 Deploy the new EAR file by using the appropriate procedures for your Web application server.
2 In SAS Management Console, navigate to Application Management Configuration Manager, right-click on Theme Name, and select Properties.
3 On the Connection tab, complete the following:
Select the communication protocol (either http or https).
Enter the host name of the Web application server on which the theme is deployed.
Enter the port number of the Web application server.
Enter the name of the new theme in the Service field.
4 Click OK to save your changes.
5 To enable the new theme to go into effect, restart your Web application server.
Modify Theme Metadata with the UpdateTheme.sas Program
To deploy SAS Web Application themes to a different Web application server and modify the theme metadata, follow these steps:
1 Deploy the new EAR file by using the appropriate procedures for your Web application server.
2 Locate the UpdateTheme.sas program in the SAS-config-dir\Lev1\Web\Utilities\SASThemeExtensions\themes\theme-name\MetadataTools directory.
3 Modify the following fields in the UpdateTheme.sas:
%let themeName=Theme Name;Specify the name of the theme to update.
222 Chapter 11 / Administering SAS Web Application Themes

%let hostName=Host Name;Specify the host name of the Web application server on which the theme is deployed.
%let port=Port;Specify the port number of the Web application server.
%let URLPath=base URL;Specify the application context root of the new theme as deployed on the Web application server.
%let protocol=http;If you are using Secure Sockets Layer (SSL), specify https instead of http as the protocol for the URL.
4 Run the UpdateTheme.sas program.
5 To enable the new theme to go into effect, restart your Web application server.
Deleting a Custom Theme from the Metadata
To delete a custom-developed theme from the deployment for the SAS Information Delivery Portal, use the DeleteTheme.sas program located in the SAS-config-dir\Lev1\Web\Utilities\SASThemeExtensions\themes\theme-name\MetadataTools directory.
If SAS software is not installed on the middle-tier machine, copy the DeleteTheme.sas program to the metadata server, and submit the program on that system machine.
Deleting a Custom Theme from the Metadata 223

Migrating Custom Themes
Overview
To apply a custom theme that you developed for an earlier release to SAS 9.3 Web applications, follow these steps:
1 Create a new theme structure. For information about creating a work area in which to construct the new version of your existing theme, see “Step 2: Create a Work Area for the Theme” on page 209.
2 Migrate the cascading style sheets used in your theme.
3 Migrate the images used in your theme.
4 Migrate the theme templates.
5 Migrate the descriptors used in your theme.
Migrating Cascading Style Sheets
Before attempting to move any CSS files from an existing theme to the \themes\theme-name\styles subdirectory of the work area for the new theme, you should first review the specifications for the Default theme at SAS-config-dir\Lev1\Web\Utilities\SASThemeExtensions\specs\Default\index.html. For any feature for which a component key has been defined, you should update the corresponding component key values in the CSS template (.vtl) files in the \Velocity\Stylesheets\Common\contexts\themes\theme-name, \Velocity\Stylesheets\Components\contexts\themes\theme-name, and \Velocity\Stylesheets\WRS\contexts\themes\theme-name subdirectories of the work area to achieve a compatible look and feel.
Custom style sheet files are required only if you need to provide theme support to features that are not covered by the CSS templates. For each style sheet file that you
224 Chapter 11 / Administering SAS Web Application Themes

add, you must ensure that a corresponding STYLESHEET element is added to in the appropriate theme descriptor template (.vtl) file in the \Velocity\ThemeDescriptors\contexts\custom\theme-name subdirectory of the work area for the new theme. The STYLESHEET element must specify the value all for its PRODUCT= attribute.
Migrating Images
Before attempting to move any image files from an existing theme to the \themes\theme-name\images subdirectory of the work area for the new theme, see the image specifications for the Default theme at SAS-config-dir\Lev1\Web\Utilities\SASThemeExtensions\specs\Default\index.html. If the image from the existing theme replaces one of the images in the new theme, then you should ensure that the image from the existing theme is saved over the default image in the proper directory under the \themes\theme-name\images subdirectory. If the image from the existing theme does not replace an image in new theme, save it in the \themes\theme-name\images\Common subdirectory.
For each image file that you update or add, you must ensure that a corresponding IMAGE element is present in the appropriate theme descriptor template (.vtl) file in the \Velocity\ThemeDescriptors\contexts\custom\theme-name subdirectory of the work area for the new theme.
Migrating Theme Templates
Before attempting to move any theme template files from an existing theme to the \themes\theme-name\templates subdirectory of the work area for the new theme, you should consider carefully whether they are compatible with the SAS Web applications. SAS Web applications rely on the theme template structure being consistent with the versions that are shipped with the software. Theme templates must have the expected set of dynamic substitution variables in order for the applications to function properly.
Migrating Custom Themes 225

Migrating Theme Descriptors
The theme descriptor template (.vtl) files in the \Velocity\ThemeDescriptors\contexts\custom\theme-name subdirectory of the work area for the new theme should represent the structure of the migrated theme resources. Review the files to ensure the following:
n If you add cascading style sheet files to provide theme support for features that are not covered by CSS templates, ensure that you add corresponding new STYLESHEET elements to the STYLES section.
n For each image file that you update or add, ensure that you update or add a corresponding IMAGE element in the IMAGES sections.
n If you migrate existing theme template files, ensure that you update or add a corresponding TEMPLATE element in the TEMPLATES sections to reflect the change.
Special Considerations for SAS Logon Manager
Changes in the Second Maintenance Release for SAS 9.3
In the second maintenance release for SAS 9.3, the SAS Logon Manager Web application uses two different designs: "logon classic" and "logon corporate." The classic design is used with SAS Web applications that use mostly HTML and JSP. The corporate design is used with SAS Web applications that use mostly Adobe Flash technology.
The corporate design uses a different directory for images and a template file than the classic design. When you migrate your custom themes, review whether your custom images or template changes should also be added to the following images and themes.
Migrating the Logon Logo Image
To migrate a custom logo image for the logon page:
1 Change the context file to point to a new logo image.
226 Chapter 11 / Administering SAS Web Application Themes

a Edit SAS-config-dir\Lev1\Web\Utilities\SASThemeExtensions\theme-name\Velocity\ThemeDescriptors\custom\theme-name\SemanticThemes.vtl
b Change the following line to specify to a different image path.
<Image name="logo_png" file="semantic/logo.png"description="SAS: The Power to Know" altTextKey="image.sas.logo.txt" />
If you want to use your existing customer logo.gif, then change the entry to resemble the following example:
<Image name="logo_png" file="logo.gif"description="your-description-here" altTextKey="image.sas.logo.txt" />
TIP You can change or remove the description attribute. It is used as a tooltip for the logo image.
2 Add styles to your theme's SAS-config-dir\Lev1\Web\Utilities\SASThemeExtensions\theme-name\themes\theme-name\styles\custom.css file. Adjust some of the values in the following example, depending on the dimensions of your logo image and the desired appearance.
.figure1 img { width: your-image-widthpx; height: your-image-heightpx;}
.figure1 { width: 100%; min-width: your-image-widthpx; max-width: your-image-widthpx;}
.logonabout { margin-bottom: 0em;}
.banner .clearfix { display: none;}
.logonhd { height: 5.0em;
Migrating Custom Themes 227

}
.logonhd h1 { padding-top: 1em;}
Logon Banner Background Image
To migrate your logon banner background image:
1 Create a new image and copy it to a new location.
a Create a new PNG version of your custom image at SAS-config-dir\Lev1\Web\Utilities\SASThemeExtensions\theme-name\themes\theme-name\images\Components\BannerBackground.gif and name it BannerBackground.png. You can use an application like Microsoft Paint to do this.
b The dimensions of BannerBackground.png are 781x145 pixels. The dimensions of BannerBackground.gif are 1063x479 pixels. You might need to resize your new image to match the size of BannerBackground.png. Again, you can use an application like Microsoft Paint to make the change.
c Copy BannerBackground.png to SAS-config-dir\Lev1\Web\Utilities\SASThemeExtensions\theme-name\themes\theme-name\images\semantic\.
2 If you want your BannerBackground.png image to repeat, then add a style override to the SAS-config-dir\Lev1\Web\Utilities\SASThemeExtensions\theme-name\themes\theme-name\styles\custom.css file:
.banner { background: url("../images/semantic/BannerBackground.png") repeat-x scroll left top transparent;}
TIP As an alternative to step 1, you can change the URL value to specify a different image, if you prefer.
Note: The corporate design shares the .banner style with the classic design. If you include the preceding .banner style in your custom.css file, then the
228 Chapter 11 / Administering SAS Web Application Themes

BannerBackground.png appears in the corporate design—which might be undesirable. You can either create a BannerBackground.png image that works well for both the classic and corporate designs, or you can eliminate BannerBackground.png by adding the following style to your custom.css file:
.banner { background: none;}
Logon Banner Background Color
This setting applies to the classic design only. If you want to change the banner background color that is to the right of the banner background image, edit SAS-config-dir\Lev1\Web\Utilities\SASThemeExtensions\theme-name\Velocity\Stylesheets\Common\contexts\themes\theme-name\logon.theme-name.vtl. Change the Logon_Classic_Banner_Background_Color value.
LogonArtTile.gif File
This file is not used in the new logon page for the classic or corporate designs. You do not need to migrate it.
LogonArtTop.gif File
To migrate your custom LogonArtTop.gif file:
1 Copy your custom LogonArtTop.gif from SAS-config-dir\Lev1\Web\Utilities\SASThemeExtensions\theme-name\images\Common\ to SAS-config-dir\Lev1\Web\Utilities\SASThemeExtensions\theme-name\images\semantic\.
2 If you want this image to repeat down the page from top to bottom, edit the custom.css file and add a repeat-y attribute as shown in the following example:
.content { background: url("../images/semantic/LogonArtTop.gif") repeat-y scroll 0 5em transparent;}
Migrating Custom Themes 229

TIP As an alternative to step 1, you can change the URL value to specify a different image, if you prefer.
Note: Similar to the .banner style, the .content style is used by both the classic and corporate designs. One setting might not look attractive on both designs. If you want to eliminate the graphic from the designs, you can set it to none (background: none;).
Colors for the Classic Design
To customize the color for the About link that appears in the banner for the classic design:
1 Edit SAS-config-dir\Lev1\Web\Utilities\SASThemeExtensions\theme-name\Velocity\Stylesheets\Common\contexts\themes\theme-name\logon.theme-name.vtl.
2 Change the Logon_Classic_About_Link_Color value to a color that works well with your custom theme's Banner_UtilityBar_Background_Color value in SAS-config-dir\Lev1\Web\Utilities\SASThemeExtensions\theme-name\Velocity\Stylesheets\Common\contexts\themes\theme-name\components.theme-name.vtl.
3 Change the additional About colors as needed. These are Logon_Classic_About_Link_Focus_Color and Logon_Classic_About_Link_Hover_Background_Color.
4 Adjust other Logon_Classic* colors in the logon.theme-name.vtl, as needed.
Colors for the Corporate Design
To customize the colors for the corporate design:
1 Edit SAS-config-dir\Lev1\Web\Utilities\SASThemeExtensions\theme-name\Velocity\Stylesheets\Common\contexts\themes\theme-name\logon.theme-name.vtl.
This file is used by the classic and corporate designs. The rest of the instructions apply to modifying the corporate-related design colors.
230 Chapter 11 / Administering SAS Web Application Themes

2 Change the page body color:
a Change Logon_Corporate_Body_Background_Color to one in your theme’s color palette or set to white (#FFFFFF) to match the classic design.
b Set Logon_Corporate_Body_Background_Gradient_Start_Color and Logon_Corporate_Body_Background_Gradient_End_Color to the same color as Logon_Corporate_Body_Background_Color.
3 Change the page text color by setting Logon_Corporate_Page_Text_Color to one in your theme’s color palette or set to black (#000000) to match the classic design.
4 Change the About link colors:
a Change the Logon_Corporate_About_Link_Color value to a color that works well with your custom theme's color palette.
b Change additional About colors as needed. These are Logon_Corporate_About_Link_Focus_Color and Logon_Corporate_About_Link_Hover_Background_Color.
5 Adjust other Logon_Corporate* colors in the logon.theme-name.vtl, as needed.
Additional Changes for the Corporate Design
If you are migrating the corporate design, edit the SAS-config-dir\Lev1\Web\Utilities\SASThemeExtensions\theme-name\themes\theme-name\styles\custom.css file and add the following styles:
body { filter: none; -ms-filter: none;}#page { /* * The following is required to override background image. It does not * inherit the color key value. */ background: insert-Logon_Corporate_Body_Background_Color-value;}.logonabout a:link { text-shadow: none;
Migrating Custom Themes 231

}.logonabout a:hover { background: none;}.logonhd h1 { text-shadow: none;}.message { background: none; filter: none;}.message h2 { text-shadow: none;}.message.info { text-shadow: none;}.message.error { text-shadow: none;}.message.warning { text-shadow: none;}.main { background: none; -moz-border-radius: 0px; -webkit-border-radius: 0px; -khtml-border-radius: 0px; border-radius: 0px;}
Rebuild SAS Themes
After previous changes are made to migrate your custom theme, run SAS Deployment Manager to rebuild the SAS Themes application. When this is complete, redeploy SAS Themes to your application server and restart the application server.
232 Chapter 11 / Administering SAS Web Application Themes

12Administering SAS Flex Application Themes
Overview of SAS Flex Application Themes . . . . . . . . . . . . . . . . . . . . . . . . 233Introduction to SAS Flex Application Themes . . . . . . . . . . . . . . . . . . . . . 233Benefits of SAS Flex Application Themes . . . . . . . . . . . . . . . . . . . . . . . . . 234Location of SAS Flex Application Themes . . . . . . . . . . . . . . . . . . . . . . . . 234
Deploying SAS Flex Application Themes on a Different Web Application Server . . . . . . . . . . . . . . . . . . . . . . . . . . . . . . . . . . . . 235
Overview of SAS Flex Application Themes
Introduction to SAS Flex Application Themes
Some SAS Web applications, such as SAS BI Dashboard and SAS BI Portlets, are displayed with the Flex interface that is provided by SAS Flex Application Themes. At start-up time, Flex applications load Flex themes automatically. A theme consists of ShockWave Flash (SWF) files that include cascading style sheets (CSS) files. The theme content is downloaded to the client and is cached by the user's Web browser. As a result, subsequent uses of the Web application result in quicker loading of theme content than it is at initial loading. The SAS Corporate theme is the default theme for all Flex applications.
233

Themes can be created with the SAS Theme Designer for Flex. For information about custom themes for Flex applications, see SAS Theme Designer for Flex User’s Guide.
Benefits of SAS Flex Application Themes
SAS Flex Application Themes are required for Flex applications, and they are downloaded as SWF files to the client's Web browser. Flex theme content runs within the Adobe Flash player and offers the following benefits:
n SAS Flex Application Themes coexist with SAS Web Application Themes. For example, SAS Information Delivery Portal uses the default Web theme, but it displays SAS BI Portlets with SAS Flex Application Themes.
n Applications that use SAS Flex Application Themes offer more visual impact, interactivity, and responsiveness.
n Improved visual impact and perceived depth are achieved through the use of skins. Skins are graphics that are applied to common user interface components that change their appearance. For example, the Corporate theme provides skins with a color palette that reflects the SAS visual identity. Skins also include some stylized graphics in the user interface.
Location of SAS Flex Application Themes
SAS Flex Application Theme files are located in the following directories:
n SAS-config-dir\Lev1\Web\Staging\exploded\sas.flexthemes3.4.ear
n SAS-config-dir\Lev1\Web\Staging\sas.flexthemes3.4.ear
234 Chapter 12 / Administering SAS Flex Application Themes

Deploying SAS Flex Application Themes on a Different Web Application Server
Typically, SAS Flex Application Themes are deployed along with other SAS Web applications on the same Web application server. If you want to deploy themes to a different Web application server, follow these steps:
1 Deploy the EAR file by using the appropriate procedures for your Web application server.
2 In SAS Management Console, navigate to Application Management Configuration Manager SAS Application Infrastructure, right-click Flex Application Themes, and select Properties.
3 On the Connection tab, complete the following:
n Select the communication protocol (either http or https).
n Enter the host name of the Web application server on which the theme is deployed.
n Enter the port number of the Web application server.
n Click OK to save your changes.
n To enable the new theme location to take effect, restart your Web application server.
Deploying SAS Flex Application Themes on a Different Web Application Server 235

236 Chapter 12 / Administering SAS Flex Application Themes

13Administering Multicast Options
Overview of Multicasting . . . . . . . . . . . . . . . . . . . . . . . . . . . . . . . . . . . . . . . . . . . . . . 238
How Much Multicast Network Traffic is Generated? . . . . . . . . . . . . . 239
Configuring Multicast Options . . . . . . . . . . . . . . . . . . . . . . . . . . . . . . . . . . . . . . . 239Applications That Use Multicast Communication . . . . . . . . . . . . . . . . . 239Multicast Options Configuration Files for SAS
Remote Services . . . . . . . . . . . . . . . . . . . . . . . . . . . . . . . . . . . . . . . . . . . . . . . . . . . . 240Multicast Options Configuration Files for Web
Application Servers . . . . . . . . . . . . . . . . . . . . . . . . . . . . . . . . . . . . . . . . . . . . . . . . . 240Multicast Options Configuration Files for SAS BI
Report Services . . . . . . . . . . . . . . . . . . . . . . . . . . . . . . . . . . . . . . . . . . . . . . . . . . . . . 241Key Multicast Properties . . . . . . . . . . . . . . . . . . . . . . . . . . . . . . . . . . . . . . . . . . . . . 241
Configuring a Multicast Authentication Token . . . . . . . . . . . . . . . . . . . . 243Understanding the Multicast Authentication Token . . . . . . . . . . . . . . . 243Reconfiguring to Use a Multicast Authentication Token . . . . . . . . . 244
Configuring the JGroups Bind Address . . . . . . . . . . . . . . . . . . . . . . . . . . . . 246Understanding JGroups the Bind Address . . . . . . . . . . . . . . . . . . . . . . . . 246Setting the Bind Address for SAS Remote Services . . . . . . . . . . . . . 247Setting the Bind Address for JBoss Application Server . . . . . . . . . . 248Setting the Bind Address for Oracle WebLogic Server . . . . . . . . . . 248Setting the Bind Address for IBM WebSphere
Application Server . . . . . . . . . . . . . . . . . . . . . . . . . . . . . . . . . . . . . . . . . . . . . . . . . . 249Setting the Bind Address for the Report Output
Generation Tool . . . . . . . . . . . . . . . . . . . . . . . . . . . . . . . . . . . . . . . . . . . . . . . . . . . . . 249
237

Overview of Multicasting
Multicast communication is used to communicate among SAS middle-tier applications in a single SAS deployment (the set of applications connected to the same SAS Metadata Server). When installation is performed with the SAS Deployment Wizard, the wizard generates a default multicast address that is based on IP address of the SAS Metadata Server. The combination of multicast address and multicast UDP port number must be different for each SAS deployment and also different from any other multicast applications at your site.
The multicast communication includes all the information that is needed to bootstrap the SAS middle-tier applications. Because this information includes the SAS environment credentials (such as the sasadm account name and its password), time to live (TTL) and encryption options are provided to secure the multicast communication.
Multicast options are specified as JVM options. Multicast options provide the ability to tune and change the behavior of the multicast communication that occurs within the SAS deployment. The multicast address and UDP port number must match the values in the Web application server's start-up script (for example, SASServer1.bat) and the environment.properties file located in the SAS-config-dir\Lev1\Web\Applications\RemoteServices directory.
Administering multicast options typically involves the following:
n setting options such as the multicast address
n configuring security with a multicast authentication token
n configuring the bind address that is used for multicast communication
238 Chapter 13 / Administering Multicast Options

How Much Multicast Network Traffic is Generated?
The amount of multicast network traffic that is generated by SAS applications is fairly small. The greatest amount of traffic is generated during application start up. When SAS Remote Services starts, the largest packet that it generates is 124 bytes. Once startup is complete, the typical rate is less than 64 Kb per hour.
When the Web application server starts, the largest packet is 256 bytes. Once startup is complete, the typical rate for an entire SAS Enterprise Business Intelligence Server deployment (including SAS Remote Services) is less than 128 Kb per hour.
Once the applications are generating multicast traffic, the amount of traffic is steady regardless of the load on the SAS Web applications.
Configuring Multicast Options
Applications That Use Multicast Communication
Multicast options should be changed in a synchronous manner among the following applications:
n SAS Remote Services
n any Web application server that is used for a SAS Web application
n SAS BI Report Services Report Output Generation tool (if applicable)
Configuring Multicast Options 239

Multicast Options Configuration Files for SAS Remote Services
You can make changes to the multicast options for the JVM that is used by SAS Remote Services. Edit the appropriate files as needed.
On Windows, in directory SAS-config-dir\Lev1\Web\Applications\RemoteServices, change the following files:
n RemoteServices.bat.
n wrapper.conf.
n environment.properties
On UNIX and z/OS, edit the RemoteServices.sh and environment.properties files.
Multicast Options Configuration Files for Web Application Servers
You can make changes to multicast options for any Web application server that is used for a SAS Web application. Edit the appropriate files as needed:
JBoss on Windows:
n Edit the JBOSS_HOME\bin\SASServer1.bat file.
n Edit the JBOSS_HOME \server\SASServer1\wrapper.conf file.
For JBoss on UNIX and z/OS, edit the SASServer1.sh file.
For deployments that use Oracle WebLogic Server, the multicast options are set as server start arguments with the administration console, and they must also be added to the SAS-config-dir\Lev1\Web\SASDomain\bin\setDomainEnv.cmd file. For deployments that use IBM WebSphere Application Server, the multicast options are set in the application server process definition. For more information about setting JVM options, see your product documentation.
240 Chapter 13 / Administering Multicast Options

Multicast Options Configuration Files for SAS BI Report Services
If the SAS BI Report Services Report Output Generation tool is used, then set multicast options for the Report Output Generation tool as well. The multicast options are set in the SAS-install-dir\SASBIReportServices\4.31\outputgen.ini file.
Key Multicast Properties
The following table shows some key multicast properties.
Table 13.1 Multicast Properties
Property Default Value Unit Description
multicast.address 239.X.Y.Z Not applicable This value is provided by the SAS Deployment Wizard prompting mechanism and defaults to 239.X.Y.Z. Values for X, Y, and Z are the last three octets of the metadata server's IP address.In an IPv6 environment, the value defaults to ff14::/16.
multicast.port 8561 Not applicable This value is provided by the SAS Deployment Wizard prompting mechanism and represents the port on which UDP communication occurs.
Configuring Multicast Options 241

Property Default Value Unit Description
multicast_udp_ip_ttl
1 Decimal. Specifies how far a multicast packet should be forwarded from a sending host.0 is restricted to the same host.1 is restricted to the same subnet.32 is restricted to the same site.64 is restricted to the same region.128 is restricted to the same continent.255 is unrestricted.
The IP multicast routing protocol uses the Time to Live (TTL) field of IP datagrams to decide how far a multicast packet should be forwarded from a sending host. The default TTL for multicast datagrams is 1, which results in multicast packets going only to other hosts in the local network.If all SAS applications participating in the multicast (this includes Remote Services, any Java applications in the middle tier, and BI Report Services) are on the same machine, the value should be 0.If your site has a SAS middle-tier application that resides on a different subnet but uses the same metadata server within the same SAS deployment, increase the value for this property.
multicast.security Not applicable Not applicable By default (with no value), both encryption and authentication are enabled. Valid values are:n ENCRYPT: encrypt but do not
require authenticationn NONE: do not encrypt and do
not require authentication
multicast.config.file
Not applicable URL string (file://, http://, and so on)
By default, a JGroups configuration is provided. However, you can provide your own configuration by specifying the URL path to that configuration. This option enables you to specify a port range or change from IP multicast to the gossip router capabilities of JGroups.
242 Chapter 13 / Administering Multicast Options

Configuring a Multicast Authentication Token
Understanding the Multicast Authentication Token
By default, the multicast communication is protected with encryption because it conveys credentials. This default setting for encryption uses a fixed encryption key that is built into the software and is common to all SAS middle-tier software. This strategy prevents access to the multicast communication from unauthorized listeners. This setting might be sufficient for deployments where multicast communication is isolated from the user community with a firewall, a TTL option, or the deployment is in an isolated data center.
If your middle tier meets any of the following criteria, then you might want to set a multicast authentication token value:
n the middle-tier environment is not well isolated from end-user access
n the security procedures at your site require protection among administrative and operational staff in various roles
n you want more protection against eavesdroppers and unauthorized participants
For these deployments, set a multicast authentication token value that is known only to the appropriate personnel. A multicast authentication token is a password-like string that is needed to connect to the multicast group and create a site-specific encryption key. In a multi-tier configuration, the SAS Deployment Wizard displays a prompt for a multicast authentication token on each tier that has an application participating in multicast communication. The same authentication token value must be specified for each tier in the same SAS deployment (each tier associated with the same metadata server).
The multicast authentication token has an interaction with the multicast.security property. By default, clients that want to join a multicast group to receive messages are required to provide an authentication token for the join request. (This is true whether a custom token value is used or if the default token value that is built into the software is used.) If you determine this process is causing an impact on performance, or that it is
Configuring a Multicast Authentication Token 243

unnecessary, you can disable the use of authentication tokens. If you set the multicast.security property to NONE, encryption and authentication are disabled. If you set the property to ENCRYPT, then encryption is enabled with no authentication of the join request.
Reconfiguring to Use a Multicast Authentication Token
Generate a Token and Set the Token for SAS Remote Services
1 Use SAS and the PWENCODE procedure to generate an encoded password to use as the multicast authentication token. For example, {SAS002}DA9A0A5C20629B7F34D2C88A165E5530.
2 Edit the SAS-config-dir\Lev1\Web\Applications\RemoteServices\RemoteServices.bat file to add a -DMULTICAST_AUTHENTICATION_TOKEN JVM option.
For Windows, add the option in the runasScripts section:
:runasScriptsset MULTICAST_AUTHENTICATION_TOKEN=token
For UNIX and z/OS, add the option to the RemoteServices.sh file after the SERVERUSER variable:
SERVERUSER=sas
MULTICAST_AUTHENTICATION_TOKEN="token"export MULTICAST_AUTHENTICATION_TOKEN
3 For Windows, also add the JVM option to the wrapper.conf file. Add it to the end of the wrapper.java.additional.11 entry:
wrapper.java.additional.11=-XX:+UseTLAB -XX:+UseConcMarkSweepGC -XX:+DisableExplicitGC -Dsun.rmi.dgc.client.gcInterval=3600000 -Dsun.rmi.dgc.server.gcInterval=3600000 -Djava.awt.headless=true -Xss256k -XX:NewSize=16m -XX:MaxNewSize=16m -XX:PermSize=64m -XX:MaxPermSize=64m -DMULTICAST_AUTHENTICATION_TOKEN=token
Note: Do not use carriage returns or line feed characters when editing long lines.
4 Restart SAS Remote Services.
244 Chapter 13 / Administering Multicast Options

Setting the Token for JBoss Application Server
1 For deployments on Windows, edit the JBOSS_HOME\server\SASServer1\wrapper.conf Add a wrapper.java.additional.nn entry that is similar to the following:
wrapper.java.additional.36=-Dcom.sas.log.config.url=file:///C:/SAS/Config/...wrapper.java.additional.37=-DMULTICAST_AUTHENTICATION_TOKEN=token
2 Edit the JBOSS_HOME\bin\SASServer1.bat file. Add the JVM option to the JAVA_OPTS variable:
set JAVA_OPTS=-DMULTICAST_AUTHENTICATION_TOKEN=token-Xms256m -Xmx512 ...
3 Restart the Web application server.
Setting the Token for WebLogic Server
1 Edit the SAS-config-dir\Lev1\Web\SASDomain\bin\setDomainEnv.cmd file. Add the JVM option to the USER_MEM_ARGS variable for SASServer1:
if "%SERVER_NAME%" == "SASServer1" ( set USER_MEM_ARGS=-DMULTICAST_AUTHENTICATION_TOKEN=token -Dsas.server.name=Server
2 Use the WebLogic Server administration console to access the Server Start tab for SASServer1.
3 Add -DMULTICAST_AUTHENTICATION_TOKEN=token to the Arguments field.
4 Restart the Web application server.
Setting the Token for WebSphere Application Server
1 Use the Integrated Solutions Console to access the Java Virtual Machine for the application server.
2 Add -DMULTICAST_AUTHENTICATION_TOKEN=token to the Generic JVM arguments field.
3 Restart the Web application server.
Configuring a Multicast Authentication Token 245

Setting the Token for the Report Output Generation Tool
1 Edit the SAS-install-dir\SASBIReportServices\4.31\outputgen.ini file.
2 Add a JavaArgs_nn entry that is similar to the following:
JavaArgs_13=-Dsas.app.launch.picklist=picklist;"help\primary.picklist"JavaArgs_14=-DMULTICAST_AUTHENTICATION_TOKEN=tokenClasspath=-cp "<VJRHOME>/eclipse/plugins/sas.launcher.jar"
Configuring the JGroups Bind Address
Understanding JGroups the Bind Address
SAS middle-tier applications use JGroups to perform multicast communication between applications and to perform caching of application properties. The JGroups software binds to the IP address of first non-loopback network interface that it can detect on the machine. Many machines have multiple network interfaces (multihomed), and each network interface has its own IP address. In some cases, the Web application server selects the value of InetAddress.getLocalHost().getHostName() as the bind address to use for multicast communication and SAS Remote Services selects a different IP address to bind to.
Multicast communication does not function correctly if the IP address selected by JGroups for SAS Remote Services does not match the IP address selected by the Web
246 Chapter 13 / Administering Multicast Options

application server. One indication of a mismatch is an error message that appears in the Web application server log file. See the following example:
13:39:35,602 ERROR [ContextLoader] Context initialization failedorg.springframework.beans.factory.BeanDefinitionStoreException: Invalid beandefinition with name 'dashboardServices' defined in ServletContext resource[/WEB-INF/spring-config/services-config.xml]: Could not resolve placeholder 'metadata.user'
ERROR [main] – ****************************************************************ERROR [main] – Required entry, '/sas/properties/environment', not found in the cache.ERROR [main] – Possible causes include: the RemoteServices VM is not started orERROR [main] – there is a multicast address/port mismatch; using ERROR [main] – address=239.168.68.1 and port=8561.ERROR [main] – ****************************************************************
Set the bind address for SAS Remote Services, the Web application server, and the SAS BI Report Services Report Generation tool if the previous error message is seen.
Setting the Bind Address for SAS Remote Services
1 For deployments on Windows, edit the SAS-config-dir\Lev1\Web\Applications\RemoteServices\wrapper.conf file. Add a wrapper.java.additional.nn entry that is similar to the following:
wrapper.java.additional.12=-Dlog4j.configuration="..."wrapper.java.additional.13=-Djgroups.bind_addr=ip-address
2 Edit the SAS-config-dir\Lev1\Web\Applications\RemoteServices\RemoteService.bat file. Add the JVM option in the start2 section:
:start2 start "SAS Remote Services" "%JAVA_JRE_COMMAND%" ^ -classpath "%CLASSPATH%" ^ -Dsas.ext.config="C:\Program Files\SASHome\sas.java.ext.config" ^ -Djgroups.bind_addr=ip-address
3 Restart SAS Remote Services.
Configuring the JGroups Bind Address 247

Setting the Bind Address for JBoss Application Server
1 For deployments on Windows, edit the JBOSS_HOME\server\SASServer1\wrapper.conf file. Add a wrapper.java.additional.nn entry that is similar to the following:
wrapper.java.additional.33=-Dcom.sas.log.config.url=file:///C:/SAS/Config...wrapper.java.additional.34=-Djgroups.bind_addr=ip-address
2 Edit the JBOSS_HOME\bin\SASServer1.bat file. Add the JVM option to the JAVA_OPTS variable:
set JAVA_OPTS=-Djgroups.bind_addr=ip-address -Xms256m -Xmx512 ...
3 Restart the Web application server.
Setting the Bind Address for Oracle WebLogic Server
1 Edit the SAS-config-dir\Lev1\Web\SASDomain\bin\setDomainEnv.cmd file. Add the JVM option to the USER_MEM_ARGS variable for SASServer1:
if "%SERVER_NAME%" == "SASServer1" ( set USER_MEM_ARGS=-Djgroups.bind_addr=ip-address -Dsas.server.name=Server
2 Use the WebLogic Server administration console to access the Server Start tab for SASServer1.
3 Add -Djgroups.bind_addr=ip-address to the Arguments field.
4 Restart the Web application server.
248 Chapter 13 / Administering Multicast Options

Setting the Bind Address for IBM WebSphere Application Server
1 Use the Integrated Solutions Console to access the Java Virtual Machine for the application server.
2 Add -Djgroups.bind_addr=ip-address to the Generic JVM arguments field.
3 Restart the Web application server.
Setting the Bind Address for the Report Output Generation Tool
1 Edit the SAS-install-dir\SASBIReportServices\4.31\outputgen.ini file.
2 Add a JavaArgs_nn entry that is similar to the following:
JavaArgs_13=-Dsas.app.launch.picklist=picklist;"help\primary.picklist"JavaArgs_14=-Djgroups.bind_addr=ip-addressClasspath=-cp "<VJRHOME>/eclipse/plugins/sas.launcher.jar"
Configuring the JGroups Bind Address 249

250 Chapter 13 / Administering Multicast Options

14SAS Configuration Scripting Tools
Overview . . . . . . . . . . . . . . . . . . . . . . . . . . . . . . . . . . . . . . . . . . . . . . . . . . . . . . . . . . . . . . . . . . 252
Special Considerations . . . . . . . . . . . . . . . . . . . . . . . . . . . . . . . . . . . . . . . . . . . . . . . . 253
Scripting Tool for WebLogic Server . . . . . . . . . . . . . . . . . . . . . . . . . . . . . . . . . 254Building the WebLogic Server Domain on Another Machine . . . . 254Rebuilding the WebLogic Server Configuration . . . . . . . . . . . . . . . . . . . 256Executing a Batch Script . . . . . . . . . . . . . . . . . . . . . . . . . . . . . . . . . . . . . . . . . . . . . 256Executing a Single Command . . . . . . . . . . . . . . . . . . . . . . . . . . . . . . . . . . . . . . . 257Executing Commands Interactively . . . . . . . . . . . . . . . . . . . . . . . . . . . . . . . . . 257Properties Reference . . . . . . . . . . . . . . . . . . . . . . . . . . . . . . . . . . . . . . . . . . . . . . . . . 258
Scripting Tool for JBoss Application Server . . . . . . . . . . . . . . . . . . . . . . 276Building the Server Configuration on Another Machine . . . . . . . . . . 276Rebuilding the JBoss Configuration . . . . . . . . . . . . . . . . . . . . . . . . . . . . . . . . 278Configuring a Single Resource (Preproduction) . . . . . . . . . . . . . . . . . . 279Command Syntax . . . . . . . . . . . . . . . . . . . . . . . . . . . . . . . . . . . . . . . . . . . . . . . . . . . . . 279Properties Reference . . . . . . . . . . . . . . . . . . . . . . . . . . . . . . . . . . . . . . . . . . . . . . . . . 281
Scripting Tool for WebSphere Application Server . . . . . . . . . . . . . . . 290Building the WebSphere Application Server Cell
on Another Machine . . . . . . . . . . . . . . . . . . . . . . . . . . . . . . . . . . . . . . . . . . . . . . . . 290Rebuilding the WebSphere Application Server Configuration . . 292Adding, Updating, and Upgrading SAS Software . . . . . . . . . . . . . . . . . 292Executing an Alternative Batch Script . . . . . . . . . . . . . . . . . . . . . . . . . . . . . . 292Executing a Single Task . . . . . . . . . . . . . . . . . . . . . . . . . . . . . . . . . . . . . . . . . . . . . 293Command Syntax . . . . . . . . . . . . . . . . . . . . . . . . . . . . . . . . . . . . . . . . . . . . . . . . . . . . . 293
251

Properties Reference . . . . . . . . . . . . . . . . . . . . . . . . . . . . . . . . . . . . . . . . . . . . . . . . . 298
Overview
The configuration scripting tools enable administrators to perform the following tasks:
n Create the Web application server configuration rather than following the manual instructions. If the automatic configuration option was disabled in the SAS Deployment Wizard, then the SAS Deployment Wizard provides an Instructions.html file that describes the configuration steps to perform the Web application server configuration. You can use the configuration scripting tools to perform these steps automatically instead of manually.
n Create the Web application server configuration on another machine. This is useful for sites that do not permit running the SAS Deployment Wizard on the middle-tier machine. The middle-tier environment is archived, copied to the target machine, and then the configuration scripting tools can be used to configure the SAS middle-tier environment. For information about preparing to install and performing the installation, see SAS Intelligence Platform: Installation and Configuration Guide.
n Rebuild the Web application server configuration. The results are identical to what is performed by the SAS Deployment Wizard and SAS Deployment Manager.
The SAS configuration scripting tools also enable an administrator to perform the following additional tasks:
n Use a command line to perform a configuration operation on a single resource. For example, creating a server instance can be performed with a single command.
n Run the configuration scripting tools in interactive mode to perform a series of commands that are entered by hand. This feature is available for WebLogic Server deployments only.
n Edit property files that are associated with specific resources and then update the resources with the configuration scripting tools.
252 Chapter 14 / SAS Configuration Scripting Tools

n Use existing property files as templates for creating additional resources. For example, an administrator can copy the definitions for SASServer1 to a new file and then use it as a template to create a new server instance.
Special Considerations
n If you are rebuilding or reconfiguring a Web application server, then make sure that all the Web application servers are stopped. For deployments that use WebLogic Server, also stop the administrative server and the nodemanager server. For deployments that use WebSphere Application Server, stop all the applications in the cell. This includes the deployment manager and the nodeagent server.
n For reconfiguration tasks and adding servers, make sure that you avoid port number conflicts.
n The configuration scripting tools do have the ability to perform administration like starting and stopping servers. However, the tools are not intended to replace the administration utilities provided by the Web application server vendor or the start and stop scripts provided by SAS.
n If you encounter errors while configuring resources such as a JDBC data source, it is possible to use the administrative console for WebSphere Application Server or WebLogic Server to delete the resource, check the settings in your properties files, and try the configuration again.
n If you encounter errors while configuring a WebSphere Application Server cell or profile, or while configuring a WebLogic Server domain, consider removing the configuration. For WebSphere Application Server, this might involve removing profiles with the manageprofiles command.
n If you encounter errors while configuring JBoss, review the properties that are being used by the tool and rerun the tool. The tool can be run many times without deleting the configuration between runs, so long as JBoss is not running. If JBoss starts in between runs, there can be locks on files that prevent subsequent runs from succeeding.
Special Considerations 253

Scripting Tool for WebLogic Server
Building the WebLogic Server Domain on Another Machine
Some sites separate the administration of SAS applications and the administration of Web application servers. For sites that do not permit running the SAS Deployment Wizard on the Web application server machine, the configuration scripting tool can be used to configure a WebLogic Server domain. The configuration scripting tool is archived from the machine where the SAS Deployment Wizard was run and provided to the Web application server administrator. The configuration scripting tool can configure WebLogic Server identically to what is created with an automated deployment with SAS Deployment Wizard. The configuration scripting tool is located in SAS-config-dir\Lev1\Web\Scripts\WebLogic. The name of the command is saswls.cmd. The wlst.commands.txt file in the same directory contains all the commands that are needed to configure the domain. The following example shows the syntax for using the configuration scripting tool to configure domain:
saswls.cmd wlst.commands.txt
Note: For UNIX deployments, the command is named saswls.sh.
If the Cache Credentials check box was not selected on the Web Application Server: Scripting Configuration page in the SAS Deployment Wizard, then you are prompted for credentials when you run the command.
When the configuration scripting tool is used to create the domain, after the script completes, the domain is configured with all the resources that are needed for the SAS Web applications. The configuration scripting tool deploys the applications and starts the servers.
1 On the Web application server machine, create the directory structure that was used on the machine where the SAS Deployment Wizard was run. The following commands are examples for a Windows environment:
mkdir c:\SAS\Config\Lev1\Web\Staging
254 Chapter 14 / SAS Configuration Scripting Tools

mkdir c:\SAS\Config\Lev1\Web\Scriptsmkdir c:\SAS\Config\Lev1\Web\Commonmkdir c:\SAS\Config\Lev1\Web\Tempmkdir c:\SAS\Config\Lev1\AppData
Note: These directory paths must be archived from the machine where the SAS Deployment Wizard was run. The archive must be transferred to the Web application server machine.
2 Extract the archive into the directories that were created in the previous step.
3 Open the Scripts\Weblogic\props\global.properties file in a text editor. Review the properties to make sure that values for the JDK path, WebLogic Server installation path, host names, and ports are accurate.
4 Begin the configuration by running saswlst.cmd wlsct.commands.txt.
If the Cache Credentials check box was not selected on the Web Application Server: Scripting Configuration page in the SAS Deployment Wizard then monitor the progress because the tool prompts you for credentials. The following code is an example:
16 Dec 2011 14:28:08,730 - CredentialsDialogPrep-processCredentials: Determine if credentials need to be solicited for those resources that require authentication...
*=*=*=*=*=*=* BEGIN Prompting for credentials *=*=*=*=*=*=*
------------------------------------------------------------------------Please enter credentials for: SAS Trusted UserEnter username: sastrust@saspwIs "sastrust@saspw" correct? (y/n): yUsername "sastrust@saspw" accepted.Enter password:Re-enter password:
5 If this is the first time the scripting tool is run on the machine, then there is a prompt to confirm that you want to create a key file:
Creating the key file can reduce the security of your system if it is not kept in a secured location after it is created. Do you want to create the key file? y or n
Scripting Tool for WebLogic Server 255

After the configuration scripting tool runs and WebLogic Server is configured, some additional tasks must be performed manually on the machine where the SAS Deployment Wizard was run. (For a multiple-machine deployment, this is the machine where the middle-tier configuration was performed.) These tasks are recorded in the Instructions.html file that is generated by the SAS Deployment Wizard. Before you perform those tasks, confirm or correct the JDK_HOME environment variable that is identified in SAS-config-dir\Lev1\level_env.bat . For UNIX deployments, the file is named level_env.sh. Open the file in an editor and make sure that the value for JDK_HOME identifies the path to a JDK or JRE.
Rebuilding the WebLogic Server Configuration
You can rebuild the WebLogic Server configuration by running the configuration scripting tool. The tool can re-create the entire WebLogic Server configuration and restore it to the originally configured state. The tool reads the commands in the commands file and configures the resources according to the settings in the properties files.
Executing a Batch Script
You can supply a file that contains a series of commands for the configuration scripting tool to execute. This approach is the same strategy that is used for rebuilding the domain with the commands listed in the wlst.commands.txt file. However, you can supply a file with different commands to configure different resources. The following example shows the syntax for using the configuration scripting tool with a commands file that is named cmds.txt:
saswls.cmds cmds.txt
In the batch script file, the commands take the following form:
<operation> <resource_type> <resource_name>
The following example shows the commands for undeploying and redeploying the SAS Web Application Themes:
undeploy application sas.themes.eardeploy application sas.themes.ear
256 Chapter 14 / SAS Configuration Scripting Tools

Executing a single command from the command line uses the same three parts for the command syntax.
If you are creating a resource that requires credentials, such as a data source, remember to create property keys in the credentials.properties file.
Executing a Single Command
You can execute a single command on a single resource from a command line. The following example shows how to undeploy SAS Web Application Themes:
saswls.cmd undeploy application sas.themes.ear
Executing Commands Interactively
In addition to running the configuration scripting tool in batch mode or executing a single command, the configuration scripting tool can be run interactively. The following example shows how to check the status of the SASServer1 server instance:
saslws.cmd
Initializing WebLogic Scripting Tool (WLST) ...
Welcome to WebLogic Server Administration Scripting Shell
Type help() for help on available commands
29 Apr 2011 13:44:43,134 - Running in script mode, forcing autoConfigure and autoDeploy.Enter commands interactively:Usage: operation type name> check server SASServer1...RUNNINGDisconnected from weblogic server: AdminServer***** This step took 1.9210000038146973 seconds to complete. *****operation completed with return code '0'
The command syntax and operations can be found by entering help at the interactive command prompt. The following display shows the results of the help command:
saswls operation resource_type resource_name [additional_options]
Scripting Tool for WebLogic Server 257

additional options that can appear anywhere on the command line to launch the script:
credentials=file_namepromptMode=TEXT|GRAPHIC
valid resource types (supported operations):
application (compile deploy undeploy)connectionfactory (create delete)dataSource (create delete)domain (create customize listservers listjmsservers createloginmodule)foreignjndiprovider (create)jdbcprovider (create delete)jmsServer (create delete)mailSession (create delete)nodemanager (start stop)policy (set)queue (create delete)server (check create delete start stop)topic (create delete)user (create)
Properties Reference
Global Properties
Property files are used by the configuration scripting tool to configure the middle-tier environment. These properties are found in SAS-config-dir/Lev1/Web/Scripts/Weblogic/props. Each of the properties are described in the following list:
SASDomainNameis the name of the WebLogic Server domain that is used for the SAS Web applications. This property is not used by the configuration scripting tool. This property is used by SAS Deployment Wizard to generate documentation only.
SASWlstScriptHomeidentifies the fully qualified path to the configuration scripting tool directory.
adminHostis the host name of the administration server for this domain.
258 Chapter 14 / SAS Configuration Scripting Tools

adminJvmOptionsis the list of JVM options for the administration server.
adminPortis the port number that the administration server listens on.
adminSSLPortis the port number for SSL communication with the administration server. This value can be set in the properties file, but the configuration scripting tool do not support configuring servers with SSL.
adminServerNameis the name of the administration server. This property is not currently used by the configuration scripting tool. The name is always AdminServer.
adminServiceNameis the Windows service name for the administration server. This property is used to generate the scripts that install Windows services.
adminUrlis the URL that is used by the wlst command to connect to the administration server.
applicationStagingDiris the fully qualified path to the staging directory for the SAS Web applications. This property is not used by the configuration scripting tool. This property is used to generate documentation only.
autoConfigureis a Boolean value. If set to false, then manual configuration is requested and the SAS Deployment Wizard creates a sample domain and configures servers in off-line mode only. All configuration steps that are run outside of SAS Deployment Wizard and SAS Deployment Manager are automated regardless of this setting.
autoDeployis a Boolean value. If set to false, then the SAS Deployment Wizard does not deploy the SAS Web applications. This property is not used by the configuration scripting tool. This property is used by SAS Deployment Wizard to generate documentation.
Scripting Tool for WebLogic Server 259

backupBinDiridentifies the fully qualified path to a directory that is used to save previous versions of the scripts in the domain/bin directory.
bitwidthOptionis used to set the -d64 JVM option for machines that need this JVM option. This property is used in the commEnvSAS.sh script.
configureJMSSecurityis used by SAS Deployment Wizard to generate documentation only.
domainChangesis used to generate a report of configuration changes in the instructions that are generated by SAS Deployment Wizard or SAS Deployment Manager. It is not used by the configuration scripting tool.
domainDiridentifies the fully qualified path to the domain to configure.
hostis the host name for this machine.
isAdminHostis a Boolean value. If the administration server is installed on this machine, then set this value to true.
javaHomeset this property to the same value as the JAVA_HOME environment variable. The property is inherited by the managed servers and tool that are launched by the configuration scripting tool.
javaVendoridentifies the Java vendor. Values include Sun, Oracle, IBM, BEA, and HP. The values are case sensitive.
jdkBugWorkaroundis set to a JVM option that is required by most recent JDKs. Do not modify this property.
260 Chapter 14 / SAS Configuration Scripting Tools

loginModuleFileidentifies the path of the JAAS loginModuleFile that is set as a JVM option for WebLogic managed servers.
midtierMulticastIpJavaOptionsis a list of JVM options that configure multicast communications with the SAS Remote Services application. These values must match the values used by the SAS Remote Services application.
minimumUlimitis the minimum acceptable unlimit setting for file descriptors on UNIX machines. The create domain operation fails if a lower setting is detected.
mwHomeDiridentifies the Oracle middleware home directory (MW_HOME). This is typically the parent directory of the WebLogic Server installation directory, but the WebLogic Server installers permit installing WebLogic Server in a different location.
nodeManagerPortis the port number that the nodemanager server for this domain is listening on.
osLinuxVendoris set to a valid Linux vendor name. Values are redhat or SuSE. The values are case sensitive. On other operating systems, the value is set to UNKNOWN. This value is used in the commEnvSAS.sh script.
osLinuxVersionidentifies the Linux operating system version number. On other operating systems, the value is set to UNKNOWN.
osTypeidentifies the operating system type. Values are win or unx. The values are case sensitive.
pythonCachedirOptionidentifies the location of the Python cache. This value is passed to the wlst command line.
Scripting Tool for WebLogic Server 261

rcFileNameidentifies the fully qualified path to a file that is used by wlst commands to return values in properties and return code status.
returnCodePropertiesidentifies the fully qualified path to the return code properties file that maps return code keys to numeric values. Do not change this property.
startScriptidentifies the fully qualified path to the domain setup script. This file is named setDomainEnv.cmd or setDomainEnv.sh.
templateDirectoryNameidentifies the fully qualified path to the directory that contains the velocity templates. The templates are used to create scripts in the domain/bin directory.
webappsrvScriptingCacheCredentialsis a Boolean value. If set to true, then credential values are cached in the credentials.properties file. If set to false, then values are purged from credentials.properties when the configuration scripting tool exits.
webauthIsCommentis set to the string or character that is used as a comment. Several lines are included in commEnvSAS.cmd or commEnvSAS.sh for the support of Web authentication. These lines are commented out unless you have manually modified the SAS deployment to support Web authentication. If Web authentication is configured, then this property contains an empty value.
weblogicBarNameis a string that is used to create the name of the Windows services in installNodeMgrSvc.cmd and uninstallNodeMgrSvc.cmd.
weblogicHomeidentifies the fully qualified path to the WebLogic Server installation. The WL_HOME environment variable is set to this value in generated scripts.
262 Chapter 14 / SAS Configuration Scripting Tools

weblogicInstalledis a Boolean value. Set to true to indicate that WebLogic Server is installed on the machine that is used for the SAS middle tier. This value is used to generate documentation and is not used by the configuration scripting tool.
weblogicNodeManagerServiceNameis the Windows service name for the nodemanager server.
weblogicProdNameis the WebLogic product name that is used as part of the Windows service name for the nodemanager server.
weblogicReconfiguredis a Boolean value. This property is set to true if the last SAS Deployment Wizard run was a reconfiguration. This property is used to generate documentation only and is not used by the configuration scripting tool.
weblogicSelectedVersionis used by SAS Deployment Wizard to generate documentation only. It is not used by the configuration scripting tool.
Credential Properties
All properties that are related to credentials are stored in the credentials.properties file. The tool prompts you for these properties. This properties file does not need to be edited directly. These values are cleared from the file after the tool completes if the global property webappsrvScriptingCacheCredentials is set to false. When stored, these values are stored in SAS base-64 encoding, not clear-text. If you chose to store passwords in this file, then they are updated when you use the Update passwords feature of the SAS Deployment Manager.
datasource.create_resource_passwdis the data source user password.
datasource.create_resource_useridis the data source user name.
domain.create_WeblogicAdmin_passwdis the WebLogic Server administrator password.
Scripting Tool for WebLogic Server 263
domain.create_WeblogicAdmin_useridis the WebLogic Server administrator user.
domain.createloginmodule_SASTrust_passwdis the SAS Trusted User password.
domain.createloginmodule_SASTrust_useridis the SAS Trusted User. This identity is used to configure the JAAS login module.
mailsession.create_SASMailSession_passwdis the mail session user password.
mailsession.create_SASMailSession_useridis the mail session user ID. This credential is used only if the mailsession property mailsrvRequiresAuthentication is set to true.
user.create_resource_passwdis the WebLogic Server user's password.
user.create_resource_useridis the WebLogic Server default realm user ID.
Resource Properties
Each property file governs the configuration of a specific resource. The next section lists and describes a group of properties that are common to many resources. The subsequent sections identify properties that are specific to each resource type.
Properties Common to Many Resources
The following properties are common to a number of resource types.
deletedis a Boolean value. If set to true, then this resource has been marked as deleted.
deletedTargetsis a comma-separated list of target servers that contain this resource that are marked for deletion. A Delete operation removes these targets and removes the resource if no targets remain.
targetsis a comma-separated list of servers that this resource instance is targeted to.
264 Chapter 14 / SAS Configuration Scripting Tools

thisOperationis a field that is used internally by SAS Deployment Wizard and SAS Deployment Manager to manage resource files. It is not used by the configuration scripting tool.
thisTargetis a field that is used internally by SAS Deployment Wizard and SAS Deployment Manager to manage resource files. It is not used by the configuration scripting tool.
Application Properties
These resources represent applications deployed in a WebLogic Server domain. The properties files are named in the pattern application.application_name.properties. For information about how these properties control WebLogic Server configuration, see the online Help in the WebLogic Administration Console. More information is available in the WebLogic Server documentation on the Oracle Web site. The WebLogic Server 10.3.3 documentation for this resource is available at http://download.oracle.com/docs/cd/E14571_01/apirefs.1111/e13952/taskhelp/applications/DeployEnterpriseApplications.html.
applicationNameis the name of the SAS Web application.
applicationPathidentifies the fully qualified path to the application archive file or directory.
compileMaxMemoryis the -Xmx option used on the weblogic.appc command line when compiling a Web application.
docApplicationNameis the name of the application that is used in documentation. This property is used by SAS Deployment Wizard to generate documentation. It is not used by the configuration scripting tool.
loadOrderis the application load order.
Scripting Tool for WebLogic Server 265

Data Source Properties
Data source properties are used to configure data source resources in WebLogic. The resource files are named in the pattern datasource.datasource_name.properties. For information about how these properties control WebLogic Server configuration, see the online Help in the WebLogic Administration Console. More information is available in the WebLogic Server documentation on the Oracle Web site. The WebLogic Server 10.3.3 documentation for this resource is available at http://download.oracle.com/docs/cd/E14571_01/web.1111/e13737/toc.htm.
capacityIncrementis the number of connections that are created when new connections are added to the connection pool.
classPathis the classpath that includes the JAR files required for the JDBC driver. This classpath is used only to keep track of JDBC JAR files used by the various data sources and the JDBC providers.
databaseServerURLis the JDBC URL for communication with the database server.
datasourceNameis the data source name. This name must be unique in a WebLogic Server domain.
driverNameis the fully qualified JDBC driver class name.
globalTransactionsProtocolis the global transactions protocol. Values include TwoPhaseCommit, LoggingLastResource, OnePhaseCommit, EmulateTwoPhaseCommit, and None. SAS applications depend on correct settings. Do not change this property.
initialCapacityis the number of physical connections to create when creating the connection pool.
inputJarLocationidentifies the fully qualified path for the directory where the JDBC driver JAR files have been staged.
266 Chapter 14 / SAS Configuration Scripting Tools
jdbcDriverJarDiridentifies the fully qualified path for the directory where the JDBC driver JAR files are copied and used by the configuration.
jndiNameis the data source JNDI name. This name is configured in application configuration files and should not be changed without corresponding changes to the applications that use this datasource.
keepLogicalConnOpenOnReleaseis a Boolean value. If set to true, then it enables WebLogic Server to keep the logical JDBC connection open for a global transaction when the physical XA connection is returned to the connection pool.
keepXaConnTillTxCompleteis a Boolean value. If set to true, then it enables WebLogic Server to keep the logical JDBC connection open for a global transaction when the physical XA connection is returned to the connection pool. SAS applications might depend on particular JDBC transaction settings. Do not change this property.
loginDelaySecondsis the number of seconds to delay before creating each physical database connection. This delay supports database servers that cannot handle multiple connection requests in rapid succession.
maxCapacityis the maximum number of physical connections that this connection pool can contain.
needTxCtxOnCloseis a Boolean value. If set to true, it specifies whether the XA driver requires a distributed transaction context when closing various JDBC objects (result sets, statements, connections, and so on). This property applies only to connection pools that use an XA driver. SAS applications might depend on particular JDBC transaction settings. Do not change this property.
optionsis a list of properties that are passed to the JDBC driver. The options are used to create physical database connections.
Scripting Tool for WebLogic Server 267

shrinkFrequencySecondsis the number of seconds to wait before shrinking a connection pool that has incrementally increased to meet demand.
testConnectionsOnReserveis a Boolean value. If set to true , then WebLogic Server can test a connection before giving it to a client. (This feature requires that you specify a value for testTableName.)
testTableNameis the name of the database table to use when testing physical database connections. This name is required when you specify a Test Frequency and enable Test Reserved Connections.
xaEndOnlyOnceis a Boolean value. If set to true, then it specifies that XAResource.end() is called only once for each pending XAResource.start(). This option prevents the XA driver from calling XAResource.end(TMSUSPEND) and XAResource.end(TMSUCCESS) successively. This property applies to data sources that use an XA driver only. SAS applications might depend on particular JDBC transaction settings. Do not change this property.
Domain Properties
Most domain configuration properties are defined in global.properties. The file domain.domainName.properties contains properties needed exclusively to create a new domain and is not required by operations on other resources.
domainTemplatePathidentifies the fully qualified path to the template JAR file that is used to create the domain.
Foreign JNDI Provider Properties
Resources are stored in properties files that are named in the pattern foreignjndiprovider.resource.properties. For information about how these properties control WebLogic Server configuration, see the online Help in the WebLogic Administration Console. More information is available in the WebLogic Server documentation on the Oracle Web site. The WebLogic Server 10.3.3 documentation for
268 Chapter 14 / SAS Configuration Scripting Tools

this resource is available at http://download.oracle.com/docs/cd/E14571_01/apirefs.1111/e13952/taskhelp/jndi/ConfigureForeignJNDIProvider.html.
foreignJNDINameis the foreign JNDI Name for a linked name.
foreignLinkNameis the user-specified name of the foreign JNDI link MBean instance.
foreignProviderNameis the user-specified name of the foreign JNDI MBean instance.
foreignProviderURLis the foreign provider URL that is used to make connections to the remote server.
initialContextFactoryis the initial context factory to use to connect. This class name depends on the JNDI provider and the vendor that are being used. The value corresponds to the standard JNDI property, java.naming.factory.initial.
localJNDINameis the local JNDI name for a linked name.
JDBC Provider Properties
JDBC provider properties are used to configure JDBC drivers in WebLogic Server. The resource files are named in the pattern jdbcprovider.resource_name.properties. WebLogic Server does not use the concept of a JDBC provider. These properties are used by the SAS Deployment Wizard to manage the JDBC driver JAR files only.
classPathis the classpath that includes the JAR files required for the JDBC driver. This is used only to keep track of JDBC JAR files used by the various data sources and the JDBC providers.
inputJarLocationidentifies the fully qualified path for the directory where the JDBC driver JAR files have been staged.
Scripting Tool for WebLogic Server 269

jdbcDriverJarDiridentifies the fully qualified path for the directory where the JDBC driver JAR files are copied and used by the configuration.
jdbcProvideris a name that is used to keep track of the JAR files related to this JDBC driver by a particular application. This name must be unique in a WebLogic Server domain.
JMS Resource Properties
Three types of JMS resources are supported. Depending on the type of resource, they are stored in properties files that are named in the pattern connectionfactory.resource.properties, queue.resource.properties, or topic.resource.properties. For information about how these properties control WebLogic Server configuration, see the online Help in the WebLogic Administration Console. More information is available in the WebLogic Server documentation on the Oracle Web site. The WebLogic Server 10.3.3 documentation for this resource is available at http://download.oracle.com/docs/cd/E14571_01/web.1111/e13738/toc.htm.
cfXAEnabledis a Boolean value. If set to true, then it indicates whether an XA queue or XA topic connection factory is returned, instead of a queue or topic connection factory. This property applies to connection factories only. SAS applications might depend on particular JDBC transaction settings. Do not change this property.
jmsModuleNameis the name of the JMS system module to target this resource to.
jmsServerNameis the name of the JMS server instance to which this module is targeted.
jndiNameis the global JNDI name used to look up the destination within the JNDI namespace. This name is configured in application configuration files and should not be changed without corresponding changes to the applications that use this JMS resource.
resourceNameis the name of this JMS resource.
270 Chapter 14 / SAS Configuration Scripting Tools

resourceTypeis the type of JMS resource to be configured. Supported values are ConnectionFactory, Queue, and Topic.
subdeploymentNameis the name of the subdeployment with which this resource is associated.
JMS Server Properties
Resources are stored in properties files that are named in the pattern jmsserver.resource.properties. For information about how these properties control WebLogic Server configuration, see the online Help in the WebLogic Administration Console. More information is available in the WebLogic Server documentation on the Oracle Web site. The WebLogic Server 10.3.3 documentation for this resource is available at http://download.oracle.com/docs/cd/E14571_01/web.1111/e13738/toc.htm.
dataSourceNameis the data source to use for a JDBC persistent store. If a data source is not configured, the value is not-set. SAS applications might depend on particular settings. Do not change this property.
jdbcStoreNameis the name of the file or database in which this JMS server stores persistent messages. If a data store is not configured, then the value of dataSourceName is not-set. SAS applications might depend on particular settings. Do not change this property.
jmsServerNameis the name of the JMS Server.
tablePrefixis a name to prefix to the table name in this JDBC store. If a table prefix is not configured, the value is not-set.
targetServerNameis the name of the managed server that is associated with this JMS server.
Scripting Tool for WebLogic Server 271

Login Module Properties
JAAS login modules are configured in a flat file as documented at: http://download.oracle.com/javase/6/docs/api/javax/security/auth/login/
Configuration.html. The module configuration properties are stored in properties files that are named in the pattern loginmodule.resource.properties. Modules are grouped together under an application name.
aliasdomainis the name of another domain that this module responds to. This domain is used when this module runs in a remote JVM and receives generated credentials from an environment that uses the trusted authentication module.
applicationPolicyis the application policy that these properties apply to.
debugset this property to true to generate debugging information to the System.out stream.
domainis the authentication domain that this module authenticates to. Requests to authenticate users outside this domain are ignored.
hasCredentialsset this property to true if this module incorporates credentials found in the credentials property file.
holdOpenConnectionis a Boolean value that controls how the login module interacts with the SAS Metadata Server. If set to false, then the login module opens a connection to the SAS Metadata Server and closes it when it is finished. Setting this property to true causes the module to store a handle to the connection object in the Subject object. This connection can then be reused by the UserContext object. This option should not be set to true if the module is being used by an application container. Otherwise, the connection is not closed until the Subject object is destroyed by garbage collection.
hostis the host name for the SAS Metadata Server.
272 Chapter 14 / SAS Configuration Scripting Tools

loginModuleCodeis the fully qualified class name for the login module.
loginModuleFlagis one of the following values: required, requisite, sufficient, optional. For more information, see http://download.oracle.com/javase/6/docs/api/javax/security/auth/login/Configuration.html.
portis the port number that the SAS Metadata Server is listening on for new connections.
repositoryis the name of the repository that is set as the default repository. For the primary authentication, the typical value is Foundation.
Login Policy Properties
JAAS login modules are configured in a flat file as documented at : http://download.oracle.com/javase/6/docs/api/javax/security/auth/login/
Configuration.html. The login policy configuration properties are stored in properties files that are named in the pattern loginpolicy.resource.properties. Modules are grouped together under an application name that is based on these policy names.
applicationPolicyis the login policy name. Typical values for a SAS deployment are PFS, SCS, and UsernamePassword.
Mail Session Properties
Resources are stored in properties files that are named in the pattern mailsession.resource.properties. For information about how these properties control WebLogic Server configuration, see the online Help in the WebLogic Administration Console. More information is available in the WebLogic Server documentation on the Oracle Web site. For example, the WebLogic Server 10.3.3 documentation is available at http://download.oracle.com/docs/cd/E14571_01/apirefs.1111/e13952/taskhelp/mail/CreateMailSessions.html.
Scripting Tool for WebLogic Server 273

mailSessionJNDINameis the JNDI name for the mail session. This name is configured in application configuration files and should not be changed without corresponding changes to the applications that use this mail session.
mailSessionNameis the name of the mail session resource.
mailSessionSMTPHostis the host name of SMTP server for the mail session.
mailsrvRequiresAuthenticationis a Boolean value. Set to true if credentials are required to access this mail server.
Policy Properties
These resources represent a WebLogic default realm policy that is configured in a WebLogic domain. The properties files are named in the pattern policy.policyname.properties. For information about how these properties control WebLogic Server configuration, see the online Help in the WebLogic Administration Console. More information is available in the WebLogic Server documentation on the Oracle Web site. The WebLogic Server 10.3.3 documentation for this resource is available at http://download.oracle.com/docs/cd/E14571_01/apirefs.1111/e13952/taskhelp/security/UseRolesAndPoliciesToSecureResources.html.
policyExpressionis the policy expression to set for the resource.
policyNameis the policy name. This property is set but is not used.
securedResourceis the resource ID.
Server Properties
Server resources are stored in properties files that are named in the pattern server.servername.properties. For information about how these properties control WebLogic Server configuration, see the online Help in the WebLogic Administration Console. More information is available in the WebLogic Server
274 Chapter 14 / SAS Configuration Scripting Tools

documentation on the Oracle Web site. The WebLogic Server 10.3.3 documentation for this resource is available at http://download.oracle.com/docs/cd/E14571_01/apirefs.1111/e13952/taskhelp/domainconfig/CreateManagedServers.html.
JDKOptionsis a list of JVM options for this server.
cmdLineChangesis a list of command line changes. This property is used by SAS Deployment Wizard to produce documentation. It is not used by the configuration scripting tool.
cmdLineScriptChangesis a list of command line script changes. This property is used by SAS Deployment Wizard to produce documentation. It is not used by the configuration scripting tool.
javaPolicySettingsis a list of JVM options to use when a Java security manager is used. This option is not currently supported with WebLogic Server, and this property is ignored.
listenPortis the port number that this server uses for HTTP connections.
managedServerNameis the name of the managed server.
scriptJDKOptionsis a list of JVM options for this server. This property is used by velocity templates to create the setDomainEnv.cmd and setDomainEnv.sh scripts. The value is usually identical to JDKOptions.
serverChangesis used by SAS Deployment Wizard to produce documentation. It is not used by the configuration scripting tool.
serviceNameis the Windows service name. This value is used to create a Windows service for the server.
Scripting Tool for WebLogic Server 275

sslListenPortis the port number that this server uses for SSL connections. The configuration scripting tool does not currently support SSL configuration.
startScriptis the location of the domain setup script, setDomainEnv.cmd.
User Properties
These resources represent WebLogic Server users in the default realm. The properties files are named in the pattern user.servername.properties. The credentials are stored in the credentials.properties file. For information about how these properties control WebLogic Server configuration, see the online Help in the WebLogic Administration Console. More information is available in the WebLogic Server documentation on the Oracle Web site. The WebLogic Server 10.3.3 documentation for this resource is available at http://download.oracle.com/docs/cd/E14571_01/apirefs.1111/e13952/taskhelp/security/DefineUsers.html.
descriptionis a description of the user.
Scripting Tool for JBoss Application Server
Building the Server Configuration on Another Machine
Some sites separate the administration of SAS applications and the administration of Web application servers. For sites that do not permit running the SAS Deployment Wizard on the Web application server machine, the configuration scripting tool can be used to configure JBoss. The configuration scripting tool is archived from the machine where the SAS Deployment Wizard was run and provided to the Web application server administrator. The configuration scripting tool can configure JBoss identically to what is created with an automated deployment with SAS Deployment Wizard. The configuration scripting tool is located in SAS-config-dir\Lev1\Web\Scripts\JBoss. The name
276 Chapter 14 / SAS Configuration Scripting Tools

of the command is jbossScripting.bat. The jbossScripting.properties file in the same directory contains all the settings that are needed to configure JBoss. The following example shows the command syntax for creating or re-creating the JBoss configuration with the default properties file:
jbossScripting.bat
Note: For UNIX deployments, the command is named jbossScripting.sh.
1 On the Web application server machine, create the directory structure that was used on the machine where the SAS Deployment Wizard was run. The following commands are examples for a Windows environment:
mkdir c:\SAS\Config\Lev1\Web\Stagingmkdir c:\SAS\Config\Lev1\Web\Scriptsmkdir c:\SAS\Config\Lev1\Web\Commonmkdir c:\SAS\Config\Lev1\AppData
Note: These directory paths must be archived from the machine where the SAS Deployment Wizard was run. The archive must be transferred to the Web application server machine.
2 Extract the archive into the directories that were created in the previous step.
3 Open the Scripts\JBoss\jbossScripting.properties file in a text editor. Review the following properties to make sure that values for the JDK and JBoss installation directory are accurate:
n config.appserver.version
n config.host.type.win
n config.jboss.install.dir
n config.jdk.install.dir
n config.lev.dir
4 Begin the configuration by running jbossScripting.bat.
If the Cache Credentials check box was not selected on the Web Application Server: Scripting Configuration page in the SAS Deployment Wizard, monitor the
Scripting Tool for JBoss Application Server 277

progress because the tool prompts you for credentials. The following code is an example:
...configJBoss: loginmodule - processing options: optionName=domain value=DefaultAuthconfigJBoss: addAttribute: Set nameconfigJBoss: loginmodule - processing options: optionName=debug value=falseconfigJBoss: addAttribute: Set nameconfigJBoss: util - found java.io.Console, using for prompting
Enter Password LoginModule=com.sas.services.security.login.OMILoginModule trusteduser=sastrust@saspw Password=
After the script completes, JBoss is configured with all the resources that are needed for the SAS Web applications. All the applications are deployed. The servers are not started automatically.
After the configuration scripting tool runs and JBoss is configured, some additional tasks must be performed manually on the machine where the SAS Deployment Wizard was run. (For a multiple-machine deployment, this is the machine where the middle-tier configuration was performed.) These tasks are recorded in the Instructions.html file that is generated by the SAS Deployment Wizard. Before you perform those tasks, confirm or correct the JDK_HOME environment variable that is identified in SAS-config-dir\Lev1\level_env.bat. For UNIX deployments, the file is named level_env.sh. Open the file in an editor and make sure that the value for JDK_HOME identifies the path to a JDK or JRE.
Rebuilding the JBoss Configuration
You can rebuild the JBoss configuration by running the configuration scripting tool. The tool can re-create the entire JBoss configuration and restore it to the originally configured state. The tool reads the commands in the commands file and configures the resources according to the settings in the properties files.
278 Chapter 14 / SAS Configuration Scripting Tools

Configuring a Single Resource (Preproduction)
You can execute a single command to configure a single resource from a command line. The following example shows how to use the -s command line option to configure servers and the -n command line option to configure the named instance only:
jbossScripting.bat -s -n server1
This example uses the default properties file, jbossScripting.properties. The properties file must include the configuration settings for the property key server1. If you are creating a resource that requires credentials, such as a data source, remember to create property keys in the jbossScripting.properties file.
Command Syntax
Optional Arguments
The jbossScripting.bat command has optional arguments:
jbossScripting.bat [propertiesFile] [resourceType] [-n resourceName]
propertiesFileIf you want to use the default properties file, jbossScripting.properties, then you do not need to provide this command argument. If you want to use a different properties file, then provide the fully qualified path to the properties file. It must be the first command argument.
resourceTypeIf you want to configure one type of resource only, then provide the command line option for that resource type. For example, to configure applications only, use the -a command line option. For the resource types, see the following table.
-n resourceNameIf you are configuring one type of resource only, you can also choose to configure a single instance of that resource too. For example, to configure SASServer2 only, use the -s -n server2 command line options to configure only the named server,
Scripting Tool for JBoss Application Server 279

SASServer2. The mapping between the property key (server2) and the server instance name (SASServer2) is performed in the jbossScripting.properties file.
Command Line Options
The command line options for the jbossScripting.bat file are provided in the following table:
Table 14.1 JbossScripting.bat Command Line Options
Short Option Name Full Option Name Description
--unconfigure This option is used internally by the configuration scripting tool. It cannot be used to unconfigure a resource such as a server or to undeploy an application.
-a --applications Use this option to configure all applications.
-c --connectionFactories Use this option to configure all connection factories.
-d --datasources Use this option to configure all data sources.
-e --externalContexts Use this option to configure all external contexts.
-h --help Use this option to see the command help.
-l --loginmodules Use this option to configure all login modules.
-m --mailsessions Use this option to configure all mail sessions.
-n --resource-name Use this option to configure a single named resource. For an example, see “Configuring a Single Resource (Preproduction)” on page 279.
280 Chapter 14 / SAS Configuration Scripting Tools

Short Option Name Full Option Name Description
-q --queues Use this option to configure all queues.
-s --servers Use this option to configure all servers.
-t --topics Use this option to configure all topics.
Properties Reference
Common Properties
The following properties are common to a number of resource types.
config.jboss.install.diris the fully qualified path to JBoss.
config.jdk.install.diris the fully qualified path to the JDK.
config.jboss.bind.hostis a string that represents bind host for JBoss. The default value is -b 0.0.0.0.
config.host.typeis either win or unx.
config.tanuki.wrapper.diris the fully qualified path of the Tanuki service wrapper for deployments that use Windows.
config.appserver.versionis a string that represents the JBoss version.
config.java.versionis a string that represents the JDK version.
config.lev.diris the fully qualified path to the SAS-config-dir/Levn directory.
Scripting Tool for JBoss Application Server 281

config.loglevelidentifies the logging level. Values are DEBUG or INFO.
config.typeis either auto or manual. This value identifies whether the Web application server was configured automatically by the SAS Deployment Wizard or configured manually.
Server Properties
The resources are stored in the pattern server.servern.property
serveris a space-separated list of server instances (for example, server1 server2 server3, and so on). This property is used by the configuration scripting tool to determine the servers instance to configure.
server.servern.nameis the name of the server configuration such as SASServer1, SASServer2, and so on.
server.servern.optionsis a semicolon-separated list of JVM options for server instance n. Escape colon and equal sign characters with a backslash (\).
server.servern.portIncrementis an integer value that identifies the increment to add to the default set of port numbers such as 0, 100, 200, 300, and so on.
TIP Do not set this property to a number other than zero and also set the other port number-related properties to unique values. Either use this property to set an offset from the default port numbers, or set this property to zero and set each of the other port-related properties to the values that you want.
server.servern.sourceidentifies the template to use when creating server instance n (for example, default, standard, all, and so on).
282 Chapter 14 / SAS Configuration Scripting Tools

server.servern.transactionindicates whether local or distributed transactions are configured. Use JTA to indicate local transactions and JTS to indicate distributed transactions.
server.servern.jmssecurityis a Boolean value that indicates whether JMS security needs to be configured. If set to true, then passwords are used on JMS calls.
server.servern.all.policy.fileis the fully qualified path to a Java policy file. SAS recommends using a policy file that has no restrictions.
server.servern.restrictive.policy.fileis the fully qualified path to a Java policy file with preset restrictions.
server.servern.port.webserverHttpidentifies the port to use for HTTP communication. The default value is 8080.
server.servern.port.webserverHttpsidentifies the port to use for HTTPS communication. The default value is 8443.
server.servern.port.jndiidentifies the port to use for the JNDI naming server. The default value is 1099.
server.servern.port.rmiidentifies the port to use for RMI communication. The default value is 1098.
server.servern.service.dependencyis a string that is used to create a Windows Service dependency.
Application Properties
These properties represent the applications that are deployed in a JBoss server. The resources are stored in the pattern application.applicationn.property.
applicationis a space-separated list of application instances such as application1 application2 application3, and so on. This property is used by the configuration scripting tool to determine the application instances to configure.
Scripting Tool for JBoss Application Server 283

application.applicationn.appnameis the name of application instance n.
application.applicationn.deploymentdiridentifies the directory where the application is deployed
application.applicationn.pathtoearis the fully qualified path to the EAR file for the application.
application.applicationn.explodeis a Boolean value. If set to true, then the EAR and WAR files contents are extracted in the deployment directory.
application.applicationn.servernameidentifies the name of the server configuration where the application is deployed, such as SASServer1, SASServer2, and so on. Do not supply more than one value for servername.
Credential Properties
All properties defining credentials are stored in the jbossScriptingCredentials.properties file. The tool prompts you for these properties. This properties file does not need to be edited directly. These values are cleared after the tool completes if the global property webappsrvScriptingCacheCredentials is set to false. When stored, they are stored in SAS base-64 encoding, not clear-text. If the option to cache credentials was enabled when the SAS Deployment Wizard was run, then the credentials are updated when the Update passwords feature of the SAS Deployment Wizard is used.
server.servern.jmssecurity.useris a string that identifies the jmssecurity user ID.
server.servern.jmssecurity.passwordis an encoded string that identifies the jmssecurity password.
server.servern.jmssecurity.encodingis a Boolean value. Use this property to indicate whether the password needs to remain encoded when used.
284 Chapter 14 / SAS Configuration Scripting Tools
datasource.datasourcen.useris the user ID that is passed to the datasource driver. This property is not used if a security-domain is used as an option for the datasource.datasourcen.options property.
datasource.datasourcen.passwordis the password that is passed to the datasource driver. This property is not used if a security-domain is used as an option for the datasource.datasourcen.options property.
Data Source Properties
Data source properties are used to configure JDBC data source resources in JBoss. The resources are stored in the pattern datasource.datasourcen.properties.
datasourceis a space-separated list of datasource instances such as datasource1 datasource2 datasource3. This property is used by the configuration scripting tool to determine the datasource instances to configure.
datasource.datasourcen.nameis the name of datasourcen.
datasource.datasourcen.classpathis the fully qualified path to each of the JAR files that are required for the JDBC driver. For drivers that use more than one JAR file, use a semicolon to separate each of the paths.
datasource.datasourcen.connectionUrlis the JDBC connection URL for the datasource resource.
datasource.datasourcen.driveris the class name for the JDBC driver.
datasource.datasourcen.jndinameis the JNDI name for the datasource.
Scripting Tool for JBoss Application Server 285

datasource.datasourcen.servernameis the name of the server configuration where the datasource is configured, such as SASServer1, SASServer2, and so on. Do not supply more than one value for servername.
datasource.datasourcen.xais a Boolean value. If set to true, then an xa-datasource-property is added as a datasource property. If set to any other value, then a connection-property is added as a datasource option. The default action is to add connection-property as the datasource option.
datasource.datasourcen.optionsis a comma-separated list of options for the datasource.
External Context Properties
An external context enables you to access resources in another JVM through JNDI. The resources are brought into the JBoss server JNDI namespace. The term external refers to any naming service that is external to the naming service that is running in the JBoss server JVM.
The resources are stored in the pattern externalcontext.externalcontextn.property.
externalcontextis a space-separated list of externalcontext instances such as externalcontext1 externalcontext2 externalcontext3, and so on. This property is used by the configuration scripting tool to determine the externalcontext instances to configure.
externalcontext.externalcontextn.localis the local JNDI name for the externalcontext.
externalcontext.externalcontextn.remoteis the remote JNDI name for the externalcontext.
externalcontext.externalcontextn.urlis the connection URL for the external resource.
externalcontext.externalcontextn.initialcontextfactoryis the JBoss context factory to use when creating the externalcontext.
286 Chapter 14 / SAS Configuration Scripting Tools
externalcontext.externalcontextn.servernameis the name of the server configuration where the externalcontext is configured, such as SASServer1, SASServer2, and so on. Do not supply more than one value for servername.
JMS Connection Factory Properties
The resources are stored in the pattern connectionfactory.connectionfactoryn.property.
connectionfactoryis a space-separated list of connectionfactory instances such as connectionfactory1 connectionfactory2 connectionfactory3, and so on. This property is used by the configuration scripting tool to determine the connectionfactory instances to configure.
connectionfactory.connectionfactoryn.nameis the name for the connectionfactory.
connectionfactory.connectionfactoryn.jndinameis the local JNDI name for the connectionfactory.
connectionfactory.connectionfactoryn.servernameis the name of the server configuration where the connectionfactory is configured, such as SASServer1, SASServer2, and so on. Do not supply more than one value for servername.
JMS Queue Properties
The resources are stored in the pattern queue.queuen.property.
queueis a space-separated list of queue instances such as queue1 queue2 queue3, and so on. This property is used by the configuration scripting tool to determine what queue instances to configure.
queue.queuen.nameis the name for the queue.
queue.queuen.jndinameis the local JNDI name for the queue.
Scripting Tool for JBoss Application Server 287

queue.queuen.servernameis the name of the server configuration where the queue is configured, such as SASServer1, SASServer2, and so on. Do not supply more than one value for servername.
JMS Topic Properties
The resources are stored in the pattern topic.topicn.property.
topicis a space-separated list of topic instances such as topic1 topic2 topic3, and so on. This property is used by the configuration scripting tool to determine which topic instances to configure.
topic.topicn.nameis the name for the topic.
topic.topicn.jndinameis the local JNDI name for the topic.
topic.topicn.servernameis the name of the server configuration where the topic is configured, such as SASServer1, SASServer2, and so on. Do not supply more than one value for servername.
Login Module Properties
The resources are stored in the pattern loginmodule.loginmodulen.property.
loginmoduleis a space-separated list of loginmodule instances such as loginmodule1 loginmodule2 loginmodule3, and so on. This property is used by the configuration scripting tool to determine the loginmodule instances to configure.
loginmodule.loginmodulen.policyidentifies the policy for the loginmodule.
loginmodule.loginmodulen.classmateidentifies the class to use for the loginmodule.
288 Chapter 14 / SAS Configuration Scripting Tools

loginmodule.loginmodulen.flagis the flag for loginmodulen. Values include required, requisite, sufficient, and optional.
loginmodule.loginmodulen.optionsis a comma-separated list of options for the loginmodule. Escape equal sign characters with a backslash (\).
loginmodule.loginmodulen.deletedis a Boolean value that determines whether this entry needs to be deleted from the login_config.xml file.
loginmodule.loginmodulen.servernameis the name of the server configuration where the loginmodule is configured, such as SASServer1, SASServer2, and so on. Do not supply more than one value for servername.
Mail Session Properties
The resources are stored in the pattern mailsession.mailsessionn.property.
mailsessionis a space-separated list of mailsession instances such as mailsession1 mailsession2 mailsession3, and so on. This property is used by the configuration scripting tool to determine the mailsession instances to configure.
mailsession.mailsessionn.nameis the name for the mailsession.
mailsession.mailsessionn.jndinameis the JNDI name for the mailsession.
mailsession.mailsessionn.mailhostidentifies the host name of the mail server for the mailsession.
mailsession.mailsessionn.servernameis the name of the server configuration where the mailsession is configured, such as SASServer1, SASServer2, and so on. Do not supply more than one value for servername.
Scripting Tool for JBoss Application Server 289

Scripting Tool for WebSphere Application Server
Building the WebSphere Application Server Cell on Another Machine
Some sites separate the administration of SAS applications and the administration of Web application servers. For sites that do not permit running the SAS Deployment Wizard on the Web application server machine, the configuration scripting tool can be used to configure WebSphere Application Server.. The configuration scripting tool is archived from the machine where the SAS Deployment Wizard was run and provided to the Web application server administrator. The configuration scripting tool can configure a cell, deployment manager, profiles, and servers, identically to what is created with an automated deployment with SAS Deployment Wizard. The configuration scripting tool is located in SAS-config-dir\Lev1\Web\Scripts\WebSphere\Scripts. The name of the command is WASDriver.bat. For UNIX deployments, the command is named WASDriver.sh.
The configuration scripting tool reads the commands listed in the SAS-config-dir\Lev1\Web\Scripts\WebSphere\tasks\websphere.configure.tasks file and then performs the tasks. Each command in the websphere.configure.tasks file, such as create JDBCProvider, uses the properties files that are stored in SAS-config-dir\Lev1\Web\Scripts\WebSphere\props to determine how to configure the resource.
If the Cache Credentials check box was not selected on the Web Application Server: Scripting Configuration page in the SAS Deployment Wizard, then you are prompted for credentials when you run the WASDriver.bat command.
1 On the Web application server machine, create the directory structure that was used on the machine where the SAS Deployment Wizard was run. The following commands are examples for a Windows environment:
mkdir c:\SAS\Config\Lev1\Web\Stagingmkdir c:\SAS\Config\Lev1\Web\Scripts
290 Chapter 14 / SAS Configuration Scripting Tools

mkdir c:\SAS\Config\Lev1\Web\Commonmkdir c:\SAS\Config\Lev1\AppData
Note: These directory paths must be archived from the machine where the SAS Deployment Wizard was run. The archive must be transferred to the Web application server machine.
2 Extract the archive into the directories that were created in the previous step.
3 Open the Scripts\WebSphere\props\global.properties file in a text editor. Review the properties to make sure that values for the JDK path, WebSphere Application Server installation path, host names, and ports are accurate.
4 Begin the configuration by running Scripts\WASDriver.bat.
If the Cache Credentials check box was not selected on the Web Application Server: Scripting Configuration page in the SAS Deployment Wizard, monitor the progress because the tool prompts you for credentials. The following code is an example:
[12/19/11 12:28:28:181 EST] - WASDriver-prepareTask: Task(s) to be executed indicate operations on resourceType(s) require userIds and passwordsfor authentication...
*=*=*=*=*=*=* BEGIN Prompting for credentials *=*=*=*=*=*=*
----------------------------------------------------------------------------Please enter credentials for: Data Source "SASServer1-SharedServices" database ConnectionEnter username:
When the configuration scripting tool is used to create the WebSphere Application Server cell, after the script completes, the environment is configured with all the resources that are needed for the SAS Web applications. The configuration scripting tool deploys the applications, but it does not start the servers.
After the configuration scripting tool runs and WebSphere Application Server is configured, some additional tasks must be performed manually on the machine where the SAS Deployment Wizard was run. (For a multiple-machine deployment, this is the machine where the middle-tier configuration was performed.) These tasks are recorded in the Instructions.html file that is generated by the SAS Deployment Wizard. Before you perform those tasks, confirm or correct the JDK_HOME environment variable that is
Scripting Tool for WebSphere Application Server 291

identified in SAS-config-dir\Lev1\level_env.bat. For UNIX deployments, the file is named level_env.sh. Open the file in an editor and make sure that the value for JDK_HOME identifies the path to a JDK or JRE.
Rebuilding the WebSphere Application Server Configuration
You can rebuild the WebSphere Application Server configuration by running the configuration scripting tool. The tool can re-create the entire WebSphere Application Server configuration and restore it to the originally configured state. The tool reads the commands in the task files and configures the resources according to the settings in the properties files.
Adding, Updating, and Upgrading SAS Software
If the SAS Deployment Wizard runs to add, update, or upgrade SAS software that affects WebSphere Application Server, a backup of the configuration scripting tool is made. For example, the contents of SAS-config-dir\Lev1\Web\Scripts\WebSphere are backed up to directory like SAS-config-dir\Lev1\Web\Scripts\WebSphere_2011-05-20-14.21.56_bak. The original directory is then re-created, and configuration scripting tasks and properties are set for the additional software, update, or upgrade.
Executing an Alternative Batch Script
The WASDriver.bat command is configured to execute the commands in the websphere.configure.tasks file. You can override this behavior and supply the name of a file that contains the commands that you want to execute. The following steps describe how run in batch mode with the commands in the cmds.txt file:
1 Create a text file that is named SAS-config-dir\Lev1\Web\Scripts\WebSphere\tasks\cmds.txt. Include commands that are similar to the following example:
undeploy Application SASThemes9.3 SERVERdeploy Application SASThemes9.3 SERVER
292 Chapter 14 / SAS Configuration Scripting Tools

TIP Put the commands file in the tasks directory. The WASDriver.bat file does not accept the fully qualified pathname to the commands file. It accepts the name of the commands file that must be in the tasks directory.
2 Invoke the command with the following command line options:
WASDriver.bat -e FILE -m AUTO -t cmds.txt
If you are creating a resource that requires credentials, such as a data source, remember to create property keys in the Credentials.CELL.credentials.properties file.
Executing a Single Task
You can use the configuration scripting tool to perform a single task. The following command demonstrates how to undeploy SAS Themes for Web Applications:
WASDriver.bat -e RUN -m AUTO -p TEXT -o undeploy -r Application -n SASThemes9.3 -s SERVER
Before this operation can run and succeed, a properties file that is named Application.SERVER.SASThemes9.3.properties must exist. This properties file is used by the configuration scripting tool to determine how to undeploy the application.
TIP The case for the resource type (-r), name (-n), and scope (-s) matter. These arguments are used to locate properties files in the props directory as well as to look up keys within the properties files.
Command Syntax
Four Parts of the Command Syntax
The command syntax in a task file has four parts:
<operation> <resourceType> <resourceName> <scope>
The following example shows the commands for creating a deployment manager profile and a node profile:
create DmgrProfile SASDmgr01 CELL
Scripting Tool for WebSphere Application Server 293
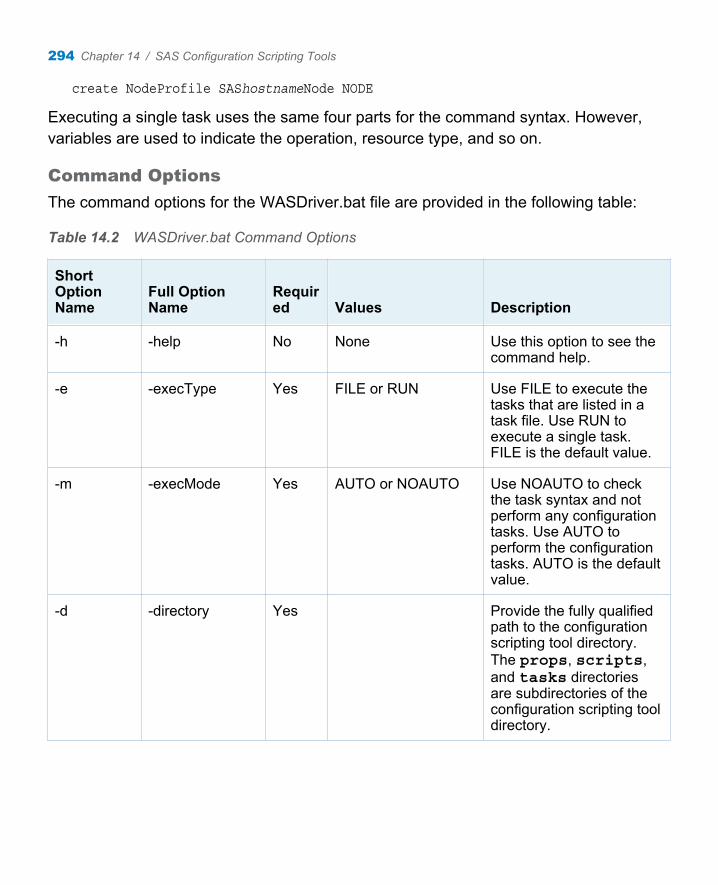
create NodeProfile SAShostnameNode NODE
Executing a single task uses the same four parts for the command syntax. However, variables are used to indicate the operation, resource type, and so on.
Command Options
The command options for the WASDriver.bat file are provided in the following table:
Table 14.2 WASDriver.bat Command Options
Short Option Name
Full Option Name
Required Values Description
-h -help No None Use this option to see the command help.
-e -execType Yes FILE or RUN Use FILE to execute the tasks that are listed in a task file. Use RUN to execute a single task. FILE is the default value.
-m -execMode Yes AUTO or NOAUTO Use NOAUTO to check the task syntax and not perform any configuration tasks. Use AUTO to perform the configuration tasks. AUTO is the default value.
-d -directory Yes Provide the fully qualified path to the configuration scripting tool directory. The props, scripts, and tasks directories are subdirectories of the configuration scripting tool directory.
294 Chapter 14 / SAS Configuration Scripting Tools

Short Option Name
Full Option Name
Required Values Description
-t -taskFile No Provide the name of the task file to use when the execution mode is FILE. The default value is websphere.configuration.tasks.
-o -operation No create, delete, start, stop, deploy, undeploy, checkAppStatus, syncNode
Provide the operation to perform when the execution mode is RUN.
-r -resourceType No Provide the resource to use when the execution mode is RUN. See the resources in Table 14.3 on page 296.
-n -resourceName No SASServer1, SAS_Messaging_Bus, and so on
Provide the name of the resource to use when the execution mode is RUN.
-s -scope No SERVER, NODE, or CELL
Provide the scope for the resource to configure when the execution mode is RUN.
-p -promptMode No TEXT or GRAPHIC Use TEXT to provide a command line prompt for credentials when credentials are not stored in the credentials file. Use GRAPHIC to provide a dialog box for credentials when credentials are not stored in the credentials file.
Scripting Tool for WebSphere Application Server 295

Resource Types
The following table provides a list of resource types and identifies the operations and scope that apply to the resource type.
Table 14.3 Resource Types, Operations, and Scopes
Resource Type Operations Scopes
ActivationSpec create, delete SERVER, NODE, CELL
Application deploy, undeploy SERVER
DataSource create, delete SERVER, NODE, CELL
DmgrProfile create CELL
JDBCProvider create, delete SERVER
JmsConnectionFactory create, delete SERVER, NODE, CELL
JmsQueue create, delete SERVER, NODE, CELL
JmsTopic create, delete SERVER, NODE, CELL
LoginModule create, delete CELL
MailSession create, delete SERVER, NODE, CELL
NodeProfile create NODE
ObjectCache create, delete SERVER, NODE, CELL
Server create, delete SERVER
SIBus create, delete SERVER
Resource Properties Files
Each resource requires a set of properties that define how the configuration scripting tool should configure it. The default location for the properties files is SAS-config-dir
296 Chapter 14 / SAS Configuration Scripting Tools

\Lev1\Web\Scripts\WebSphere\props. The properties files are named according to the following pattern:
<resourceType>.<scope>.<resourceName>.properties
For example, the Server.SERVER.SASServer1.properties file describes settings for the SASServer1 application server instance. You could change a property such as WC_defaulthost or jvmOptions in the file and then re-create the server by executing only the server creation task. The following command is an example:
WASDriver.bat -e RUN -m AUTO -p TEXT -o create -n SASServer1 -t SERVER
Note: Many properties, such as the Web application server port number, are also stored in the SAS Metadata Server. The configuration scripting tool does not modify values in SAS metadata. Be careful that you do not create an inconsistency with SAS metadata.
Managing Credentials
Credentials are required to configure resources within a CELL, NODE, or SERVER. The following list identifies some of the credentials that might be needed:
n WebSphere Application Server console credentials
n the SAS trusted user password for SAS Web applications that connect to SAS servers
n database credentials for JDBC connections
n SMTP mail server credentials, if the SMTP mail server is secured
By default, the SAS Deployment Wizard does not persist any of these credentials. When you run the configuration scripting tool, you are prompted for all credentials that are required to configure the resources. The credentials are temporarily stored in the Credentials.CELL.credentials.properties file. The credentials are removed from the file when the configuration scripting tool exits unless you enabled the Cache Credentials check box on the Web Application Server: Scripting Configuration page in the SAS Deployment Wizard. By default, prompts appear on the command line as each credential is needed. An option is available to display a dialog box that prompts for credentials. To display the dialog box for credential prompts, add the following command option to the WASDriver.bat script:
Scripting Tool for WebSphere Application Server 297

-p GRAPHIC
If the option to cache credentials was enabled when the SAS Deployment Wizard was run, then the credentials are stored in the Credentials.CELL.credentials.properties file. In this case, the configuration scripting tool reads the credentials from the file rather than prompting for them. When the Update passwords feature of the SAS Deployment Manager is used, the passwords for the login modules and mail sessions are updated in the credentials file. Passwords for data source definitions are not updated.
Log File
Details for the command execution are stored in the SAS-config-dir\Lev1\Web\Scripts\WebSphere\logs\WASDriver.log file. The SAS Deployment Wizard invokes the configuration scripting tool, so this already contains messages for an installed system. This file can be useful for troubleshooting middle-tier configuration tasks performed with the SAS Deployment Wizard and the SAS Deployment Manager.
Properties Reference
Modifying Properties
n Be careful when editing properties files. If you make a change to a property in one file, be sure to apply the same change to all occurrences of the property in all properties files.
n Do not change the value of properties that are not identified in this document. Some undocumented properties are used for the creation of the Instructions.html file.
n An asterisk (*) beside the property name indicates that the property value is stored in SAS metadata. If you change the property, then you create a difference with the information that is stored in SAS metadata.
Global Properties
The following list defines the properties that are used in the websphere.global.properties file.
appsrvnodename *
is the name of the node that contains the WebSphere Application Servers.
298 Chapter 14 / SAS Configuration Scripting Tools

appsrvnodermiport *
is the RMI port number for the WebSphere Application Server node agent.
appsrvnodesoapport *
is the SOAP port number for the WebSphere Application Server node agent.
cellname *
is the name of the WebSphere Application Server cell.
config.lev.web.staging.dir *
identifies the fully qualified path to the SAS Web application EAR files. This path is SAS-config–dir/Lev1/Web/Staging.
defaultsibusname *
is the name for the service integration bus. The default value is SAS_Messaging_Bus.
dmgrhttpport *
identifies the port to use for HTTP communication with the deployment manager server. The default value is 9060.
dmgrhttpsport *
identifies the port to use for HTTPS communication with the deployment manager server. The default value is 9043.
dmgrnodename *
is the name of the node that contains the deployment manager server. The default value is SASDmgr01Node.
dmgrport *
identifies the port to use for communication with the deployment manager server. The default value is 9060.
dmgrprofilename *
identifies the profile name for the deployment manager server. The default value is SASDmgr01.
dmgrprotocol *
identifies the default protocol to use for communication with the deployment manager server. Values are SOAP or RMI. The default value is SOAP.
Scripting Tool for WebSphere Application Server 299

dmgrrmiport *
identifies the RMI port number for the deployment manager server. The default value is 9809.
dmgrrmiprops *
identifies the fully qualified path to the sas.client.props file in the deployment manager profile. This file is used to set the RMI properties for the deployment manager server.
dmgrrmitimeout *
is the time-out value in seconds for RMI communication from the deployment manager server to the node agent. The default value is 900.
dmgrsoapport *
identifies the port to use for SOAP communication with the deployment manager server. The default value is 8879.
dmgrsoapprops *
identifies the fully qualified path to the soap.client.props file in the deployment manager profile. This file is used to set the SOAP properties for the deployment manager server.
dmgrsoaptimeout *
is the time-out value in seconds for SOAP communication from the deployment manager server to the node agent. The default value is 900.
globalPropsFileNameidentifies the fully qualified path to the websphere.global.properties file.
mustCreateDmgrProfileis a Boolean value. If set to true, then the configuration scripting tool creates the deployment manager profile.
nodermiprops *
identifies the fully qualified path to the sas.client.props file in the node profile. This file is used to set the RMI properties for the node.
nodesoapprops *
identifies the fully qualified path to the soap.client.props file in the node profile. This file is used to set the SOAP properties for the node.
300 Chapter 14 / SAS Configuration Scripting Tools

os.localhost.host.name *
is the short host name for the machine where the configuration scripting tool runs.
profilename *
is the profile name for the node.
scriptingDirectoryidentifies the fully qualified path to the configuration scripting tool for WebSphere Application Server.
webapp.auto_deploy*
is a Boolean value. If set to true, then the SAS Web applications are automatically deployed to WebSphere Application Server. If set to false, then you must deploy the SAS Web applications manually.
webappsrv.admin.host *
is the fully qualified domain name for the machine that is running the WebSphere Application Server administration server.
webappsrv.admin.security.is_enabled*
is a Boolean value. If set to true, then WebSphere Application Server administration security is enabled for the cell.
webappsrv.admin.url *
is the URL for the WebSphere Application Server administration console.
webappsrv.auto_configure*
is a Boolean value. If set to true, then the configuration scripting tool performs an automatic configuration of an application server instance. If set to false, then you must configure the application server instance manually.
webappsrv.host *
is the fully qualified domain name of the machine to configure with the configuration scripting tool.
webappsrv.policy.use_restrictive*
is a Boolean value. If set to true, then Java 2 security is enabled for application deployments.
Scripting Tool for WebSphere Application Server 301

webappsrv.scripting.cache_credentials*
is a Boolean value. If set to true, then the credentials that are required for configuring resources are saved in a file.
webappsrv.server.admin.http.port *
identifies the port to use for HTTP communication with the deployment manager server. The default value is 9060.
webappsrv.server.admin.https.port *
identifies the port to use for HTTPS communication with the deployment manager server. The default value is 9043.
websphere.appsrv.logs *
identifies the fully qualified path to the directory for WebSphere Application Server logs.
websphere.dmgr.logs *
identifies the fully qualified path to the directory for the deployment manager server logs.
websphere.install.dir *
identifies the fully qualified path to the directory where WebSphere Application Server is installed. Set this property to the same value that is used for the WAS_INSTALL_ROOT variable.
websphere.profile.dir *
identifies the fully qualified path to the directory where the WebSphere Application Server profiles are stored.
websphere.scripting.classpathis the class path to use for the configuration scripting tool.
websphere.scripting.credentialsidentifies the fully qualified path to the file that contains the credentials (user IDs and passwords) that are required to configure resources.
websphere.scripting.diridentifies the fully qualified path to the configuration scripting tool for WebSphere Application Server.
302 Chapter 14 / SAS Configuration Scripting Tools

websphere.scripting.jythonidentifies the fully qualified path to the directory for the Jython procedures.
websphere.scripting.libidentifies the fully qualified path for directory that contains the JAR file for the configuration scripting tool.
websphere.scripting.logsidentifies the fully qualified path to the directory for the configuration scripting tool logs.
websphere.scripting.propsidentifies the fully qualified path to the directory for the configuration scripting tool properties files.
websphere.scripting.scriptsidentifies the fully qualified path to the directory for the configuration scripting tool, WASDriver.sh or WASDriver.bat.
websphere.scripting.srcidentifies the fully qualified path to the directory for the configuration scripting tool Groovy source modules.
websphere.scripting.tasksidentifies the fully qualified path to the configuration scripting tool tasks directory.
websphere.scripting.tasks.fileidentifies the fully qualified path to the configuration scripting tool tasks file.
websphere.temp.dir *
identifies the fully qualified path to the temporary directory for the configuration scripting tool.
websphere.wsadmin.classpathis the class path to use for the WebSphere Application Server wsadmin client application.
websphere.wsadmin.jythonidentifies the fully qualified path to the directory for the WebSphere Application Server wsadmin client application Jython procedures.
Scripting Tool for WebSphere Application Server 303

webspherend.is_installed*
is a Boolean value. Set to true if WebSphere Application Server is installed on this machine. Set to false, if it is installed on a remote machine.
wsadminPropsis a string that identifies common command-line options that are used to run the wsadmin client application.
Credentials Properties
The following list defines the properties that are used in the Credentials.CELL.credentials.properties file.
DataSource.create_scope_resource-identifier_passwdis the data source user password.
DataSource.create_scope_resource-identifier_useridis the data source user ID.
LoginModule.create_CELL_SAS-Trusted-user_passwdis the password for the SAS trusted user identity. It is used for creating the JAAS login module.
LoginModule.create_CELL_SAS-Trusted-user_useridis the user ID for the SAS trusted user identity. It is used for creating the JAAS login module.
MailSession.create_scope_SMTP-Mail-Server_passwdis password for the user ID that is used to communicate with the SMTP mail server.
MailSession.create_scope_SMTP-Mail-Server_useridis the user ID that is used to communicate with the SMTP mail server.
Application Properties
This section defines the properties that are needed to deploy a SAS Web application. The properties files are named in the pattern Application.SERVER.applicationName.properties.
appnameis the Web application name.
304 Chapter 14 / SAS Configuration Scripting Tools

classloaderModeidentifies the class loader mode. Values are PARENT_LAST or PARENT_FIRST. The default value is PARENT_LAST.
classloaderPolicyidentifies the class loader policy. Values are MULTIPLE or SINGLE. The default value is MULTIPLE.
deployejbis a Boolean value. If set to true, then Enterprise Java Bean (EJB) support is requested for the installation.
deploywsis a Boolean value. If set to true, then Web services support is requested for the installation.
loadorderis an integer value that identifies the load order. The default value is 100.
pathtoearis the fully qualified path to the EAR file for the Web application.
servernameis the name of the target WebSphere Application Server instance where the Web application is installed.
Data Source Properties
This section defines the properties that are needed to configure a data source. The properties files are named in the pattern DataSource.scope.dataSourceIdentifier.properties. For more information about connection pool properties, see the WebSphere Application Server product documentation.
dataSourceIdentifieris the unique identifier for this datasource.
pCpAgedTimeoutis the value in seconds for the database connection pool aged time-out.
Scripting Tool for WebSphere Application Server 305

pCpConnectionTimeoutis the value in seconds for the database connection pool time-out.
pCpMaxConnectionsis the maximum number of connections for the database connection pool.
pCpMinConnectionsis the minimum number of connections for the database connection pool.
pCpPurgePolicyidentifies the database connection pool purge policy.
pCpReapTimeis the value for the database connection pool reap time-out.
pCpTestConnectionis a Boolean value. If set to true, then the database connection pool is tested when it is configured.
pCpTestConnectionIntervalis the value in seconds for the database connection pool testing interval.
pCpUnusedTimeoutis the value in seconds for the time-out that controls when unused connections are returned to the connection pool.
pDsClassNameis the class name for the JDBC provider.
pDsClassPathis the fully qualified path to each of the JAR files that are required for the JDBC provider.
pDsConnectionUrlis the JDBC connection URL.
pDsDataSourceNameis the name of the data source.
pDsDatabaseis the database product name.
306 Chapter 14 / SAS Configuration Scripting Tools

pDsHelperClassis the WebSphere Application Server helper class name for the JDBC provider.
pDsHostis the host name for the machine with the database.
pDsJaasAliasNameis the name that is used to construct a JAAS alias entry. The entry contains the user ID and password for the database connection.
pDsJdbcProviderNameis the name of the JDBC provider that is associated with this data source.
pDsJdbcProviderReuseis a Boolean value. If set to true, then an existing JDBC provider definition with the same name is reused. If set to false, then the existing definition is deleted and all data sources associated with it, and a new JDBC provider is created.
pDsJdbcProviderTypeidentifies the JDBC provider type. It is a unique description for the JDBC provider, such as "DB2 Universal JDBC Driver Provider."
pDsJndiNameis the JNDI name for this data source.
pDsOptionsis a comma-separated list of data source options for the data source.
pDsPortis the port number for the database.
pDsPropEnableMultithreadedAccessDetectionis a Boolean value that controls whether to enable multi-threaded access detection to the database using this data source.
pDsPropPreTestSQLStringis an SQL command that is used to test the database connection.
pDsPropValidateNewConnectionis a Boolean value. If set to true, then the configuration scripting tool attempts to validate the new database connection.
Scripting Tool for WebSphere Application Server 307
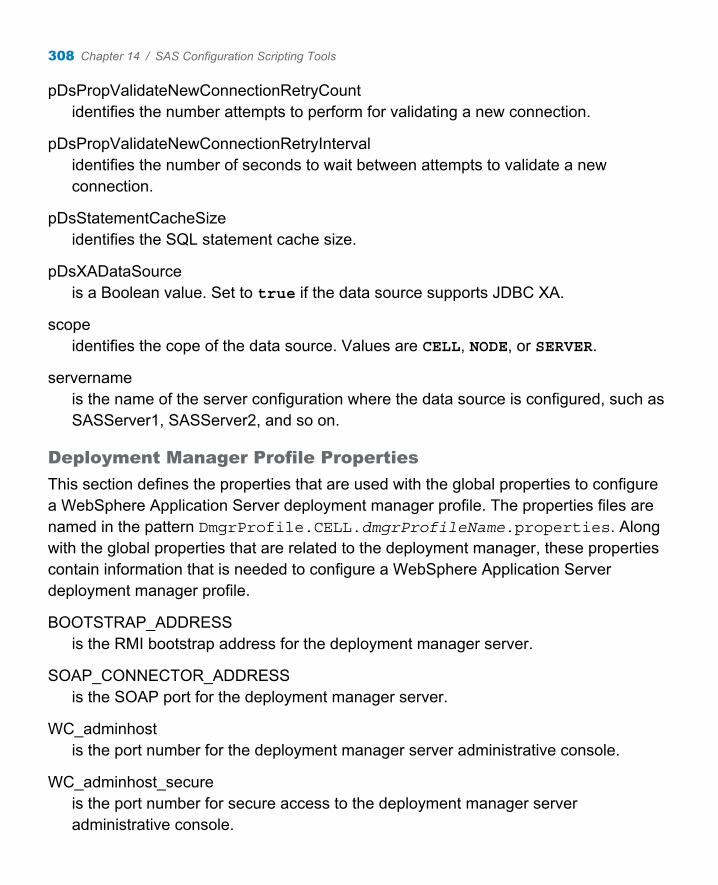
pDsPropValidateNewConnectionRetryCountidentifies the number attempts to perform for validating a new connection.
pDsPropValidateNewConnectionRetryIntervalidentifies the number of seconds to wait between attempts to validate a new connection.
pDsStatementCacheSizeidentifies the SQL statement cache size.
pDsXADataSourceis a Boolean value. Set to true if the data source supports JDBC XA.
scopeidentifies the cope of the data source. Values are CELL, NODE, or SERVER.
servernameis the name of the server configuration where the data source is configured, such as SASServer1, SASServer2, and so on.
Deployment Manager Profile Properties
This section defines the properties that are used with the global properties to configure a WebSphere Application Server deployment manager profile. The properties files are named in the pattern DmgrProfile.CELL.dmgrProfileName.properties. Along with the global properties that are related to the deployment manager, these properties contain information that is needed to configure a WebSphere Application Server deployment manager profile.
BOOTSTRAP_ADDRESSis the RMI bootstrap address for the deployment manager server.
SOAP_CONNECTOR_ADDRESSis the SOAP port for the deployment manager server.
WC_adminhostis the port number for the deployment manager server administrative console.
WC_adminhost_secureis the port number for secure access to the deployment manager server administrative console.
308 Chapter 14 / SAS Configuration Scripting Tools

WC_defaulthostis the HTTP transport port for the deployment manager server.
WC_defaulthost_secureis the HTTPS transport port for the deployment manager server.
create.dmgrprofile.response.fileidentifies the fully qualified path for the file that contains all the responses that are needed to create a deployment manager profile (dmgr) with the manageprofiles command. For more information, see the description of the create.DmgrProfile.CELL.responsedmgrProfileName.properties file in the next section.
jvmOptionsis the list of JVM options for the deployment manager server.
Deployment Manager manageprofiles Command Response File Properties
The WebSphere Application Server manageprofiles command uses properties from three sources to create the deployment manager server profile:
n global properties
n deployment manager profile properties
n properties in the create.DmgrProfile.CELL.response.dmgrProfileName.properties file
This section defines the properties in the create.DmgrProfile.CELL.response.dmgrProfileName.properties file.
createmust have a null value so that the manageprofiles command creates the deployment manager server profile.
cellNameuse the value for cellname from the websphere.global.properties file.
defaultPortsmust have a null value so that the manageprofiles command configures the deployment manager server profile to use the default ports.
Scripting Tool for WebSphere Application Server 309
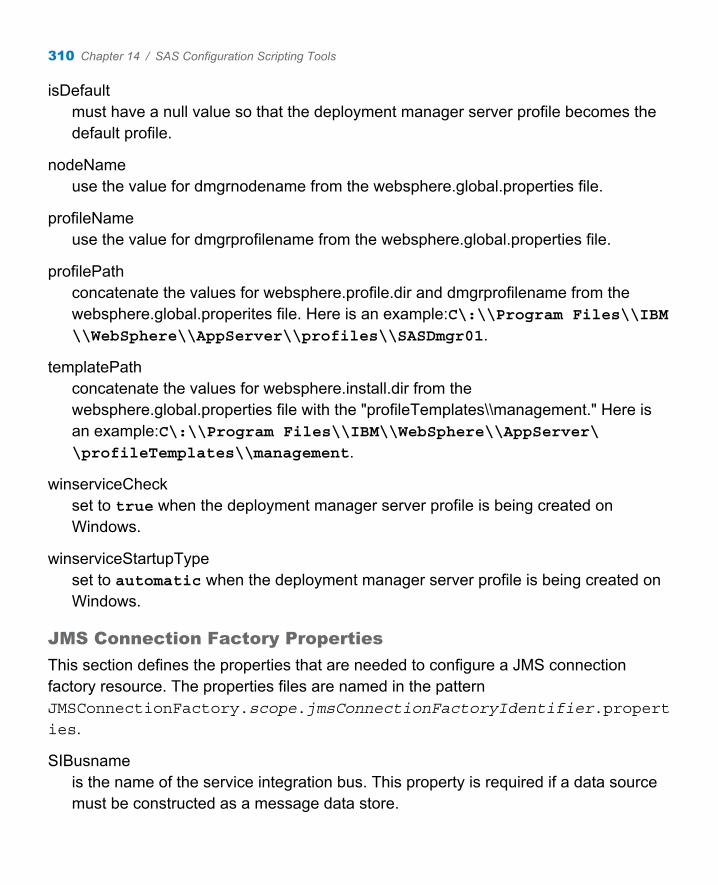
isDefaultmust have a null value so that the deployment manager server profile becomes the default profile.
nodeNameuse the value for dmgrnodename from the websphere.global.properties file.
profileNameuse the value for dmgrprofilename from the websphere.global.properties file.
profilePathconcatenate the values for websphere.profile.dir and dmgrprofilename from the websphere.global.properites file. Here is an example:C\:\\Program Files\\IBM\\WebSphere\\AppServer\\profiles\\SASDmgr01.
templatePathconcatenate the values for websphere.install.dir from the websphere.global.properties file with the "profileTemplates\\management." Here is an example:C\:\\Program Files\\IBM\\WebSphere\\AppServer\\profileTemplates\\management.
winserviceCheckset to true when the deployment manager server profile is being created on Windows.
winserviceStartupTypeset to automatic when the deployment manager server profile is being created on Windows.
JMS Connection Factory Properties
This section defines the properties that are needed to configure a JMS connection factory resource. The properties files are named in the pattern JMSConnectionFactory.scope.jmsConnectionFactoryIdentifier.properties.
SIBusnameis the name of the service integration bus. This property is required if a data source must be constructed as a message data store.
310 Chapter 14 / SAS Configuration Scripting Tools

connectionFactoryIdis a unique identifier for this JMS connection factory.
pagedTimeoutis the value in seconds for the JMS connection pool aged time-out.
pconnectionFactoryNameis the JMS connection factory name.
pconnectionFactoryTypeis the JMS connection factory type. Values are Queue or Topic.
pconnectionTimeoutis the value in seconds for the JMS connection pool time-out.
pdataSourceis the name of a data source that has already been created. This data source is used as a messaging data store.
pjaasAliasNameis the name of the JAAS alias definition that contains the user ID and password for the data source when a messaging data store is used.
pjndiNameis the JNDI name for this JMS connection factory.
pmaxConnectionsis the maximum number of JMS connection pool connections.
pminConnectionsis the minimum number of JMS connection pool connections.
pproviderEndPointsis the JMS provider endpoints string that is used for remote connections.
ppurgePolicyis the JMS connection pool purge policy.
preapTimeis the value for the JMS connection pool reap time.
Scripting Tool for WebSphere Application Server 311

pschemaNameis the schema name for the data store when a messaging data source is used.
punusedTimeoutis the JMS connection pool unused connection time-out.
scopeis the scope for this JMS connection factory. Values are SERVER, NODE or CELL.
servernameis the name of the server configuration where the JMS connection factory is configured, such as SASServer1, SASServer2, and so on.
JMS Queue Properties
This section defines the properties that are needed to configure a JMS queue resource. The properties files are named in the pattern JMSQueue.scope.jmsQueueIdentifier.properties.
SIBusnameis the name of the service integration bus to which this JMS queue is associated.
pdeliveryModeis the type of message delivery for this JMS queue destination. Values are Application, Nonpersistent, or Persistent. The default value is Application.
pjndiNameis the JNDI name for this JMS queue.
ppriorityis an integer between 0 and 9. If a value is not provided, then the priority must be assigned by the producing application.
pqueueNameis the name of the JMS queue.
preadAheadidentifies the read ahead optimization. Values are AsConnection, Enabled, or Disabled. The default value is AsConnection.
312 Chapter 14 / SAS Configuration Scripting Tools
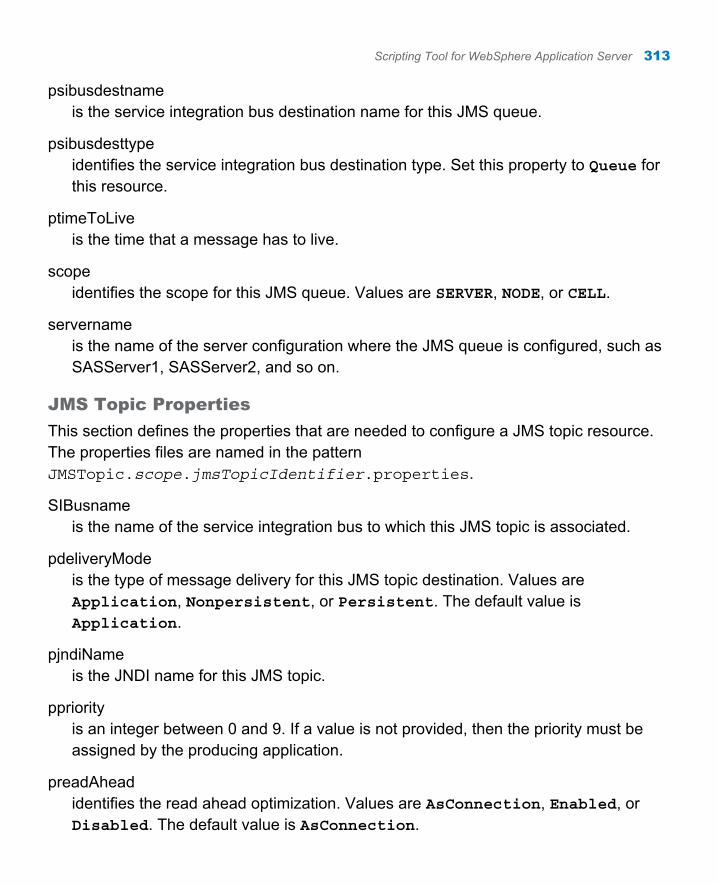
psibusdestnameis the service integration bus destination name for this JMS queue.
psibusdesttypeidentifies the service integration bus destination type. Set this property to Queue for this resource.
ptimeToLiveis the time that a message has to live.
scopeidentifies the scope for this JMS queue. Values are SERVER, NODE, or CELL.
servernameis the name of the server configuration where the JMS queue is configured, such as SASServer1, SASServer2, and so on.
JMS Topic Properties
This section defines the properties that are needed to configure a JMS topic resource. The properties files are named in the pattern JMSTopic.scope.jmsTopicIdentifier.properties.
SIBusnameis the name of the service integration bus to which this JMS topic is associated.
pdeliveryModeis the type of message delivery for this JMS topic destination. Values are Application, Nonpersistent, or Persistent. The default value is Application.
pjndiNameis the JNDI name for this JMS topic.
ppriorityis an integer between 0 and 9. If a value is not provided, then the priority must be assigned by the producing application.
preadAheadidentifies the read ahead optimization. Values are AsConnection, Enabled, or Disabled. The default value is AsConnection.
Scripting Tool for WebSphere Application Server 313

psibusdestnameis the service integration bus destination name for this JMS topic.
psibusdesttypeidentifies the service integration bus destination type. Set this property to TopicSpace for this resource.
ptimeToLiveis the time that a message has to live.
ptopicSpaceis the name for this topic space. This value is typically the same as the ptopicname value.
ptopicnameis the name of for this topic definition.
scopeidentifies the scope for this JMS topic. Values are SERVER, NODE, or CELL.
servernameis the name of the server configuration where the JMS topic is configured, such as SASServer1, SASServer2, and so on.
Login Module Properties
This section defines the properties that are needed to configure a JAAS login module. The properties files are named in the pattern LoginModule.CELL.loginModuleIdentifier.properties.
JaasAliasis the JAAS alias name for this login module.
JaasAliasDomainidentifies an additional domain to which this login module responds. This property is used when this login module is running in a remote JVM and receives generated credentials from an environment using the trusted authentication module.
JaasCredentialsRequiredis a Boolean value. If set to true, then the login module requires credentials to construct custom properties for the module.
314 Chapter 14 / SAS Configuration Scripting Tools

JaasDebugset this property to true to generate debugging information to the System.out stream.
JaasDomainidentifies the domain in which this login module is authenticating. Requests to authenticate users outside this domain are ignored.
JaasHoldOpenConnectionis a Boolean value. If set to true, then the authentication connection is held open after the login module is driven to avoid TCP/IP overhead.
JaasHostis the fully qualified domain name for the metadata server. Authentication requests are sent to this host name.
JaasModuleClassNameis the class name for the login module.
JaasModuleFlagidentifies the flag for the login module configuration. Valid values are required, requisite, sufficient, or optional.
JaasPortidentifies the network port that the metadata server is listening on for new connections.
JaasRepositoryidentifies the repository name to use as the default repository when the connection is returned. For the primary authentication, this repository is usually the foundation repository.
Mail Session Properties
This section defines the properties that are needed to configure a mail session resource. The properties files are named in the pattern MailSession.scope.mailSessionIdentifier.properties.
mailSessionJndiNameis the JNDI name for this mail session resource.
Scripting Tool for WebSphere Application Server 315

mailSessionNameis the name for this mail session.
mailSessionSmtpHostis the SMTP host name for this mail session.
scopeidentifies the scope for this mail session. Values are SERVER, NODE, or CELL.
server.mailsrv.requires.authenticationis a Boolean value. Set to true if the SMTP server requires credentials for authentication.
servernameis the name of the server configuration where the mail session is configured, such as SASServer1, SASServer2, and so on.
Node Profile Properties
This section defines the properties that are needed to configure a node profile. The properties files are named in the pattern NodeProfile.NODE.profileName.properties.
BOOTSTRAP_ADDRESSis the RMI bootstrap address for the node agent server.
SOAP_CONNECTOR_ADDRESSis the SOAP port for the node agent server.
create.nodeprofile.response.fileidentifies the fully qualified path to the file that contains all the responses that are needed to create the node profile with the manageprofiles command.
jvmOptionsis the list of JVM options for the node agent server.
Node Profile manageprofile Command Response File Properties
The WebSphere Application Server manageprofiles command uses properties from three sources to create the node profile:
n the global properties
316 Chapter 14 / SAS Configuration Scripting Tools

n the node profile properties file
n properties in the create.NodeProfile.NODE.response.profileName.properties file
createmust have a null value so that the manageprofiles command creates the node agent profile.
cellNameuse the value for cellname from the websphere.global.properties file
federateLatermust have a value of true so that the manageprofiles command does not federate the node into the cell during the profile creation. The node is automatically federated by the configuration scripting tool with processing that occurs later.
hostnameuse the value for webappsrv.admin.host from the websphere.global.properties file.
nodeDefaultPortsmust have a null value to force the manageprofiles command to create the default ports for the nodeagent server.
nodeNameuse the value for appsrvnodename from the websphere.global.properties file.
profileNameuse the value for profilename from the websphere.global.properties file.
profilePathuse the value for websphere.profile.dir and the value for profilename. Both values are read from the websphere.global.properites file. For example: c\:\\Program Files\\IBM\\WebSphere\\AppServer\\profiles\\SAShost01Node.
templatePathuse the value for websphere.install.dir from websphere.global.properties file and the characters "profileTemplates\\management." For example: c\:\\Program Files\\IBM\\WebSphere\\AppServer\\profileTemplates\\management.
Scripting Tool for WebSphere Application Server 317

winserviceCheckused only when the node profile is being created on Windows. This value must be set to true.
winserviceStartupTypeused only when the node profile is being created on Windows. This value must be set to automatic.
Server Properties
This section defines the properties that are needed to configure a WebSphere Application Server. The properties files are named in the pattern Server.SERVER.serverName.properties.
BOOTSTRAP_ADDRESSis the RMI bootstrap address for the Web application server.
SOAP_CONNECTOR_ADDRESSis the SOAP port for the Web application server.
WC_adminhostis the port number for the deployment manager server administrative console.
WC_adminhost_secureis the port number for secure access to the deployment manager server administrative console.
WC_defaulthostis the HTTP transport port for the deployment manager server.
WC_defaulthost_secureis the HTTPS transport port for the deployment manager server.
enforceJava2Securityis a Boolean value. Set to true to indicate that Java 2 security must be enforced for all Web applications on this Web application server.
jvmOptionsis the list of JVM options for the Web application server.
318 Chapter 14 / SAS Configuration Scripting Tools

scopeset this value to SERVER.
serverididentifies the server ID of the server configuration where the application is deployed, such as server1, server2, and so on.
servernameidentifies the name of the server configuration where the application is deployed, such as SASServer1, SASServer2, and so on.
SIBus Properties
This section defines the properties that are needed to configure the SAS Service Integration Bus. The properties files are named in the pattern SIBus.SERVER.SIBusIdentifier.properties.
SIBusnameis the name for the Service Integration Bus. The default value is SAS_Messaging_Bus.
reuseSIBusMemberis a Boolean value. Set to true to indicate that if a definition with the same name already exists, then reuse the existing definition.
servernameidentifies the name of the server configuration where the service integration bus is deployed, such as SASServer1, SASServer2, and so on. The Web application server with the name is added as a new member.
Scripting Tool for WebSphere Application Server 319

320 Chapter 14 / SAS Configuration Scripting Tools
Appendix 1Configuring the SAS Environment File
About the SAS Environment File . . . . . . . . . . . . . . . . . . . . . . . . . . . . . . . . . . . . 321
Configuring the SAS Environment File . . . . . . . . . . . . . . . . . . . . . . . . . . . . . 322Customizing the SAS Environment File . . . . . . . . . . . . . . . . . . . . . . . . . . . . 322Element Description . . . . . . . . . . . . . . . . . . . . . . . . . . . . . . . . . . . . . . . . . . . . . . . . . . 323
About the SAS Environment File
A SAS environment file defines the available set of SAS environments for SAS client applications, and is generated during the configuration of the SAS Web Infrastructure Platform. The SAS Logon Manager includes a servlet that provides default information for the initial deployment. When you have validated that your client applications work successfully with a deployment, it is recommended that you deploy the sas-environment.xml file to an HTTP server. This step ensures that you can customize the sas-environment.xml file to specify the name that you want to use and to account for the IT topology at your site.
Your site might have requirements that application clients interact with separate development, test, and production environments. Or, you might elect to have separate SAS deployments to support distinct business units. In either scenario, when multiple environments are required, you can customize and deploy the sas-environment.xml file as needed.
321

Configuring the SAS Environment File
Customizing the SAS Environment File
The sas-environment.xml is located in the SAS-config-dir\Lev1\Web\Common directory.
Because Web application servers are likely to be rebooted, it is not recommended that this file be placed in a Web application server. Instead, place the customized file on an HTTP server.
Here is a sample sas-environment.xml file that is configured for two environments:
<?xml version="1.0" encoding="UTF-8"><environments xmlns="http://www.sas.com/xml/schema/sas-environment-9.2" xmlns:xsi="http://www.w3.org/2001/XMLSchema-instance" xsi:schemaLocation="http://www.sas.com/xml/schema/sas-environment-9.2 http://www.sas.com/xml/schema/sas-environment-9.2/sas-environment-9.2.xsd"> <environment name="Red" default="false"> <desc>test server Red for SAS Financial Management Studio</desc> <service-registry>http://red.na.sas.com:8080/SASWIPClientAccess/remote/ServiceRegistry</service-registry> </environment> <environment name="Blue" default="true"> <desc>test server Blue for SAS Financial Management Studio</desc> <service-registry>http://blue.na.sas.com:7001/SASWIPClientAccess/remote/ServiceRegistry</service-registry> </environment></environment>
The service registry that is specified in the file enables desktop client applications to determine the location of required services on the middle tier. It also enables the applications to obtain a list of services available in the environment. Note that this sas-environment.xml file resides on an HTTP server, but the configuration in the file refers to the Web application servers and their port numbers.
If SSL is configured at your site, specify the https protocol and the SSL port number for the service registry.
322 Appendix 1 / Configuring the SAS Environment File

If your site has multilingual users, you can configure the sas-environment.xml file to include localized descriptions. In the next example, the Blue environment is specified in German:
<environment name="Blue"> <desc>test2 Blue</desc> <desc xml:lang="de">Blau</desc> <service-registry>http://blue.na.sas.com:7001/SASWIPClientAccess/remote/ServiceRegistry</service-registry></environment>
When the customized sas-environment.xml file is available for multiple environments, refer to the documentation for your SAS application or solution for instructions about how to enable the availability of these environments for the users. If you change the location of the sas-environment.xml file, be aware that SAS desktop applications such as SAS Enterprise Miner need to be updated with the new location. The SAS desktop applications that integrate with the middle tier use the -Denv.definition.location JVM option in INI files to identify the location of the sas-environment.xml file. Refer the documentation for the SAS desktop applications that you use. The SAS-install-dir/sassw.config file is also used to identify the location of the sas-environments.xml file. Update the SASENVIRONMENTSURL= value in the sassw.config file.
Element Description
The following list identifies and describes the elements that can be used in the sas-environment.xml file:
environmenthas a name attribute that cannot contain space characters. This attribute is used internally by SAS software to identify each of the environments that are available in the deployment. This element has an attribute that is named default. This attribute is used to identify a default environment for client applications. If more than one environment element has this attribute set to true, then the last environment in the file with the attribute set to true is set as the default environment. It is not necessary to set the attribute to false for all other environments.
Configuring the SAS Environment File 323

descused in the client applications to provide a menu of environment choices. As shown in the previous example, this field can provide a localized message when the xml:lang attribute is set.
service-registrycontains the URL to the service registry for the environment. Use the protocol, host name, and port number of the Web application server that is running the SAS Web Infrastructure Platform.
324 Appendix 1 / Configuring the SAS Environment File

Glossary
alertan automatic notification of an electronic event that is of interest to the recipient.
authenticationSee client authentication
authentication domaina SAS internal category that pairs logins with the servers for which they are valid. For example, an Oracle server and the SAS copies of Oracle credentials might all be classified as belonging to an OracleAuth authentication domain.
authentication providera software component that is used for identifying and authenticating users. For example, an LDAP server or the host operating system can provide authentication.
base paththe location, relative to a WebDAV server's URL, in which packages are published and files are stored.
client authenticationthe process of verifying the identity of a person or process for security purposes.
client-side poolinga configuration in which the client application maintains a collection of reusable workspace server processes.
325

content mappingthe correspondence of the SAS metadata folder structure to a content repository system. SAS metadata folders are generally mapped to a WebDAV such as the SAS Content Server repository, or to a local file system.
credentialsthe user ID and password for an account that exists in some authentication provider.
deployto install an instance of operational SAS software and related components. The deployment process often includes configuration and testing as well.
foundation repositorythe metadata repository that is used to specify metadata for global resources that can be shared by other repositories. For example, a foundation repository is used to store metadata that defines users and groups on the metadata server.
foundation servicesSee SAS Foundation Services
hot deploymentthe process of upgrading an application or component in a client-server environment while the server is running. Hot-deployed components are made available immediately, and do not require the server to be restarted.
identitySee metadata identity
Java Development KitSee JDK
Java RMISee remote method invocation
326 Appendix 1 / Configuring the SAS Environment File

Java Virtual MachineSee JVM
JDKa software development environment that is available from Oracle Corporation. The JDK includes a Java Runtime Environment (JRE), a compiler, a debugger, and other tools for developing Java applets and applications. Short form: JDK.
JVMa program that interprets Java programming code so that the code can be executed by the operating system on a computer. The JVM can run on either the client or the server. The JVM is the main software component that makes Java programs portable across platforms. A JVM is included with JDKs and JREs from Oracle Corporation, as well as with most Web browsers. Short form: JVM.
metadata identitya metadata object that represents an individual user or a group of users in a SAS metadata environment. Each individual and group that accesses secured resources on a SAS Metadata Server should have a unique metadata identity within that server.
middle tierin a SAS business intelligence system, the architectural layer in which Web applications and related services execute. The middle tier receives user requests, applies business logic and business rules, interacts with processing servers and data servers, and returns information to users.
poola group of server connections that can be shared and reused by multiple client applications. A client-side pool consists of one or more puddles.
portala Web application that enables users to access Web sites, data, documents, applications, and other digital content from a single, easily accessible user interface.
Configuring the SAS Environment File 327

A portal's personalization features enable each user to configure and organize the interface to meet individual or role-based needs.
portleta Web component that is managed by a Web application and that is aggregated with other portlets to form a page within the application. Portlets can process requests from the user and generate dynamic content.
puddlea group of servers that are started and run using the same login credentials. Each puddle can also allow a group of clients to access the servers.
remote method invocationa Java programming feature that provides for remote communication between programs by enabling an object that is running in one Java Virtual Machine (JVM) to invoke methods on an object that is running in another JVM, possibly on a different host. Short form: RMI.
remote service deploymenta service deployment that supports shared access to a set of SAS Foundation Services that are deployed within a single Java Virtual Machine (JVM), but which are available to other JVM processes. Applications use the remote service deployment to deploy and access remote foundation services.
repositorya storage location for data, metadata, or programs.
RMISee remote method invocation
SAS Application Servera logical entity that represents the SAS server tier, which in turn comprises servers that execute code for particular tasks and metadata objects.
328 Appendix 1 / Configuring the SAS Environment File

SAS batch servera SAS Application Server that is running in batch mode. In the SAS Open Metadata Architecture, the metadata for a SAS batch server specifies the network address of a SAS Workspace Server, as well as a SAS start command that will run jobs in batch mode on the SAS Workspace Server.
SAS BI Web servicea Web service that adheres to the XML for Analysis (XMLA) specification for executing SAS Stored Processes.
SAS Content Servera server that stores digital content (such as documents, reports, and images) that is created and used by SAS client applications. To interact with the server, clients use WebDAV-based protocols for access, versioning, collaboration, security, and searching.
SAS Foundation Servicesa set of core infrastructure services that programmers can use in developing distributed applications that are integrated with the SAS platform. These services provide basic underlying functions that are common to many applications. These functions include making client connections to SAS application servers, dynamic service discovery, user authentication, profile management, session context management, metadata and content repository access, activity logging, event management, information publishing, and stored process execution.
SAS Framework Data Servera database server that is the default location for middle-tier data such as alerts, comments, and workflows, as well as data for the SAS Content Server and SAS Service Parts Optimization. The server is provided as an alternative to using a third-party DBMS. The server cannot be used as a general-purpose data store.
SAS Management Consolea Java application that provides a single user interface for performing SAS administrative tasks.
Configuring the SAS Environment File 329

SAS Metadata Repositorya container for metadata that is managed by the SAS Metadata Server.
SAS Web Infrastructure Platforma collection of middle-tier services and applications that provide infrastructure and integration features that are shared by SAS Web applications and other HTTP clients.
SAS Workspace Servera SAS IOM server that is launched in order to fulfill client requests for IOM workspaces.
server-side poolinga configuration in which a SAS object spawner maintains a collection of reusable workspace server processes that are available for clients. The usage of servers in this pool is governed by the authorization rules that are set on the servers in the SAS metadata.
serviceone or more application components that an authorized user or application can call at any time to provide results that conform to a published specification. For example, network services transmit data or provide conversion of data in a network, database services provide for the storage and retrieval of data in a database, and Web services interact with each other on the World Wide Web.
service configurationa set of values that can be customized for a particular service in SAS Foundation Services. By editing a service configuration, you can override the default configuration for the foundation service.
service deploymenta collection of SAS Foundation Services that specifies the data that is necessary in order to instantiate the services, as well as dependencies upon other services. Applications query a metadata source (a SAS Metadata Server or an XML file) to
330 Appendix 1 / Configuring the SAS Environment File

obtain the service deployment configuration in order to deploy and access foundation services.
session contexta context that serves as a control structure for maintaining state within a bound session. 'State' includes information about the latest status, condition, or content of a process or transaction. Session Services, User Services, and Logging Services use the session context to facilitate resource management and to pass information among services.
single sign-onan authentication model that enables users to access a variety of computing resources without being repeatedly prompted for their user IDs and passwords. For example, single sign-on can enable a user to access SAS servers that run on different platforms without interactively providing the user's ID and password for each platform. Single sign-on can also enable someone who is using one application to launch other applications based on the authentication that was performed when the user initially logged on.
SSOSee single sign-on
themea collection of specifications (for example, colors, fonts, and font styles) and graphics that control the appearance of an application.
trustto accept the authentication or verification that has been performed by another software component.
trust relationshipa logical association through which one component of an application accepts verification that has already been performed by another component.
Configuring the SAS Environment File 331

trusted usera privileged service account that can act on behalf of other users on a connection to the metadata server.
unrestricted identitya user or group that has all capabilities and permissions in the metadata environment due to membership in the META: Unrestricted Users Role (or listing in the adminUsers.txt file with a preceding asterisk).
user contexta set of information about the user who is associated with an active session. The user context contains information such as the user's identity and profile.
Web-distributed authoring and versioninga set of extensions to the HTTP protocol that enables users to collaboratively edit and manage files on remote Web servers. Short form: WebDAV.
WebDAVSee Web-distributed authoring and versioning
WebDAV repositorya collection of files that are stored on a Web server so that authorized users can access them.
332 Appendix 1 / Configuring the SAS Environment File

Index
A
alert notificationSMS 82
alertsdefault delivery type 79
anonymous access 42anonymous Web user 199Apache HTTP Server
cache control for static content40
application serverupdating JBoss configuration
149updating WebLogic
configuration 149updating WebSphere
configuration 149ARM (application response
measurement)enabling for SAS Logon
Manager 160SAS Logon Manager 160
audit 99auditing 86, 88
for Web applications 86relational tables for 86
authenticated users 94authentication 34, 198
See also Web authenticationSAS Anonymous Web User
with 42SAS authentication for Java
200token for multicast security
243authentication requests 148authorization
for SAS Content Server 179
B
backupsSAS Content Server 165
bind address 246branding 207
C
cache controltime-out values for static
content (Apache) 40cascading style sheets (CSS)
205migrating 224
channels
333
deleting packages 109clear text 198client access
enabling for JMX 116client-side pooling 62clustering 31
for Web application servers28, 37
codebase 53colors
changing in themes 214comment management
predefined role 72concurrent logon sessions 159configuration
auditing for Web applications86
cluster of Web application servers 28, 37
custom logoff message 149data sources for middle tier
59HTTP sessions 37JBoss application server 149Job Execution Services 63middle-tier 20multicast options 239properties for SAS Web
Report Studio 75reconfiguring Web application
server 137removing configuration
content 124restrictive policy files 46
sample middle-tier deployment scenarios 21
SAS environment file 322scripting tools 252shared between middle and
server tiers 57SharedServices DSN 60SMTP mail server for middle
tier 58Web application server, to
enable JMX client access116
Web services for Java 193WebLogic application server
149WebSphere application server
149Configuration Manager 73
deleting Web services 193example 75properties for SAS Web
Report Studio 75summary of steps for 74
connection parametersfor HTTP and HTTPS
sessions 84content
See also SAS Content ServerSee also static contentloading manually 168moving and sharing 165updating manually 169
custom logoff message 149custom themes
See themes
334 Index

custom Web applicationsSee Web applications
D
data sources 59configuring for middle tier 59configuring SharedServices
DSN 60database persistence 183DAVTree utility 104
adding resources to WebDAV105
advanced features 107connecting to a WebDAV
location 104copying or moving files in
WebDAV 107editing text files in WebDAV
107starting 104
debuggingPackage Clean-Up utility 113Web application logging levels
142Default theme 206demilitarized zone (DMZ) 32deployment
EAR files 16manually deploying content to
SAS Content Server 165redeploying Web applications
129
sample middle-tier scenarios21
SAS Deployment Manager124
themes 206, 207themes, in test environment
218themes, on different Web
application server 221directives 100
adjusting URLs manually 170DMZ (demilitarized zone) 32documentation 15
E
e-mailconfiguring SMTP server 58sending to users 95
EAR filesdeploying in correct order 16exploded, in development
environment 138names 128redeploying 129
encryption 33environment
See also middle-tier environment
restoring to use default restrictive policy files 51
environment file, configuring322
exploded directories 126
Index 335

exploded EAR filesin development environment
138
F
filesadding to SAS Content Server
178deleting 179permissions for WebDAV files
175firewalls 32folders
creating 177deleting 179permissions for WebDAV
folders 175forcing users to log off 95
G
generated Web services 192, 199
global propertiessetting for SAS applications
77graphics
changing in themes 215
H
heap size 35
HTTP serversload balancing for 33proxy plug-in between Web
application server and 39serving static content 39static content deployed in
reverse proxy 25HTTP sessions
affinity 31auditing 88configuring 37connection parameters for 84force users to log off 96time-out interval 151
HTTP transport-level security199
HTTPS sessionsconnection parameters for 84
I
IBM WebSphere Application Server
See WebSphereimages 205
changing in themes 215migrating 225
IOM Spawners 119
J
Java
336 Index

configuring Web services for193
SAS authentication for 200Web authentication for 148,
200Java Development Kit (JDK) 5Java Mail Session 58Java Management Extensions
See JMX (Java Management Extensions)
JBossreconfiguring 276
JBoss Application Server 4creating restrictive policies for
49disabling restrictive policy
handling for 52example policy files 47exploded EAR files 138redeploying Web applications
130updating configuration 149
JConsolemanaging SAS resources 116
JDBC 60JBoss 285WebLogic 269WebSphere 305
JGroups 246JMX (Java Management
Extensions) 115enabling client access 116JConsole 116managing SAS resources 115MBeans 115, 117
JSR 168 15JVM options
default values 36JBoss 282SAS Content Server 164SAS Workflow 11WebLogic 275WebSphere 318
L
load balancing 33loading content manually 168locked settings 77log files
changing location of 141, 143logging 140
changing logging levels 142for Web applications 139logging contexts 144Package Clean-Up utility 113service settings for Web
applications 139logging off
forcing users to log off 95login sessions
system maintenance tools for managing 96
logoff messageconfiguring custom message
149
Index 337
M
Maintenance Restart Wizard 97maintenance tools
for managing user login sessions 96
MBeans 115, 117accessing 115Server MBean 120ServerFactory MBean 118Spawner MBean 119
metadatadeleting themes from 223modifying theme metadata
221, 222middle tier
configuration shared with server tier 57
configuring 20configuring data sources for
59configuring SMTP mail server
for 58relational databases with 62sample deployment scenarios
21SAS Framework Data Server
with 59security 42
middle-tier environment 2SAS Content Server 12SAS Web Infrastructure
Platform 5SAS Workflow 11starting Web applications 16
third-party software components 4
Web applications 13migrating themes 224
cascading style sheets (CSS)224
images 225SAS Logon Manager 226theme descriptors 226theme templates 225
monitoring users 94moving content 165multicast options 238
configuring 239multicast properties 241multicast security 43, 238
authentication token for 243
N
naming themes 218
O
online documentationSee documentation
Oracle WebLogic ServerSee WebLogic
P
Package Clean-Up utility 108arguments 112
338 Index

changing prompt behavior110
deleting packages 109deleting specific packages
110examples 114listing packages 111logging and debugging 113syntax for deleting packages
109packages
deleting 109deleting specific packages
110listing 111
passwords 263, 284, 297, 298performance
clustering Web application servers 31
network topology 21SAS Workflow 11
permissionscustom portlets and Web
applications 53customizing for socket access
53WebDAV folders and files 175
persistence, database 183pooling 62portlets
access permissions for custom portlets 53
preferences 70product-specific branding 207production environment
moving themes to 219prompts
Package Clean-Up utility 110properties
global properties for SAS applications 77
SAS Application Infrastructure77
SAS Web Report Studio 75proxy configurations
configuring HTTP sessions in environments with 37
proxy plug-insbetween Web application
server and HTTP server 39Public Key Cryptography 33
Q
quiesce the system 98
R
rebuilding themes 218rebuilding Web applications 125
exploded directories 126rebuilding one or more 126when to rebuild 125
redeploying Web applications 129
JBoss 130redeploying EAR files 129WebLogic 131
Index 339

WebSphere 135relational databases
with middle tier 62relational tables
for auditing 86reports
See SAS Web Report Studioresources
adding to WebDAV repository105
managing SAS resources with JConsole 116
managing SAS resources with JMX tools 115
restrictive policy files 46creating for JBoss 49creating for WebSphere 49customizing permissions for
socket access 53disabling for JBoss 52disabling for WebSphere 52example files for JBoss and
WebSphere 47permissions for custom
portlets and Web applications 53
restoring default policies 51reverse proxy
static content deployed in 25roles
Comments:Administrator 72Job Execution Services 68
S
SAS Anonymous Web UserSAS authentication with 42
SAS Application Infrastructure properties 77
SAS applicationsglobal properties for 77
SAS authentication 198for Java 200SAS Anonymous Web User
with 42SAS BI Dashboard 14, 20SAS BI Portlets 15SAS BI Web Services for Java
5SAS Comment Manager
Comments:Administrator role72
predefined role 72SAS Content Server 5, 12, 164
adding files to 178Administration Console 172authorization for 179backing up 165deploying content manually
165loading content manually 168moving and sharing content
165reconfiguring to use a
database for storage 183updating content manually
169
340 Index

SAS Content Server Administration Console 172
accessing 172adding files to SAS Content
Server 178creating folders 177deleting folders or files 179interface 173permissions for WebDAV
folders and files 175SAS Default theme 206SAS Deployment Manager 124
accessing 125auditing for Web applications
86custom log on, log off, and
time-out messages 149exploded EAR files in
development environment138
HTTP session time-out interval 151
rebuilding Web applications125
removing configuration content 124
update passwords 263, 284, 298
SAS Documentation Web application 15
SAS environment file 321configuring sas-
environment.xml 322SAS Foundation Services 9
SAS Framework Data Server 59
SharedServices database on61
with middle tier 59SAS Information Delivery Portal
14, 20SAS Intelligence Platform 2SAS Logon Manager 5
ARM capabilities 160auditing 88concurrent logon sessions
159enabling ARM for 160
SAS Mail Service 58SAS Management Console
assigning default theme from220
Configuration Manager 73modifying theme metadata
221SAS Preferences Manager 5,
70SAS Remote Services
Applicationheap size for 35multicast options 240
SAS resourcesmanaging with JConsole 116managing with JMX tools 115
SAS servers 118, 120SAS Shared Web Assets 5SAS Stored Process Web
application 5SAS Themes Web application
Index 341

serving static content 39SAS Web Administration
viewing audit reports 99SAS Web Administration
Console 5, 92accessing 94forcing users to log off 95monitoring users 94sending e-mail to users 95system maintenance tools for
user login sessions 96users appearing in 94viewing information about
Web applications 100SAS Web Application Themes
See themesSAS Web Infrastructure
Platform 5, 70Configuration Manager 73connection parameters for
HTTP and HTTPS sessions84
default alert notification delivery type 79
global properties for SAS applications 77
SAS Comment Manager 72SAS Preferences Manager 70SAS Web Administration
Console 92SAS Web Infrastructure
Platform Services 5, 10SAS Web Report Studio 13, 20
configuring properties 75
sas-environment.xml, configuring 322
Secure Sockets LayerSee SSL (Secure Sockets
Layer)security
HTTP transport-level 199logon audit 88middle tier 42multicast 43, 238restrictive policy files 46SAS Anonymous Web User
42SAS Comment Manager 72Single Sign-On 44SSL 45transport-level 201Web services 198WS-Security message-level
199Server MBean 120server tier
configuration shared with middle tier 57
server-side pooling 62ServerFactory MBean 118servers
See SAS serverssession affinity 31session time-out interval 151SharedServices database 59
on SAS Framework Data Server 61
SharedServices DSN 59configuring 60
342 Index

Single Sign-On (SSO) 44SMS alert notification 82SMTP mail server
configuring for middle tier 58socket access
customizing permissions for53
sourcesSee data sources
Spawner MBean 119SSL (Secure Sockets Layer) 33
enabling 199for Web applications 45
SSO (Single Sign-On) 44static content 39
Apache cache control for 40deployed in reverse proxy 25serving in SAS Themes Web
application 39serving with HTTP servers 39
system maintenance toolsfor managing user login
sessions 96system users 94
T
test environmentdeploying themes in 218
testing themes 219text files
editing in WebDAV 107theme descriptors 205
migrating 226
theme templates 205changing 217migrating 225
themes 204assigning as default theme
220cascading style sheets (CSS)
205changing colors 214changing graphics 215changing theme templates
217components 204creating and deploying 206creating work area for 209Default theme 206defining and deploying 207deleting from metadata 223deploying in test environment
218deployment on different Web
application server 221designing 208images and 205migrating 224migrating cascading style
sheets (CSS) 224migrating images 225migrating theme descriptors
226migrating theme templates
225modifying metadata 221, 222moving to production
environment 219
Index 343

naming 218rebuilding 218testing 219
third-party software 4time-out interval 151transport-level security 201tuning Web application servers
36
U
UNIXsupport for Web applications
4UpdateDefaultTheme.sas
program 221UpdateTheme.sas program
222updating content manually 169URLs
adjusting directive URLs manually 170
usersappearing in SAS Web
Administration Console 94authenticated 94forcing users to log off 95monitoring with SAS Web
Administration Console 94prohibit log on sessions 98sending e-mail to 95system maintenance tools for
managing login sessions96
system users 94
W
warning messageinactive user sessions 155
Web application servers 4bind address and JGroups
246configuring a cluster of 28, 37deploying themes on different
server 221enabling JMX client access
116multicast options 240proxy plug-in between HTTP
server and 39reconfiguring 137, 252tuning 36Web applications deployed in
single server 22Web application themes
See themesWeb applications 13
access permissions for foundation service-enabled53
auditing for 86changing location of log files
141, 143changing logging levels 142configuring custom logoff
messages 149
344 Index

custom log on, log off, and time-out messages 149
deployed across Web application server cluster28
deployed in single Web application server 22
deploying EAR files in correct order 16
directives 100disable concurrent logon
sessions 159EAR file names 128exploded EAR files in
development environment138
HTTP session time-out interval 151
inactive user sessions 155logging contexts 144logging for 139prohibit user log on sessions
98rebuilding 125redeploying to JBoss 130redeploying to WebLogic 131redeploying to WebSphere
135SAS BI Dashboard 14SAS Deployment Manager
and 124SAS Documentation for the
Web 15SAS Information Delivery
Portal 14
SAS Web Administration Console 92
SAS Web Report Studio 13settings 100Single Sign-On 44SSL for 45starting 16themes 204viewing information about 100warning message 155
Web authentication 34, 148, 199
See also authenticationfor Java 200RESTful Web Services 200transport-level security 201updating JBoss application
server configuration 149updating WebLogic
application server configuration 149
updating WebSphere application server configuration 149
Web Service Maker 192, 200Web services
configuring for Java 193deleting 193generated 192, 199security for 198SiteMinder 201third-party authentication 201XMLA 199
webanon account 42WebDAV
Index 345
See also DAVTree utilityadding resources to repository
105content management with
DAVTree utility 104copying or moving files 107deleting packages 109editing text files 107permissions for folders and
files 175WebDAVDump utility 165WebDAVRestore utility 165WebLogic 4
exploded EAR files 139reconfiguring 254redeploying Web applications
131updating application server
configuration 149WebSphere 4
creating restrictive policies for49
disabling restrictive policy handling for 52
example policy files 47
exploded EAR files 139reconfiguring 290redeploying Web applications
135updating application server
configuration 149Windows
support for Web applications4
work areacreating for themes 209
WS-Security message-level security 199
X
XMLA Web services 199
Z
z/OSsupport for Web applications
4
346 Index