rollback rx pro - horizon datasys · rollback rx professional edition. ... revert files to old time...
TRANSCRIPT

1
© Horizon DataSys. Copyright 2018. All Rights Reserved Last Updated: May 15, 2018
Version 11.0
Horizon DataSys
RollBack Rx Pro
User Manual
2
RollBack Rx Professional Edition
Table of Contents Introduction .................................................................................................................................. 5
Chapter 1: Installation and Setup .................................................................................................. 7
Minimum Requirements for RollBack Rx PC Edition ................................................................... 7
Install RollBack Rx PC Edition....................................................................................................... 8
RollBack Rx PC Edition Activation ............................................................................................. 11
Uninstall RollBack Rx from Windows ........................................................................................ 13
Uninstall RollBack Rx When Windows Fails to Boot ................................................................. 13
Chapter 2: Rollback System ........................................................................................................ 14
Rollback System from the Application Console ....................................................................... 15
Rollback System When Windows Fails To Start Up .................................................................. 15
Rollback System from Desktop Shortcut .................................................................................. 15
Rollback System with Scheduled Tasks .................................................................................... 16
Chapter 3: Recover Files ............................................................................................................. 17
Search Snapshots to Recover Files .......................................................................................... 17
Explore Snapshots to Recover Files ........................................................................................ 18
Revert Files to Old Time Stamp ............................................................................................... 18
3
RollBack Rx Professional Edition
Taking new snapshot from the Application Console ................................................................ 19
Take New Snapshots When Windows Fails to Start Up ............................................................ 20
Take New Snapshots from Desktop Shortcut ........................................................................... 21
Scheduling Snapshots ............................................................................................................. 22
Chapter 5: Manage Snapshots ................................................................................................. 24
View Snapshot Properties ..................................................................................................... 24
Delete Snapshots ................................................................................................................... 24
Lock or Unlock Snapshots ...................................................................................................... 25
Rename Snapshots ................................................................................................................ 25
Defrag Snapshots .................................................................................................................. 26
Explore Snapshots ................................................................................................................. 26
Chapter 6: System Security ...................................................................................................... 27
RollBack Rx Access Control ....................................................................................................... 27
Create New Users ..................................................................................................................... 28
System Security ......................................................................................................................... 29
Chapter 7: Manage Baseline ....................................................................................................... 30
Update Baseline ........................................................................................................................ 30
Reset to Baseline ...................................................................................................................... 30
Chapter 8: Scheduled Tasks ........................................................................................................ 32
Rollback System with Scheduled Tasks ..................................................................................... 32
Take Snapshots with Scheduled Tasks ...................................................................................... 33
Chapter 4: Taking Snapshots ................................................................................................... 19
4
RollBack Rx Professional Edition
Program Appearance ............................................................................................................ 34
Advanced Settings ............................................................................................................... 34
Network Settings .................................................................................................................. 35
Chapter 10: Command Line Switches ...................................................................................... 36
Product Support ...................................................................................................................... 41
F.A.Q ........................................................................................................................... 42
Chapter 9: Program Settings ................................................................................................ 34
5
RollBack Rx Professional Edition
Introduction This User's Guide is designed to familiarize you with features and benefits of RollBack Rx. You can find the complete list of all the product's features and a brief description of each feature in this document. It is highly recommended that you read this User's Guide thoroughly before installing/setup. The information contained in this User's Guide is subject to change without notice. Horizon Datasys assumes no responsibility nor obligation of any kind for any errors contained herein nor in connection with the furnishing, performance, or use of this document.
RollBack Rx has revolutionized the way PC users recover from common computing disasters. RollBack Rx offers instant PC rollback, file recovery, system, and PC disaster recovery, all in one. RollBack Rx can instantly undo any common PC issue by reverting the PC back to any saved earlier state. With RollBack Rx, you can easily restore your PC to how it was an hour ago, last year, yesterday, last week or even a few seconds ago. RollBack Rx's file recovery feature easily restores files from archived snapshots. System and data security (snapshot encryption) prevents unauthorized access to system and data even if the PC is stolen. RollBack Rx allows computer users, regardless of their skill levels, to easily fix most common computer problems in seconds.
What makes RollBack Rx the best choice for your PC protection solution?
Does not require hidden partition or reserved disk space to install. Supports an unlimited number of snapshots. Takes a new snapshot in 5 seconds. Takes snapshots in the background without interrupting your work. Rolls-back to a snapshot in less than 10 seconds. Works even if Windows OS fails to startup. Allows you to browse inside snapshots to recover documents. Allows snapshot encryption to prevent unauthorized access. Does not deteriorate PC system performance.
6
RollBack Rx Professional Edition
What Can RollBack Rx Do?
RollBack Rx allows you quickly and easily to:
Recover deleted and corrupted files. Rollback your entire computer to a clean system after a virus infection. Restore a crashed system to prior working state. Reset a multi-user system to a clean, pre-configured state after each user's session. Completely remove unwanted software installations. Back out of a failed software deployment. Fix Windows system crashes or software problems. Try out software products before actual deployments without risk. Protect system and data from unauthorized access.
Program Components
RollBack Rx has two components that are installed during the setup process:
Application Console (Windows-based GUI) Subsystem Console (pre-Windows mini-OS)
Application Console (GUI): The Application Console is RollBack Rx’s main graphical userinterface (GUI). This is the GUI or Windows-based component that is installed into the primary operating system. It is from this console that you can perform all the RollBack Rx functions and have access to all the program features while in Windows.
Subsystem Console: Subconsole for short, this is the RollBack Rx’s mini operating system thatboots prior to the Windows operating system. The Subsystem Console is the Interface to RollBack Rx disk operating system (DOS). The Subsystem Console works below the Windows operating system to provide a failsafe rollback capability if Windows is inaccessible (ie. in caseof a Blue Screen of Death or system crash).
You can access the Subsystem Console by pressing the HOME key on the keyboard duringsystem startup while the RollBack Rx pre-Windows (Splash Screen) is displayed. From withinthe Subsystem Console, you can perform many tasks such as rolling back the PC to a previous state. Take a snapshot of the crashed PC (so that you can retrieve data from this snapshot after performing a rollback) or uninstall RollBack Rx.
System Tray Icon: This is RollBack Rx’s shortcut on your desktop to the main Application Console You can find it in the lower right hand corner of your Windows desktop. This SysTray iconprovides you quick access to the RollBack Rx GUI interface. From the system tray; users can quickly take new snapshots, roll-back to a previous snapshot or even launch the RollBack Rx main program console. You can access the system tray icon by right-clicking on the icon to bring up the popup menu.
7
RollBack Rx Professional Edition
Chapter 1: Installation and Setup
Minimum Requirements for RollBack Rx PC Edition
Verify that your system meets the following minimum requirements before attempting to
install RollBack Rx PC Edition.
• 800 megahertz (MHz) processor.
• Microsoft® Windows® XP, Millennium Edition (Me), Microsoft® Windows® 2000,Windows Vista™, Windows 7,Windows 8 & 8.1,Windows 10
• 1 gigabytes (GB) of RAM.
• 1 gigabyte (GB) of free hard disk space for installation.
• CD/DVD-ROM drive if you need to setup from the installation CD.
• Additionally, you must have an Internet Service provider (ISP) if you wish to activatethe program over an Internet connection.
Rollback Rx: Professional is designed ONLY for Windows PCs. Do NOT install it on servers Mac, and Linux Operating Systems.
Always backup your important data before installing Rollback Rx.

8
RollBack Rx Professional Edition
Install RollBack Rx PC Edition
Read and click "Accept" on the End User License Agreement. Then click “Next.” Also Click “Next” on the next screen to check for the latest available version/build setup files.
Choose the location to install RollBack Rx to. A minimum of 1 GB of free disk space is required where RollBack Rx PC Edition will be installed.
RollBack Rx PC Edition is now ready to install. Click "Next" to start the installation process.
Before installing RollBack Rx close any applications that are running.
To install RollBack Rx PC Edition, insert the installation disk or run the Rollback_Rx _[Version].exe file (where [Version] is the version number of your installation file).
-If you are installing Rollback Rx from a downloaded compressed/zip file, You willneed to extrac s
A welcome screen will appear at the start of the installation process. Click Next to continue installation of RollBack Rx PC Edition.
t the contents from the package first before running the setup.
9
RollBack Rx Professional Edition
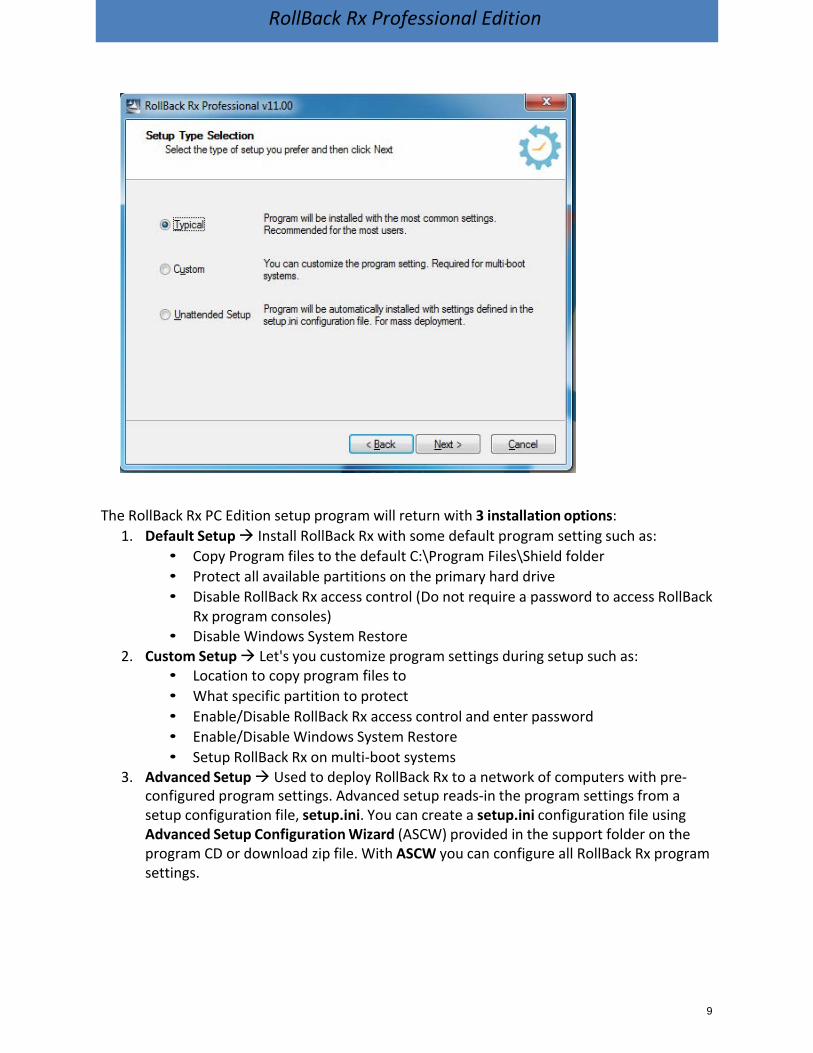
The RollBack Rx PC Edition setup program will return with 3 installation options: 1. Default Setup Install RollBack Rx with some default program setting such as:
• Copy Program files to the default C:\Program Files\Shield folder• Protect all available partitions on the primary hard drive• Disable RollBack Rx access control (Do not require a password to access RollBack
Rx program consoles)• Disable Windows System Restore
2. Custom Setup Let's you customize program settings during setup such as:• Location to copy program files to• What specific partition to protect• Enable/Disable RollBack Rx access control and enter password• Enable/Disable Windows System Restore• Setup RollBack Rx on multi-boot systems
3. Advanced Setup Used to deploy RollBack Rx to a network of computers with pre- configured program settings. Advanced setup reads-in the program settings from asetup configuration file, setup.ini. You can create a setup.ini configuration file usingAdvanced Setup Configuration Wizard (ASCW) provided in the support folder on theprogram CD or download zip file. With ASCW you can configure all RollBack Rx programsettings.
10
RollBack Rx Professional Edition
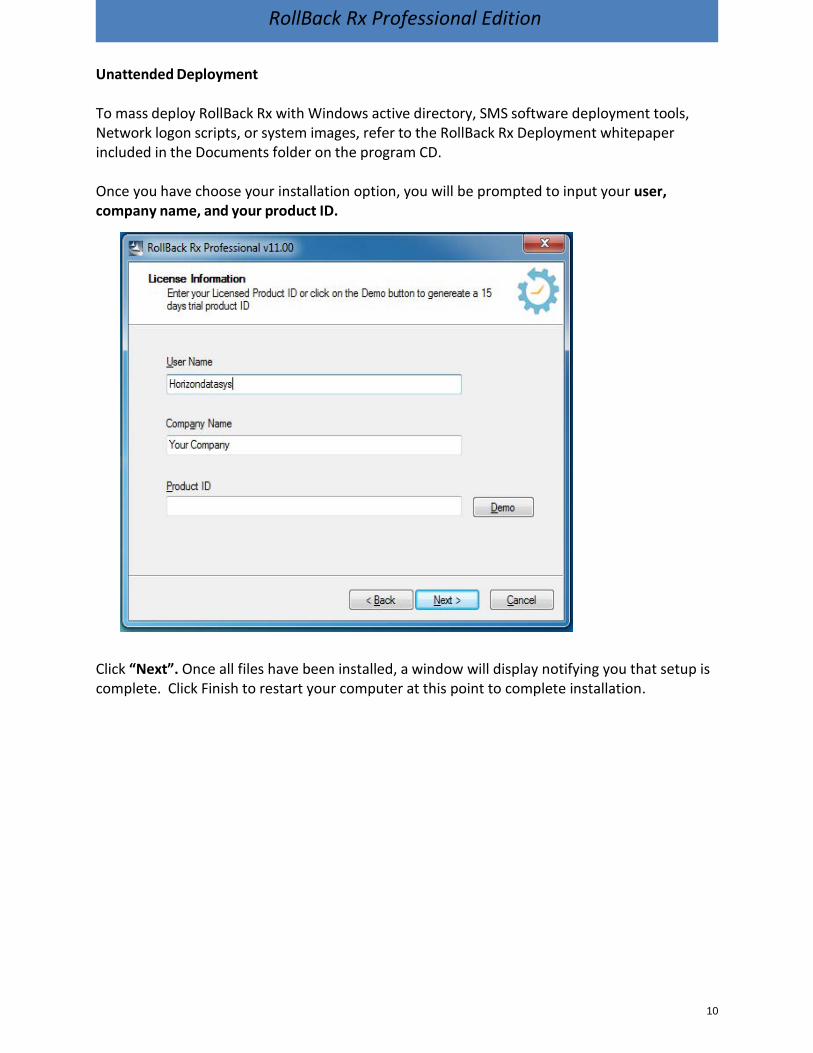
Unattended Deployment
To mass deploy RollBack Rx with Windows active directory, SMS software deployment tools, Network logon scripts, or system images, refer to the RollBack Rx Deployment whitepaper included in the Documents folder on the program CD.
Once you have choose your installation option, you will be prompted to input your user,company name, and your product ID.
Click “Next”. Once all files have been installed, a window will display notifying you that setup is complete. Click Finish to restart your computer at this point to complete installation.
11
RollBack Rx Professional Edition
RollBack Rx PC Edition Licence Activation
Horizon Datasys committed to the protection of intellectual property rights and the reduction of software piracy. Everyone in the economic chain, not just the software developer, is hurt by piracy, including the reseller, the support provider, and you, the end user.
RollBack Rx contains a software-based product activation technology, which means you must activate your RollBack Rx installations in order to authenticate your license key.
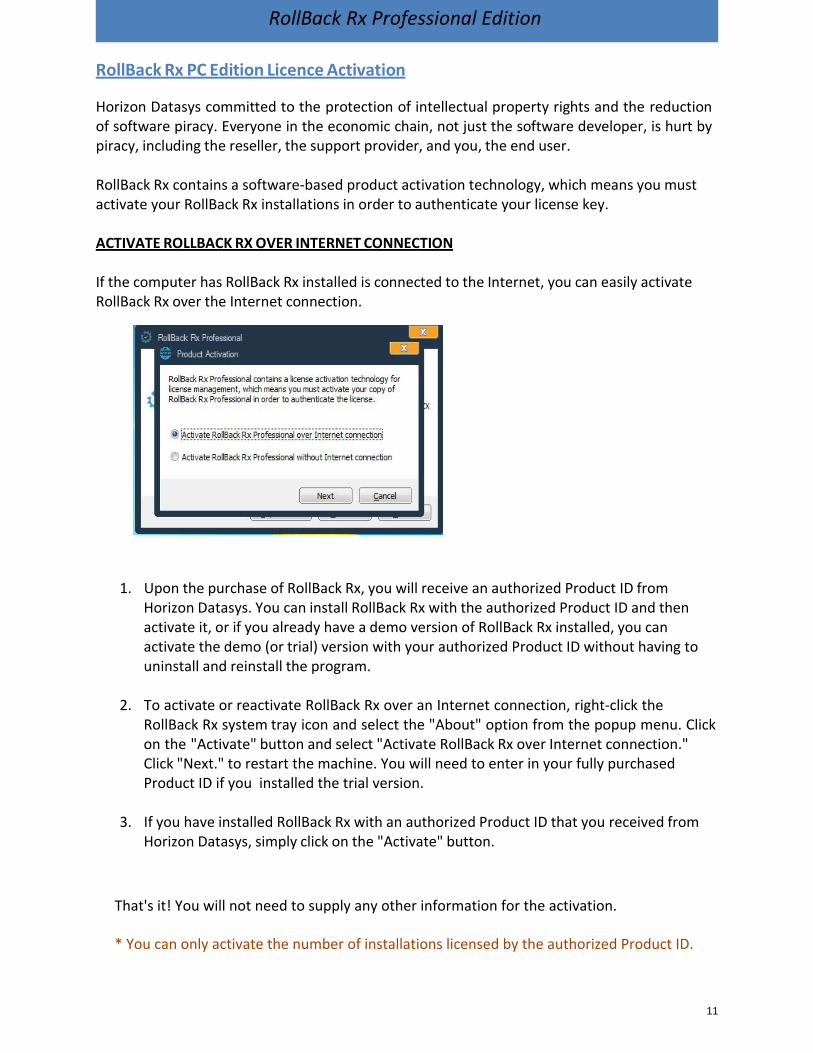
ACTIVATE ROLLBACK RX OVER INTERNET CONNECTION
If the computer has RollBack Rx installed is connected to the Internet, you can easily activate RollBack Rx over the Internet connection.
1. Upon the purchase of RollBack Rx, you will receive an authorized Product ID fromHorizon Datasys. You can install RollBack Rx with the authorized Product ID and thenactivate it, or if you already have a demo version of RollBack Rx installed, you canactivate the demo (or trial) version with your authorized Product ID without having touninstall and reinstall the program.
2. To activate or reactivate RollBack Rx over an Internet connection, right-click theRollBack Rx system tray icon and select the "About" option from the popup menu. Clickon the "Activate" button and select "Activate RollBack Rx over Internet connection."Click "Next." to restart the machine. You will need to enter in your fully purchasedProduct ID if you installed the trial version.
3. If you have installed RollBack Rx with an authorized Product ID that you received fromHorizon Datasys, simply click on the "Activate" button.
That's it! You will not need to supply any other information for the activation.
* You can only activate the number of installations licensed by the authorized Product ID.
12
RollBack Rx Professional Edition
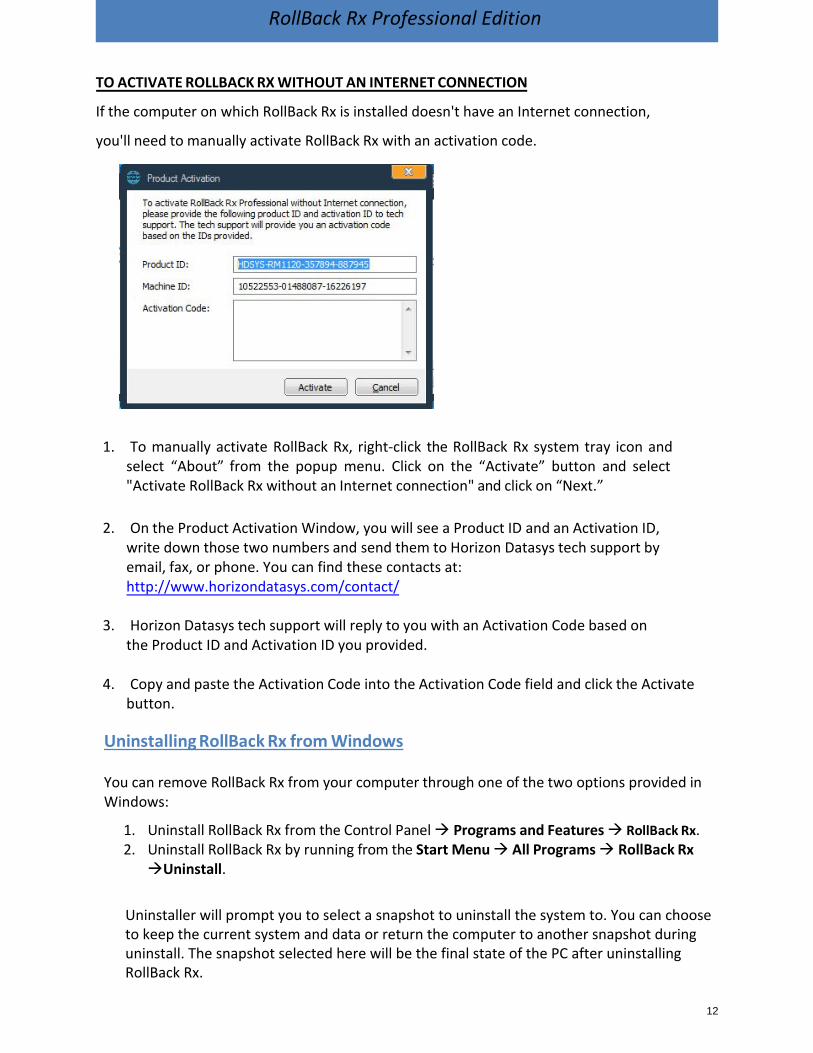
TO ACTIVATE ROLLBACK RX WITHOUT AN INTERNET CONNECTION
If the computer on which RollBack Rx is installed doesn't have an Internet connection,
you'll need to manually activate RollBack Rx with an activation code.
1. To manually activate RollBack Rx, right-click the RollBack Rx system tray icon andselect “About” from the popup menu. Click on the “Activate” button and select"Activate RollBack Rx without an Internet connection" and click on “Next.”
2. On the Product Activation Window, you will see a Product ID and an Activation ID,write down those two numbers and send them to Horizon Datasys tech support byemail, fax, or phone. You can find these contacts at:http://www.horizondatasys.com/contact/
3. Horizon Datasys tech support will reply to you with an Activation Code based onthe Product ID and Activation ID you provided.
4. Copy and paste the Activation Code into the Activation Code field and click the Activatebutton.
Uninstalling RollBack Rx from Windows
You can remove RollBack Rx from your computer through one of the two options provided in Windows:
1. Uninstall RollBack Rx from the Control Panel Programs and Features RollBack Rx.2. Uninstall RollBack Rx by running from the Start Menu All Programs RollBack RxUninstall.
Uninstaller will prompt you to select a snapshot to uninstall the system to. You can choose to keep the current system and data or return the computer to another snapshot during uninstall. The snapshot selected here will be the final state of the PC after uninstalling RollBack Rx.
13
RollBack Rx Professional Edition
*If you are experiencing problems with your computer, DO NOT attempt to uninstall RollBack Rxfirst. Rolling-back the system to a prior snapshot might fix the problem. If you have problemsaccessing either the RollBack Rx Application Console or the Subsystem Console to perform arollback, contact Horizon Datasys technical support before attempting to uninstall RollBack Rx.
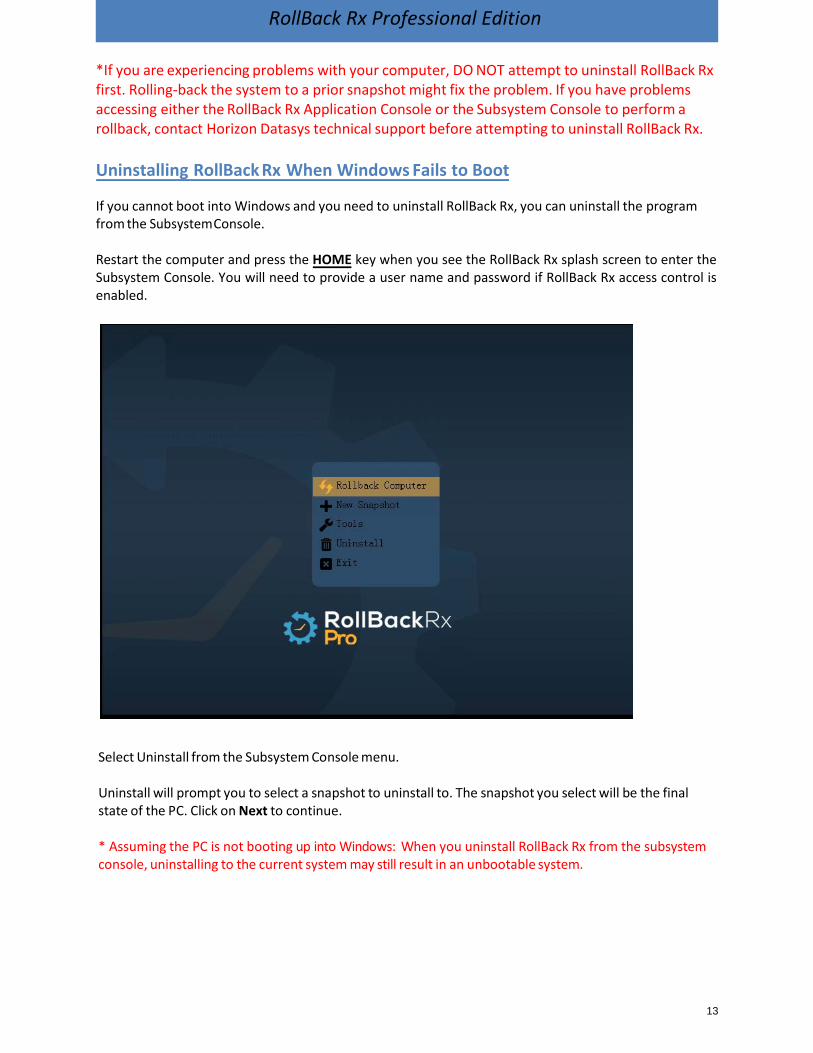
Uninstalling RollBack Rx When Windows Fails to Boot
If you cannot boot into Windows and you need to uninstall RollBack Rx, you can uninstall the program from the Subsystem Console.
Restart the computer and press the HOME key when you see the RollBack Rx splash screen to enter the Subsystem Console. You will need to provide a user name and password if RollBack Rx access control is enabled.
Select Uninstall from the Subsystem Console menu.
Uninstall will prompt you to select a snapshot to uninstall to. The snapshot you select will be the final state of the PC. Click on Next to continue.
* Assuming the PC is not booting up into Windows: When you uninstall RollBack Rx from the subsystemconsole, uninstalling to the current system may still result in an unbootable system.

14
RollBack Rx Professional Edition
Chapter 2: Rollback System Different Ways to Rollback Your System
You can rollback your system using one of the following methods:
• Rollback system from RollBack Rx main program console from inside Windows.• Rollback system from RollBack Rx subsystem console when Windows OS fails to start
up.• Rollback system by right-clicking system tray icon.• Rollback system with command line switches or batch files.• Set-up a scheduled task to automatically rollback system.
Rollback System from the Application Console
To rollback your system from the RollBack Rx application console:
1. Right-click the RollBack Rx system tray icon. Select "Open RollBack Rx" from thepopup menu. You will need a password to access the main program console if theRollBack Rx access control is enabled.
2. In the main program console, under Common Tasks in the topmost menu, click on"Rollback system", the right-hand panel will display all the available snapshots. Thecurrent snapshot you are in is indicated by a big green arrow. Select the snapshot youwant to rollback your system to. You can choose to take a snapshot of the currentsystem before rolling-back by checking the "Take a snapshot of the current PC beforerollback in case I want to come back" checkbox. Click on "Next" to continue.
* Rollback system to a snapshot will reset everything on the hard drive to the time of thesnapshot. To keep the latest user data created after the snapshot, you can select files or foldersto transfer to the restoring snapshot, so your data will remain unchanged even after rolling- back to another snapshot. To exclude files from being changed by a roll-back, click on theExclusion button.
15
RollBack Rx Professional Edition
3. Select the files or folders in the current system, that you would like to synchronize withthe snapshot you are rolling back to. It is recommended you only select files, becauselarge folders could take much longer to synchronize.
4. The computer needs to restart to complete the install. Click on "Restart" to restart thecomputer.
* You can select to take a snapshot of the current PC before rolling-back to a snapshot in case youwant to come back later
Rollback System When Windows Fails To Start Up
If you encounter a complete system crash and you’re not able to start Windows, you need to rollback the system from the RollBack Rx Subsystem Console.
1. To access the Subsystem Console, restart the computer press the HOME key as you seethe RollBack Rx logo. You will need to provide a user name and password if the RollBackRx access control is enabled.
2. Click on "Rollback system". You will see a list of available snapshots. Select a snapshotand click on "Next" to rollback to that snapshot.
Rollback System from Desktop Shortcut
To rollback system from the desktop shortcut:
1. Right click RollBack Rx icon in the system tray, select "Rollback system" from the popupmenu. Select a snapshot to rollback the system to. You can also choose to take asnapshot of the current PC by checking the "Take a snapshot of the current PC beforerollback, in case I want to come back" checkbox. Click on "Next" to continue.
2. The computer needs to restart to rollback to that snapshot. Click on "Restart" torestart the computer.
16
RollBack Rx Professional Edition
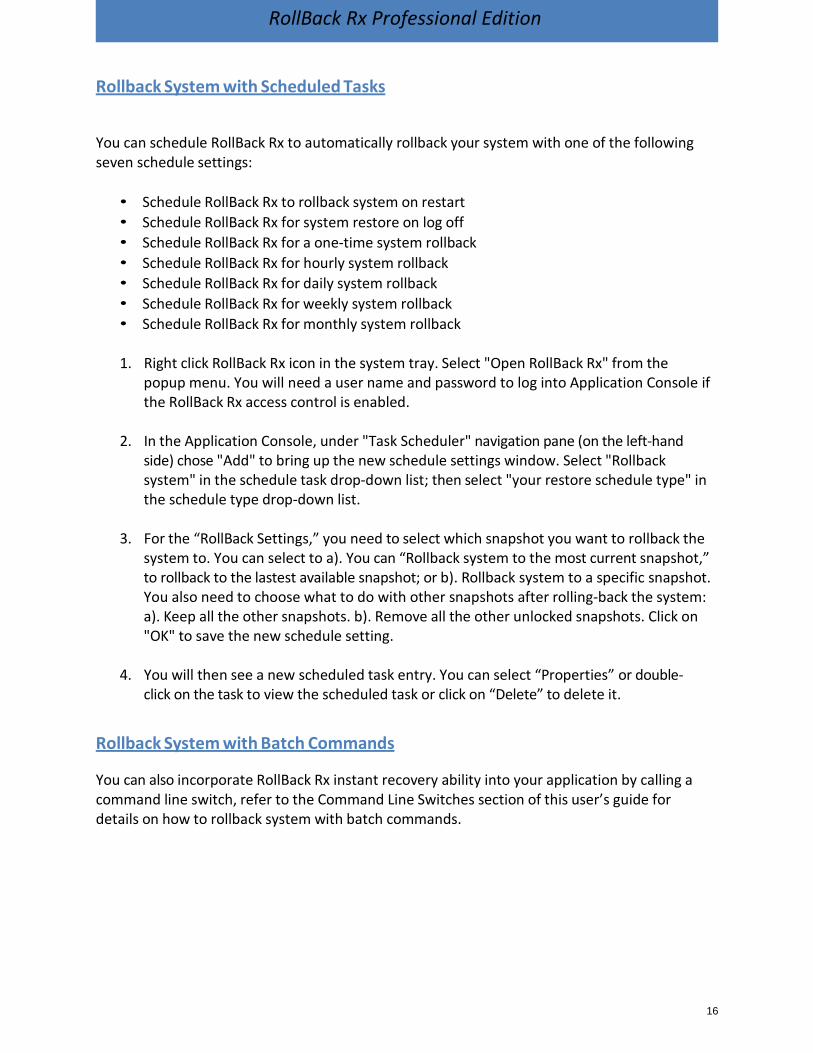
Rollback System with Scheduled Tasks
You can schedule RollBack Rx to automatically rollback your system with one of the following seven schedule settings:
• Schedule RollBack Rx to rollback system on restart• Schedule RollBack Rx for system restore on log off• Schedule RollBack Rx for a one-time system rollback• Schedule RollBack Rx for hourly system rollback• Schedule RollBack Rx for daily system rollback• Schedule RollBack Rx for weekly system rollback• Schedule RollBack Rx for monthly system rollback
1. Right click RollBack Rx icon in the system tray. Select "Open RollBack Rx" from thepopup menu. You will need a user name and password to log into Application Console ifthe RollBack Rx access control is enabled.
2. In the Application Console, under "Task Scheduler" navigation pane (on the left-handside) chose "Add" to bring up the new schedule settings window. Select "Rollbacksystem" in the schedule task drop-down list; then select "your restore schedule type" inthe schedule type drop-down list.
3. For the “RollBack Settings,” you need to select which snapshot you want to rollback thesystem to. You can select to a). You can “Rollback system to the most current snapshot,”to rollback to the lastest available snapshot; or b). Rollback system to a specific snapshot.You also need to choose what to do with other snapshots after rolling-back the system:a). Keep all the other snapshots. b). Remove all the other unlocked snapshots. Click on"OK" to save the new schedule setting.
4. You will then see a new scheduled task entry. You can select “Properties” or double- click on the task to view the scheduled task or click on “Delete” to delete it.
Rollback System with Batch Commands
You can also incorporate RollBack Rx instant recovery ability into your application by calling a command line switch, refer to the Command Line Switches section of this user’s guide for details on how to rollback system with batch commands.
17
RollBack Rx Professional Edition
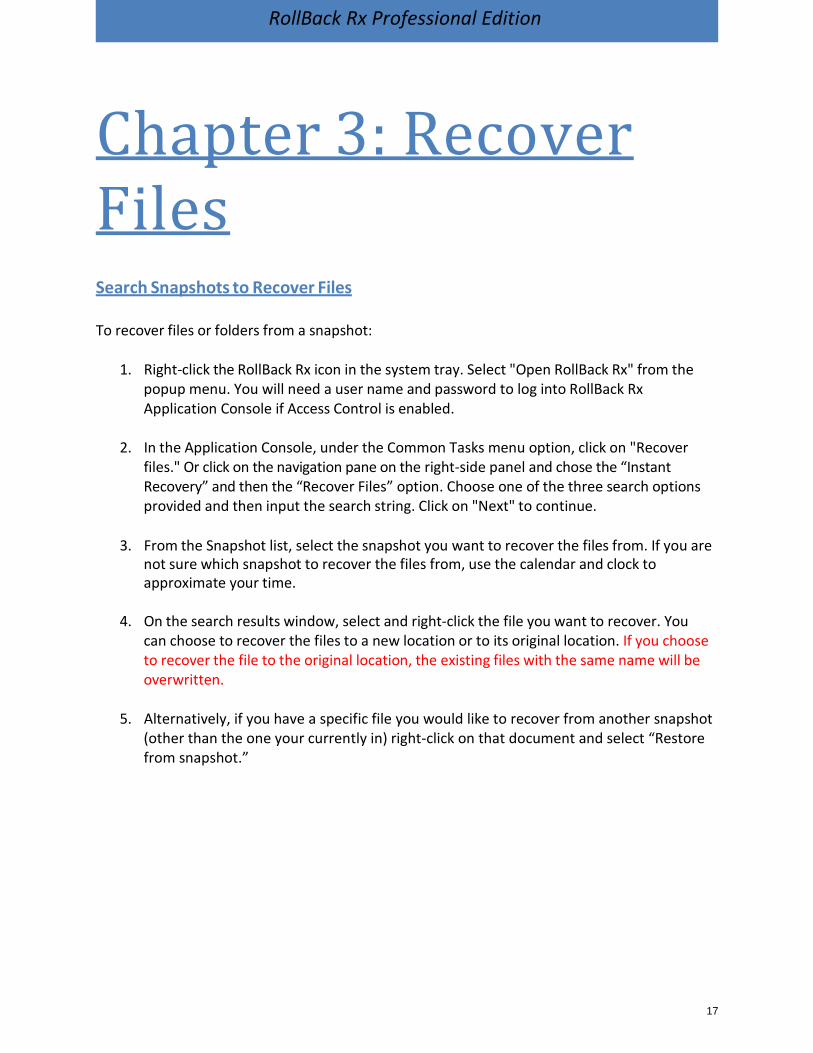
Chapter 3: Recover Files Search Snapshots to Recover Files
To recover files or folders from a snapshot:
1. Right-click the RollBack Rx icon in the system tray. Select "Open RollBack Rx" from thepopup menu. You will need a user name and password to log into RollBack RxApplication Console if Access Control is enabled.
2. In the Application Console, under the Common Tasks menu option, click on "Recoverfiles." Or click on the navigation pane on the right-side panel and chose the “InstantRecovery” and then the “Recover Files” option. Choose one of the three search optionsprovided and then input the search string. Click on "Next" to continue.
3. From the Snapshot list, select the snapshot you want to recover the files from. If you arenot sure which snapshot to recover the files from, use the calendar and clock toapproximate your time.
4. On the search results window, select and right-click the file you want to recover. Youcan choose to recover the files to a new location or to its original location. If you chooseto recover the file to the original location, the existing files with the same name will beoverwritten.
5. Alternatively, if you have a specific file you would like to recover from another snapshot(other than the one your currently in) right-click on that document and select “Restorefrom snapshot.”
18
RollBack Rx Professional Edition
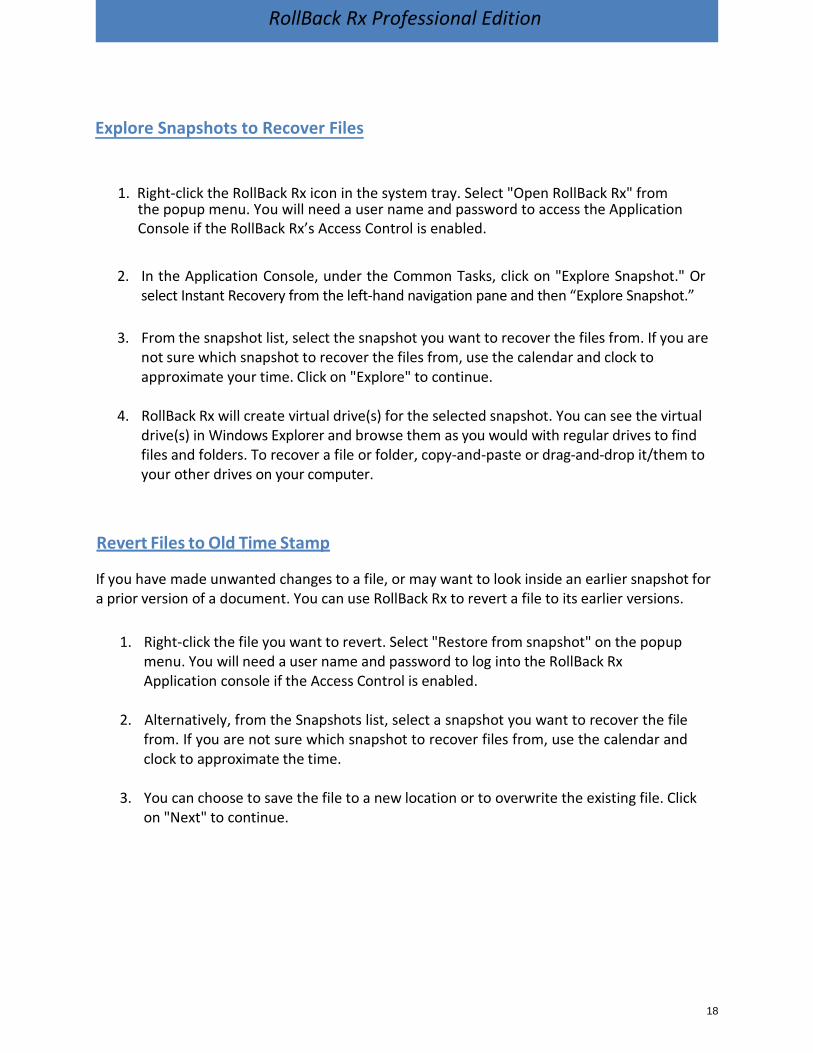
2. In the Application Console, under the Common Tasks, click on "Explore Snapshot." Orselect Instant Recovery from the left-hand navigation pane and then “Explore Snapshot.”
3. From the snapshot list, select the snapshot you want to recover the files from. If you arenot sure which snapshot to recover the files from, use the calendar and clock toapproximate your time. Click on "Explore" to continue.
4. RollBack Rx will create virtual drive(s) for the selected snapshot. You can see the virtualdrive(s) in Windows Explorer and browse them as you would with regular drives to findfiles and folders. To recover a file or folder, copy-and-paste or drag-and-drop it/them toyour other drives on your computer.
Revert Files to Old Time Stamp
If you have made unwanted changes to a file, or may want to look inside an earlier snapshot for a prior version of a document. You can use RollBack Rx to revert a file to its earlier versions.
1. Right-click the file you want to revert. Select "Restore from snapshot" on the popupmenu. You will need a user name and password to log into the RollBack RxApplication console if the Access Control is enabled.
2. Alternatively, from the Snapshots list, select a snapshot you want to recover the filefrom. If you are not sure which snapshot to recover files from, use the calendar andclock to approximate the time.
3. You can choose to save the file to a new location or to overwrite the existing file. Clickon "Next" to continue.
Explore Snapshots to Recover Files
1. Right-click the RollBack Rx icon in the system tray. Select "Open RollBack Rx" fromthe popup menu. You will need a user name and password to access the ApplicationConsole if the RollBack Rx’s Access Control is enabled.

19
RollBack Rx Professional Edition
Chapter 4: Taking Snapshots The magic of RollBack Rx is in its snapshots. You can recover a crashed system by simply rolling it back to a prior snapshot; you can recover an earlier version of a corrupted file. A snapshot can be viewed as a complete picture of the system at the moment in time when the snapshot was taken. It’s very important to regularily take (or automatically set RollBack Rx to take) new snapshots to include the most recent changes on your system. This way, in case you need to do a system rollback, you won't be rolling back to weeks or months ago. You can take a new snapshot in seconds with RollBack Rx.
You can take a new snapshot with one of the following methods:
• Take new snapshots from RollBack Rx’s main program console in Windows.• Take new snapshot from the RollBack Rx pre-Windows subsystem console when
Windows fails to start up.• Take new snapshots by right-clicking on RollBack Rx system tray (systray) icon.• Take new snapshots with command line switches or with batch files.• Setup scheduled tasks to automatically take new snapshots.
Taking new snapshot from the Application Console
To take new snapshots from the RollBack Rx Application Console:
1. Right-click the RollBack Rx systray icon. Select "Open RollBack Rx" from the popupmenu. You will need a password to log into the RollBack Rx Application Console ifAccess Control is enabled.
2. In the Application Console, under the Commons Tasks menu, click on “Take snapshot.” Youwill need to enter a name and can also enter a description for the new snapshot. You canalso choose to lock the new snapshot by checking the “lock the new snapshot” option.Locking the snapshot will prevent it from being deleted. Click on "Next" to continue.
* Snapshot name is limited to 20 characters.* Snapshot description is limited to 50 characters.
3. New snapshot will be created instantly.* To ensure best possible snapshot integrity, it’s recommend that you save all the files andclose all running applications before taking a new snapshot.
20
RollBack Rx Professional Edition
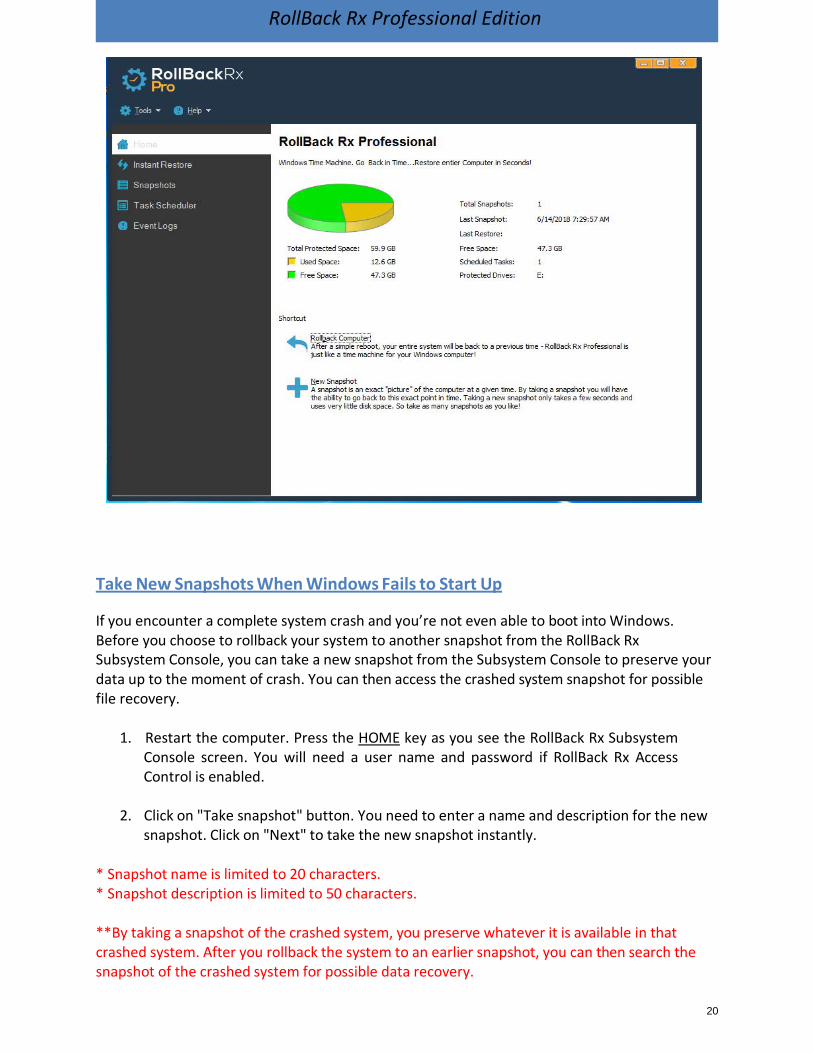
Take New Snapshots When Windows Fails to Start Up
If you encounter a complete system crash and you’re not even able to boot into Windows. Before you choose to rollback your system to another snapshot from the RollBack Rx Subsystem Console, you can take a new snapshot from the Subsystem Console to preserve your data up to the moment of crash. You can then access the crashed system snapshot for possible file recovery.
1. Restart the computer. Press the HOME key as you see the RollBack Rx SubsystemConsole screen. You will need a user name and password if RollBack Rx AccessControl is enabled.
2. Click on "Take snapshot" button. You need to enter a name and description for the newsnapshot. Click on "Next" to take the new snapshot instantly.
* Snapshot name is limited to 20 characters.* Snapshot description is limited to 50 characters.
**By taking a snapshot of the crashed system, you preserve whatever it is available in that crashed system. After you rollback the system to an earlier snapshot, you can then search the snapshot of the crashed system for possible data recovery.
21
RollBack Rx Professional Edition
Take New Snapshots from the System Tray Icon
To take new snapshots from the system tray:
1. Right click the RollBack Rx icon in the system tray located on the bottom right corner ofthe screen and select "New Snapshot" from the.popup menu. You will need a user nameand password if the RollBack Rx Access Control option is enabled.
2. Enter a name and description for the new snapshot. You can also choose to lock the newsnapshot by checking the "Lock the new snapshot" option. Locking the snapshot willprevent it from been deleted. Click on "Next" to continue.
3. New snapshot will be created instantly.
* To ensure best possible snapshot integrity, it’s recommended that you save all the filesand close all running applications before taking a new snapshot.
22
RollBack Rx Professional Edition
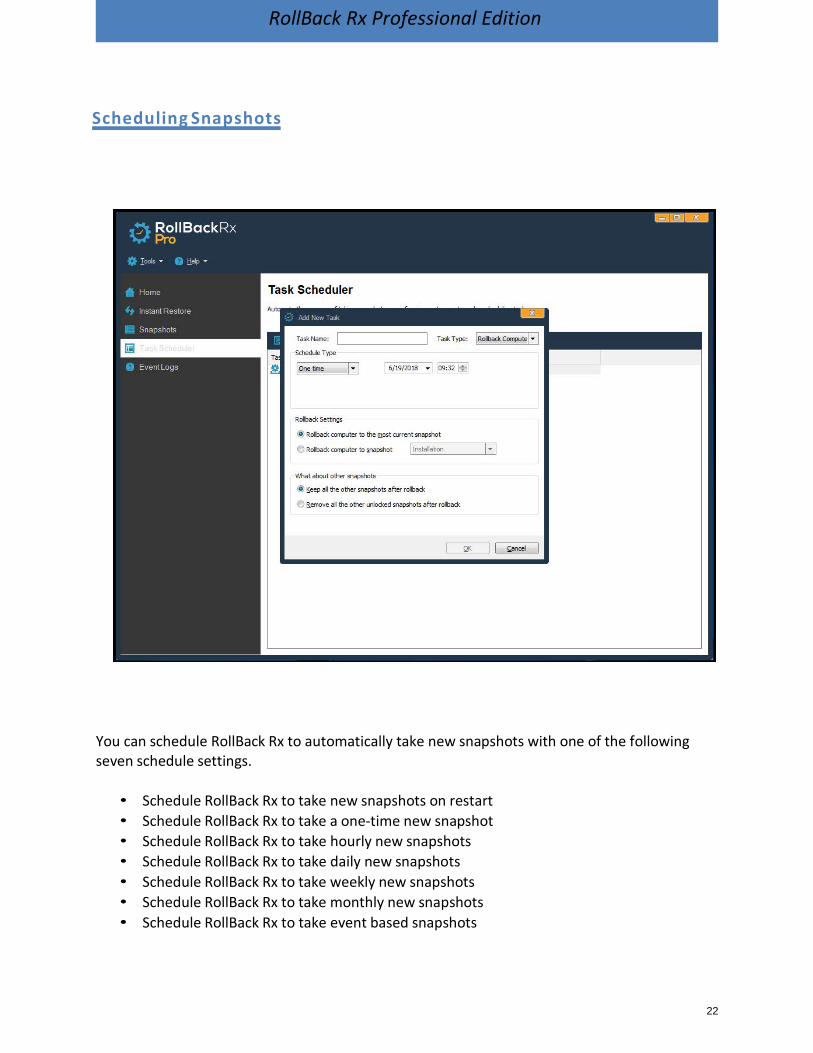
Scheduling Snapshots
You can schedule RollBack Rx to automatically take new snapshots with one of the following seven schedule settings.
• Schedule RollBack Rx to take new snapshots on restart• Schedule RollBack Rx to take a one-time new snapshot• Schedule RollBack Rx to take hourly new snapshots• Schedule RollBack Rx to take daily new snapshots• Schedule RollBack Rx to take weekly new snapshots• Schedule RollBack Rx to take monthly new snapshots• Schedule RollBack Rx to take event based snapshots
23
RollBack Rx Professional Edition
1. Right click the RollBack Rx icon in the system tray, select "Open RollBack Rx" from thepopup menu. You will need a user name and password to login to the RollBack RxApplication Console if Access Control is enabled.
2. In the Application Console, under the Control Panel Tasks, click on the "TaskScheduler". The righthand side panel shows the currently scheduled tasks. Click on"Add" to bring up the new schedule settings window. Type in a name in the Name fieldfor the new task. Select the Task Type as "Take snapshot." In the Schedule Type drop- down list and select a schedule type. Click on "OK" to save the new scheduled task.
3. You will then see a new scheduled task entry. You can select to view the properties ofthe scheduled task or delete it.
Scheduling Snapshots is key when it comes to constant data protection and its even easier to do it if you take advantage of the command switches Rollback has.
For more information about how to use Rollback command switches see pg. 39

24
RollBack Rx Professional Edition
Chapter 5: Manage Snapshots Manage Snapshots
V ie w Sn a ps ho t Pro pe rt ie s
To view the properties of a snapshot:
1. Right click the RollBack Rx icon in the system tray. Select "Open RollBack Rx" from thepopup menu. You will need a user name and password to logon RollBack Rx ApplicationConsole if Access Control is enabled.
2. In the Application Console, choose the "Snapshots" option in the lefthand navigationpane. The righthand side panel shows all the available snapshots. The current snapshotyou are in is indicated by a big green arrow.
3. Right-click a snapshot and select "Properties" from the right-click popup menu. You canchange the snapshot name and description on the Snapshot Properties window. Theused space information reveals how much diskdrive space is taken up by all snapshotsand how much is taken by this particular snapshot.
De le t e Snaps ho ts
To delete RollBack Rx snapshots:
1. Right-click the RollBack Rx icon in the system tray, select "Open RollBack Rx" from thepopup menu. You will need a user name and password to login to RollBack RxApplication Console if Access Control is enabled.
2. In the Application Console, choose the "Snapshots" option in the lefthand navigationpane. The righthand side panel shows all the available snapshots. The current snapshotyou are in is indicated by a big green arrow.
3. Right-click a snapshot and select "Delete" from the popup menu. To delete multiplesnapshots, hold down the Ctrl key while selecting snapshots.
25
RollBack Rx Professional Edition
4. From the Tools menu you can also select the Delete All Unlocked button to delete all theunlocked snapshots.
* You cannot delete the baseline snapshot, any locked snapshots, nor your current snapshot. Todelete locked snapshots, unlock it first.
Lo c k or Un lo ck Sn aps ho t s
You can lock a snapshot to prevent it from being accidentally deleted and from being removed by RollBack Rx’s automatic deletion of older snapshots.
1. Right-click the RollBack Rx icon in the system tray, select "Open RollBack Rx" from thepopup menu. You will need a user name and password to login to RollBack RxApplication Console if the access control is enabled.
2. In the Application Console, choose the "Snapshots" option in the lefthand navigationpane. The righthand side panel shows all the available snapshots. The current snapshotyou are in is indicated by a big green arrow.
3. Right-click a snapshot and select either “Lock” or “Unlock" from the popup menu. Tolock/unlock multiple snapshots, hold down the Ctrl key while selecting snapshots.
4. You can also use the “Lock All” or “Unlock All” buttons to lock/unlock all the snapshotsfrom the Tools menu.
R e na me Sn a ps hots
To rename a snapshot:
1. Right-click the RollBack Rx icon in the system tray, select "Open RollBack Rx" from thepopup menu. You will need a user name and password to login to RollBack RxApplication Console if the access control is enabled.
2. In the Application Console, choose the "Snapshots" option in the lefthand navigationpane. The righthand side panel shows all the available snapshots. The current snapshotyou are in is indicated by a big green arrow.
3. Right-click a snapshot and select "Properties" and on the Snapshot Properties windows typethe new name in the Name field. Or highlight the snapshot you wish to change the name ofand from the Tools menu select Properties.
26
RollBack Rx Professional Edition
D e f ra g Sna ps hots
If you have taken or deleted many snapshots, you may need to defrag snapshots to reclaim free disk space and improve system performance.
1. Right-click the RollBack Rx icon in the system tray, select "Open RollBack Rx" from thepopup menu. You will need a user name and password to login to RollBack RxApplication Console if the access control is enabled.
2. In the Application Console under Tools & Settings click on "Snapshot Defragmenter." Clickon "Defragment Now" and select the snapshot(s) to start defrag. In the navigation pane onthe lefthand side column select “Snapshots,” chose the “Defragment” submenu option,select the snapshot(s), and click on “Next.” It might take some time to defrag all snapshots(depends on how many snapshots you have and when it they were defragged last).
3. To automate snapshot defragging go to Tools & Settings > Settings > Advanced Settings >select “Defrag snapshots at the subsystem during next bootup” and define when youwould like the defrag to regularily take place, either after deleting some number ofsnapshots or after taking some number of snapshots.
* For optimal system performance it's important to defrag snapshots regularily.
E x pl or e Sn a ps hots
You can mount a snapshot as (a) virtual drive(s) and explore it/them as (a) local drive(s). To explore a snapshot:
1. Right-click the RollBack Rx icon in the system tray, select "Open RollBack Rx" from thepopup menu. You will need a user name and password to login to RollBack RxApplication Console if the access control is enabled.
2. In the Application Console, choose the "Snapshots" option in the lefthand navigationpane. The righthand side panel shows all the available snapshots. The current snapshotyou are in is indicated by a big green arrow.
3. Right-click a snapshot and select "Explore" from the popup menu. When the SnapshotBrowser window appears select “Open Virtual Drive(s).”
4. The snapshot will be mounted as (a) virtual drive(s). You can then browse the virtualdrive(s) as a local disk in Windows Explorer. Click on "Close Virtual Drive(s)” todismount the snapshot. Rebooting the PC will also dismount the snapshot as well.
27
RollBack Rx Professional Edition
Chapter 6: System Security RollBack Rx Access Control
To prevent unauthorized users from accessing Rollback Rx on your system you can password protect RollBack Rx by enabling Access control. The Access Control’s user account(s) and password(s) apply to both RollBack Rx Application Console and the Subsystem Console. Enabling Access Control will prevent unauthorized users from creating snapshot, from rolling- back the system, and even from viewing the contents of any snapshot created after the baseline snapshot.
Enable RollBack Rx Access Control during Setup
To enable RollBack Rx Access Control during setup, you need to use either Custom Setup or Advanced Setup:
1. To enable the Access Control during Custom Setup: Select the enable Access Controlcheckbox and provide a password for the administrator account. You must rememberthis password. You will need it to access the RollBack Rx program consoles. You alsoneed this password to uninstall RollBack Rx.
2. To enable the Access Control during Advanced Setup, you need to use the AdvancedSetup Configuration Wizard (ASCW) provided in the support folder on the program CD.For more information on ASCW, refer to the RollBack Rx deployment whitepaper in thedocument folder on the program CD.
Enable RollBack Rx Access Control after Setup
1. To enable RollBack Rx Access Control after setup, right-click the RollBack Rx icon inthe system tray. Select "Open RollBack Rx" from the popup menu.
2. In the Application Console, under Control Panel, click on "Access Control" underTools & Settings. Check the "Enable access control" checkbox.
3. You will be prompted to set a password for the administrator account. You mustremember this password. You will need it to access the RollBack Rx program consoles.You also need this password to uninstall RollBack Rx. Confirm password and click “OK.”
* If you have installed RollBack Rx using the Default Setup, access control is disabled by default.
28
RollBack Rx Professional Edition
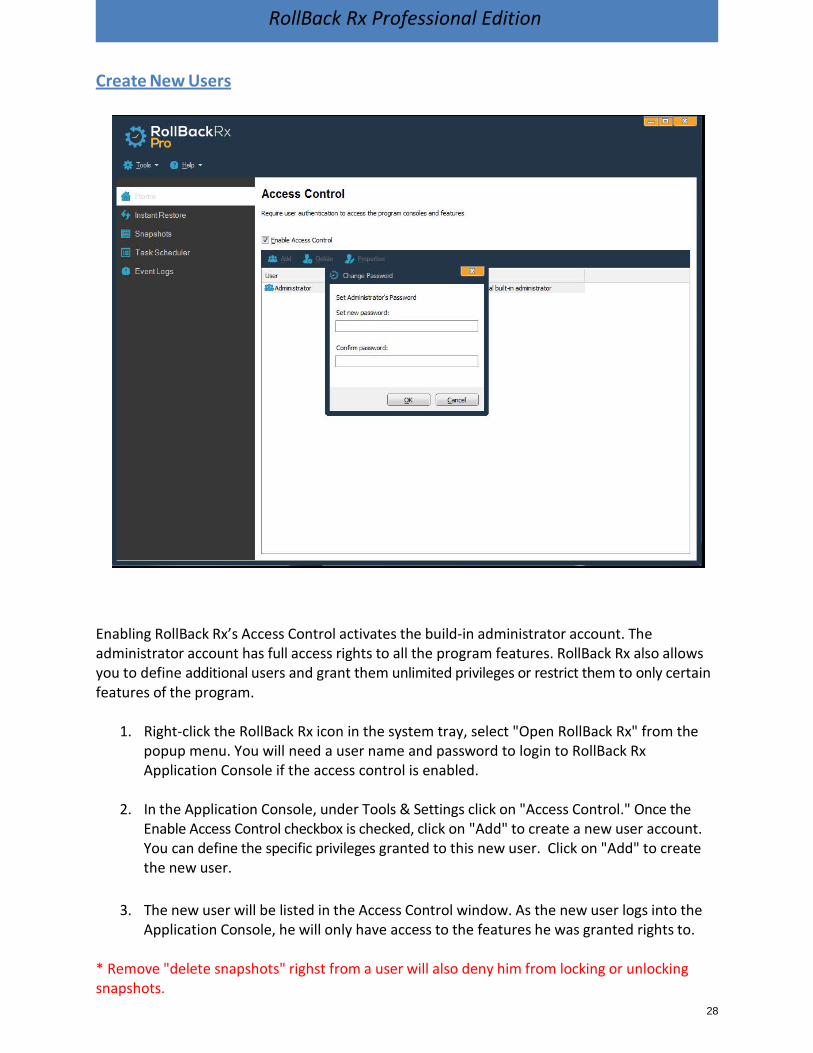
Create New Users
Enabling RollBack Rx’s Access Control activates the build-in administrator account. The administrator account has full access rights to all the program features. RollBack Rx also allows you to define additional users and grant them unlimited privileges or restrict them to only certain features of the program.
1. Right-click the RollBack Rx icon in the system tray, select "Open RollBack Rx" from thepopup menu. You will need a user name and password to login to RollBack RxApplication Console if the access control is enabled.
2. In the Application Console, under Tools & Settings click on "Access Control." Once theEnable Access Control checkbox is checked, click on "Add" to create a new user account.You can define the specific privileges granted to this new user. Click on "Add" to createthe new user.
3. The new user will be listed in the Access Control window. As the new user logs into theApplication Console, he will only have access to the features he was granted rights to.
* Remove "delete snapshots" righst from a user will also deny him from locking or unlockingsnapshots.
29
RollBack Rx Professional Edition
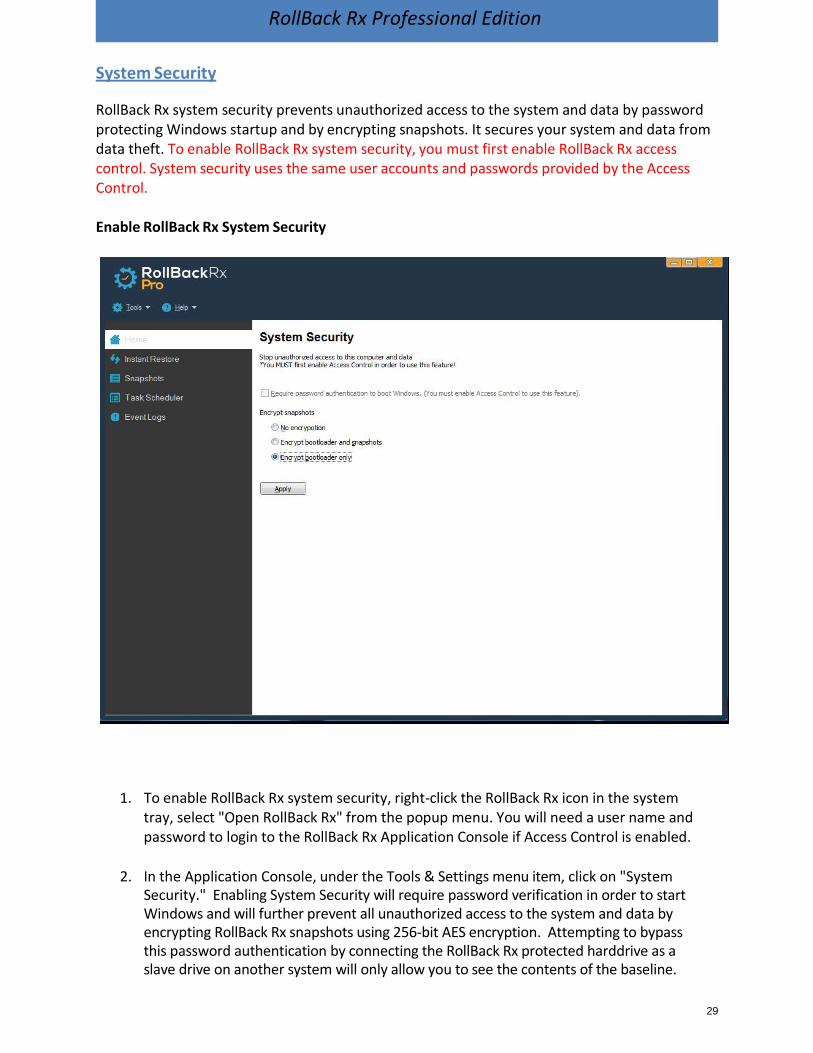
System Security
RollBack Rx system security prevents unauthorized access to the system and data by password protecting Windows startup and by encrypting snapshots. It secures your system and data from data theft. To enable RollBack Rx system security, you must first enable RollBack Rx access control. System security uses the same user accounts and passwords provided by the Access Control.
Enable RollBack Rx System Security
1. To enable RollBack Rx system security, right-click the RollBack Rx icon in the systemtray, select "Open RollBack Rx" from the popup menu. You will need a user name andpassword to login to the RollBack Rx Application Console if Access Control is enabled.
2. In the Application Console, under the Tools & Settings menu item, click on "SystemSecurity." Enabling System Security will require password verification in order to startWindows and will further prevent all unauthorized access to the system and data byencrypting RollBack Rx snapshots using 256-bit AES encryption. Attempting to bypassthis password authentication by connecting the RollBack Rx protected harddrive as aslave drive on another system will only allow you to see the contents of the baseline.
30
RollBack Rx Professional Edition
Chapter 7: Manage Baseline Update Baseline
The very first snapshot created during the setup of RollBack Rx is the baseline snapshot. It’s the foundation of all snapshots created thereafter. After updating the operating system with a new service pack or after making some other major changes on your computer, you might want to make the current system as the new baseline.
1. Right-click the RollBack Rx icon in the system tray, select "Open RollBack Rx" from thepopup menu. You will need a user name and password to login to the RollBack RxApplication Console if Access Control is enabled.
2. In the Application Console, under Tools & Settings, click on "Baseline Manager." Theright-side panel shows the Baseline Manager options. Select the "Update theBaseline" option. The computer will need to restart in order to update the baseline.
* Updating the baseline will consolidate all the existing snapshots into a single new baseline. Allother snapshots will be deleted after running “Update the Baseline” option. If you just want totake a new snapshot of the current system, select take snapshot instead.
Reset to Baseline
The very first snapshot created during the setup of RollBack Rx is the baseline snapshot. It’s most likely the base configuration of your computer during the installation of RollBack Rx. Over a period of time, you may have taken many new snapshots incorporating new programs or settings. But would now like to improve performance or undo problem issues by returning the system back the baseline setting. Resetting to the baseline allows you to return the computer back to the baseline configuration with a single reboot.
1. Right-click RollBack Rx icon in the system tray, select "Open RollBack Rx" from the popupmenu. You will need a user name and password to login to the RollBack Rx ApplicationConsole if Access Control is enabled.
31
RollBack Rx Professional Edition
2. In the Application Console, underTools & Settings, click on "Baseline Manager." Theright-side panel shows the Baseline Manager options. Select "Reset to the Baseline."The computer needs to restart to reset to the baseline.
* All the snapshots taken after the baseline snapshot will be permanently deleted after youReset to the Baseline. Please back-up your important data before running Reset to theBaseline option. If you want to rollback the system to the existing baseline snapshot and keepall the other snapshots, select rollback system instead.
32
RollBack Rx Professional Edition
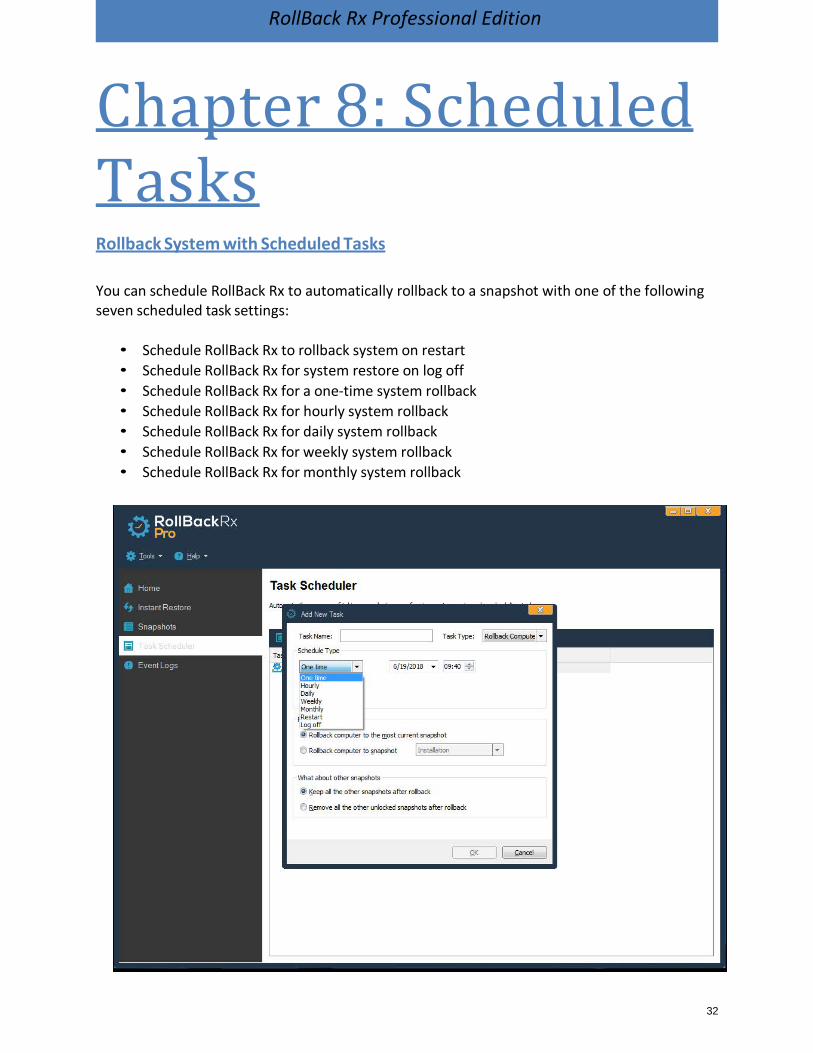
Chapter 8: Scheduled Tasks Rollback System with Scheduled Tasks
You can schedule RollBack Rx to automatically rollback to a snapshot with one of the following seven scheduled task settings:
• Schedule RollBack Rx to rollback system on restart• Schedule RollBack Rx for system restore on log off• Schedule RollBack Rx for a one-time system rollback• Schedule RollBack Rx for hourly system rollback• Schedule RollBack Rx for daily system rollback• Schedule RollBack Rx for weekly system rollback• Schedule RollBack Rx for monthly system rollback
33
RollBack Rx Professional Edition
1. Right click RollBack Rx icon in the system tray, select "Open RollBack Rx" from the popupmenu. You will need a user name and password to logon the Application Console if theaccess control is enabled.
2. In the Application Console, on the left-hand side navigation pane, click on the "TaskScheduler” option. Click on "Add" in the Task Scheduler sub-menu to bring up the newschedule settings window. Type in a new name for this task. Select "Rollback system" asthe task type. In the schedule task drop-down list select a schedule type.
3. For the Rollback Settings, you can either to rollback the system to the most recentsnapshot or to some specific snapshot. In the “What about other snapshots” option youcan also choose what to do with other snapshots after rolling-back, either keep all theother snapshots or remove all the other unlocked snapshots. Click on "OK" to save thenewly scheduled task.
4. You will then see a new scheduled task entry. You can select to view the properties ofthe scheduled task or delete it.
Take Snapshots with Scheduled Tasks
You can schedule RollBack Rx to automatically take new snapshots with one of the following seven schedule settings.
• Schedule RollBack Rx to take new snapshots on restart• Schedule RollBack Rx to take a one-time new snapshot• Schedule RollBack Rx to take hourly new snapshots• Schedule RollBack Rx to take daily new snapshots• Schedule RollBack Rx to take weekly new snapshots• Schedule RollBack Rx to take monthly new snapshots• Schedule RollBack Rx to take event based snapshots
• Right-click the RollBack Rx icon in the system tray, select "Open RollBack Rx" from thepopup menu. You will need a user name and password to login to the ApplicationConsole if the access control is enabled.
• In the Application Console, on the left-hand side navigation pane, click on the "TaskScheduler” option. The right-side panel shows the scheduled tasks. Click on "Add" in thesub-menu to bring up the Add New Task settings window. Type in a name for this newscheduled task. Select "Take Snapshot" in the Task Type drop-down list and select "aschedule type" in the schedule type drop-down list. Click on "OK" to save the newscheduled task.
• You should see a new scheduled task entry. You can select to view the properties of thescheduled task or delete it.
34
RollBack Rx Professional Edition
Chapter 9: Program Settings Program Appearance
To customize RollBack Rx program appearance:
1. Right-click the RollBack Rx icon in the system tray, select "Open RollBack Rx" from thepopup menu. You will need a user name and password to login to the ApplicationConsole if the access control is enabled.
2. In the Application Console, under Tools & Settings > Settings > Program Appearence youshould see a checkbox labeled “Show RollBack icon in the system tray.” The right sidepanel shows the program settings options, click on the "Program Appearance" tab.There you can customize the following RollBack Rx program settings:
• Show/Do not show RollBack Rx icon in the system tray• Show/Do not show RollBack Rx logo during startup• Show/Do not show user name in logon screen• Show/Do not show popup message when taking scheduled tasks• Allow/Do not allow user to cancel scheduled tasks• Change the Subsystem Console hotkey from HOME to something else• Auto-run missed scheduled tasks at next logon
Advanced Settings
To configure advanced RollBack Rx program settings:
1. Right-click the RollBack Rx icon in the system tray, select "Open RollBack Rx" from thepopup menu. You will need a user name and password to login to the Application Consoleif the access control is enabled.
2. In the Application Console, go to Tools & Settings > Settings > Advanced Settings. Theright-side panel shows the program settings options, click on the "Advanced settings"tab. There you can customize the following program settings:
• Automatically delete unlocked snapshots when they’re more than days old• Automatically delete unlocked snapshots when free space is below MB.
35
RollBack Rx Professional Edition
• Defrag snapshots during next startup to reclaim free space and improvesystem performance after deleting snapshots
• Defrag snapshots during next startup to reclaim free space and improvesystem performance after taking snapshots.
• Always take a snapshot of the current system before rolling-back to anothersnapshot.
• Show the recover files utility after rolling-back the system to anothersnapshot.
• Keep these files and folders unchanged when restoring the system to anothersnapshot. Click Settings to define excluded files and folders.
To connect RollBack Rx to the Remote Management Console (the RollBack Rx RMC), a free utility that enables you to centrally control all the RollBack Rx client machines on your network from a single interface:
1. Right-click the RollBack Rx icon in the system tray, select "Open RollBack Rx" from thepopup menu. You will need a user name and password to login to the ApplicationConsole if the access control is enabled.
2. In the Application Console, go to Tools & Settings > Settings > Network Settings. Toconnect to the computer with the remote management console installed, you willneed to provide:
• RollBack Rx Remote Management Console (RMC) server name or IP addressand server port.
• If the computer is behind a proxy or firewall, you will also need to provide theproxy server's settings in order to connect to the remote management consoleserver.
RollBack Rx
36
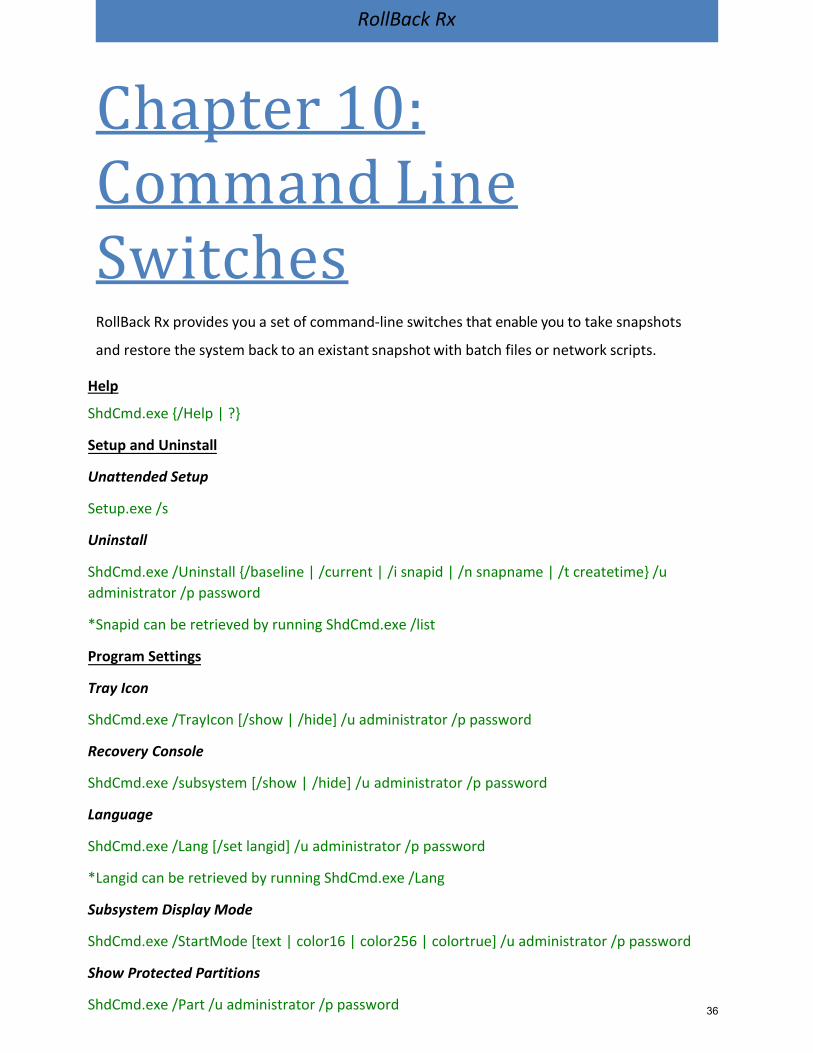
Chapter 10: Command Line Switches RollBack Rx provides you a set of command-line switches that enable you to take snapshots
and restore the system back to an existant snapshot with batch files or network scripts.
Help
ShdCmd.exe {/Help | ?}
Setup and Uninstall
Unattended Setup
Setup.exe /s
Uninstall
ShdCmd.exe /Uninstall {/baseline | /current | /i snapid | /n snapname | /t createtime} /u administrator /p password
*Snapid can be retrieved by running ShdCmd.exe /list
Program Settings
Tray Icon
ShdCmd.exe /TrayIcon [/show | /hide] /u administrator /p password
Recovery Console
ShdCmd.exe /subsystem [/show | /hide] /u administrator /p password
Language
ShdCmd.exe /Lang [/set langid] /u administrator /p password
*Langid can be retrieved by running ShdCmd.exe /Lang
Subsystem Display Mode
ShdCmd.exe /StartMode [text | color16 | color256 | colortrue] /u administrator /p password
Show Protected Partitions
ShdCmd.exe /Part /u administrator /p password
RollBack Rx
37
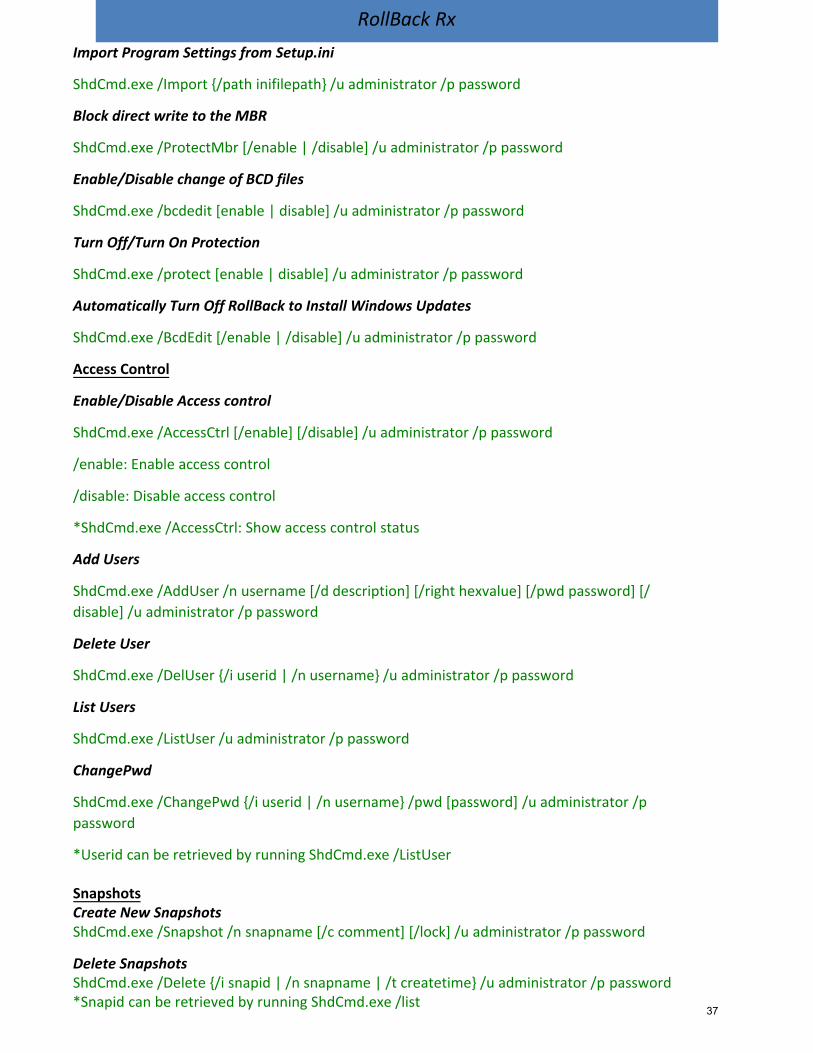
Import Program Settings from Setup.ini
ShdCmd.exe /Import {/path inifilepath} /u administrator /p password
Block direct write to the MBR
ShdCmd.exe /ProtectMbr [/enable | /disable] /u administrator /p password
Enable/Disable change of BCD files
ShdCmd.exe /bcdedit [enable | disable] /u administrator /p password
Turn Off/Turn On Protection
ShdCmd.exe /protect [enable | disable] /u administrator /p password
Automatically Turn Off RollBack to Install Windows Updates
ShdCmd.exe /BcdEdit [/enable | /disable] /u administrator /p password
Access Control
Enable/Disable Access control
ShdCmd.exe /AccessCtrl [/enable] [/disable] /u administrator /p password
/enable: Enable access control
/disable: Disable access control
*ShdCmd.exe /AccessCtrl: Show access control status
Add Users
ShdCmd.exe /AddUser /n username [/d description] [/right hexvalue] [/pwd password] [/disable] /u administrator /p password
Delete User
ShdCmd.exe /DelUser {/i userid | /n username} /u administrator /p password
List Users
ShdCmd.exe /ListUser /u administrator /p password
ChangePwd
ShdCmd.exe /ChangePwd {/i userid | /n username} /pwd [password] /u administrator /p password
*Userid can be retrieved by running ShdCmd.exe /ListUser
Snapshots Create New Snapshots ShdCmd.exe /Snapshot /n snapname [/c comment] [/lock] /u administrator /p password
Delete Snapshots ShdCmd.exe /Delete {/i snapid | /n snapname | /t createtime} /u administrator /p password *Snapid can be retrieved by running ShdCmd.exe /list
RollBack Rx
38
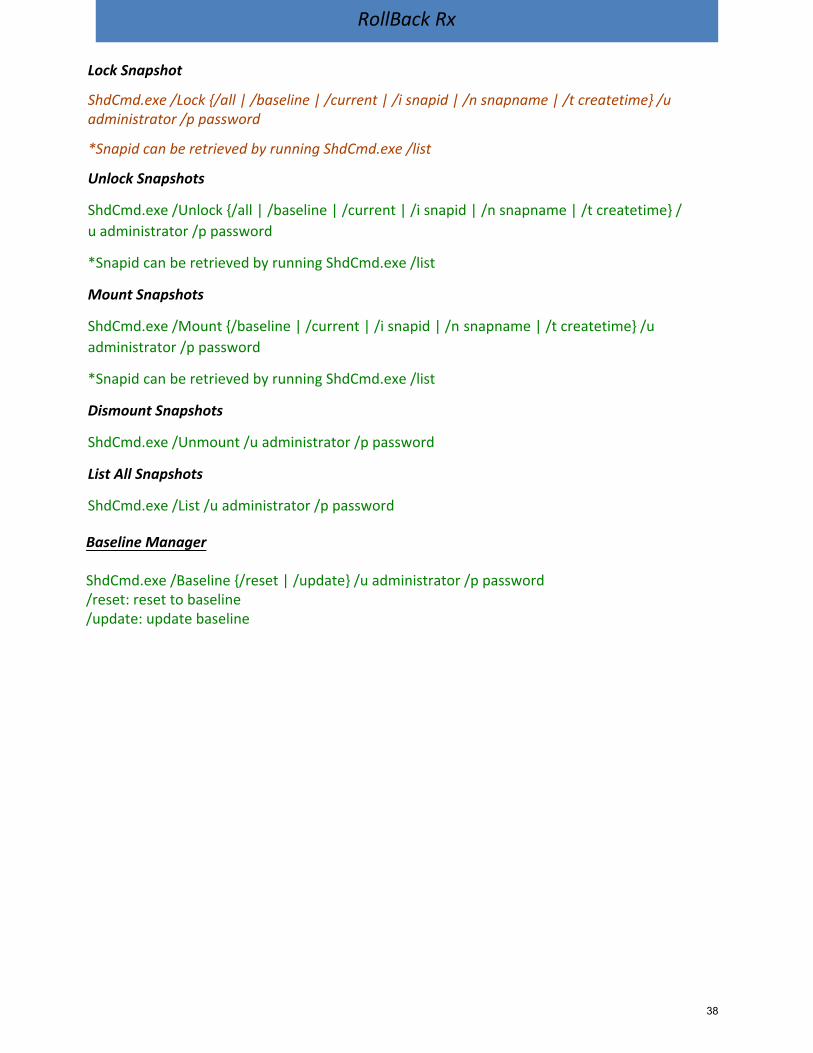
Lock Snapshot
ShdCmd.exe /Lock {/all | /baseline | /current | /i snapid | /n snapname | /t createtime} /u administrator /p password
*Snapid can be retrieved by running ShdCmd.exe /list
Unlock Snapshots
ShdCmd.exe /Unlock {/all | /baseline | /current | /i snapid | /n snapname | /t createtime} /u administrator /p password
*Snapid can be retrieved by running ShdCmd.exe /list
Mount Snapshots
ShdCmd.exe /Mount {/baseline | /current | /i snapid | /n snapname | /t createtime} /u administrator /p password
*Snapid can be retrieved by running ShdCmd.exe /list
Dismount Snapshots
ShdCmd.exe /Unmount /u administrator /p password
List All Snapshots
ShdCmd.exe /List /u administrator /p password
Baseline Manager
ShdCmd.exe /Baseline {/reset | /update} /u administrator /p password/reset: reset to baseline/update: update baseline
RollBack Rx
39
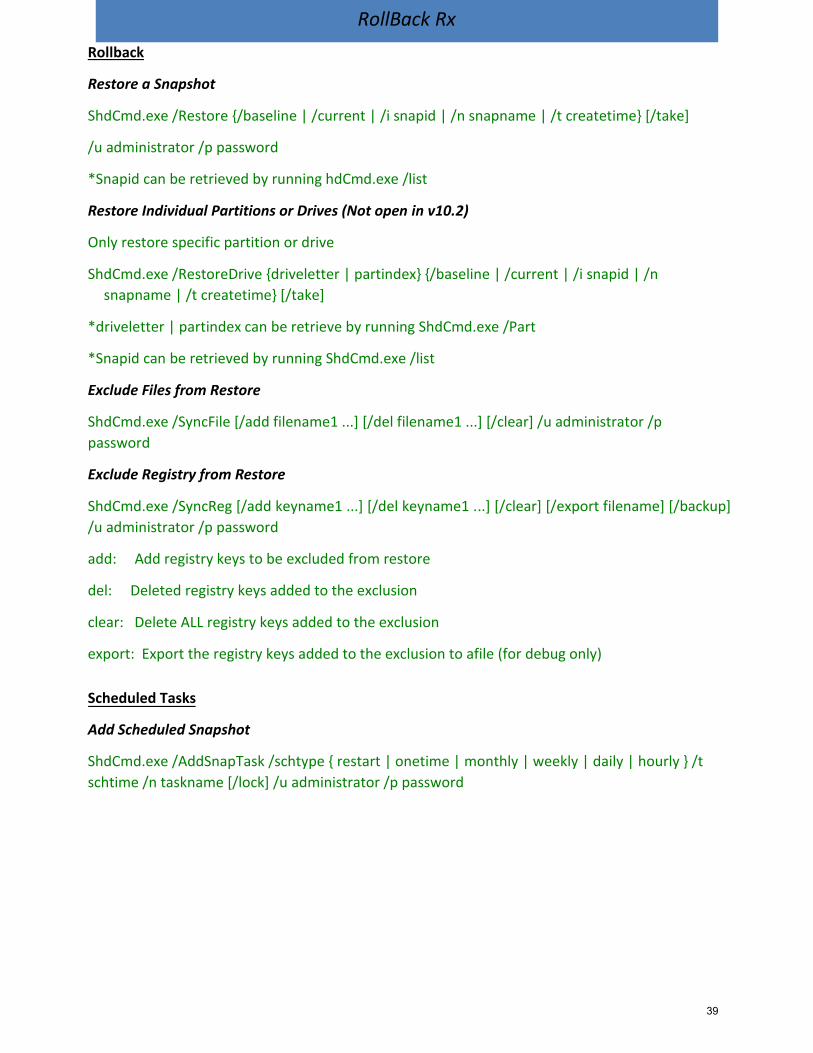
Rollback
Restore a Snapshot
ShdCmd.exe /Restore {/baseline | /current | /i snapid | /n snapname | /t createtime} [/take]
/u administrator /p password
*Snapid can be retrieved by running hdCmd.exe /list
Restore Individual Partitions or Drives (Not open in v10.2)
Only restore specific partition or drive
ShdCmd.exe /RestoreDrive {driveletter | partindex} {/baseline | /current | /i snapid | /n snapname | /t createtime} [/take]
*driveletter | partindex can be retrieve by running ShdCmd.exe /Part
*Snapid can be retrieved by running ShdCmd.exe /list
Exclude Files from Restore
ShdCmd.exe /SyncFile [/add filename1 ...] [/del filename1 ...] [/clear] /u administrator /p password
Exclude Registry from Restore
ShdCmd.exe /SyncReg [/add keyname1 ...] [/del keyname1 ...] [/clear] [/export filename] [/backup] /u administrator /p password
add: Add registry keys to be excluded from restore
del: Deleted registry keys added to the exclusion
clear: Delete ALL registry keys added to the exclusion
export: Export the registry keys added to the exclusion to afile (for debug only)
Scheduled Tasks
Add Scheduled Snapshot
ShdCmd.exe /AddSnapTask /schtype { restart | onetime | monthly | weekly | daily | hourly } /t schtime /n taskname [/lock] /u administrator /p password
RollBack Rx
40
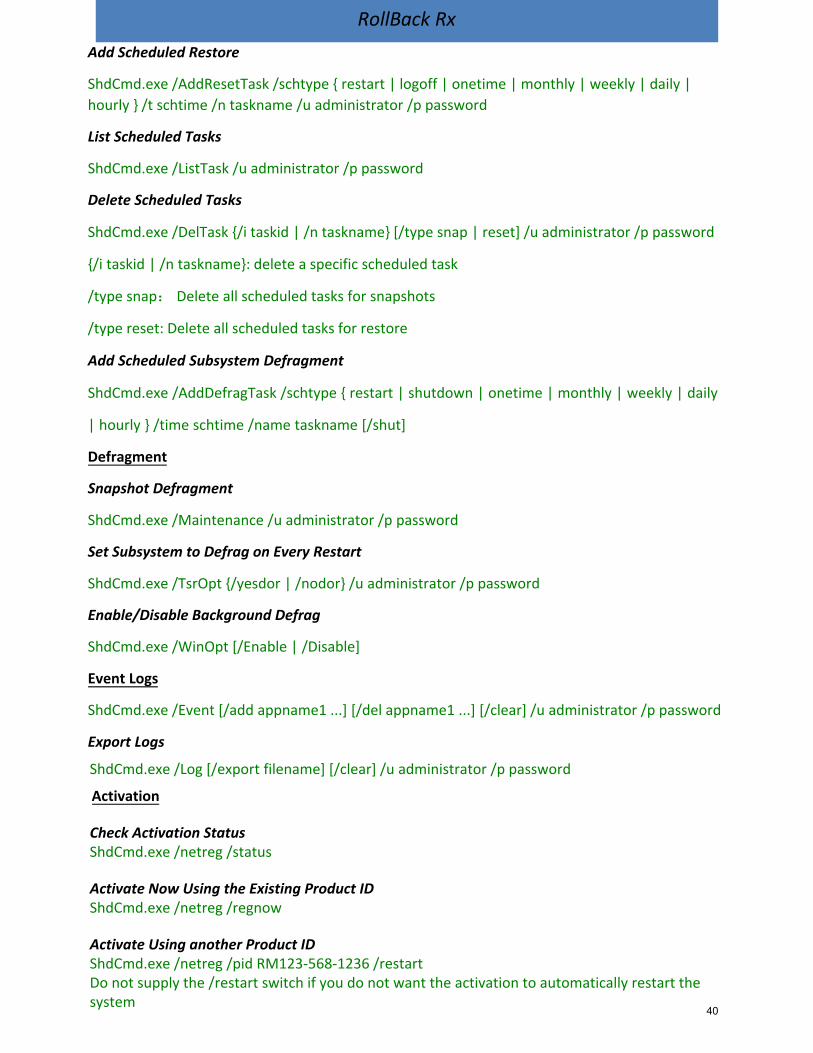
Add Scheduled Restore
ShdCmd.exe /AddResetTask /schtype { restart | logoff | onetime | monthly | weekly | daily | hourly } /t schtime /n taskname /u administrator /p password
List Scheduled Tasks
ShdCmd.exe /ListTask /u administrator /p password
Delete Scheduled Tasks
ShdCmd.exe /DelTask {/i taskid | /n taskname} [/type snap | reset] /u administrator /p password
{/i taskid | /n taskname}: delete a specific scheduled task
/type snap: Delete all scheduled tasks for snapshots
/type reset: Delete all scheduled tasks for restore
Add Scheduled Subsystem Defragment
ShdCmd.exe /AddDefragTask /schtype { restart | shutdown | onetime | monthly | weekly | daily
| hourly } /time schtime /name taskname [/shut]
Defragment
Snapshot Defragment
ShdCmd.exe /Maintenance /u administrator /p password
Set Subsystem to Defrag on Every Restart
ShdCmd.exe /TsrOpt {/yesdor | /nodor} /u administrator /p password
Enable/Disable Background Defrag
ShdCmd.exe /WinOpt [/Enable | /Disable]
Event Logs
ShdCmd.exe /Event [/add appname1 ...] [/del appname1 ...] [/clear] /u administrator /p password
Export Logs
ShdCmd.exe /Log [/export filename] [/clear] /u administrator /p password
Activation
Check Activation StatusShdCmd.exe /netreg /status
Activate Now Using the Existing Product IDShdCmd.exe /netreg /regnow
Activate Using another Product IDShdCmd.exe /netreg /pid RM123-568-1236 /restartDo not supply the /restart switch if you do not want the activation to automatically restart the system
RollBack Rx
41
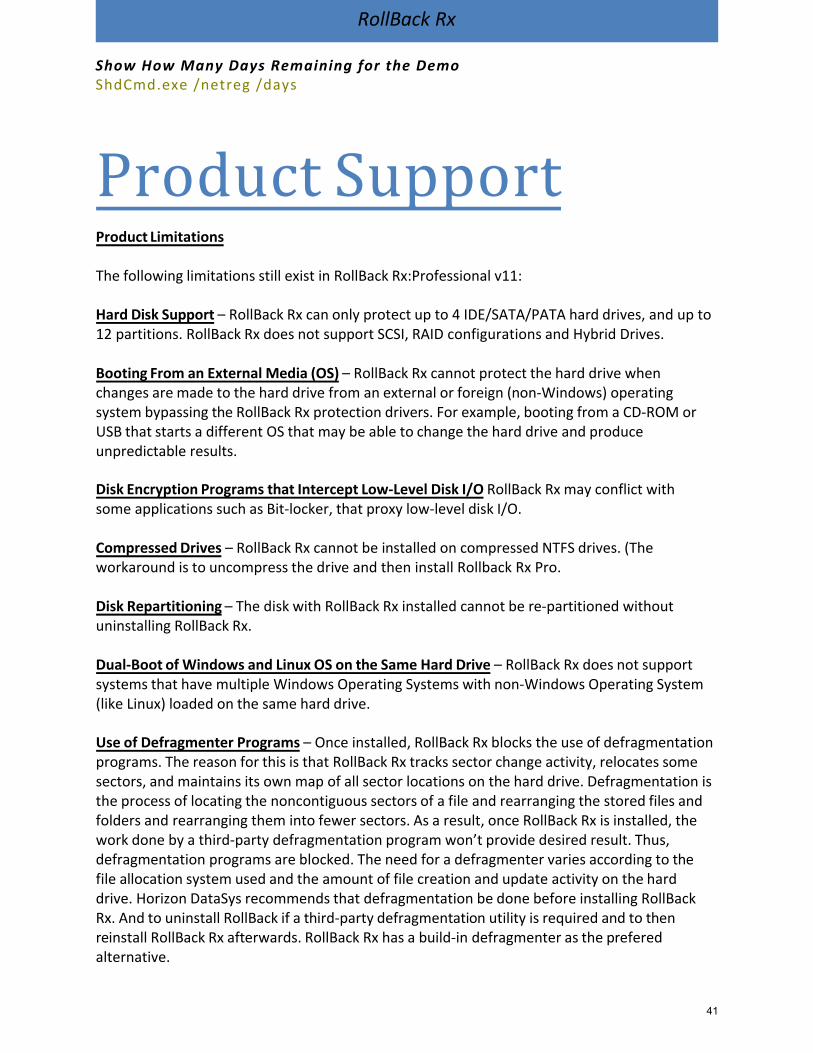
Product Support Product Limitations
The following limitations still exist in RollBack Rx:Professional v11:
Hard Disk Support – RollBack Rx can only protect up to 4 IDE/SATA/PATA hard drives, and up to 12 partitions. RollBack Rx does not support SCSI, RAID configurations and Hybrid Drives.
Booting From an External Media (OS) – RollBack Rx cannot protect the hard drive when changes are made to the hard drive from an external or foreign (non-Windows) operating system bypassing the RollBack Rx protection drivers. For example, booting from a CD-ROM or USB that starts a different OS that may be able to change the hard drive and produce unpredictable results.
Disk Encryption Programs that Intercept Low-Level Disk I/O RollBack Rx may conflict with some applications such as Bit-locker, that proxy low-level disk I/O.
Compressed Drives – RollBack Rx cannot be installed on compressed NTFS drives. (The workaround is to uncompress the drive and then install Rollback Rx Pro.
Disk Repartitioning – The disk with RollBack Rx installed cannot be re-partitioned without uninstalling RollBack Rx.
Dual-Boot of Windows and Linux OS on the Same Hard Drive – RollBack Rx does not support systems that have multiple Windows Operating Systems with non-Windows Operating System (like Linux) loaded on the same hard drive.
Use of Defragmenter Programs – Once installed, RollBack Rx blocks the use of defragmentation programs. The reason for this is that RollBack Rx tracks sector change activity, relocates some sectors, and maintains its own map of all sector locations on the hard drive. Defragmentation is the process of locating the noncontiguous sectors of a file and rearranging the stored files and folders and rearranging them into fewer sectors. As a result, once RollBack Rx is installed, the work done by a third-party defragmentation program won’t provide desired result. Thus, defragmentation programs are blocked. The need for a defragmenter varies according to the file allocation system used and the amount of file creation and update activity on the hard drive. Horizon DataSys recommends that defragmentation be done before installing RollBack Rx. And to uninstall RollBack if a third-party defragmentation utility is required and to then reinstall RollBack Rx afterwards. RollBack Rx has a build-in defragmenter as the prefered alternative.
Show How Many Days Remaining for the DemoShdCmd.exe /netreg /days
RollBack Rx
42
Support Options
Horizon DataSys is committed to providing exceptional customer support and exemplary technical service to all our customers. Our goal is to provide you with professional assistance in the use of our software through a variety of methods including user documentation, online, and personal contacts. According to our experience with customers, the most common questions usually be answered by using our Frequently Asked Question (FAQ) or other various technical white papers. Please check your questions in the FAQ. and knowledge base before proceeding with other support options.
Click here to access the FAQ
Click here to access the Community Forum
If you’re still not able to find answers to your questions in the RollBack Rx FAQ and the Community Forum, you can go to Horizon Datasys web site support page for more product related documents, white papers, and other information. You can also submit an online support ticket with the Horizon Datasys technical support team through our online support forum:
Click here to file a support ticket
Canada: 1100 - 1200 West 73rd Ave Vancouver, BC V6P 6G5 Canada Toll: (800) 496-0148 ext. 1 Intl: (604) 324-0797 Fax: (604) 608-3390
USA: 1685 H Street #846 Blaine, WA 98230 USA Toll: (800) 496-0148 ext. 3 Fax: (360) 233-0466
International: Melbourne, Australia........................................... Buenos Aires, Argentina...................................... Brasilia, Brazil....................................................... Santiago, Chile..................................................... Bogota, Colombia................................................ Santo Domingo, Rupublica Dominicana.............. Hong Kong, China................................................ Jerusalem, Israel.................................................. Mexico City, Mexico (Toll-free) ........................... Panama City, Panama.......................................... Lima, Peru............................................................ Madrid, España.................................................... Caracus, Venezuela..............................................
(61) 3-865-21961(54) 11-51993556(55) 61-37172269(56) 2-9382493(57) 1-3819331(1) 829-954-8138(852) 300-85705(972) 2-3721-075(1) 800-681-6746(507) 833-9233(511) 720-4141(34) 91-1898-193(58) 212-3359405