rhinoceros beetle - 3doodlerthe3doodler.com/wp-content/uploads/2016/08/rhinocerosbeetle.pdf ·...
TRANSCRIPT
Rhinoceros BeetleBy Louis
the3Doodler.com/Community | Copyright WobbleWorks, Inc. 2014
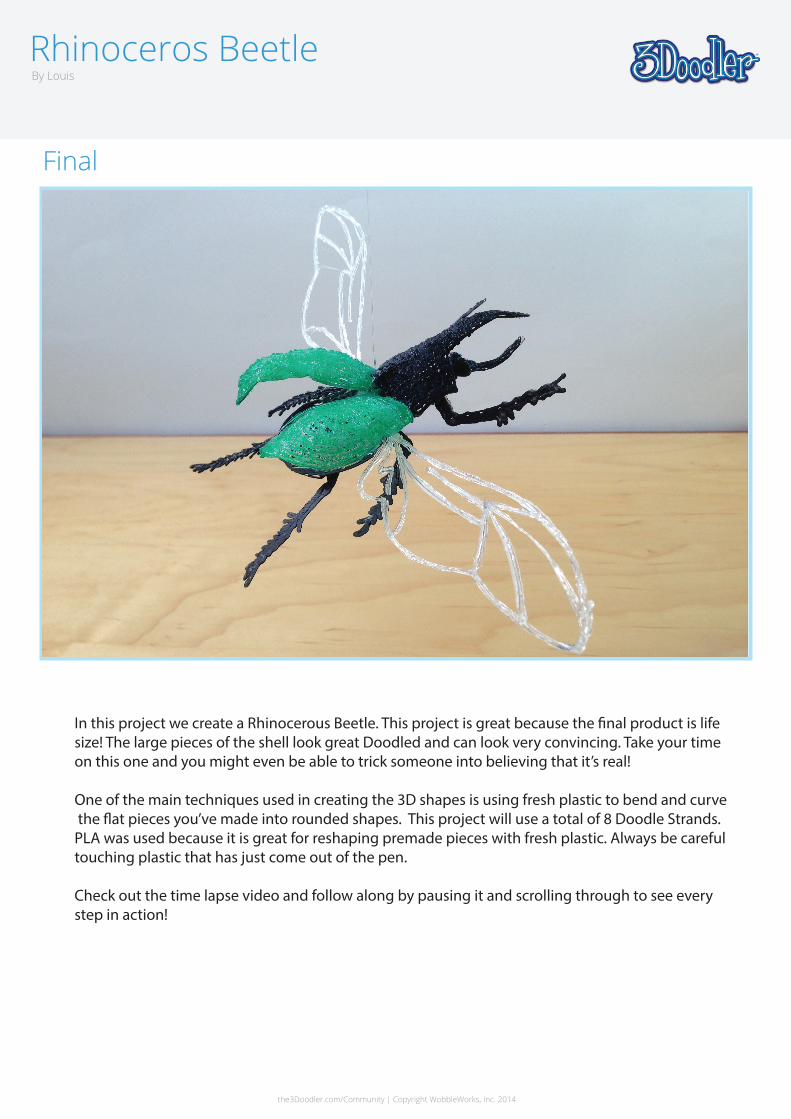
Final
In this project we create a Rhinocerous Beetle. This project is great because the �nal product is life size! The large pieces of the shell look great Doodled and can look very convincing. Take your time on this one and you might even be able to trick someone into believing that it’s real!
One of the main techniques used in creating the 3D shapes is using fresh plastic to bend and curve the �at pieces you’ve made into rounded shapes. This project will use a total of 8 Doodle Strands.PLA was used because it is great for reshaping premade pieces with fresh plastic. Always be carefultouching plastic that has just come out of the pen.
Check out the time lapse video and follow along by pausing it and scrolling through to see every step in action!
the3Doodler.com/Community | Copyright WobbleWorks, Inc. 2014
Rhinoceros BeetleBy Louis
the3Doodler.com/Community | Copyright WobbleWorks, Inc. 2014
Step 1 Step 2
Step 5 Step 6
Step 3 Step 4Add plastic to the outer edges of the shell pieces and shape and round them out with your fingers.
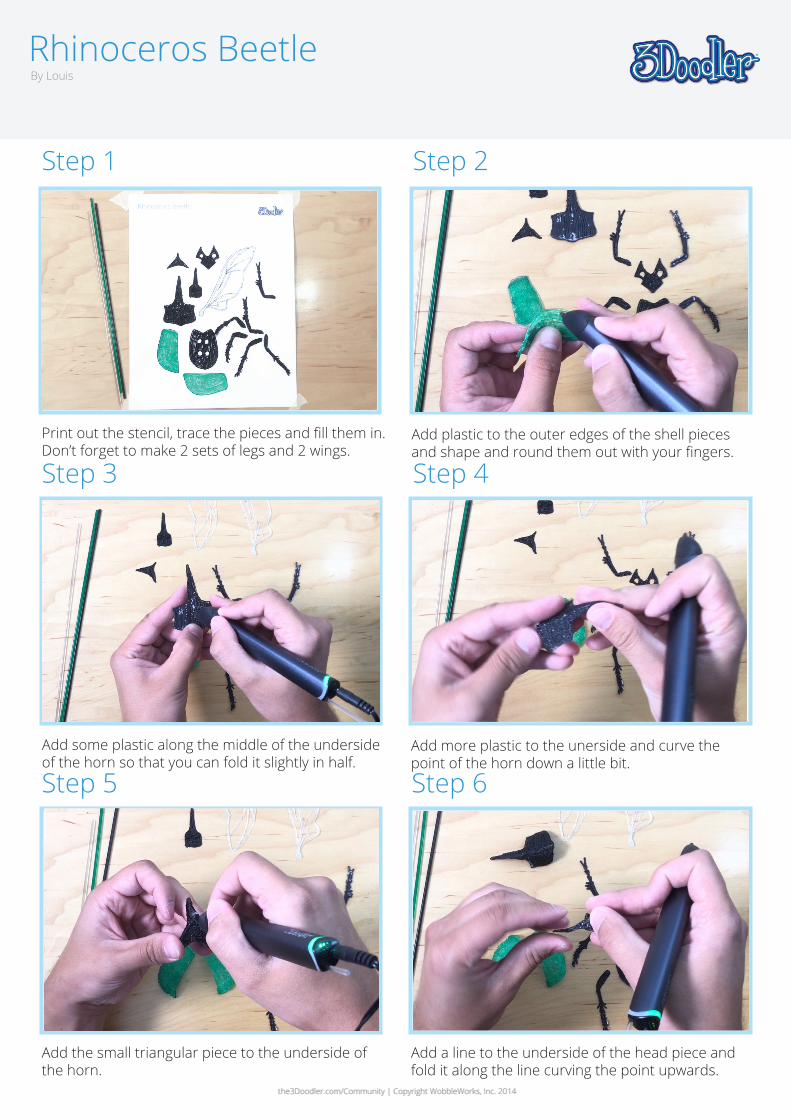
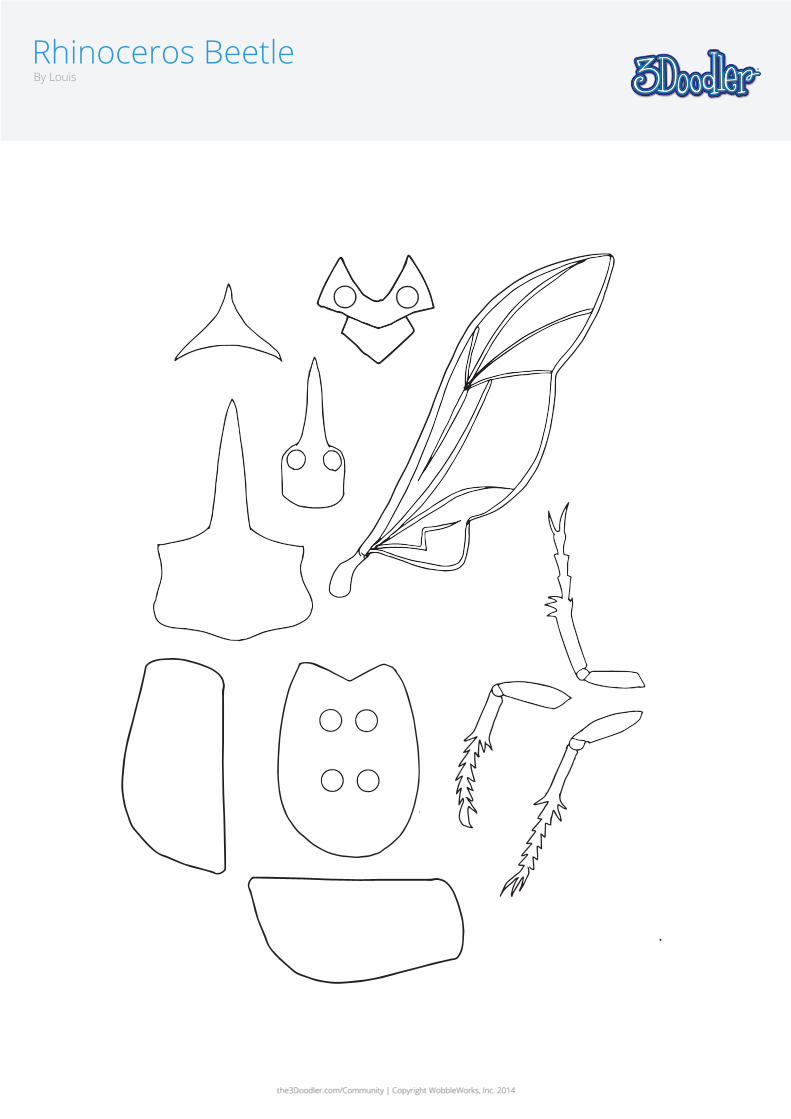
Print out the stencil, trace the pieces and fill them in.Don’t forget to make 2 sets of legs and 2 wings.
Doodle a line down the center of the bottom of thelarge head piece and fold it along that line.
Add more plastic to the unerside and curve the point of the horn down a little bit.
Add the small triangular piece to the underside of the horn.
Add a line to the underside of the head piece and fold it along the line curving the point upwards.
Add some plastic along the middle of the undersideof the horn so that you can fold it slightly in half.

the3Doodler.com/Community | Copyright WobbleWorks, Inc. 2014
Rhinoceros BeetleBy Louis
the3Doodler.com/Community | Copyright WobbleWorks, Inc. 2014
Step 7 Step 8
Step 9Add fresh plastic around the edges of the bottom of the body and shape it to round it out.
Attach the head piece to the under side of the largehorn so that the points curve towards each other.
Next, add the smaller mid section of he body to the main body.
Step 10
Attach the legs by putting the ends through theholes on the body and adding plastic to join them.
Step 11
Repeat the process for each of the legs.
Step 12
Add the head to the body.
the3Doodler.com/Community | Copyright WobbleWorks, Inc. 2014
Rhinoceros BeetleBy Louis
the3Doodler.com/Community | Copyright WobbleWorks, Inc. 2014
Step 13 Step 14
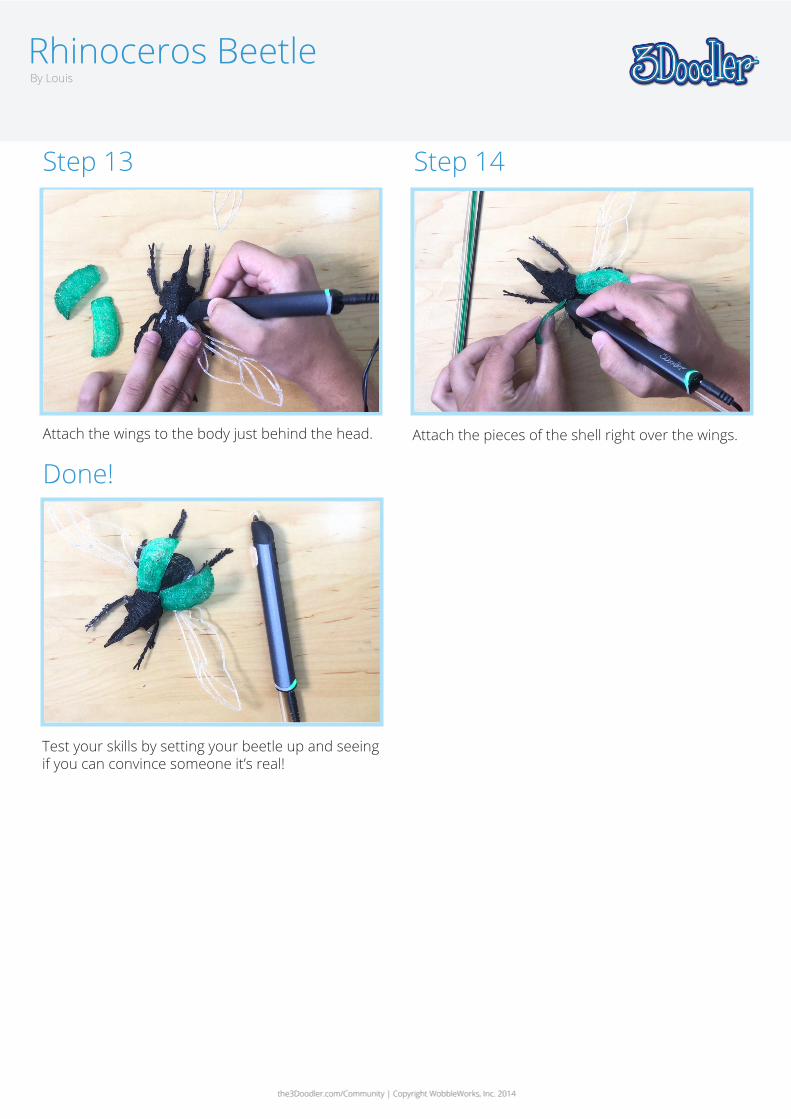
Done!Attach the pieces of the shell right over the wings.Attach the wings to the body just behind the head.
Test your skills by setting your beetle up and seeingif you can convince someone it’s real!
Rhinoceros BeetleBy Louis
the3Doodler.com/Community | Copyright WobbleWorks, Inc. 2014the3Doodler.com/Community | Copyright WobbleWorks, Inc. 2014