red hat openstack platform 9 database-as-a-service guide
TRANSCRIPT

OpenStack Team
Red Hat OpenStack Platform9Database-as-a-Service Guide
Database-as-a-Service for Red Hat OpenStack Platform

Red Hat OpenStack Platform 9 Database-as-a-Service Guide
Database-as-a-Service for Red Hat OpenStack Platform
OpenStack [email protected]
Legal Notice
Copyright © 2016 Red Hat, Inc.
The text of and illustrations in this document are licensed by Red Hat under a Creative CommonsAttribution–Share Alike 3.0 Unported license ("CC-BY-SA"). An explanation of CC-BY-SA isavailable athttp://creativecommons.org/licenses/by-sa/3.0/. In accordance with CC-BY-SA, if you distribute this document or an adaptation of it, you mustprovide the URL for the original version.
Red Hat, as the licensor of this document, waives the right to enforce, and agrees not to assert,Section 4d of CC-BY-SA to the fullest extent permitted by applicable law.
Red Hat, Red Hat Enterprise Linux, the Shadowman logo, JBoss, OpenShift, Fedora, the Infinitylogo, and RHCE are trademarks of Red Hat, Inc., registered in the United States and othercountries.
Linux ® is the registered trademark of Linus Torvalds in the United States and other countries.
Java ® is a registered trademark of Oracle and/or its affiliates.
XFS ® is a trademark of Silicon Graphics International Corp. or its subsidiaries in the United Statesand/or other countries.
MySQL ® is a registered trademark of MySQL AB in the United States, the European Union andother countries.
Node.js ® is an official trademark of Joyent. Red Hat Software Collections is not formally related toor endorsed by the official Joyent Node.js open source or commercial project.
The OpenStack ® Word Mark and OpenStack logo are either registered trademarks/service marksor trademarks/service marks of the OpenStack Foundation, in the United States and other countriesand are used with the OpenStack Foundation's permission. We are not affiliated with, endorsed orsponsored by the OpenStack Foundation, or the OpenStack community.
All other trademarks are the property of their respective owners.
AbstractThis guide describes how to deploy, configure, and use Database-as-a-Service, trove, with Red HatOpenStack Platform.
. . . . . . . . . . . . . . . . . . . . . . . . . . . . . . . . . . . . . . . . . . . . . . . . . . . . . . . . . . . . . . . . . . . . . . . . . . . . . . . . . . . . . . . . . . . . . . . . . . . . . . . . . . . . . . . . . . . . . . . . . . . . . . . . . . . . . . . . . . . . . . . . . . . . . . . . . . . . . . . . . . . . . . . . . . . . . . . . . . . . . . . . . . . . . . . . . . . . . . . . . . . . . . . . . . . . . . . . . . . . . . . . . . . . . . . . . . . . . . . . . . . . . . . . . . . . . . . . . . . . . . . . . . . . . . . . . . . . . . . .
. . . . . . . . . . . . . . . . . . . . . . . . . . . . . . . . . . . . . . . . . . . . . . . . . . . . . . . . . . . . . . . . . . . . . . . . . . . . . . . . . . . . . . . . . . . . . . . . . . . . . . . . . . . . . . . . . . . . . . . . . . . . . . . . . . . . . . . . . . . . . . . . . . . . . . . . . . . . . . . . . . . . . . . . . . . . . . . . . . . . . . . . . . . . . . . . . . . . . . . . . . . . . . . . . . . . . . . . . . . . . . . . . . . . . . . . . . . . . . . . . . . . . . . . . . . . . . . . . . . . . . . . . . . . . . . . . . . . . . . .
. . . . . . . . . . . . . . . . . . . . . . . . . . . . . . . . . . . . . . . . . . . . . . . . . . . . . . . . . . . . . . . . . . . . . . . . . . . . . . . . . . . . . . . . . . . . . . . . . . . . . . . . . . . . . . . . . . . . . . . . . . . . . . . . . . . . . . . . . . . . . . . . . . . . . . . . . . . . . . . . . . . . . . . . . . . . . . . . . . . . . . . . . . . . . . . . . . . . . . . . . . . . . . . . . . . . . . . . . . . . . . . . . . . . . . . . . . . . . . . . . . . . . . . . . . . . . . . . . . . . . . . . . . . . . . . . . . . . . . . .
Table of Contents
PREFACE
CHAPTER 1. ADMINISTERING DATABASE-AS-A-SERVICE1.1. INSTALL AND CONFIGURE THE DATABASE-AS-A-SERVICE CONTROLLER1.2. SECURE DATABASE-AS-A-SERVICE
CHAPTER 2. USING DATABASE-AS-A-SERVICE2.1. AUTOMATE THE CREATION AND CONFIGURATION OF DATABASE-AS-A-SERVICE GUEST IMAGES
3
444
7
7
Table of Contents
1

Red Hat OpenStack Platform 9 Database-as-a-Service Guide
2

PREFACE
Database-as-a-Service (DBaaS) enables users to conveniently utilize a relational or non-relationaldatabase in their OpenStack environment without having to worry about the administrative taskssuch as deployment, configuration, or backups. This functionality is provided by the trovecomponent, which provisions and manages guest database images.
DBaaS comprises several services:
Guest Agent service, running on guest instances and managing the datastore; this includesbringing a new datastore online and performing database operations.
Task Manager service, which provisions, manages, and performs operations on instances.
API service, which provides a RESTful API and forwards API requests to the guest agent or taskmanager. Command-line interface to the DBaaS API is provided by the trove client, which ispart of the python-troveclient package.
Conductor service, running on the host and listening for messages from guest instances to passto the host; for example, status updates.
The following database platforms are supported:
MySQL 5.5 and 5.6
MariaDB 5.5 and 10
Warning
DEPRECATION NOTICE: Beginning in Red Hat OpenStack Platform 10, the OpenStackTrove service will no longer be included in the Red Hat OpenStack Platform distribution.We are working with a trusted partner to provide our customers with a production readyDBaaS service. Please contact your sales account manager to learn more about thisoption.
Warning
The OpenStack Database-as-a-Service is available in this release as a TechnologyPreview, and therefore is not fully supported by Red Hat. It should only be used fortesting, and should not be deployed in a production environment. For more informationabout Technology Preview features, see Scope of Coverage Details.
PREFACE
3
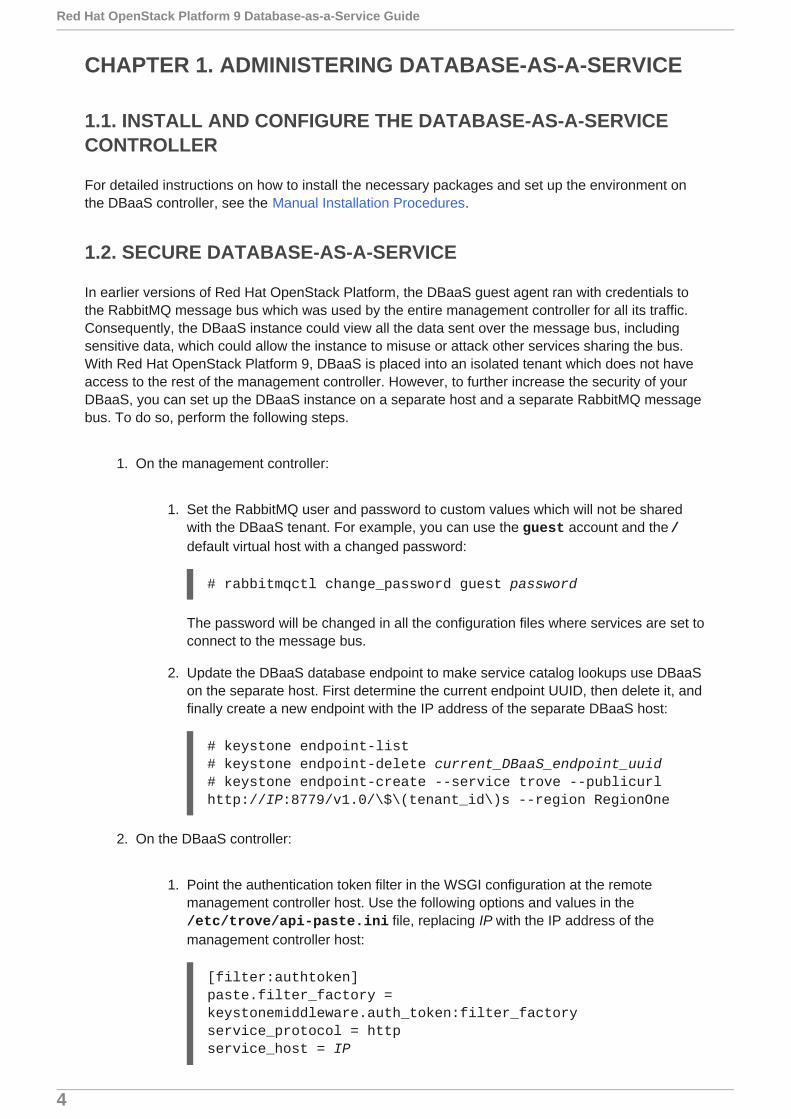
CHAPTER 1. ADMINISTERING DATABASE-AS-A-SERVICE
1.1. INSTALL AND CONFIGURE THE DATABASE-AS-A-SERVICECONTROLLER
For detailed instructions on how to install the necessary packages and set up the environment onthe DBaaS controller, see the Manual Installation Procedures.
1.2. SECURE DATABASE-AS-A-SERVICE
In earlier versions of Red Hat OpenStack Platform, the DBaaS guest agent ran with credentials tothe RabbitMQ message bus which was used by the entire management controller for all its traffic.Consequently, the DBaaS instance could view all the data sent over the message bus, includingsensitive data, which could allow the instance to misuse or attack other services sharing the bus.With Red Hat OpenStack Platform 9, DBaaS is placed into an isolated tenant which does not haveaccess to the rest of the management controller. However, to further increase the security of yourDBaaS, you can set up the DBaaS instance on a separate host and a separate RabbitMQ messagebus. To do so, perform the following steps.
1. On the management controller:
1. Set the RabbitMQ user and password to custom values which will not be sharedwith the DBaaS tenant. For example, you can use the guest account and the /default virtual host with a changed password:
# rabbitmqctl change_password guest password
The password will be changed in all the configuration files where services are set toconnect to the message bus.
2. Update the DBaaS database endpoint to make service catalog lookups use DBaaSon the separate host. First determine the current endpoint UUID, then delete it, andfinally create a new endpoint with the IP address of the separate DBaaS host:
# keystone endpoint-list# keystone endpoint-delete current_DBaaS_endpoint_uuid# keystone endpoint-create --service trove --publicurl http://IP:8779/v1.0/\$\(tenant_id\)s --region RegionOne
2. On the DBaaS controller:
1. Point the authentication token filter in the WSGI configuration at the remotemanagement controller host. Use the following options and values in the /etc/trove/api-paste.ini file, replacing IP with the IP address of themanagement controller host:
[filter:authtoken]paste.filter_factory = keystonemiddleware.auth_token:filter_factoryservice_protocol = httpservice_host = IP
Red Hat OpenStack Platform 9 Database-as-a-Service Guide
4
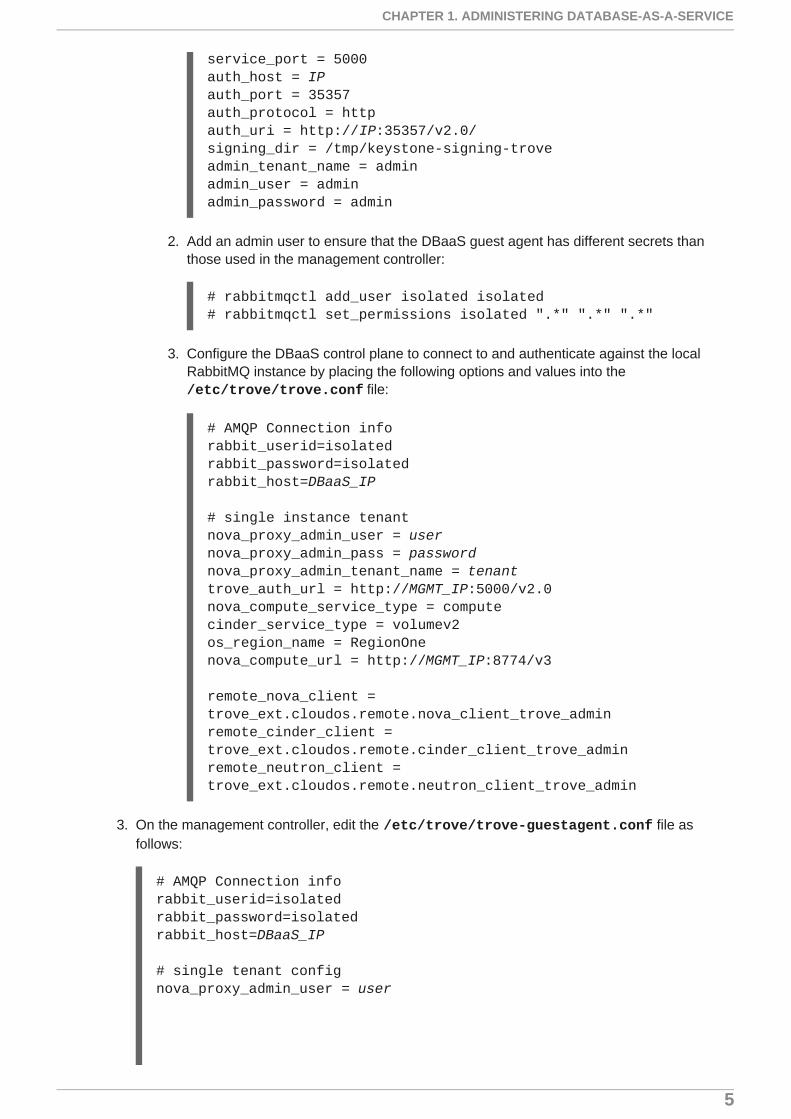
service_port = 5000auth_host = IPauth_port = 35357auth_protocol = httpauth_uri = http://IP:35357/v2.0/signing_dir = /tmp/keystone-signing-troveadmin_tenant_name = adminadmin_user = adminadmin_password = admin
2. Add an admin user to ensure that the DBaaS guest agent has different secrets thanthose used in the management controller:
# rabbitmqctl add_user isolated isolated# rabbitmqctl set_permissions isolated ".*" ".*" ".*"
3. Configure the DBaaS control plane to connect to and authenticate against the localRabbitMQ instance by placing the following options and values into the /etc/trove/trove.conf file:
# AMQP Connection inforabbit_userid=isolatedrabbit_password=isolatedrabbit_host=DBaaS_IP
# single instance tenantnova_proxy_admin_user = usernova_proxy_admin_pass = passwordnova_proxy_admin_tenant_name = tenanttrove_auth_url = http://MGMT_IP:5000/v2.0nova_compute_service_type = computecinder_service_type = volumev2os_region_name = RegionOnenova_compute_url = http://MGMT_IP:8774/v3
remote_nova_client = trove_ext.cloudos.remote.nova_client_trove_adminremote_cinder_client = trove_ext.cloudos.remote.cinder_client_trove_adminremote_neutron_client = trove_ext.cloudos.remote.neutron_client_trove_admin
3. On the management controller, edit the /etc/trove/trove-guestagent.conf file asfollows:
# AMQP Connection inforabbit_userid=isolatedrabbit_password=isolatedrabbit_host=DBaaS_IP
# single tenant confignova_proxy_admin_user = user
CHAPTER 1. ADMINISTERING DATABASE-AS-A-SERVICE
5

nova_proxy_admin_pass = passwordnova_proxy_admin_tenant_name = tenanttrove_auth_url = http://MGMT_IP:5000/v2.0swift_url = http://MGMT_IP:8080/v1/AUTH_
1.2.1. ACL Policies
Alternatively, you can improve the security by taking advantage of the ACL policies provided byRabbitMQ virtual hosts. In this case, you can assign separate users to each virtual host, includingseparate permissions. For example, you can define a virtual host called /isolated and assign the isolated user appropriate permissions for the virtual host. To do so, perform the following steps:
1. Change the guest account password for the default / virtual host:
# rabbitmqctl change_password guest password
2. Add the new user and virtual host and set the permissions appropriately:
# rabbitmqctl add_user isolated isolated# rabbitmqctl add_vhost /isolated# rabbitmqctl -p /isolated set_permissions isolated ".*" ".*" ".*"
3. Edit the DBaaS configuration. There are two files to edit: /etc/trove/trove-guestmanager.conf, which is generated by packstack from puppet-trove and is to beinjected into the guest instance, and /etc/trove/trove-conductor.conf, whichconfigures the DBaaS control plane service for asynchronous status updates from theDBaaS instance. The RabbitMQ settings are identical for both files:
[oslo_messaging_rabbit]rabbit_host=IPrabbit_virtual_host=/isolatedrabbit_userid=isolatedrabbit_password=isolatedrabbit_port=5672rabbit_ha_queues=Falserabbit_hosts=IP:5672rabbit_use_ssl=False
The advantage of this approach is its simplicity in comparison with the scenario where separatehosts and message queues are used. This can be useful if provisioning is performed in anautomated manner; for example, using Red Hat OpenStack Platform director.
Red Hat OpenStack Platform 9 Database-as-a-Service Guide
6
CHAPTER 2. USING DATABASE-AS-A-SERVICE
2.1. AUTOMATE THE CREATION AND CONFIGURATION OFDATABASE-AS-A-SERVICE GUEST IMAGES
Red Hat recommends using the trove-image-create tool for generating automated DBaaS-compatible images for supported datastores.
To get the trove-image-create tool, install the openstack-trove-images package:
# yum install openstack-trove-images
The following basic options are available:
Option Description, parameters
-i, --image The base image that you are going to use. QEMU images (qcow2) are supported.Specify the image file name (and, optionally, its path) as a pamaterer.
-r, --release The OpenStack version you want to use. Specify kilo, liberty, or mitaka asa parameter.
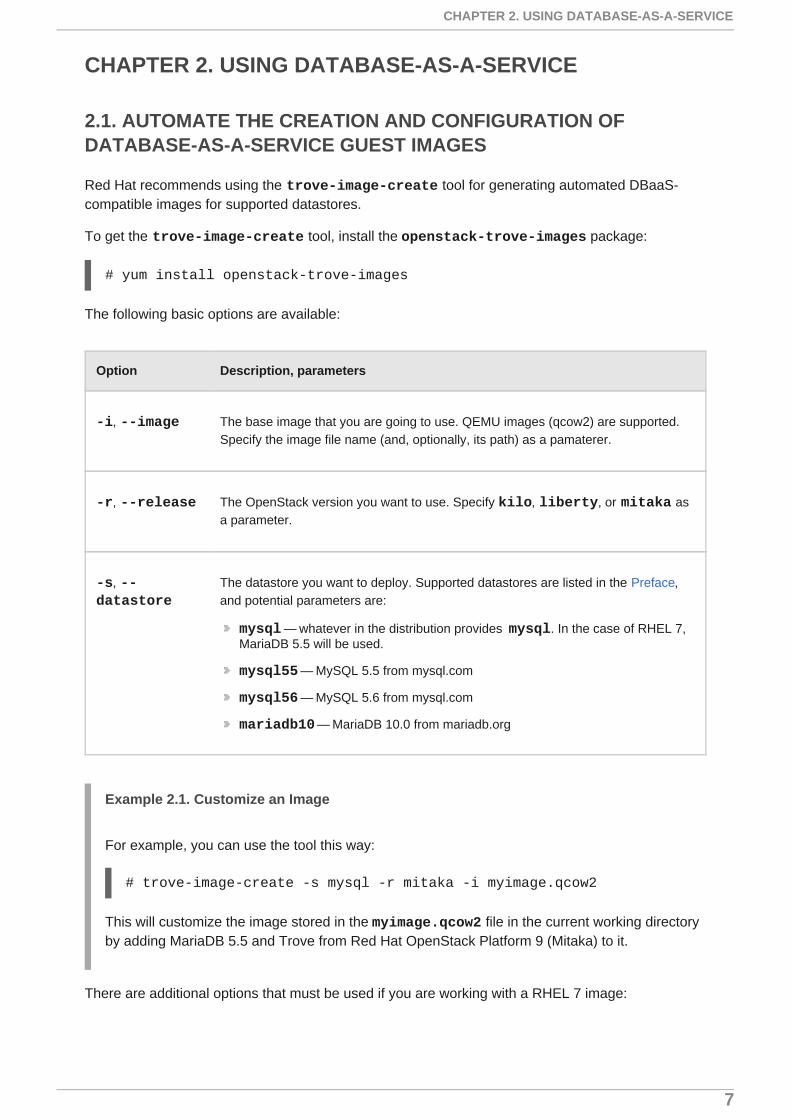
-s, --datastore
The datastore you want to deploy. Supported datastores are listed in the Preface,and potential parameters are:
mysql — whatever in the distribution provides mysql. In the case of RHEL 7,MariaDB 5.5 will be used.
mysql55 — MySQL 5.5 from mysql.com
mysql56 — MySQL 5.6 from mysql.com
mariadb10 — MariaDB 10.0 from mariadb.org
Example 2.1. Customize an Image
For example, you can use the tool this way:
# trove-image-create -s mysql -r mitaka -i myimage.qcow2
This will customize the image stored in the myimage.qcow2 file in the current working directoryby adding MariaDB 5.5 and Trove from Red Hat OpenStack Platform 9 (Mitaka) to it.
There are additional options that must be used if you are working with a RHEL 7 image:
CHAPTER 2. USING DATABASE-AS-A-SERVICE
7

Option Recognized parameters and theirsyntax
Description
--sm-register
USER:password:PASSWORDUSER:file:FILE_CONTAINING_PASSWORD
Register with Subscription Managerusing your Red Hat credentials.
--sm-pool pool:POOL_IDfile:FILE_CONTAINING_POOL_IDauto
Attach a specified or automaticallydetermined subscription pool to thesystem.
Example 2.2. Customize a RHEL 7 Image
For example:
# trove-image-create -s mysql -r mitaka -i ../../images/rhel-mariadb55.qcow2 --sm-register [email protected]:password:123456 --sm-pool auto
This will customize the image in a manner similar to the previous example but also register thesystem using Red Hat login name [email protected], password 123456, and the best-matching subscription.
2.1.1. Loading the Image to Database-as-a-Service Management
When the customization of the image is complete, perform the following steps:
1. Upload the image to the Image service. To do so, run a command similar to this one:
# openstack image create rhel7-mariadb55 --disk-format qcow2 --container-format bare --public < myimage.qcow2
2. Get the ID of the uploaded image from the output of the previous command, which shouldlook like the following:
+------------------+------------------------------------------------------+| Field | Value |+------------------+------------------------------------------------------+| checksum | dec3f16054739459d03984b7a552cd9c || container_format | bare || created_at | 2016-01-27T20:10:36Z |
Red Hat OpenStack Platform 9 Database-as-a-Service Guide
8
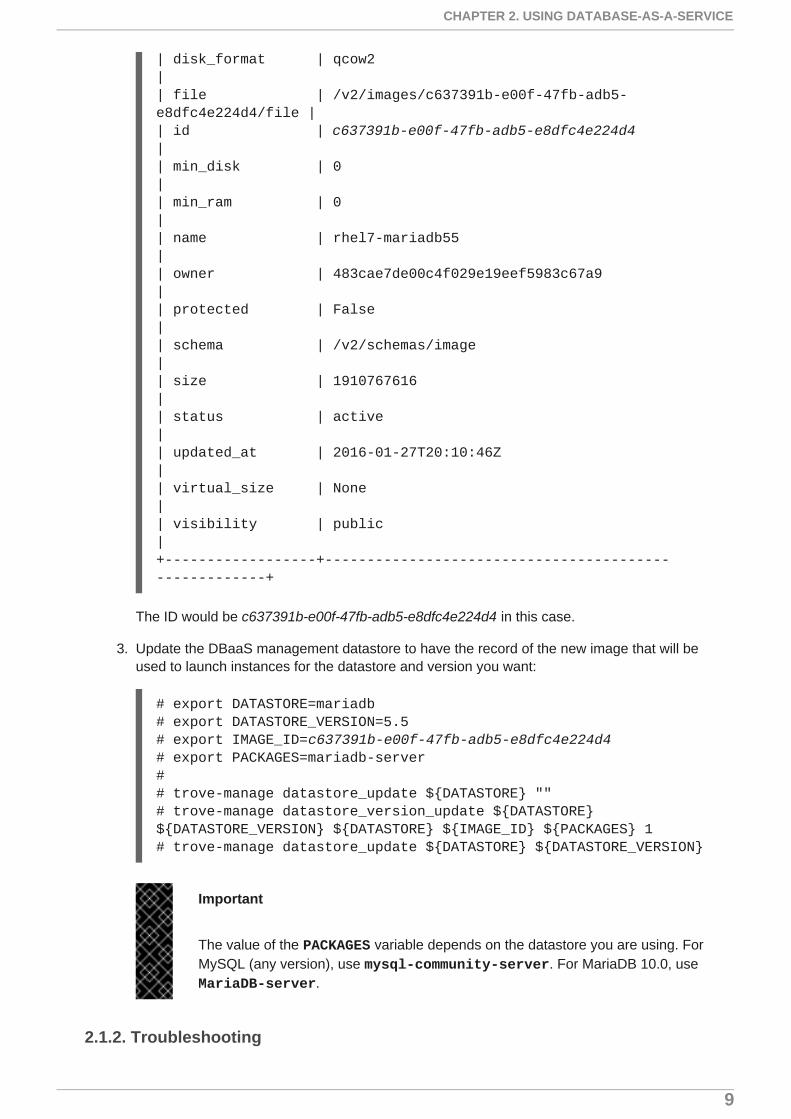
| disk_format | qcow2 || file | /v2/images/c637391b-e00f-47fb-adb5-e8dfc4e224d4/file || id | c637391b-e00f-47fb-adb5-e8dfc4e224d4 || min_disk | 0 || min_ram | 0 || name | rhel7-mariadb55 || owner | 483cae7de00c4f029e19eef5983c67a9 || protected | False || schema | /v2/schemas/image || size | 1910767616 || status | active || updated_at | 2016-01-27T20:10:46Z || virtual_size | None || visibility | public |+------------------+------------------------------------------------------+
The ID would be c637391b-e00f-47fb-adb5-e8dfc4e224d4 in this case.
3. Update the DBaaS management datastore to have the record of the new image that will beused to launch instances for the datastore and version you want:
# export DATASTORE=mariadb# export DATASTORE_VERSION=5.5# export IMAGE_ID=c637391b-e00f-47fb-adb5-e8dfc4e224d4# export PACKAGES=mariadb-server## trove-manage datastore_update ${DATASTORE} ""# trove-manage datastore_version_update ${DATASTORE} ${DATASTORE_VERSION} ${DATASTORE} ${IMAGE_ID} ${PACKAGES} 1# trove-manage datastore_update ${DATASTORE} ${DATASTORE_VERSION}
Important
The value of the PACKAGES variable depends on the datastore you are using. ForMySQL (any version), use mysql-community-server. For MariaDB 10.0, use MariaDB-server.
2.1.2. Troubleshooting
CHAPTER 2. USING DATABASE-AS-A-SERVICE
9

In the event of an instance failing on launch, an image with an SSH key can be created and used fortroubleshooting. The trove-image-create tool has the --root-ssh-key option for thispurpose. This option takes the path to a public key as a parameter, and injects the key into theimage. For example:
# trove-image-create -i myimage.qcow2 -r liberty -s mysql --root-ssh-key ~/.ssh/id_rsa.pub
In order to be able to access an instance based on this image, follow these steps:
1. Edit the security group associated with the instance.
2. Open the SSH port.
3. Consider allowing ICMP as well.
4. If the instance is in a private network, you will need to add a floating IP to the instance.
After completing these steps, you should be able to run the following command to log in to theinstance:
# ssh root@INSTANCE_IP
Red Hat OpenStack Platform 9 Database-as-a-Service Guide
10