portrait and candid photography sample chapter
DESCRIPTION
Portrait and Candid PhotographyTRANSCRIPT
Click here to buy the book.
Sample Chapter

Click here to buy the book.
WH
AT
YO
U M
US
T K
NO
W A
BO
UT
PH
OTO
GR
AP
HIN
G P
EO
PLE
OBSERVE AND CONNECT WITH PEOPLE
COMPOSE YOUR PICTURE
UNDERSTAND LIGHT
KNOW YOUR EQUIPMENT
COMPACT DIGITAL CAMERAS
DSLR CAMERAS
CHOOSE LENSES FOR YOUR DSLR
1C
HA
PT
ER
Click here to buy the book.
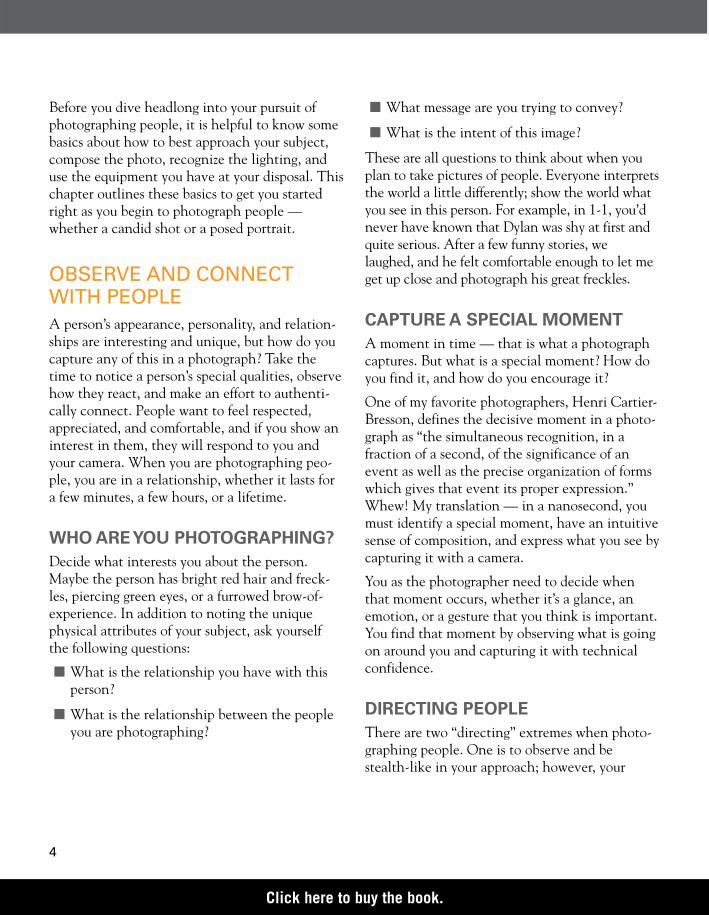
Before you dive headlong into your pursuit ofphotographing people, it is helpful to know somebasics about how to best approach your subject,compose the photo, recognize the lighting, anduse the equipment you have at your disposal. Thischapter outlines these basics to get you startedright as you begin to photograph people —whether a candid shot or a posed portrait.
OBSERVE AND CONNECTWITH PEOPLEA person’s appearance, personality, and relation-ships are interesting and unique, but how do youcapture any of this in a photograph? Take thetime to notice a person’s special qualities, observehow they react, and make an effort to authenti-cally connect. People want to feel respected,appreciated, and comfortable, and if you show aninterest in them, they will respond to you andyour camera. When you are photographing peo-ple, you are in a relationship, whether it lasts fora few minutes, a few hours, or a lifetime.
WHO ARE YOU PHOTOGRAPHING?Decide what interests you about the person.Maybe the person has bright red hair and freck-les, piercing green eyes, or a furrowed brow-of-experience. In addition to noting the uniquephysical attributes of your subject, ask yourselfthe following questions:
■ What is the relationship you have with thisperson?
■ What is the relationship between the peopleyou are photographing?
4
■ What message are you trying to convey?
■ What is the intent of this image?
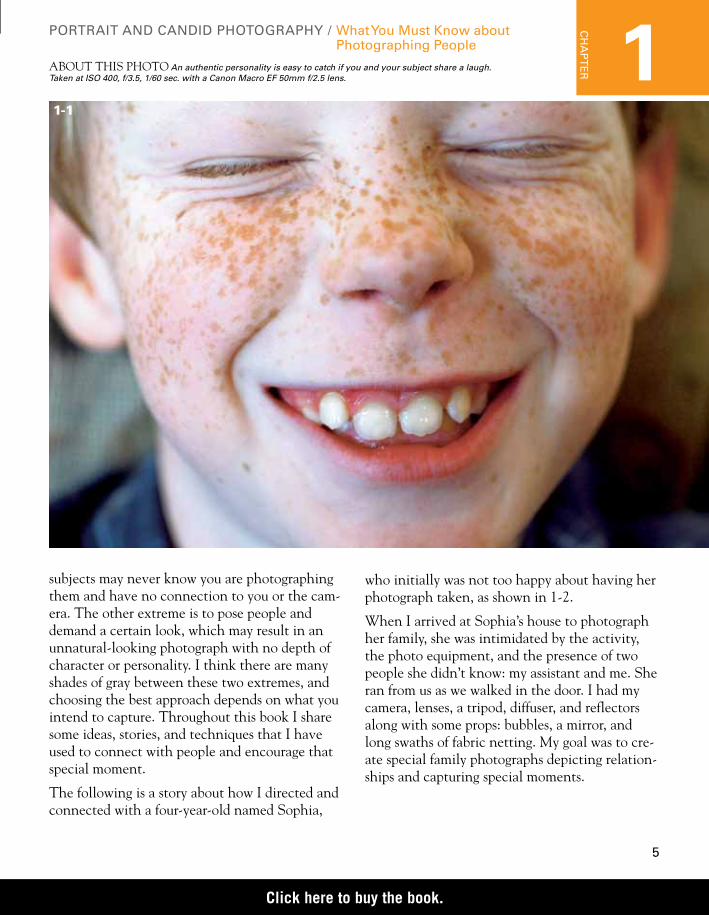
These are all questions to think about when youplan to take pictures of people. Everyone interpretsthe world a little differently; show the world whatyou see in this person. For example, in 1-1, you’dnever have known that Dylan was shy at first andquite serious. After a few funny stories, welaughed, and he felt comfortable enough to let meget up close and photograph his great freckles.
CAPTURE A SPECIAL MOMENTA moment in time — that is what a photographcaptures. But what is a special moment? How doyou find it, and how do you encourage it?
One of my favorite photographers, Henri Cartier-Bresson, defines the decisive moment in a photo-graph as “the simultaneous recognition, in afraction of a second, of the significance of anevent as well as the precise organization of formswhich gives that event its proper expression.”Whew! My translation — in a nanosecond, youmust identify a special moment, have an intuitivesense of composition, and express what you see bycapturing it with a camera.
You as the photographer need to decide whenthat moment occurs, whether it’s a glance, anemotion, or a gesture that you think is important.You find that moment by observing what is goingon around you and capturing it with technicalconfidence.
DIRECTING PEOPLEThere are two “directing” extremes when photo-graphing people. One is to observe and bestealth-like in your approach; however, your
Click here to buy the book.
1C
HA
PT
ER
5
subjects may never know you are photographingthem and have no connection to you or the cam-era. The other extreme is to pose people anddemand a certain look, which may result in anunnatural-looking photograph with no depth ofcharacter or personality. I think there are manyshades of gray between these two extremes, andchoosing the best approach depends on what youintend to capture. Throughout this book I sharesome ideas, stories, and techniques that I haveused to connect with people and encourage thatspecial moment.
The following is a story about how I directed andconnected with a four-year-old named Sophia,
who initially was not too happy about having herphotograph taken, as shown in 1-2.
When I arrived at Sophia’s house to photographher family, she was intimidated by the activity,the photo equipment, and the presence of twopeople she didn’t know: my assistant and me. Sheran from us as we walked in the door. I had mycamera, lenses, a tripod, diffuser, and reflectorsalong with some props: bubbles, a mirror, andlong swaths of fabric netting. My goal was to cre-ate special family photographs depicting relation-ships and capturing special moments.
PORTRAIT AND CANDID PHOTOGRAPHY / What You Must Know aboutPhotographing People
1-1
ABOUT THIS PHOTO An authentic personality is easy to catch if you and your subject share a laugh.Taken at ISO 400, f/3.5, 1/60 sec. with a Canon Macro EF 50mm f/2.5 lens.
Click here to buy the book.

I began the shoot by talking with everyone andgathering them all together for various shots wherethey were casually positioned, both standing andsitting. We laughed and conversed between theshots. When I was shooting the pictures, I kepttalking and gave them feedback about how theylooked and direction on what to do.
I moved the family to the backyard, turned onsome music, and helped Sophia blow bubbles inan effort to gain her confidence. I gave her somefabric netting to play with, and still defiant, shegave a sourpuss look off-camera. It took a while
6
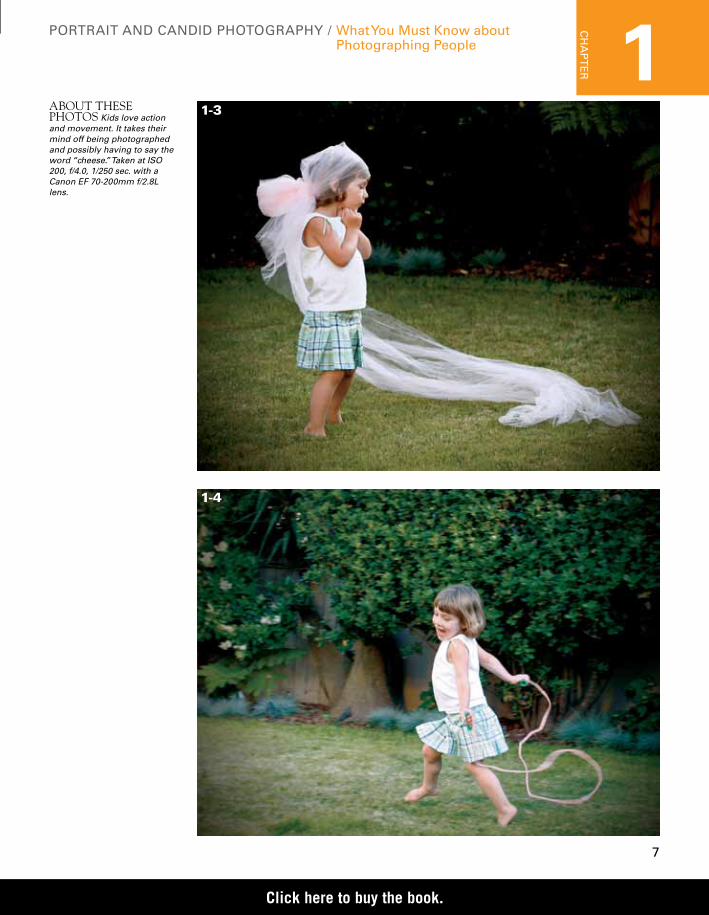
to build the trust, but eventually I was able tocapture some great action shots of Sophia run-ning around in the backyard, oblivious to beingphotographed, as shown in 1-3 and 1-4, capturingthe kind of special moments I’d hoped for.
1-2
ABOUT THIS PHOTO At first, Sophia felt I was an intruder. I like this picture, because she has areal expression on her face. Taken at ISO 200, f/4.0, 1/350 sec. with a Canon EF 70-200mm f/2.8L lens.
When you’re having your picturetaken, you can’t see how you look,
which makes some people very self-conscious. Peopleneed feedback from their photographer. Encouragingcomments and direction really help your subjectsloosen up in front of the lens.
tip
Click here to buy the book.
1C
HA
PT
ER
7
PORTRAIT AND CANDID PHOTOGRAPHY / What You Must Know aboutPhotographing People
ABOUT THESEPHOTOS Kids love actionand movement. It takes theirmind off being photographedand possibly having to say theword “cheese.” Taken at ISO200, f/4.0, 1/250 sec. with aCanon EF 70-200mm f/2.8Llens.
1-3
1-4
Click here to buy the book.
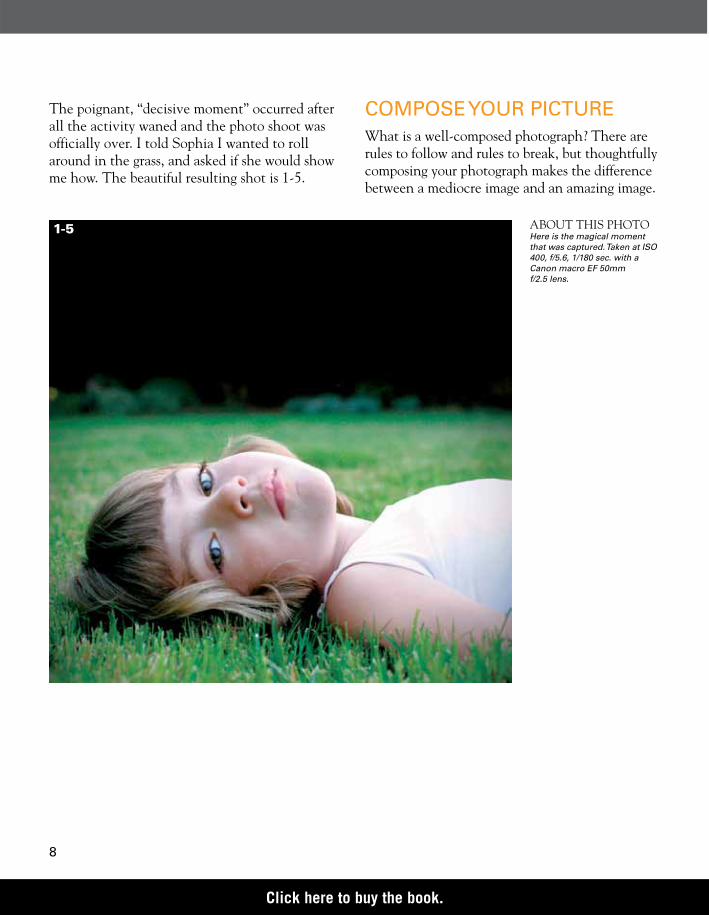
The poignant, “decisive moment” occurred afterall the activity waned and the photo shoot wasofficially over. I told Sophia I wanted to rollaround in the grass, and asked if she would showme how. The beautiful resulting shot is 1-5.
8
COMPOSE YOUR PICTUREWhat is a well-composed photograph? There arerules to follow and rules to break, but thoughtfullycomposing your photograph makes the differencebetween a mediocre image and an amazing image.
ABOUT THIS PHOTOHere is the magical momentthat was captured. Taken at ISO400, f/5.6, 1/180 sec. with aCanon macro EF 50mm f/2.5 lens.
1-5
Click here to buy the book.
1C
HA
PT
ER
9
To compose your shot is to look through theviewfinder and interpret what you see. Keepingsome basic rules in mind and recognizing certaindesign elements prior to pressing the shutter but-ton enables you to create an image as opposed tojust taking one.
LEARN CREATIVE TECHNIQUES TOCOMPOSE YOUR PICTUREWhen you’re beginning to learn the basics aboutcomposing your image, remembering everythingwhile you’re looking through your viewfindercan be difficult. Start with one technique persituation, and, with practice, composing yourphotograph will become second nature.
The following are a few techniques to practicewhen taking photographs:
■ Experiment and take a lot of photographs.Even after you think the picture taking isover, you never know when that magicalmoment will happen. Be prepared to captureunexpected moments.
■ Fill the frame with your image. Look at thebackground and get rid of any distracting ele-ments. Seeing people up close provides imme-diate impact and a feeling of intimacy.
■ Include a natural frame in your photo-graphs. Using an overhanging tree branch,doorway, or archway in the foreground createsmore visual interest.
■ Place your subject off-center. A face right inthe center of an image is great for a driver’slicense or passport photo, but when it comesto artfully composing a shot, consider theRule of Thirds. Think of your entire scene asa tic-tac-toe board, and place something ofinterest at one or more of those intersections.
■ Incorporate basic design elements in yourphotographs. These basic elements includeperspective, focal point, line, repetition, pat-tern, texture, color, symmetry, and contrast.
PORTRAIT AND CANDID PHOTOGRAPHY / What You Must Know aboutPhotographing People
For more details about all the ele-ments of composition and basicdesign elements, see Chapter 4.
x-ref
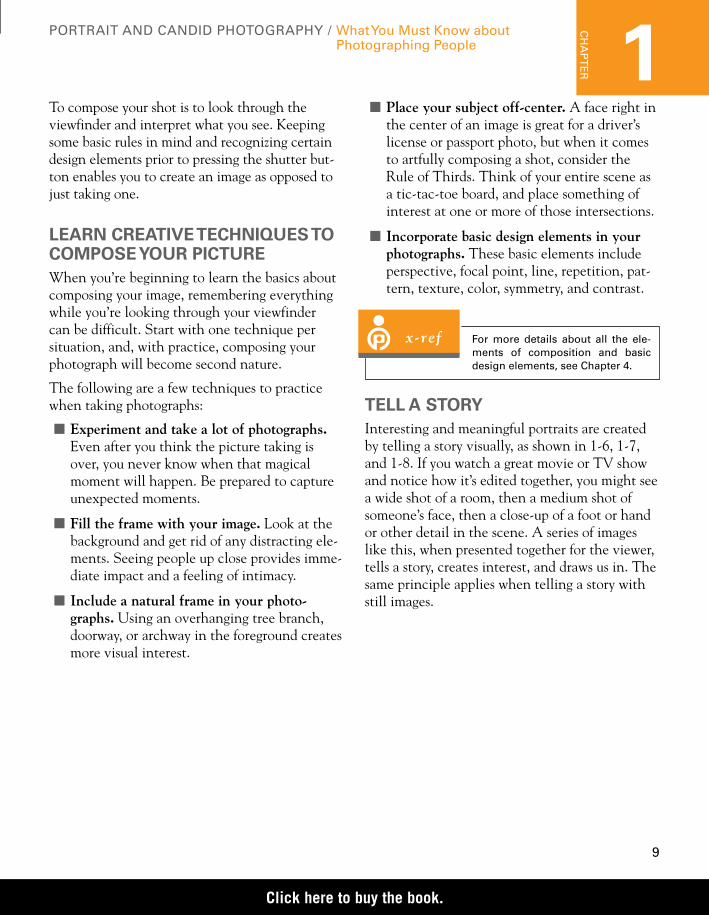
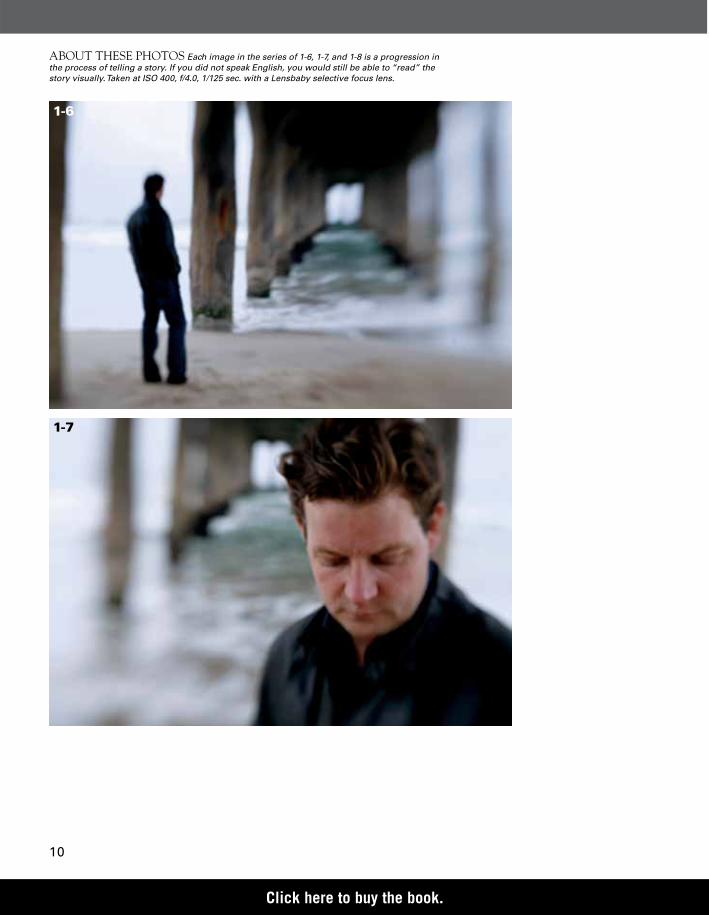
TELL A STORYInteresting and meaningful portraits are createdby telling a story visually, as shown in 1-6, 1-7,and 1-8. If you watch a great movie or TV showand notice how it’s edited together, you might seea wide shot of a room, then a medium shot ofsomeone’s face, then a close-up of a foot or handor other detail in the scene. A series of imageslike this, when presented together for the viewer,tells a story, creates interest, and draws us in. Thesame principle applies when telling a story withstill images.
Click here to buy the book.
10
ABOUT THESE PHOTOS Each image in the series of 1-6, 1-7, and 1-8 is a progression inthe process of telling a story. If you did not speak English, you would still be able to “read” thestory visually. Taken at ISO 400, f/4.0, 1/125 sec. with a Lensbaby selective focus lens.
1-7
1-6
Click here to buy the book.

1C
HA
PT
ER
11
UNDERSTAND LIGHTOver the centuries, artists have translated theirvisions and impressions of light with a brush oncanvas; you as the photographer have an oppor-tunity to express yourself and capture light in aphotograph. To understand and “see” light, it’simportant to know about the variations of lightand how to identify those differences.
There are many types of light, both natural andartificial, but to see light as a photographer is torecognize the quality and direction of light andhow it falls upon your subject. The source oflight, the intensity, the angle, the color, the shadows and highlights that light creates, andwhere you place your subject all affect the look ofyour final image. Consider the following:
■ Is your light source large (sun) or small (flashlight)?
■ How intense is the light — harsh or soft?
■ What color is the light; is it a gray overcastday or a golden sunset?
■ Is the light directly overhead or hitting yoursubject at an angle?
■ How can you modify the light to enhanceyour subject?
Searching for and creating flattering light is pos-sible when you know what to look for. Once youlearn this new language of light, the world opensup with many more photographic opportunities,and your images dramatically improve.
PORTRAIT AND CANDID PHOTOGRAPHY / What You Must Know aboutPhotographing People
1-8
In Chapter 3, I cover the subject oflight in more detail, but these arethe basic considerations.
x-ref
Click here to buy the book.
12
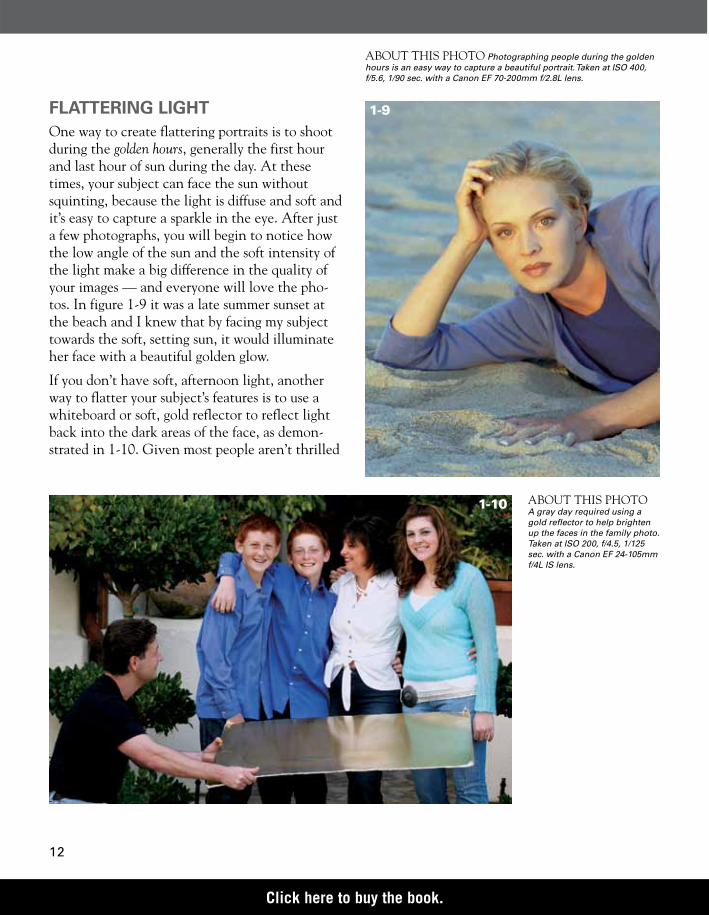
FLATTERING LIGHTOne way to create flattering portraits is to shootduring the golden hours, generally the first hourand last hour of sun during the day. At thesetimes, your subject can face the sun withoutsquinting, because the light is diffuse and soft andit’s easy to capture a sparkle in the eye. After justa few photographs, you will begin to notice howthe low angle of the sun and the soft intensity ofthe light make a big difference in the quality ofyour images — and everyone will love the pho-tos. In figure 1-9 it was a late summer sunset atthe beach and I knew that by facing my subjecttowards the soft, setting sun, it would illuminateher face with a beautiful golden glow.
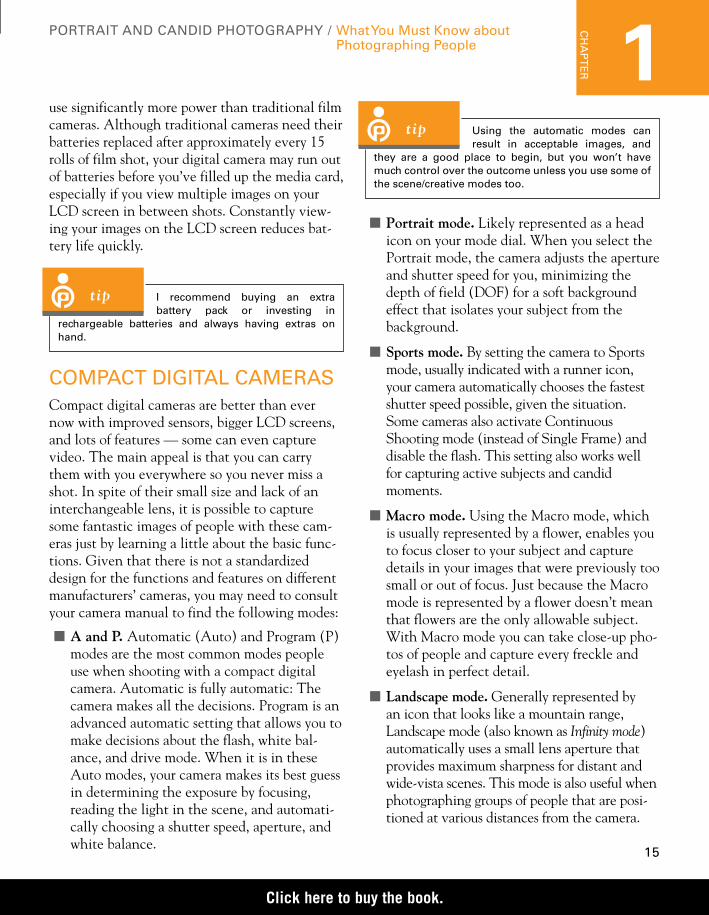
If you don’t have soft, afternoon light, anotherway to flatter your subject’s features is to use awhiteboard or soft, gold reflector to reflect lightback into the dark areas of the face, as demon-strated in 1-10. Given most people aren’t thrilled
1-9
ABOUT THIS PHOTO Photographing people during the goldenhours is an easy way to capture a beautiful portrait. Taken at ISO 400,f/5.6, 1/90 sec. with a Canon EF 70-200mm f/2.8L lens.
ABOUT THIS PHOTOA gray day required using agold reflector to help brightenup the faces in the family photo.Taken at ISO 200, f/4.5, 1/125sec. with a Canon EF 24-105mmf/4L IS lens.
1-10
Click here to buy the book.

1C
HA
PT
ER
13
to see pictures of themselves with under-eyeshadows and wrinkles, reflecting soft, even lightback into the face will make them much happierwith the resulting photograph, as you can see in 1-11.
Now you can begin to search out flattering lightin every situation. After learning that reflectedlight brightens my face, fills in shadows, and cam-ouflages wrinkles, I have taken to standing nearlarge white walls and understand the many bene-fits of restaurants with soft light and white table-cloths. As a result, I look better!
WHAT OUR EYES SEEIt’s frustrating when your images don’t conveywhat you intended to capture. If you’ve taken ahigh-contrast digital photograph and noticed thatthe shadows and highlights in the image have lit-tle to no detail, you are not alone. Many peopledon’t realize that our eyes recognize a broaderrange of light than a camera is capable of record-ing. We can see the details in dark shadows and
bright highlights that our cameras cannot cap-ture. Keeping this in mind when you are compos-ing your scene enables you to choose the bestlocations for a shot and gives you a better chanceof correctly exposing your image.
PORTRAIT AND CANDID PHOTOGRAPHY / What You Must Know aboutPhotographing People
ABOUT THIS PHOTOI zoomed in to capture the flat-tering light created by the goldreflector. Taken at ISO 200;f/4.5;1/125 sec. with a Canon EF24-105mm f/4L IS lens.
1-11
In Chapter 3, I provide more techni-cal information to help you meas-
ure the difference between the light you see and thelight the camera records.
x-ref
KNOW YOUR EQUIPMENTThe light is beautiful, your subjects are positionedand comfortable, and you are composing yourshot — this is not the optimal time to learn thebasics about your equipment. If you are flounder-ing with the technical fundamentals, you mightmiss that magic moment. Using the camera andlenses needs to become second nature to you, soyou can concentrate on creating the best image.Learning about the basics in increments and
Click here to buy the book.

practicing along the way is a good recipe for suc-cess. Following is a brief overview of some basicequipment essential to beginning your photo-graphic journey.
MEGAPIXELSA digital image is made up of thousands of tiny,tile-like, colored squares called pixels, and onemillion pixels equals one megapixel (MP). This isimportant to know because digital cameras meas-ure resolution (the quality of the image) inmegapixels. For example, a 7MP camera producesan image capable of being printed at 11" × 14" orpossibly larger, while still retaining sharpness anddetail. Think about your final product: If youneed to print out large images, make sure you areusing a camera with the appropriate number ofmegapixels.
MEMORY CARDSMemory cards are the recording medium for digitalcameras — the digital camera writes the imagedata to the removable memory card as you shoot.Because memory cards are available in manyshapes, sizes, and speeds, and some are proprietaryto the manufacturer’s camera, refer to your camera
14
manual, or to the memory card itself, to identifywhich variety your camera accepts. When youpurchased your camera, a small-capacity memorycard was probably included, typically 16MB(megabyte); however, I’m sure you quickly discov-ered that a 16MB memory card does not hold verymany images.
Pay attention to the memory card capacity andmake sure you purchase at least one 1GB (gigabyte)memory card. For example, a 7MP camera set atthe highest resolution with a 1GB memory cardholds approximately 280 images — Table 1-1 out-lines the general capacities of various memory cardsizes, based on camera pixels. Having a 1GB mediacard enables you to shoot images continuouslywithout running out of room, and you avoid havingto download your images to a computer in the mid-dle of a shoot. Memory cards are also very fragile,so be careful when you take them out of the cam-era. Keep them away from magnetic sources andcurious dogs that enjoy chewing on plastic — thesecould damage your card and result in lost images.
BATTERIESDigital cameras use either a rechargeable batterypack or traditional batteries. And, digital cameras
Table 1-1Approximate Memory Card Capacities*
5MP 6MP 7MP 8MP 10MP 12 MP Memory Card Size Camera Camera Camera Camera Camera Camera
Number of images
512MB 280 232 140 120 116 90
1GB 560 464 280 240 280 232
2GB 819 640 560 480 409 320
4GB 1,628 1,280 1,120 960 814 640
* These numbers are approximate. Check your digital camera manual and LCD viewfinder to confirm the number of images your memory card holdsin relation to your camera’s resolution settings.
Click here to buy the book.
1C
HA
PT
ER
15
use significantly more power than traditional filmcameras. Although traditional cameras need theirbatteries replaced after approximately every 15rolls of film shot, your digital camera may run outof batteries before you’ve filled up the media card,especially if you view multiple images on yourLCD screen in between shots. Constantly view-ing your images on the LCD screen reduces bat-tery life quickly.
PORTRAIT AND CANDID PHOTOGRAPHY / What You Must Know aboutPhotographing People
I recommend buying an extra battery pack or investing in
rechargeable batteries and always having extras onhand.
tip
Using the automatic modes canresult in acceptable images, and
they are a good place to begin, but you won’t havemuch control over the outcome unless you use some ofthe scene/creative modes too.
tip
COMPACT DIGITAL CAMERASCompact digital cameras are better than evernow with improved sensors, bigger LCD screens,and lots of features — some can even capturevideo. The main appeal is that you can carrythem with you everywhere so you never miss ashot. In spite of their small size and lack of aninterchangeable lens, it is possible to capturesome fantastic images of people with these cam-eras just by learning a little about the basic func-tions. Given that there is not a standardizeddesign for the functions and features on differentmanufacturers’ cameras, you may need to consultyour camera manual to find the following modes:
■ A and P. Automatic (Auto) and Program (P)modes are the most common modes peopleuse when shooting with a compact digitalcamera. Automatic is fully automatic: Thecamera makes all the decisions. Program is anadvanced automatic setting that allows you tomake decisions about the flash, white bal-ance, and drive mode. When it is in theseAuto modes, your camera makes its best guessin determining the exposure by focusing,reading the light in the scene, and automati-cally choosing a shutter speed, aperture, andwhite balance.
■ Portrait mode. Likely represented as a headicon on your mode dial. When you select thePortrait mode, the camera adjusts the apertureand shutter speed for you, minimizing thedepth of field (DOF) for a soft backgroundeffect that isolates your subject from thebackground.
■ Sports mode. By setting the camera to Sportsmode, usually indicated with a runner icon,your camera automatically chooses the fastestshutter speed possible, given the situation.Some cameras also activate ContinuousShooting mode (instead of Single Frame) anddisable the flash. This setting also works wellfor capturing active subjects and candidmoments.
■ Macro mode. Using the Macro mode, whichis usually represented by a flower, enables youto focus closer to your subject and capturedetails in your images that were previously toosmall or out of focus. Just because the Macromode is represented by a flower doesn’t meanthat flowers are the only allowable subject.With Macro mode you can take close-up pho-tos of people and capture every freckle andeyelash in perfect detail.
■ Landscape mode. Generally represented by an icon that looks like a mountain range,Landscape mode (also known as Infinity mode)automatically uses a small lens aperture thatprovides maximum sharpness for distant andwide-vista scenes. This mode is also useful whenphotographing groups of people that are posi-tioned at various distances from the camera.
Click here to buy the book.
Here are a couple of ways to control the light onyour subject:
■ Flash mode. A lightning bolt icon is locatedon the back of your camera representing theFlash mode. Set your Mode dial to P, whichallows you to cycle through all your flashoptions. Some compact cameras require you touse the Manual mode in order to use the fullfeatures of your flash. Selecting the forced flashoption enables you to use the flash outside inbright light, filling in harsh shadows on faces.
■ Exposure compensation. Digital camerashave an additional feature that controls theamount of light hitting your camera’s sensor;it’s called exposure compensation. Adjustingyour exposure compensation to add morelight (+) or reduce light (–) is a quick, semi-automatic way to adjust how the camerarecords the light in your scene. By using expo-sure compensation, you still don’t have totalcreative control over your camera, but youcan make your image appear lighter or darker.
Have you wondered what zoom on a compactcamera really means? Camera manufacturersoften refer to digital zoom and optical zoom whenmarketing a compact digital camera. Opticalzoom is the important feature because it refers tothe lens optics and results in getting you closer toyour subject without sacrificing image quality —a true zoom. The lens is not removable on a digi-tal compact camera or a larger super-zoom vari-ety, but both cameras refer to focal length as “X.”For example: From your location, 3X opticalzoom gets you three times closer to your subject,and 10X optical zoom gets you ten times closer toyour subject. Digital zoom doesn’t actually resultin a closer shot, the camera is simply zoomingand cropping so the image you are focused onappears larger, but the result is a lower-qualityimage than if you were zooming with an opticalzoom.
16
dSLR CAMERASThe d stands for digital and the SLR for singlelens reflex. The camera’s reflex mechanism is aseries of mirrors and prisms inside the body thatreflect the image coming through the lens to youroptical viewfinder. Digital SLR cameras are simi-lar to traditional film SLR cameras, except thatan image sensor captures your images and recordsthem onto a media card instead of film.
In addition to the compact camera scene modeslisted in the previous section, a dSLR alsoincludes two more modes that are helpful whenshooting pictures of people:
■ Shutter priority. Referred to as Tv. You setthe desired shutter speed, and the cameraautomatically adjusts for the proper apertureexposure. This is a good setting to use whenyou need control over movement in yourimage. You can choose to freeze the action or blur it, depending on your shutter speed selection.
■ Aperture priority. Referred to as Av. You setthe desired aperture, and the camera automat-ically adjusts for the proper shutter speedexposure. Use this setting to control yourdepth of field. This is great for isolating yoursubject and blurring out the background witha wide aperture.
While compact digital cameras have some greatuses, there are several big advantages that dSLRshave:
■ Image quality. A larger image sensor provideslarger pixels, and more of them, for greaterdetail in your images. Enhanced ISO capabil-ity leads to faster shutter speeds and less noise(a grainy appearance at higher ISOs, usually800 or higher) in your images.
Click here to buy the book.

1C
HA
PT
ER
17
■ Speed. You experience faster start-up andfocusing, less shutter delay, and more framesper second for shooting images in sequence;dSLRs are great for taking pictures of kids,animals, sports, or anything else that moves.
■ Creativity. Manual modes allow for greatercontrol. Manual mode is what most profes-sional photographers use.
■ RAW format capability. RAW files areuncompressed and therefore offer moreoptions and control over your final image.
photograph. There are three ways you can con-trol DOF:
■ Distance to your subject. An image taken inclose proximity to your subject produces ashallow DOF. An image taken at a consider-able distance from your subject will have adeeper DOF.
■ Aperture selected. Aperture can be confusingbecause a large f-stop number (f/22) repre-sents a small lens opening and a small f-stopnumber (f/2.8) represents a large lens open-ing. It’s easier to think of it like this: A largeaperture (f/2.8 or f/4) provides a shallowDOF; for example, your subject is in focus butthe distant mountain range is blurred. A smallaperture (f/16 or f/22) provides a deep DOF;for example, both the subject and the distantmountain range are in focus. Using a smallaperture is a good way to ensure the environ-ment surrounding your subject is in focus. Inimages by Ansel Adams, he used a very smallaperture to capture sweeping vistas of theenvironment in minute detail.
■ Lens focal length. Short focal length lenses(for example, 17-35mm) have a large field ofview. Long focal length lenses (for example,70-200mm) have a narrow field of view.
LENS APERTUREMeasured in f-stops, a lens aperture is a mechani-cal iris inside of the lens that opens and closes tovarying degrees to control the amount of lighthitting the digital camera’s sensor. Think of theaperture of your camera lens as the pupil in youreye. In a dark room, your pupils enlarge and openup to let in more light — in bright light, yourpupils constrict to let in less light. The aperture f-stops on your lens control light in the samemanner, as shown in figure 1-12.
PORTRAIT AND CANDID PHOTOGRAPHY / What You Must Know aboutPhotographing People
For more information on file formatsand how to choose the best one foryou, see Chapter 10.
x-ref
■ Lenses. You have the ability to swap lensesfor different perspectives and effects.
CHOOSE LENSES FOR YOURdSLRThere are various lenses available for a dSLRcamera, and each type of lens has different capabilities. The choice of a lens is based onthe results you want to achieve in your images.Depth of field, lens aperture, and lens focallength are determining factors in the creationof your image.
DEPTH OF FIELDDepth of field (DOF) refers to the zone of sharp-ness in your image. Your DOF is deep if most ofyour scene is in focus; it is shallow if a small areais in focus. The human eye is drawn to the part ofan image that is sharp and in focus. As a photog-rapher, you can creatively use DOF to direct theviewer’s eyes to the important elements in your
Click here to buy the book.

If it starts to get confusing, just remember, alarger aperture (for example, f/1.4, f/2, f2.8, orf/4) lets in more light and gives you a shallowDOF. Use a larger aperture to isolate your subjectand blur the background, as shown in 1-13.
18
A smaller aperture (for example, f/16 or f/22)lets in less light and gives you deeper DOF. Usea smaller aperture to render your entire scenein focus, as shown in 1-14.
1-12
ABOUT THIS IMAGE Standard aperture openingsare f/1.4, f/2, f/2.8, f/4, f/5.6, f/8, f/16, and f/22.
1-13
ABOUT THIS PHOTO An example of shallow DOF using alarge aperture. Taken with a Canon EF 70-200mm lens at f/2.8.
Click here to buy the book.

1C
HA
PT
ER
19
A lens with a larger maximum aperture (forexample, f/2.8) is considered a “fast” lens becausemore light passes through the lens, allowing afaster shutter speed. A lens with a smaller maxi-mum aperture (for example, f/5.6) is “slow”because less light passes through the lens andrequires a slower shutter speed. A fast lens isoptimum when shooting in low-light situations
and for creating a shallow DOF. Due to the high-quality optics, these lenses are heavier and moreexpensive.
Made of optical glass or plastic, a lens attemptsto duplicate the human eye by seeing an image,focusing, and transmitting its colors, sharpness,and brightness through the camera to thedigital sensor. Many types of lenses are availablefor your dSLR, and understanding how theywork helps you gain creative control over yourimage. Choosing the right lens is a tradeoffbetween cost, size, weight, lens speed, and imagequality.
PORTRAIT AND CANDID PHOTOGRAPHY / What You Must Know aboutPhotographing People
1-14
ABOUT THIS PHOTO An example of deep DOF using asmall aperture. Taken with a Canon EF 24-105mm lens at f/22.
Learn how aperture, shutter speed,and ISO combine to create a goodexposure in Chapter 3.
x-ref
Click here to buy the book.
LENS FOCAL LENGTHThe focal length of a lens, which is displayed onthe barrel of the lens, establishes the field of viewfor the camera. The following is a description ofthe various lenses and their focal lengths:
■ Standard lens. A lens with a focal length of50mm is considered a normal, all-purpose lensbecause it closely approximates what youreyes see. With its natural angle of view andperspective, a standard lens captures the sub-ject plainly, with no special effects; but youcan use standard lenses in creative ways byvarying the subject’s distance, aperture, andangle.
■ Telephoto lens. The focal length of a tele-photo lens ranges anywhere from 60 to1000mm; acting like a telescope, it magnifiesyour subject and narrows the field of view.Images taken with a telephoto lens have aflattened perspective and a shallow DOF. Thislens is ideal for portraits because you can iso-late your subject from the background and theperspective is very flattering.
■ Wide-angle lens. The focal length of a wide-angle lens is any measurement less than50mm, but is typically 17-28mm.Traditionally used for environmental portraitsor special-effect images, this lens exaggerates
20
or stretches perspective and distorts the viewif your subject is too close to the camera. Atclose range, a wide-angle lens can producecomical, distorted images, and it is not con-sidered a flattering choice for portraits.
■ Macro lens. Macro lenses have various focallengths, (for example, 50mm, 65mm, and100mm), and unlike other lenses, enable youto photograph your subject from a very closedistance without distortion. Shooting withthis lens not only produces images with a dif-ferent scale, but it also focuses your viewer’sattention on details that might otherwise gounnoticed — your images will have a close-up, intimate feel.
■ Selective focus lens. Traditionally used tocorrect the converging lines of buildings asyou composed your shot from the ground,selective focus lenses provided a solution tothe unnatural perspective problem. Nowthese lenses and other selective focus lensvariations are also used for a contemporaryeffect. You can manually control the lens tofind a sweet spot of focus in your image andartfully blur other elements, producing adreamlike aesthetic. See 1-6 for an example ofselective focus.
■ Focal length multiplier. This is also known asthe dSLR crop factor. Now that I’ve told youall about lens focal lengths, here is one morefactor that can affect the perceived focallength in your final image. In the beginning, a35mm SLR camera and lens would captureimages and record them onto film. Now withdSLRs, the image is captured by the camera’ssensor and recorded onto a media card. ManydSLR cameras have a sensor smaller than the
Before you purchase a lens, knowthat lenses are not interchangeable
between camera brands. A lens mount is the point ofconnection between the lens and your dSLR, and theseconnections are proprietary to the camera manufac-turer. A lens designed for a Canon camera will not workon a Nikon camera. If you’re interested in purchasing athird-party lens, manufacturers do produce lenses withmounts to fit all the major dSLR cameras manufactured.
note
Click here to buy the book.
1C
HA
PT
ER
21
35mm photographic film frame and only cap-ture part of the information projected by alens. This results in a cropped field of view,which makes images appear as though you areshooting with a longer lens. To compute thefocal length, you must know your dSLR cropfactor or multiplier; this information isincluded with your camera. The three mostcommon multipliers are 1.5, 1.6, and 2.0. Forexample, if you attach a 100mm lens to adSLR with a 1.5 crop factor, it captures imagesas a 150mm lens (100mm × 1.5 = 150mm).
More expensive dSLRs have a full-size sensor,capable of capturing images without a cropfactor; however, unless your image requires awide-angle look, shooting with a longer focallength can be very flattering to your subject.
PORTRAIT AND CANDID PHOTOGRAPHY / What You Must Know aboutPhotographing People
An f-stop is a fraction that indicatesthe diameter of the aperture. The f
stands for the focal length on the lens, the slash (/)means divided by, and the number represents the stopin use.
note
Click here to buy the book.
22
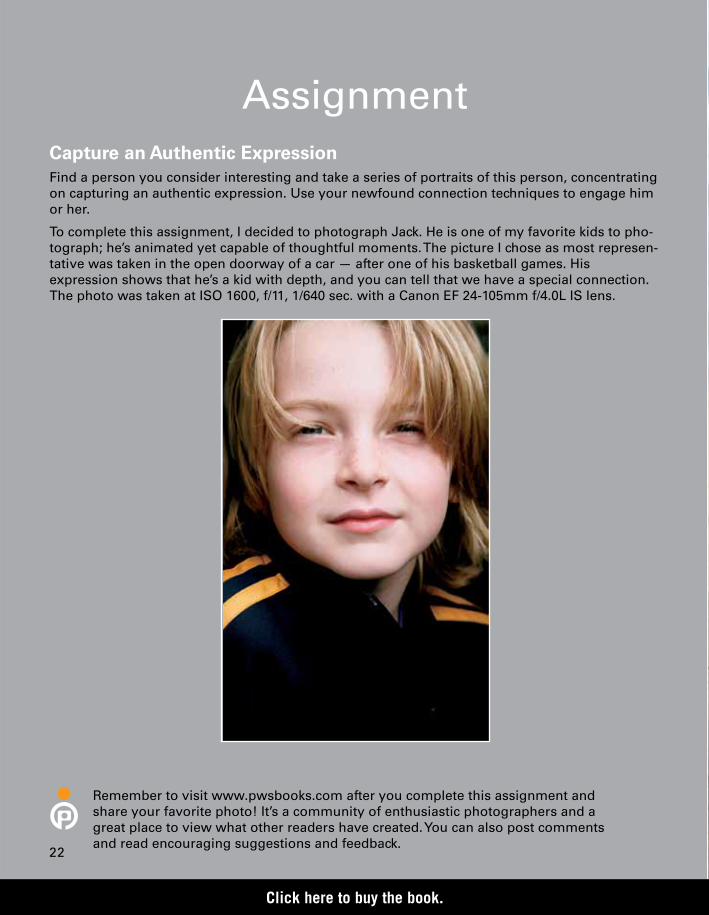
AssignmentCapture an Authentic ExpressionFind a person you consider interesting and take a series of portraits of this person, concentratingon capturing an authentic expression. Use your newfound connection techniques to engage himor her.
To complete this assignment, I decided to photograph Jack. He is one of my favorite kids to pho-tograph; he’s animated yet capable of thoughtful moments. The picture I chose as most represen-tative was taken in the open doorway of a car — after one of his basketball games. Hisexpression shows that he’s a kid with depth, and you can tell that we have a special connection.The photo was taken at ISO 1600, f/11, 1/640 sec. with a Canon EF 24-105mm f/4.0L IS lens.
Remember to visit www.pwsbooks.com after you complete this assignment andshare your favorite photo! It’s a community of enthusiastic photographers and agreat place to view what other readers have created. You can also post commentsand read encouraging suggestions and feedback.
Click here to buy the book.

Click here to buy the book.