password - clerk instructions - secure payment...
TRANSCRIPT
- 1 -
Instruction GuideCreating / Changing / Deleting
Terminal Passwords & Clerk ID’sAll Terminals
Dec 15, 2009
Table of Contents
Table of Contents .......................................................................................................................................................
Gift Card Password and Clerk Functionality, by Terminal Type ............................................................................
Terminal processing detail ......................................................................................................................................
VeriFone Omni / Vx Terminals (Omni 3750, Omni 3740, Omni 3730, Omni 3730LE, Vx570, Vx610, Vx510, and Vx510LE) ...
Instructions for Creating or Changing the Manager Password................................................................................
Instructions for Creating or Changing the Transaction Password ...........................................................................
Instructions for Creating or Removing Clerk ID Function........................................................................................
Instructions for Adding or Removing Clerks............................................................................................................
Instructions for Logging Clerks In/Out, Changing Password...................................................................................
Thales Talento Terminals ..........................................................................................................................................
Instructions for Changing the Master Password .....................................................................................................
Instructions for Adding/Removing a Manager Password ........................................................................................
Instructions for Creating or Removing Clerk ID Function........................................................................................
Hypercom Terminals (T7p, T7p-T, and T7 Plus) ............................................................................................................
Instructions for Creating or Removing Clerk ID Function........................................................................................
Instructions for Logging Clerks In ...........................................................................................................................
Instructions to Log Out All Clerks............................................................................................................................
Instructions to Print a List of All Clerks Currently Logged In ...................................................................................
Hypercom Terminals (ICE 5500, ICE5700, and ICE 5500 Plus) .......................................................................................
Instructions for Creating or Removing Clerk ID Function........................................................................................
Instructions for Logging Clerks In ...........................................................................................................................
Instructions for Logging Clerks Out.........................................................................................................................
Instructions to Log Out All Clerks............................................................................................................................
Instructions to Print a List of All Clerks Currently Logged In ...................................................................................
Hypercom Optimum Terminals (T4100, T4205, T4210, and T4220)...............................................................................
Instructions for Creating or Changing the Manager Password................................................................................
Instructions for Creating or Changing the Transaction Password ...........................................................................
Instructions for Creating or Removing Clerk ID Function........................................................................................
Instructions for Adding or Removing Clerks............................................................................................................
Instructions for Logging Clerks In ...........................................................................................................................
TechTrex PrimeTrex Terminals .................................................................................................................................
Instructions for Creating or Changing the Manager Password................................................................................
Instructions for Creating or Changing the Transaction Password ...........................................................................
Instructions for Creating or Removing Clerk ID Function........................................................................................
Instructions for Adding or Removing Clerks............................................................................................................
Instructions for Logging Clerks In/Out, Changing Password...................................................................................
- 2 -
Page
...... 2
...... 4
...... 5
...... 6
...... 7
...... 7
...... 7
...... 8
...... 8
...... 9
.... 10
.... 10
.... 10
.... 11
.... 12
....12
.... 12
.... 12
.... 13
.... 14
....14
.... 14
.... 14
.... 14
.... 15
.... 16
.... 16
.... 16
.... 17
....17
.... 18
.... 19
.... 19
.... 19
.... 20
.... 20
Table of Contents (cont)
Page
TechTrex PrimeTrex IP Terminals................................................................................................................................. 21
Instructions for Creating or Changing the Manager Password.................................................................................... 22
Instructions for Creating or Changing the Transaction Password ............................................................................... 22
Instructions for Creating or Removing Clerk ID Function............................................................................................ 22
Instructions for Adding or Removing Clerks................................................................................................................ 23
Instructions for Logging Clerks In/Out, Changing Password....................................................................................... 23
VeriFone Tranz Terminal (Tranz 330, Tranz 380, Tranz 380x2, and Tranz 460)..................................................................... 24
Instructions to Create or Change the Master Password ............................................................................................. 25
Instructions to Create a Transaction Passwords......................................................................................................... 25
Instructions to Delete a Transaction Password........................................................................................................... 25
VeriFone (Lipman) Nurit Terminals (Nurit 2085, Nurit 2085+, Nurit 3010, Nurit 3020, Nurit 8320, Nurit 8000, Nurit 8400) ......... 26
Instructions for Creating or Changing the Transaction Password ............................................................................... 27
Instructions for Creating or Removing Clerk ID Function............................................................................................ 27
Instructions for Adding Clerks ..................................................................................................................................... 28
- 3 -

- 4 -
Gift Card Password and Clerk Functionality, by Terminal Type
Terminal Password Activation
Password Increase
Minimum/ Maximum
Length Max #
Passwords Clerk ID Minimum/ Maximum
Length Max # Clerks
Clerk ID on
Receipt?
VeriFone Tranz 330 Y N 1 - 4 19 N N/A N/A N
VeriFone Tranz 380 Y N 1 - 4 19 N N/A N/A N
VeriFone Tranz 380x2 Y N 1 - 4 19 N N/A N/A N
VeriFone Tranz 460 Y N 1 - 4 19 N N/A N/A N
Nurit 2085 Y Y 1 - 4 1 Y** 1 - 3 100 Y
Nurit 2085+ Y Y 1 - 4 1 Y** 1 - 3 100 Y
Nurit 3000 Y Y 1 - 4 1 Y** 1 - 3 100 Y
Nurit 3020 Y Y 1 - 4 1 Y** 1 - 3 100 Y
Nurit 3010 Y Y 1 - 4 1 Y** 1 - 3 100 Y
Nurit 8000 Y Y 1 - 4 1 Y** 1 - 3 100 Y
Nurit 8320 Y Y 1 - 4 1 Y** 1 - 3 100 Y
Nurit 8400 Y Y 1 - 4 1 Y** 1 - 3 100 Y
Thales Talento Y N 1 - 6 9 Y** 1 - 9 # N
VeriFone Omni 3730 Y Y 1 - 6 1 Y 1 - 5 20 Y
VeriFone Omni 3730LE Y Y 1 - 6 1 Y 1 - 5 20 Y
VeriFone Omni 3740 Y Y 1 - 6 1 Y 1 - 5 20 Y
VeriFone Omni 3750 Y Y 1 - 6 1 Y 1 - 5 20 Y
VeriFone Vx510 Y Y 1 - 6 1 Y 1 - 5 20 Y
VeriFone Vx510LE Y Y 1 - 6 1 Y 1 - 5 20 Y
VeriFone Vx570 Y Y 1 - 6 1 Y 1 - 5 20 Y
VeriFone Vx610 Y Y 1 - 6 1 Y 1 - 5 20 Y
TechTrex PrimeTrex Y Y 1 - 6 1 Y 1 - 5 20 Y
TechTrex PrimeTrex IP Y Y 1 - 6 1 Y 1 - 5 20 Y
Hypercom T7p N N N/A N/A Y** 1 - 4 100 Y
Hypercom T7 Plus N N N/A N/A Y** 1 - 4 100 Y
Hypercom T4100 Y Y 1 - 6 1 Y 1 - 5 20 Y
Hypercom T4205 Y Y 1 - 6 1 Y 1 - 5 20 Y
Hypercom T4210 Y Y 1 - 6 1 Y 1 - 5 20 Y
Hypercom T4220 Y Y 1 - 6 1 Y 1 - 5 20 Y
Hypercom ICE 5500 N N N/A N/A Y** 1 - 4 100 Y
Hypercom ICE 5700 N N N/A N/A Y** 1 - 4 100 Y
N = Function Unavailable Y = Function Available # = Individual Clerks Are Not Controlled - No record is kept of individual clerks, no reporting is available. Y** = Open Entry Field, no control of access - The terminal will prompt for the Clerk ID, but will continue regardless of the number entered. This can not be used to restrict access to the transaction. N/A = Not Applicable Please see following page for more details regarding terminal processing.
- 5 -
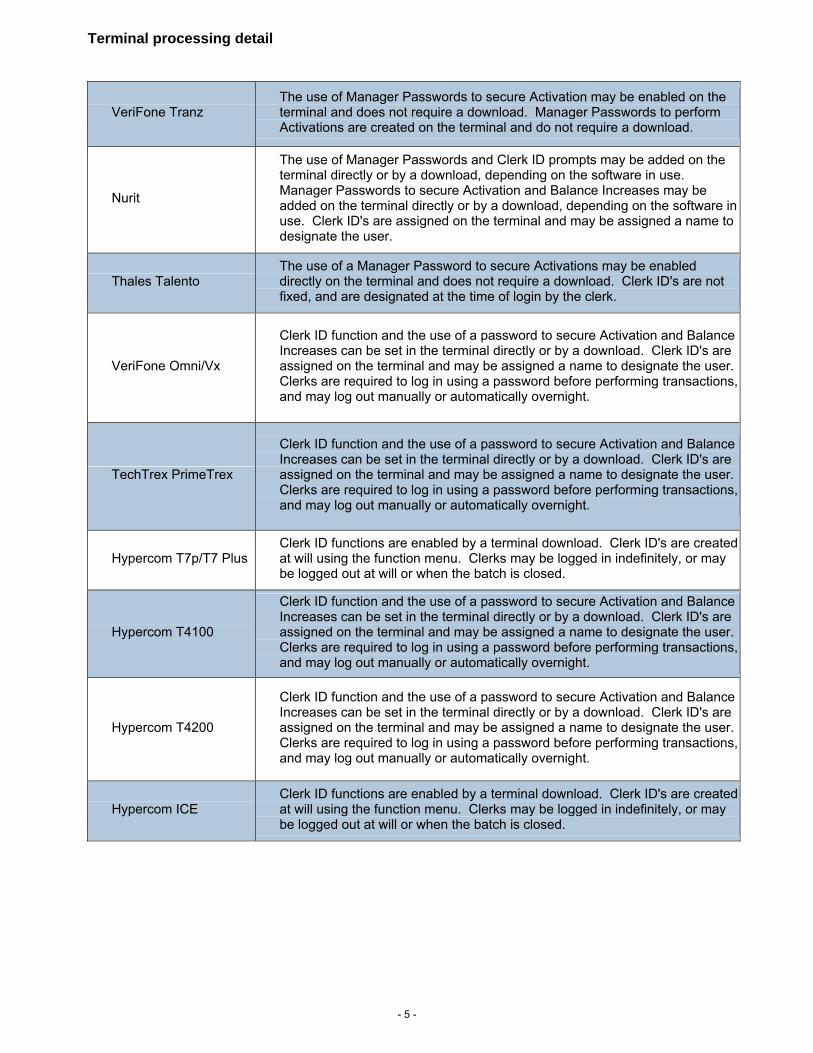
Terminal processing detail
VeriFone Tranz
The use of Manager Passwords to secure Activation may be enabled on the terminal and does not require a download. Manager Passwords to perform Activations are created on the terminal and do not require a download.
Nurit
The use of Manager Passwords and Clerk ID prompts may be added on the terminal directly or by a download, depending on the software in use. Manager Passwords to secure Activation and Balance Increases may be added on the terminal directly or by a download, depending on the software in use. Clerk ID's are assigned on the terminal and may be assigned a name to designate the user.
Thales Talento The use of a Manager Password to secure Activations may be enabled directly on the terminal and does not require a download. Clerk ID's are not fixed, and are designated at the time of login by the clerk.
VeriFone Omni/Vx
Clerk ID function and the use of a password to secure Activation and Balance Increases can be set in the terminal directly or by a download. Clerk ID's are assigned on the terminal and may be assigned a name to designate the user. Clerks are required to log in using a password before performing transactions, and may log out manually or automatically overnight.
TechTrex PrimeTrex
Clerk ID function and the use of a password to secure Activation and Balance Increases can be set in the terminal directly or by a download. Clerk ID's are assigned on the terminal and may be assigned a name to designate the user. Clerks are required to log in using a password before performing transactions, and may log out manually or automatically overnight.
Hypercom T7p/T7 Plus Clerk ID functions are enabled by a terminal download. Clerk ID's are created at will using the function menu. Clerks may be logged in indefinitely, or may be logged out at will or when the batch is closed.
Hypercom T4100
Clerk ID function and the use of a password to secure Activation and Balance Increases can be set in the terminal directly or by a download. Clerk ID's are assigned on the terminal and may be assigned a name to designate the user. Clerks are required to log in using a password before performing transactions, and may log out manually or automatically overnight.
Hypercom T4200
Clerk ID function and the use of a password to secure Activation and Balance Increases can be set in the terminal directly or by a download. Clerk ID's are assigned on the terminal and may be assigned a name to designate the user. Clerks are required to log in using a password before performing transactions, and may log out manually or automatically overnight.
Hypercom ICE Clerk ID functions are enabled by a terminal download. Clerk ID's are created at will using the function menu. Clerks may be logged in indefinitely, or may be logged out at will or when the batch is closed.

- 6 -
VeriFone Omni / Vx Terminals Omni 3750, Omni 3740, Omni 3730, Omni 3730LE, Vx570, Vx610, Vx510, and Vx510LE
- 7 -
VeriFone Omni / Vx Terminals (Omni 3750, Omni 3740, Omni 3730, Omni 3730LE, Vx570, Vx610, Vx510, and Vx510LE)
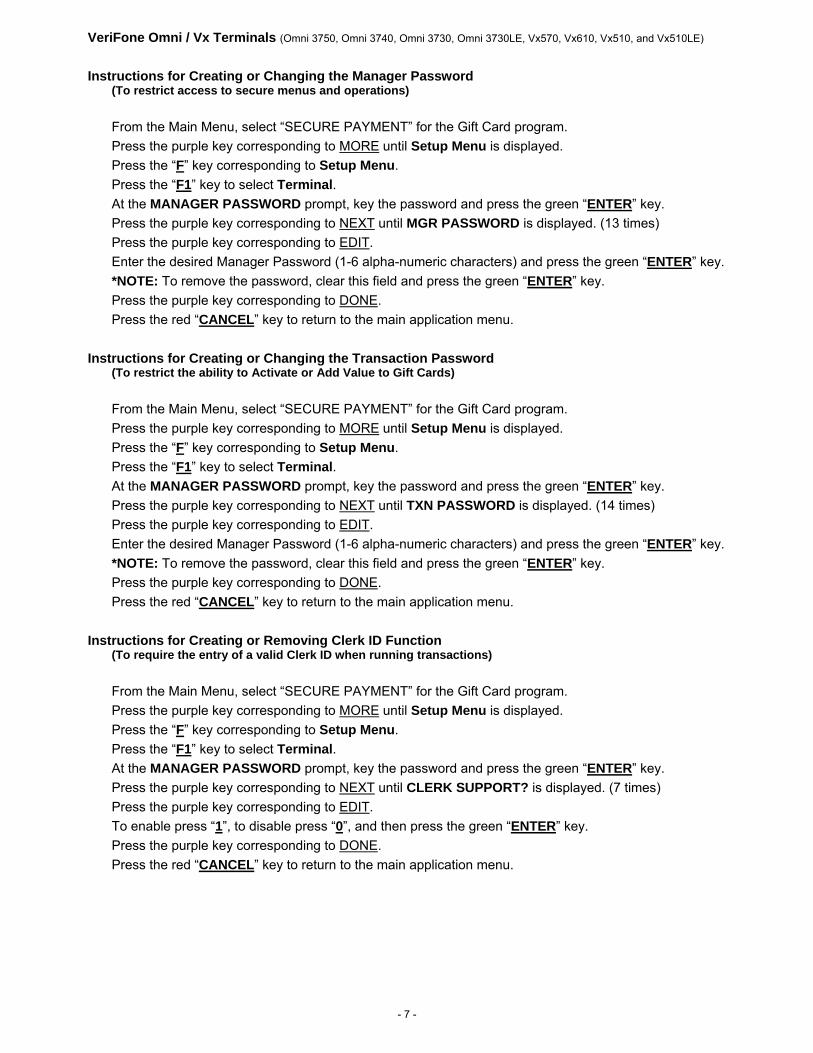
Instructions for Creating or Changing the Manager Password
(To restrict access to secure menus and operations) From the Main Menu, select “SECURE PAYMENT” for the Gift Card program. Press the purple key corresponding to MORE until Setup Menu is displayed. Press the “F” key corresponding to Setup Menu. Press the “F1” key to select Terminal. At the MANAGER PASSWORD prompt, key the password and press the green “ENTER” key. Press the purple key corresponding to NEXT until MGR PASSWORD is displayed. (13 times) Press the purple key corresponding to EDIT. Enter the desired Manager Password (1-6 alpha-numeric characters) and press the green “ENTER” key. *NOTE: To remove the password, clear this field and press the green “ENTER” key. Press the purple key corresponding to DONE. Press the red “CANCEL” key to return to the main application menu.
Instructions for Creating or Changing the Transaction Password (To restrict the ability to Activate or Add Value to Gift Cards) From the Main Menu, select “SECURE PAYMENT” for the Gift Card program. Press the purple key corresponding to MORE until Setup Menu is displayed. Press the “F” key corresponding to Setup Menu. Press the “F1” key to select Terminal. At the MANAGER PASSWORD prompt, key the password and press the green “ENTER” key. Press the purple key corresponding to NEXT until TXN PASSWORD is displayed. (14 times) Press the purple key corresponding to EDIT. Enter the desired Manager Password (1-6 alpha-numeric characters) and press the green “ENTER” key. *NOTE: To remove the password, clear this field and press the green “ENTER” key. Press the purple key corresponding to DONE. Press the red “CANCEL” key to return to the main application menu.
Instructions for Creating or Removing Clerk ID Function (To require the entry of a valid Clerk ID when running transactions) From the Main Menu, select “SECURE PAYMENT” for the Gift Card program. Press the purple key corresponding to MORE until Setup Menu is displayed. Press the “F” key corresponding to Setup Menu. Press the “F1” key to select Terminal. At the MANAGER PASSWORD prompt, key the password and press the green “ENTER” key. Press the purple key corresponding to NEXT until CLERK SUPPORT? is displayed. (7 times) Press the purple key corresponding to EDIT. To enable press “1”, to disable press “0”, and then press the green “ENTER” key. Press the purple key corresponding to DONE. Press the red “CANCEL” key to return to the main application menu.
- 8 -
VeriFone Omni / Vx Terminals (Omni 3750, Omni 3740, Omni 3730, Omni 3730LE, Vx570, Vx610, Vx510, and Vx510LE)
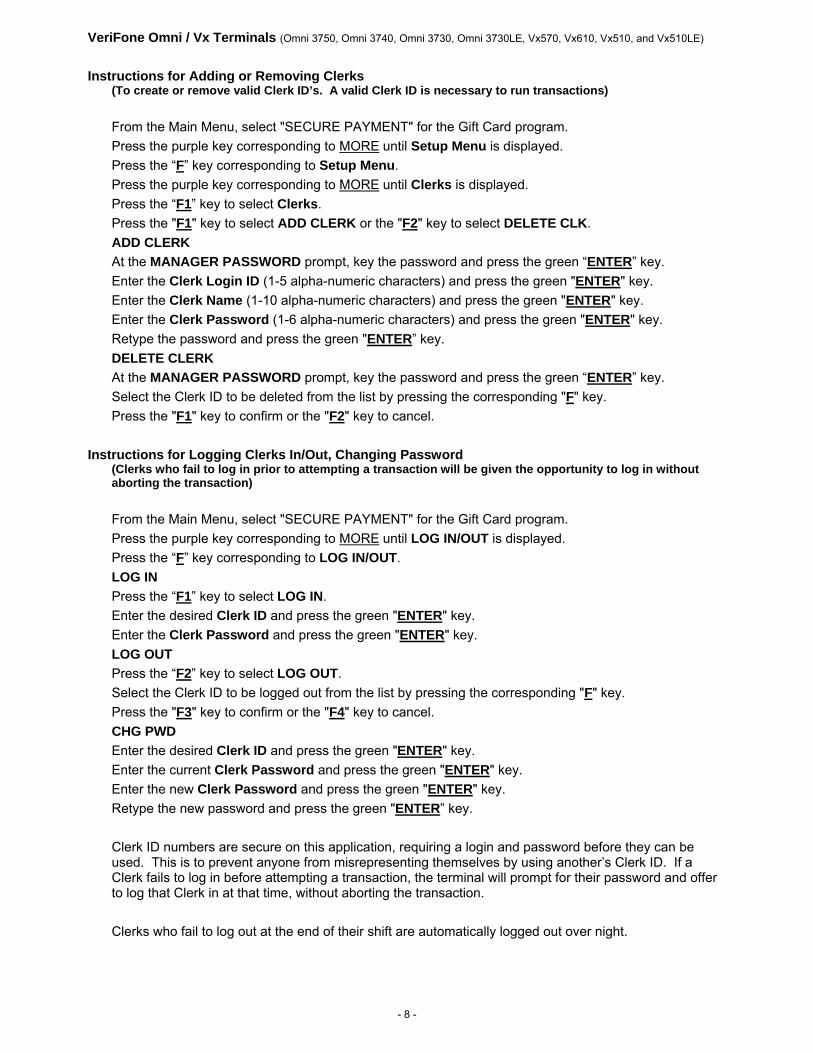
Instructions for Adding or Removing Clerks
(To create or remove valid Clerk ID’s. A valid Clerk ID is necessary to run transactions) From the Main Menu, select "SECURE PAYMENT" for the Gift Card program. Press the purple key corresponding to MORE until Setup Menu is displayed. Press the “F” key corresponding to Setup Menu. Press the purple key corresponding to MORE until Clerks is displayed. Press the “F1” key to select Clerks. Press the "F1" key to select ADD CLERK or the "F2" key to select DELETE CLK. ADD CLERK At the MANAGER PASSWORD prompt, key the password and press the green “ENTER” key. Enter the Clerk Login ID (1-5 alpha-numeric characters) and press the green "ENTER" key. Enter the Clerk Name (1-10 alpha-numeric characters) and press the green "ENTER" key. Enter the Clerk Password (1-6 alpha-numeric characters) and press the green "ENTER" key. Retype the password and press the green "ENTER” key. DELETE CLERK At the MANAGER PASSWORD prompt, key the password and press the green “ENTER” key. Select the Clerk ID to be deleted from the list by pressing the corresponding "F" key. Press the "F1" key to confirm or the "F2" key to cancel.
Instructions for Logging Clerks In/Out, Changing Password (Clerks who fail to log in prior to attempting a transaction will be given the opportunity to log in without aborting the transaction) From the Main Menu, select "SECURE PAYMENT" for the Gift Card program. Press the purple key corresponding to MORE until LOG IN/OUT is displayed. Press the “F” key corresponding to LOG IN/OUT. LOG IN Press the “F1” key to select LOG IN. Enter the desired Clerk ID and press the green "ENTER" key. Enter the Clerk Password and press the green "ENTER" key. LOG OUT Press the “F2” key to select LOG OUT. Select the Clerk ID to be logged out from the list by pressing the corresponding "F" key. Press the "F3" key to confirm or the "F4" key to cancel. CHG PWD Enter the desired Clerk ID and press the green "ENTER" key. Enter the current Clerk Password and press the green "ENTER" key. Enter the new Clerk Password and press the green "ENTER" key. Retype the new password and press the green "ENTER” key. Clerk ID numbers are secure on this application, requiring a login and password before they can be used. This is to prevent anyone from misrepresenting themselves by using another’s Clerk ID. If a Clerk fails to log in before attempting a transaction, the terminal will prompt for their password and offer to log that Clerk in at that time, without aborting the transaction. Clerks who fail to log out at the end of their shift are automatically logged out over night.

- 9 -
Thales Talento Terminals
- 10 -
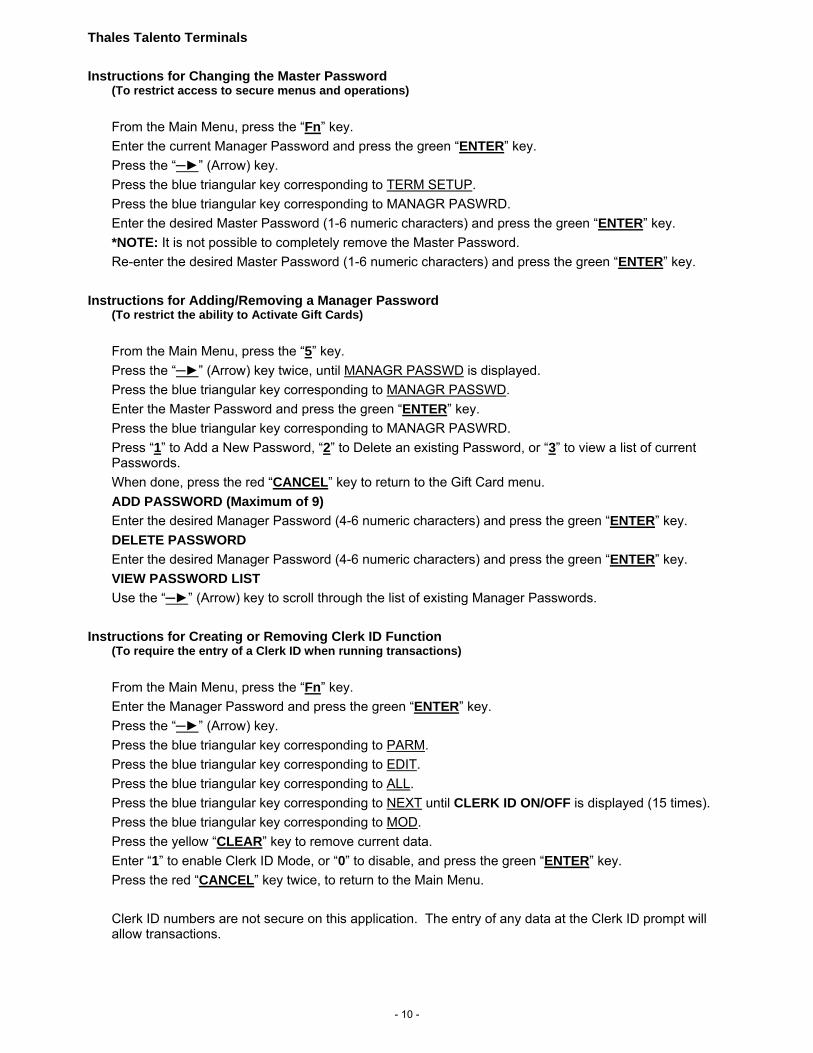
Thales Talento Terminals
Instructions for Changing the Master Password (To restrict access to secure menus and operations) From the Main Menu, press the “Fn” key. Enter the current Manager Password and press the green “ENTER” key. Press the “─►” (Arrow) key. Press the blue triangular key corresponding to TERM SETUP. Press the blue triangular key corresponding to MANAGR PASWRD. Enter the desired Master Password (1-6 numeric characters) and press the green “ENTER” key. *NOTE: It is not possible to completely remove the Master Password. Re-enter the desired Master Password (1-6 numeric characters) and press the green “ENTER” key.
Instructions for Adding/Removing a Manager Password (To restrict the ability to Activate Gift Cards) From the Main Menu, press the “5” key. Press the “─►” (Arrow) key twice, until MANAGR PASSWD is displayed. Press the blue triangular key corresponding to MANAGR PASSWD. Enter the Master Password and press the green “ENTER” key. Press the blue triangular key corresponding to MANAGR PASWRD. Press “1” to Add a New Password, “2” to Delete an existing Password, or “3” to view a list of current Passwords. When done, press the red “CANCEL” key to return to the Gift Card menu. ADD PASSWORD (Maximum of 9) Enter the desired Manager Password (4-6 numeric characters) and press the green “ENTER” key. DELETE PASSWORD Enter the desired Manager Password (4-6 numeric characters) and press the green “ENTER” key. VIEW PASSWORD LIST Use the “─►” (Arrow) key to scroll through the list of existing Manager Passwords.
Instructions for Creating or Removing Clerk ID Function (To require the entry of a Clerk ID when running transactions) From the Main Menu, press the “Fn” key. Enter the Manager Password and press the green “ENTER” key. Press the “─►” (Arrow) key. Press the blue triangular key corresponding to PARM. Press the blue triangular key corresponding to EDIT. Press the blue triangular key corresponding to ALL. Press the blue triangular key corresponding to NEXT until CLERK ID ON/OFF is displayed (15 times). Press the blue triangular key corresponding to MOD. Press the yellow “CLEAR” key to remove current data. Enter “1” to enable Clerk ID Mode, or “0” to disable, and press the green “ENTER” key. Press the red “CANCEL” key twice, to return to the Main Menu. Clerk ID numbers are not secure on this application. The entry of any data at the Clerk ID prompt will allow transactions.

- 11 -
Hypercom Terminals T7p, T7p-T, and T7 Plus
- 12 -
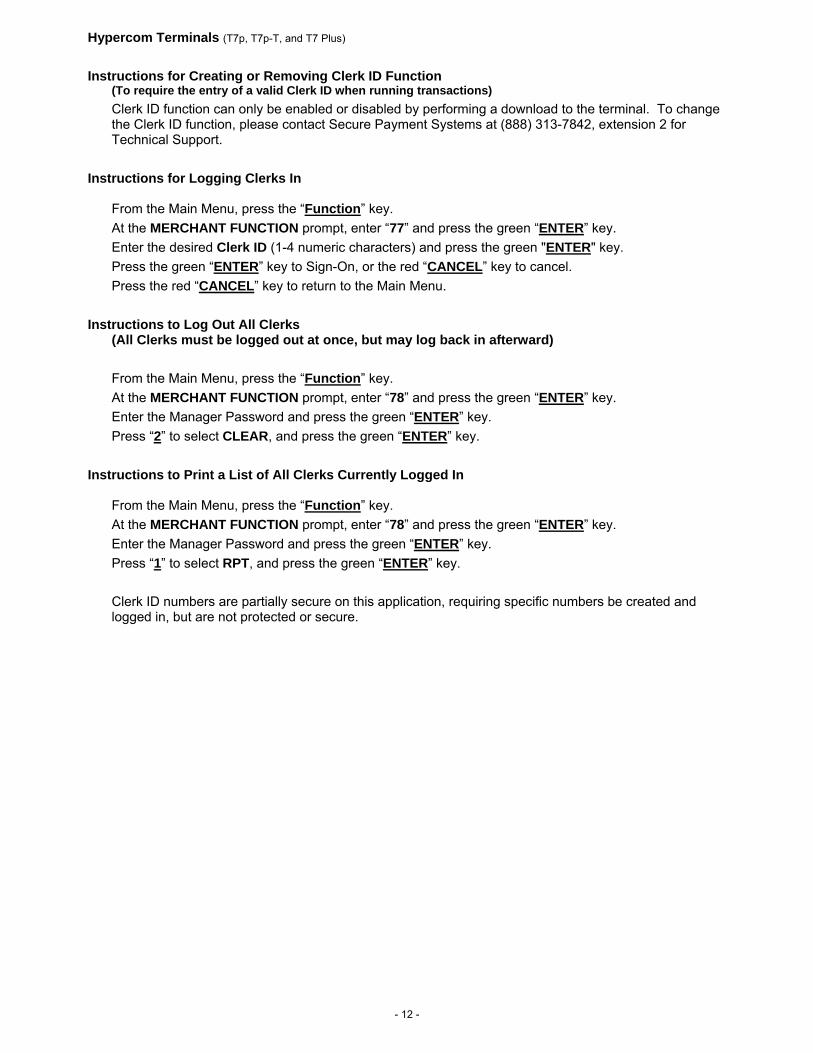
Hypercom Terminals (T7p, T7p-T, and T7 Plus)
Instructions for Creating or Removing Clerk ID Function (To require the entry of a valid Clerk ID when running transactions) Clerk ID function can only be enabled or disabled by performing a download to the terminal. To change the Clerk ID function, please contact Secure Payment Systems at (888) 313-7842, extension 2 for Technical Support.
Instructions for Logging Clerks In
From the Main Menu, press the “Function” key. At the MERCHANT FUNCTION prompt, enter “77” and press the green “ENTER” key. Enter the desired Clerk ID (1-4 numeric characters) and press the green "ENTER" key. Press the green “ENTER” key to Sign-On, or the red “CANCEL” key to cancel. Press the red “CANCEL” key to return to the Main Menu.
Instructions to Log Out All Clerks (All Clerks must be logged out at once, but may log back in afterward) From the Main Menu, press the “Function” key. At the MERCHANT FUNCTION prompt, enter “78” and press the green “ENTER” key. Enter the Manager Password and press the green “ENTER” key. Press “2” to select CLEAR, and press the green “ENTER” key.
Instructions to Print a List of All Clerks Currently Logged In
From the Main Menu, press the “Function” key. At the MERCHANT FUNCTION prompt, enter “78” and press the green “ENTER” key. Enter the Manager Password and press the green “ENTER” key. Press “1” to select RPT, and press the green “ENTER” key.
Clerk ID numbers are partially secure on this application, requiring specific numbers be created and logged in, but are not protected or secure.

- 13 -
Hypercom Terminals ICE 5500, ICE5700, and ICE 5500 Plus
- 14 -
Hypercom Terminals (ICE 5500, ICE5700, and ICE 5500 Plus)
Instructions for Creating or Removing Clerk ID Function
(To require the entry of a valid Clerk ID when running transactions) Clerk ID function can only be enabled or disabled by performing a download to the terminal. To change the Clerk ID function, please contact Secure Payment Systems at (888) 313-7842, extension 2 for Technical Support.
Instructions for Logging Clerks In
From the Main Menu, touch the MENU BAR. Touch the “Cashier” button on the screen. Touch the “Add/Remove” button on the screen. Enter the desired Clerk ID (1-4 numeric characters) and press the green "ENTER" key. Press the green “ENTER” key to Sign-On, or the red “CANCEL” key to cancel. Press the red “CANCEL” key to return to the Main Menu.
Instructions for Logging Clerks Out
From the Main Menu, touch the MENU BAR. Touch the “Cashier” button on the screen. Touch the “Add/Remove” button on the screen. Enter the desired Clerk ID (1-4 numeric characters) and press the green "ENTER" key. Press the green “ENTER” key to Sign-Out, or the red “CANCEL” key to cancel. Press the red “CANCEL” key to return to the Main Menu.
Instructions to Log Out All Clerks
From the Main Menu, touch the MENU BAR. Touch the “Cashier” button on the screen. Touch the “Clear” button on the screen.
Instructions to Print a List of All Clerks Currently Logged In
From the Main Menu, touch the MENU BAR. Touch the “Cashier” button on the screen. Touch the “Reports” button on the screen. Touch the “Cashiers” button on the screen.
Clerk ID numbers are secure on this application, requiring a login before they can be used. Clerks remain logged in and active until logged out manually.

- 15 -
Hypercom Optimum Terminals T4100, T4205, T4210, and T4220
- 16 -
Hypercom Optimum Terminals (T4100, T4205, T4210, and T4220)
Instructions for Creating or Changing the Manager Password
(To restrict access to secure menus and operations) From the Main Menu, select “SECURE PAYMENT SYSTEMS” for the Gift Card program. Press the key corresponding to the arrow icon until Setup Menu is displayed. Press the key corresponding to Setup Menu. Press the key to select Terminal. At the MANAGER PASSWORD prompt, key the password and press the green “ENTER” key. Press the key corresponding to NEXT until MGR PASSWORD is displayed. (15 times) Press the key corresponding to EDIT. Enter the desired Manager Password (1-6 alpha-numeric characters) and press the green “ENTER” key. *NOTE: To remove the password, clear this field and press the green “ENTER” key. Press the key corresponding to DONE. Press the red “CANCEL” key to return to the main application menu.
Instructions for Creating or Changing the Transaction Password (To restrict the ability to Activate or Add Value to Gift Cards) From the Main Menu, select “SECURE PAYMENT SYSTEMS” for the Gift Card program. Press the key corresponding to the arrow icon until Setup Menu is displayed. Press the key corresponding to Setup Menu. Press the key to select Terminal. At the MANAGER PASSWORD prompt, key the password and press the green “ENTER” key. Press the key corresponding to NEXT until TXN PASSWORD is displayed. (16 times) Press the key corresponding to EDIT. Enter the desired Manager Password (1-6 alpha-numeric characters) and press the green “ENTER” key. *NOTE: To remove the password, clear this field and press the green “ENTER” key. Press the key corresponding to DONE. Press the red “CANCEL” key to return to the main application menu.
Instructions for Creating or Removing Clerk ID Function (To require the entry of a valid Clerk ID when running transactions) From the Main Menu, select “SECURE PAYMENT SYSTEMS” for the Gift Card program. Press the key corresponding to the arrow icon until Setup Menu is displayed. Press the key corresponding to Setup Menu. Press the key to select Terminal. At the MANAGER PASSWORD prompt, key the password and press the green “ENTER” key. Press the key corresponding to NEXT until CLERK SUPPORT? is displayed. (9 times) Press the key corresponding to EDIT. To enable press “1”, to disable press “0”, and then press the green “ENTER” key. Press the key corresponding to DONE. Press the red “CANCEL” key to return to the main application menu.
- 17 -
Hypercom Optimum Terminals (T4100, T4205, T4210, and T4220)
Instructions for Adding or Removing Clerks
(To create or remove valid Clerk ID’s. A valid Clerk ID is necessary to run transactions) From the Main Menu, select "SECURE PAYMENT SYSTEMS" for the Gift Card program. Press the key corresponding to the arrow icon until Setup Menu is displayed. Press the key corresponding to Setup Menu. Press the key corresponding to MORE until Clerks is displayed. Press the key to select Clerks. Press the key to select ADD CLERK or the key to select DELETE CLK. ADD CLERK At the MANAGER PASSWORD prompt, key the password and press the green “ENTER” key. Enter the Clerk Login ID (1-5 alpha-numeric characters) and press the green "ENTER" key. Enter the Clerk Name (1-10 alpha-numeric characters) and press the green "ENTER" key. Enter the Clerk Password (1-6 alpha-numeric characters) and press the green "ENTER" key. Retype the password and press the green "ENTER” key. DELETE CLERK At the MANAGER PASSWORD prompt, key the password and press the green “ENTER” key. Select the Clerk ID to be deleted from the list by pressing the corresponding key. Press the key to confirm or the key to cancel.
Instructions for Logging Clerks In
From the Main Menu, select "SECURE PAYMENT SYSTEMS" for the Gift Card program. Select a transaction to begin. Enter the desired Clerk ID when prompted and press the green “ENTER” key. Enter the Clerk Password and press the green “ENTER” key. To Log In, press the key corresponding to “Yes”. Clerk ID numbers are secure on this application, requiring a login and password before they can be used. This is to prevent anyone from misrepresenting themselves by using another’s Clerk ID. If a Clerk fails to log in before attempting a transaction, the terminal will prompt for their password and offer to log that Clerk in at that time, without aborting the transaction. Clerks who fail to log out at the end of their shift are automatically logged out over night.

- 18 -
TechTrex PrimeTrex Terminals
- 19 -
TechTrex PrimeTrex Terminals Instructions for Creating or Changing the Manager Password
(To restrict access to secure menus and operations) From the Main Menu, select the Gift Card program. Press the “Scroll Down” key until Setup is displayed. Press the “F” key corresponding to Setup. At the Manager Password prompt, key the password and press the green “OK” key. Press the “F2” key to select Terminal. Press the “F3” key to Slct (Select). Press the “F2” key for Next until Manager Pwd is displayed. (10 times) Press the “F3” key for EDIT. Enter the desired Manager Password (1-6 alpha-numeric characters) and press the green “OK” key. *NOTE: To remove the password, clear this field and press the green “OK” key. Press the “F4” key for Exit. Press the “F2” key to save the changes. Press the red “CANC” key to return to the main application menu.
Instructions for Creating or Changing the Transaction Password (To restrict the ability to Activate or Add Value to Gift Cards) From the Main Menu, select the Gift Card program. Press the “Scroll Down” key until Setup is displayed. Press the “F” key corresponding to Setup. At the Manager Password prompt, key the password and press the green “OK” key. Press the “F2” key to select Terminal. Press the “F3” key to Slct (Select). Press the “F2” key for Next until Transaction Pwd is displayed. (11 times) Press the “F3” key for EDIT. Enter the desired Transaction Password (1-6 alpha-numeric characters) and press the green “OK” key. *NOTE: To remove the password, clear this field and press the green “OK” key. Press the “F4” key for Exit. Press the “F2” key to save the changes. Press the red “CANC” key to return to the main application menu.
Instructions for Creating or Removing Clerk ID Function (To require the entry of a valid Clerk ID when running transactions) From the Main Menu, select the Gift Card program. Press the “Scroll Down” key until Setup is displayed. Press the “F” key corresponding to Setup. At the Manager Password prompt, key the password and press the green “OK” key. Press the “F2” key to select Terminal. Press the “F3” key to Slct (Select). Press the “F2” key for Next until Clrk/Srvr Mode is displayed. (12 times) Press the “F3” key for EDIT. Enter “1” to enable or “0” to disable and press the green “OK” key. Press the “F4” key for Exit. Press the “F2” key to save the changes. Press the red “CANC” key to return to the main application menu.
- 20 -
TechTrex PrimeTrex Terminals
Instructions for Adding or Removing Clerks (To create or remove valid Clerk ID’s. A valid Clerk ID is necessary to run transactions) From the Main Menu, select the Gift Card program. Press the “Scroll Down” key until Clerk Setup is displayed. Press the “F” key corresponding to Clerk Setup. ADD CLERK Press the “F3” key to select Add Clerk. At the MANAGER PASSWORD prompt, key the password and press the green “OK” key. Enter the Clerk ID (1-5 alpha-numeric characters) and press the green "OK" key. Enter the Clerk Password (1-6 alpha-numeric characters) and press the green "OK" key. Retype the password and press the green "OK” key. DELETE CLERK Press the “Scroll Down” key until Delete Clerk is displayed. Press the “F1” key to select Delete Clerk. At the MANAGER PASSWORD prompt, key the password and press the green “OK” key. Enter the desired Clerk ID (1-5 alpha-numeric characters) and press the green "OK" key. Enter the Clerk Password (1-6 alpha-numeric characters) and press the green "OK" key.
Instructions for Logging Clerks In/Out, Changing Password (Clerks who fail to log in prior to attempting a transaction will be given the opportunity to log in without aborting the transaction) From the Main Menu, select the Gift Card program. Press the “Scroll Down” key until Clerk Setup is displayed. Press the “F” key corresponding to Clerk Setup. Log On Press the “F1” key to select Log On. Enter the desired Clerk ID and press the green "OK" key. Enter the Clerk Password and press the green "OK" key. Log Off Press the “F2” key to select Log Off. Enter the desired Clerk ID and press the green "OK" key. Press the "F2" key to confirm or the "F1" key to cancel. CHG PWD Press the “F4” key to select Modify Clerk. Enter the desired Clerk ID and press the green "OK" key. Enter the Clerk Password and press the green "OK" key. Enter the New Password and press the green "OK" key. Re-enter the New Password and press the green "OK" key. Clerk ID numbers are secure on this application, requiring a login and password before they can be used. This is to prevent anyone from misrepresenting themselves by using another’s Clerk ID. If a Clerk fails to log in before attempting a transaction, the terminal will prompt for their password and offer to log that Clerk in at that time, without aborting the transaction. Clerks who fail to log out at the end of their shift are automatically logged out over night.

- 21 -
TechTrex PrimeTrex IP Terminals
- 22 -
TechTrex PrimeTrex IP Terminals
Instructions for Creating or Changing the Manager Password (To restrict access to secure menus and operations) From the Main Menu, select the Gift Card program. Press the “Scroll Down” key until Setup Menu is displayed. Press the “F” key corresponding to Setup Menu. At the MANAGER PASSWORD prompt, key the password and press the green “OK” key. Press the “F2” key to select Terminal. Press the “F3” key to Slct (Select). Press the “F2” key for Next until Manager Pwd is displayed. (10 times) Press the “F3” key for EDIT. Enter the desired Manager Password (1-6 alpha-numeric characters) and press the green “OK” key. *NOTE: To remove the password, clear this field and press the green “OK” key. Press the “F4” key for Exit. Press the “F2” key to save the changes. Press the red “CANC” key to return to the main application menu.
Instructions for Creating or Changing the Transaction Password (To restrict the ability to Activate or Add Value to Gift Cards) From the Main Menu, select the Gift Card program. Press the “Scroll Down” key until Setup Menu is displayed. Press the “F” key corresponding to Setup Menu. At the MANAGER PASSWORD prompt, key the password and press the green “OK” key. Press the “F2” key to select Terminal. Press the “F3” key to Slct (Select). Press the “F2” key for Next until Transaction Pwd is displayed. (11 times) Press the “F3” key for EDIT. Enter the desired Transaction Password (1-6 alpha-numeric characters) and press the green “OK” key. *NOTE: To remove the password, clear this field and press the green “OK” key. Press the “F4” key for Exit. Press the “F2” key to save the changes. Press the red “CANC” key to return to the main application menu.
Instructions for Creating or Removing Clerk ID Function (To require the entry of a valid Clerk ID when running transactions) From the Main Menu, select the Gift Card program. Press the “Scroll Down” key until Setup Menu is displayed. Press the “F” key corresponding to Setup Menu. At the MANAGER PASSWORD prompt, key the password and press the green “OK” key. Press the “F2” key to select Terminal. Press the “F3” key to Slct (Select). Press the “F2” key for Next until Clrk/Srvr Mode is displayed. (12 times) Press the “F3” key for EDIT. Enter “1” to enable or “0” to disable and press the green “OK” key. Press the “F4” key for Exit. Press the “F2” key to save the changes. Press the red “CANC” key to return to the main application menu.
- 23 -
TechTrex PrimeTrex IP Terminals
Instructions for Adding or Removing Clerks (To create or remove valid Clerk ID’s. A valid Clerk ID is necessary to run transactions) From the Main Menu, select the Gift Card program. Press the “Scroll Down” key until Clerk Setup is displayed. Press the “F” key corresponding to Clerk Setup. ADD CLERK Press the “F3” key to select Add Clerk. At the MANAGER PASSWORD prompt, key the password and press the green “OK” key. Enter the Clerk Login ID (1-5 numeric characters) and press the green "OK" key. Enter the Clerk Password (1-6 numeric characters) and press the green "OK" key. Retype the password and press the green "OK” key. DELETE CLERK Press the “Scroll Down” key until Delete Clerk is displayed. Press the “F1” key to select Delete Clerk. *NOTE: Press the “F2” key to Delete All Clerks. At the MANAGER PASSWORD prompt, key the password and press the green “OK” key. Enter the desired Clerk ID and press the green "OK" key. Enter the Clerk Password for the corresponding clerk and press the green "OK" key.
Instructions for Logging Clerks In/Out, Changing Password (Clerks who fail to log in prior to attempting a transaction will be given the opportunity to log in without aborting the transaction) From the Main Menu, select the Gift Card program. Press the “Scroll Down” key until Clerk Setup is displayed. Press the “F” key corresponding to Clerk Setup. Log On Press the “F1” key to select Log On. Enter the desired Clerk ID and press the green "OK" key. Enter the Clerk Password and press the green "OK" key. Log Off Press the “F2” key to select Log Off. Enter the desired Clerk ID and press the green "OK" key. Press the "F2" key to confirm or the "F1" key to cancel. Change Password Press the “F4” key to select Modify Clerk. Enter the desired Clerk ID and press the green "OK" key. Enter the Clerk Password and press the green "OK" key. Enter the New Password and press the green "OK" key. Re-enter the New Password and press the green "OK" key. Clerk ID numbers are secure on this application, requiring a login and password before they can be used. This is to prevent anyone from misrepresenting themselves by using another’s Clerk ID. If a Clerk fails to log in before attempting a transaction, the terminal will prompt for their password and offer to log that Clerk in at that time, without aborting the transaction. Clerks who fail to log out at the end of their shift are automatically logged out over night.

- 24 -
VeriFone Tranz Terminal Tranz 330, Tranz 380, Tranz 380x2, and Tranz 460
- 25 -
VeriFone Tranz Terminal (Tranz 330, Tranz 380, Tranz 380x2, and Tranz 460)
Instructions to Create or Change the Master Password
(To restrict access to secure menus and operations) From the Main Screen, press the “FUNC/ENTER” key. At the FUNCTION? prompt, press the “7” key. At the RECALL WHAT? prompt, enter “913”. (Press the “FUNC/ENTER” key if 380, 380x2, or 460) Press the “BACKSPACE” key. At the ENTER PASSWORD prompt, key in the terminal password and press the “FUNC/ENTER” key. Enter the desired Master Password (1-4 alpha-numeric characters) and press the “FUNC/ENTER” key. *NOTE: To remove the password and disable all transaction passwords, clear this field and press the “FUNC/ENTER” key. Press the “CLEAR” key to return to the Main Menu.
Instructions to Create a Transaction Passwords (To restrict the ability to Activate Gift Cards) From the Main Screen, press the “FUNC/ENTER” key. At the FUNCTION? prompt, press the “4” key. At the MASTER PASSWORD prompt, enter the Master Password and press the “FUNC/ENTER” key. Press the “1” key to add a new password. (The maximum number of passwords is 8) Enter the desired Transaction Password (1-4 alpha-numeric characters) and press the “FUNC/ENTER” key. Press the “1” key to add another password, or press the “CLEAR” key to return to the Main Menu.
Instructions to Delete a Transaction Password
From the Main Screen, press the “FUNC/ENTER” key. At the FUNCTION? prompt, press the “4” key. At the MASTER PASSWORD prompt, enter the Master Password and press the “FUNC/ENTER” key. Press the “2” key to delete a password. *NOTE: To view a list of all available passwords, press the “3” key. The terminal will begin to scroll the saved passwords. Enter the desired Transaction Password and press the “FUNC/ENTER” key. Press the “2” key to delete another password, or press the “CLEAR” key to return to the Main Menu. *NOTE: Deleting the Master Password will disable all stored Transaction Passwords, but will not delete them. Enabling a Master Password will re-enable all previously stored Transaction Passwords.

- 26 -
VeriFone (Lipman) Nurit Terminals Nurit 2085, Nurit 2085+, Nurit 3010, Nurit 3020, Nurit 8320, Nurit 8000, and Nurit 8400
- 27 -
VeriFone (Lipman) Nurit Terminals (Nurit 2085, Nurit 2085+, Nurit 3010, Nurit 3020, Nurit 8320, Nurit 8000, and Nurit 8400)
Instructions for Creating or Changing the Transaction Password
(To restrict the ability to Activate or Add Value to Gift Cards) From the Main Menu, press the “MENU/ESC” key. Press the “4” key to display 1.Hosts Params. *NOTE: If 1.Hosts Params is not available it will be necessary to contact Secure Payment Systems at (888) 313-7842, extension 2 for Technical Support. The download file will need to be modified and the terminal downloaded in order to access this functionality. Press the green “ENTER” key to display the password prompt. Enter the password and press the green “ENTER” key. Press the “F1” key to select Terminal. At the ENTER PASSWORD: prompt, key the password and press the green “ENTER” key. Using the “FORCED” key, scroll down the list of Hosts until SPSGFT or SPSSVL is displayed and press the green “ENTER” key. Using the “FORCED” key, scroll down the list until MasterPass is displayed and press the green “ENTER” key. Enter the desired Manager Password (1-4 alpha-numeric characters) and press the green “ENTER” key. *NOTE: To remove the password, clear this field and press the green “ENTER” key. Press the “MENU/ESC” key. At the Save Parameters? prompt, press the button beneath YES to save the changes. Press the “MENU/ESC” key until the Main Menu screen is displayed (CREDIT…SALE ACCOUNT )
Instructions for Creating or Removing Clerk ID Function
From the Main Menu, press the “MENU/ESC” key. Press the “4” key to display 1.Hosts Params. *NOTE: If 1.Hosts Params is not available it will be necessary to contact Secure Payment Systems at (888) 313-7842, extension 2 for Technical Support. The download file will need to be modified and the terminal downloaded in order to access this functionality. Press the green “ENTER” key to display the password prompt. Enter the password and press the green “ENTER” key. Press the “F1” key to select Terminal. At the ENTER PASSWORD: prompt, key the password and press the green “ENTER” key. Using the “FORCED” key, scroll down the list of Hosts until SPSGFT or SPSSVL is displayed and press the green “ENTER” key. Using the “FORCED” key, scroll down the list until AskClerkIdFlag is displayed and press the green “ENTER” key. Enter “1” to enable or “0” to disable and press the green “ENTER” key. Press the “MENU/ESC” key. At the Save Parameters? prompt, press the button beneath YES to save the changes. Press the “MENU/ESC” key until the Main Menu screen is displayed (CREDIT…SALE ACCOUNT )
- 28 -
VeriFone (Lipman) Nurit Terminals (Nurit 2085, Nurit 2085+, Nurit 3010, Nurit 3020, Nurit 8320, Nurit 8000, and Nurit 8400)
Instructions for Adding Clerks (To create or remove valid Clerk ID’s. A valid Clerk ID is necessary to run transactions) From the Main Menu, press the “MENU/ESC” key. Press the “2” key to display 2.Merch. Params. Press the “8” key to display 8.Ind. Prompts. Press the green “ENTER” key to display the password prompt. Enter the password and press the green “ENTER” key. Press the “1” key for 1.CLERK ID MODE. Press the “2” key to enable or the “1” key to disable this function. At the ENTER CLERK ID: prompt, enter the desired Clerk ID (1-3 numeric characters) and press the green “ENTER” key. At the Name: prompt, enter the desired Clerk identifier (1-19 alpha-numeric characters) and press the green “ENTER” key. Continue to add clerks until complete. The terminal holds a maximum of 100, numbered from 1 to 100. Press the “MENU/ESC” key until the Main Menu screen is displayed (CREDIT…SALE ACCOUNT ) Clerk ID numbers are not secure on this application. Anyone entering a valid number will be allowed to run transactions.