ougd201 - dpp. what is design for print. top ten manual
DESCRIPTION
OUGD201 - DPP. What is Design for Print. Top Ten ManualTRANSCRIPT

/ A ‘‘Top Ten Manual’ focusing on the main aspects of commercial print processes and the know how to getting it right in print.
/ Print guide
Baljeet Kaur Samra
/ OUGD201 Design Production - PrintWhat is Design for Print?

/ Contents
1 / Paper Size 2 / Printing Methods
LithographyFlexographyScreen PrintingDigital
3 / Colour
CMYK & RGBPMSSpot ColoursDuotoneTints / Shades / Tones
7 / Trapping 8 / Print Finishes
VarnishesEmbossing / DebossingFoil Blocking
9 / Proofing
A / B / CStandarised Paper sizes
The importance of ensuring that trapping has been considered in your work.
The importance of proofing your work before having it printed.

4 / Stock 5 / Imposition 6 / File types
10 / Costings
A guide to different stock and their primary uses.
A guide to imposition when send artwork to print.
Which file types to use when sending your artwork to print.
Choosing the right printer and getting you’re constings right.

/ Paper size
‘A’ Series
AOA1A2A3A4A5A6A7A8A9A10
841 x 1189594 x 841420 x 594297 x 420210 x 197148 x 210105 x 14874 x 10552 x 7437 x 5226 x 37
‘B’ Series
AOA1A2A3A4A5A6A7A8A9A10
1000 × 1414594707 × 1000500 × 707353 × 500250 × 353176 × 250125 × 17688 × 12562 × 8844 × 6231 × 44
‘C’ Series
AOA1A2A3A4A5A6A7A8A9A10
917 × 1297648 × 917458 × 648324 × 458229 × 324162 × 229114 × 16281 × 11457 × 8140 × 5728 × 40

ISO Paper Size
The ISO paper size system is an international standard that is used in many places in the world in copy and print devices that defines paper sizes. Based on the metric system, the ISO paper size system uses a height-to-width ratio with an aspect ratio of 1 to 1.414, If a sheet is cut into two, the resulting halves are the same proportions as the original.

/ printing methods
Flexography
Flexography (often abbreviated to flexo) is a form of printing process which utilises a flexible relief plate. It is basically an updated version of letterpress that can be used for printing on almost any type of substrate including plastic, metallic films, cellophane, and paper. It is widely used for printing on the non-porous substrates required for various types of food packaging.
Lithography
In modern lithography, the image is made of a polymer coating applied to a flexible aluminum plate. To print an image lithographically, the flat surface of the stone plate is roughened slightly etched and divided into regions that accept a film of water, and thereby repel the greasy ink. The image can be printed directly from the stone plate (the orientation of the image is reversed), or it can be offset, by transferring the image onto a flexible sheet (rubber) for printing and publication.
Screen Printing
Screen printing is a printing technique that uses a woven mesh to support an ink blocking stencil. The attached stencil forms open areas of mesh that transfer ink or other printable materials which can be pressed through the mesh. A roller or squeegee is moved across the screen stencil, forcing or pumping ink past the threads of the woven mesh in the open areas.

Commercial PrintingProcessesExplaining the process behind various printing techniques such as;Lithography Flexography Screen printingDigital printing
Digital Printing
Digital printing refers to methods of printing from a digital based image directly to a variety of media. Refers to professional printing where small run jobs from desktop publishing and other digital sources are printed using large format and/or high volume laser or inkjet printers. It also allows for on demand printing, short turn around.

/ Litho Printing
How does Litho printng work?
The process of Litho Printing is based on the basic principle that oil and water do not mix.
The first step begins with the plates. Lithographic plates have a roughened surface and are coated with a photosensitive (light sensitive) emulsion. This emulsion is a suspension of two chemicals that cannot be mixed together.
There are two ways that the plates are made :
1 - Exposure from light source with film on top of the plate.
2 – Exposure to the plate
using a machine that exposes the plate, using lasers directly from the computer.
Both of these ways create a photographic negative of the image/text for print, releasing the emulsion, and transferring
a clear image to the emulsion.The final step is very similar
to developing film in a photo lab. The emulsion is then chemically treated to remove the unexposed portions.
Once the printing plate has been made, the printing image/text is rendered grease receptive and hydrophobic, or water repelling.
On the press the plate is then mounted on the plate cylinder
which as it rotates, will come into contact with the wet rollers by a dampening solution or water, adhering to the rough or negative portions of the image. Then the plate will come into contact with the roller coated with ink, and this will then adhere to the smooth or positive portions of the image.
If this image were to be transferred directly to paper, it would create a positive image, but there would be moistened paper. To prevent this, a cylinder covered with a rubber surface, known as a blanket, is rolled over the plate. The blanket squeezes away the water, and picks up the

ink. The cylinder is then rolled over the paper, transferring the ink. This is called “offset lithography” because the image is first transferred to the blanket cylinder, and the image is offset to the drum before being applied to the paper.

called because it meters the amount of ink applied to the plate), a roller with the plate attached, and a impression roller. The meter roll applies a predetermined measurement of ink to the plate. The plate is subsequently scraped by the doctor blade. The substrate is passed between the print plate and the impression roller, which applies pressure to the keep the substrate against the plate.
/ Flexo Printing
How does Flexo printng work?
Flexographic printing begins with development of a flexographic plate. Flexographic plates can be created using three different methods. One method uses a UV reactive polymer. UV light is shined onto a film negative positioned over the polymer. The polymer reacts to the UV that comes through the negative and hardens. The unhardened polymer is removed using water or a chemical solvent.
A second technique is digital platemaking. Digital
platemaking involves establishing the wanted image in a digital format (typically with a desktop publishing program) and using that digital master image to laser-etch the plate.
The final method is to create a mold. In this technique, a metal plate is exposed using a negative. Following the exposure, the plate is given an acid bath creating an engraved image. A master plate mold is produced from the engraved metal plate, and the final printing plate is produced from the master mold.
Effectively, there are three rollers involved: a meter roll (so


/ ScreenPrinting
How does Screenprintng work?
The equivalent of the printing plate for the screen printer is the screen - a wooden or aluminium frame with a fine nylon mesh stretched over it. The mesh is coated with a light sensitive emulsion or film, which - when dry - will block the holes in the mesh.
The image that needs to be printed is output to film either by camera or image-setter. This film positive and the mesh on the screen are sandwiched together and exposed to
ultra-violet light in a device
called a print-down frame. The screen is then washed with a jet of water which washes away all the light sensitive emulsion that has not been hardened by the ultra-violet light. This leaves you with an open stencil which corresponds exactly to the image that was supplied on the film. Now the screen is fitted on the press and is hinged so it can be raised and lowered.
The substrate to be printed is placed in position under the screen and ink is placed on the top side of the screen, (the frame acts also as wall to contain the ink ). A rubber blade gripped in a wooden or
metal handle called a squeegee (not unlike a giant wind-screen wiper) is pulled across the top of the screen; it pushes the ink through the mesh onto the surface of the substrate you are printing. To repeat the process the squeegee floods the screen again with a return stroke before printing the next impression.


/ DigitalPrinting
How does Digitalprintng work?
Digital Printing takes a different approach assembling each image from a complex set numbers and mathematical formulas. These images are captured from a matrix of dots, generally called pixels, this process is called digitizing. The digitized image is then used to digitally controlled deposition of ink, toner or exposure to electromagnetic energy, such as light, to reproduce images. The mathematical formulas also allow for algorithms to compress the data. It also give
a method of Calibration or Color Management Systems which helps to keep images looking the same color despite where they are view or printed. One important function that the mathematical formulas allowed was the development of a common language for digital printing it is called PostScript and was developed by Adobe. To see what PostScript looks like open a PDF or EPS in a text editor, the code seems very intricate but to a computer it just a simple code of instructions.
One of the most important advantages that Digital printing
offers is a quicker response time due to its minimal press setup and it’s built in multicolor registration system. This eliminates many of the upfront, time consuming processes that can cause analog printing methods to have a slower turn around time.
Another advantage of Digital printing is the ability of offer variable printing; this means that each printed piece can have different information on it providing personalization and customization unmatched by analog processes.


/ Colour
Pantone Matching
A popular color matching system used by the printing industry to print spot colors. Most applications that support color printing allow you to specify colors by indicating the Pantone name or number. This assures that you get the right color when the file is printed, even though the color may not look right when displayed on your monitor.
PMS works well for spot colors but not for process colors, which are generally specified using the CMYK color model.
CMYK & RGB
The CMYK color model is a subtractive color model, used in color printing. CMYK refers to the four inks used in some color printing: cyan, magenta, yellow, and key (black).
The RGB color model is an additive color model in which red, green, and blue light is added together in various ways to reproduce a broad array of colors. Name of the model comes from the initials of the three additive primary colors, red, green, and blue.
The main purpose of the RGB color model is for the sensing, representation, and display of images in electronic systems, such as televisions and computers.
Spot Colours
In offset printing, a spot color is any color generated by an ink (pure or mixed) that is printed using a single run.
The widely spread offset-printing process is composed of four spot colors: Cyan, Magenta, Yellow, and Key (black) commonly referred to as CMYK. More advanced processes involve the use of six spot colors (hexachromatic process), which add Orange and Green to the process (termed CMYKOG). The two additional spot colors are added to compensate for the ineffective reproduction of faint tints using CMYK colors only.
The term spot color can also mean any color generated by a non-standard offset ink; such as metallic, fluorescent, spot varnish, or custom hand-mixed inks.

Colour Models & TechniquesThis section looks at the difference between CMYK & RGB as well as focusing on spot colours, dutotone and tints.
Duotone
Duotone is a halftone reproduction of an image using the superimposition of one contrasting color halftone (traditionally black) over another color halftone. This is most often used to bring out middle tones and highlights of an image. The most common colors used are blue, yellow, browns and reds.
Tints / Shades / Tones
These terms are often used incorrectly, although they describe fairly simple color concepts. If a color is made lighter by adding white, the result is called a tint. If black is added, the darker version is called a shade. And if gray is added, the result is a different tone.

/ Stock
Chromo Labels, Wrapping, Covers
Cast CoatedHigh quality Colour Printing
Coated paper with high gloss finish. Wet coated paper is pressed / cast against a hot metal drum.
Waterproof coating on single side intended for good embossing and varnishing performance.
Cartridge Adds Texture
Thich white paper particularly used for pencil and ink drawings.
Newsprint Newspapers & Comics
Made from mechanically ground wood pulp. Cheap to produce.
Antique Adds Texture
Roughest finish offered on offset paper.
Uncoated woodfree Office paper
Printer, photocopy paper, general office use. Largest printing and writing paper category by capacity.
Art Colour printing & Magazines
High quality paper with clay filler to give good printing surface.
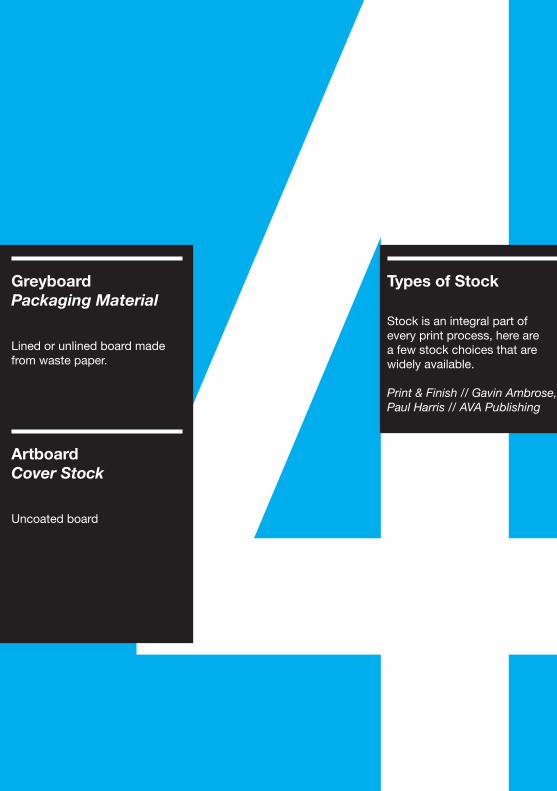
Types of Stock
Stock is an integral part of every print process, here are a few stock choices that are widely available.
Print & Finish // Gavin Ambrose, Paul Harris // AVA Publishing
Greyboard Packaging Material
Lined or unlined board made from waste paper.
Artboard Cover Stock
Uncoated board

/ Imposition
the printed product: The compositor must determine how many sheets are to be printed to create a finished book.
Stitching/binding method: The compositor must understand how the sheets are placed to form the signatures that compose the finished book.
Paper fiber direction: Many papers have a “grain,” reflecting the alignment of the paper fibers. That these fibers must run lengthwise along the fold influences the alignment,
How doesimposition work?
Correct imposition minimizes printing time by maximizing the number of pages per impression, reducing cost of press time and materials. To achieve this, the printed sheet must be filled as fully as possible.
Imposition is affected by five different parameters:
Format of the product: The size of the finished page determines how many pages can be printed on a single sheet.
Number of pages of
hence the position, of the pages on the printed sheet.
To understand how the pages are related to each other, an imposition dummy may be used. This is made by folding several sheets of paper in the way the press will print and fold the product. A little copy is then created, and this can help paginate the product.

Imposition
Imposition is one of the fundamental steps in the prepress printing process. It consists in the arrangement of the printed product’s pages on the printer’s sheet, in order to obtain faster printing, simplified binding and less waste of paper.

/ File types
your bitmap files as (the sort of things created in Photoshop).
TIFFs and PSDs are lossless. You don’t lose any quality by saving a file as a TIFF or PSD.
JPEGs normally lose quality when you save them but take up a lot less space on your computer. A very high quality JPEG is often not a lot different to a TIFF or PSD, but it does very much depend on the sort of image you’re saving.
A TIFF or PSD is normally a better option than a JPEG. But if you’ve been supplied with a
Which files should you send to print?
You are best off saving vector artwork (the sort of stuff from Illustrator) as an EPS, PDF or AI file. In this photo from the Print Handbook you can see why PDFs (bottom left) and EPSs trump TIFFs and JPEGs every time for vector stuff.
Even at 300dpi the TIFF and JPG don’t handle this vector graphic nearly so well. They have to convert it to pixels, and in this situation it shows. Bitmaps
TIFFs, JPEGs and even PSDs are what you should be saving
JPEG, from a camera or stock photo website, and you’re not modifying the image then you will gain nothing from saving it as a TIFF or PSD. A TIFF or PSD cannot create detail where there was none in the first place. But a JPEG can remove detail where once there was some.
There’s a couple of thing to notice in the pictures here related to JPEGs. Firstly, JPEGs can’t handle spot colours. So when this JPEG was saved it converted the Pantone colour

File Types
It is essential when sending files to print, that you have discussed with your printer which type of file they will be using to then print your artwork
into a CMYK value. Secondly, the white space in between the red lines on the JPEG is filled with a very subtle yellow/grey tint. This is due to the compression.
Files for your printers: Ask them but probably PDFs or native Creative Suite files (.ai, .psd, .indd)Vectors: EPSs, PDFs and AIsBitmaps: TIFFs, PSDs and sometimes JPEGs
www.printhandbook.com

/ Trapping
right choice will depend on the type of products (packaging applications including flexo-printing have other requirements than commercial printing on offset systems) and the degree of interactivity or automation that is wanted.
Trapping MethodsOne approach to trapping
is to change the submitted artwork. In general, all digital files produced using any current professional software have some level of trapping provided already, via application default values. Additional trapping may also be necessary, but all traps should be as unobtrusive as possible.
Traps can be applied at several stages in the digital workflow, using one of two trapping technologies: vector-based and raster-based. The

TrappingTrapping is a term most commonly used in the prepress industry to describe the compensation for misregistration between printing units on a multicolor press. This misregistration causes unsightly gaps or white-space on the final printed work. Trapping involves creating overlaps (spreads) or underlaps (chokes) of objects during the print production process to eliminate misregistration on the press.

Spot Varnishes
A varnish is a liquid coating applied to a printed surface (for example the outside of a presentation folder) to add a clear glossy, matte, satin, or neutral finish.
Spot Varnish is applied to chosen spots (areas), of a printed piece. This has the affect of highlighting and drawing attention to that part of the design, but it also provides the additional visual stimulus of having varied textures on a single printed surface.
FinishesEmbossing &Debossing
Foil Blocking
Foil stamping, typically a commercial print process, is the application of pigment or metallic foil, often gold or silver , but can also be various patterns or what is known as pastel foil which is a flat opaque color or white special film-backed material, to paper where a heated die is stamped onto the foil, making it adhere to the surface leaving the design of the die on the paper. Foil stamping can be combined with embossing to create a more striking 3D image.
Embossing is the process of creating a three-dimensional image or design in paper and other materials. Embossing is typically accomplished by applying heat and pressure with male and female dies, usually made of copper or brass, that fit together and squeeze the fibers of the substrate.
In debossing an image such as a logo, a title, or other design is heat-pressed into the surface of the paper with a die, creating depressions or indentations rather than raised impressions as in embossing.

Print Finishes
Looking at the various print finishes that can be applied to artwork such as;VarnishesEmbossing / DebossingFoil Blocking

/ Proofing
usually involves ink-jet printing or other technologies (i.e. Laminate Proof) to produce high-quality one-off copies of the production artwork. Soft proofing usually involves highly color accurate wide-gamut computer displays.
In the best conditions the proofing process will actually try to emulate the effects of the printing press through color management and screening techniques, which can be quite challenging because proofing devices may behave and operate quite differently than press devices.
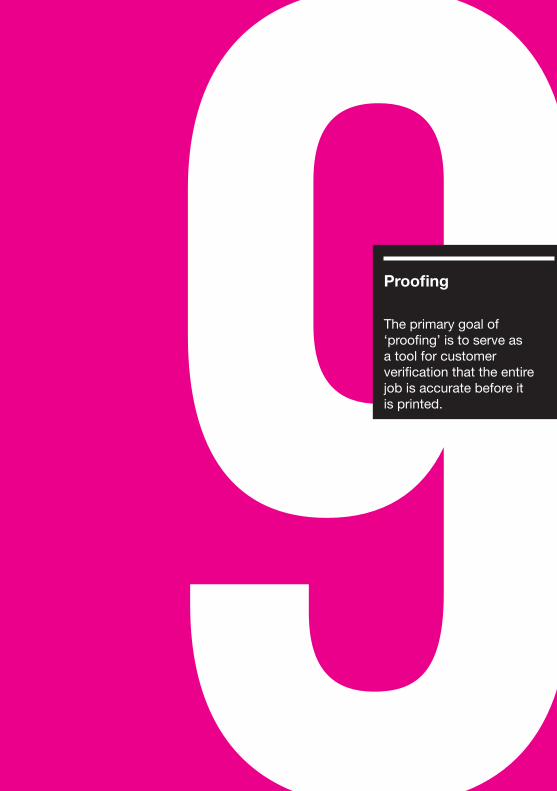
What is Proofing?The primary goal of ‘proofing’
is to serve as a tool for customer verification that the entire job is accurate. Prepress proofing (also known as off-press proofing) is a cost effective way of providing a visual copy without the expense of creating a Press Proof. If errors are found during the printing process on press it can prove very costly to one or both parties involved.
The main objective of proofing is to produce either a soft or hard copy of what the final product will look like on press. Hard copy proofing
/ Proofing
usually involves ink-jet printing or other technologies (i.e. Laminate Proof) to produce high-quality one-off copies of the production artwork. Soft proofing usually involves highly color accurate wide-gamut computer displays.
In the best conditions the proofing process will actually try to emulate the effects of the printing press through color management and screening techniques, which can be quite challenging because proofing devices may behave and operate quite differently than press devices.
What is Proofing?The primary goal of ‘proofing’
is to serve as a tool for customer verification that the entire job is accurate. Prepress proofing (also known as off-press proofing) is a cost effective way of providing a visual copy without the expense of creating a Press Proof. If errors are found during the printing process on press it can prove very costly to one or both parties involved.
The main objective of proofing is to produce either a soft or hard copy of what the final product will look like on press. Hard copy proofing
Proofing
The primary goal of ‘proofing’ is to serve asa tool for customer verification that the entire job is accurate before it is printed.

/ Costing
What is Proofing?Commerical CostingsPrint costing is an integral
part of any print project. Is essential to ensure that you have discussed your exact requirements with your printer so there are no issues about extra costs.
It always a good idea to get a quote from 2 or 3 different printers just so that you have an idea of how much it will cost - allowing you to make the decision that best suits you.

Top Ten ManualAll photographs are taken by myself with thanks to Team Impression.