queensland society of model and experimental engineers inc. · queensland society of model and...
TRANSCRIPT
Official publication of the Queensland Society of Model
and Experimental Engineers Inc.
OCTOBER 2017
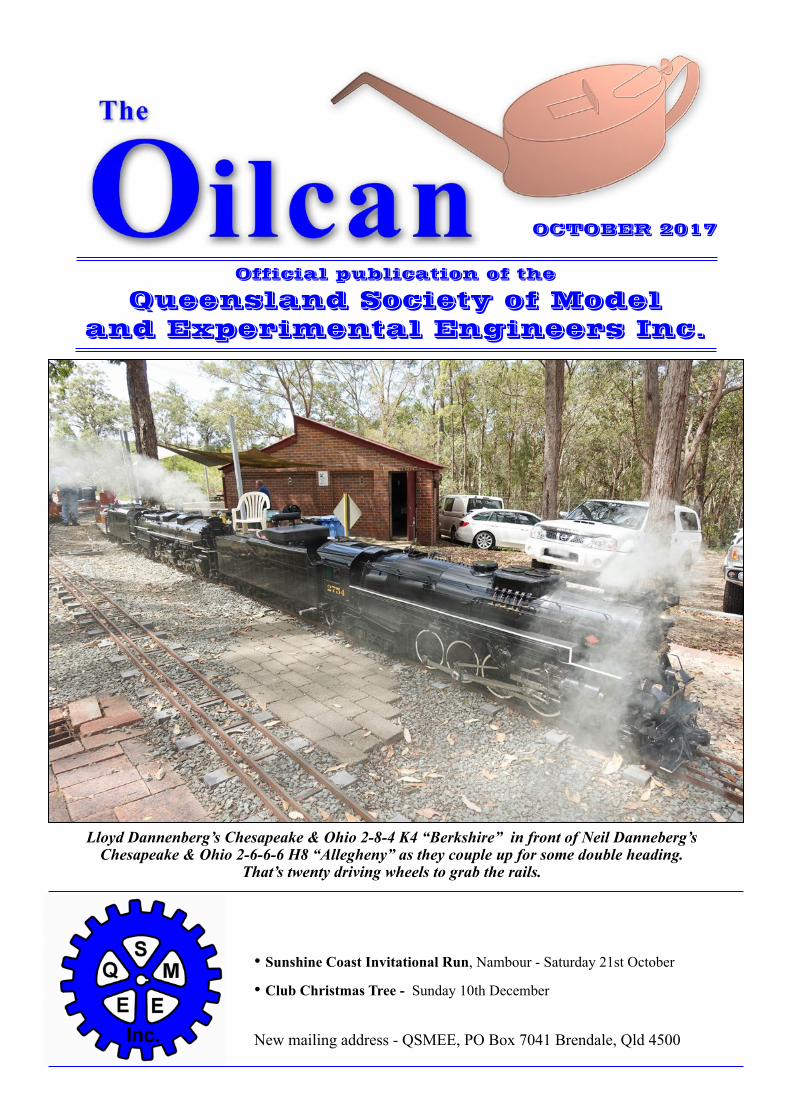
Lloyd Dannenberg’s Chesapeake & Ohio 2-8-4 K4 “Berkshire” in front of Neil Danneberg’s Chesapeake & Ohio 2-6-6-6 H8 “Allegheny” as they couple up for some double heading.
That’s twenty driving wheels to grab the rails.
• Sunshine Coast Invitational Run, Nambour - Saturday 21st October
• Club Christmas Tree - Sunday 10th December
New mailing address - QSMEE, PO Box 7041 Brendale, Qld 4500
Editorial.Neville RobertsonThis journal is not great on editorials – this, I think, is the second or third in the four years I’ve been wielding the proverbial blue pencil – but occasionally one is merited.
First and foremost, I’d like to thank all those who’ve responded to the call for articles. Without their input The Oilcan would be but a shadow of what it currently is. As much as I’d like to name contributors, particularly the most consistent ones, it would be unfair to do so. What I will do, however, is renew my appeal for others to join them. But authors, both existing and potential, please don’t rest on your laurels or assume you’re not needed – our newsletter is open-ended and relies on a constant supply of fresh material to keep the membership informed and entertained.
Conversations with various club members tell me that their focus is anything but narrow. Most have an interest in the wide world of engineering, both miniature and full-size as well as old and new. Human interest items are well received; with this in mind, please consider letting us have an anecdote or two from your life in engineering or indeed, from your model engineering activities – we’ve seen that these can be instructive and amusing. Several members have been especially prolific in submitting this sort of material; its popularity speaks for itself.
“How to do” items are always welcome; the recently published write-up on restoring an old, worn three-jaw chuck has, I’ve been told, provided the inspiration for several other members to do likewise. This edition of The Oilcan features two more items along similar lines whilst a mini-constructional feature on a most useful lathe accessory is scheduled for the January edition. Workshop hints and tips appear in most issues; one hopes they are of use. If you have any, please let’s have them. If there’s some generalised model engineering topic about which you’d like to express an opinion, consider writing an editorial.
Note that as a “light touch” editor, I make changes to text only in terms of spelling, grammar or punctuation but seldom content. Be aware too, that publication cannot be guaranteed immediately after you’ve submitted an article. This is because the makeup of any one newsletter needs to be balanced to cater for the widest possible range of interests. It doesn’t always work out that way but be assured that this is the aim.
Past newsletters have been limited in length due to the cost of postage of hard copies. The committee recently approved an increase in the length of the newsletter – the additional cost of the required A4 envelope and the postage thereon is negligible relative to other expenditure given that so few Oilcans are now dispatched this way.
However, sanction to extend the newsletter places demands on the need for more material. With this in mind, should a free ads section be included as well as a correspondence column? Let me have your thoughts on this as well as any other comments you wish to make.
Among the features of our newsletter are links to external content, mainly on YouTube. Clicking on these, or alternatively, copying and pasting them to whichever search engine you use, effectively extends the length of The Oilcan via stand-alone material or supplements/complements an article through video content. If you have anything along these lines that you believe may interest our readership, please let’s have it, especially if it’s unusual and railway related.
Finally, I’d like to express my thanks to Barry Coster for the sterling job he does in readying the material for publication. Without him we’d have no newsletter or the one we do have would not be to the high standard of presentation we’ve come to expect. He and Di also comb through old copies of The Oilcan for the material featured in “Blasts from the past.” I also want to express my appreciation to Garry Menzies who has taken on the task of providing reports on special events, the “Did you know?” regular feature, as well as for his suggestions on ways to improve our publication.
Barry has provided some guidance on the submission of material. Following these suggestions will make his task much easier. He writes as follows:
If you’ve ever had thoughts of submitting an article for the Oilcan, please do so as it is a very easy process - there is nothing daunting.
• Don’t try and lay out the article, keep it simple.
• Use any text editor to write your words.
• In the text, nominate (if you wish) where a photo ordrawing should be inserted. Refer to the photo nameor number.
• You don’t need to insert the photo into your document - it’s easier if you don’t!
• At the end of the story you might leave a list of shortcaptions that can go under each photo.
• Please provide each photo in the highest resolutionyou have.
• If you have a CAD drawing, it is easiest that youprint the drawing to PDF. (You may need to checkyour PDF program to see if you can create a highquality or press quality document).
Page 2
What’s new at Pine Valley Railway.Chris Hillyard, Works Coordinator
Bending of sheet metal.John Andrews
• Don’t forget about attribution (author’s name) and other links to material you may have used (have you got permission?)
• Don’t worry about typeface or font size.
It is a real pain to extract photos or drawings from a submitted document so even if placed as a guide, provide everything separately.
Just a few brief notes to let the members know where we are at this present time.
New Carriage Shed: As at time of writing the four main floor concrete slabs have been laid. The western side of the floor has been completed, there only remains a small strip of the floor on the eastern side at the southern end to be completed.
The second of five concrete stairs, at the southern end of the shed , has also been laid. Hopefully we will be able to lay the third step on Wednesday 04.10.17.
Overhead Pedestrian Bridge Pine Valley Station: Replacement work will soon recommence on the northern half of the pedestrian bridge. The major steel components for this work have already been purchased and are on site. If you are able to and would like to assist with this project could you please contact the project manager – Norm McKenzie.
Drain at the base of the blue stone wall, Northern end: Work has recommenced on completing the drain that runs along at the base of the large blue stone wall at the northern end of the property. If you are able to and would like to assist with this project please contact the project manager Harry Beauchamp.
Overhaul to Club diesel, Murdoch: Running repairs to the diesel are progressing. The engine and drive train have been serviced. However during this process the muffler system, or should I say what was left of it needs to be replaced. The initial muffler replacement was found to be insufficient. A second expansion chamber has been installed on the exhaust system but the noise level remains to be too noisy and will require further work. In the meantime further inspection of the drivers riding car revealed that the flanges on the drivers riding car wheels were worn out. The Wednesday Warriors have since removed and modified the wheels. The riding car was placed back into service last Sunday. If you would like to assist with the necessary modification of the muffler system please contact the project manager – Ian Crawford.
Roundhouse Steaming Bays: The tracks in the steaming bays and the approach track off the unloader through to the turntable need attention to better accommodate the larger locomotives that are now coming on line. This is a combined project being undertaken by Clive Harnwell and Neil Dannenberg. If you would like to assist with this project please contact either Clive or Neil.
Eastern Fence line Roundhouse Car Park Area: As the members who regularly attend running day would be aware the lack of car parking spaces in this area has become a problem. In order to increase the available parking spaces in this area the fence has been raised in order to build a retaining wall under the fence line that will allow the ground to the west of the fence to be levelled off for additional parking. Members would have noticed that a wall has been started and solid fill has been placed in this area. This is a project that needs to be completed as we had an incident during Track n Tent where our neighbours dogs were able to escape under the fence. If you are able to assist with this project please contact the project manager Shane Ferris.
In general if you are looking for a project to complete, small or large, that you can call your own you will find plenty of jobs to be undertaken. Refer to “The Non Boiler Report” that is always displayed on the bottom of the white board to the left of the sign on register. If you complete any of the tasks listed, please ensure that you mark off the completion date on the forms. Any assistance that the members can provide by completing these tasks will be greatly appreciated by all.
I recently needed to put a 20 degree bend in several pieces of 1.6 mm zincalume from which the tender tank for my new loco is being constructed.
I had the tender tank laser cut from this material as recommended by the laser cutter. He put in all the 3/64” rivet holes using the laser (about 3000 holes).
The piece in question forms the flare around the top of the tender and on each side is about 600 mm long by 30 mm wide. The bend is 10 mm from one of the long edges. I have no press brake or pan brake, and even if I did, I doubt that this fold could be achieved. Hammering the bend in the bench vise was considered and rejected as being likely to cause unwanted distortion.
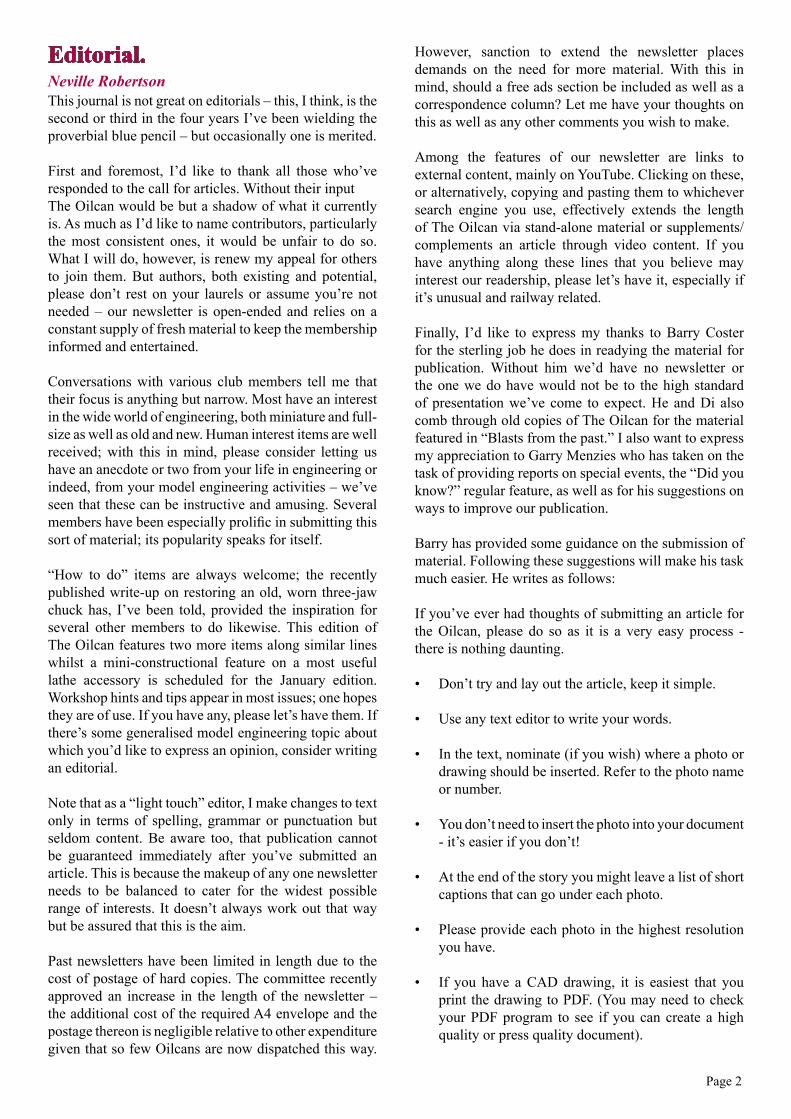
After getting no useful suggestions from club members, I decided to cut the material half way through using a 1 mm slitting saw in the mill-drill, after first determining by use of Tan tables that a 20 deg bend would not close up a 1 mm slot by 0.6 mm deep. I aligned the vise as
Page 3
Instructions for making scale-model forty-four gallon drums. Bob White
The world’s largest collection of narrow-gauge steam locomotives.
precisely as possible with the X axis, and initially thought to clamp the work piece to a long straight piece of steel. I did not have a long straight piece of steel strong enough so I placed parallels either side of the vise and sat the work-piece on these in the vise. I then cut a groove 1 mm wide and 0.6 mm deep using the slitting saw for the width of the vise.
When the cut reached the end of the vise, the feed was reversed and the cutter withdrawn to the start. The vise was then loosened and the work-piece slid to the right as far as possible while still engaging the cutter in the slot. The vise was then tightened and the process repeated until the end was reached.
NOW, the bending!
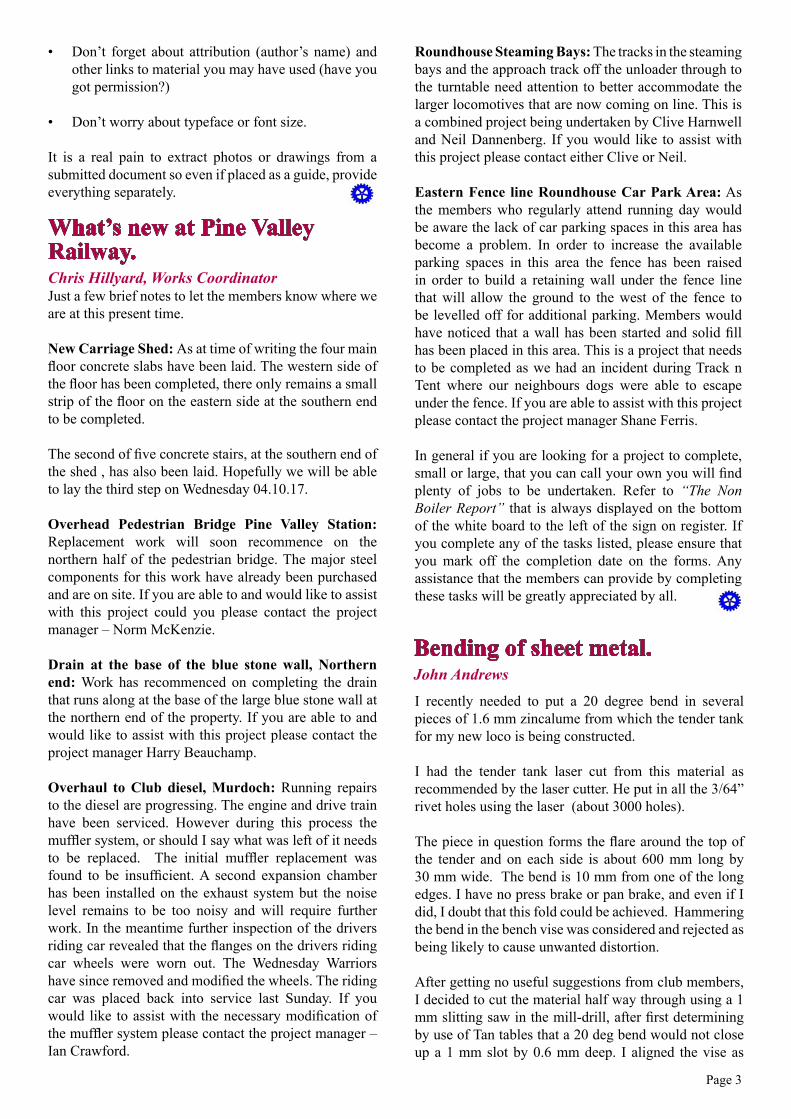
I clamped the work-piece between two of my longest straight pieces of 50 x 30 steel with G clamps, with the cut groove aligned with the edges of the steel.
Then with the aid of two more solid pieces of bright mild, using my longest shifters as handles, I bent the work-piece about 10 degrees, shifted the bending to the other end and repeated the process, until an indicator clamped to the work-piece showed alignment with a bevel square set to 20 degrees.
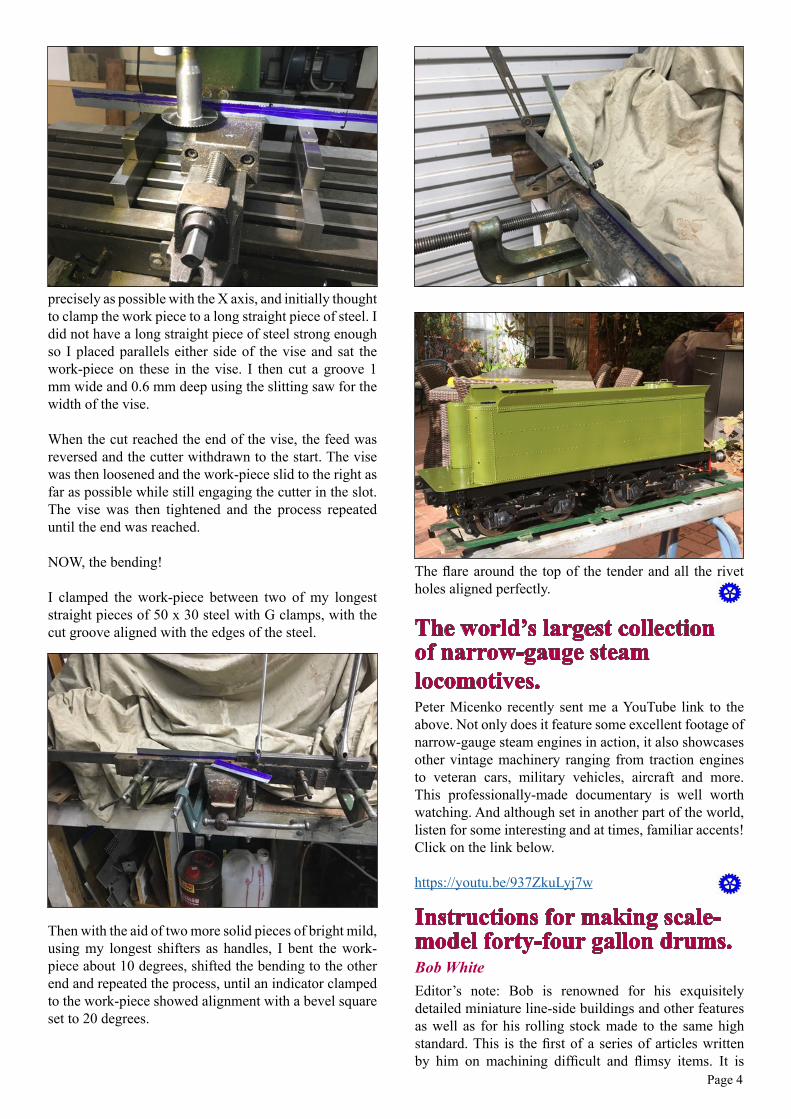
The flare around the top of the tender and all the rivet holes aligned perfectly.
Peter Micenko recently sent me a YouTube link to the above. Not only does it feature some excellent footage of narrow-gauge steam engines in action, it also showcases other vintage machinery ranging from traction engines to veteran cars, military vehicles, aircraft and more. This professionally-made documentary is well worth watching. And although set in another part of the world, listen for some interesting and at times, familiar accents! Click on the link below.
https://youtu.be/937ZkuLyj7w
Editor’s note: Bob is renowned for his exquisitely detailed miniature line-side buildings and other features as well as for his rolling stock made to the same high standard. This is the first of a series of articles written by him on machining difficult and flimsy items. It is
Page 4
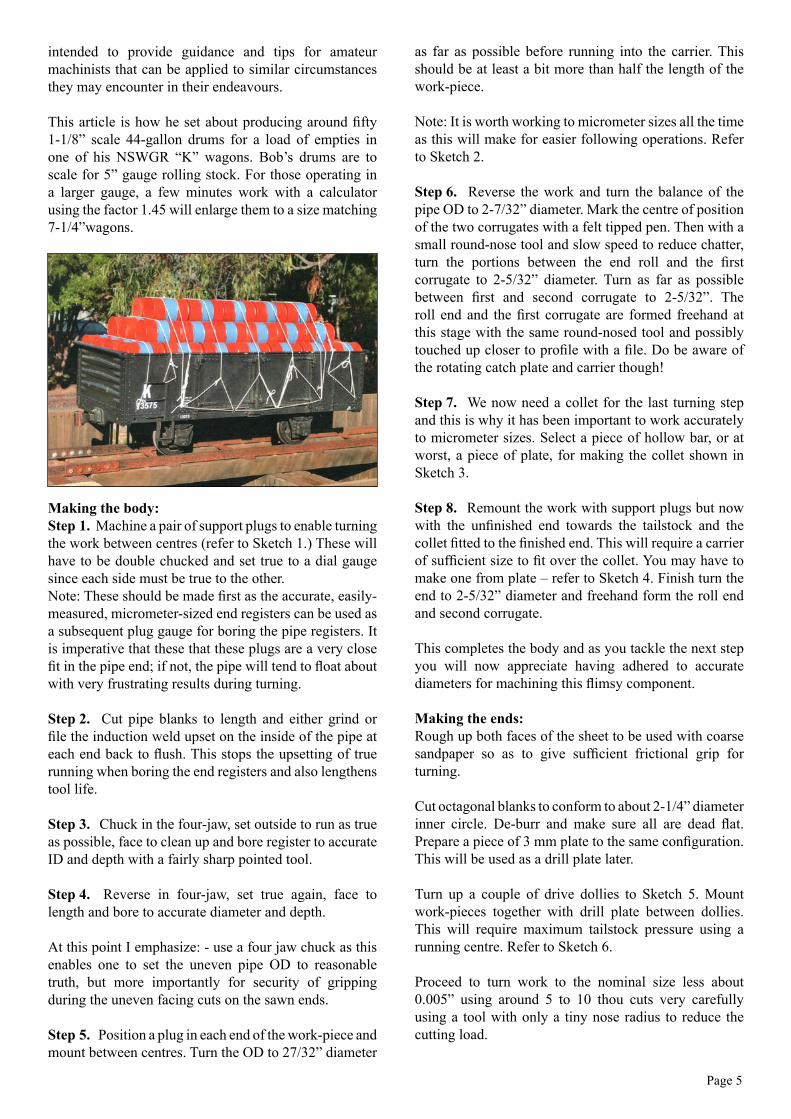
intended to provide guidance and tips for amateur machinists that can be applied to similar circumstances they may encounter in their endeavours.
This article is how he set about producing around fifty 1-1/8” scale 44-gallon drums for a load of empties in one of his NSWGR “K” wagons. Bob’s drums are to scale for 5” gauge rolling stock. For those operating in a larger gauge, a few minutes work with a calculator using the factor 1.45 will enlarge them to a size matching 7-1/4”wagons.
Making the body: Step 1. Machine a pair of support plugs to enable turning the work between centres (refer to Sketch 1.) These will have to be double chucked and set true to a dial gauge since each side must be true to the other. Note: These should be made first as the accurate, easily-measured, micrometer-sized end registers can be used as a subsequent plug gauge for boring the pipe registers. It is imperative that these that these plugs are a very close fit in the pipe end; if not, the pipe will tend to float about with very frustrating results during turning.
Step 2. Cut pipe blanks to length and either grind or file the induction weld upset on the inside of the pipe at each end back to flush. This stops the upsetting of true running when boring the end registers and also lengthens tool life.
Step 3. Chuck in the four-jaw, set outside to run as true as possible, face to clean up and bore register to accurate ID and depth with a fairly sharp pointed tool.
Step 4. Reverse in four-jaw, set true again, face to length and bore to accurate diameter and depth.
At this point I emphasize: - use a four jaw chuck as this enables one to set the uneven pipe OD to reasonable truth, but more importantly for security of gripping during the uneven facing cuts on the sawn ends.
Step 5. Position a plug in each end of the work-piece and mount between centres. Turn the OD to 27/32” diameter
as far as possible before running into the carrier. This should be at least a bit more than half the length of the work-piece.
Note: It is worth working to micrometer sizes all the time as this will make for easier following operations. Refer to Sketch 2.
Step 6. Reverse the work and turn the balance of the pipe OD to 2-7/32” diameter. Mark the centre of position of the two corrugates with a felt tipped pen. Then with a small round-nose tool and slow speed to reduce chatter, turn the portions between the end roll and the first corrugate to 2-5/32” diameter. Turn as far as possible between first and second corrugate to 2-5/32”. The roll end and the first corrugate are formed freehand at this stage with the same round-nosed tool and possibly touched up closer to profile with a file. Do be aware of the rotating catch plate and carrier though!
Step 7. We now need a collet for the last turning step and this is why it has been important to work accurately to micrometer sizes. Select a piece of hollow bar, or at worst, a piece of plate, for making the collet shown in Sketch 3.
Step 8. Remount the work with support plugs but now with the unfinished end towards the tailstock and the collet fitted to the finished end. This will require a carrier of sufficient size to fit over the collet. You may have to make one from plate – refer to Sketch 4. Finish turn the end to 2-5/32” diameter and freehand form the roll end and second corrugate.
This completes the body and as you tackle the next step you will now appreciate having adhered to accurate diameters for machining this flimsy component.
Making the ends: Rough up both faces of the sheet to be used with coarse sandpaper so as to give sufficient frictional grip for turning.
Cut octagonal blanks to conform to about 2-1/4” diameter inner circle. De-burr and make sure all are dead flat. Prepare a piece of 3 mm plate to the same configuration. This will be used as a drill plate later.
Turn up a couple of drive dollies to Sketch 5. Mount work-pieces together with drill plate between dollies. This will require maximum tailstock pressure using a running centre. Refer to Sketch 6.
Proceed to turn work to the nominal size less about 0.005” using around 5 to 10 thou cuts very carefully using a tool with only a tiny nose radius to reduce the cutting load.
Page 5
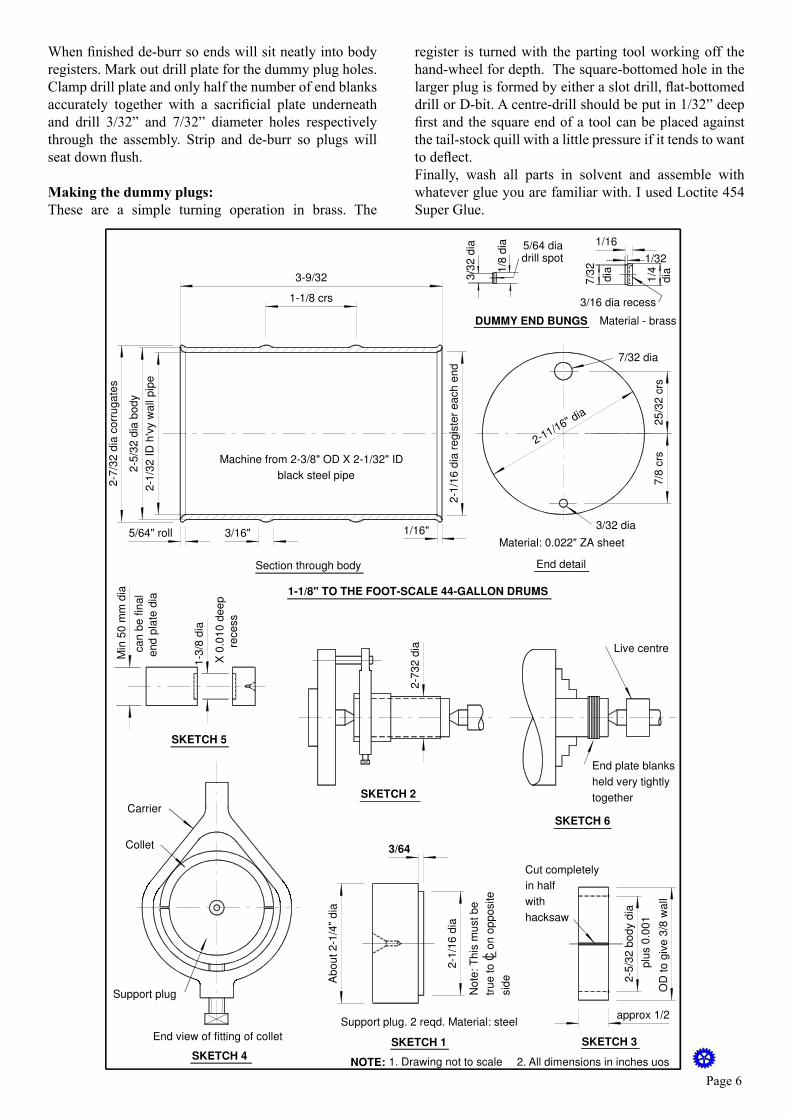
When finished de-burr so ends will sit neatly into body registers. Mark out drill plate for the dummy plug holes. Clamp drill plate and only half the number of end blanks accurately together with a sacrificial plate underneath and drill 3/32” and 7/32” diameter holes respectively through the assembly. Strip and de-burr so plugs will seat down flush.
Making the dummy plugs: These are a simple turning operation in brass. The
3/32 dia
7/32 dia
3-9/32
1-1/8 crs
2-5
/32
dia
bo
dy
2-7
/32
dia
co
rru
ga
tes
2-1
/32
ID
h'v
y w
all
pip
e
2-1
/16
dia
re
gis
ter
ea
ch
en
d
25
/32
crs
7/8
crs
2-11/16" dia
5/64" roll 3/16" 1/16"
1/16
1/32
7/3
2
1/4
diadia1
/8 d
ia
3/3
2 d
ia 5/64 dia drill spot
3/16 dia recess
SKETCH 4
Carrier
Collet
Support plug
End view of fitting of collet
Section through body
Machine from 2-3/8" OD X 2-1/32" ID
black steel pipe
End detail
Material: 0.022" ZA sheet
1-1/8" TO THE FOOT-SCALE 44-GALLON DRUMS
3/64
Ab
ou
t 2
-1/4
" d
ia
2-1
/16
dia
No
te: T
his
mu
st b
e
tru
e to
C o
n o
pp
osite
sid
e
Support plug. 2 reqd. Material: steel
SKETCH 1
2-5
/32
bo
dy d
ia
plu
s 0
.00
1
OD
to
giv
e 3
/8 w
all
Cut completely
in half
with
hacksaw
approx 1/2
SKETCH 3
2-7
32
dia
SKETCH 2
SKETCH 5
SKETCH 6
Live centre
End plate blanks
held very tightly
together
1-3
/8 d
ia
X 0
.01
0 d
ee
p
rece
ss
Min
50
mm
dia
ca
n b
e fin
al
en
d p
late
dia
DUMMY END BUNGS Material - brass
NOTE: All dimensions in inches uos 1. Drawing not to scale 2.
register is turned with the parting tool working off the hand-wheel for depth. The square-bottomed hole in the larger plug is formed by either a slot drill, flat-bottomed drill or D-bit. A centre-drill should be put in 1/32” deep first and the square end of a tool can be placed against the tail-stock quill with a little pressure if it tends to want to deflect. Finally, wash all parts in solvent and assemble with whatever glue you are familiar with. I used Loctite 454 Super Glue.
Page 6
Workshop hint. Neville RobertsonThere’s little worse for the spine and back muscles than spending the day at the lathe, mill or work bench in an uncomfortable stance; that is, bent forward at the hips or with back hunched. It also appears that most machine tool manufacturers contribute to the situation by providing support stands that set machines at too low a height. It may be okay for some but for anyone exceeding 175 cms (about 5’-9”) in height will find it a problem. The general rule is to stand up straight for maximum comfort.
So how to determine the correct height of your lathe, mill, other machine or workbench to suit your personal dimensions? The first step is to stand upright with one arm vertically at your side but with the forearm horizontal. Measure the distance from floor to the underside of your elbow. Call it dimension “A”. All references to it use floor level as the datum.
For a lathe, dimension “A” should be the height to the centreline of the compound slide (top slide) feed-screw.
Turret mills are inevitably a compromise because of large variations in table height. A rule of thumb that works reasonably well is that “A” should be the lowest average working height of the table or if it’s a mill-drill, the centreline of the table feed-screw. Slightly high is better than too low. Drill presses may be similarly dealt with.
Workbench: another compromise but one that works well enough is to pitch the top edge of your vise jaws to “A”. This may set the main working surface a bit low but given that the object you’re making or assembling effectively “adds” additional centimetres or inches makes for a happy medium. The fact that many of us now in our dotage (a.k.a. “golden years”) also find it easier to sit on a bar stool at the bench whilst undertaking certain operations contributes to our comfort.
Bandsaws can be awkward to elevate, but again, there’s nothing wrong with sitting whilst a cutting operation is underway.
Elevating machine tools can be achieved through the use of either hardwood packers if the item is relatively light or standard steel sections if it’s heavy. It’s well worth doing - a few inches can make the difference between aching muscles at the end of the day or feeling fit enough to take on the arduous task of an evening of television viewing.........!?
Cab ride in BB 18 ¼ N0. 1089.Ron GriffithsIn early January 1966, my Stanley Steam car friend, Milton Shaw, asked if I would like to go to Brisbane for a flying visit (from Benalla, Victoria), to see a sick Stanley. This car was owned by Ernie Cottee of drinks and jam fame and was not running very well according to its exasperated owner. This trip was ‘all expenses paid’ for both Milton and myself so we set off in Milton’s brand new Fiat 2300. This was a beautiful car easily capable of cruising at 80 mph so we made pretty good time.
When we arrived in Brisbane we booked into the Canberra Hotel and my room on the seventh floor overlooked Central Station. The lack of air conditioning in the hotel allowed the large window to be swung open which let in a delightful breeze: plus something else delightful. The sound of chime whistles and urgent exhausts from lots of sometimes green, sometimes blue steam locos hauling seven car suburban trains far below. This was exciting stuff for a Victorian boy where steam hauled trains were becoming very scarce.
While I was semi-delirious listening and watching all this steam action, Milton was phoning Ernie Cottee. Milton had a strange look on his face when he finished the phone call as he announced that Ernie would not allow me to see his workshop plus the ailing Stanley. I said “Good, that’ll give me more time to go down to Central and check out all these beaut little locos”. The appointment for Dr. Milton to make a house call on his sick patient was for ALL of the next day which gave me plenty of loco time.
Be impressed, Vico!
After breakfast the next morning, Milton asked what I was going to do all day. I said ‘have a guess’ What, ALL day came the reply? No worries, I’ll see if I can get a cab ride. You’ll be lucky he said: a cab ride on a suburban passenger train. Hmm, best of luck he said walking towards his much-loved Fiat.
In those days Brisbane was a very free and easy place with little in the way of enforced rules and regulations as regards train-spotters on Central station provided you bought a platform ticket. So, armed with a platform ticket, I walked hurriedly towards the action guided by the smell of hot oil and coal smoke. Is there a nicer smell? The time was about 8.30 am and the morning rush was still on. I was amazed at the amount of noise from all the carriage doors being slammed shut as the passengers alighted.
I watched the many trains coming and going, delighting in the condition of the engines. The paint work, rods and valve motion were very clean and the mechanical
Page 7
condition was very good. I was impressed by these sprightly little blue tank engines and bigger green Pacifics but more was to come!
Enter, No. 1089.As the morning rush-hour drew to a close, the number of trains in the station thinned out. This seemed to be a good time to try my luck at getting a cab ride and the next steam hauled train to come along (there was some diesels around) was hauled by a beautifully kept BB18¼. But wait - there was a big medallion on the boiler stating that this was the last steam loco to be made in Australia. This loco was obviously the shed pet and it was spotless. It would be quite an honour to have a cab ride in that loco so I thought “here goes” the driver can only say “no”.
Walking along the length of the engine and trying to look as impressed as possible (I really was) I ultimately came alongside the cab and was surprised to be eye-ball to eye-ball with the driver. In Victoria, the crew are a lot higher up in the big R class passenger engines and the difference in size was very noticeable.
I commented on the beautiful condition of this little Pacific to the driver, explaining that I was from Victoria where the engines were grimy and unloved and that I had a lot of R class cab rides and would it be possible to ride in this engine please. He said “a bloody Vico, eh; how much time have you got because we won’t be back here for a couple of hours”. I said “I’ve got all day”. With that he smiled and said the magic words “hop on”.
He told me where to stand, looked at his watch, looked back for the green flag from the guard, blew the lovely chime whistle and gave the regulator a big, quick tug then quickly pushed it back in to about 1/3 open. The way that little engine walked away with seven cars was very impressive and not only did it look a million dollars but it was very steam tight and the valve timing was perfect. One aspect of the valve timing was interesting and instructive. Under power there was no clanking from loose rods but as soon as the regulator was closed while drifting, there was clanking! Compression is necessary! We were heading north from Central, stopping all stations and to say that I was loving every second of it would be an understatement. The sure-footedness of the engine was very impressive as was the driver’s handling of her. The fireman was all smiles as well and he spent a lot of time on his seat between firings.
The Driver’s technique.The driver’s technique was the same at every start: looked at his watch, looked back for the green flag from the guard, blew the lovely chime whistle and gave the regulator a big, quick tug then quickly pushed it back in to about 1/3 open whereupon the engine would walk away in fine style.
Turning on the “Y”. We eventually coasted in to a station the name of which escapes me (probably Shorncliff) a bit ahead of time and the passengers alighted but nobody got on. The driver explained that this was the end of the line and the whole train would be turned “on that “Y” over there near the golf course”. When I asked where we were going now he said “Ipswich, do you want to come with us or do you want to get off at Central?” Have a guess what I said!?
Pinning her ears back.The driver explained that once we were out of the city and heading towards Ipswich the distance between stations was enough to pin her ears back. Well, pin her ears back he did! This lovely engine just wanted to gallop and I reckon we probably got to 80 kph at times which is quite respectable for 4’ 3”dia. (51”) drivers. The Americans used to reckon on a loco being able to cruise at ‘wheel diameter speed’ i.e., 51” wheels = 51 mph (or 80 kph), 80” wheels for 80 mph etc. so No. 1089 was doing just fine. The driver said these engines were very popular with the crews and I could see why. They were fast, sure-footed, rode well and steamed well.
One time I was watching the fireman going about his duties and I said “have you just turned the injector off”. He said with a smirk “no, I’ve just turned it on”. That engine had been working fairly hard for some miles and I was quite taken aback by his answer. I don’t think one injector had been on all the time as was the case with the VR R class Hudsons when working passenger trains. Topping-up with the second injector was sometimes necessary. By the time we arrived back at Central it was early afternoon. I said goodbye and many thanks to the crew who were masters of the engine which was master of its job. I learned that engines don’t have to be big to be impressive and that Walkers of Maryborough really knew how to make steam locos.
The sick Stanley.Milton walked into the Hotel lobby where I was waiting for him looking very annoyed and frustrated. He let forth a volley of unprintables when I asked if he’d cured the patient. The trouble was easily rectified once spotted. He said “it turns out that some *&^%%** scholar thought they could decrease steam consumption by replacing the 1” main steam pipe to the steam-chest with a bit of 3/8” copper pipe. ***&^%%$# idiots!” he cried out. The normal 20 hp Stanley engine is a double-acting twin high pressure unit, like a loco, of 4” bore x 5” stroke and a 3/8” copper pipe was not going to provide neck-snapping acceleration! He found the original pipe-work, plumbed it all in place and steamed her up. Verdict: patient healed.
We were back home again in five days after a very memorable trip.
Page 8
What I want in a man.Chris Hillyard
Spring wire supplier.Mike Ruska
Model Engineer Walt DisneySteve Malone
Chris Hillyard, from Works Co-ordinator to researcher reporting into what the fairer sex are looking for when choosing a partner. Members take note!
What I Want In a Man, Original List 1. Handsome 2. Charming 3. Financially successful 4. A caring listener 5. Witty 6. In good shape 7. Dresses with style 8. Appreciates finer things 9. Full of thoughtful surprises What I Want in a Man, Revised List (age 32) 1. Nice looking 2. Opens car doors, holds chairs 3. Has enough money for a nice dinner 4. Listens more than talks 5. Laughs at my jokes 6. Carries bags of groceries with ease 7. Owns at least one tie 8. Appreciates a good home-cooked meal 9. Remembers birthdays and anniversaries What I Want in a Man, Revised List (age 42) 1. Not too ugly 2. Doesn’t drive off until I’m in the car 3. Works steadily - splurges on dinner out occasionally 4. Nods head when I’m talking 5. Usually remembers punch lines of jokes 6. Is in good enough shape to rearrange the furniture 7. Wears a shirt that covers his stomach 8. Knows not to buy champagne with screw-top lids 9. Remembers to put the toilet seat down 10. Shaves most weekends
What I Want in a Man, Revised List (age 52) 1. Keeps hair in nose and ears trimmed 2. Doesn’t belch or scratch in public 3. Doesn’t borrow money too often 4. Doesn’t nod off to sleep when I’m venting 5. Doesn’t re-tell the same joke too many times 6. Is in good enough shape to get off the couch on weekends 7.Usually wears matching socks and fresh underwear 8. Appreciates a good TV dinner 9. Remembers your name on occasion 10. Shaves some weekends
What I Want in a Man, Revised List (age 62) 1. Doesn’t scare small children 2. Remembers where bathroom is 3. Doesn’t require much money for upkeep 4. Only snores lightly when asleep 5. Remembers why he’s laughing 6. Is in good enough shape to stand up by himself 7. Usually wears some clothes 8. Likes soft foods 9. Remembers where he left his teeth 10. Remembers that it’s the weekend What I Want in a Man, Revised List (age 72) 1. Breathing. 2. Doesn’t miss the toilet.
Parke Piano Strings and MaterialsPO Box 6103French’s ForestNSW 2086
Website: www.parkepianostrings.com.auEmail: [email protected]: (02) 9451 3500
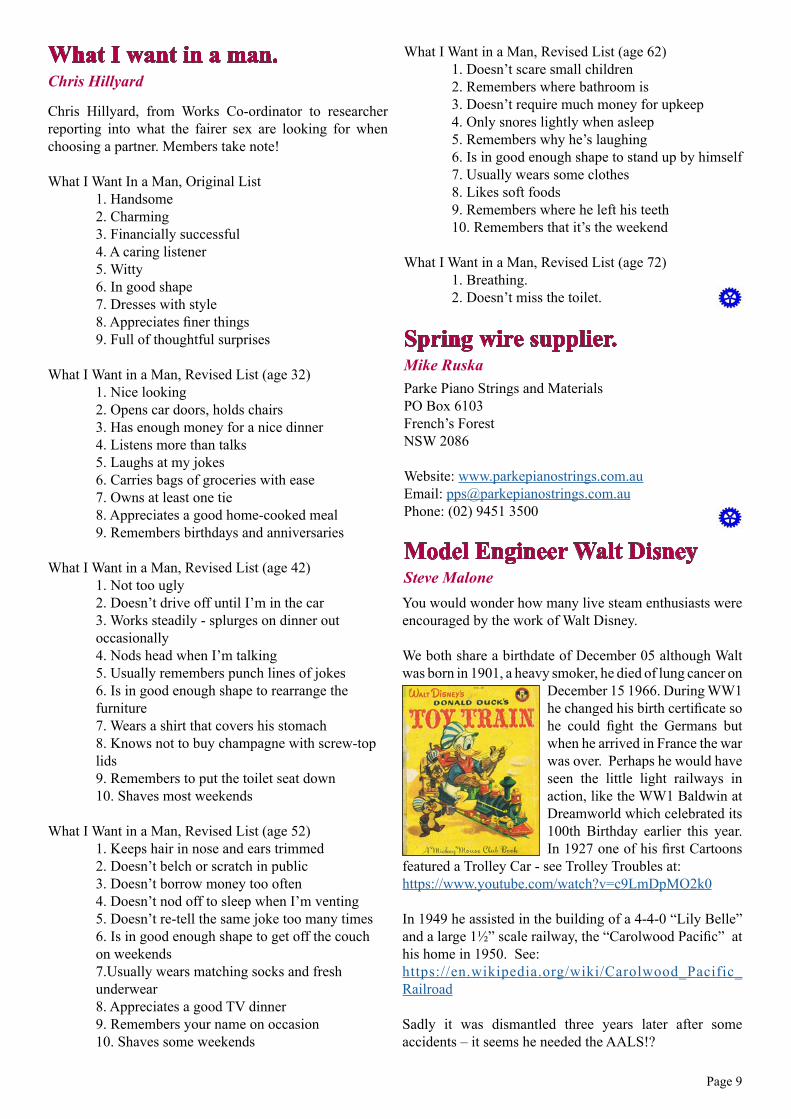
You would wonder how many live steam enthusiasts were encouraged by the work of Walt Disney.
We both share a birthdate of December 05 although Walt was born in 1901, a heavy smoker, he died of lung cancer on
December 15 1966. During WW1 he changed his birth certificate so he could fight the Germans but when he arrived in France the war was over. Perhaps he would have seen the little light railways in action, like the WW1 Baldwin at Dreamworld which celebrated its 100th Birthday earlier this year. In 1927 one of his first Cartoons
featured a Trolley Car - see Trolley Troubles at: https://www.youtube.com/watch?v=c9LmDpMO2k0
In 1949 he assisted in the building of a 4-4-0 “Lily Belle” and a large 1½” scale railway, the “Carolwood Pacific” at his home in 1950. See:https://en.wikipedia.org/wiki/Carolwood_Pacific_Railroad
Sadly it was dismantled three years later after some accidents – it seems he needed the AALS!?
Page 9
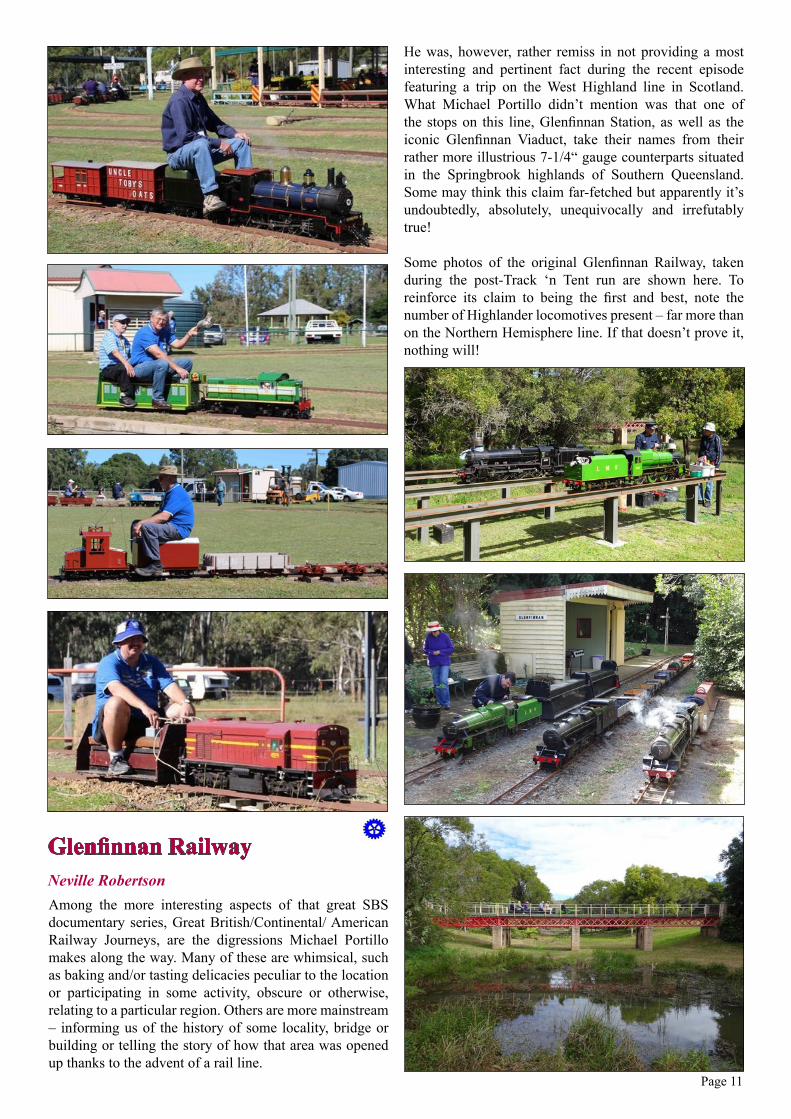
GRANDCHESTER ALL QLD SCALE MODEL WEEKEND29 April – 1 May 2017Garry Menzies
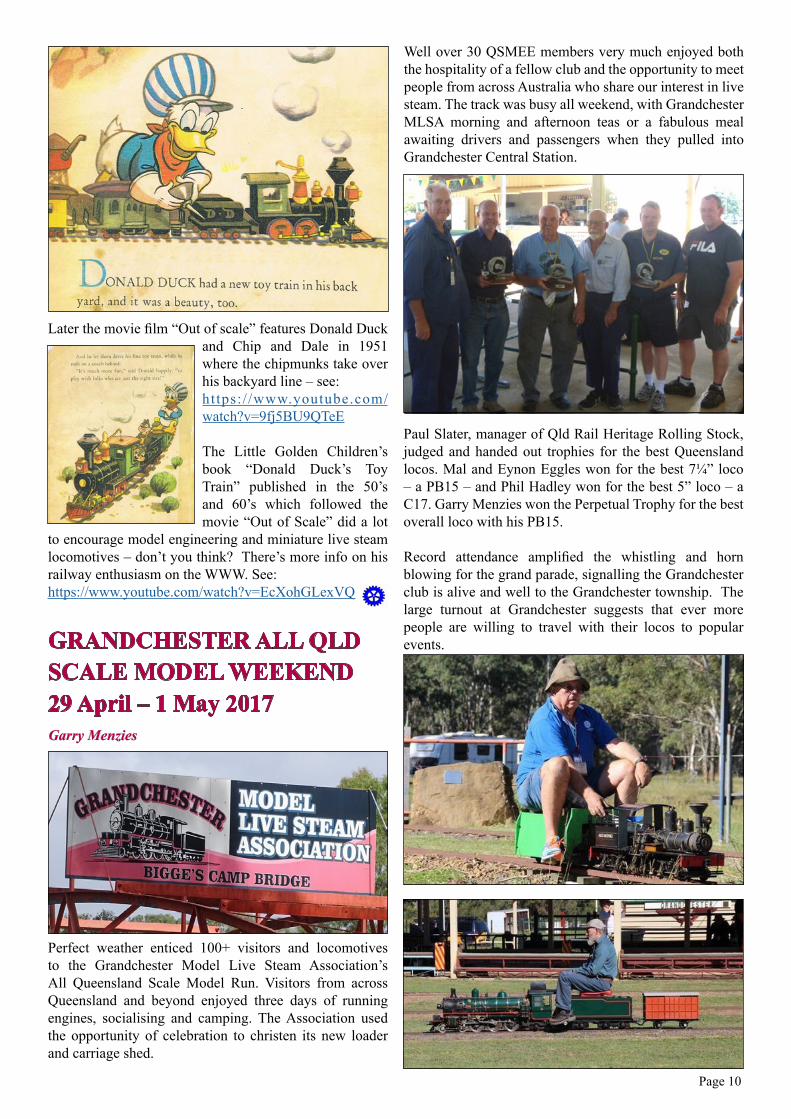
Later the movie film “Out of scale” features Donald Duck and Chip and Dale in 1951 where the chipmunks take over his backyard line – see: https:/ /www.youtube.com/watch?v=9fj5BU9QTeE
The Little Golden Children’s book “Donald Duck’s Toy Train” published in the 50’s and 60’s which followed the movie “Out of Scale” did a lot
to encourage model engineering and miniature live steam locomotives – don’t you think? There’s more info on his railway enthusiasm on the WWW. See:https://www.youtube.com/watch?v=EcXohGLexVQ
Paul Slater, manager of Qld Rail Heritage Rolling Stock, judged and handed out trophies for the best Queensland locos. Mal and Eynon Eggles won for the best 7¼” loco – a PB15 – and Phil Hadley won for the best 5” loco – a C17. Garry Menzies won the Perpetual Trophy for the best overall loco with his PB15.
Record attendance amplified the whistling and horn blowing for the grand parade, signalling the Grandchester club is alive and well to the Grandchester township. The large turnout at Grandchester suggests that ever more people are willing to travel with their locos to popular events.
Perfect weather enticed 100+ visitors and locomotives to the Grandchester Model Live Steam Association’s All Queensland Scale Model Run. Visitors from across Queensland and beyond enjoyed three days of running engines, socialising and camping. The Association used the opportunity of celebration to christen its new loader and carriage shed.
Well over 30 QSMEE members very much enjoyed both the hospitality of a fellow club and the opportunity to meet people from across Australia who share our interest in live steam. The track was busy all weekend, with Grandchester MLSA morning and afternoon teas or a fabulous meal awaiting drivers and passengers when they pulled into Grandchester Central Station.
Page 10
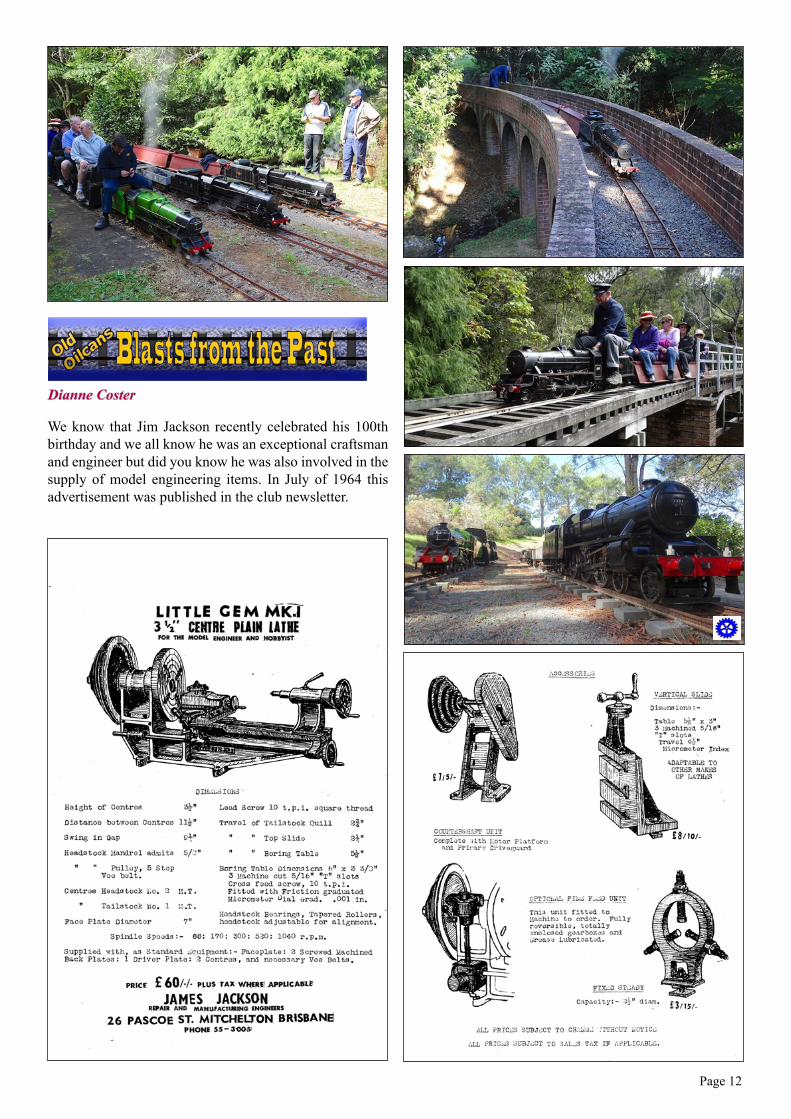
Glenfinnan RailwayNeville RobertsonAmong the more interesting aspects of that great SBS documentary series, Great British/Continental/ American Railway Journeys, are the digressions Michael Portillo makes along the way. Many of these are whimsical, such as baking and/or tasting delicacies peculiar to the location or participating in some activity, obscure or otherwise, relating to a particular region. Others are more mainstream – informing us of the history of some locality, bridge or building or telling the story of how that area was opened up thanks to the advent of a rail line.
He was, however, rather remiss in not providing a most interesting and pertinent fact during the recent episode featuring a trip on the West Highland line in Scotland. What Michael Portillo didn’t mention was that one of the stops on this line, Glenfinnan Station, as well as the iconic Glenfinnan Viaduct, take their names from their rather more illustrious 7-1/4“ gauge counterparts situated in the Springbrook highlands of Southern Queensland. Some may think this claim far-fetched but apparently it’s undoubtedly, absolutely, unequivocally and irrefutably true!
Some photos of the original Glenfinnan Railway, taken during the post-Track ‘n Tent run are shown here. To reinforce its claim to being the first and best, note the number of Highlander locomotives present – far more than on the Northern Hemisphere line. If that doesn’t prove it, nothing will!
Page 11
Page 12
Dianne Coster
We know that Jim Jackson recently celebrated his 100th birthday and we all know he was an exceptional craftsman and engineer but did you know he was also involved in the supply of model engineering items. In July of 1964 this advertisement was published in the club newsletter.
President: Don Bell 0418 726 301 V-President: Garry Menzies (07) 3378 7852 Secretary: Chris Hillyard (07) 3269 3239 Treasurer: Ian Crawford (07) 3889 9929
Boiler Inspectors: E. Evans, (07) 3800 4164 R. Jones, (07) 3349 9443 L. Dannenberg, (07) 5497 9405 G. Menzies, (07) 3378 7852
Committee: Terry Daley, Allan Dekker, Graham Larkin, Norm MacKenzie, John Ruggles.
Please address all correspondence to: The Secretary, QSMEE PO Box 7041 Brendale, Qld 4500
Email: [email protected] website: www.tracksandtrains.com/qsmee
Sunshine Coast Invitational Run, Nambour, Saturday 21st October
Club Christmas Tree, Sun 10th December
62nd AALS Convention, March 30 - April 02Bunbury WA.
Page 13
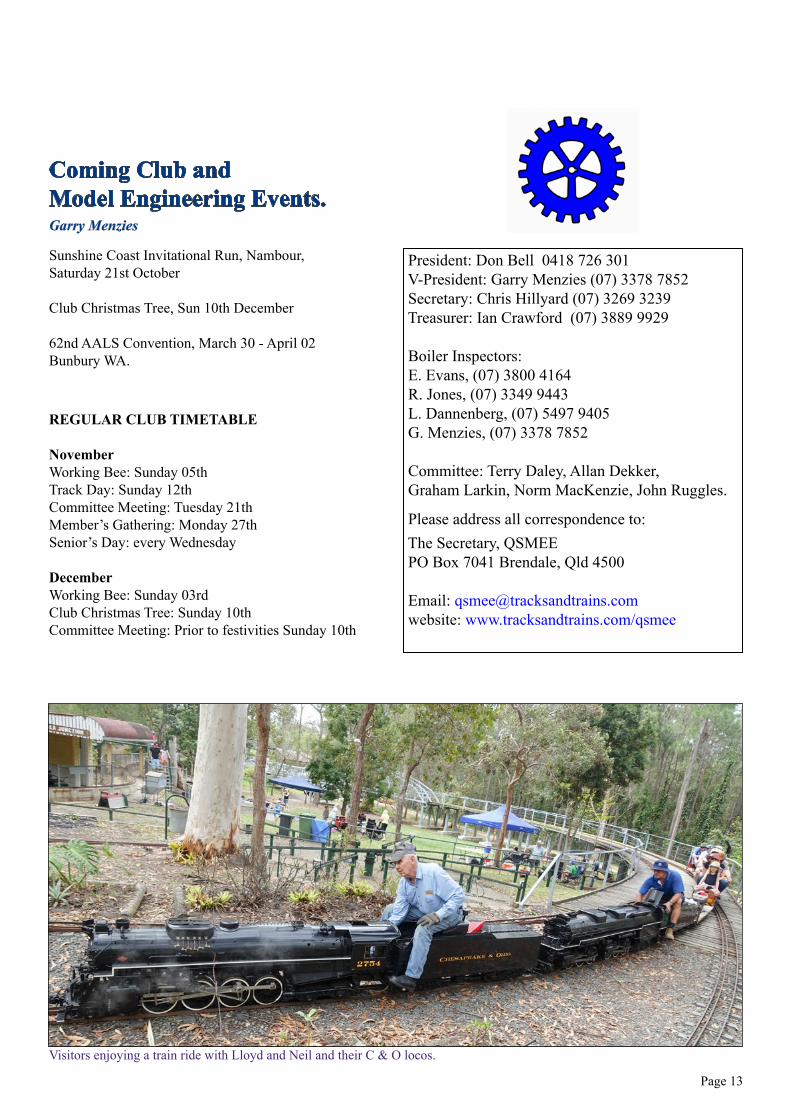
Visitors enjoying a train ride with Lloyd and Neil and their C & O locos.
Coming Club and Model Engineering Events.Garry Menzies
REGULAR CLUB TIMETABLE
NovemberWorking Bee: Sunday 05th Track Day: Sunday 12th Committee Meeting: Tuesday 21th Member’s Gathering: Monday 27th Senior’s Day: every Wednesday
DecemberWorking Bee: Sunday 03rd Club Christmas Tree: Sunday 10th Committee Meeting: Prior to festivities Sunday 10th