qt quick game programming 1 0
DESCRIPTION
Membuat game secara cepat dengan qtTRANSCRIPT

Crash course to
Qt Quick™ Game Programming

Qt Quick Game Programming © 2010 QUIt Coding
About this document
This tutorial has been written in co-operation between NOMOVOK and Quit Coding.
QUIt Coding is an official member of the Qt Ambassador Program. As ambassadors, we are committed to continue providing extraordinary user experience with Qt.
Thanks to Nokia/Qt people for delivering the best platform to build mobile software with!
For a feedback about this document, please contact [email protected]
Version: 1.0 - October 24, 2010
Copyright © 2010 QUIt Coding.
Nokia, Qt and their respective logos are trademarks of Nokia Corporation in Finland and/or other countries worldwide.
Cover images are public domain and courtesy of NASA. "Lunar Roving Vehicle" is from Apollo 17 mission and "Bootprint" from Apollo 11 mission.
This document is licensed under the Creative Commons Attribution-Share Alike 3.0 license. For more information, see http://creativecommons.org/licenses/by-sa/3.0/legalcode for the full terms of the license.
2

Qt Quick Game Programming © 2010 QUIt Coding
Table of Contents
Introduction..............................................................................................4
What is Qt Quick?...................................................................................4
Hello QML!.............................................................................................5
Separation between QML UI and the application logic...................................7
Implementing 5-in-a-row game................................................................9
Main UI ................................................................................................9
Main menu and controls.........................................................................12
Game board and animations...................................................................15
Game data structures............................................................................23
OpenGL usage and Fluid 3D....................................................................28
Summary.................................................................................................31
3

Qt Quick Game Programming © 2010 QUIt Coding
IntroductionThis tutorial is a crash course into Qt Quick development using the latest Qt 4.7 release. We'll first introduce briefly what Qt Quick is, and then dig into implementation details of a game called 5-in-a-row. The user interface of 5-in-a-row is written in QML, which is the declarative language behind Qt Quick, while the game logic is implemented with standard Qt C++.
Readers of this tutorial are expected to be already familiar with Qt. Detailed documentation about Qt Quick is also out of scope for this tutorial. Please refer to Qt Reference Documentation while proceeding to get more detailed information. It is the best friend of any serious Qt developer1
Full source code of 5-in-a-row game as well as a Debian package for N900 are available from http://quitcoding.com. For best learning experience, we recommend opening the sources with your favorite editor and following the code while reading this tutorial. In case you haven't already customized yourself with any specific editor / IDE, we warmly recommend using Qt Creator which integrates extremely well with Qt & QML development. Experimenting by doing small changes in the code and observing the outcome should help to get the essence of Qt Quick in no time.
After reading this tutorial, one should have gained a solid Qt Quick knowledge to continue the journey. So let's start!
What is Qt Quick?Qt Quick is the marketing name for a new declarative UI framework, which has been developed with multiple code names such as “Qt Declarative UI”, “Qt Kinetic” and “QML”. It provides tools for building highly dynamic and animated user interfaces in fraction of the time it would take to build the same UI using traditional imperative methods. It also helps designers and developers to co-operate more effectively as developers can concentrate on the application logic (C++ or JavaScript) providing necessary properties and signals/slots, and let the designers do their magic creating spectacular user interface for the application with QML.
1 Qt Reference Documentation - http://doc.qt.nokia.com/4.7/
4

Qt Quick Game Programming © 2010 QUIt Coding
So what does Qt Quick contain:
• New declarative language for defining user interfaces called QML. Despite the fact that the name resembles XML, QML is not XML-based but instead uses a JSON (JavaScript Object Notation) syntax with some added sugar. Compared to XML, it is faster for machines to parse and easier for humans to read & write (less typing!). Thanks to Web 2.0, JSON is widely used for serializing and transmitting structured data over a network connection.
• QtDeclarative module, which implements an interface between the QML language and the elements available to it. This module also provides a C++ API that can be used to load and interact with QML files from within Qt applications. QtDeclarative is implemented using QGraphicsView framework and QML components are QGraphicsObjects.
• Integration with the Qt Creator IDE to help writing QML as well as full visual drag-and-drop editor to build user interfaces using QML elements, creating application layouts with states, animations for transitions between states etc. Visual designer for QML is under work and not fully usable yet, but it's getting there and even without it, using Qt Creator accelerates writing QML thanks to syntax highlighting, integrated qmlviewer usage etc.
Qt Quick is designed for custom, animated user interfaces which have become ever so common in mobile phones, set-top boxes, netbooks and other modern consumer devices. Current QtDeclarative module provided with Qt 4.7 contains a wide set of different QML elements (Rectangle, Image, Flickable etc.) but not (at least yet) any higher level widgets (like button, menus etc.).
Fortunately building own user interfaces and widgets with QML is very fast and straightforward so enough talking and let's start coding!
Hello QML!To get an understanding of what QML is like, we'll start by implementing a very simple QML application.
import QtQuick 1.0
Rectangle { id: panel width: 400 height: 200 color: "#D0D0D0"
5

Qt Quick Game Programming © 2010 QUIt Coding
Text { id: helloText text: "Hello QML!" color: "red" font.pointSize: 24 anchors.centerIn: parent } }
As you see, syntax is very similar to JSON and contains mostly property: value pairs. Let's now go through it in pieces to understand the basics.
import QtQuick 1.0
This line imports the built-in QML types (Rectangle, Image, ...) that come with Qt and all the QML files must start with this line. In Qt 4.7.0 the correct line to use was “import Qt 4.7”, but since Qt 4.7.1 “QtQuick” should be used instead.
Specifying the version number is important for compatibility. It guarantees that the behavior of the code won't change as QML language will be extended in the future with new elements and features. Any features from newer versions will not be used, even if available. Version number should also be used when importing own custom components. We'll tell more about this in the following chapters.
Rectangle { id: panel width: 400 height: 200 color: "#D0D0D0"
This creates a Rectangle of width 400 pixels and height 200 pixels. We give the rectangle an id “panel” to be able to reference it from other places. Color used to fill the rectangle is RGB "#D0D0D0" (light gray).
Text { id: helloText text: "Hello QML!" color: "red" font.pointSize: 24 anchors.centerIn: parent }
Then we create a new Text element inside our rectangle. It will be initialized with red “Hello QML!” text with font size of 24pt, and is anchored to the center of the parent rectangle item. Anchoring items relatively to each others is one of the
6

Qt Quick Game Programming © 2010 QUIt Coding
powerful features of QML and makes layouting easy and intuitive.
To run this example, save it as “hello.qml” and use qmlviewer binary provided in the Qt SDK:
kaj@T61KG:~/qml_hello$ qmlviewer hello.qml
What you should get is a red text in the center of a light gray rectangle, something similar to this:
Of course this only grasped the surface of what QML can do but we'll get deeper soon. All you need to know right now is that writing QML is easy and fun!
Separation between QML UI and the application logicUser interface is just the visual part of the application and real applications need also some functionality underneath it. QML steers quite naturally into cleaner separation of UI and the application logic so using it enhances the software architecture.
There are mainly three ways to implement the application logic:
• JavaScript: All QML applications use JavaScript (ECMAScript) by nature, and it is also possible to write the whole application logic with it. This suits especially well for simple applications that don't require system services, as JavaScript has limited access outside its sandbox. One pro is also that applications using plain JavaScript are totally platform independent and don't need to be compiled. It is even possible to run these applications through network with qmlviewer just like running web applications with a browser.
• C++ application: Second option is building the application logic with Qt
7

Qt Quick Game Programming © 2010 QUIt Coding
C++, creating QDeclarativeView, and loading QML UI into it. QML and C++ sides will communicate with each other through Qt Signals and Slots as well as Qt Properties. This is the most powerful option where QML elements (QDeclarativeItems) can be accessed from C++. But the power comes with a cost of dependency into QGraphicsView architecture and a risk of mixing user interface with the application logic. As always, good architectural decisions will keep things clean and mean.
• C++ plugins: Third option is to provide the application logic as plugin libraries built by implementing own QDeclarativeExtensionPlugin based classes. This method forces cleaner separation of UI and logic, while applications are still launched with 'qmlviewer' binary provided in the Qt SDK. The plugins are taken into use with “import com.quitcoding.MyPlugin 1.0” kind of line in the beginning of QML files.
Which one of these to use depends on the needs and it's even possible to mix and match different options. For example one popular approach is to use JavaScript for implementing the parts of the application logic which are coupled with the QML UI, and then use C++ plugins for features that need to access system services.
In the next chapter we use the second option to implement our game logic. This decision is made mainly for educational purposes and there are no technical restrictions that would prevent us from using any of the before mentioned techniques.
8

Qt Quick Game Programming © 2010 QUIt Coding
Implementing 5-in-a-row gameThe application we implement is a 5-in-a-row game with user interface written in QML. Although QML is not specifically developed for games, it suits well for our needs to create an animated, nice looking game. Below is a screenshot of the end result.
Screenshot of 5-in-a-row in the game mode.
In the following subchapters we go though in detail the most important parts of the implementation of this game, starting from the QML UI and switching then to the C++ application logic. We demonstrate a big variety of QML components and how they are used as well as layouting in QML, creating animations, communicating between QML and C++ with signals/slots and properties, and much more.
As mentioned earlier, the source code of the game is freely available from http://quitcoding.com and we recommend to follow the code while proceeding with this tutorial for best learning experience.
Main UI The main QML file is called MainView.qml. It is the one which gets opened into our view and handles loading of all other components. For the ones familiar with web development, a corresponding analogy would be loading of “index.html” or a
9

Qt Quick Game Programming © 2010 QUIt Coding
similar main page.
Let's start by going through the important parts of MainView.qml first.
import QtQuick 1.0
Item { width: 800 height: 480
// *** Game View *** GameView { id: gameView // Gameview is disabled when gameViewHider is shown enabled: gameViewHider.state == "hide" }
First we import all the QtQuick 1.0 QML elements and create our root Item. Items are the most basic QML components without any visible appearance. Items have a position and dimensions, and thus they are often used to group and layout visual components.
We aim to make our game scalable into different screen sizes so width and height here are just the default values which suit Nokia N900. Later when we create a QDeclarativeView, we will set it to automatically resize the root item to its dimensions.
GameView is our first own element and we enable it to receive mouse events only when the gameViewHider component is not shown.
// *** Game View Hider *** Rectangle { id: gameViewHider anchors.fill: parent color: "black" opacity: 0.7
The following rectangle is this gameViewHider which state we just bound to the gameView's enabled property. Its purpose is to darken the screen when a menu is shown. That's why it is black with partial opacity in the default state. States and transitions are important parts of QML and the gameViewHider has those defined as will be seen next.
states: [ State {
10

Qt Quick Game Programming © 2010 QUIt Coding
name: "hide" when: menuPanel.state == "hide" PropertyChanges { target: gameViewHider opacity: 0 } } ]
transitions: Transition { NumberAnimation { properties: "opacity" duration: 400 } } }
First we create a state called “hide” and define that in this state gameViewHider's opacity is changed to 0, meaning fully transparent. With the “when” property, the state is synchronized to be on when the menuPanel gets hidden. So when the menuPanel is hidden, also the gameViewHider is hidden and thus the gameView is enabled.
We could implement a second state for “show” but it is not necessary as all items already have a default empty state (“”) which means “state of the item in the beginning, when no other state is on”. Based on this information, when we want to show the gameViewHider we can request it to change into state “” and the opacity changes back to 0.7 which was defined earlier to be the default opacity. This will now happen automatically when the menuPanel's state is not “hide”.
The transitions provide animations when switching between states. Without defining this transition, the opacity change would be instant, but we of course want it to fade in and out smoothly. The property we want to animate is naturally “opacity” and we define the transition to take place in 400 milliseconds.
// *** Main Menu panel *** MenuPanel { id: menuPanel }}
The order of the elements in a QML file has importance as the later ones will be drawn on top of the earlier ones. This is why we define the gameViewHider after the gameView and only after those, our main game menu MenuPanel, as it needs to be drawn on top of the other elements.
11

Qt Quick Game Programming © 2010 QUIt Coding
All visible QML components inherit the Item component and it's properties, including “z” which sets the stacking order of the item. This property can be used to stack items arbitrarily regardless of the order they are declared in. However, as we have declared the items in the order we want them to be drawn, we don't have to set the “z” properties.
Main menu and controlsSo let's jump then to look into the implementation of the MenuPanel which is presented in the screenshot below (Notice also the gameViewHider in action).
The implementation starts from a file called MenuPanel.qml as QML automatically gives all *.qml files within the same directory the visibility to be included into your application. Just remember to name all QML files starting with a capital letter and use them without the .qml suffix, just like we did with the MenuPanel in MainView.qml.
import QtQuick 1.0
Item { id: menuPanel ... property bool fluid3D: switch3D.on
Item {
12

Qt Quick Game Programming © 2010 QUIt Coding
id: minimizeButton width: 80; height: 80 anchors.top: parent.top anchors.left: parent.left Image { source: "images/minimize.png" anchors.centerIn: parent } MouseArea { anchors.fill: parent onClicked: { mainWidget.minimizeWindow(); } } }
In the MenuPanel, we declare our own boolean type property “fluid3D”, which will be explained later. The first item in the MenuPanel is referred as minimizeButton. We could have created a separate component file for this kind of button but as we only have minimizeButton and exitButton of the similar type, we decided this time not to do so.
The anchoring lines here are in fact unnecessary as the parent's top-left corner is the default anchoring position for an item. They are just shown here for clarity.
We declare an image into the center of the item and create a MouseArea to listen for click events inside the whole button area. Whenever the button is clicked, we call the minimizeWindow() slot of the mainWidget C++ class, which we will implement later and export to be visible in the QML context.
We can skip the details of the exitButton implementation as it is almost identical to the minimizeButton.
Frame { id: menuPanelFrame width: 540 height: 370 anchors.centerIn: parent
Image { id: gameLogo ... }
Row { ...
13
Qt Quick Game Programming © 2010 QUIt Coding
Frame { id: aboutArea ... }
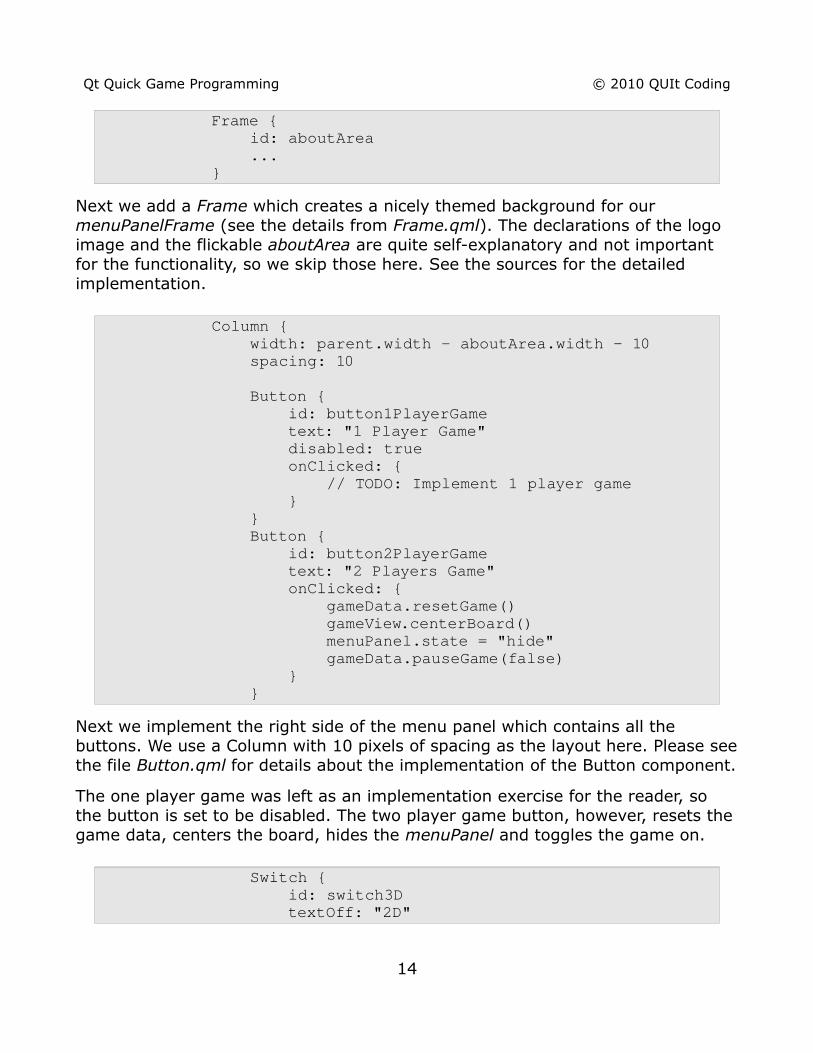
Next we add a Frame which creates a nicely themed background for our menuPanelFrame (see the details from Frame.qml). The declarations of the logo image and the flickable aboutArea are quite self-explanatory and not important for the functionality, so we skip those here. See the sources for the detailed implementation.
Column { width: parent.width aboutArea.width – 10 spacing: 10
Button { id: button1PlayerGame text: "1 Player Game" disabled: true onClicked: { // TODO: Implement 1 player game } } Button { id: button2PlayerGame text: "2 Players Game" onClicked: { gameData.resetGame() gameView.centerBoard() menuPanel.state = "hide" gameData.pauseGame(false) } }
Next we implement the right side of the menu panel which contains all the buttons. We use a Column with 10 pixels of spacing as the layout here. Please see the file Button.qml for details about the implementation of the Button component.
The one player game was left as an implementation exercise for the reader, so the button is set to be disabled. The two player game button, however, resets the game data, centers the board, hides the menuPanel and toggles the game on.
Switch { id: switch3D textOff: "2D"
14

Qt Quick Game Programming © 2010 QUIt Coding
textOn: "3D" } Button { id: buttonContinue text: "Continue Game" disabled: { if (!gameData.gameOn) return true else return false } onClicked: { menuPanel.state = "hide" gameData.pauseGame(false) } } } }
Similarly to the Button, the Switch is also our own QML component, implemented in Switch.qml file. The current state of this switch is connected to fluid3D property that we declare in the beginning of the file.
The continue button is made to be disabled when the game is not running. When clicked, it will behave similarly to game starting button except that it will not reset the game data or scroll board to the center.
The MenuPanel has also a “hide” state with a transition, where it is moved up, away from the screen, while simultaneously fading it to transparent. The implementation of this is similar to the one in the gameViewHider so we can bravely move ahead and start looking at the secrets of the game board.
Game board and animationsBelow is a screenshot of an ongoing game after a couple of moves and with the menuPanel hidden.
15

Qt Quick Game Programming © 2010 QUIt Coding
Screenshot of the whole GameView while playing.
What you see here is the board with tiles and a control panel on right, showing the game status and controls. We can start going through the code from GameView.qml which collects all these components together.
import QtQuick 1.0
Item { id: gameView anchors.fill: parent ...
// *** Background image *** Image { id: backgroundImage source: "images/background.jpg" x: gameView.width/8.0 – boardFlickable.contentX/4.0 y: gameView.height/8.0 – boardFlickable.contentY/4.0 }
The first element in the gameView is the background image with so called “parallax scrolling”. This means that during scrolling, the background moves into the same direction as the foreground but not as much. This creates a cool feeling of depth and has given eye candy to computer games from the very early days, so of course we want to do it with QML as well. We achieve this effect by binding the x and y properties of the background image to fractions of the boardFlickable's contentX and contentY properties.
16

Qt Quick Game Programming © 2010 QUIt Coding
// *** Board *** Flickable { id: boardFlickable anchors.fill: parent contentWidth: boardGrid.width + \ controlPanel.width + 40 + 10 contentHeight: boardGrid.height + 40 maximumFlickVelocity: 500 flickDeceleration: 1000
Next we start the implementation of the board element. Flickable is part of the stock QML elements, providing a view which takes in all sorts of QML content and makes it scrollable (and flickable) horizontally and/or vertically. We specify the content size to match the boardGrid size with suitable margins and slow down the flicking animations with the maximumFlickVelocity and the flickDeceleration properties since playing the 5-in-a-row game doesn't require moving from one board side to another that often.
Grid { id: boardGrid columns: 19 spacing: 2 x: 20 y: 20
Repeater { model: gameData.tiles Tile { } } } } }
Next comes the actual content of our Flickable: the boardGrid, which contains the board tiles. The Grid component automatically wraps items into 19 rows when we define the number of columns to be 19 and fill it with 19x19 = 361 tiles. The Repeater QML component multiplies its content item as many times as model property defines. Here the model comes from our C++ GameData class's tiles() property, which returns a QDeclarativeListProperty<Tile> entity.
In the screenshot below, you see part of our flickable grid filled with tiles.
17

Qt Quick Game Programming © 2010 QUIt Coding
Tiles in different states
Before going further with the GameView.qml, let's check what Tile.qml, which we just used for each board tile, contains.
import QtQuick 1.0
Item { id: tile width: 80; height: 80
// Tile background rectangle Image { source: "images/tile_background.png" opacity: { if (modelData.highlighted) return 1.0 else return 0.6 }
Each Tile rectangle in the grid is 80x80 pixels. That should be large enough to hit with a finger in our target devices but at the same time small enough to be able to fit adequate amount of tiles on the screen to keep the game playable. The Tile's background image has full opacity when it is highlighted (which means it is the most recently selected tile) and 60% opacity when not, to reveal our beautiful background image behind the board.
Behavior on opacity { enabled: gameData.moves != 0 NumberAnimation {
18

Qt Quick Game Programming © 2010 QUIt Coding
properties:"opacity" duration: 500 } } }
We set a behavior on opacity to get it changing smoothly. The syntax of QML behaviors is “Behavior on <property> { [animations] }” which can be translated to English as “Whenever the <property> changes, instead of changing it directly, use the [animations]”. Behaviors are used to specify a default animation for a property change and here we use it to animate opacity. Behaviors have an enabled property and here we set it to be starting from the first move. So when cleaning the whole board in the beginning of a new game, the tiles disappear instantly.
// Tile Button Image { anchors.centerIn: parent source: { if (modelData.hasButton1) "images/tile_button1.png" else if (modelData.hasButton2) "images/tile_button2.png" else "" } opacity: modelData.hasButton1 || modelData.hasButton2 Behavior on opacity { enabled: gameData.moves != 0 NumberAnimation { properties: "opacity" duration: 1500 } } }
Next we create the button into the tile. The image is different depending on which player has added it into the tile. Setting the opacity like this makes it visible only when the tile has been selected, and behavior animates the opacity change just like with the background but with a longer duration.
MouseArea { anchors.fill: parent enabled: !modelData.hasButton1 && !modelData.hasButton2 onClicked: {
19

Qt Quick Game Programming © 2010 QUIt Coding
explosion.explode() gameData.flip(index) } } Explosion { id: explosion }}
Tile needs to take in mouse/touch input so we add a MouseArea which fills the whole tile area. We enable the area to receive mouse events only when the tile doesn't already contain a button. When the tile is clicked, explosion animation is started and flip() slot implemented in the GameData C++ class is called with the index of the tile. This index property comes automatically from the Repeater element of the GameView, and is the number of the tile, starting from 0. So something between 0 and the number of elements inside the Repeater model minus one. In this case the maximum index is 19*19 – 1 = 360. Speaking of the GameView, we have now seen the whole Tile and can return to look at how the GameView ends.
// *** Animation to center the board *** ParallelAnimation { id: centeringAnimation NumberAnimation { target: boardFlickable property: "contentX" to: boardFlickable.contentWidth / 2 boardFlickable.width / 2 duration: 1000 easing.type: Easing.InOutQuad }
NumberAnimation { target: boardFlickable property: "contentY" to: boardFlickable.contentHeight / 2 boardFlickable.height / 2 duration: 1000 easing.type: Easing.InOutQuad } }
Next in GameView we have an animation for moving the view into center of the board when the game begins. This is implemented with a ParallelAnimation, an animation which can group other animations inside it and run them in parallel.
20

Qt Quick Game Programming © 2010 QUIt Coding
Inside the ParallelAnimation, there are two NumberAnimations that operate on the contentX and contentY properties of the boardFlickable, and animate them to the center location in 1000ms.
There are plenty of more animation elements in QML which can be mixed to get quite complex animations achieved like SequentialAnimation, SpringAnimation, AnchorAnimation etc. Please consult Qt Quick reference documentation for details and usage examples of these.
// *** Control panel *** ControlPanel { id: controlPanel anchors.right: boardFlickable.right anchors.rightMargin: 10 }}
The last element in the GameView is the ControlPanel, which is shown in the right side of the board. The screenshot below shows the ControlPanel in three different states from left to right respectively: When the game has just started and the Undo button is disabled, when the player 2, who sits on the opposite side of the device, has the turn and when the game ended to the victory of the player 1.
Control panel in three different states
Sources of ControlPanel.qml are rather long so only going through here a few of the most interesting pieces.
21

Qt Quick Game Programming © 2010 QUIt Coding
Button { id: buttonUndo … text: "Undo" opacity: gameData.gameOn disabled: !gameData.moves onClicked: { gameData.undoTile() } }
The ControlPanel contains two button widgets which are implemented in Button.qml. The Undo button is specified to be visible only when the game is on, so that it gives room for the winner notification when the game ends. It is disabled when no moves have been made and therefore performing undo is not possible. When the button is clicked, the undoTile() slot of the GameData is called.
states: State { name: "Turned" when: !gameData.player1Turn PropertyChanges { target: rotablePanel rotation: 180 } }
transitions: Transition { NumberAnimation { properties: "rotation" easing.type: Easing.OutBack duration: 800 } }
Another notable code block is the one above, which defines the secondary state for top panels. When the player 2 has the turn, panels are rotated upside-down as the idea is to play this game next to the opponent while keeping the device still in between. This way the control panel information is always faced towards the player whose turn it is, while keeping the device owner in control to move into the main menu. We define a NumberAnimation for the rotation with "OutBack" easing type, which gives a nice bouncy effect for the animation. There are plenty of pre-defined animation easing curves to select from. Please consult QML documentation for all of them.
22

Qt Quick Game Programming © 2010 QUIt Coding
We have now gone through the main QML UI parts of the game and can concentrate next into the game data and the logic parts.
Game data structuresThe game logic is implemented with C++ by implementing our own executable game binary (see the other possibilities from earlier chapter). Our game is quite simple so implementing the logic with JavaScript would also be a relatively simple task. C++ was selected this time to demonstrate how it's done and to get a better integration with our platforms.
We start from main.cpp which is very straightforward.
#include <QApplication>#include "mainwidget.h"
int main(int argc, char *argv[]){ QApplication app(argc, argv); app.setStartDragDistance(30); MainWidget mainWidget; mainWidget.show(); return app.exec();}
First we create an instance of MainWidget and show it as our main view. Only interesting line here is the setStartDragDistance which is used by flickable QML items (Flickable, ListView etc.) to define the amount of pixels needed to start movement. The correct amount is device specific and important for usability as clicking with a finger causes always some movement and if the dragging starts too easily, it is hard to perform a click.
Let's start looking into MainWidget class from its header file.
class MainWidget : public QDeclarativeView{ Q_OBJECT
public: MainWidget(QWidget *parent=0); ~MainWidget();public slots: void minimizeWindow(); void exitApplication();
23

Qt Quick Game Programming © 2010 QUIt Coding
private: QDeclarativeContext *m_context; GameData m_gameData;};
Our MainWidget class is derived from QDeclarativeView, the canvas designed to show and run QML content inside it. All public slots are callable from the QML side, and used to control the main application functionalities. The GameData class contains game specific features and is also exposed to QML through QDeclarativeContext. Next we'll go through the implementation.
QString filename(contentPath + "MainView.qml");
MainWidget::MainWidget(QWidget *parent) : QDeclarativeView(parent){ // Switch to fullscreen in device#if defined(Q_OS_SYMBIAN) || defined(Q_WS_MAEMO_5) setWindowState(Qt::WindowFullScreen);#endif
setResizeMode(QDeclarativeView::SizeRootObjectToView);
The constructor of the MainWidget starts by setting the window into fullscreen mode in Maemo and Symbian devices. On desktop platforms we keep the application windowed. Then we want to set the view into QDeclarativeView::SizeRootObjectToView mode, which basically means that our QML root object (MainView.qml) will be resized based on the MainWidget's size and thus will adjust itself to suit our device screen size or the window size. This can be tested by resizing the game window and seeing how we have created an UI that scales into different resolutions.
// Register Tile to be available in QML qmlRegisterType<Tile>("gameCore", 1, 0, "Tile");
// Setup context m_context = rootContext(); m_context>setContextProperty("mainWidget", this); m_context>setContextProperty("gameData", &m_gameData); // Open root QML file setSource(QUrl(filename));}
Next we'll register the Tile class to be visible in QML so that our tiles can access
24

Qt Quick Game Programming © 2010 QUIt Coding
their data. If you look back into Tile.qml, the modelData is available thanks to this registration. To add also MainWidget (as mainWidget) and GameData (as gameData) classes available into QML side, we take the root context of the view and register these instances using the setContextProperty() method. The ownership of these object instances remain in the C++ side so we can access the data from QML easily through properties and by calling the public slots but the memory management of the data continues to be handled in the C++ side.
QDeclarativeView's setSource(url) method loads the QML into the view and we use it here to open our MainView.qml file. The reason for the parameter to be of type QUrl instead of QString is that it is not limited into local files but instead can take any url and load the QML also from network automatically. This network transparency is yet another nice feature which is supported throughout QML.
In case you are looking at the full sources of MainWidget, you'll next see the implementation of minimizeWindow() and exitApplication() slots. These are very straightforward so we can skip them and move to bigger GameData class already.
As with the earlier MainWidget, let's start GameData also from its header.
class GameData : public QObject{ Q_OBJECT
public: GameData(QObject *parent=0); ~GameData();
Q_PROPERTY(int moves READ moves WRITE setMoves NOTIFY movesChanged); int moves() const {return m_moves;} void setMoves(int moves) {if(moves==m_moves) return; m_moves = moves; emit movesChanged();}
GameData contains several Qt properties which are used to read and write the game model variables. Properties work very effectively between QML and C++ sides. To declare a property, the Q_PROPERTY() macro is used.
The first property we implement is for the amount of moves made in the game so far. The getter method to read the value is moves(), the setter method is setMoves(int moves) and the notification signal which is emitted whenever the value is changed is movesChanged(). Without this last NOTIFY signal the information of property changes does not go through in QML, so it must not be forgotten. Another important thing to remember when implementing the properties is that setter function should always check whether the value really
25

Qt Quick Game Programming © 2010 QUIt Coding
changes and only emit the signal if it does, to prevent unnecessary property changing chains from triggering.
Many of the properties in our game are very similar, but there is one which is using a QML specific feature we have not yet seen.
... Q_PROPERTY(QDeclarativeListProperty<Tile> tiles READ tiles CONSTANT); QDeclarativeListProperty<Tile> tiles(){ return QDeclarativeListProperty<Tile>(this, m_tiles);}
The QDeclarativeListProperty class allows applications to expose list-like properties to QML and we use it here to expose a QList containing all the game tiles. Using QLists like this with QML has limitations currently, mostly due to the memory management and notifying changes in the list. But as our list of tiles is static, we can use CONSTANT attribute which indicates that the property value does not change. Constant properties cannot have a WRITE method or a NOTIFY signal.
public slots: void resetGame(); void pauseGame(bool state); void flip(int index); void undoTile(); void updateTime();signals: void movesChanged(); void gameTimeChanged(); void player1TurnChanged(); void gameOnChanged();
Next in the GameData class are the public slots which are invokable from the QML, and the changed signals of all our properties. The slots are not able to return a value. In cases where this would be needed, use instead a public method with the Q_INVOKABLE macro.
private: Tile *tile(int index) const { return (index >= 0 && index < m_tiles.count()) ? m_tiles.at(index) : 0;} bool checkWin(int index, int dx, int dy, QList<Tile *> &winningTiles);
QList<Tile *> m_tiles;
26

Qt Quick Game Programming © 2010 QUIt Coding
QStack<Tile *> m_selectedTiles; bool m_gameOn; bool m_player1Turn; int m_moves; int m_gameTimeSeconds; QTime m_gameTime; QTimer *m_gameTimer; QString m_time;};
In the private section we have two helper methods. First one returns the pointer of a tile, based on its index in the QList (the tile grid). This wrapper ensures that the index is valid. Second helper method checks if there are 5 same tiles in a row and the player has won.
The private variables contain a list of all tiles (m_tiles), a stack of the selected tiles for undo (m_selectedTiles), the state of the game (m_gameOn) and few other variables which usage is quite easy to understand.
From the GameData implementation we can pick the flip() slot which is called whenever a user clicks a tile in the board to select it.
void GameData::flip(int index){ if (!m_gameOn) return;
Tile *t = tile(index); if (!t || t>hasButton1() || t>hasButton2()) return;
First we check that the game is on and get the instance of the tile. To continue, the tile must not be NULL and not be already selected.
setMoves(m_moves+1); if (player1Turn()) { t>setHasButton1(true); } else { t>setHasButton2(true); }
Now we have progressed into a state where the amount of movements can be increased. Instead of incrementing m_moves variable directly, we use setMoves method which handles emitting the change also to the QML side. Then we set the correct button visible, depending on whose turn it was.
27

Qt Quick Game Programming © 2010 QUIt Coding
// Check for winning QList<Tile *> winningTiles; if (checkWin(index, 1, 0, winningTiles) || checkWin(index, 0, 1, winningTiles) || checkWin(index, 1, 1, winningTiles) || checkWin(index, 1, 1, winningTiles)) {
// Player whose turn it was won for(int i=0 ; i<winningTiles.count() ; ++i) { winningTiles.at(i)>setHighlighted(true); } setGameOn(false); return; }
At this state we check if the new tile caused the current player to win. Algorithm to assure this is implemented in the checkWin() method. In case this happened, the tiles which form the winning row are collected into winningTiles and highlighted in the for loop before setting the game stopped.
// Set only last tile highlighted if (!m_selectedTiles.empty()) m_selectedTiles.last()>setHighlighted(false); t>setHighlighted(true);
// Add tile into selected list, for undo m_selectedTiles << t;
setPlayer1Turn(!player1Turn());}
If the game continues, we'll remove the highlight from the previously selected tile using the m_selectedTiles stack, highlight this newly selected tile and add it on the top of m_selectedTiles. The last operation in the flip() method is to change the turn.
There are more code in the game logic on the C++ side but as it's not directly in the scope of explaining how to utilize Qt Quick and QML, we'll let the readers to continue on their own with the rest of the code.
OpenGL usage and Fluid 3DTo increase the eye-candy of our game and to demonstrate some more features of Qt Quick, we will implement a “fluid” 3D mode for the game board. This basically means that the board tilts when it's panned, to enable the user to see it
28

Qt Quick Game Programming © 2010 QUIt Coding
a bit further. So this also increases the usability as it's possible to see quite a big area of the board with just a few quick panning moves. Below is a screenshot of the board when flicked in 3D mode.
This kind of rotation animation of large elements is a good candidate for hardware acceleration. Especially on embedded devices, the animation would not be smooth if done utilizing the CPU. Qt supports OpenGL (ES) acceleration which usage is transparent from QML, the viewport just needs to be set to be a QGLWidget instead of the normal QWidget.
To enable OpenGL usage, we do a bit of additions into the MainWidget constructor.
// Set optimizations not already done in QDeclarativeView setAttribute(Qt::WA_OpaquePaintEvent); setAttribute(Qt::WA_NoSystemBackground);
// Make QDeclarativeView use OpenGL backend QGLWidget *glWidget = new QGLWidget(this); setViewport(glWidget); setViewportUpdateMode(QGraphicsView::FullViewportUpdate);
QGraphicsView has plenty of flags which optimize how it behaves, first two lines above are the ones which suit our needs. Changing QDeclarativeView (or QGraphicsView) to use OpenGL is done by creating QGLWidget and setting the view to use it with the setViewport method. The last line is is also an optimization, telling view to always redraw the whole visible area of the view as this is the fastest option (and should always be used) when OpenGL is used.
29

Qt Quick Game Programming © 2010 QUIt Coding
In Qt, the standard desktop Open GL and the OpenGL ES which is used in mobile devices are both enabled with the same QGLWidget class. So effectively this means that the code above uses OpenGL when running on a desktop computer and OpenGL ES when running on Nokia N900 and similar mobile devices.
// This implements "Fluid" 3D tilting transform: [ Rotation { origin.x: gameView.width / 2 origin.y: gameView.height / 2 axis { x: 1; y: 0; z: 0 } angle: menuPanel.fluid3D ? Math.min( Math.max(boardFlickable.verticalVelocity / 4, 75), 75) : 0 Behavior on angle { SpringAnimation { spring: 1.5; damping: 0.75 } } }, Rotation { origin.x: gameView.width / 2 origin.y: gameView.height / 2 axis { x: 0; y: 1; z: 0 } angle: menuPanel.fluid3D ? Math.min( Math.max(boardFlickable.horizontalVelocity / 4, 75), 75) : 0 Behavior on angle { SpringAnimation { spring: 1.5; damping: 0.75 } } } ]
Tilting the board in 3D is done in GameView inside the boardFlickable element. We use the transforms list property of Item, which can contain any amount of Rotation, Scale and Translate transformations. We have separate rotations for x and y axis which change the angle based on the boardFlickable's verticalVelocity and horizontalVelocity properties respectively. To get the animation smoother, we use a behavior on the angle property and a SpringAnimation which is designed to follow the target value in a configurable spring-like manner.
30

Qt Quick Game Programming © 2010 QUIt Coding
SummaryWe have now gone through the implementation of our game, which is targeted for touch-screen enabled mobile devices. The game contains ~800 lines of QML code and ~300 lines of C++. The source codes are not optimized for size in any way, but this is still quite impressive considering the features, animations, OpenGL (ES) acceleration etc. achieved with it.
With small improvements and feature additions, this game would be ready for deployment in the OVI Store. We estimate the amount of Qt Quick-based content to increase drastically during 2011 now that the Qt 4.7 has been released and the number of devices supporting it will most likely be increasing.
To get more information about Qt Quick and to learn how to utilize it effectively, please check the links below. Happy hacking, everyone!
Links:
• Home of Qt application and UI framework: http://qt.nokia.com
• Qt 4.7 documentation: http://doc.qt.nokia.com/4.7/
• Source codes of 5-in-a-row game and Debian package for Nokia N900 are available from: http://quitcoding.com
31

QUIt Coding is a small group of talented individuals enjoying software development with cutting edge technologies. QUIt Coding expertises in Qt UI technologies. We are official members of Qt Ambassador Program. www.quitcoding.com
NOMOVOK is specialized on Open Source deployments, especially focused on MeeGo product creation services. NOMOVOK currently employs over 140 OSS specialists, and collaborates tightly with 25 different leading OSS companies worldwide. www.nomovok.com