primary filmmaking-guide (5.6mb)
TRANSCRIPT

Filmmaking Guide Primary
CONTENTS
1
3
6
8
2
5
4
7
9
Introduction to filmmaking P1 P7 - 10
P11 - 14
P15
P16 - 17
P18
P2
P3 - 4
P5 - 6
Linking film to literacy and curriculum
Making your film: the process
Glossary
Warm up activities
Film language
Equipment you need
Getting your film seen: competitions and film festivals
Where to find out more about filmmaking
Keep it short Build skills Be clear about the film Cut the choice Let them copy Work with your gear
The camera Light Sound Editing
Filmmaking roles Pre-production Production Calling the shots Filming Sound recording Post-production The editing process Effects and titles Sound Sharing the film
Learning to act (Performing exercise) Learning about cuts (Editing exercise) Freeze frame (Camera exercise) Sound with no picture (Sound exercise) Framing with the camera (Camera exercise) Storyboarding (Pre-production exercise)
Film viewing and literacy Writing in the filmmaking process Filmmaking ideas in other subjects
Camera Tripod Sound recording Lighting Editing
Resource booklet written by Tom Barrance
1 Filmmaking Guide - Primary
Making films at school doesn’t have to be really complicated and expensive. You’ve probably already got enough basic gear in your school to get started. Here are some ways to make sure your students get good results, and to make the process manageable and enjoyable.
Keep it short
The number one rule for good filmmaking in school, start short and simple before you try making longer films.
Making long or complicated films is a sure way to get learners fed up, bogged down or bored. The first films they make while they are learning shouldn’t be more than half a minute long. (You’d be surprised how much work it takes to make a really good 20 second film.) They can go on to make longer films once they’ve learnt the basics.
Build skills
Get started with simple activities so your students can discover things like:
• what the different shots are for, and how to use them.
• how to work together in filmmaking teams.
• how to shoot good video, and how to tell if it’s good.
Be clear about the film
Your students will find things a lot easier if they know exactly what kind of film they’re going to make, what it’s for and who’s likely to watch it.
Cut the choice
It might seem odd, but one of the best ways to bring out your students’ creativity in filmmaking is to stop them doing things. Set really tight limits and they’ll really have to think hard. Tell them the film
has to be twenty seconds long, they can only use five shots, or they’ve got to use two close ups, a long shot, a mid shot and a low angle shot.
Let them copy
Young filmmakers can learn loads by trying to copy ‘real’ films. Choose a very short scene from a film the club have watched. Then get them to make a shot-by-shot copy and see how close they can get to the original. It’s a real challenge.
Work with your gear
There’s nothing more frustrating than trying to make a film with equipment that isn’t up to the job. It doesn’t mean you need more expensive gear, but just means you need to make films your gear can cope with. No microphone? Don’t try and record live sound, make the soundtrack on your computer or tablet afterwards. Basic camera? Shoot outside or in rooms with plenty of light. No tripod? Zoom out and get in close.
Separate the sound
It’s hard to record good live sound, particularly if you’ve only got basic equipment. Even if you’ve got better gear, you’ll probably still get better results by forgetting the sound while you’re filming and making a soundtrack on your computer. You can include natural-sounding effects, music and voiceovers, or you could record the voiceover first and edit the pictures to fit.
1/ INTRODUCTION TO FILMMAKING IN SCHOOLS
Filmmaking Guide - Primary2
2/ WARM UP ACTIVITIES
Here are some basic ways of getting students’ skills and understanding of film up to scratch before they start serious filmmaking.
Learning to act (Performing exercise)
Children can be shy – or silly – when they are filmed for the first time. Get them used to acting, and build their confidence with activities that include the whole group or class. You could start with the ‘Magic Floor’. Get them to stand on one side of the room and tell them the floor is magic. Then tell them how they’ve got to cross it: for example “you’re on a tightrope”, “a monster is chasing you”, “you’re wading through a swamp”.
Learning about cuts (Editing exercise)
• Get the learners to guess how many separate cuts there were in it.
• Play it again and get them to clap on each cut. Get them to count the number of times they have clapped.
• Get them to talk about why there are so many cuts.
Freeze frame (Camera exercise)
Pause on a shot. Get groups to talk about what’s in each shot and why it’s there. They could also discuss what kind of story it is, where they think it’s set, and what they think will happen next.
If you’re in class, you could get them to write a sentence based on each shot.
Sound with no picture (Sound exercise)
Choose an opening sequence with a good soundtrack and a variety of different sounds. It could have just diegetic (‘natural’/‘real’) sounds, or it could have music as well.
Play the sound without the picture. Get groups to list everything they hear, and what it makes them imagine about the place, the people, the time of day/year, and the story.
Framing with the camera (Camera exercise)
Set each group the task of shooting examples of different kinds of shots with no camera movements or zooms (e.g. one person shoots a long shot, the next person shoots a closeup, and so on), then screen and discuss what they’ve filmed.
Storyboarding (Pre-production exercise)
Use the Lumière Brothers film ‘L’arroseur arrosée’ (available online or on the BFI ‘Early Cinema: Primitives and Pioneers’ DVD).
Get the students to guess when it was made, and discuss how it’s different from a modern film (it’s all filmed in one take). Then get each group to storyboard a modern version of the film, using different shot sizes and camera positions.
3 Filmmaking Guide - Primary
3/ LINKING FILM TO LITERACY AND CURRICULUM
of a place or setting. You could use these as the basis for writing poetry and thinking about metaphor or personification. You could go on to make poem films: get children to film places near the school in the same way and write voiceover poems.
Writing in the filmmaking process
Making a film involves a lot of purposeful speaking and listening, and you can also fit in transactional and creative writing:
• Summaries of the film story.
• Treatments that explain how they’re going to film the story.
• Scripts for drama scenes and voiceovers.
• Shot lists and shooting schedules to list what’s going to be filmed, where and when.
• Written notes and descriptions on storyboards.
Some teachers have noticed that making films improves children’s writing. It can help with things like detailed description, point of view and showing rather than telling: using appearance and actions to depict characters’ feelings, rather than just saying ‘x felt sad’.
Film viewing and literacy
Learning about film and filmmaking is a great way to help develop children’s understanding of storytelling, even with quite young children. Here are some ways to develop literacy based on film viewing (you could order films via FILMCLUB to use):
• Take examples of shots and get children to rewrite them as sentences, e.g. an extreme long shot as a sentence describing the setting; a long shot as a sentence introducing people; a close-up to show what people are feeling.
• Play just the soundtrack from a scene and get children to guess what’s in the scene and what’s going to happen.
You could do these activities with an opening sequence before they watch the whole film:
• Write a first-person story where one character from a film describes a scene from their point of view.
• Write letters from one character to another.
• Write a short story featuring characters from a feature film they have watched.
• Lots of films include sequences that use several shots, including close-ups, to show the atmosphere
Filmmaking Guide - Primary4
3/ LINKING FILM TO LITERACY AND CURRICULUM (CONTINUED)
Filmmaking ideas in other subjects
HistoryMake fictional or documentary films about historical events or local history.
GeographyMake films about the local area or a place you’re visiting on a field trip.
Modern foreign languagesMake simple films of fictional stories or everyday things like going to the dentist.
ScienceUse filmmaking to record experiments and to show concepts.
Design and TechnologyThey can make films to explain their research process and design ideas and show products being tested and made or taken apart.
PSHE/CitizenshipThey could make documentaries, news pieces or fiction films about their lives or important issues in the area.
PE, Dance, DramaFilm is a very useful way to record, discuss and improve performance. They could also make films showing and explaining correct techniques.
ArtLearners could use filmmaking to collect examples of shapes, patterns and colours, to record the processes of making things, or to describe artworks and what they think about them.
FILMCLUB has many films grouped according to the curriculum, as well as national and international campaigns and school calendar events. Check out www.filmclub.org/resources and have a browse.
5 Filmmaking Guide - Primary
Camera
Before you decide that you need to buy a camera, check out what’s already available in school.
• The cameras on lots of students’ phones are pretty good, at least in good light. iPads and some other tablets have also got built-in cameras, but they’re awkward to hold.
• Some compact still cameras can shoot really good video. The sound may not be great, and they’re a bit fiddlier to hold steady, but if your school’s already got them they’re a good option. Some of them have better wide angle lenses and longer zooms than basic video cameras.
• Basic HD video cameras are a lot cheaper than they used to be. Some are better and more suitable for school use than others (more reliable, better video quality, easier to use). Check out the reviews and try them out if you can.
Sound recording
• The easiest option is to plan your film so it doesn’t need live sound.
• The camera’s built-in microphone might be okay if you can find a quiet space and get close to the subject.
• If you’re serious about sound, you need a separate microphone (and a camera with microphone and headphone sockets).
• A basic tieclip or lavalier microphone is the cheapest way to get good sound for interviews and presentations to camera.
• If your camera has a microphone socket and an accessory shoe, you could put a directional microphone on it. Good ones are quite expensive however.
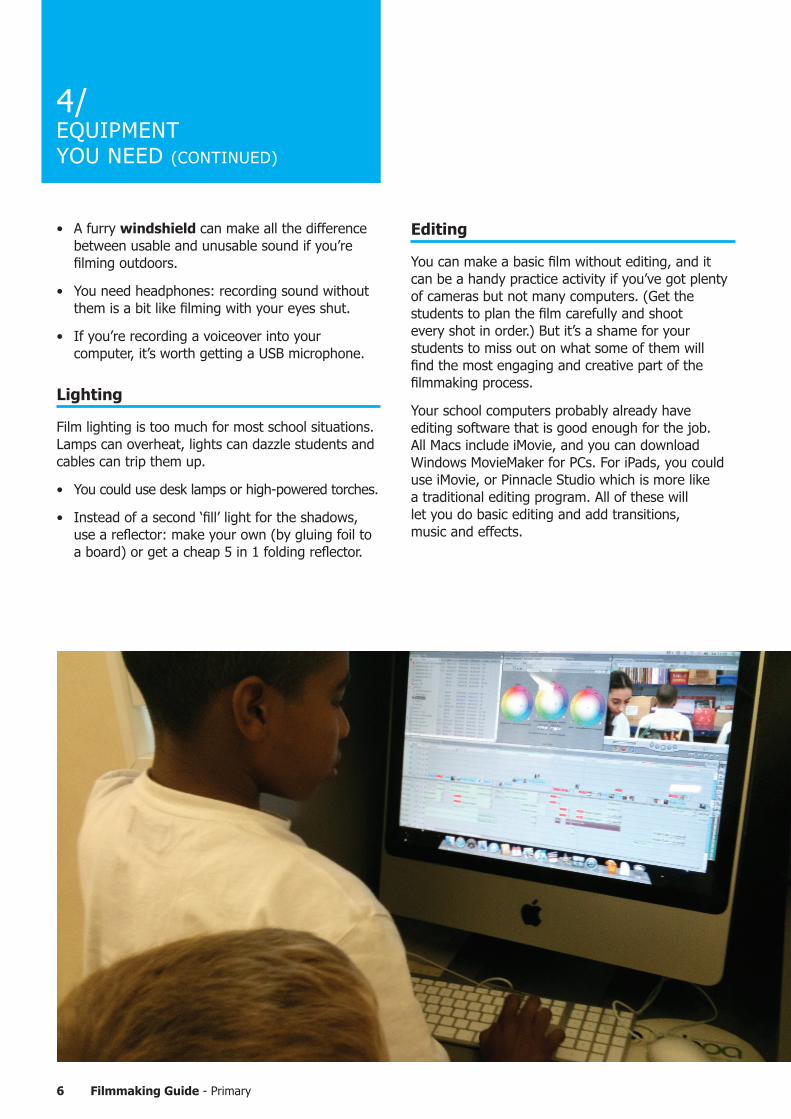
• For recording drama the traditional way, you’ll need a separate microphone on a boom pole, plus a student to hold it up in the air above the action.
Tripod
• You really need a way of keeping the camera still. It’s not just about stopping camera shake. Putting the camera on a tripod makes students slow down and think about each shot, rather than ‘panning and scanning’.
• Any tripod is probably better than nothing, but you really need a pan and tilt head.
• It also needs to be fairly big and stable.
4/ EqUIPMENT YOU NEED
Filmmaking Guide - Primary6
• A furry windshield can make all the difference between usable and unusable sound if you’re filming outdoors.
• You need headphones: recording sound without them is a bit like filming with your eyes shut.
• If you’re recording a voiceover into your computer, it’s worth getting a USB microphone.
Lighting
Film lighting is too much for most school situations. Lamps can overheat, lights can dazzle students and cables can trip them up.
• You could use desk lamps or high-powered torches.
• Instead of a second ‘fill’ light for the shadows, use a reflector: make your own (by gluing foil to a board) or get a cheap 5 in 1 folding reflector.
Editing
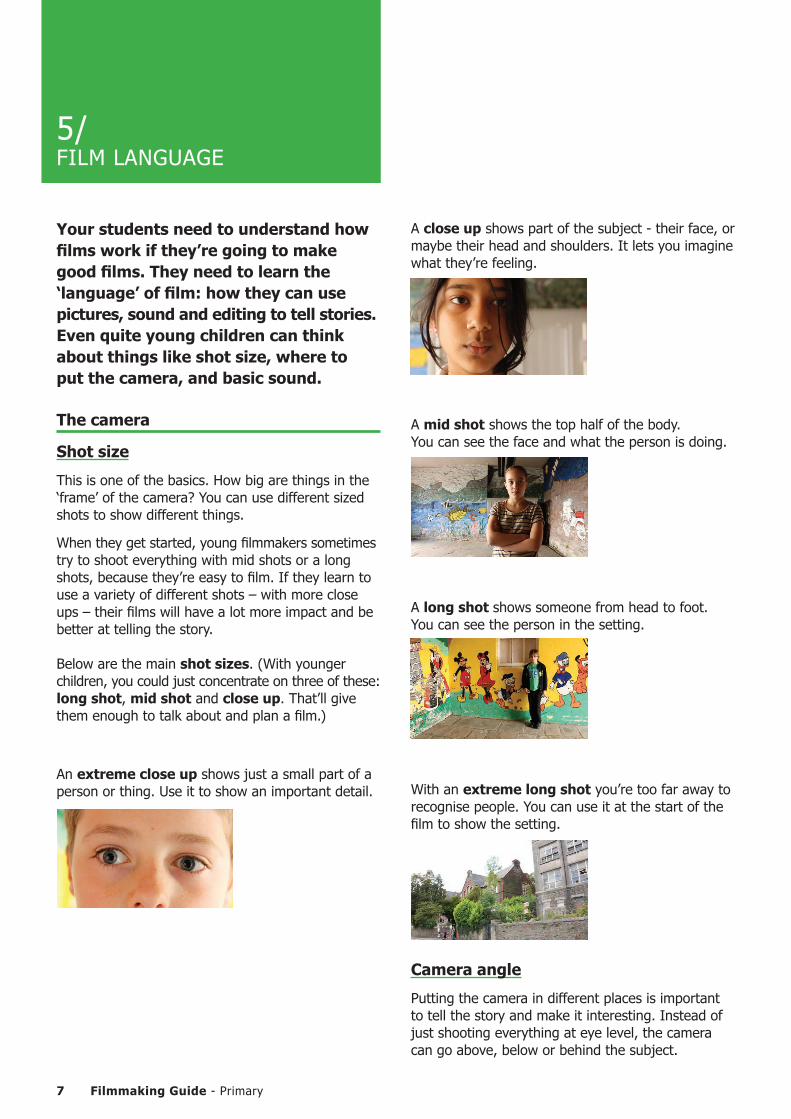
You can make a basic film without editing, and it can be a handy practice activity if you’ve got plenty of cameras but not many computers. (Get the students to plan the film carefully and shoot every shot in order.) But it’s a shame for your students to miss out on what some of them will find the most engaging and creative part of the filmmaking process.
Your school computers probably already have editing software that is good enough for the job. All Macs include iMovie, and you can download Windows MovieMaker for PCs. For iPads, you could use iMovie, or Pinnacle Studio which is more like a traditional editing program. All of these will let you do basic editing and add transitions, music and effects.
4/ EqUIPMENT YOU NEED (CONTINUED)
7 Filmmaking Guide - Primary
With an extreme long shot you’re too far away to recognise people. You can use it at the start of the film to show the setting.
Camera angle
Putting the camera in different places is important to tell the story and make it interesting. Instead of just shooting everything at eye level, the camera can go above, below or behind the subject.
Your students need to understand how films work if they’re going to make good films. They need to learn the ‘language’ of film: how they can use pictures, sound and editing to tell stories. Even quite young children can think about things like shot size, where to put the camera, and basic sound.
The camera
Shot size
This is one of the basics. How big are things in the ‘frame’ of the camera? You can use different sized shots to show different things.
When they get started, young filmmakers sometimes try to shoot everything with mid shots or a long shots, because they’re easy to film. If they learn to use a variety of different shots – with more close ups – their films will have a lot more impact and be better at telling the story. Below are the main shot sizes. (With younger children, you could just concentrate on three of these: long shot, mid shot and close up. That’ll give them enough to talk about and plan a film.)
An extreme close up shows just a small part of a person or thing. Use it to show an important detail.
A close up shows part of the subject - their face, or maybe their head and shoulders. It lets you imagine what they’re feeling.
A mid shot shows the top half of the body. You can see the face and what the person is doing.
A long shot shows someone from head to foot. You can see the person in the setting.
5/ FILM LANGUAGE
Filmmaking Guide - Primary8
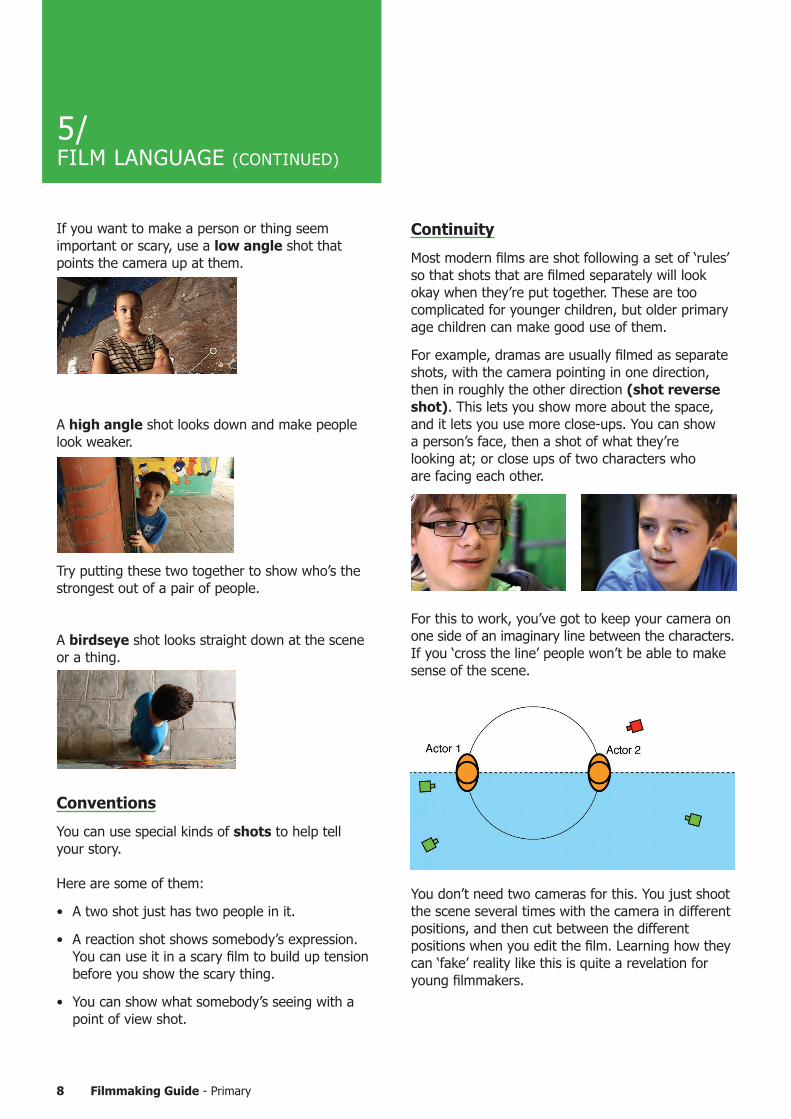
For this to work, you’ve got to keep your camera on one side of an imaginary line between the characters. If you ‘cross the line’ people won’t be able to make sense of the scene.
You don’t need two cameras for this. You just shoot the scene several times with the camera in different positions, and then cut between the different positions when you edit the film. Learning how they can ‘fake’ reality like this is quite a revelation for young filmmakers.
A high angle shot looks down and make people look weaker.
Try putting these two together to show who’s the strongest out of a pair of people.
A birdseye shot looks straight down at the scene or a thing.
Conventions
You can use special kinds of shots to help tell your story. Here are some of them:
• A two shot just has two people in it.
• A reaction shot shows somebody’s expression. You can use it in a scary film to build up tension before you show the scary thing.
• You can show what somebody’s seeing with a point of view shot.
If you want to make a person or thing seem important or scary, use a low angle shot that points the camera up at them.
Continuity
Most modern films are shot following a set of ‘rules’ so that shots that are filmed separately will look okay when they’re put together. These are too complicated for younger children, but older primary age children can make good use of them.
For example, dramas are usually filmed as separate shots, with the camera pointing in one direction, then in roughly the other direction (shot reverse shot). This lets you show more about the space, and it lets you use more close-ups. You can show a person’s face, then a shot of what they’re looking at; or close ups of two characters who are facing each other.
5/ FILM LANGUAGE (CONTINUED)

9 Filmmaking Guide - Primary
Camera movements
It’s best to ban camera movements when children are starting to learn filmmaking. If you’ve got a tripod, get them to set up each shot and then lock the tripod. That way, they’ll learn to use separate shots to tell the story, rather than panning and zooming.
Once they’ve got the hang of this, older students could try using camera movements for effect. The camera should only go in one direction, not back and forth.
• Steady, slow tracking shots are a cool way to show a space or what a character is seeing. Put the camera on something like a wheelchair or skateboard. It can go forwards (track in), backwards (track out), or sideways (crab).
• A tilt turns the camera upwards or downwards. The classic example is the shot that starts with someone’s feet and tilts up to show how big or scary they are.
• With a pan, the camera turns left or right to scan a scene or follow a movement. It’s tricky to do well.
• Be very careful with handheld cameras, which can be unwatchable. Zoom all the way out to make camera shake less obvious.
Using the lens
Children need to learn not to zoom while they’re filming. This can be quite a challenge - for them, it feels natural to zoom in and out and wave the camera around. They need to realise that the zoom button is just for setting up the shot.
Zoom all the way out, or use a special adaptor, for wide angle shots. These can make small spaces look bigger and make camera angles look more dramatic.
Zoom in for a telephoto shot, which is like looking through a telescope: good for showing details and cutting out distracting backgrounds, but hard to hold steady.
Light
Good light can make a big difference. Try to film where there is plenty of light, with the light above and behind you.
• Flat light (light from a cloudy sky, or reflected off a white wall or ceiling) is much easier to handle than contrasting light such as low sunlight.
• If you want dramatic low key lighting for a scary scene, try using a desk lamp or work lamp to the side of the subject to give strong shadows.
Sound
Sound is really important. The filmmakers should be thinking about it right from the start, rather than adding it as an afterthought. Here are three kinds of sound they might want to use:
• Realistic (‘diegetic’) sounds like footsteps, waves or crowd noises that fit the scene. They don’t have to be recorded live – sound effects that you add in the editing program can sound better than the real thing.
• Different kinds of music. Children can use it to tell the audience where and when the story is set, to set a mood, to tell them what kind of film it is (the ‘genre’), or to let them know that something’s about to happen.
• You should always record voiceovers separately - don’t try recording them into the camera while you film. A voiceover can narrate the story, or tell us what a character is thinking.
5/ FILM LANGUAGE (CONTINUED)
Filmmaking Guide - Primary10
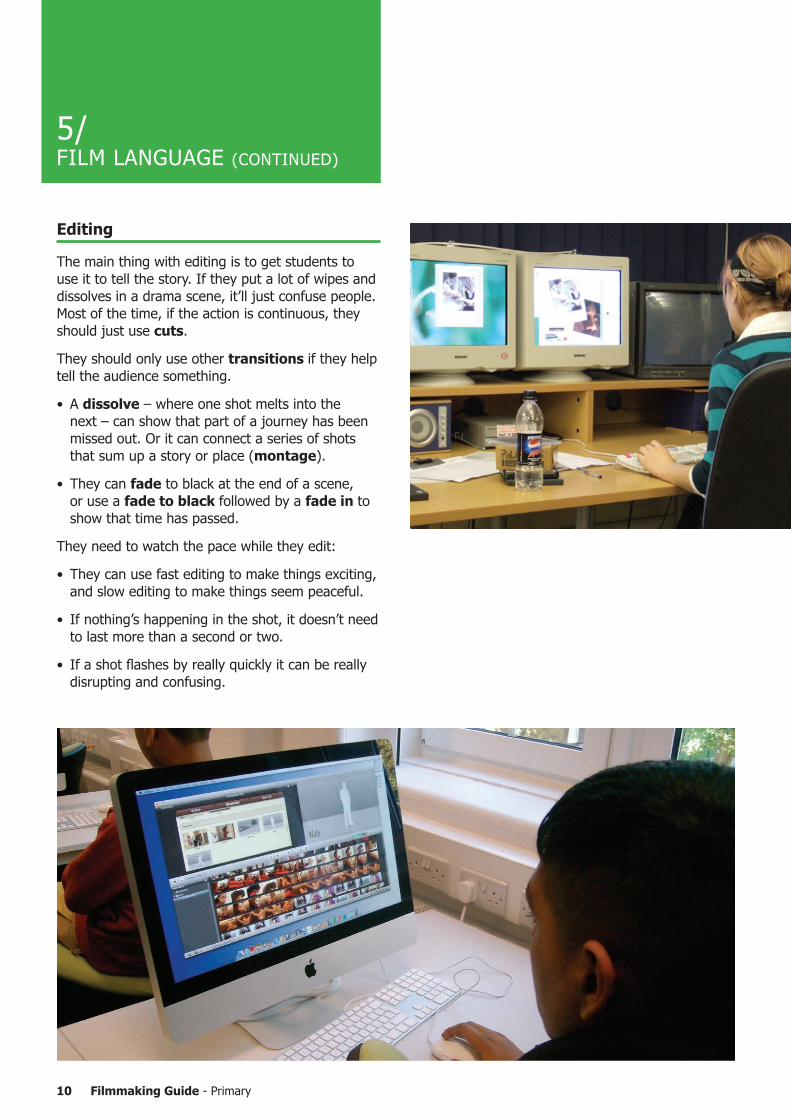
Editing
The main thing with editing is to get students to use it to tell the story. If they put a lot of wipes and dissolves in a drama scene, it’ll just confuse people. Most of the time, if the action is continuous, they should just use cuts.
They should only use other transitions if they help tell the audience something.
• A dissolve – where one shot melts into the next – can show that part of a journey has been missed out. Or it can connect a series of shots that sum up a story or place (montage).
• They can fade to black at the end of a scene, or use a fade to black followed by a fade in to show that time has passed.
They need to watch the pace while they edit:
• They can use fast editing to make things exciting, and slow editing to make things seem peaceful.
• If nothing’s happening in the shot, it doesn’t need to last more than a second or two.
• If a shot flashes by really quickly it can be really disrupting and confusing.
5/ FILM LANGUAGE (CONTINUED)
11 Filmmaking Guide - Primary
There are three main stages to making any film.
• Pre-production is the bit that happens before you start filming. This is where you get ideas and work out how to make the film. If you spend plenty of time on this stage, you can save hours or days later on.
• Production is the actual filming part.
• Post-production is where you edit the film together, add or edit sound and titles, and get it ready to show to people.
Filmmaking roles
There are lots of different jobs at different stages of the filmmaking process. If there’s a big enough team you should be able to find roles for everyone, and everyone should know what their role is, even if you decide to rotate them. But you can also simplify it right down, with just a director and a cameraperson.
• You can divide up creative jobs like writers, composers, set designers, wardrobe and costume, makeup artists and prop makers.
• The director is the person with the creative vision. Even if the group makes most of the creative decisions together, you’ll probably need a director at the filming stage to keep things organised.
• You’ll definitely need a camera operator even if you have to rotate the role so everyone gets a go.
• If your film’s got live sound, you’ll need a sound recordist to check sound levels, hold microphones and so on.
• A continuity person keeps notes to avoid distracting changes of costume and hairstyle from shot to shot.
• Production assistants can do things like set things up, keep the set tidy and stop other people from wandering onto the set.
• Once the filming is finished, you could have editing as a separate role - though everyone may want to have some creative involvement.
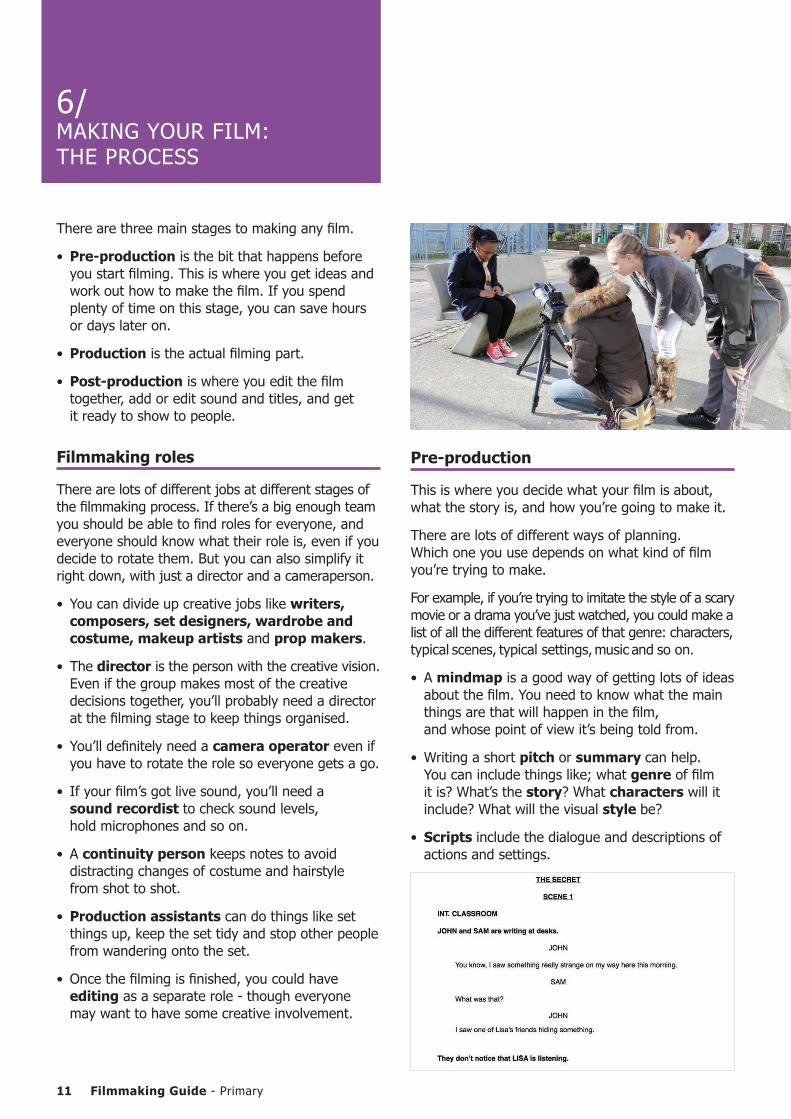
Pre-production
This is where you decide what your film is about, what the story is, and how you’re going to make it.
There are lots of different ways of planning. Which one you use depends on what kind of film you’re trying to make.
For example, if you’re trying to imitate the style of a scary movie or a drama you’ve just watched, you could make a list of all the different features of that genre: characters, typical scenes, typical settings, music and so on.
• A mindmap is a good way of getting lots of ideas about the film. You need to know what the main things are that will happen in the film, and whose point of view it’s being told from.
• Writing a short pitch or summary can help. You can include things like; what genre of film it is? What’s the story? What characters will it include? What will the visual style be?
• Scripts include the dialogue and descriptions of actions and settings.
6/ MAKING YOUR FILM: THE PROCESS
Filmmaking Guide - Primary12
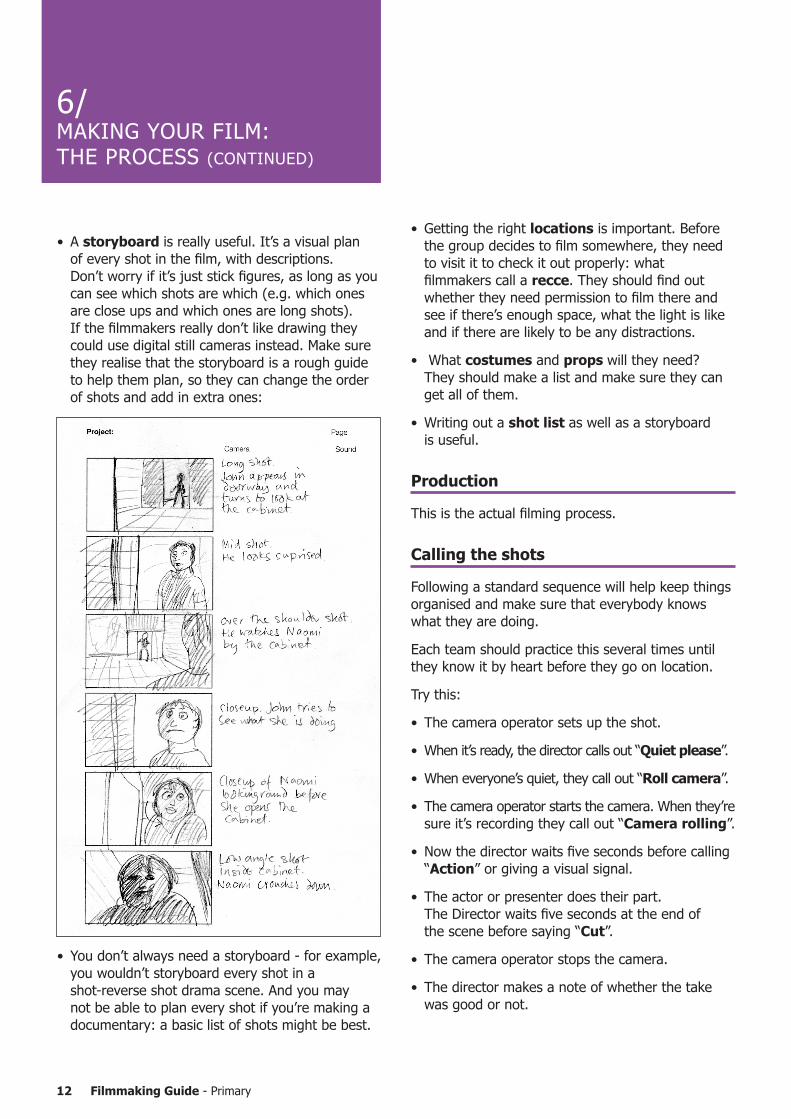
• A storyboard is really useful. It’s a visual plan of every shot in the film, with descriptions. Don’t worry if it’s just stick figures, as long as you can see which shots are which (e.g. which ones are close ups and which ones are long shots). If the filmmakers really don’t like drawing they could use digital still cameras instead. Make sure they realise that the storyboard is a rough guide to help them plan, so they can change the order of shots and add in extra ones:
• You don’t always need a storyboard - for example, you wouldn’t storyboard every shot in a shot-reverse shot drama scene. And you may not be able to plan every shot if you’re making a documentary: a basic list of shots might be best.
• Getting the right locations is important. Before the group decides to film somewhere, they need to visit it to check it out properly: what filmmakers call a recce. They should find out whether they need permission to film there and see if there’s enough space, what the light is like and if there are likely to be any distractions.
• What costumes and props will they need? They should make a list and make sure they can get all of them.
• Writing out a shot list as well as a storyboard is useful.
Production
This is the actual filming process.
Calling the shots
Following a standard sequence will help keep things organised and make sure that everybody knows what they are doing.
Each team should practice this several times until they know it by heart before they go on location.
Try this:
• The camera operator sets up the shot.
• When it’s ready, the director calls out “Quiet please”.
• When everyone’s quiet, they call out “Roll camera”.
• The camera operator starts the camera. When they’re sure it’s recording they call out “Camera rolling”.
• Now the director waits five seconds before calling “Action” or giving a visual signal.
• The actor or presenter does their part. The Director waits five seconds at the end of the scene before saying “Cut”.
• The camera operator stops the camera.
• The director makes a note of whether the take was good or not.
6/ MAKING YOUR FILM: THE PROCESS (CONTINUED)
13 Filmmaking Guide - Primary
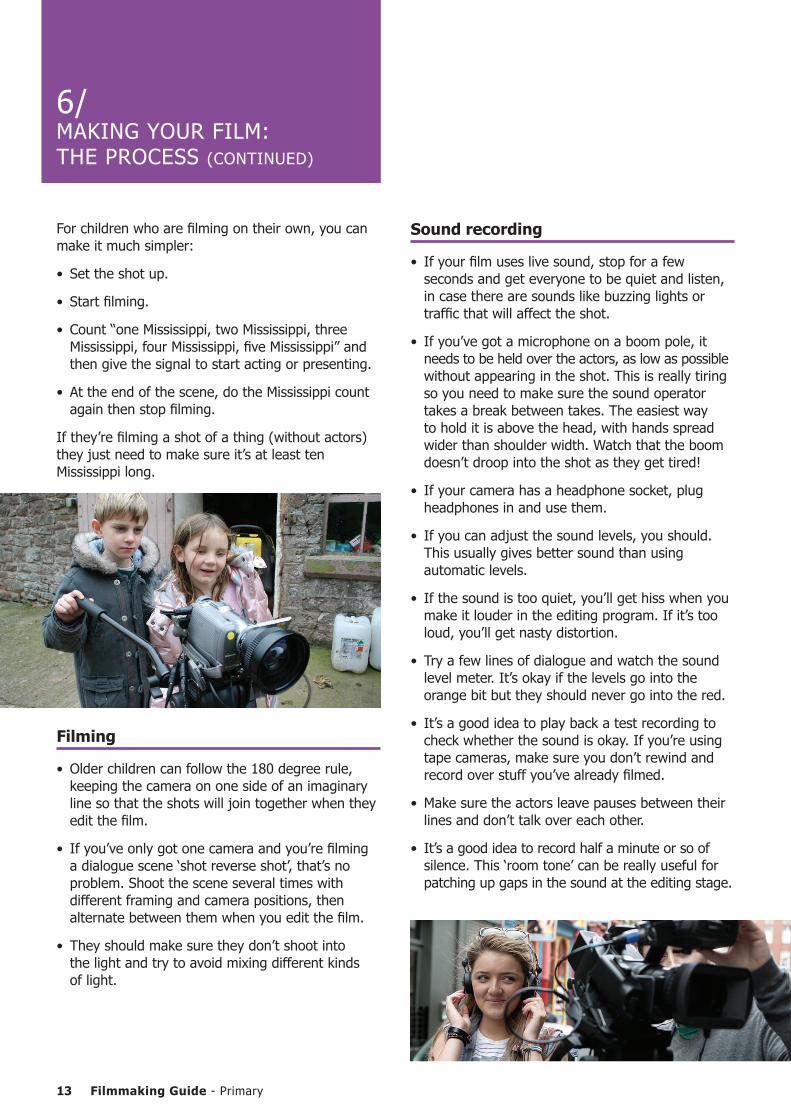
For children who are filming on their own, you can make it much simpler:
• Set the shot up.
• Start filming.
• Count “one Mississippi, two Mississippi, three Mississippi, four Mississippi, five Mississippi” and then give the signal to start acting or presenting.
• At the end of the scene, do the Mississippi count again then stop filming.
If they’re filming a shot of a thing (without actors) they just need to make sure it’s at least ten Mississippi long.
Filming
• Older children can follow the 180 degree rule, keeping the camera on one side of an imaginary line so that the shots will join together when they edit the film.
• If you’ve only got one camera and you’re filming a dialogue scene ‘shot reverse shot’, that’s no problem. Shoot the scene several times with different framing and camera positions, then alternate between them when you edit the film.
• They should make sure they don’t shoot into the light and try to avoid mixing different kinds of light.
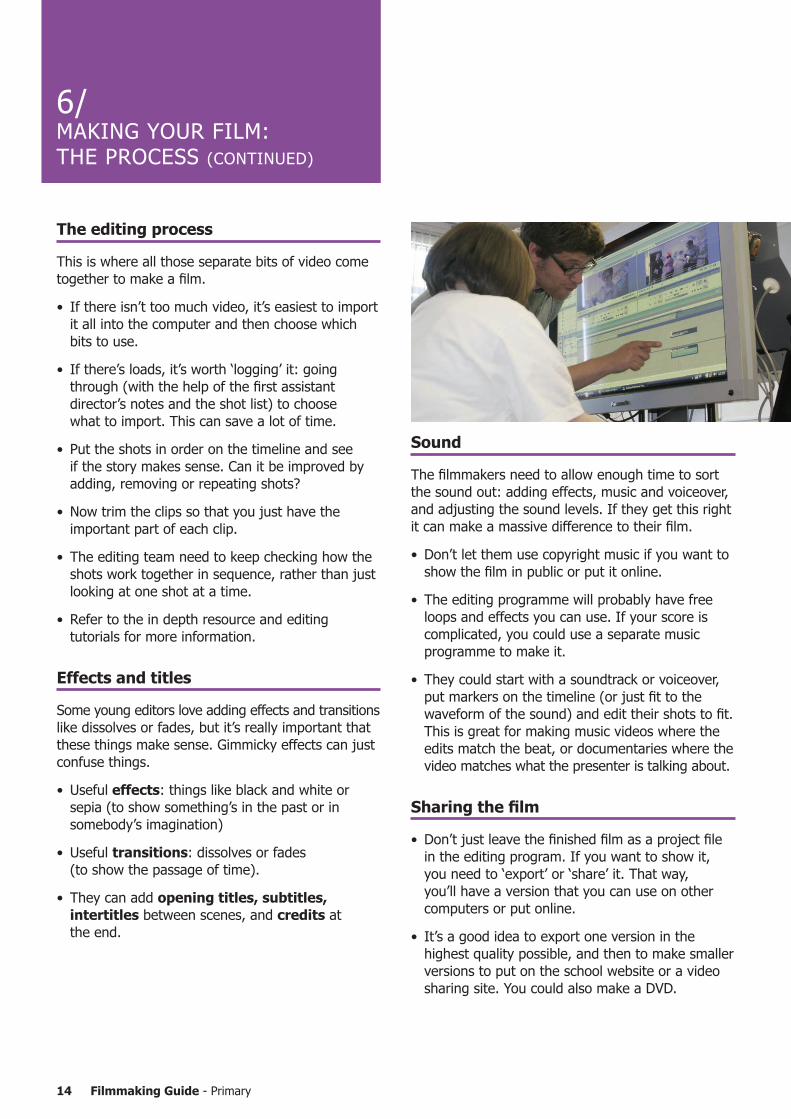
Sound recording
• If your film uses live sound, stop for a few seconds and get everyone to be quiet and listen, in case there are sounds like buzzing lights or traffic that will affect the shot.
• If you’ve got a microphone on a boom pole, it needs to be held over the actors, as low as possible without appearing in the shot. This is really tiring so you need to make sure the sound operator takes a break between takes. The easiest way to hold it is above the head, with hands spread wider than shoulder width. Watch that the boom doesn’t droop into the shot as they get tired!
• If your camera has a headphone socket, plug headphones in and use them.
• If you can adjust the sound levels, you should. This usually gives better sound than using automatic levels.
• If the sound is too quiet, you’ll get hiss when you make it louder in the editing program. If it’s too loud, you’ll get nasty distortion.
• Try a few lines of dialogue and watch the sound level meter. It’s okay if the levels go into the orange bit but they should never go into the red.
• It’s a good idea to play back a test recording to check whether the sound is okay. If you’re using tape cameras, make sure you don’t rewind and record over stuff you’ve already filmed.
• Make sure the actors leave pauses between their lines and don’t talk over each other.
• It’s a good idea to record half a minute or so of silence. This ‘room tone’ can be really useful for patching up gaps in the sound at the editing stage.
Post-production
6/ MAKING YOUR FILM: THE PROCESS (CONTINUED)
Filmmaking Guide - Primary14
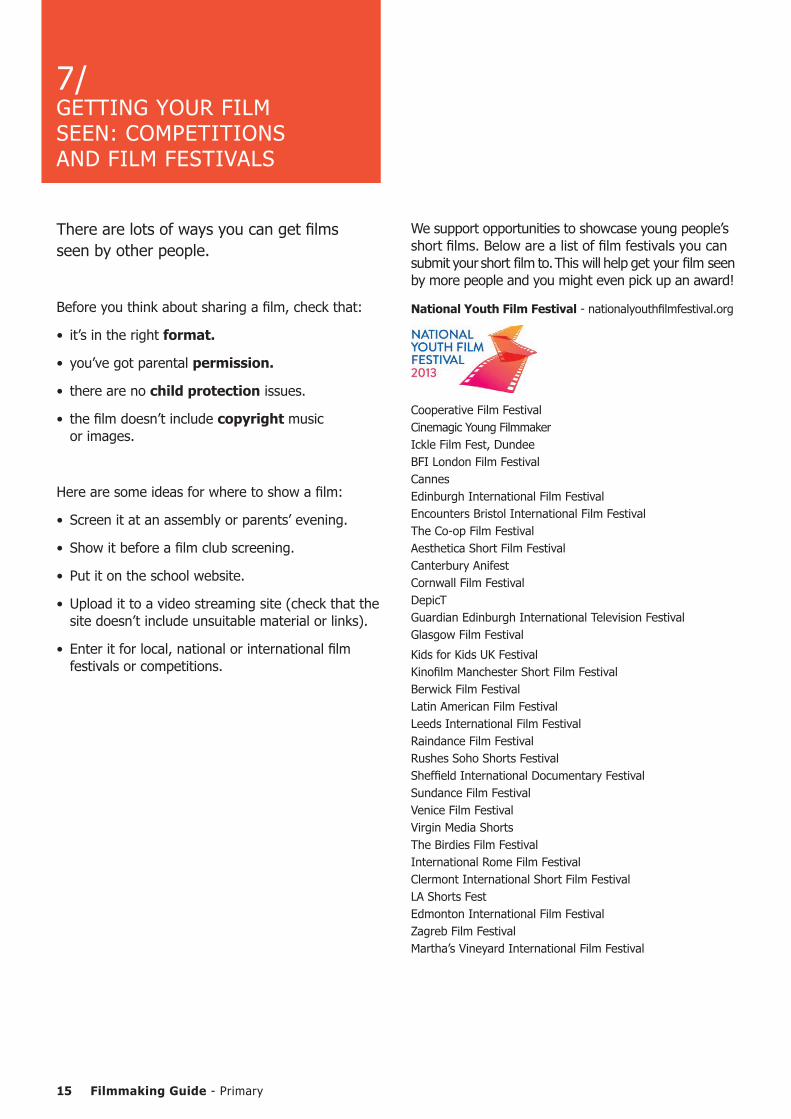
The editing process
This is where all those separate bits of video come together to make a film.
• If there isn’t too much video, it’s easiest to import it all into the computer and then choose which bits to use.
• If there’s loads, it’s worth ‘logging’ it: going through (with the help of the first assistant director’s notes and the shot list) to choose what to import. This can save a lot of time.
• Put the shots in order on the timeline and see if the story makes sense. Can it be improved by adding, removing or repeating shots?
• Now trim the clips so that you just have the important part of each clip.
• The editing team need to keep checking how the shots work together in sequence, rather than just looking at one shot at a time.
• Refer to the in depth resource and editing tutorials for more information.
Effects and titles
Some young editors love adding effects and transitions like dissolves or fades, but it’s really important that these things make sense. Gimmicky effects can just confuse things.
• Useful effects: things like black and white or sepia (to show something’s in the past or in somebody’s imagination)
• Useful transitions: dissolves or fades (to show the passage of time).
• They can add opening titles, subtitles, intertitles between scenes, and credits at the end.
Sound
The filmmakers need to allow enough time to sort the sound out: adding effects, music and voiceover, and adjusting the sound levels. If they get this right it can make a massive difference to their film.
• Don’t let them use copyright music if you want to show the film in public or put it online.
• The editing programme will probably have free loops and effects you can use. If your score is complicated, you could use a separate music programme to make it.
• They could start with a soundtrack or voiceover, put markers on the timeline (or just fit to the waveform of the sound) and edit their shots to fit. This is great for making music videos where the edits match the beat, or documentaries where the video matches what the presenter is talking about.
Sharing the film
• Don’t just leave the finished film as a project file in the editing program. If you want to show it, you need to ‘export’ or ‘share’ it. That way, you’ll have a version that you can use on other computers or put online.
• It’s a good idea to export one version in the highest quality possible, and then to make smaller versions to put on the school website or a video sharing site. You could also make a DVD.
6/ MAKING YOUR FILM: THE PROCESS (CONTINUED)
15 Filmmaking Guide - Primary
We support opportunities to showcase young people’s short fi lms. Below are a list of fi lm festivals you can submit your short film to. This will help get your fi lm seenby more people and you might even pick up an award!
National Youth Film Festival - nationalyouthfi lmfestival.org
Cooperative Film FestivalCinemagic Young Filmmaker Ickle Film Fest, DundeeBFI London Film FestivalCannesEdinburgh International Film FestivalEncounters Bristol International Film FestivalThe Co-op Film FestivalAesthetica Short Film FestivalCanterbury AnifestCornwall Film FestivalDepicTGuardian Edinburgh International Television FestivalGlasgow Film Festival
Kids for Kids UK FestivalKinofi lm Manchester Short Film FestivalBerwick Film FestivalLatin American Film FestivalLeeds International Film FestivalRaindance Film FestivalRushes Soho Shorts FestivalSheffi eld International Documentary FestivalSundance Film FestivalVenice Film FestivalVirgin Media ShortsThe Birdies Film Festival International Rome Film FestivalClermont International Short Film FestivalLA Shorts FestEdmonton International Film FestivalZagreb Film FestivalMartha’s Vineyard International Film Festival
There are lots of ways you can get fi lms seen by other people.
Before you think about sharing a fi lm, check that:
• it’s in the right format.
• you’ve got parental permission.
• there are no child protection issues.
• the fi lm doesn’t include copyright music or images.
Here are some ideas for where to show a fi lm:
• Screen it at an assembly or parents’ evening.
• Show it before a fi lm club screening.
• Put it on the school website.
• Upload it to a video streaming site (check that the site doesn’t include unsuitable material or links).
• Enter it for local, national or international fi lm festivals or competitions.
7/GETTING YOUR FILM SEEN: COMPETITIONS AND FILM FESTIVALS
Filmmaking Guide - Primary16
180 degree rule A rule for filming shot reverse shot where the camera stays on one side of an imaginary line, so the shots will join together without confusing the audience.
Boom A pole for holding a microphone above the action while filming a scene. Continuity person The person on a film set who makes sure that things such as costumes, hairstyles etc are consistent from shot to shot. Continuity system A set of ‘rules’ about camera position and editing that is used in most films to make scenes look realistic. Costume designer The person who decides what people in a film will wear. Cut Where one shot changes to another without an obvious transition. Diegetic sound Sound that seems like a natural part of the scene, e.g. crashing waves, footsteps, dialogue. Directional microphone A microphone that mainly picks up sound from directly in front and cuts out sound from the side and rear. Fill light A second light on a film set that lightens the shadows. HD (high definition) video Video where the image is made up of more pixels (dots) than standard definition video. 1280 x 720 pixels is HD, 1920 x 1080 pixels is ‘Full HD’.
Key light The main light on a film set. Lavalier microphone A small microphone designed to be mounted on a person’s clothing. Location A real place where a film is shot (as opposed to a ‘set’ which is a constructed space). Low key lighting Dramatic lighting with strong shadows, often used in thrillers or scary movies. Montage A sequence where shots are joined together to get an idea across or sum up a story or place. Non-diegetic sound Sound that the audience knows has been added, like music and voiceover. Pitch A short, persuasive description of a film, used to sell the idea to potential backers. Post-production The final stage of making a film where it’s edited together and prepared for screening/distribution. Pre-production The planning stage of making a film. Production The filming stage of making a film. Script A detailed description of how a film will be made, including setting, action, and dialogue. Sequence A series of shots that go together (a bit like a paragraph in a story).
8/ GLOSSARY
17 Filmmaking Guide - Primary
Set designer The person who designs a set where the film is shot. Shot list A list of all the shots in a film or sequence, in order. Shooting schedule A kind of diary used to plan a film shoot, with a list of what is going to be filmed, where, and when.
Shot A single continuous section of film. Shot reverse shot The traditional way of joining shots together, with the camera filming first in one direction then in the opposite direction. Storyboard A series of pictures (drawings or photos), usually with written notes, which show how a sequence will be filmed. Transition The way one shot changes to another in a film sequence. Treatment A detailed written description of how a story will be filmed. Voiceover A spoken soundtrack to a film sequence. Wardrobe supervisor The person who organises the costumes and makes sure they are available at the right time. Windshield A foam or furry cover for a microphone to cut down wind noise. (Furry ones are much more effective).
8/ GLOSSARY (CONTINUED)
Filmmaking Guide - Primary18
Leading film education charities First Light and FILMCLUB have joined forces to form new organisation FILM NATION UK which is delivering an exciting programme of film experiences for young people including watching, understanding and making film.
To find out more go to www.filmnationuk.org
This booklet includes images and some content adapted with permission from the interactive DVD-ROM and app Making Movies Make Sense, published by Cineclub and Media Education Wales. For more information please visit www.makingmoviesmakesense.org Using film in schools mediaed.org.uk/using_film_in_schools
An online guide and downloadable PDF on how to use film effectively in Primary and Secondary schools, with information about equipment, resources, curriculum, and more.
BFI Education www.bfi.org.uk/education
The British Film Institute provide education activities, training and workshops, free education resources, and DVD-ROM short film compilations with teaching notes.
FILM NATION UK is a new organisation, formed by the merger of leading film education organisations FILMCLUB and First Light.
First Light helps young people develop skills, talent and creativity and confidence by providing opportunities for young people to work with industry professionals to create short films.
FILM NATION UK will launch in Autumn 2013 and work alongside a number of partner organisations including the BFI, Pearson, National Schools Partnership and many other grassroots organizations to deliver a bold and visionary new programme of film education that will be available to every 5-19 year old across the UK. Sign up to our newsletter for more information: www.filmnationuk.org
9/ WHERE TO FIND OUT MORE ABOUT FILMMAKING