pre-phase preamp - k&k sound | natural pickup … · pre-phase preamp thank you for choosing...
TRANSCRIPT
92798 Cape Arago Hwy, Coos Bay, OR 97420 | 541-888-3517 | Toll Free 1-800-867-6863 | kksound.com
PRE-PHASE PREAMP
Thank you for choosing the Pre-Phase! This little preamp provides an astonishing sound quality. The addition of the phase switch is one of the most important tools for live sound amplification of any acoustic instrument. The super lightweight of the Pre-Phase will not affect the acoustic tone of your instrument and the battery life is about 150 hours with a standard alkaline battery. The volume control wheel allows for convenient adjustment during performance. With the Pre-Phase you should be able to plug your acoustic guitar into any amp or PA directly. Simply use the EQ on the amp or Mixer channel to adjust your tone.
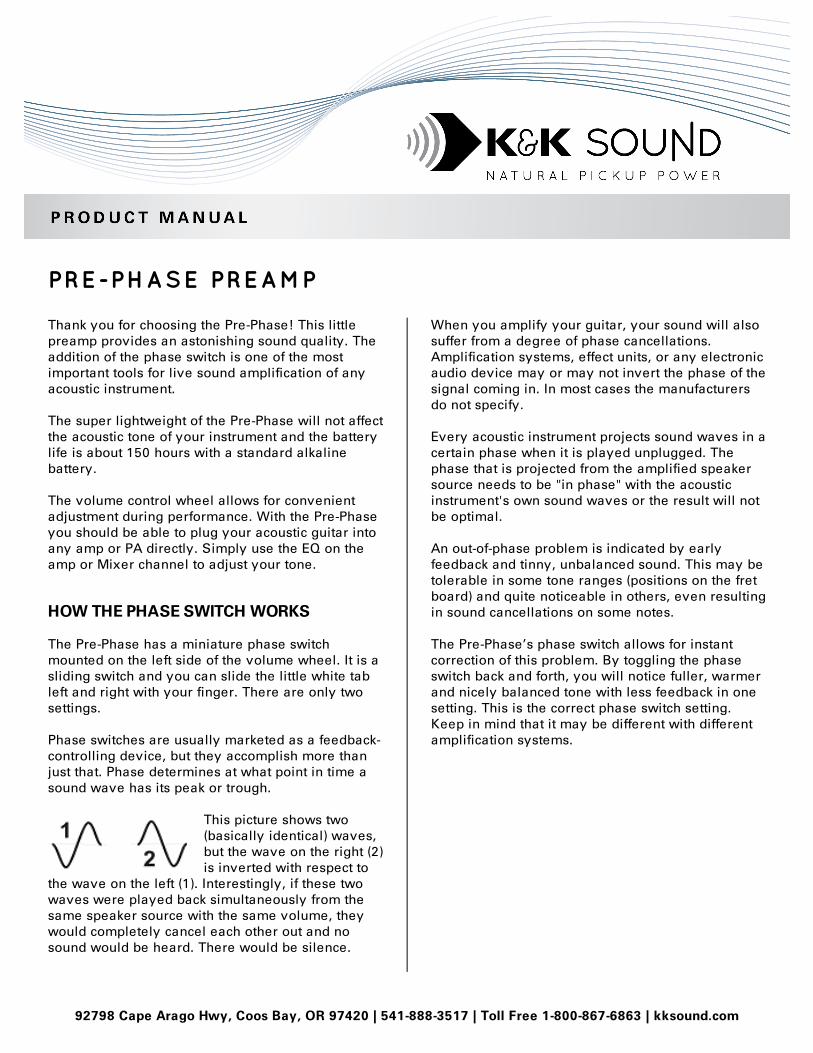
HOW THE PHASE SWITCH WORKS The Pre-Phase has a miniature phase switch mounted on the left side of the volume wheel. It is a sliding switch and you can slide the little white tab left and right with your finger. There are only two settings. Phase switches are usually marketed as a feedback-controlling device, but they accomplish more than just that. Phase determines at what point in time a sound wave has its peak or trough.
This picture shows two (basically identical) waves, but the wave on the right (2) is inverted with respect to
the wave on the left (1). Interestingly, if these two waves were played back simultaneously from the same speaker source with the same volume, they would completely cancel each other out and no sound would be heard. There would be silence.
When you amplify your guitar, your sound will also suffer from a degree of phase cancellations. Amplification systems, effect units, or any electronic audio device may or may not invert the phase of the signal coming in. In most cases the manufacturers do not specify. Every acoustic instrument projects sound waves in a certain phase when it is played unplugged. The phase that is projected from the amplified speaker source needs to be "in phase" with the acoustic instrument's own sound waves or the result will not be optimal. An out-of-phase problem is indicated by early feedback and tinny, unbalanced sound. This may be tolerable in some tone ranges (positions on the fret board) and quite noticeable in others, even resulting in sound cancellations on some notes. The Pre-Phase’s phase switch allows for instant correction of this problem. By toggling the phase switch back and forth, you will notice fuller, warmer and nicely balanced tone with less feedback in one setting. This is the correct phase switch setting. Keep in mind that it may be different with different amplification systems.
2
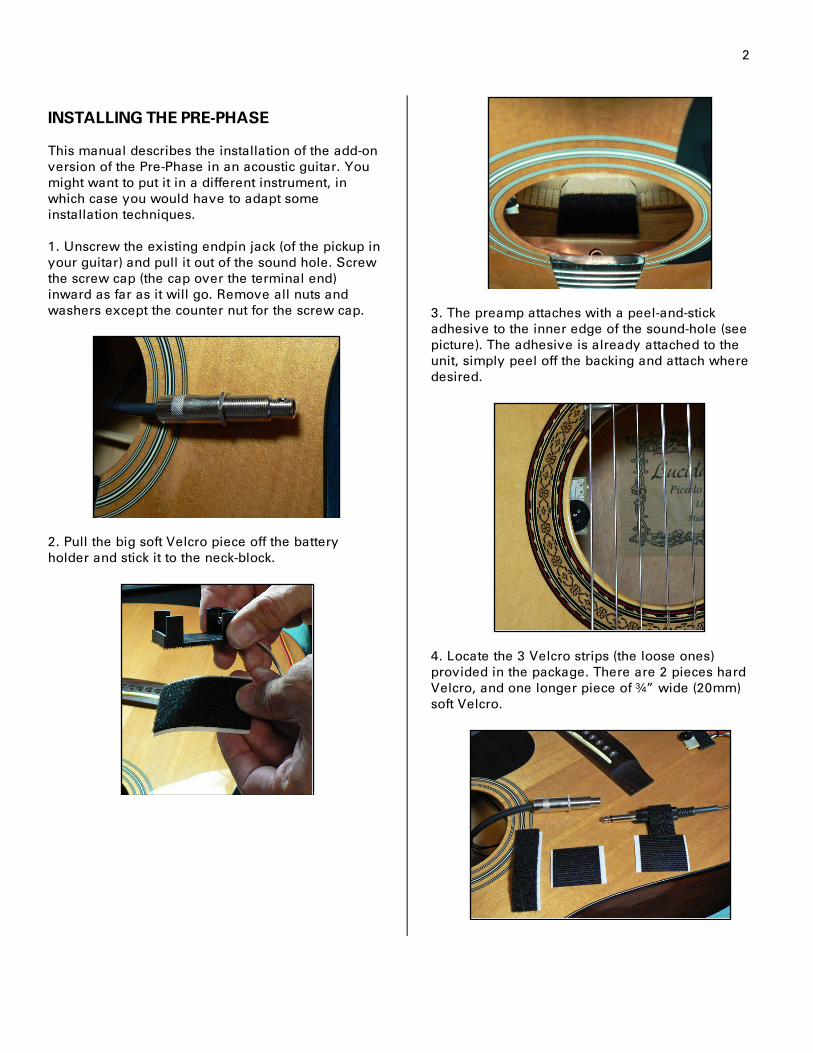
INSTALLING THE PRE-PHASE This manual describes the installation of the add-on version of the Pre-Phase in an acoustic guitar. You might want to put it in a different instrument, in which case you would have to adapt some installation techniques. 1. Unscrew the existing endpin jack (of the pickup in your guitar) and pull it out of the sound hole. Screw the screw cap (the cap over the terminal end) inward as far as it will go. Remove all nuts and washers except the counter nut for the screw cap.
2. Pull the big soft Velcro piece off the battery holder and stick it to the neck-block.
3. The preamp attaches with a peel-and-stick adhesive to the inner edge of the sound-hole (see picture). The adhesive is already attached to the unit, simply peel off the backing and attach where desired.
4. Locate the 3 Velcro strips (the loose ones) provided in the package. There are 2 pieces hard Velcro, and one longer piece of ¾” wide (20mm) soft Velcro.
3
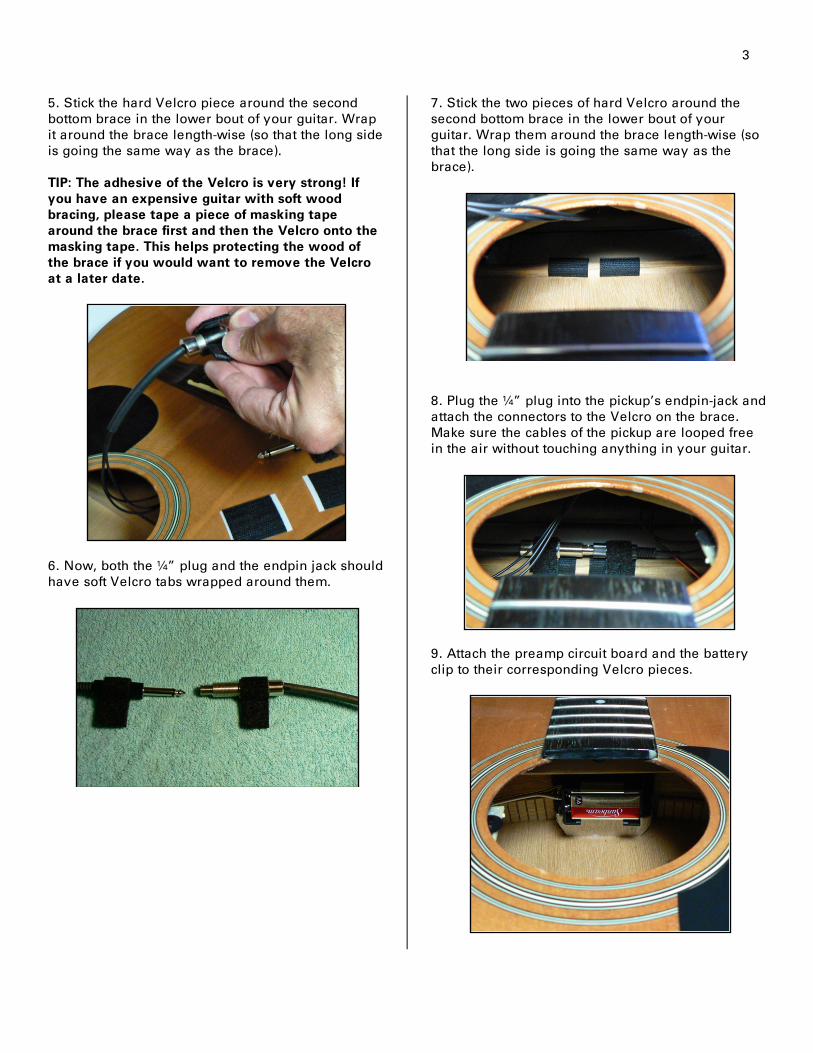
5. Stick the hard Velcro piece around the second bottom brace in the lower bout of your guitar. Wrap it around the brace length-wise (so that the long side is going the same way as the brace). TIP: The adhesive of the Velcro is very strong! If you have an expensive guitar with soft wood bracing, please tape a piece of masking tape around the brace first and then the Velcro onto the masking tape. This helps protecting the wood of the brace if you would want to remove the Velcro at a later date.
6. Now, both the ¼” plug and the endpin jack should have soft Velcro tabs wrapped around them.
7. Stick the two pieces of hard Velcro around the second bottom brace in the lower bout of your guitar. Wrap them around the brace length-wise (so that the long side is going the same way as the brace).
8. Plug the ¼” plug into the pickup’s endpin-jack and attach the connectors to the Velcro on the brace. Make sure the cables of the pickup are looped free in the air without touching anything in your guitar.
9. Attach the preamp circuit board and the battery clip to their corresponding Velcro pieces.
4
10. Install the new endpin jack: Unscrew the endpin jack's strap mount knob. Take off the nut and washer. Find out the thickness of your end block and set the nut on the cap accordingly (see picture below). Once in place, screw the cap against it to secure the nut. Insert the jack from the inside into the endpin hole. Tip: A chopstick or something similar helps to get a hold of the jack and pull it through the hole. Attach outside washer and nut and tighten. Attach the end knob. Important: Make sure that the strap knob screws in ALL THE WAY over the outer threaded part of the jack, so that a tiny portion of the thread is exposed when the strap-knob is tightened. If you don’t do this, you might experience insufficient signal transmission and sound, which is cutting in and out.
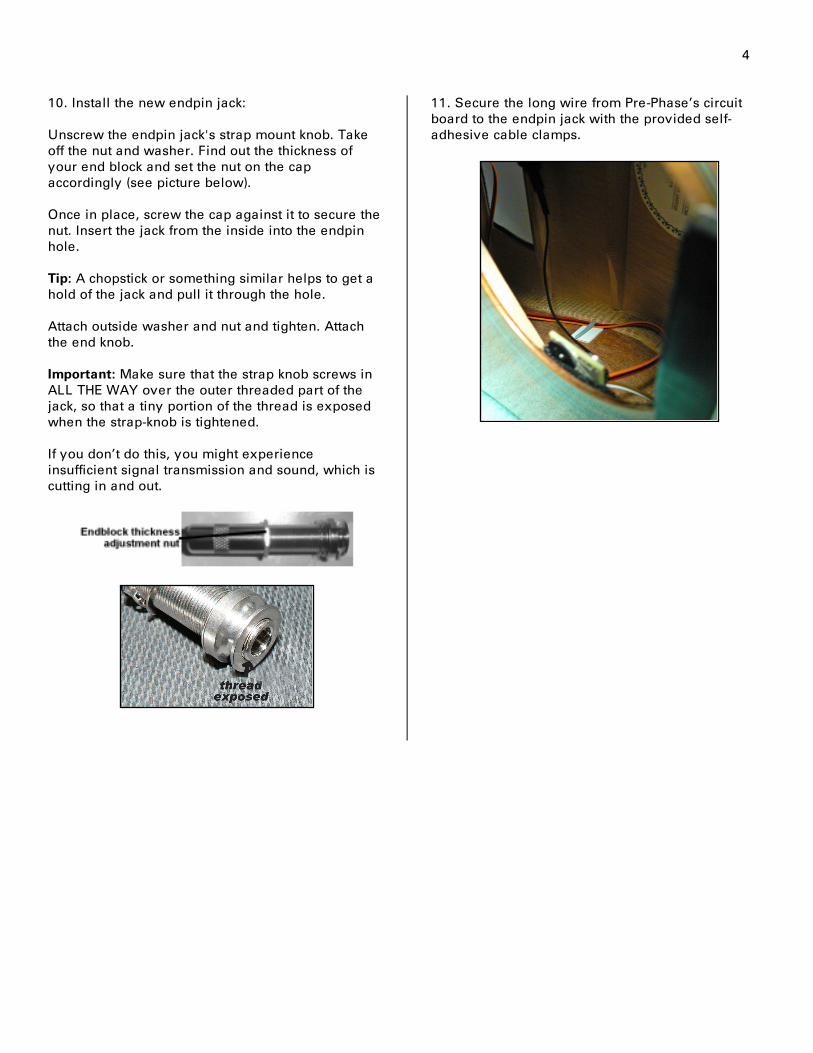
11. Secure the long wire from Pre-Phase’s circuit board to the endpin jack with the provided self-adhesive cable clamps.