powerview remote control guide - hunter douglas new powerview ® pebble® remote and ... important:...
TRANSCRIPT

© 2017 Hunter Douglas. All rights reserved. All trademarks used herein are the property of Hunter Douglas or their respective owners. 5110540123 5/17
PowerView® MotorizationREMOTE CONTROL GUIDE
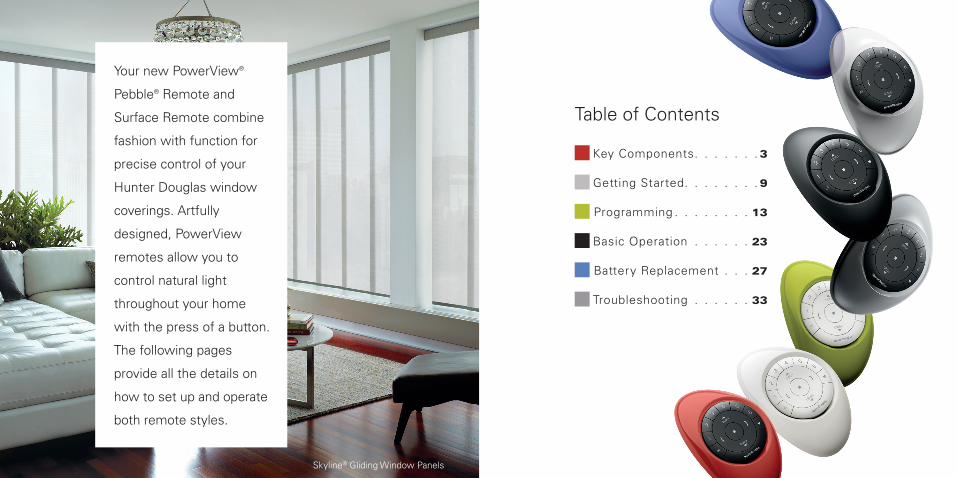
Your new PowerView®
Pebble® Remote and
Surface Remote combine
fashion with function for
precise control of your
Hunter Douglas window
coverings. Artfully
designed, PowerView
remotes allow you to
control natural light
throughout your home
with the press of a button.
The following pages
provide all the details on
how to set up and operate
both remote styles.
Table of Contents
Key Components . . . . . . . 3
Getting Started. . . . . . . . 9
Programming . . . . . . . . 13
Basic Operation . . . . . . 23
Battery Replacement . . . 27
Troubleshooting . . . . . . 33
Skyline® Gliding Window Panels
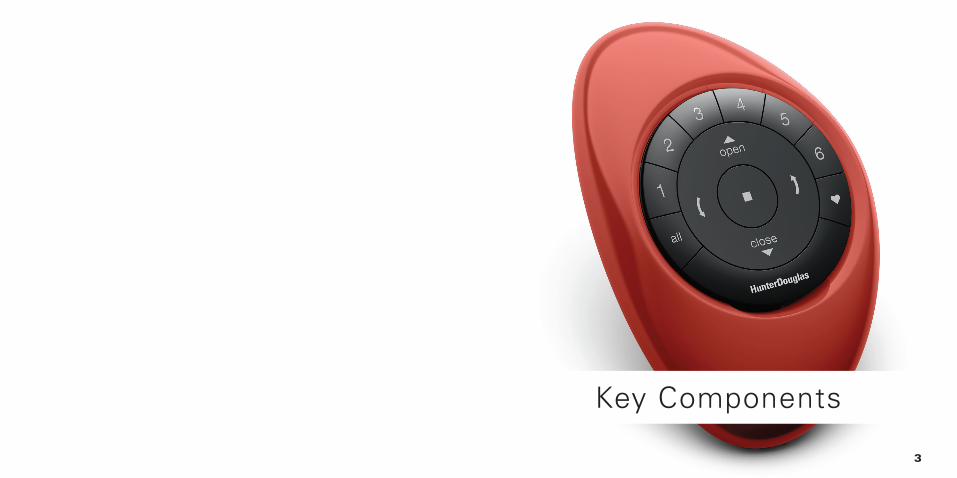
Key Components
3
54
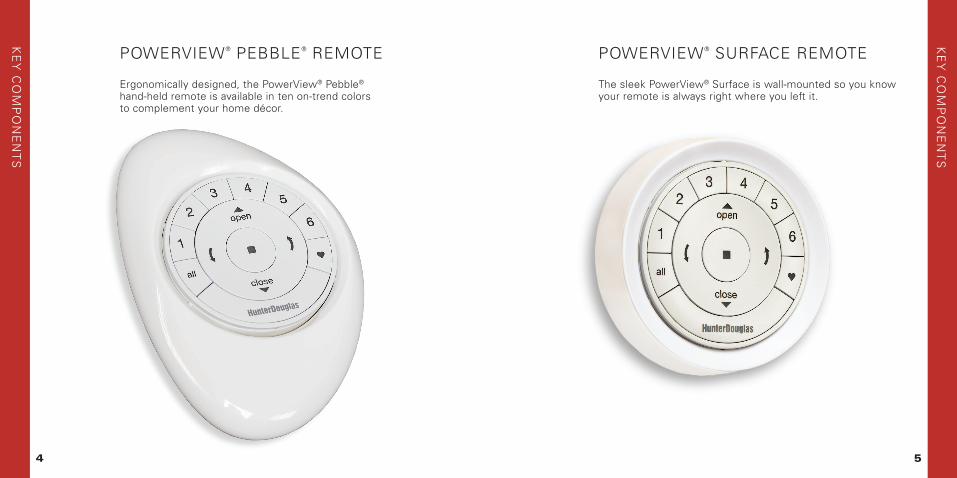
POWERVIEW® SURFACE REMOTE
The sleek PowerView® Surface is wall-mounted so you know your remote is always right where you left it.
KE
Y C
OM
PO
NE
NT
S
KE
Y C
OM
PO
NE
NT
S
POWERVIEW® PEBBLE® REMOTE
Ergonomically designed, the PowerView® Pebble® hand-held remote is available in ten on-trend colors to complement your home décor.
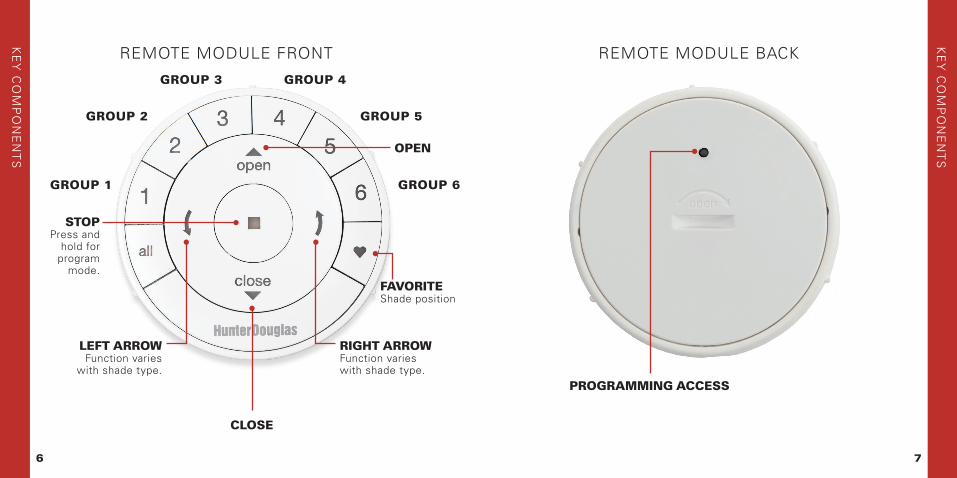
REMOTE MODULE FRONT
RIGHT ARROWFunction varies with shade type.
LEFT ARROWFunction varies
with shade type.
FAVORITEShade position
STOPPress and
hold for program
mode.
7
GROUP 1
GROUP 2
GROUP 3 GROUP 4
GROUP 5
GROUP 6
6
REMOTE MODULE BACK
CLOSE
OPEN
KE
Y C
OM
PO
NE
NT
S
KE
Y C
OM
PO
NE
NT
S
PROGRAMMING ACCESS

9
Getting Started
REMOTE MODULE (BACK COVER REMOVED)
BATTERY COMPARTMENT 3V CR 2032
BATTERY COMPARTMENT
3V CR 2032
PROGRAMMING
8
KE
Y C
OM
PO
NE
NT
S
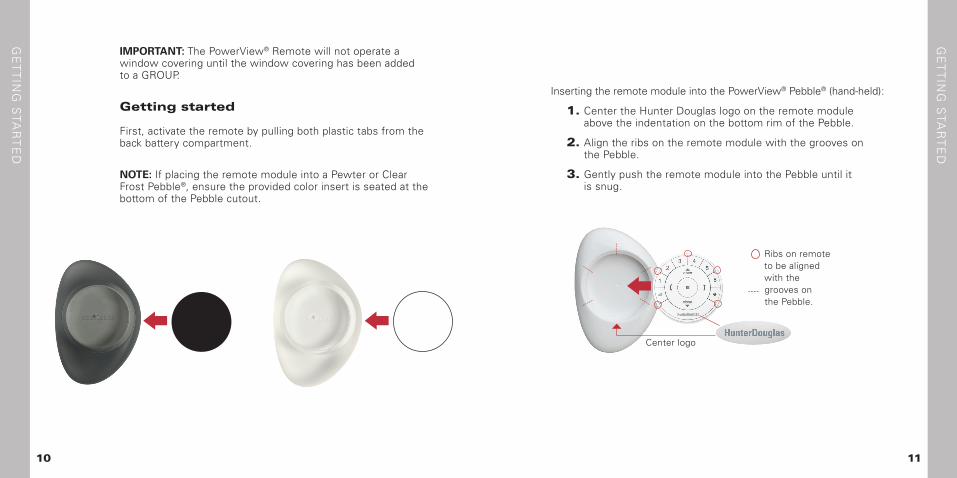
IMPORTANT: The PowerView® Remote will not operate a window covering until the window covering has been added to a GROUP.
Getting started
First, activate the remote by pulling both plastic tabs from the back battery compartment.
NOTE: If placing the remote module into a Pewter or Clear Frost Pebble®, ensure the provided color insert is seated at the bottom of the Pebble cutout.
10
GE
TT
ING
STA
RT
ED
GE
TT
ING
STA
RT
ED
11
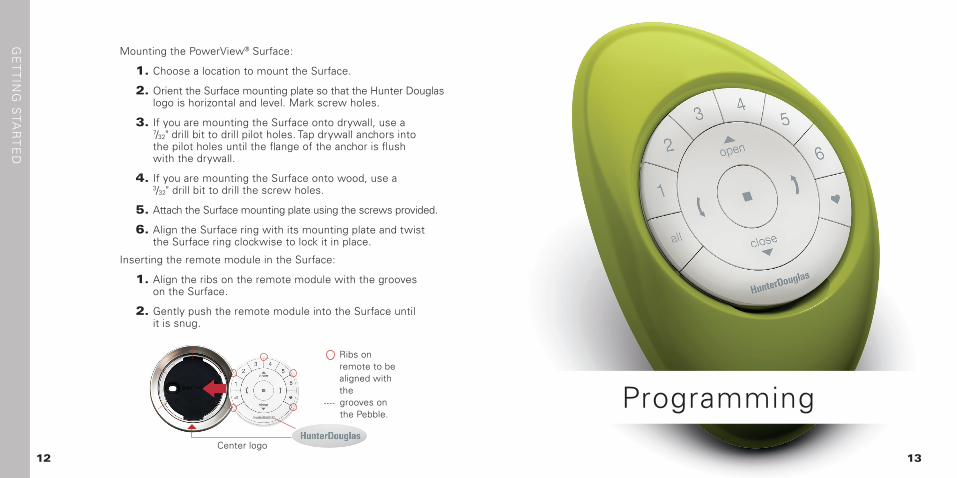
Inserting the remote module into the PowerView® Pebble® (hand-held):
1. Center the Hunter Douglas logo on the remote module above the indentation on the bottom rim of the Pebble.
2. Align the ribs on the remote module with the grooves on the Pebble.
3. Gently push the remote module into the Pebble until it is snug.
Ribs on remote to be aligned with the
grooves on the Pebble.
Center logo
Programming
1312
GE
TT
ING
STA
RT
ED
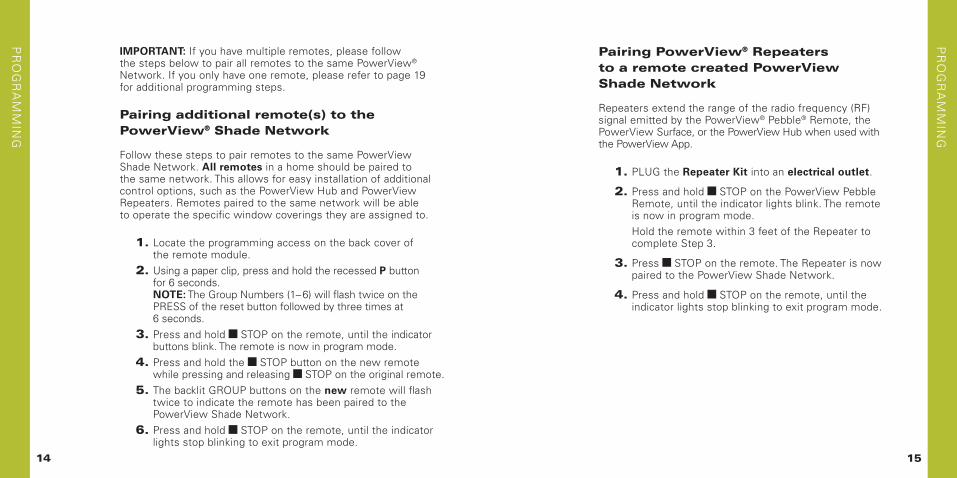
Mounting the PowerView® Surface:
1. Choose a location to mount the Surface.
2. Orient the Surface mounting plate so that the Hunter Douglas logo is horizontal and level. Mark screw holes.
3. If you are mounting the Surface onto drywall, use a 7/32" drill bit to drill pilot holes. Tap drywall anchors into the pilot holes until the flange of the anchor is flush with the drywall.
4. If you are mounting the Surface onto wood, use a 3/32" drill bit to drill the screw holes.
5. Attach the Surface mounting plate using the screws provided.
6. Align the Surface ring with its mounting plate and twist the Surface ring clockwise to lock it in place.
Inserting the remote module in the Surface:
1. Align the ribs on the remote module with the grooves on the Surface.
2. Gently push the remote module into the Surface until it is snug.
Ribs on remote to be aligned with the
grooves on the Pebble.
Center logo
IMPORTANT: If you have multiple remotes, please follow the steps below to pair all remotes to the same PowerView® Network. If you only have one remote, please refer to page 19 for additional programming steps.
Pairing additional remote(s) to the PowerView® Shade Network
Follow these steps to pair remotes to the same PowerView Shade Network. All remotes in a home should be paired to the same network. This allows for easy installation of additional control options, such as the PowerView Hub and PowerView Repeaters. Remotes paired to the same network will be able to operate the specific window coverings they are assigned to.
1. Locate the programming access on the back cover of the remote module.
2. Using a paper clip, press and hold the recessed P button for 6 seconds.
NOTE: The Group Numbers (1– 6) will flash twice on the PRESS of the reset button followed by three times at 6 seconds.
3. Press and hold STOP on the remote, until the indicator buttons blink. The remote is now in program mode.
4. Press and hold the STOP button on the new remote while pressing and releasing STOP on the original remote.
5. The backlit GROUP buttons on the new remote will flash twice to indicate the remote has been paired to the PowerView Shade Network.
6. Press and hold STOP on the remote, until the indicator lights stop blinking to exit program mode.
15
Pairing PowerView® Repeaters to a remote created PowerView Shade Network
Repeaters extend the range of the radio frequency (RF) signal emitted by the PowerView® Pebble® Remote, the PowerView Surface, or the PowerView Hub when used with the PowerView App.
1. PLUG the Repeater Kit into an electrical outlet.
2. Press and hold STOP on the PowerView Pebble Remote, until the indicator lights blink. The remote is now in program mode.
Hold the remote within 3 feet of the Repeater to complete Step 3.
3. Press STOP on the remote. The Repeater is now paired to the PowerView Shade Network.
4. Press and hold STOP on the remote, until the indicator lights stop blinking to exit program mode.
14
PR
OG
RA
MM
ING
PR
OG
RA
MM
ING
Pairing remote(s) to a PowerView® Hub created PowerView Shade Network
A Hub previously paired to an existing remote created PowerView® Shade Network or that had created its own network during setup, can have additional Pebble® or Surface remotes paired to it, even if the remotes are introduced after the initial Hub setup. The repeater’s green light will flash, whenever it repeats a command sent by a device on the same PowerView Shade Network.
1. Locate the programming access on the back cover of the remote module.
2. Using a paper clip, press and hold the recessed P button for 6 seconds.
NOTE: The Group Numbers (1–6) will flash twice on the PRESS of the reset button followed by three times at 6 seconds.
3. Hold the remote module within approximately 12 inches of the Hub.
Complete Steps 4 and 5 at the same time.
4. Press and hold the STOP button on the remote module.
5. Press and hold the P button on the back of the Hub for approximately three seconds.
NOTE: The Group Numbers (1–6) will flash to indicate that the remote module has been paired to the PowerView Shade Network.
17
Creating a Duplicate Remote
A duplicate remote will operate the same set of window coverings and GROUPS as the original remote.
1. Locate the programming access on the back cover of the remote module.
2. Using a paper clip, press and hold the recessed P button for 6 seconds.
NOTE: The Group Numbers (1–6) will flash twice on the PRESS of the reset button followed by three times at 6 seconds.
3. Press and hold STOP on the original remote, until the indicator lights blink. The remote is now in program mode.
4. While pressing and holding ALL on the new remote, press and release STOP on the original remote.
5. The backlit GROUP buttons on the duplicate remote will flash twice to indicate all of the information from the original remote has been copied.
6. Press and hold STOP on the original remote, until the indicator lights stop blinking to exit program mode.
16
PR
OG
RA
MM
ING
PR
OG
RA
MM
ING
Deactivating the remote’s auto-wake feature
The auto-wake feature activates the backlights on the remote, whenever the remote is handled. This feature is useful for immediately seeing which shade GROUP buttons were activated last, but deactivating this feature will help to conserve battery life. When the auto-wake feature is deactivated, press STOP to wake the remote and see which group buttons are active.
1. Press and hold the GROUP 6 button on the remote for approximately 6 seconds.
2. The GROUP numbers (1– 6) will blink once to indicate the auto-wake feature has been disabled.
Reactivating a remote’s auto-wake feature
1. Press and hold the GROUP 6 button on the remote for approximately 6 seconds.
2. The GROUP numbers (1– 6) will blink twice to indicate the auto-wake feature has been enabled.
1918
NOTE: It is recommended that only similar window coverings be included in a GROUP because of differences in product features and operation. When a window covering is added to a GROUP for the first time, it is also added to the PowerView® Shade Network that links window coverings and devices together.
A GROUP can be a single window covering or multiple window coverings. There are six unique assignable GROUPS to use on each remote. A window covering may be assigned to more than one GROUP.
Join a window covering to a GROUP
1. Press and hold STOP on the remote, until the indicator lights blink. The remote is now in program mode.
2. Press the desired GROUP number (1– 6) on the remote. The backlit GROUP number will flash to show it is selected.
3. Press and hold the manual control button on the window covering.
4. While continuing to press the manual button, press OPEN on the remote. The window covering will
move slightly to indicate it has been joined to the GROUP. Release the manual control button.
5. Press and hold STOP on the remote, until the indicator lights stop blinking to exit program mode.
PR
OG
RA
MM
ING
PR
OG
RA
MM
ING
2120
PR
OG
RA
MM
ING
PR
OG
RA
MM
ING
Remove a window covering from a GROUP
1. Press and hold STOP on the remote, until the indicator lights blink. The remote is now in program mode.
2. Press the desired GROUP number (1– 6) on the remote.The backlit GROUP number will flash to show it is selected.
3. Press and hold the manual control button on the window covering.
4. While continuing to press the manual button, press CLOSE on the remote. The window covering will
move slightly to indicate it has been removed from the GROUP. Release the manual control button.
5. Press and hold STOP on the remote, until the indicator lights stop blinking to exit program mode.
Set a FAVORITE position
Each window covering has one FAVORITE position, which is set at 50% open by default. Setting a new FAVORITE position overwrites any previous setting.
1. Open or close the window covering to the desired position.
2. Press and hold STOP on the remote, until the indicator lights blink. The remote is now in program mode.
3. Press and hold the manual control button on the window covering.
4. While continuing to press the manual control button, press ♥ FAVORITE on the remote. The window covering will move slightly to indicate it has set this window covering position as your FAVORITE. Release the manual control button.
5. Press and hold STOP on the remote, until the indicator lights stop blinking to exit program mode.
Resetting window covering programming
This reset erases Network information stored in the window covering, including GROUP assignments, preventing any input device from operating the window covering. Its primary use is during installation to correct GROUP and Network assignments. This reset does not affect travel limits.
1. Press and hold the manual control button for 12 seconds. The window covering will move slightly once after 6 seconds, then again after 12 seconds. Release the button.
2. Refer to “Join a window covering to a GROUP” on page 19 to program the window covering to a group.
22
PR
OG
RA
MM
ING
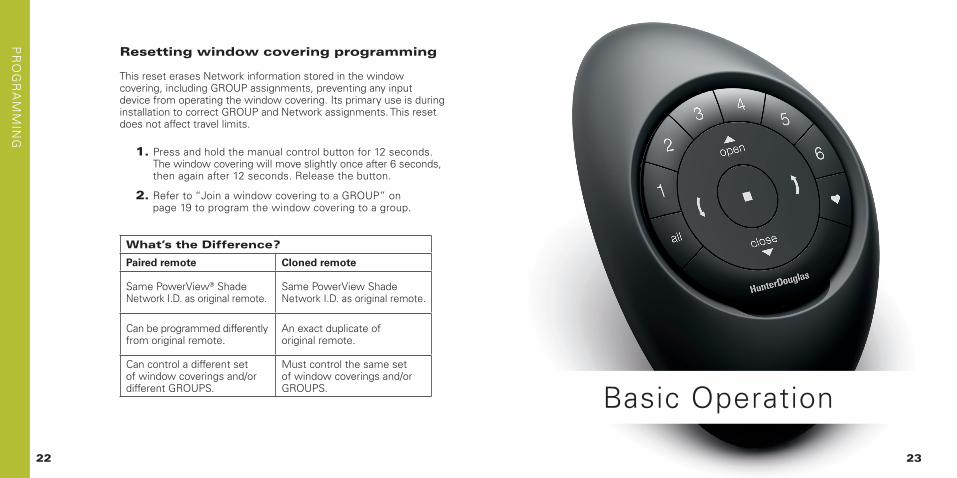
What’s the Difference?
Paired remote Cloned remote
Same PowerView® Shade Network I.D. as original remote.
Same PowerView Shade Network I.D. as original remote.
Can be programmed differently from original remote.
An exact duplicate of original remote.
Can control a different set of window coverings and/or different GROUPS.
Must control the same set of window coverings and/or GROUPS. Basic Operation
23
Once the window coverings have been joined to a GROUP or multiple GROUPS, the remote is ready to operate the window covering(s). Multiple window coverings can be operated at the same time.
NOTE: Some PowerView® window treatments offer variable operation from the basic operation listed here. For full instructions on how to operate your PowerView window treatment, please consult the IOC that came with your window treatment.
Basic Operation
1. To wake up the remote, simply pick it up or press STOP. The last GROUP(S) selected will be
highlighted and active.
2. Press ALL or GROUP 1– 6 button(s) to select specific window covering(s) to operate. Selected GROUP button(s) will light to show they are selected.
a. Multiple GROUP buttons may be selected at the same time.
b. To deselect a GROUP, press the GROUP button again. The backlit GROUP button will go out.
3. Press OPEN to open the selected window covering(s).
4. Press CLOSE to close the selected window covering(s).
25
5. For window covering(s) with vanes or a middle rail*, press the RIGHT ARROW to close the window covering and open the vanes, rotate the vanes to the right, or fully raise the middle rail.
6. For window covering(s) with vanes or a middle rail, press the LEFT ARROW to close the vanes, rotate the vanes to the left, or fully lower the middle rail.
a. NOTE: Single-function window coverings will not operate by pressing the ARROW buttons.
7. Press STOP to stop window covering/vane movement anywhere along its travel.
8. While a window covering is in motion, press the opposite of its motion ( OPEN or CLOSE) to reverse direction.
9. Press ♥ FAVORITE to send selected window covering(s) to your preset FAVORITE position.
* Applies to Top-Down/Bottom-Up and Duolite™ window coverings only. The bottom rail on Top-Down/Bottom-Up window coverings operates using the OPEN and CLOSE commands.
24
BA
SIC
OP
ER
AT
ION
BA
SIC
OP
ER
AT
ION
Battery Replacement
27
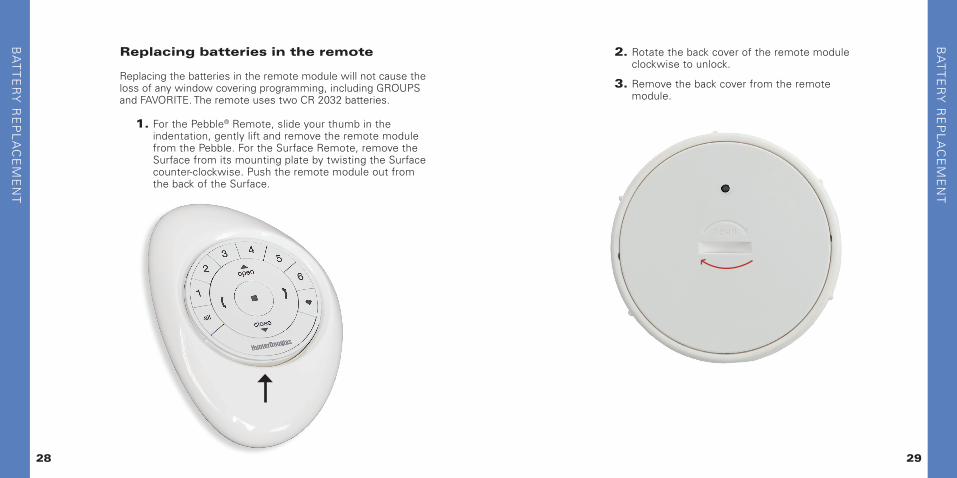
Replacing batteries in the remote
Replacing the batteries in the remote module will not cause the loss of any window covering programming, including GROUPS and FAVORITE. The remote uses two CR 2032 batteries.
1. For the Pebble® Remote, slide your thumb in the indentation, gently lift and remove the remote module from the Pebble. For the Surface Remote, remove the Surface from its mounting plate by twisting the Surface counter-clockwise. Push the remote module out from the back of the Surface.
2. Rotate the back cover of the remote module clockwise to unlock.
3. Remove the back cover from the remote module.
2928
BA
TT
ER
Y R
EP
LA
CE
ME
NT
BA
TT
ER
Y R
EP
LA
CE
ME
NT
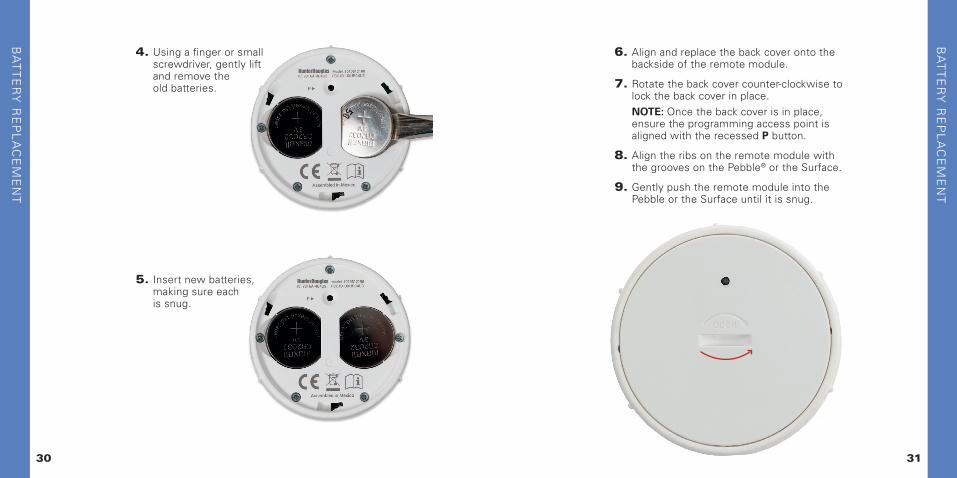
4. Using a finger or small screwdriver, gently lift and remove the old batteries.
5. Insert new batteries, making sure each is snug.
30 31
6. Align and replace the back cover onto the backside of the remote module.
7. Rotate the back cover counter-clockwise to lock the back cover in place.
NOTE: Once the back cover is in place, ensure the programming access point is aligned with the recessed P button.
8. Align the ribs on the remote module with the grooves on the Pebble® or the Surface.
9. Gently push the remote module into the Pebble or the Surface until it is snug.
BA
TT
ER
Y R
EP
LA
CE
ME
NT
BA
TT
ER
Y R
EP
LA
CE
ME
NT
Troubleshooting
33
What is a PowerView® Shade Network?
The PowerView® Shade Network is a unique radio frequency that allows PowerView Motorization devices to communicate with each other within a home. All PowerView devices within a home should be added to the same PowerView Shade Network. This allows for easy installation of additional control options, such as the PowerView Hub, PowerView Repeaters and PowerView Scene Controllers. Additionally, Remotes joined to the same PowerView Shade Network will be able to operate all window coverings in the PowerView Shade Network as desired.
Troubleshooting
1. None of the backlit buttons illuminate on my remote when I press the buttons.
• Check to make sure the batteries are inserted properly and are new.
• Join an existing PowerView Shade Network with the remote.
2. I programmed my window covering to work from two different remotes. The window covering works well with the second remote, but will no longer respond to the first remote.
• Check to make sure the batteries in both remotes are inserted properly and are new.
• All PowerView remotes within a home need to be included in the same PowerView Shade Network. Refer to “Pairing additional remote(s) to the PowerView Shade Network” on page 14.
35
TR
OU
BL
ES
HO
OT
ING
34
TR
OU
BL
ES
HO
OT
ING
3. My window covering does not respond when I press OPEN or CLOSE.
• Make sure that there is power to the window covering and that the window covering functions properly by pressing the manual control button on the window covering.
• Make sure the correct GROUP number or ALL has been selected before pressing OPEN or CLOSE. Active GROUP buttons will be backlit.
• Add the window covering(s) to a GROUP on the remote. Refer to “Join a window covering to a GROUP” on page 19.
4. My window covering operates when I press OPEN or CLOSE, but not when I press either of the arrow buttons.
• The arrow buttons are for operating Top-Down/Bottom-Up shades, Duolite™ shades, and shadings or sheers with operable vanes only. Refer to the product’s Installation, Operation, and Care instructions for proper operation.
• If the window covering is a Top-Down/Bottom-Up shade, a Duolite shade, or a shading or sheer with operable vanes, reset the travel limits on the window covering. Press and hold the manual button on the window covering for 6 seconds, until it jogs. The window covering will then run an auto-calibration sequence.
37
U.S. Radio Frequency FCC ComplianceThis device complies with Part 15 of the FCC Rules. Operation is subject to the following two conditions: (1) This device may not cause harmful interference, and (2) This device must accept any interference received, including interference that may cause undesired operation.This equipment has been tested and found to comply with the limits for a Class B digital device, pursuant to Part 15 of the FCC Rules. These limits are designed to provide reasonable protection against harmful interference in a residential installation. This equipment generates, uses and can radiate radio frequency energy and, if not installed and used in accordance with the instructions, may cause harmful interference to radio communications. However, there is no guarantee that interference will not occur in a particular installation. If this equipment does cause harmful interference to radio or television reception, which can be determined by turning the equipment off and on, the user is encouraged to try to correct the interference by one or more of the following measures:• Reorient or relocate the receiving antenna.• Increase the separation between the equipment and receiver.• Connect the equipment into an outlet on a circuit different from that to which the receiver is connected.• Consult the dealer or an experienced radio/TV technician for help.Any changes or modifications not expressly approved by the party responsible for compliance could void the user’s authority to operate the equipment.
Industry CanadaUnder Industry Canada regulations, this radio transmitter may only operate using an antenna of a type and maximum (or lesser) gain approved for the transmitter by Industry Canada. To reduce potential radio interference to other users, the antenna type and its gain should be so chosen that the equivalent isotropically radiated power (e.i.r.p.) is not more than that necessary for successful communication.This device complies with Industry Canada licence-exempt RSS standard(s). Operation is subject to the following two conditions: (1) this device may not cause interference, and (2) this device must accept any interference, including interference that may cause undesired operation of the device.Class B Digital Device NoticeThis Class B digital apparatus complies with Canadian ICES-003, RSS-Gen and RSS-210.
Industrie CanadaConformément à la réglementation d’Industrie Canada, le présent émetteur radio peut fonctionner avec une antenne d’un type et d’un gain maximal (ou inférieur) approuvé pour l’émetteur par Industrie Canada. Dans le but de réduire les risques de brouillage radioélectrique à l’intention des autres utilisateurs, il faut choisir le type d’antenne et son gain de sorte que la puissance isotrope rayonnée équivalente (p.i.r.e.) ne dépasse pas l’intensité nécessaire à l’établissement d’une communication satisfaisante.Le présent appareil est conforme aux CNR d’Industrie Canada applicables aux appareils radio exempts de licence. L’exploitation est autorisée aux deux conditions suivantes : (1) l’appareil ne doit pas produire de brouillage, et (2) l’utilisateur de l’appareil doit accepter tout brouillage radioélectrique subi, même si le brouillage est susceptible d’en compromettre le fonctionnement.Appareil Numérique de Classe B – AvisCet appareil numérique de classe B est conforme à la norme NMB-003, CNR-Gen et CNR-210 du Canada.CAN ICES-3 (B)/NMB-3(B)
European ConformityWe, the undersigned,Hunter Douglas Window Fashions One Duette Way, Broomfield, CO 80020, USAHunter Douglas Europe B.V. Piekstraat 2, 3071 EL Rotterdam, The Netherlandscertify and declare under our sole responsibility that the PowerView® Remote Control conforms with the essential requirements of the EMC directive 2004/108/EC and R&TTE directive 1999/5/EC.A copy of the original declaration of conformity may be found at www.hunterdouglas.com/RFcertifications.