part 6 paving - adept 5... · the contractor’s method statement for the scheme the laying plant...
TRANSCRIPT

Part 6 Paving
(including hand laying)

Information you need BEFORE the job starts.....
The contractor’s method statement for the scheme
The laying plant to be used and the asphalt plant which will
supply to the job
Bond coat type – should be a polymer modified emulsion
Name of man in charge ( foreman/supervisor you talk to
especially if things are not done properly)
Delivery and rolling temperatures if a modified bitumen mix is
to be used, otherwise the BS594987 temperatures.
Start and finish times for the Traffic Management. Check all
diversion signs and TM is in place and OK
Check dips written on surface meet thickness requirements Ironwork lifted in good time so concrete is set Laying records to check Rate of spray of bond coats (used for all layers) and correct product Correct material being supplied Delivery times and temperatures Identify delay times and location of paver stoppages. Wind speed, surface and air temperatures (in winter) c.f SHW Cl 945

Density checks with calibrated gauge and
coring base and if possible binder course
Texture depth and rolling straight edge ( if in the
spec)
How much material has been cut off
Painting of kerb faces, ironwork and joints

NB
Make sure all prepping has been completed
BEFORE paving starts, not whilst it is in progress or after!
(ie setting manhole frames,
gully frames, valve boxes etc)

Pavers

Tracked pavers give the best riding quality but
are not widely used in the UK

Older, 4-wheeled paver, showing main parts very
clearly(These produce more even surfaces than 2 wheeled
pavers but very few are still being used.)

Modern paver, 2 large driving wheels but the
wheels under the hopper are also driven

Another modern paver with built-in bond-coat
tank and integral spray bar

Small paver, note just 2 wheels under the hopper, OK
for non-critical jobs such as factory yards but not roads

Paver hopper (showing the conveyors which feed the asphalt
to the screed and the rollers by which the delivery truck is pushed)

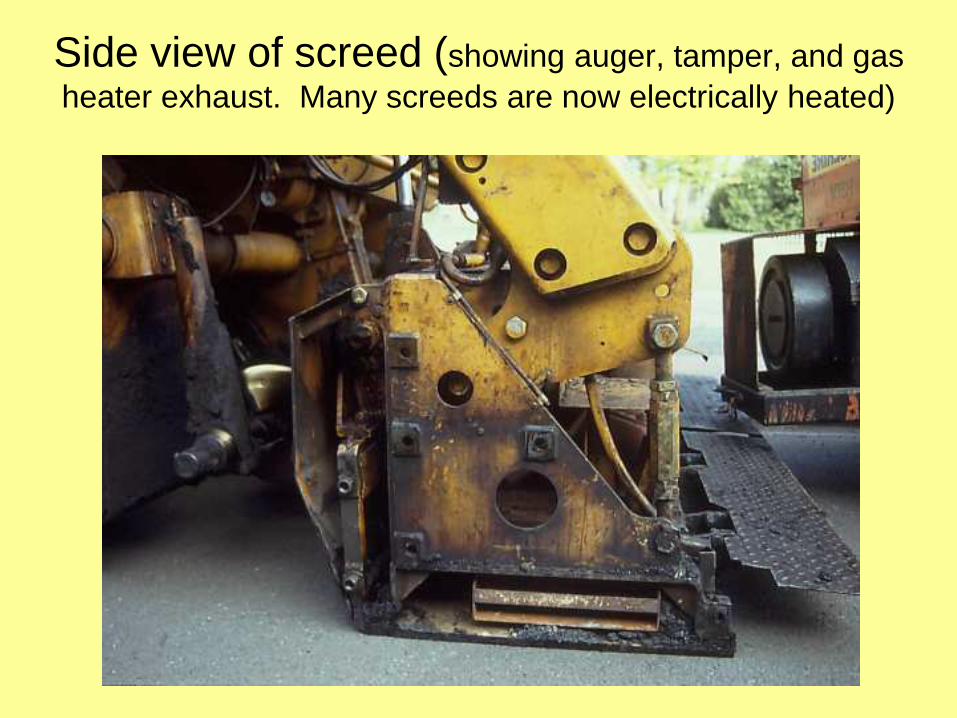
Side view of screed (showing auger, tamper, and gas
heater exhaust. Many screeds are now electrically heated)

Hydraulically extended screed (The 2 larger
pistons/cylinders are simply to make the screed more rigid when
extended)

An older screed’s width being extended (these are
generally more rigid than hydraulically extended screeds)

Delivery of asphalt to the paver

Ideally, on any but the smallest job, start with 60t,
ie 3 trucks, in front of the paver (The paver is meant to
move steadily with no start/stops)

Truck protects asphalt in paver hopper

Don’t let the truck bump into the paver !!!
( this causes a ridge across the new asphalt mat.

No prizes for spotting this problem !!
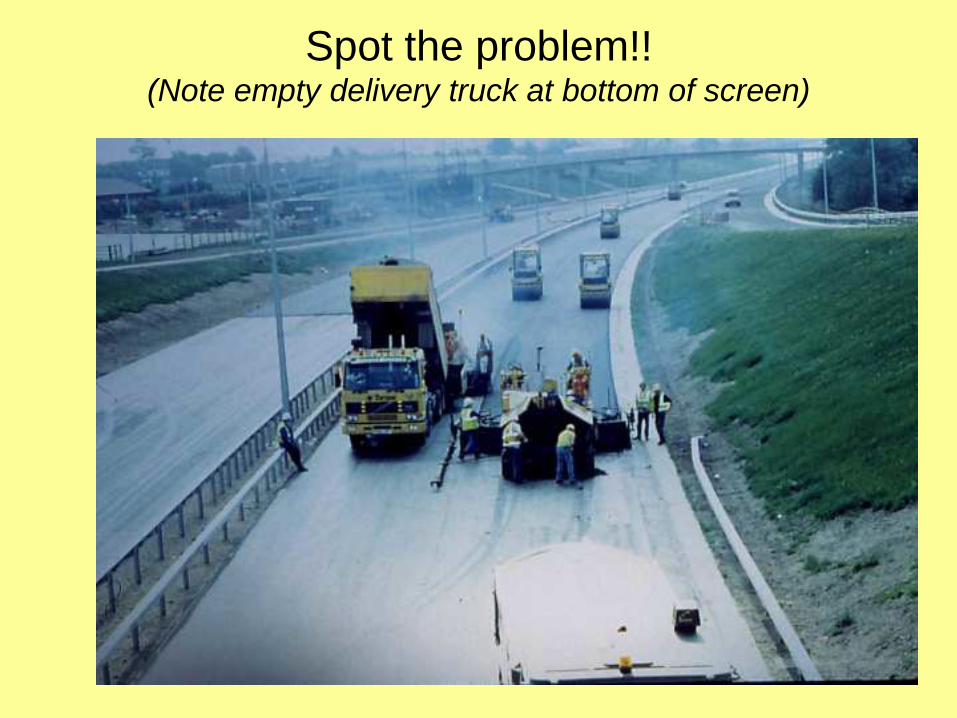
Spot the problem!! (Note empty delivery truck at bottom of screen)

Paver hopper (showing un-insulated steel sides (or “wings”))

Thermal image of a “just-laid” mat (Note cold areas of
asphalt from the previous load, from the hopper wings)

The same mat, 20 metres later

“Insulated” paver hopper, Tarmac (pity all paver hoppers are not like this)

Checking temperature of hot mix (Today, he would be
wearing safety goggles)

Controlling the thickness of the as-laid
asphalt.

Surface course
Binder Course
String Line
DIPPING TO DETERMINE REQUIRED THICKNESS OF NEXT COURSE
NOTE: The string line must always be parallel to finished road profile
Control pin

Checking the mat thickness
For inlays............. Measure new height of kerb face
Generally Check the dips (thickness) sprayed on carriageway Check the thickness of edges of mat after laying Take a level on site and check some levelling points
Use a screwdriver pushed through the hot mat and hold against a steel rule to measure thickness of hot mats
NB Remember the permitted tolerances

Main paver inputs influencing level control
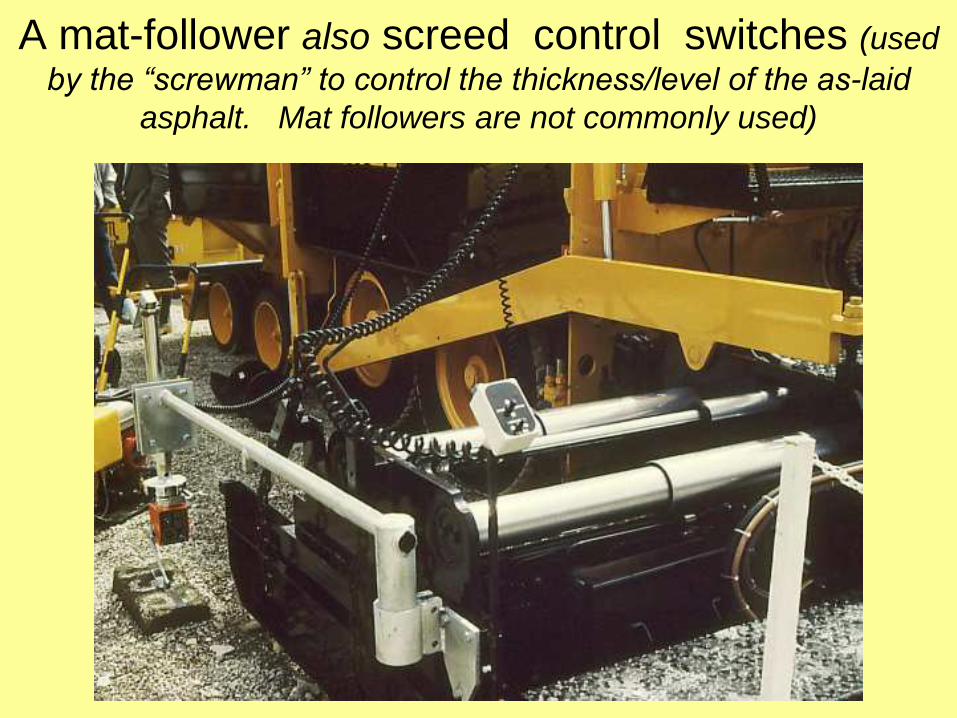
A mat-follower also screed control switches (used
by the “screwman” to control the thickness/level of the as-laid
asphalt. Mat followers are not commonly used)

Averaging beam (Gives a better riding quality than the paver alone)
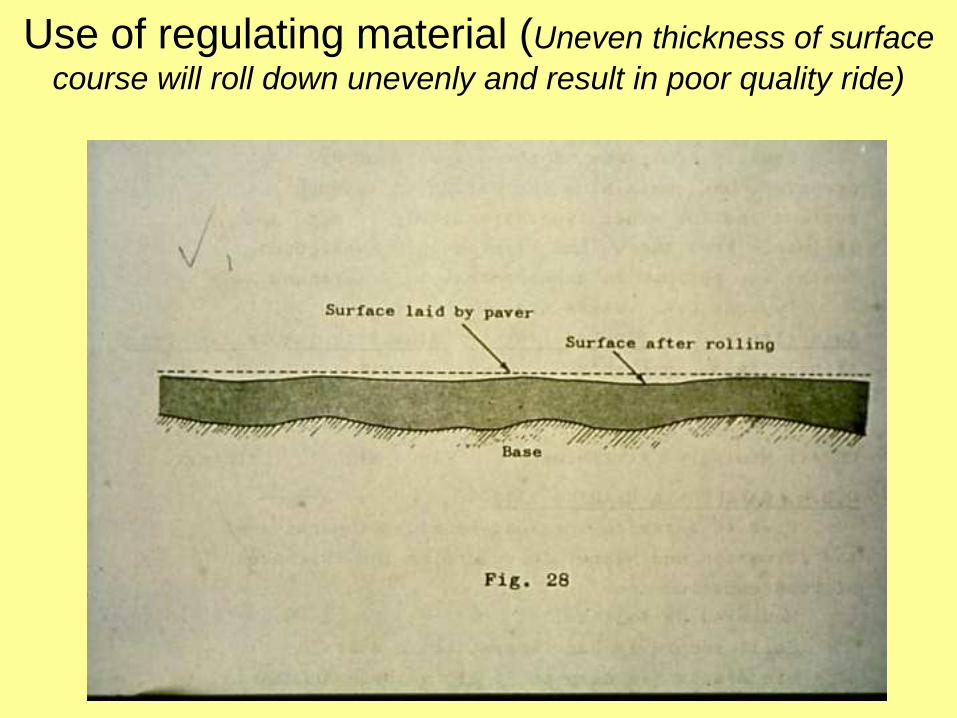
Use of regulating material (Uneven thickness of surface
course will roll down unevenly and result in poor quality ride)

Finer points about laying

Pavers working in echelon (extremely good practice,
central surface course joint is made “hot to hot” no poor joints)

Note neatly cut edge to this first-laid mat ( This now needs painting with hot 50 or 70 pen bitumen before
the next mat is laid)

Attention to joint (1), roller runs on mat 1 with just 150mm overlap onto mat 2.

Attention to joint (2), mat 2 just laid (today, these
men would all be wearing safety helmets)

Good practice, note temporary cover on gully

Removing temporary cover to gully
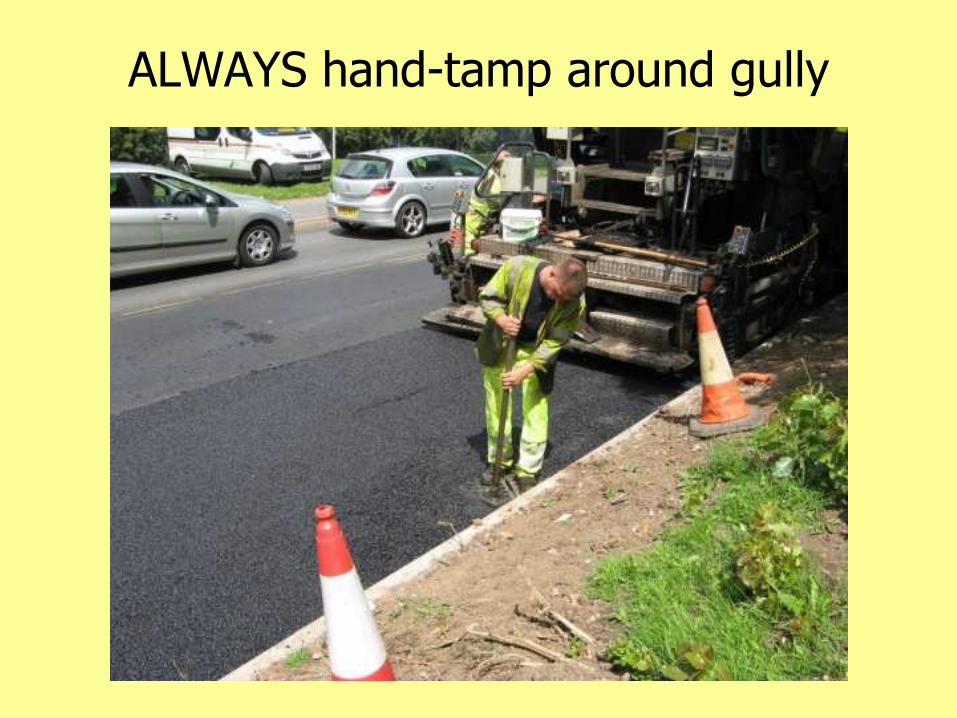
ALWAYS hand-tamp around gully

Making good around frame

VERY poor, lapped joint, not durable, likely to fail
within 4 or 5 years instead of 15 to 20.

Screed extensions incorrectly adjusted

Mat patterns caused by unskilled paver set-up,
(uneven pressure and compaction by screed extensions)

Reflective crack in 2 year old, well-laid surface
course (entirely due to poorly made binder course joint )

Note that IAN 154/12 allows longitudinal
joints between mats may be located
in the middle of the traffic lane,
but must be at least 300mm from any joint
in the layer beneath.
( This is to avoid good asphalt being
planed out when carrying out resurfacing
works.)

Gritting just laid, still hot sma mat
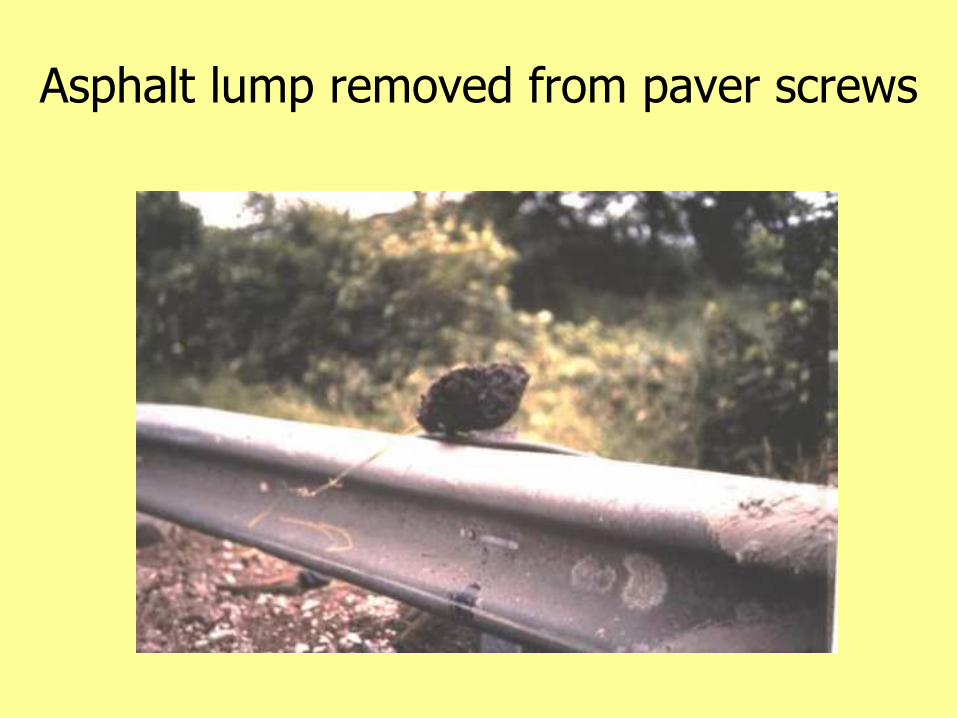
Asphalt lump removed from paver screws

Problem due to cold lumps

Problem, oil in truck body to make asphalt slip off
truck easily, (use soapy water instead)

Hand lay work
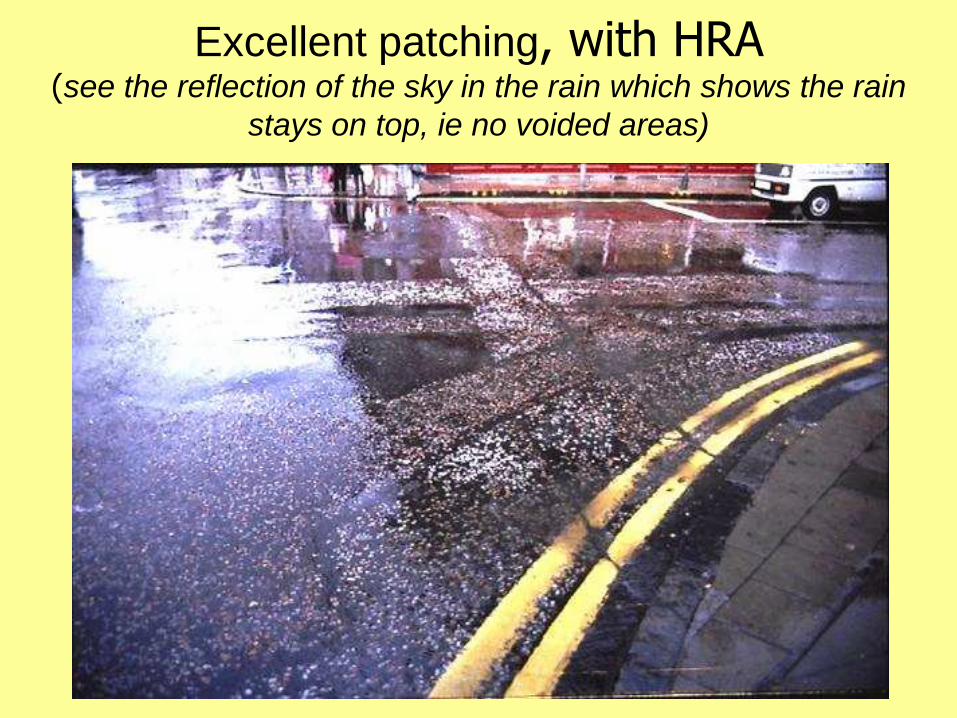
Excellent patching, with HRA (see the reflection of the sky in the rain which shows the rain
stays on top, ie no voided areas)

Very poor hand-laid work (see uncompacted areas at
edges,, insufficient asphalt used so it is too low to be rolled)
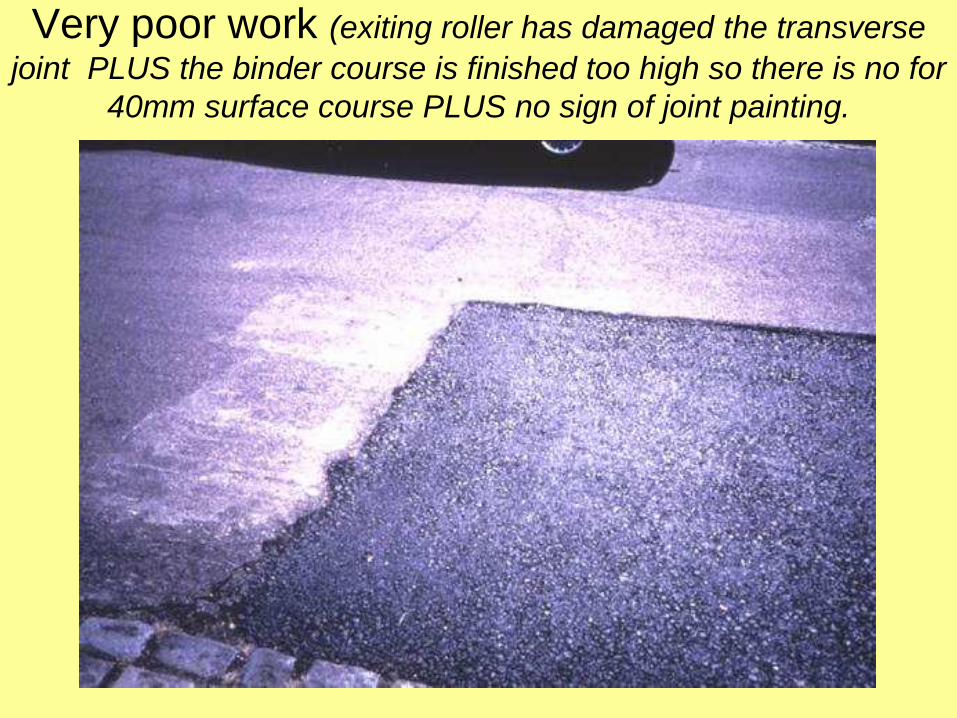
Very poor work (exiting roller has damaged the transverse
joint PLUS the binder course is finished too high so there is no for
40mm surface course PLUS no sign of joint painting.

Cold areas, poorly compacted

Bobcat job, even base but rough edges (preferred in
USA since gives better interlock with new asphalt)

Sawn edges as preferred in UK (but uneven base to area caused using a pneumatic breaker so
uneven surface finish very likely )

Good practice (Pushing new mix against vertical, bitumen
coated edges. When rolled will make strong vertical joint )

Material must always be workable to be
properly spread and then fully compacted.
If problems, consider use one of the following:-
. hot boxes,
. fluxed mixes
. or Sasobit, a wax additive
. or lay over-thick, ie one layer NOT two
. or use infra-red heaters for repairing patching
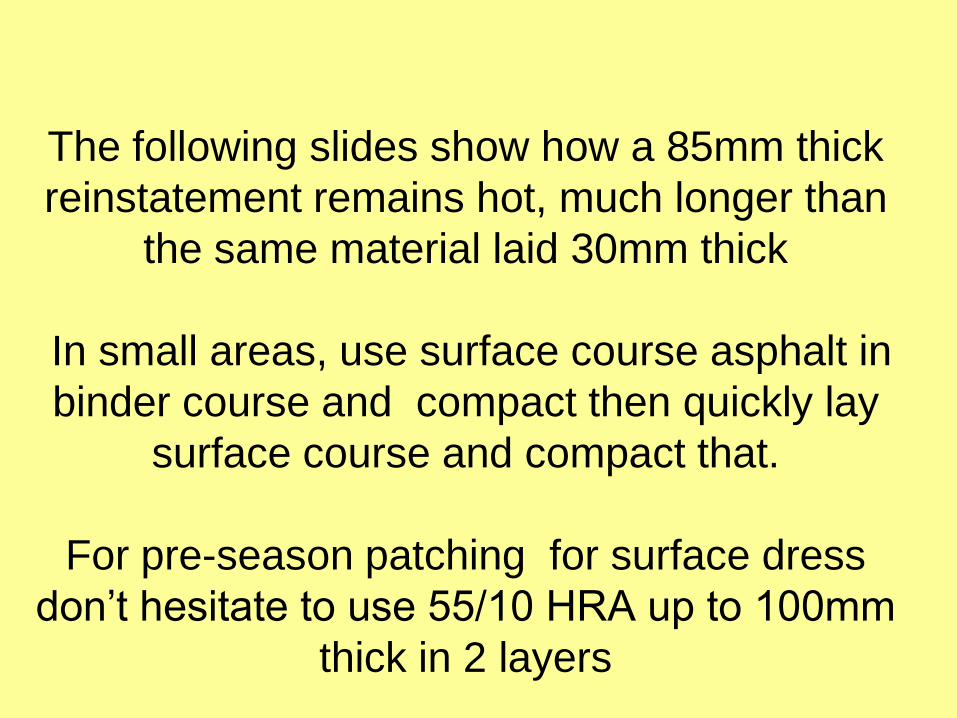
The following slides show how a 85mm thick
reinstatement remains hot, much longer than
the same material laid 30mm thick
In small areas, use surface course asphalt in
binder course and compact then quickly lay
surface course and compact that.
For pre-season patching for surface dress
don’t hesitate to use 55/10 HRA up to 100mm
thick in 2 layers
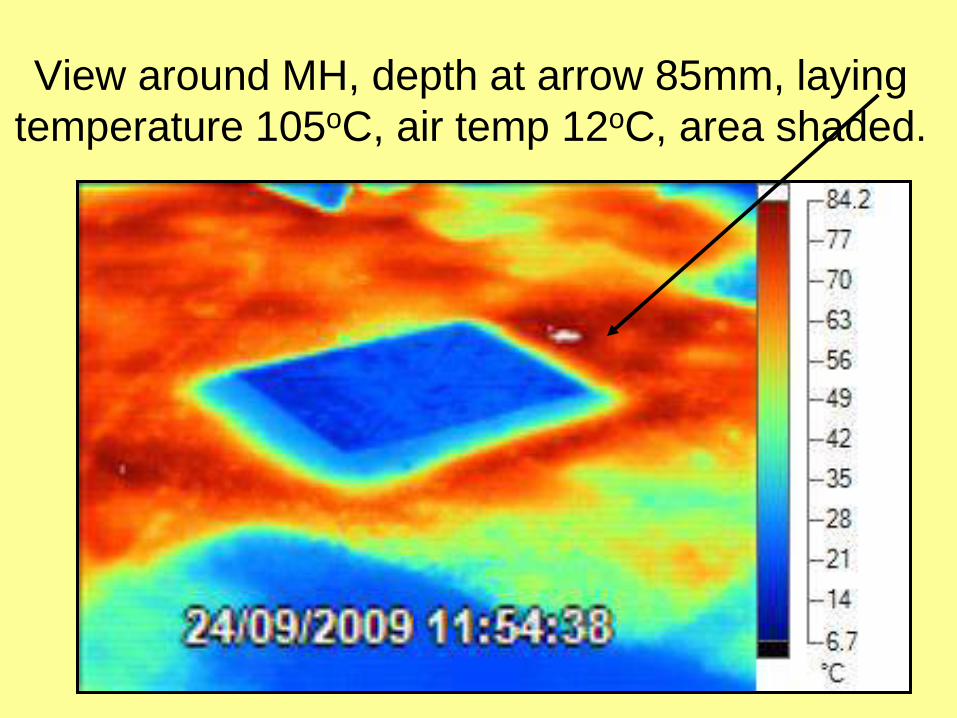
View around MH, depth at arrow 85mm, laying
temperature 105oC, air temp 12oC, area shaded.
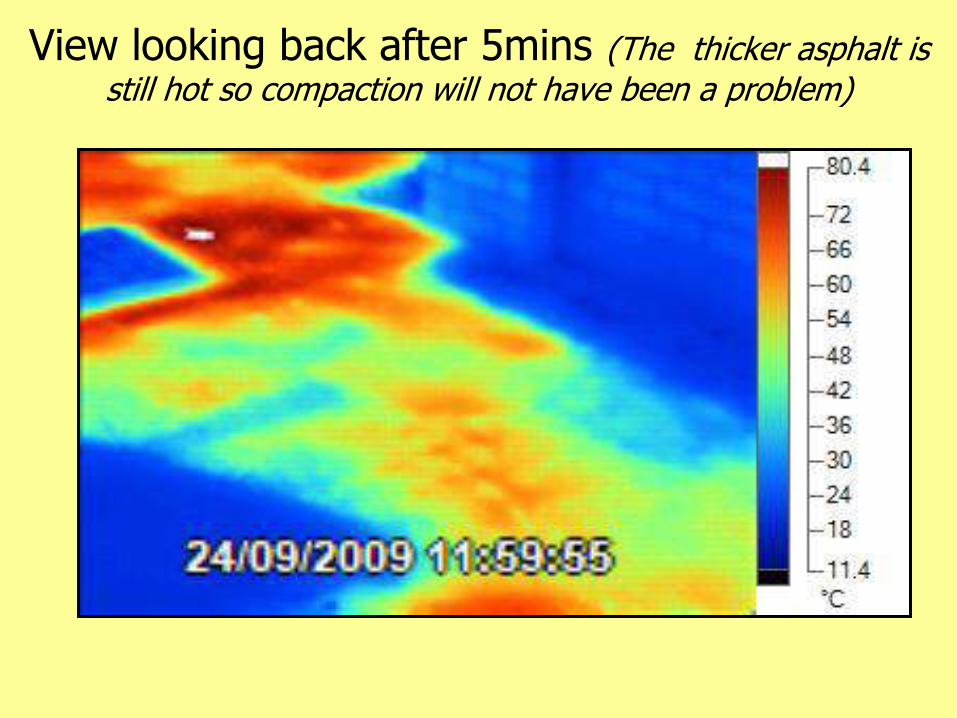
View looking back after 5mins (The thicker asphalt is still hot so compaction will not have been a problem)

Hot-box, good but use asphalt on the same day!!

Pathetic job. Greek hand-laid job, car tyres as roller, holiday photo.

Any questions?