pal exteriors guide
DESCRIPTION
PAL Exteriors GuideTRANSCRIPT

To use this flip book click the arrows either side of the document to scroll through pages, or hover the mouse over the document and click to enter full screen mode.
www.paintaids.co.nz 2
years yearsyears
Five decades of experiencedesigning and manufacturingpaint sleeves, brushes and tools.
GENERAL TIPS FOR PAINTING YOUR EXTERIOR
3 www.paintaids.co.nz
years yearsyearsFive decades of experience designing and
manufacturing paint sleeves, brushes and tools.
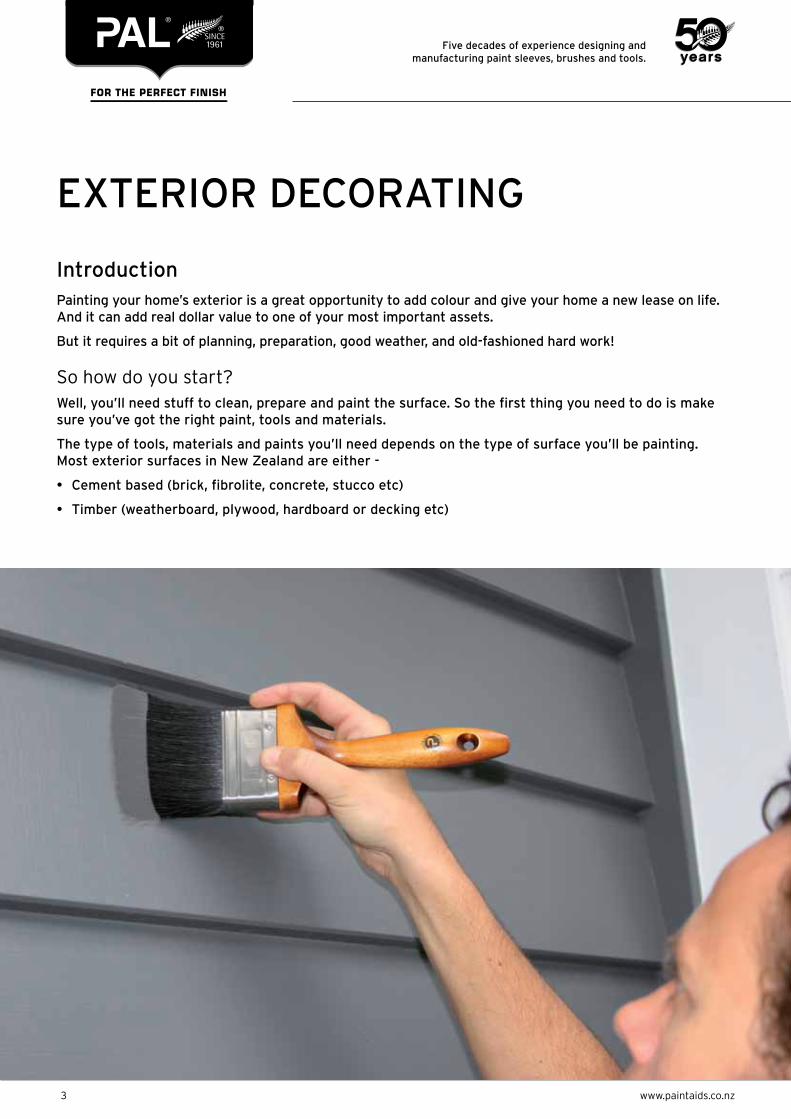
IntroductionPainting your home’s exterior is a great opportunity to add colour and give your home a new lease on life. And it can add real dollar value to one of your most important assets.
But it requires a bit of planning, preparation, good weather, and old-fashioned hard work!
So how do you start?Well, you’ll need stuff to clean, prepare and paint the surface. So the first thing you need to do is make sure you’ve got the right paint, tools and materials.
The type of tools, materials and paints you’ll need depends on the type of surface you’ll be painting. Most exterior surfaces in New Zealand are either -
• Cement based (brick, fibrolite, concrete, stucco etc)
• Timber (weatherboard, plywood, hardboard or decking etc)
ExTErIor DECorATINg
www.paintaids.co.nz 4
years yearsyearsFive decades of experience designing and
manufacturing paint sleeves, brushes and tools.
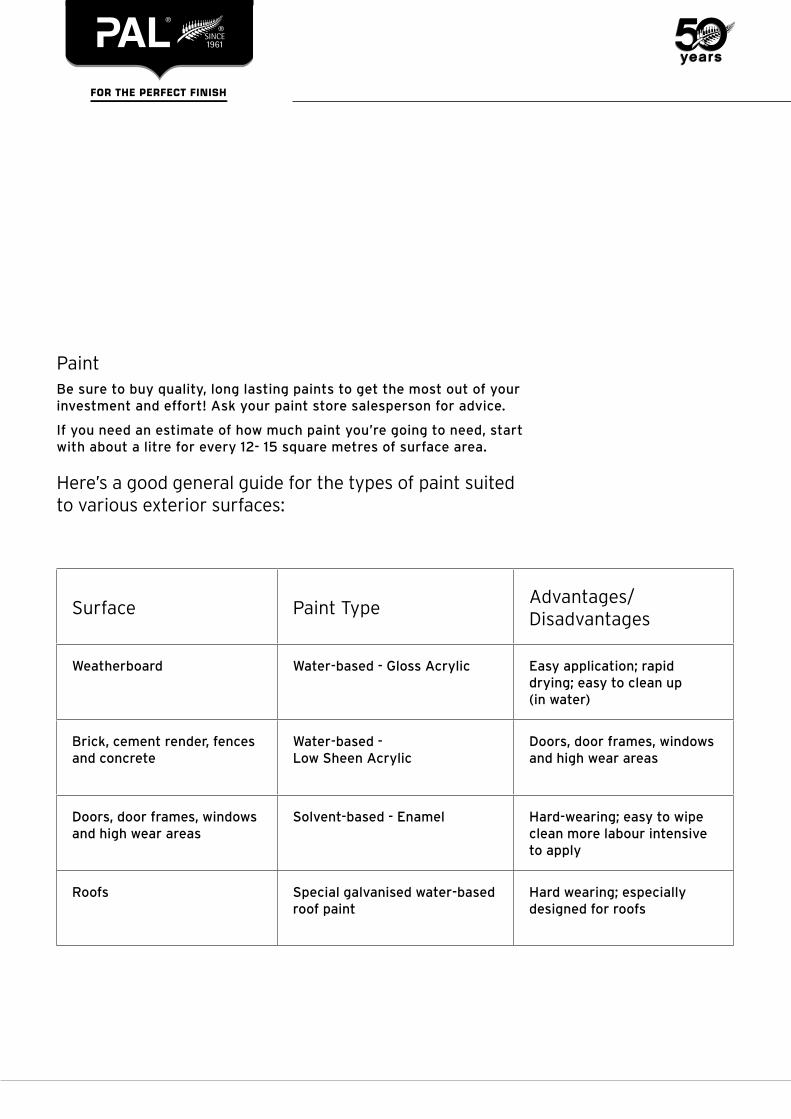
Surface Paint TypeAdvantages/Disadvantages
Weatherboard Water-based - gloss Acrylic Easy application; rapid drying; easy to clean up (in water)
Brick, cement render, fences and concrete
Water-based - Low Sheen Acrylic
Doors, door frames, windows and high wear areas
Doors, door frames, windows and high wear areas
Solvent-based - Enamel Hard-wearing; easy to wipe clean more labour intensive to apply
roofs Special galvanised water-based roof paint
Hard wearing; especially designed for roofs
PaintBe sure to buy quality, long lasting paints to get the most out of your investment and effort! Ask your paint store salesperson for advice.
If you need an estimate of how much paint you’re going to need, start with about a litre for every 12- 15 square metres of surface area.
Here’s a good general guide for the types of paint suited to various exterior surfaces:
5 www.paintaids.co.nz
years yearsyearsFive decades of experience designing and
manufacturing paint sleeves, brushes and tools.
Tools & MaterialsA good exterior finish means investing in good tools and materials that help you get the job done right.
The basics• Paint tray and pot
• roller handle and extension pole (recommended for painting walls and ceilings)
• Drop cloth
• Masking tape
• Clean cloth for wiping away small drips
• Sugar soap
• Fillers (Use an exterior filler for brick and concrete, and a flexible filler for timber)
• Primer
• Sandpaper, all grades
• Caulking gun
• Chemical paint stripper
• Ladder or trestles
• Turpentine
• Paint Stirrer
• Paint Pail openers (Plastic/Metal)
For stripping exterior surfaces• Stripping knives in a wide range of sizes from our PAL®
range 25mm/38mm/50mm/63mm/75mm/100mm/125mm.
• Also available is a 5-in-1 Stripping Tool.
For scraping exterior surfaces• For scraping surfaces choose from the PAL® shave hook –
triangle or combo or the 75mm burn off scraper.
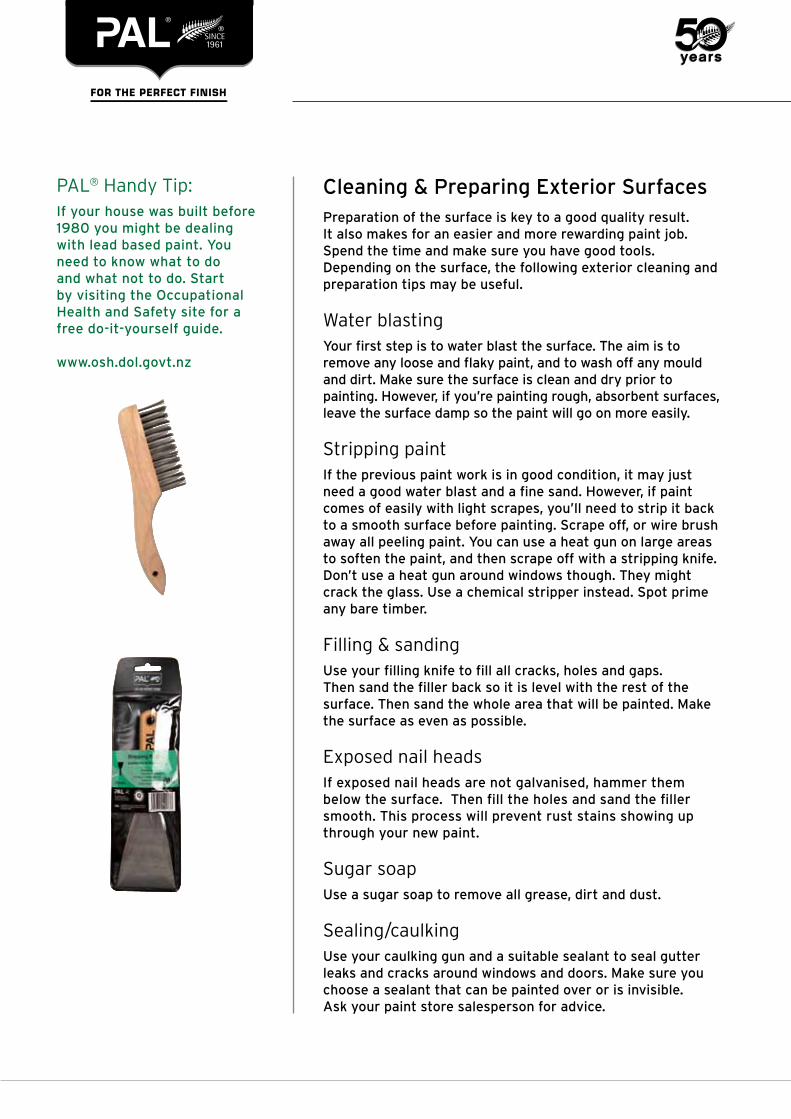
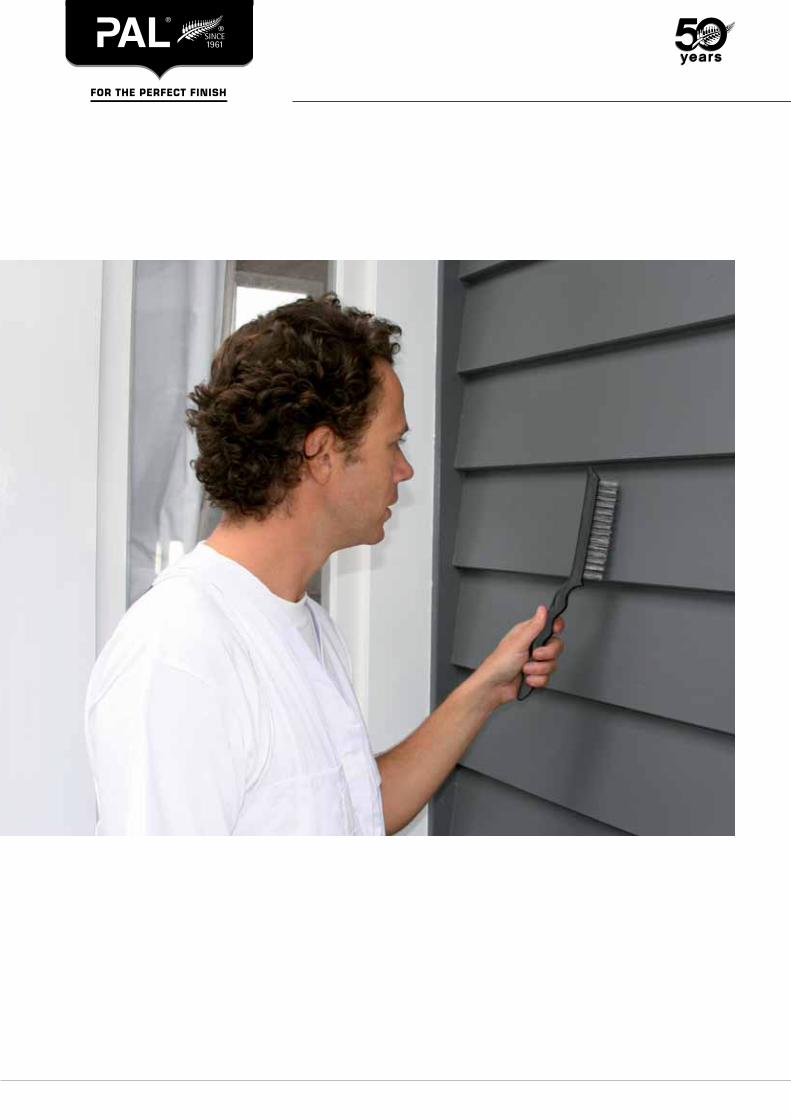
For cleaning surfaces & removing flaking paint• PAL® Wire Brushes are recommended. Available in 4 row
Plastic, 4 row Wooden, 6 row Arch.
For sanding• The PAL® Sanding Sponge (Coarse), or PAL Cork Sanding
Block for wrapping your sandpaper around.
For filling cracks, holes & gaps• PAL® Filling Knives are available in a wide variety of sizes :
38mm/50mm/63mm/75mm/100mm.
For applying putty around windows• Try the PAL® Putty Knife.
For applying your chosen paint• Check the packaging of PAL® products to match
applicators to your chosen paint.
www.paintaids.co.nz 6
years yearsyearsFive decades of experience designing and
manufacturing paint sleeves, brushes and tools.
Cleaning & Preparing Exterior SurfacesPreparation of the surface is key to a good quality result. It also makes for an easier and more rewarding paint job. Spend the time and make sure you have good tools. Depending on the surface, the following exterior cleaning and preparation tips may be useful.
Water blastingYour first step is to water blast the surface. The aim is to remove any loose and flaky paint, and to wash off any mould and dirt. Make sure the surface is clean and dry prior to painting. However, if you’re painting rough, absorbent surfaces, leave the surface damp so the paint will go on more easily.
Stripping paintIf the previous paint work is in good condition, it may just need a good water blast and a fine sand. However, if paint comes of easily with light scrapes, you’ll need to strip it back to a smooth surface before painting. Scrape off, or wire brush away all peeling paint. You can use a heat gun on large areas to soften the paint, and then scrape off with a stripping knife. Don’t use a heat gun around windows though. They might crack the glass. Use a chemical stripper instead. Spot prime any bare timber.
Filling & sandingUse your filling knife to fill all cracks, holes and gaps. Then sand the filler back so it is level with the rest of the surface. Then sand the whole area that will be painted. Make the surface as even as possible.
Exposed nail headsIf exposed nail heads are not galvanised, hammer them below the surface. Then fill the holes and sand the filler smooth. This process will prevent rust stains showing up through your new paint.
Sugar soapUse a sugar soap to remove all grease, dirt and dust.
Sealing/caulkingUse your caulking gun and a suitable sealant to seal gutter leaks and cracks around windows and doors. Make sure you choose a sealant that can be painted over or is invisible. Ask your paint store salesperson for advice.
PAL® Handy Tip: If your house was built before 1980 you might be dealing with lead based paint. You need to know what to do and what not to do. Start by visiting the occupational Health and Safety site for a free do-it-yourself guide. www.osh.dol.govt.nz
7 www.paintaids.co.nz
years yearsyearsFive decades of experience designing and
manufacturing paint sleeves, brushes and tools.
Handy tips for painting your exterior surfaces
Don’t paint a surface in direct sunlight. Yes a sunny day helps your paint dry, but direct sunlight can actually damage your paint finish by drying it Too quickly. We recommend painting in the shade and following the sun around your house. Stay in shaded areas while applying fresh paint.
Here’s an easy D.I.Y moisture test for concrete surfaces after water blasting. Simply tape a square of clear plastic sheeting (around 50cm by 50cm) to the surface. Make sure you apply the tape securely so that it’s airtight. Wait at least 24 hours, then check underneath the sheet for any sign of condensation. Condensation will mean that the surface needs longer to dry before painting can start.
Tackle your exterior paint job one section at a time. That way you achieve lots of milestones and break down a large job into achievable tasks.
BArE SUrFACES
Bare bricks, concrete & masonryNew concrete surfaces need to cure for at least 28 days before painting. During this time, wipe away salt and lime build-up.
After 28 days, use a wire brush to clean the surface. Then rub the surface down to wipe off any loose sand. Fill all cracks, gaps and holes with exterior filler. Sand it smooth and dust off. Apply a suitable primer if the surface is powdery, porous or highly glazed. Ask your paint store sales person for advice.
Bare timberIf bare timber has been exposed to the elements for more than a month, you’ll need to sand it back before you paint it. replace all rotten and decayed timber.
All new timber should be primed first, then gaps, cracks and holes should be filled with exterior wood filler (flexible filler). Then sand smooth and dust down.
www.paintaids.co.nz 8
years yearsyearsFive decades of experience designing and
manufacturing paint sleeves, brushes and tools.
9 www.paintaids.co.nz
years yearsyearsFive decades of experience designing and
manufacturing paint sleeves, brushes and tools.
Cement based walls (brick, fibrolite, concrete, masonry, stucco etc)
Cleaning & preparing
New concrete• New concrete surfaces need to cure for at least 28 days
before painting. During this time, wipe away salt and lime build-up.
• After 28 days, use a wire brush to clean the surface. Then rub the surface down to wipe off any loose sand.
• Fill all cracks, gaps and holes with exterior filler.
• Sand it smooth and dust off.
• Apply a suitable primer if the surface is powdery or porous and to lock in the lime. Ask your paint store sales person for advice.
Old concrete• Your first step is to water blast the surface. The aim is to
remove any loose and flaky paint, and to wash off any mould and dirt. Mix an anti-fungal solution into the water.
• Fill all cracks, gaps and holes with exterior filler.
• Sand it smooth and dust off.
• Apply a suitable primer if the surface is powdery or porous and to lock in the lime. Ask your paint store sales person for advice.
• Be sure to dampen the surface with a hose before you start painting. The moisture will make it easier to paint.
ExTErIor WALLS
PAL® Handy Tip: Dust from old lead or chromate based paint can be very dangerous! Visit the oSH site for advice on dealing with such paint.
www.osh.dol.govt.nz
Depending on whether you’re painting a cement or timber wall, you’ll need to tackle the job in particular ways.
Painting
Type of paint
The best paint to use on concrete based exterior walls is a water-based low sheen acrylic. It’s easy to apply, good on porous surfaces, rapid drying and easy to clean up in water.
Best applicators for the job
For painting cement based walls we recommend using a good quality, big roller. Try a PAL® roller No.3 (180mm or 230mm) for water-based paint, to give you quick coverage and a nice finish.
www.paintaids.co.nz 10
years yearsyearsFive decades of experience designing and
manufacturing paint sleeves, brushes and tools.
Timber walls (weatherboard, plywood, hardboard etc)
Cleaning & preparing
General guidelines• The first thing to do is to wash the timber surface down with a warm water and sugar
soap solution. Dirt and grease tend to build up around door handles and window catches especially. So be sure to give these areas a really good scrub.
• If the paint work is glossy, you might want to rub the gloss down to remove imperfections and create a slightly rougher surface for the new paint to stick properly. rub down with 200 grit wet and dry abrasive paper dipped in water.
Previously painted timber in good condition• If the timber has been previously painted, check to see if the paint work is in good
condition. If it is, just rub it down with a rag dipped in methylated spirits. Then rub down gloss with 200 grit paper.
• This is all the stripping you’ll need to do before filling and then priming.
• Always prime previously painted timber with an oil-based primer unless you have totally stripped the timber bare.
Previously painted timber in poor condition• Harder stripping will be needed if the previous paint work is in poor condition (flaking,
cracked, peeling, etc) or if the previous colour is much darker than the new colour.
• rub down gloss.
• replace or repair any rotted timber.
• Prime bare patches of wood.
• Fill gaps, cracks and nail holes with exterior wood filler (flexible filler).
• remove any loose putty on windows, and replace with new putty.
Always prime previously painted timber with an oil-based primer unless you have totally stripped the timber bare
11 www.paintaids.co.nz
years yearsyearsFive decades of experience designing and
manufacturing paint sleeves, brushes and tools.
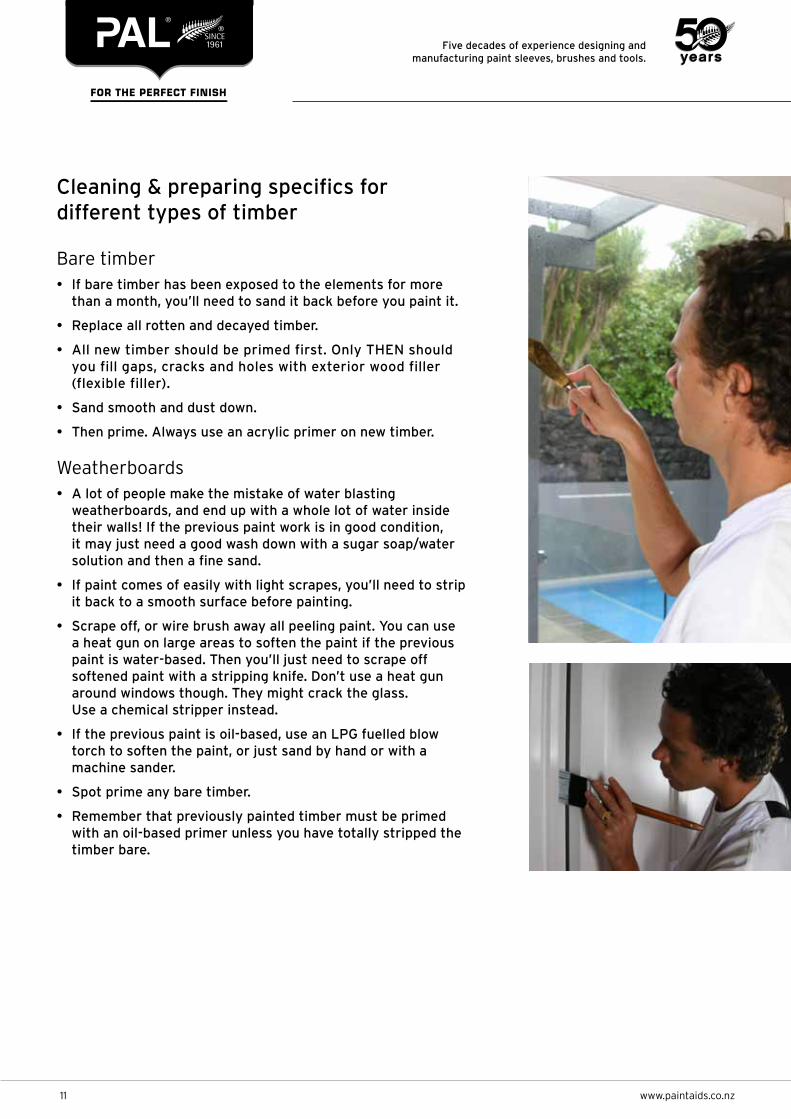
Bare timber• If bare timber has been exposed to the elements for more
than a month, you’ll need to sand it back before you paint it.
• replace all rotten and decayed timber.
• All new timber should be primed first. only THEN should you fill gaps, cracks and holes with exterior wood filler (flexible filler).
• Sand smooth and dust down.
• Then prime. Always use an acrylic primer on new timber.
Weatherboards• A lot of people make the mistake of water blasting
weatherboards, and end up with a whole lot of water inside their walls! If the previous paint work is in good condition, it may just need a good wash down with a sugar soap/water solution and then a fine sand.
• If paint comes of easily with light scrapes, you’ll need to strip it back to a smooth surface before painting.
• Scrape off, or wire brush away all peeling paint. You can use a heat gun on large areas to soften the paint if the previous paint is water-based. Then you’ll just need to scrape off softened paint with a stripping knife. Don’t use a heat gun around windows though. They might crack the glass. Use a chemical stripper instead.
• If the previous paint is oil-based, use an LPg fuelled blow torch to soften the paint, or just sand by hand or with a machine sander.
• Spot prime any bare timber.
• remember that previously painted timber must be primed with an oil-based primer unless you have totally stripped the timber bare.
Cleaning & preparing specifics for different types of timber
www.paintaids.co.nz 12
years yearsyearsFive decades of experience designing and
manufacturing paint sleeves, brushes and tools.
Wood surfaces (Cedar etc.)• Apply a moss and mould killer to the timber, and leave on
for up to 2 days. You may need to repeat this process if the moss or mould is really stubborn.
• Be sure to thoroughly wash the timber off to get rid of residue.
• We recommend also using a deck cleaner and brightener that will take the grey out of weathered wood. Try Flood® Dekswood, available in 1L and 4L.
• Then sand. When sanding timber, sand WITH the grain. The aim is to get rid of small imperfections and loose fibres from the surface. Loose fibres are likely if the timber has been exposed to the elements for more than a week.
• Dust the timber off.
Painting
Type of paint• For weatherboard use a gloss acrylic.
• For other timber walls you can use a low-sheen pigmented paint or a semi-transparent penetrating oil stain.
• If you’re after a natural finish use Flood® CWF Clearwood for exterior wood and Flood® CWF UV Natural Clearwood finish for exterior wood.
Best applicators for the job• For weatherboards, and when using any kind of water-based
paint on timber, use one of PAL®’s brushes (available in three price ranges to suit varying budgets) and try a Speed brush handle and pad (125mm/175mm available).
• For painting a cedar type wall we recommend using rollers. To select the correct roller use the PAL® roller System to match to the paint you have chosen.
Handy Hints
Always sand and prime timber on the same day. That way you prevent the risk of any moisture getting in and messing with your paint work.
Make sure you have a hose handy if you’re softening oil-based paint with a blowtorch. This process for removing paint can be a very real fire hazard, especially if your torch catches any rot, rubbish, nests or building paper popping out of the wall!
When painting weatherboard, start from the top. Paint the lap first and then the face. Try to paint to natural breaks if possible.
13 www.paintaids.co.nz
years yearsyearsFive decades of experience designing and
manufacturing paint sleeves, brushes and tools.
www.paintaids.co.nz 14
years yearsyearsFive decades of experience designing and
manufacturing paint sleeves, brushes and tools.
Clean & prepare
Remove all dirt, moss & mould• Apply a moss and mould killer to the timber, and leave on for
up to 2 days. You may need to repeat this process if the moss or mould is really stubborn.
• Be sure to thoroughly wash the timber off to get rid off residue.
• We recommend also using a deck cleaner that will take the grey out of weathered wood. Try Flood® Dekswood, available in 1L and 4L.
Sand• When sanding timber, sand WITH the grain. The aim is to get
rid of small imperfections and loose fibres from the surface. Loose fibres are likely if the timber has been exposed to the elements for more than a week.
• Sand sharp edges so that they’re slightly rounded off, This will help paint stay onto the edges.
• Dust the timber off.
Type of paint
For decks and fences, choose either:• A low-sheen pigmented paint.
• A semi-transparent penetrating oil stain.
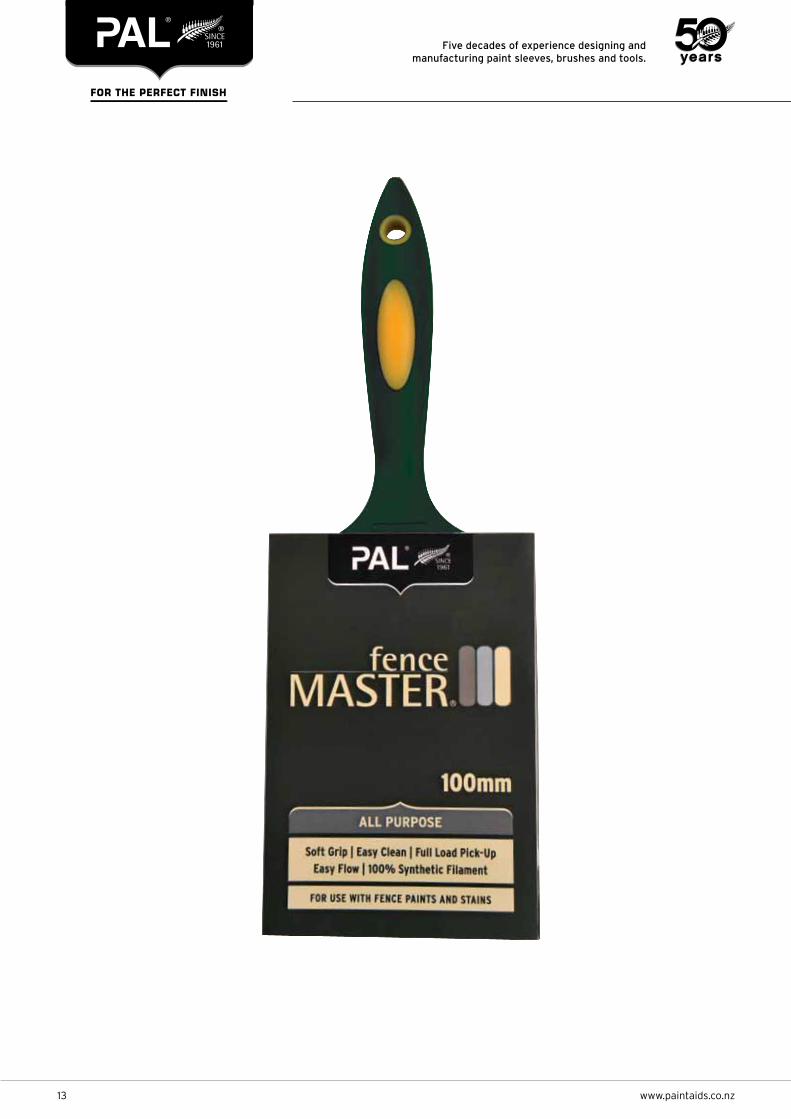
Best applicators for the job• For fences you need go no further than the PAL® Fencemaster
range. Suitable for both fence and paint stains. Brushes available in 100mm and 50mm.
• or try our new Fence and Deck kit with a 100mm roller, great for a quicker application. Plus you can add an extension pole to take out the back breaking work.
DECKS & FENCES
Handy Hints
Apply at least 2 coats of paint to your decks and fences. If using a semi-transparent stain, on dressed timber, apply a third coat after 3 months.
When painting a fence, don’t forget to coat the “end grains” (underneath the fence). This will help prevent moisture that could later cause cracking of your paint job and rotting of the fence!
Even after your deck or fence is painted, wash it down regularly with a moss and mould killer. This will protect your paint job from becoming affected by moss or mould build up.
Handy Tip: Dust from old lead or chromate based paint can be very dangerous! Visit the oSH site for advice on dealing with such paint.
15 www.paintaids.co.nz
years yearsyearsFive decades of experience designing and
manufacturing paint sleeves, brushes and tools.
rooFS
Cleaning & preparing
New galvanised/zincalume roofs• Wash the roof using a roof wash and paint cleaner. Be sure to
wash spouting too. Then rinse these products off thoroughly.
• Apply an appropriate primer. Ask your paint store salesperson for advice if you live near the water as you’ll need a special primer to deal with salt. You’ll also need to wash away salt build-up after your first coat of primer, before applying a second coat.
Older/weathered roofs (unpainted)• Wash the roof using a roof wash and paint cleaner. Be sure to
wash spouting too. Then rinse these products off thoroughly.
• Strip back old flaking layers of paint.
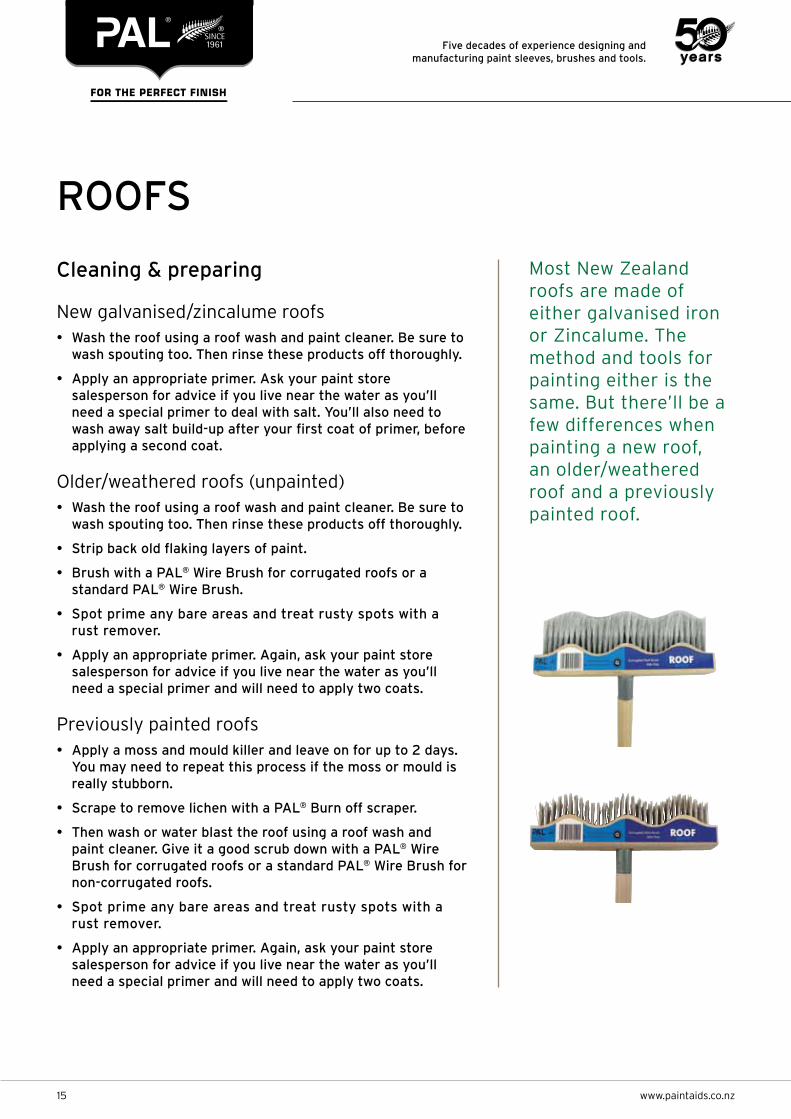
• Brush with a PAL® Wire Brush for corrugated roofs or a standard PAL® Wire Brush.
• Spot prime any bare areas and treat rusty spots with a rust remover.
• Apply an appropriate primer. Again, ask your paint store salesperson for advice if you live near the water as you’ll need a special primer and will need to apply two coats.
Previously painted roofs• Apply a moss and mould killer and leave on for up to 2 days.
You may need to repeat this process if the moss or mould is really stubborn.
• Scrape to remove lichen with a PAL® Burn off scraper.
• Then wash or water blast the roof using a roof wash and paint cleaner. give it a good scrub down with a PAL® Wire Brush for corrugated roofs or a standard PAL® Wire Brush for non-corrugated roofs.
• Spot prime any bare areas and treat rusty spots with a rust remover.
• Apply an appropriate primer. Again, ask your paint store salesperson for advice if you live near the water as you’ll need a special primer and will need to apply two coats.
Most New Zealand roofs are made of either galvanised iron or Zincalume. The method and tools for painting either is the same. But there’ll be a few differences when painting a new roof, an older/weathered roof and a previously painted roof.
www.paintaids.co.nz 16
years yearsyearsFive decades of experience designing and
manufacturing paint sleeves, brushes and tools.
Painting
Type of paintThe best paint to use on roofs is a special galvanised water-based roof paint. A lot of these have UV resistant pigments and tough polymers, so they’re designed to wear the exposure to sun and rain.
You’ll usually need 2 coats, but this type of paint is fast-drying.
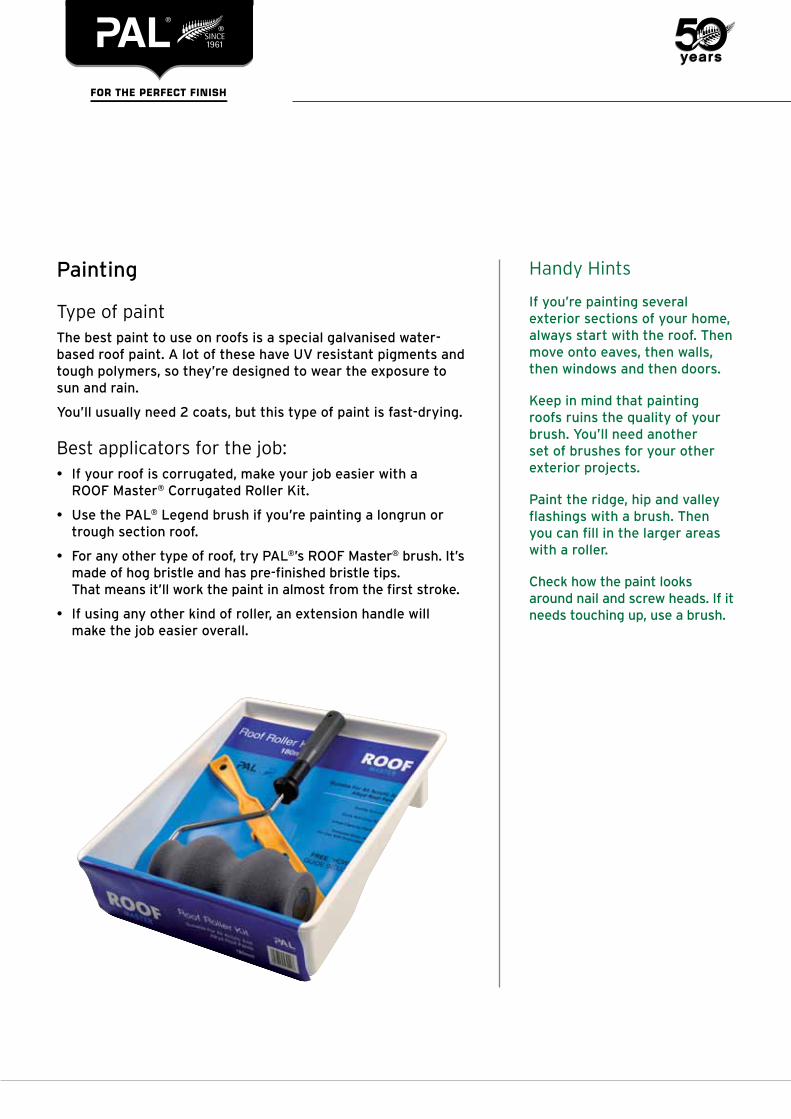
Best applicators for the job:• If your roof is corrugated, make your job easier with a
rooF Master® Corrugated roller Kit.
• Use the PAL® Legend brush if you’re painting a longrun or trough section roof.
• For any other type of roof, try PAL®’s rooF Master® brush. It’s made of hog bristle and has pre-finished bristle tips. That means it’ll work the paint in almost from the first stroke.
• If using any other kind of roller, an extension handle will make the job easier overall.
Handy Hints
If you’re painting several exterior sections of your home, always start with the roof. Then move onto eaves, then walls, then windows and then doors.
Keep in mind that painting roofs ruins the quality of your brush. You’ll need another set of brushes for your other exterior projects.
Paint the ridge, hip and valley flashings with a brush. Then you can fill in the larger areas with a roller.
Check how the paint looks around nail and screw heads. If it needs touching up, use a brush.