ofa organizingmanual part5
TRANSCRIPT
PART 1: WHO WE ARE 1
OFAORGANIZING
MANUAL
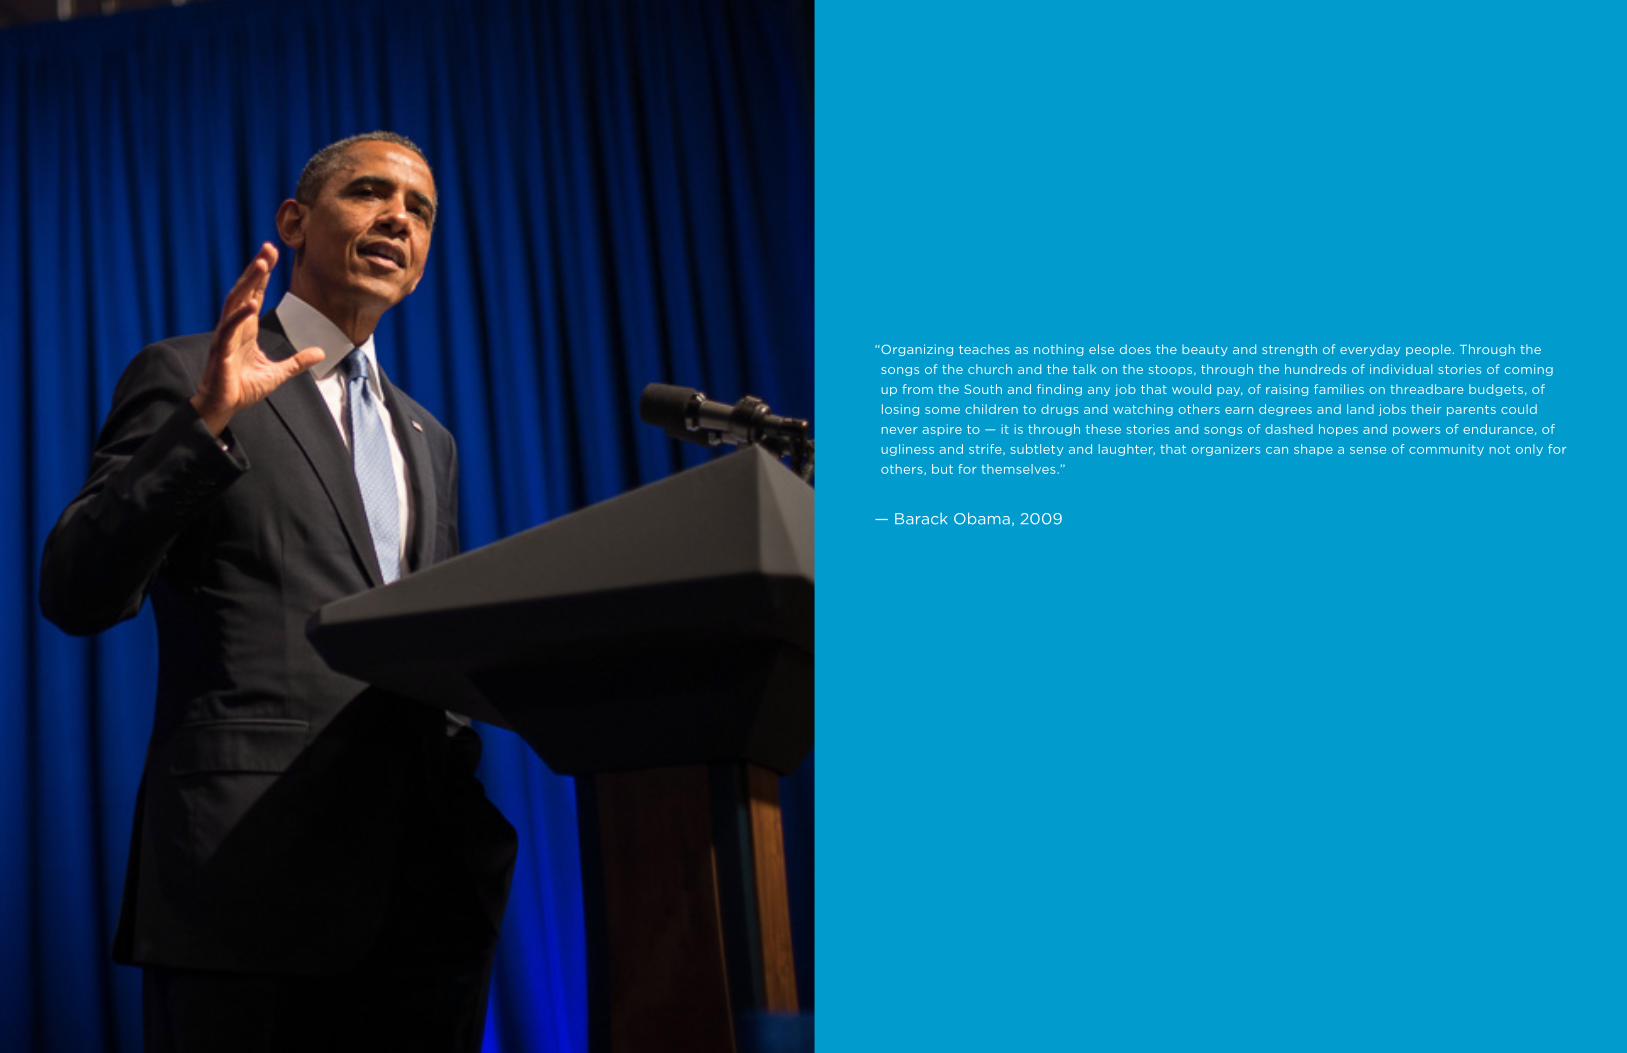
“ Organizing teaches as nothing else does the beauty and strength of everyday people. Through the songs of the church and the talk on the stoops, through the hundreds of individual stories of coming up from the South and finding any job that would pay, of raising families on threadbare budgets, of losing some children to drugs and watching others earn degrees and land jobs their parents could never aspire to — it is through these stories and songs of dashed hopes and powers of endurance, of ugliness and strife, subtlety and laughter, that organizers can shape a sense of community not only for others, but for themselves.”
— Barack Obama, 2009

4 PART 1: WHO WE ARE PART 1: WHO WE ARE 5
Part I: Who We Are OFA Mission OFA Culture and Expectations
Part II: Building Strategic Issue Campaigns How a Bill Becomes a Law OFA Issue Organizing Strategy Power Mapping Earned Media Digital Organizing Talking About the Issues through Personal Stories Crafting Your Local Strategy
Part III: OFA Chapters and Teams Why Chapters and Teams History on the Chapter Program Chapter Responsibilities and Phases of Development Chapter Structure Chapter Role Descriptions Team Responsibilities and Phases of Development Team Structure Team Role Descriptions Testing and Confirming Leadership
Part IV: Methods for Building Capacity Personal Story 1:1 Meetings Volunteer Recruitment and Retention House Meetings Trainings Why data is important
Appendix A: Step-by-step guides Event Organizing 101 Organizing a Press Event Organizing a MOC Office Visit Blizzarding Getting sign-on: Petition and Pledge Card Drives Writing Letters to the Editor Pledge-to-Call Drives Taking Strong Photos How to organize a House Meeting How to organize a Training
6 PART 1: WHO WE ARE PART 1: WHO WE ARE 7
This manual represents the collected best practices of Organizing for Action
volunteers and staff. It is intended for OFA volunteers working in our organization in
many capacities — fellows, chapter leads, data captains, statewide resource leads, and
brand new volunteers, just to name a few examples. The information in this manual
gives context on how OFA develops its strategy and how volunteer leaders can adapt
that strategy to the local level. It provides information about best practices in issue
organizing and building people-centered, metrics-driven grassroots issue advocacy
campaigns. And it provides places for you to reflect on how to adapt these methods to
the organizing work you’re doing in your community with fellow OFA volunteers.
While this manual is intended as a resource, your greatest resource in organizing at
OFA will be other volunteer leaders and the staff who support them. Every volunteer
and volunteer leader should be connected to our organization through a point of
contact. For you, this person may be your neighborhood team leader, chapter lead,
state coordinator, or mentor. As you work through this manual, work with your point of
contact on how you can implement these techniques into the organizing you are doing
in your community.
The organizing that OFA volunteers are doing on behalf of the issues Americans
voted for in 2012 is already changing the conversation and holding elected officials
accountable to their constituents. By engaging our communities on issues that matter
to our everyday lives, and organizing to persuade our Members of Congress to support
us, grassroots volunteers are bringing the country closer to the change it voted for. We
hope that you’ll use the organizing techniques in this manual to bring your community
together and make your elected representatives hear your voices, and thereby push
forward making the change we voted for a reality.
Thank you for being part of the OFA family, thank you for leaning in to learn more
about organizing, and thank you for continuing to propel our movement forward.
YOU AREOFA
98 APPENDIX A: STEP-BY-STEP GUIDES APPENDIX A: STEP-BY-STEP GUIDES 99
Appendix: Step-by-step guides Event Organizing 101Organizing a Press EventOrganizing a MOC Office VisitBlizzardingGetting sign-on: Petition and Pledge Card DrivesWriting Letters to the EditorPledge-to-Call DrivesTaking Strong PhotosHow to organize a House MeetingHow to organize a Training
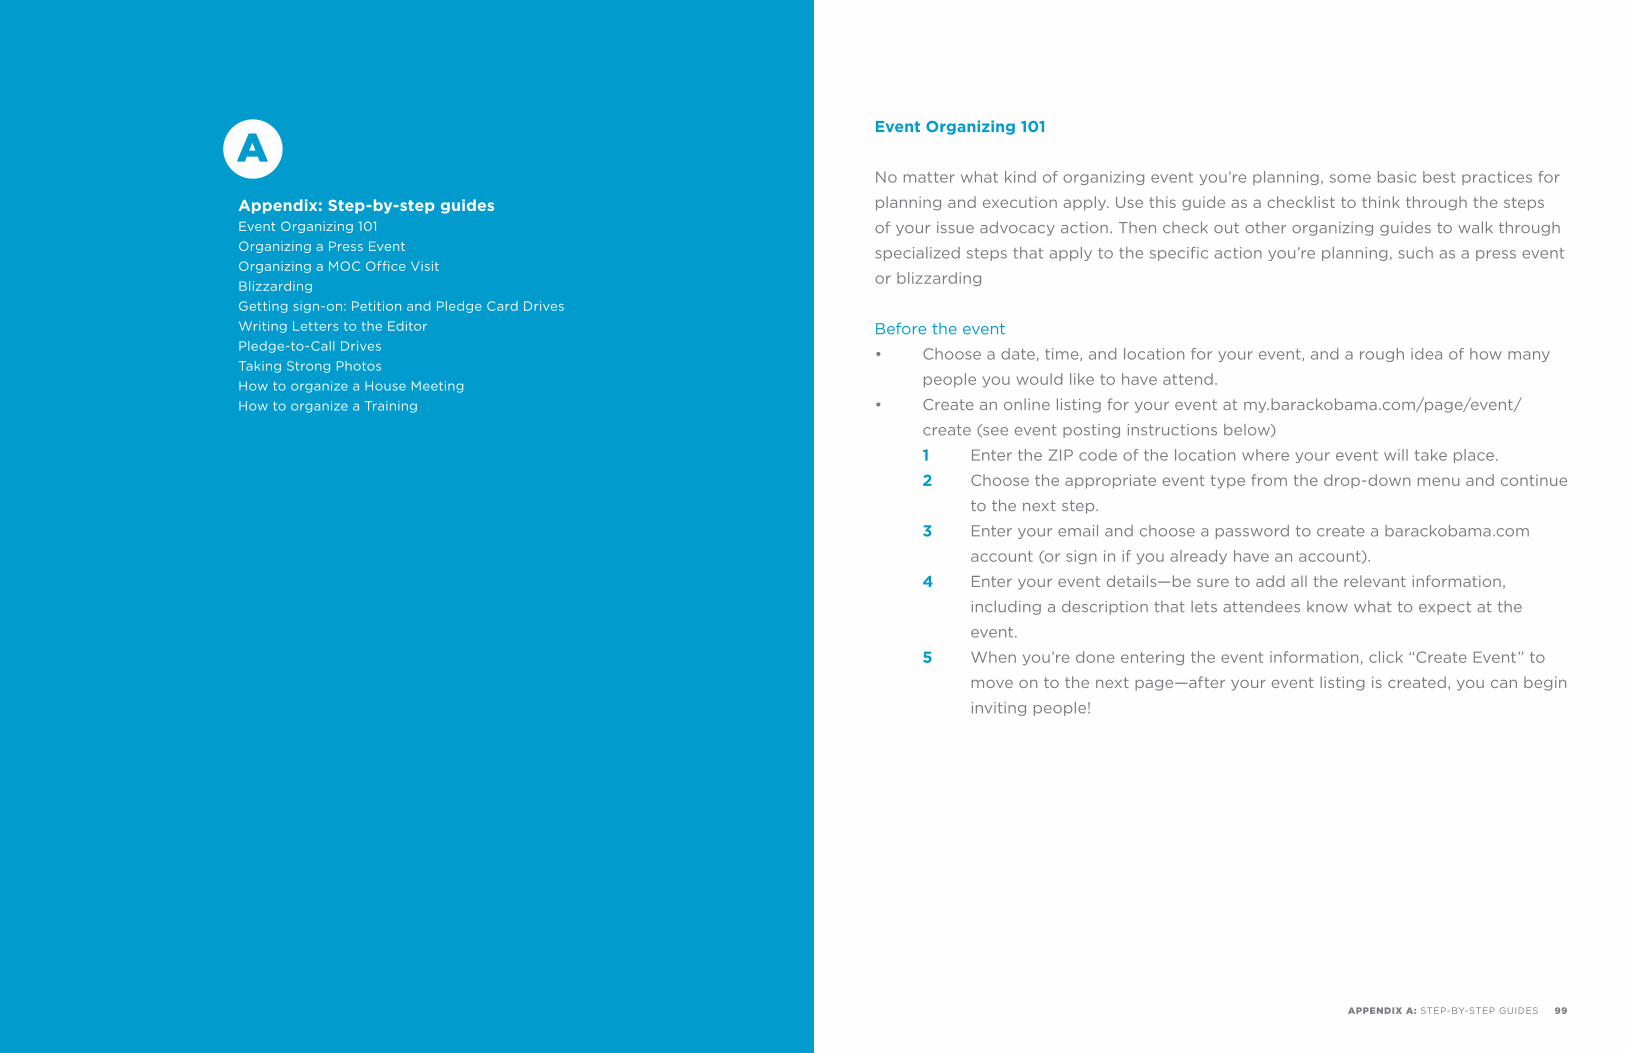
Event Organizing 101
No matter what kind of organizing event you’re planning, some basic best practices for
planning and execution apply. Use this guide as a checklist to think through the steps
of your issue advocacy action. Then check out other organizing guides to walk through
specialized steps that apply to the specific action you’re planning, such as a press event
or blizzarding
Before the event
• Choose a date, time, and location for your event, and a rough idea of how many
people you would like to have attend.
• Create an online listing for your event at my.barackobama.com/page/event/
create (see event posting instructions below)
1 Enter the ZIP code of the location where your event will take place.
2 Choose the appropriate event type from the drop-down menu and continue
to the next step.
3 Enter your email and choose a password to create a barackobama.com
account (or sign in if you already have an account).
4 Enter your event details—be sure to add all the relevant information,
including a description that lets attendees know what to expect at the
event.
5 When you’re done entering the event information, click “Create Event” to
move on to the next page—after your event listing is created, you can begin
inviting people!
A
100 APPENDIX A: STEP-BY-STEP GUIDES APPENDIX A: STEP-BY-STEP GUIDES 101
• Start recruiting for your event, keeping in mind that you should get commitments from
about twice as many people as you’d like to attend (for example, if your attendance
goal is 15 attendees, you should strive to get RSVPs from 30 people). This is based on
typical show-up rates for events.
• Plan out the agenda for your event, and how long each part of the agenda will take.
• Do some basic research on where your member of Congress stands on the issue, in-
cluding their past statements and votes. You can find fact sheets on a number of issues
at barackobama.com to share with your guests.
• One rule of organizing is that every event you hold should lead to future action. Think
about what action you want your event attendees to take after this event, and be ready
to share the details with them at your event.
• Make a confirmation call to everyone who RSVPs and send them a reminder email.
• Day of event: Make sure you arrive early to your event location to get sign-in ready and
prepare the space.
During the event
• Ask every attendee to sign in using a sign-in form, and thank them for coming
• Follow the agenda you created
• Share the goals of the event with all attendees, and at the end of the event,
report back on how the group did on achieving these goals.
• Take pictures, tweet and update Facebook with stories, quotes, and fun
anecdotes. We want everyone to know that folks across the country are getting
involved in our issue campaigns.
• As your event draws to a close, sign all attendees up for the next action.
After the event
• Thank your guests for participating and confirm them for your next action
(tip: use both a phone call and an email).
• Share your success! Report back to your organizer how the event went.
• Make sure the data from your event is entered into our database and all the
attendees for the event have been marked recorded in the calender in
our database
• Post photos, anecdotes and stories on social networks, so that you can share the
link later with attendees, as well as those who didn’t show.
• Call through those who didn’t show and invite them to your next action.
102 APPENDIX A: STEP-BY-STEP GUIDES APPENDIX A: STEP-BY-STEP GUIDES 103
Organizing a Press Event
FIRST: Confirm with your state coordinator/lead that your event should be an earned
media event.
A huge component of issue organizing is being able to persuade our Members
of Congress to enact the change we want. Members of Congress are often most
persuaded by what messages they are getting from their constituents. However, not
every constituent has the time to contact their Member of Congress on every issue
up for debate. So our job is to make sure we can amplify their voices to our elected
officials. The best way to do that is to host an event that the media will cover, ensuring
that our message gets out far and wide.
There are four main elements that every event needs in order to be the most attractive
for media outlets and the most impactful. You need: 1) a clear message, 2) effective
speakers, 3) a good location, and 4) provide a local perspective on a national issue. For
more details on each of these elements, please revisit pages XX of this manual.
Appendix: Step-by-step guides Organizing a Press Event
A
104 APPENDIX A: STEP-BY-STEP GUIDES APPENDIX A: STEP-BY-STEP GUIDES 105
Timeline
3 Weeks Prior to Event:
• Identify the message/purpose of event
• Identify speakers who could speak at event
• Research locations for event
• Plan phone banks to recruit for event
2 Weeks Prior to Event:
• Lock in location
• Start locking in speakers
• Post event on Barackobama.com when location is locked
• Conduct Phone Banks to recruit for event
1 Week Prior to Event:
• Confirm speakers for event
• Confirm attendees for event
• 4 days prior to event, you will receive press advisories and
sample remarks for talkers
Best Practices
Message: You need to have a clear understanding of what the message is you want
conveyed at the event.
• This message should be weaved in the signage, the talking points of each talker
and reflected in your location.
• The message must include which Member of Congress you are focusing on for
the event (either positively or negatively)
• The message must include organizations represented at the event
• Keep in mind the importance of signage, and judge the strength of your signage
by asking yourself: If I were watching the news while doing the dishes in my
home, and the TV were muted, would I understand the purpose of this event?
Talkers: The people who are going to help spread the message of the event.
• Surrogates: People who attract media attention—elected official, celebrity
• Validators: Someone who is seen as an expert on the issue. They validate
the issue to the local community—local elected official, community leader,
and grass-tops.
• Constituent supporter: Someone who is an everyday person who can speak
personally on the issue. They bring the human element to the story.
Location:
• Where and when possible, your location should reflect the message of the event.
• Make sure you have a location that you can control.
• Keep locations close to news stations (the less they have to travel, the more likely
they are to show up).
• Think about the background image. Does it reinforce your message?
Connecting local issues with national issues:
• Earned media events are more appealing to news outlets when they are able to
cover a national story and give it local flavor.

106 APPENDIX A: STEP-BY-STEP GUIDES APPENDIX A: STEP-BY-STEP GUIDES 107
Pitching the Press
A pitch call is an opportunity to talk directly to a news outlet to tell them about your
event, why they should cover it, and get a concrete commitment from them to cover
the event. It is important to note that television stations have morning meetings to
determine which stories they will cover for that day. In the days leading up to your
event, calling and emailing press advisories to news outlets is the best way to put your
event on the radar of news outlets. Some local TV stations and newspapers will have an
event calendar where they will let the public add their events so other visitors to their
websites can see the upcoming events. This is a good way to get additional attention
for your event.
Timeline
4 Days Prior to Event:
• Receive Press Advisories from State Coordinator/Lead
• Receive specific message guidance on the Day of Action event
• Confirm speakers for event (speakers should be locked as early as possible)
• Send message guidance and sample remarks to speakers
• Recruit volunteer(s) who can take pictures and/or video and post to social
networks and submit to TV stations and newspapers (for those websites that
allow)
72 hours Prior to Event:
• Press Advisories emailed to press outlets in AM
• Host a prep call or meet with your speakers to ensure they are clear on the
message for the event
48 hours Prior to Event:
• Press Advisories emailed to press outlets in AM
• Follow up via phone to ensure outlets received these advisories (most outlets will
not make a commitment to attend your event at this point)
• Prepare signs for your event that fit with the message frame
24 hours Prior to Event:
• Press Advisories emailed to press outlets in AM
• Follow up via phone with a pitch call to the press outlets (now you should make
the ask to attend your event)
• Confirm any last minute details with speakers
• Confirm volunteer(s) who will take pictures and/or video of the event
Day of the Event:
• Pitch calls and/or confirmation calls to the press in AM
• Greet reporters who attend the event and get their contact information
(either ask them to sign in on a Press sign-in sheet, or collect their business card)
• Report out to State Coordinators/Leads any press that showed to your
event ASAP
• Have a volunteer designated just to take photos and/or video of the event
• Post pictures and status to Facebook and Twitter during your event
• Upload photo/video to news outlet’s websites who did not attend your event
• Email pictures during your event to your state coordinator/lead
• Look for and send up any press clips from your event
• Report out to State Coordinators/Leads event details including total attendees
108 APPENDIX A: STEP-BY-STEP GUIDES APPENDIX A: STEP-BY-STEP GUIDES 109
Best Practices for Pitching to Press
• Begin generating interest in your event by emailing press advisories to news
outlets 72 to 48 hours in advance of your event
• After emailing the initial advisory, follow up with a call to ensure they received the
information and do not have any questions.
• Mornings are the best time to call a newsroom. By afternoon most reporters are
under a deadline and will be less willing to be on the phone for very long.
• Be prepared for a brush-off! Unless your event is the same day you are calling/
emailing the newsroom, they will most likely not commit to attending your event,
but make sure to ask when they will make the decision so you can follow up.
• Think of your press pitch call as a volunteer call – you always have an “ask” to
make, but you also need to give the reporter a reason to say yes. Make the story
appealing to them.
• Wear your passion on your sleeve! Your excitement will make reporters excited to
attend.
• Make your call personal – local reporters want to cover issues that affect their
communities specifically. Why is your Congressman’s office important? Why is
this issue so important to your community?
• Have strong follow up! Even if you’ve already spoken to a reporter and gotten a
commitment to attend, follow up the morning of your event with another call to
confirm their attendance.
Day after the Event:
• Continue looking for any press clips from your event and send up
• Send any additional pictures and/or video to your State Coordinator/Lead
• Post wrap up of event to your Facebook and Twitter accounts
110 APPENDIX A: STEP-BY-STEP GUIDES APPENDIX A: STEP-BY-STEP GUIDES 111
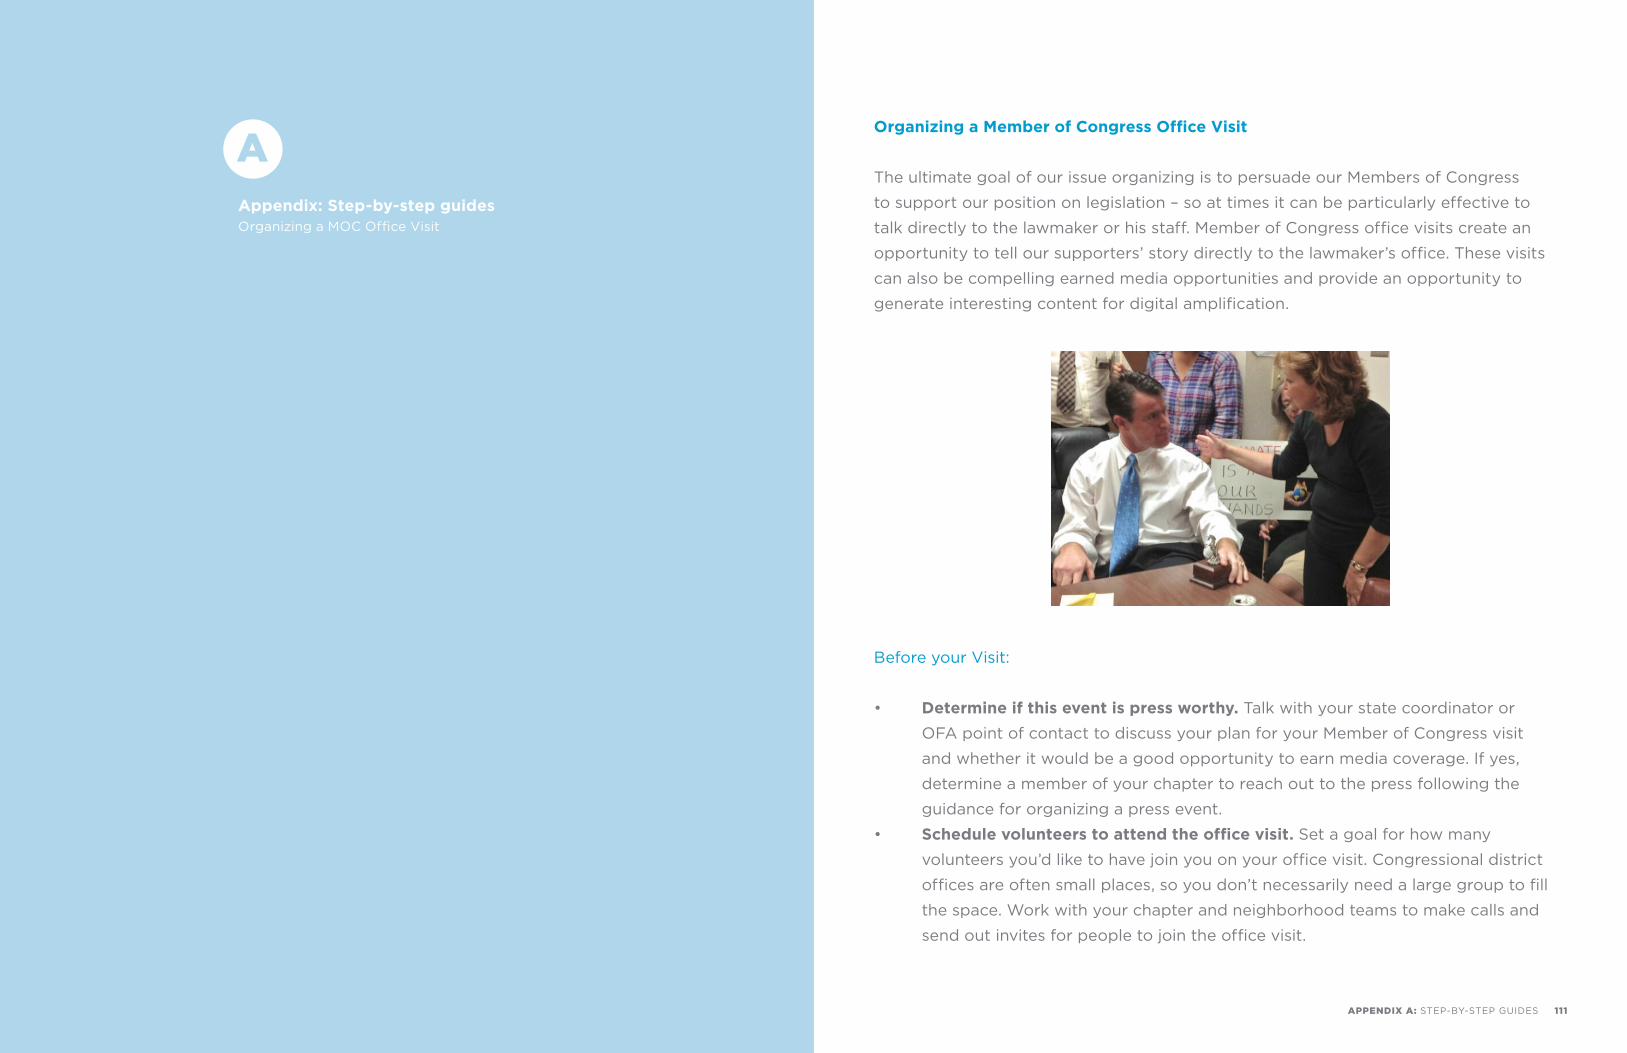
Organizing a Member of Congress Office Visit
The ultimate goal of our issue organizing is to persuade our Members of Congress
to support our position on legislation – so at times it can be particularly effective to
talk directly to the lawmaker or his staff. Member of Congress office visits create an
opportunity to tell our supporters’ story directly to the lawmaker’s office. These visits
can also be compelling earned media opportunities and provide an opportunity to
generate interesting content for digital amplification.
Before your Visit:
• Determine if this event is press worthy. Talk with your state coordinator or
OFA point of contact to discuss your plan for your Member of Congress visit
and whether it would be a good opportunity to earn media coverage. If yes,
determine a member of your chapter to reach out to the press following the
guidance for organizing a press event.
• Schedule volunteers to attend the office visit. Set a goal for how many
volunteers you’d like to have join you on your office visit. Congressional district
offices are often small places, so you don’t necessarily need a large group to fill
the space. Work with your chapter and neighborhood teams to make calls and
send out invites for people to join the office visit.
Appendix: Step-by-step guides Organizing a MOC Office Visit
A
112 APPENDIX A: STEP-BY-STEP GUIDES APPENDIX A: STEP-BY-STEP GUIDES 113
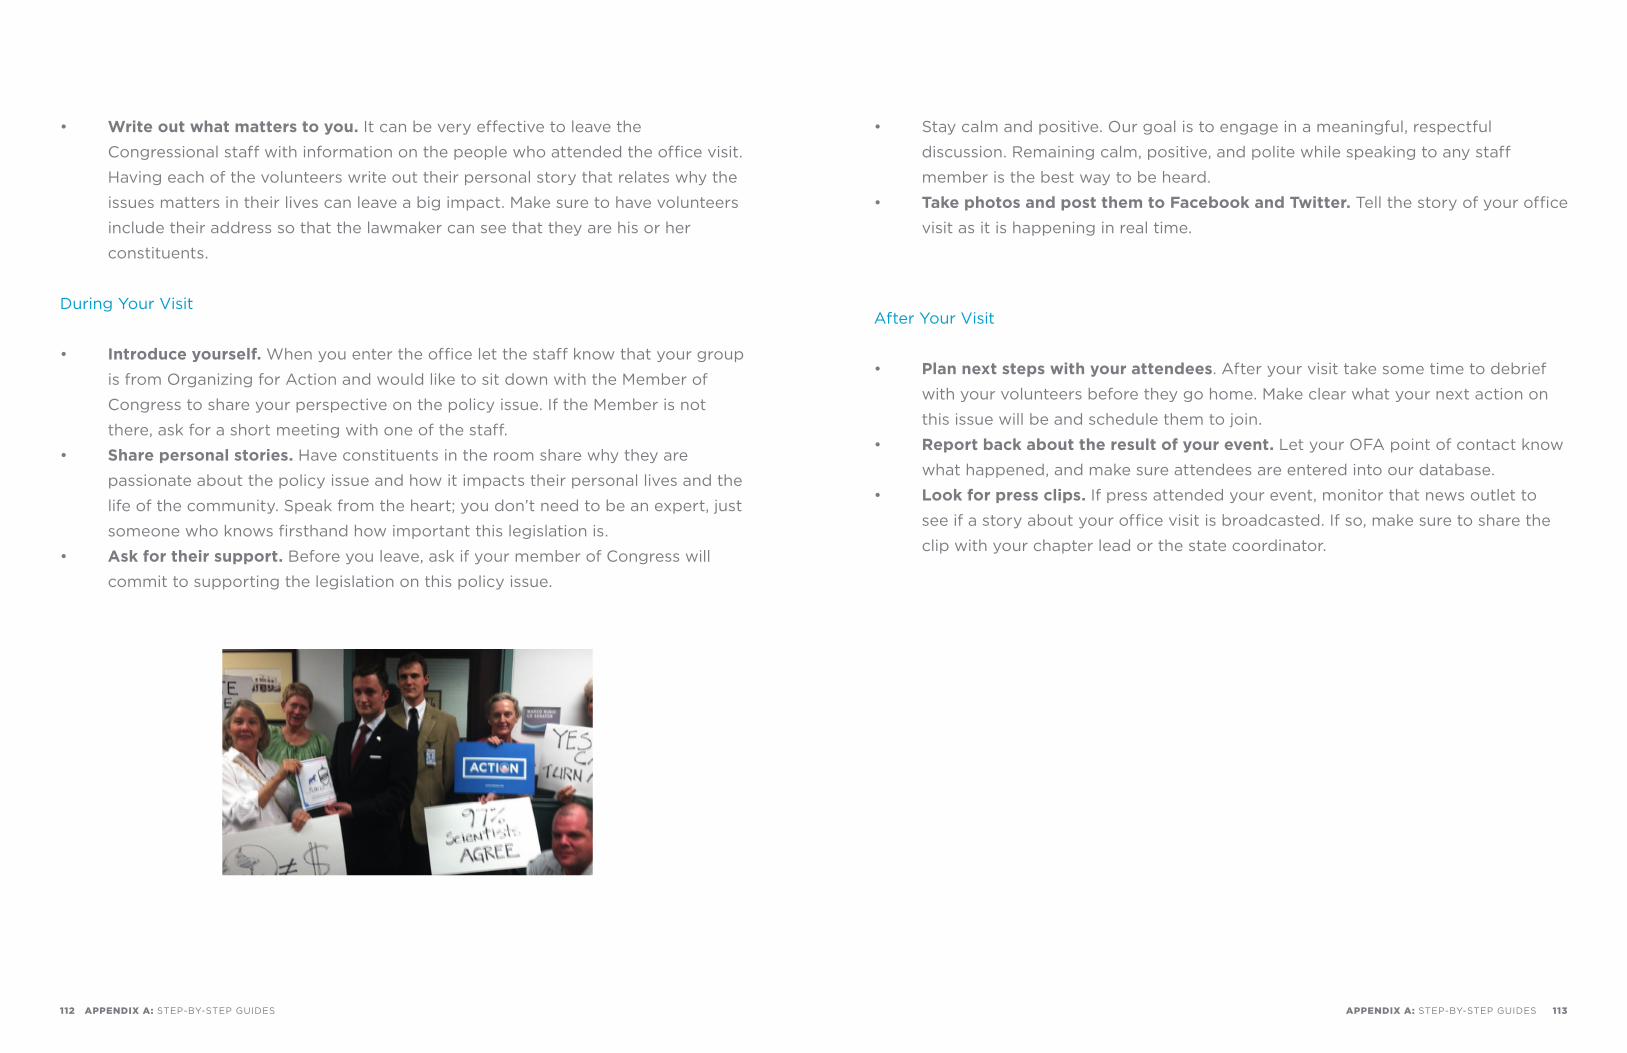
• Write out what matters to you. It can be very effective to leave the
Congressional staff with information on the people who attended the office visit.
Having each of the volunteers write out their personal story that relates why the
issues matters in their lives can leave a big impact. Make sure to have volunteers
include their address so that the lawmaker can see that they are his or her
constituents.
During Your Visit
• Introduce yourself. When you enter the office let the staff know that your group
is from Organizing for Action and would like to sit down with the Member of
Congress to share your perspective on the policy issue. If the Member is not
there, ask for a short meeting with one of the staff.
• Share personal stories. Have constituents in the room share why they are
passionate about the policy issue and how it impacts their personal lives and the
life of the community. Speak from the heart; you don’t need to be an expert, just
someone who knows firsthand how important this legislation is.
• Ask for their support. Before you leave, ask if your member of Congress will
commit to supporting the legislation on this policy issue.
• Stay calm and positive. Our goal is to engage in a meaningful, respectful
discussion. Remaining calm, positive, and polite while speaking to any staff
member is the best way to be heard.
• Take photos and post them to Facebook and Twitter. Tell the story of your office
visit as it is happening in real time.
After Your Visit
• Plan next steps with your attendees. After your visit take some time to debrief
with your volunteers before they go home. Make clear what your next action on
this issue will be and schedule them to join.
• Report back about the result of your event. Let your OFA point of contact know
what happened, and make sure attendees are entered into our database.
• Look for press clips. If press attended your event, monitor that news outlet to
see if a story about your office visit is broadcasted. If so, make sure to share the
clip with your chapter lead or the state coordinator.
114 APPENDIX A: STEP-BY-STEP GUIDES APPENDIX A: STEP-BY-STEP GUIDES 115
Blizzarding
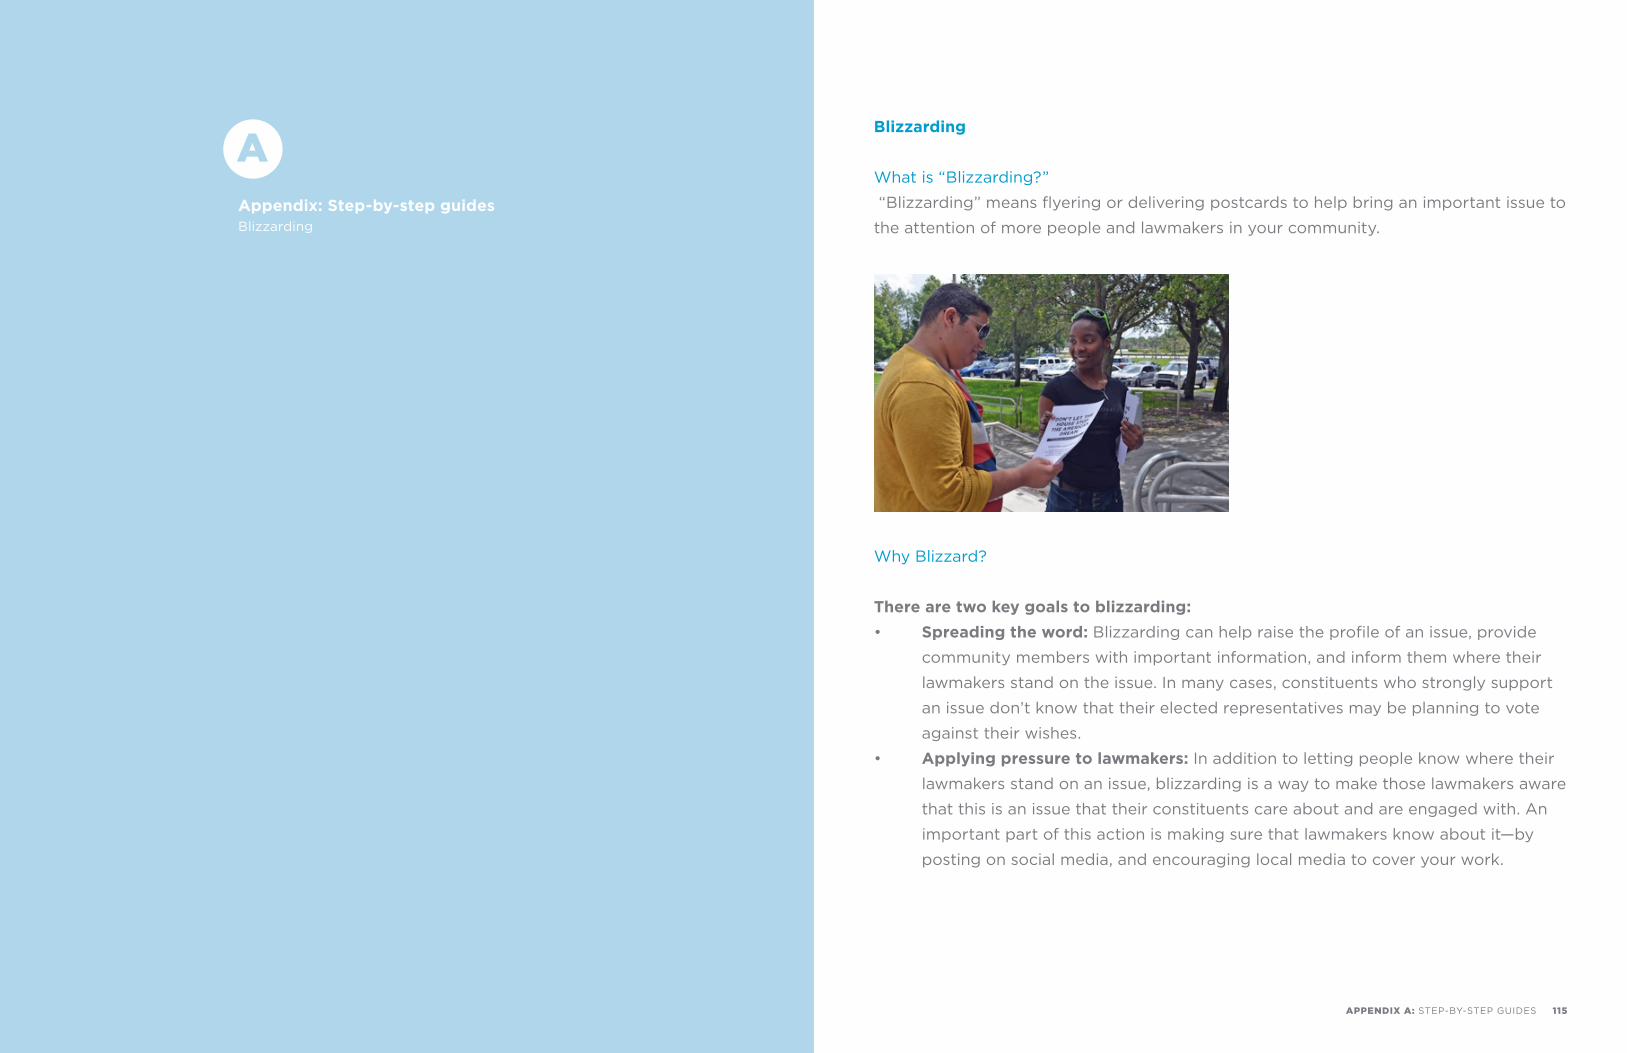
What is “Blizzarding?”
“Blizzarding” means flyering or delivering postcards to help bring an important issue to
the attention of more people and lawmakers in your community.
Why Blizzard?
There are two key goals to blizzarding:
• Spreading the word: Blizzarding can help raise the profile of an issue, provide
community members with important information, and inform them where their
lawmakers stand on the issue. In many cases, constituents who strongly support
an issue don’t know that their elected representatives may be planning to vote
against their wishes.
• Applying pressure to lawmakers: In addition to letting people know where their
lawmakers stand on an issue, blizzarding is a way to make those lawmakers aware
that this is an issue that their constituents care about and are engaged with. An
important part of this action is making sure that lawmakers know about it—by
posting on social media, and encouraging local media to cover your work.
Appendix: Step-by-step guides Blizzarding
A
116 APPENDIX A: STEP-BY-STEP GUIDES APPENDIX A: STEP-BY-STEP GUIDES 117
Planning Your Blizzarding Event
You can blizzard by yourself, or with a group of friends or local supporters that you
help recruit.
• Find a neighborhood: Identify the best neighborhoods for flyering or postcard
delivery. Think about which communities are most likely to be impacted by the
issue, where the issue has the most support, and which areas you have existing
relationships and familiarity with.
• Print your flyers/ postcards: You’ll be responsible for printing up copies yourself.
You can find fliers for a number of issues at barackobama.com.
• Recruiting volunteers: Even a small group can be successful using this action, but
it’s important that you document and amplify your efforts effectively. Here are a
few volunteers roles you should consider having:
° Photo/ digital captain: Someone to take excellent photos during your
event and post to Facebook and Twitter afterward (be sure to mention the
issue and the lawmaker you’re trying to influence).
° Logistics captain: Someone whose primary responsibility is making sure
everyone knows where they’re going, that they have the materials they
need, and that communication is clear while volunteers are out flyering
Making an Impact
• Be aware of the visual: A flyering event with just a handful of people can have
an enormous impact informing communities, applying pressure to lawmakers
and creating great social media content. Even just a few good photos can tell the
story of your event, but be aware of the visual—make sure your message is clear
but respectful, and that you’re focusing on your interaction with the community.
• Reach out to local radio, blogs, and TV media outlets: Reach out well in
advance, the day before, and as a follow-up the day of your event to pitch your
flyering event to press. In some communities, local radio stations, local blogs, and
TV shows carry a lot of weight.
• Consider your messenger: If your team is pitching your event to a publication
widely read by a specific community, the volunteers doing interviews should
ideally be someone who identifies with that community. For example, a Spanish-
speaker may be the best messenger for a Spanish language newspaper serving
the Latino community.
• Tell your lawmaker about it: A great way to reach lawmakers is through social
media. For example, tweet a photo and description of your event using your
lawmakers Twitter handle.
118 APPENDIX A: STEP-BY-STEP GUIDES APPENDIX A: STEP-BY-STEP GUIDES 119
Petition Drive
Gathering Petition Signatures
Petitions are one of the best and easiest ways to raise awareness and build support
for an issue in your community. Below are a few tips and tricks for successful petition
signature gathering:
Find the Right Petition
• You can download petitions for a number of issues at barackobama.com
• Make sure to print out copies that are easy to read—even from a distance—and
clearly communicate the issue.
Make the Ask the Right Way
• Be approachable, but don’t wait to be approached. Having a friendly demeanor
goes a long way when it comes to gathering signatures. Even if it doesn’t come
naturally to you, smile and speak with confidence—it will make the difference
between a successful outing and a disappointing one.
• Make a clear ask. Research shows that people are more likely to respond when
you phrase the question as “Have you signed the petition in support of ____”
rather than open-ended questions like “Do you support ____?”
• Be sure to smile and make eye contact (don’t wear sunglasses if you can avoid
it), and be as engaging and friendly as you can.
Be Strategic About When and Where You Go
• Look for spots with lots of foot traffic. You can maximize your efforts by talking to
the more people in the time you have to gather signatures.
• Choose a time of the day when more people are outside. Mornings, lunch hour, and
early evenings are often the best time during the weekday.
• Catch people in line or as they exit. DMVs, shopping centers, theatres, and bus
stops can be a great place to talk to people as they wait.
• Make signature swings. Hit everyone in one location and then move on to the next.
When foot traffic dies off, move on to a new spot.
• Make multiple events each day. Even just a few signatures here and there add up
over the course of the day.
• Ask for advice. Your friends, co-workers, neighbors and fellow volunteers know their
neighborhoods best and may have good advice on where to look for signatures.
Appendix: Step-by-step guides Getting sign-on: Petition and Pledge Card Drives
A
120 APPENDIX A: STEP-BY-STEP GUIDES APPENDIX A: STEP-BY-STEP GUIDES 121
Writing Letters to the Editor
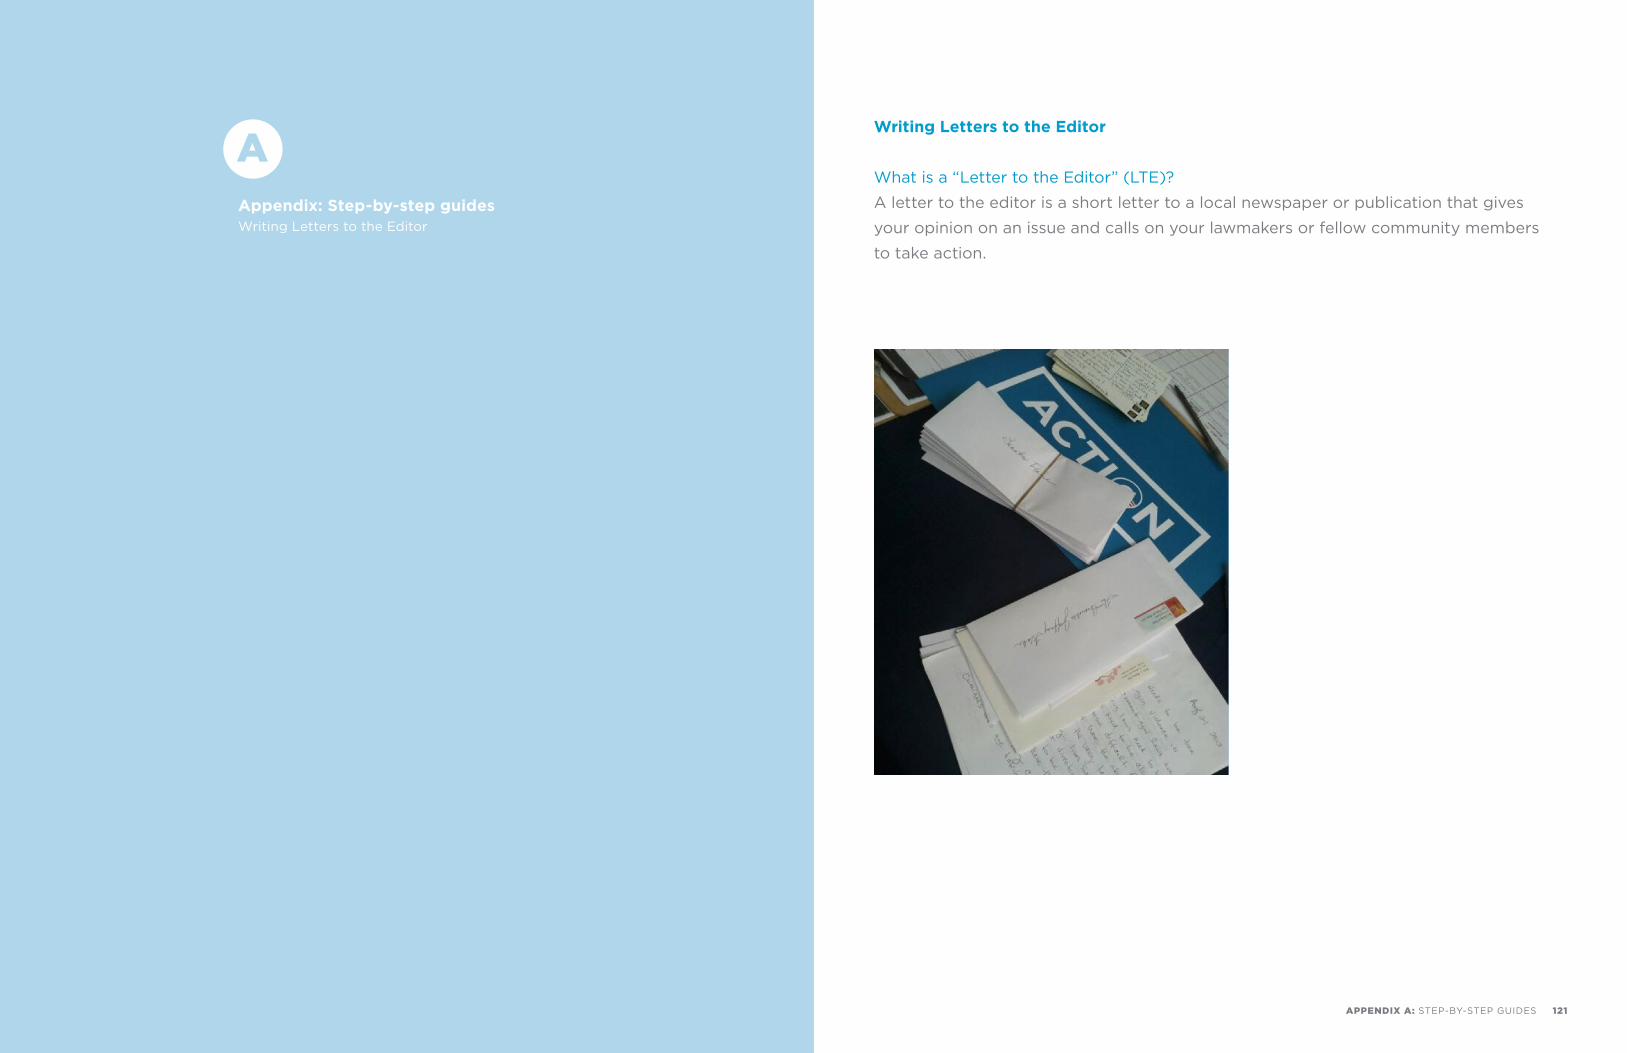
What is a “Letter to the Editor” (LTE)?
A letter to the editor is a short letter to a local newspaper or publication that gives
your opinion on an issue and calls on your lawmakers or fellow community members
to take action.
Appendix: Step-by-step guides Writing Letters to the Editor
A
122 APPENDIX A: STEP-BY-STEP GUIDES APPENDIX A: STEP-BY-STEP GUIDES 123
Why Write an LTE?
The letter to the editor section is a widely read of most newspapers. These letters can
help win issue campaigns by:
• Raising awareness. An LTE is a great way to raise the profile of an issue in your
local community.
• Responding rapidly to new developments. Many publications print LTEs within
a day or two of receiving them, making them one of the most effective actions
when trying to respond quickly to new developments or announcements.
• Energizing our supporters and thanking supportive members of Congress.
Published letters fire up local supporters and show lawmakers that their
constituents have their back when they lead on important issues.
• Sending a message to the opposition. LTEs can show unsupportive lawmakers
that their constituents care passionately about an issue and will hold them
accountable if they fail to represent them.
• Persuading those who are on the fence. LTEs can show how an issue affects local
people in a way that those on the fence, including lawmakers, may sympathize
with.
People Read LTEs to Find Out:
• How local people think or feel about an issue.
• How an issue is affecting the local community.
• What are the major impacts of a potential piece of legislation or action.
However, people do not read LTEs for:
• In-depth policy descriptions. LTEs should be short and demonstrate the local and
personal connection to an issue and the views of local community members. You
don’t have to be an expert on an issue to share your personal story. Most papers
will not print select letters that are too long or try to outline an entire policy issue.
• National political debates about an issue. People turn to TV and large publications
to learn about the national debate on the issues. LTEs that speak in general terms
about how an issue affects the entire country or region will likely not be selected
for publication in a local paper.
124 APPENDIX A: STEP-BY-STEP GUIDES APPENDIX A: STEP-BY-STEP GUIDES 125
Planning Your LTE Campaign
• Research publication type. Which publications are commonly read in your
community? Most local newspapers have well-read letters to the editor sections,
but they can be found in unlikely places. Don’t forget online spaces like Patch.
com, alternative papers or lifestyle magazines that younger people may read,
and community specific media, including media in languages other than English.
Don’t discount a publication just because you don’t often read it—it may be
very popular with other parts of your community. Investigate what’s out there
by asking friends what they read and listen to. Make a list of the publications to
target with your campaign.
• Consider radio and TV media outlets. In some communities, local radio stations
and public-access TV shows carry a lot of weight. Look into submitting LTEs to
such programs if they have a segment where letters are read aloud on air.
• Know the rules for LTE submission. Publications usually have tight rules for
publishing, including length of the LTE and listing your own contact information
in a very specific manner, and they will reject letters if they break the rules. Know
the rules for submission and make sure your letters conform to them. Know the
publication’s schedule and submission deadlines.
Write Your LTE
• Keep it short. Stay within the publication’s rules—likely no longer than 250 or 300
words. This may seem very short, but shorter letters are the most effective. Get
to the point.
• Tell your story. Begin the letter with a brief story about you or someone you know.
People can argue with your positions, but they can’t argue with your experience.
Describe how this issue has affected you, your family, a coworker or a friend. Make
it personal. Even another local OFA volunteer, someone you met on a long plane
or bus ride, or in line at the grocery store can be a great subject for an anecdote
(especially if this person is from the local area). Make the issue human.
• Know your audience. What type of publication are you writing for, and who
is reading it? Retired people, young professionals, and immigrant families may
find different types of personal stories compelling. Use a story the audience will
connect with. Ideally, have your letter writer be of the same group or background
as the primary readership of the publication.
• Don’t delve into policy. There is not enough room in 300 words to make a
nuanced policy argument. When using facts and numbers, use only one or two,
and choose the most powerful. A long string of facts and information is not an
argument.
• Use powerful language. Let your feelings show! Use powerful verbs and
descriptive nouns. Write short, punchy sentences. Vary sentence length. This will
help your letter stand out and make it more likely to be published.
• Make a call to action. End your letter with a specific call to action to your local
lawmakers or community members.
• Check for proper grammar and spelling. If you’re working with a group, trade
letters with each other and edit them carefully. If you’re writing a letter by
yourself, ask a friend to take a look at it before you submit it. Don’t submit LTEs
with errors—they will likely not be published, and even worse, they may be
published with the original errors.
126 APPENDIX A: STEP-BY-STEP GUIDES APPENDIX A: STEP-BY-STEP GUIDES 127
Getting Published
• Monitor the publication. After you send your LTE, keep an eye out! Many
publications, especially small ones, may not tell you if you will be published
because you have already given your permission to publish the letter by sending
it.
• If you are published: Success! Congratulations! Your message is being heard.
Make sure to:
1 Reshare the printed LTE on Facebook, Twitter, and other social media outlets.
Link to the page where it is published online. E-mail it yourself from the site if
possible.
2 If the publication has an “e-mail” or “share” feature, ask local supporters to use
the web site itself to send the piece to family and friends. This will make it rise on
the “most e-mailed” or “most shared” list on the site if it has one.
3 If your letter is printed in the actual paper, clip the letter and make a scan of it. If
it’s broadcast on TV or radio, record it.
Dear Editor:
[If you are responding to or referencing another article, you should reference
it by writing the first sentence, then the title of the article, the name of the
publication & finally the date it was published. If not, you can start here with
the reason why you’re writing, but it’s not always necessary. Sometimes it’s
best to include some kind of interesting hook here that also explains why
you’re writing without saying “I’m writing because…”]
[Tell your personal story in this second section. How has the issue impacted
you, your family, or someone you know? Or why is this issue important to you?
What are the impacts of the issue on people in your community? Remember
to be concise, draw a local connection, and relate to the community you know
best by touching on the values you share with them. If you include contrast—
what the opponents think—be respectful.]
[So now what? Are you encouraging readers to contact their legislator? Are
you asking them to take some other action? Don’t be afraid to make a specific
ask of the people reading your letter.]
[End on a positive note. You have gone to all this trouble to entice your
readers, you don’t want to turn them off to your opinions before you’ve sealed
the deal.]
Sincerely,
[YOUR NAME]
[YOUR CITY, ST, Month DD, YYYY]
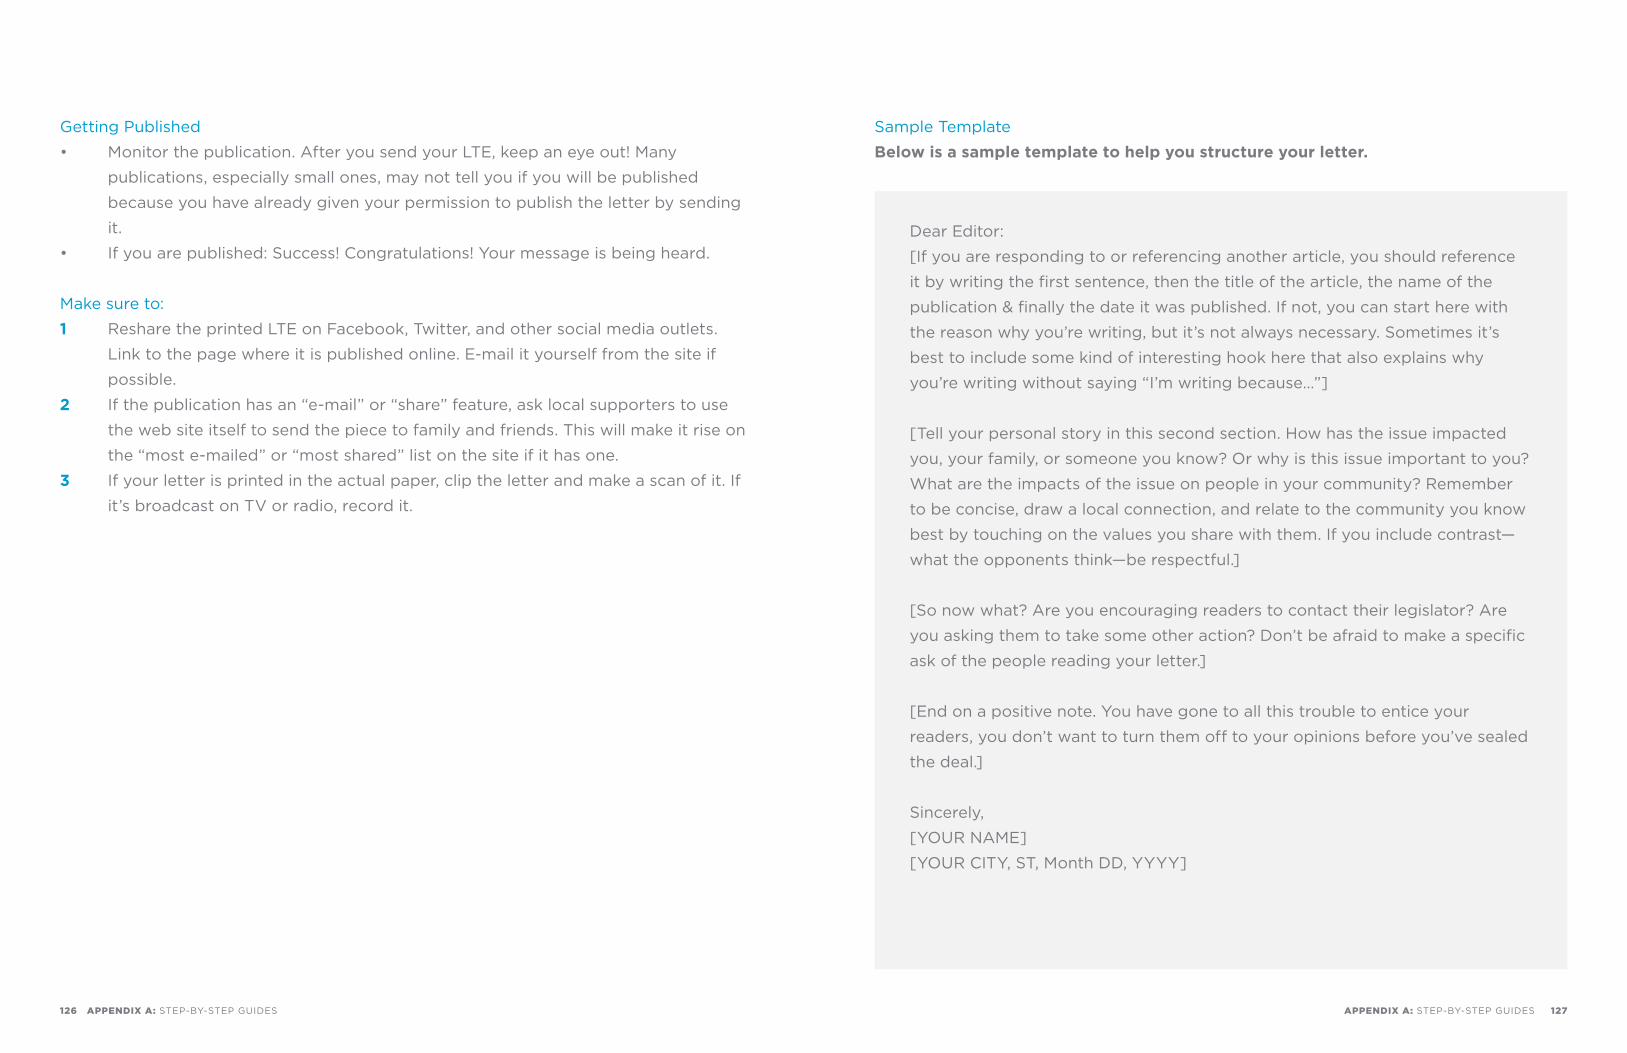
Sample Template
Below is a sample template to help you structure your letter.
128 APPENDIX A: STEP-BY-STEP GUIDES APPENDIX A: STEP-BY-STEP GUIDES 129
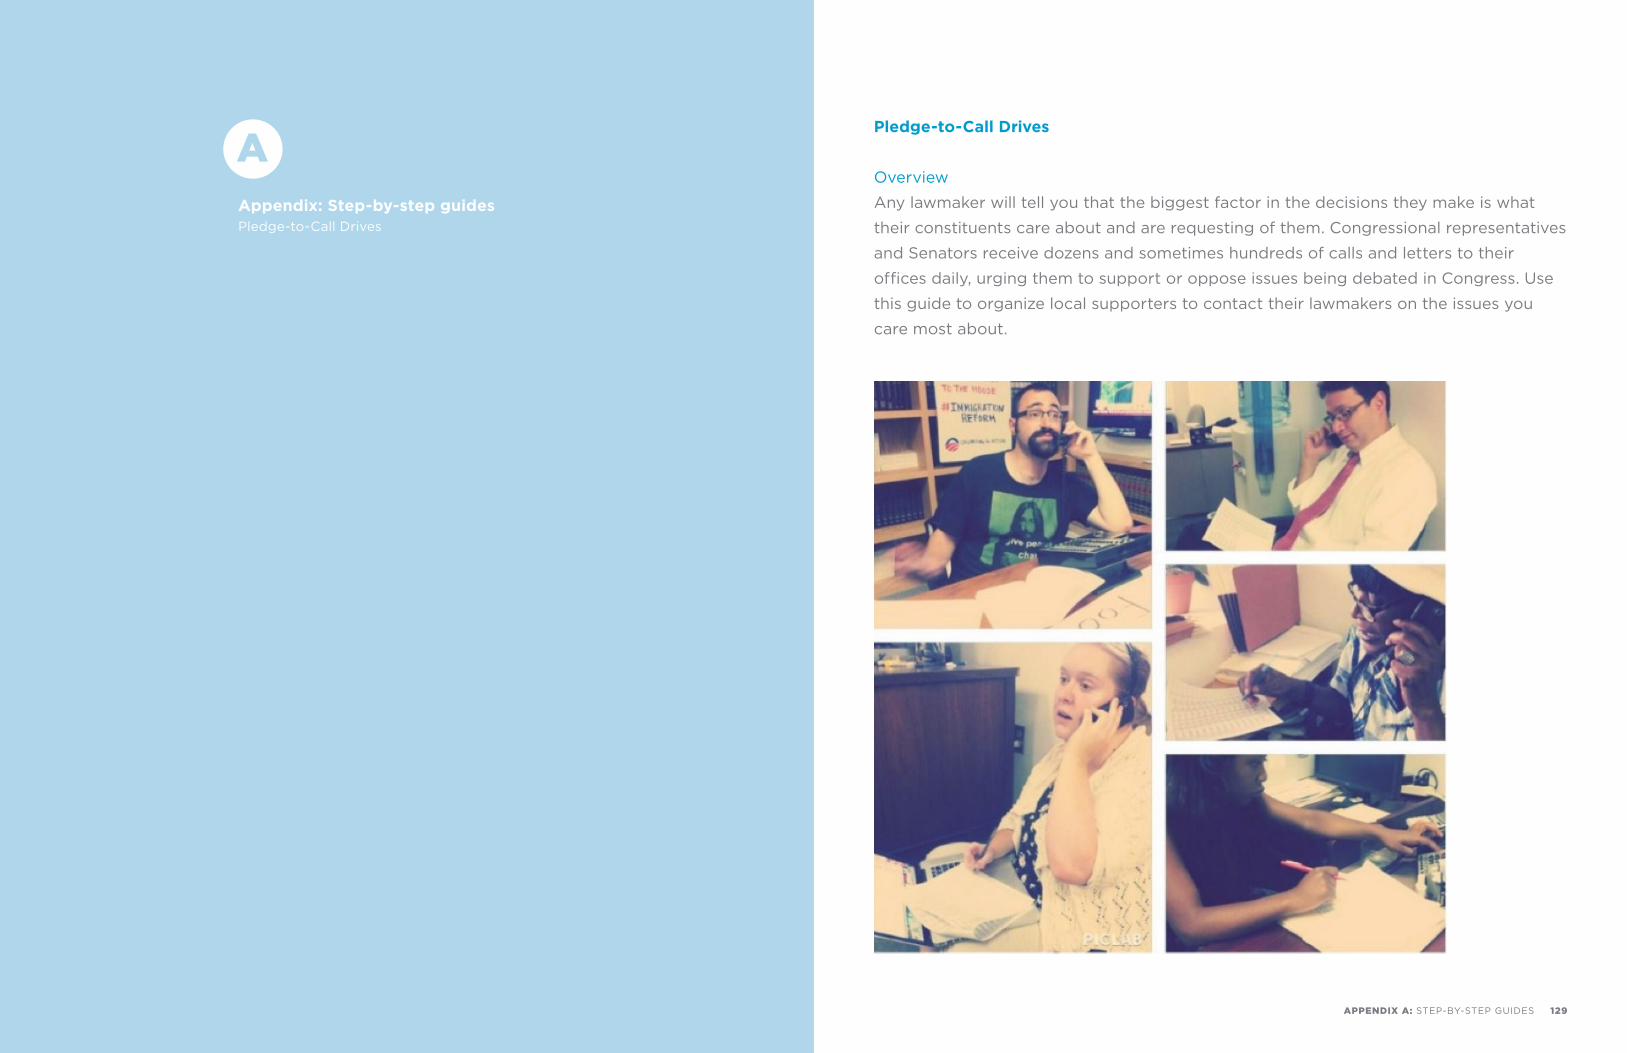
Pledge-to-Call Drives
Overview
Any lawmaker will tell you that the biggest factor in the decisions they make is what
their constituents care about and are requesting of them. Congressional representatives
and Senators receive dozens and sometimes hundreds of calls and letters to their
offices daily, urging them to support or oppose issues being debated in Congress. Use
this guide to organize local supporters to contact their lawmakers on the issues you
care most about.
Appendix: Step-by-step guides Pledge-to-Call Drives
A
130 APPENDIX A: STEP-BY-STEP GUIDES APPENDIX A: STEP-BY-STEP GUIDES 131
Step 1: Calling Your Representative Or Senator
Before you ask others to call, be sure to do it yourself. Your voice is just as important,
and having already completed the process will make it easier to explain it to others.
You may find it helpful to do a quick internet search for any comments your members
of Congress (remember, you have two senators and one representative) have made on
the issue you are calling about. You can urge their support for an issue, give them your
information and be done with the call in less than a minute. The easiest way to get in
touch with your member’s office is through the Congressional Switchboard. Dial: (202)
224-3121 and ask to be put in touch with your representatives.
SAMPLE SCRIPT
Hi, my name is [NAME] and I live at [say ADDRESS slowly—often they will
record it so they can send you a response]. I’m a constituent, and I’m calling to
encourage [REPRESENTATIVE/SENATOR NAME] to support [ISSUE].
[Explain why this issue is important to you personally].
Can I count on [HIS/HER] vote in support of this important issue?
[WAIT FOR RESPONSE]
[IF YES:] Great! Thank you so much for your support!
[IF NO:] I’m sorry to hear that. Again, I’d like to strongly urge
[REPRESENTATIVE/SENATOR] to reconsider, because [HIS/HER] constituents
strongly support action on this issue.
Please stay in touch with me about [HIS/HER] position on this issue.
Step 2: Find 5 Friends & Family To Call
Remember that for every call you place in support of a bill, there are also groups
mobilizing to generate calls and letters in opposition. In order to ensure the voices
of your community are heard loud and clear, the next and most important step is to
find at least five friends or family members to call with the same message that you
called about.
• Make it easy for them. You should provide them with the name of their
Representative and the direct line to their office, which you can get from the
Congressional Switchboard in Step 1.
• Give clear instructions. You might want to print up a sample script for them
follow. If not, be sure to give them clear direction on what to say.
• Make it personal. Explain why this issue is so important to you, and encourage
them to talk about why they care as well. It will be easier for them to get their
point across over the phone if they’ve already discussed it in person with you.
132 APPENDIX A: STEP-BY-STEP GUIDES APPENDIX A: STEP-BY-STEP GUIDES 133
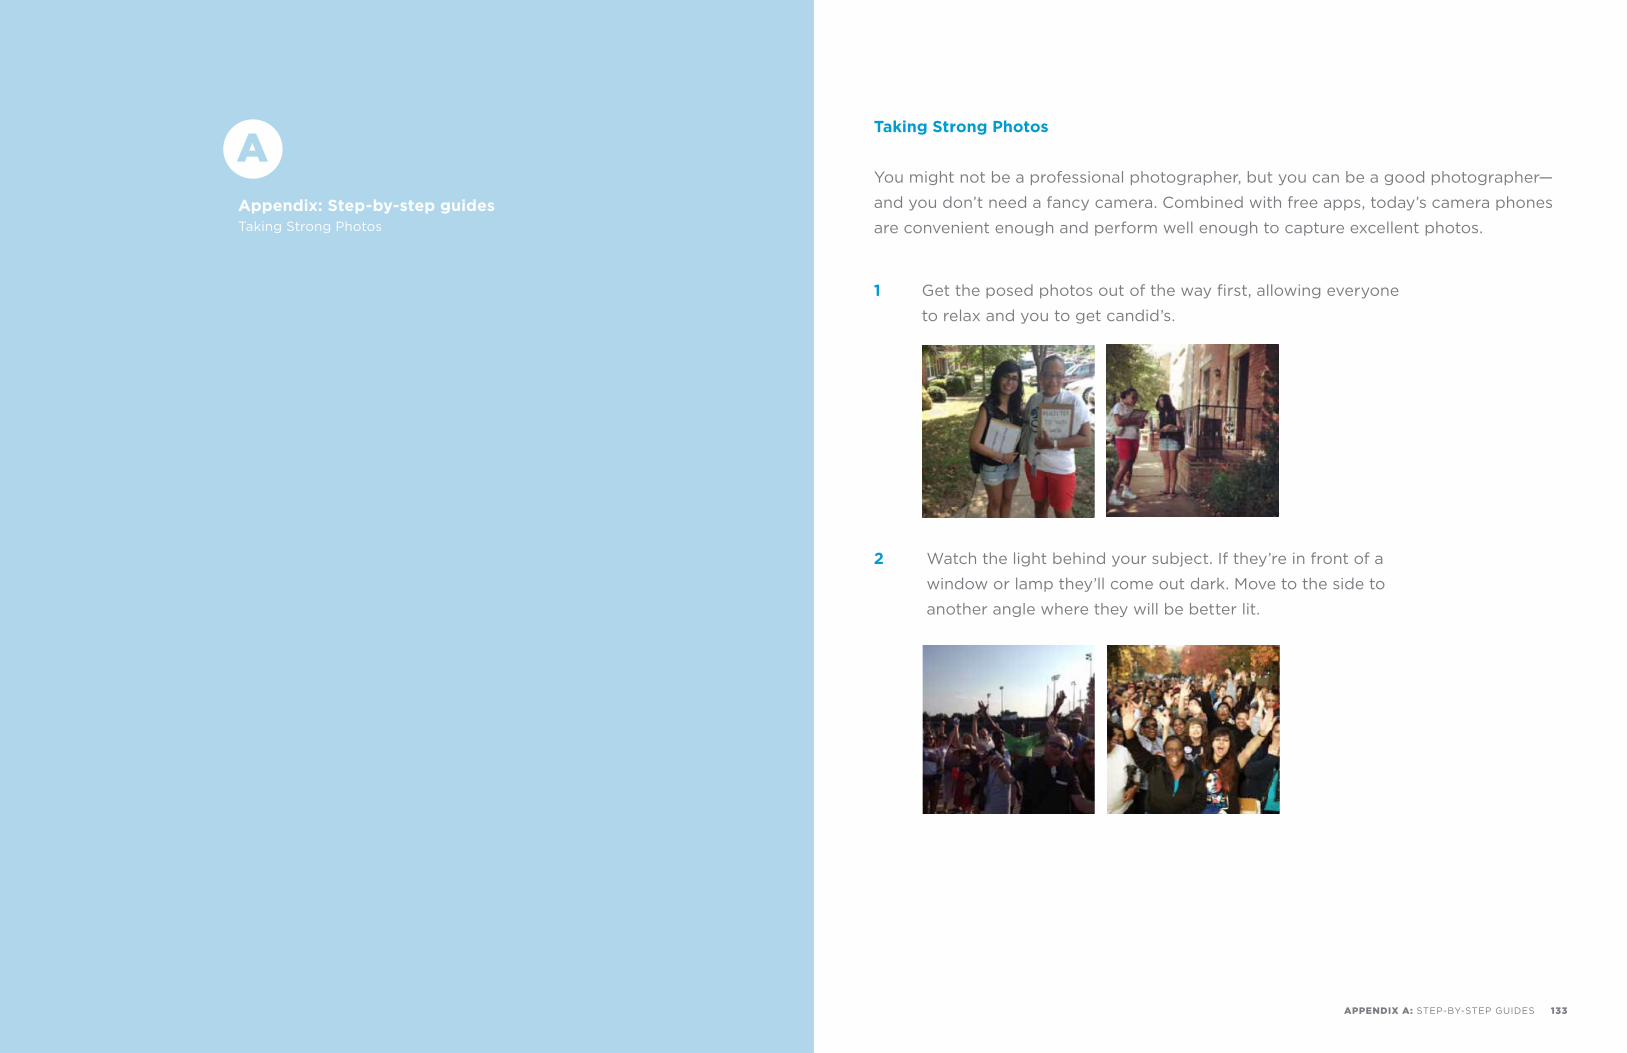
Taking Strong Photos
You might not be a professional photographer, but you can be a good photographer—
and you don’t need a fancy camera. Combined with free apps, today’s camera phones
are convenient enough and perform well enough to capture excellent photos.
1 Get the posed photos out of the way first, allowing everyone
to relax and you to get candid’s.
2 Watch the light behind your subject. If they’re in front of a
window or lamp they’ll come out dark. Move to the side to
another angle where they will be better lit.
Appendix: Step-by-step guides Taking Strong Photos
A
134 APPENDIX A: STEP-BY-STEP GUIDES APPENDIX A: STEP-BY-STEP GUIDES 135
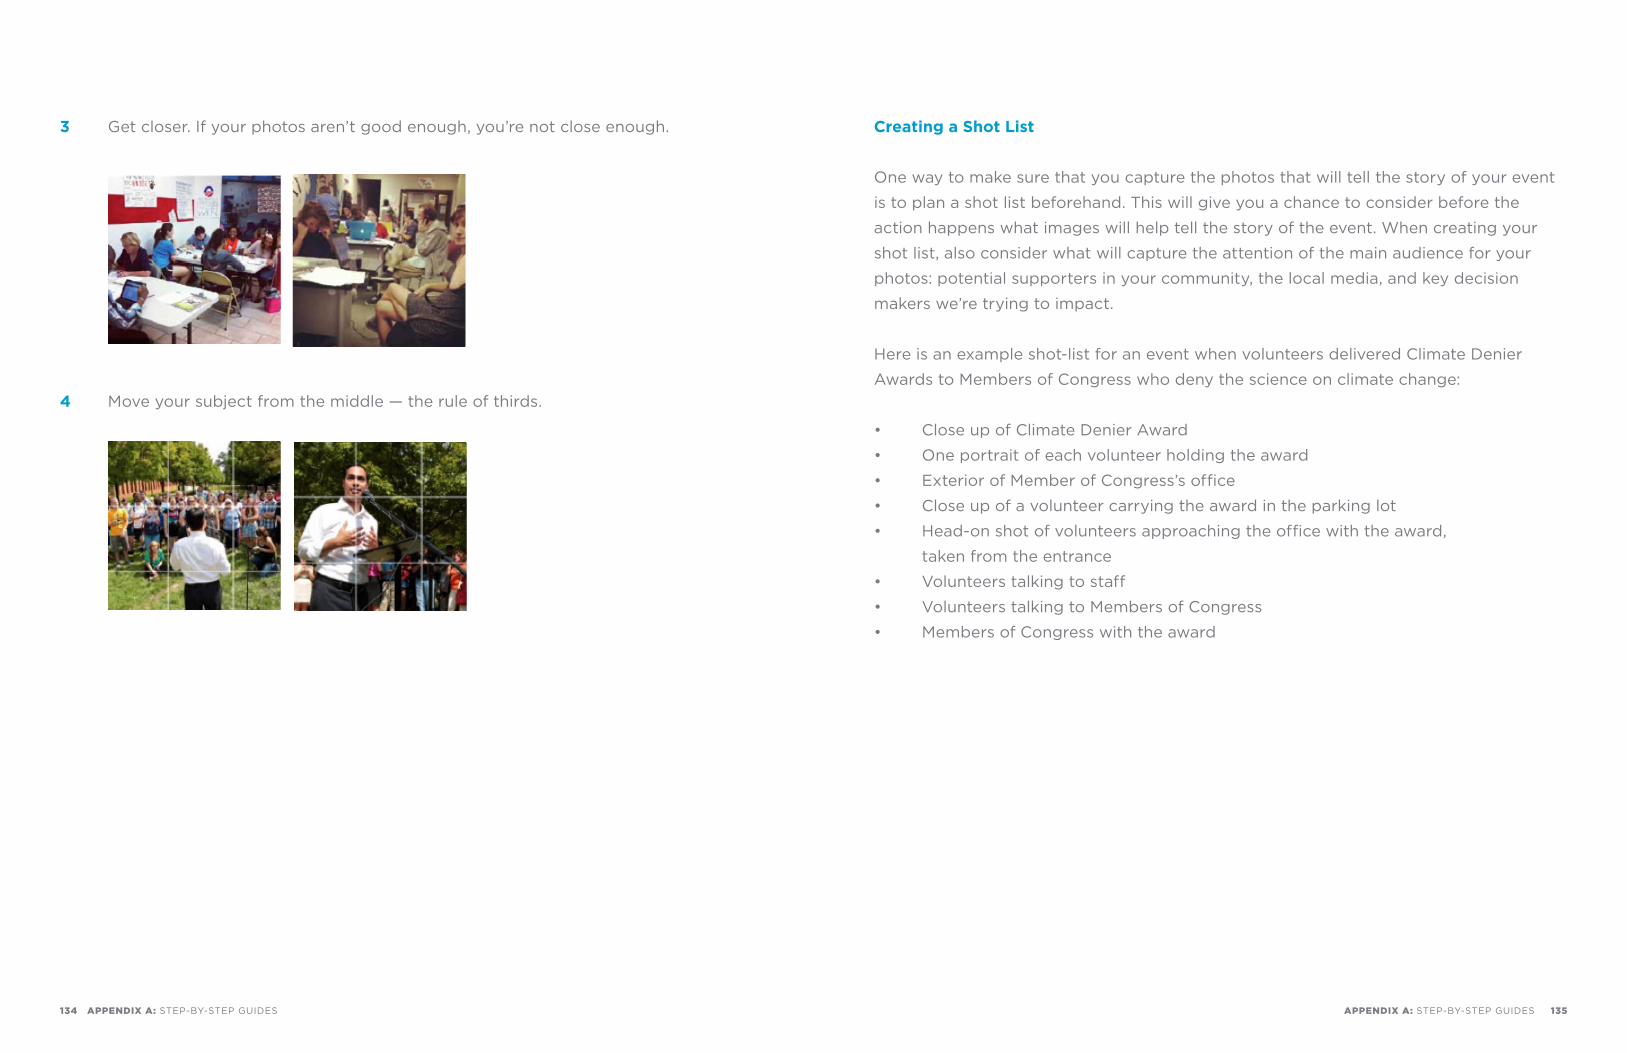
3 Get closer. If your photos aren’t good enough, you’re not close enough.
4 Move your subject from the middle — the rule of thirds.
Creating a Shot List
One way to make sure that you capture the photos that will tell the story of your event
is to plan a shot list beforehand. This will give you a chance to consider before the
action happens what images will help tell the story of the event. When creating your
shot list, also consider what will capture the attention of the main audience for your
photos: potential supporters in your community, the local media, and key decision
makers we’re trying to impact.
Here is an example shot-list for an event when volunteers delivered Climate Denier
Awards to Members of Congress who deny the science on climate change:
• Close up of Climate Denier Award
• One portrait of each volunteer holding the award
• Exterior of Member of Congress’s office
• Close up of a volunteer carrying the award in the parking lot
• Head-on shot of volunteers approaching the office with the award,
taken from the entrance
• Volunteers talking to staff
• Volunteers talking to Members of Congress
• Members of Congress with the award
136 APPENDIX A: STEP-BY-STEP GUIDES APPENDIX A: STEP-BY-STEP GUIDES 137
Appendix: Step-by-step guides How to Organize a House Meeting
AOrganizing a House Meeting
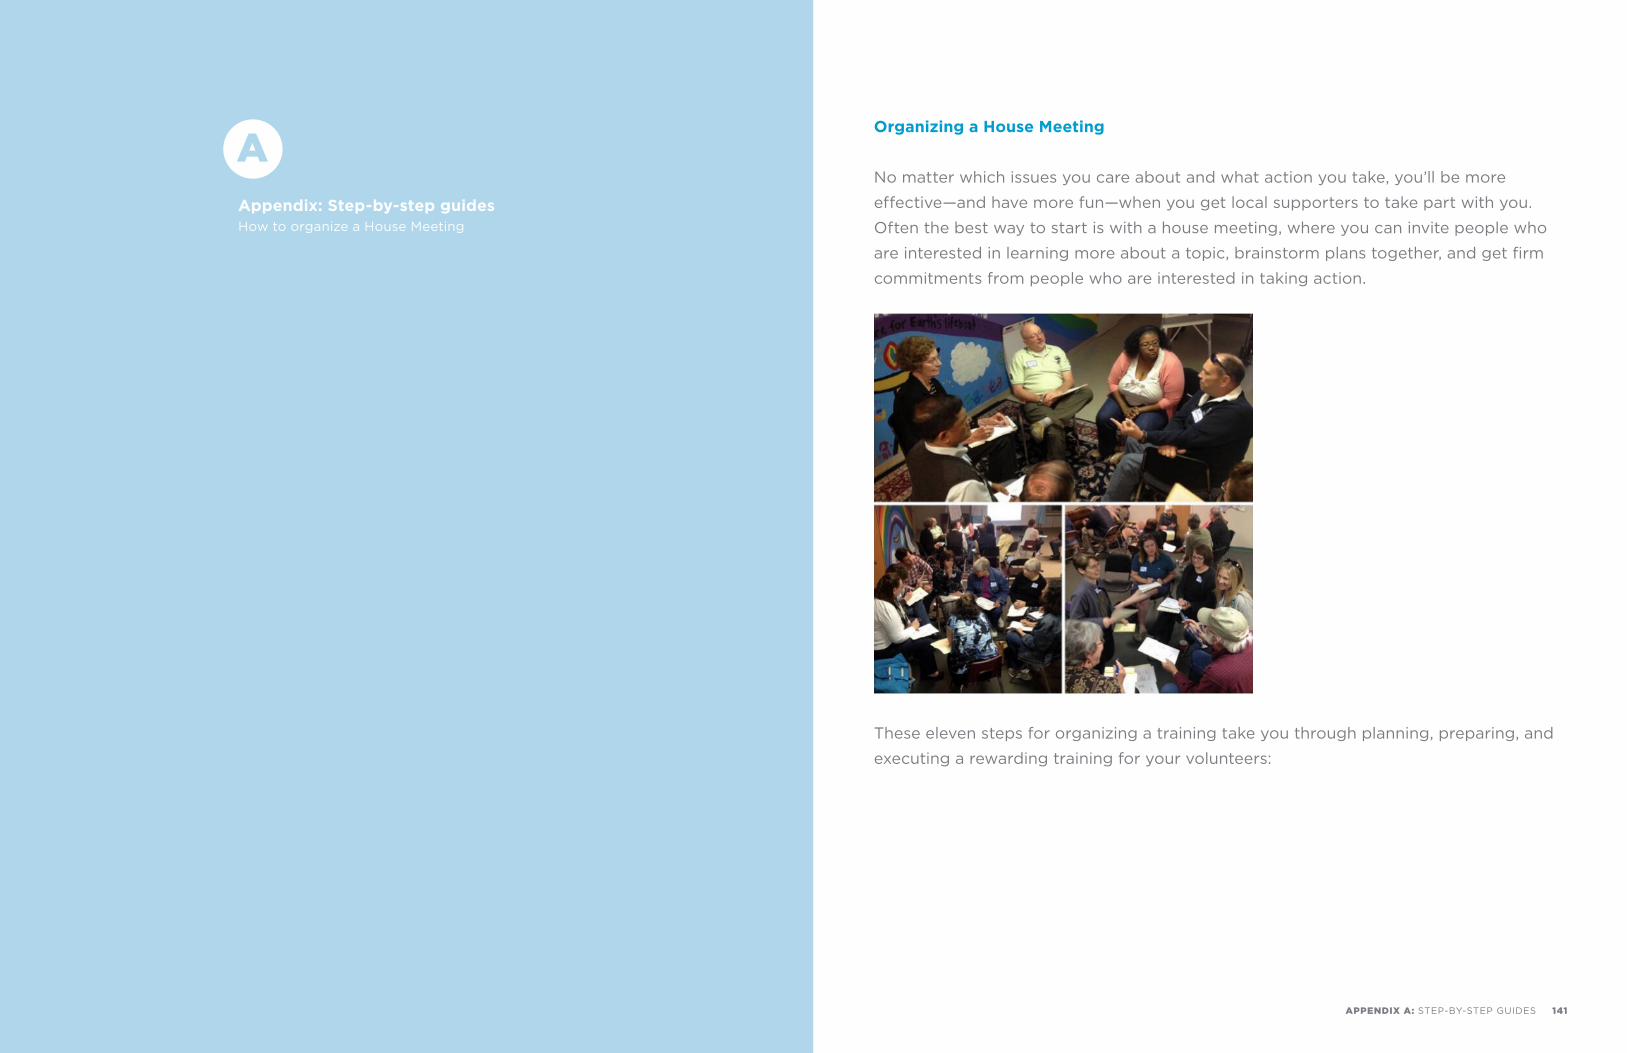
No matter which issues you care about and what action you take, you’ll be more effective
— and have more fun — when you get local supporters to take part with you. Often the
best way to start is with a house meeting, where you can invite people who are interested
in learning more about a topic, brainstorm plans together, and get firm commitments
from people who are interested in taking action.
Hosting an event can also be a great way to meet new people in your area who care
passionately about the same issues you do. Whether you’re a first-time host or an
experienced veteran, below are a few basic tips on how to have a successful house
meeting.
Before the House Meeting
• Decide on a date, time, location and issue topic for your house meeting.
• Create an outline listing for your event on barackobama.com/events.
• Recruit guests. Reach out to friends and family, but also be sure to ask them
to invite their friends that you might not know. You may want to promote your
event online as well as in local coffee shops or other areas that allow flyering or
event postings. Be sure to invite more people than you plan on having, as not
everyone who RSVPs will be able to make it, and always make confirmation calls
for anyone who RSVPs.
• Prepare. Print any materials you’ll need beforehand, and set up your space
for optimal sign-in, flow and seating before your first guests arrive. If you’ll
be using a computer, speakers, or any other equipment for you meeting, but
sure to test it beforehand in the space you’ll be meeting so you know it’s
working properly.
138 APPENDIX A: STEP-BY-STEP GUIDES APPENDIX A: STEP-BY-STEP GUIDES 139
During the House Meeting
• Welcome the attendees as they arrive, and ask them to sign in. Provide them
with a brief overview of the agenda and be sure to make them feel comfortable.
• Introduce yourself to the group, and then go around and ask the attendees
to introduce themselves and briefly state why they care about the issue
being discussed.
• Outline the issue you’ve decided to focus on. Keep it brief, and don’t feel like
you have to be an expert on the issue. Be sure to cover:
1 The problem. Start addressing the problem at hand. What are you and
your guests trying to fix with your organizing?
2 The local connection: If you’re focusing on a national issue like immigration
reform or climate change, identify the local connection. How does the local
community feel about the issue? Are there groups who are particularly
affected or interested in the issue? What are your elected representatives’
position on the issue?
3 The leverage point. Who are the people or local lawmakers who have the
most control over the issue at hand, and how can you best move them?
• Choose an action and then begin the planning process with your new volunteers.
Consider:
1 What action can you and your guests take in your community to have the
biggest impact on the issue at hand?
2 Is this action realistic?
3 Is it the best use of your time and resources?
4 Don’t feel like you have to solve the problem all at once — successful issue
campaigns involve lots of small actions that build on one another over time.
During the House Meeting
• Make a clear call to action. Once you’ve identified the action you’re planning on
taking, get firm commitments from your guests to take part. People will be much
more likely to commit now, while they’re fired up and engaged in the issue, than
they will be if you wait to follow up later.
• Determine next steps. Assign roles and responsibilites to members of the group.
Exchange contact information and set up regular communication or check-ins to
make sure every member of the team is on track. Give people clear next steps,
and set a date for your next meeting or outing.
• Share your success. During your house meeting make sure to amplify your
success by sharing photos and quotes of the new volunteers attending. Report
out what action your house party group has committed to take.
After the House Meeting
• Report the results of your house meeting. Check in with your OFA organizer to
tell them how many people attended and what actions you’ve planned as a result
of your house meeting.
• Enter data into out database to keep track of who attended the house meeting,
and record their commitments for future actions in the calender in our database.
• Follow-up with attendees to remind them of their commitment to take part in
future actions and make sure they have all the information they need to make
those actions happen.
140 APPENDIX A: STEP-BY-STEP GUIDES APPENDIX A: STEP-BY-STEP GUIDES 141
Organizing a House Meeting
No matter which issues you care about and what action you take, you’ll be more
effective—and have more fun—when you get local supporters to take part with you.
Often the best way to start is with a house meeting, where you can invite people who
are interested in learning more about a topic, brainstorm plans together, and get firm
commitments from people who are interested in taking action.
These eleven steps for organizing a training take you through planning, preparing, and
executing a rewarding training for your volunteers:
Appendix: Step-by-step guides How to organize a House Meeting
A
142 APPENDIX A: STEP-BY-STEP GUIDES APPENDIX A: STEP-BY-STEP GUIDES 143
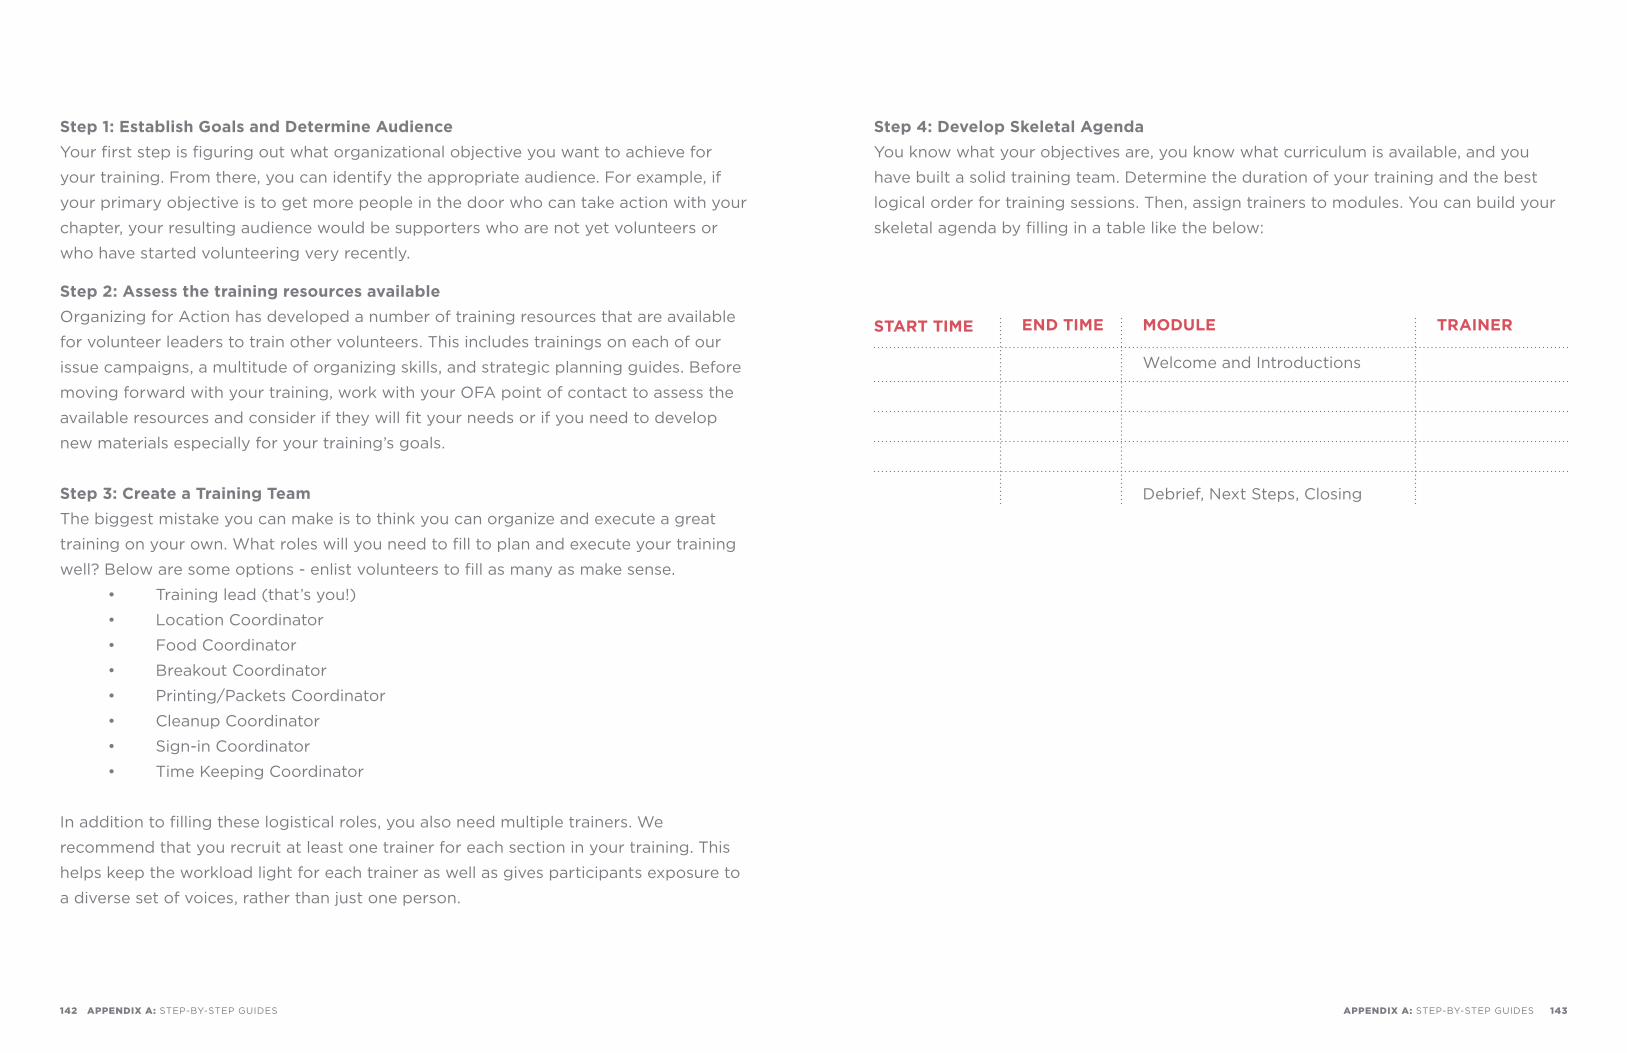
START TIME END TIME MODULE TRAINER
Welcome and Introductions
Debrief, Next Steps, Closing
Step 1: Establish Goals and Determine Audience
Your first step is figuring out what organizational objective you want to achieve for
your training. From there, you can identify the appropriate audience. For example, if
your primary objective is to get more people in the door who can take action with your
chapter, your resulting audience would be supporters who are not yet volunteers or
who have started volunteering very recently.
Step 2: Assess the training resources available
Organizing for Action has developed a number of training resources that are available
for volunteer leaders to train other volunteers. This includes trainings on each of our
issue campaigns, a multitude of organizing skills, and strategic planning guides. Before
moving forward with your training, work with your OFA point of contact to assess the
available resources and consider if they will fit your needs or if you need to develop
new materials especially for your training’s goals.
Step 3: Create a Training Team
The biggest mistake you can make is to think you can organize and execute a great
training on your own. What roles will you need to fill to plan and execute your training
well? Below are some options - enlist volunteers to fill as many as make sense.
• Training lead (that’s you!)
• Location Coordinator
• Food Coordinator
• Breakout Coordinator
• Printing/Packets Coordinator
• Cleanup Coordinator
• Sign-in Coordinator
• Time Keeping Coordinator
In addition to filling these logistical roles, you also need multiple trainers. We
recommend that you recruit at least one trainer for each section in your training. This
helps keep the workload light for each trainer as well as gives participants exposure to
a diverse set of voices, rather than just one person.
Step 4: Develop Skeletal Agenda
You know what your objectives are, you know what curriculum is available, and you
have built a solid training team. Determine the duration of your training and the best
logical order for training sessions. Then, assign trainers to modules. You can build your
skeletal agenda by filling in a table like the below:
144 APPENDIX A: STEP-BY-STEP GUIDES APPENDIX A: STEP-BY-STEP GUIDES 145
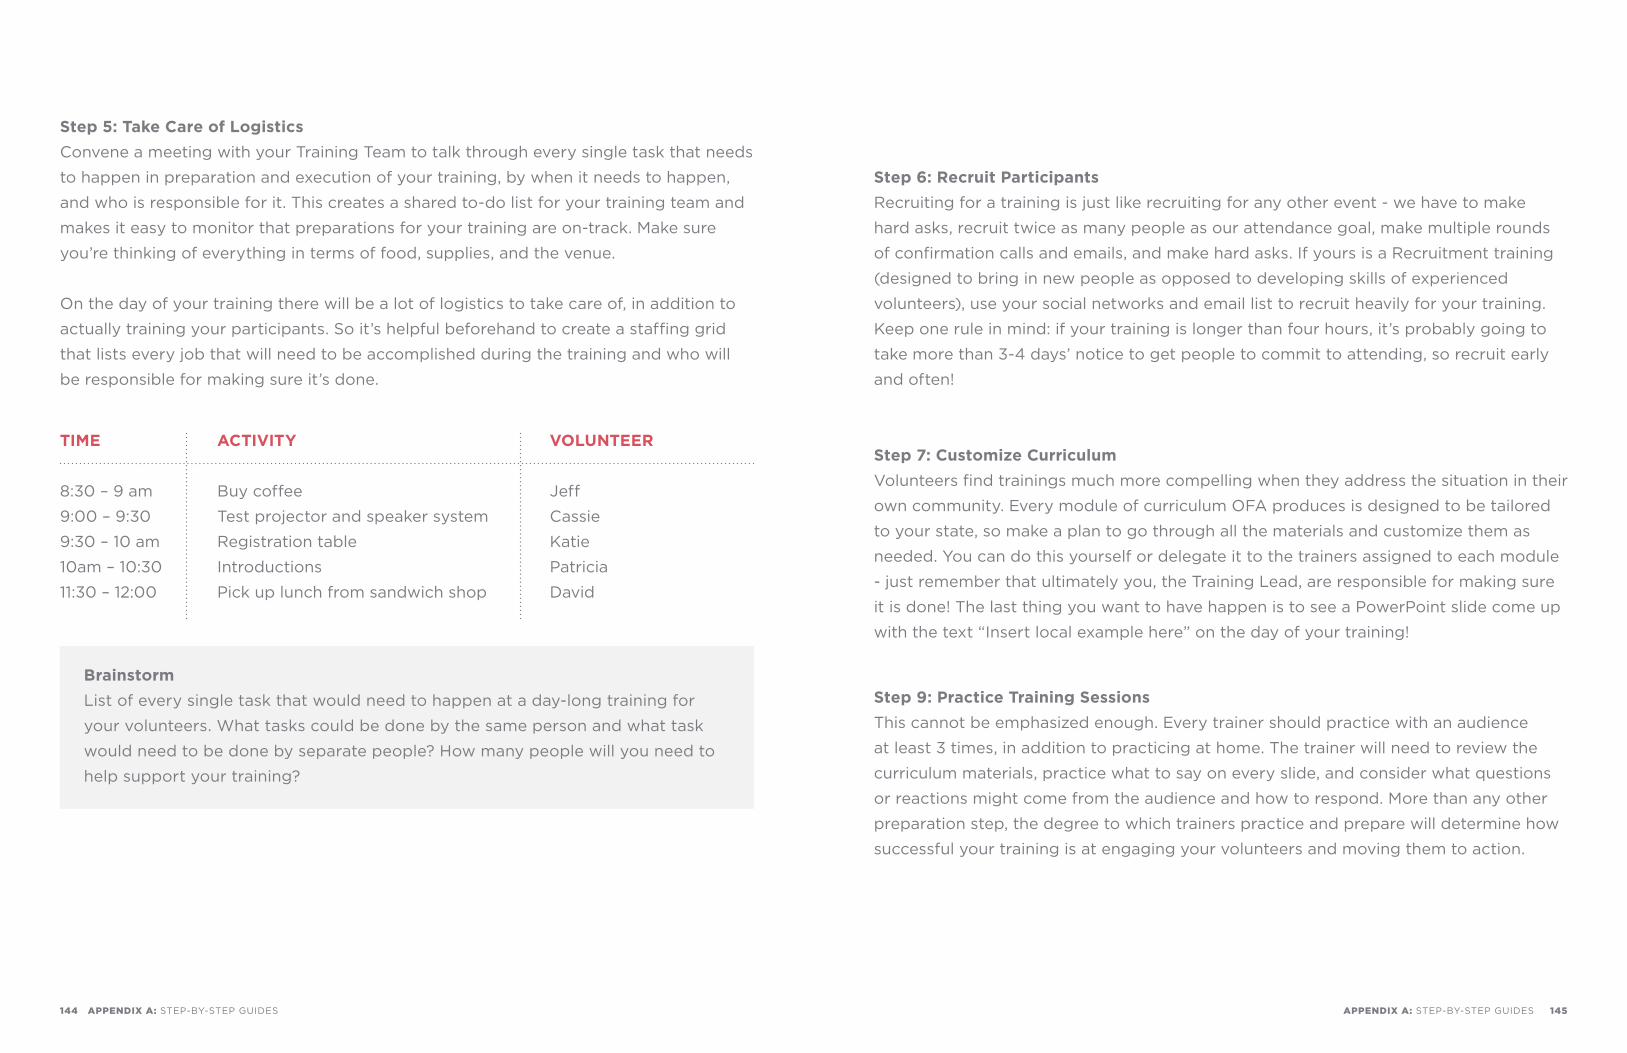
TIME
8:30 – 9 am
9:00 – 9:30
9:30 – 10 am
10am – 10:30
11:30 – 12:00
ACTIVITY
Buy coffee
Test projector and speaker system
Registration table
Introductions
Pick up lunch from sandwich shop
VOLUNTEER
Jeff
Cassie
Katie
Patricia
David
Step 5: Take Care of Logistics
Convene a meeting with your Training Team to talk through every single task that needs
to happen in preparation and execution of your training, by when it needs to happen,
and who is responsible for it. This creates a shared to-do list for your training team and
makes it easy to monitor that preparations for your training are on-track. Make sure
you’re thinking of everything in terms of food, supplies, and the venue.
On the day of your training there will be a lot of logistics to take care of, in addition to
actually training your participants. So it’s helpful beforehand to create a staffing grid
that lists every job that will need to be accomplished during the training and who will
be responsible for making sure it’s done.
Brainstorm
List of every single task that would need to happen at a day-long training for
your volunteers. What tasks could be done by the same person and what task
would need to be done by separate people? How many people will you need to
help support your training?
Step 6: Recruit Participants
Recruiting for a training is just like recruiting for any other event - we have to make
hard asks, recruit twice as many people as our attendance goal, make multiple rounds
of confirmation calls and emails, and make hard asks. If yours is a Recruitment training
(designed to bring in new people as opposed to developing skills of experienced
volunteers), use your social networks and email list to recruit heavily for your training.
Keep one rule in mind: if your training is longer than four hours, it’s probably going to
take more than 3-4 days’ notice to get people to commit to attending, so recruit early
and often!
Step 7: Customize Curriculum
Volunteers find trainings much more compelling when they address the situation in their
own community. Every module of curriculum OFA produces is designed to be tailored
to your state, so make a plan to go through all the materials and customize them as
needed. You can do this yourself or delegate it to the trainers assigned to each module
- just remember that ultimately you, the Training Lead, are responsible for making sure
it is done! The last thing you want to have happen is to see a PowerPoint slide come up
with the text “Insert local example here” on the day of your training!
Step 9: Practice Training Sessions
This cannot be emphasized enough. Every trainer should practice with an audience
at least 3 times, in addition to practicing at home. The trainer will need to review the
curriculum materials, practice what to say on every slide, and consider what questions
or reactions might come from the audience and how to respond. More than any other
preparation step, the degree to which trainers practice and prepare will determine how
successful your training is at engaging your volunteers and moving them to action.
OFA
Step 9: Confirm Participants and Logistics
Your team should do two rounds of confirmation calls as well as two emails with all
the logistical information leading up to the training event. You should also check in
with your Training Team often to make sure everyone is on track with their assigned
responsibilities.
Step 10: Train!
Take lots of pictures, and post them on Facebook and Twitter to share the success of
your training!
Step 11: Celebrate, Evaluate, Learn and Improve
Make sure to collect an evaluation from all participants, as well as have an immediate
debrief discussion with your training team right after the training, as well as a more
extended debrief a few days later. Take note of your key lessons and takeaways, apply
them to your next training, and keep getting better at what you already do amazingly!
barackobama.com