occam on the arduino - adam sampsonoffog.org/publications/cpa2009-arduino-slides.pdf · occam on...
TRANSCRIPT

occam on the Arduino
Adam T. SampsonSchool of Computing, University of Kent
Matt C. JadudDepartment of Computer Science, Allegheny College
Christian L. JacobsenDepartment of Computer Science, University of Copenhagen
also featuring photos by:Maja Sweeny
Finding a platform
● We merged the Transterpreter into the KRoC tree a while ago, but we've only worked on one port recently – the Surveyor robot
● The Surveyor costs $400, and is cute but not terribly robust
● Other ports we've done in the past (the Pioneer, the Lego Mindstorms, and various one-off robots) have been similarly expensive
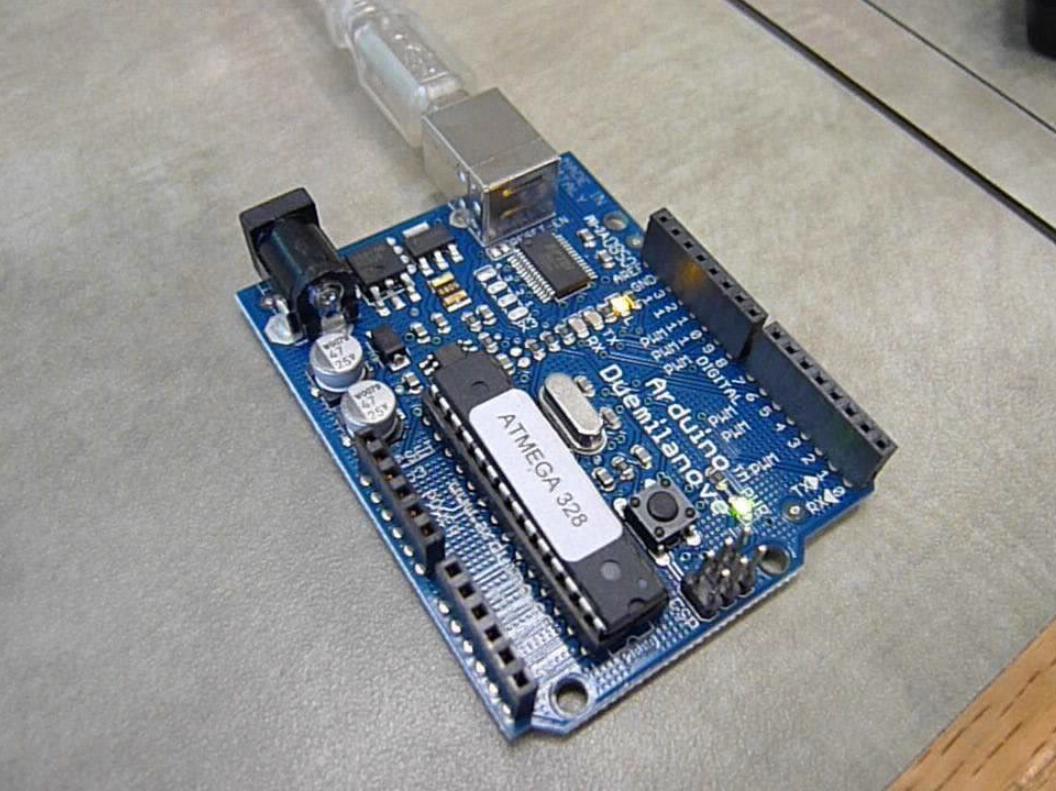

The Arduino
● Family of AVR-based development boards● Costs $25
– Cheaper in bulk
● Open-source hardware and software– Anyone can build their own Arduino variants – and
lots of people have done
– Simple bootloader
– Simple IDE
● Huge community – http://www.arduino.cc/
The plan
● Port the Transterpreter to the Arduino– ... which is really “port it to the AVR processor”
● Provide a toolkit of processes for people to build interesting things with– The Arduino's C++ library is called Wiring...
– ... so our occam library is called Plumbing
● Write a book that introduces students to embedded programing with Plumbing– Primarily aimed at non-techies – lots of artists and
musicians use Arduinos

Squeezing occam into not much space
● The ATmega328P on the Arduino is a reasonably typical low-cost microcontroller– 32KiB flash, 2KiB RAM
– 16MHz, 16-bit (effectively) CPU
– Lots of IO facilities: ports, timers, interrupts, UARTs, ADCs...
– Just the chip costs $4
● We use the normal occam-on-a-small-machine tricks: use 16-bit mode, disable most -pi features
Nonetheless, we have the will!
● The AVR is a Harvard-architecture design– Separate address spaces for instructions and data
● By default, the AVR C compiler copies data from flash into RAM on startup
● We implemented a virtual memory backend for the Transterpreter so we can keep TVM bytecode in flash– ... and a trimmed-down bytecode loader to support it
– Room for ~14KiB of bytecode at the moment
Loading programs
● The Arduino comes with a bootloader that lets you upload chunks of data into flash over the USB port – that's what makes it an Arduino!
● The USB interface is quite slow, so it's a pain having to upload the Transterpreter every time you change your program...
● ... so we've fixed it so you don't have to● We use the existing bootloader; the Arduino is
still an Arduino
And just about that time she calls me up
● Handling interrupts in occam is an interesting problem – but we have to do it!
● Carl and Jon had come up with a scheme to map interrupts to channels on the Surveyor that worked, but was too memory-hungry for our purposes– The AVR has lots of interrupts and very little RAM
● Came up with an approach that only needs two words per interrupt – works nicely– ... after some subtle debugging

Success!
● The traditional Arduino demo is to blink the built-in LED on and off– Easy to do in occam, of course...
● Of course, since this is occam, we can blink all the IO lines on and off in parallel, at different rates– This is extremely hard to do in C++!
● We’ve also done: buttons, serial communications, ADC, pin change interrupts...

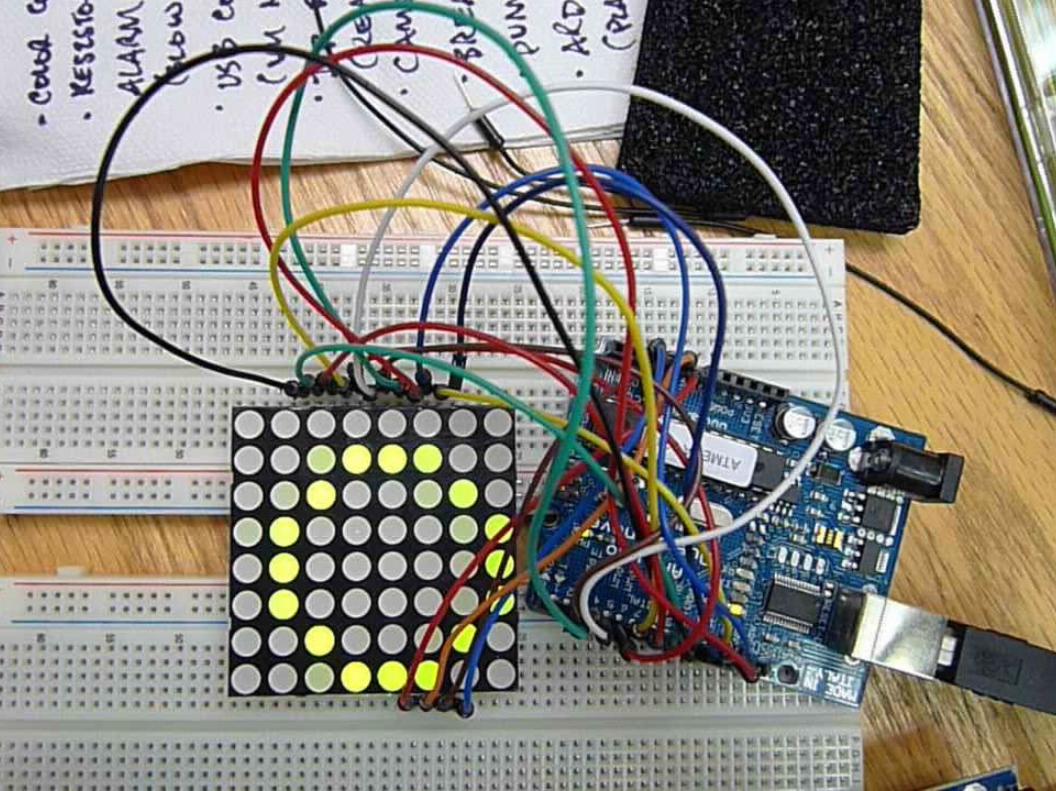
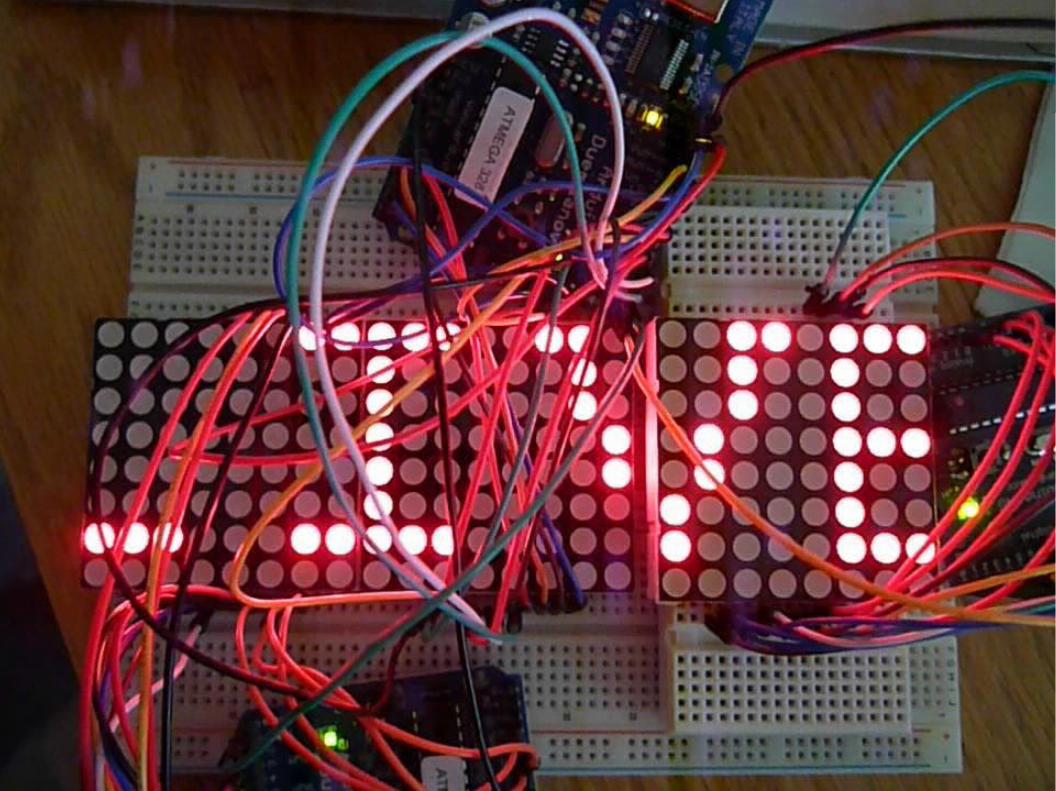
64 LEDs (well, 128, actually...)
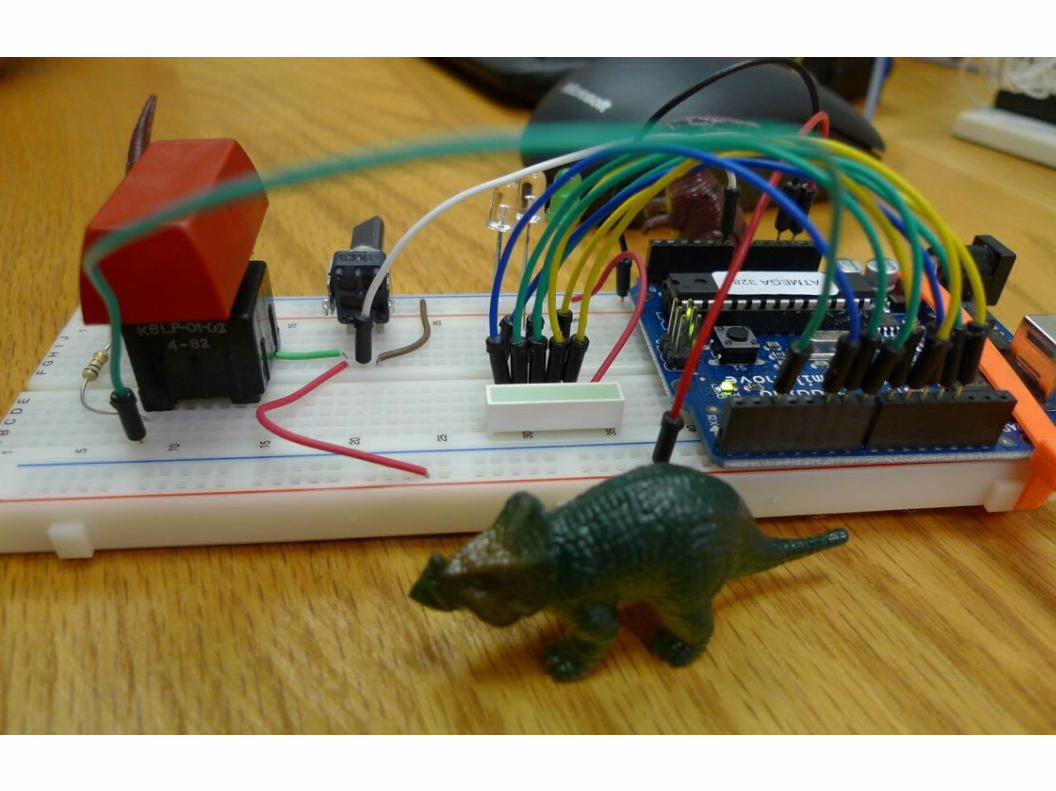
A real application
● 8x8 LED matrix– 8 rows and 8 columns, with an LED at each vertex
– The AVR isn't really designed to drive that many LEDs directly off its IO pins, but it does work...
● Need to scan reasonably fast to draw graphics● Need to buffer data as it's passed along the
display
One
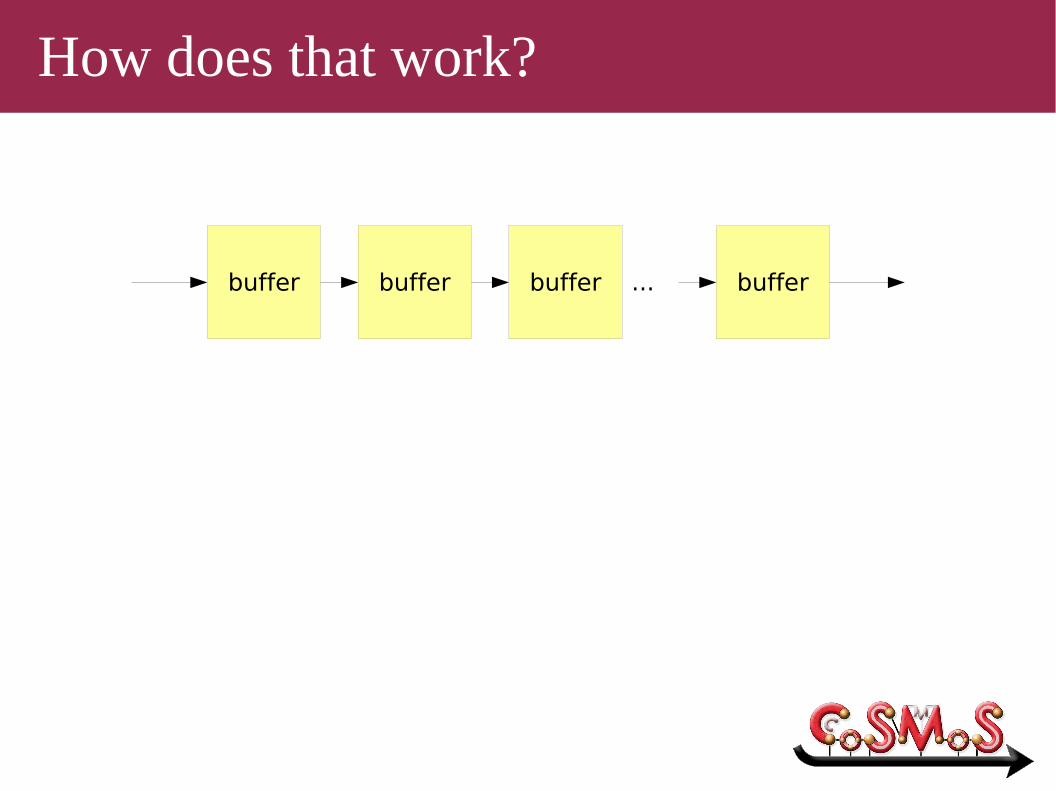
How does that work?
buffer buffer buffer buffer...

How does that work?
buffer buffer buffer buffer...
column column column column...
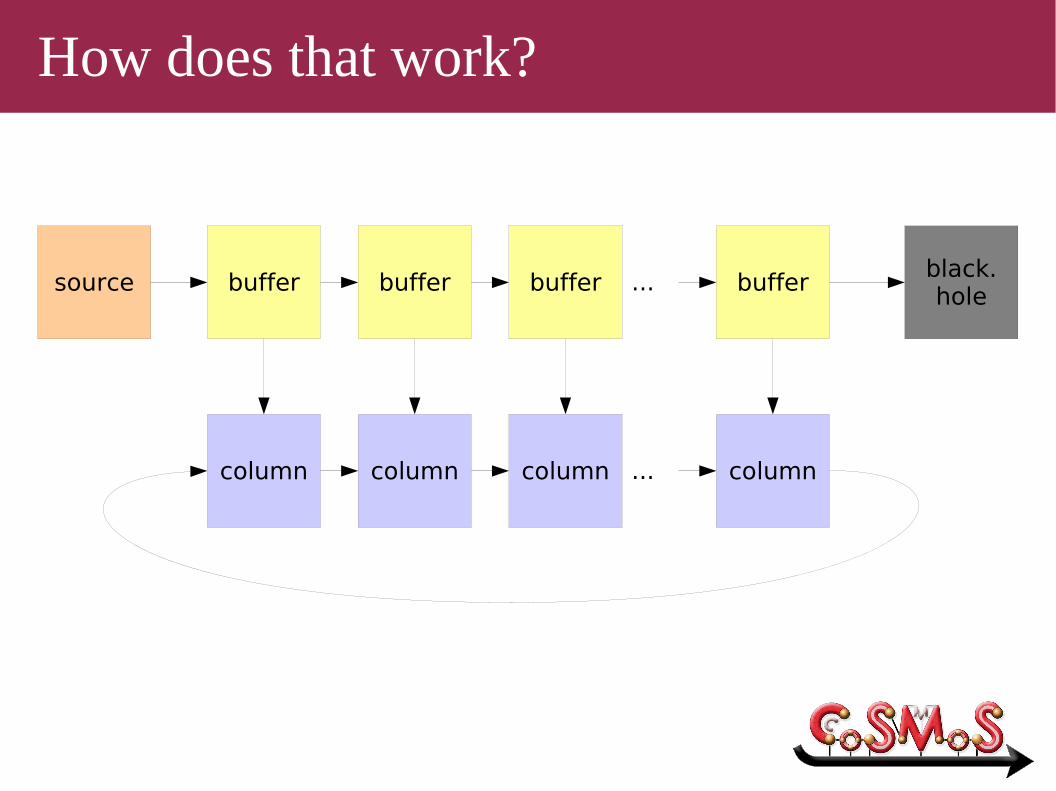
How does that work?
buffer buffer buffer buffer...
column column column column...
source black.hole

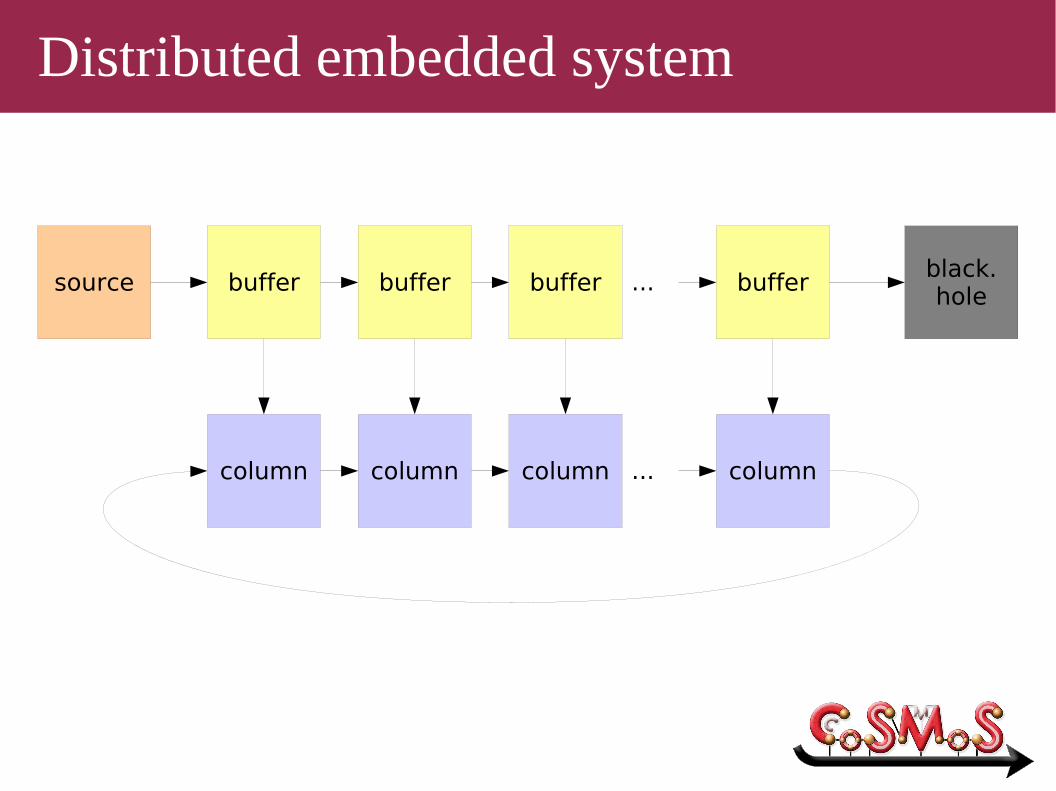
Distributed embedded system
buffer buffer buffer buffer...
column column column column...
source black.hole
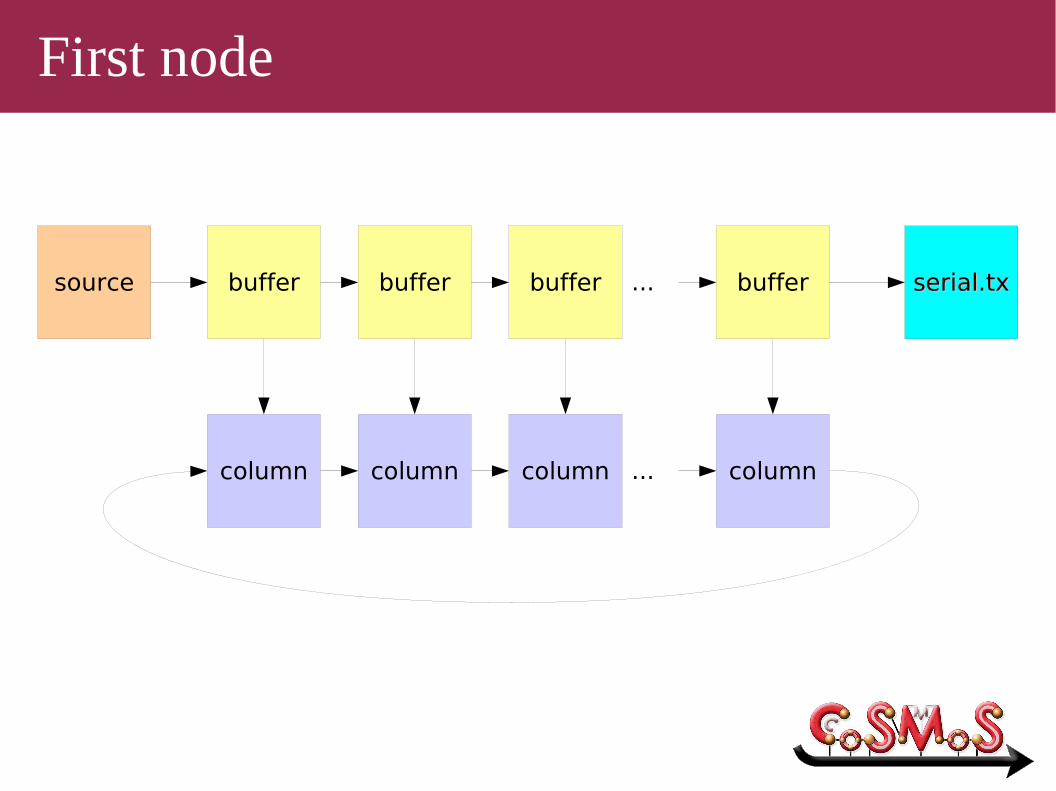
First node
buffer buffer buffer buffer...
column column column column...
source serial.txserial.tx
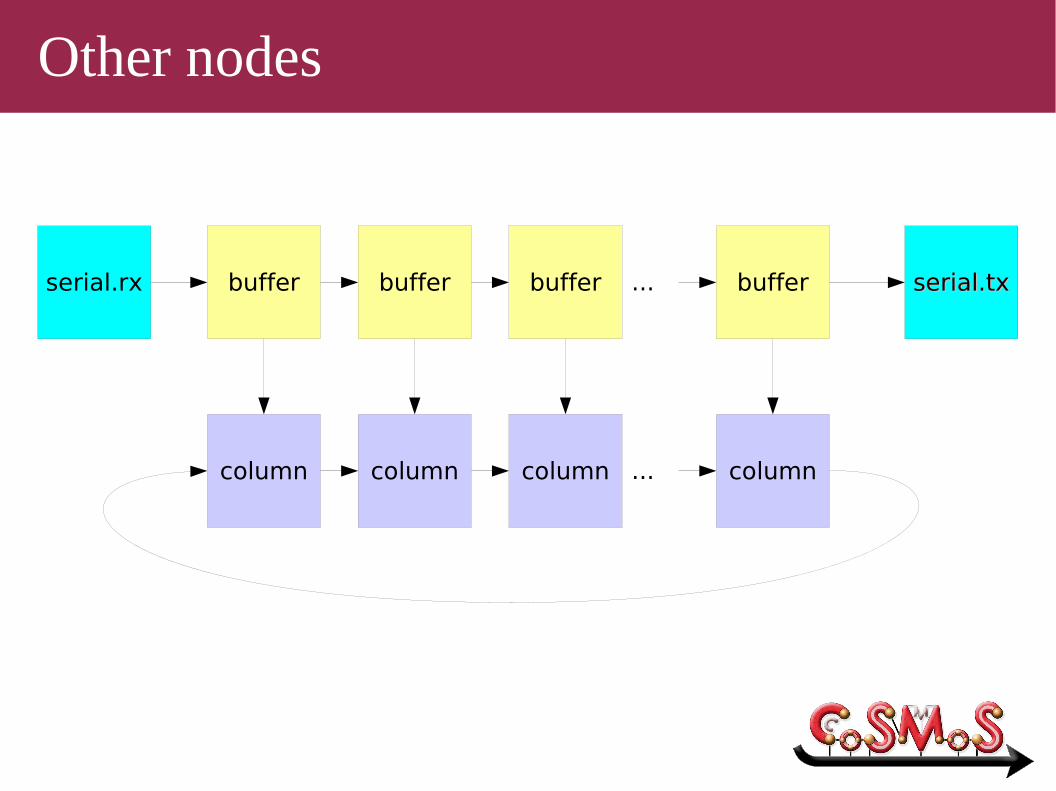
Other nodes
buffer buffer buffer buffer...
column column column column...
serial.rx serial.txserial.tx


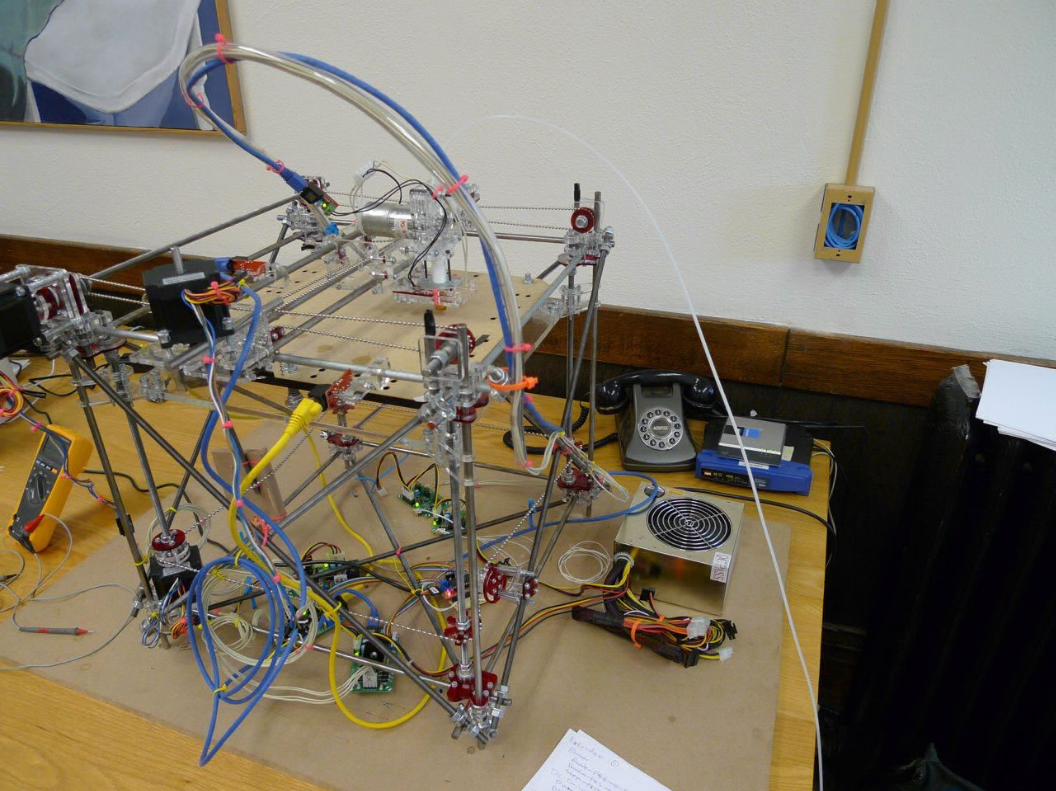
The RepRap
● Homebrew 3D printer– Builds up 3D models layer by layer in ABS plastic
● Controlled by an Arduino board● The existing firmware is complete rubbish● Matt plans to get a student to reimplement it in
occam using the Transterpreter...
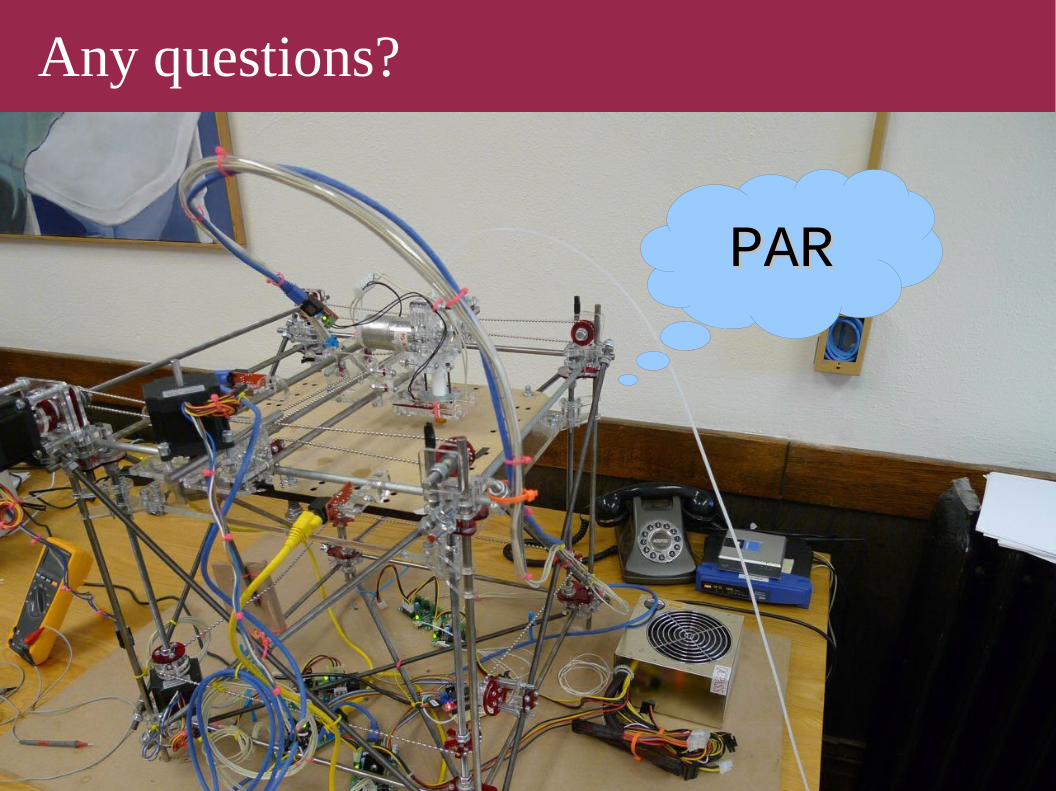
Any questions?
PARPAR