nomad jukebox - creative labsccftp.creative.com/manualdn/manuals/tsd/2424/jukebox.pdf · creative...
TRANSCRIPT

Nomad Jukebox
User GuideOn-line Version

Getting Started����������� ����������� ����������� �����������
Information in this document is subject to change without notice and does not represent a commitment on the part of Creative Technology Ltd. No part of this manual may be reproduced or transmitted in any form or by any means, electronic or mechanical, including photocopying and recording, for any purpose without the written permission of Creative Technology Ltd. The software described in this document is furnished under a license agreement and may be used or copied only in accordance with the terms of the license agreement. It is against the law to copy the software on any other medium except as specifically allowed in the license agreement. The licensee may make one copy of the software for backup purposes.Copyright © 2000 by Creative Technology Ltd. All rights reserved.Version 1.0February 2001Sound Blaster, the Sound Blaster logo, and the Creative logo are registered trademarks, and Sound Blaster Live! and Environmental Audio are trademarks of Creative Technology Ltd. in the United States and/or other countries.NOMAD is a registered trademark of Aonix and is used by Creative Technology Ltd. and/or its affiliates under license. CDDB-Enabled, CDDB, CDDB2 and the CDDB Logo are trademarks of CDDB, Inc.Microsoft and Windows are either registered trademarks or trademarks of Microsoft Corporation in the United States and/or other countries. MPEG Layer-3 audio compression technology licensed from Fraunhofer IIS and Thomson Multimedia.Pentium is a registered trademark of Intel Corporation.Macintosh is registered trademark and Mac and Power are trademarks of Apple Computer, Inc. All other brand and product names listed are trademarks or registered trademarks of their respective holders. All specifications subject to change without prior notice. Use of this product is subject to the limited warranty. Actual contents may differ slightly from those pictured. This product is designed to assist you in reproducing material for which you own the copyright or are authorized to copy by the copyright owner or by exemption in applicable law. Unless you own the copyright or have such authorization, you may be violating copyright law and may be subject to payment of damages and other remedies. If you are uncertain about your rights, you should contact your legal advisor.

THE TERMS OF THIS AGREEMENT. IF YOU DO NOT AGREE MENTATION AND ACCOMPANYING ITEMS TO THE PLACE
ONnted to you is effective until terminated. You may terminate it at any ng the Software (including any portions or copies thereof) to Creative. ll also terminate automatically without any notice from Creative if you with any term or condition of this Agreement. You agree upon such return the Software (including any portions or copies thereof) to termination, Creative may also enforce any rights provided by law. The
his Agreement that protect the proprietary rights of Creative will ce after termination.RRANTY
nts, as the sole warranty, that the disks on which the Software is be free of defects, as set forth in the Warranty Card or printed manual he Software. No distributor, dealer or any other entity or person is xpand or alter this warranty or any other provisions of this Agreement. tion, other than the warranties set forth in this Agreement, will not bind
ot warrant that the functions contained in the Software will meet your r that the operation of the Software will be uninterrupted, error-free or ious code. For purposes of this paragraph, “malicious code” means any
designed to contaminate other computer programs or computer data, uter resources, modify, destroy, record, or transmit data, or in some other he normal operation of the computer, computer system, or computer ing viruses, Trojan horses, droppers, worms, logic bombs, and the like.
STATED ABOVE IN THIS AGREEMENT, THE SOFTWARE IS S-IS WITHOUT WARRANTY OF ANY KIND, EITHER IMPLIED, INCLUDING, BUT NOT LIMITED TO, ANY RRANTIES OF MERCHANTABILITY AND FITNESS FOR A
R PURPOSE. CREATIVE IS NOT OBLIGATED TO PROVIDE ES, UPGRADES OR TECHNICAL SUPPORT FOR THE
ve shall not be liable for the accuracy of any information provided by rd party technical support personnel, or any damages caused, either rectly, by acts taken or omissions made by you as a result of such ort.ll responsibility for the selection of the Software to achieve your s, and for the installation, use and results obtained from the Software. e the entire risk as it applies to the quality and performance of the ld the Software prove defective, you (and not Creative, or its distributors me the entire cost of all necessary servicing, repair or correction.ives you specific legal rights, and you may also have other rights which try/state to country/state. Some countries/states do not allow the plied warranties, so the above exclusion may not apply to you. Creative arranties of any kind if the Software was customized, repackaged or ay by any third party other than Creative. OF REMEDIES AND DAMAGESEMEDY FOR BREACH OF WARRANTY WILL BE THAT SET
HE WARRANTY CARD OR PRINTED MANUAL INCLUDED OFTWARE. IN NO EVENT WILL CREATIVE OR ITS BE LIABLE FOR ANY INDIRECT, INCIDENTAL, SPECIAL OR
TIAL DAMAGES OR FOR ANY LOST PROFITS, LOST ST REVENUES OR LOST DATA ARISING FROM OR O THE SOFTWARE OR THIS AGREEMENT, EVEN IF R ITS LICENSORS HAVE BEEN ADVISED OF THE OF SUCH DAMAGES. IN NO EVENT WILL CREATIVE’S R DAMAGES TO YOU OR ANY OTHER PERSON EVER
E AMOUNT PAID BY YOU TO USE THE SOFTWARE,
PLEASE READ THIS DOTO THE TERMS OF THEOF ACQUISITION FOR
This is a legal agreement besubsidiaries (“Creative”). TCreative offers to license threlated documentation and aexecutable programs, driver(collectively, the “SoftwareLICENSE1. Grant of License
The Software is licensedAgreement. You own thesubsequently recorded oapplicable, its licensors)and reserves all rights n
2. For Use on a Single CoThe Software may be usYou may transfer the mato another computer, prothereof) is erased from tSoftware will be used on
3. Stand-Alone BasisYou may use the Softwathe functions it providesat the location of the comthe Software or its functof the Software through
4. CopyrightThe Software is owned States copyright laws ancopyright notice from anif any, accompanying th
5. One Archival CopyYou may make one (1) aSoftware for backup pursingle computer, provideproprietary rights notice
6. No Merger or IntegratYou may not merge any Software with, any othelaws of the jurisdiction winto or integrated with aterms and conditions of integrated portion all cooriginals of the Software
7. Network VersionIf you have purchased a to the installation of the Smultiple systems. Each “license of a “node copy”specific “node”.
8. Transfer of LicenseYou may transfer your lportions of the SoftwareSoftware or any copy thby the terms and conditi
Creative End-User Software License AgreementVersion 2.3, January 2000
CUMENT CAREFULLY BEFORE INSTALLING THE SOFTWARE. BY INSTALLING AND USING THE SOFTWARE, YOU AGREE TO BE BOUND BY AGREEMENT, DO NOT INSTALL OR USE THE SOFTWARE. PROMPTLY RETURN, WITHIN 15 DAYS, THE SOFTWARE, ALL RELATED DOCU
A FULL REFUND.
tween you and Creative Technology Ltd. and its his Agreement states the terms and conditions upon which e software sealed in the disk package together with all ccompanying items including, but not limited to, the s, libraries and data files associated with such programs ”).
, not sold, to you for use only under the terms of this disk or other media on which the Software is originally or
r fixed; but, as between you and Creative (and, to the extent , Creative retains all title to and ownership of the Software ot expressly granted to you.mputered only on a single computer by a single user at any time. chine-readable portion of the Software from one computer vided that (a) the Software (including any portion or copy he first computer and (b) there is no possibility that the more than one computer at a time.
re only on a stand-alone basis, such that the Software and are accessible only to persons who are physically present puter on which the Software is loaded. You may not allow
ions to be accessed remotely, or transmit all or any portion any network or communication line.
by Creative and/or its licensees and is protected by United d international treaty provisions. You may not remove the y copy of the Software or any copy of the written materials, e Software.
rchival copy of the machine-readable portion of the poses only in support of your use of the Software on a d that you reproduce on the copy all copyright and other
s included on the originals of the Software.ionportion of the Software into, or integrate any portion of the r program, except to the extent expressly permitted by the here you are located. Any portion of the Software merged
nother program, if any, will continue to be subject to the this Agreement, and you must reproduce on the merged or pyright and other proprietary rights notices included in the .
“network” version of the Software, this Agreement applies oftware on a single “file server”. It may not be copied onto node” connected to the “file server” must also have its own of the Software, which becomes a license only for that
icense of the Software, provided that (a) you transfer all or copies thereof, (b) you do not retain any portion of the ereof, and (c) the transferee reads and agrees to be bound ons of this Agreement.
9. Limitations on Using, Copying, and Modifying the SoftwareExcept to the extent expressly permitted by this Agreement or by the laws of the jurisdiction where you acquired the Software, you may not use, copy or modify the Software. Nor may you sub-license any of your rights under this Agreement. You may use the Software for your personal use only, and not for public performance or for the creation of publicly displayed videotapes.
10. Decompiling, Disassembling, or Reverse EngineeringYou acknowledge that the Software contains trade secrets and other proprietary information of Creative and its licensors. Except to the extent expressly permitted by this Agreement or by the laws of the jurisdiction where you are located, you may not decompile, disassemble or otherwise reverse engineer the Software, or engage in any other activities to obtain underlying information that is not visible to the user in connection with normal use of the Software.
11. For Software with CDDB featuresThis package contains software from CDDB, Inc.of Berkeley California ("CDDB"). The software from CDDB (the "CDDB Client") enables this application to do online disc identification and obtain music-related information, including name, artist, track and title information ("CDDB Data") from online servers ("CDDB Servers") and to perform other functions.You agree that you will use CDDB Data, the CDDB Client and CDDB Servers for your own personal non-commercial use only. You agree not to assign, copy, transfer or transmit the CDDB Client or any CDDB Data to any third party. YOU AGREE NOT TO USE OR EXPLOIT CDDB DATA, THE CDDB CLIENT,OR CDDB SERVERS,EXCEPT AS EXPRESSLY PERMITTED HEREIN.You agree that your non-exclusive license to use the CDDB Data, the CDDB Client and CDDB Servers will terminate if you violate these restrictions. If your license terminates, you agree to cease any and all use of the CDDB Data, the CDDB Client and CDDB Servers. CDDB reserves all rights in CDDB Data, the CDDB Client and the CDDB Servers, including all ownership rights. You agree that CDDB, Inc. may enforce its rights under this Agreement against you directly in its own name.The CDDB Client and each item of CDDB Data are licensed to you "AS IS." CDDB makes no representations or warranties, express or implied, regarding the accuracy of any CDDB Data from in the CDDB Servers. CDDB reserves the right to delete data from the CDDB Servers or to change data categories for any cause that CDDB deems sufficient. No warranty is made that the CDDB Client or CDDB Servers are error-free or that functioning of CDDB Client or CDDB Servers will be uninterrupted. CDDB is not obligated to provide you with any new enhanced or additional data types or categories that CDDB may chose to provide in the future.CDDB DISCLAIMS ALL WARRANTIES EXPRESS OR IMPLIED, INCLUDING, BUT NOT LIMITED TO, IMPLIED WARRANTIES OF MERCHANTABILITY, FITNESS FOR A PARTICULAR PURPOSE, TITLE AND NON-INFRINGEMENT. CDDB does not warrant the results that will be obtained by your use of the CDDB Client or any CDDB Server. IN NO CASE WILL CDDB BE LIABLE FOR ANY CONSEQUENTIAL OR INCIDENTIAL DAMAGES OR FOR ANY LOST PROFITS, OR LOST REVENUES.In particular, you agree not for any purpose to transmit the Software or display the Software's object code on any computer screen or to make any hardcopy memory dumps of the Software's object code. If you believe you require information related to the interoperability of the Software with other programs, you shall not decompile or disassemble the Software to obtain such information, and you agree to request such information from Creative at the address listed below. Upon receiving such a request, Creative shall determine whether you require such information for a legitimate purpose and, if so, Creative will provide such information to you within a reasonable time and on reasonable conditions.In any event, you will notify Creative of any information derived from reverse engineering or such other activities, and the results thereof will constitute the confidential information of Creative that may be used only in connection with the Software.
TERMINATIThe license gratime by returniThe license wifail to comply termination to Creative. Uponprovisions of tcontinue in forLIMITED WACreative warrafurnished will included with tauthorized to eAny representaCreative.Creative does nrequirements ofree from malicprogram code consume compfashion usurp tnetwork, includEXCEPT AS PROVIDED AEXPRESS ORIMPLIED WAPARTICULAANY UPDATSOFTWARE.Further, CreatiCreative or thidirectly or inditechnical suppYou assume fuintended resultYou also assumSoftware. Shouor dealers) assuThis warranty gvary from counexclusion of imdisclaims all waltered in any wLIMITATIONTHE ONLY RFORTH IN TWITH THE SLICENSORSCONSEQUENSAVINGS, LORELATING TCREATIVE OPOSSIBILITYLIABILITY OEXCEED TH

all Creative Labs be liable for any loss or any commercial damage, including imited to special, incidental, ential, or other damages. Some states/s do not allow the exclusion of n of liability for consequential or al damages, in which case the above n may not apply to you.oduct is found to be defective, Creative its option, agrees to replace or repair the at no charge except as stated below, that you deliver the product with a aterial authorization (RMA) number ted proof of purchase. If you ship the to Creative Labs, you must assume the mage or loss in profit. You must use the
container (or the equivalent) and pay the charge. Labs may replace or repair the product or reconditioned parts, and the
parts or product become the property of Labs. Creative Labs warrants the or replaced product to be free from n material and workmanship for a f ninety (90) days from the return date.eturning any product, contact Creative chnical Support (for telephone numbers esses, see the Technical Support section ocument). If Creative Labs Technical verifies that the product is defective, the uthorization Department will issue an mber to place on the outer package of uct. Creative Labs cannot accept any that does not include an RMA number ackage.
REGARDLESS OF THE FORM OF THE CLAIM. Some countries/states do not allow the limitation or exclusion of liability for incidental or consequential damages, so the above limitation or exclusion may not apply to you.PRODUCT RETURNSIf you must ship the software to Creative or an authorized Creative distributor or dealer, you must prepay shipping and either insure the software or assume all risk of loss or damage in transit.U.S. GOVERNMENT RESTRICTED RIGHTSAll Software and related documentation are provided with restricted rights. Use, duplication or disclosure by the U.S. Government is subject to restrictions as set forth in subdivision (b)(3)(ii) of the Rights in Technical Data and Computer Software Clause at 252.227-7013. If you are sub-licensing or using the Software outside of the United States, you will comply with the applicable local laws of your country, U.S. export control law, and the English version of this Agreement.CONTRACTOR/MANUFACTURERThe Contractor/Manufacturer for the Software is:
Creative Technology Ltd31, International Business ParkCreative ResourceSingapore 609921
GENERALThis Agreement is binding on you as well as your employees, employers, contractors and agents, and on any successors and assignees. Neither the Software nor any information derived therefrom may be exported except in accordance with the laws of the U.S. or other applicable provisions. This Agreement is governed by the laws of the State of California (except to the extent federal law governs copyrights and federally registered trademarks). This Agreement is the entire agreement between us and supersedes any other understandings or agreements, including, but not limited to, advertising, with respect to the Software. If any provision of this Agreement is deemed invalid or unenforceable by any country or government agency having jurisdiction, that particular provision will be deemed modified to the extent necessary to make the provision valid and enforceable, and the remaining provisions will remain in full force and effect.For questions concerning this Agreement, please contact Creative at the address stated above. For questions on product or technical matters, contact the Creative technical support center nearest you.
ADDENDUM TO THE MICROSOFT SOFTWARE LICENSE AGREEMENT (WINDOWS 95)IMPORTANT: By using the Microsoft software files (the “Microsoft Software”) provided with this Addendum, you are agreeing to be bound by the following terms. If you do not agree to be bound by these terms, you may not use the Microsoft Software.The Microsoft Software is provided for the sole purpose of replacing the corresponding files provided with a previously licensed copy of the Microsoft software product identified above (“ORIGINAL PRODUCT”). Upon installation, the Microsoft Software files become part of the ORIGINAL PRODUCT and are subject to the same warranty and license terms and conditions as the ORIGINAL PRODUCT. If you do not have a valid license to use the ORIGINAL PRODUCT, you may not use the Microsoft Software. Any other use of the Microsoft Software is prohibited.SPECIAL PROVISIONS APPLICABLE TO THE EUROPEAN UNIONIF YOU ACQUIRED THE SOFTWARE IN THE EUROPEAN UNION (EU), THE FOLLOWING PROVISIONS ALSO APPLY TO YOU. IF THERE IS ANY INCONSISTENCY BETWEEN THE TERMS OF THE SOFTWARE LICENSE AGREEMENT SET OUT EARLIER AND IN THE FOLLOWING PROVISIONS, THE FOLLOWING PROVISIONS SHALL TAKE PRECEDENCE.DECOMPILATIONYou agree not for any purpose to transmit the Software or display the Software’s object code on any computer screen or to make any hard copy memory dumps of the Software’s object code. If you believe you require information related to the interoperability of the Software with other programs, you shall not decompile or disassemble the Software to obtain such information, and you agree to request such information from Creative at the address listed earlier. Upon receiving such a request, Creative shall determine whether you require such information for a legitimate purpose
and, if so, Creative will provide such information to you within a reasonable time and on reasonable conditions.LIMITED WARRANTYEXCEPT AS STATED EARLIER IN THIS AGREEMENT, AND AS PROVIDED UNDER THE HEADING “STATUTORY RIGHTS”, THE SOFTWARE IS PROVIDED AS-IS WITHOUT WARRANTY OF ANY KIND, EITHER EXPRESS OR IMPLIED, INCLUDING, BUT NOT LIMITED TO, ANY IMPLIED WARRANTIES OR CONDITIONS OF MERCHANTABILITY, QUALITY AND FITNESS FOR A PARTICULAR PURPOSE.LIMITATION OF REMEDY AND DAMAGESTHE LIMITATIONS OF REMEDIES AND DAMAGES IN THE SOFTWARE LICENSE AGREEMENT SHALL NOT APPLY TO PERSONAL INJURY (INCLUDING DEATH) TO ANY PERSON CAUSED BY CREATIVE’S NEGLIGENCE AND ARE SUBJECT TO THE PROVISION SET OUT UNDER THE HEADING “STATUTORY RIGHTS”.STATUTORY RIGHTSIrish law provides that certain conditions and warranties may be implied in contracts for the sale of goods and in contracts for the supply of services. Such conditions and warranties are hereby excluded, to the extent such exclusion, in the context of this transaction, is lawful under Irish law. Conversely, such conditions and warranties, insofar as they may not be lawfully excluded, shall apply.Accordingly nothing in this Agreement shall prejudice any rights that you may enjoy by virtue of Sections 12, 13, 14 or 15 of the Irish Sale of Goods Act 1893 (as amended).GENERALThis Agreement is governed by the laws of the Republic of Ireland. The local language version of this agreement shall apply to Software acquired in the EU. This Agreement is the entire agreement between us, and you agree that Creative will not have any liability for any untrue statement or representation made by it, its agents or anyone else (whether innocently or negligently) upon which you relied upon entering this Agreement, unless such untrue statement or representation was made fraudulently.
LIMITED HARDWARE WARRANTYCreative Labs warrants that the product enclosed herein to be free of defects for a period of ninety (90) days from the date of purchase. In the event of a defect in material or workmanship during the warranty period, Creative Labs, at its discretion, will repair or replace the defective product when the defective product is returned to Creative Labs by the owner. The remedy for this breach of warranty is limited to servicing or replacement only and shall not cover any other damages, including but not limited to the loss of profit, special, incidental, consequential, and other claims.Creative Labs specifically disclaims all other warranties, expressed or implied, including but not limited to implied warranties of merchantability and fitness for a particular purpose with respect to the defects of the products and the program license granted herein. With respect to the use of this product, in no
event shof profitbut not lconsequcountrielimitatioincidentlimitatioIf the prLabs, at product providedreturn mand a daproduct risk of daoriginal shippingCreativewith newreplacedCreativerepaireddefects iperiod oshippingBefore rLabs' Teand addrof this dSupport Return ARMA nuthe prodproduct on the p

������������������������
g to the FCC96 208 and ET95-19, Manufacturer/’s Name:
Creative Labs, Inc.turer/Importer’s Address:Carthy Boulevard
Milpitas, CA. 95035United StatesTel: (408) 428-6600
under its sole responsibility that the productme: Creative Labsumbers: DAP-6G01/DAP-6G02 tested according to the FCC / CISPR22/85 ent for Class B devices and found compliant
following standards:C:ANSI C63.4 1992, FCC Part 15 Subpart B
Complies with Canadian ICES-003 Class B.ce complies with part 15 of the FCC Rules.n is subject to the following two conditions:is device may not cause harmful interference, dis device must accept any interference received, luding interference that may cause undesirable eration.iel est conforme à la section 15 des régles FCC.tionnement est soumis aux deux conditions : matériel ne peut étre source D’interférences etit accepter toutes les interférences reques, Y
mpris celles pouvant provoquer un ctionnement indésirable.
entary Information:01 == Standard Model02 == Europe Model is the docking station model.
Compliance ManagerCreative Labs, Inc.
March 30, 2000
�������������������������������
The following sections contain notices for various countries:
CAUTION: This device is intended to be connected by the user to a CSA/TUV/UL certified/listed IBM AT or compatible personal computers in the manufacturer’s defined operator access area. Check the equipment operating/installation manual and/or with the equipment manufacturer to verify/confirm if your equipment is suitable for devices to be connected to it.ATTENTION: Ce périphérique est destiné à être connecté par l’utilisateur à un ordinateur IBM AT certifié ou listé CSA/TUV/UL ou compatible, à l’intérieur de la zone d'accès définie par le fabricant. Consulter le mode d’emploi/guide d'installation et/ou le fabricant de l’appareil pour vérifier ou confirmer qu'il est possible de connecter d'autres périphériques à votre sytème.
����������������
FCC Part 15: This equipment has been tested and found to comply with the limits for a Class B digital device, pursuant to Part 15 of the FCC Rules. These limits are designed to provide reasonable protection against harmful interference in a residential installation. This equipment generates, uses, and can radiate radio frequency energy and, if not installed and used in accordance with the instructions, may cause harmful interference to radio communications. However, this notice is not a guarantee that interference will not occur in a particular installation. If this equipment does cause harmful interference to radio or television reception, which can be determined by turning the equipment off and on, the user is encouraged to try one or more of the following measures:
❑ Reorient or relocate the receiving antenna.❑ Increase the distance between the equipment and receiver.❑ Connect the equipment to an outlet on a circuit different from that
to which the receiver is connected.❑ Consult the dealer or an experienced radio/TV technician.❑ Caution
To comply with the limits for the Class B digital device, pursuant to Part 15 of the FCC Rules, this device must be installed in computer equipment certified to comply with the Class B limits.
All cables used to connect the computer and peripherals must be shielded and grounded. Operation with non-certified computers or non-shielded cables may result in interference to radio or television reception.
Modifications
Any changes or modifications not expressly approved by the grantee of this device could void the user’s authority to operate the device.
����������������
This apparatus complies with the Class “B” limits for radio interference as specified in the Canadian Department of Communications Radio Interference Regulations.
Cet appareil est conforme aux normes de CLASSE “B” d’interférence radio tel que spécifié par le Ministère Canadien des Communications dans les règlements d’interférence radio.
��� �����
This product conforms to the following Council Directive:❑ Directive 89/336/EEC, 92/31/EEC (EMC), 73/23/EEC (LVD)
AccordinImporter
Manufac 1901 Mc
declares Trade NaModel Nhas beenrequiremwith the EMI/EM
This deviOperatio
1. Than
2. Thincop
Ce matérSon Foncsuivantes
1. Le2. Do
cofon
SupplemDAP-6GDAP-6GDS-6401

Contents vi
"""""""""""""""""""""""""""""""""" � ......................................................ix.......................................................x.......................................................x.......................................................x......................................................xi.....................................................xii.....................................................xii
"""""""""""""""""""""""""""""""""" #.......................................................2
"""""""""""""""""""""""""""""""""" &.......................................................5.......................................................6.......................................................6.......................................................7.......................................................7.......................................................7.......................................................8.......................................................8.......................................................9
������!
������������ """""""""""""""""""""""""""""""""""""""""""""""""""Software ..............................................................................................System Requirements.........................................................................
Windows................................................................................Macintosh..............................................................................
Handling Instructions .........................................................................Proper Care and Usage .........................................................Health Hazards......................................................................
# $�������������� """""""""""""""""""""""""""""""""""Location of Controls...........................................................................
% �������� ����������� """"""""""""""""""""""""""Step 1: Insert Batteries........................................................................Step 2: Connect NOMAD Jukebox to Your PC or Mac...................Step 3: Run Jukebox Tutorial.............................................................Step 4: Install Software.......................................................................
Windows................................................................................Macintosh..............................................................................
Step 5: Verify NOMAD Jukebox Driver Installation .......................Step 6: Connect Headphones .............................................................Step 7: Select and Play a Track..........................................................

Contents vii
"""""""""""""""""""""""""""""""" #(.....................................................10.....................................................10.....................................................11.....................................................11.....................................................12.....................................................13.....................................................13.....................................................14.....................................................14.....................................................15.....................................................16.....................................................16.....................................................17.....................................................17.....................................................17.....................................................18.....................................................19.....................................................19.....................................................19.....................................................20.....................................................20.....................................................21.....................................................23.....................................................24.....................................................25.....................................................26.....................................................26
' �!����$�������������� """"""""""""""""""""""""""Screen Icons ........................................................................................Starting NOMAD Jukebox ................................................................Navigating Music Library Screens ....................................................
Navigating to Lower Level Screens.....................................Navigating to Upper Level Screens .....................................
Music Library......................................................................................Searching for an Album, Artist, Style, or Play List.............Queueing an Album..............................................................Queueing a Track..................................................................Viewing Details.....................................................................Previewing a Track ...............................................................Removing Albums, Tracks or Active Queue List...............
Playing Tracks/Albums ......................................................................Skipping Forward/Backward................................................Setting Play Mode.................................................................Saving an Active Queue List................................................
EAX and System Menu......................................................................Adjusting Parametric EQ......................................................Adjusting Spatialization Settings .........................................Adjusting Environmental Audio ..........................................Using Playback Speed ..........................................................Creating and Saving an Audio Recording ...........................Listening to an Audio Recording .........................................Saving an Active Queue List................................................Deleting Library Items..........................................................Viewing System Information................................................Adjusting System Preferences..............................................

Contents viii
��*! """"""""""""""""""""""" %,.....................................................27.....................................................29.....................................................29.....................................................29.....................................................31.....................................................31.....................................................32.....................................................32
"""""""""""""""""""""""""""""""" ''.....................................................34.....................................................34.....................................................35.....................................................35.....................................................36
"""""""""""""""""""""""""""""""" ',.....................................................37
"""""""""""""""""""""""""""""""" '1
) �!����$�������������� �����*������+��PlayCenter 2........................................................................................
Changing Skins .....................................................................Managing Files ...................................................................................
Converting and Transferring Files .......................................Deleting Files ........................................................................Creating Play Lists................................................................
Connecting to the NOMAD Web Site...............................................Environmental Audio .........................................................................
& �!������������-��.�*�����������!����""""SoundJam MP and NOMAD Jukebox..............................................
NOMAD Jukebox WINDOW .............................................Opening SoundJam.............................................................................
SoundJam Controls...............................................................Converting CD Audio to MP3...........................................................
� /��������� ����������! """""""""""""""""""""""""""""""NOMAD Jukebox (DAP-6G01)........................................................
0 /�����!������� """""""""""""""""""""""""""""""""""""""""""""

Introduction ix
rmat portable audio player/recorder. ble CD player and features high-capacity (150 albums). Its features include a Line--Out connections for connecting a four-S2000 Digital.
or (DSP) and real-time effects processor supports headphone spatialization and ports multiple formats including MP3, ts downloadable features including new
les on your computer and NOMAD cks into compressed digital audio files.ges your digital audio files as well as
rom Naxos and Soundbuzz.com,
r online services, and play them back on
������������
Your Creative NOMAD Jukebox is the latest USB-compatible, multi-foThis new, light-weight (14 oz.) digital audio player is the size of a portastorage—6 GB of built-in storage—that holds an entire music collectionIn connection for analog recording from external sources and two Linespeaker system such as Cambridge SoundWorks FourPointSurround FPNOMAD Jukebox features an onboard, real-time digital signal processfor superior audio playback and customization. A Headphone-Out jackequalizer effects. This SDMI-capable portable digital audio player supWAV and other future format standards. The NOMAD Jukebox supporeffects algorithms, security features, and auto playlist generators.
����*�� NOMAD Jukebox includes:❑ Creative PlayCenter 2 for managing your favorite digital audio fi
Jukebox. It is also an integrated encoder for ripping audio CD tra❑ SoundJam MP the ultimate music center for your Mac, that mana
converting almost any kind of sound file into MP3 files.❑ More than 20 hours of preloaded music and audio book content f
You can also download more MP3 files through worldwide web sites oyour NOMAD Jukebox.

Introduction x
vironments.
ing)
upport
iles)
s:
upport
��!����2������!
The NOMAD Jukebox is supported in both Windows and Macintosh en
+����*! The minimum system requirements for NOMAD Jukebox are:❑ Microsoft® Windows® 98 and Windows® 2000❑ 200 MHz or higher Pentium® or AMD K6 200
(Pentium II or AMD K6-2 or better recommended for MP3 encod❑ SVGA graphics adapter (256 colors, 640 x 480)❑ Internet connection for Internet content downloading or CDDB s
(user is responsible for charges incurred)❑ 32 MB RAM (64 MB recommended)❑ USB port❑ 30 MB free hard disk space (more required for storage of audio f❑ Installed mouse❑ CD-ROM drive with digital audio extraction support
�������!� The minimum system requirements for NOMAD Jukebox are as follow❑ Mac® OS version 8.6 or higher❑ iMac™, G3 or higher❑ Internet connection for Internet content downloading or CDDB s
(any expenses incurred are the responsibility of the user)❑ 32 MB RAM (64 MB recommended)❑ USB port❑ USB Manager, version 1.2 or higher❑ 12 MB free hard disk space (more for audio file storage)

Introduction xi
t on the Jukebox.
with a dry cloth.ebox and components to dry completely
rong magnetic fields, or high heat.
etaching its power cable.
ce before cleaning.
ards, and mix with used or other battery kage and cause personal injury.
e specified. Attempting to recharge ing different types of batteries, such as e personal injury.ur batteries in this way may damage your
3����������!��������!
��������������� ����������������������
❑ Do not drop the Jukebox on a solid surface or drop a heavy objec
����������������������������������������
❑ If the Jukebox comes into contact with water, dry it immediately ❑ If the Jukebox becomes wet, remove the batteries. Allow the Juk
before re-assembling.❑ If the Jukebox is not functioning, call Technical Support.
������������������������
❑ Avoid storing NOMAD Jukebox where there is high humidity, st
/�����������$����
����������
Be sure that NOMAD Jukebox is properly turned off before d
��������������
����
❑ Disconnect the power adapter from the wall outlet or power sour❑ Do not use liquid or aerosol cleaners.❑ Use a damp cloth for cleaning.
�!��������
� �������0�����!
Do not dispose of the batteries in fire, recharge, put in backwtypes—improper use of batteries may lead to explosion or lea
DO NOT:❑ Use the NOMAD Jukebox to recharge batteries other than the typ
batteries such as normal, heavy duty, or alkaline batteries, or mixrechargeable alkaline, may lead to explosion or leakage and caus
❑ Use external battery chargers to charge your batteries. Charging yobatteries and your Jukebox.
❑ Immerse the batteries in water.❑ Repair or disassemble the batteries.❑ Drop the batteries or subject them to extreme force.❑ Short-circuit the batteries—this may result in skin burns.

Introduction xii
uct; see the diagram on the bottom of the
ure, and metal objects when not in use.t with skin or eyes. If this happens, wash edical attention.ations.
rvicing should only be done by qualified
If you are not certain of the power supply
tions included in your documentation and
ay result in electric shock or fire, and can
battery may cause respiratory irritation.
kin irritation and/or chemical burns. ap and water. If a chemical burn or the
evere irritation and chemical burns may st 15 minutes, lifting the upper and lower
k medical attention.
DO:❑ Insert the batteries according to the polarity markings on the prod
battery compartment for proper positioning.❑ Keep the batteries in a cool and dry place, away from heat, moist❑ Handle leaking batteries with rubber gloves. Avoid direct contac
the skin and flush the eyes thoroughly with clean water—seek m❑ Dispose of used batteries as required by local ordinances or regul❑ Keep the batteries out of reach of children.
��4����� Do not attempt to service any part of the product yourself. Seservice personnel.
.�*�������! The product should be operated only with the power adapter included. type in your home, consult your product dealer.If you are using batteries with your product, refer to the operating instrucmarkings, if any, on the product.
.�� �����������!��
❑ Do not use any object to probe the openings of the product—this malso damage the product.
❑ Do not spill liquid of any kind on the product.
3�����3�5���!
���������� Inhaling the fumes from the contents of an exposed, damaged, or leakingIf this happens, breathe in fresh air and seek medical attention.
����������� Direct skin contact with the contents of a damaged battery may cause sRemove contaminated clothing and wash the affected skin area with soirritation persists, seek medical attention.
6��������� If the contents of a damaged battery comes into contact with the eyes, sresult. Flush the eyes thoroughly with clean water immediately for at leaeyelids while doing so, until no evidence of the chemical remains. See

Your NOMAD Jukebox 1
1
nomadworld.com.
Protective carrying pouch
Backphones
$��������������
Your NOMAD Jukebox includes the following
For a list of the latest accessories, visit NOMAD World at http://www.
Power adapter and cable
Software installation CD
USB cable
8 rechargeable AA NiMH batteries
NOMAD Jukebox
Quick Start guide
The connector may be slightly different from that shown, depending on the country in which you purchased NOMAD Jukebox.

Your NOMAD Jukebox 2
Screen Title
Main Info
Soft button functions
Scroll Up/Down buttonsScreen navigation—press to move up or down through the items, press and hold to move rapidly through the list. Also, use to increment character in search/save operation.
Skip Forward buttonRestart audio at the beginning of the next track in the Play List.Hold down the button to enable the Seek function and search forward to any point in the memory.
Stop buttonPress once to pause playback. Press again to stop playback. The PlayPointer returns to the beginning of the track. Press the Play button to resume playback.
7������������������!
/� /� /� /�
Play buttonPress to immediately play a selected track. A track selected from the Music Library is placed at the top of the ACTIVE QUEUE LIST; a track selected from the ACTIVE QUEUE LIST advances the list to that track and begins playback.
Skip Backward buttonPress to restart audio at the start of the previous track in the Play List. The PlayPointer icon indicates the playing track.Hold down the button to enable the Seek function and search backward to any point in the memory.
EAX and System buttonPress to display the full list of EAX & System Settings which can be adjusted.
Library buttonPress to switch between LIBRARY CATEGORIES screen and ACTIVE QUEUE LIST screen.
Soft buttonsPress to execute the command listed directly above each of them.

Your NOMAD Jukebox 3
e through the
playback volume of to NOMAD Jukebox s 1 and 2, adjust the e speakers instead.
Headphones Jack
Power JackConnects to the power adapter.NOMAD Jukebox recharges the NiMH batteries if the batteries are installed and the adapter is connected to an outlet.
ort
Lock switchWhile in the ON position, the control buttons and Volume Adjuster cannot be operated.
Volume ControlAdjusts audio volumheadphones.Note: To control thespeakers connectedusing Line Out Jackvolume control of th
USB PLine In JackConnects to an external device for recording to NOMAD Jukebox.
Line Out Jacks 1 and 2Use for a four-speaker system such as Creative Cambridge SoundWorks FourPointSurround.

Your NOMAD Jukebox 4
Battery case
ResetIf NOMAD Jukebox stops responding, insert and push a straightened paperclip into this hole.
0�����0�����0�����0�����

Setting Up NOMAD Jukebox 5
2aded— you can enjoy playing the songs a PC. Just follow these steps to listen to
the battery case.
rm for t clip
IMPORTANTMake sure that the four metal contact clips are set against the plastic platform and not pushed sideways or downwards when you insert the batteries.Use only Creative NiMH batteries. Follow the placement diagram in the battery compartment for proper installation. Do not mix batteries of different types or power (amperage).Batteries must be charged fully for 12 hours before initial use. Time required for recharging is four hours while Jukebox is turned off or ten hours if Jukebox is in use.
�������� �����������
Your NOMAD Jukebox comes with more than 20 hours of music preloimmediately on your NOMAD Jukebox whether or not it is connected tothe songs immediately:
�� �#8���!���0�����!
Insert the rechargeable NiMH batteries according to the diagram inside
����������������
Plastic platfometal contac
Fully recharging the batteries may take as long as 12 hours. Remember to have one set of four batteries fully recharged and ready to power your NOMAD Jukebox.
Using alkaline, NiCd, and other batteries will result in shorter playback time. The recharging element of the Jukebox is not designed to recharge these batteries.

Setting Up NOMAD Jukebox 6
2 or Sound Jam.er adapter.
�� �%8������������������ ����$����.��������
The diagram below shows how to make the connection for:A. Downloading MP3 music to NOMAD Jukebox using PlayCenterB. 1. Supplying power to your NOMAD Jukebox by using the pow
2. Recharging the NiMH batteries in NOMAD Jukebox.
�� �'8��������� �/�������
To run the Jukebox tutorial:1. Insert the NOMAD Jukebox Installation CD into your
CD-ROM drive.2. For Windows, when the software installation screen
appears, select Creative Jukebox Tutorial.For Macs, when the software installation screen appears, select NJBdemo.
3. When the tutorial screen appears, click on a topic to run it.
You may leave your computer on when you connect your NOMAD Jukebox to the USB port. A USB device, such as the Jukebox, is automatically detected by your computer.

Setting Up NOMAD Jukebox 7
are.
nstalled are selected by default. Click the Registration dialog appears.e instructions to complete the registration.
tion. you that the Creative PlayCenter 2 Setup
re.M drive, select the “Yes, I want to restart
cess the installation screen by double-
�� �)8���!���������*��
Install all the programs in the installation CD before accessing the softw
+����*! To install the software for Windows:1. At the Creative PlayCenter 2 setup screen, the applications to be i
right arrow button to start the installation. The Creative Product 2. Click the Next button to begin the registration process. Follow th
To register at a later time, click the Cancel button.3. Follow the instructions on the screen to continue with the installa
A message appears after the first application is installed, informingis completed.
4. Click the OK button and continue installing the remaining softwa5. When prompted to restart your system, leave the CD in the CD-RO
my computer now” option and then click the Finish button.
�������!� To install the software for Macintosh:1. Insert the Creative Installation CD into your CD-ROM drive. Ac
clicking the Jukebox icon.2. When the Jukebox Installation screen appears,
double click on the SoundJam MP Installer.3. Click Install on the next SoundJam Instalation
screen.Note: Sound Jam’s Installer may detect earlier versions of SoundJam, in which case it is best to select OK and install over the older version.
4. Restart your system when prompted.

Setting Up NOMAD Jukebox 8
the
osition.
�� �&8�9��������������� ����4����!���������
To check that the NOMAD Jukebox driver was successfully installed:1. Click the Start button on the Windows Taskbar and select
Settings, and click on Control Panel.2. On the Control Panel window, double-click the System icon.3. In the System Properties dialog, click the Device Manager
tab.4. On the Device Manager tab page, double-click “Universal
Serial Bus controllers,” and then check that Creative NOMAD Jukebox is listed.
�� �:8��������3�� ���!
To connect the headphones to the NOMAD Jukebox:1. Insert the headphones jack into the connector on the right side of
NOMAD Jukebox.2. Ensure that the lock switch on NOMAD Jukebox is in the OFF p3. Press and hold the Play button for two seconds.4. Put on your headphones as shown.

Setting Up NOMAD Jukebox 9
reen appears e Jukebox for o tracks left.”
reen..
t or Genre.
lbum.
ks on the
ns when it is the computer,
�� �,8����������.������/���
To play a track preloaded on your NOMAD Jukebox:1. Turn on your NOMAD Jukebox. The ACTIVE QUEUE LIST sc
whenever you turn on NOMAD Jukebox. If you are turning on ththe first time, the ACTIVE QUEUE LIST displays the message “N
1. Press the LIB button to display the LIBRARY CATEGORIES sc2. Press Open to display a list of albums available for playback.
If you prefer, use the UP/DOWN arrows to select tracks by Artis3. Press the UP/DOWN arrow to select an album.
4. With the album selected, press the Play button to play the entire a
Or, select a single track by pressing Open to view a list of the tracalbum. Press the Play button to listen to the selected track.
Note: NOMAD Jukebox can only be accessed through its control buttodisconnected from the computer. If NOMAD Jukebox is connected to use PlayCenter 2 to control the functions of your Jukebox.

Using Your NOMAD Jukebox 10
3
eing played.
Source icon, the batteries are fully
Loading” appears on the display.screen
e saved
kebox.
�!����$��������������
���������! The following symbols are used on the NOMAD Jukebox display:Category (Album, Artist, Style, etc.)
List of tracks from an album, a play list, etc.
Single track.
PlayPointer appears beside the track or list that is currently b
A selected item is highlighted.
Battery Charging. Note: Should the Battery Charging icon change to the Powercharged.Power Source is from the adapter.
�������������������
To turn on the NOMAD Jukebox, press and hold the Play button until “Whenever you turn on NOMAD Jukebox, the ACTIVE QUEUE LIST appears.When you make changes to the ACTIVE QUEUE LIST, the settings arwhen you turn off the Jukebox.To display the Library Categories screen, press the LIB button on the Ju
The interactive tutorial on the installation CD is included to guide you through the important operations on NOMAD Jukebox.
The PLAY LISTS category appears on your NOMAD Jukebox only after a Play List has been created.

Using Your NOMAD Jukebox 11
d tracks stored on the NOMAD Jukebox. elect the list or track and press either the
PEN (soft button) to navigate to the
the Tracks screen.
en
AILS to navigate to the Details screen.
Details screen
The bottom level of the Music Library; cannot be expanded further.
��4����������!���7�����������!
The Music Library screens allow you to view and select from the lists anTo select lists or tracks, use the SCROLL UP/DOWN button. To play, sPLAY button or the QUEUE soft button.There are four main types of screens in the Music Library:
❑ Categories❑ Lists❑ Tracks❑ Details
These screens may apply to play lists, albums, artists, and genres.
��4�����������7�*��74������!
Categories screen
The top level of the Music Library. Press OLists screen.
Lists screen
Press OPEN to navigate to
Tracks scre
Press DET

Using Your NOMAD Jukebox 12
Details screen
Press CLOSE to navigate to the Tracks screen.
screenLOSE to navigate to the Lists screen.
e Categories screen.
Details screen
Press CLOSE to navigate to the Tracks screen.
screenLOSE to navigate to the Lists screen.
e Categories screen.
��4������������ ��74������!
TracksPress C
Lists screenPress CLOSE to navigate to th
Categories screen
TracksPress C
Lists screenPress CLOSE to navigate to th
Categories screen
BACK may be displayed instead of CLOSE.

Using Your NOMAD Jukebox 13
lect ALBUMS.OR ALBUMS screen.
MINUS to change the letter and then OLL UP/DOWN buttons to move
y position (indicated by a ^).
each letter is entered, the letters are th the ALBUMS list. The ALBUM est match is displayed.
4. Press GO! to jump to the nearest match. The album appears on the screen.
��!���7������
���������������������;�����!�;�����;����.����7�!�
Begin your search from the LIBRARY CATEGORIES screen.
1.Press SCROLL UP/DOWN buttons to se2.Press SEARCH to access the SEARCH F
3. Press PLUS/press the SCRthe letter entr
NOTE: As compared wiwith the near
To return to the LIBRARY CATEGORIES screen without searching, press the LIB button.

Using Your NOMAD Jukebox 14
QUEUE LIST. If the Queue List is
—start from the ALBUMS screen.
ARY CATEGORIES screen, use the ct the type of music from which you want
ARY CATEGORIES screen, select G and press the OPEN button. Select the EUE.
select an album, then press QUEUE.and press QUEUE for each album.E QUEUE LIST screen to review
efault, the ACTIVE QUEUE LIST tracks. Press COLLAPSE to view
select an album, then press OPEN to
nd press QUEUE for each.
button to access the ACTIVE QUEUEto review the tracks in your queue list.
<��������������
Queueing an album adds each album selected to the end of the ACTIVEcurrently playing, the playback is not interrupted by the operation.Begin queueing from the ALBUMS screen.
<��������/���
Queueing a track or voice recording is very similar to adding an album
You may select tracks from the GENRES screen as well: On the LIBRSCROLL UP/DOWN button to select GENRES and press OPEN. Seleto choose and press OPEN.To add a voice recording to the ACTIVE QUEUE LIST, from the LIBRGENRES. Use the SCROLL UP/DOWN button to select RECORDINrecording you want to add to the ACTIVE QUEUE LIST and press QU
1. Press the SCROLL UP/DOWN button toNOTE: Select the albums one at a time
2. Press the LIB button to access the ACTIVyour queue list.
NOTE: By dscreen displaysby albums.
1. Press the SCROLL UP/DOWN button todisplay the tracks available.NOTE: Select the tracks one at a time a
2. Press the LIBLIST screen

Using Your NOMAD Jukebox 15
the TRACKS screen and the second type
he DETAILS screen:
en indicates the current playback setting
isplays the Track Order, Album,
the TRACKS screen.
isplays the Track Title, Artist, andtings (see note below) and Play Mode
the ACTIVE QUEUE LIST screen.
9�*���������! There are two types of DETAILS screens. The first type is accessed fromis accessed from the ACTIVE QUEUE LIST screen.
The following playback settings, if selected (set to ON), are shown on tEA Environmental PresetEQ Parametric EQHS Headphone SpatializationTS Time Scaling4S 4-Channel Speaker Sound (only if speakers are connected)When viewing DETAILS, the word in the lower right corner of the screfor the play list: ONCE, SHUFFLE, RANDOM, or REPEAT
View DETAILS accessed from the TRACKS screen:1. Press DETAILS. The DETAILS screen d
Artist, and duration of the track.
2. Press CLOSE to return to
Viewing DETAILS accessed from the ACTIVE QUEUE LIST screen:
1. Press DETAILS. The DETAILS screen dAlbum together with Audio Playback set(see “Setting Play Mode” on page 17 ).
2. Press BACK to return to
The following Playback settings are shown on the LCD if they are on:• EA: Environmental
Audio• EQ: Parametric EQ• HS: Headphone
Spatialization• TS: Playback speed• 4S: 4-Channel Speaker
Sound (appears only if speakers are connected and the effect is on).
You can adjust all the settings from the EAX AND SYSTEM MENU screen.

Using Your NOMAD Jukebox 16
e ACTIVE QUEUE LIST screen.
the ACTIVE QUEUE LIST screen. The
ntirety..
o select tracks to clear and then press
UEUE LIST screen.
bove the middle soft button.
R-LIST.
.�4�*������/���
Previewing a track allows you to listen to a track before placing it in thBegin from the DETAILS screen accessed from the TRACKS screen.
���4���������!;�/���!��������4�<���7�!�
Removing selected Albums, Tracks, or Play Lists only clears them fromaction does not erase actual tracks from NOMAD Jukebox.Begin from the ACTIVE QUEUE LIST screen and COLLAPSE view.
1.Press PREVIEW. The track plays in its e2.Press STOP to stop the Preview playback
Removing an item:1. Press the SCROLL UP/DOWN buttons t
REMOVE for each one.The track is cleared from the ACTIVE Q
Clearing the ACTIVE QUEUE LIST:1. Press EXPAND to display COLLAPSE a
Press CLEA
Preview cannot be used if audio is already playing.

Using Your NOMAD Jukebox 17
T screen are to be played: ONCE, play), and REPEAT.
D buttons to skip forward to the nextack.
RD buttons to seek forwards or g played.
change to the desired Play Mode.
.�������/���!=�����!
�� ����>��*���=0��*���
�����
�������.�������
Play Mode specifies how tracks or albums in the ACTIVE QUEUE LISSHUFFLE (play once in random order), RANDOM (continuous randomBegin from the DETAILS screen.
1. Press the SKIP FORWARD/BACKWARtrack or skip backward to the previous tr
1.Hold the SKIP FORWARD/BACKWAbackwards to anywhere of the track bein
1. Press MODE (repeatedly, if necessary) to

Using Your NOMAD Jukebox 18
the tracks as a play list for easy retrieval.IVE QUEUE LIST function on the EAX
ress the DETAILS button.he PLAY LIST categories.
hange each letter of the play list title LL UP/DOWN buttons to move the ated by a ^.
UMS screen returns. LIBRARY CATEGORIES screen.
SCROLL UP/DOWN buttons toAY LISTS.EN to check your saved PLAY LIST.
��4�����������4�<���7�!�
You can add tracks to the ACTIVE QUEUE LIST screen and then saveSaving a play list on the DETAILS screen is a shortcut to the SAVE ACTAND SYSTEM MENU screen.
1. On the ACTIVE QUEUE LIST screen, p2.Press SAVELIST to save the play list in t
3. Press PLUS/MINUS to cand then press the SCROletter entry position indic
4. Press DONE! The ALB5. Press BACK to return to
6. Press theselect PL
7. Press OP
To delete a play list, see “Deleting Library Items” on page 25.

Using Your NOMAD Jukebox 19
io, and Playback Speed. For a more box Tutorial. System Menus include
er settings by +/- 12 decibels. Fine-tune 0 hertz. Adjustments are heard
th Narrow, Wide or Full effects. Duplicate bridge SoundWorks FourPointSurround.
D SYSTEM MENU and then presst PARAMETRIC EQ.
SCROLL UP/DOWN button to select for adjustment.US/MINUS to adjust the setting.T to save the adjustment(s).
o select SPATIALIZATION.
SCROLL UP/DOWN buttons tosetting for adjustment.US/MINUS to adjust the setting.T to save the adjustment(s).
6�?�������!������
EAX menus include Parametric EQ, Spatialization, Environmental Auddetailed explanation of these features, refer to the online NOMAD Jukefeatures and preferences that can be adjusted and set.
��@�!�����.���������6<
You can adjust the sound by changing Bass, Treble, and Middle equalizaudio playback further by setting middle frequency between 200 to 450immediately if you are currently playing a track.
��@�!������ ������5������������!
With Spatialization, you can experience audio from your headphones wior Surround effects are also possible with a four-speaker system like CamBegin from the EAX AND SYSTEM MENU.
1. Press the EAX button to access EAX ANthe SCROLL UP/DOWN button to selec
2. Press OPEN.
3. Press thea setting
4. Press PL5. Press SE
1.Press the SCROLL UP/DOWN buttons t2.Press OPEN.
3. Press theselect a
4. Press PL5. Press SE
These adjustments are applied only if EQ ENABLED is selected. They are disabled if EQ BYPASSED is selected.• To close the EAX AND
SYSTEM MENU without making changes, press the EAX button.
Only one spatialization effect can be applied at a time. For example, if you select FULL spatialization for your headphones, no spatialization effects are applied to your speakers.

Using Your NOMAD Jukebox 20
, Concert Hall, Club, Hallway, Living
ithout distortion.
o select ENVIRONMENTAL
SCROLL UP/DOWN buttons to selectfor adjustment.US/MINUS to adjust the setting.T to save the adjustment(s).
select PLAYBACK SPEED.
SCROLL UP/DOWN buttons toetting for adjustment.US/MINUS to adjust the setting.e Playback Speed, the setting must
T to save the adjustment(s).
��@�!�����6�4���������������
You can select one of the following Environmental Audio settings: CityRoom, Arena, Auditorium, Cave, Stone Room, or Ball Room.Begin on the EAX AND SYSTEM MENU.
�!����.�������� �
Playback Speed allows you to slow down or speed up audio playback wBegin on the EAX AND SYSTEM MENU.
1. Press the SCROLL UP/DOWN buttons tSETTINGS.
2. Press ENTER.
3. Press thea setting
4. Press PL5. Press SE
1.Press the SCROLL UP/DOWN buttons to2.Press OPEN.
3. Press theselect a s
4. Press PLTo enablbe ON.
5. Press SE

Using Your NOMAD Jukebox 21
hed microphone..
e to the Jukebox’s LINE IN jack.
ns to select RECORDING.
SCROLL UP/DOWN buttons toetting for adjustment.
To start recording without adjusting the go to step 6, below.US/MINUS to adjust the setting.
6.Press ARM to go torecording standby state.
��������������4���������������������
NOMAD Jukebox is capable of recording hours of audio using an attacEnsure that you are in EAX AND SYSTEM MENU before proceeding
1. Connect a pre-amplified microphon
2.Press the SCROLL UP/DOWN butto3.Press OPEN.
4. Press theselect a sNOTE: settings,
5. Press PL
A pre-amplified microphone should be used for recording.
To listen to what you are recording, select MONITOR THRU (set to ON).
Recordings are saved in increments of 10 minutes, when recording at 48Mhz.

Using Your NOMAD Jukebox 22
g.se recording.
inue recording or press DISCARD to
recording.
11.Press PLUS/MINUS to change the letter and then press the SCROLL UP/DOWN buttons to move the letter entry position.
12.Press DONE! to save therecording. The recording is saved in GENRES and ALBUMS.
7. Press the PLAY button to begin recordin8. Press the STOP button or PAUSE to pau
9. Press RESUME to contdelete the recording.
10.Press SAVE to save the
You can make adjustments to the settings while you are recording—see steps 4 and 5, above

Using Your NOMAD Jukebox 23
EGORIES screen.
o select GENRES.
OWN buttons to select
SCROLL UP/DOWN buttons toe recording you have saved. PLAY button to listen.TAILS to view information on the
EUE to place track on active playlist.
7�!��������������������������
To listen to your saved audio recording, begin with the LIBRARY CAT
1.Press the SCROLL UP/DOWN buttons t2.Press OPEN.
3. Press the SCROLL UP/DRECORDINGS.
4. Press OPEN.
5. Press theselect th
6. Press thePress DEtrack.Press QU
You can use PlaybackSpeed (see “Using Playback Speed” on page 20) to slow down or speed up the playback speed of your audio recording.
Use PlayCenter 2 to encode your recording to an MP3 track to reduce its file size or to fill in the track details. Refer to its online Help for instructions.

Using Your NOMAD Jukebox 24
D SYSTEM MENU screen.ing an Active Queue List” on page 18. select SAVE ACTIVE QUEUE LIST.
US/MINUS to change the letter and s the SCROLL UP/DOWN buttons to
e letter entry position indicated by a).NE! to save the playlist.
��4�����������4�<���7�!�
You can save an Active Queue List on the Jukebox.
1. After you create an active play list, press EAX to access EAX ANNote: For details on how to create an active queue list, refer to“Sav
2.Press the SCROLL UP/DOWN buttons to3.Press OPEN.
4. Press PLthen presmove thcaret ( ^
5. Press DO

Using Your NOMAD Jukebox 25
in on the EAX AND SYSTEM MENU.
select DELETE LIBRARY ITEMS.ORIES screen.
UP/DOWN buttons to select
s the SCROLL UP/DOWN buttonslect the play list you would like tote.s ERASE!
7. Press the SCROLLUP/DOWNbuttons to selectthe playlist todelete.
ERASE! to delete. Press CANCEL to l the deletion.
�������7����������!
You can delete a play list, track, or album from NOMAD Jukebox. Beg
1. Press the SCROLL UP/DOWN buttons to2. Press OPEN to access LIBRARY CATEG
3. Press the SCROLLPLAY LISTS.
4. Press OPEN.
5.Presto sedele
6.Pres
8. Presscance
This feature stops playback and clears the current playlist. If a playlist is selected for deletion, only the list is deleted—the tracks or albums remain on the Jukebox.

Using Your NOMAD Jukebox 26
kebox's power consumption, disk space, date of your Jukebox is also shown. You 's PlayCenter 2.
e Jukebox's overall functions, such as the , Sleep mode, Accented Characters and
to select SYSTEM INFORMATION.
return to the LIBRARY CATEGORIES
o return to the EAX and System Menu
ROLL UP/DOWN buttons to select ajustment.MINUS to adjust the setting. save the adjustment(s).
9�*������!��������������
The SYSTEM INFORMATION screen provides useful data on your Juand number of audio tracks and albums stored. The release number andcan also view your Jukebox's ID if you have created one using CreativeBegin on the EAX AND SYSTEM MENU.
��@�!�������!���.�����!
The SYSTEM PREFERENCES screen allows you to adjust some of thLCD display’s Backlight or Contrast settings, preferred startup volumeNovice Mode functions.
1. Press the SCROLL UP/DOWN buttons 2. Press OPEN.
3. Press LIB toscreen.Press EAX tscreen.
1.Select SYSTEM PREFERENCES.2.Press OPEN.
3. Press the SCsetting for ad
4. Press PLUS/5. Press SET to
The System Information screen is for display only. You cannot adjust any of the settings except the ID. To change the ID, start PlayCenter 2, go to NOMAD Jukebox Window and click Settings on the toolbar. Type a new ID and click OK.
You can set the LCD Backlight to ALWAYS ON, ALWAYS OFF, or OFF AFTER DELAY. If OFF AFTER DELAY is selected, the BACKLIGHT OFF DELAY setting appears to configure the backlight to turn off 10 to 300 seconds after your last operation.Adjustments to System Preferences are effective immediately.

r NOMAD Jukebox Software in Windows 29
4+����*!
. Use the NOMAD Jukebox Tutorial to dows Taskbar, select Programs, select Tutorial. For more information, see the
nter 2; or click Start on the Taskbar, Creative PlayCenter 2.0 Help.
AD Jukebox:
Using You
�!����$�������������� �����*������
This chapter describes only the basic tasks available with PlayCenter 2learn the PlayCenter 2 fundamentals—click the Start button on the WinCreative, select Creative PlayCenter 2.0, and click on NOMAD JukeboxPlayCenter 2 Help file by clicking the question mark (?) on the PlayCechoose Programs, choose Creative, choose PlayCenter 2.0, and click on
.��������% Creative PlayCenter 2 allows you to manage the contents on your NOM❑ Play MP3 files on the Jukebox.❑ View and manage the contents of the NOMAD Jukebox.❑ Upload MP3 and other files to the NOMAD Jukebox.❑ Download the contents (except MP3 files) to the computer.
To open PlayCenter 2:1. Connect NOMAD Jukebox to your
computer. (See “Step 2: Connect NOMAD Jukebox to Your PC or Mac” on page 6.)
2. You can start PlayCenter 2 by either of the following methods:• Double-click on the PlayCenter
2 icon on the Windows Desktop.• Click Start on the Windows
Taskbar, select Programs, select Creative, select Creative PlayCenter 2.0, and click on Creative PlayCenter 2.0.
When NOMAD Jukebox is connected to your computer, you must use PlayCenter 2 to control the Jukebox.

t corner.dditional topics.
the bottom of the window.ukebox, such as headphones or speakers.
30 Using Your NOMAD Jukebox Software in Windows
To access help information:1. On the PlayCenter 2, click the question mark (?) in the upper righ2. On the Help screen, double-click the book icon to display a
To change the PlayCenter 2 settings:1. Click on the Settings button to display the
Setting dialog.2. Click on one of the tabs to display the dialog on which
changes can be made to the PlayCenter 2:• PlayCenter 2: Selects modules (Audio CD, My
Computer, NOMAD Jukebox, PC Music Library) to be displayed on either panel.
• PC Music Library: Assign folder for storing files on your PC’s hard disk drive.
• My Computer: Select the types of media files that you want PlayCenter 2 to display.
• CD Ripping: Configure a CD-ROM drive for digital audio extraction.
• Encoder: Select compression method.• CDDB: Select whether or not to automatically
retrieve CDDB information for audio CD.• Transfer: Select options for file transfer.
To play a track using PlayCenter 2:1. Click the NOMAD Jukebox button.2. Double-click All Tracks to display all of the tracks available.3. Select a track from the list and press the play button at
You may listen to the track only through devices attached to the J
You must be connected to the Internet to retrieve an audio CD’s information from CDDB2.To retrieve information each time you insert an audio CD, enable “Always get the information of an audio CD from CDDB” in the Settings dialog. See “Using CDDB” in the on-line help for more information.
r NOMAD Jukebox Software in Windows 31
s between your NOMAD Jukebox and ess to playing and listening to tracks
ukebox and your computer, add or delete ware.
Using You
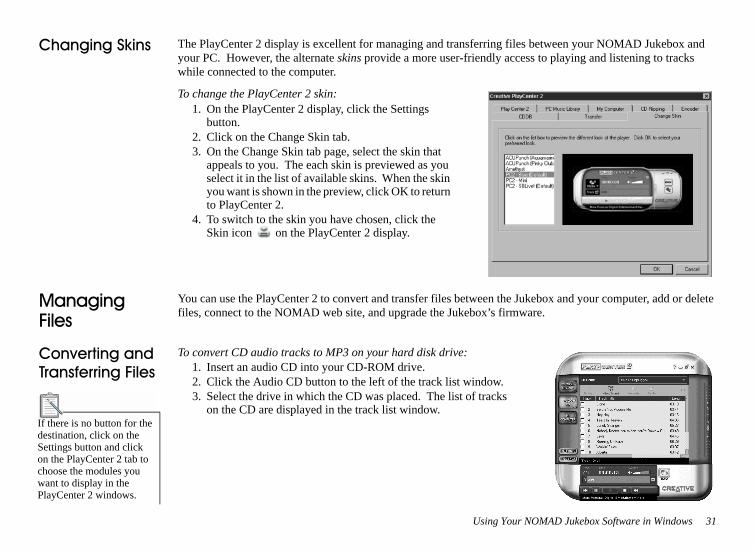
������������! The PlayCenter 2 display is excellent for managing and transferring fileyour PC. However, the alternate skins provide a more user-friendly accwhile connected to the computer.
To change the PlayCenter 2 skin:1. On the PlayCenter 2 display, click the Settings
button.2. Click on the Change Skin tab.3. On the Change Skin tab page, select the skin that
appeals to you. The each skin is previewed as you select it in the list of available skins. When the skin you want is shown in the preview, click OK to return to PlayCenter 2.
4. To switch to the skin you have chosen, click the Skin icon on the PlayCenter 2 display.
���������>��!
You can use the PlayCenter 2 to convert and transfer files between the Jfiles, connect to the NOMAD web site, and upgrade the Jukebox’s firm
���4����������/���!�������>��!
To convert CD audio tracks to MP3 on your hard disk drive:1. Insert an audio CD into your CD-ROM drive.2. Click the Audio CD button to the left of the track list window.3. Select the drive in which the CD was placed. The list of tracks
on the CD are displayed in the track list window.If there is no button for the destination, click on the Settings button and click on the PlayCenter 2 tab to choose the modules you want to display in the PlayCenter 2 windows.

rd disk (or other destination).y the file to your PC.
32 Using Your NOMAD Jukebox Software in Windows
4. Click TRANSFER/RIP on the right side of the PlayCenter 2 and select the destination for the converted tracks, for example, Music Library.
5. Select the track(s) to be converted and transferred to your NOMAD Jukebox (or to your PC’s hard disk drive).
6. The PlayCenter 2 shows the status of the selected tracks in the Transfer Queue window.
To copy files from your hard disk to the Jukebox:1. On the PC Music Library window, select the
tracks to be uploaded to the Jukebox.2. Click the arrow button pointing to the
Jukebox window.The Transfer Queue scale at the bottom of the PC Music Library window displays the status of the transfer.
To transfer files from the Jukebox to your computer:
1. In the My Computer window, open the folder to which you want to copy the file from the Player.
2. Select the file in the Player that you want to copy to your PC’s ha3. Click the Upload button on the NOMAD Jukebox window to cop
You cannot transfer MP3 files from the Jukebox to your computer.

r NOMAD Jukebox Software in Windows 33
MAD Jukebox.
r computer’s hard disk. You are asked to
ebox.
Using You
�������>��! To delete files from NOMAD Jukebox:1. In the NOMAD Jukebox window, select the file to be deleted.2. Click on the Delete icon to permanently remove the file from NO
To delete files from your computer’s hard disk:1. In the My Computer window, select the file to be deleted.2. Click on the Delete icon to permanently remove the file from you
confirm the deletion.
��������.����7�!�!
After you create a play list on your computer, you can copy it to the Juk
To create a play list on the Jukebox:1. Click the NOMAD Jukebox button on PlayCenter 2.2. Click the NOMAD Jukebox menu.3. On the menu, select Play List.4. Click New on the PlayCenter 2 Toolbar.5. In the Play List 1box, enter a title for your play list.
6. In the My Computer window, display a music library containing the track(s) you want to add to the play list.
7. Select the track(s) you want to add to the play list.
8. Click the left arrow button to add the track(s) to the play list. If the track(s) are located on your computer, they are copied to the Jukebox.
To create a play list on your computer:1. Click the PC Music Library button on the
PlayCenter 2 window.2. Click Play Lists in the PC Music Library window.3. Click New.4. In the Play List 1 box, enter a new name for the play list.5. Follow the instructions, starting with number 6, above.

ser’s Location box and press the ENTER
connection.
ser’s Location box and press the ENTER
.layCenter 2). Follow the instructions on
an input source, such as a CD-ROM. To cording Mode, Analog; and choose an ile; you must re-record the title to remove
tal Audio effects and right-click on it. If d by “EA.”
34 Using Your NOMAD Jukebox Software in Windows
����������������������+�����
To connect to the NOMAD web site:1. Click on the Internet button on PlayCenter 2.
Or, type the URL address (www.nomadworld.com) into your browkey.
You must have a Internet service provider in order to make the Internet
� ��������������
���� A!�>���*��
To upgrade the NOMAD Jukebox:1. Click on the Internet button on PlayCenter 2.
Or, type the URL address (www.nomadworld.com) into your browkey.
2. On the NOMADWorld home page, click on Software Downloads3. Under Downloads, look for an upgrade to NOMAD Jukebox (or P
the web site to download the upgrade file.
6�4���������������
You may use Environmental Audio effects when recording a title from include effects, display the Recorder Settings dialog and enable CD Reeffect. When you include the effect with the recording, it remains in the fthe effect.In the Playlist, highlight the title to which you want to add Environmenyou add Environmental Audio effects, the title in the Playlist is precedeTo enhance an audio file or audio CD track with EAX:
1. Select the track to be enhanced with an EAX environment.2. Click the EAX button to display the EAX menu.3. Select the Effects or Environment option.4. Click on an Effect/Environment.5. Click on the Rip To arrow to convert the file with the EAX
enhancement.

ing SoundJam™ MP with Macintosh OS 33
5�
any order, with a 10-band graphic can also:
vorite CDs, into MP3 files that you can
t-in Web menu.s commercial recordings that come in the
linking to CDDB, the Internet’s massive
t name, album, and much more.ying a music file:icking the file.
n—or even the folder— to SoundJam or
gate to the folder in which the file or files
Us
�!������������-��.�*�����������!���
SoundJam MP is the ultimate MP3 music center—play all MP3 files, inequalizer to make the sound quality exactly what you want. SoundJam
❑ Display animated graphics.❑ Change its look, “skin,” at your command.❑ Play music CDs with visuals.❑ Convert almost any kind of sound file, including those on your fa
transfer to your NOMAD Jukebox.❑ Download new MP3 files directly from the Internet with the buil❑ Play streaming music from the Internet—live broadcasts as well a
form of real-time transmissions, not downloadable files.❑ Automatically fill in the names of your CDs, songs and artists by
CD-ROM information database.❑ Serve as a database of your own music. Sort by song name, artis
With SoundJam installed there are several methods for opening and pla❑ Files opened or created in SoundJam can be opened by double-cl❑ Drag the file’s icon over the SoundJam icon.
Or, with SoundJam or a SoundJam window open, drag the file icothe SoundJam window.
❑ With SoundJam open, open the File menu, choose Open, and naviare located. Double-click on the file you want to play.

ing SoundJam™ MP with Macintosh OS 34
x is correctly connected to your Mac, the dded to SoundJam’s Window menu.ion of .NVF. SoundJam can manipulate
um of eight characters followed by ays the files, the song’s full title is
ialog box, where you can select files that g files from another SoundJam playlist or u drag the files, SoundJam transfers the
progress.ct the bass, treble, balance and volume of
Us
����������.��������������� �
When SoundJam MP is installed on your Mac and the NOMAD Jukebomain NOMAD screen appears and an entry for the Nomad window is aVoice files created with the NOMAD Jukebox have a file name extensand play .NVF files in the same way it works with any other file.
���������� �+����+
NOMAD Jukebox Logo: Click this logo to launch your Web browser and access the Creative Labs NOMAD Web site: www.nomadworld.com. It includes music downloads, information about the Nomad hardware and accessories, and more.Content Gauge: The content gauge monitors the memory in your NOMAD Jukebox.Playlist: In the NOMAD Jukebox playlist, the first column lets you list tracks by album, artist, genre, name, size or time. The subsequent columns also allow you to list tracks by these catorgories. The display at the top of the playlist tells you how many items are in the playlist and how much space the files require.MP3 file names in the NOMAD Jukebox playlist appear with a maximthe.MP3 file name extension. When the NOMAD Jukebox actually pldisplayed.Add...: Clicking this button brings up the standard Macintosh get file dyou want to add to the playlist. It’s much easier, however, to simply drathe Macintosh Finder into the NOMAD Jukebox playlist. As soon as yofiles to the NOMAD Jukebox, and keeps you updated on the transfer’s Settings...: Clicking this button brings up a window where you can seleyour NOMAD Jukebox.

ing SoundJam™ MP with Macintosh OS 35
for you to run and enjoy. See “Step 4:
ttons, a counter, and other features. The
Opens the Equalizer window
Plays the current track over and over. Also, pressing again continuously plays the entire playlist.
Plays tracks in the playlist randomly.
PlayStopPausePreviousNextEject the CD-ROM
Us
� �������������
Once SoundJam is properly installed on your hard disk drive, it is readyInstall Software” on page 7 for installation instructions.To open SoundJam:
1. Double-click on the SoundJam MP icon to start the program.
����������������!
The SoundJam control panel contains a volume slider, play and stop buillustration below identifies the controls most useful to you.
Play Status: The box (or handle) on the progress bar indicates the current point in the track being played. You can replay or skip sections of the track by dragging the box with the mouse.
Opens the Playlist window.
Opens the information window
Bass and Treble sliders. Adjusting these controls will deactivate the graphic equalizer
Track Information: Toggles between the track title, album, and artist if available.

ing SoundJam™ MP with Macintosh OS 36
wing instructions represent one of the
or your NOMAD Jukebox.e progress of the file conversion is shown
splaying the newly converted MP3 files.ox window opens automatically. the NOMAD Jukebox and drag them into
s you want to load into the Player.matically transferred to the Player.de:-ROM drive. When CD-ROM drive icon presenting the tracks you want to convert
acks you want to convert. Drag the track
Us
���4�������������������.'
There are several ways to convert music from a CD to MP3. The follopreferred methods.To convert CD audio tracks to MP3 files:
1. Insert a CD into your CD-ROM drive.2. On the Window menu, choose Audio CD (or the name
of the CD).3. Click the name of a track that you want to convert to
MP3.4. Click Add to Converter.5. When you have added all of the files you want to
convert into the Converter, select “SoundJam MP3 Encoder” from the “Convert using” menu. Then, click on the “Start converting” button.This conversion uses the default configuration. You may want to change the configuration later, but for now the default settings will supply excellent quality MP3 files fThe “Start converting” button changes to “Stop converting” and thin a bar on the lower left of the window.
6. When the conversion is complete, the playlist window reopens di7. Connect the NOMAD Jukebox to your Mac; the NOMAD Jukeb8. Select the files in the SoundJam playlist that you want to load into
the NOMAD Jukebox playlist.Or, click Add in the NOMAD Jukebox window and select the file
9. Once the files are in the NOMAD Jukebox window, they are autoOther methods that you can use to convert CD tracks to MP3 files inclu
❑ On the Windows menu, choose Converter. Insert a CD in your CDis displayed on the desktop, double-click on it. Select the icons reand drag them into the Converter window.
❑ On the Window menu, choose Converter. Open a playlist of the trnames from the playlist into the Converter.

Technical Specifications 37
A
teries for tracks encoded at 128Kbps
ack
be available from www.nomadworld.com
/��������� ����������!
���������� �B��.C:D(#E
Size (W x H x D)❑ 5" x 5" x 1.5"
Weight❑ 14 oz without batteries
Memory❑ 8 MB DRAM buffer
Capacity❑ 6 GB hard drive (100 hours at 128Kbps encoding)
Battery Life (playback time)❑ Four hours of continuous playback from fully charged NiMH bat❑ The following may reduce the playback time:
• Tracks encoded at greater than 128Kbps• EAX selected (set to ON)• Use of operations (such as skip forward/reverse) during playb• Passive speakers or high-power headphones• Backlight set for more than 10 (default) seconds
Interface❑ USB digital data port offering up to 3.2 MBps transfer rate
Playback Formats❑ MP3*
Signal to Noise❑ >90 dB
* Future audio codec support, firmware upgrades, and SDMI compliance will

Technical Specifications 38
es and up to two times slower for MP3
be available from www.nomadworld.com
Frequency Response❑ 20 Hz~20000 Hz
Harmonic Distortion❑ <0.1%
Operating System/Firmware❑ Upgradeable via Internet
Line Input❑ 1/8" stereo minijack
Line outputs❑ Two 1/8" stereo minijacks for front and rear speakers
Headphone Out❑ 1/8" stereo minijack, 100 mW
LCD Display❑ Large 132 x 64 pixel backlit display
Data Connector❑ USB
EAX❑ Environment effects❑ Parametric equalization❑ 3D spatialized headphones❑ 4-channel surround and playback speed
Playback Speed❑ Up to two times faster or slower for audio book content, WAV fil
audio playbackAudio Codec Support
❑ MPEG Audio Layer 3 (MP3), WAV, and future formats (WMA)*
SDMI Compliance❑ Hardware ready*
* Future audio codec support, firmware upgrades, and SDMI compliance will

Troubleshooting 39
B
ding to the polarities indicated on
to the polarities on NOMAD Jukebox.
������"���!&����������������"#��
e rechargeable batteries have sufficient
y button to turn on NOMAD Jukebox..
/�����!�������
��������������� �!��������"#�
#�����
❑ The rechargeable NiMH batteries are not inserted correctly accorNOMAD Jukebox.
❑ The batteries are too weak.�� ������
❑ Check the polarities on the batteries and re-insert them according❑ Recharge the batteries.
�����������$#������������� ������� �%����������&���$��
�������������� �!��������������'������
#����
NOMAD Jukebox has stopped responding.�� �����
Follow these steps:1. Ensure that the power cable is attached to NOMAD Jukebox or th
power.2. Insert and push a straightened paper clip into the Reset hole. 3. NOMAD Jukebox’s LCD becomes blank. Press and hold the Pla4. If you continue to encounter this problem, call Technical Support

Troubleshooting 40
�!�� �����!��������������)
eries are not recommended for NOMAD han power from rechargeable NiMH
ully charged before using them with
����� ������������� �������#����
tteries.
your NOMAD Jukebox.
�"*+,�,-�#��%.�,*%�/�%�0�����
n (EAX AND SYSTEM MENU).
LUS/MINUS to select OFF; press SET to
(�������� �� ����������������� ��� ���������������������
#����
Due to the high-power consumption of NOMAD Jukebox, alkaline battJukebox. The power from alkaline batteries is consumed much faster tbatteries.�� �����
Purchase additional Creative NiMH batteries and ensure that they are fNOMAD Jukebox.
��������������������� ������ �������������������� �
� ������ ��� �� ������������)
#����
NOMAD Jukebox was designed to operate with rechargeable NiMH ba�� �����
Only using Creative NiMH batteries ensures optimum performance for
������������������ �!�������������������� ������������
�-��%���%�1/������#�*2%�31%1%�"*���� ����)
#����
Novice Mode is selected (ON) on the SYSTEM PREFERENCES scree�� �����
Select SYSTEM PREFERENCES and the select Novice Mode. Press Psave the setting.

43
����������������4�7��! .������������
At Creative, we are committed to giving you the best product as well as the best technical support.Before You Contact UsPlease be seated at your computer and have the following information:• Model and serial numbers (usually found on the back of the device) of the product,
and date of purchase.• Error message on the screen and how it came about.• Information on the adapter card that conflicts with the product, if applicable.• Hardware configuration information such as the base I/O address, IRQ line, or DMA
channel used, if applicable.• Computer type and speed (for example, Pentium 166) and memory available.• Type and version of your operating system; for example, DOS 6.22, Windows 3.1x,
or Windows 95.You can contact Technical Support through one of the following addresses or numbers:
Creative Labs, Inc.Technical Support1523 Cimarron PlazaStillwater, OK 74075 U.S.A.
• Telephone: 405 742 6622• Facsimile: 405 742 6633Operating hours (U.S.A. Central Time)• Monday—Saturday: 8:00 a.m.—10:00 p.m.• Sunday Noon—8:00 p.m.• Public Holidays: ClosedYou can get our latest program and driver updates, technical data, and answers to frequently asked questions through these 24-hour services:• Telephone: 405 742 6622• Internet: http://www.creativehelp.com
To return a Creative product for a factory service, contact the Creative Technical Support office. Once the staff has verified the product is defective, you will be given a Return Merchandise Authorization (RMA) number. NOTE: Retain your purchase receipt, as well as all packaging and contents, until all product components are functioning to your satisfaction. They are required in the unlikely event you need to return the product to Creative.When returning a product for factory service:• Shipment to Creative is at your expense and you assume all risk. Ship
the package through a carrier that provides proof of delivery; insure the shipment at full product value.
• Place the RMA number on the outside of the package.• Use proper materials for packing the product for shipment.• For free repair or replacement, you must include a copy of a dated
proof of purchase (store receipt), proving the product is still under Warranty
Creative may replace or repair the product with new or reconditioned parts, and the faulty parts or product will become the property of Creative.Outside the United StatesTo avoid tariffs when shipping a product to Creative Labs from outside the U.S., you must complete an official customs form before shipping the product. To ensure delivery, Creative may include charges for return shipment.