network management applications and device managers ... · avaya network management applications...
TRANSCRIPT
Integrated Management 2.1
Network Management Applications and Device Managers Configuration
May 2004
Network Management and Device Managers Configuration
Copyright 2004 Avaya Inc. All Rights Reserved
The products, specifications, and other technical information regarding the products contained in this document are subject to change without notice. All information in this document is believed to be accurate and reliable, but is presented without warranty of any kind, express or implied, and users must take full responsibility for their application of any products specified in this document. Avaya disclaims responsibility for errors which may appear in this document, and it reserves the right, in its sole discretion and without notice, to make substitutions and modifications in the products and practices described in this document.
© 2004 Avaya Inc. All rights reserved. All trademarks identified by the ® or ™ are registered trademarks or trademarks, respectively, of Avaya Inc. All other trademarks are the property of their respective owners.
Release 1.001
Table of Contents
Preface . . . . . . . . . . . . . . . . . . . . . . . . . . . . . . . . . . . . . . . . . . . . . . . . . . v
The Purpose of This Guide . . . . . . . . . . . . . . . . . . . . . . . . . . . . . . . . .vWho Should Use This Guide . . . . . . . . . . . . . . . . . . . . . . . . . . . . . . . .vOrganization of This Guide . . . . . . . . . . . . . . . . . . . . . . . . . . . . . . . . vi
Chapter 1 — Avaya Network Management Overview. . . . . . . . . . . . 1
Network Management Applications and Device Managers Overview . . . . . . . . . . . . . . . . . . . . . . . . . . . . . . . . . . . . .1
Network Management Features . . . . . . . . . . . . . . . . . . . . . . . . .3Device Management Tools . . . . . . . . . . . . . . . . . . . . . . . . . . . . . . . . .4
Overview . . . . . . . . . . . . . . . . . . . . . . . . . . . . . . . . . . . . . . . . . . .4Avaya Device Managers . . . . . . . . . . . . . . . . . . . . . . . . . . . . . . .5
Network Management Tools . . . . . . . . . . . . . . . . . . . . . . . . . . . . . . .7Overview . . . . . . . . . . . . . . . . . . . . . . . . . . . . . . . . . . . . . . . . . . .7Network-wide Applications . . . . . . . . . . . . . . . . . . . . . . . . . . . . .8
Chapter 2 — Before You Install . . . . . . . . . . . . . . . . . . . . . . . . . . . . . 11
Running in NNM Mode (HP-OV) . . . . . . . . . . . . . . . . . . . . . . . . . . .11Before Running the Installation - Windows . . . . . . . . . . . . . . . . . . .12
Stopping the Server . . . . . . . . . . . . . . . . . . . . . . . . . . . . . . . . . .12Before Running the Installation - Solaris . . . . . . . . . . . . . . . . . . . . .13
Verifying Available Disk Space . . . . . . . . . . . . . . . . . . . . . . . . .13Upgrading from Previous Versions . . . . . . . . . . . . . . . . . . . . . . . . . .15
Upgrading from MSNM 5.0 . . . . . . . . . . . . . . . . . . . . . . . . . . . .15Upgrading from Older Versions . . . . . . . . . . . . . . . . . . . . . . . . .15
Chapter 3 — Installation Instructions. . . . . . . . . . . . . . . . . . . . . . . . . 17
Before the Installation . . . . . . . . . . . . . . . . . . . . . . . . . . . . . . . . . . .17Installing Avaya Network Management Applications
and Device Managers . . . . . . . . . . . . . . . . . . . . . . . . . . . . . . . . . .17After the Installation . . . . . . . . . . . . . . . . . . . . . . . . . . . . . . . . . . . . .17
Chapter 4 — After You Install. . . . . . . . . . . . . . . . . . . . . . . . . . . . . . . 18
SNMP Options . . . . . . . . . . . . . . . . . . . . . . . . . . . . . . . . . . . . . . . . .19Configuring SNMPv1 Options for HP-OV NNM . . . . . . . . . . . .19Configuring SNMPv3 Options . . . . . . . . . . . . . . . . . . . . . . . . . .20Creating an Administrator Community Name . . . . . . . . . . . . .20
Configuring TFTP Server for Solaris . . . . . . . . . . . . . . . . . . . . . . . . .20
Avaya Network Management Applications and Device Managers Configuration Guide iii
Table of Contents
Configuring Login Security . . . . . . . . . . . . . . . . . . . . . . . . . . . . . . . .21Downloading Embedded Software . . . . . . . . . . . . . . . . . . . . . . . . . .21Entering the SMON License . . . . . . . . . . . . . . . . . . . . . . . . . . . . . . .22
Entering the Avaya SMON Manager License . . . . . . . . . . . . . .22Entering SMON Device Licenses . . . . . . . . . . . . . . . . . . . . . . . .22
Configuring Access Security (HP-OV NNM Mode Only) . . . . . . . . .23Configuring Proxy Settings (Optional) . . . . . . . . . . . . . . . . . . . . . . .23Configuring the Web Server (Optional) . . . . . . . . . . . . . . . . . . . . . .24Configuring FTP (Optional) . . . . . . . . . . . . . . . . . . . . . . . . . . . . . . .28Loading Additional MIBs (Optional) . . . . . . . . . . . . . . . . . . . . . . . .29Configuring Default Settings . . . . . . . . . . . . . . . . . . . . . . . . . . . . . .30
Cold Start Traps . . . . . . . . . . . . . . . . . . . . . . . . . . . . . . . . . . . . .30
Chapter 5 — Running Avaya Network Management in Multiple Modes . . . . . . . . . . . . . . . . . . . . . . . . . . . . . . . . . . . . . . . 31
Installing Avaya Network Management in Multiple Modes . . . . . .31Installing Avaya Network Management in
Standalone Mode . . . . . . . . . . . . . . . . . . . . . . . . . . . . . . . . . .32Installing Avaya Network Management in
HP-OV NNM Mode . . . . . . . . . . . . . . . . . . . . . . . . . . . . . . . . .32Configuring Avaya Network Management Modes . . . . . . . . . . . . . .32
Configuring Avaya Network Management to Run in Standalone Mode . . . . . . . . . . . . . . . . . . . . . . . . . . . . . . . . . .33
Configuring Avaya Network Management to Run in HP-OV NNM Mode . . . . . . . . . . . . . . . . . . . . . . . . . . . . . . . . .34
Chapter 6 — Getting Started with Avaya Network Management . 35
Getting Started with Avaya Network Management in Standalone Mode . . . . . . . . . . . . . . . . . . . . . . . . . . . . . . . . . . . . .36
Getting Started with Avaya Network Management in HP-OV NNM Mode . . . . . . . . . . . . . . . . . . . . . . . . . . . . . . . . . . . .37
Appendix A — Supported Devices . . . . . . . . . . . . . . . . . . . . . . . . . . 39
iv Avaya Network Management Applications and Device Managers Configuration Guide
Preface
Welcome to Avaya Network Management. This chapter provides an introduction to the structure and assumptions of this guide. It includes the following sections:
• The Purpose of This Guide - A description of the goals of this guide.
• Who Should Use This Guide - The intended audience of this guide.
• Organization of This Guide- A brief description of the subjects contained in the various sections of this guide.
The Purpose of This Guide
The purpose of the Avaya Network Management Application and Device Manager Installation and Configuration Guide is to provide a broad view of Avaya Network Management applications, act as a guide for getting started and help you maintain your network using Avaya Network Management.
Who Should Use This Guide
This guide is intended for network managers familiar with network management and its fundamental concepts.
Avaya Network Management Applications and Device Managers Configuration Guide v
Preface
Organization of This Guide
This guide is structured to reflect the following conceptual divisions:
• Preface - This section describes the guide’s purpose, intended audience and organization.
• Avaya Network Management Overview - An overall description of the Avaya Integrated Management suite and its various parts.
• Before You Install - Information on preparing to install Avaya Network Management applications.
• After You Install - Information on configuring Avaya Network Management applications after installation.
• Running Avaya Network Management in Multiple Modes - Information on running Avaya Network Management in both Standalone and HP-OV NNM Modes on the same computer.
• Getting Started with Avaya Network Management - Information on the initial tasks you should perform when using Avaya Network Management.
vi Avaya Network Management Applications and Device Managers Configuration Guide
1
Avaya Network Manage
Avaya Network Management Overview
This chapter provides an overall description of Avaya Network Management applications and Device Managers that are included in Avaya Integrated Management. It includes the following topics:
• Network Management Applications and Device Managers Overview - An overall description of Avaya Network Management, its various parts, features, and benefits.
• Device Management Tools - A general description of the “device manager” concept, and a brief description of device manager features.
• Network Management Tools - An overview and description of the Avaya Network Management campus-wide management tools.
Network Management Applications and Device Managers Overview
Avaya Network Management Applications and Device Managers are part of the Avaya Integrated Management suite, which provides you with a complete set of tools and an applications platform. All of the tools in Avaya Integrated Management are accessible through a common Web-based user interface to facilitate system and network management.
Avaya Network Management Applications and Device Managers are SNMP based network management applications. There are different types of applications to fill different network management needs. Avaya Network Management consists of the following types of applications:
• Device Managers - Includes device managers for Avaya’s LAN, backbone switches, and wireless Access Points. These applications allow configuration, management, and fault diagnosis for the specific device. For more information about device managers, refer to “Device Management Tools” on page 4.
ment Applications and Device Managers Configuration Guide 1
Chapter 1
• Network Management Tools - Includes applications that help you manage your network as a whole. These applications allow you to monitor switching, configure VLANs, set up rules to enhance quality of service, and perform other important network tasks. For more information about network-wide applications, refer to “Network Management Tools” on page 7.
• Network Management Framework - Avaya Network Management Applications and Device Managers run within the “framework” of a network management application. The framework management application provides easy access to Device Managers and Network Management Applications. It also provides a view of your entire network.
— You can use HP OpenView NNM as the framework. This is called running Avaya Network Management in HP-OV NNM Mode. In this mode, the framework also provides an overall view of the multi-vendor network to the network administrator and defines the scope of the network to Avaya Network Management applications.
— Alternatively, Avaya Network Management can be run in Standalone Mode. Avaya Network Management Console provides an overall view of the network of Avaya’s LAN and backbone switches, Avaya Wireless Access Points, Avaya Media Servers, Avaya IP phones, and other devices in the network. Avaya Network Management applications can be launched from Avaya Network Management Console. Avaya Network Management Console also provides a discovery service, trap logs, and other important information to the Network Management applications.
— Avaya Network Management can be installed in both HP-OV NNM Mode and Standalone Mode on a single computer. However, only one mode can be active at any given time. For more information on installing and running multiple modes of Avaya Network Management, refer to Chapter 5, Running Avaya Network Management in Multiple Modes.
* Note: Avaya Network Management can only run in Standalone Mode on a Windows-based server. For Solaris installations, Avaya Network Management must run in HP-OV NNM mode.
2 Avaya Network Management Applications and Device Managers Configuration Guide
Avaya Network Management Overview
Network Management Features
Avaya Network Management’s main features and benefits include:
• Performance monitoring for switched environment (SMON)
• Multilayer switch monitoring
• VLAN management
• Comprehensive and easy-to-use device configuration
• Backup and easy distribution of device configurations
• Easy configuration of network traffic management policies
• Easy updating of device software
• Easy mapping of hosts to switch ports
• Fault diagnosis and management
• Remote access via the Internet
• Multiple user access
Avaya Network Management Applications and Device Managers Configuration Guide 3
Chapter 1
Device Management Tools
This section provides a general description of the “device manager” concept, and a brief description of the device managers. This section discusses the following topics:
• Overview
• Avaya Device Managers
Overview
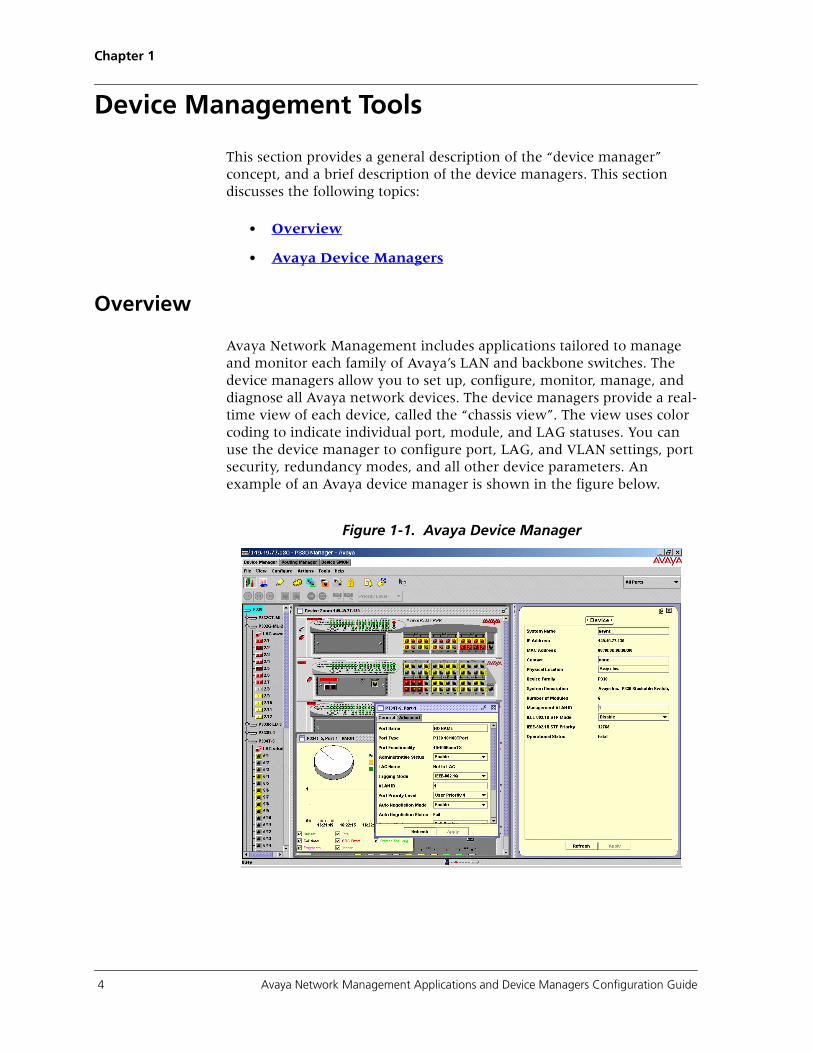
Avaya Network Management includes applications tailored to manage and monitor each family of Avaya’s LAN and backbone switches. The device managers allow you to set up, configure, monitor, manage, and diagnose all Avaya network devices. The device managers provide a real-time view of each device, called the “chassis view”. The view uses color coding to indicate individual port, module, and LAG statuses. You can use the device manager to configure port, LAG, and VLAN settings, port security, redundancy modes, and all other device parameters. An example of an Avaya device manager is shown in the figure below.
Figure 1-1. Avaya Device Manager
4 Avaya Network Management Applications and Device Managers Configuration Guide
Avaya Network Management Overview
In addition, each device can be monitored using Avaya’s Device SMON applications. Device SMON provides switch monitoring capabilities, as well as graphs and pie charts displaying traffic types on ports, VLANs, and switches.
Avaya Device Managers
This section provides a brief description of the features that the Avaya device managers allow you to configure. Not all features are applicable for all devices. This section also provides a list of the Avaya devices that can be managed with Avaya device managers. For more details about a specific application, refer to the device manager’s User Guide.
Avaya device managers provide the following features:
• Bridge and port level Spanning Tree configuration
• Connected stations monitoring
• Device security configuration
• Event Log configuration
• Link Aggregation Group (LAG) configuration
• Load sharing configuration
• OSPF routing configuration
• Packet filtering configuration
• Performance monitoring
• Port and error counters
• Port mirroring configuration
• Port redundancy configuration
• Port RMON statistics
• Port security configuration
• Power over Ethernet (PoE) configuration
• Routing Path Protocol configuration
• Routing redundancy configuration
• Static routes table configuration
• Trap managers configuration
Avaya Network Management Applications and Device Managers Configuration Guide 5
Chapter 1
• VLAN configuration
• WAN connection configuration
• Wireless Access Point configuration
* Note: For information on the features supported by a specific device manager, refer to the device’s User Guide.
In addition, Device SMON provides switch level (Layer 2) monitoring of the information passing through the devices in your network. AnyLayer SMON provides information about higher level (Layer 3 and above) packets passing through the routers in your network. These include the following statistics:
• DSCP statistics
• Ethernet segment statistics
• Extended port statistics
• Host matrix
• Host statistics
• Network layer host Statistics
• Network layer subnet Statistics
• Port history statistics
• Port statistics
• Protocol distribution statistics
• Router statistics
• Switch statistics
• VLAN statistics
• Voice port statistics
6 Avaya Network Management Applications and Device Managers Configuration Guide
Avaya Network Management Overview
The Avaya Device Managers allow you to manage the following devices:
• Avaya C460
• Avaya G350
• Avaya W310
• Avaya C360
• Avaya P130
• Avaya P330/G700
• Avaya P580/P882
• Avaya Access Points 3, 4, 5, 6
Network Management Tools
This section provides a general description of the Avaya Network Management tools, and a brief description of each of the network applications. This section discusses the following topics:
• Overview
• Network-wide Applications
Overview
Avaya Integrated Management includes network-wide applications that allow you to manage the Avaya LAN and backbone switches, Avaya Media Gateways, and Wireless Access Points in your network as a whole. These applications allow you to configure VLANs, monitor switching, and perform other important network tasks. For example, Avaya Network Management includes Avaya SMON Manager for advanced switch monitoring (Avaya Integrated Management includes a 90 day trial version of SMON, and you can purchase a license to continue use beyond 90 days). Avaya SMON Manager monitors the Ethernet switching fabric and gives you a complete top-down view of all switched traffic across your network.
Avaya Network Management Applications and Device Managers Configuration Guide 7
Chapter 1
Other network-wide applications include Avaya Network Configuration Manager for multiple device and port configuration, Avaya QoS Manager for configuring policy-based management, Avaya VLAN Manager for configuring and monitoring VLANs, Avaya Address Manager for mapping hosts to switch ports, and Avaya Software Update Manager for automatically updating your network devices with the most up to date software.
Network-wide Applications
This section provides a brief description of each of the Avaya Network Management network-wide applications. For more details about a specific application, refer to the application’s User Guide.
• Network Management Console - Avaya Network Management Console is an application that allows you to view the devices in your network. Avaya Network Management Console also provides a platform from which you can launch applications to manage network devices and monitor the traffic on your network. In addition, Network Management Console provides a Discovery service that searches your network for devices.
Network Management Console uses a client/server architecture, allowing multiple users to access the Avaya Network Management Console simultaneously. Web based technology provides a method for accessing and managing your network from any computer with Internet access.
* Note: Avaya Network Management Console is not available for Solaris servers.
• Avaya SMON Manager - A collection of applications that work together with the other Avaya Network Management components to provide a full spectrum of in-depth monitoring of switch traffic and network performance. Avaya SMON Manager consists of a software console application on a workstation and remote monitoring probes in network devices that support SMON.
The Avaya SMON Manager console constantly communicates with the SMON devices on your network. The console uses SNMP to gather information from the devices. Avaya SMON Manager provides a suite of powerful graphic display tools to view this information.
8 Avaya Network Management Applications and Device Managers Configuration Guide
Avaya Network Management Overview
Avaya SMON Manager provides you with detailed analysis of the traffic flow on your switched network, from a global view down to a specific host, and from total MAC layer traffic down to a specific application protocol - all in real-time.
Using SMON monitoring, you can get:
— A global view of traffic for all switches on the network.
— An overall view of traffic passing through a specific switch.
— Detailed data about the hosts transmitting packets or cells through a switch.
— An analysis of traffic passing through each port connected to a switch.
• Avaya Network Configuration Manager - An application that allows you to save device and module configurations, and apply them to devices and modules across the network. Device and module configurations can be stored and applied to selected devices and modules. Avaya Network Configuration Manager makes it easy to create an accurate and consistent network configuration.
• Avaya QoS Manager - An application that allows you to configure policy-based management of the traffic on the network. Policy-based management is one of the newest and fastest growing trends in network management. Policy-based management allows network managers to implement forwarding and routing information bandwidth prioritization based on policies and rules, and focus on QoS. Instead of routing packets only by their destination address, Avaya QoS Manager allows you to assign a priority or block packets based on the source and destination addresses, and protocols. This can help you provide services that rely on consistent levels of forwarding service.
• Avaya Software Update Manager - An application that downloads software to managed Avaya devices. Avaya Software Update Manager can also check the software versions currently in use against the latest versions available from Avaya, and recommend updates when a newer version is available. You can use Avaya Software Update Manager to retrieve a new release from Avaya’s Web site, store it on your hard disk, and subsequently download it to the appropriate device.
• Avaya Address Manager - Avaya Address Manager is an application that allows you to see which network devices are directly attached to the ports on your network devices.
Avaya Network Management Applications and Device Managers Configuration Guide 9

Chapter 1
Using advanced network searches, Avaya Address Manager helps you build, maintain, and display a centralized list of hosts discovered in the network with their MAC and IP addresses, and device port connectivity. In addition, Avaya Address Manager enables you to print or export the list. You can also import connections into Avaya Address Manager.
Avaya Address Manager helps you rapidly locate a host or switch port on the network, and find duplicate IP addresses in the network.
10 Avaya Network Management Applications and Device Managers Configuration Guide

2
Avaya Network Manage
Before You Install
This chapter provides a description of the procedures you need to follow before installing Avaya Network Management Applications and Device Managers:
• Running in NNM Mode (HP-OV) - Software requirements for running Avaya Network Management applications and Device Managers with HP-OpenView.
• Before Running the Installation - Windows - Information on necessary steps to be taken before installing Avaya Network Management applications on a Windows-based server.
• Before Running the Installation - Solaris - Information on necessary steps to be taken before installing Avaya Network Management Applications on a Solaris server.
• Upgrading from Previous Versions - Information on upgrading to Avaya Integrated Management from older versions of Avaya network management software.
For further information on system requirements and installation procedures for Avaya Integrated Management Suite applications, refer to the Avaya Integrated Management 2.0 Installation Guide.
Running in NNM Mode (HP-OV)
This section provides the requirements to prepare Avaya Network Management to work with HP OpenView/NNM.
1. Follow the requirements for Avaya Integrated Management. For the specific requirements, refer to the Avaya Integrated Management 2.0 Installation Guide.
2. Update HP OpenView/NNM with the latest patches from the HP website.
ment Applications and Device Managers Configuration Guide 11
Chapter 2
Before Running the Installation - Windows
This section provides the instructions to prepare for Avaya Network Management installation on a Windows-based server.
Stopping the Server
Before installing the Network Management and Device Manager applications, you must stop the Avaya Network Management Server and all running HP-OV NNM background processes. The process to be stopped depends on the mode in which Avaya Network Management is running. The following sections provide instructions on stopping Avaya Network Management Server and HP-OV NNM background processes.
Stopping Avaya Network Management Console
To stop the Avaya Network Management Server:
Select Start > Programs > Avaya > Network Management Server > Stop Avaya Network Management Server.
Or
1. Open a command line window.
2. Enter cvserver stop. The Avaya Network Management Server stops.
Stopping HP-OV NNM Background Processes
To stop HP-OV background processes:
Select Start > Programs > HP OpenView > Network Node Manager Admin > NNM Services - Stop.
Or
1. Open a command line window.
2. Enter ovstop. HP-OV NNM background processes stop.
12 Avaya Network Management Applications and Device Managers Configuration Guide

Before You Install
Before Running the Installation - Solaris
This section provides the instructions to prepare for Avaya Network Management installation on a Sun Solaris server.
Verifying Available Disk Space
Before you install or update Avaya Network Management applications, verify that you have sufficient disk space in the installation and log storage file systems.
Verifying Disk Space in the Installation File System
Avaya Network Management requires a minimum of 175MB free disk space in the file system for installation. The default file system for installation is /opt.
To verify available disk space in the installation file system:
1. Log in as root. If you are currently logged in with another user ID, type su - root.
2. If HP-OV NNM is currently running, close the application by selecting Map > Exit.
3. Type df -k /opt to verify that there is a minimum of xxx MB free space in the /opt file system.
If the /opt file system contains sufficient free disk space, proceed to “Verifying Disk Space in the Log Storage File System” on page 13.
If the /opt file system does not contain sufficient disk space, locate a file system with sufficient free disk space and note it for installation.
Verifying Disk Space in the Log Storage File System
Avaya Network Management requires a minimum of 100MB free disk space in the file system for log file creation and storage. The default file system for log files is /var.
To verify available disk space in the /var file system, type df -k /var.
Avaya Network Management Applications and Device Managers Configuration Guide 13

Chapter 2
If the /var file system does not contain sufficient free disk space, locate a file system with sufficient free disk space and create directories for Network Management:
1. Type ovstop.
2. Type mkdir -p /location/var/opt.
3. Type cd /var/opt.
4. Type tar cf - . |(cd /location/var/opt; tar xfB -).
5. Type cd /.
6. Type rm -rf /var/opt.
7. Type ln -s /location/var/opt /var/opt.
* Note: location refers to the name of the file system containing the required disk space.
* Note: To maximize performance, install Avaya Network Management software on a local hard disk.
Configuring Swap Space
By default, a swap partition exists on your server. Avaya Network Management recommends a minimum of 128MB swap space.
* Note: You must have root permission to configure swap space.
To verify available swap space, type df -lk.
To allocate additional swap space:
1. Create a file by typing mkfile -v size[m/k]/ location/ filename, where size is the amount of additional swap space you wish to allocate, location is the directory in which the file is located, and filename is the name of the file.
2. Open the /etc/vstab file and add /home/filename - - swap no.
3. Exit the /etc/vstab file.
4. Type swap -a to add the swap file to your available swap space. The additional swap space is taken from the local hard disk.
5. Type swap -s to verify the additional swap space.
14 Avaya Network Management Applications and Device Managers Configuration Guide
Before You Install
Upgrading from Previous Versions
This section provides information on upgrading from previous versions of Avaya network management software.
* Note: You may only upgrade from previous versions on Windows-based servers. This version does not support upgrade from previous versions of MSNM for Solaris or CajunView for Solaris.
Upgrading from MSNM 5.0
You can upgrade to Avaya Integrated Management from MSNM 5.0 directly. All customization files, device maps, and data files are preserved. For instructions on upgrading from MSNM 5.0, refer to the Avaya Integrated Management 2.0 Installation Guide.
Upgrading from Older Versions
If you have an older version of Avaya network management software (CajunView or MSNM version prior to 5.0), you must first upgrade to MSNM 5.0 and then upgrade to Avaya Integrated Management 2.0. For instructions on upgrading to MSNM 5.0, refer to the Avaya MultiService Network Management for Windows NT 5.0 Installation Guide.
* Note: If you have legacy devices in your network that are not supported by Avaya Integrated Management 2.0, their Device Managers, device maps, customization files and data files will not be preserved after upgrading to Avaya Integrated Management 2.0. Avaya recommends that if you need to support legacy devices, keep the older version of the network management software on a separate computer to manage these devices.
Avaya Network Management Applications and Device Managers Configuration Guide 15

Chapter 2
16 Avaya Network Management Applications and Device Managers Configuration Guide
3
Avaya Network Manage
Installation Instructions
This chapter provides information on the procedures you need to follow to installing Avaya Network Management Applications and Device Managers:
Before the Installation
To ensure proper installation of Avaya Network Management Applications and Device Managers, follow the procedures discussed in Chapter 2, Before You Install.
Installing Avaya Network Management Applications and Device Managers
For information on installing Network Management Applications and Device Managers included in the Avaya Integrated Management suite, refer to the Avaya Integrated Management 2.0 Installation Guide.
After the Installation
After installation of Avaya Network Management Applications and Device Managers, follow the procedures discussed in Chapter 4, After You Install.
ment Applications and Device Managers Configuration Guide 17
4
Avaya Network Manage
After You Install
This chapter provides information on the tasks you should perform after installing Avaya Network Management:
• SNMP Options - Information on configuring SNMP for Avaya Network Management.
• Configuring TFTP Server for Solaris - Information on configuring TFTP service for Solaris installations.
• Configuring Login Security - Information on configuring secure login mode for Avaya Network Management.
• Downloading Embedded Software - Information on maintaining the most current release of embedded software for Avaya network devices.
• Entering the SMON License - Information on entering SMON licenses for Avaya Network Management and Device Managers.
• Configuring Access Security (HP-OV NNM Mode Only) - Information on configuring access security for Avaya Network Management in HP-OV NNM Mode.
• Configuring Proxy Settings (Optional) - Information on configuring Avaya Network Management to work through a proxy server.
• Configuring the Web Server (Optional) - Information on configuring a custom web server to work with Avaya Network Management.
• Configuring FTP (Optional) - Information on configuring an FTP server to work with Avaya Network Management.
• Loading Additional MIBs (Optional) - Information on loading additional SNMP MIBs into Avaya Network Management.
• Configuring Default Settings - Information on configuring default settings in HP-OV NNM with recommended values for Avaya Network Management.
ment Applications and Device Managers Configuration Guide 18
After You Install
SNMP Options
This section provides information on configuring SNMP options for Avaya Network Management.
You should set up read-write communities for all devices and read-only communities for key devices. The default SNMP version is SNMPv1. If you are using SNMPv3, set up user names and passwords. For more information on configuring SNMP, refer to Avaya Network Management Console in Standalone Mode User Guide and Using Network Node Manager - HP OpenView.
The following topics are covered in this section:
• Configuring SNMPv1 Options for HP-OV NNM
• Configuring SNMPv3 Options
• Creating an Administrator Community Name
• Configuring Access Security (HP-OV NNM Mode Only)
Configuring SNMPv1 Options for HP-OV NNM
Once you set the SNMP community string on a device, it can be used to manage a device using Avaya Network Management. To configure SNMPv1 options:
1. Start HP-OV NNM by typing ovw.
2. In HP-OV NNM, select Options > SNMP Configuration. The SNMP Configuration dialog box opens.
3. In the Specific Node tab, click Add. The SNMP Parameters dialog box opens.
4. In the Target field, enter the IP address for the switch that sends trap information.
5. In the Community field, enter public for general read access for another applicable value to limit read access.
6. In the Set Community field, enter the community string assigned to the computer designated as the trap recipient. This provides read/write access. This computer is set up as a trap recipient in the Avaya Switch Web Agent.
7. Click OK to save the changes and close the SNMP Parameters dialog box.
Avaya Network Management Applications and Device Managers Configuration Guide 19
Chapter 4
8. Click Apply to save the changes and continue adding target switches.
Or
Click OK to save changes and close the SNMP Configuration dialog box.
Configuring SNMPv3 Options
To use SNMPv3 with Avaya Network Management, you must enable Login Mode and configure user names and password.
For more information on configuring Login Mode and user names and passwords, refer to the Avaya Network Management User Administration User Guide.
To enable HP-OV NNM for use with SNMPv3, you must first install the HP-OV NNM SNMP Security Pack. Contact your HP dealer for details. For more information on configuring SNMPv3 when using Avaya Network Management in HP-OV NNM mode, refer to the HP-OV NNM Administrator’s Guide and the HP-OV NNM Security Pack Reference Guide.
Creating an Administrator Community Name
Some features of the Avaya P580/P882 Manager require you to connect to the device using an SNMP community name with Administrator privileges. It is important that you create a community name with Administrator privileges on each Avaya P580/P882 device in your network.
You can create a community name with Administrator privileges using the CLI or the Embedded Web Manager. For more information, refer to the Avaya P580/P882 Operations Guide.
Configuring TFTP Server for Solaris
Avaya Network Configuration Manager and Avaya Software Update Manager use TFTP to transfer files to and from Avaya network devices. To use these applications, you must configure TFTP server setttings on your Solaris server.
20 Avaya Network Management Applications and Device Managers Configuration Guide
After You Install
To verify TFTP server configuration, open the /etc/inetd.conf file and search for the following entry:
tftp dgram udp wait root /usr/sbin/in.tftpdin.tftpd - s /tftpboot
Ensure that there is not a # character at the beginning of this entry. If there is not, TFTP service is enabled on your server.
By default, the TFTP server runs in secure mode, allowing access only to files in the /tftpboot directory. Avaya Network Configuration Manager and Avaya Software Update Manager must be configured with /tftpboot as the Secure Network Path to allow required access to files on your server.
Configuring Login Security
Avaya Network Management offers secure “login mode” which allows definitions of user names and passwords. In this mode, Network Management Application and Device Manager users are prompted for a login name and password. For more information, refer to Avaya Network Management User Administration User Guide.
Downloading Embedded Software
Embedded software for Avaya’s devices can be found on the Avaya support website. To manage your devices properly, obtain the latest software for your network agents. After you obtain the embedded software, download the software to the agents location on your network. Updating your embedded software provides the following benefits:
• Most recent network management features.
• Support for new modules and devices.
Avaya Software Update Manager is an application designed to get new releases of embedded software and download them to the devices on your network. For more information, refer to the Avaya Software Update Manager User Guide.
Avaya Network Management Applications and Device Managers Configuration Guide 21
Chapter 4
Entering the SMON License
The Avaya Network Management with SMON Manager package contains a license enabling you to use Avaya SMON Manager on a permanent basis. The base Avaya Network Management package does not include a permanent SMON license. Instead, a 90-day trial license of SMON is included. You can purchase a license key to activate SMON beyond the 90-day limit.
In addition, an SMON Device License is required to use SMON on most Avaya network devices.
The following topics are covered in this section:
• Entering the Avaya SMON Manager License
• Entering SMON Device Licenses
Entering the Avaya SMON Manager License
When launching Avaya SMON Manager before creating a valid license key, a dialog box for entering the license key is displayed. If you purchased the Avaya Network Management with SMON Manager package, enter the license key provided. This allows unlimited use of Avaya SMON Manager. If you purchased the base Avaya Network Management package, press ENTER. This allows use of Avaya SMON Manager for 90 days.
Entering SMON Device Licenses
SMON for Avaya P130, P330, and C460 devices do not require a device SMON license for the first 90 days of use.
After 90 days from initial use, Device SMON is disabled unless you enter a valid permanent device SMON license. For information on entering device SMON licenses, refer to your device’s SMON Installation Guide.
* Note: You can run device SMON on the Avaya P580/P882 without a device SMON license.
For information on purchasing device SMON licenses for your Avaya network devices, contact your Avaya representative.
22 Avaya Network Management Applications and Device Managers Configuration Guide
After You Install
Configuring Access Security (HP-OV NNM Mode Only)
To prevent unauthorized users from accessing your network, It is recommended that you configure access security in HP-OV NNM. The following procedures provide instructions for configuring access security for Avaya Network Management using the features in HP-OV NNM.
1. Open the NNM_Directory\www\conf\session.conf file in a text editor, where NNM_Directory is the directory in which HP-OV NNM is installed. For Solaris installations, the file is located in /etc/opt/OV/share/www/conf/session.conf
2. Change the User Login parameter to on.
3. Save the file.
4. Close the text editor.
5. Open a command line window.
6. Enter Ovhtpasswd new_user, where new_user is the user name for accessing Avaya Network Management.
7. Open the NNM_Directory\www\etc\htpasswd file in a text editor, where NNM_Directory is the directory in whichHP-OV NNM is installed. For Solaris installations, this file is located in /etc/opt/OV/share/www/etc/htpasswd.
8. Ensure that the user added in step 6 appears.
9. Close the file. Access security is configured for Avaya Network Management in HP-OV NNM Mode.
Configuring Proxy Settings (Optional)
If your network has a non-permissive firewall, you must configure Avaya Network Management to work with your proxy server. This will enable Avaya Software Update Manager’s Analyze and Retrieve from the Web functions.
To configure Avaya Network Management to work with your proxy server:
1. Type ovstop at a command-line prompt to stop HP-OV NNM’s background processes, if they are running.
Avaya Network Management Applications and Device Managers Configuration Guide 23
Chapter 4
2. Open the Avaya_Net_Mgt/cvs/private/gen/cv.prop file in a text editor, where Avaya_Net_Mgt is the directory in which Avaya Network Management is installed. For Solaris installations, the file is located in /opt/avaya/privatennm/gen/cv.prop.
3. Edit the line starting proxy.host= to proxy.host=Proxy_name, where Proxy_name is the IP address or DNS name of your proxy server. For example, proxy.host=avaya.proxy.com.
4. Edit the line starting proxy.port= to proxy.port=Proxy_port, where Proxy_port is the port used by your proxy server. For example, proxy.port=80.
5. Save the file, Avaya Network Management is configured to work with your proxy server.
Configuring the Web Server (Optional)
The Avaya Integrated Management application installs the Apache 2.0 HTTP server and configures it for use with Avaya Integrated Management Applications. For installations using a custom HTTP server, insert the definitions script into the HTTP server’s configuration file.
* Note: To configure Avaya Network Management for Solaris to use the web server, open the file /opt/avaya/privatennm/gen/cv.prop and edit the entry ov.http.port= to ov.http.port=OV_http_port, where OV_http_port is the port used by your web server. For example, ov.http.port=8080. The port to be used is found in your web server configuration.
* Note: To use Voice Integration services, open the /etc/profile file and add entries for AIM_FPM=fpm_ip_address and AIM_MSA=msa_ip_address, where fpm_ip_address is the IP address of the server running Avaya Fault and Performance Manager and msa_ip_address is the server running Avaya MultiSite Administration. After you add the AIM_FPM and AIM_MSA entries, add an entry export AIM_FPM AIM_MSA to enable the server to use the values you configured.
24 Avaya Network Management Applications and Device Managers Configuration Guide
After You Install
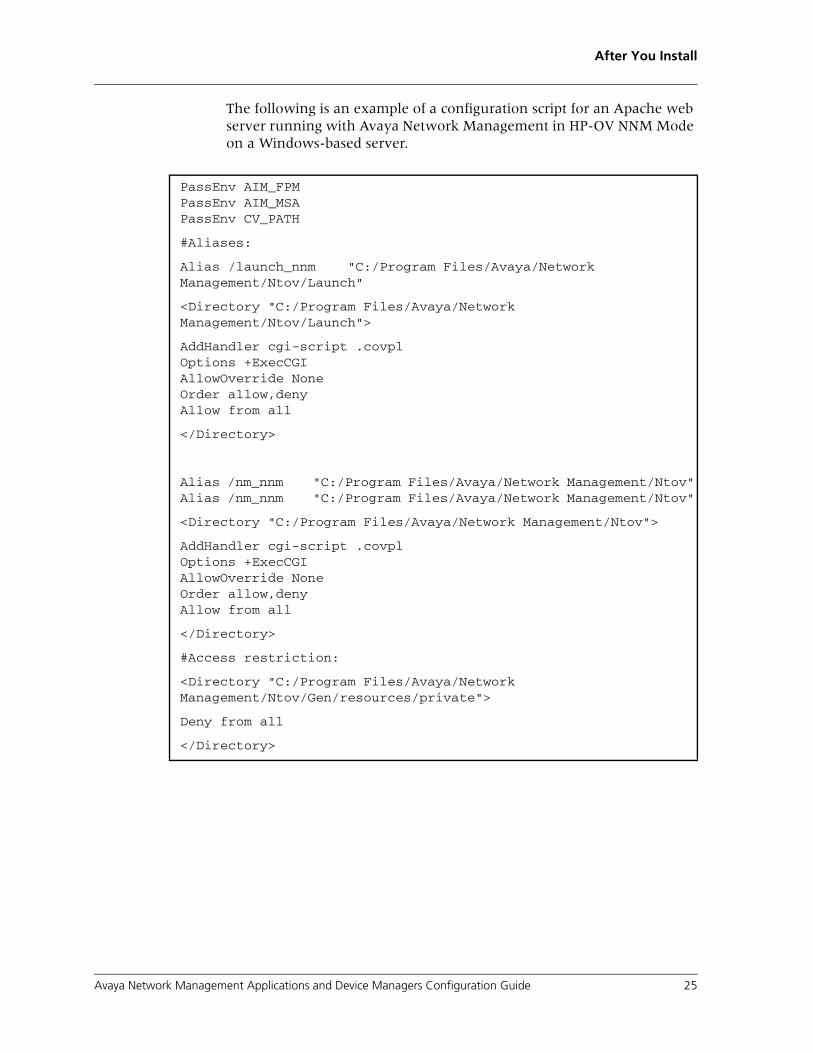
The following is an example of a configuration script for an Apache web server running with Avaya Network Management in HP-OV NNM Mode on a Windows-based server.
PassEnv AIM_FPMPassEnv AIM_MSAPassEnv CV_PATH
#Aliases:
Alias /launch_nnm "C:/Program Files/Avaya/Network Management/Ntov/Launch"
<Directory "C:/Program Files/Avaya/Network Management/Ntov/Launch">
AddHandler cgi-script .covplOptions +ExecCGIAllowOverride NoneOrder allow,denyAllow from all
</Directory>
Alias /nm_nnm "C:/Program Files/Avaya/Network Management/Ntov"Alias /nm_nnm "C:/Program Files/Avaya/Network Management/Ntov"
<Directory "C:/Program Files/Avaya/Network Management/Ntov">
AddHandler cgi-script .covplOptions +ExecCGIAllowOverride NoneOrder allow,denyAllow from all
</Directory>
#Access restriction:
<Directory "C:/Program Files/Avaya/Network Management/Ntov/Gen/resources/private">
Deny from all
</Directory>
Avaya Network Management Applications and Device Managers Configuration Guide 25
Chapter 4
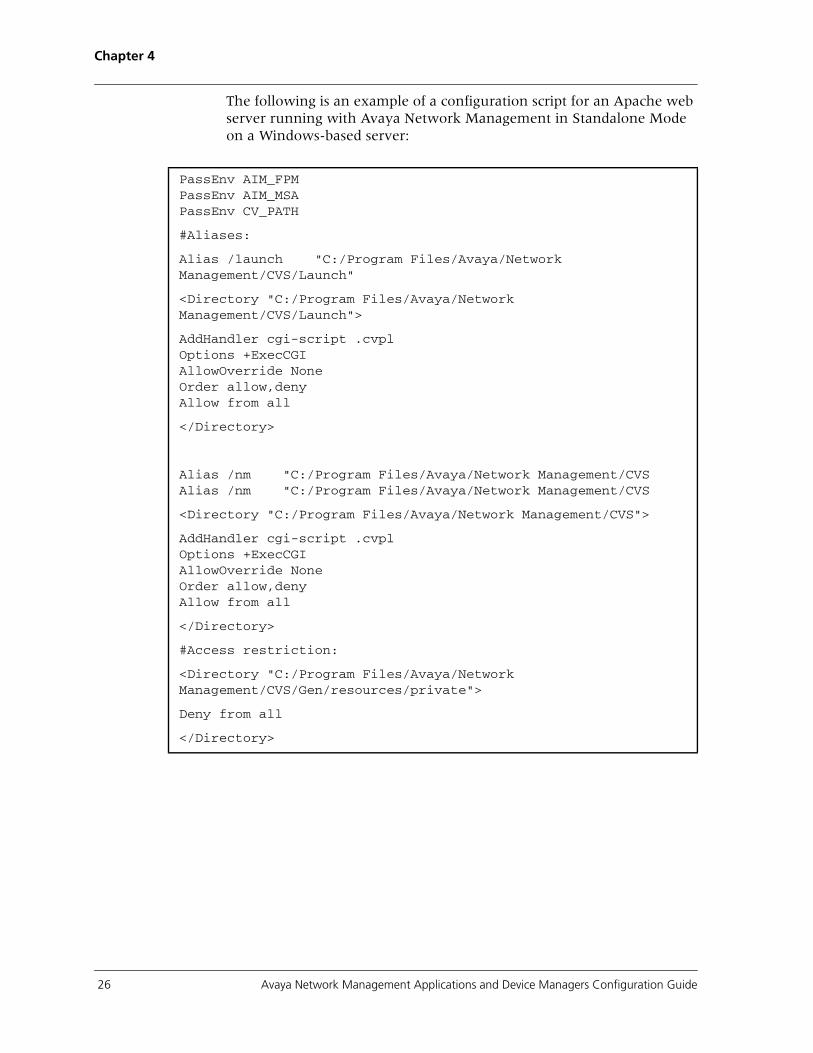
The following is an example of a configuration script for an Apache web server running with Avaya Network Management in Standalone Mode on a Windows-based server:
PassEnv AIM_FPMPassEnv AIM_MSAPassEnv CV_PATH
#Aliases:
Alias /launch "C:/Program Files/Avaya/Network Management/CVS/Launch"
<Directory "C:/Program Files/Avaya/Network Management/CVS/Launch">
AddHandler cgi-script .cvplOptions +ExecCGIAllowOverride NoneOrder allow,denyAllow from all
</Directory>
Alias /nm "C:/Program Files/Avaya/Network Management/CVSAlias /nm "C:/Program Files/Avaya/Network Management/CVS
<Directory "C:/Program Files/Avaya/Network Management/CVS">
AddHandler cgi-script .cvplOptions +ExecCGIAllowOverride NoneOrder allow,denyAllow from all
</Directory>
#Access restriction:
<Directory "C:/Program Files/Avaya/Network Management/CVS/Gen/resources/private">
Deny from all
</Directory>
26 Avaya Network Management Applications and Device Managers Configuration Guide
After You Install
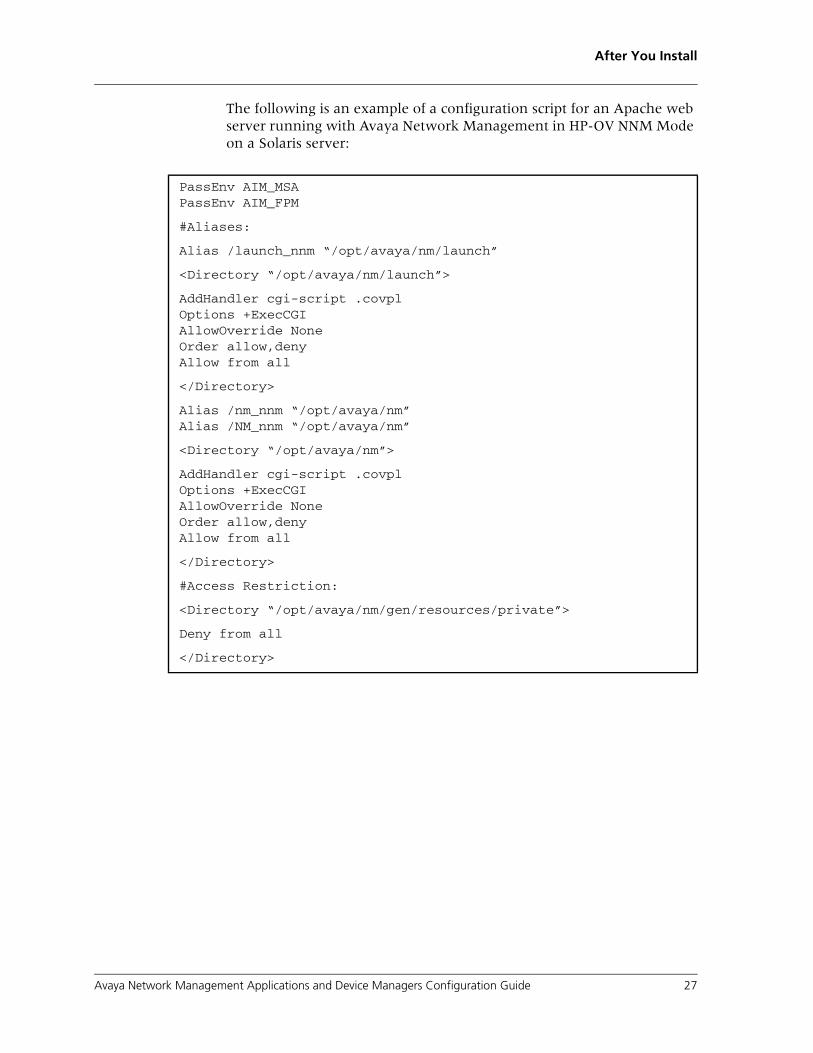
The following is an example of a configuration script for an Apache web server running with Avaya Network Management in HP-OV NNM Mode on a Solaris server:
PassEnv AIM_MSAPassEnv AIM_FPM
#Aliases:
Alias /launch_nnm “/opt/avaya/nm/launch”
<Directory “/opt/avaya/nm/launch”>
AddHandler cgi-script .covplOptions +ExecCGIAllowOverride NoneOrder allow,denyAllow from all
</Directory>
Alias /nm_nnm “/opt/avaya/nm”Alias /NM_nnm “/opt/avaya/nm”
<Directory “/opt/avaya/nm”>
AddHandler cgi-script .covplOptions +ExecCGIAllowOverride NoneOrder allow,denyAllow from all
</Directory>
#Access Restriction:
<Directory “/opt/avaya/nm/gen/resources/private”>
Deny from all
</Directory>
Avaya Network Management Applications and Device Managers Configuration Guide 27
Chapter 4
Configuring FTP (Optional)
FTP is supported by Avaya Software Update Manager and Avaya Network Configuration Manager for certain network switches and gateways.
To configure FTP service on your Windows server:
1. Create a user on the Windows server.
2. Select Start > Control Panel > Administrative Tools > Internet Services Manager.
3. Select Default FTP Site.
4. Select the Home Directory tab.
5. Under FTP Site Directory, select Read and Write.
6. Click Apply to save changes.
7. Close the Control Panel.
8. Open Avaya Software Update Manager.
9. Select File > Options. The Options dialog box opens.
10. In the FTP Global Use field, select Enabled.
11. In the FTP User Name and Password field, enter the user name and password you created.
12. In the FTP Server Page field, enter the path of the FTP Site Directory on your server.
13. Click Apply to save the changes. The FTP server is configured to work with Avaya Software Update Manager.
* Note: The procedure is identical for Network Configuration Manager.
To configure FTP service on your Solaris server:
1. Open the /etc/inetd.conf and search for the entry:
ftp stream tcp6 nowait root /usr/sbin/in.ftpd in.ftpd -a
Verify that the entry does not begin with a # character.
2. Open Avaya Software Update Manager.
28 Avaya Network Management Applications and Device Managers Configuration Guide
After You Install
3. Select File > Options. The Options dialog box appears.
4. In the FTP Global Use field, select Enabled.
5. In the FTP User Name and Password field, enter the user name and password you created.
6. In the FTP Server Page field, enter the path of the FTP Site Directory on your computer.
7. Click Apply to save the changes. The FTP server is configured to work with Avaya Software Update Manager.
Loading Additional MIBs (Optional)
Some Avaya MIBs are loaded automatically when you install Avaya Network Management. If you want to install additional MIBs:
1. In HP-OV NNM, select Options > Load/Unload MIBs:SNMP. The Load/Unload MIBs:SNMP dialog box appears.
2. Click Load. A directory browser appears.
3. Navigate to the Install_Directory/snmpmibs directory, where Install_Directory is the directory in which you installed Avaya Network Management.
4. Select the MIBs you wish to add to the MIBs database.
5. Clock Open. The new MIBs are loaded. For more information, refer to Managing Your Network with HP OpenView Network Node Manager 6.2.
Avaya Network Management Applications and Device Managers Configuration Guide 29
Chapter 4
Configuring Default Settings
The following section explains how to configure specific default settings with recommended values.
Cold Start Traps
The default setting in HP-OV NNM is not to record cold start traps in the Event Log. To record cold start traps in the Event Log:
1. In HP-OV NNM, select Options > Event Configuration. The Event Configuration dialog box opens.
2. In the Enterprises window, select snmpTraps.
3. In the Events for Enterprise snmpTraps (.1.3.6.1.6.3.1.1.5) window, double-click SNMP_Cold_Start. The Modify Events dialog box opens.
4. Click the Event Messages tab.
5. Click Log and display in category.
6. Select a category in which cold start traps will be displayed.
7. Click OK. Cold start traps appear in the selected category.
30 Avaya Network Management Applications and Device Managers Configuration Guide
5
Avaya Network Manage
Running Avaya Network Management in Multiple Modes
This chapter provides information about installing and running Avaya Network Management applications and Device Managers both in Standalone Mode and in HP-OV NNM mode on the same computer.
To use Avaya Network Management Console both in Standalone Mode and in HP NNM mode on the same computer, you must install Avaya Network Management Console twice, once in Standalone Mode and once in HP-OV NNM Mode.
This chapter contains the following sections:
• Installing Avaya Network Management in Multiple Modes - Information on installing Avaya Network Management Server in both Standalone and HP-OV NNM Modes on the same computer.
• Configuring Avaya Network Management Modes - Information on selecting the mode in which Avaya Network Management Server will run on startup.
Installing Avaya Network Management in Multiple Modes
The following sections provide instructions for installing Avaya Network Management both in Standalone Mode and in HP-OV NNM Mode.
ment Applications and Device Managers Configuration Guide 31
Chapter 5
Installing Avaya Network Management in Standalone Mode
If HP-OV NNM is installed on your computer and you wish to install Avaya Network Management in Standalone Mode, refer to the Avaya Integrated Management 2.0 Installation Guide.
Installing Avaya Network Management in HP-OV NNM Mode
If Avaya Network Management in Standalone Mode is installed on your computer, the following instructions explain how to install HP-OV NNM and Avaya Network Management Server in HP-OV NNM Mode.
1. If HP-OV NNM is not installed on your computer, install HP-OV NNM. For instructions on installing HP-OV NNM, refer to HP OpenView NNM For Windows NT/2000/XP Installation Guide.
2. Stop HP-OV NNM background processes. For instructions on stopping HP-OV NNM background processes, refer to “Stopping HP-OV NNM Background Processes” on page 12.
3. Install Avaya Network Management Server in HP-OV NNM Mode. For instructions on installing Avaya Network Management Server, refer to the Avaya Integrated Management 2.0 Installation Guide.
Configuring Avaya Network Management Modes
If you installed Avaya Network Management Server in both Standalone and HP-OV NNM Modes, you must select the mode that runs when your computer starts.
* Note: If you do not configure your computer to start with one of the modes, error messages will appear on startup.
32 Avaya Network Management Applications and Device Managers Configuration Guide
Running Avaya Network Management in Multiple Modes
Configuring Avaya Network Management to Run in Standalone Mode
To run Avaya Network Management Server in Standalone Mode when your computer starts:
1. Configure your computer to run Avaya Network Management Server on startup:
a. Open the Services applet in Windows Control Panel.
b. Select Avaya Network Management Server.
c. Click Startup.
d. Select Automatic.
e. Click OK.
2. Configure HP-OV NNM background services not to start automatically:
a. Select SNMP Trap Service.
b. Click Startup.
c. Select Manual.
d. Click OK.
e. Select HP OpenView Process Manager.
f. Click Startup.
g. Select Manual.
h. Click OK.
i. Close the Services applet.
3. Restart your computer. Your computer is now configured to run Avaya Network Management Server in Standalone mode on startup.
Avaya Network Management Applications and Device Managers Configuration Guide 33
Chapter 5
Configuring Avaya Network Management to Run in HP-OV NNM Mode
To run Avaya Network Management Server in HP-OV NNM Mode when your computer starts:
1. Configure Avaya Network Management Server not to start automatically:
a. Open the Services applet in Windows Control Panel.
b. Select Avaya Network Management Server.
c. Click Startup.
d. Select Manual.
e. Click OK.
2. Configure HP-OV NNM background processes to run when your computer starts:
a. Select SNMP Trap Service.
b. Click Startup.
c. Select Automatic.
d. Click OK.
e. Select HP OpenView Process Manager.
f. Click Startup.
g. Select Automatic.
h. Click OK.
i. Close the Services applet.
3. Restart your computer. Your computer is configured to run Avaya Network Management Server in HP-OV NNM Mode on startup.
34 Avaya Network Management Applications and Device Managers Configuration Guide
6
Avaya Network Manage
Getting Started with Avaya Network Management
This chapter provides instructions on how to get started with Avaya Network Management. It includes the following sections:
• Getting Started with Avaya Network Management in Standalone Mode - Instructions on what to do after installing Avaya Network Management in Standalone Mode.
• Getting Started with Avaya Network Management in HP-OV NNM Mode - Instructions on what to do after installing Avaya Network Management in HP-OV NNM Mode.
* Note: The tasks listed in this chapter should only be performed after completing the post-installation tasks documented in Chapter 4, After You Install.
* Note: Avaya Network Management can be installed in Standalone Mode and HP-OV NNM Mode on the same computer. For information about running Avaya Network Management in Standalone Mode and HP-OV NNM Mode on the same computer, refer to Chapter 5, Running Avaya Network Management in Multiple Modes.
ment Applications and Device Managers Configuration Guide 35
Chapter 6
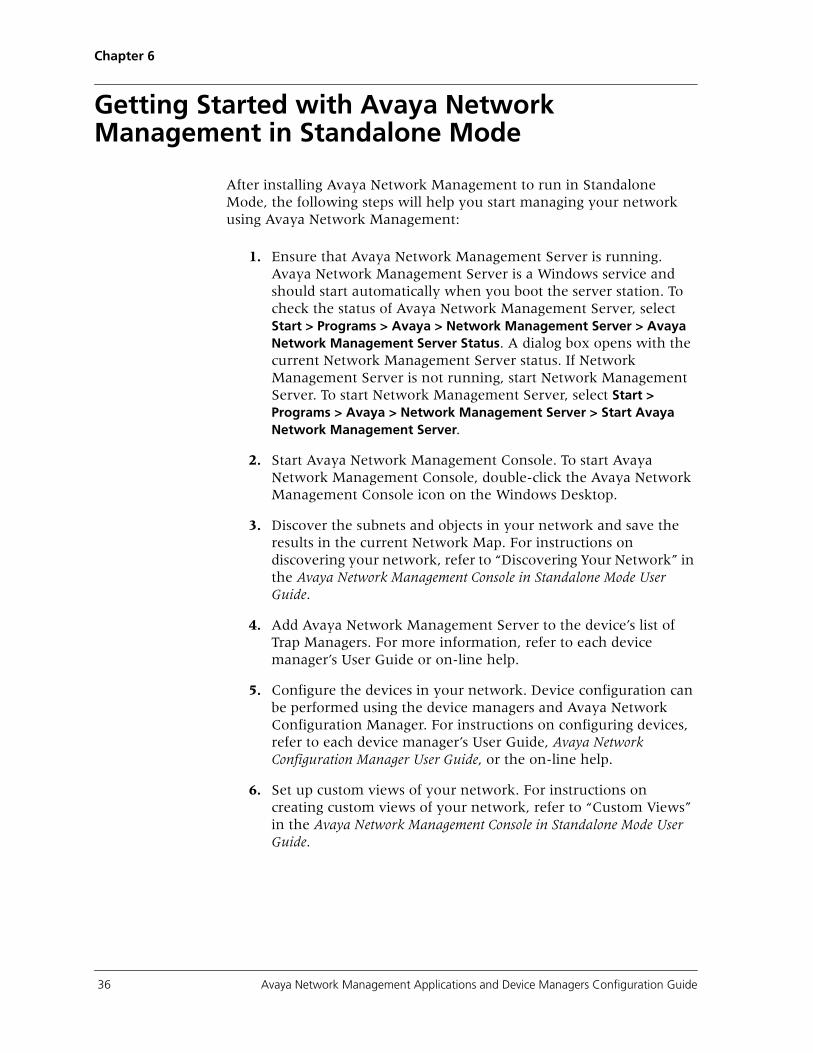
Getting Started with Avaya Network Management in Standalone Mode
After installing Avaya Network Management to run in Standalone Mode, the following steps will help you start managing your network using Avaya Network Management:
1. Ensure that Avaya Network Management Server is running. Avaya Network Management Server is a Windows service and should start automatically when you boot the server station. To check the status of Avaya Network Management Server, select Start > Programs > Avaya > Network Management Server > Avaya Network Management Server Status. A dialog box opens with the current Network Management Server status. If Network Management Server is not running, start Network Management Server. To start Network Management Server, select Start > Programs > Avaya > Network Management Server > Start Avaya Network Management Server.
2. Start Avaya Network Management Console. To start Avaya Network Management Console, double-click the Avaya Network Management Console icon on the Windows Desktop.
3. Discover the subnets and objects in your network and save the results in the current Network Map. For instructions on discovering your network, refer to “Discovering Your Network” in the Avaya Network Management Console in Standalone Mode User Guide.
4. Add Avaya Network Management Server to the device’s list of Trap Managers. For more information, refer to each device manager’s User Guide or on-line help.
5. Configure the devices in your network. Device configuration can be performed using the device managers and Avaya Network Configuration Manager. For instructions on configuring devices, refer to each device manager’s User Guide, Avaya Network Configuration Manager User Guide, or the on-line help.
6. Set up custom views of your network. For instructions on creating custom views of your network, refer to “Custom Views” in the Avaya Network Management Console in Standalone Mode User Guide.
36 Avaya Network Management Applications and Device Managers Configuration Guide
Getting Started with Avaya Network Management
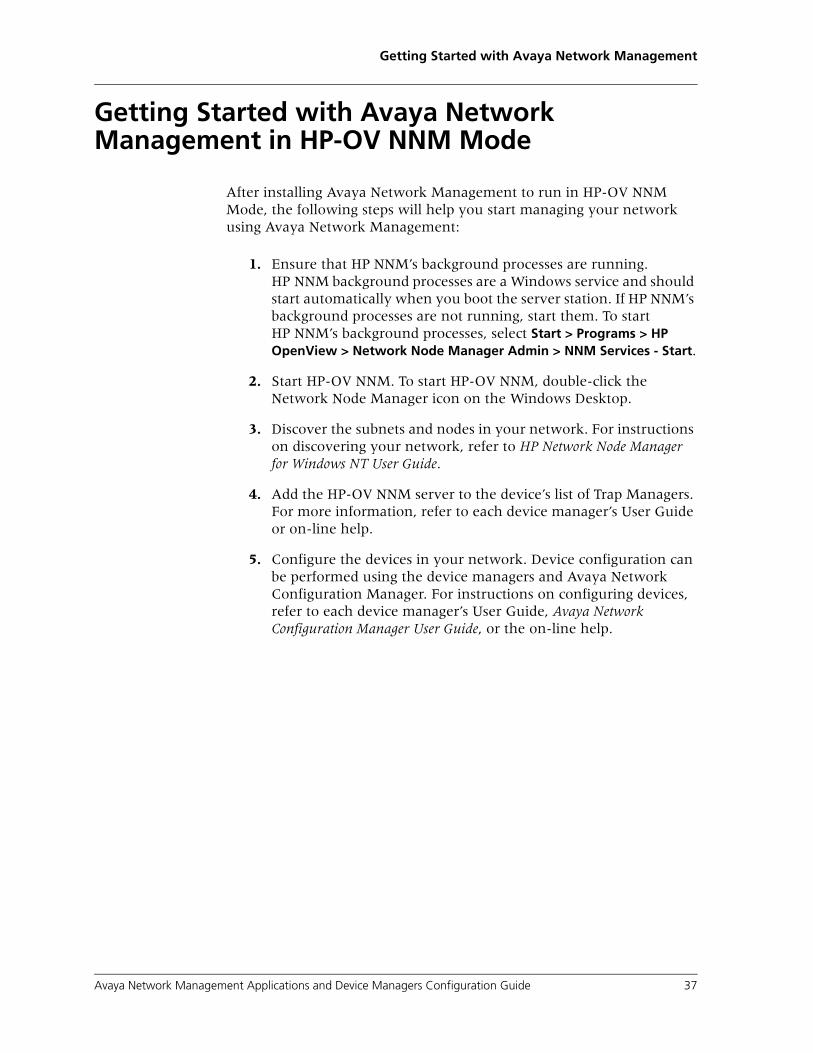
Getting Started with Avaya Network Management in HP-OV NNM Mode
After installing Avaya Network Management to run in HP-OV NNM Mode, the following steps will help you start managing your network using Avaya Network Management:
1. Ensure that HP NNM’s background processes are running. HP NNM background processes are a Windows service and should start automatically when you boot the server station. If HP NNM’s background processes are not running, start them. To start HP NNM’s background processes, select Start > Programs > HP OpenView > Network Node Manager Admin > NNM Services - Start.
2. Start HP-OV NNM. To start HP-OV NNM, double-click the Network Node Manager icon on the Windows Desktop.
3. Discover the subnets and nodes in your network. For instructions on discovering your network, refer to HP Network Node Manager for Windows NT User Guide.
4. Add the HP-OV NNM server to the device’s list of Trap Managers. For more information, refer to each device manager’s User Guide or on-line help.
5. Configure the devices in your network. Device configuration can be performed using the device managers and Avaya Network Configuration Manager. For instructions on configuring devices, refer to each device manager’s User Guide, Avaya Network Configuration Manager User Guide, or the on-line help.
Avaya Network Management Applications and Device Managers Configuration Guide 37

Chapter 6
38 Avaya Network Management Applications and Device Managers Configuration Guide
A
Avaya Network Manage
Supported Devices
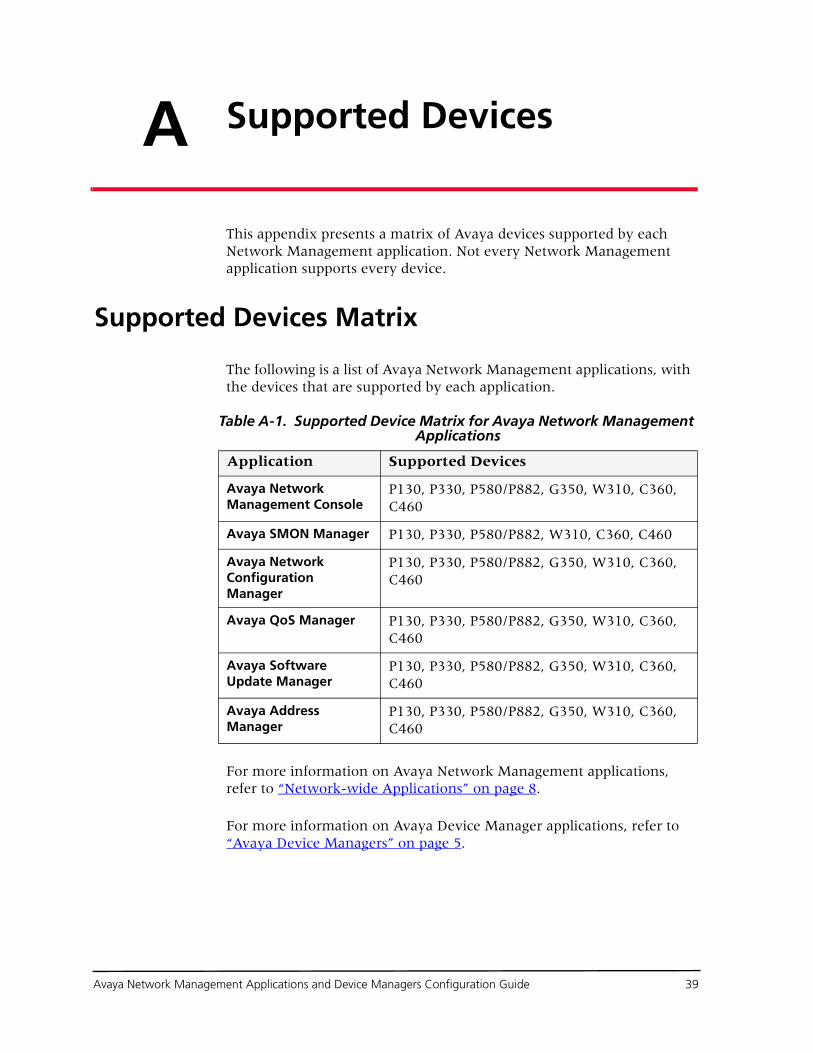
This appendix presents a matrix of Avaya devices supported by each Network Management application. Not every Network Management application supports every device.
Supported Devices Matrix
The following is a list of Avaya Network Management applications, with the devices that are supported by each application.
For more information on Avaya Network Management applications, refer to “Network-wide Applications” on page 8.
For more information on Avaya Device Manager applications, refer to “Avaya Device Managers” on page 5.
Table A-1. Supported Device Matrix for Avaya Network Management Applications
Application Supported Devices
Avaya Network Management Console
P130, P330, P580/P882, G350, W310, C360, C460
Avaya SMON Manager P130, P330, P580/P882, W310, C360, C460
Avaya Network Configuration Manager
P130, P330, P580/P882, G350, W310, C360, C460
Avaya QoS Manager P130, P330, P580/P882, G350, W310, C360, C460
Avaya Software Update Manager
P130, P330, P580/P882, G350, W310, C360, C460
Avaya Address Manager
P130, P330, P580/P882, G350, W310, C360, C460
ment Applications and Device Managers Configuration Guide 39