nanosuit upgrade modules -...
TRANSCRIPT

F I R S T R O W
S E C O N D R O W
Nanosuit Upgrade Modules provide the power to add
bonus abilities to your Nanosuit. There are enough of
these kits in the world that you can master everything in
the game (eventually), but you should still choose your
purchases carefully.
Only four upgrades can be equipped at the same time.
Because of this, it’s important to select upgrades that
work well together. When you get your first sets of points, buy one upgrade from each of the four lines in your Nanosuit
Customization Menu. Put the upgrades into the orange slots on the bottom of the screen, and start working on their
conditions for improvement.
Each upgrade lists one of these conditions. For example,
Super Stealth gets even better Cloaking and Scanner
Resistance if you remain cloaked near enemies for 60
total seconds. Highlight Super Stealth to check on your
progress with this. Once you’ve met that condition, the
upgrade is improved permanently (even for subsequent
playthroughs of the game).
NANOSUIT UPGRADE MODULES
Nanosuit Upgrades
UPGRADE COST BENEFIT(S) MAXIMUM BONUS CONDITION
SUPER STEALTH 1
50% FASTER CLOAKING, 50% SCANNER RESISTANCE, HIGHLIGHT ENEMY FOOTPRINTS
75% REMAIN CLOAKED NEAR ENEMIES FOR 60 SECONDS
SENSOR UPGRADE 1 RADAR/ZOOM UPGRADE, HACK
ASSISTANCE, ENEMY SOUND BOOSTDOUBLE EFFECTIVENESS TAG 20 TARGETS
BRUTE FORCE 3 25% STRONGER POWER KICK, UNLOCK AIR STOMP
INCREASE RANGE BY 25%
KILL 10 TARGETS WITH POWER KICK, KILL 10 TARGETS WITH AIR STOMP
ENDURANCE 2 33% LONGER SPRINT, IMPROVED AQUATIC MOVEMENT
INCREASE BONUS TO 50%
SPRINT 1,000 METERS AND SWIM 1,000 METERS
UPGRADE NAME COST BENEFIT(S) MAXIMUM BONUS CONDITION
DEFLECTION 150% BULLET IMPACT DAMPENING, BOUNCE BACK BULLETS, 50% FASTER KNOCKBACK RECOVERY
INCREASE BONUS TO 75% ABSORB 10,000 DAMAGE
THREAT DETECTOR 1 SHOW ENEMY TRACER FIRE, HIGHLIGHT
HAZARDS, HIGHLIGHT EXPLOSIVES
INCREASE HIGHLIGHT RANGE BY 50%
TAG 20 TARGETS
ENERGY UPGRADE 2
25% EMP PROTECTION, 25% FASTER ENERGY RECHARGE, 25% LESS HUD INTERFERENCE
INCREASE BONUS TO 50% REGENERATE 10,000 ENERGY
REFLEX BOOST 225% FASTER WEAPON RELOADING, AIM DOWN SIGHTS, AND WEAPON SELECTION
INCREASE BONUS TO 50%
KILL 20 ENEMIES WITHIN 1 SECOND OF AIMING DOWN SIGHTS
MO
BIL
ITY
AN
D U
TIL
ITY
UPGRADE COST BENEFIT(S) MAXIMUM BONUS CONDITION
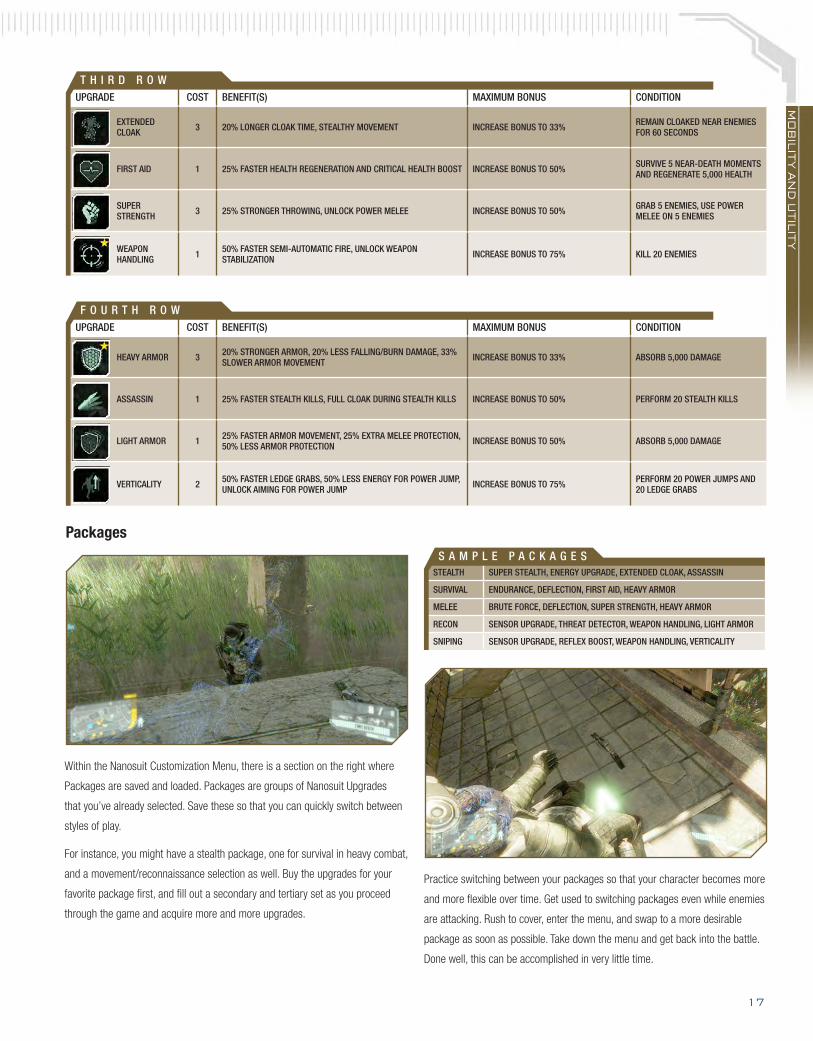
EXTENDED CLOAK 3 20% LONGER CLOAK TIME, STEALTHY MOVEMENT INCREASE BONUS TO 33% REMAIN CLOAKED NEAR ENEMIES
FOR 60 SECONDS
FIRST AID 1 25% FASTER HEALTH REGENERATION AND CRITICAL HEALTH BOOST INCREASE BONUS TO 50% SURVIVE 5 NEAR-DEATH MOMENTS AND REGENERATE 5,000 HEALTH
SUPER STRENGTH 3 25% STRONGER THROWING, UNLOCK POWER MELEE INCREASE BONUS TO 50% GRAB 5 ENEMIES, USE POWER
MELEE ON 5 ENEMIES
WEAPON HANDLING 1 50% FASTER SEMI-AUTOMATIC FIRE, UNLOCK WEAPON
STABILIZATION INCREASE BONUS TO 75% KILL 20 ENEMIES
STEALTH SUPER STEALTH, ENERGY UPGRADE, EXTENDED CLOAK, ASSASSIN
SURVIVAL ENDURANCE, DEFLECTION, FIRST AID, HEAVY ARMOR
MELEE BRUTE FORCE, DEFLECTION, SUPER STRENGTH, HEAVY ARMOR
RECON SENSOR UPGRADE, THREAT DETECTOR, WEAPON HANDLING, LIGHT ARMOR
SNIPING SENSOR UPGRADE, REFLEX BOOST, WEAPON HANDLING, VERTICALITY
UPGRADE COST BENEFIT(S) MAXIMUM BONUS CONDITION
HEAVY ARMOR 3 20% STRONGER ARMOR, 20% LESS FALLING/BURN DAMAGE, 33% SLOWER ARMOR MOVEMENT INCREASE BONUS TO 33% ABSORB 5,000 DAMAGE
ASSASSIN 1 25% FASTER STEALTH KILLS, FULL CLOAK DURING STEALTH KILLS INCREASE BONUS TO 50% PERFORM 20 STEALTH KILLS
LIGHT ARMOR 1 25% FASTER ARMOR MOVEMENT, 25% EXTRA MELEE PROTECTION, 50% LESS ARMOR PROTECTION INCREASE BONUS TO 50% ABSORB 5,000 DAMAGE
VERTICALITY 2 50% FASTER LEDGE GRABS, 50% LESS ENERGY FOR POWER JUMP, UNLOCK AIMING FOR POWER JUMP INCREASE BONUS TO 75% PERFORM 20 POWER JUMPS AND
20 LEDGE GRABS
S A M P L E P A C K A G E S
Within the Nanosuit Customization Menu, there is a section on the right where
Packages are saved and loaded. Packages are groups of Nanosuit Upgrades
that you’ve already selected. Save these so that you can quickly switch between
styles of play.
For instance, you might have a stealth package, one for survival in heavy combat,
and a movement/reconnaissance selection as well. Buy the upgrades for your
favorite package first, and fill out a secondary and tertiary set as you proceed
through the game and acquire more and more upgrades.
Packages
Practice switching between your packages so that your character becomes more
and more flexible over time. Get used to switching packages even while enemies
are attacking. Rush to cover, enter the menu, and swap to a more desirable
package as soon as possible. Take down the menu and get back into the battle.
Done well, this can be accomplished in very little time.
T H I R D R O W
F O U R T H R O W
17
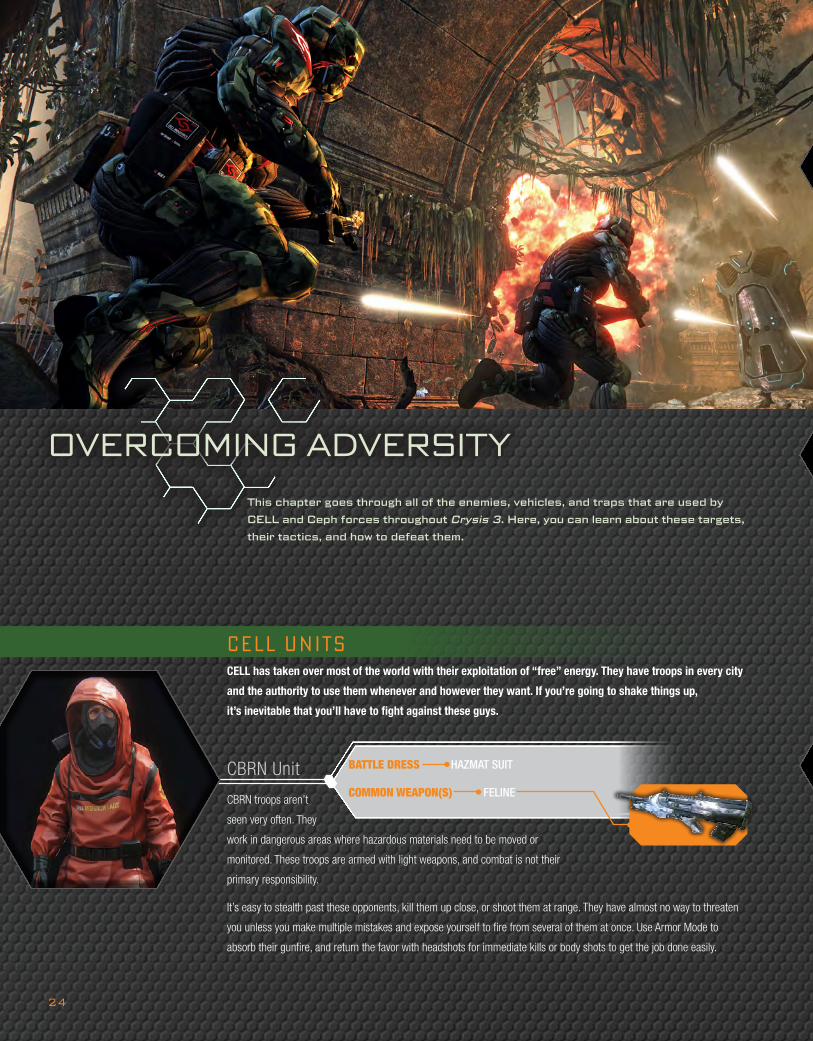
OVERCOMING ADVERSITY
This chapter goes through all of the enemies, vehicles, and traps that are used by
CELL and Ceph forces throughout Crysis 3. Here, you can learn about these targets,
their tactics, and how to defeat them.
BATTLE DRESS HAZMAT SUIT
COMMON WEAPON(S) FELINE
CELL UNITS
CBRN Unit
CELL has taken over most of the world with their exploitation of “free” energy. They have troops in every city
and the authority to use them whenever and however they want. If you’re going to shake things up,
it’s inevitable that you’ll have to fight against these guys.
CBRN troops aren’t
seen very often. They
work in dangerous areas where hazardous materials need to be moved or
monitored. These troops are armed with light weapons, and combat is not their
primary responsibility.
It’s easy to stealth past these opponents, kill them up close, or shoot them at range. They have almost no way to threaten
you unless you make multiple mistakes and expose yourself to fire from several of them at once. Use Armor Mode to
absorb their gunfire, and return the favor with headshots for immediate kills or body shots to get the job done easily.
24

OV
ER
CO
MIN
G A
DV
ER
SIT
Y
BATTLE DRESS HEAVY ARMOR, PROTECTIVE HELMET
COMMON WEAPON(S) ALPHA JACKAL
BATTLE DRESS LIGHT ARMOR
COMMON WEAPON(S) FELINE, MARSHALL
BATTLE DRESS LIGHT ARMOR
COMMON WEAPON(S) DSG-1, HAMMER II
SECONDARY EQUIPMENT SURVEILLANCE KIT
Enforcer
Recon
Marksman
Enforcers are heavier
troops that take more
damage to kill. They’re prepared for close-range combat and can deal high
damage if you aren’t ready for them. Use stealthy kills with the Predator Bow or assassinate them if you get close.
Otherwise, stay at long range, use cover, and fire in bursts to bring these guys down.
Despite their protective helmets, Enforcers still drop quickly if you score good headshots against them. Use a sniper
weapon or your bow to take them out at range without mishap.
Marksman deploy on
upper ledges and other
areas with a good view of
the surrounding terrain. They’re trained as snipers and carry rifles that have range, accuracy, and high damage. If you’re a
stealthy character, see if there is a way to jump behind Marksmen. They’re easy to sneak up on if you get to their ledges.
Marksmen don’t patrol or look behind themselves; they’re too focused on scanning the area for targets.
Even ranged players should use Stealth Mode while lining up their shots against Marksmen. Make sure that your aim is
dead on, and then switch to Armor Mode when you’re ready to fire the killshot. This way you won’t lose energy from firing
in Stealth Mode, and your character is better able to handle any damage if nearby enemies return fire.
Recon troops are
very common. They’re a
standard CELL operative, deployed to patrol areas, look for enemy targets, or defend
positions. Though only armed with basic weaponry, they’re able to defeat enemies
through persistence and numbers. Don’t take them for granted!
Stalk Recon targets in your area and note their position. If any of them are isolated, kill them first. Use the Predator bow for
easy victories and then remember to get your arrows back afterward.
If you’re using more traditional combat methods, find cover near larger walls or doorways when fighting Recon troops.
This gives you the option to back off from battle, restore your energy, and return when you’re ready for more. Don’t stand in
the open and trade fire (even with Armor Mode on). Always have your escape in mind, if you like living.
25
WE
AP
ON
SY
ST
EM
S A
ND
SU
IT D
YN
AM
ICS
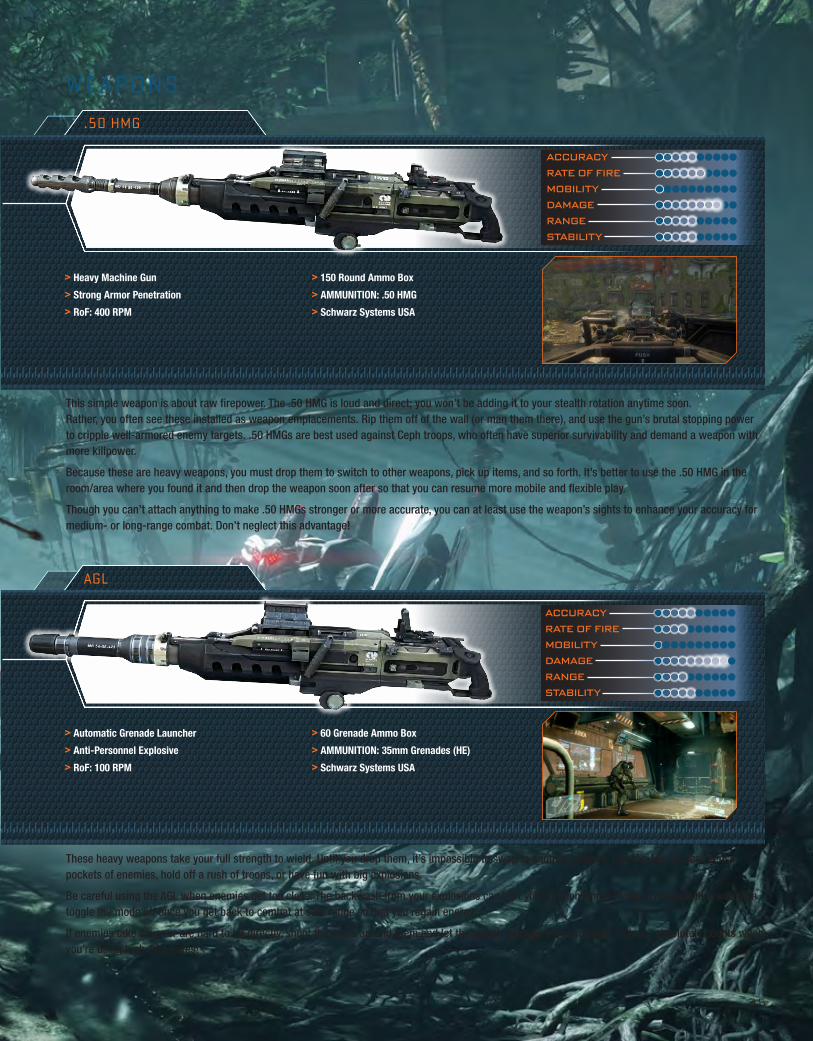
WEAPONS
This simple weapon is about raw firepower. The .50 HMG is loud and direct; you won’t be adding it to your stealth rotation anytime soon. Rather, you often see these installed as weapon emplacements. Rip them off of the wall (or man them there), and use the gun’s brutal stopping power to cripple well-armored enemy targets. .50 HMGs are best used against Ceph troops, who often have superior survivability and demand a weapon with more killpower.
Because these are heavy weapons, you must drop them to switch to other weapons, pick up items, and so forth. It’s better to use the .50 HMG in the room/area where you found it and then drop the weapon soon after so that you can resume more mobile and flexible play.
Though you can’t attach anything to make .50 HMGs stronger or more accurate, you can at least use the weapon’s sights to enhance your accuracy for medium- or long-range combat. Don’t neglect this advantage!
These heavy weapons take your full strength to wield. Until you drop them, it’s impossible to swap to another weapon. Use the AGL to clear dense pockets of enemies, hold off a rush of troops, or have fun with big explosions.
Be careful using the AGL when enemies get too close. The backwash from your explosions can hurt you! Turn on Armor Mode to mitigate this, and then toggle the mode off once you get back to combat at safe range so that you regain energy.
If enemies take cover or are hard to hit directly, shoot the areas around them and let the splash damage kill your target. “Close” absolutely counts when you’re using high explosives!
ACCURACY
RATE OF FIRE
MOBILITY
DAMAGE
RANGE
STABILITY
AGL
ACCURACY
RATE OF FIRE
MOBILITY
DAMAGE
RANGE
STABILITY
> Heavy Machine Gun
> Strong Armor Penetration
> RoF: 400 RPM
> 150 Round Ammo Box
> AMMUNITION: .50 HMG
> Schwarz Systems USA
> Automatic Grenade Launcher
> Anti-Personnel Explosive
> RoF: 100 RPM
> 60 Grenade Ammo Box
> AMMUNITION: 35mm Grenades (HE)
> Schwarz Systems USA
.50 HMG
35
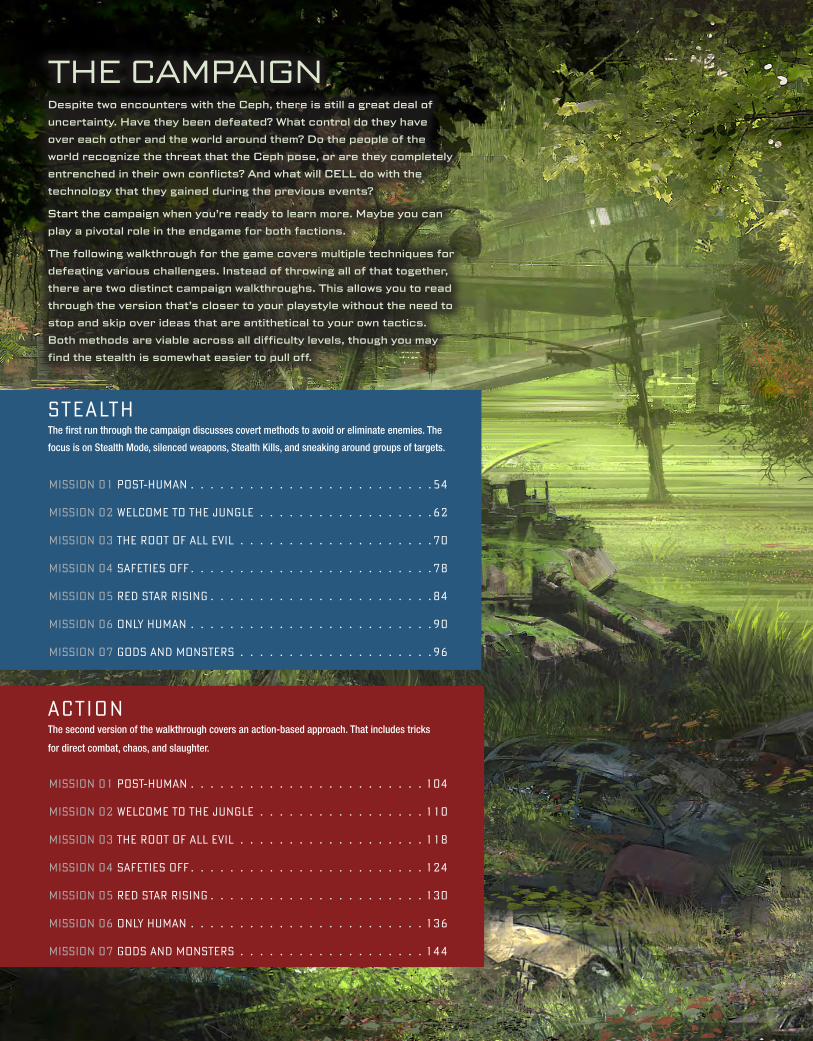
THE CAMPAIGNDespite two encounters with the Ceph, there is still a great deal of
uncertainty. Have they been defeated? What control do they have
over each other and the world around them? Do the people of the
world recognize the threat that the Ceph pose, or are they completely
entrenched in their own conflicts? And what will CELL do with the
technology that they gained during the previous events?
Start the campaign when you’re ready to learn more. Maybe you can
play a pivotal role in the endgame for both factions.
The following walkthrough for the game covers multiple techniques for
defeating various challenges. Instead of throwing all of that together,
there are two distinct campaign walkthroughs. This allows you to read
through the version that’s closer to your playstyle without the need to
stop and skip over ideas that are antithetical to your own tactics.
Both methods are viable across all difficulty levels, though you may
find the stealth is somewhat easier to pull off.
MISSION 01 POST-HUMAN 104
MISSION 02 WELCOME TO THE JUNGLE 110
MISSION 03 THE ROOT OF ALL EVIL 118
MISSION 04 SAFETIES OFF 124
MISSION 05 RED STAR RISING 130
MISSION 06 ONLY HUMAN 136
MISSION 07 GODS AND MONSTERS 144
ACTIONThe second version of the walkthrough covers an action-based approach. That includes tricks
for direct combat, chaos, and slaughter.
STEALTHThe first run through the campaign discusses covert methods to avoid or eliminate enemies. The
focus is on Stealth Mode, silenced weapons, Stealth Kills, and sneaking around groups of targets.
MISSION 01 POST-HUMAN 54
MISSION 02 WELCOME TO THE JUNGLE 62
MISSION 03 THE ROOT OF ALL EVIL 70
MISSION 04 SAFETIES OFF 78
MISSION 05 RED STAR RISING 84
MISSION 06 ONLY HUMAN 90
MISSION 07 GODS AND MONSTERS 96

WELCOME TO THE JUNGLE
The elevator takes you and Psycho all the way down to street level, in the ruins
of New York. Before you leave the complex, there are a few important things to
do. Turn on your Visor and look through the area ahead. A new icon appears, and
it is a good one to find. Your suit is detecting upgrade modules. These kits let you
purchase upgrades for your Nanosuit.
DATAPADS 3
PROPAGANDA POSTERS 1
BLACK BOXES 2
C E L L I N T E L
62
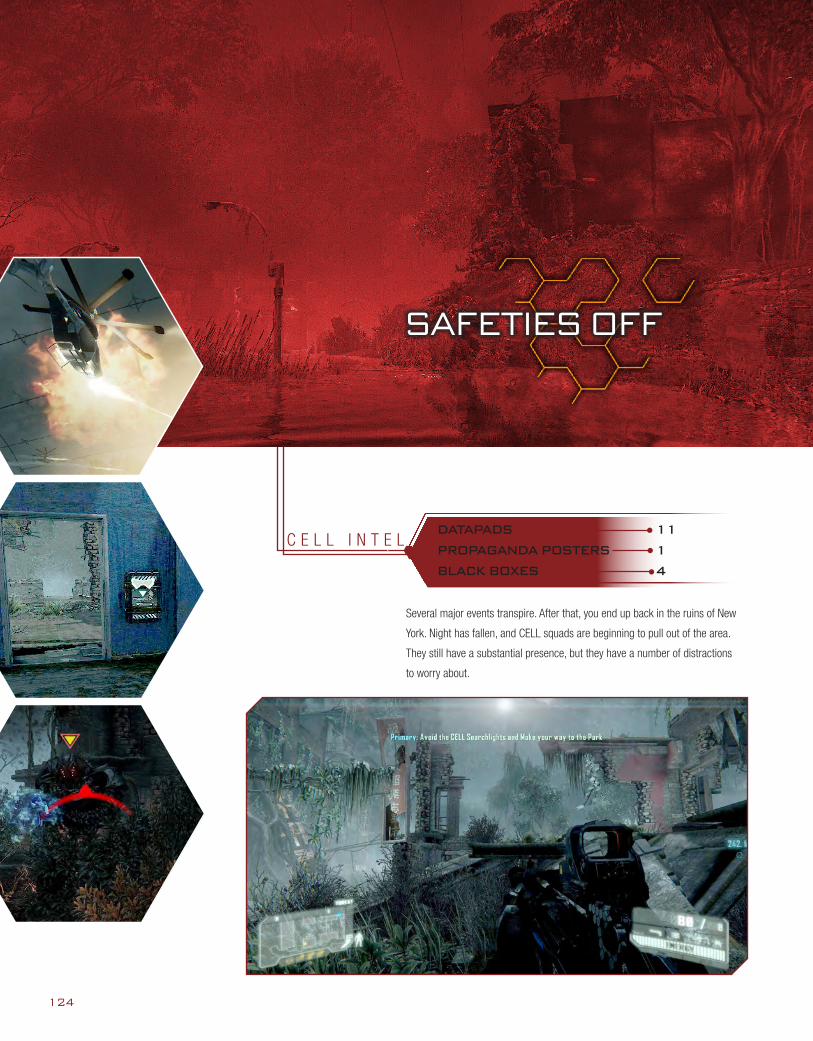
SAFETIES OFF
Several major events transpire. After that, you end up back in the ruins of New
York. Night has fallen, and CELL squads are beginning to pull out of the area.
They still have a substantial presence, but they have a number of distractions
to worry about.
DATAPADS 11
PROPAGANDA POSTERS 1
BLACK BOXES 4
C E L L I N T E L
124
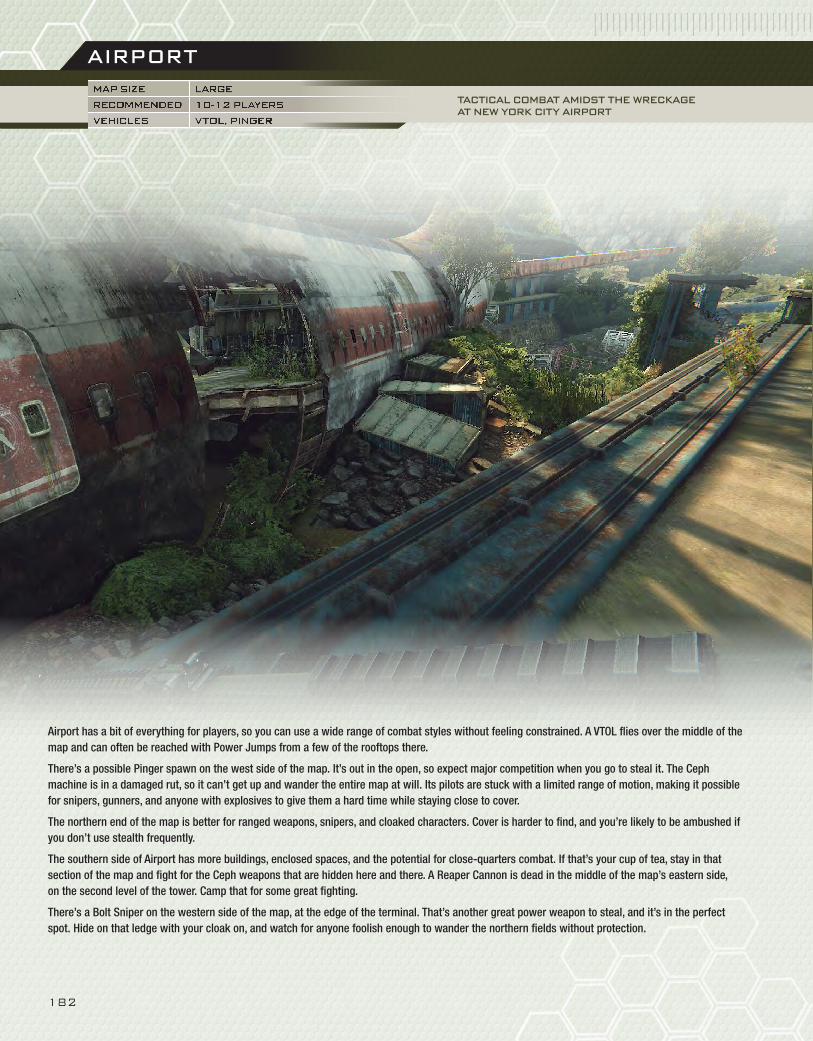
AIRPORT
TACTICAL COMBAT AMIDST THE WRECKAGE AT NEW YORK CITY AIRPORT
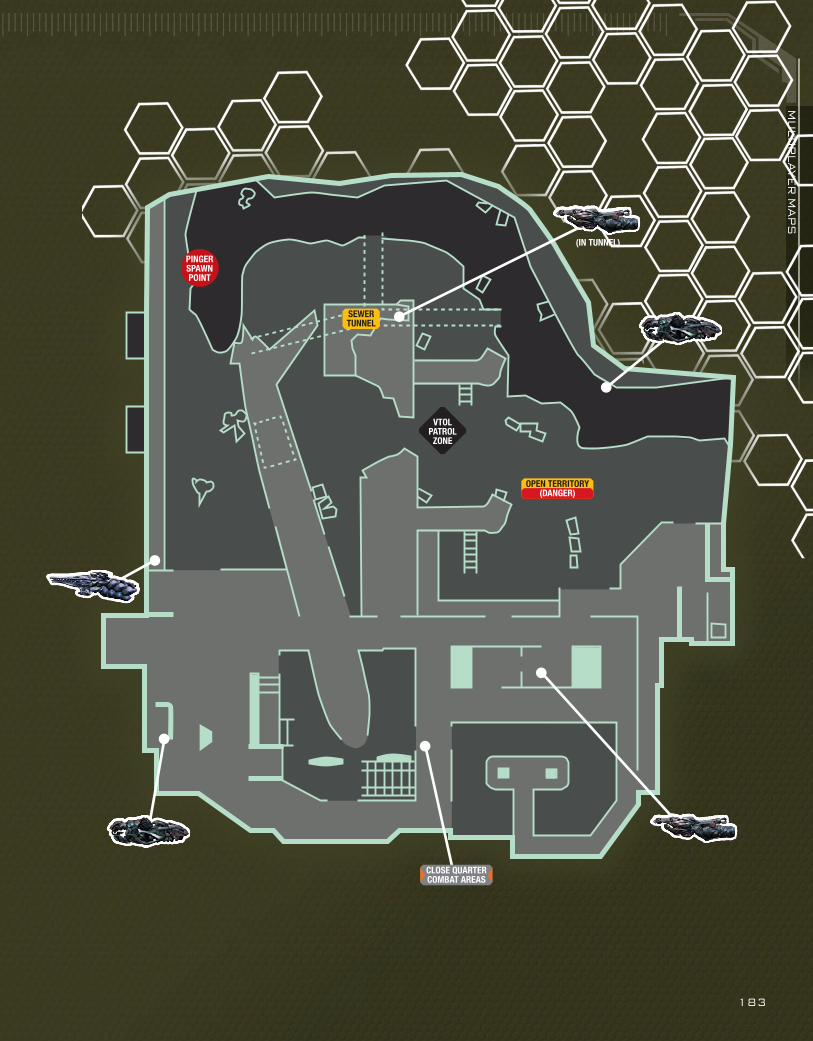
Airport has a bit of everything for players, so you can use a wide range of combat styles without feeling constrained. A VTOL flies over the middle of the map and can often be reached with Power Jumps from a few of the rooftops there.
There’s a possible Pinger spawn on the west side of the map. It’s out in the open, so expect major competition when you go to steal it. The Ceph machine is in a damaged rut, so it can’t get up and wander the entire map at will. Its pilots are stuck with a limited range of motion, making it possible for snipers, gunners, and anyone with explosives to give them a hard time while staying close to cover.
The northern end of the map is better for ranged weapons, snipers, and cloaked characters. Cover is harder to find, and you’re likely to be ambushed if you don’t use stealth frequently.
The southern side of Airport has more buildings, enclosed spaces, and the potential for close-quarters combat. If that’s your cup of tea, stay in that section of the map and fight for the Ceph weapons that are hidden here and there. A Reaper Cannon is dead in the middle of the map’s eastern side, on the second level of the tower. Camp that for some great fighting.
There’s a Bolt Sniper on the western side of the map, at the edge of the terminal. That’s another great power weapon to steal, and it’s in the perfect spot. Hide on that ledge with your cloak on, and watch for anyone foolish enough to wander the northern fields without protection.
MAP SIZE LARGE
RECOMMENDED 10-12 PLAYERS
VEHICLES VTOL, PINGER
182
MU
LTIP
LA
YE
R M
AP
S
VTOL PATROL ZONE
SEWER TUNNEL
OPEN TERRITORY (DANGER)
(IN TUNNEL)
PINGER SPAWN POINT
CLOSE QUARTER COMBAT AREAS
183