namlit 1000 open tray impression technique
DESCRIPTION
ÂTRANSCRIPT
11
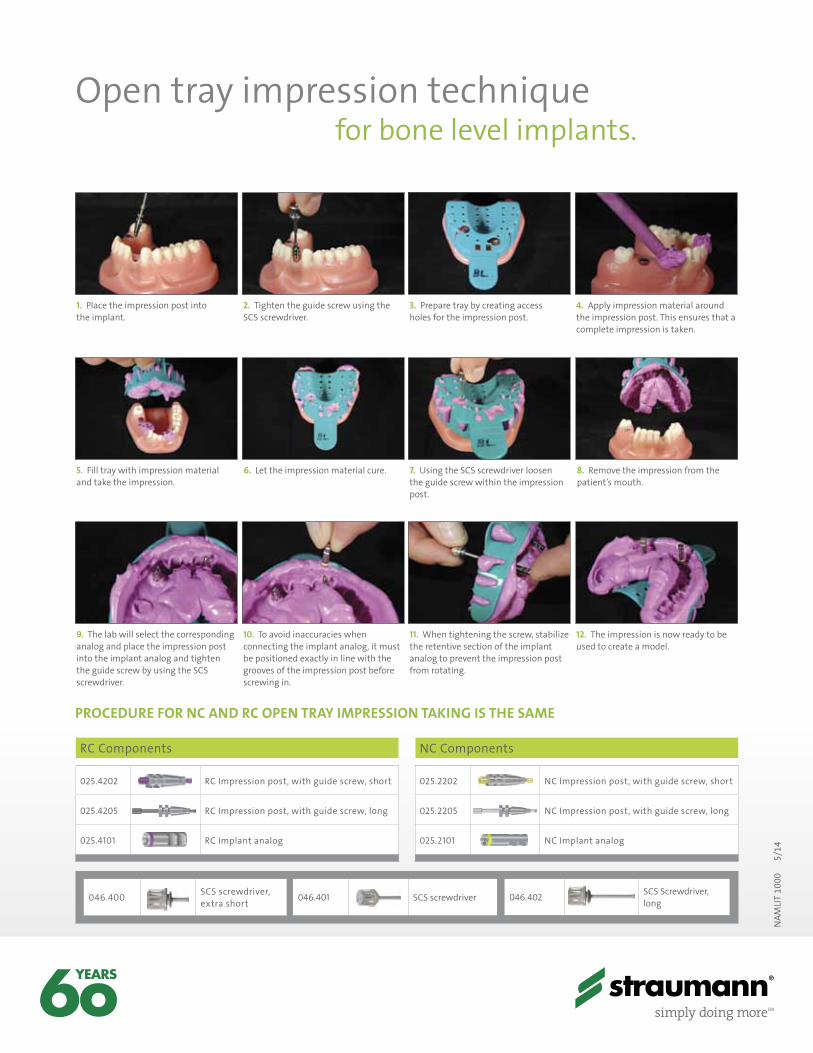
Open tray impression technique for bone level implants.
RC Components
025.4202 RC Impression post, with guide screw, short
025.4205 RC Impression post, with guide screw, long
025.4101 RC Implant analog
NC Components
025.2202 NC Impression post, with guide screw, short
025.2205 NC Impression post, with guide screw, long
025.2101 NC Implant analog
Procedure for Nc aNd rc oPeN tray imPressioN takiNg is the same
1. Place the impression post intothe implant.
5. Fill tray with impression material and take the impression.
9. The lab will select the corresponding analog and place the impression post into the implant analog and tighten the guide screw by using the SCS screwdriver.
2. Tighten the guide screw using the SCS screwdriver.
10. To avoid inaccuracies when connecting the implant analog, it must be positioned exactly in line with the grooves of the impression post before screwing in.
3. Prepare tray by creating access holes for the impression post.
7. Using the SCS screwdriver loosen the guide screw within the impression post.
11. When tightening the screw, stabilize the retentive section of the implant analog to prevent the impression post from rotating.
4. Apply impression material around the impression post. This ensures that a complete impression is taken.
6. Let the impression material cure.
12. The impression is now ready to be used to create a model.
8. Remove the impression from the patient’s mouth.
046.402 SCS Screwdriver, long046.400 SCS screwdriver,
extra short 046.401 SCS screwdriver
NAM
LIT
1000
5/14